This main story mission is the start of the game’s conclusion, and it’s appropriately involved, featuring a space battle and a combat-heavy search for the final artifacts.
This is a very long mission, with numerous non-optional combat sections. Before embarking on Revelation, you’ll want to stock up on Aid items and ammo. You may also want to finish a few Skill challenges so you can grab that next rank in your chosen combat Skills.
You’ll also need to make sure your ship can make it to the Masada system. The final jump, from Decaran to Masada, is a distance of 18.754LY, so make sure your jump range is 19LY or better before starting the long series of jumps required to reach Masada III. You can increase your jump range by upgrading your ship, and/or the Astrodynamics skill — Ranks 1 and 3 both increase jump range significantly.
Finally, you should spend any credits you have available to upgrade your ships guns and shields, since there’s a fairly tough space battle upon entering the Masada System.
Once you’re properly stocked up on healing and ammo, and you’re sure your ship can make the journey, it’s time to travel to Masada III in the Masada system. If you haven’t taken the route before, you’ll have to do a series of jumps — you can use the mission log to find the Masada system, then make the jumps required to reach the system.
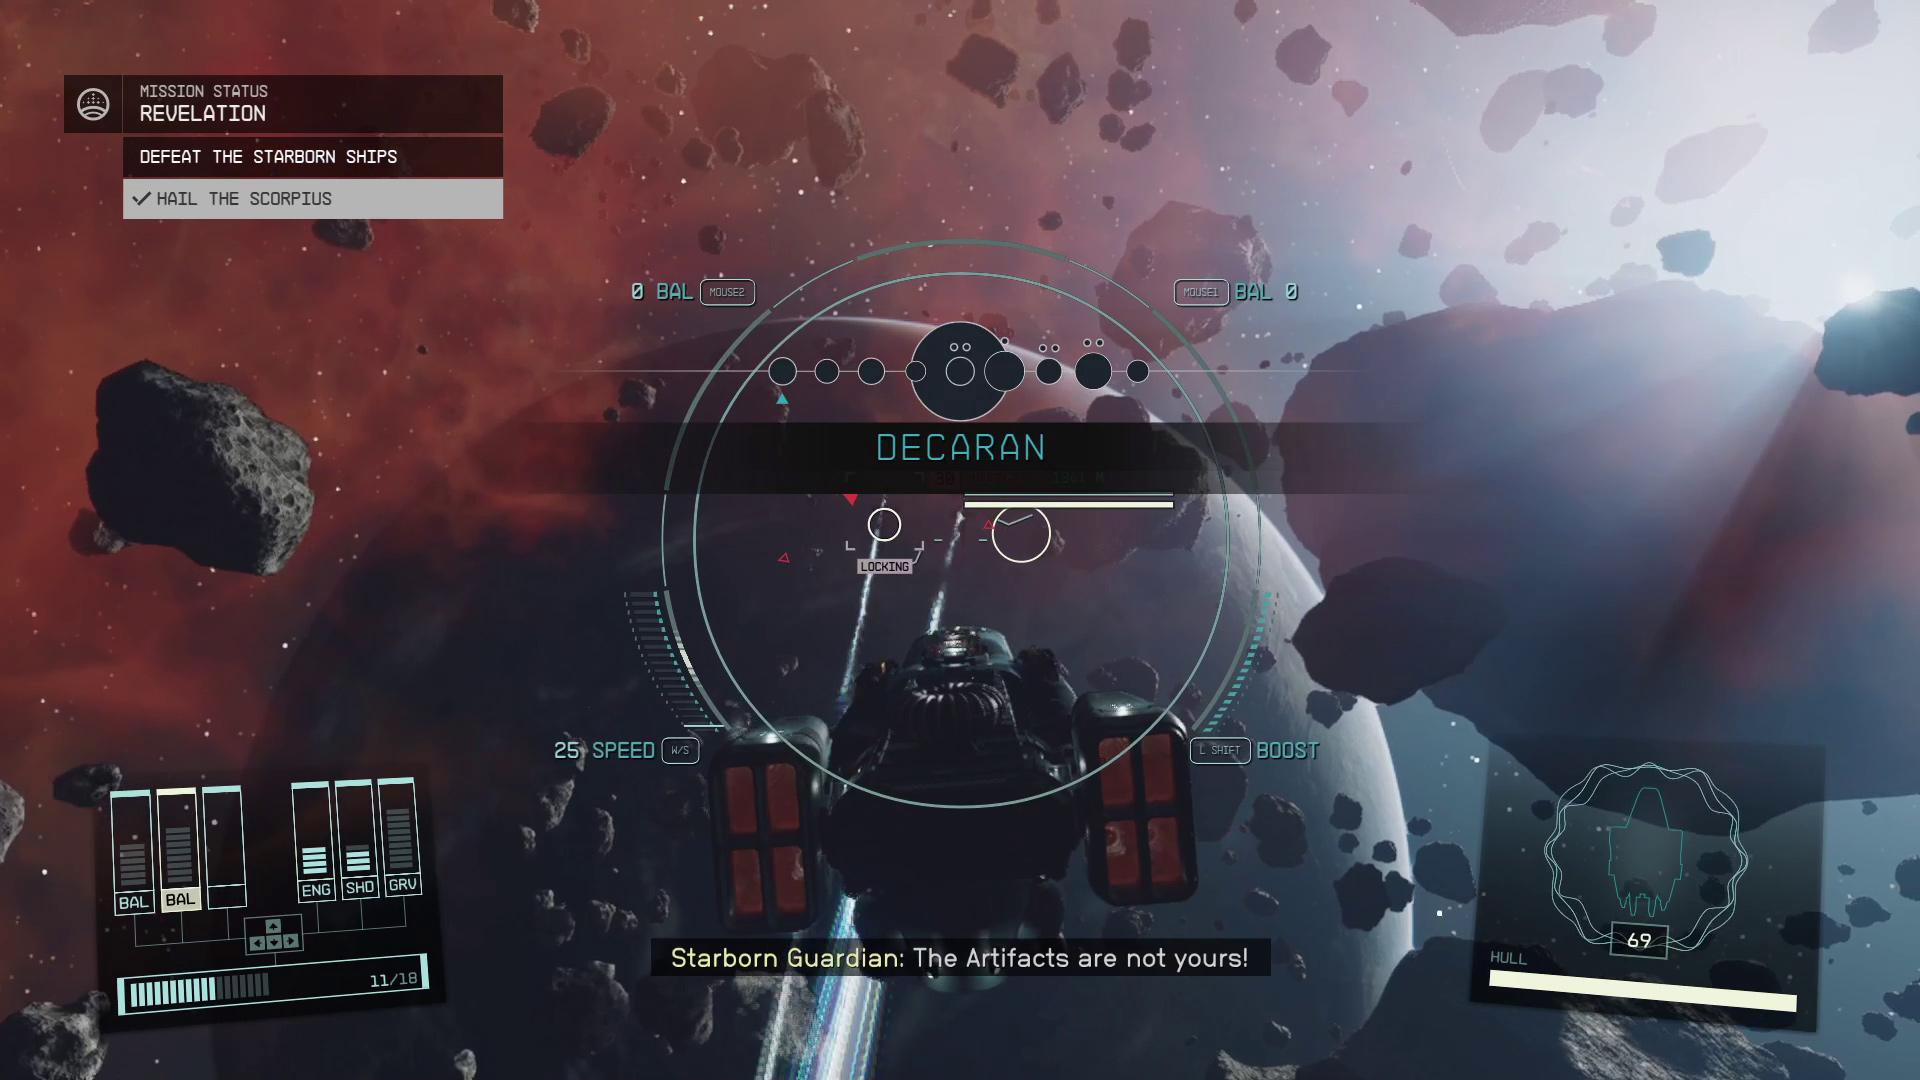
Defeat the Starborn Ships
You’ll be attacked immediately after jumping into the system. Technically, a brief conversation will occur first, but you won’t have any time to prepare after it ends before one or both Starborn (plus an additional Starborn Guardian) open fire on you. With that in mind, shift all but one energy from your Grav Drive to weapons and shields before jumping — ideally, you should jump into the Masada system with full points in shields and weapons.
Things will be much easier if you sided with The Emissary or The Hunter — if you told them they were both wrong in the previous mission, you’ll have to fight both of them in addition to a Starborn Hunter, for a total of three enemies. Regardless, you should focus down the Starborn Guardian’s ship first, as it will be lower level and easier to eliminate. Once that’s done, make sure you focus fire on whoever is left: avoid splitting your attention between the remaining enemies.
They don’t even wait for the system popup to fade before attacking, which isn’t very sporting
The Helix will sometimes go invisible, but you can continue to target it, so just stay close and trust your targeting systems. Both the Scorpius and the Helix will warp away when you get them to around 30% HP.
Land at the Buried Temple
Both the Scorpius and the Helix will warp away when you get them to around 30% HP. Once you’ve defeated all the Starborn ships, you’ll be able to use your Mission log to land on Masada III.
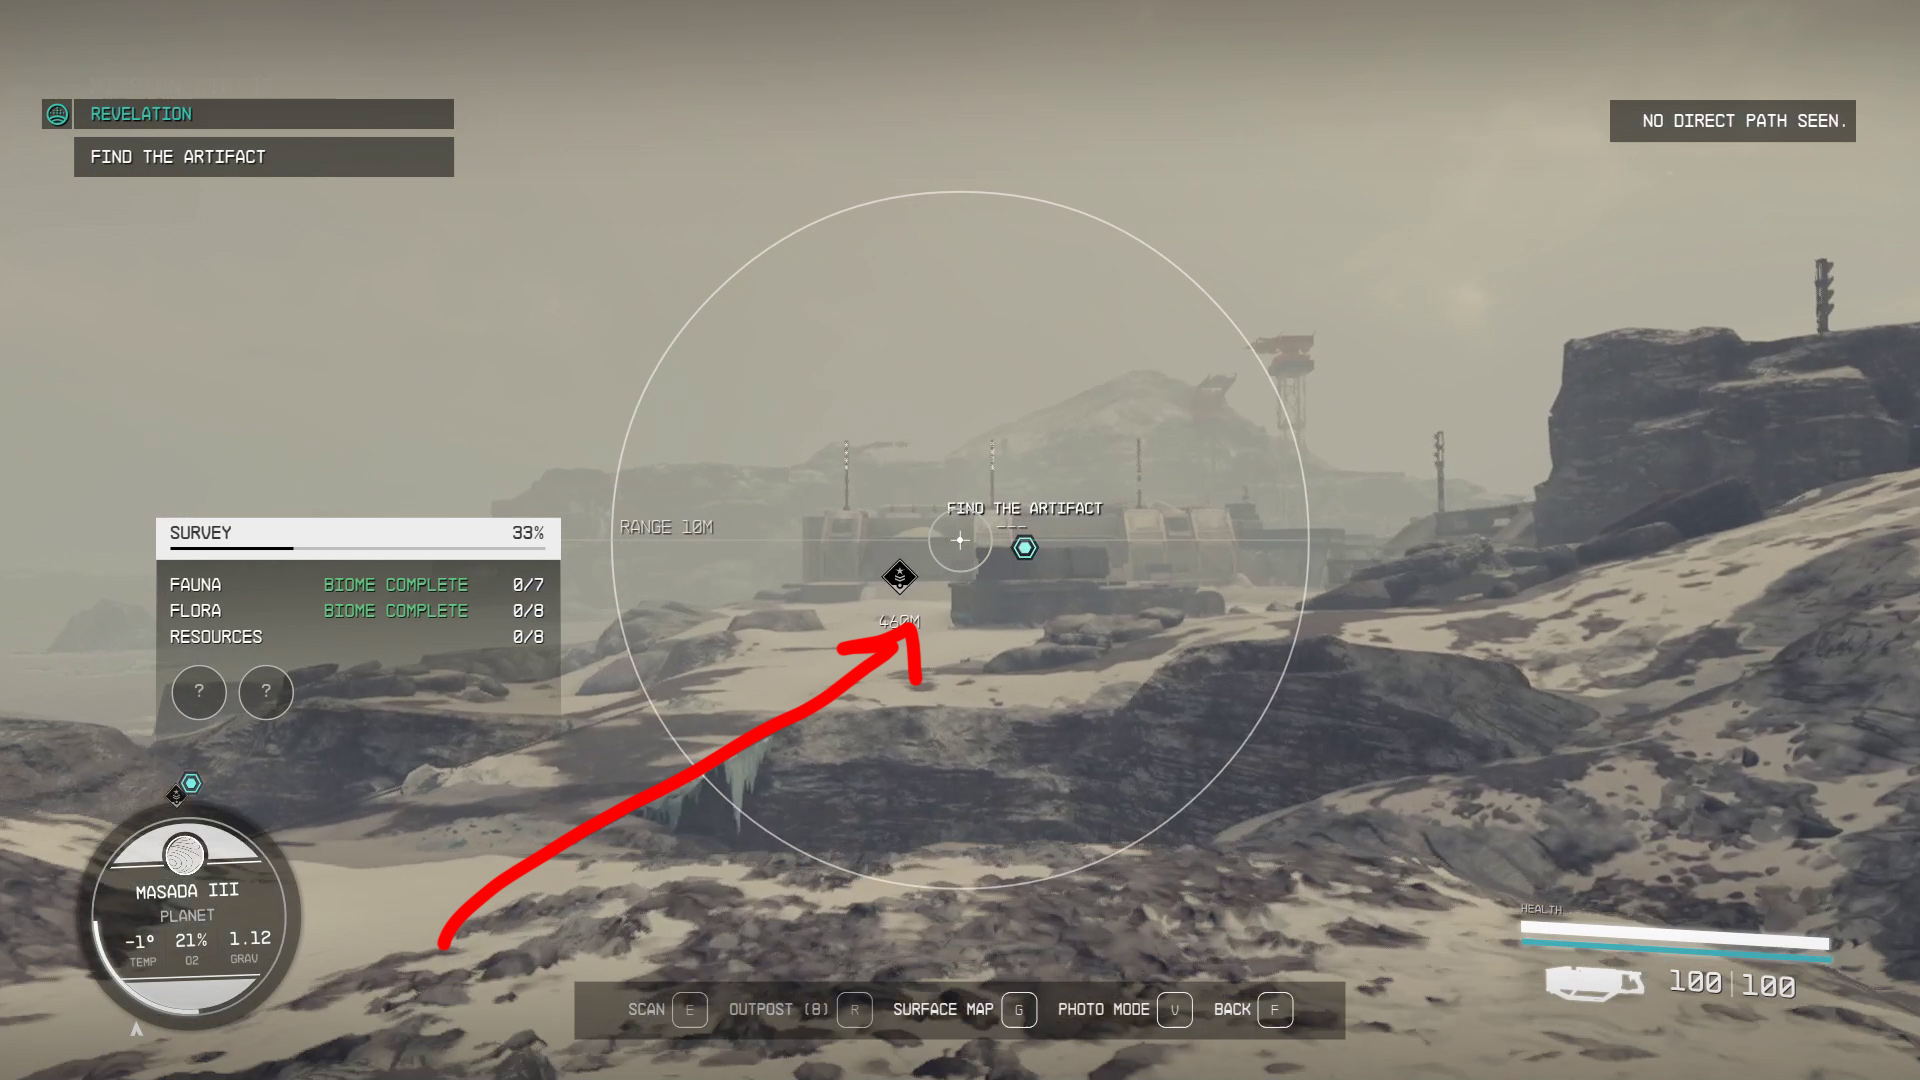
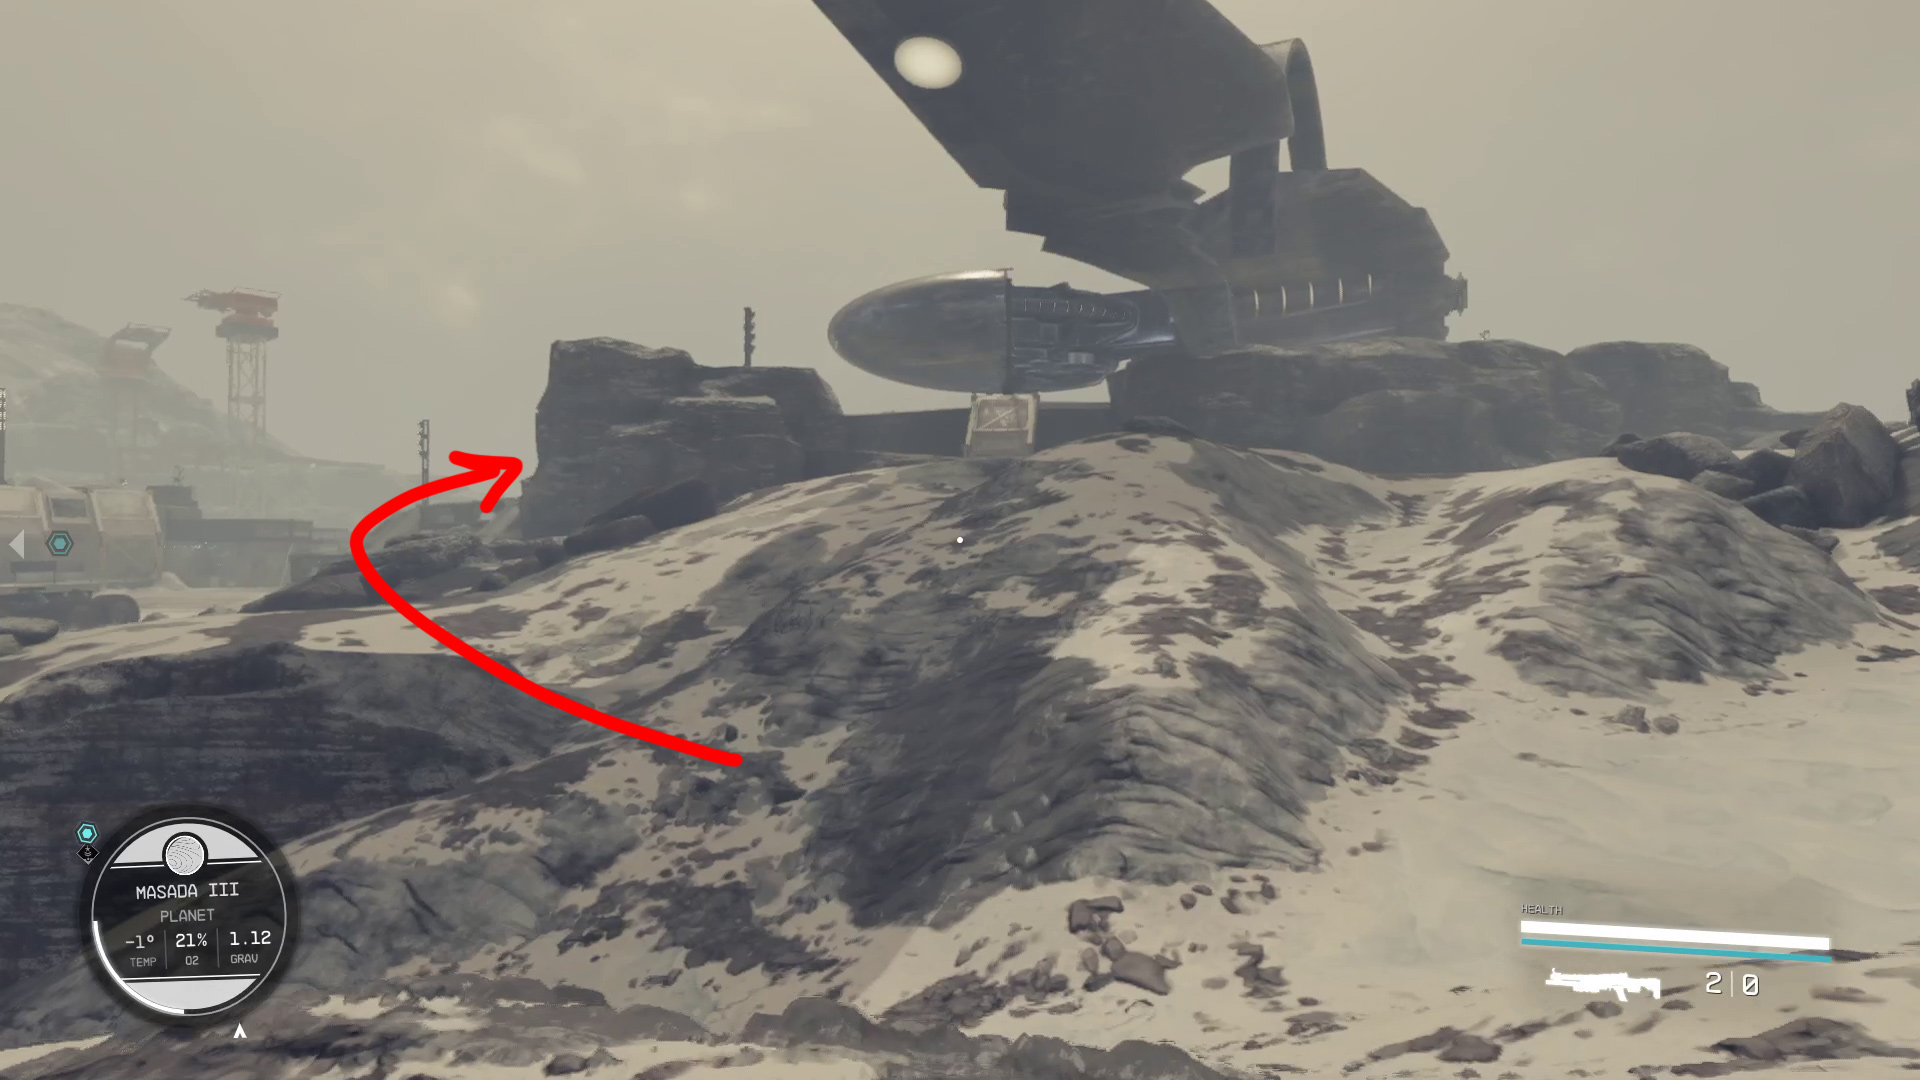
Find the Artifact
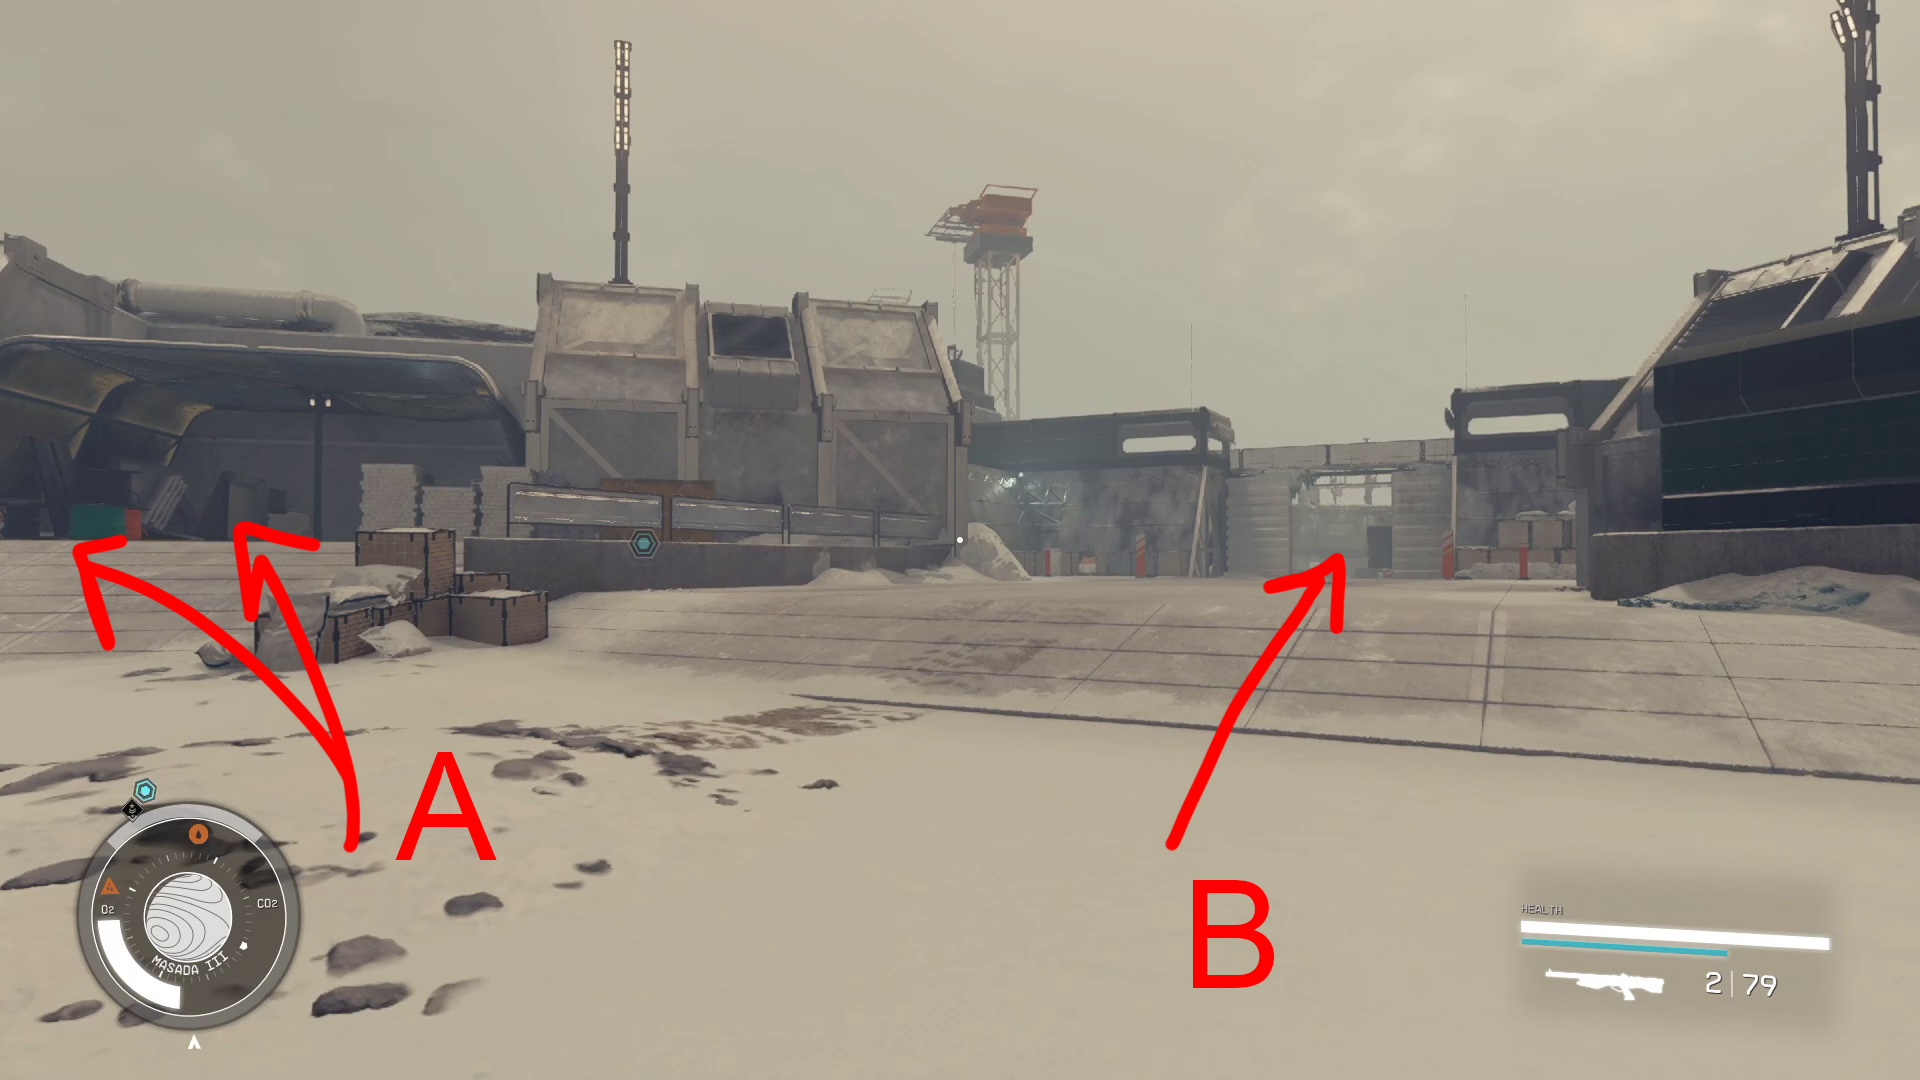
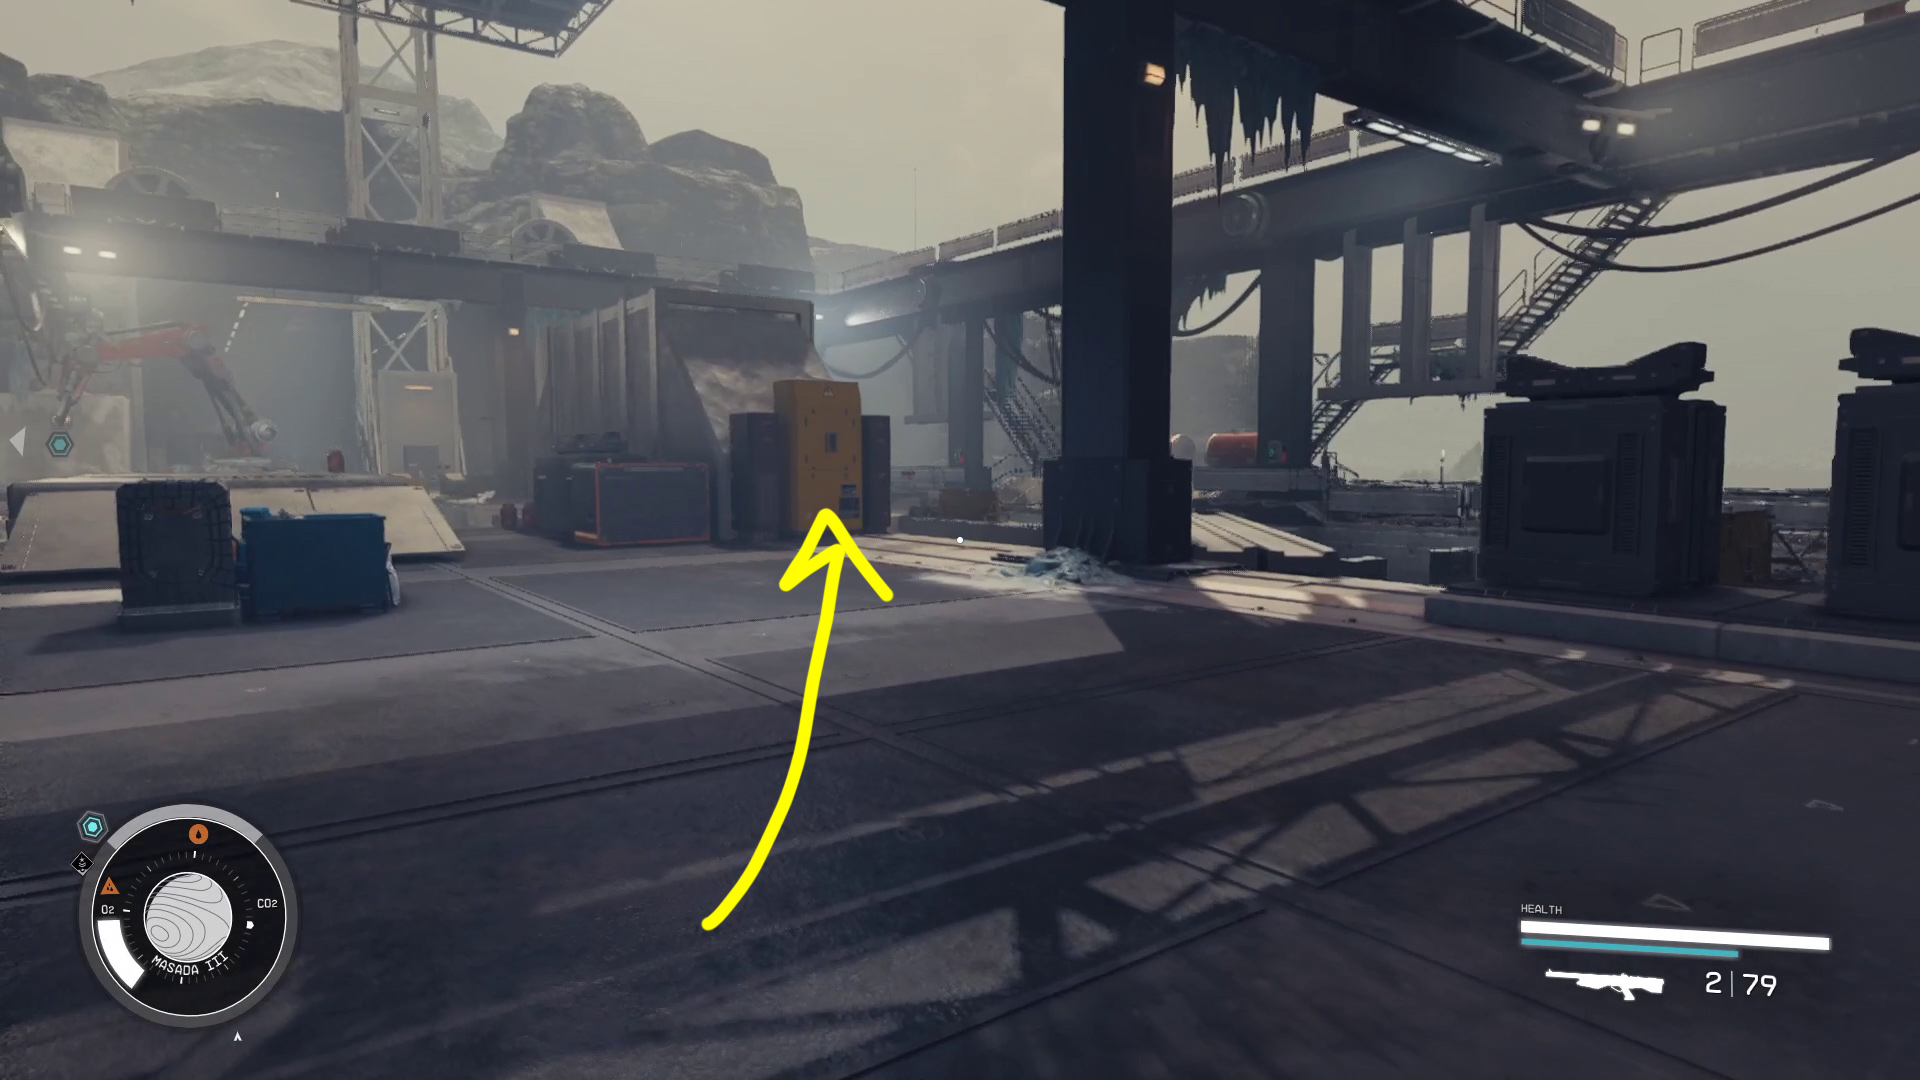
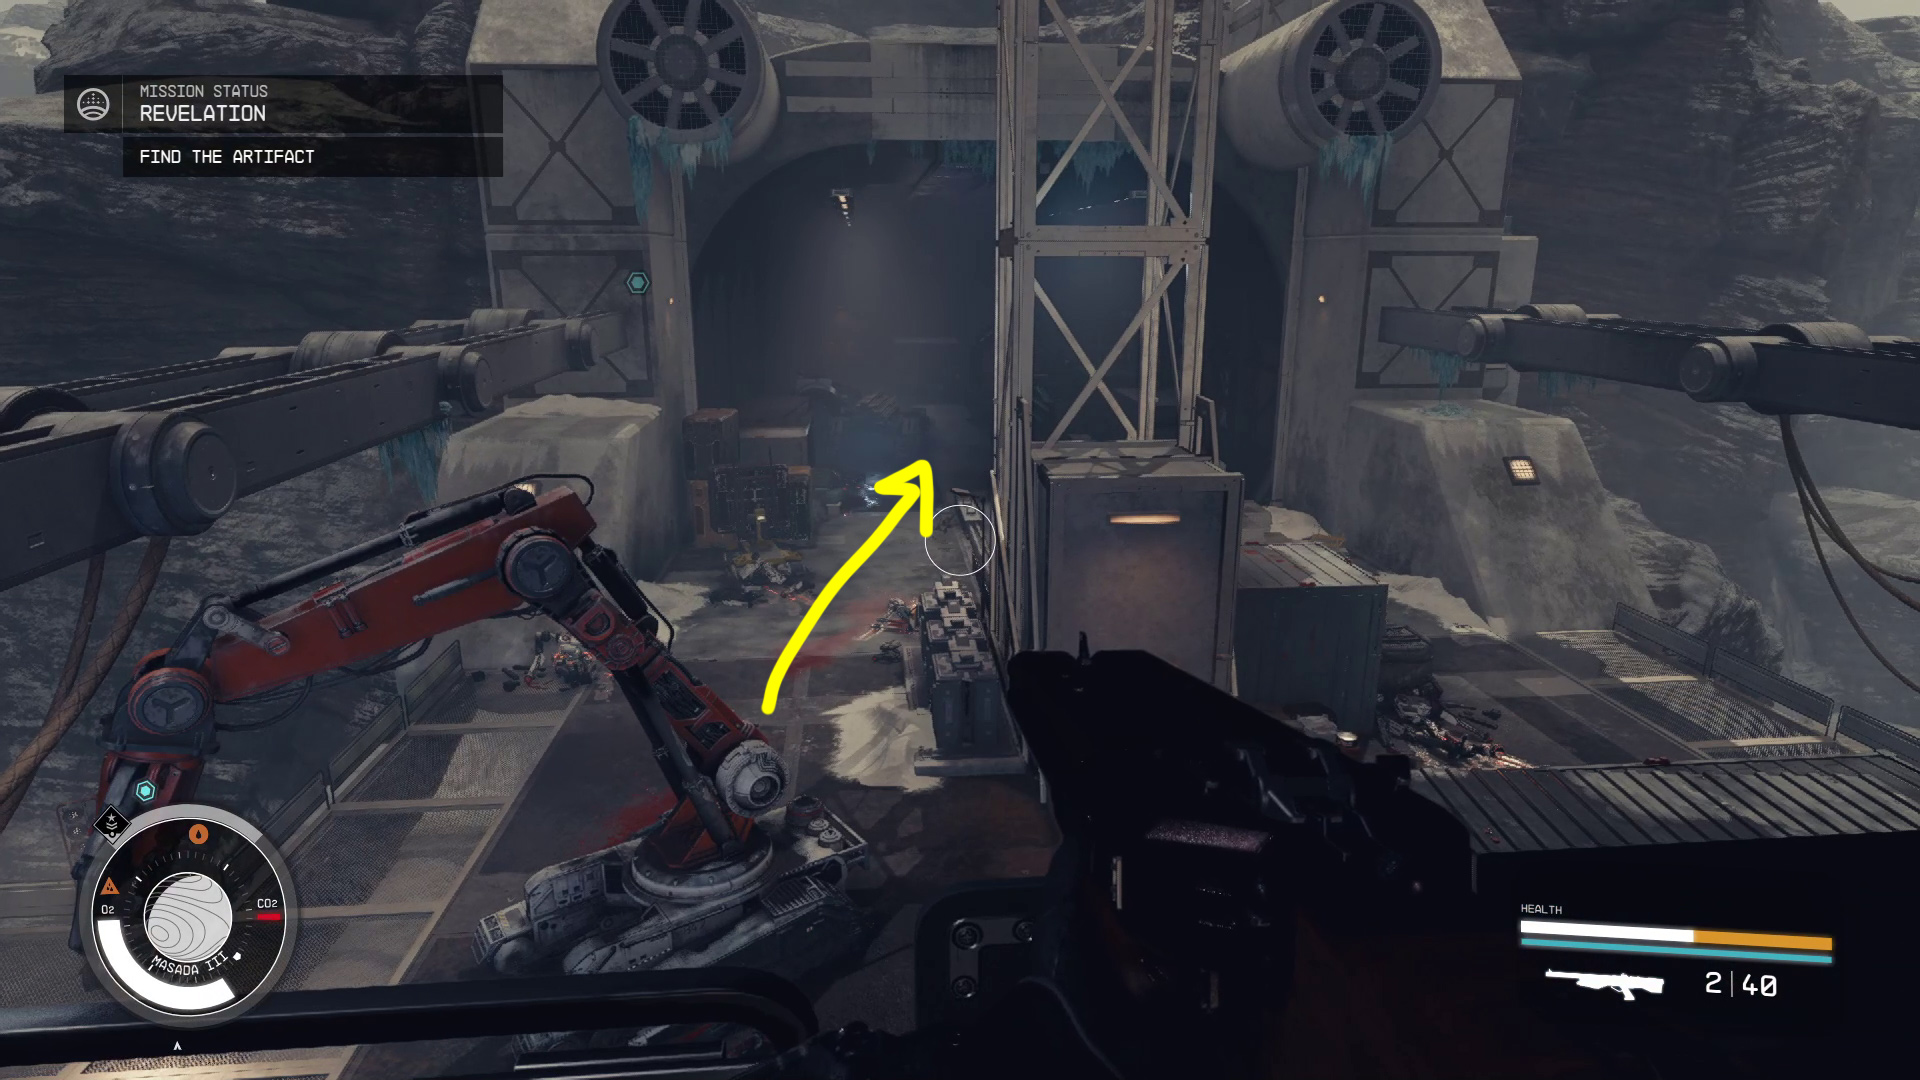
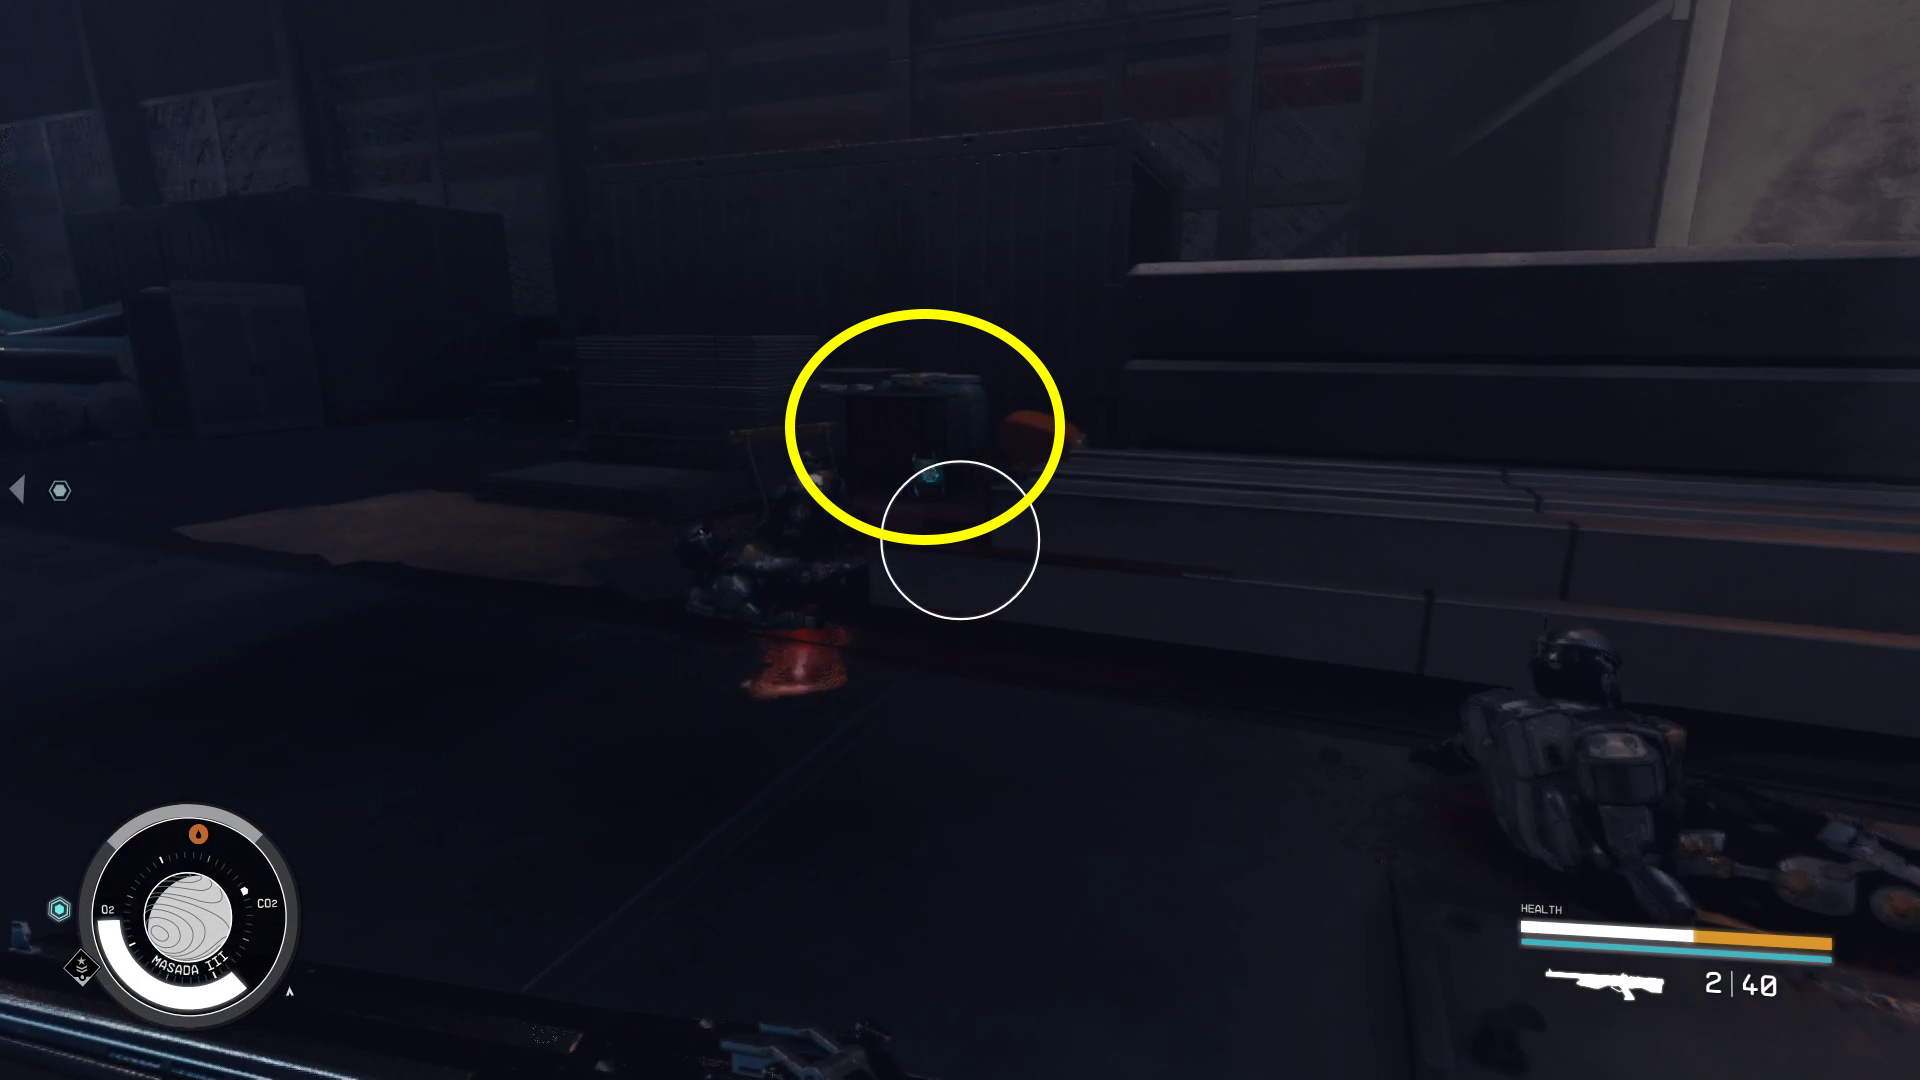
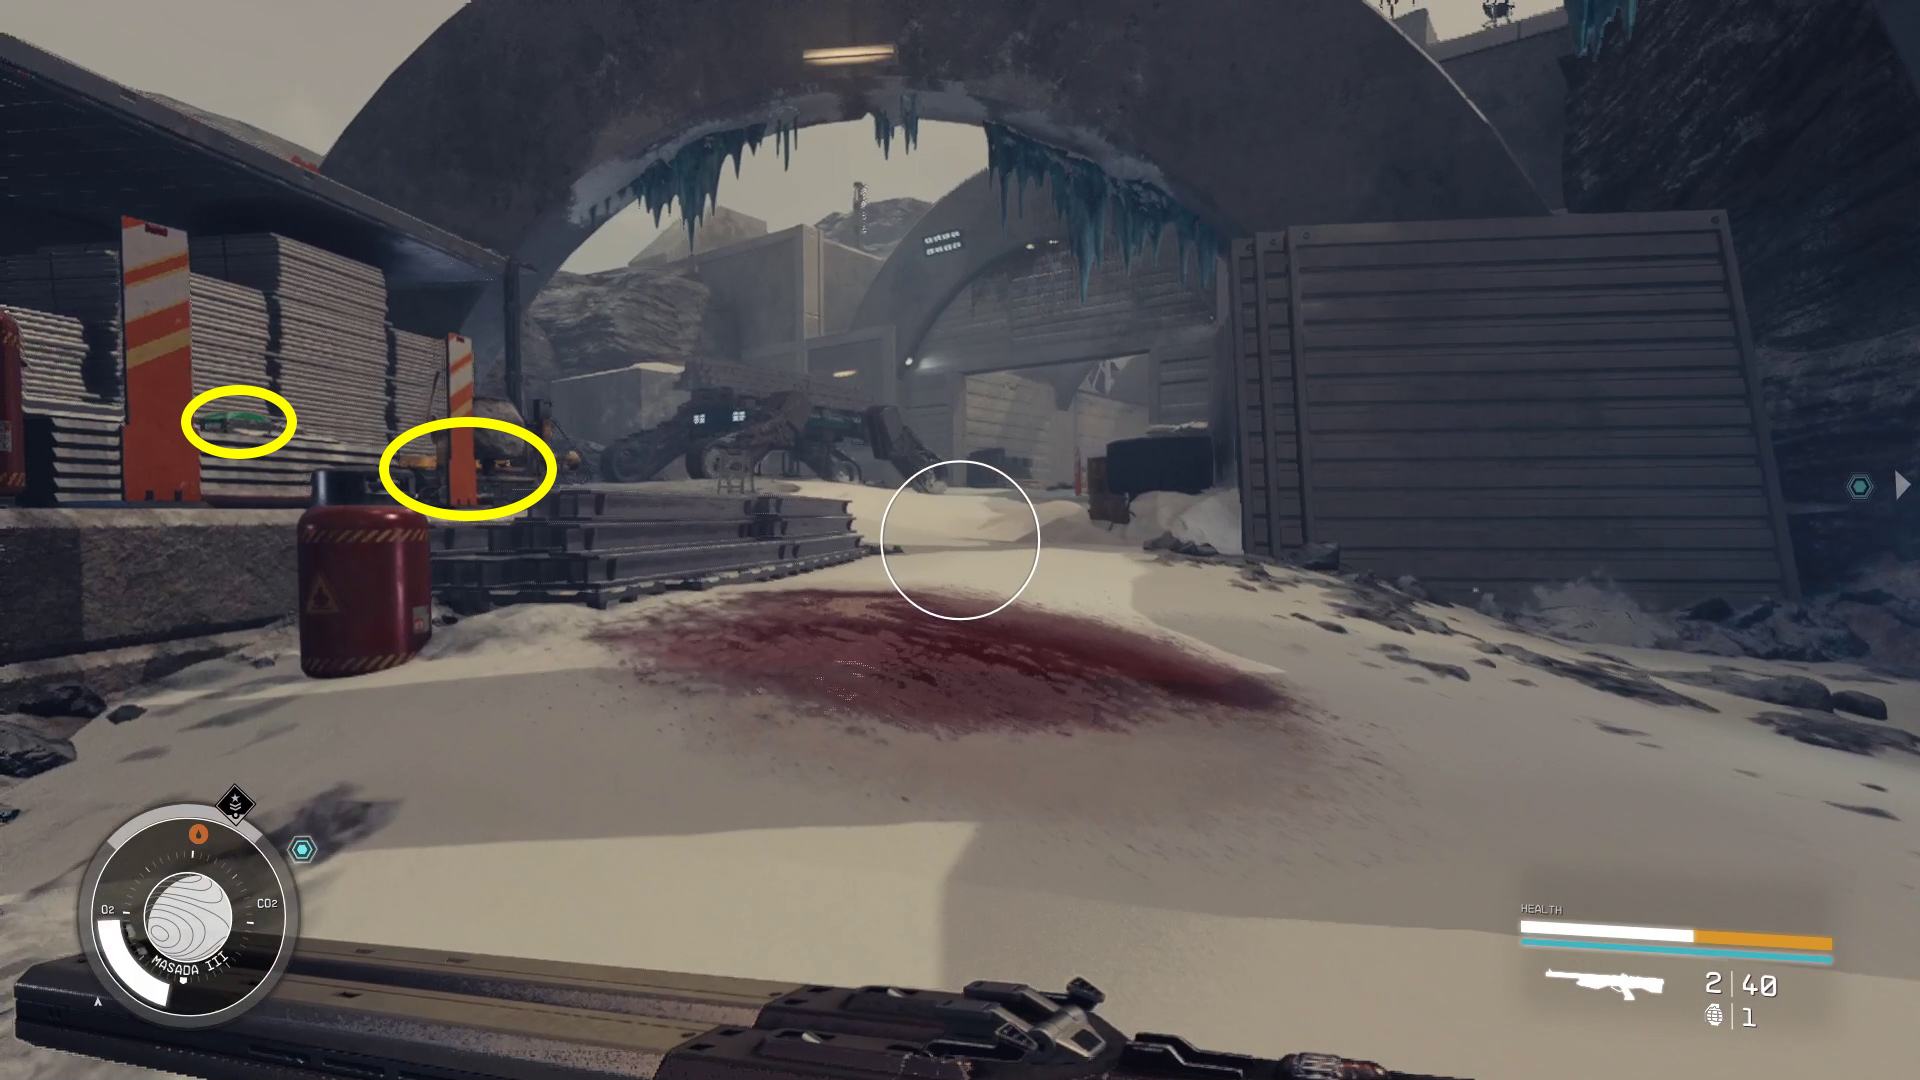
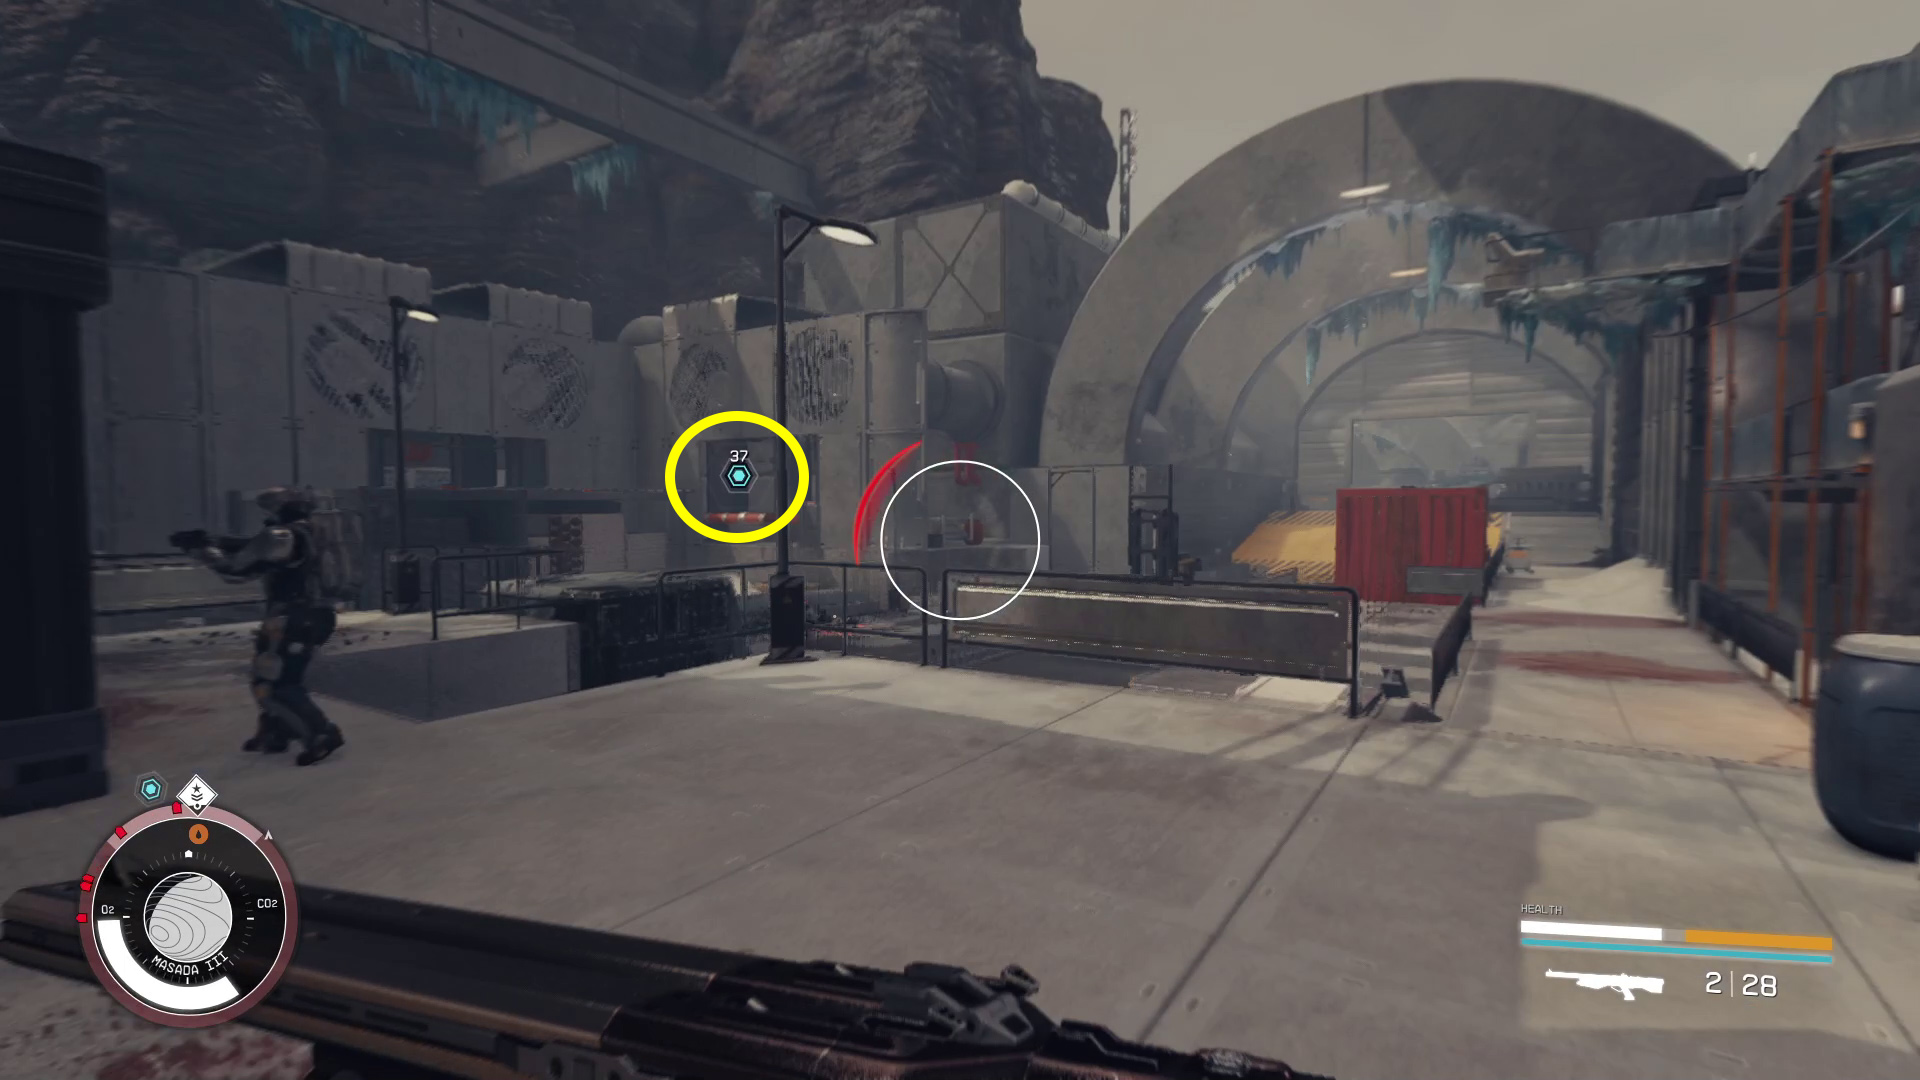
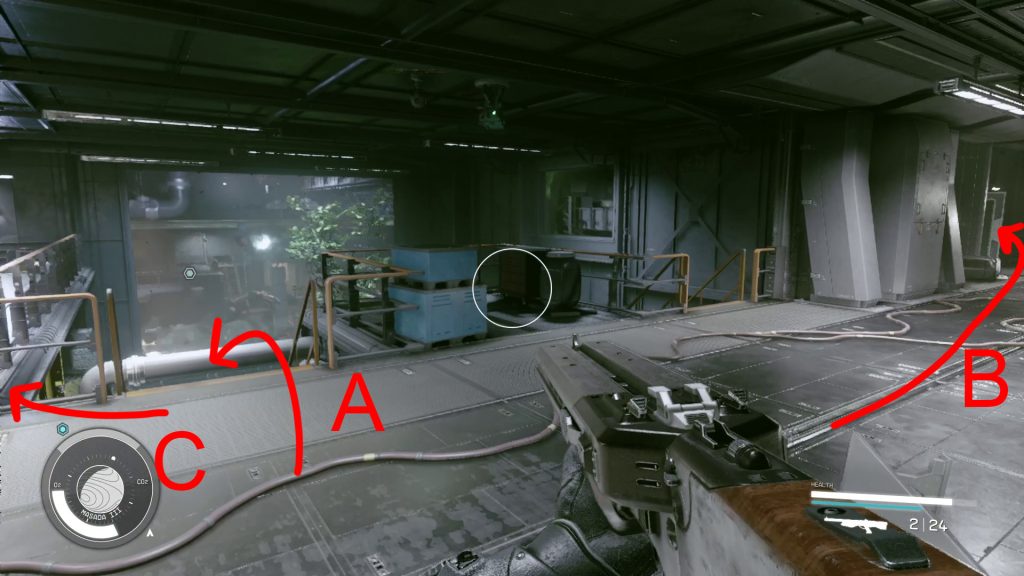
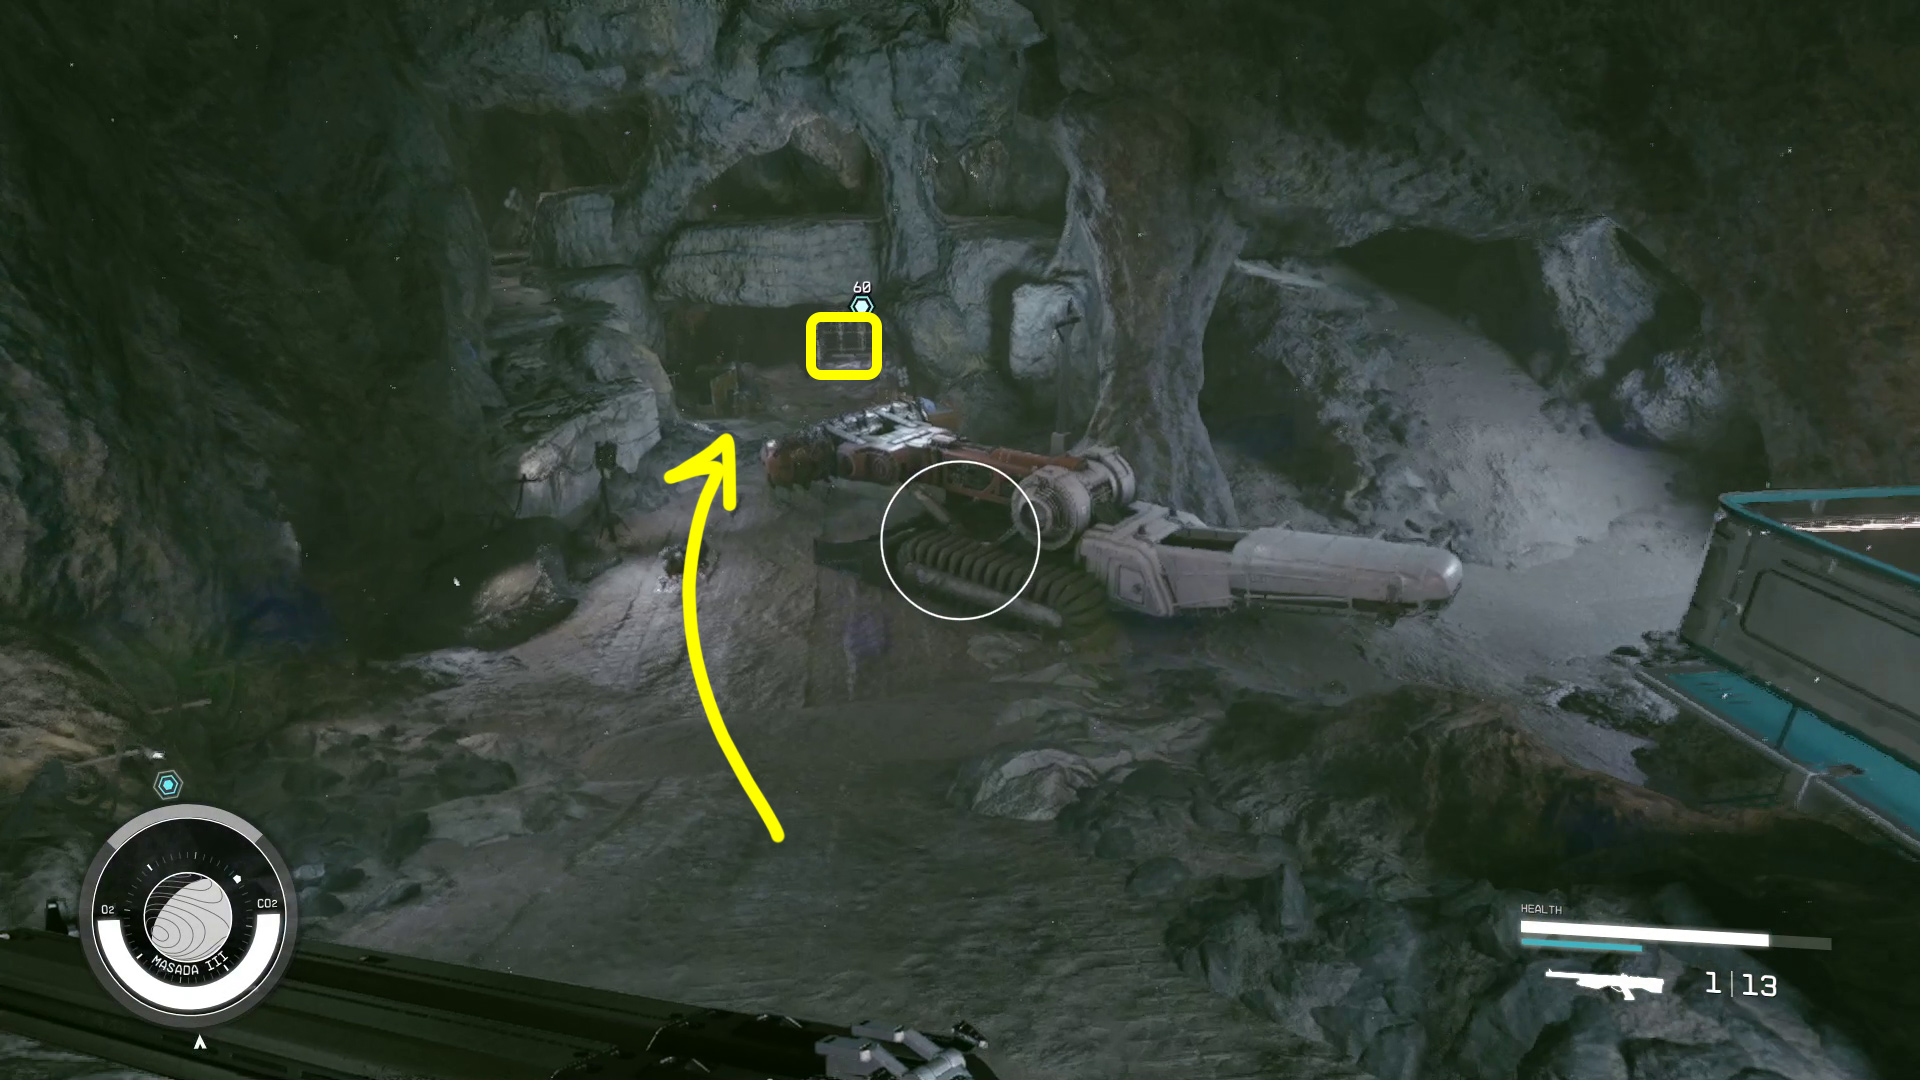
Upon landing, look for the objective marker — you should see a base in the distance (Image 2) — and start heading towards it. If you want, you can stop by the landing pad the Scorpius is at (Image 3), as there are a few corpses on the ramp to loot. There are also a few storage boxes you can find (Image 4A) just to the left of the main entrance of the base (4B).
Image 2Image 3Image 4
From this point until the section “Find the Artifact (3)”, you’ll be able to use the Scanner to guide you to the next objective, so just press / if you get turned around.
Inside the base, make sure you take the time to loot all the corpses you find. Unless you seriously stocked up on Aid items and Ammo before starting the mission, it’ll be well worth it. Make your way through the base towards the objective marker, and you’ll start crossing a huge bridge with a catwalk on either side.
Defeat the Starborn
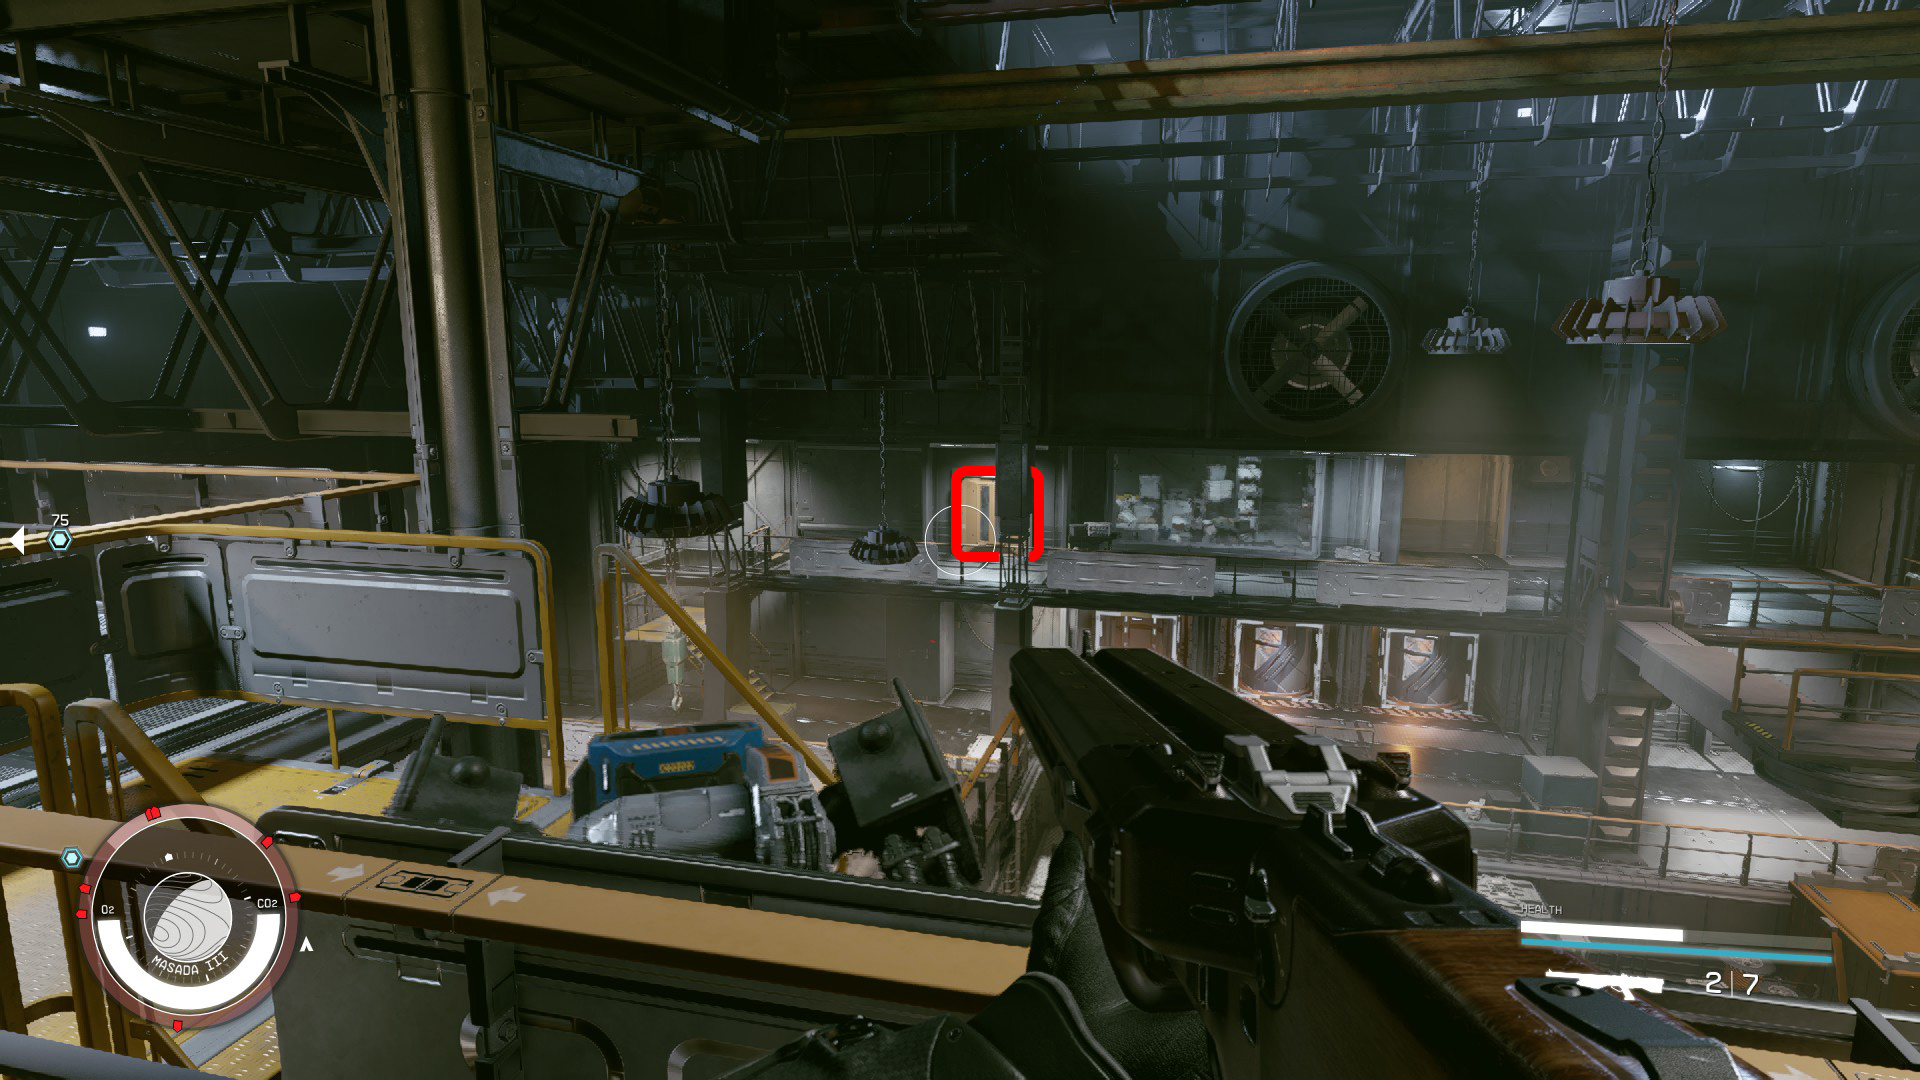
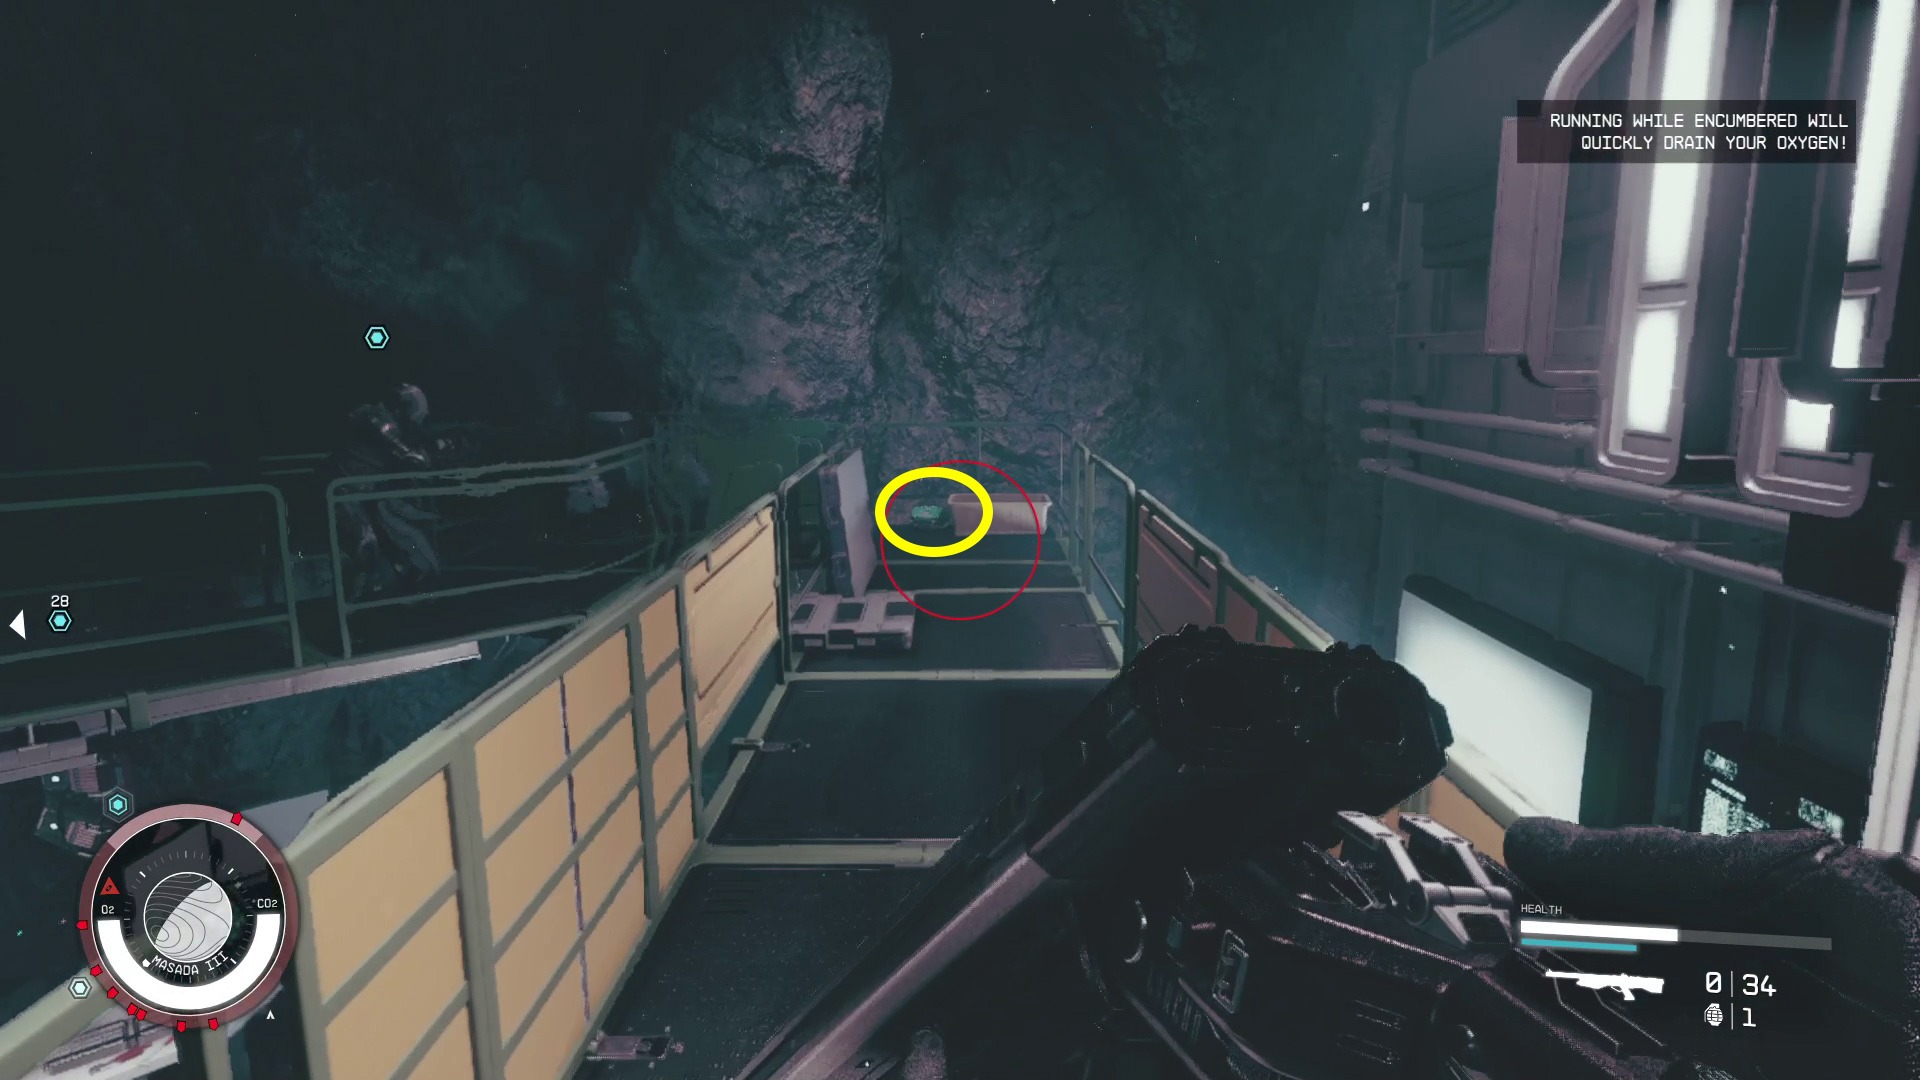
When you get partway across the bridge, a Starborn — well, three of one Starborn — will spawn and attack you. Unless you have a long-ranged weapon, it’s best to take cover behind the yellow box metal (Image 5) and let the melee Starborn come to you — this will protect you from the other two. He’ll keep making copies of himself, so you’ll actually have to kill more than three to end this fight.
There are a number of explosive containers on the catwalk (Image 7), so one way to deal with the Starborns, especially the melee ones, is to run up the stairs and then draw them to one of the containers, then shoot it.
During (or after) this fight, make sure you grab the aid items that are available both on the bridge and the catwalk (Image 6-7). The ones on the bridge are all on support columns, while the Aid items on the catwalk can be found on the ground. There is also a table with ammo on the left-hand catwalk.
Image 5Image 6Image 7
Find the Artifact (2)
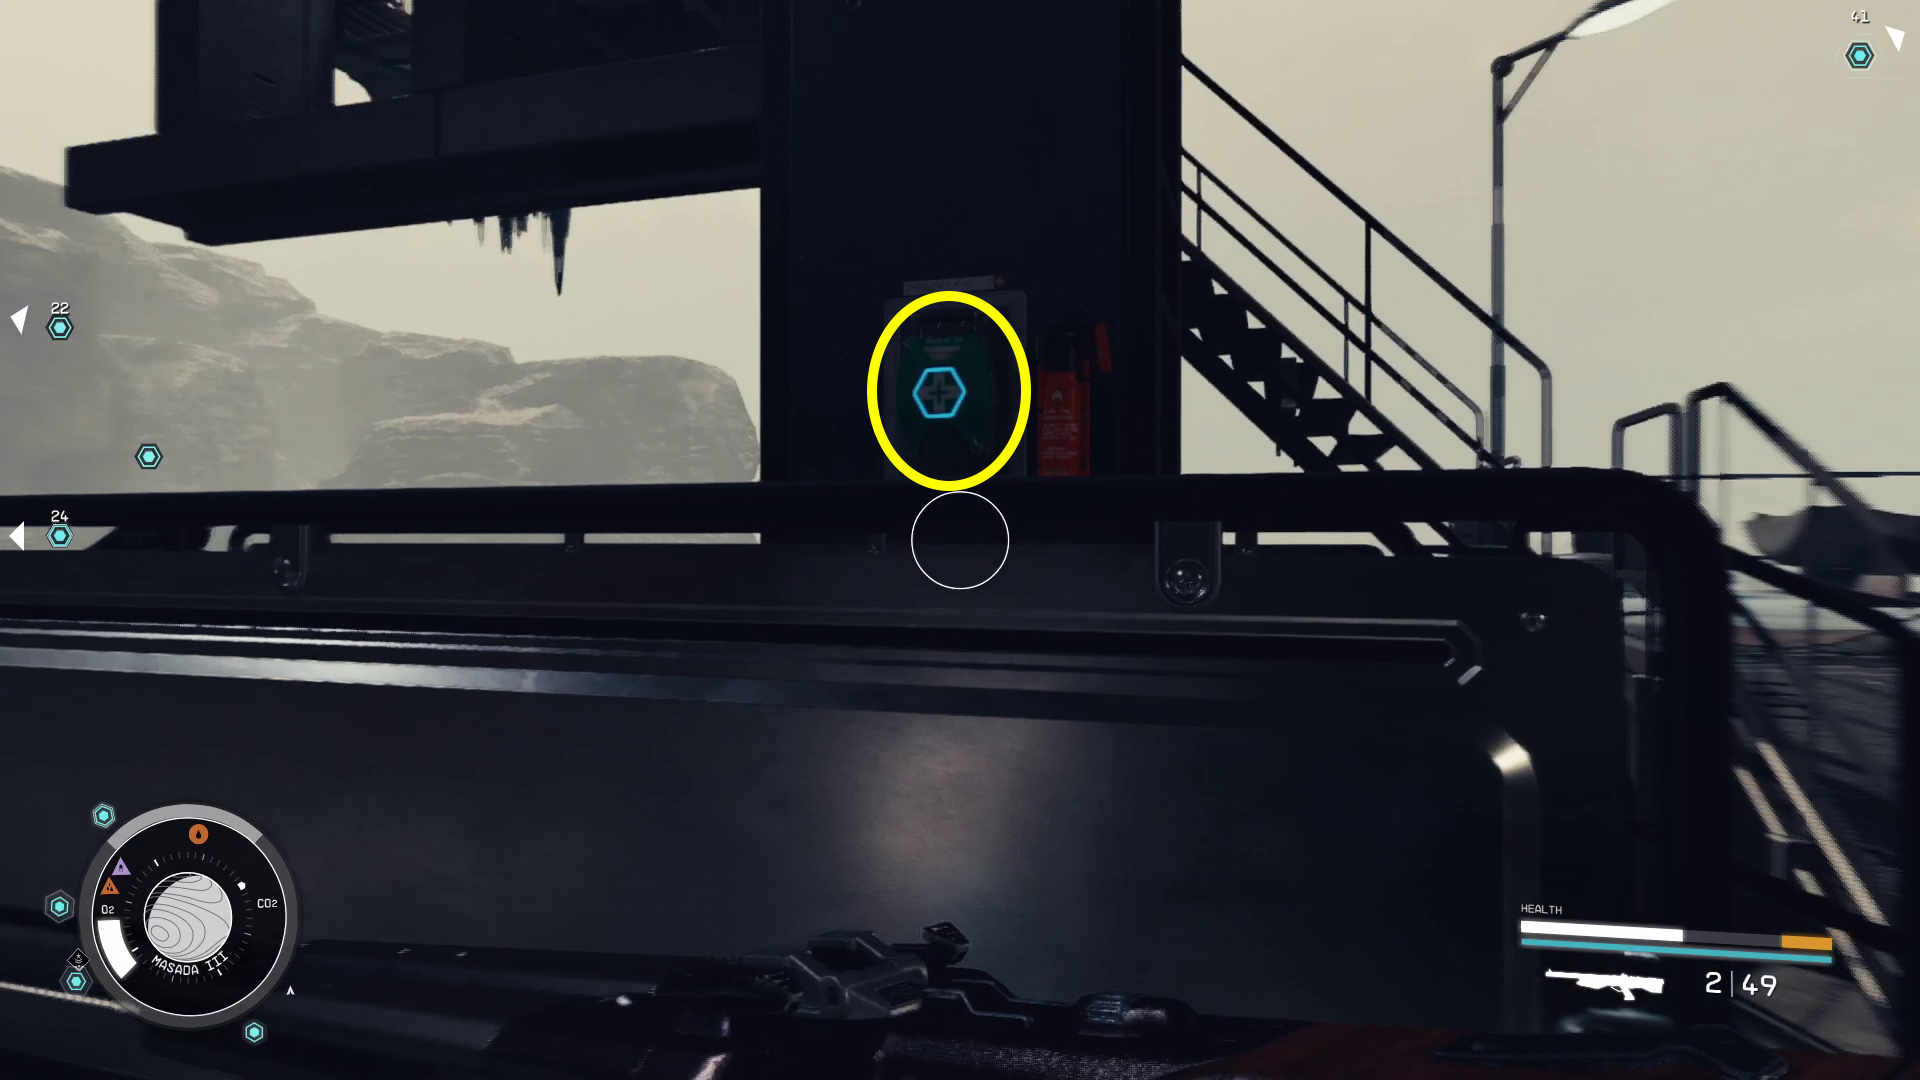
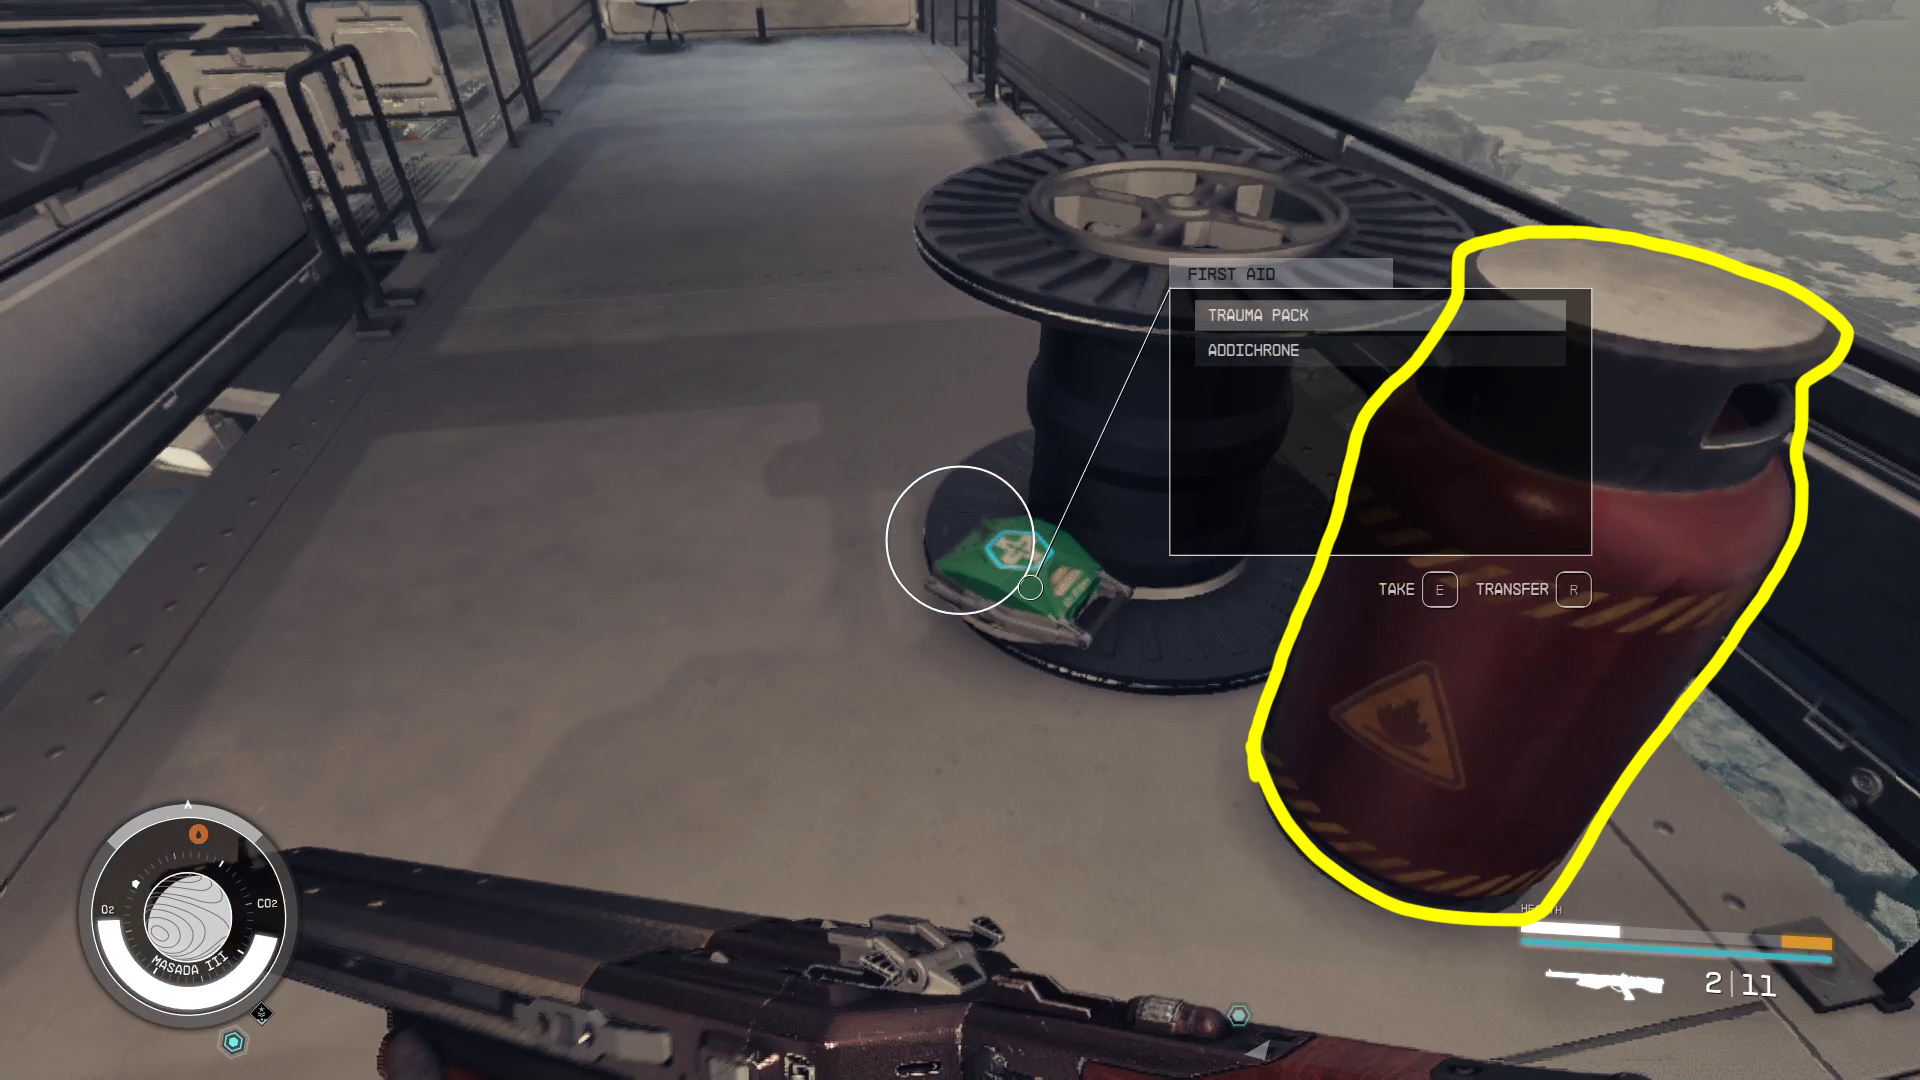
With the Starborn defeated, you can head deeper into the base, Continue to the other side of the bridge (Image 8), again making sure to loot the corpses you find. Upon entering the structure, there will be some ammo and Aid items on your right (Image 9) — grab them, and then you can use the scanner to find your way deeper into the base. You’ll encounter more corpses, plus an aid item and a storage crate on your left once you’re outside again (Image 10). Keep going forward and you’ll soon reach the entrance area of the Buried Temple.
Image 8Image 9Image 10
Defeat the Starborn (2)/Defeat the Ecliptic Soldiers
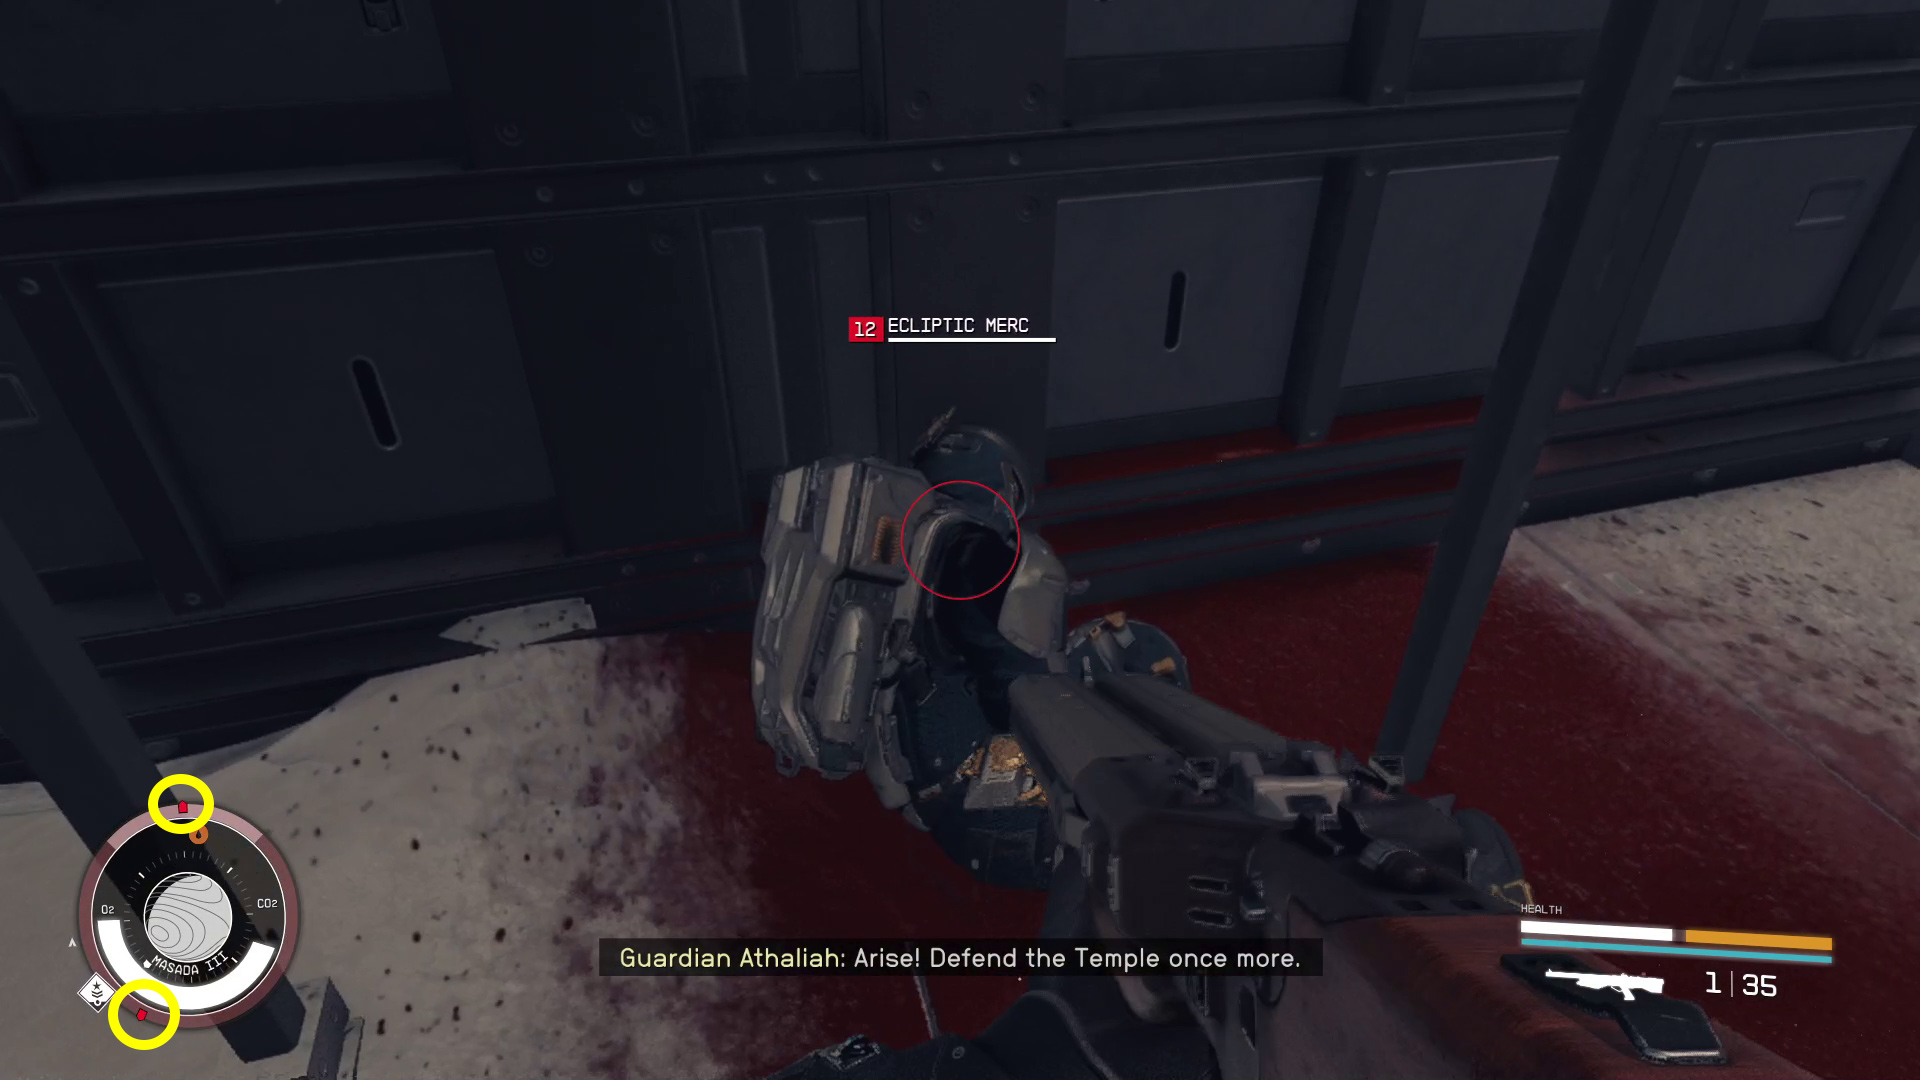
Naturally, it won’t be as easy as just walking in; to proceed, you’ll have to defeat another Starborn Guardian. This one’s got a different gimmick than the last one, though: Guardian Athaliah will revive the nearby dead Ecliptic Soldiers to fight you. Sometimes, they won’t all revive properly, so you may need to use your compass to find the last few soldiers (Image 11).
Kill enough of the first two waves of soldiers, and then you’ll get an objective marker showing you where the Guardian is (Image 12). At this point, your best bet is to try and ignore the rest of the soldiers in favor of killing the Guardian. The Guardian will teleport away after taking enough damage, and you’ll have to hunt them down again using the objective marker. Once they’re down for good, the soldiers will go back to being regular old dead instead of still-shooty dead.
Image 11Image 12
Find a Way to Open the Door
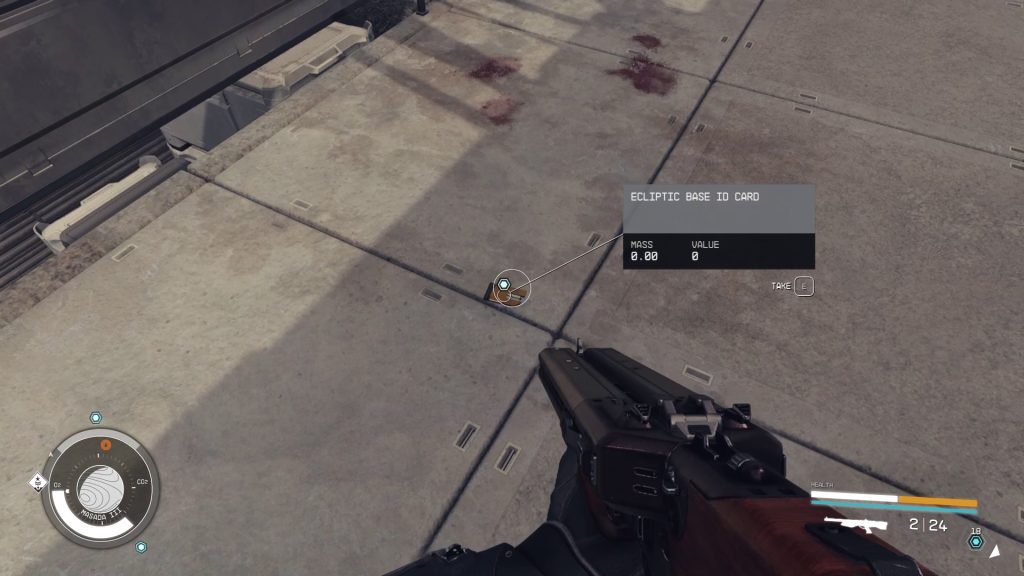
Now you need to find a way into the temple. Fortunately, the game generously gives you objective markers for this bit, so it isn’t particularly tricky. Collect all the ammo and loot from the corpses, and check out the structure in the middle of the area (Image 13) for loot as well. Then head towards one of the objective markers, which will lead you to an Ecliptic Base ID Card (Image 14). If you can’t figure out how to reach it, use your scanner and follow the path it gives you.
Image 13Image 14
There’s plenty more loot around the perimeter of the area, so be thorough in your scavenging. When you’re ready, follow the objective marker to the ID Card Reader, use it, then head through the Secure Access door it opens.
Find the Artifact (3)
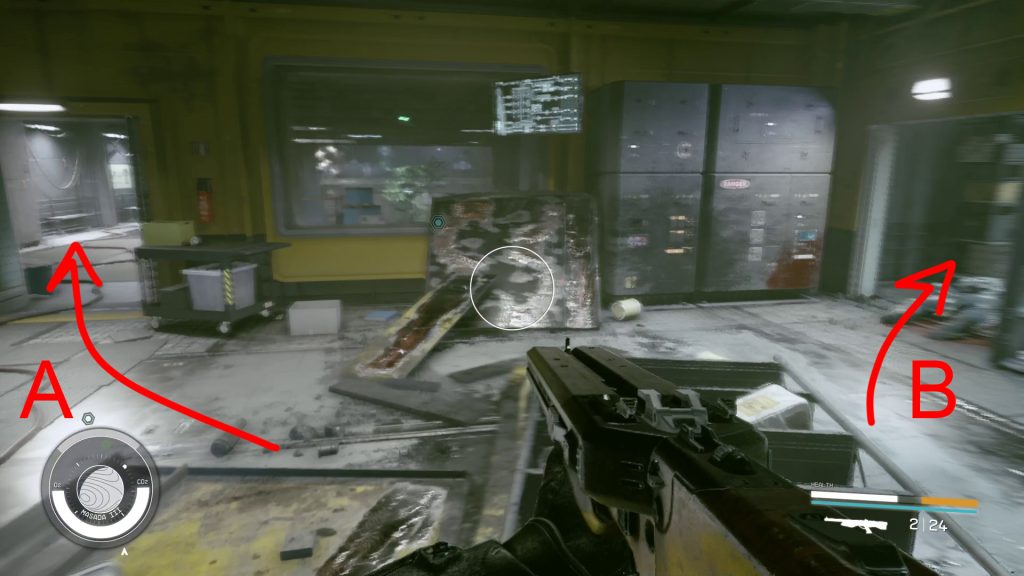
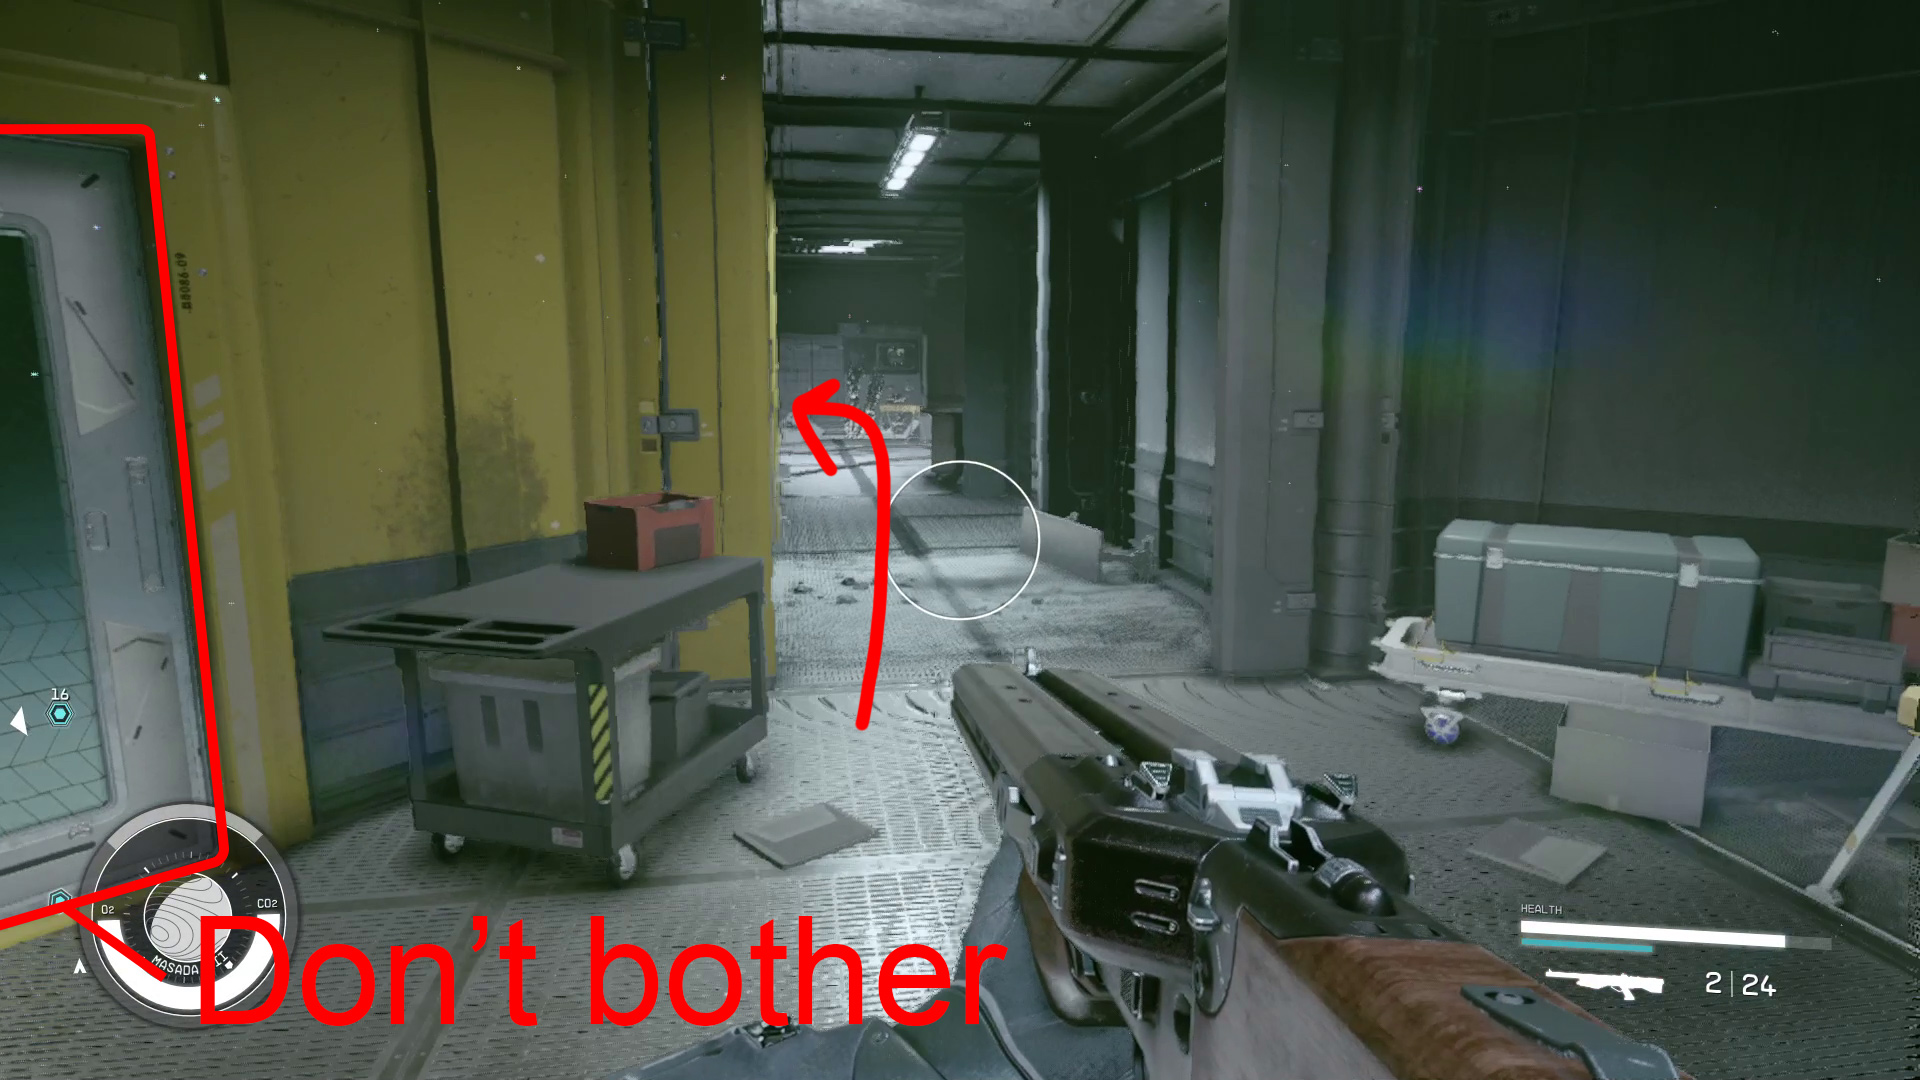
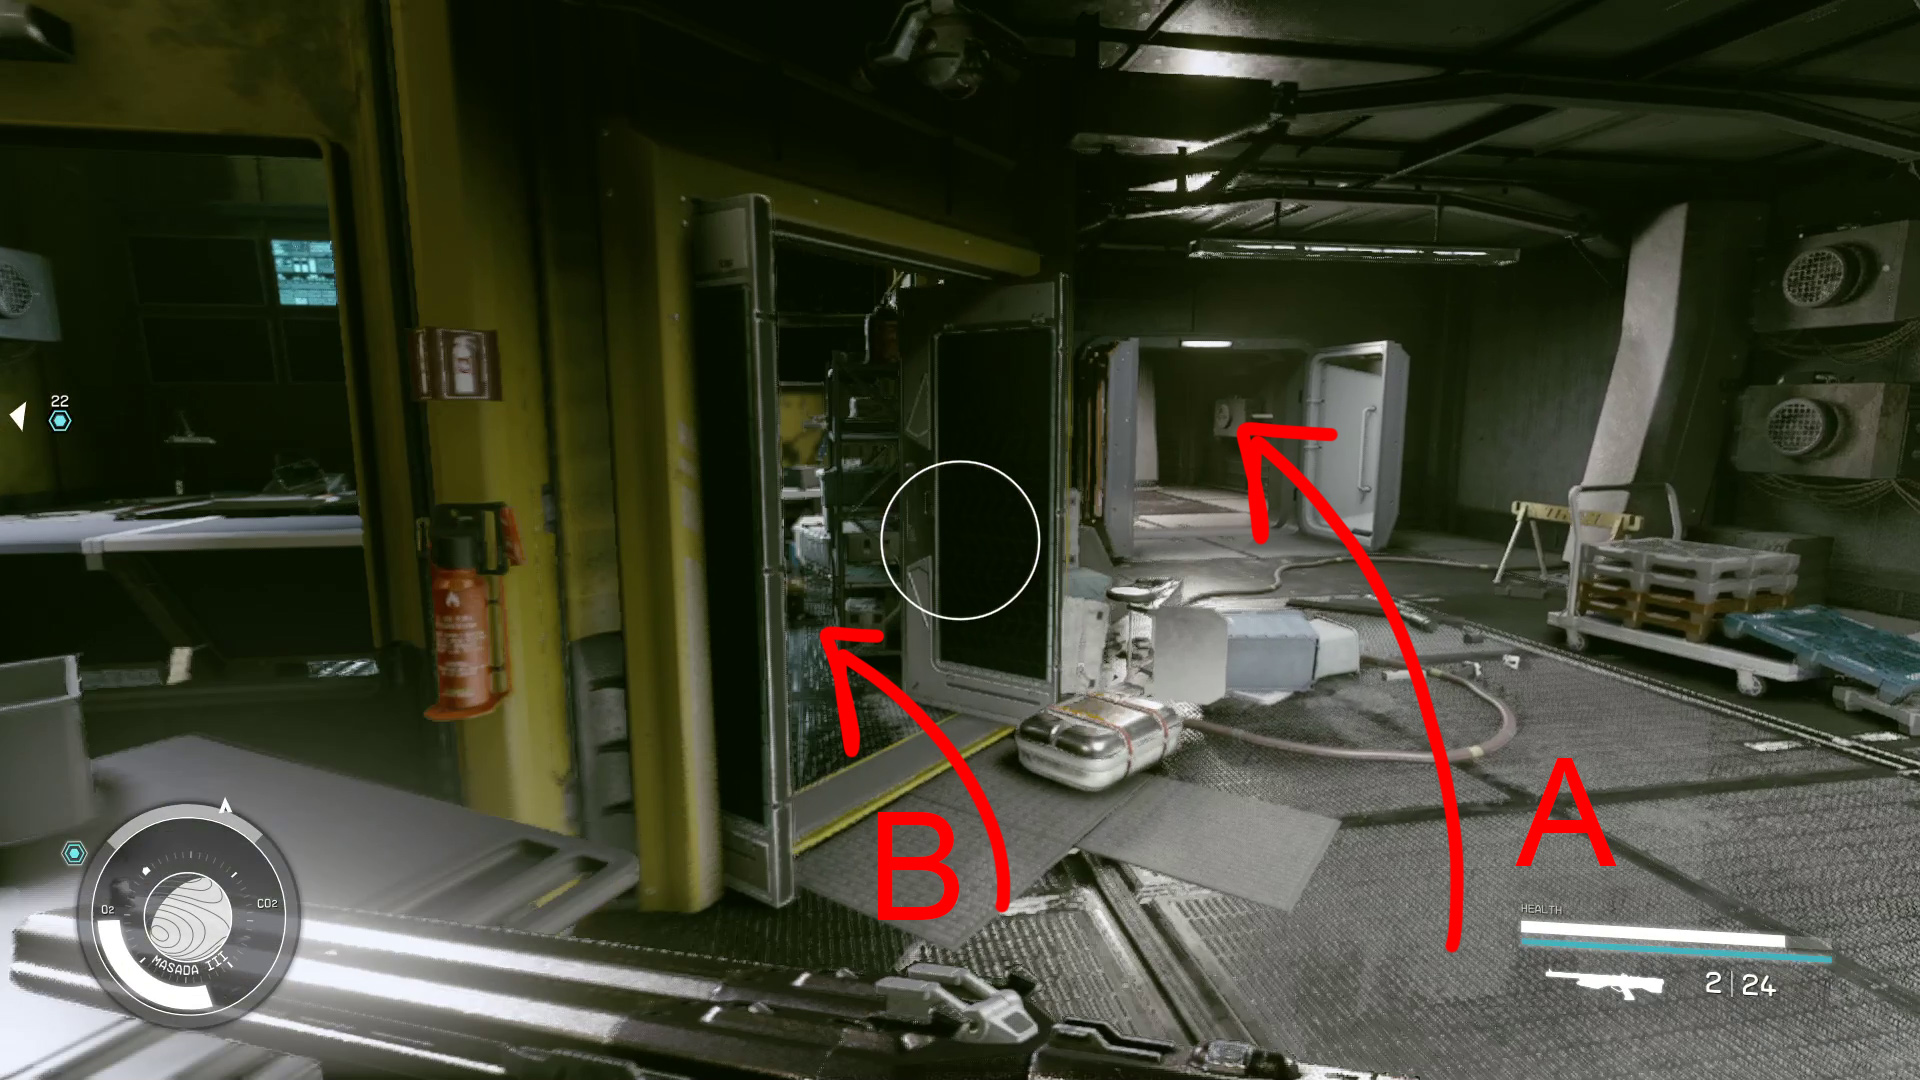
Beyond the door the ID Card Reader opens is a hallway, and at the end of it is a door that leads into the Ecliptic Base. Go into the base, and you’ll go down a hallway and enter a control room. The only way forward from here is through the doorway on the left. In the following room, you can turn right to find a plushie in a locker, plus more loot through the nearby doorway (Image 15B) — the way forward is through the door on the left (15A).
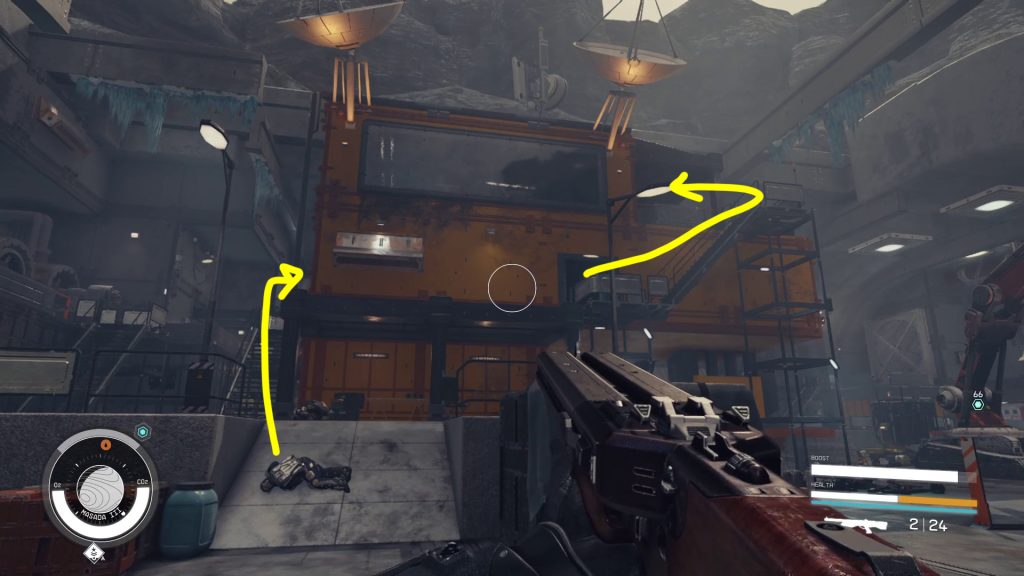
In the next room, you’ll see some stairs straight ahead (Image 16A) — we’ll go that way in a second, but first, go right (16B) and enter the storage room, where you’ll find an aid item on the wall, plus plenty of lockers and a corpse to loot. Go back to the stairs, and continue past them (16C) to find a corpse to loot. Now you can go down the stairs (16A).
Image 15Image 16
At the bottom of the stairs on your right is a locked door you can open for some loot, plus a corpse halfway through a window you can loot without picking the lock. To the left is the way forward, plus a locked door that leads to a fairly disappointing amount of loot (Image 17). Continue forward and down the stairs (the locked door to your left by the stairs leads to the same disappointing room), where you’ll find another door on your left (Image 18B) with a bit of loot inside.
Image 17Image 18
Enter the Anomaly/Leave the Anomaly
Around the corner (18A) and through the vinyl strip curtain, you’ll see some familiar floating lights. Step into them, and you’ll enter the anomaly, which sends you back to a very familiar section of the game — the mine you started in. Just like before, cross the stone bridge and keep going forward into the tunnel. After a bit, you’ll find another floating blob of lights — walk into it to leave the anomaly.
Defeat the Starborn
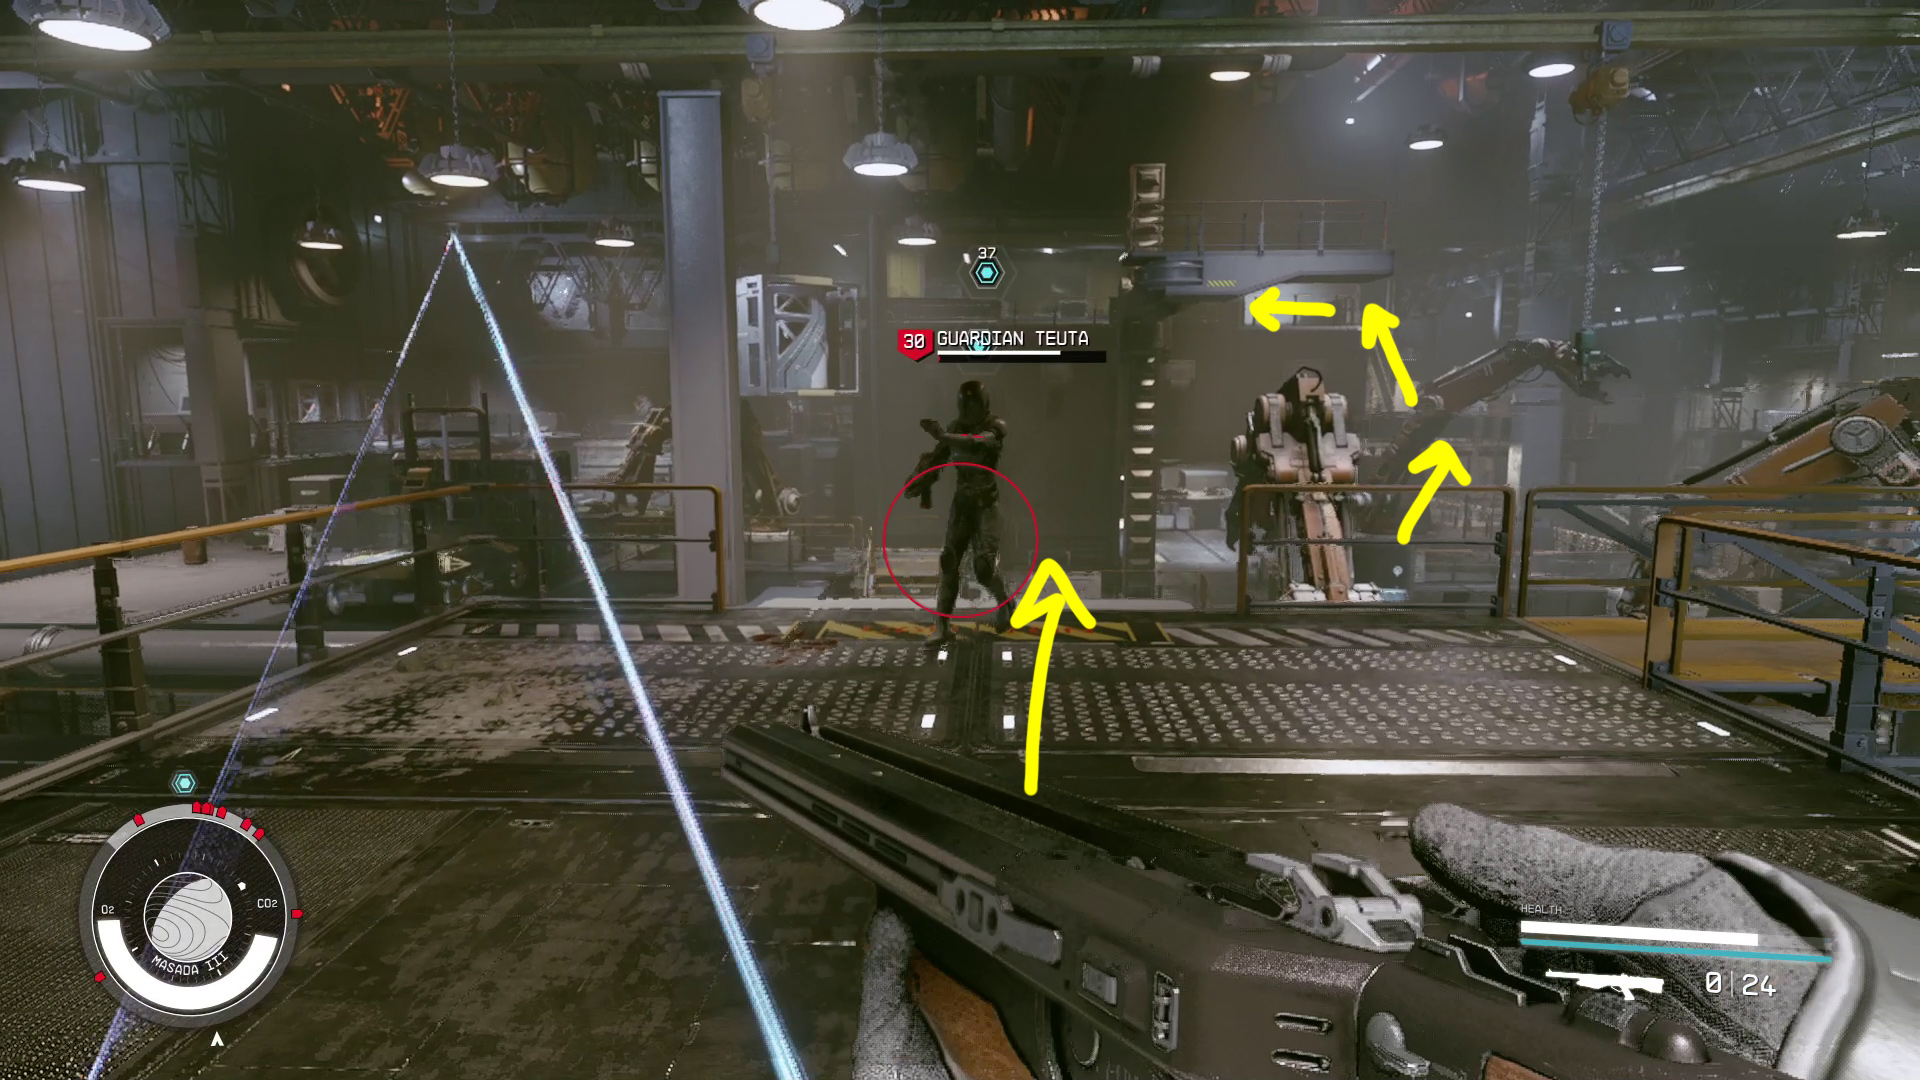
After your brief jaunt through the past, you’ll be back in the Ecliptic base. Just ahead is a huge chamber, but you won’t have time to check it out — as soon as you walk forward, Guardian Teuta will show up and attack you, and the room’s many turrets will open fire in your direction. After defeating Guardian Teuta, Guardian Rinn will show up, and you’ll have to take them down as well. Both Guardians will be indicated by an objective marker when they show up, making it easy to track them down if they teleport away.
(Optional) Disable the Defenses
It can be a pretty big pain in the butt to fight the Guardians with a bunch of turrets and robots attacking you. However, if you have rank 3 in Security, you can unlock the security control room, then either deactivate the turrets/robots, or even reset their Friend/Foe settings so they help you fight the Starborn. You can reach the control room by going up the two stairs that are just past halfway across the room (Image 19), and then picking the lock on the door to the control room — the computer you need to use to disable the defenses is indicated by an objective marker.
Image 19 – The path to disable the defenses
Find a Way to Open the Door
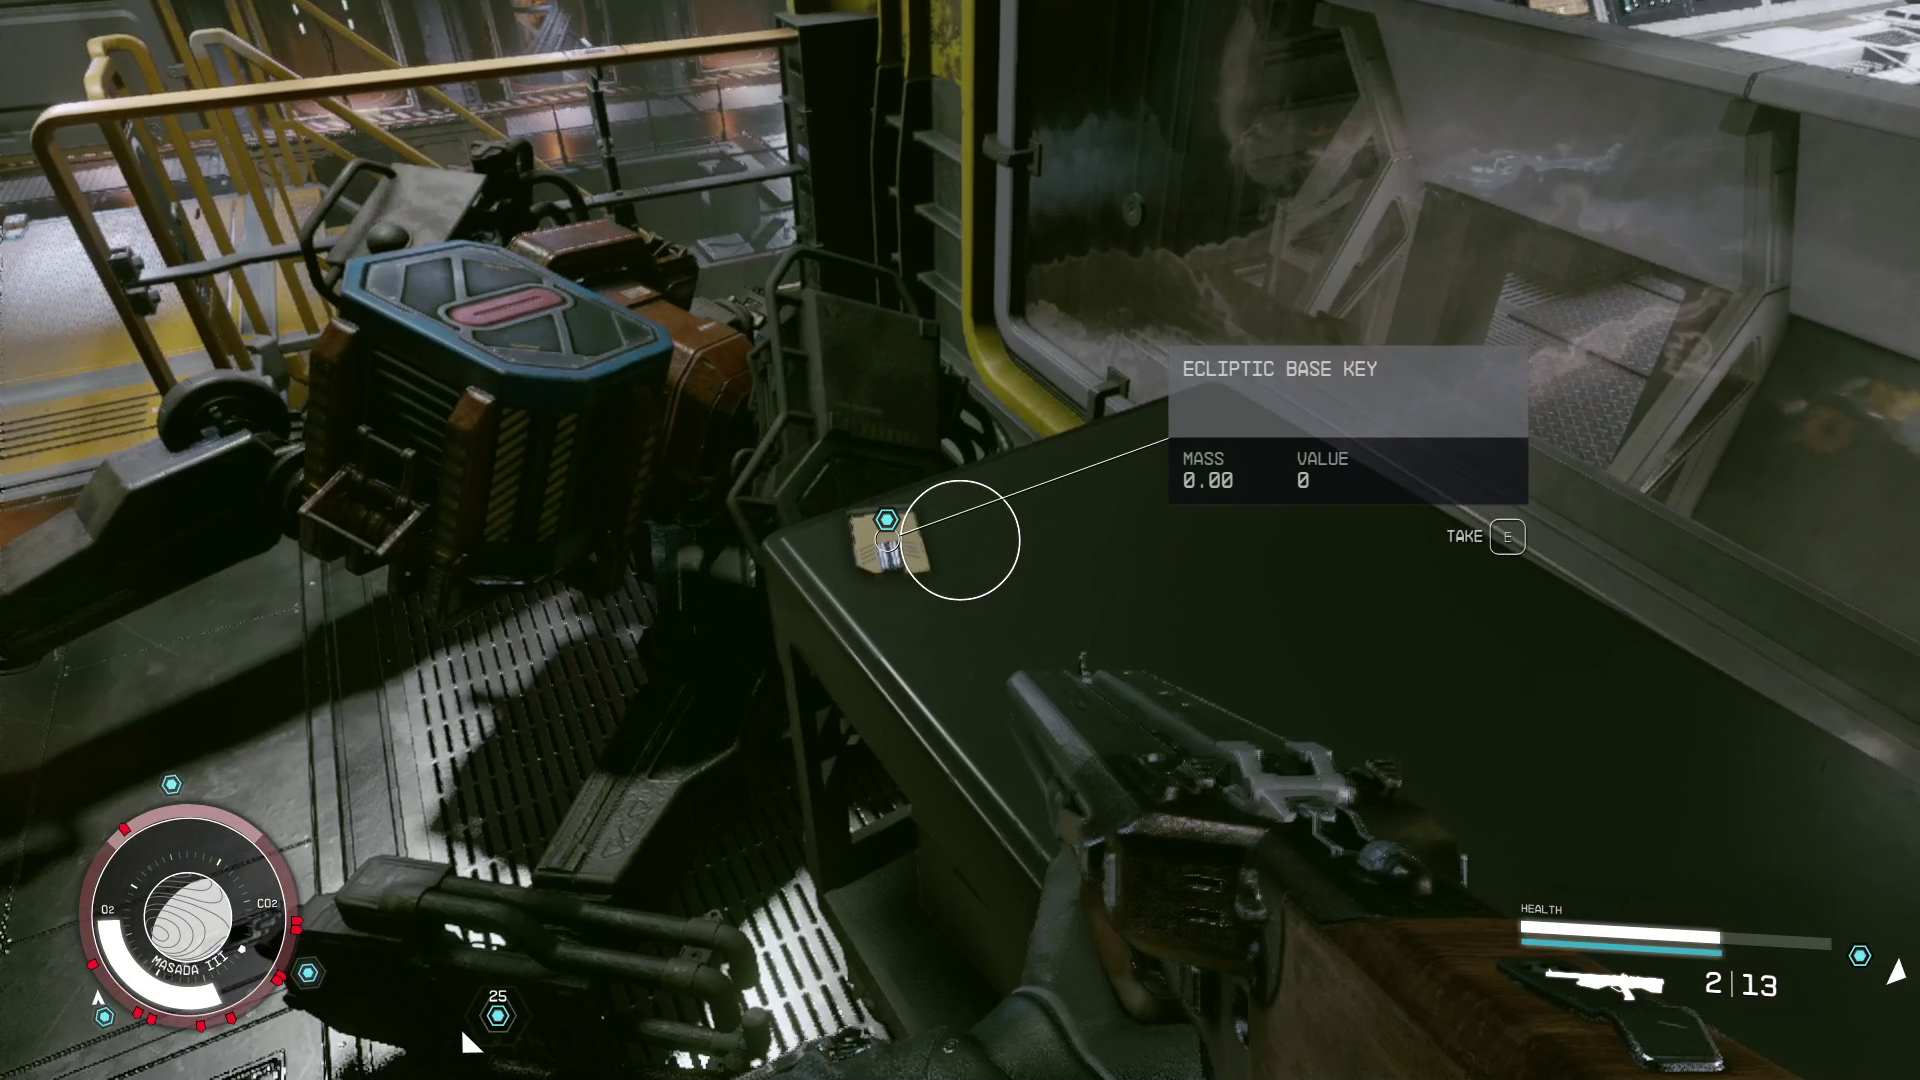
After you kill the second Guardian, a keycard will spawn, allowing you access to the security room even if you don’t have the requisite lockpicking skill. The Ecliptic Base Key (Image 20) can be found by going up the stairs indicated in Image 19.
Image 20
Find the Artifact (4)
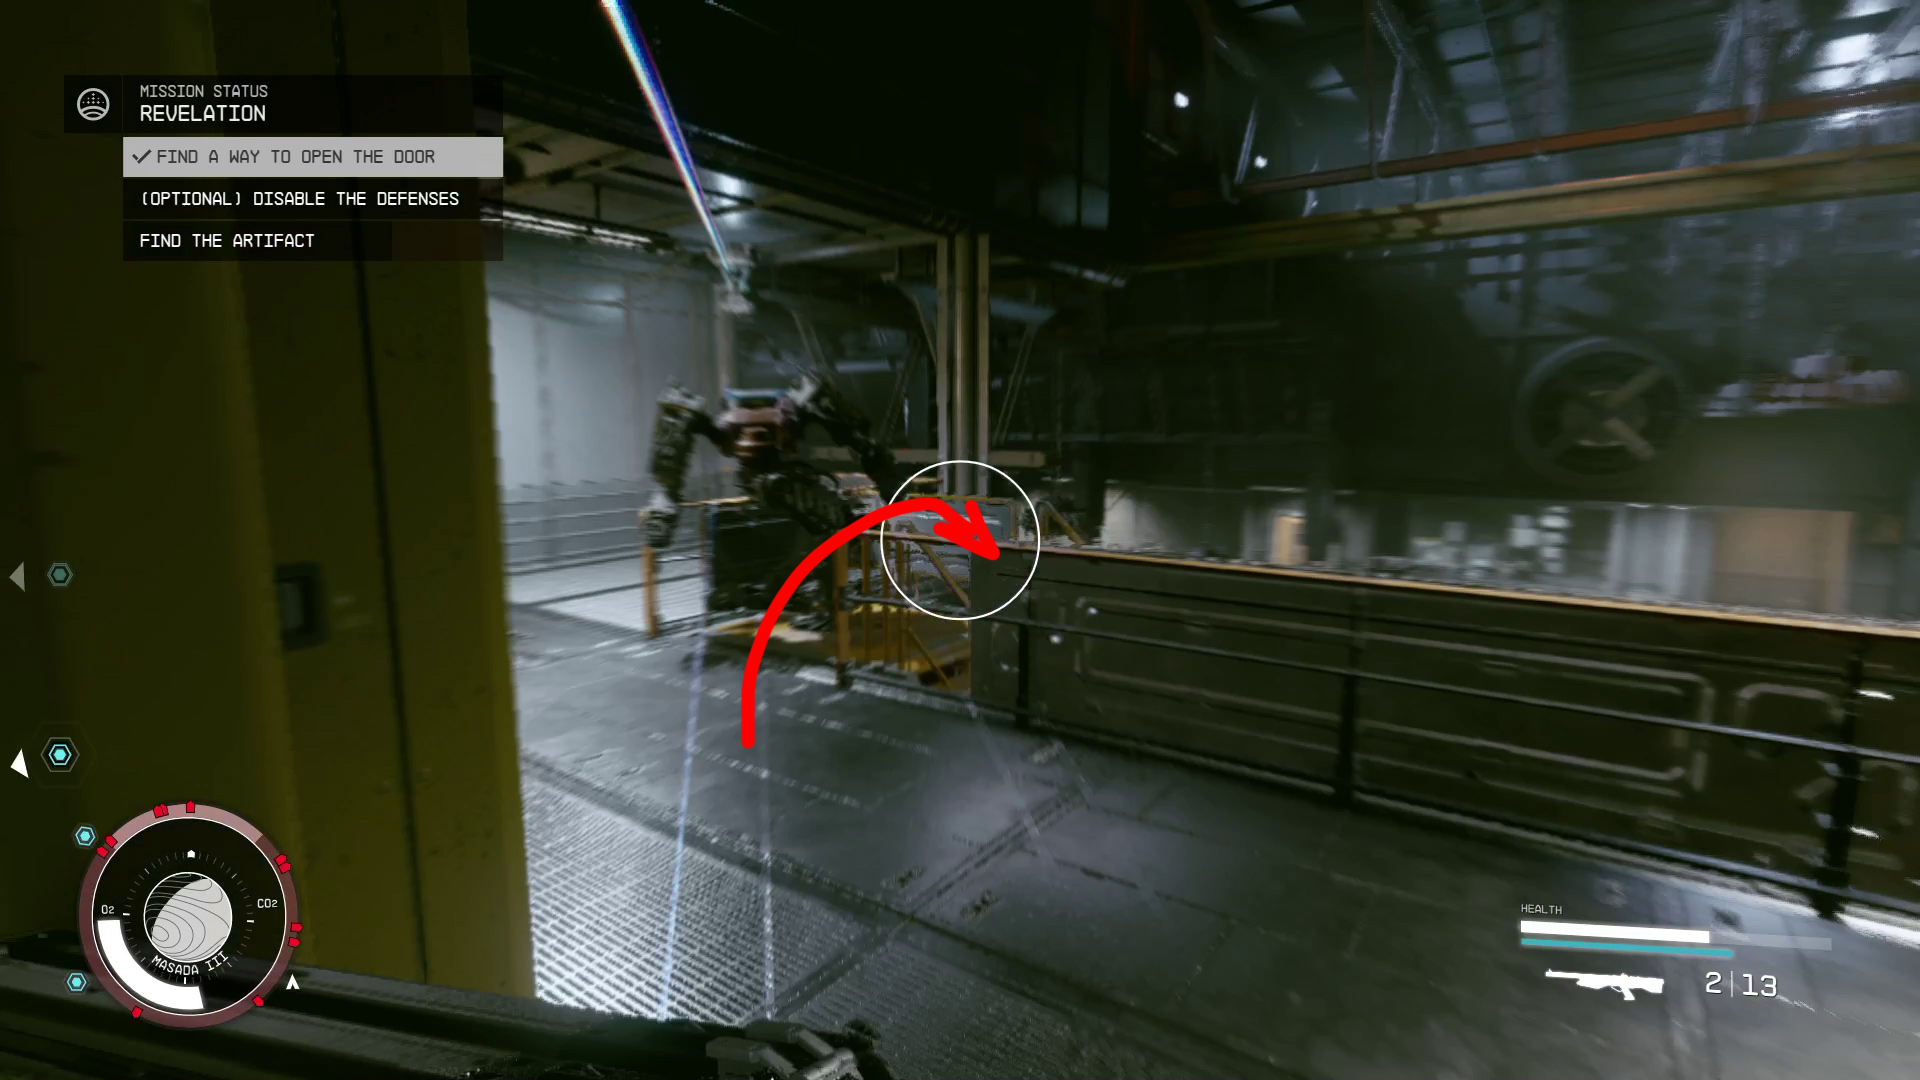
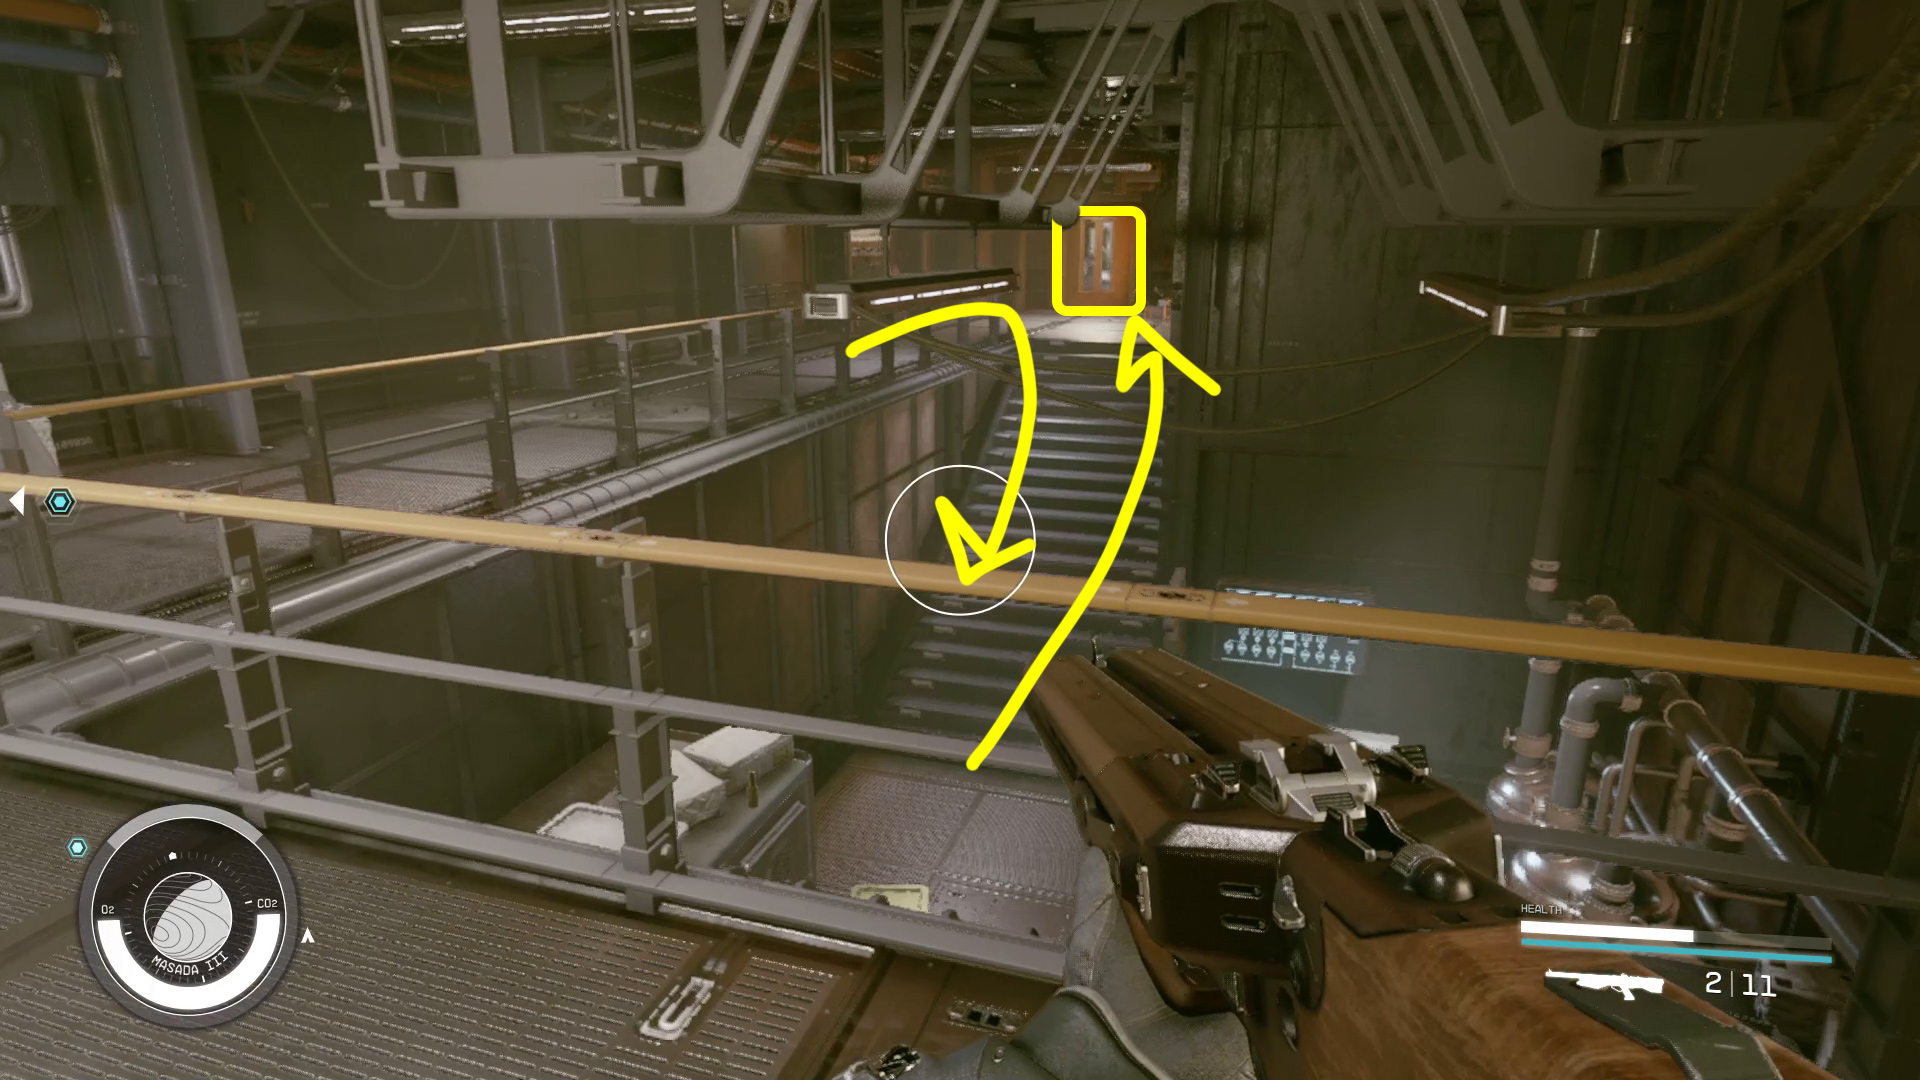
Once you have the base key, turn right (relative to the glass window that looks into the control room) and go down the stairs (Image 21). After going down one flight of stairs, head onto the catwalk and towards the door on the wall ahead (Image 22) to leave the room.
Image 21Image 22
You may not want to exit, just yet, however. There are two rooms you can go into with your newfound key (Images 23, 24– view is from the top of the stairs) that contain some ammo and aid items.
Image 23Image 24
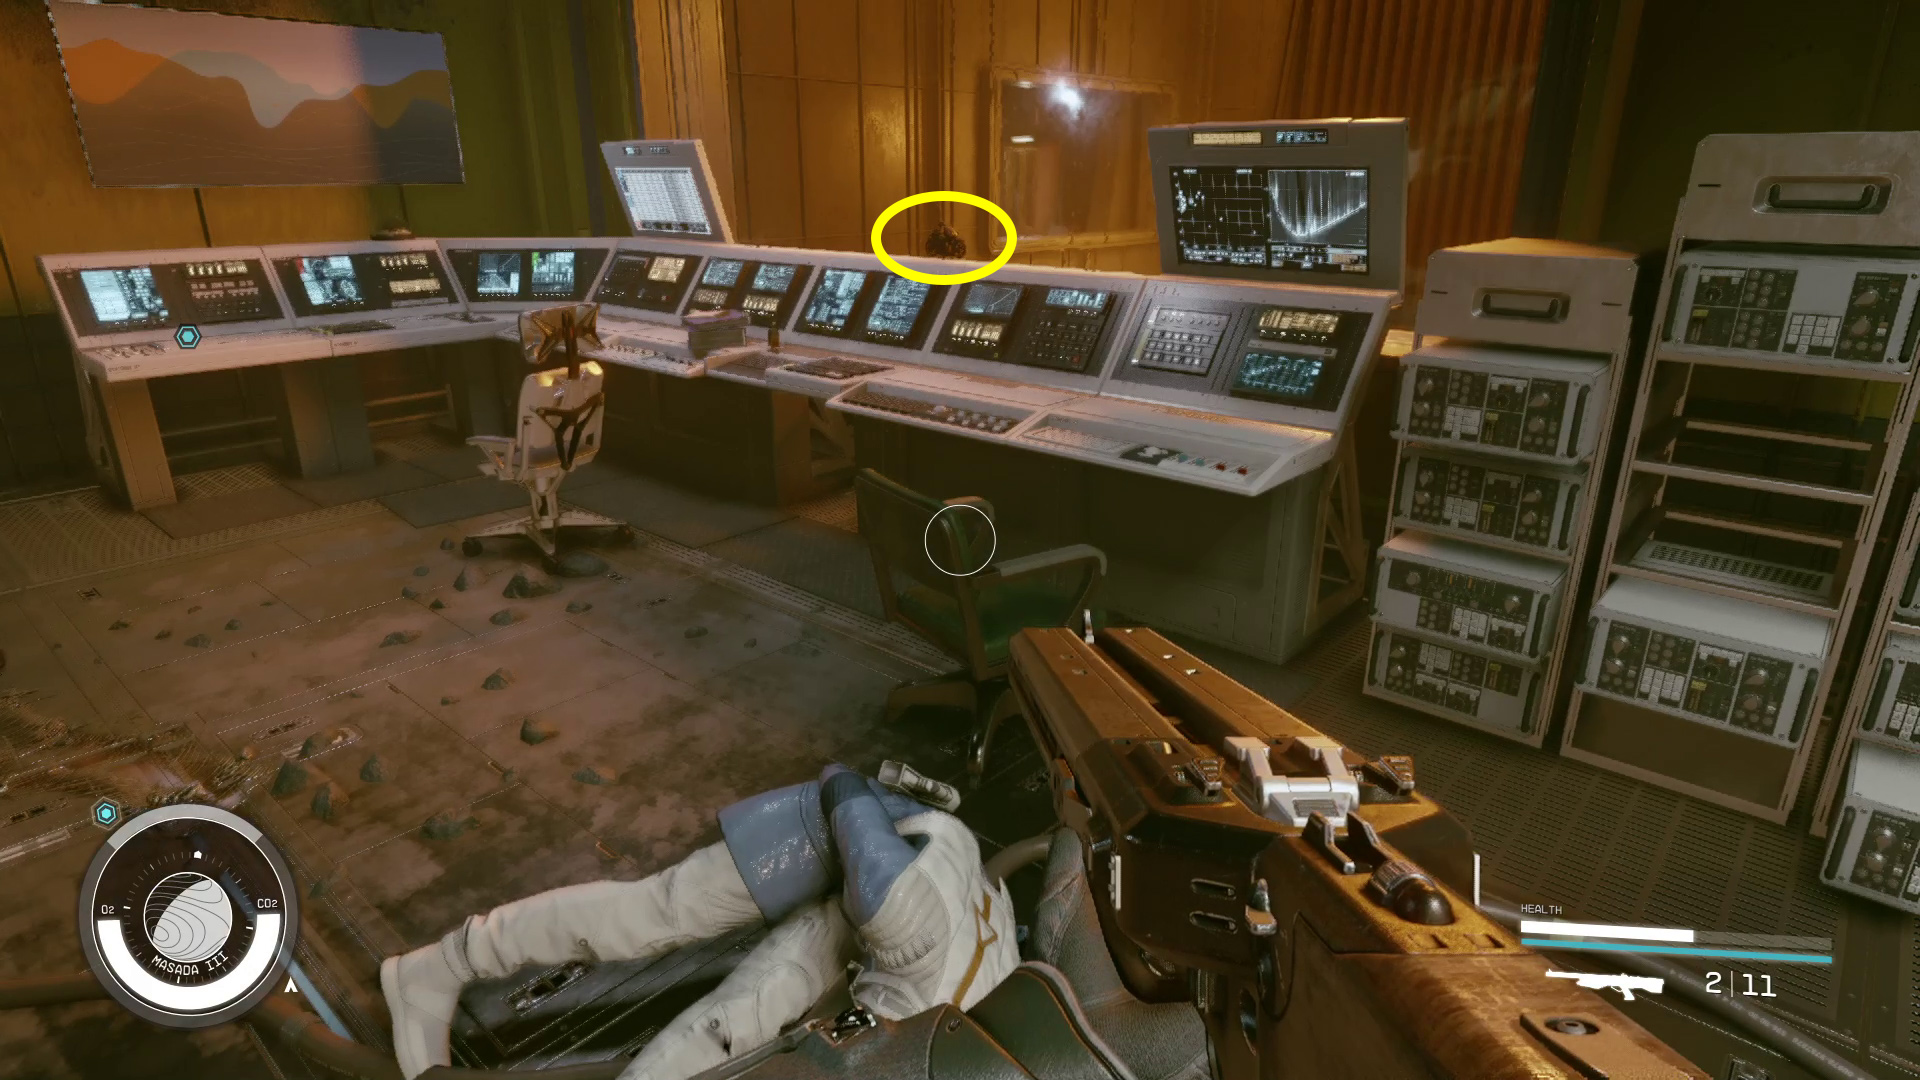
Once you’re ready, head through the exit door (Image 22), then continue through the series of rooms beyond — there’s only one way forward, all the way to the next anomaly. Collectors-of-things won’t want to miss the Antique Toy Motorcycle in the control room with the dead scientists (Image 25); there’s other loot in this room as well. In the following area, you can go down the stairs to find a corpse, plus an aid item on the wall. Then head through the door (Image 26).
Image 25Image 26
Enter the Anomaly
You can check out the Ecliptic Excavation Computer in the next room for a bit of background on the base, and then it’s through the open door and down the stairs, and into the anomaly.
Find a Way Out of the Anomaly
The anomaly will once again take you to a familiar scene from the past. This time, it’s Petrov’s ship — walk forward, and you’ll begin a conversation with him. Say whatever you want, and combat will start after the second dialog choice. You have two options here:
Kill Captain Petrov immediately, loot the Private Quarters key from his body, then run through the locked door and into the anomaly.
Kill everyone and loot their corpses before leaving.
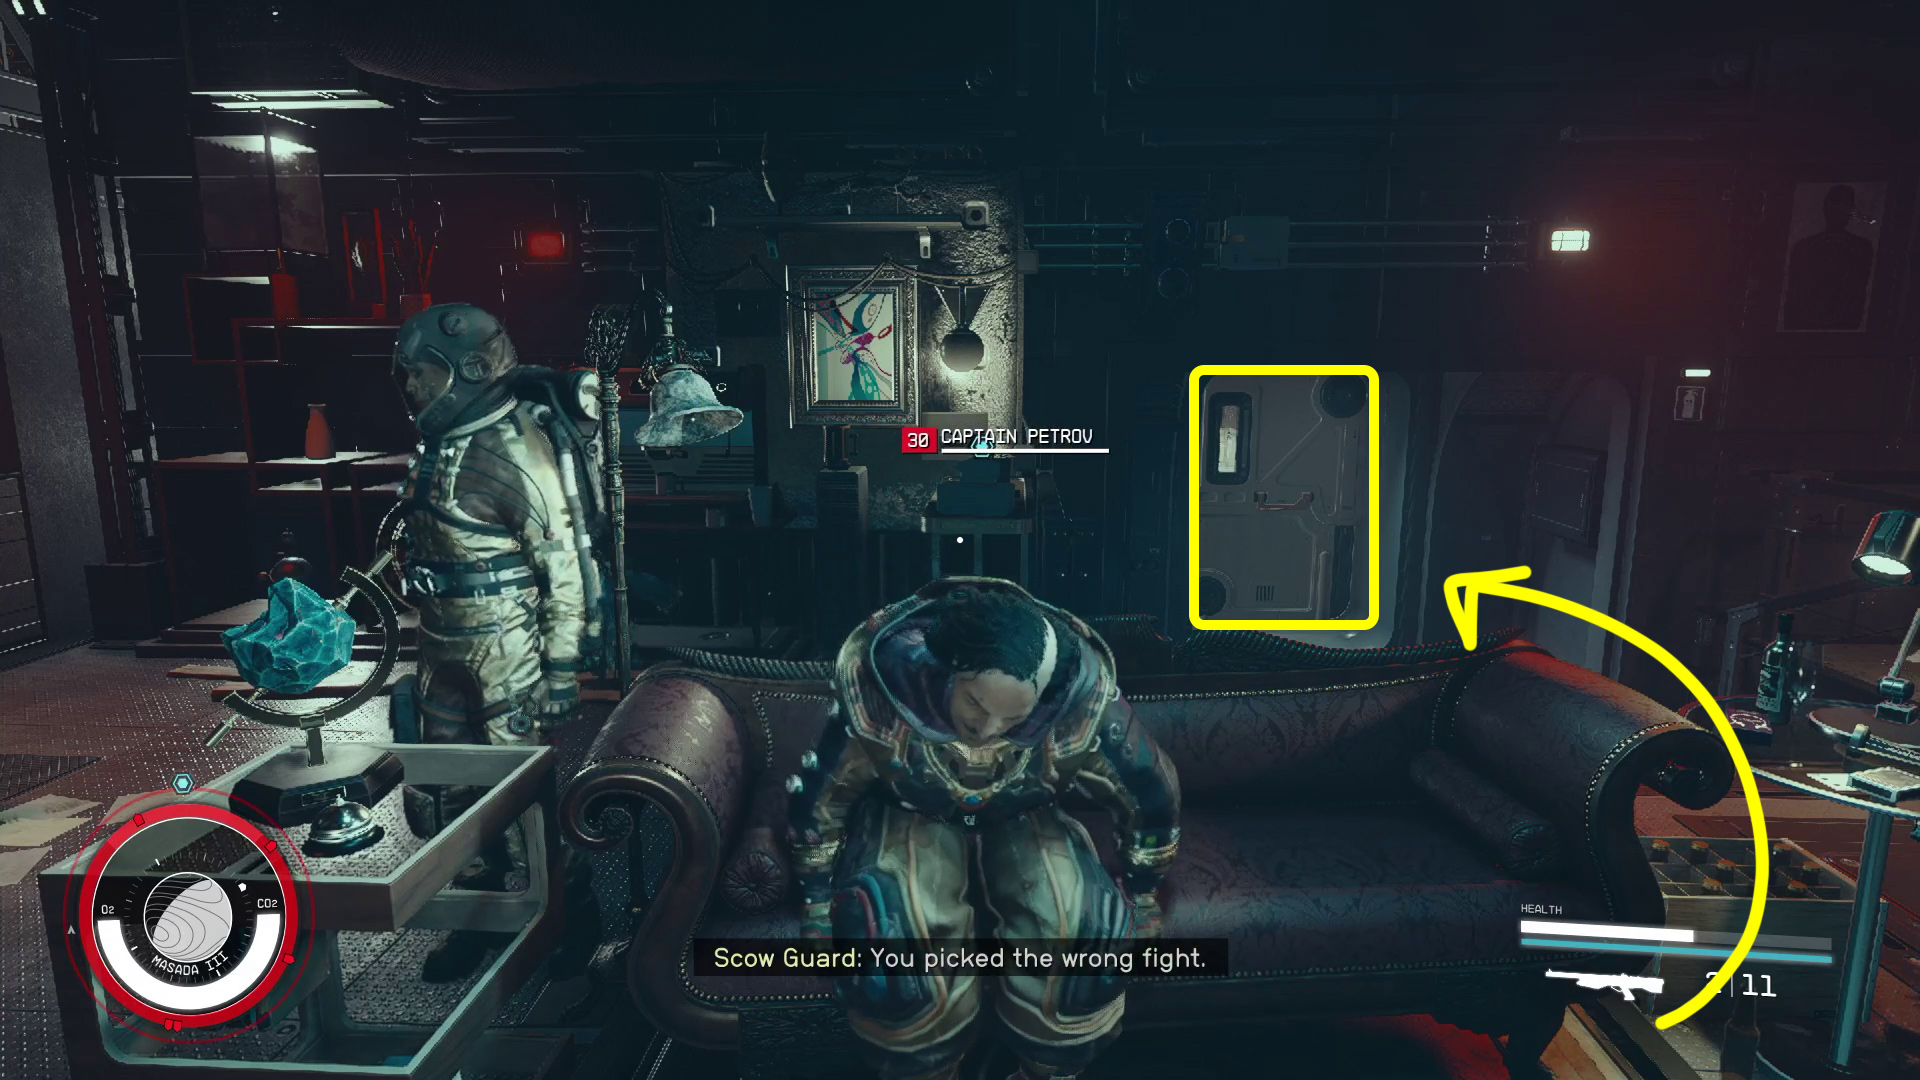
Both options are fine — if you are efficient, killing everyone will gain you resources rather than cost you resources. Whatever you decide, you’ll need to kill Captain Petrov, loot the key from his corpse, then go through the door (Image 27) and into the anomaly.
Image 27 – The door that leads out of this anomaly
Find the Artifact (5)
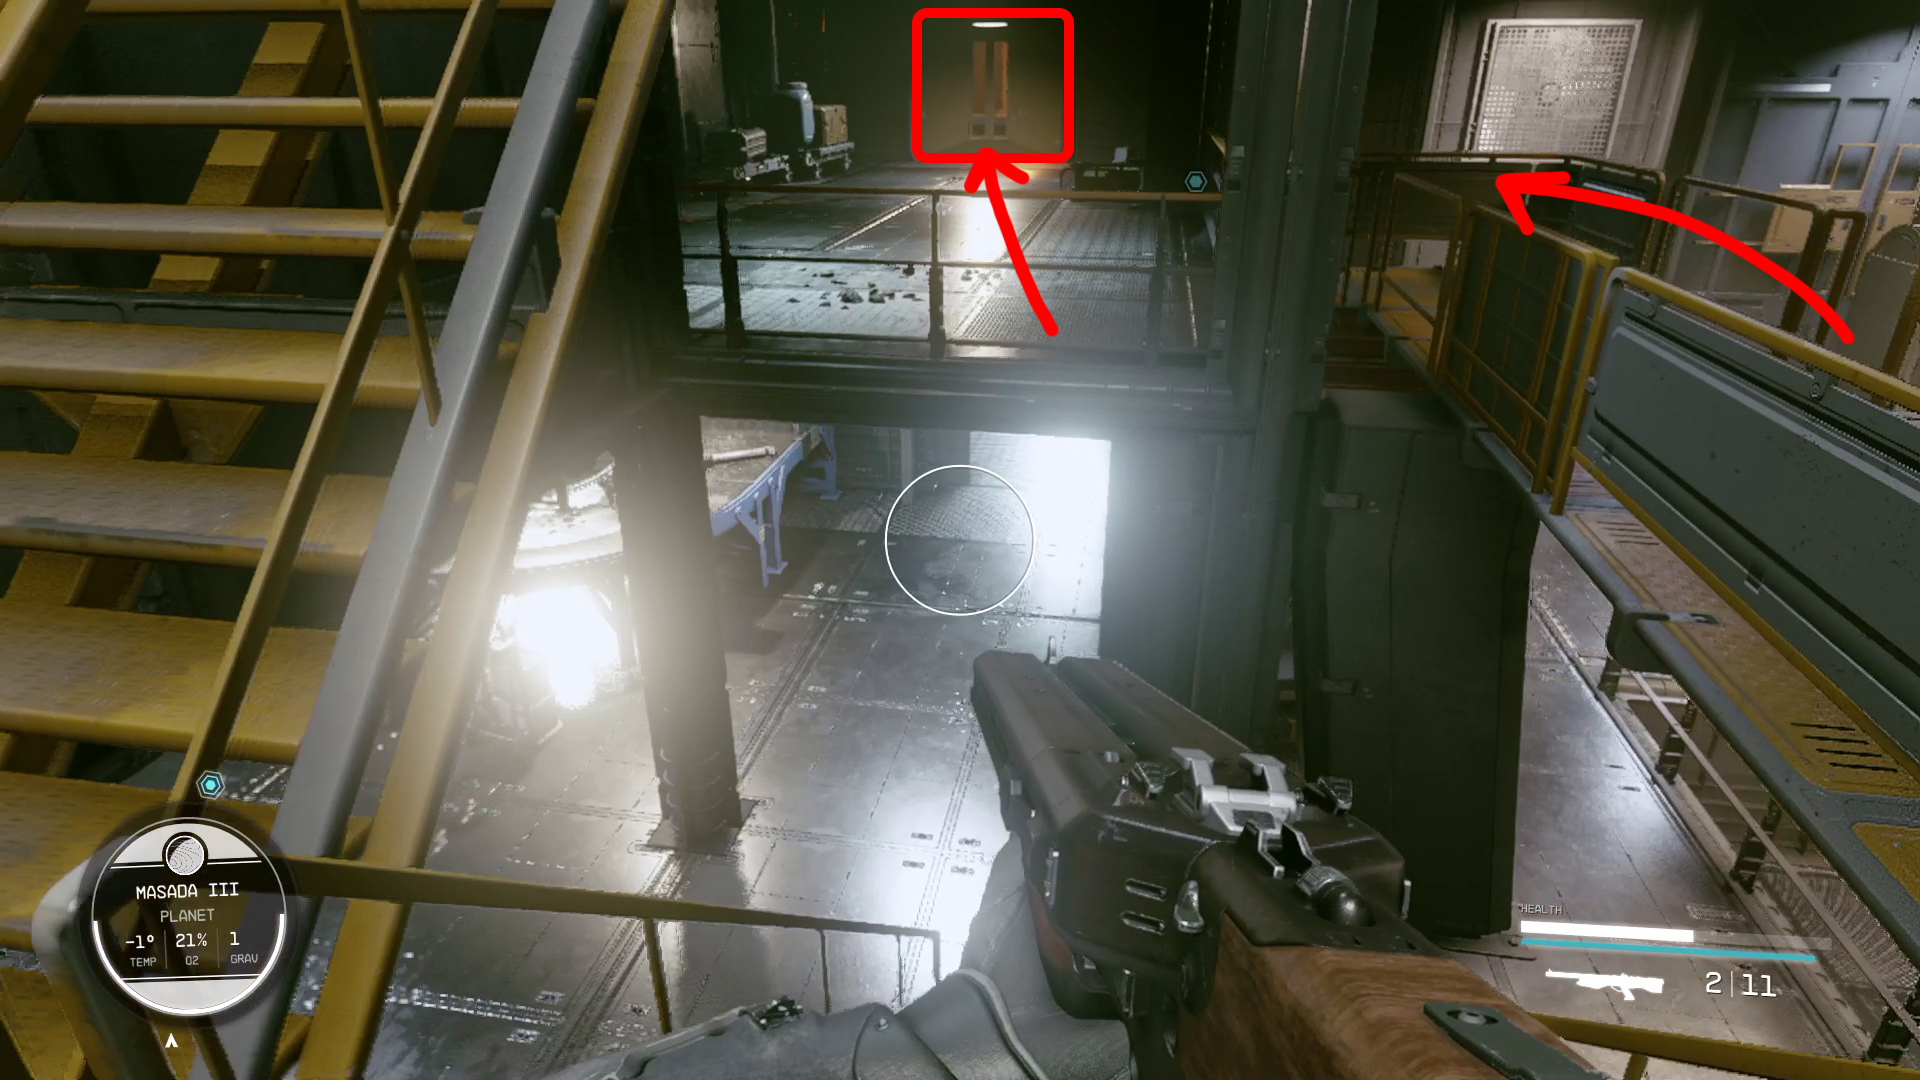
Back in the Ecliptic base, head forward through the double doors (Image 28) and then forward down the stone ramp. Go left past the mining equipment and onto the lift (Image 29) — press the button to activate the lift to the Cavern. While on the lift, you’ll find yourself transported by another anomaly.
Image 28Image 29
Leave the Anomaly
This is an interesting one: you get to see another reality where you died on the Eye. You have a few choices:
Turn around and enter the anomaly behind you to leave immediately
Stay and talk to Vladimir by walking forward a few steps
You can choose the [Attack] option to fight Vladimir if you want. It’s not the “real” universe, right? So that makes it… OK? Plus, killing him is the only way we know of to get Vladimir Sall’s Outfit.
When you’re ready, go through the anomaly the objective marker is indicating, and you’ll find yourself back on the lift.
Find the Artifact (6)
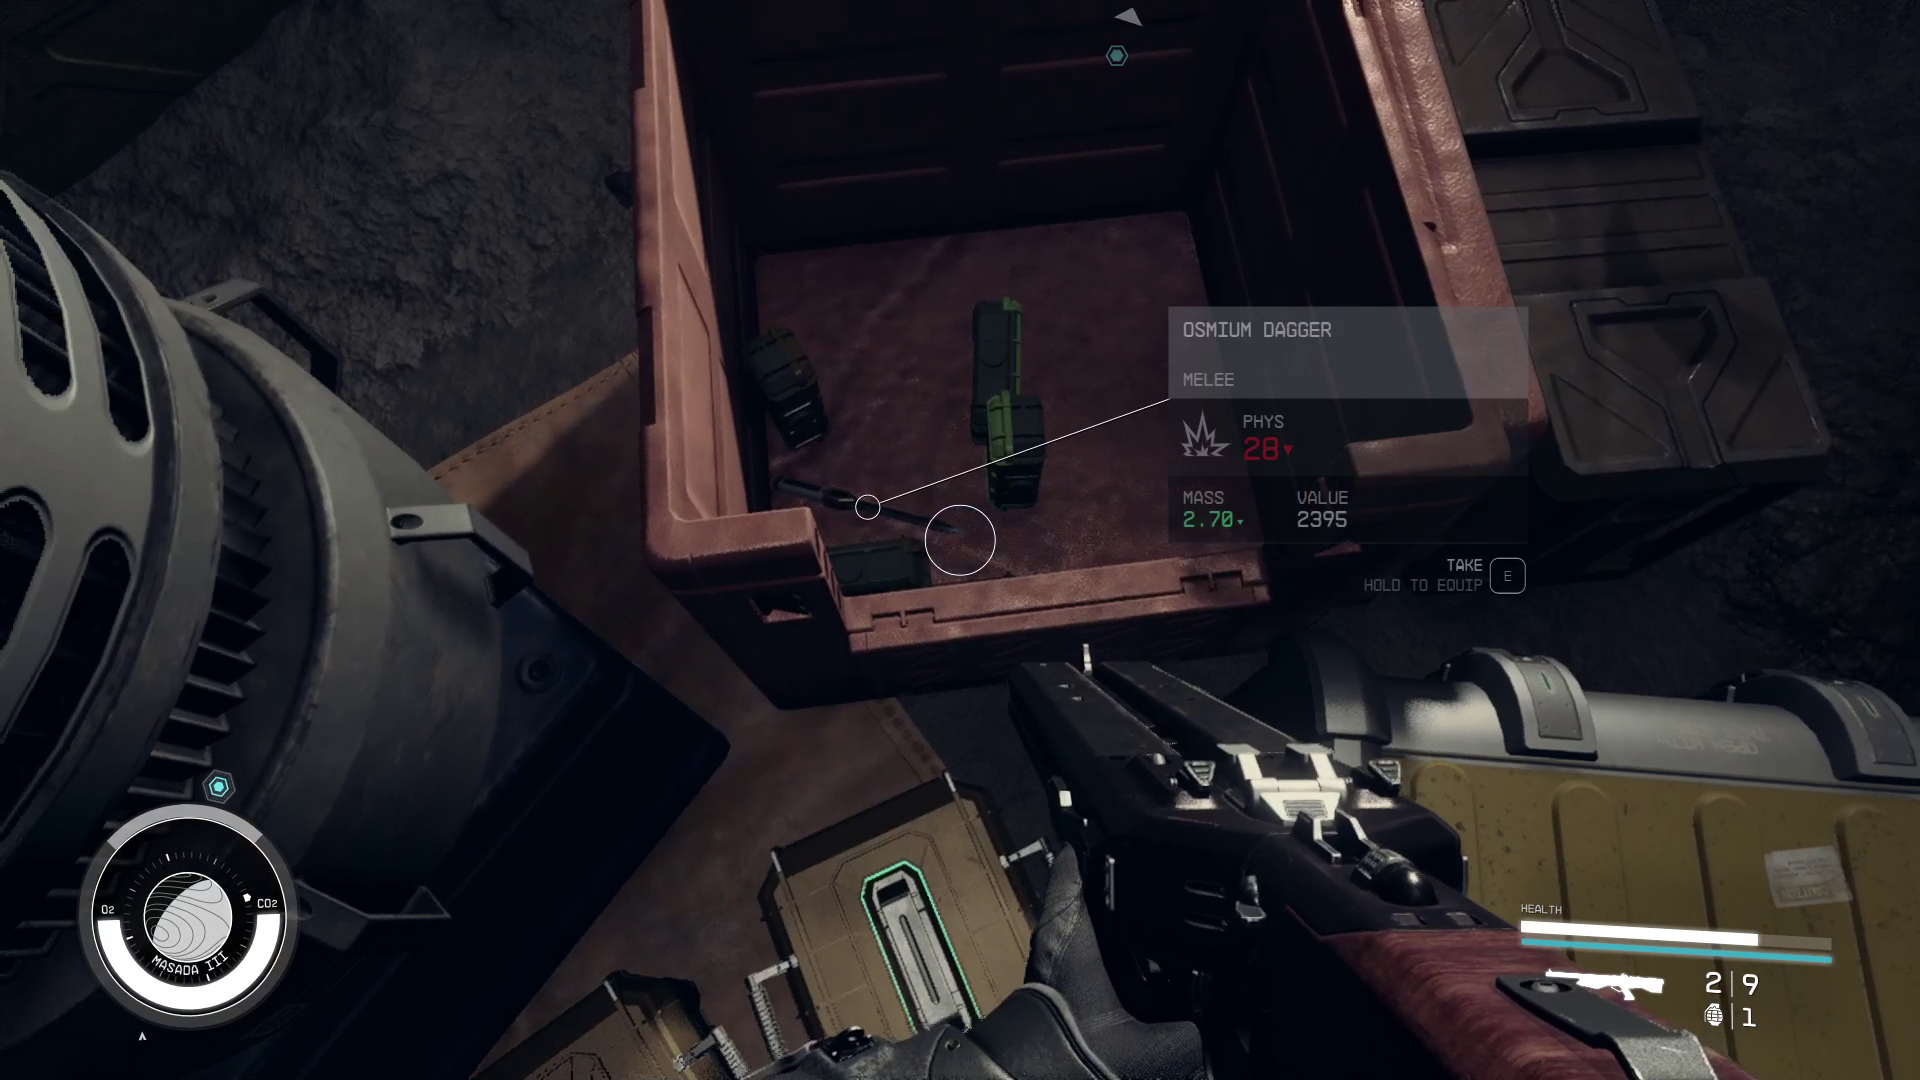
Once the lift stops, you’ll be able to get off. Just ahead by the lights, you’ll find an incredible amount of ammo, weapons, and aid items. Grab as much as you can carry, because there’s a couple more combat encounters ahead, and one is very, very long. Even though you won’t want to actually use it, make sure you pick up the dagger in the orange crate (Image 30), and equip it before continuing forward into the tunnel (you’ll see why in just a moment).
Image 30 – The dagger you should equip before the next combat section
Defeat the Starborn
Make your way through the tunnel, and you’ll soon enter a large open cavern. Guardian Fionn will taunt you, and then a bunch of duplicates of you will spawn. Wait for the last one to pop into existence, and then you can equip a better weapon. You’ll notice that all of the duplicates have the dagger you equipped — instead of guns — which should make them a lot easier to fight.
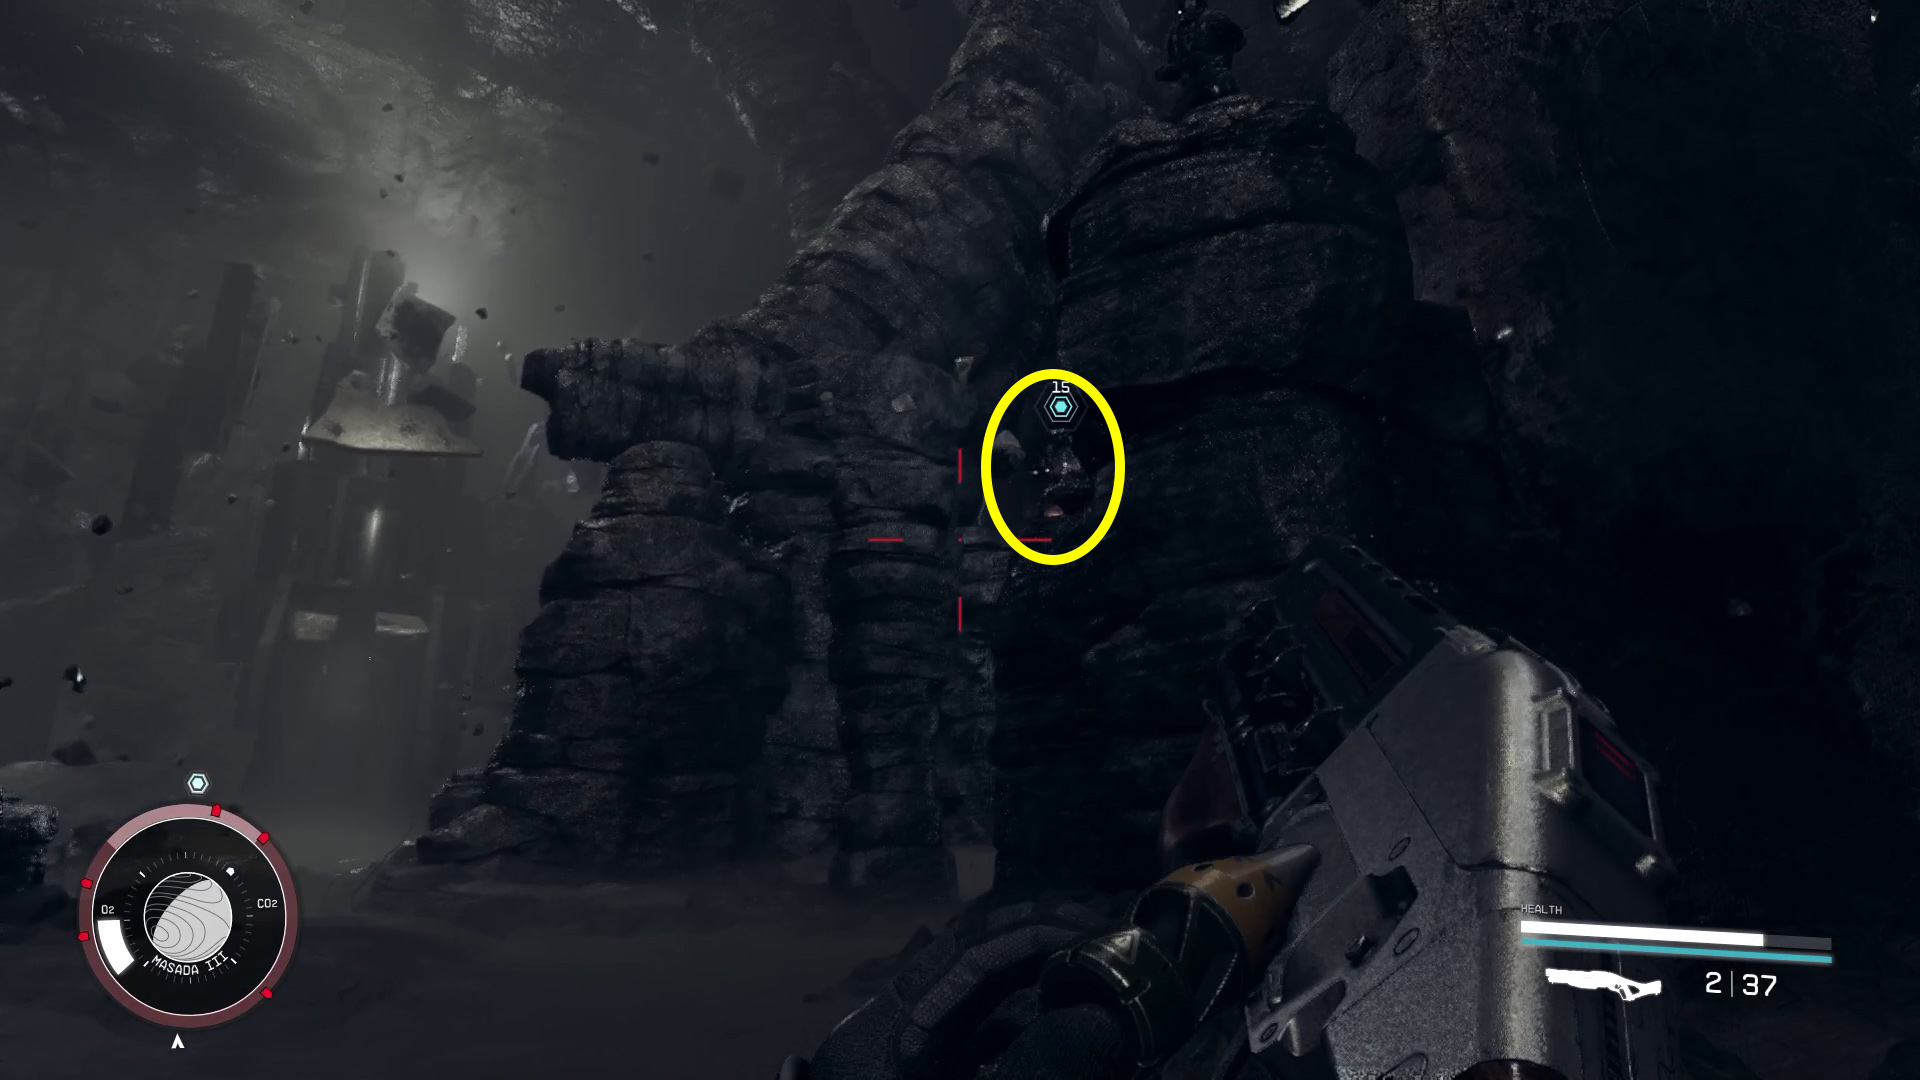
Once you kill enough of the duplicates, Guardian Fionn will reveal themself. Look for the objective marker on top of the rock columns (Image 31), as Fionn likes to hide on top of them while cloaked, and sometimes the marker doesn’t seem to appear.
Image 31- Fionn is likely to be on top of one of the rock columns
Find the Artifact (7)
Fionn finished off, you can get back to hunting down the Artifact. There’s an exit to the cavern on the opposite side from where you came in — you can use your scanner to help find it, and the objective marker is also indicating the door. You’ll find a corpse on the way to the door you should loot for ammo; you can then approach the door and go through it to reach the Buried Temple.
In the Buried Temple, you’ll be confronted by The Emissary and/or The Hunter. Once again, you’ve got a choice to make:
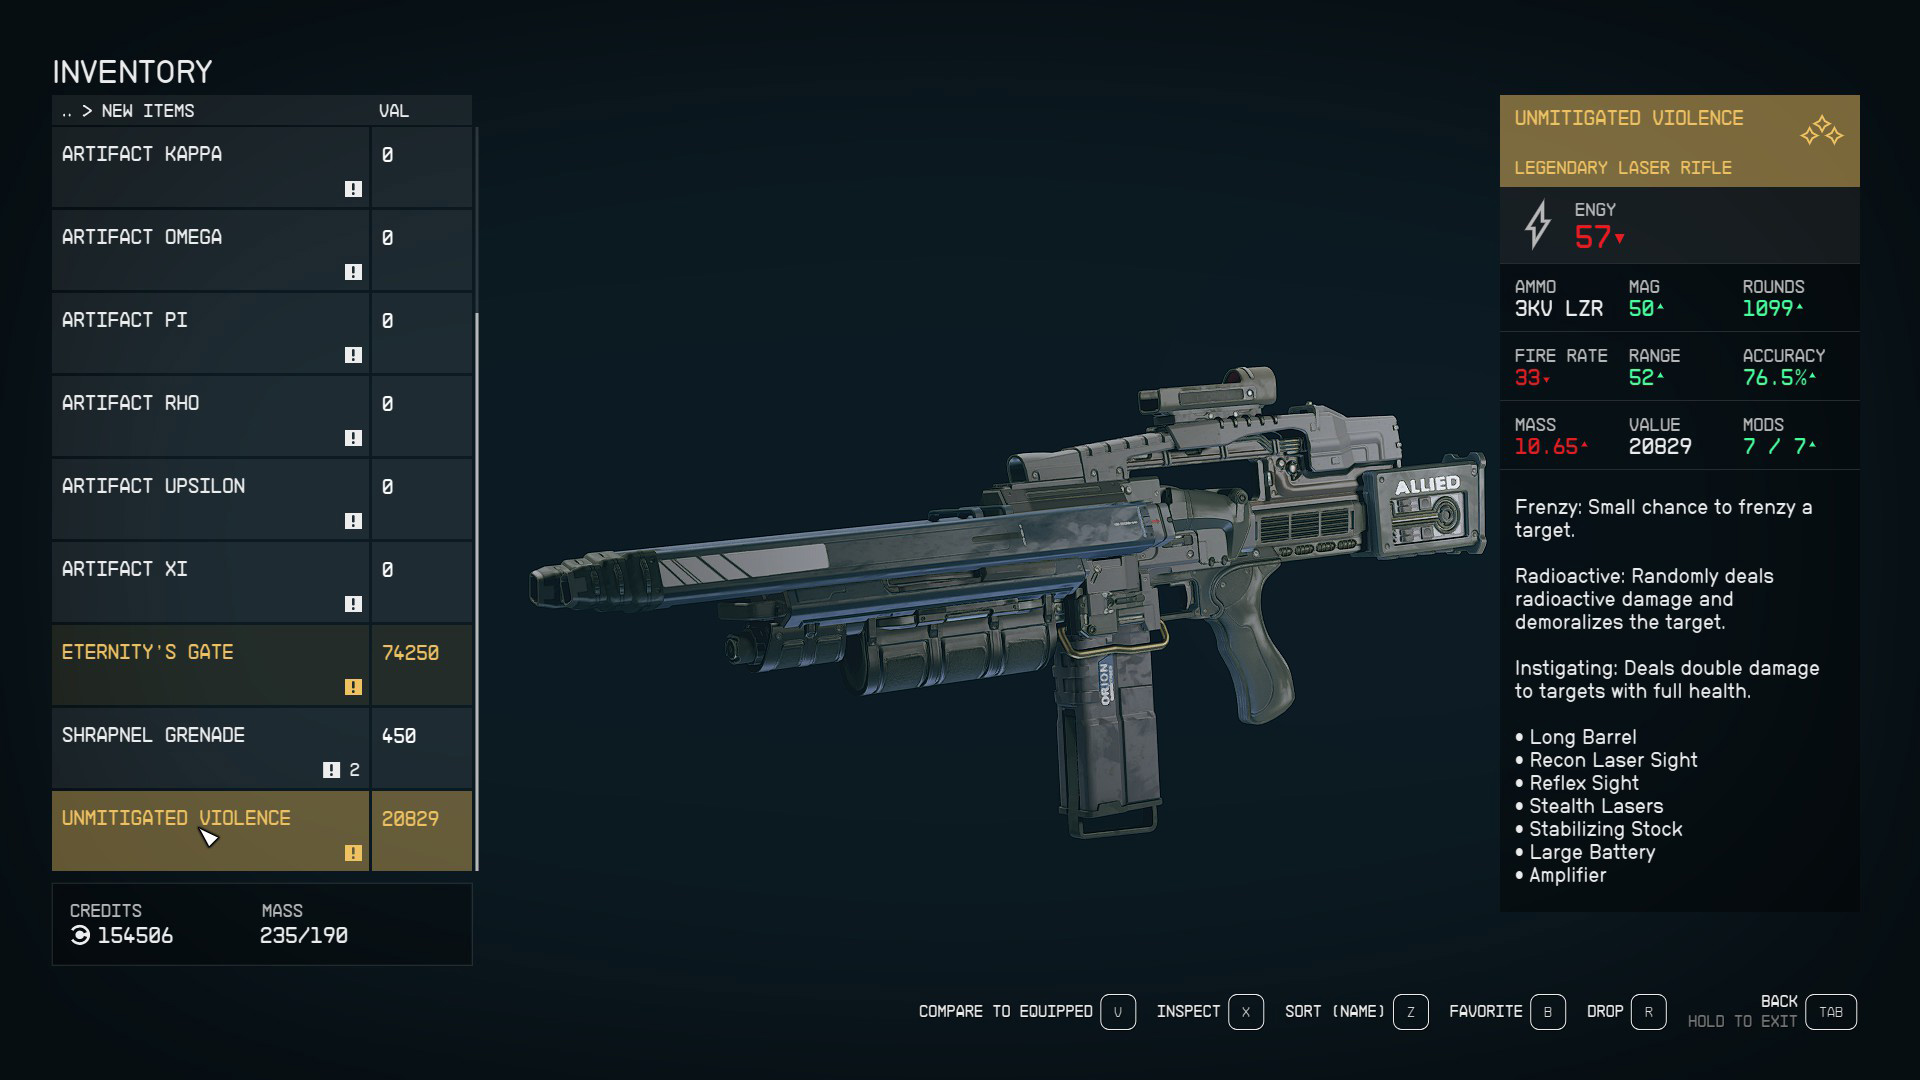
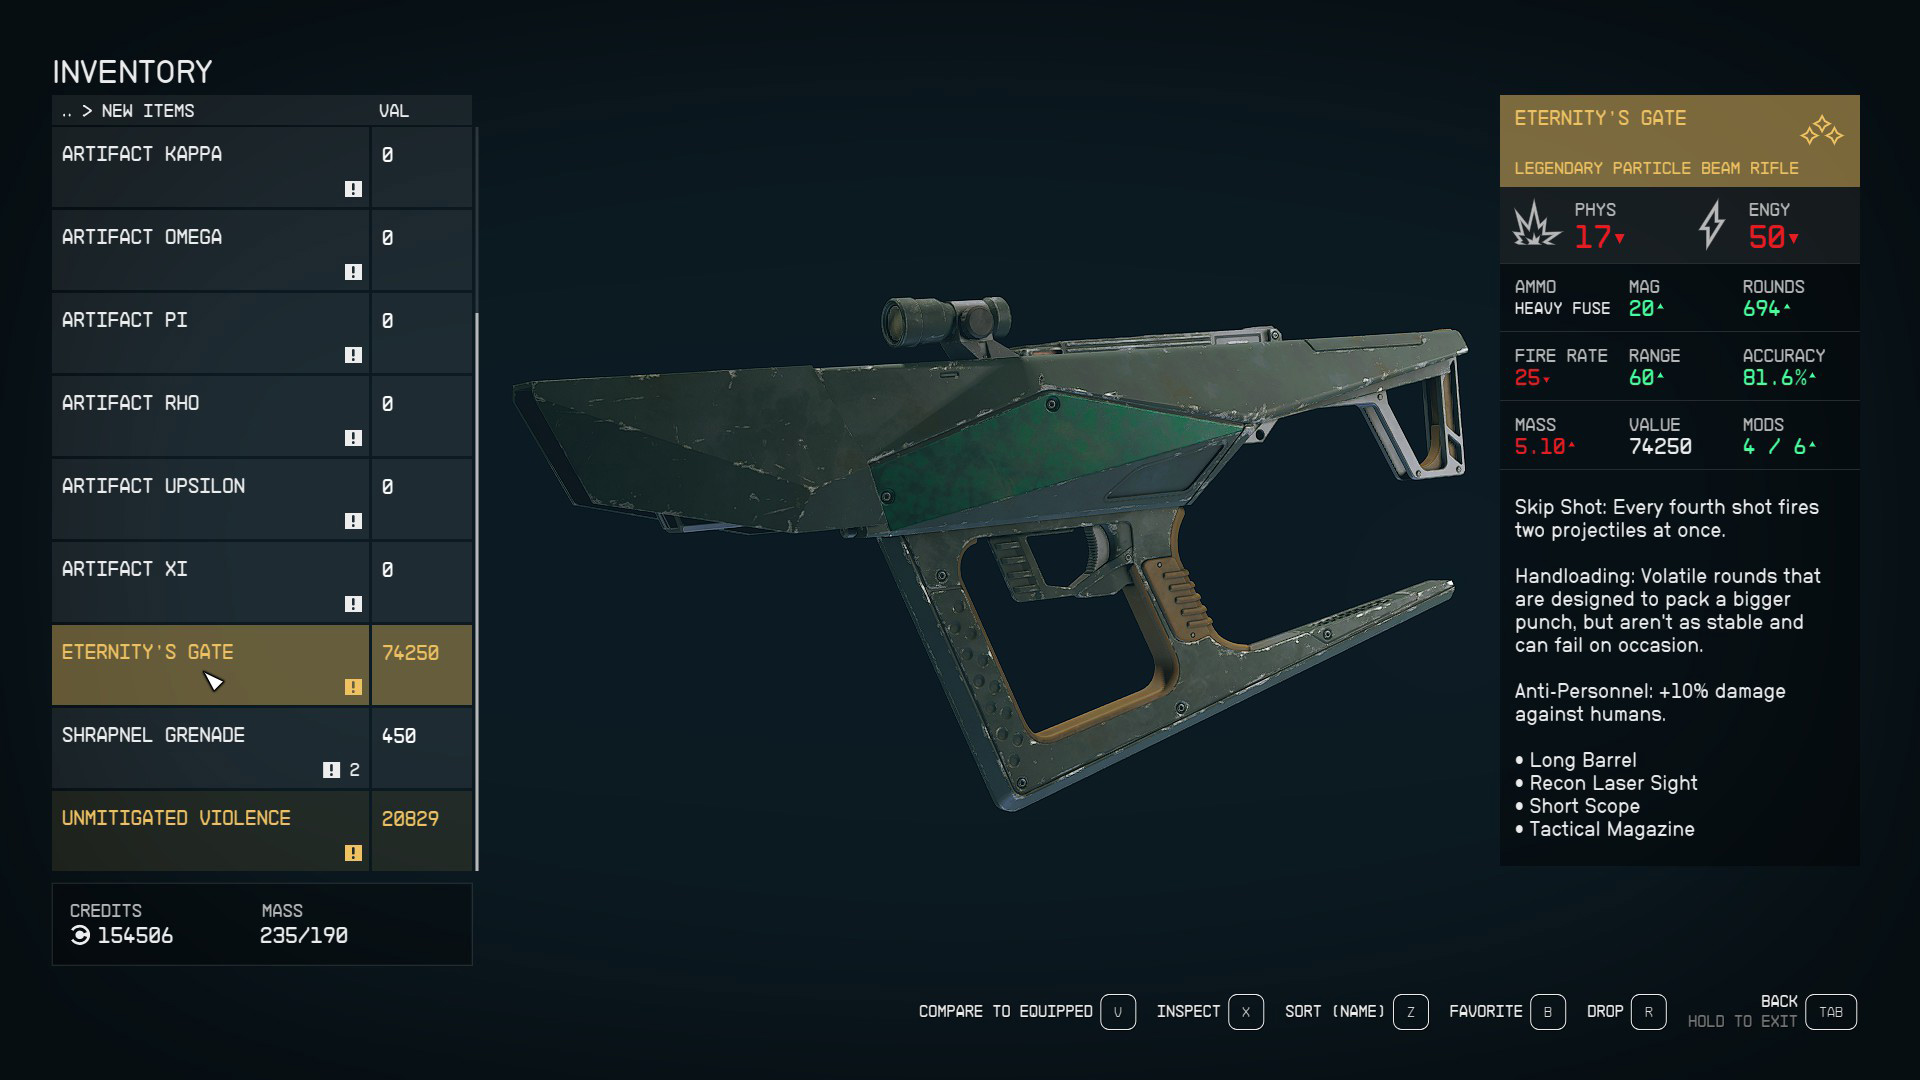
[Attack] – Fight whoever isn’t on your side (or both of them, if you sided with neither Starborn). This earns you the equipment of the Starborn(s) you defeat, which includes their unique Legendary weapon.
[Speech] – A Persuasion attempt. If successful, the Starborn(s) you’re facing will simply give you their Artifacts.
The Hunter’s unique weaponThe Emissary’s unique weapon
If you fail the Speech attempt, or choose to Attack, you’ll go through an extended set of combat sequences. Some tips for each section (this assumes you are fighting both Starborn, but the same general principles apply):
Buried Temple – Try and stay off the ground to avoid grenades — you’re in zero-G, so it’s easy to do so. Remember that the controls are the same as in the temple puzzles, and that you can use the sprint key to boost around.
The Lodge – Make sure you loot each member of Constellation — they’re probablyjust illusions, so don’t feel bad.
NASA – The Emissary likes to teleport away a lot more than the Hunter — and seems to do less damage — so focus on taking down The Hunter first. Once he’s down, make sure you avoid the Emissary if he’s grouped up — target the version of him that’s alone, if possible. If he’s clumped up, use grenades, or focus one until it teleports away, then keep chasing and attacking that one.
Neon – This one ends as soon as you do enough damage to the Emissary, so rush at his copies and focus fire.
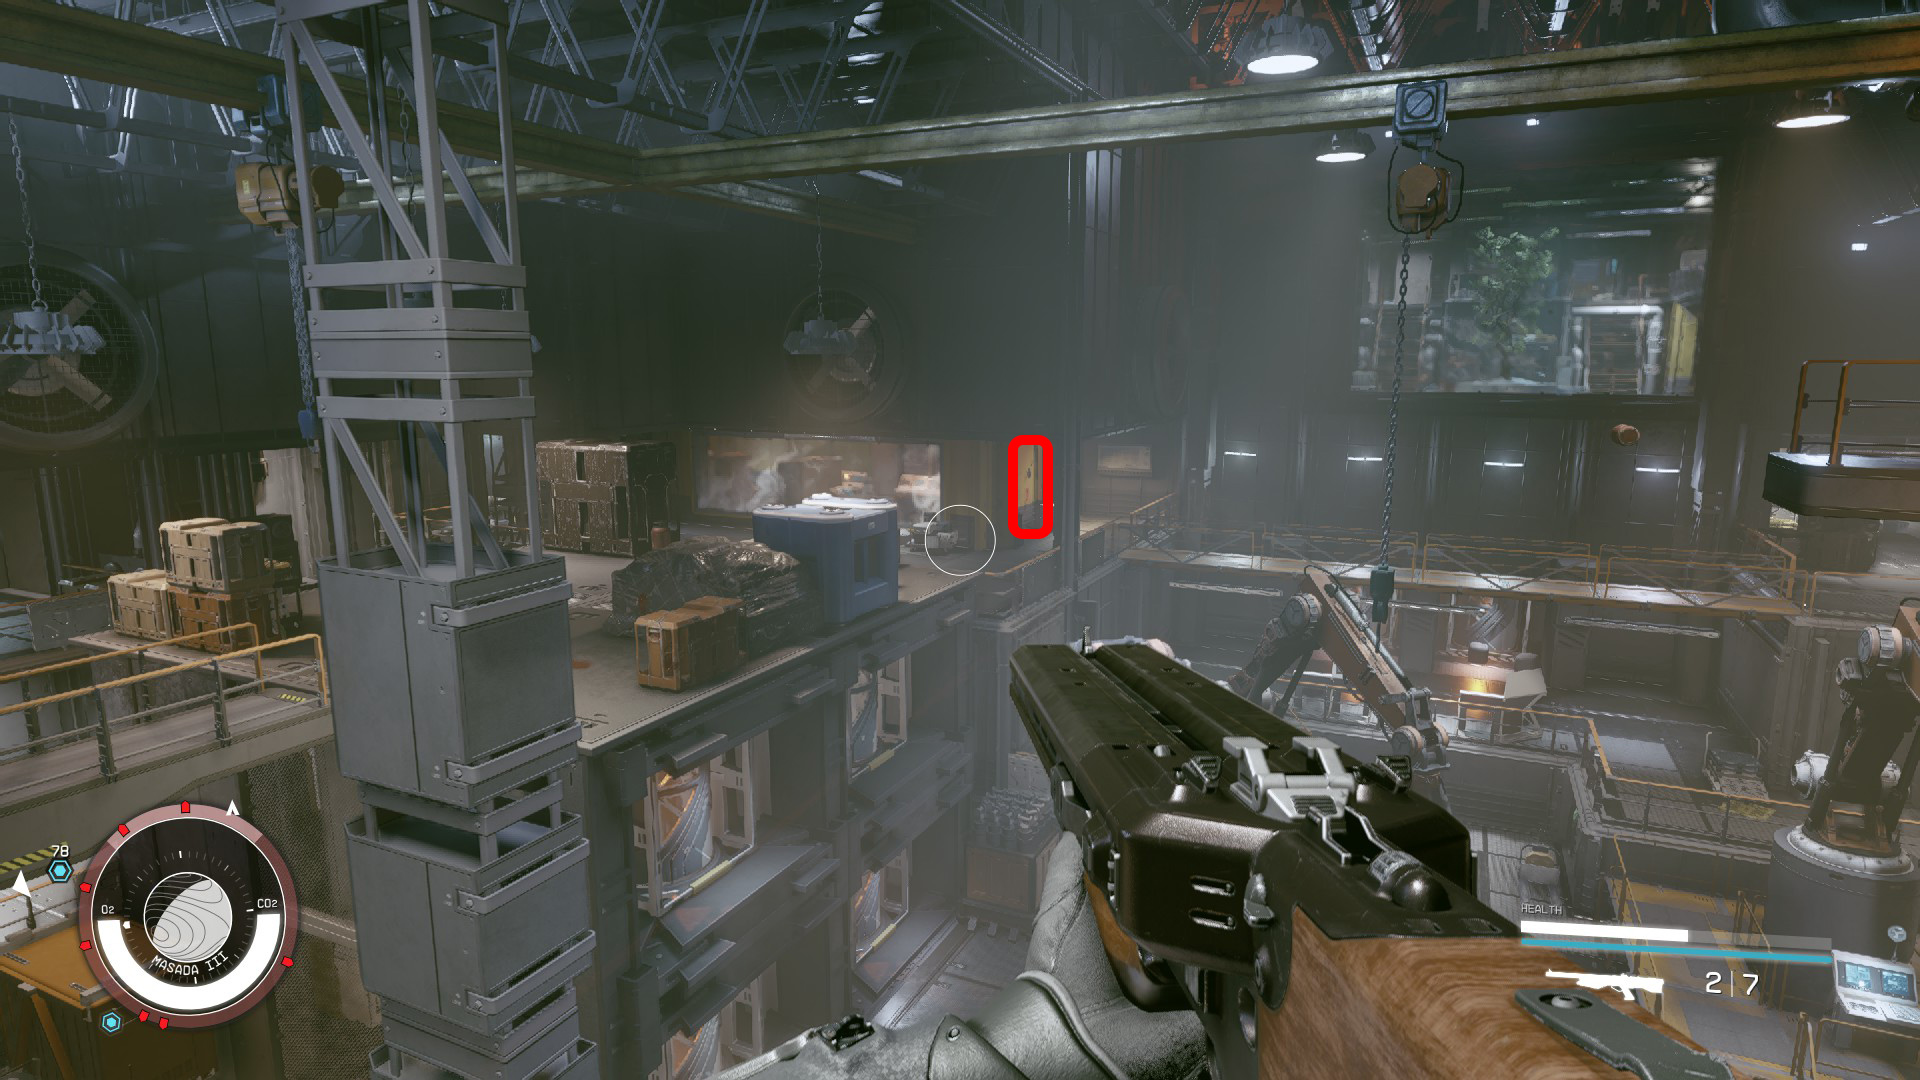
Nishina Research Lab – There are Aid Items on the catwalk, in the opposite corner from where you arrive (Image 32). If you have a long range weapon you like, stay behind cover and pick off the turrets. However, like in the Neon sequence, this one ends as soon as you do enough damage to one or two copies of the Emissary, so you can also just rush him down and kill him as fast as possible.
Slayton – You don’t have to fight here — just run down the hallways after the Emissary (follow the objective markers) and you’ll soon come to an anomaly you can go through.
Nasa (2) – There will be duplicates of you here — they don’t have a ton of health, but it’s usually easier to just ignore them and focus on hunting down the Emissary’s copies.
Once you finish up in the second NASA sequence, you’ll be back in the Buried Temple, with the corpse(s) of the Starborn on the ground in front of you.
Image 32 – Potentially useful, if you’re out of healing
Take the Artifacts
If you fought, loot the Starborn(s) for their Artifacts and weapon(s); otherwise simply wait for them to give you the Artifacts. Then go to the center of the room and grab the final Artifact You’ll be treated to the usual cosmic cutscene, and then find yourself back outside, near your ship, with the mission complete!
All that’s left to do now in the main story is build the Armillary and use it to travel into The Unity, which we’ll do in the next mission, One Giant Leap.
Unabashed FromSoftware fanboy still learning to take his time with games (and everything else, really). The time he doesn't spend on games is spent on music, books, or occasionally going outside.