You’ve made it back to Derceto from an extended time in memories, and dark forces are coming to a head. There might be more to this than a missing uncle…
After returning from the Sunken Temple, you’ll find yourself in the attic, talking to Edward/Emily. When the cutscene ends, you’ll be at the top of the spiral stairs, just outside of the attic. You have a new item in your Investigation inventory, The Dark Man’s Contract. Go through all of the pages to complete this objective.
Break into Dr. Gray’s office and find out what he knows
Next, we’ve got to get into Dr. Gray’s office. This will require opening the safe in the Clerk’s Office, in order to get the key. However, before you do this, there are a lot of optional clues and Lagniappes you can collect: you may want to go to Dr. Gray’s Apartment to get the Do Not Disturb Lagniappe, Lunacy and the Astarte Artists’ Colony clue, Preperations for St. John’s clue, Trust Me clue, and the Keep Our Secrets clue. The following drop downs will lead you to these items.
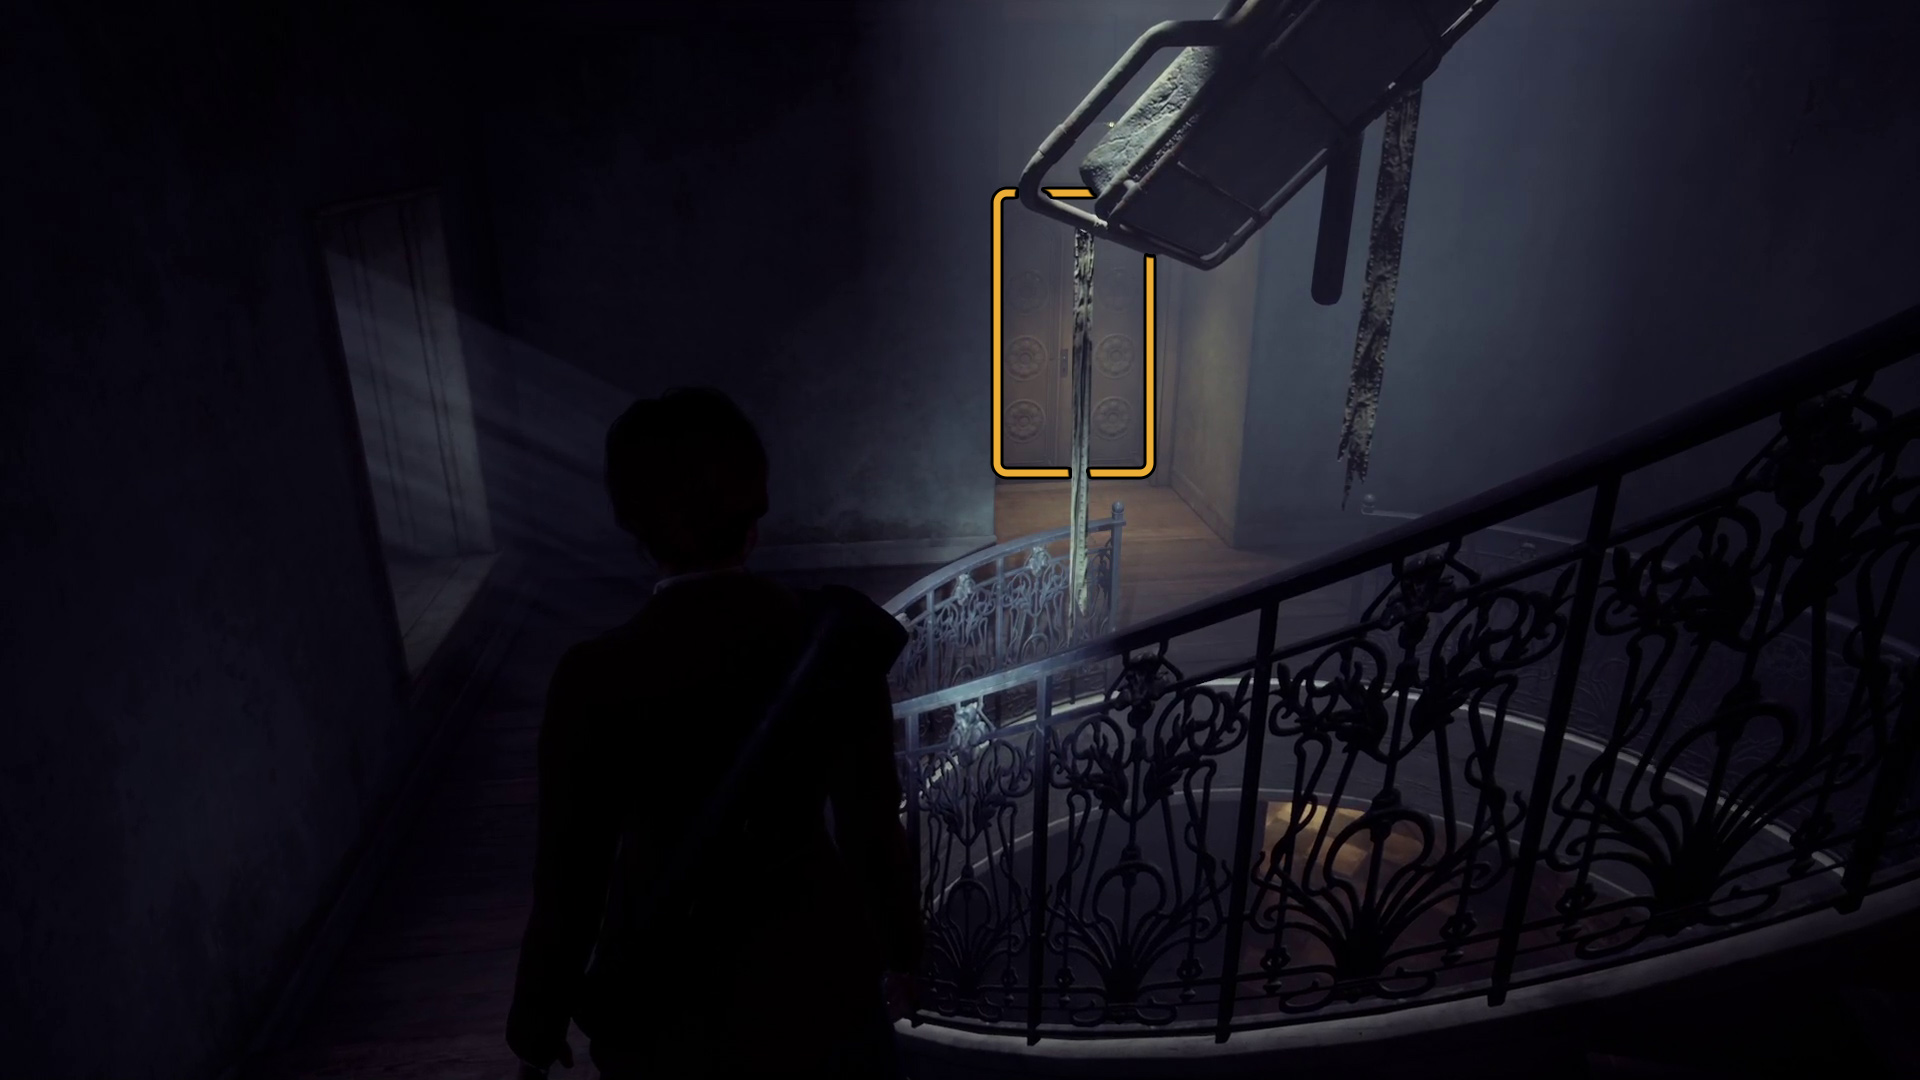
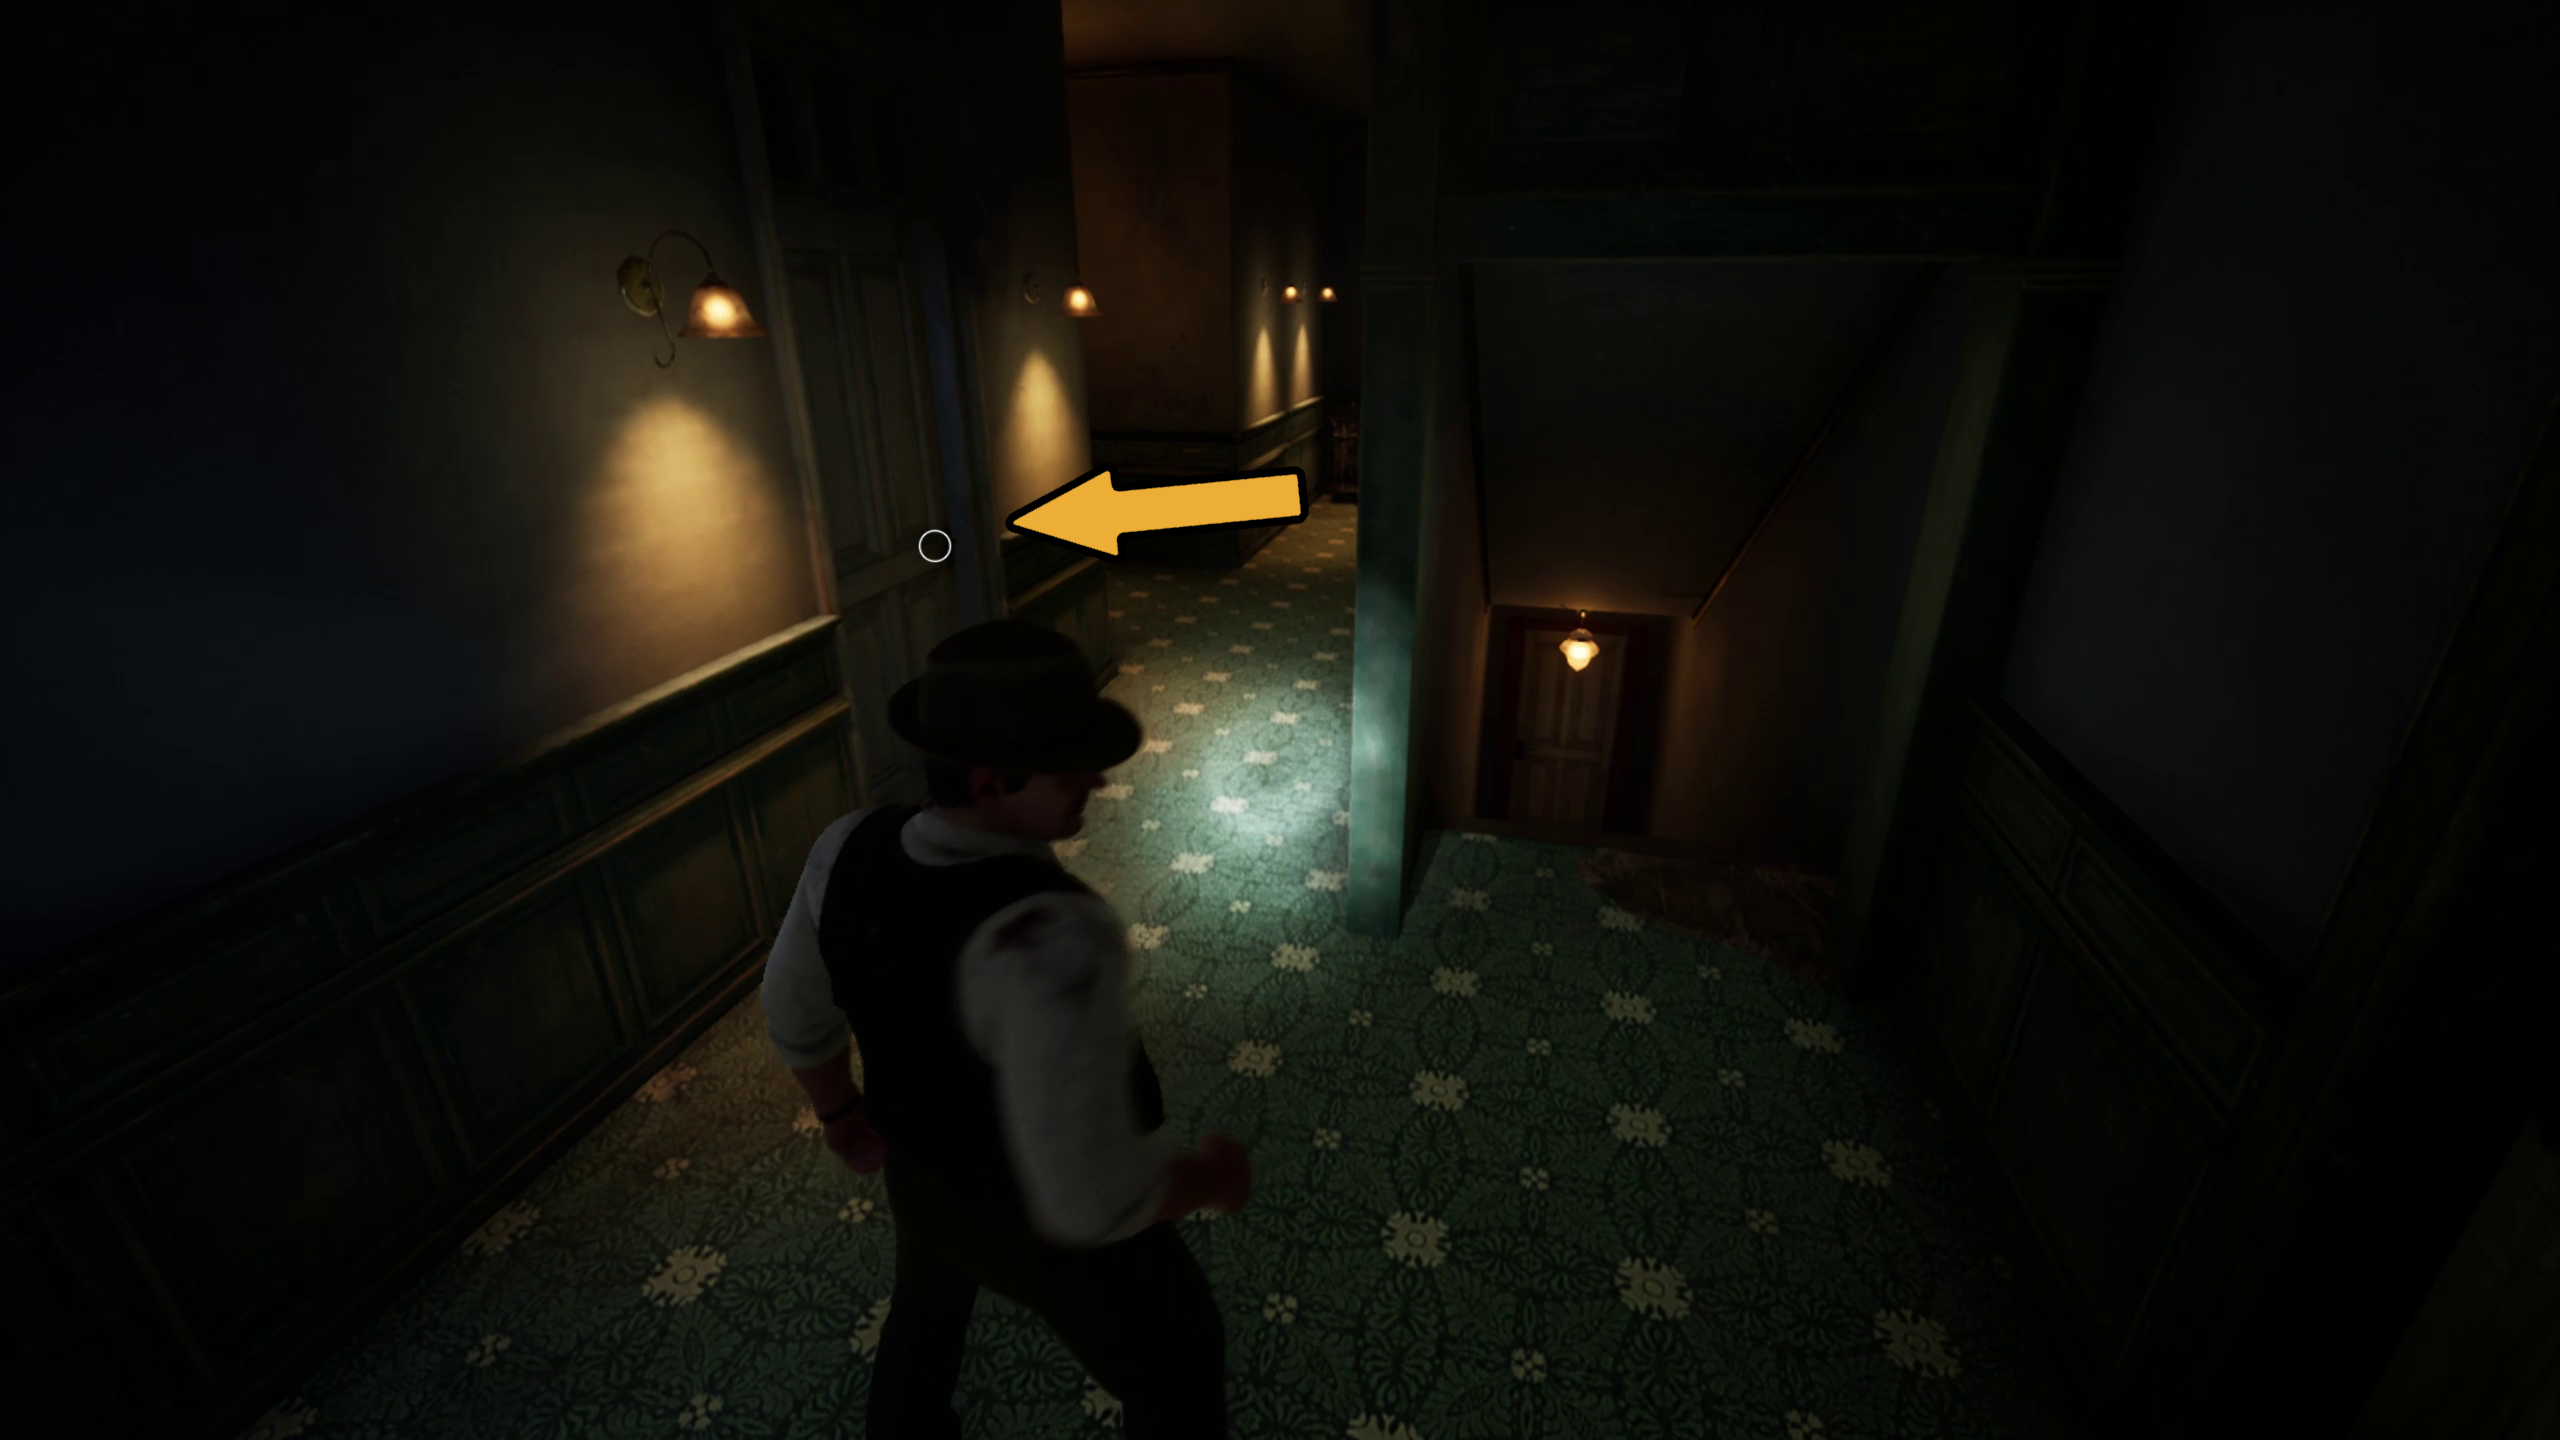
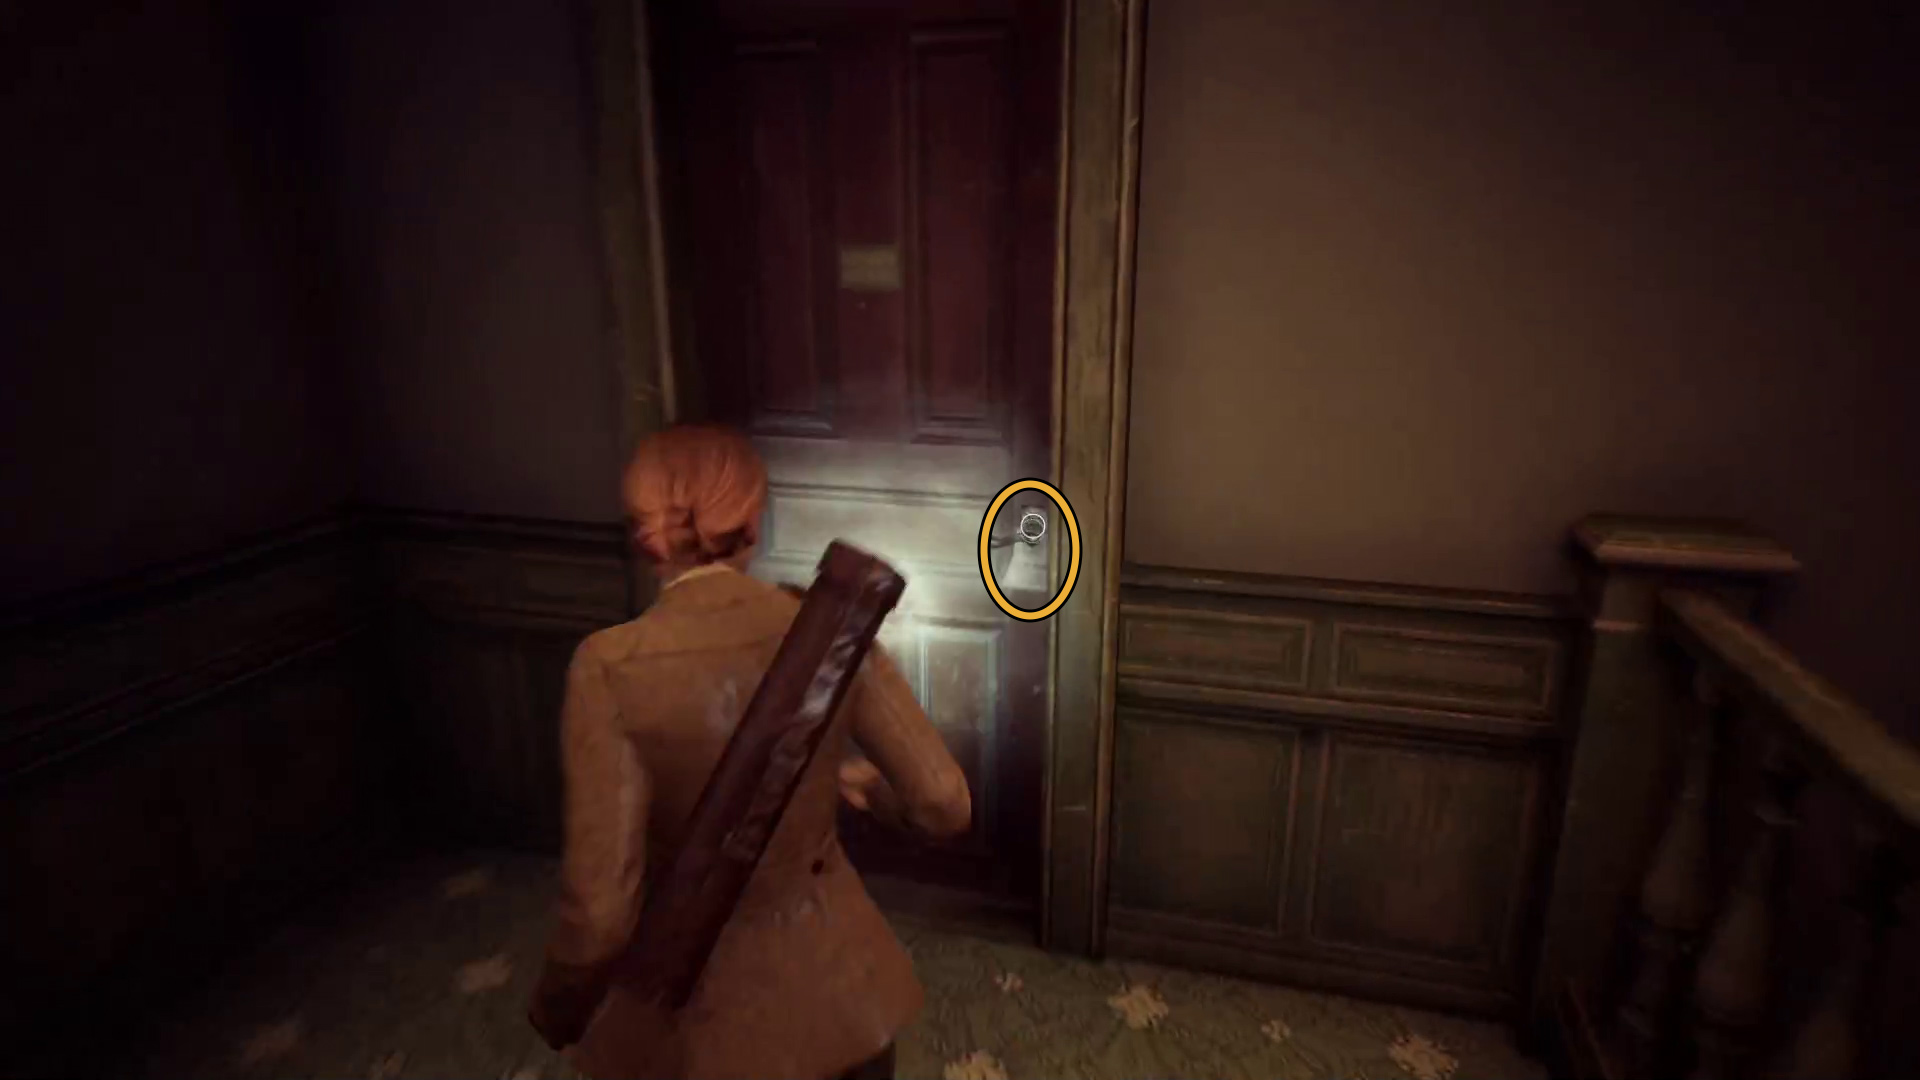
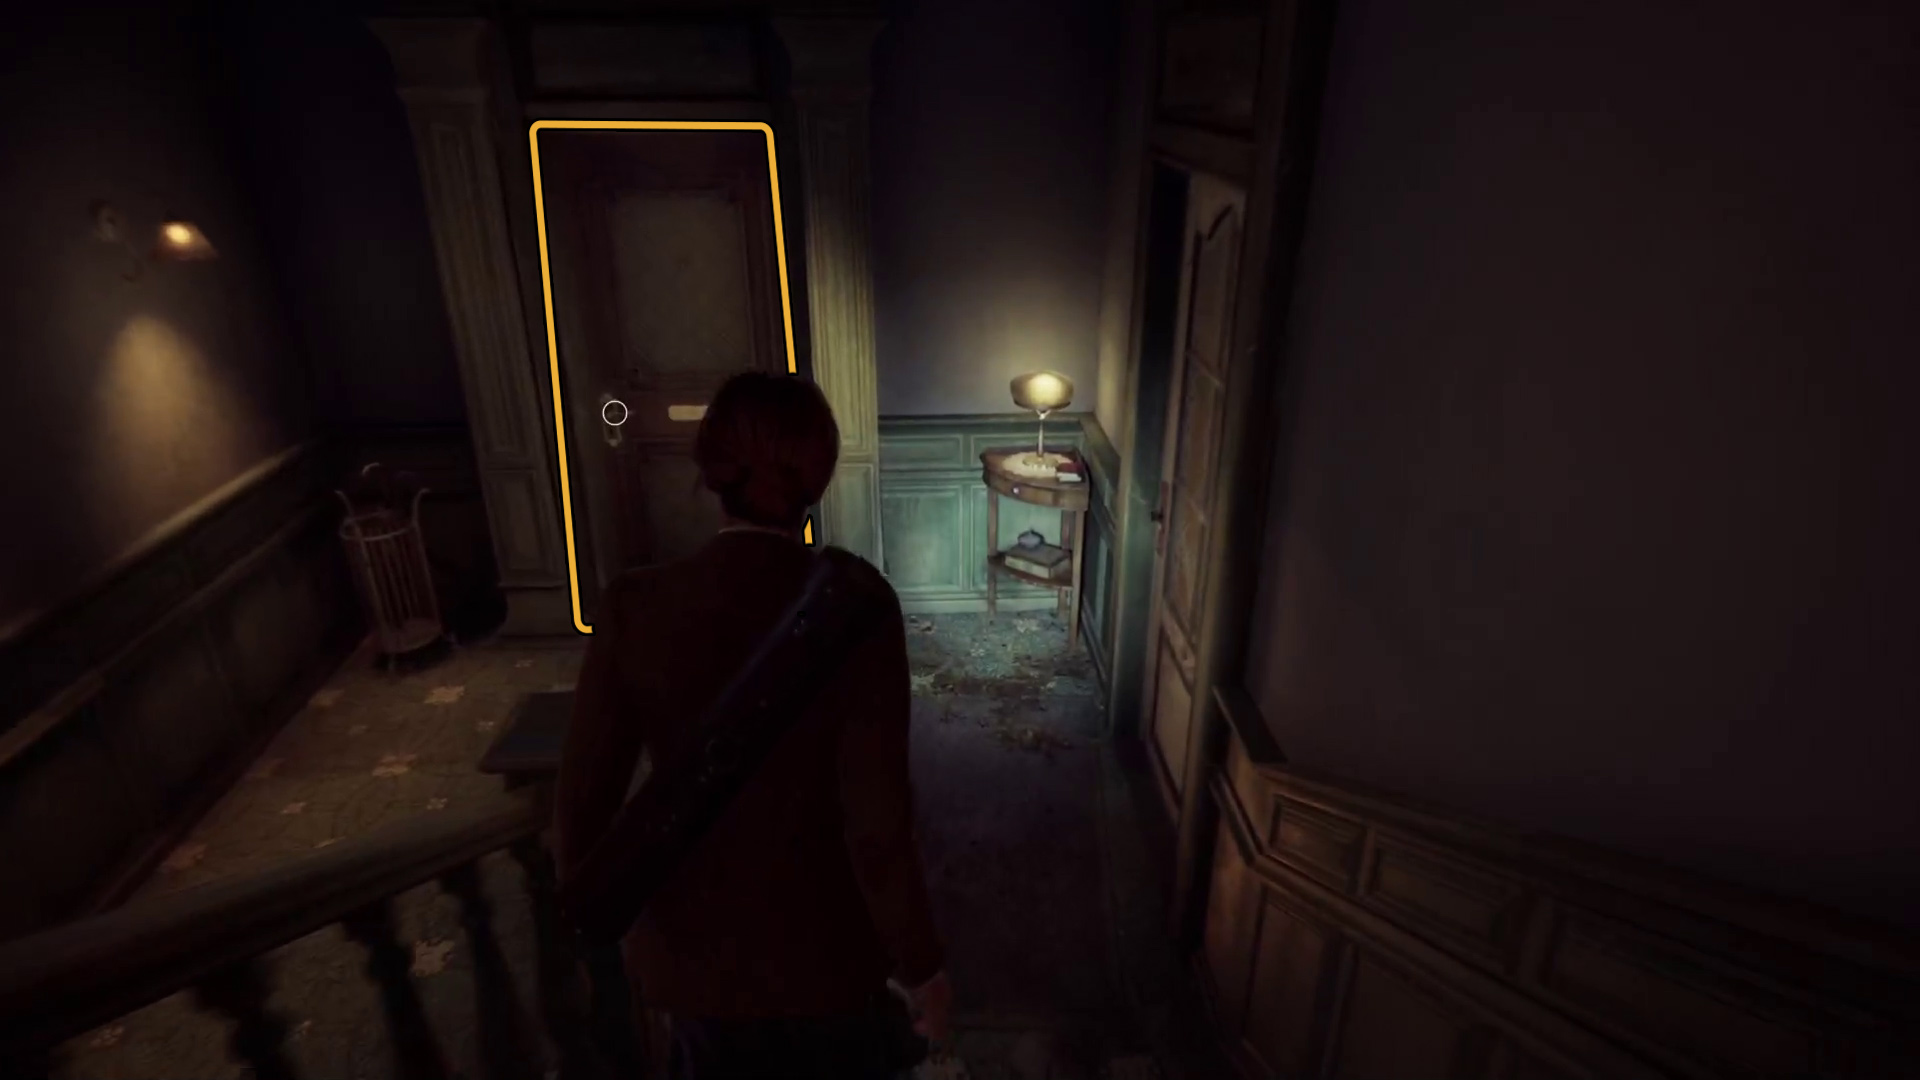
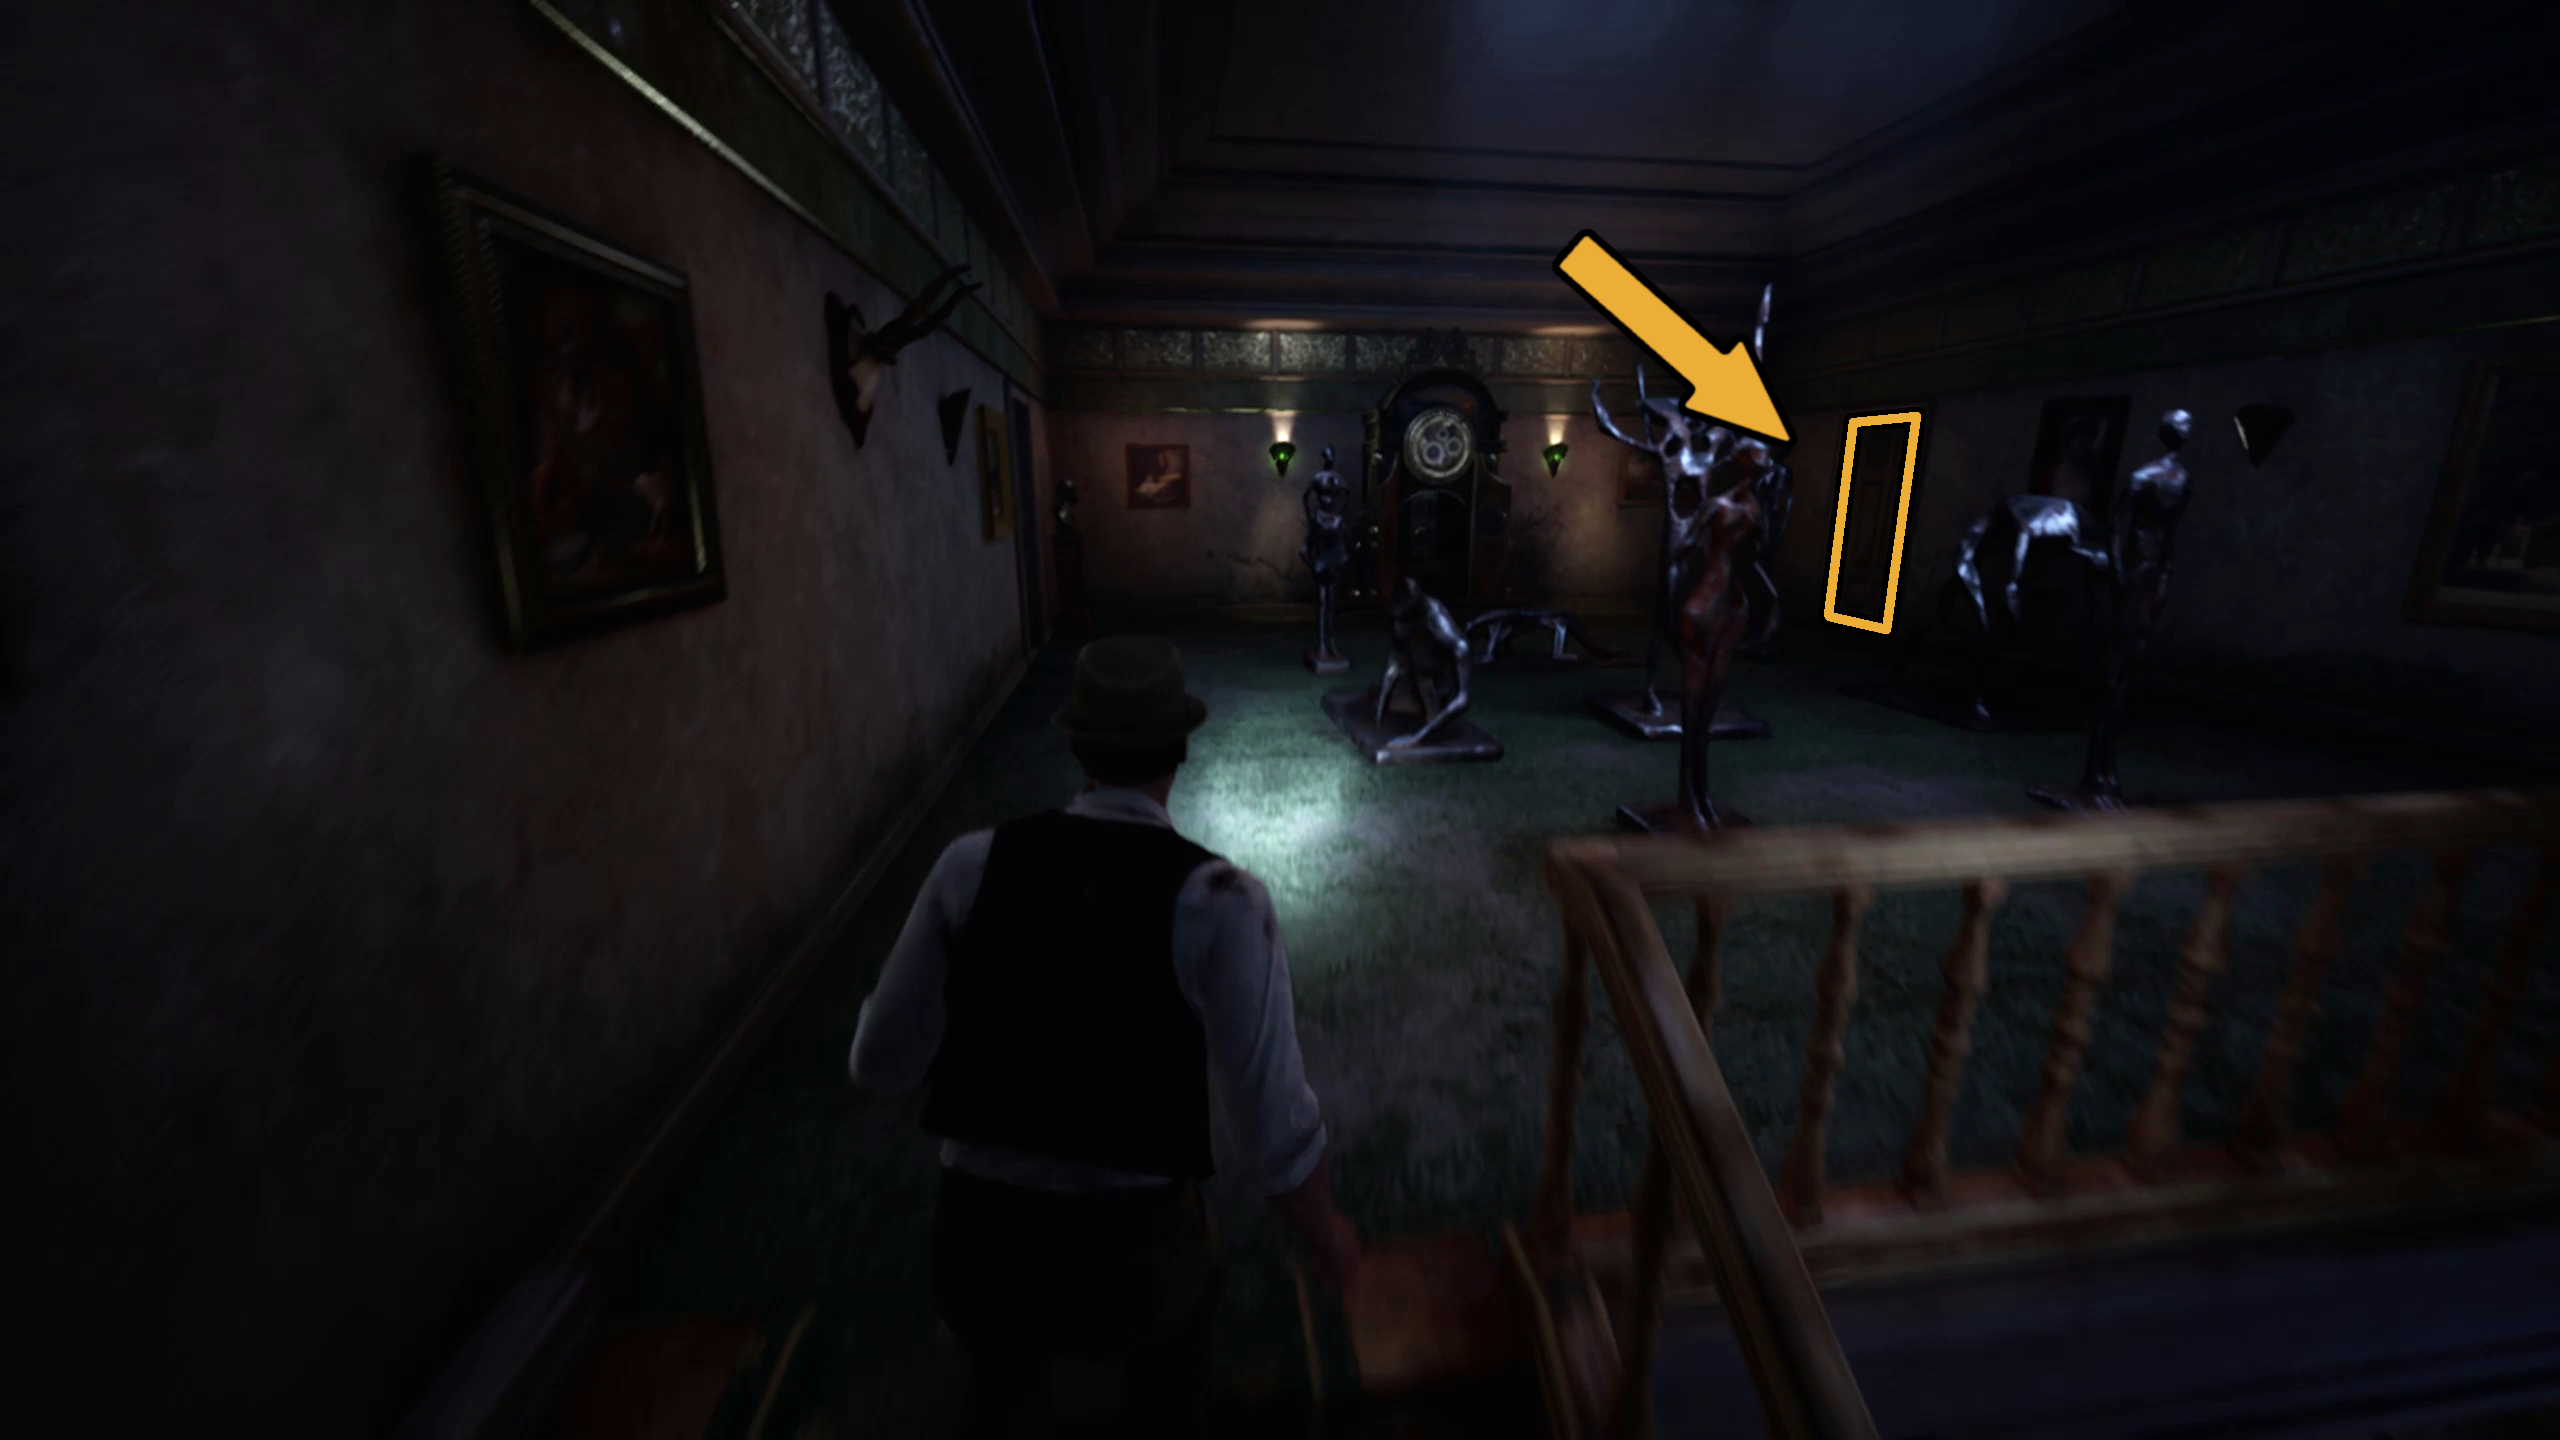
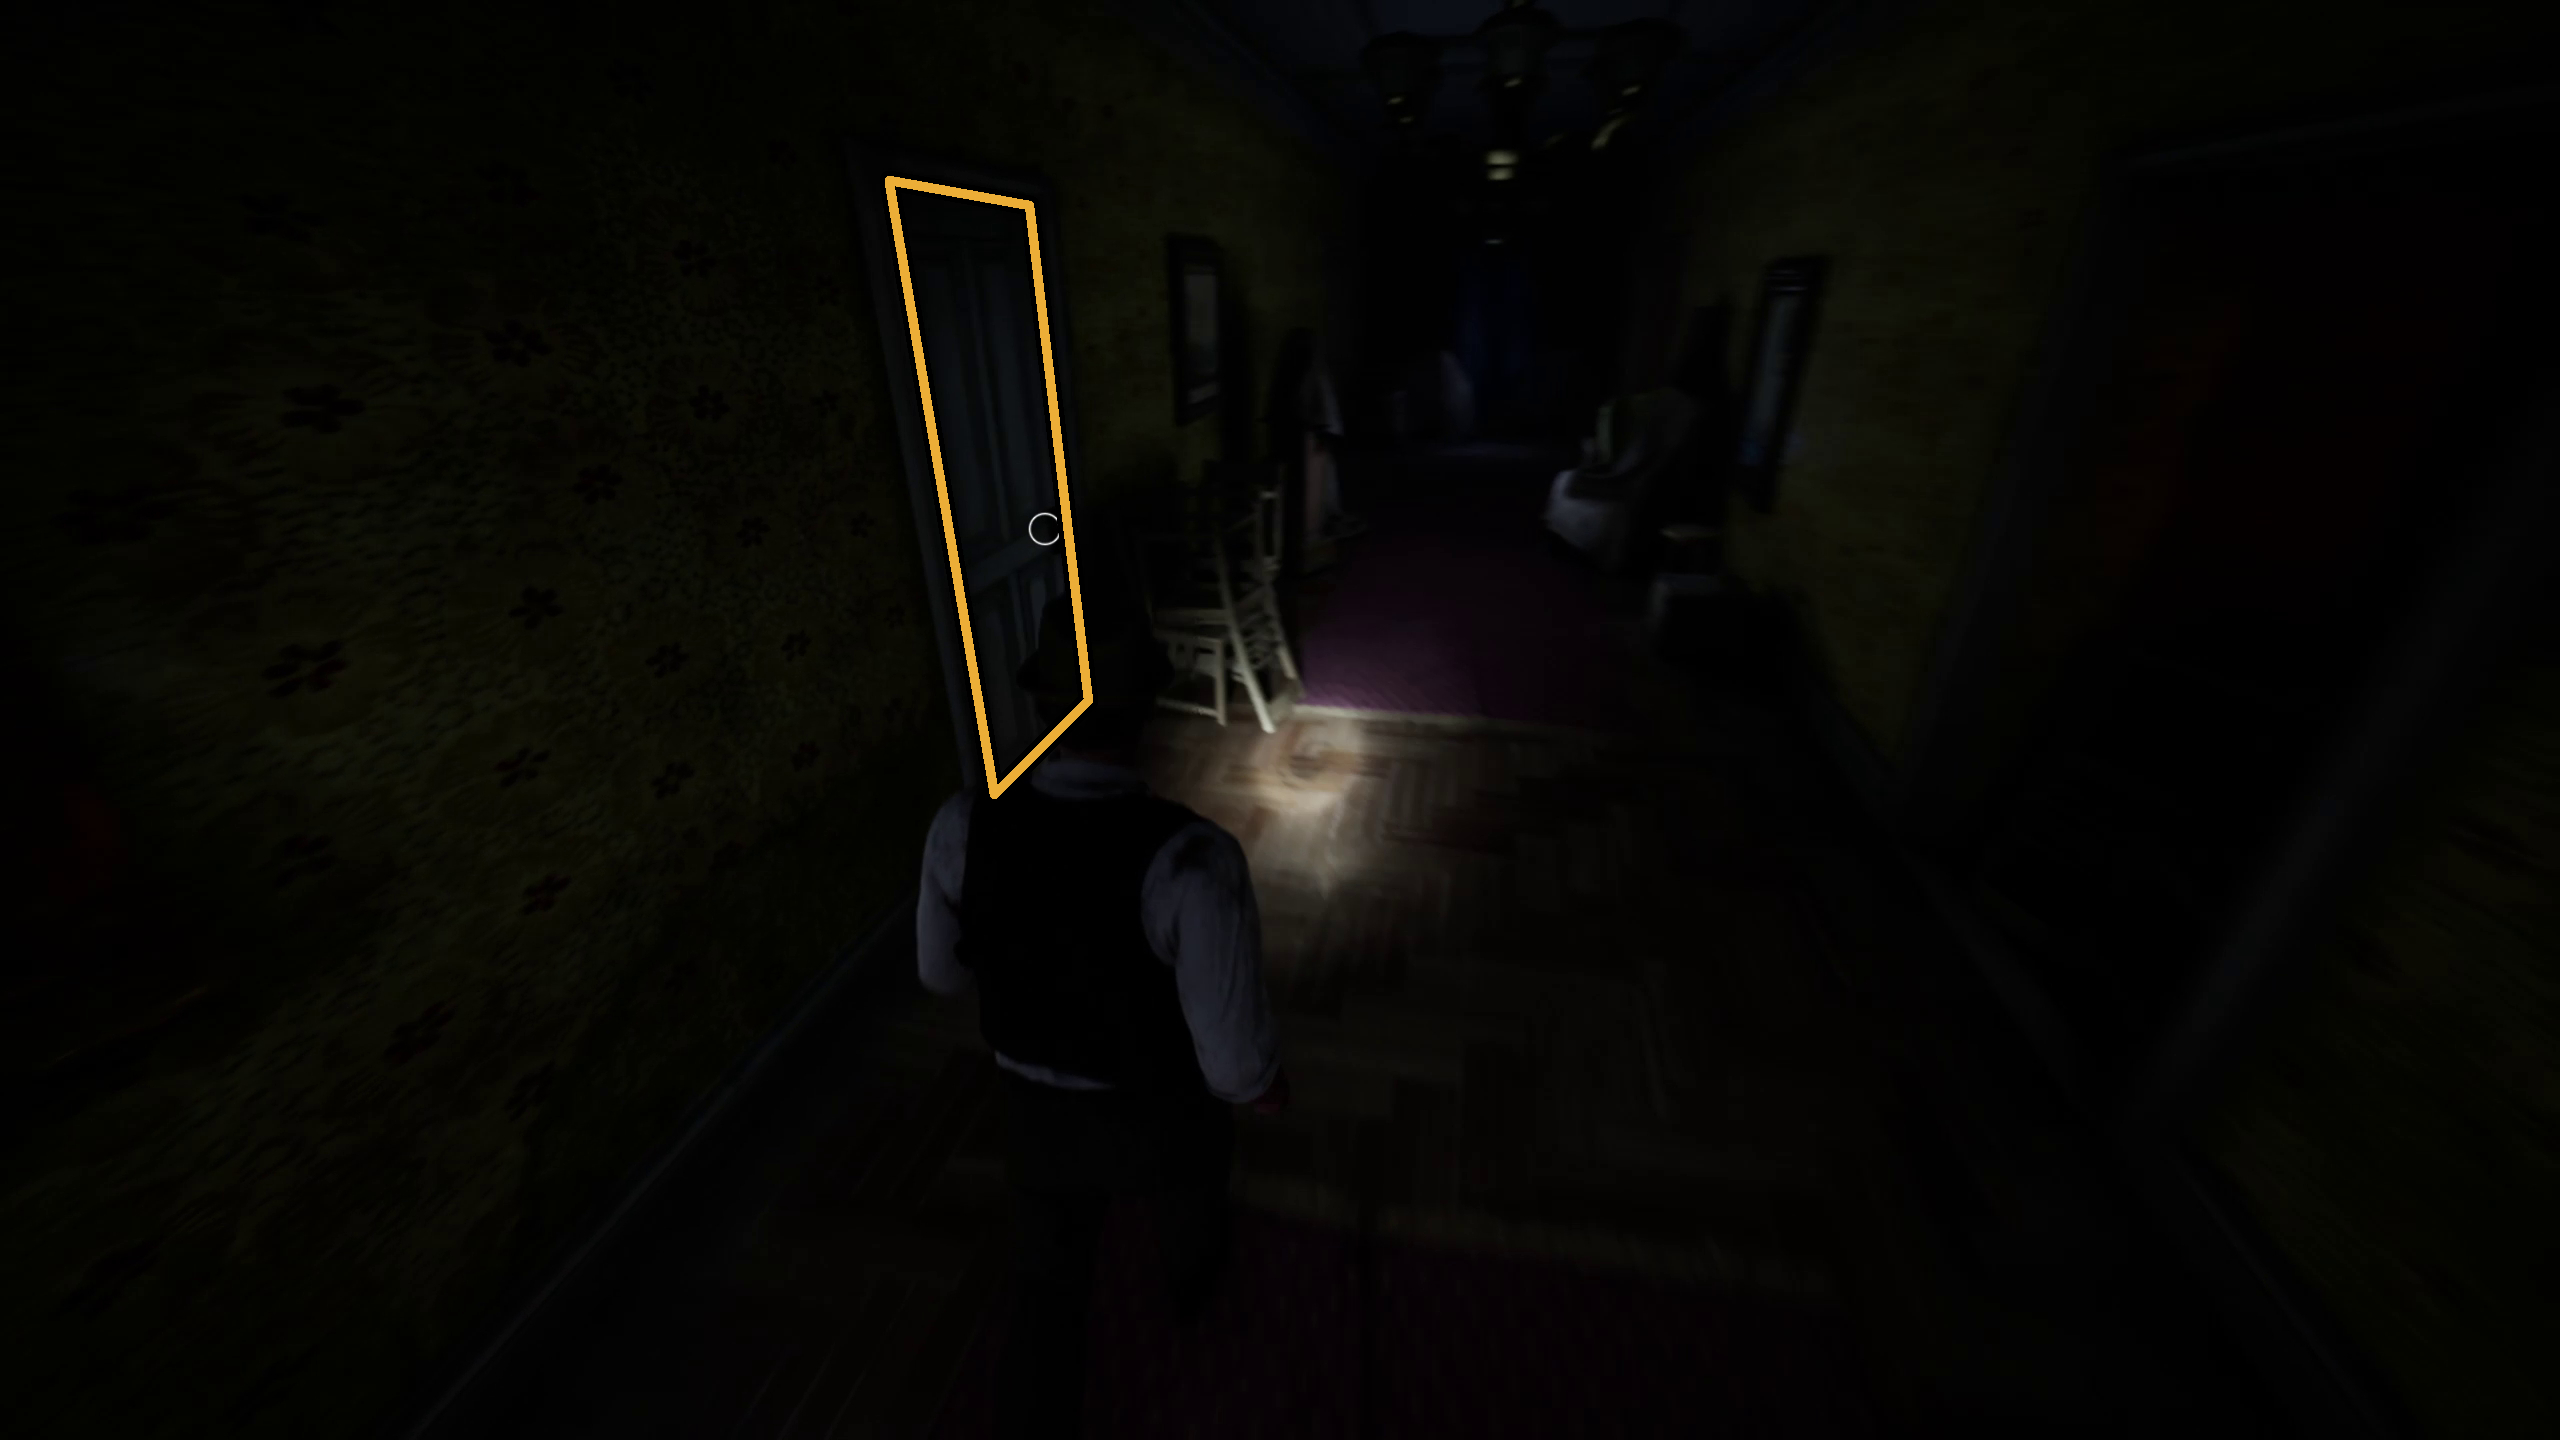
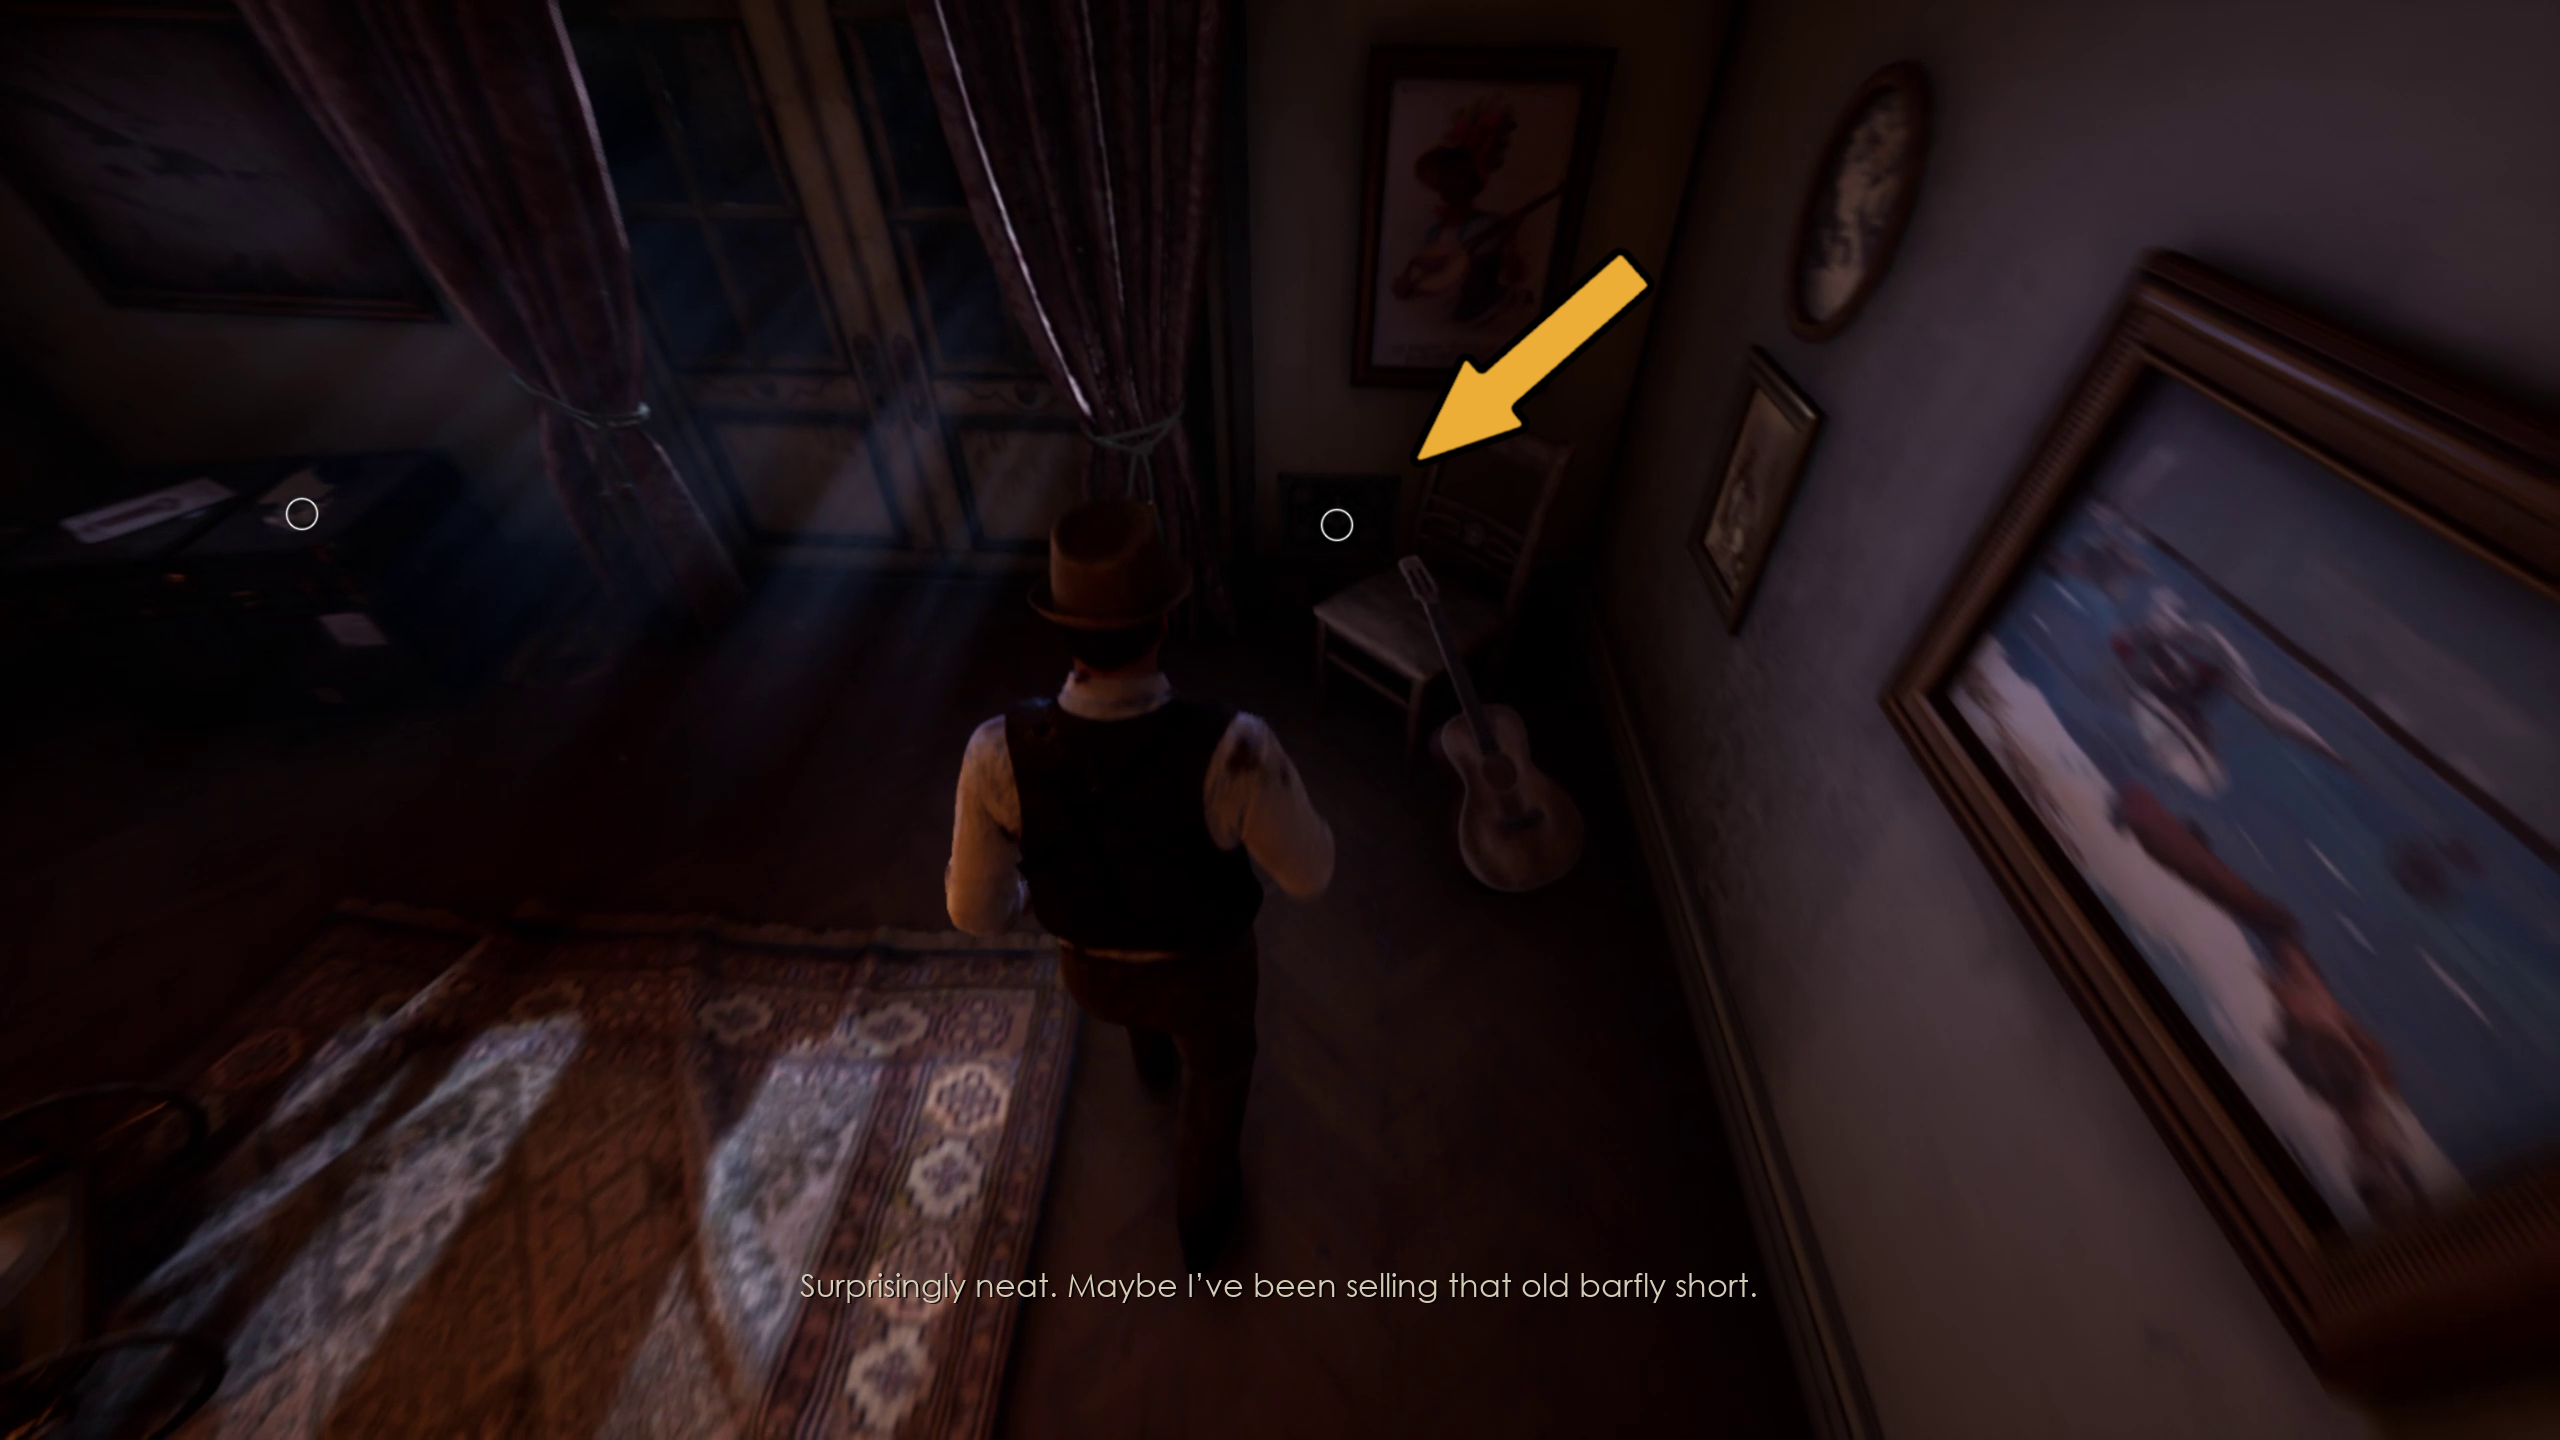
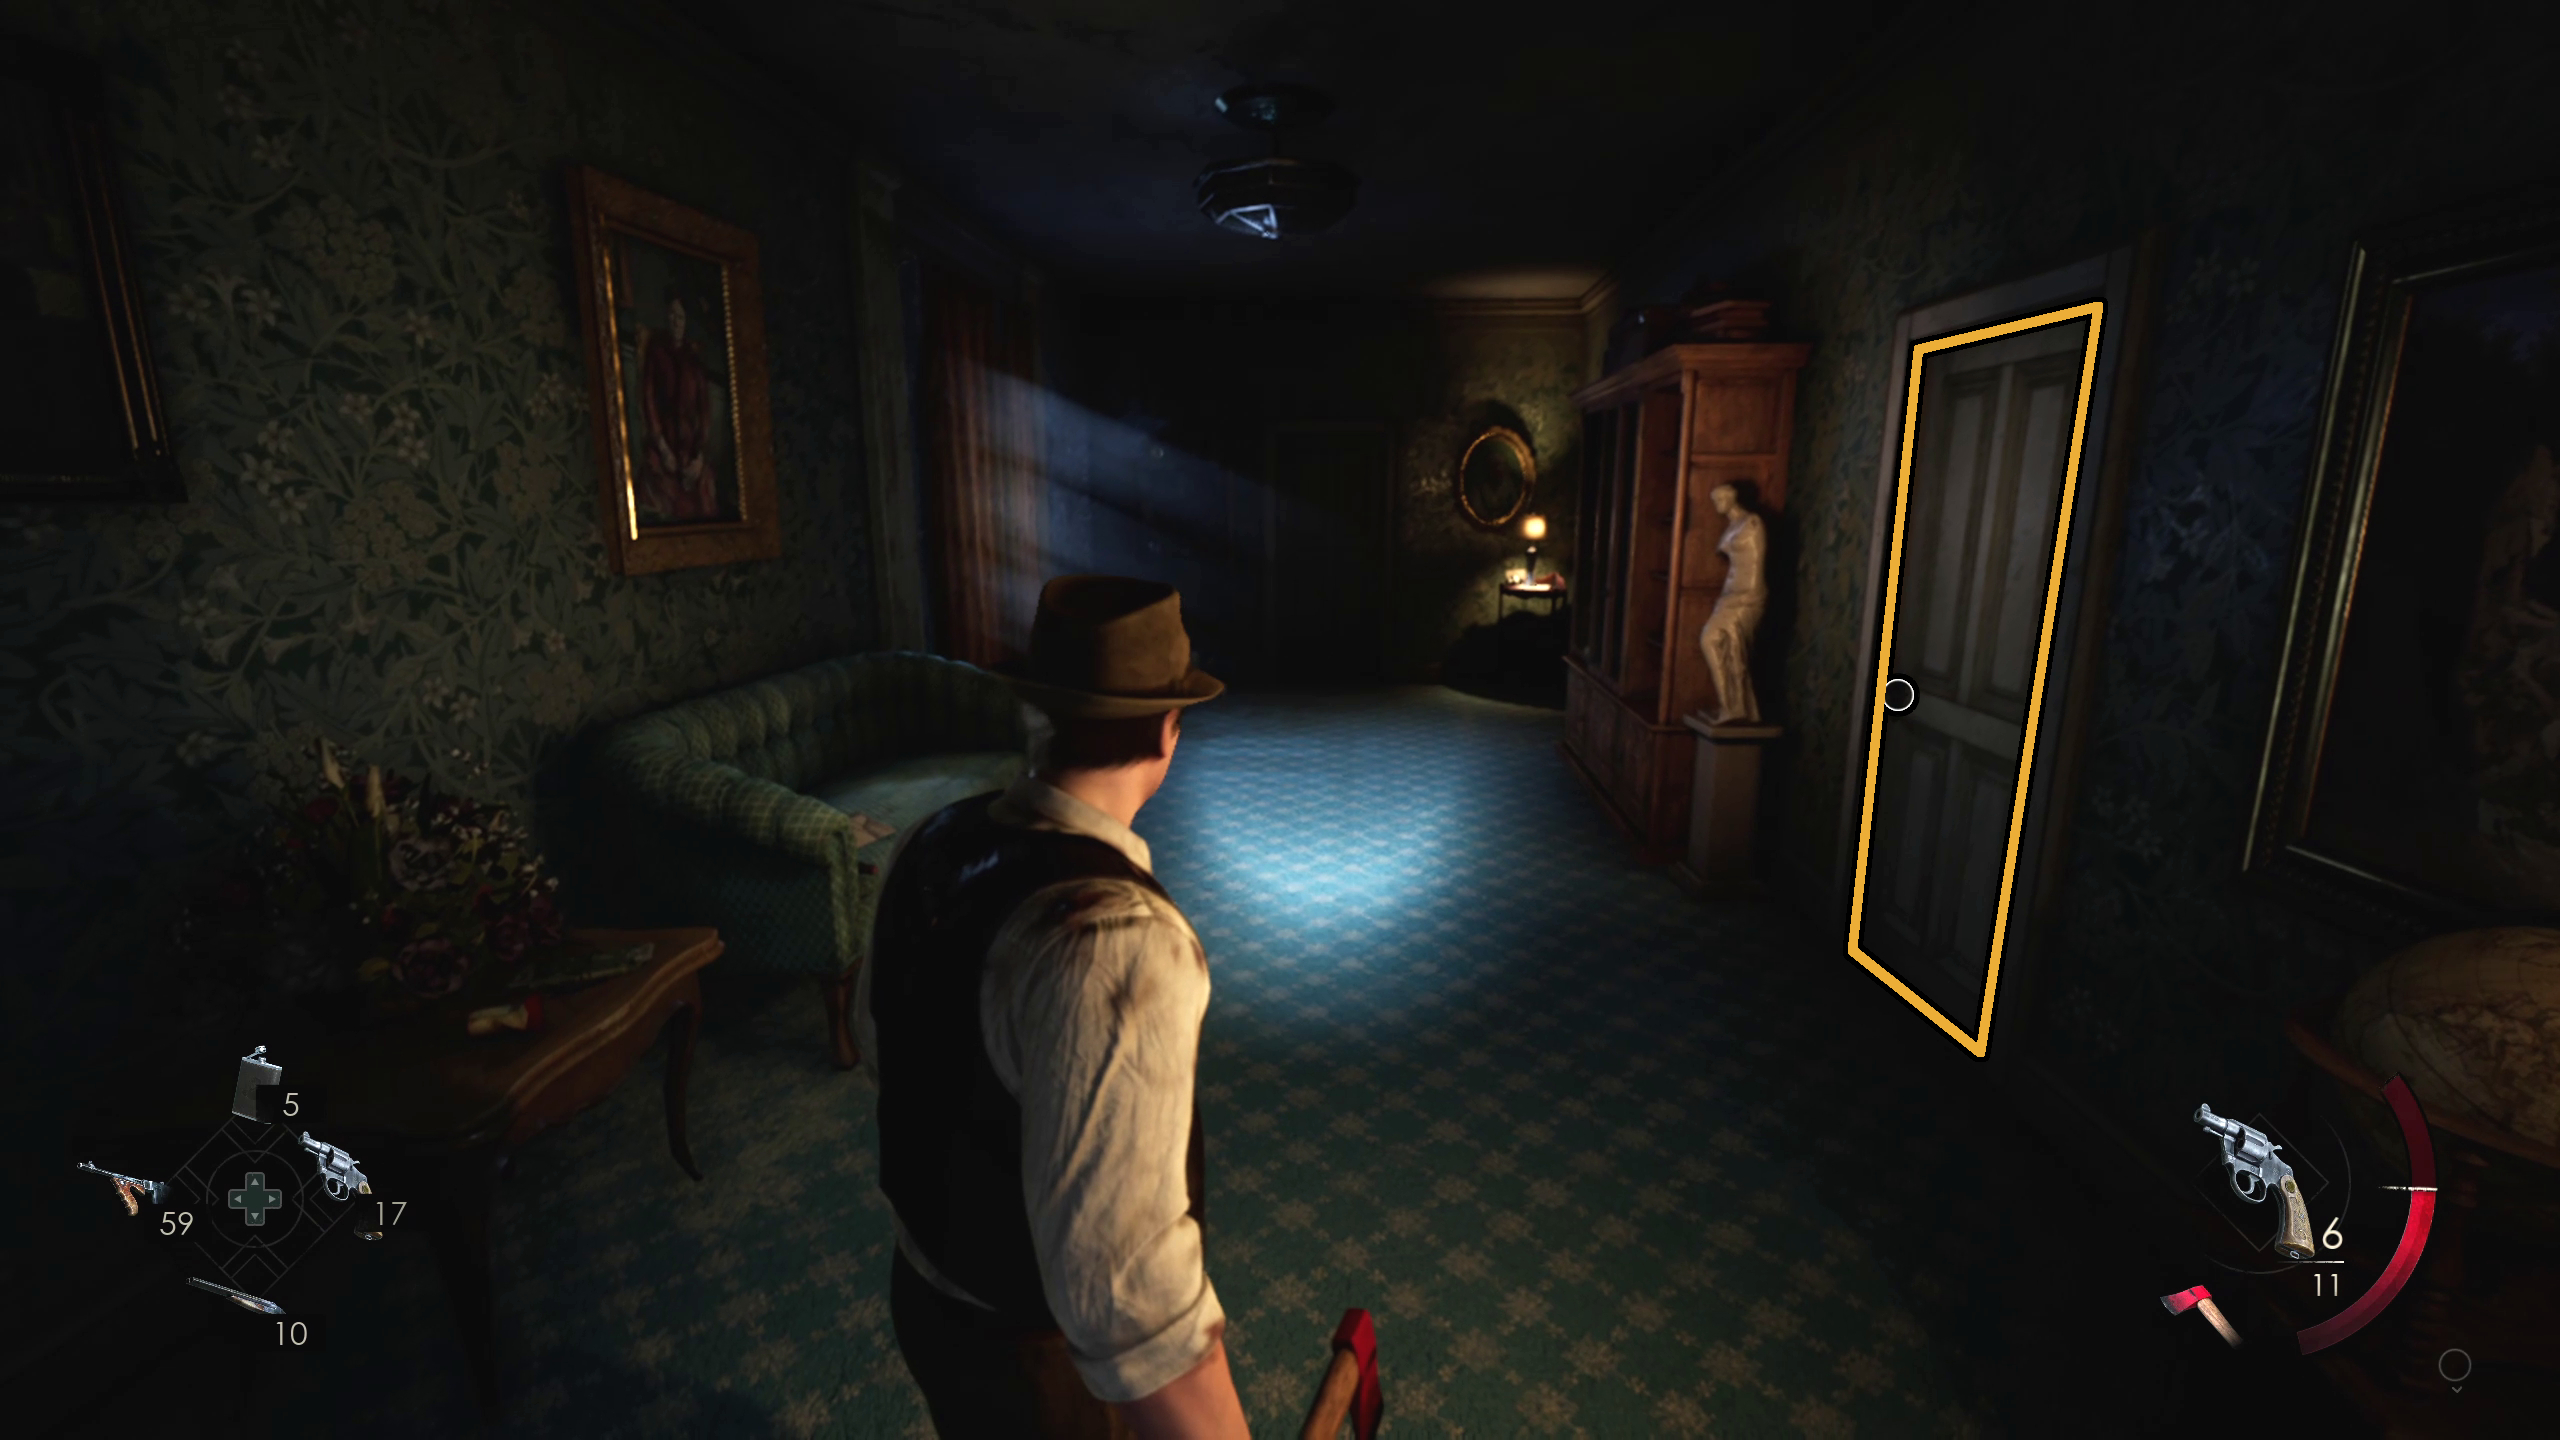
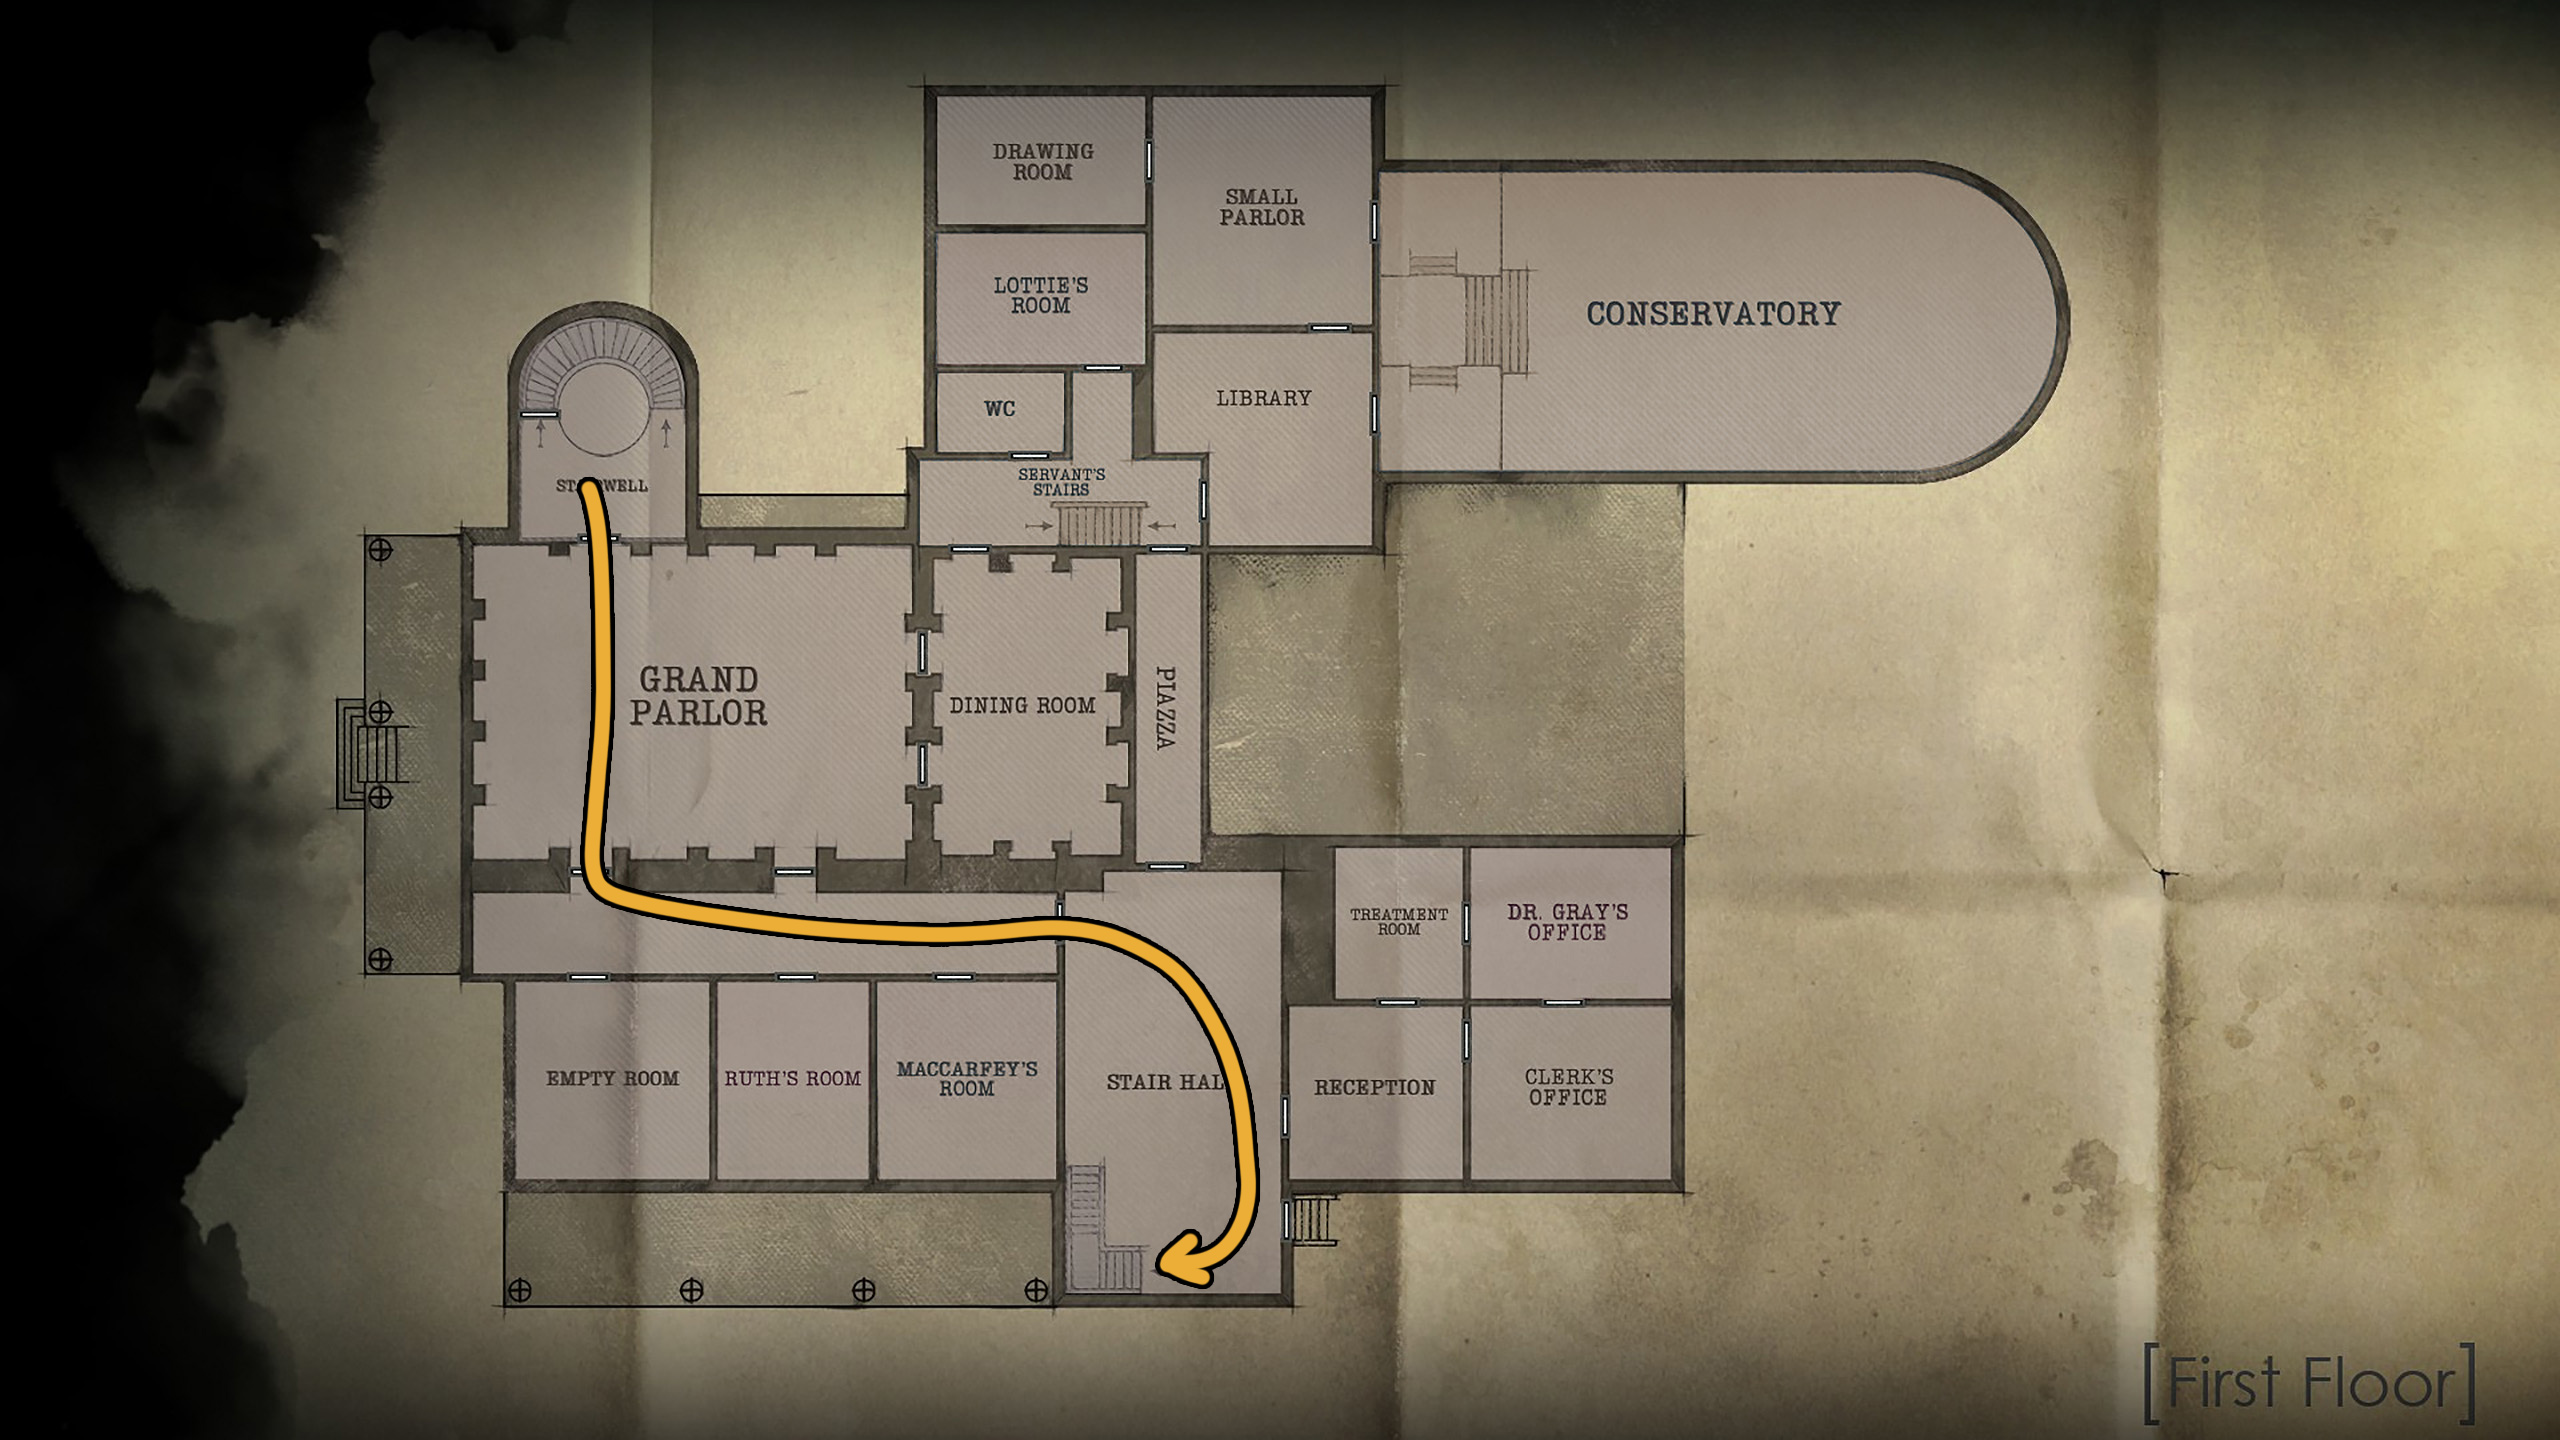
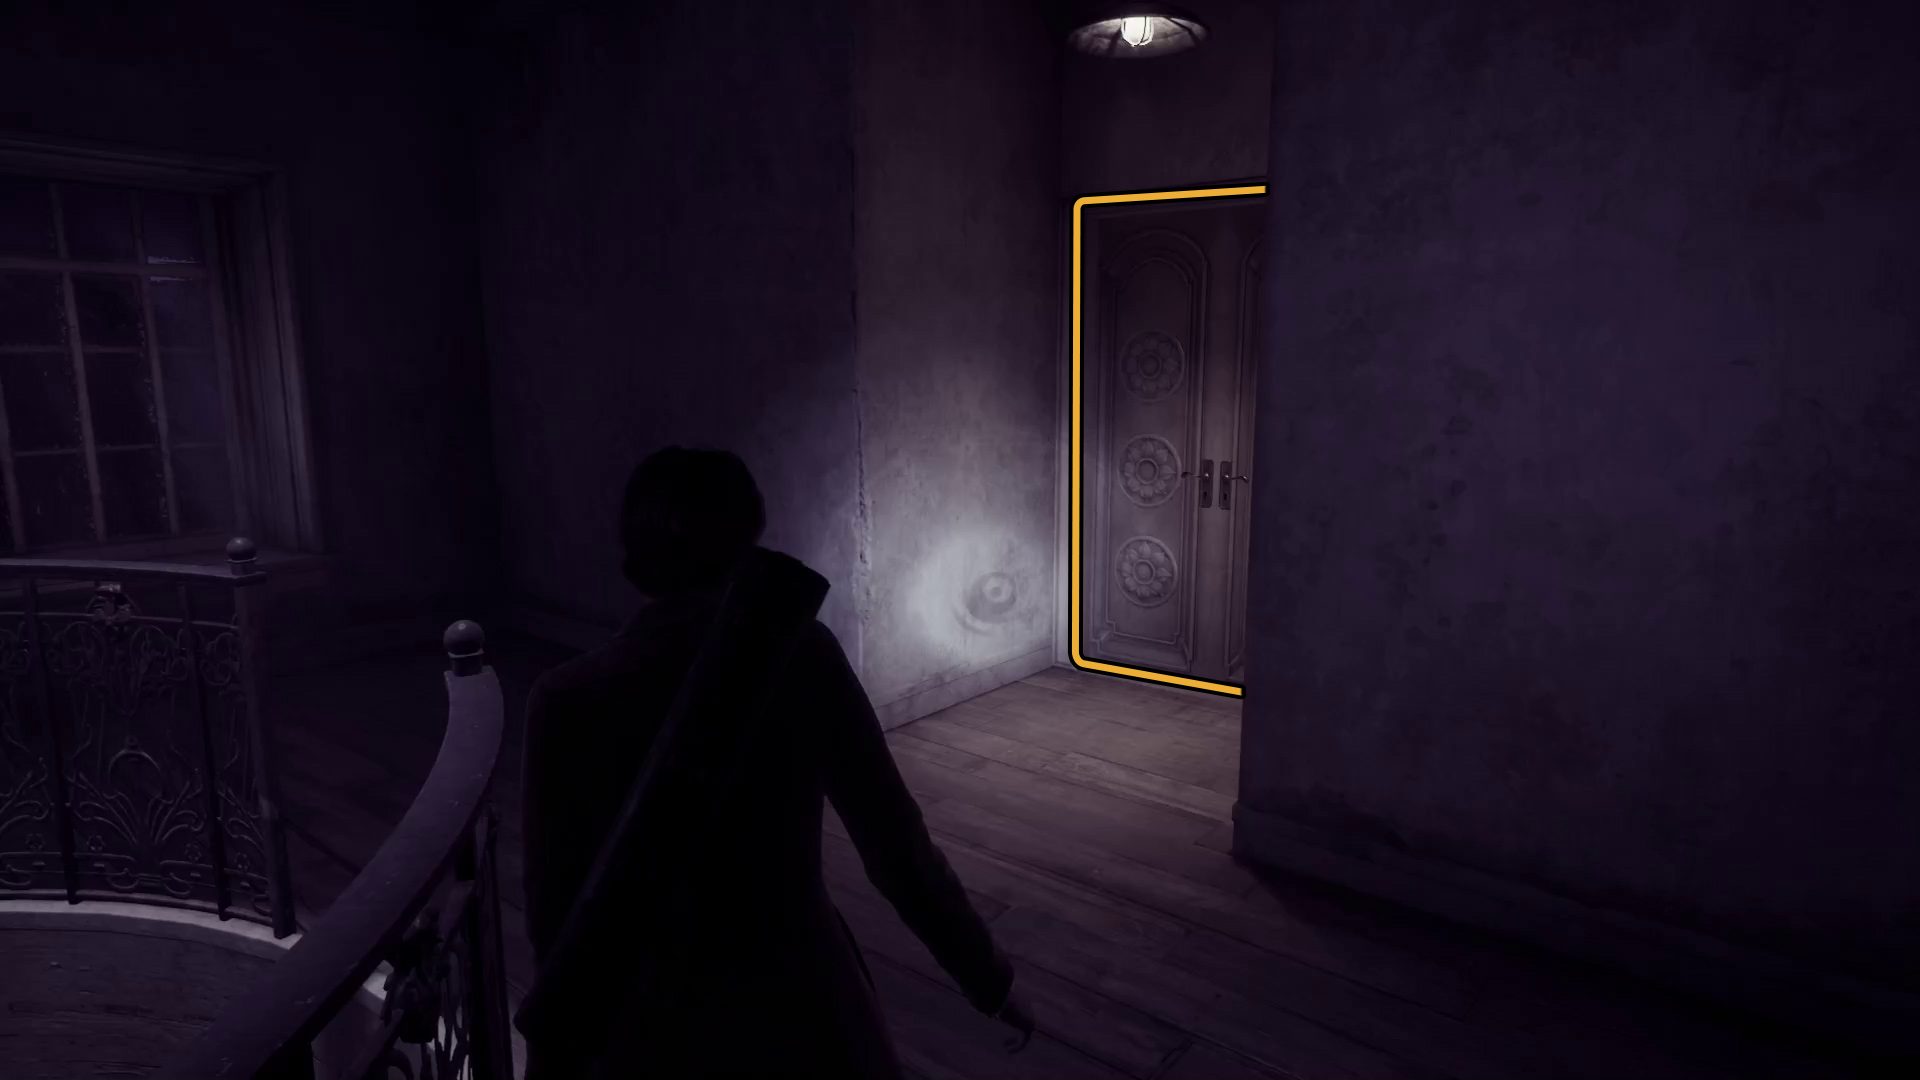
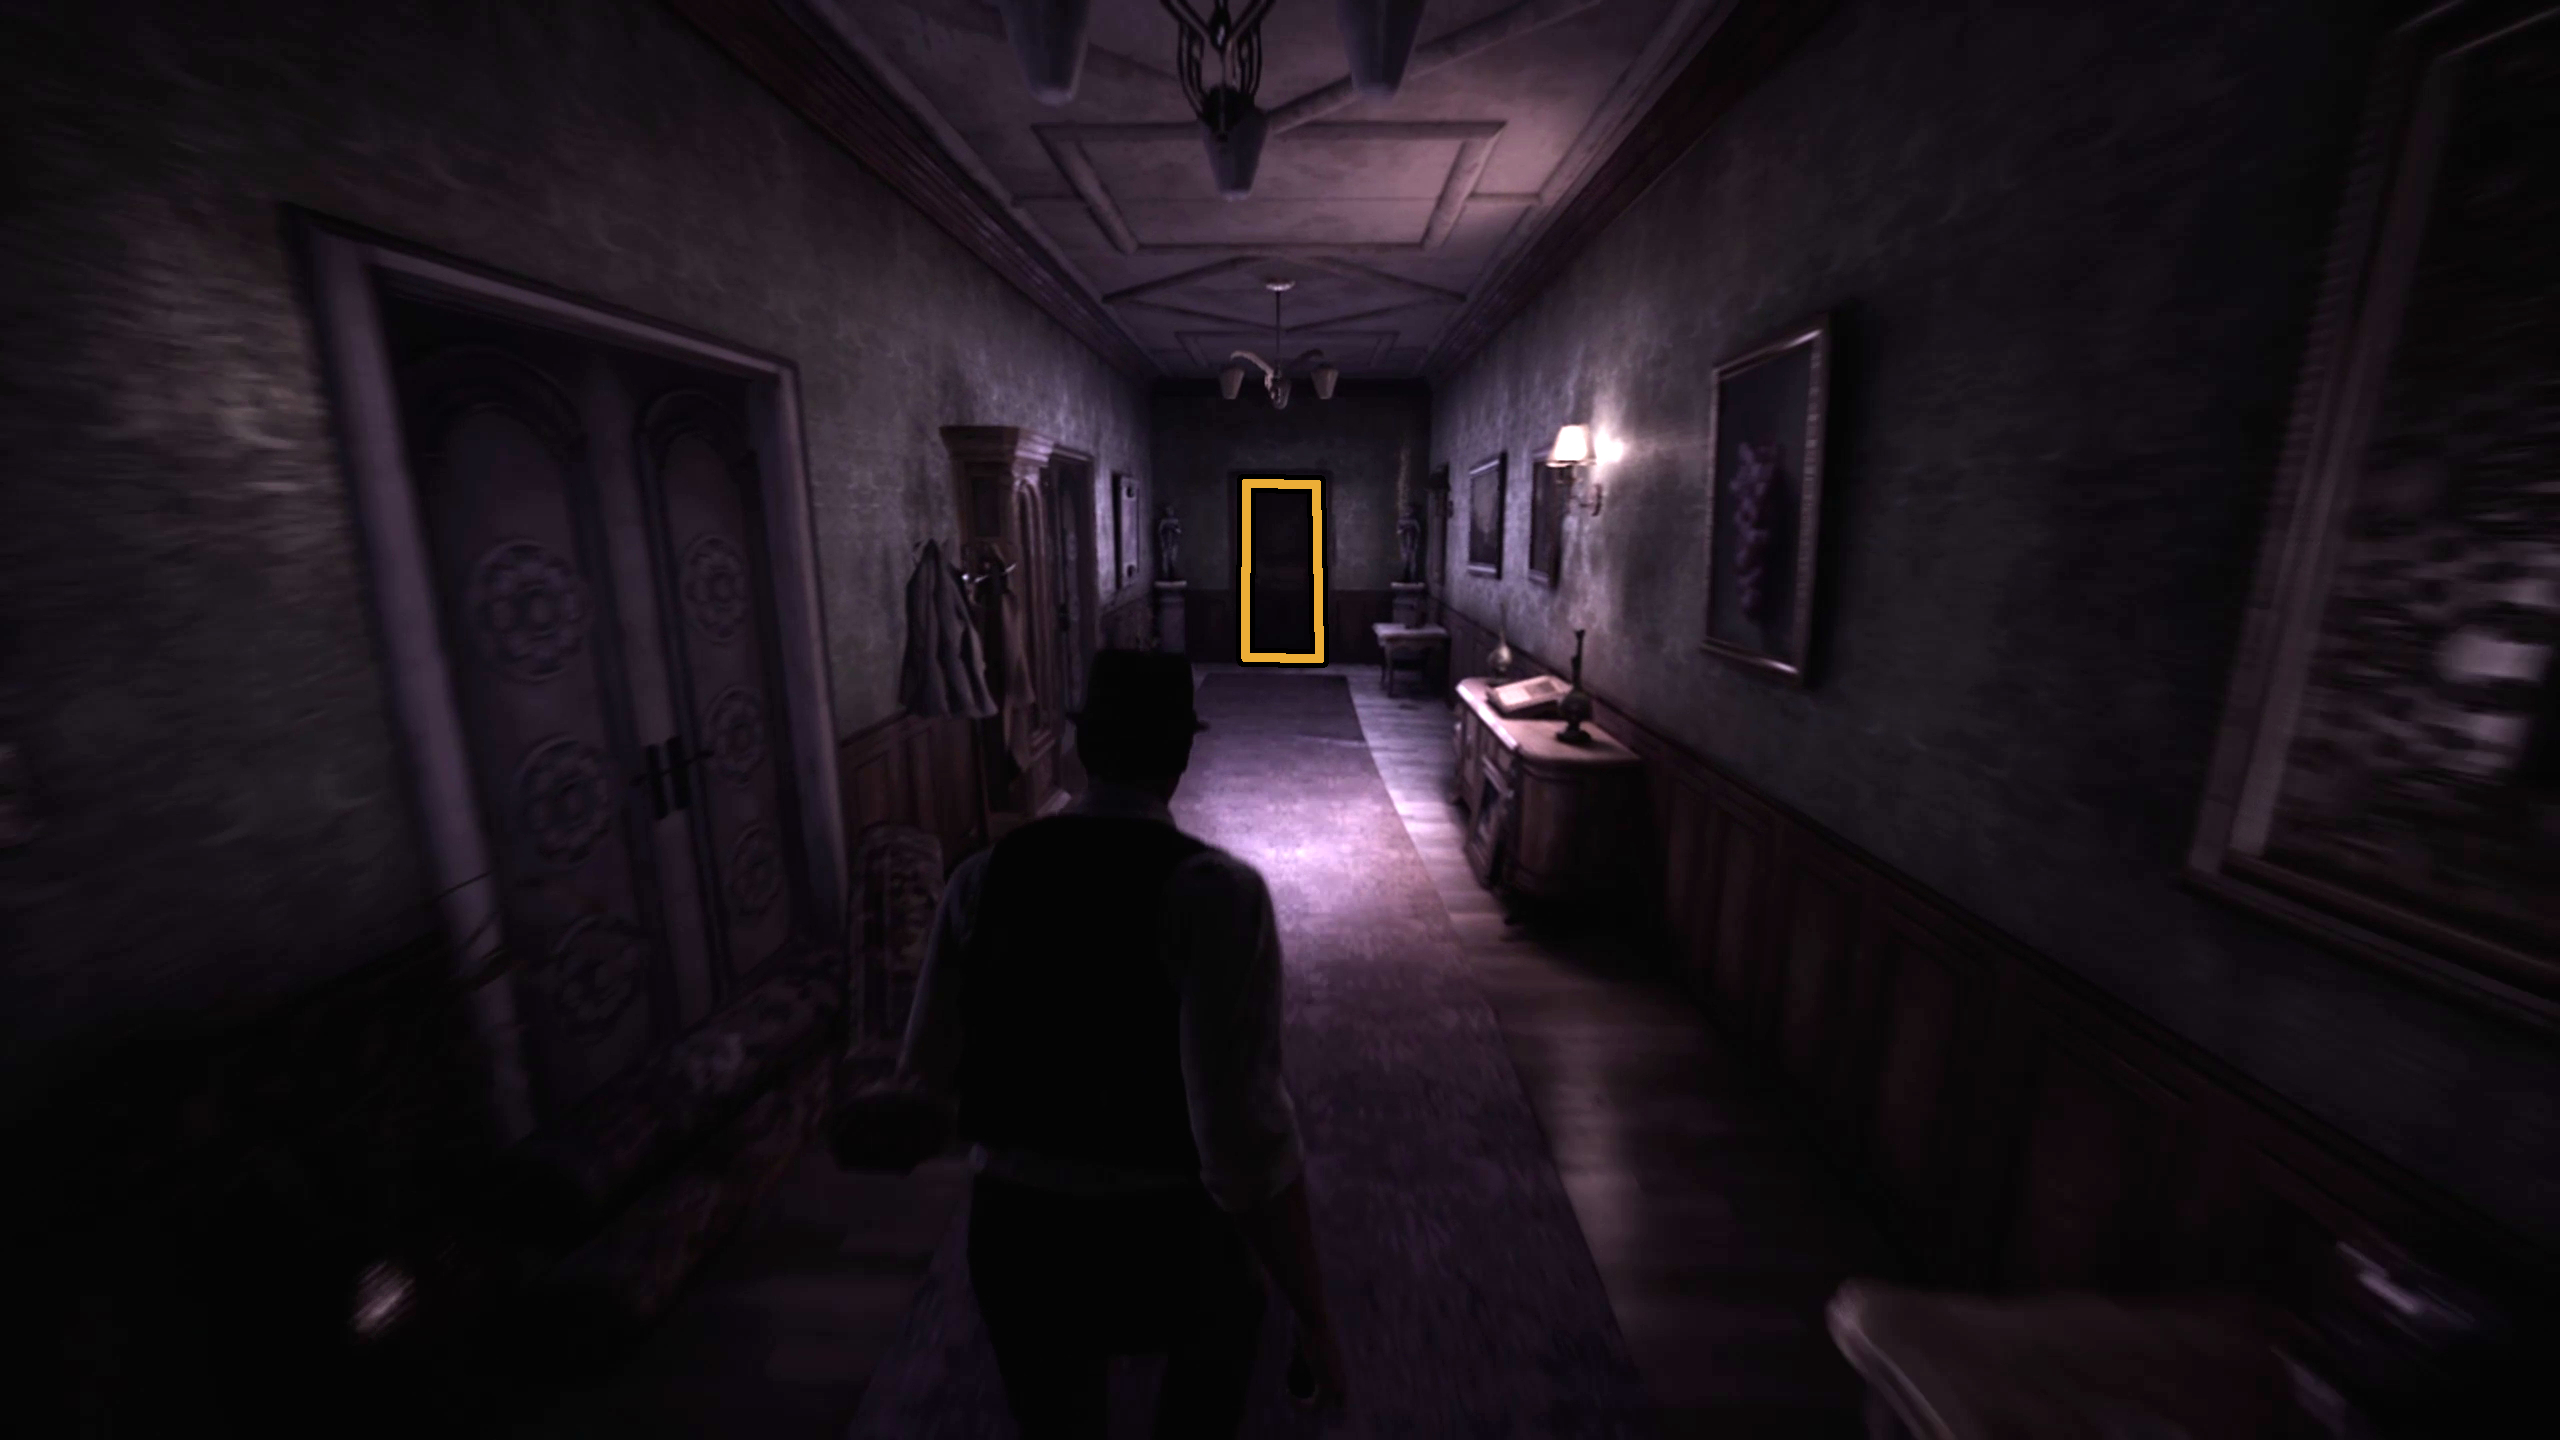
Go down two flights of the spiral stairs, and you’ll come to the doors to the Grand Parlor (Image 1). Opening them will start a cutscene, and when it ends, you’ll need to turn left, cross the parlor, and go through the doors to the Dining Room (Image 2).
Image 1Image 2
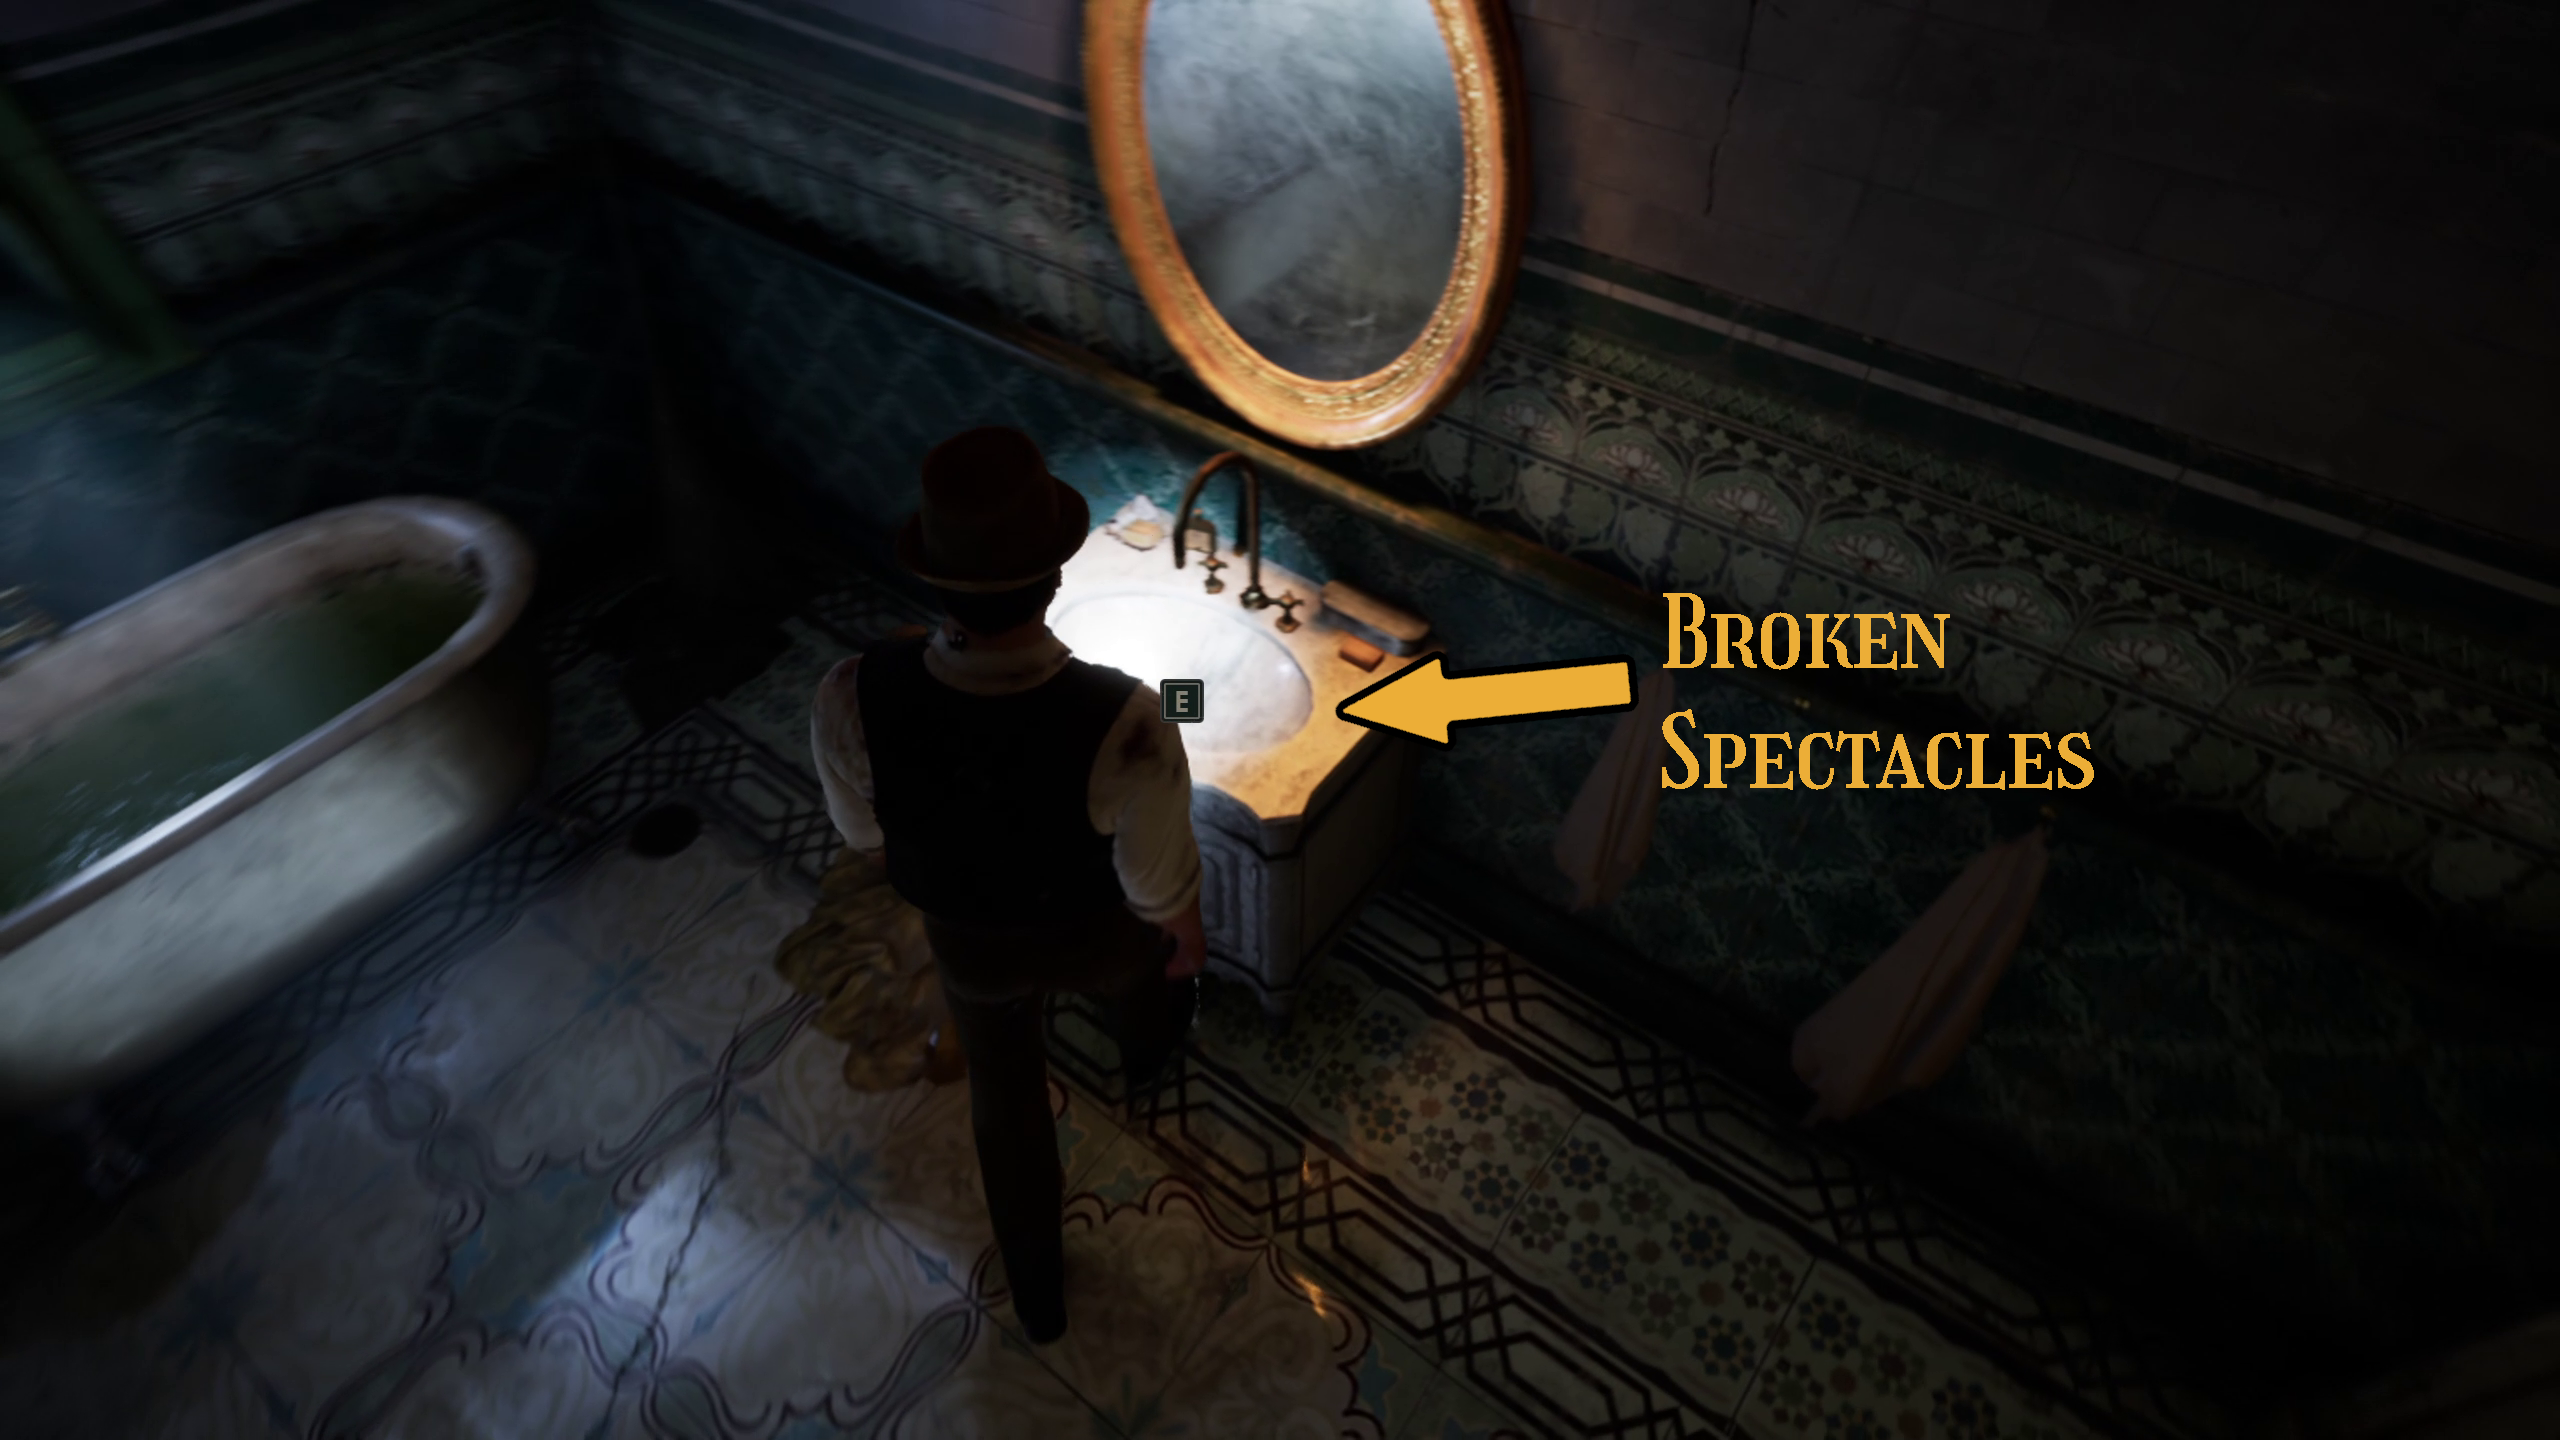
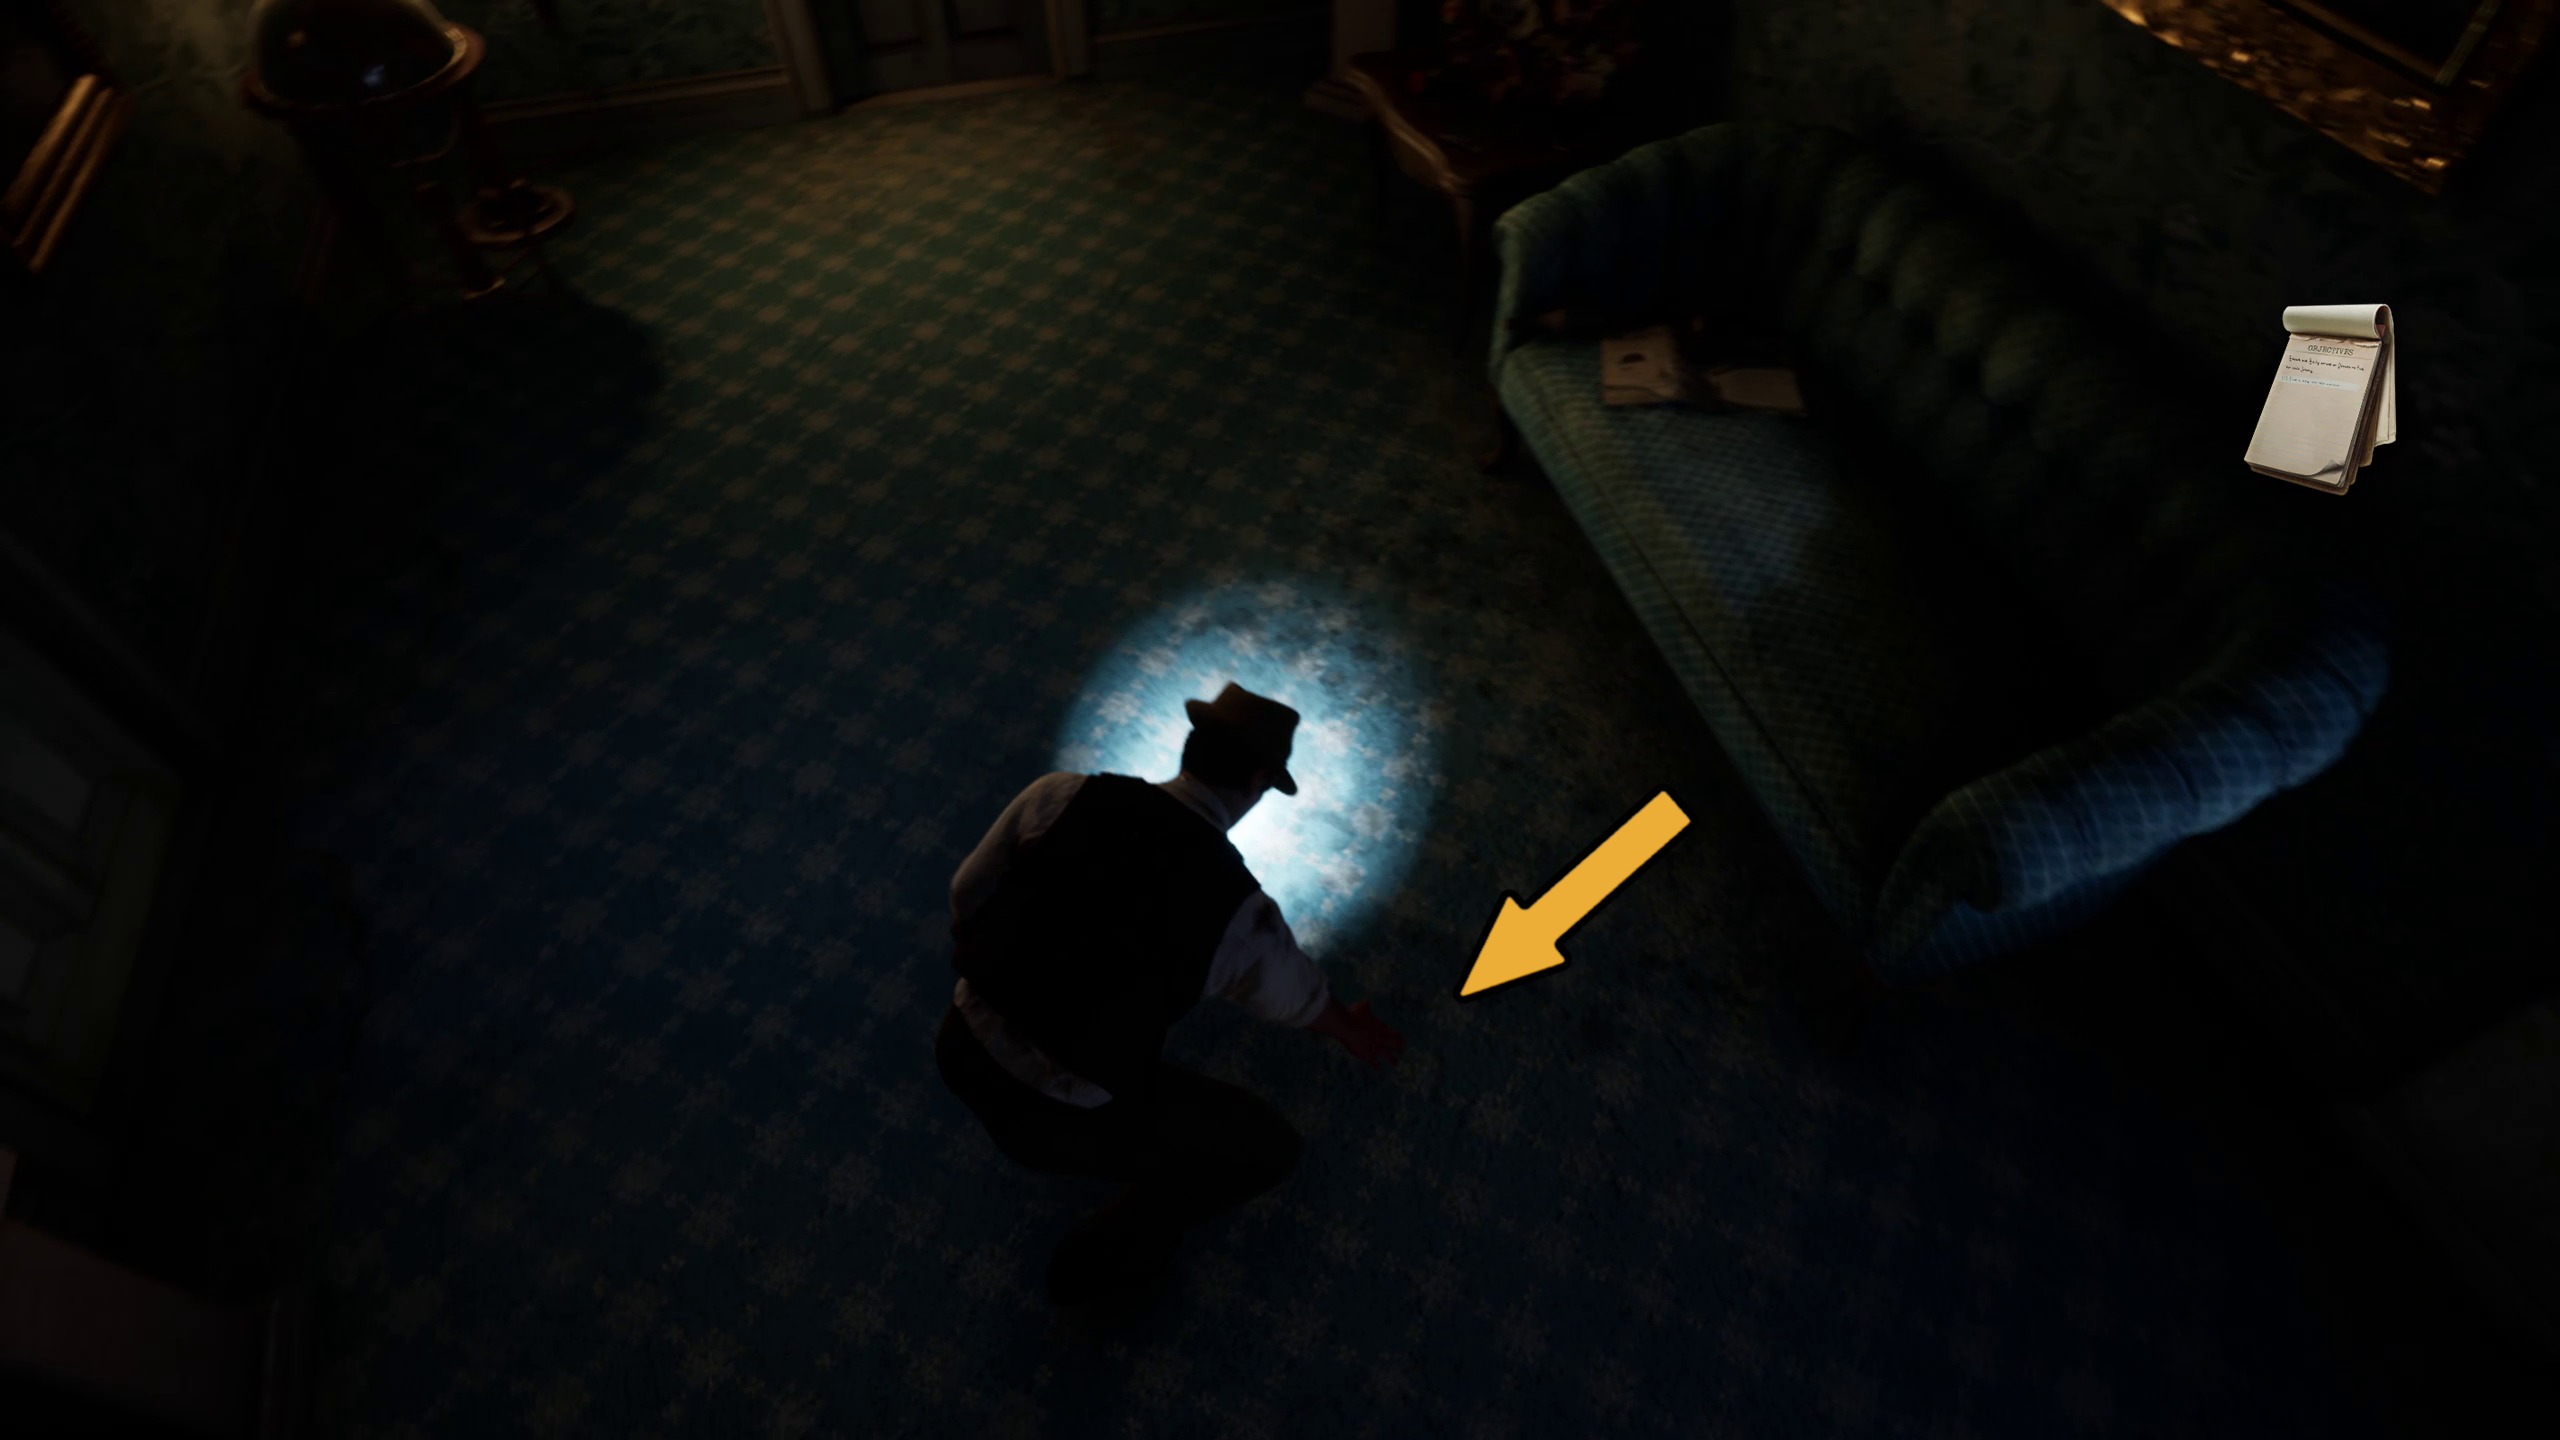
In the dining room, go left and unbolt the door that leads to the hallway, then go through. Turn right and open the door to your left to go into the bathroom (Image 3). In the sink, you will find the Broken Spectacles Lagniappe (Image 4).
Image 3Image 4
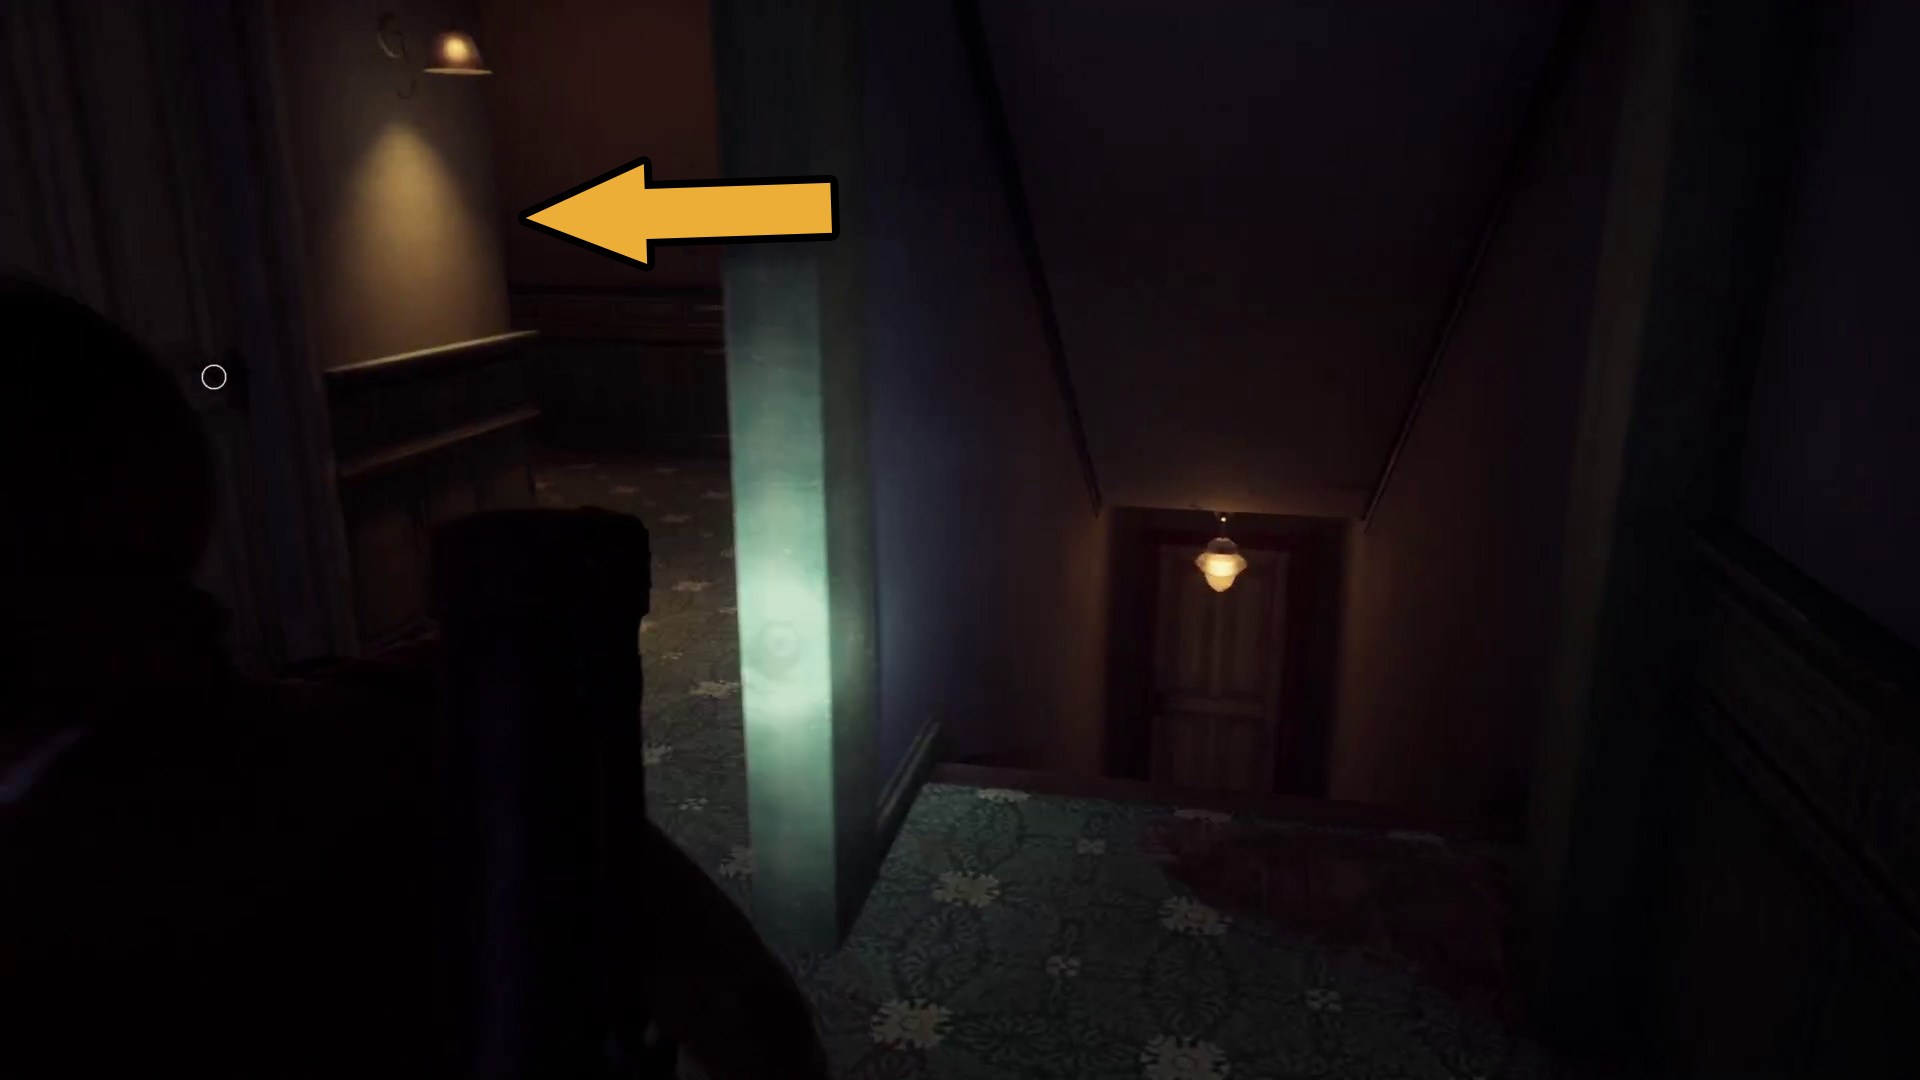
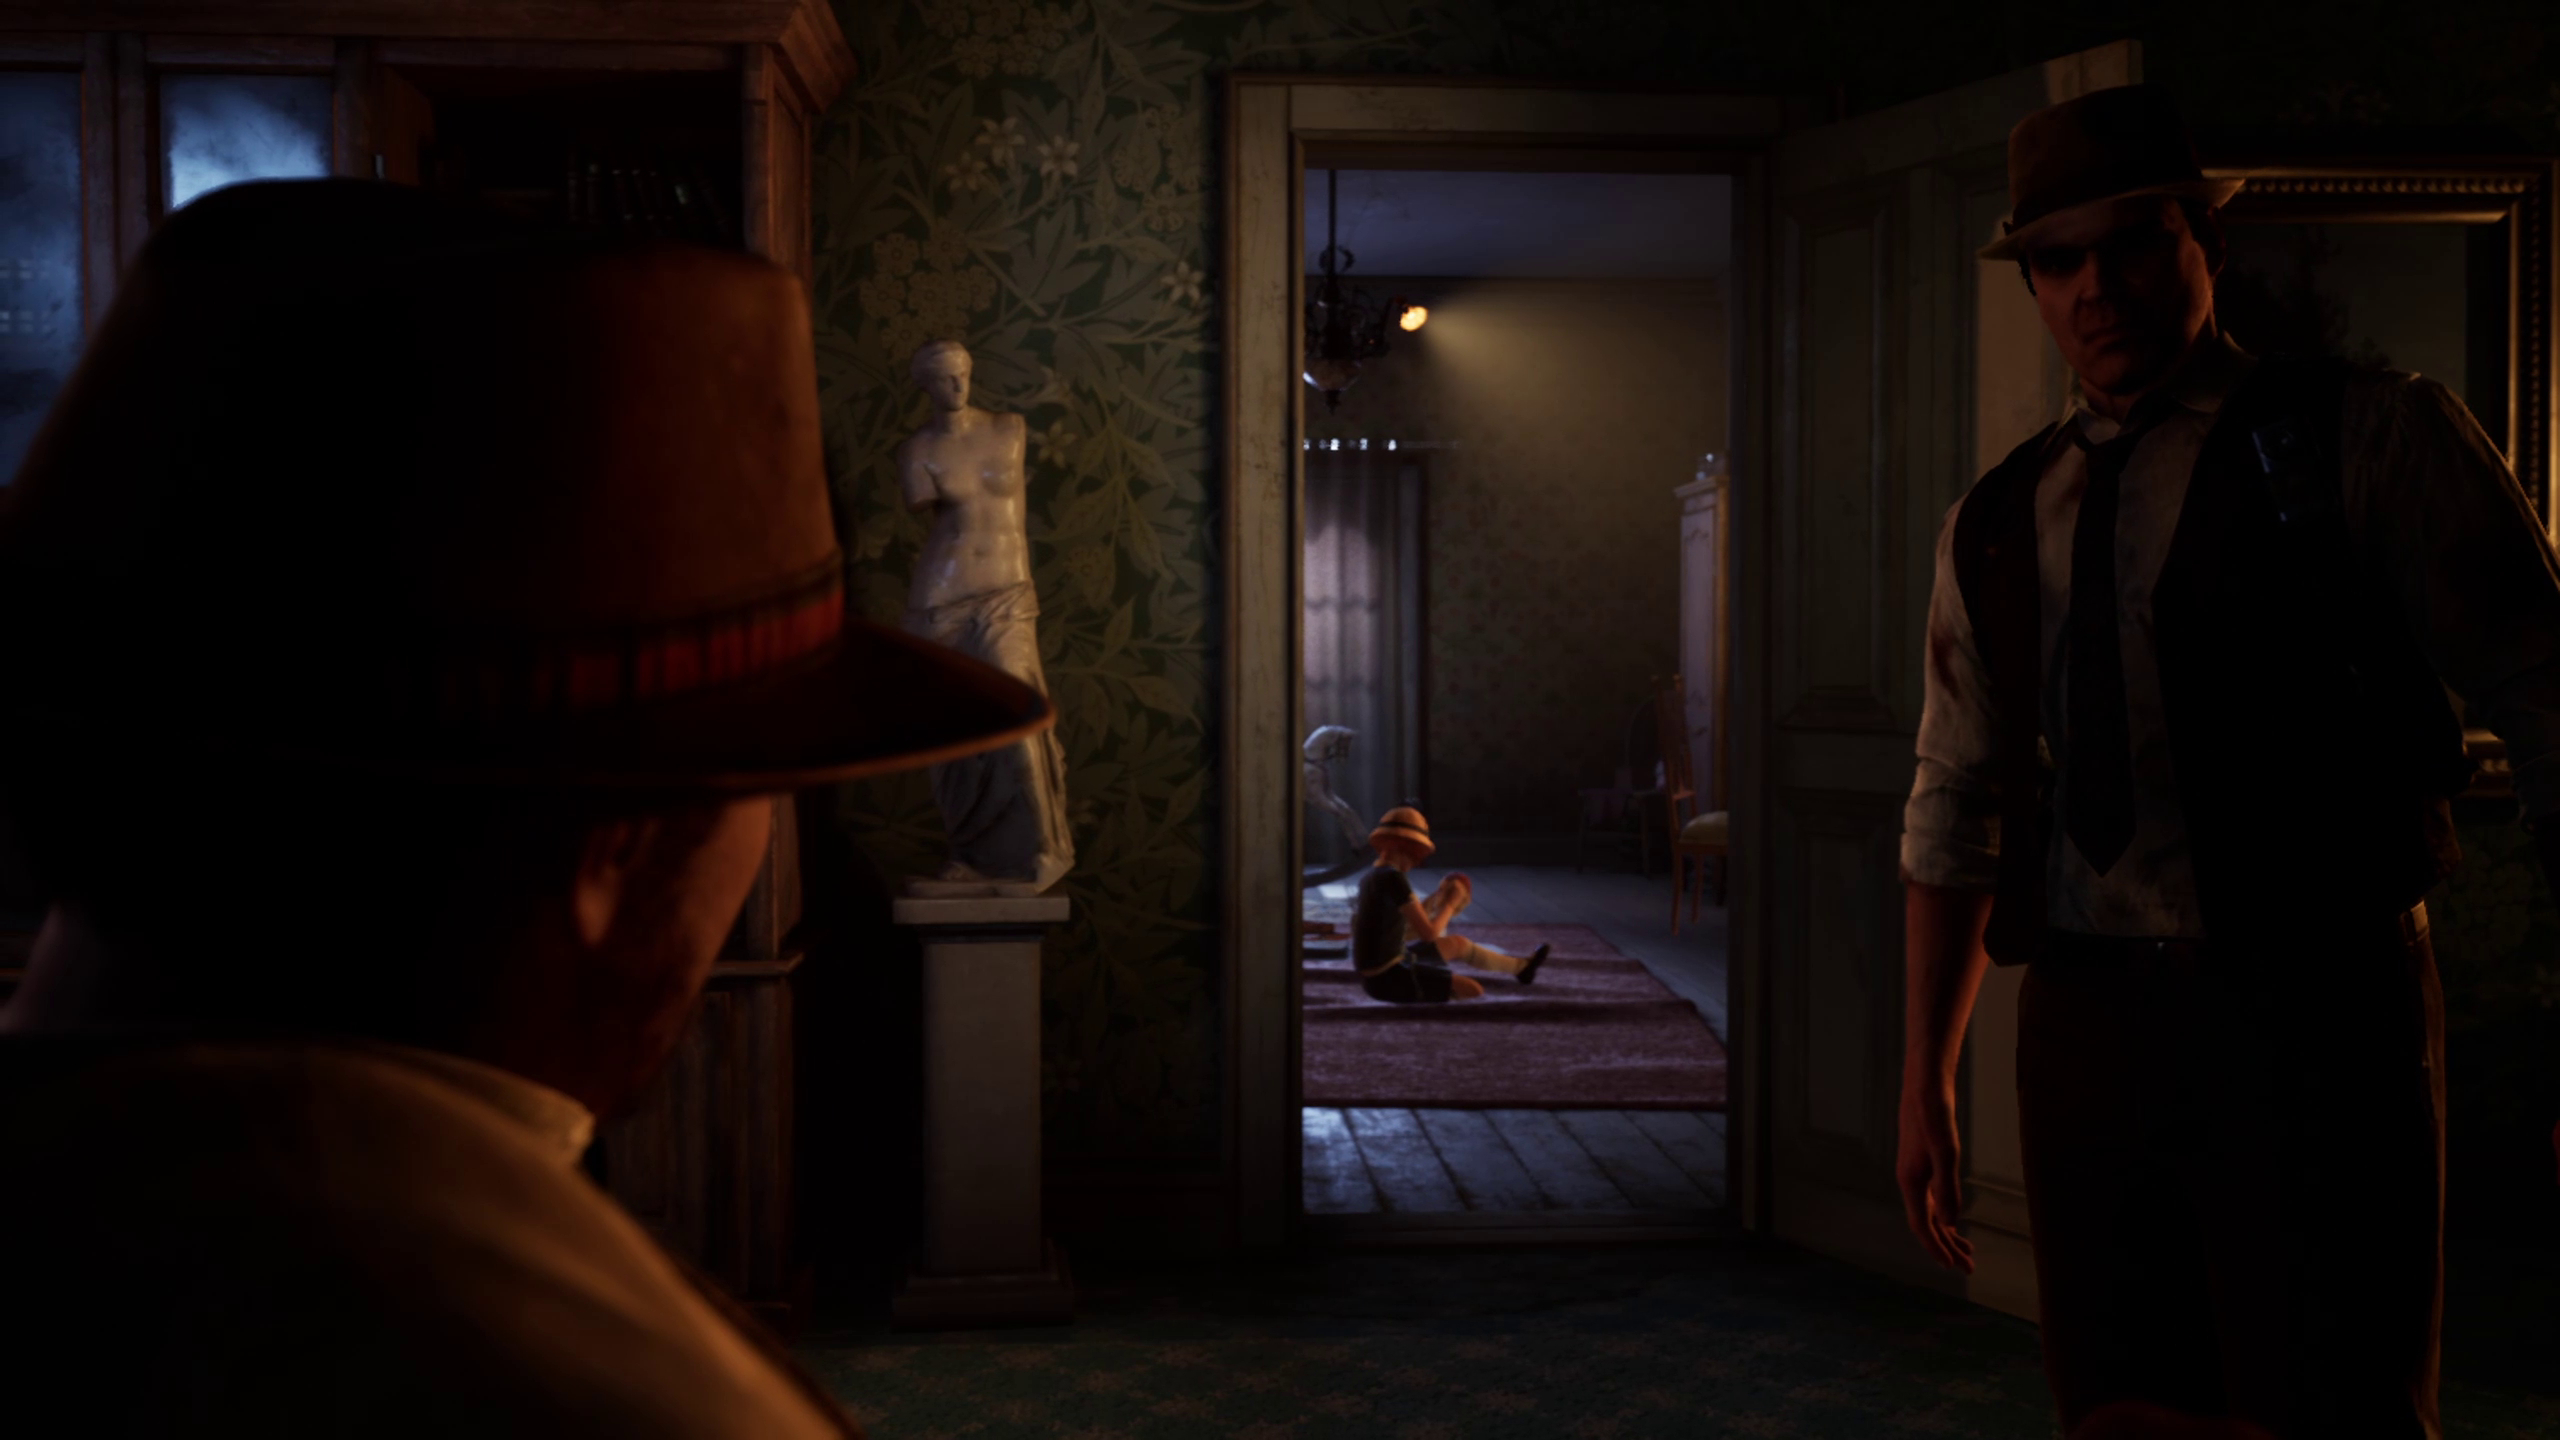
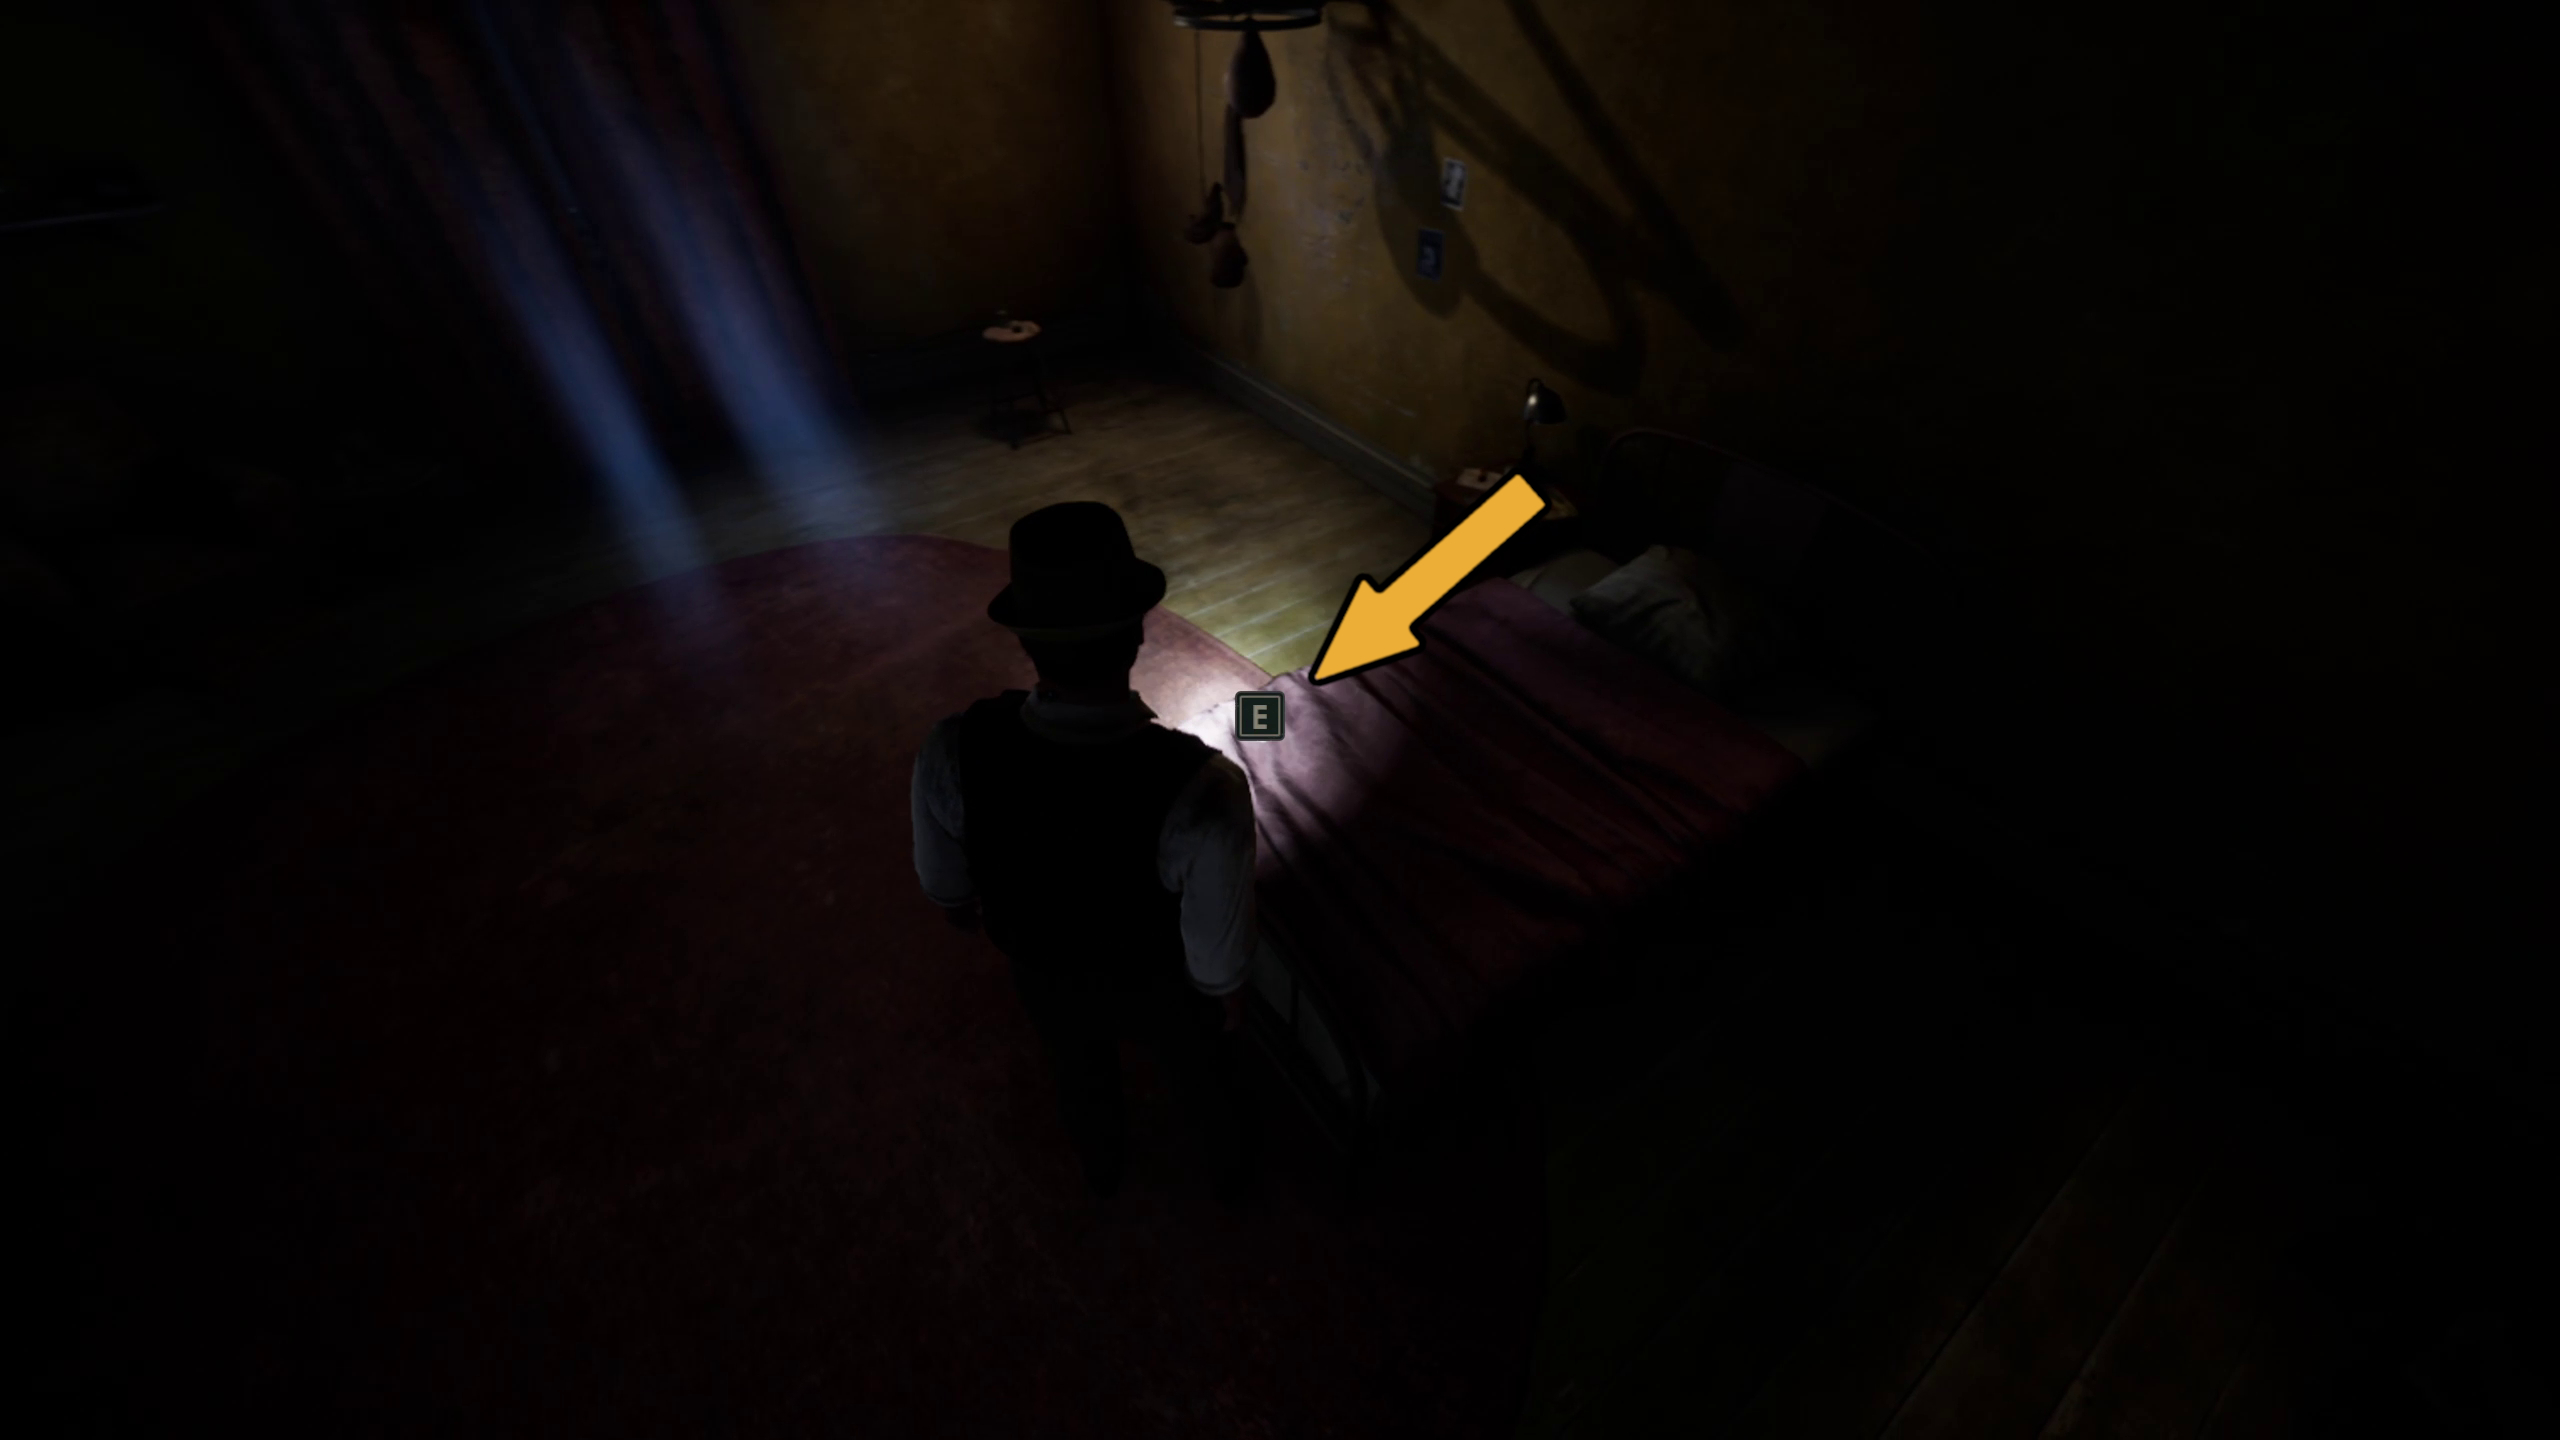
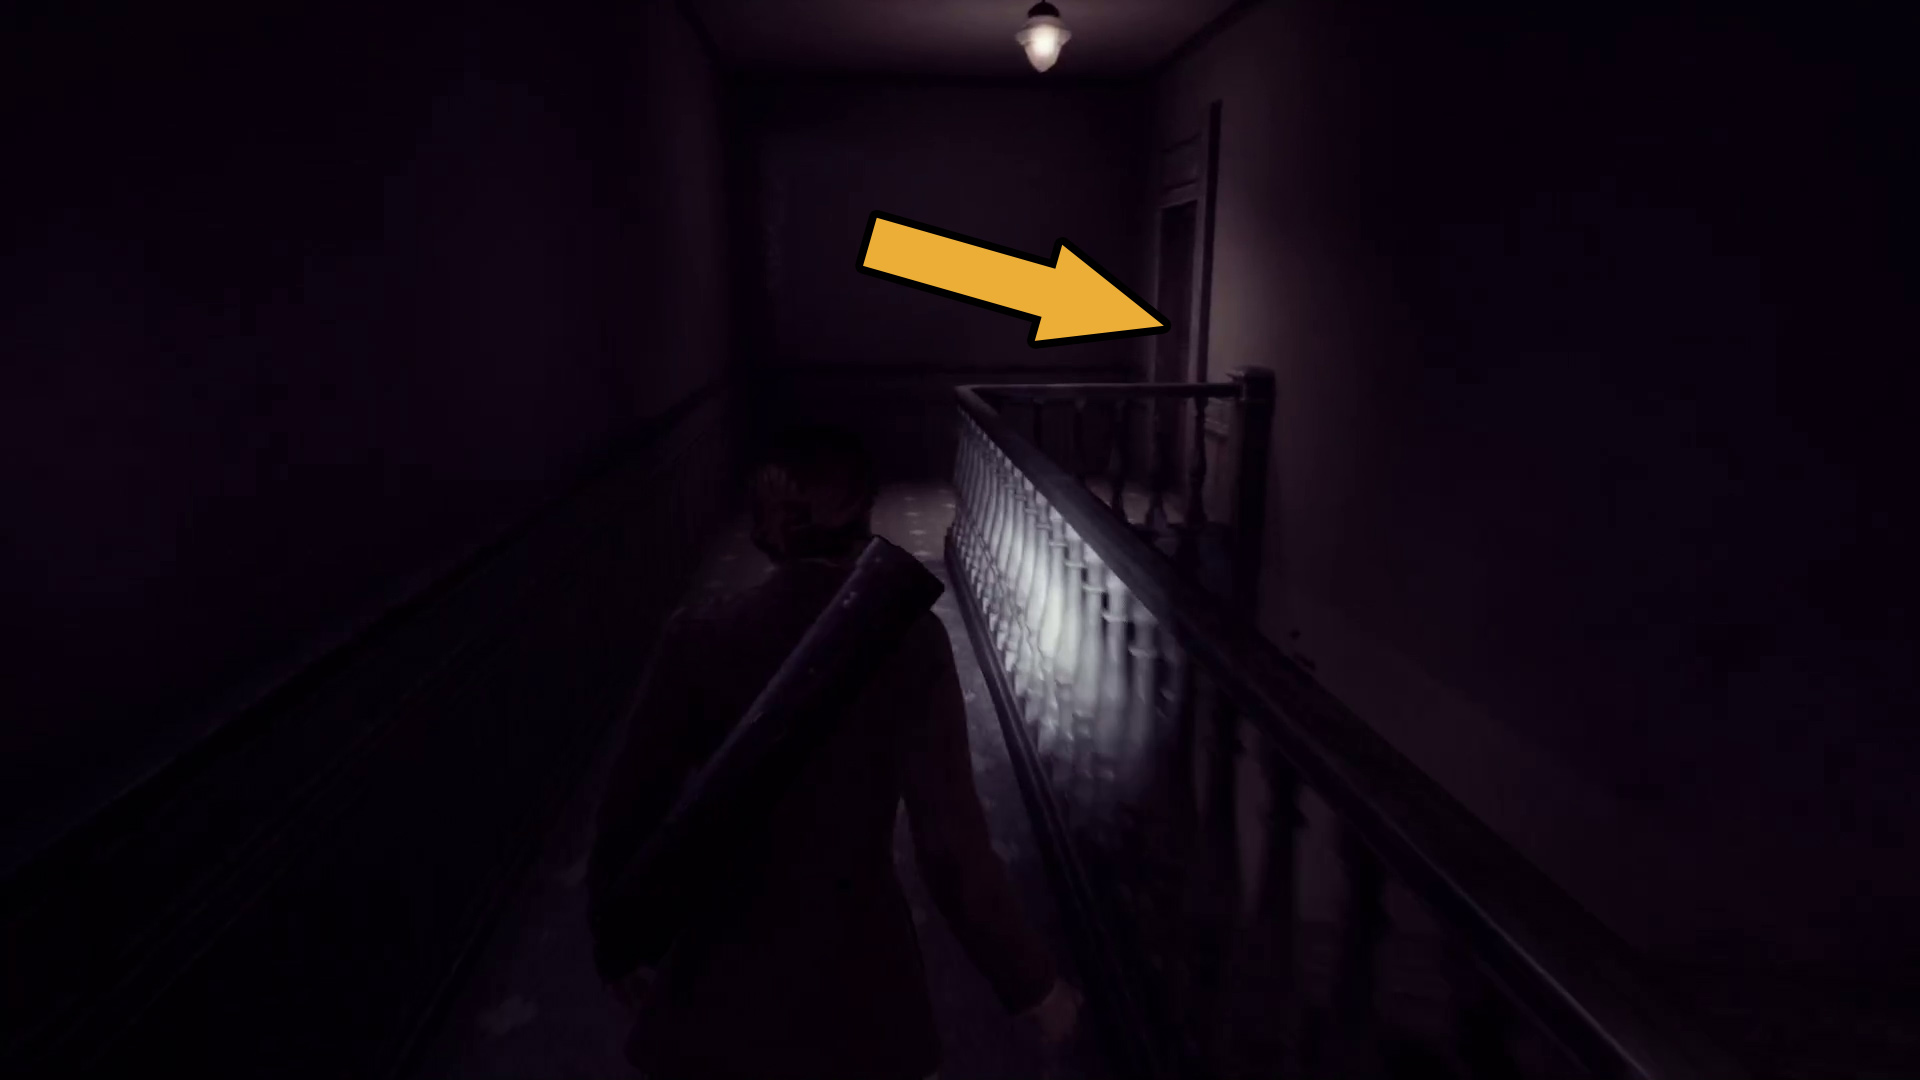
After that, go down the hall and through the open door on the left (Image 5) to find the Preperations for St. John’s clue in Lottie’s room, on her desk (Image 6).
Image 5Image 6
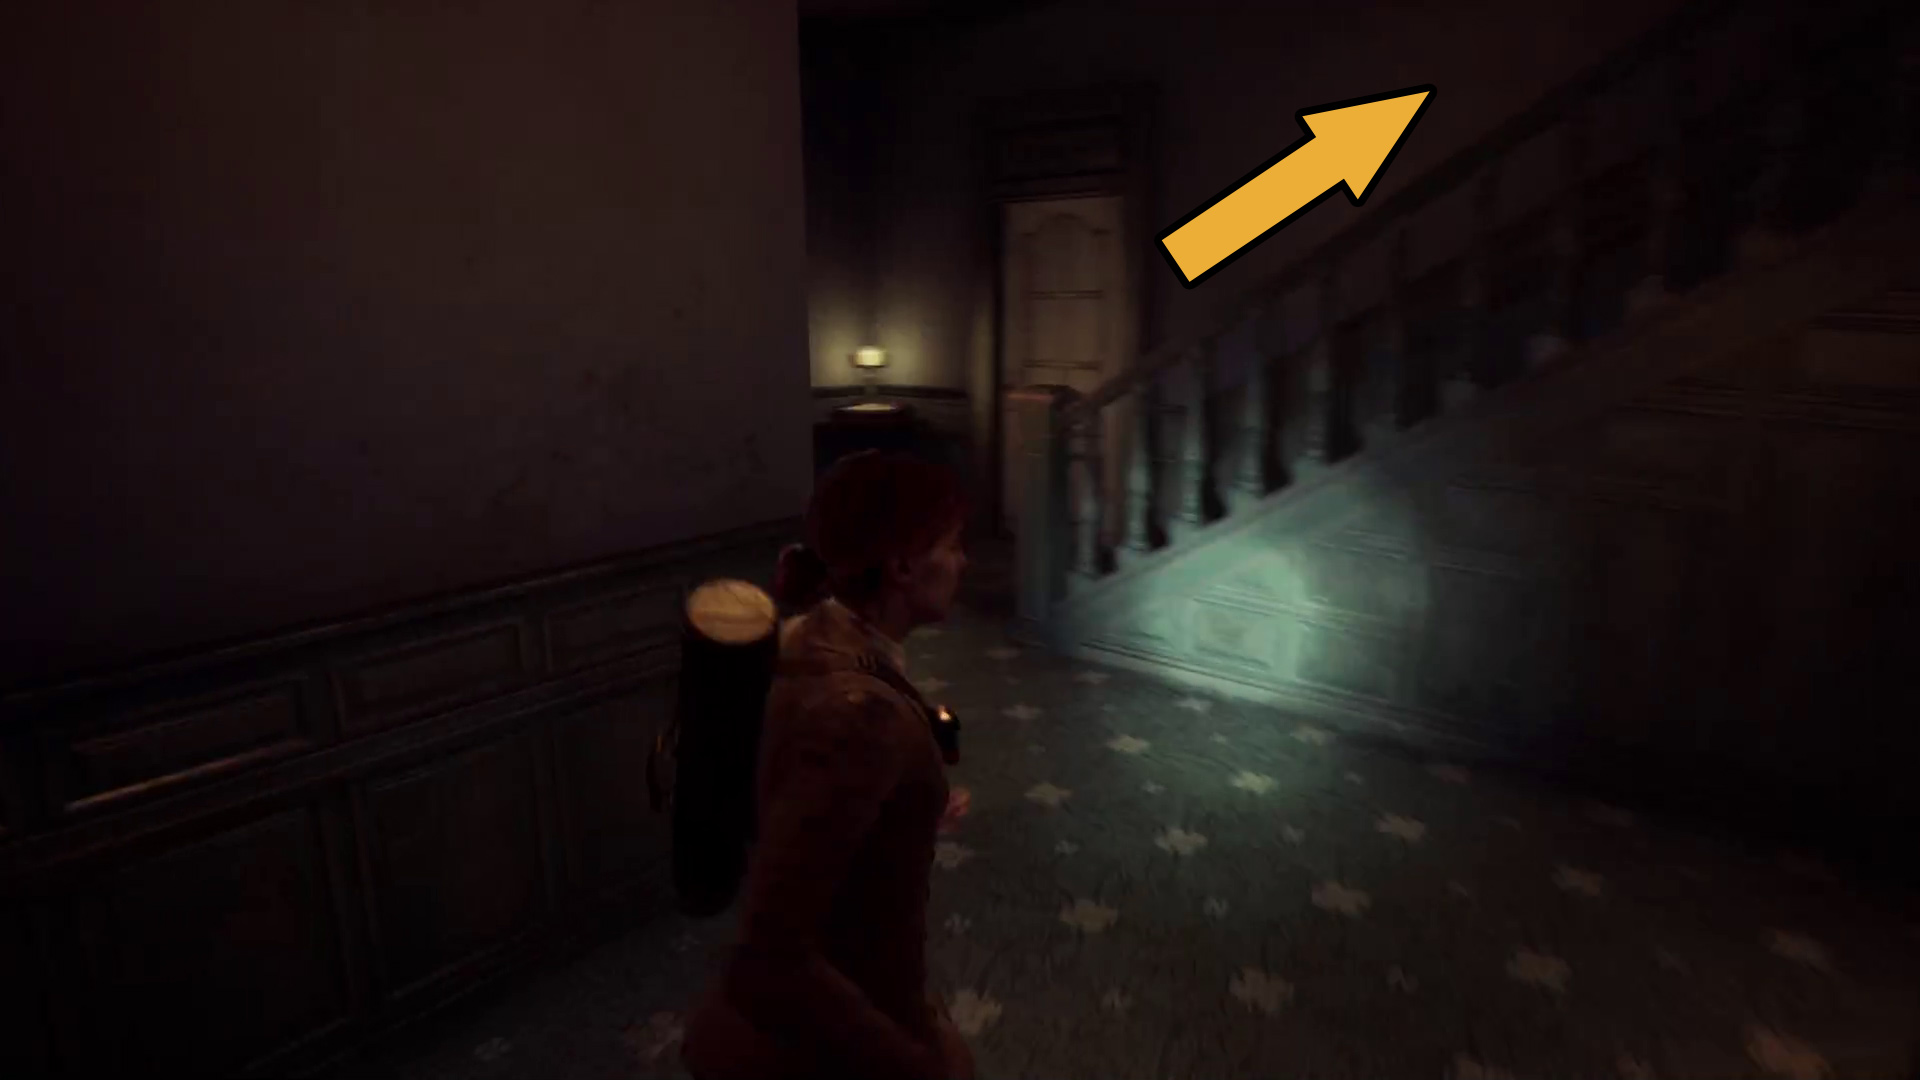
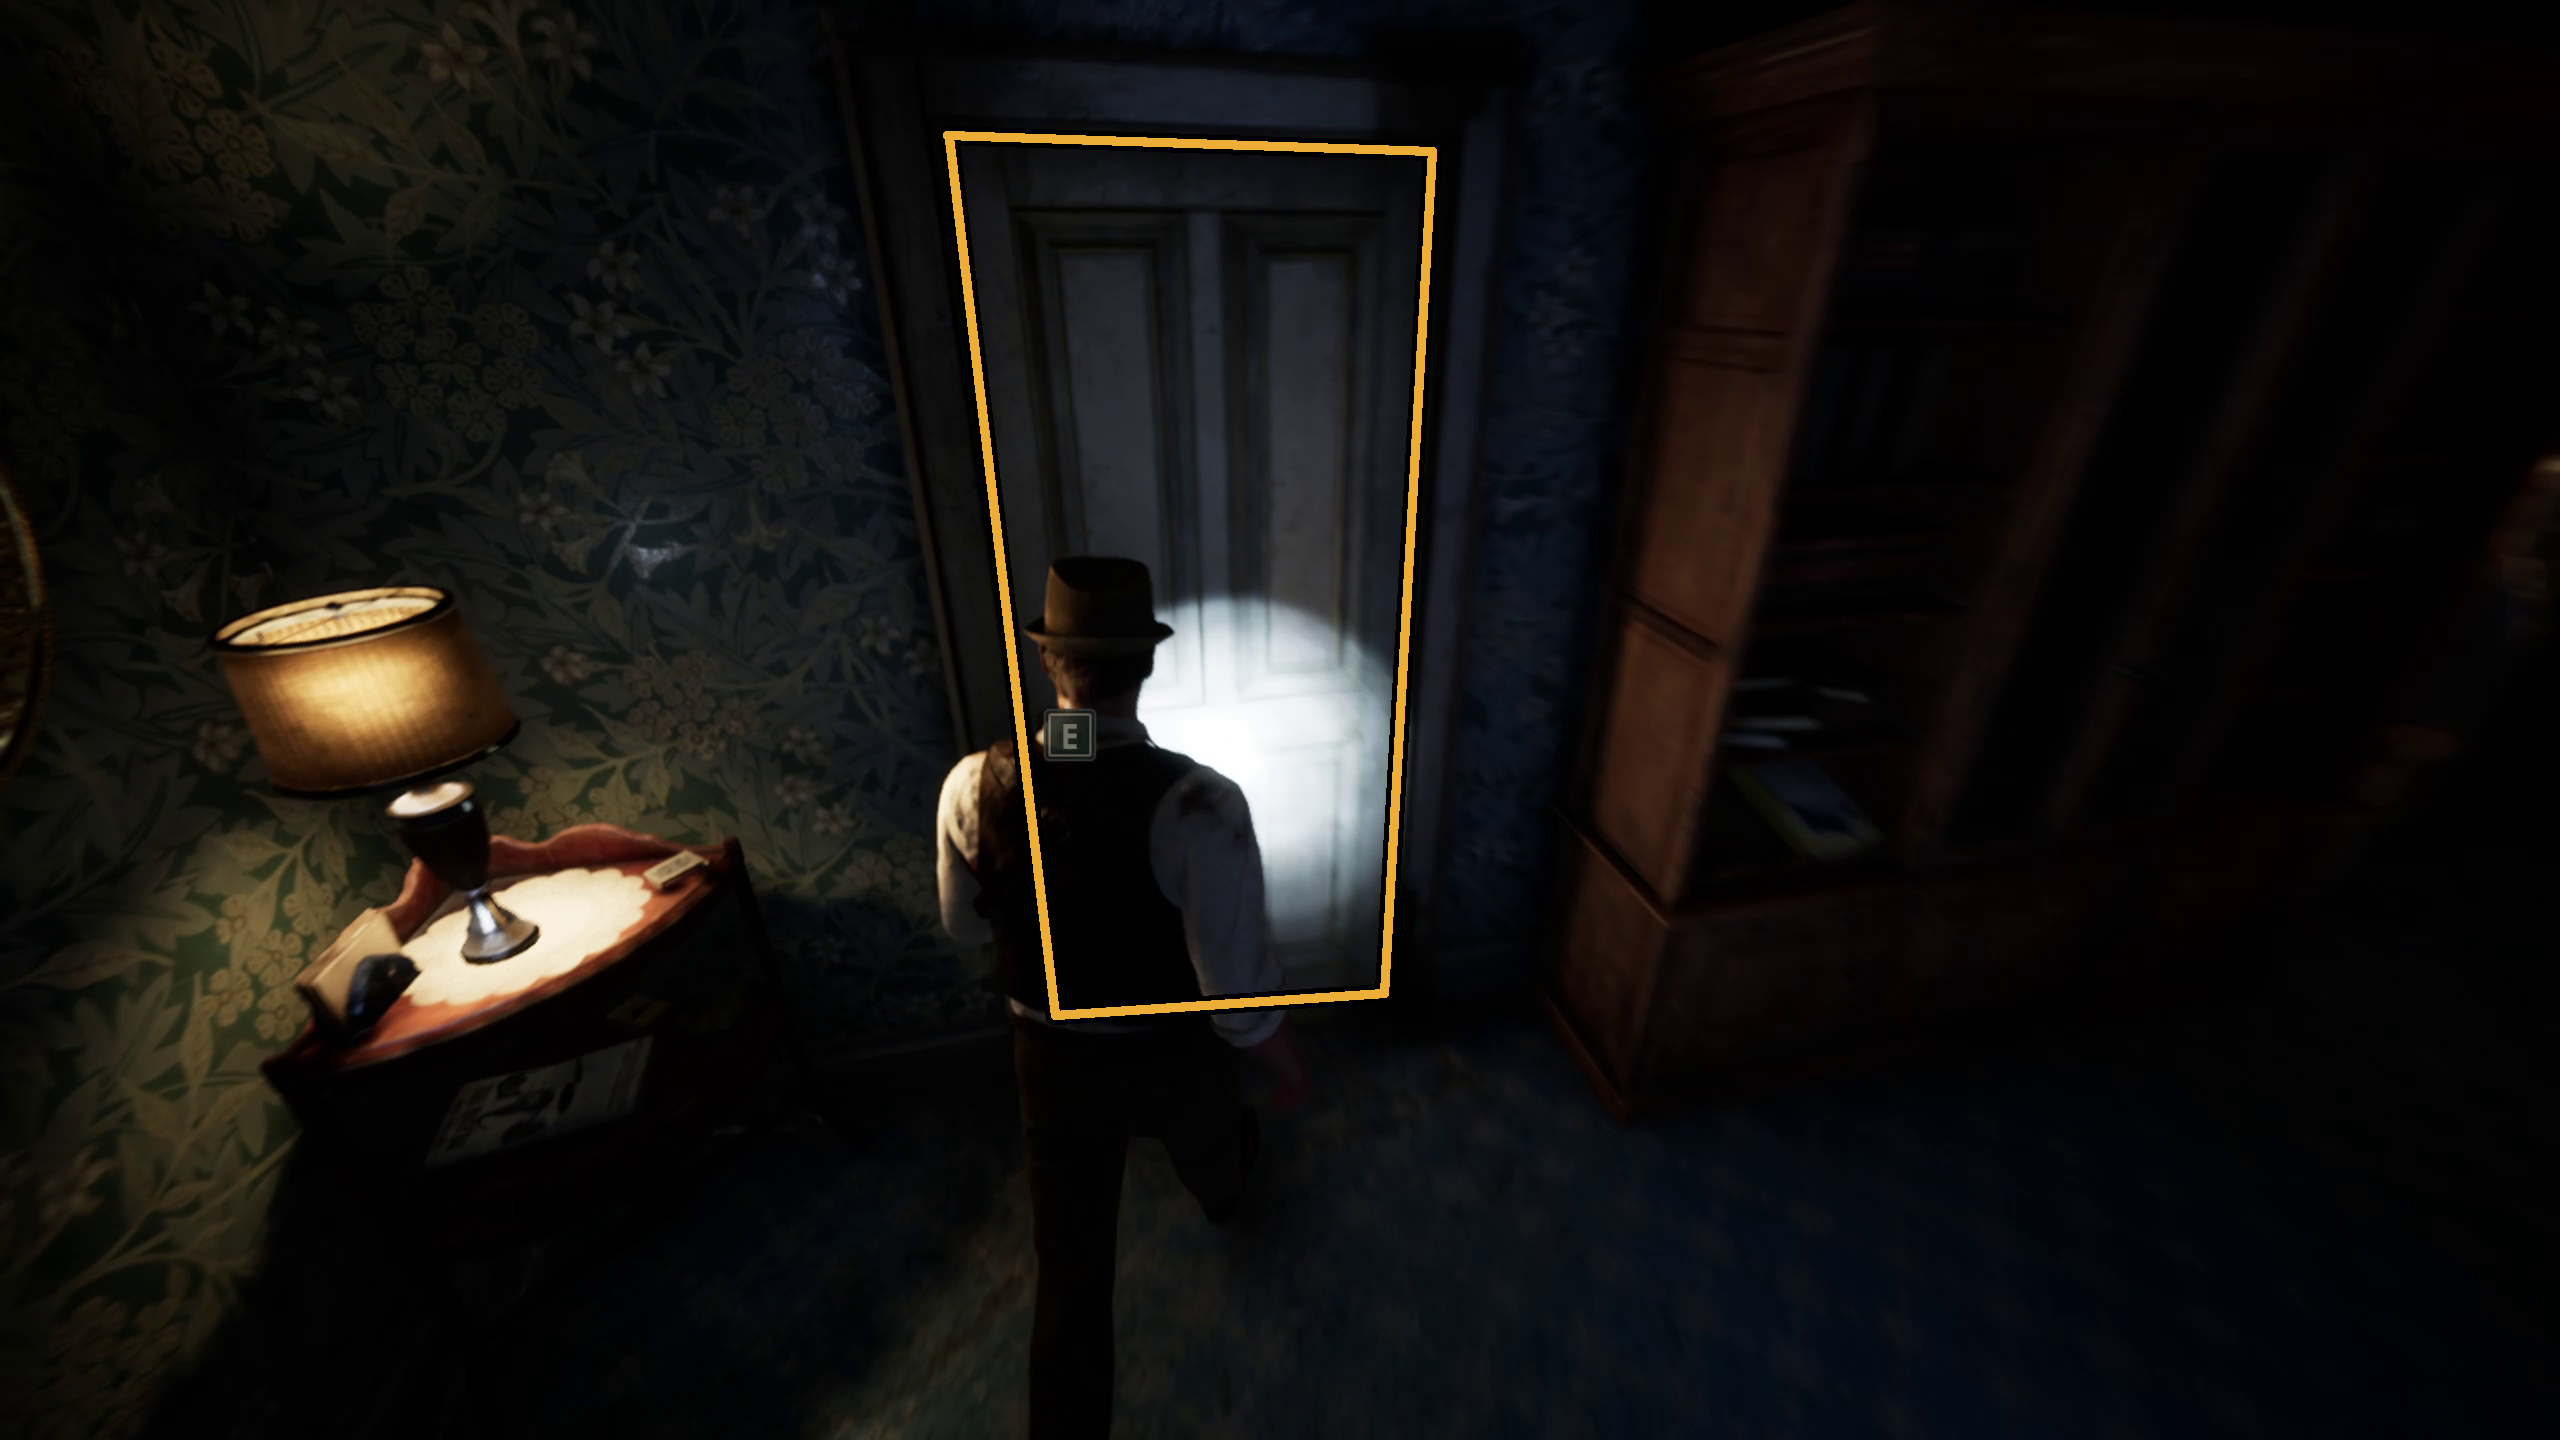
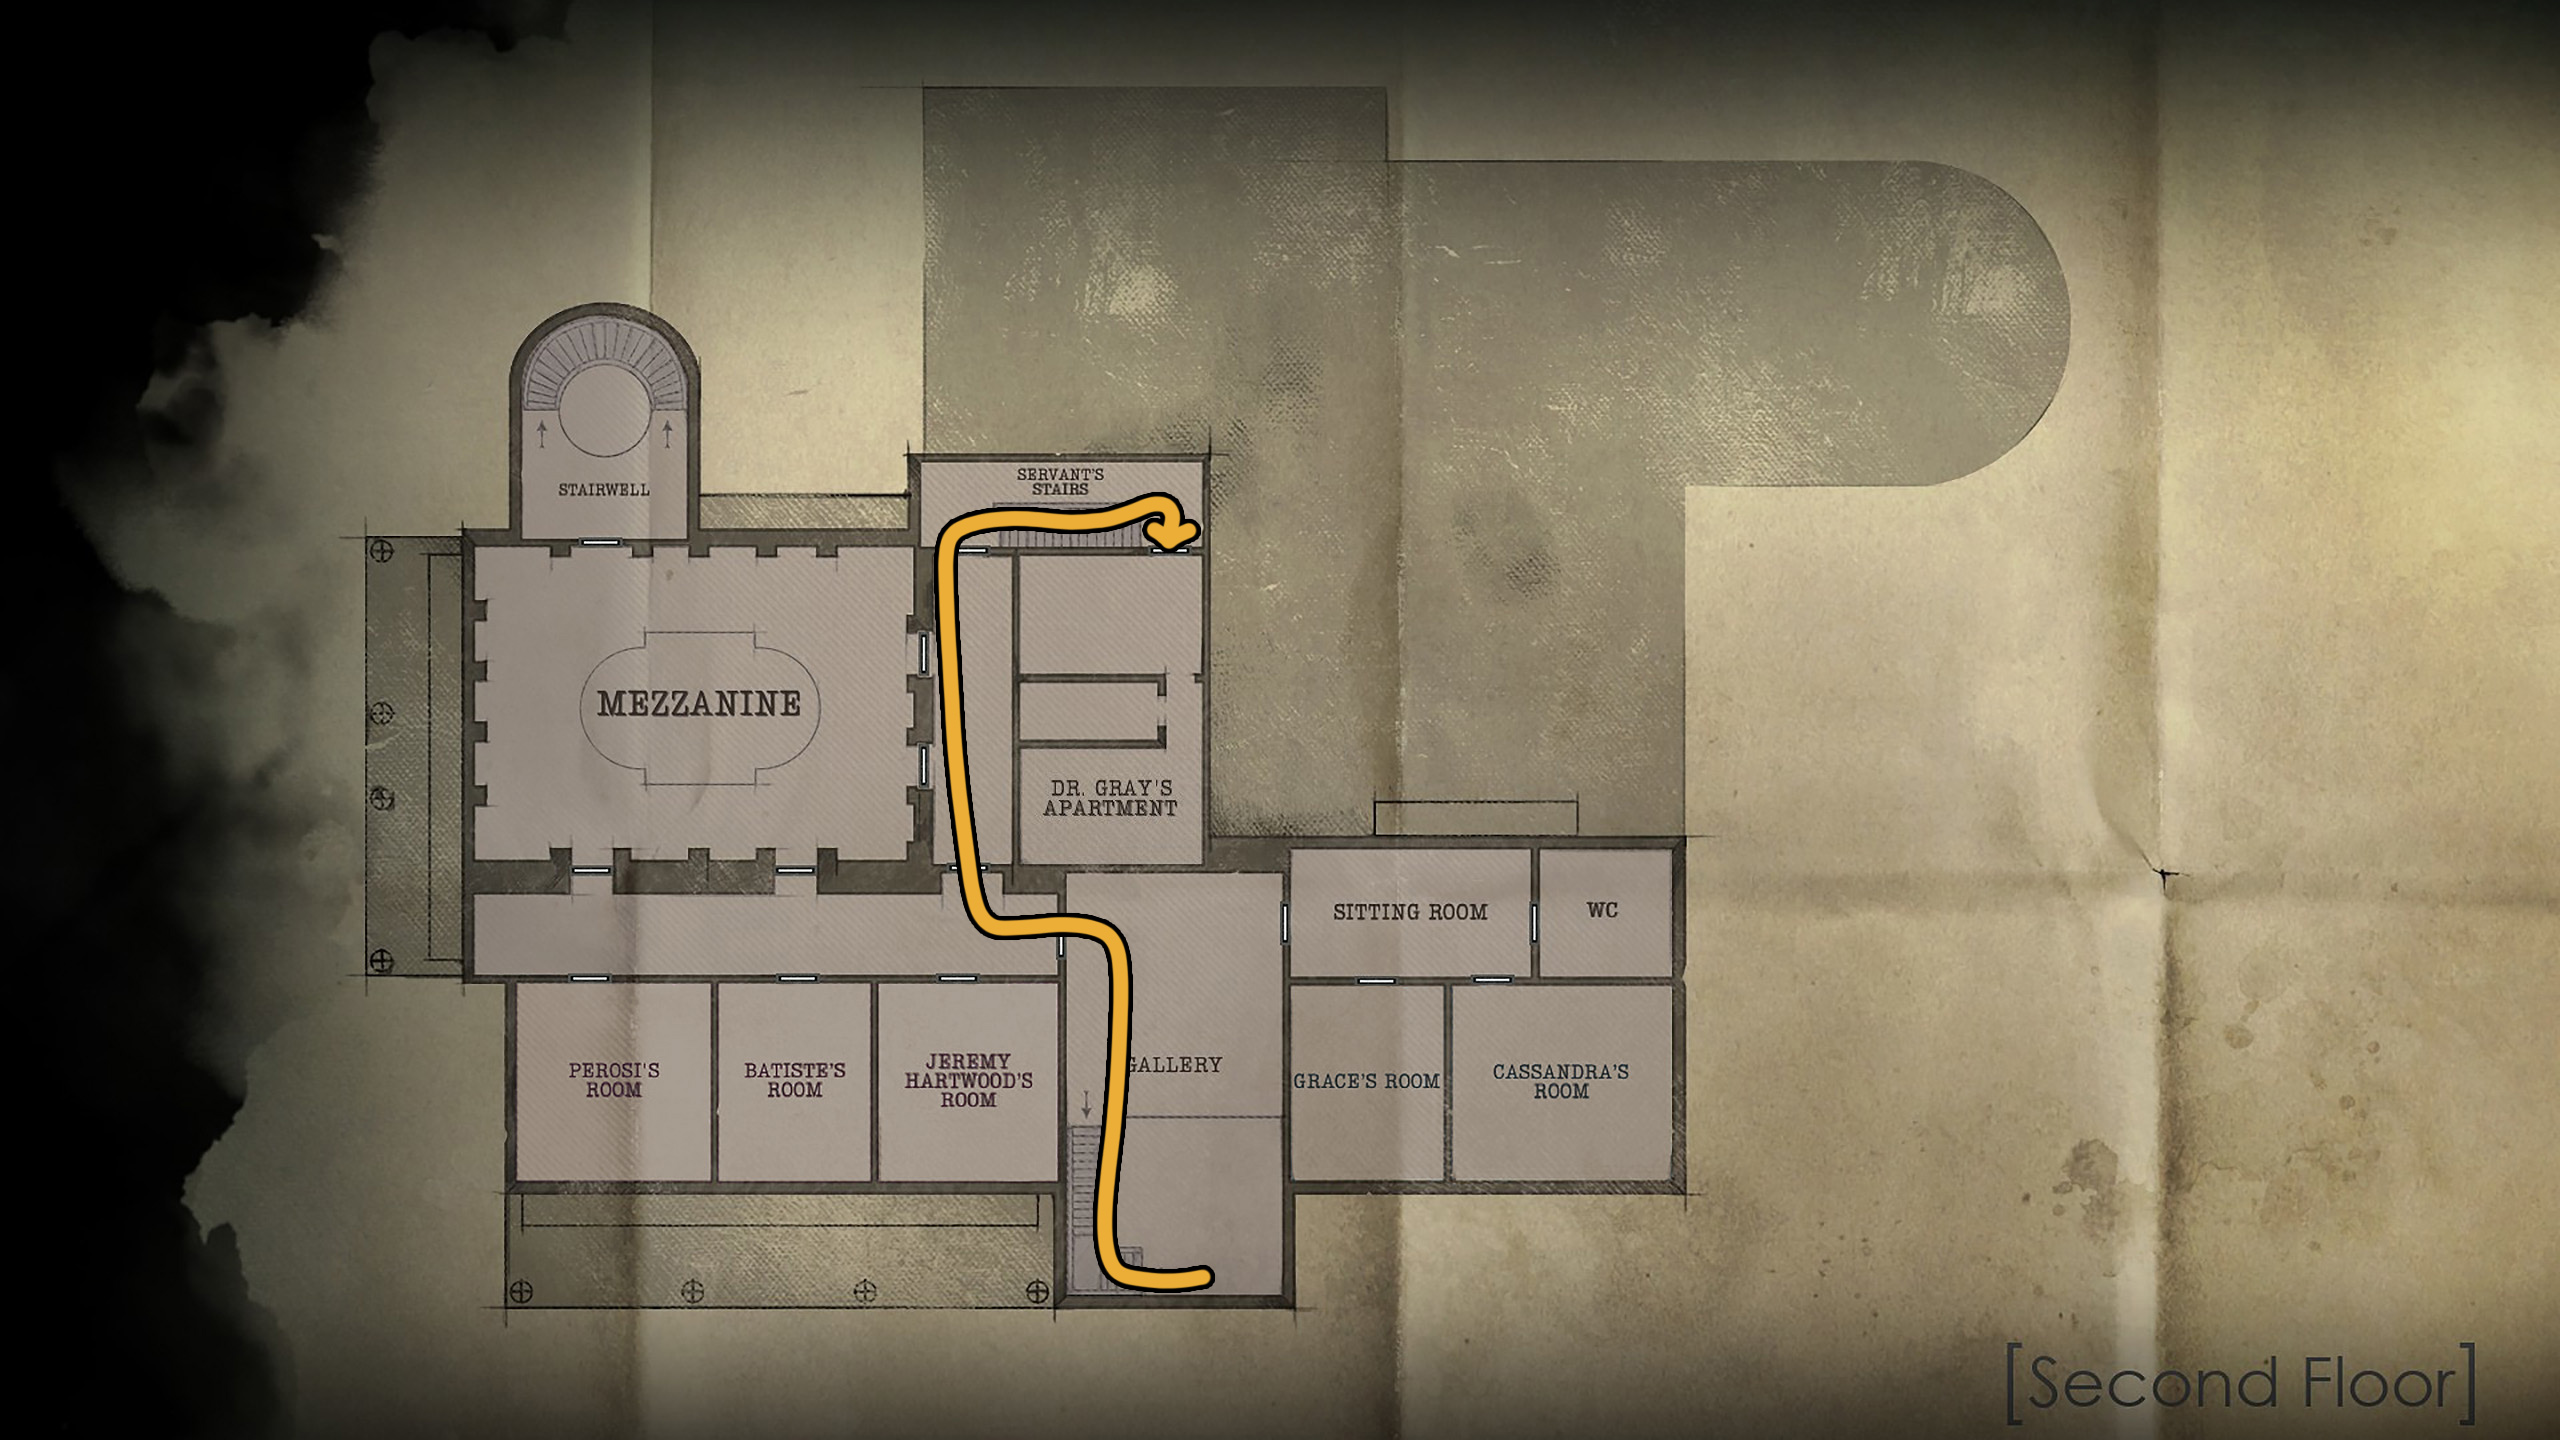
Leave Lottie’s room and go up the stairs (Image 7), and head to the door at the end of the hall. It might take a few tries, but you can grab the Do Not Disturb sign lagniappe from the doorhandle of Dr. Grey’s apartment (Image 8).
Image 7Image 8
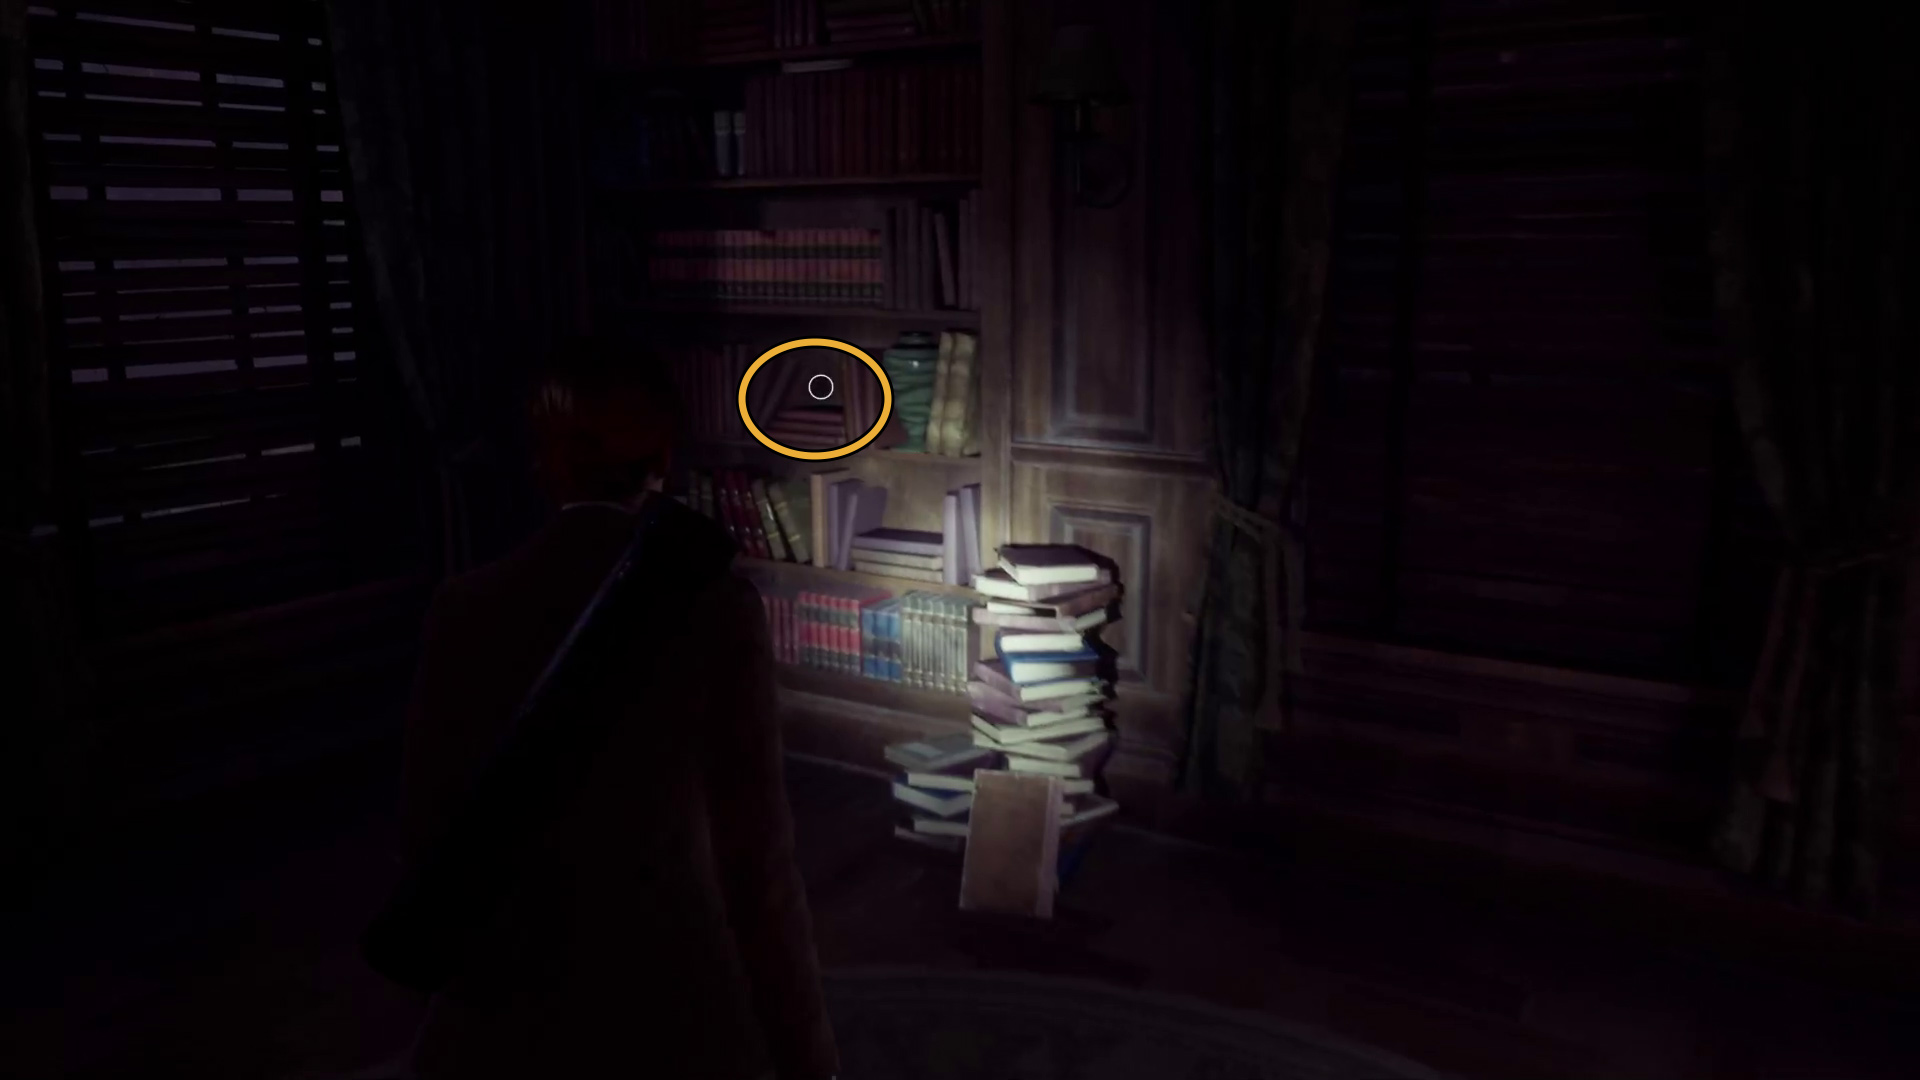
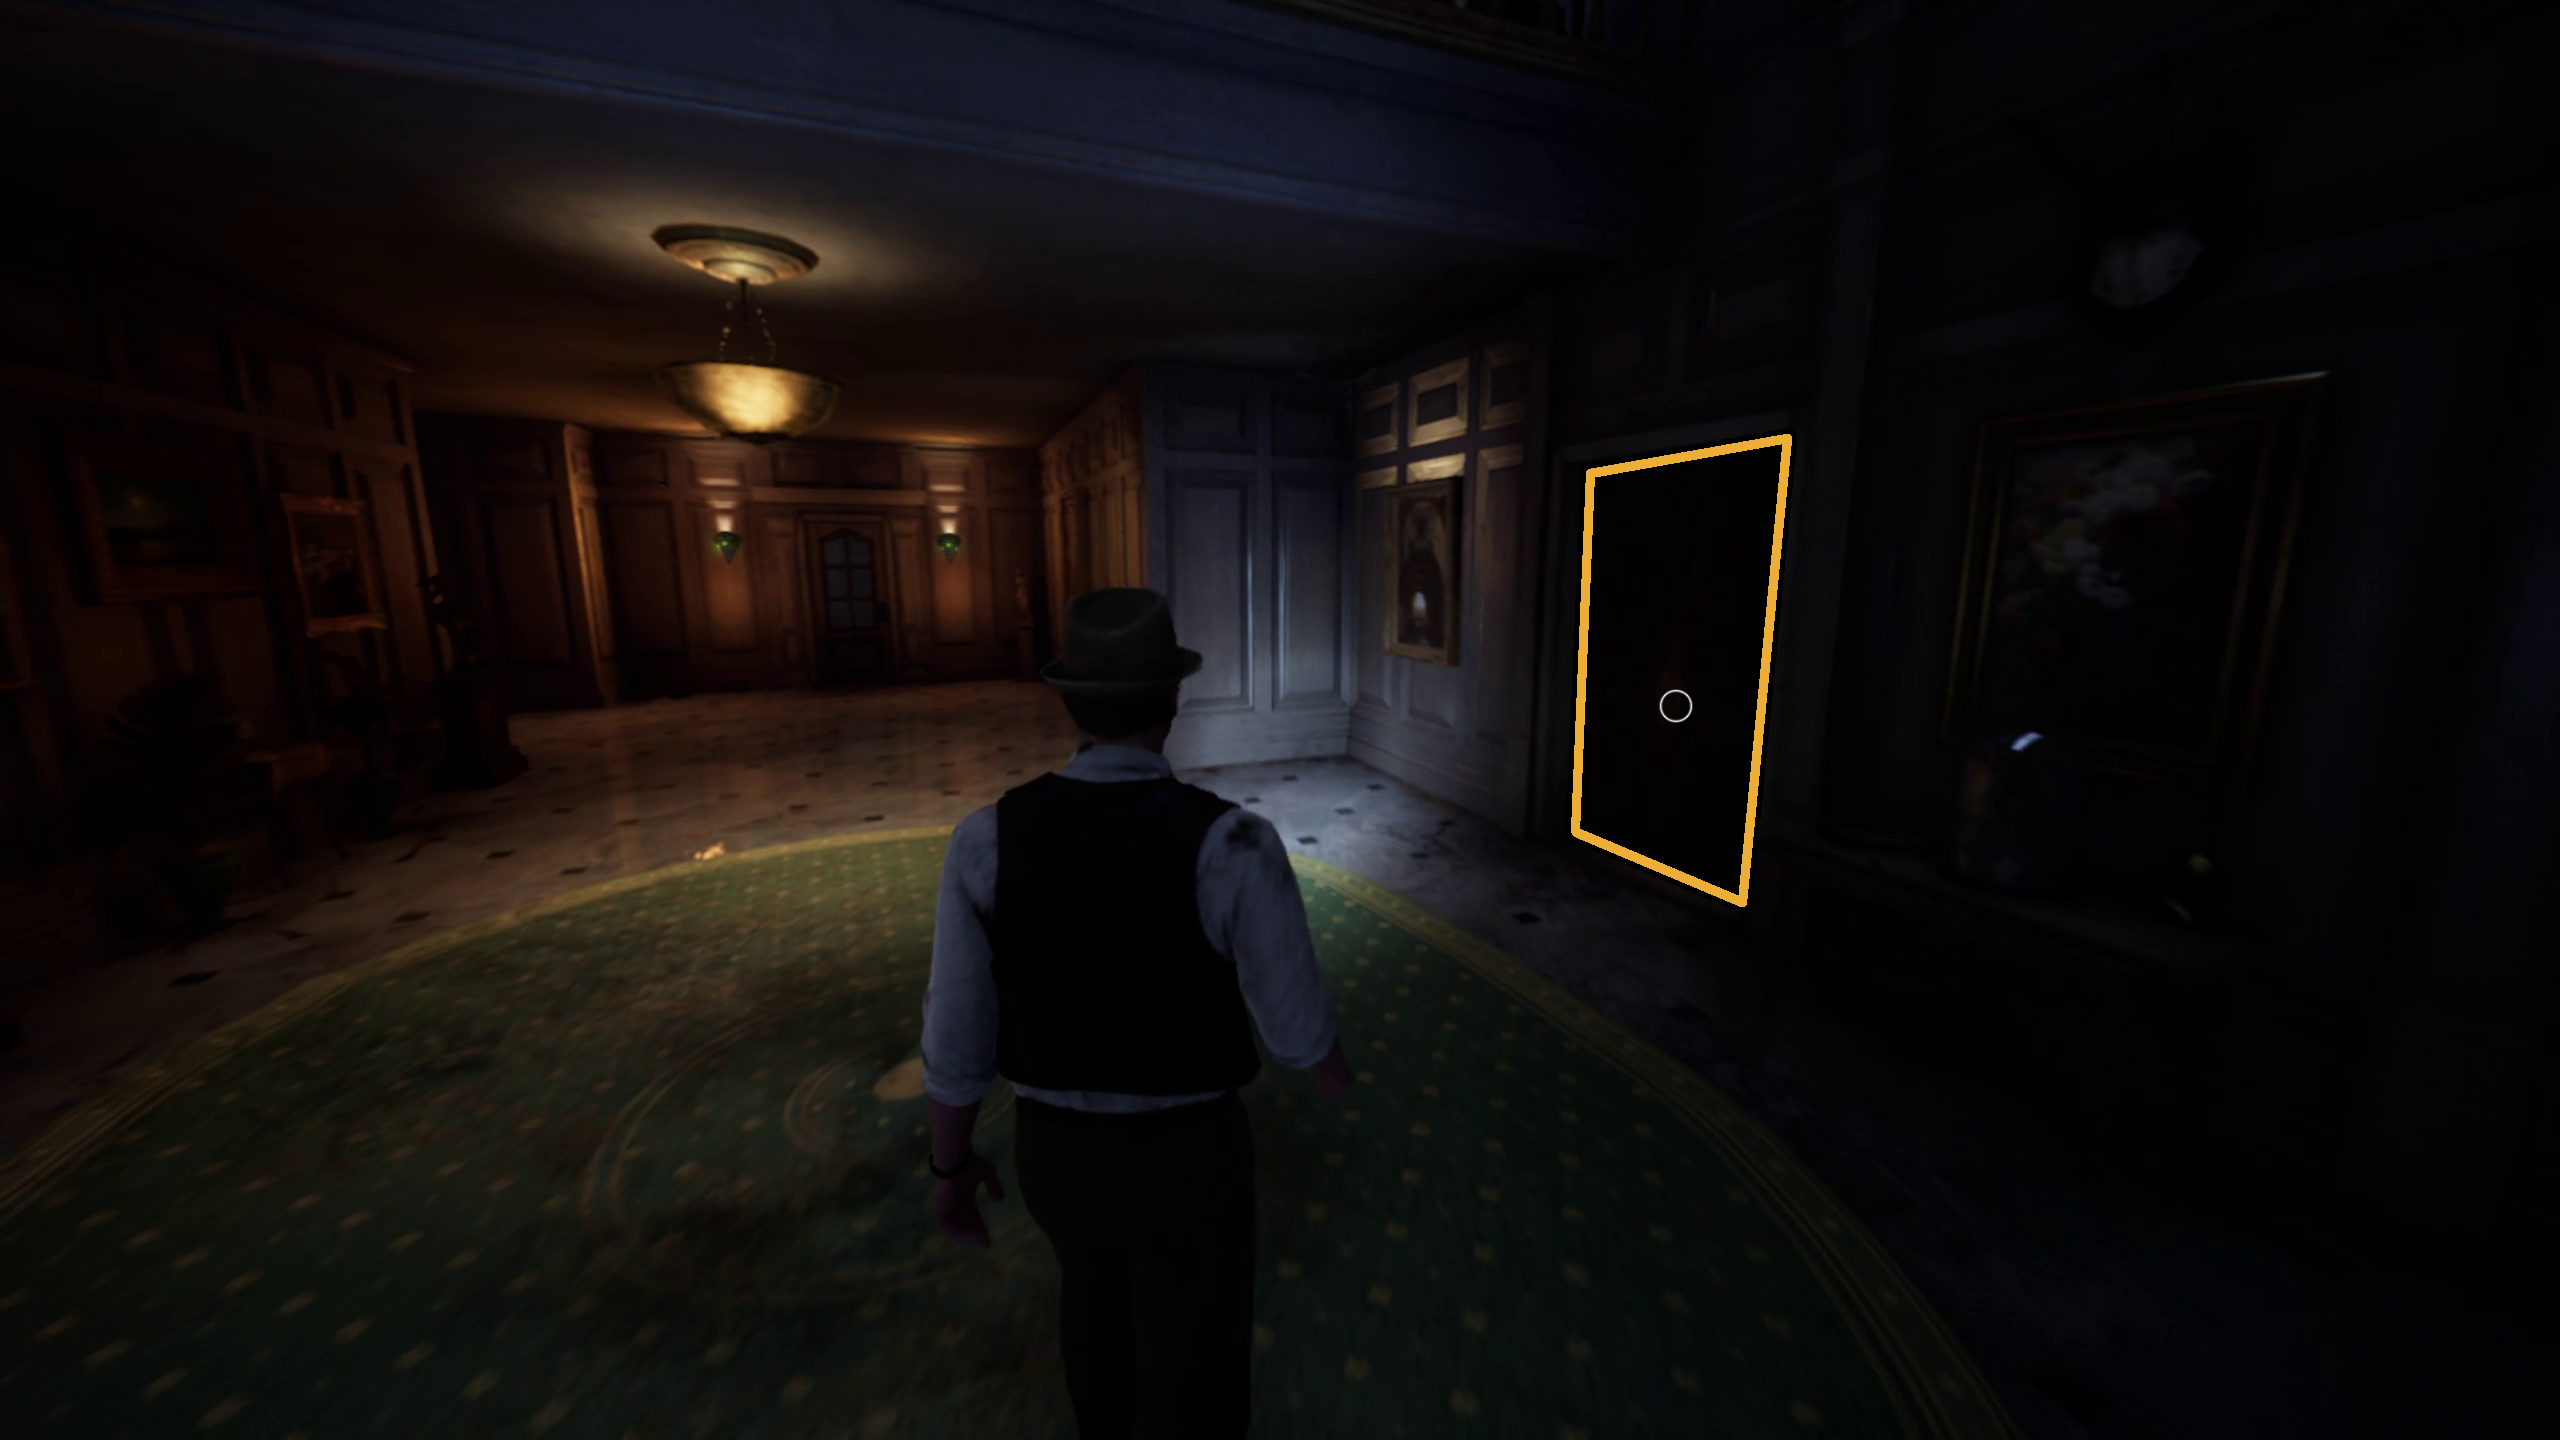
Go back down the stairs, and go through the door to the Library (Image 1). On the bookcase in the far right corner, you can find the Lunacy and the Astarte Artists’ Colony clue (Image 2).
Image 1Image 2
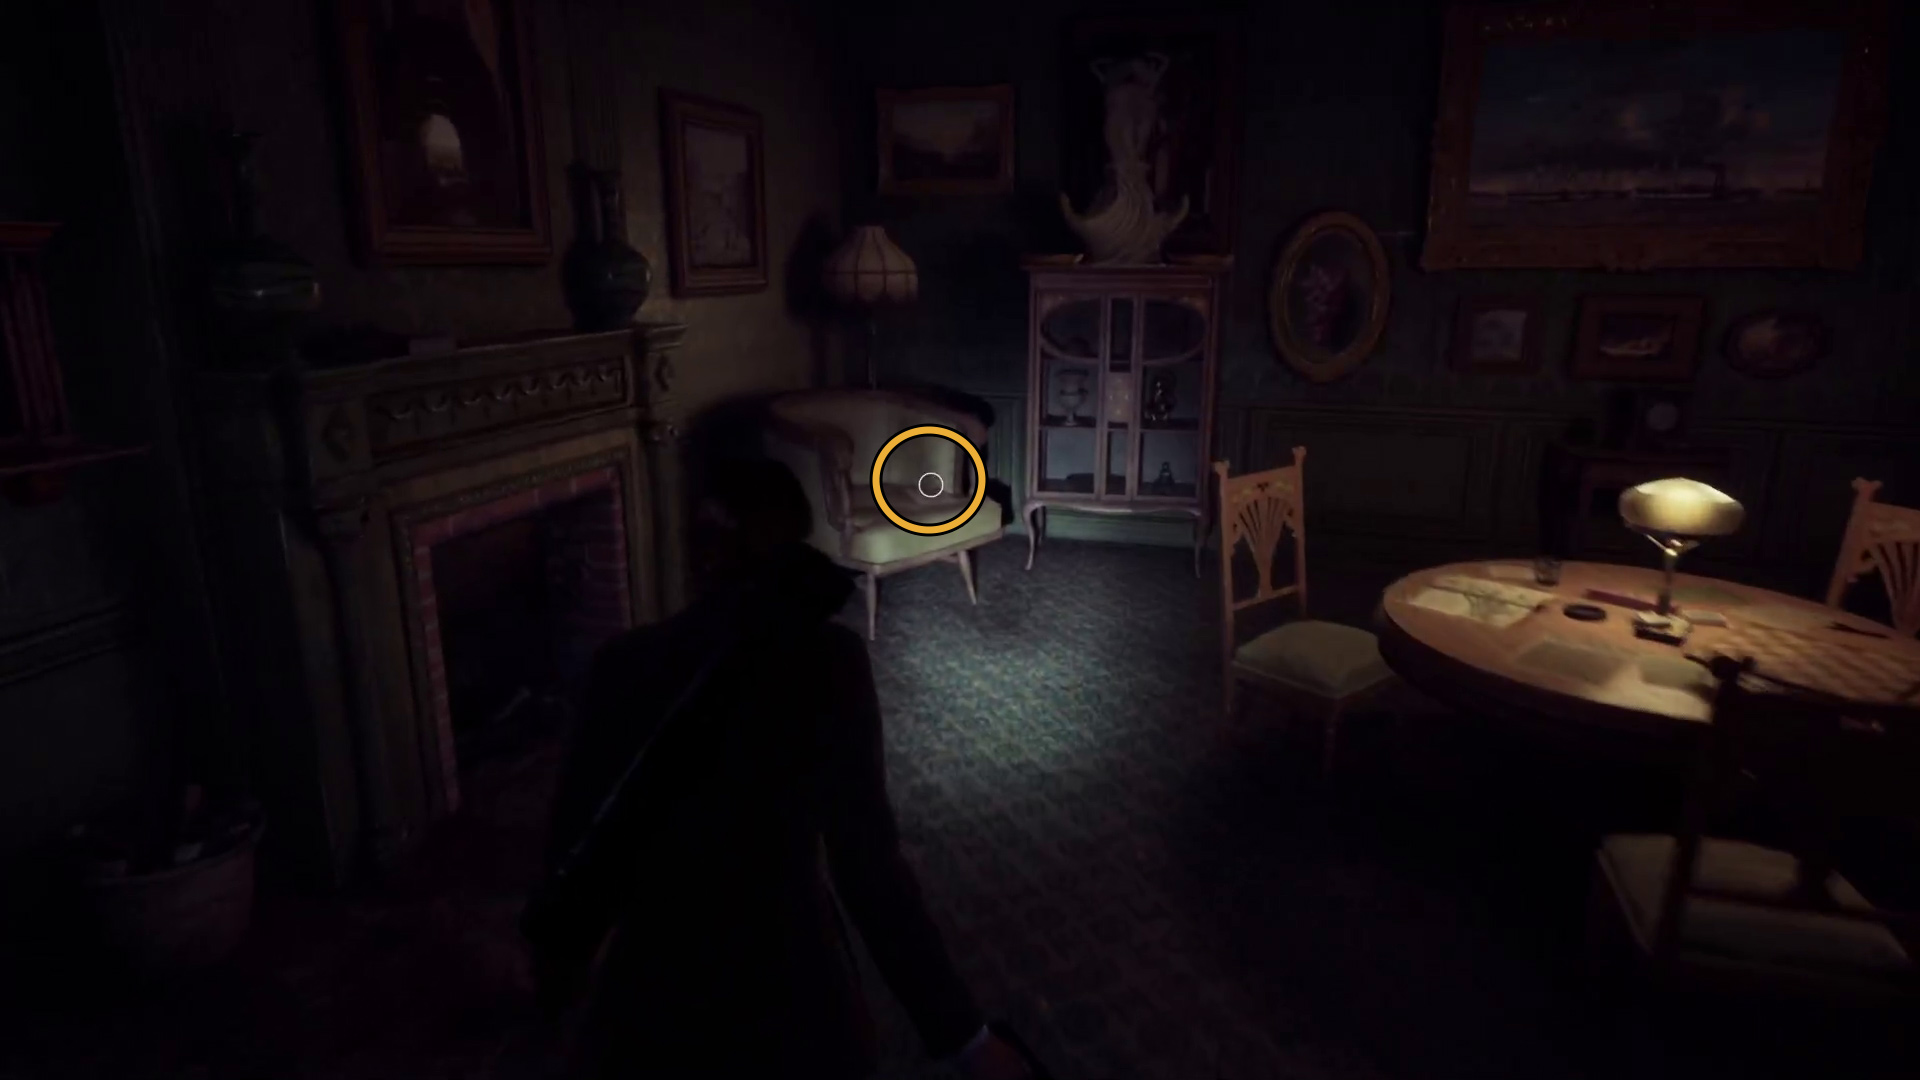
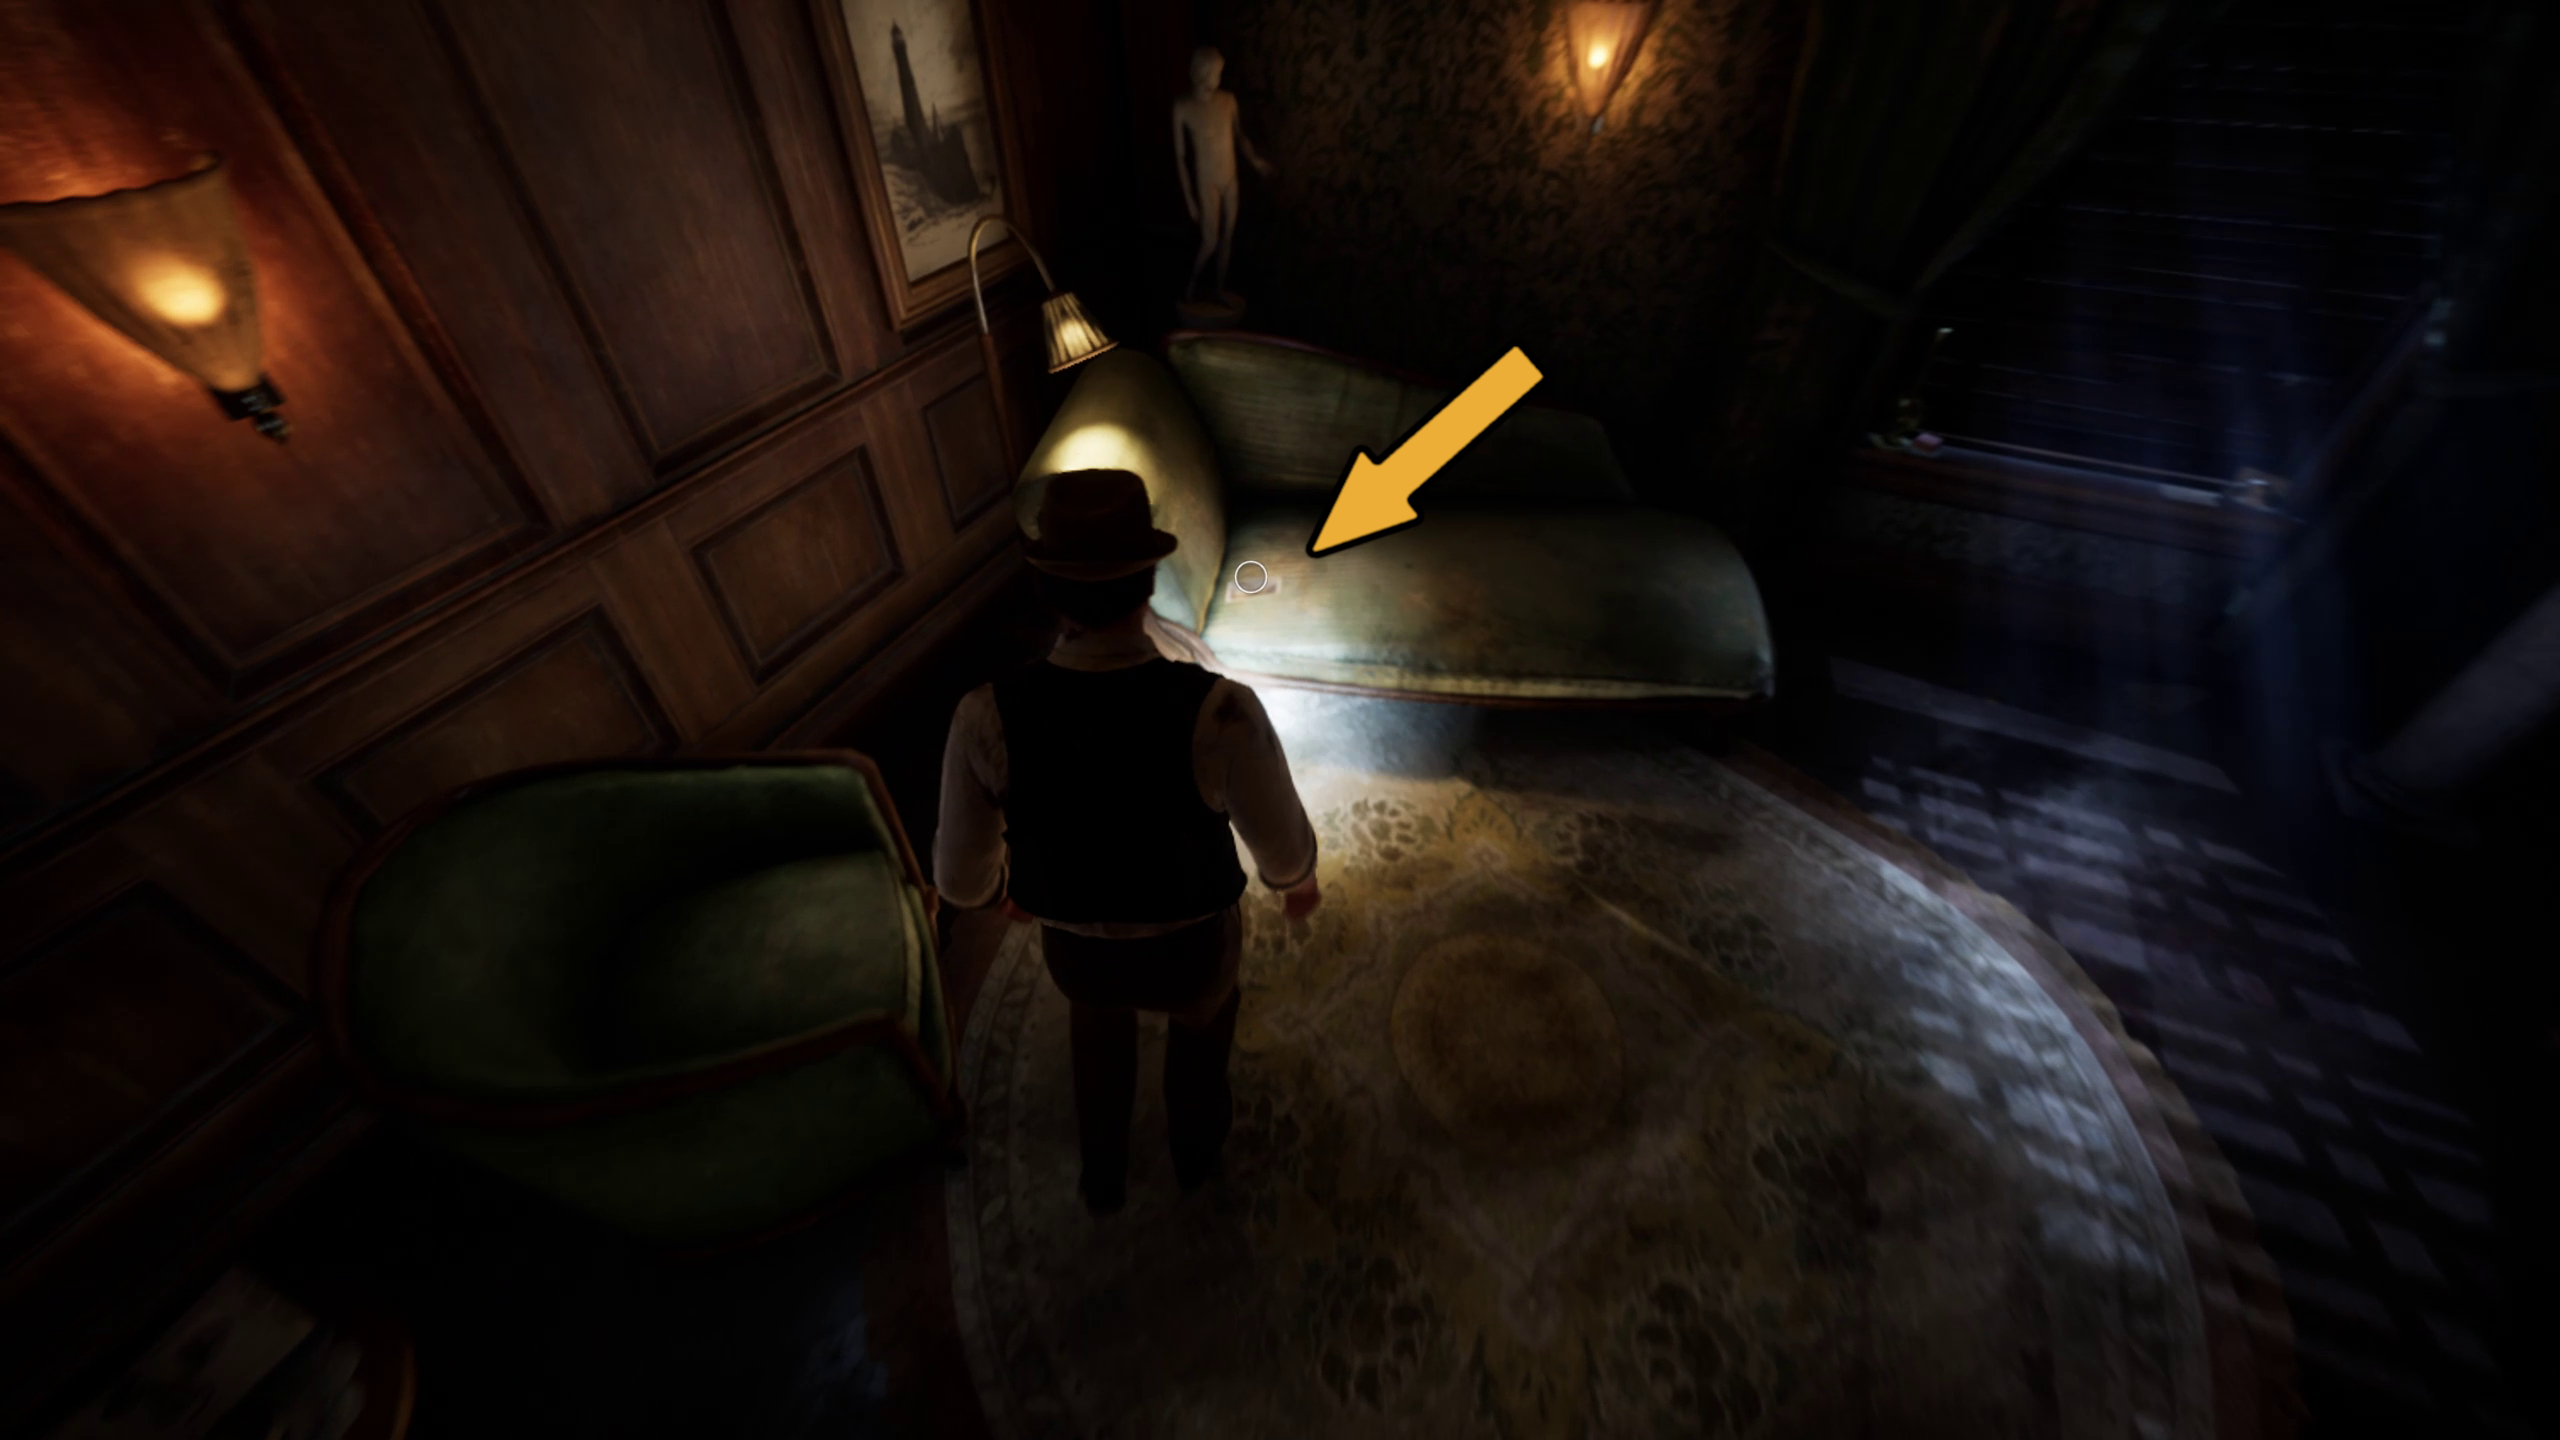
Turn around and go through the door to the Small Parlor. On the left, grab the Opera Playbill lagniappe from the chair (Image 3), then turn around and go through the doors that lead to the Conservatory (Image 4).
Image 3Image 4
Once in the Conservatory, go down the stairs and take a left, toward a stairwell going down, to find the Keep Our Secrets note (Image 5). Then, continue out to the Kitchen Garden (Image 6).
Image 5Image 6
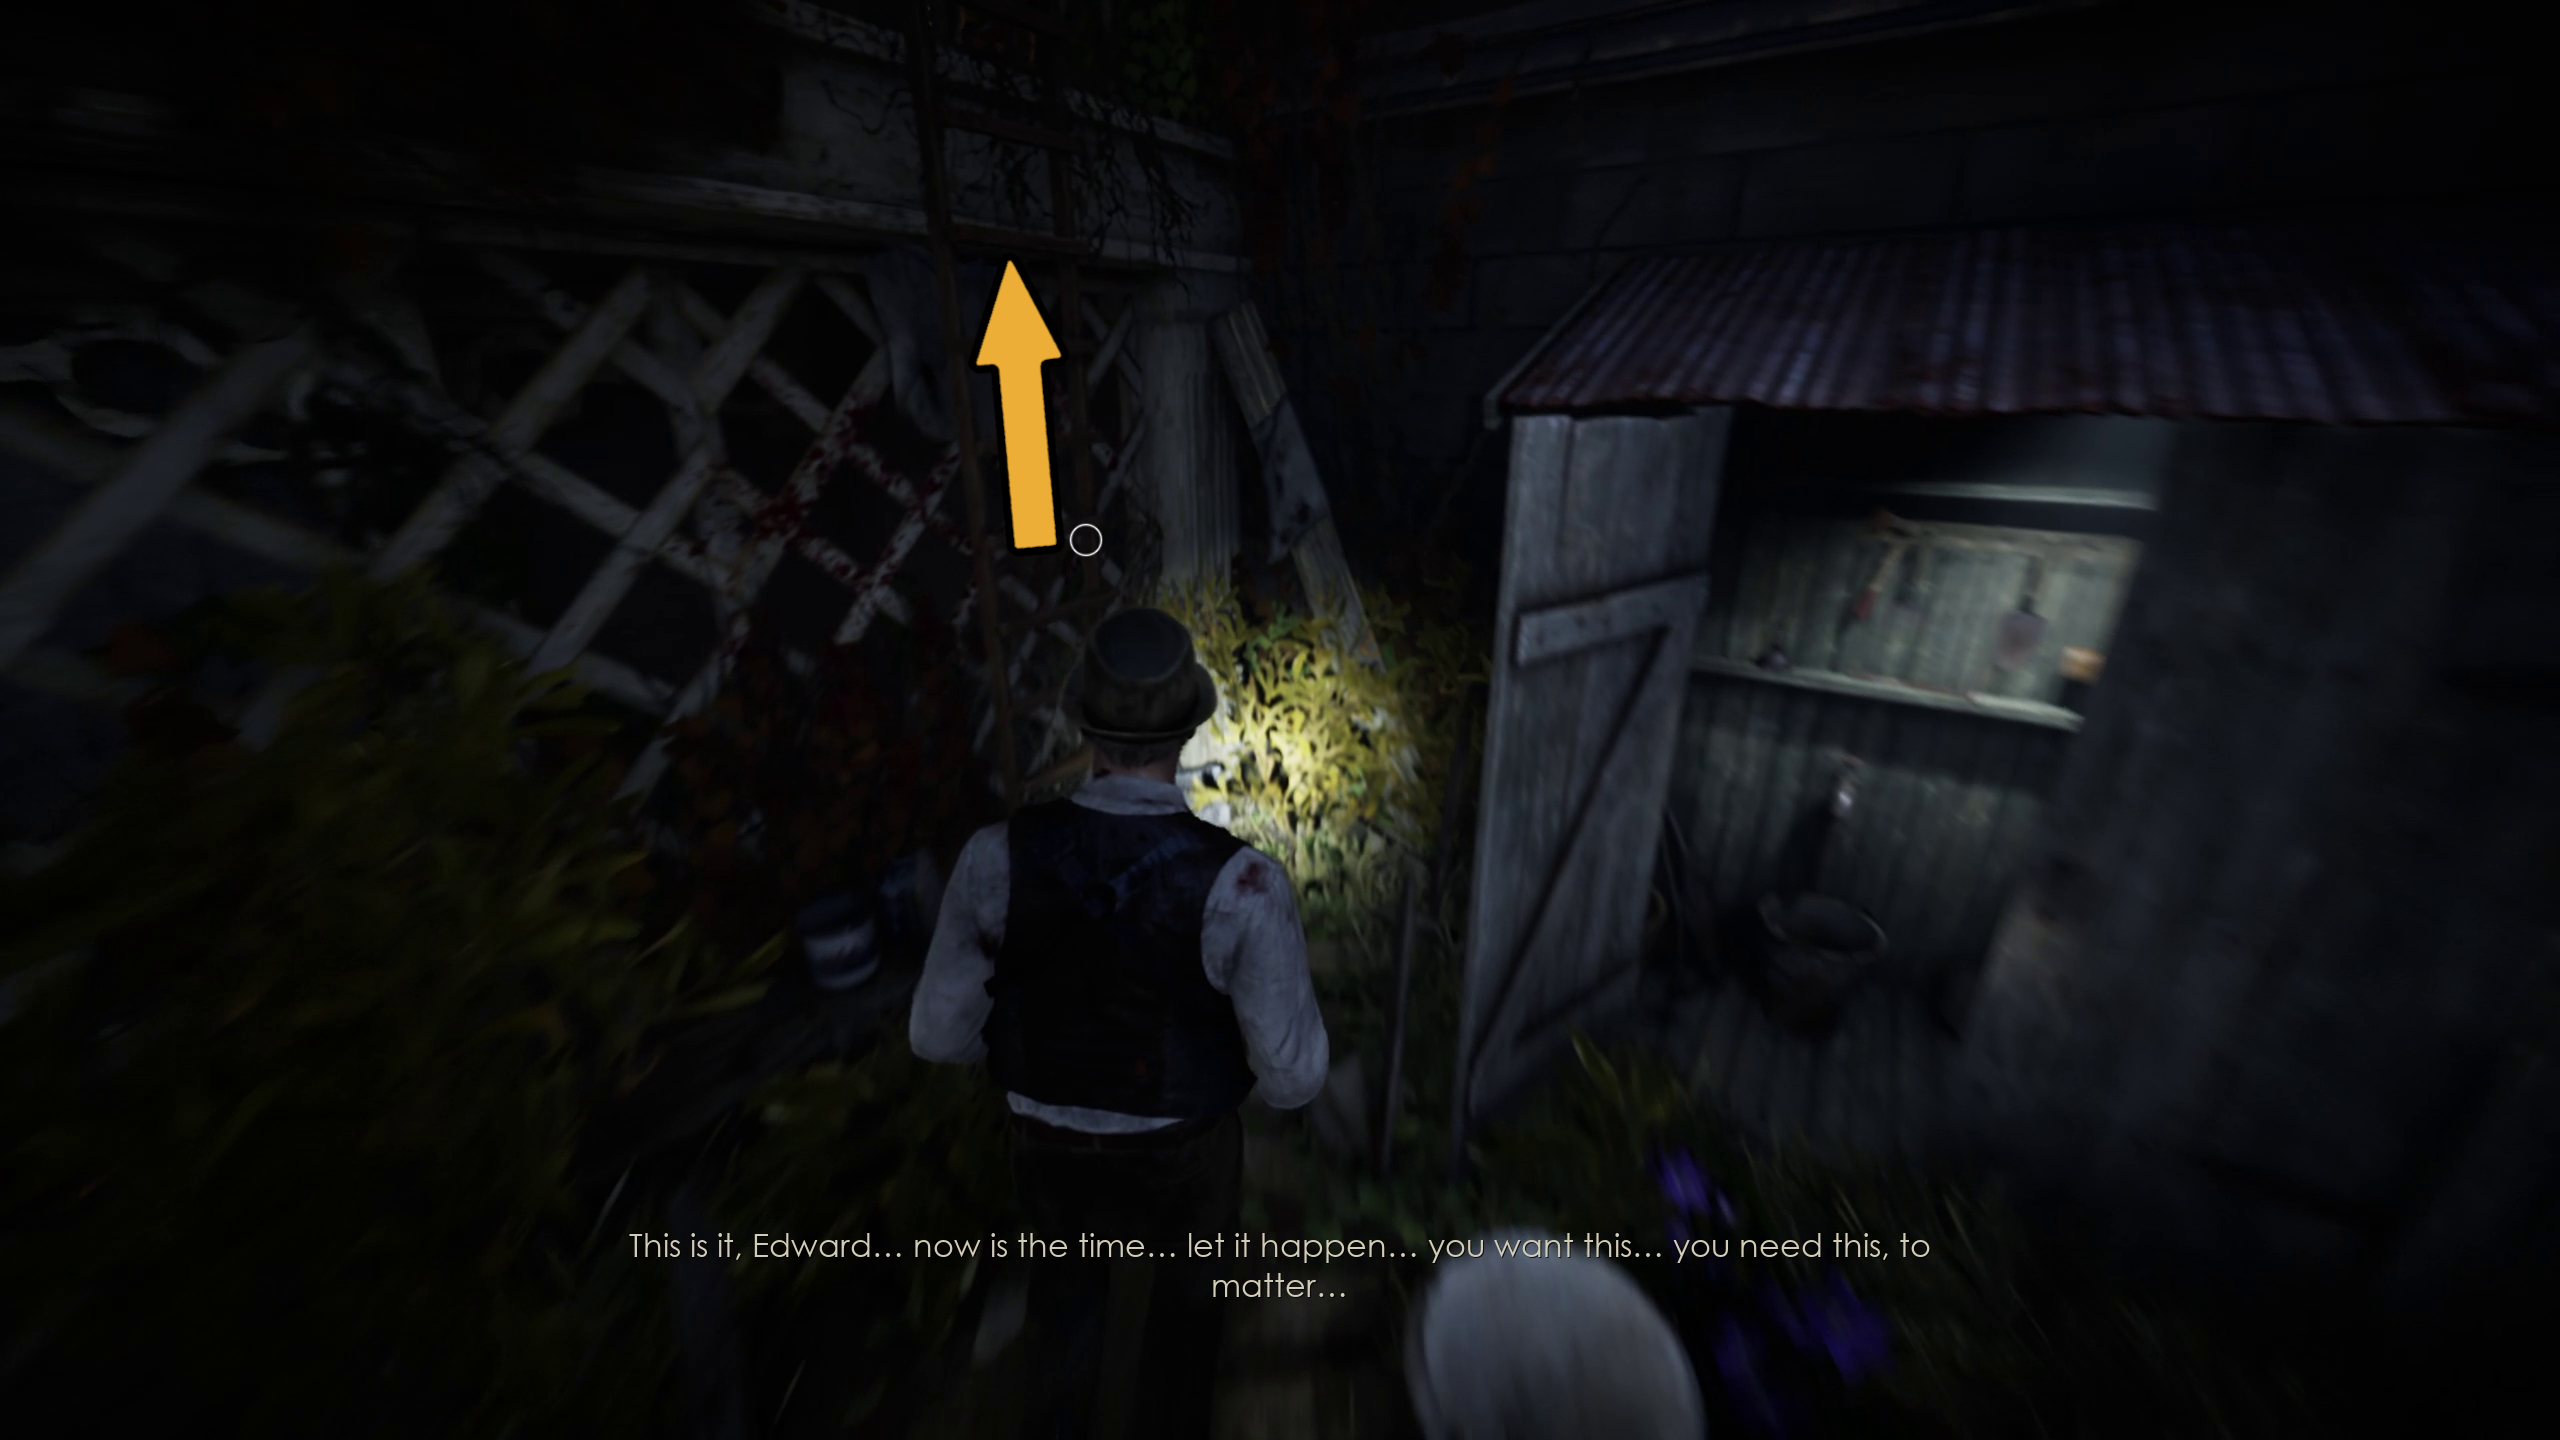
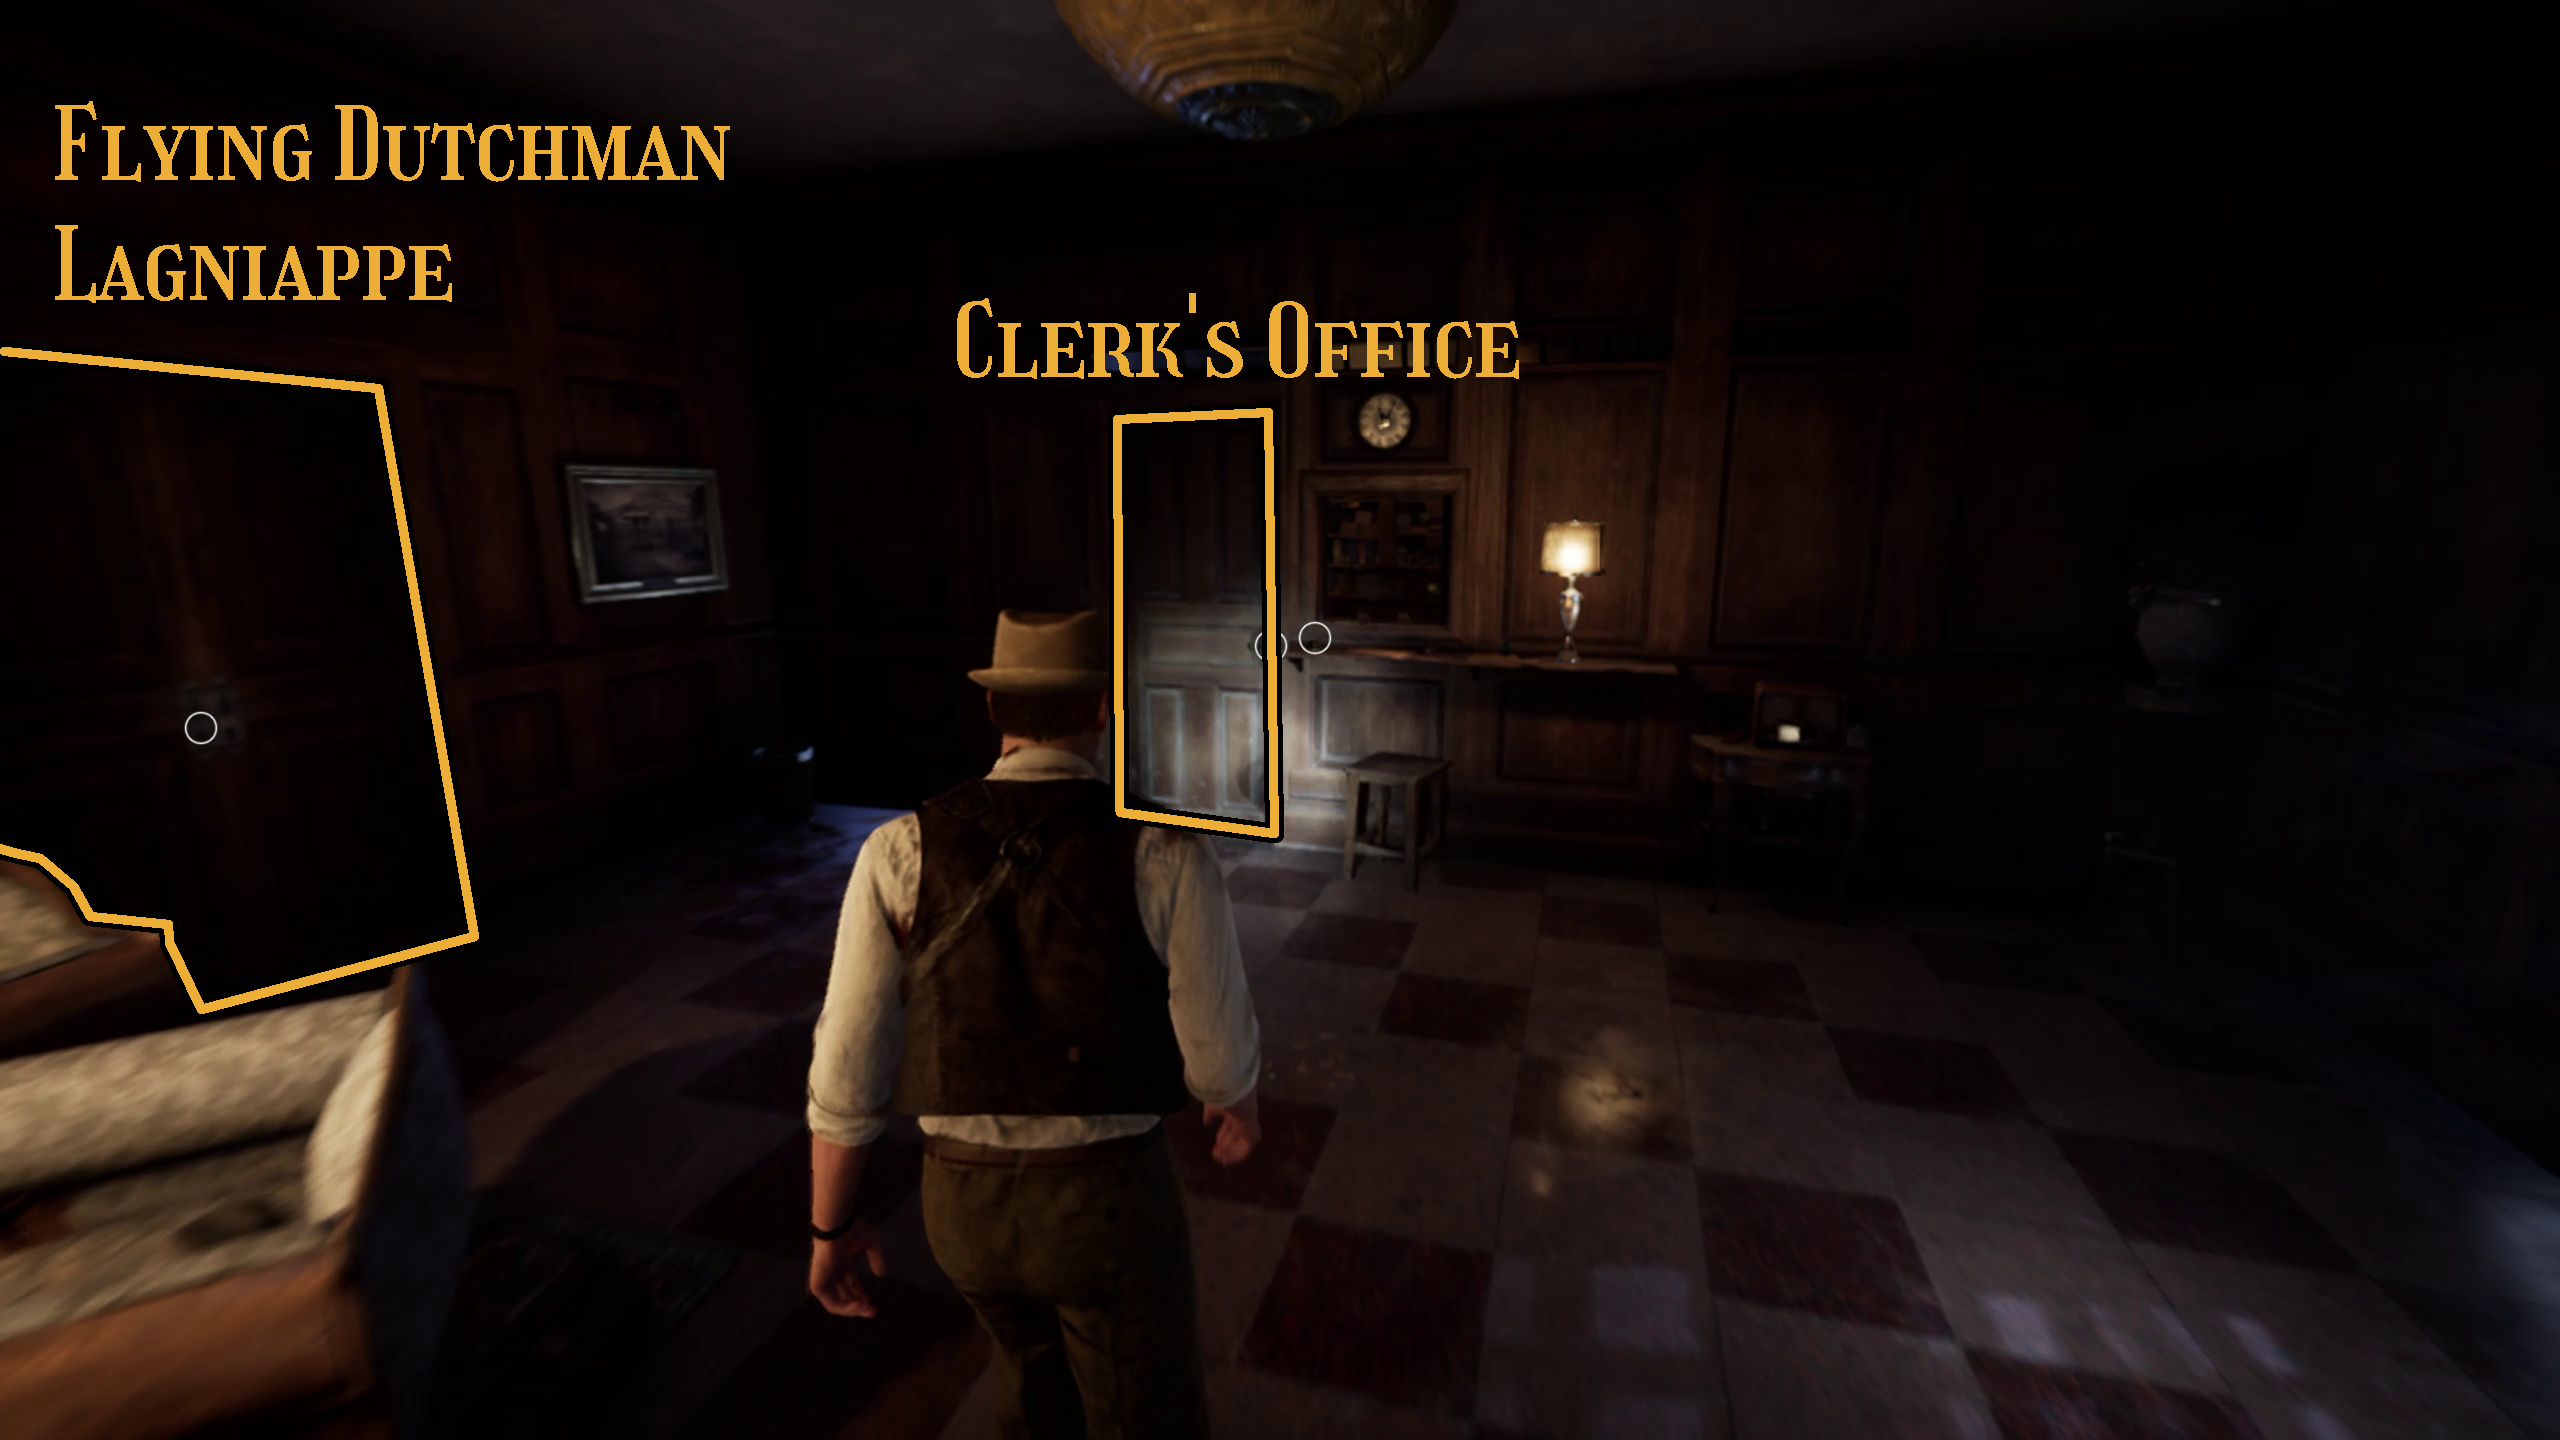
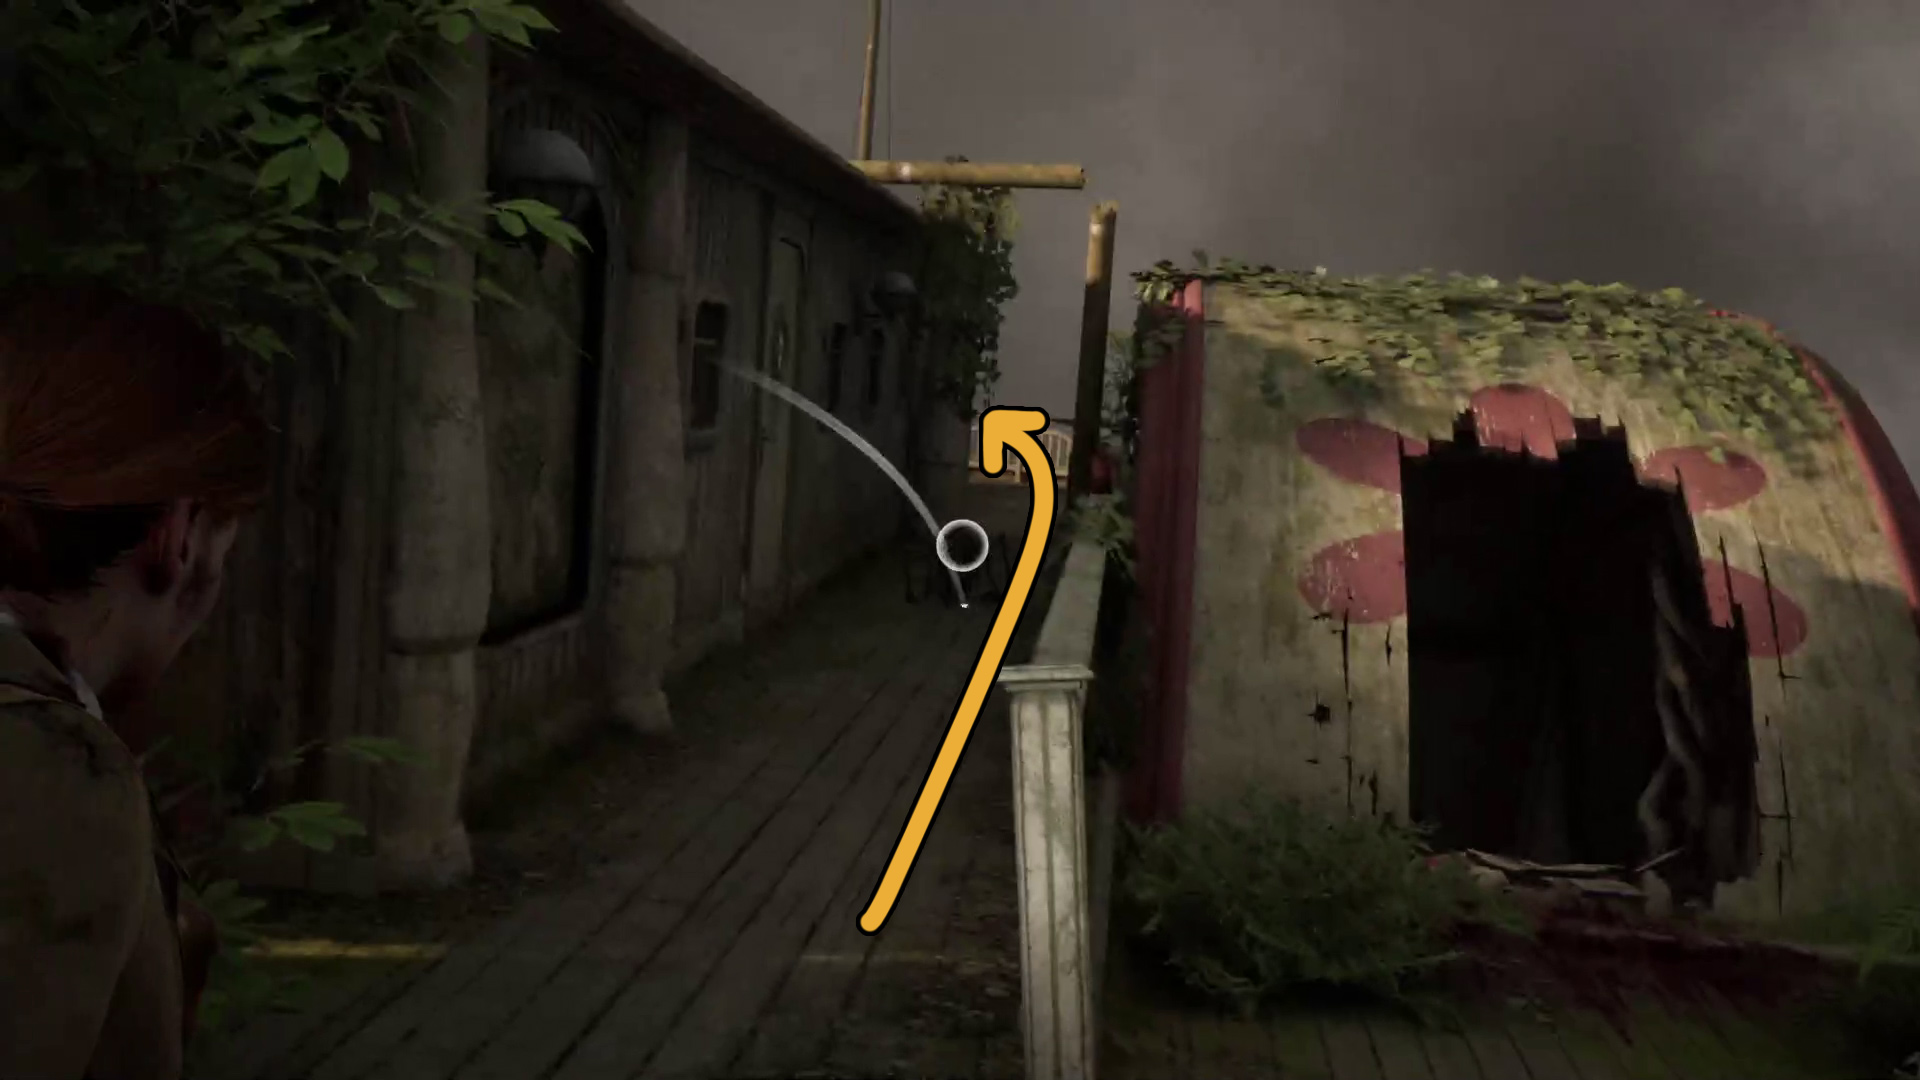
In the Garden, go up the ladder (Image 7), and then through the door at the end of the Piazza (Image 8). Then, the Clerk’s Office, which leads to Dr. Grey’s, will be on your left. Before heading inside, you will need to take a trip upstairs first (see below).
Image 7Image 8
In order to get into the safe in the Clerk’s Office, you will need to head upstairs in order to find the combination. When you go upstairs, head for the Sitting Room (Image 1). When you get there, a cutscene will play featuring MacCafferty and Grace (Image 2). After it, make sure to grab the key that MacCafferty dropped on the ground (Image 3).
Image 1Image 2Image 3
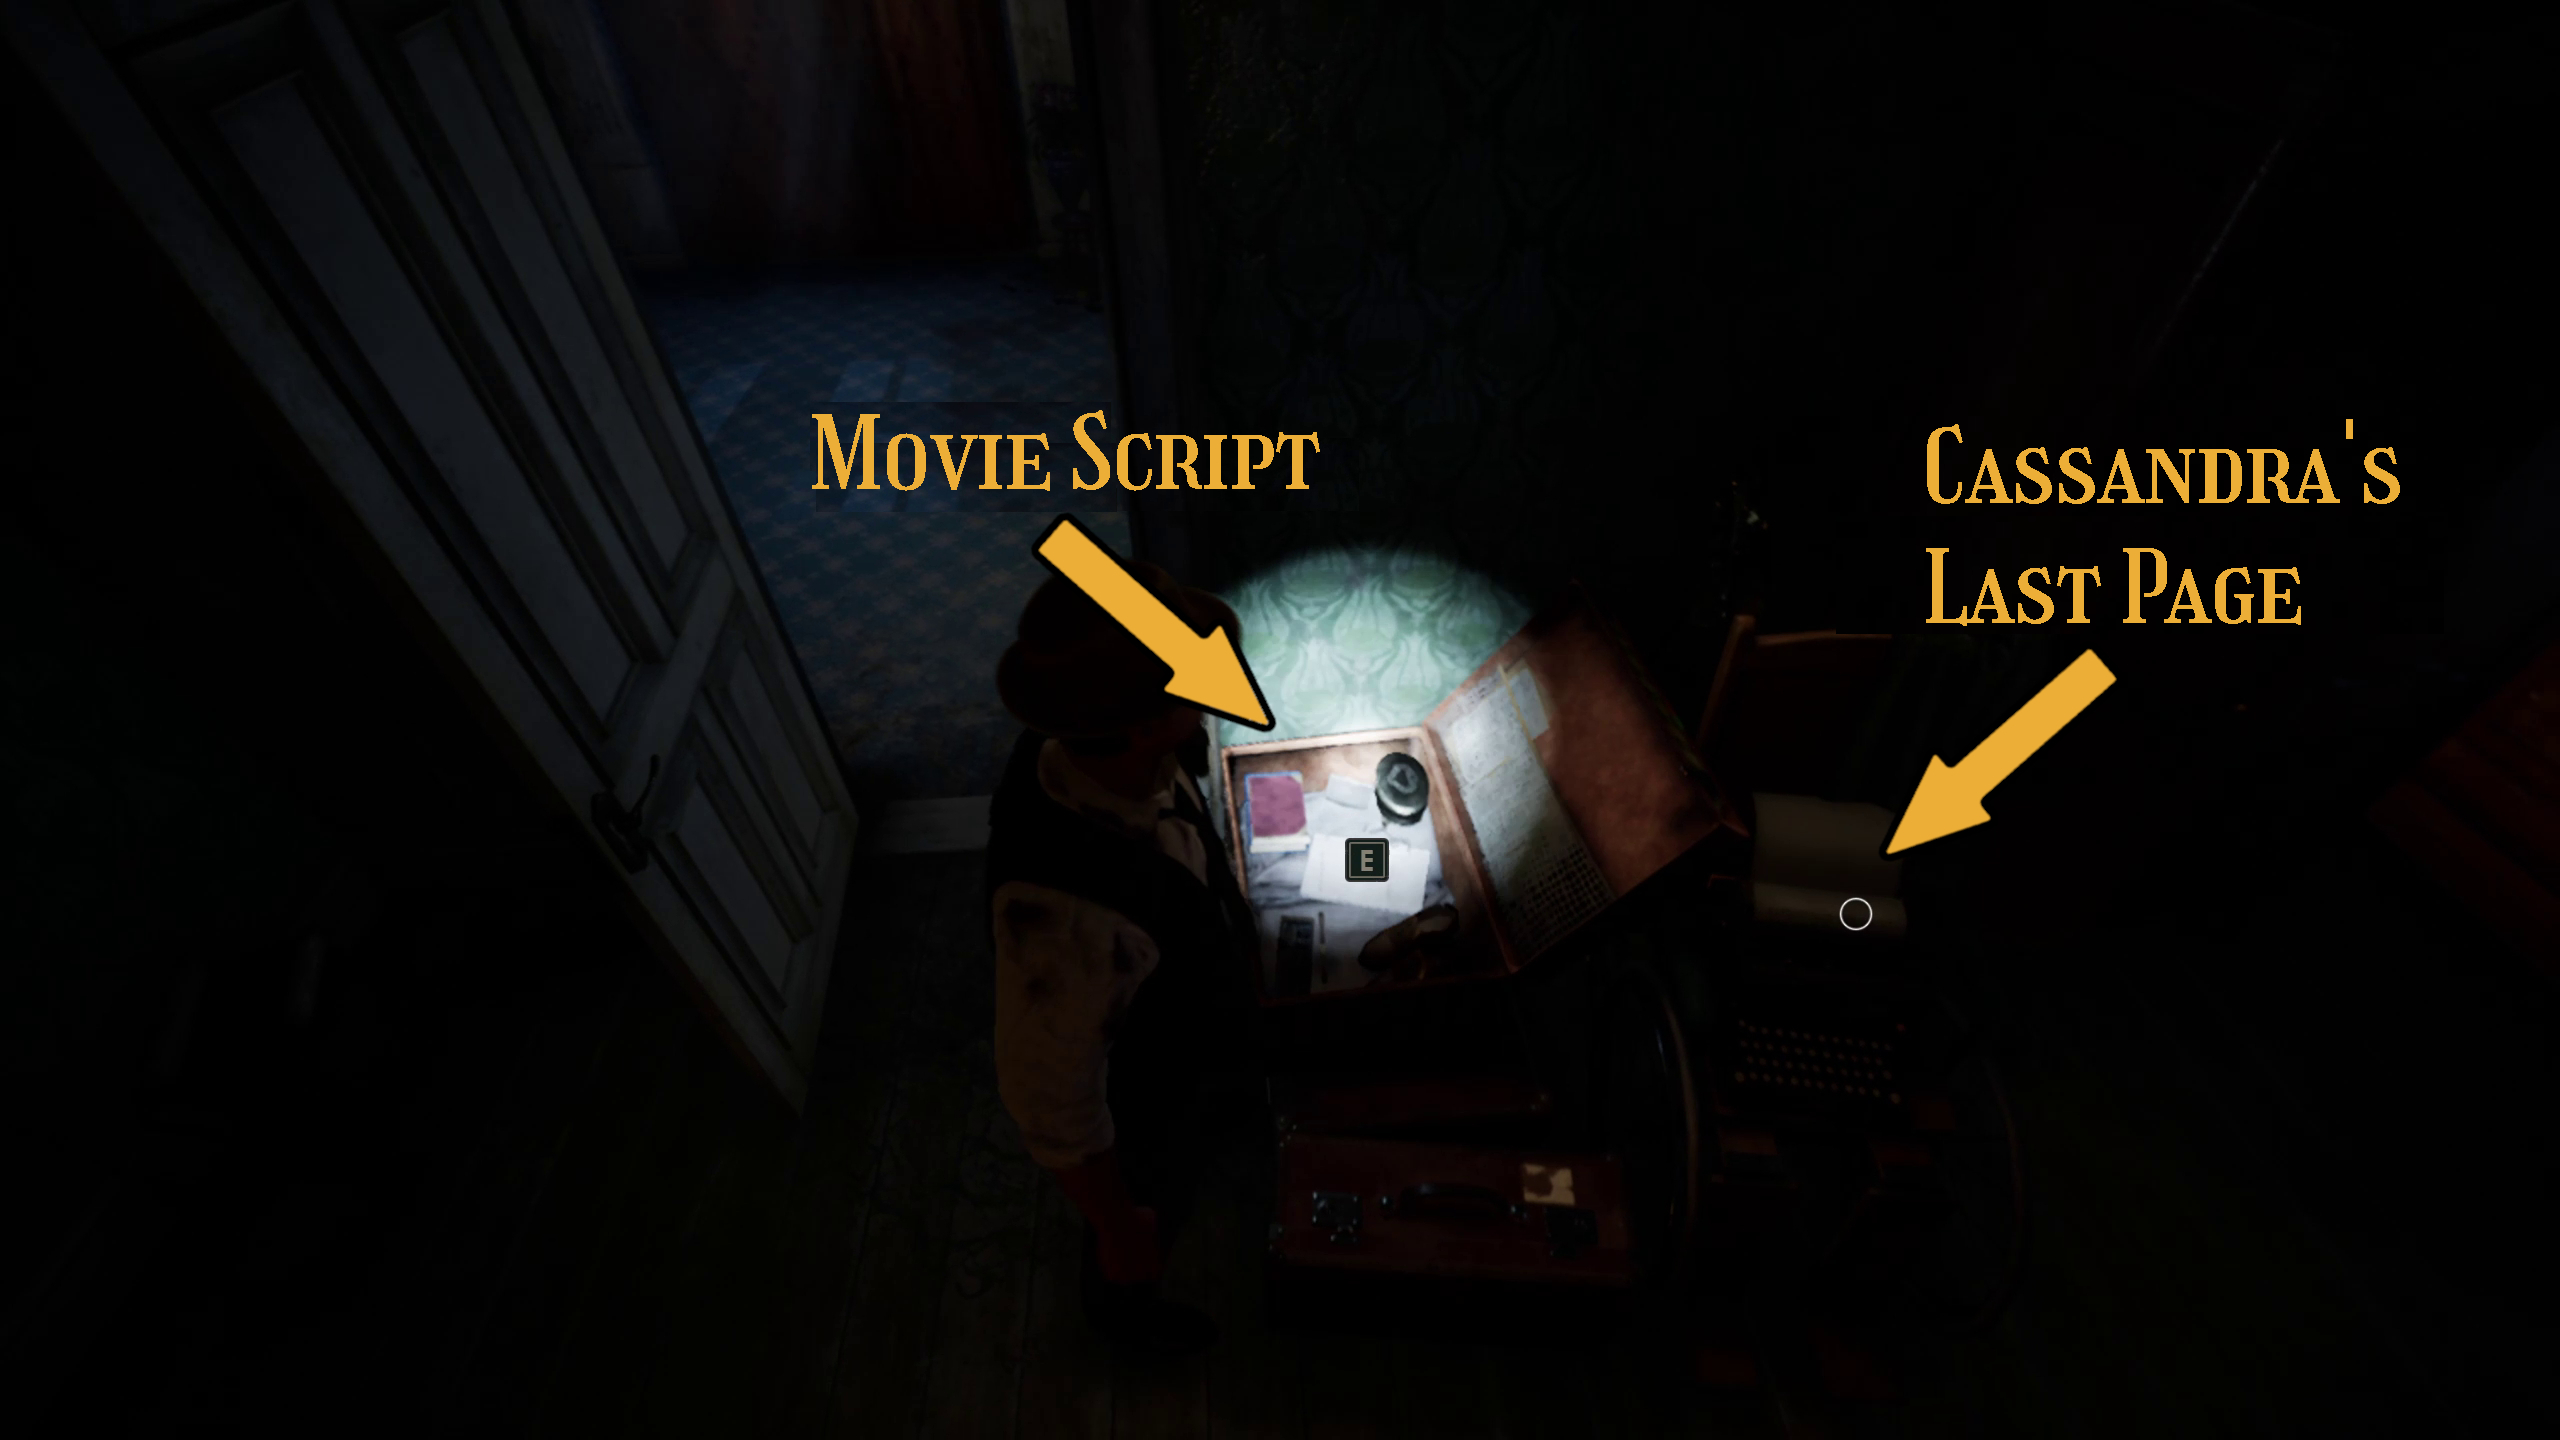
After you’ve picked up the key, you can head into Cassandra Beauregard’s room (the second door on the right) (Image 4). Turn to the left in order to grab the Cassandra’s Last Page note (which contains the combination to the safe in the Clerk’s Office) and the Movie Script Lagniappe (Image 5).
Image 4Image 5
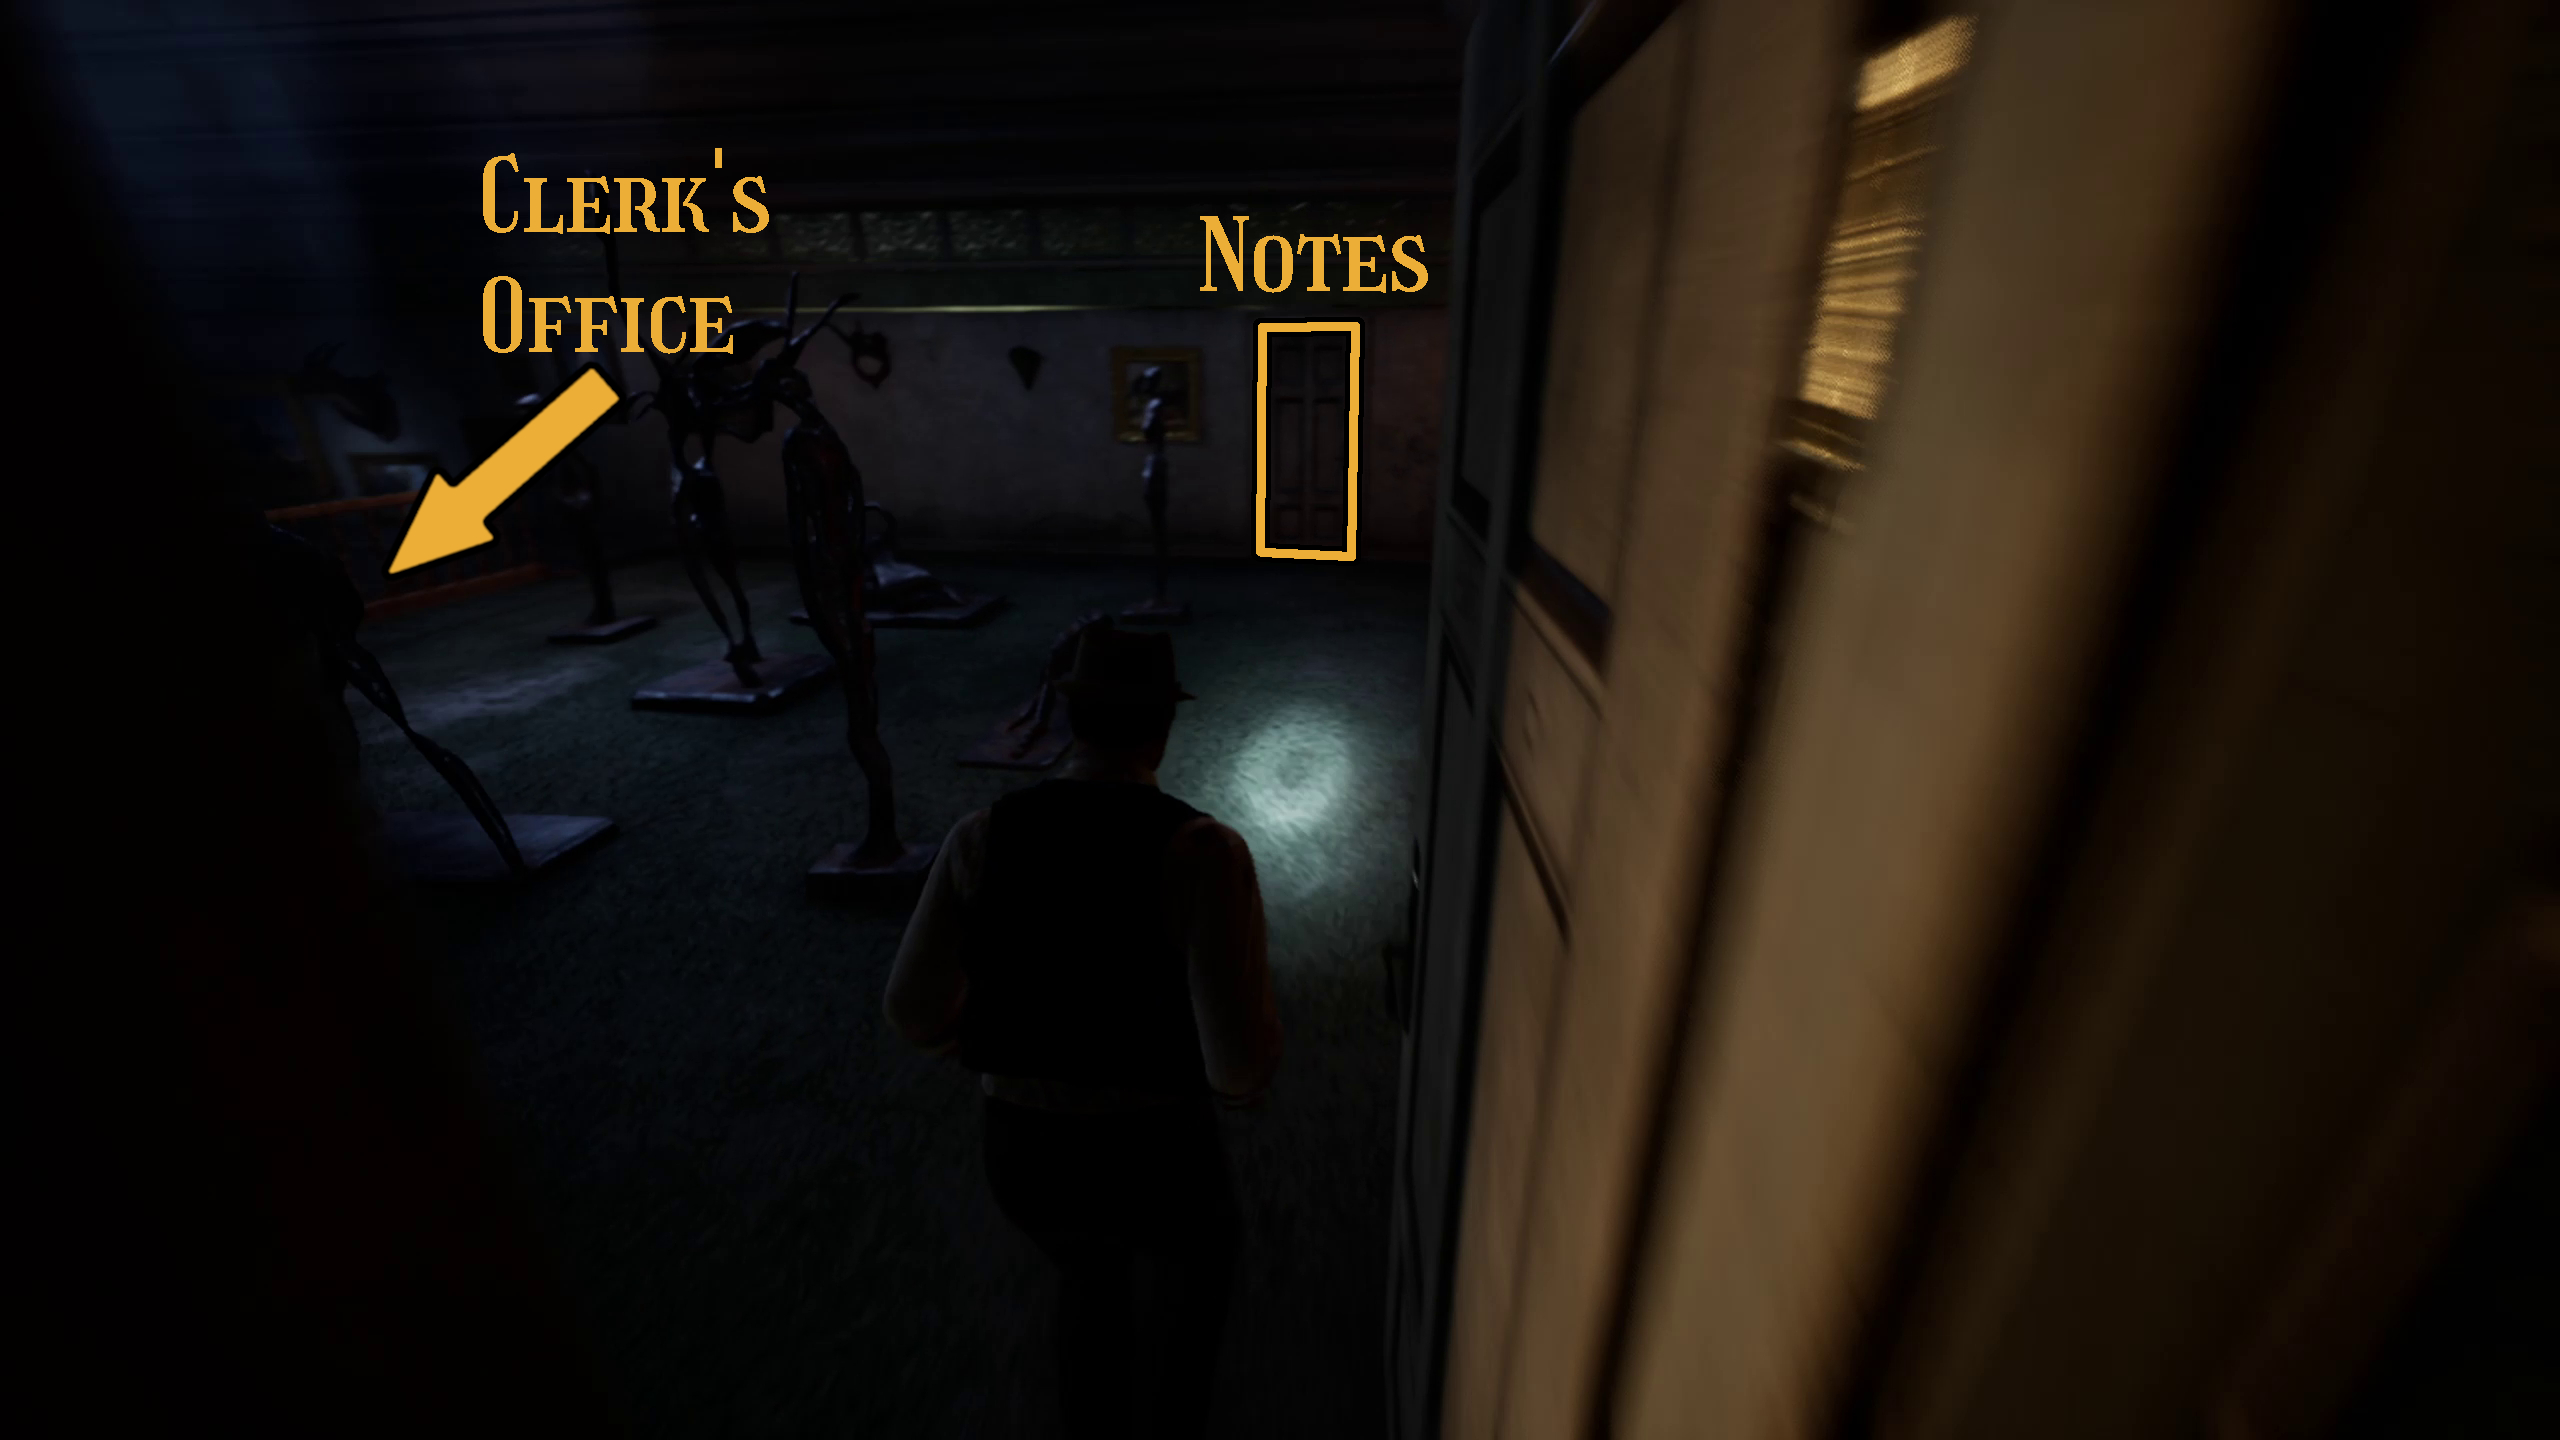
Once you’ve grabbed those, if you want to collect some clues in the form of notes (Trust Me and To Detective Carnby), you should go down the 2nd Floor Hallway (Image 6). Otherwise, you can go downstairs in order to return to the Clerk’s Office, now that you have the combination.
Image 6
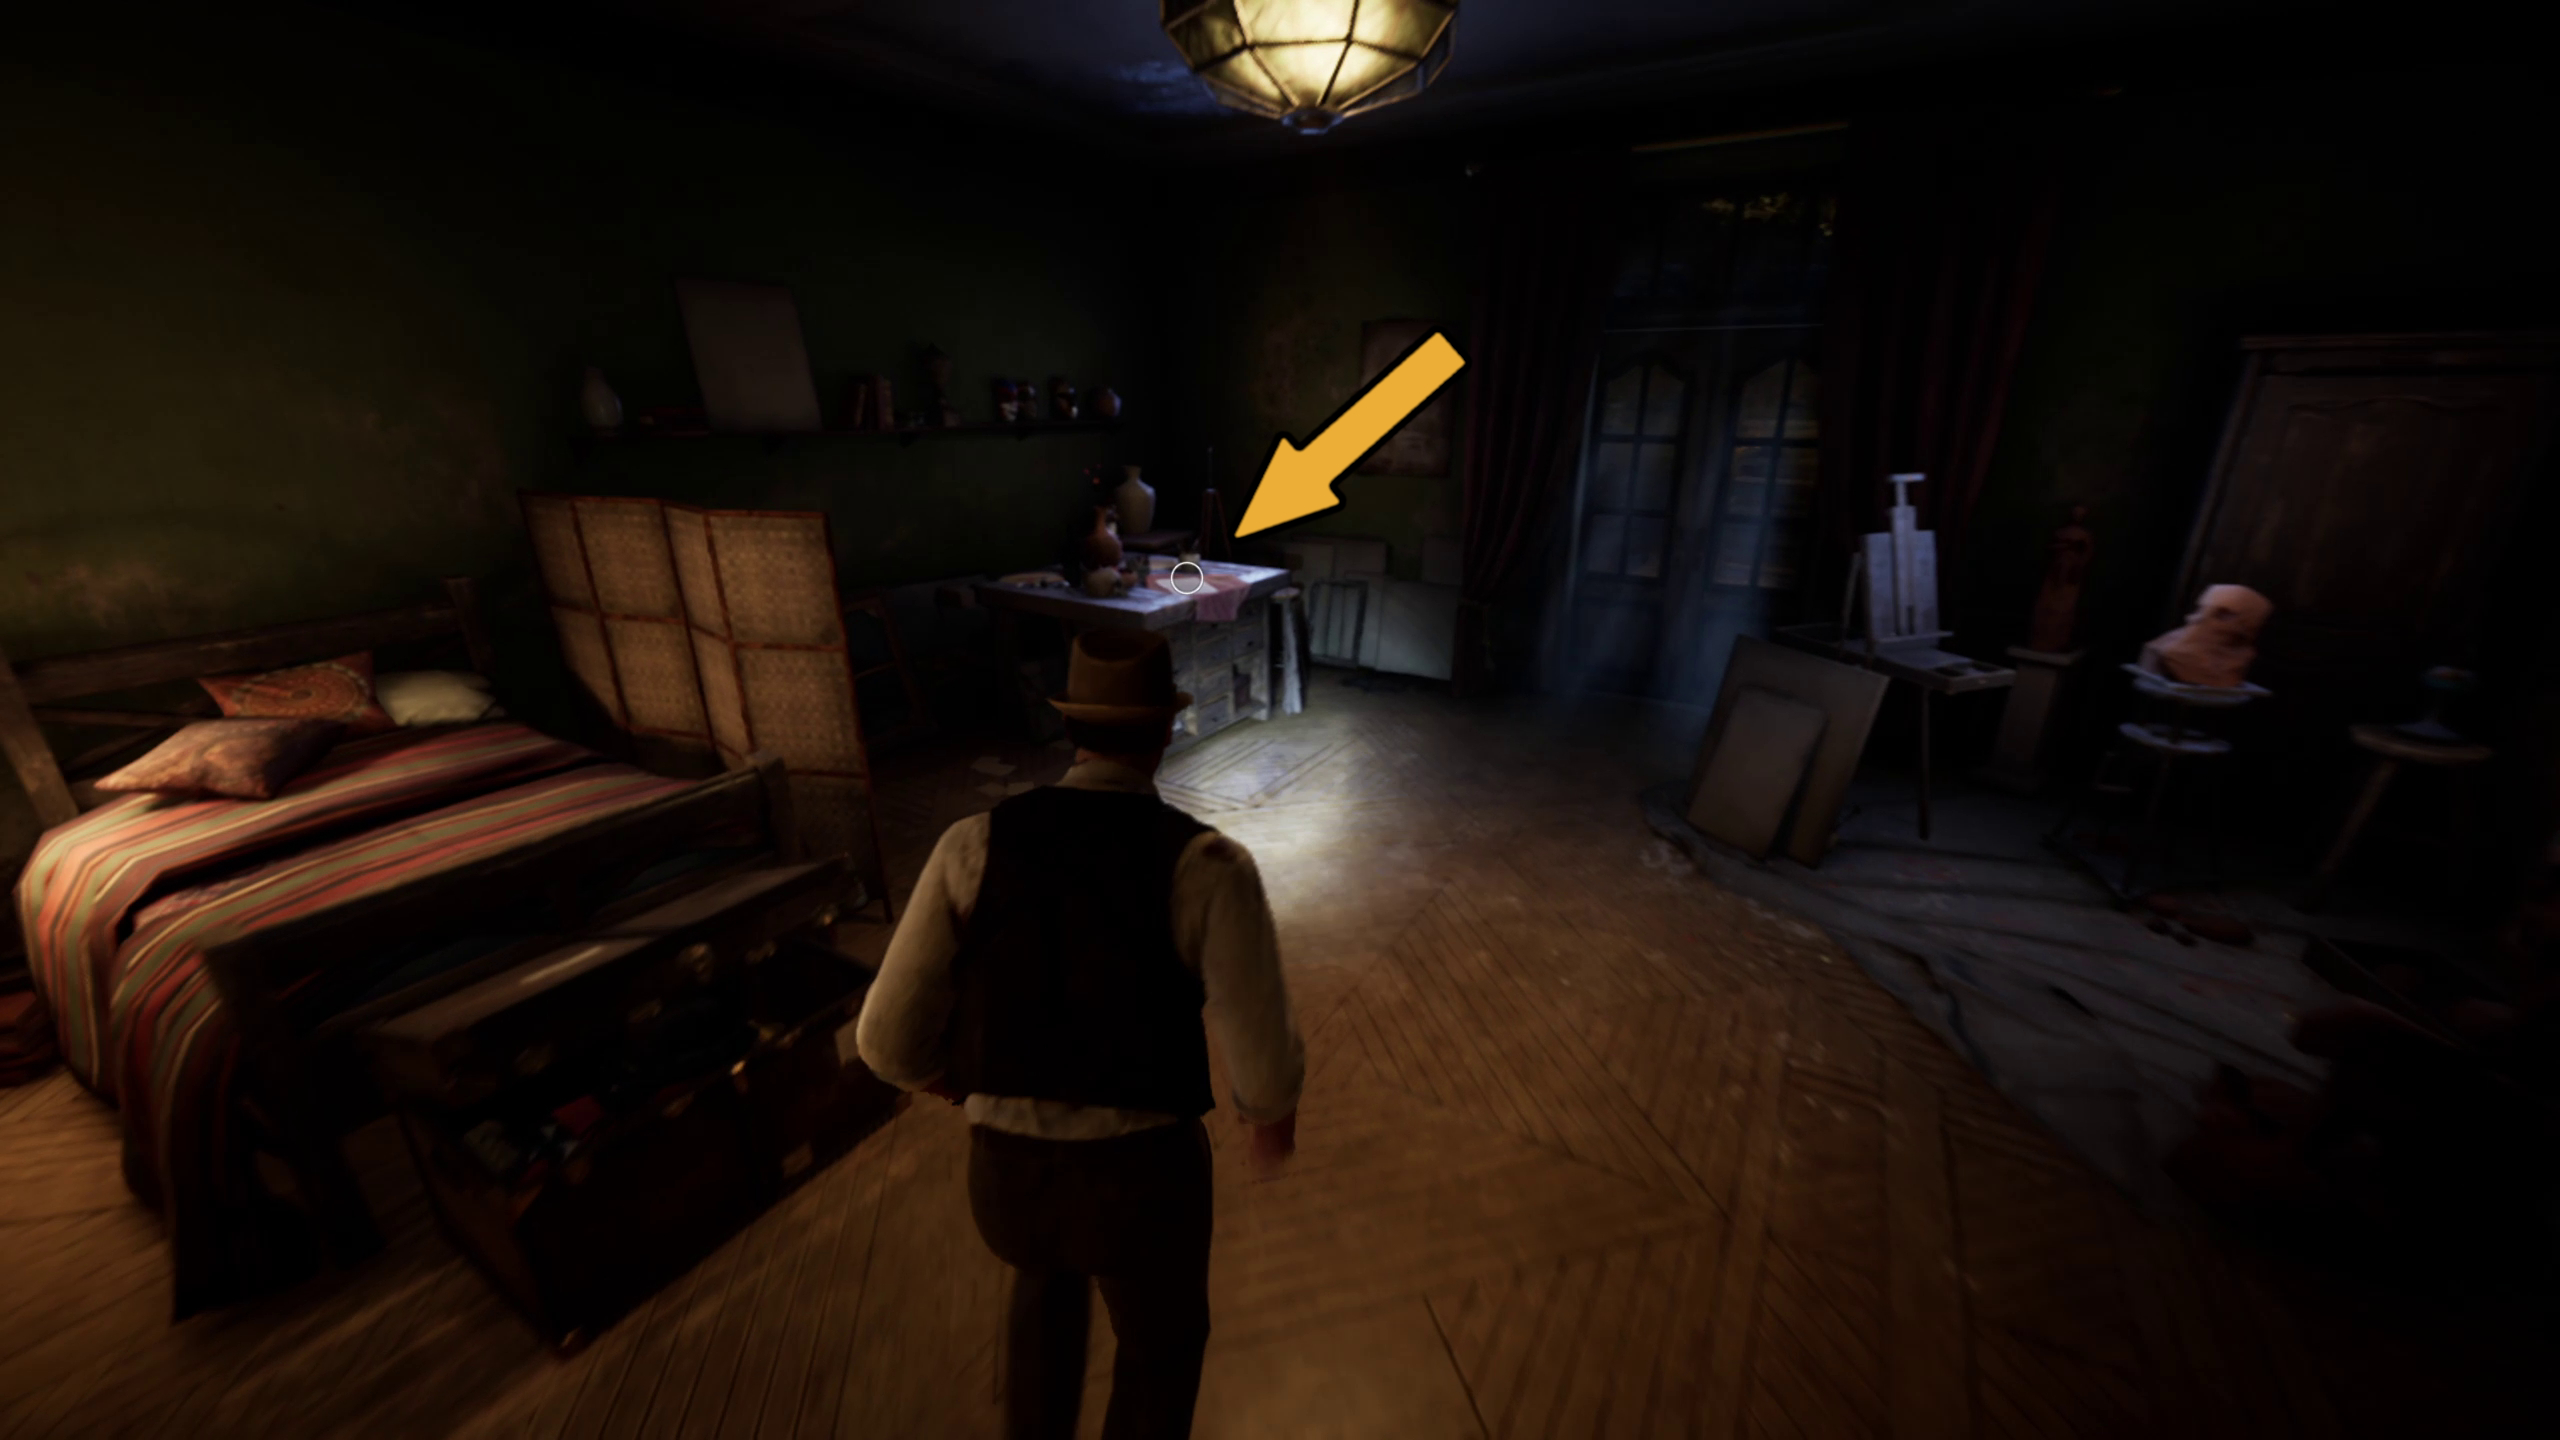
If you would like to collect the notes in the hallway, you just need to visit Jeremy’s Room for “To Detective Carnby” (Images 1 and 2).
Image 1Image 2
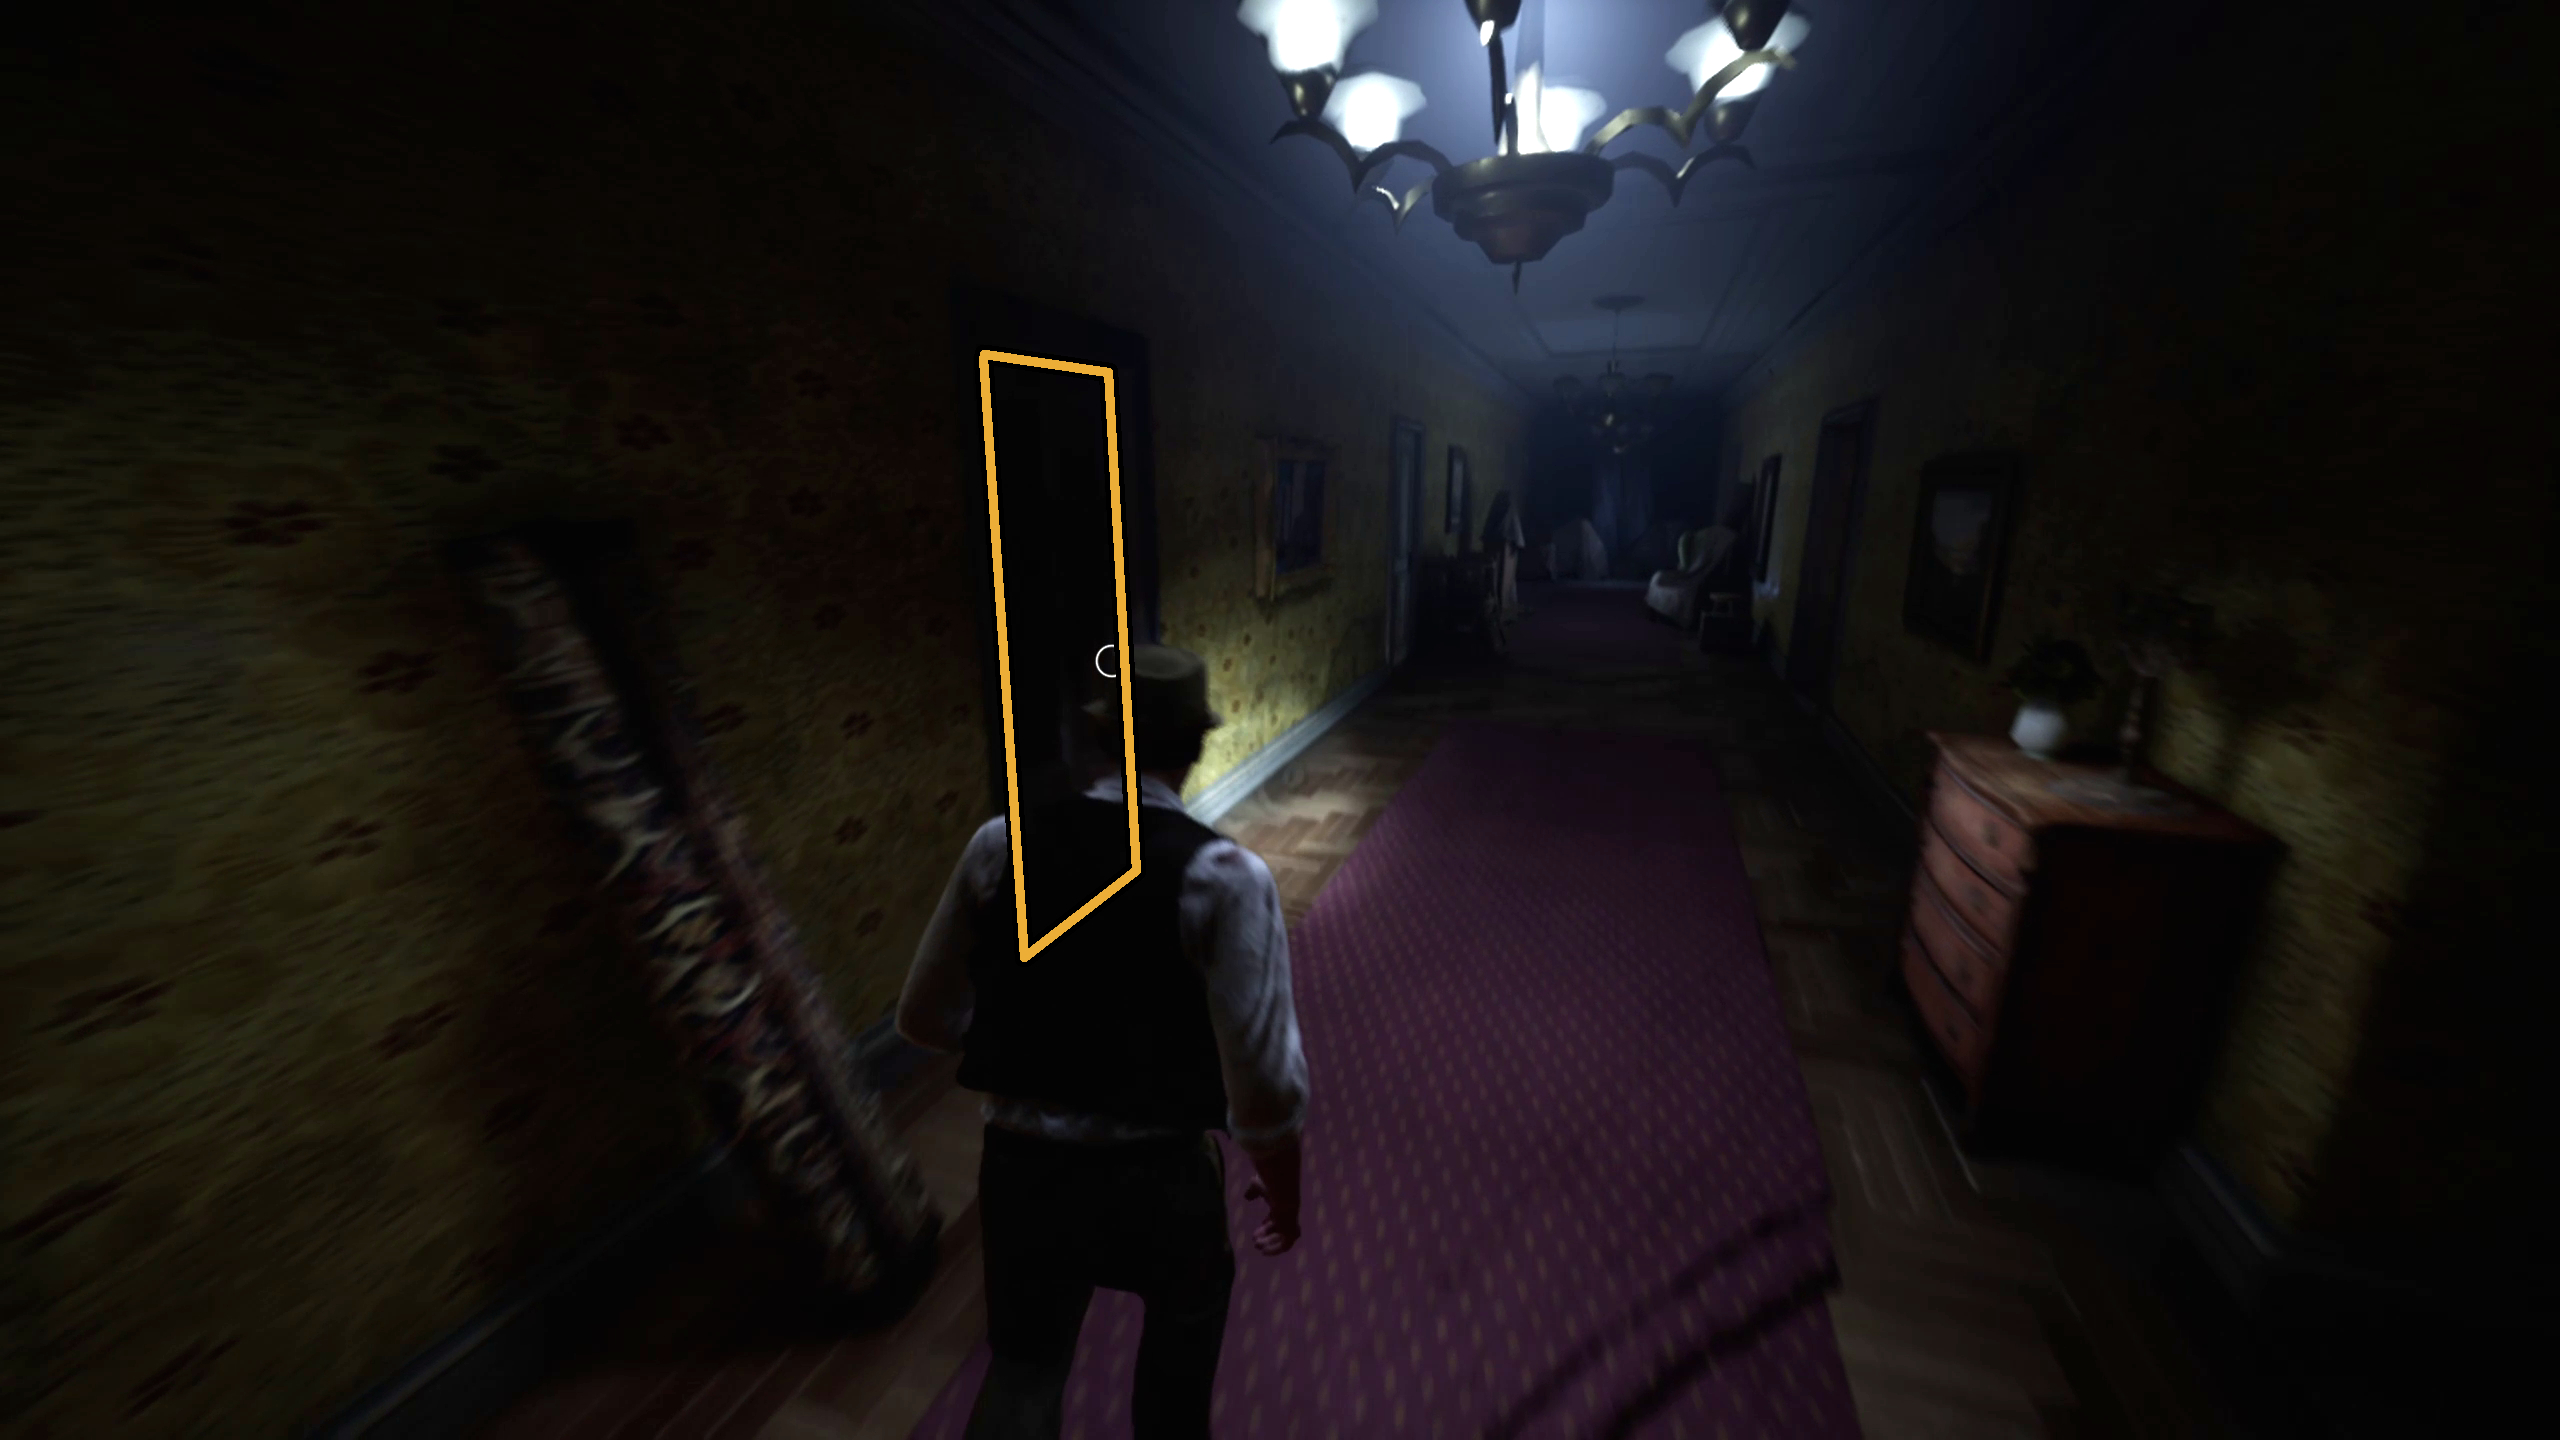
After that, go one room over to Batiste’s Room to collect “Trust Me” (Images 3 and 4)
Image 3Image 4
Once you head back downstairs, head into the Reception room (Image 7). Once there, you can go through the double doors to the left to grab The Flying Dutchman Lagniappe from the reclining chair (Image 8), and then head into the Clerk’s Office through the door you opened earlier with Bastiste’s Keys (Image 9).
Image 7Image 8Image 9
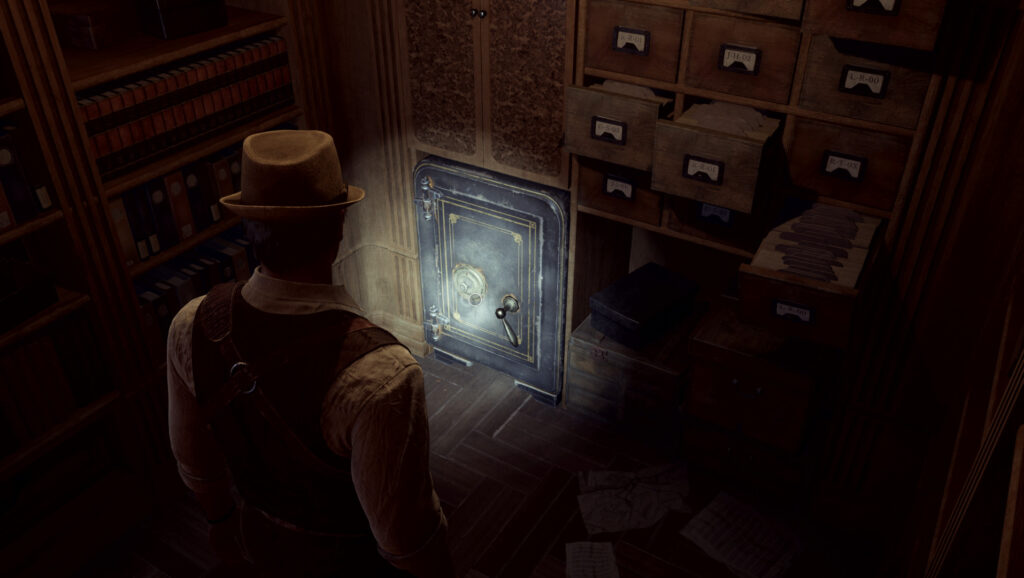
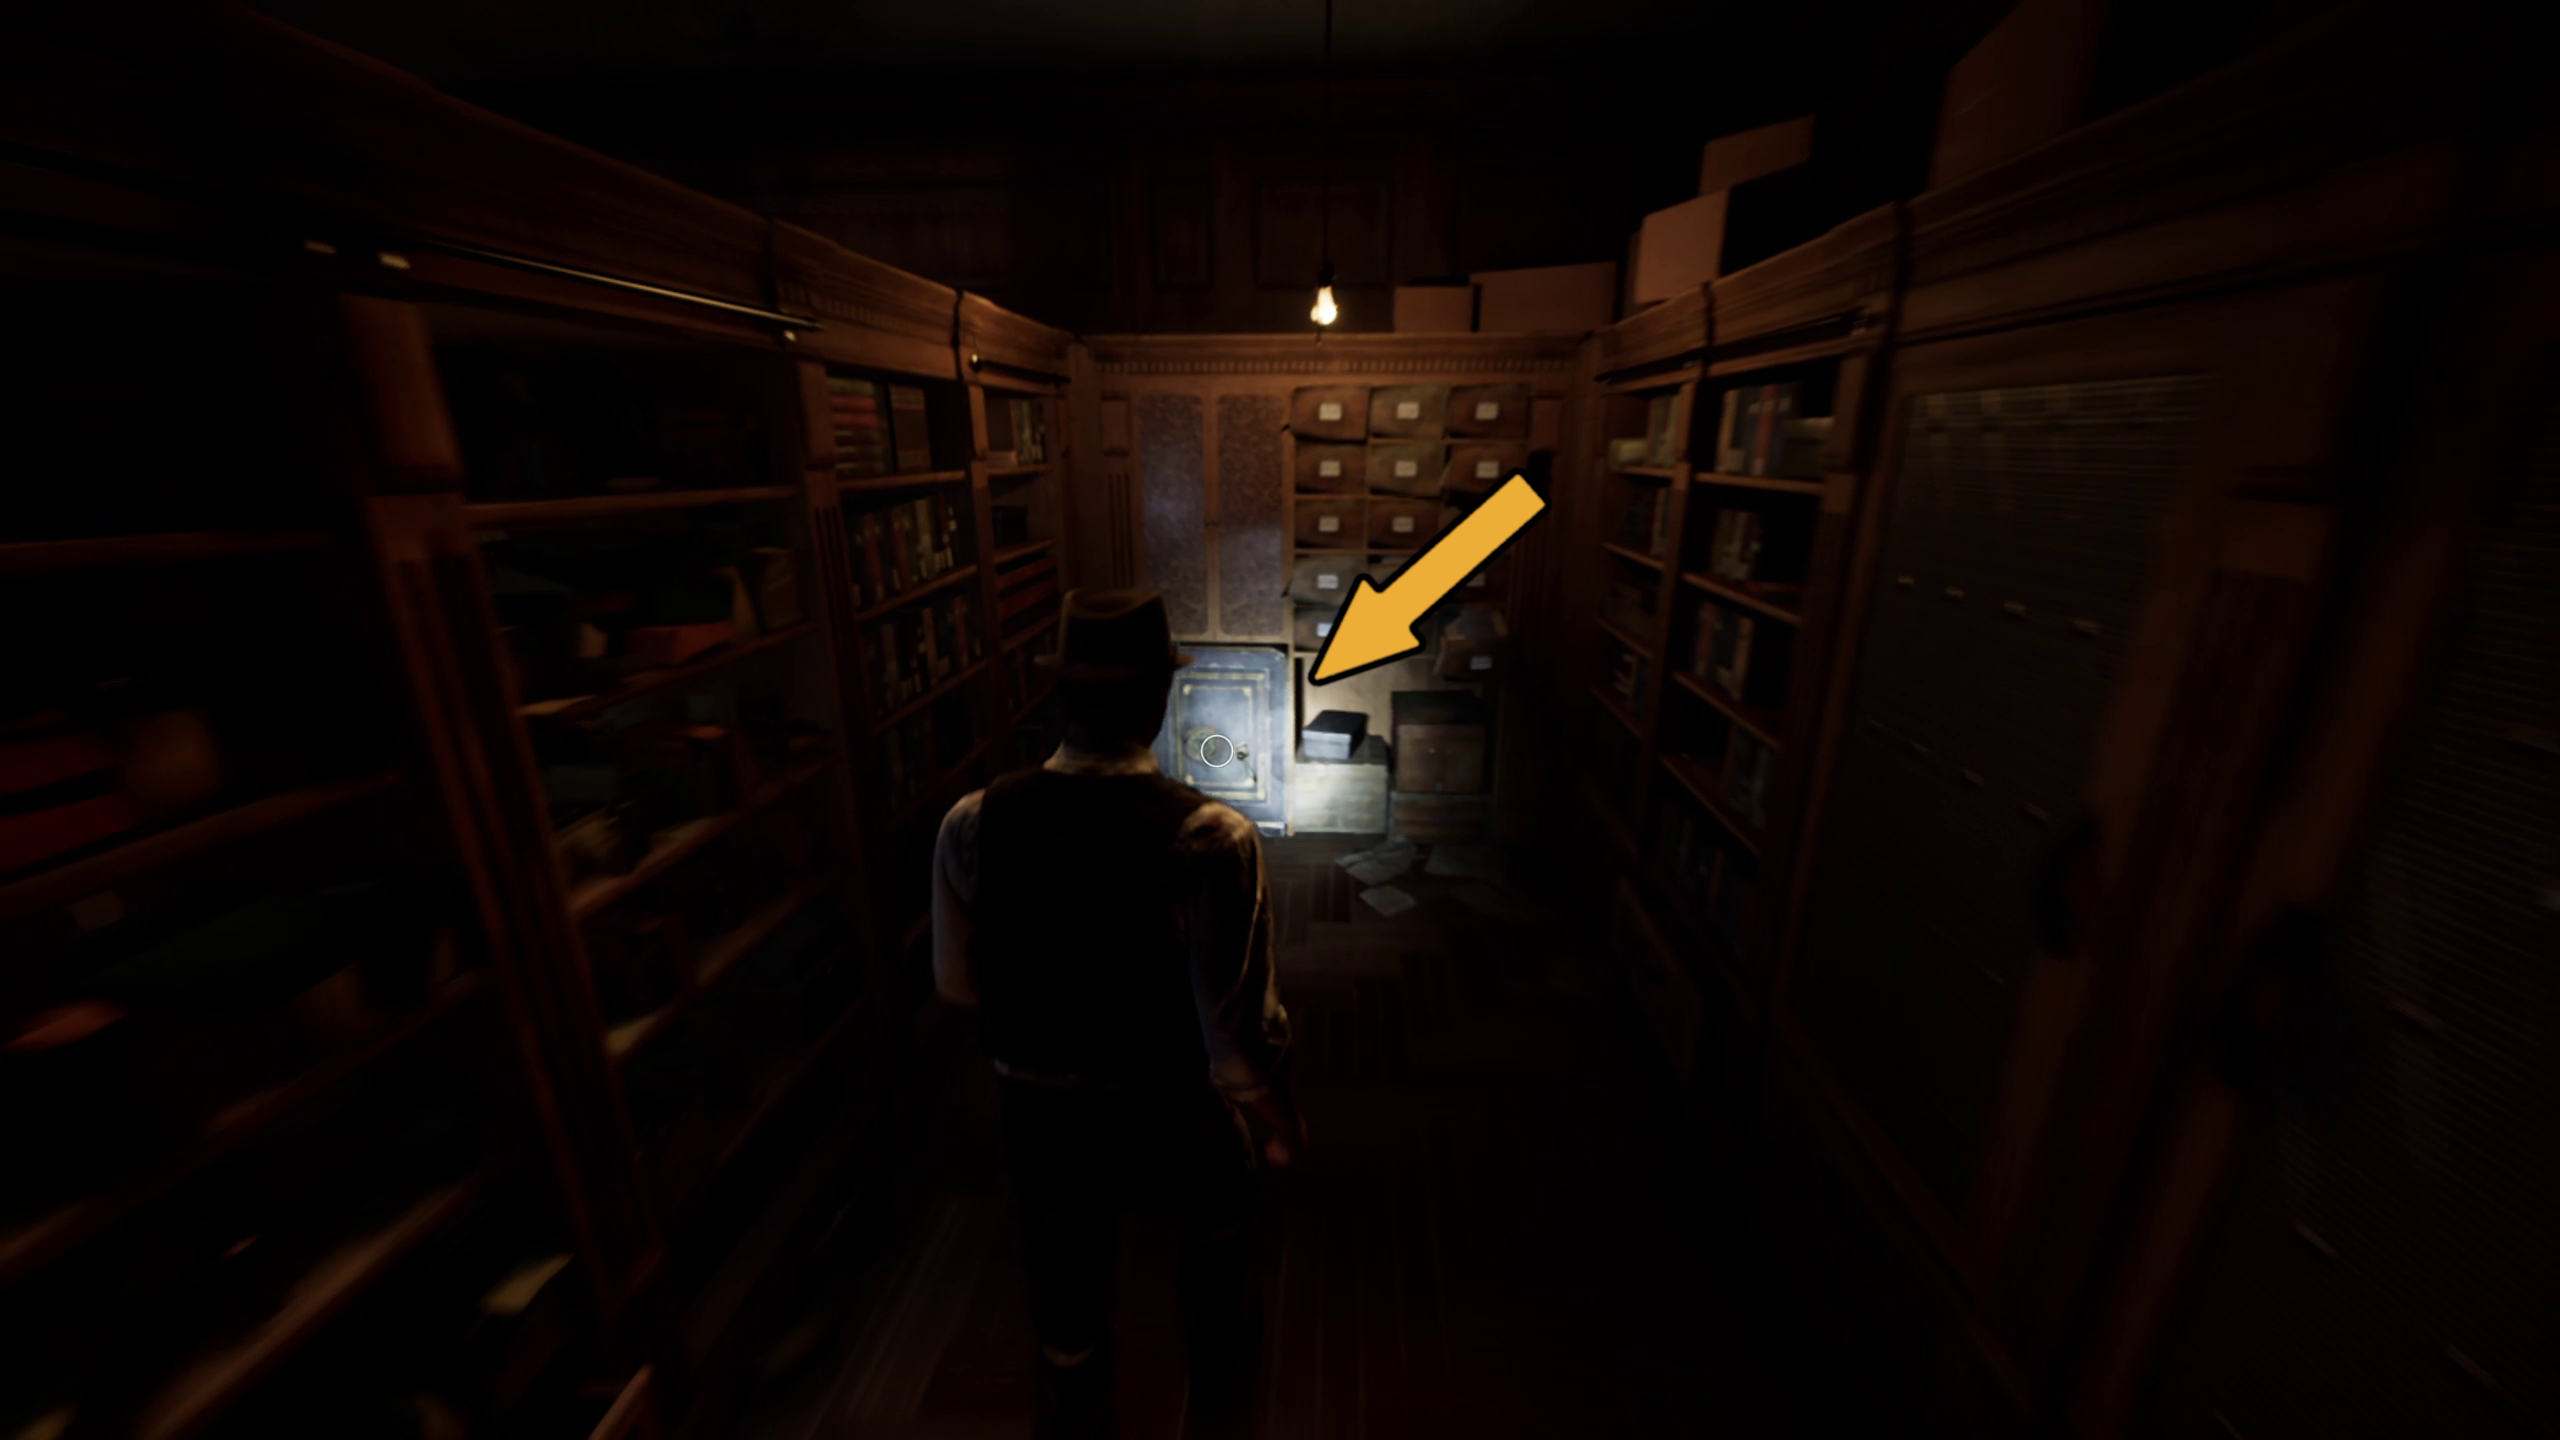
Once you’re in the Clerk’s Office, go around the corner to the safe (Image 10). Using notes you’ve picked up already (or if you’ve played before and have a good memory), you can determine it’s combination.
Image 10
Cassandra Beauregard always seemed to know something…
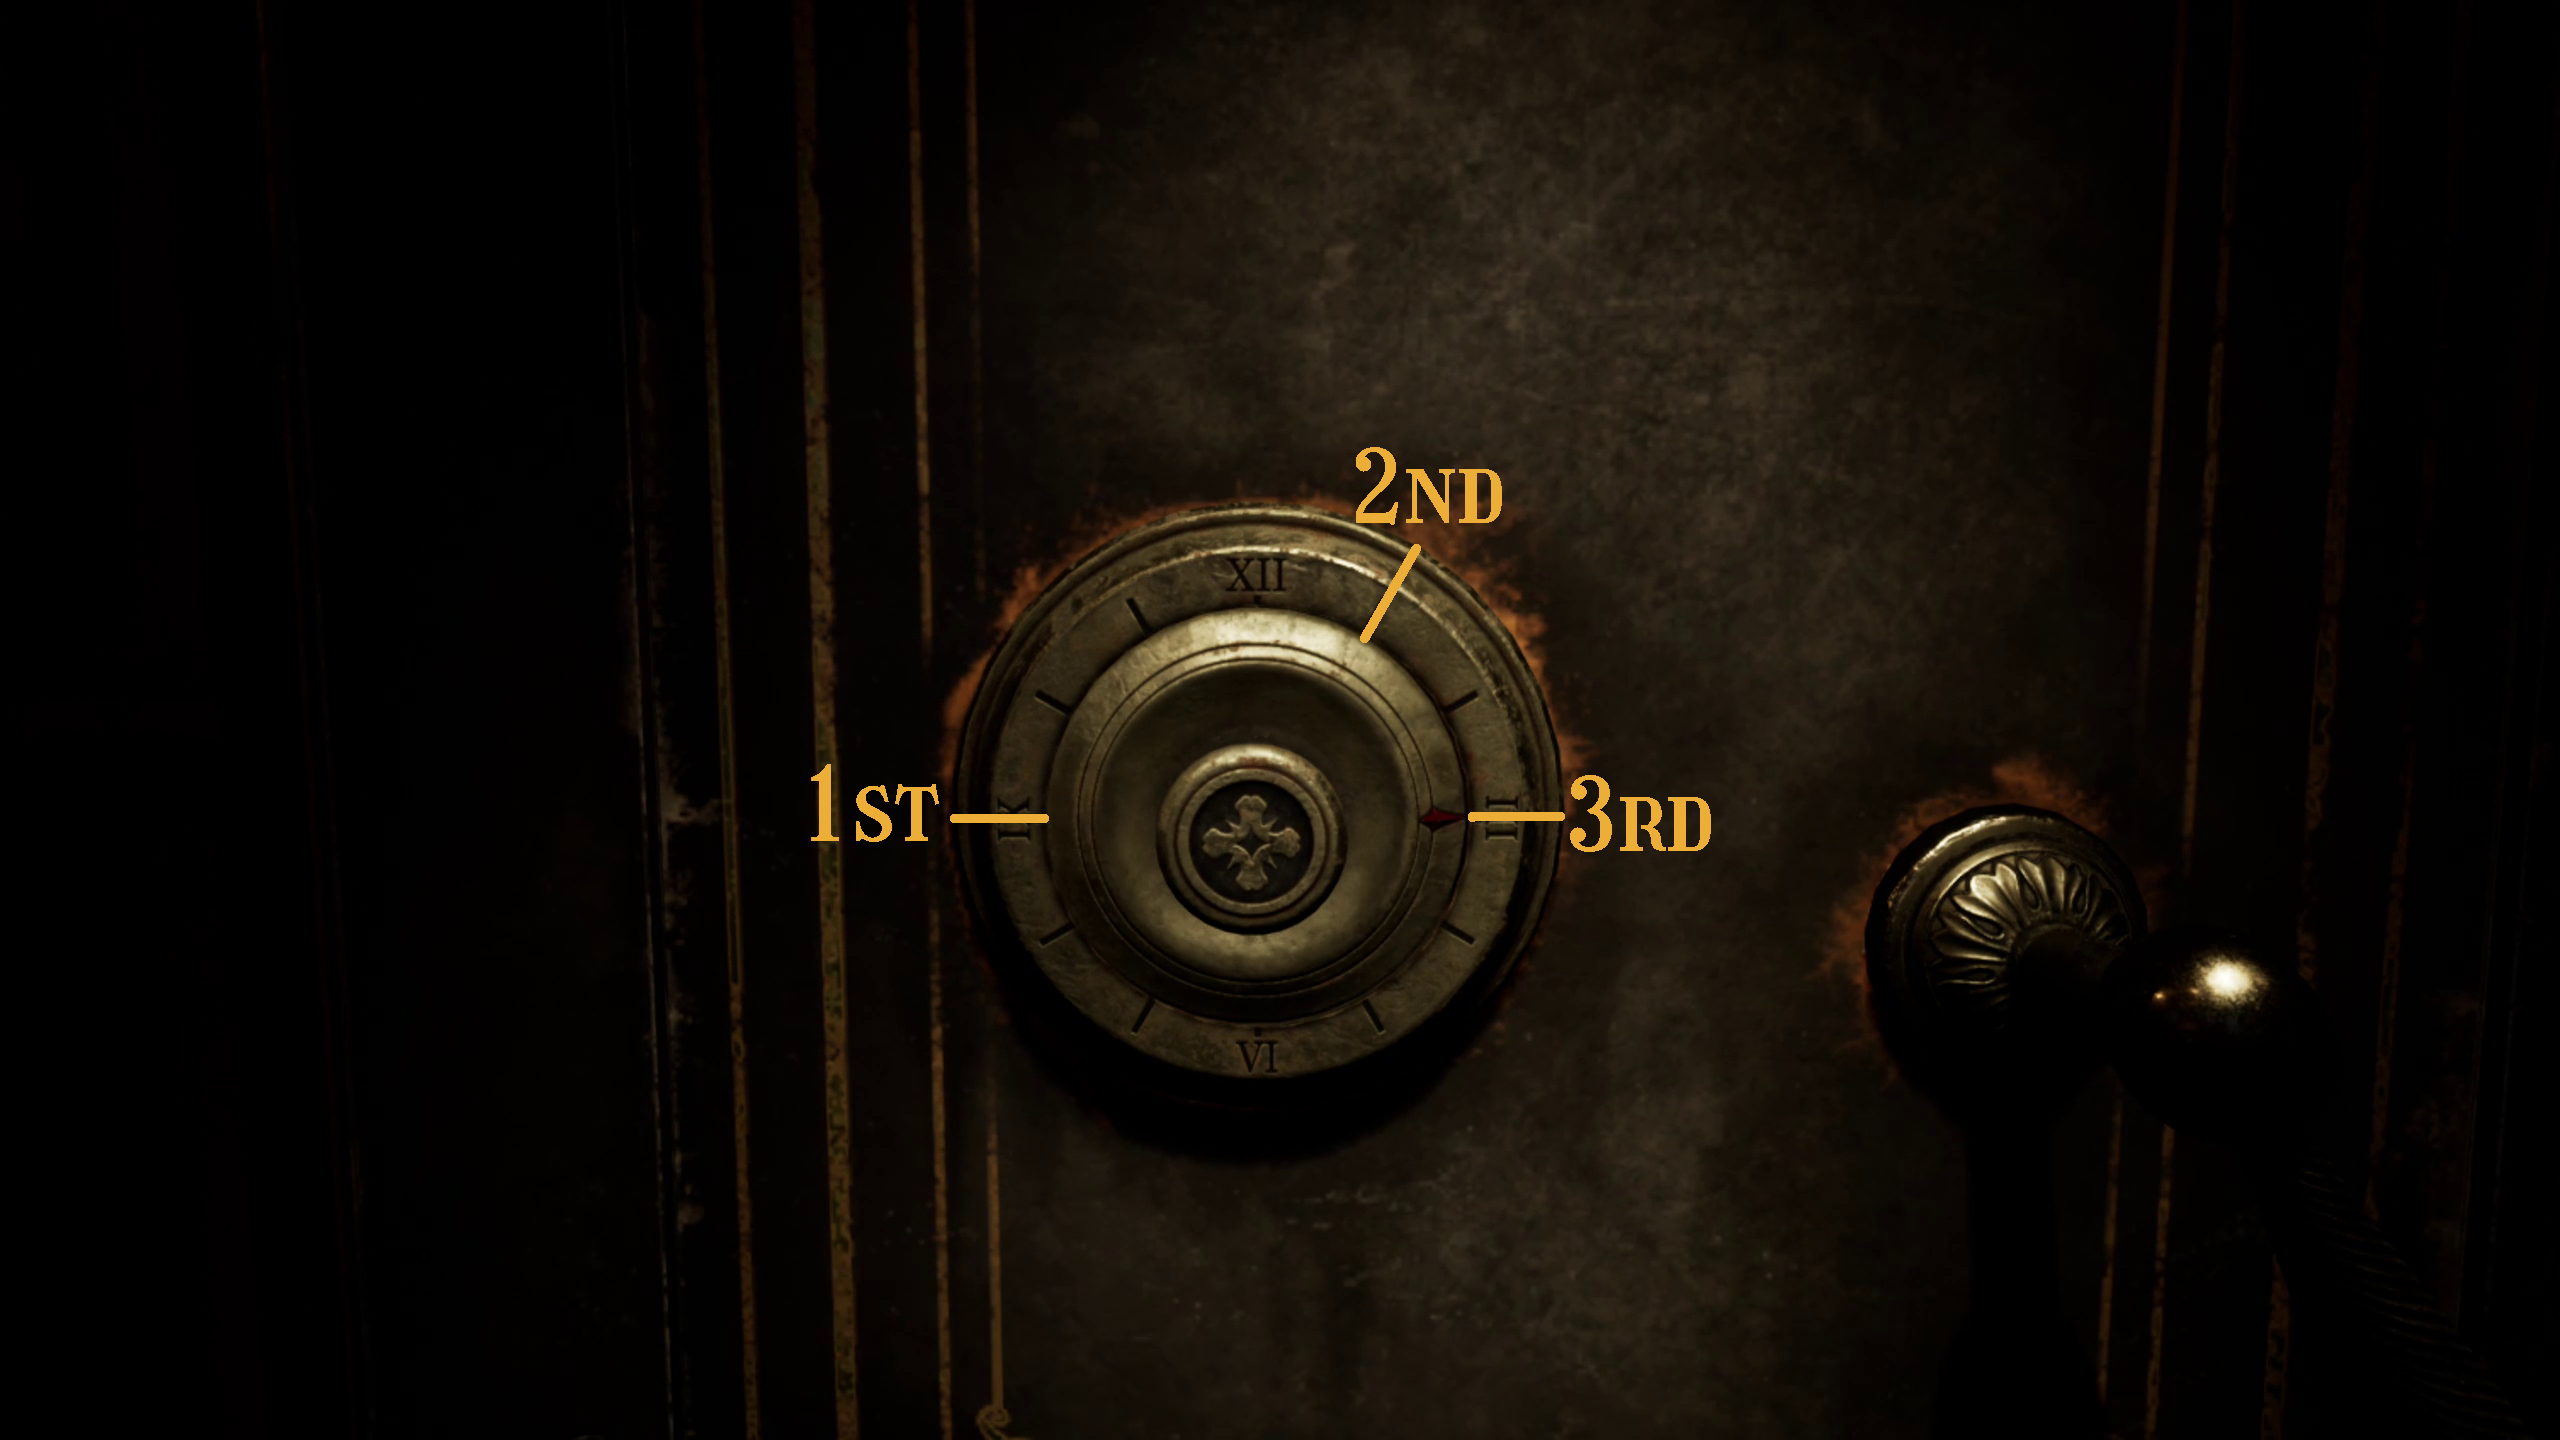
You can use “Cassandra’s Last Note” that you picked up earlier to find the combination: 9-1-3. Go left, right, left when inputting the numbers.
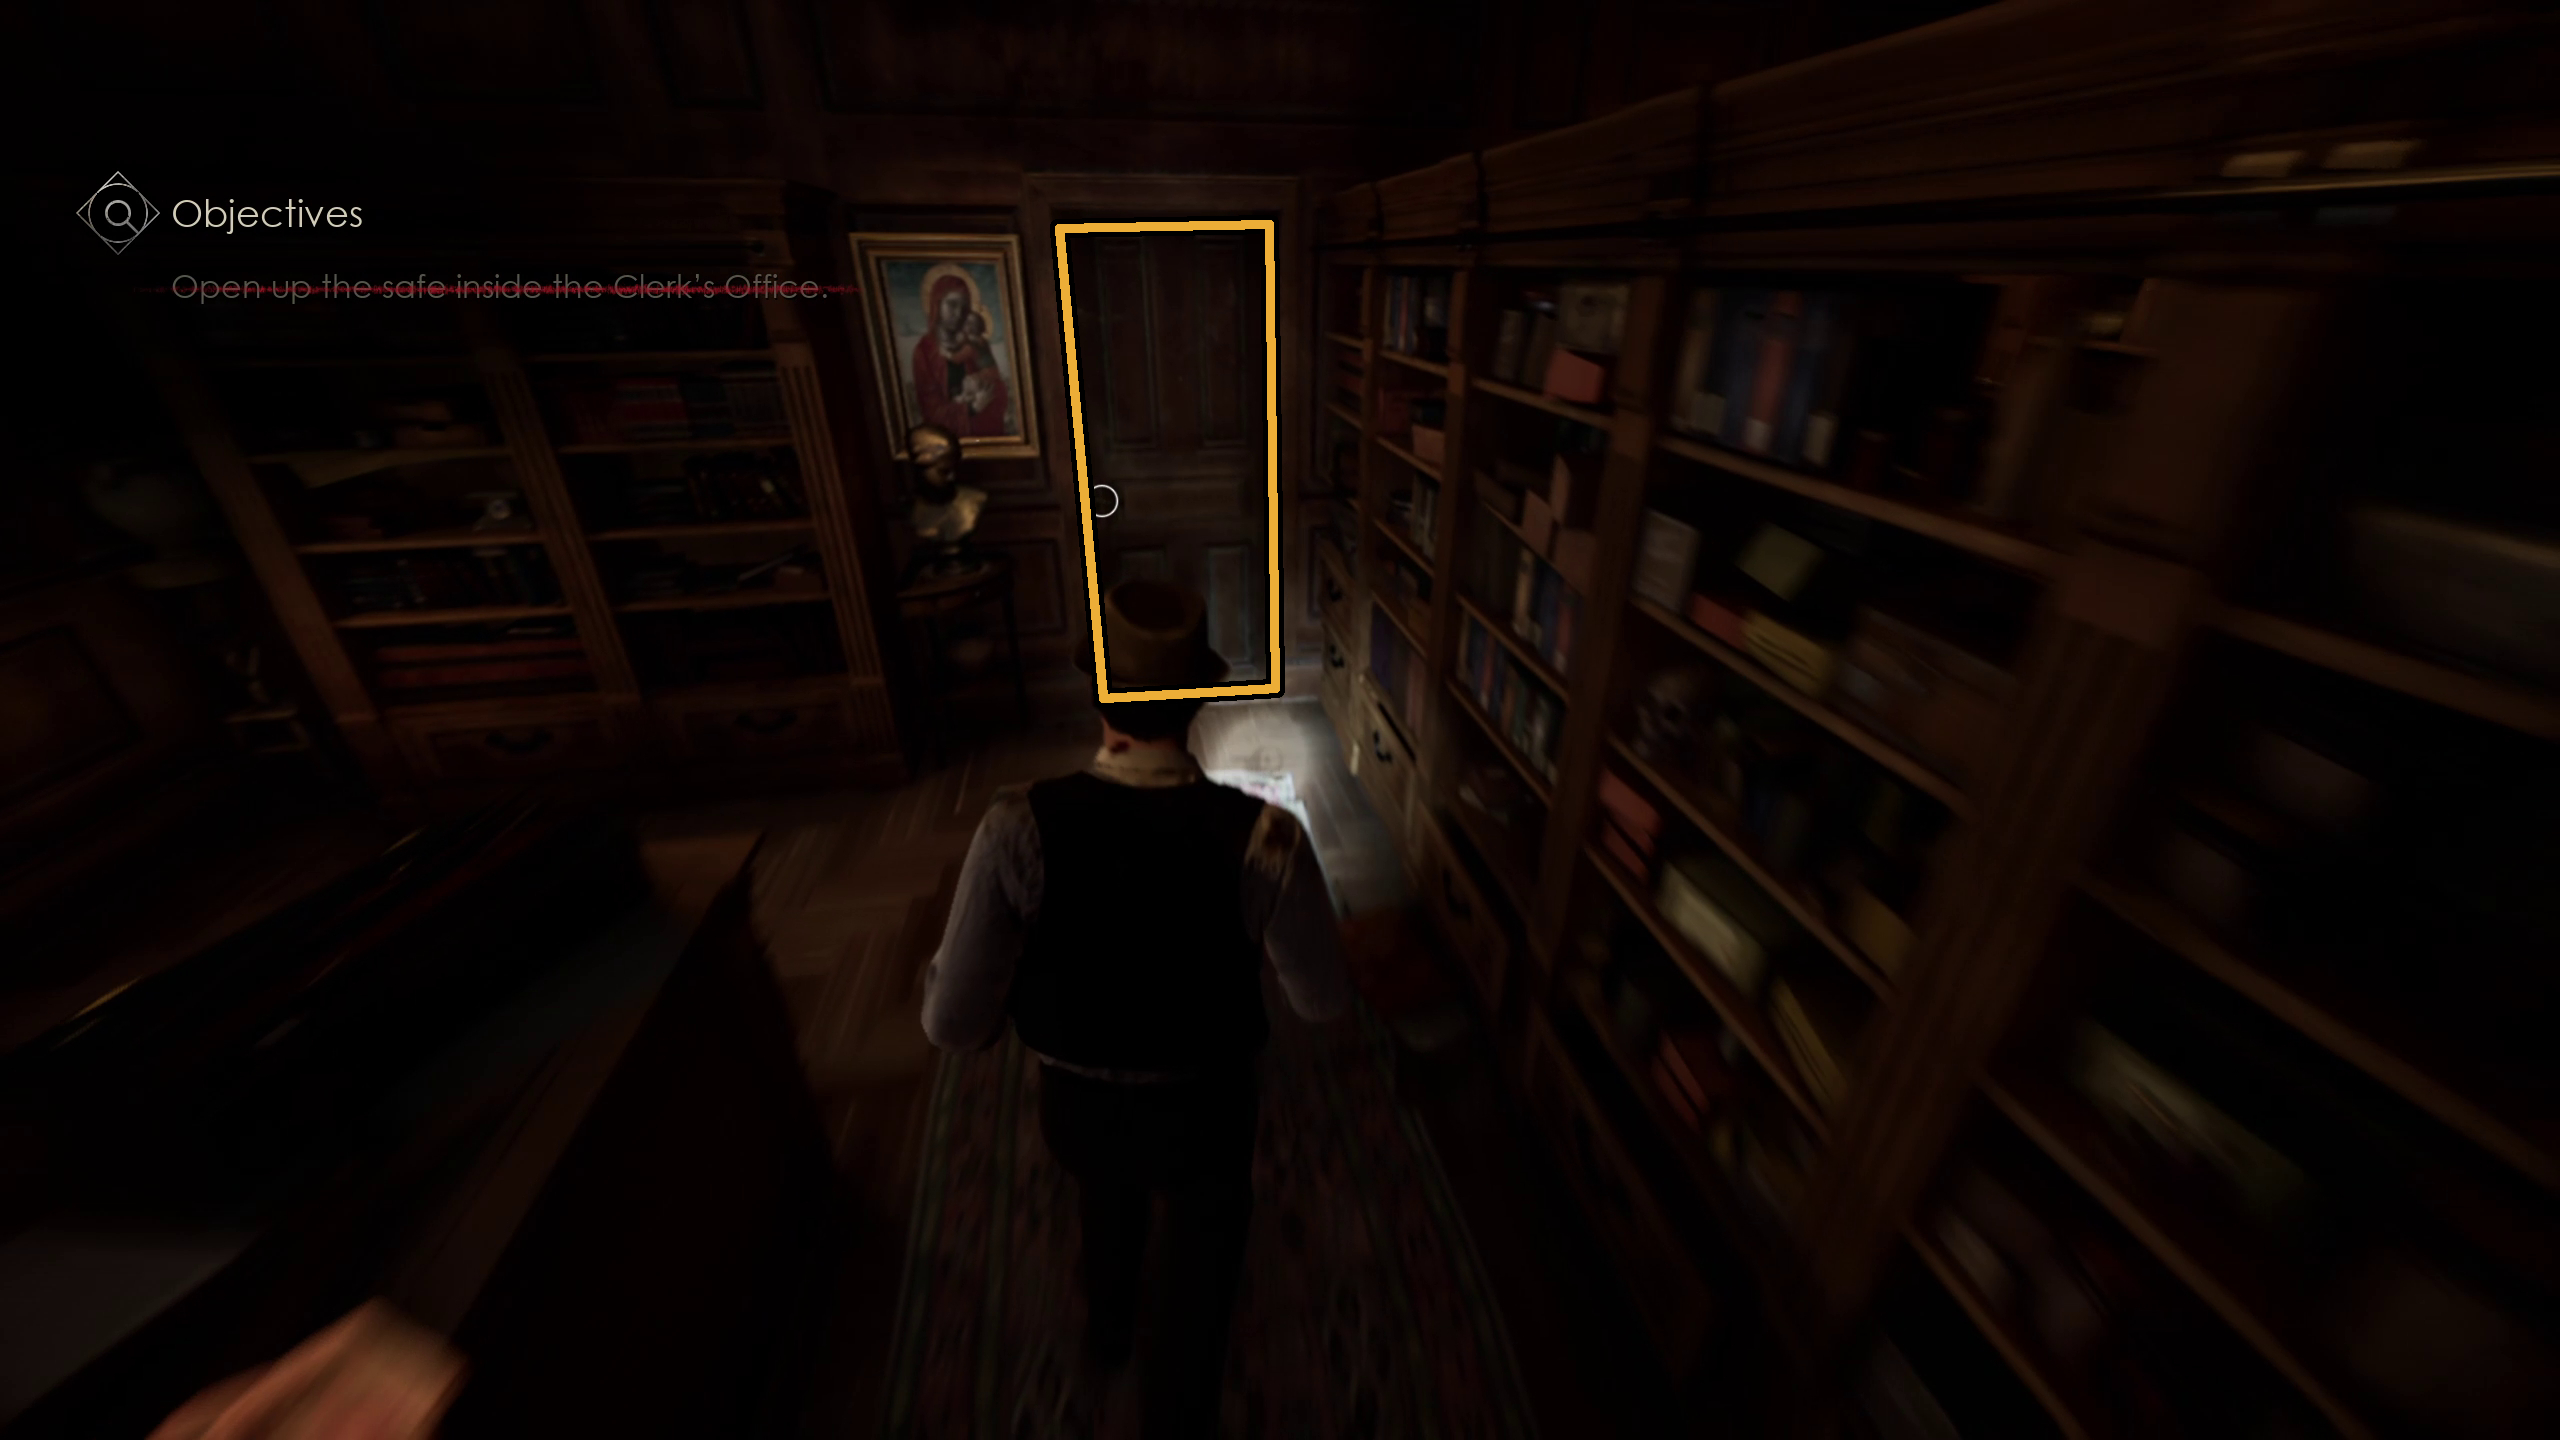
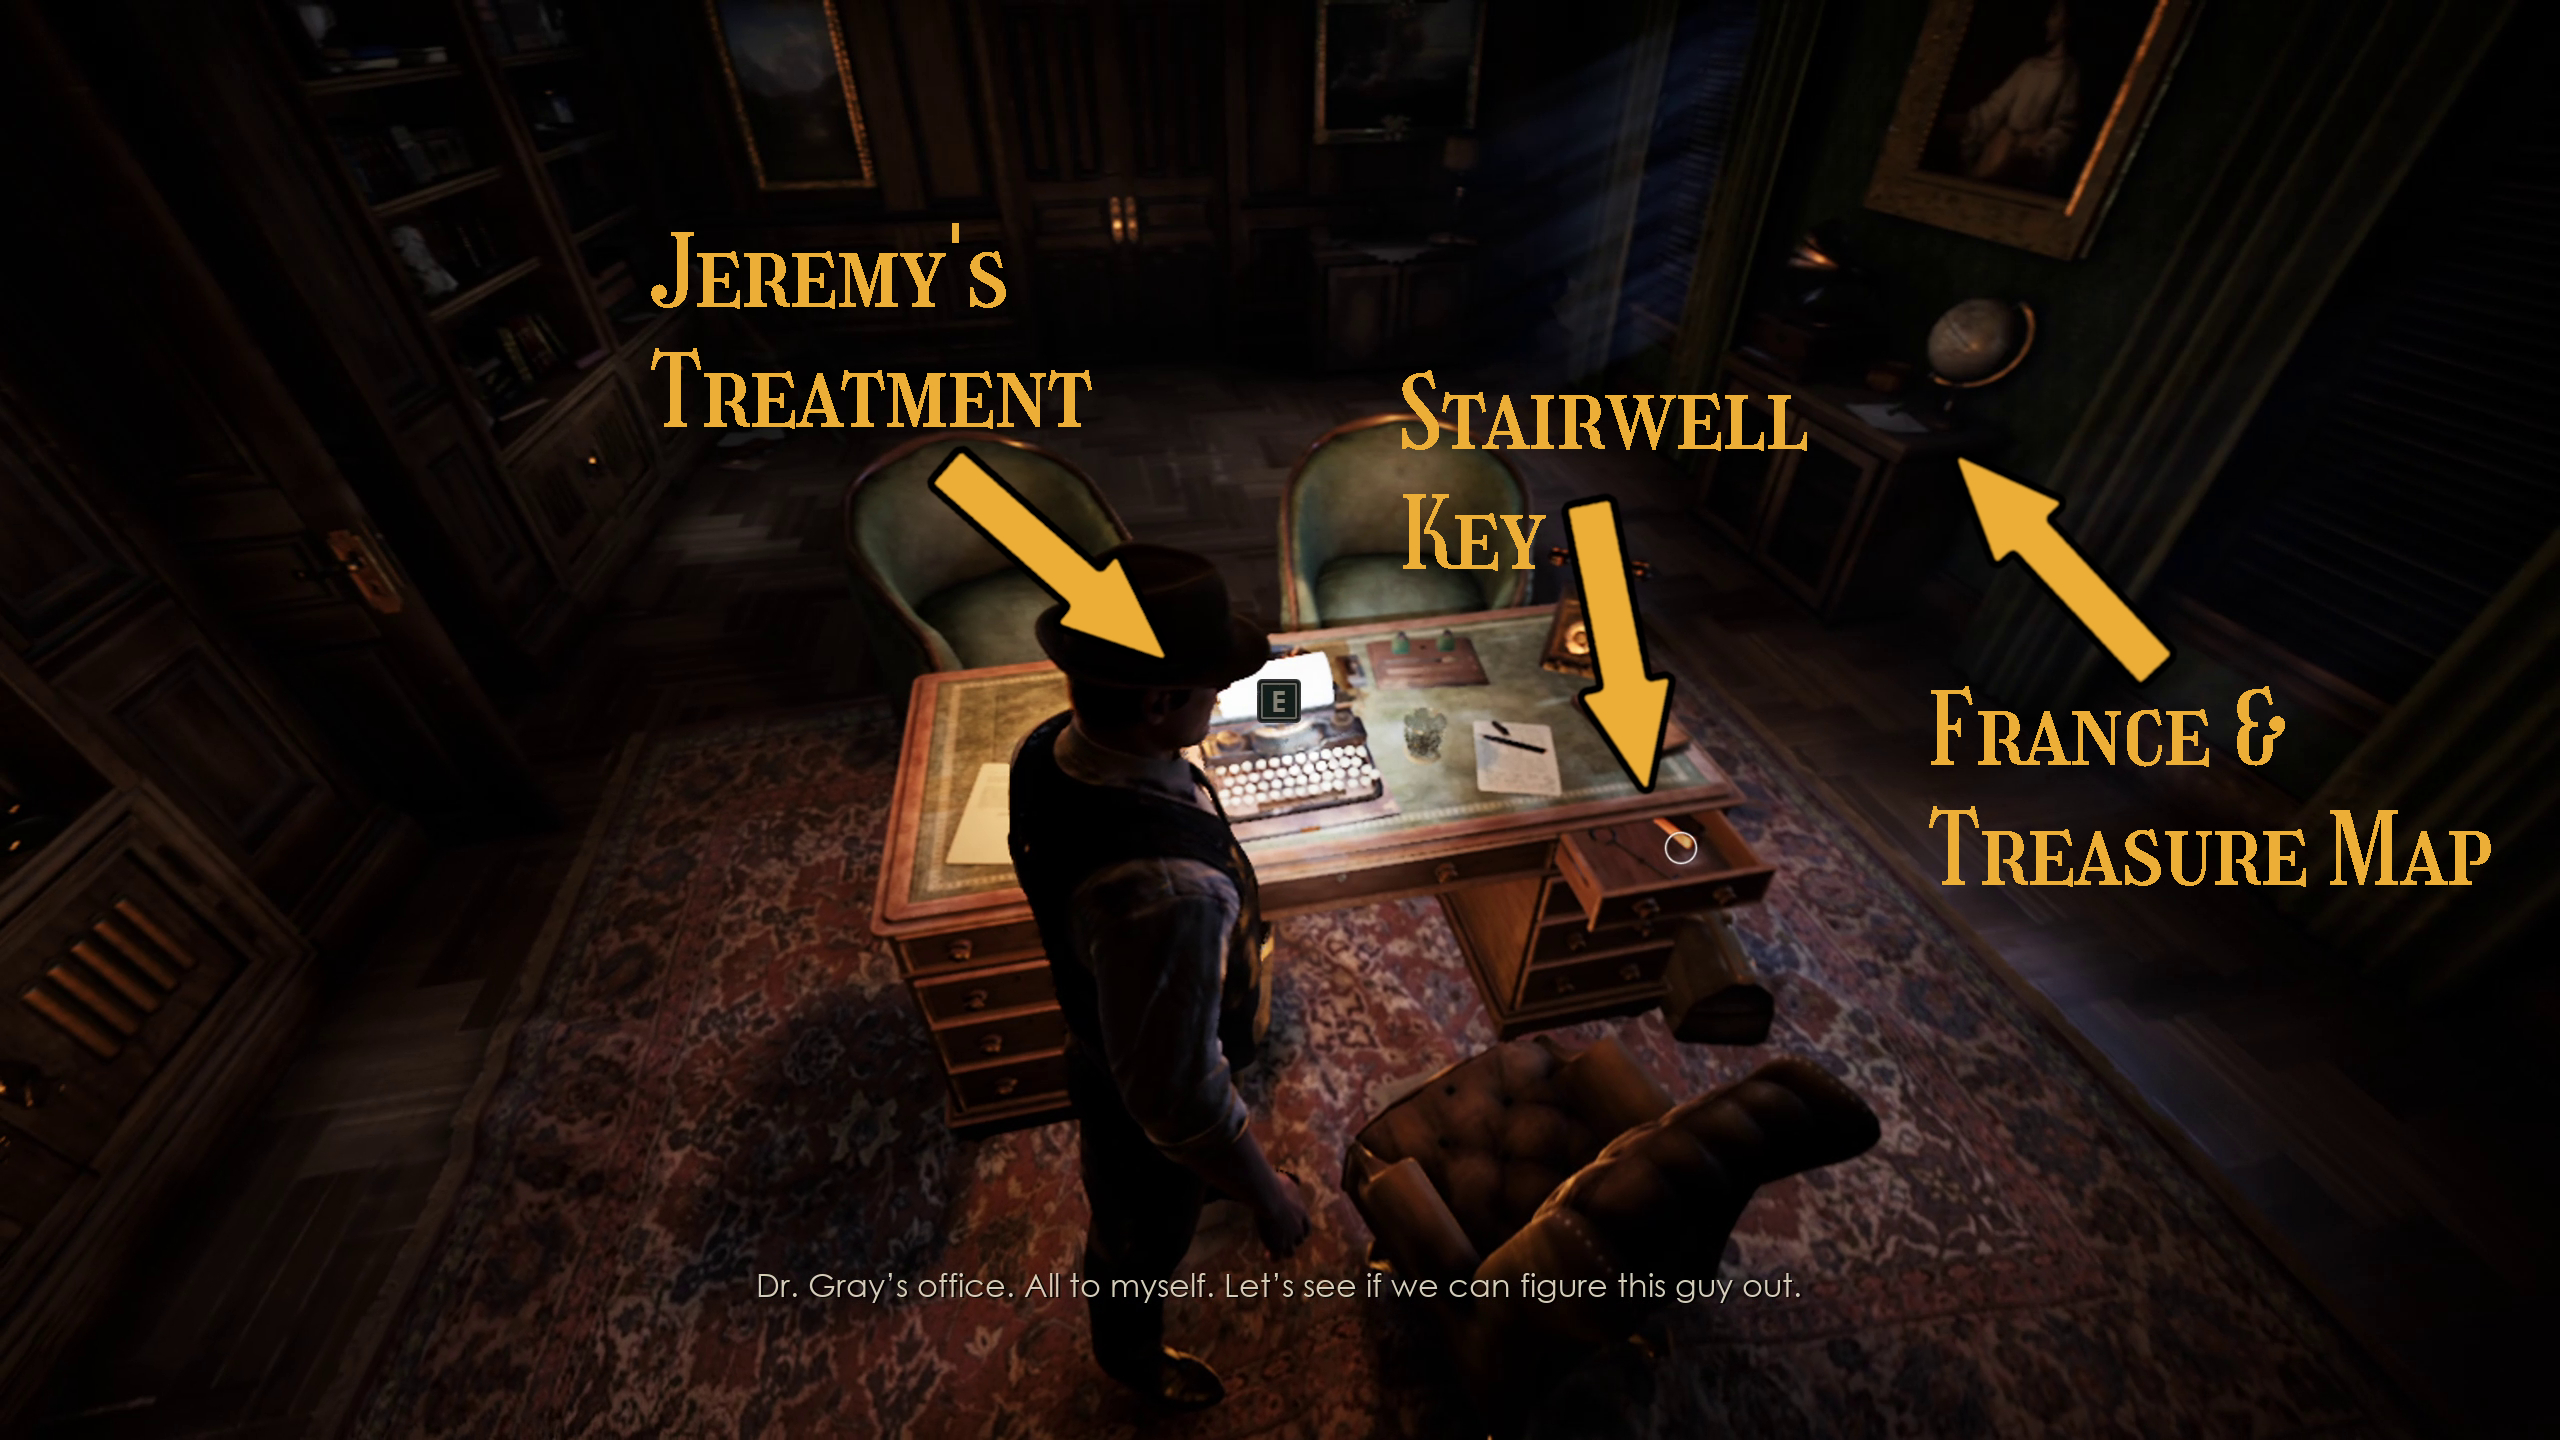
Once you’ve opened the safe, you will find Dr. Gray’s Office Key, as well as a note, The Empty Room. You can take this key and go back around the corner of the Clerk’s Office to use the key to enter Dr. Gray’s Office (Image 11). Once inside, you can grab the 2 notes (“Jeremy’s Treatment” and “Cassandra’s Things”), the Stairwell Key, and France (Image 12). If you are playing as Edward, you will also be able to pick up the note “MacCafferty’s Pirate Treasure” here.
Image 11Image 12
With France in hand, you can opt to head upstairs to the Globe in the Sitting Room (Image 13). Using France, you can open the Globe, allowing you to grab the Map of Caribbean Lagniappe (Image 14). Edward will pass by this area again anyway, but Emily might not otherwise, so if you are playing as Edward you might choose to do this later, when you pass by the globe again.
Image 13Image 14
Look for Jeremy’s X-ray Plates in the Infirmary
Next, you’ll want to find your way to the basement of Derceto, but you should head there in a very specific order in order to acquire a specific Lagniappe and see a specific scene.
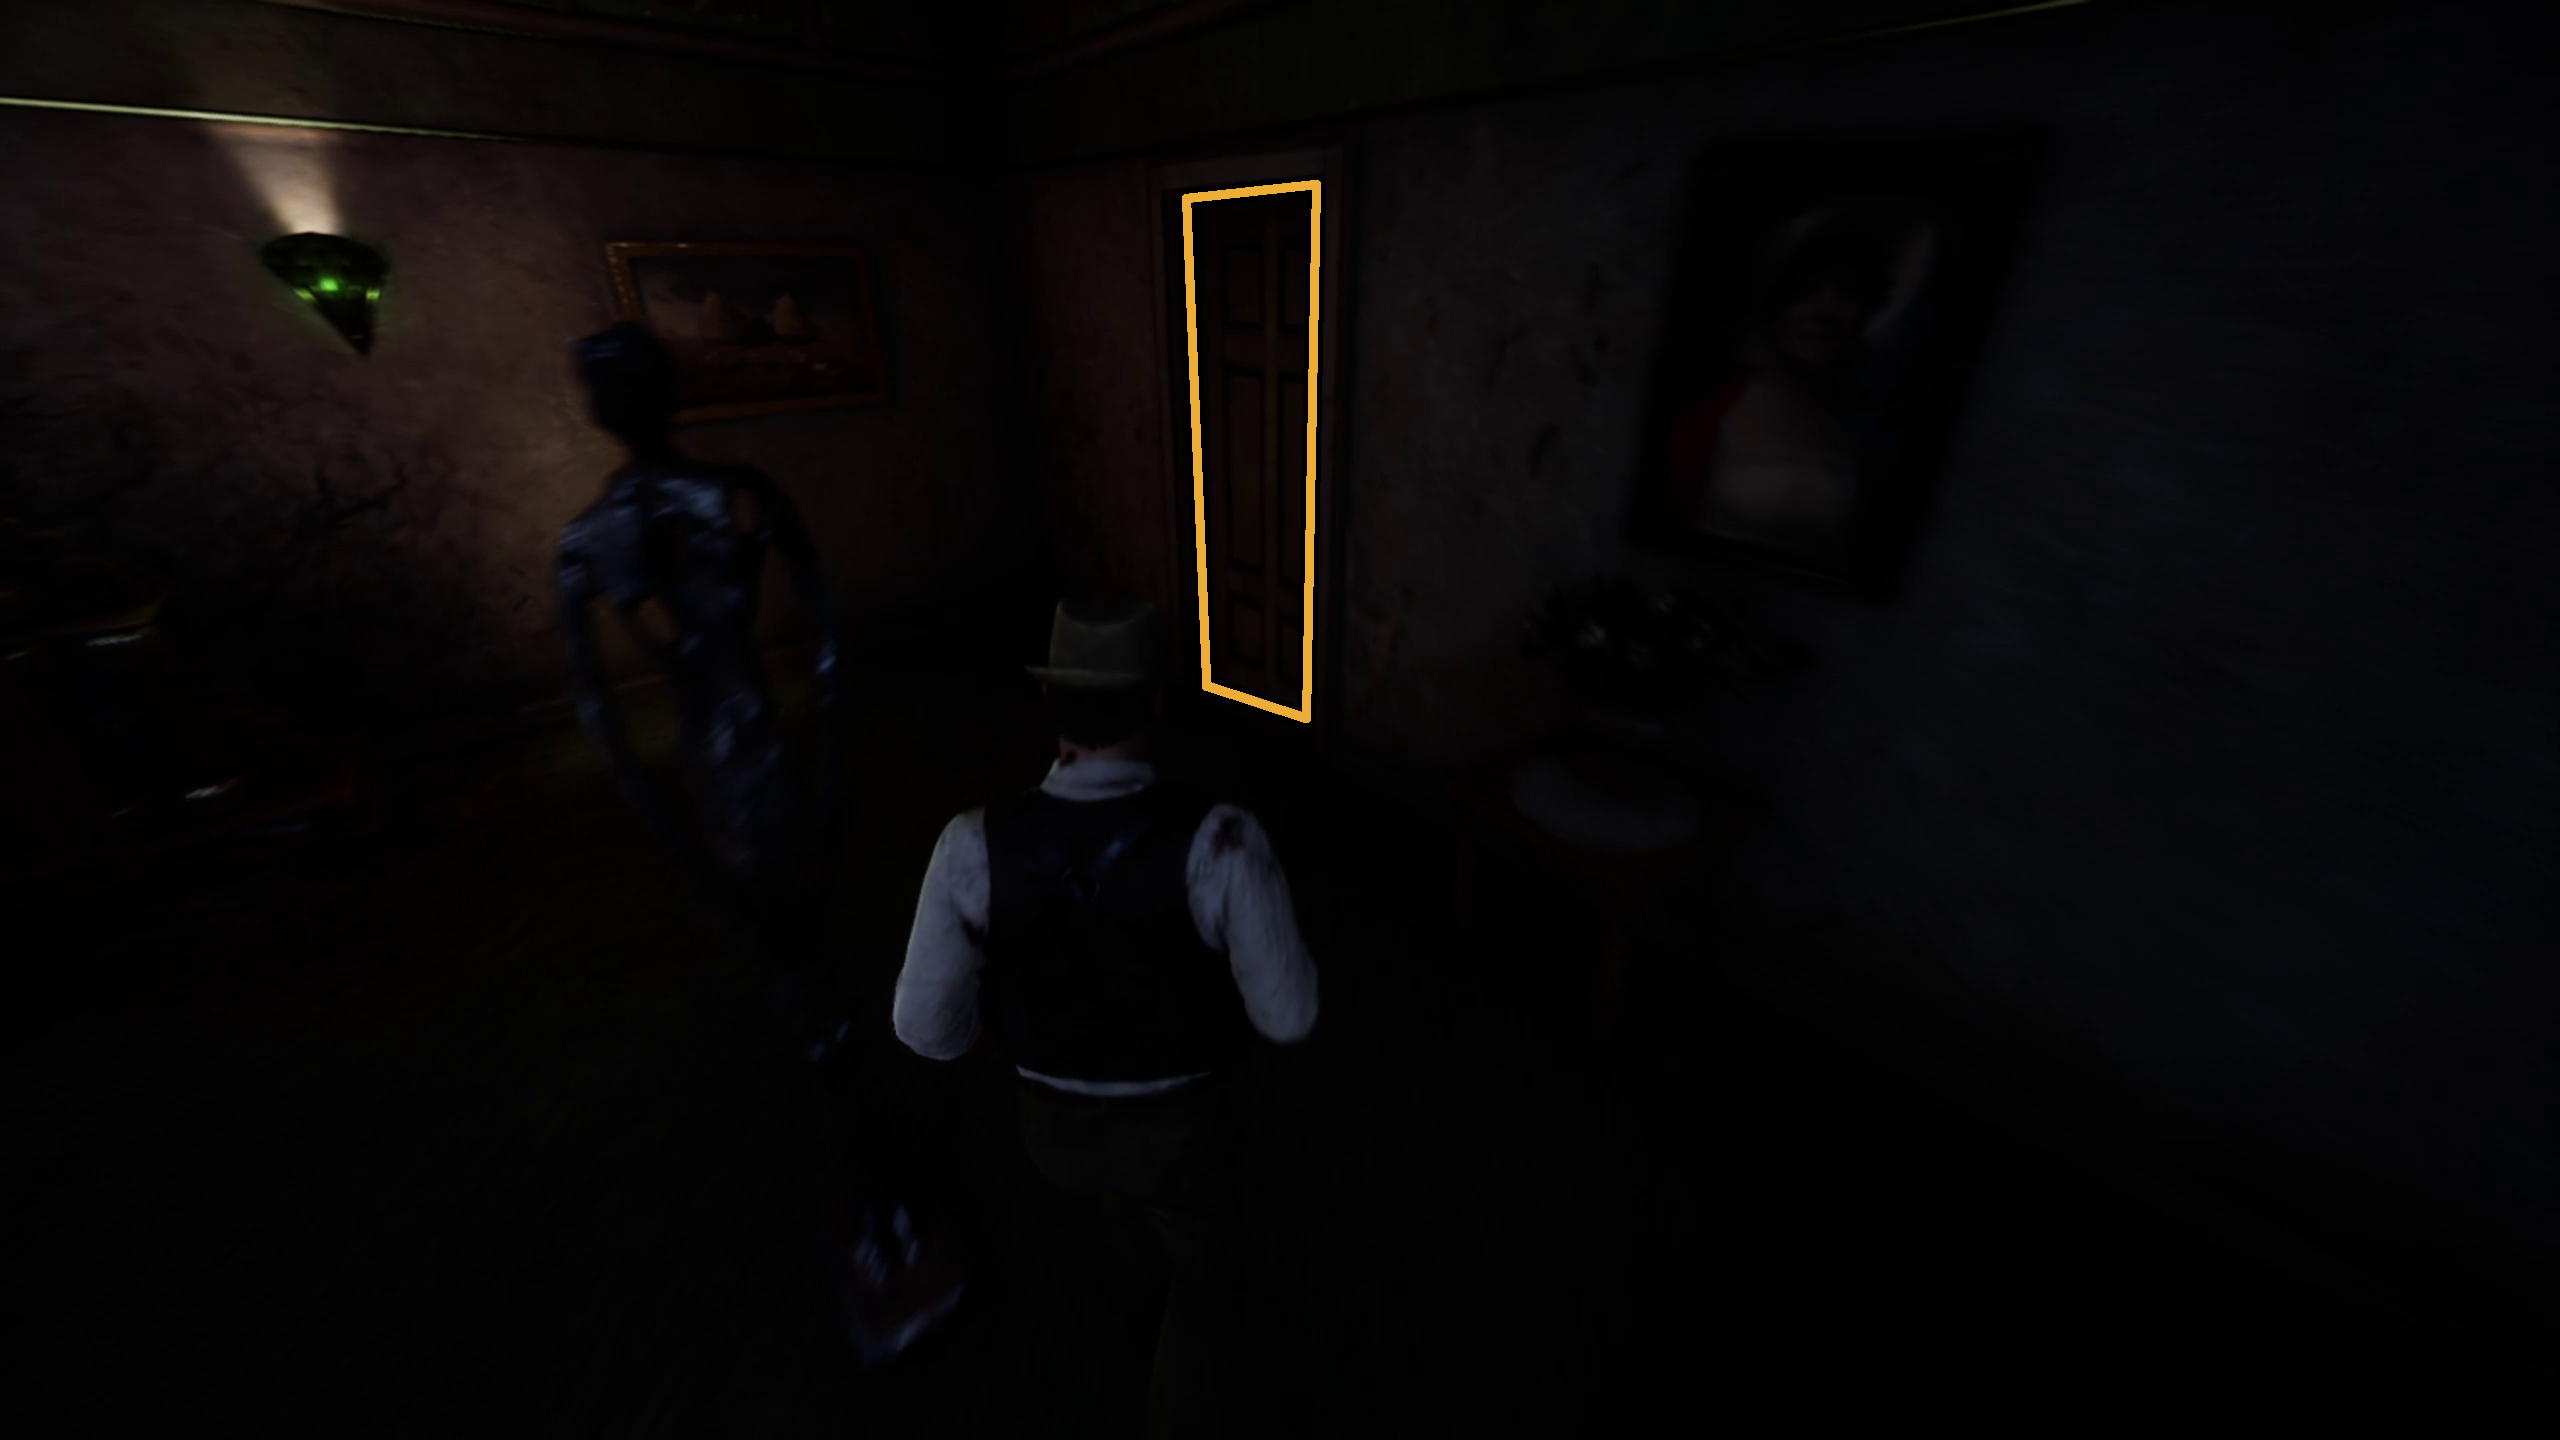
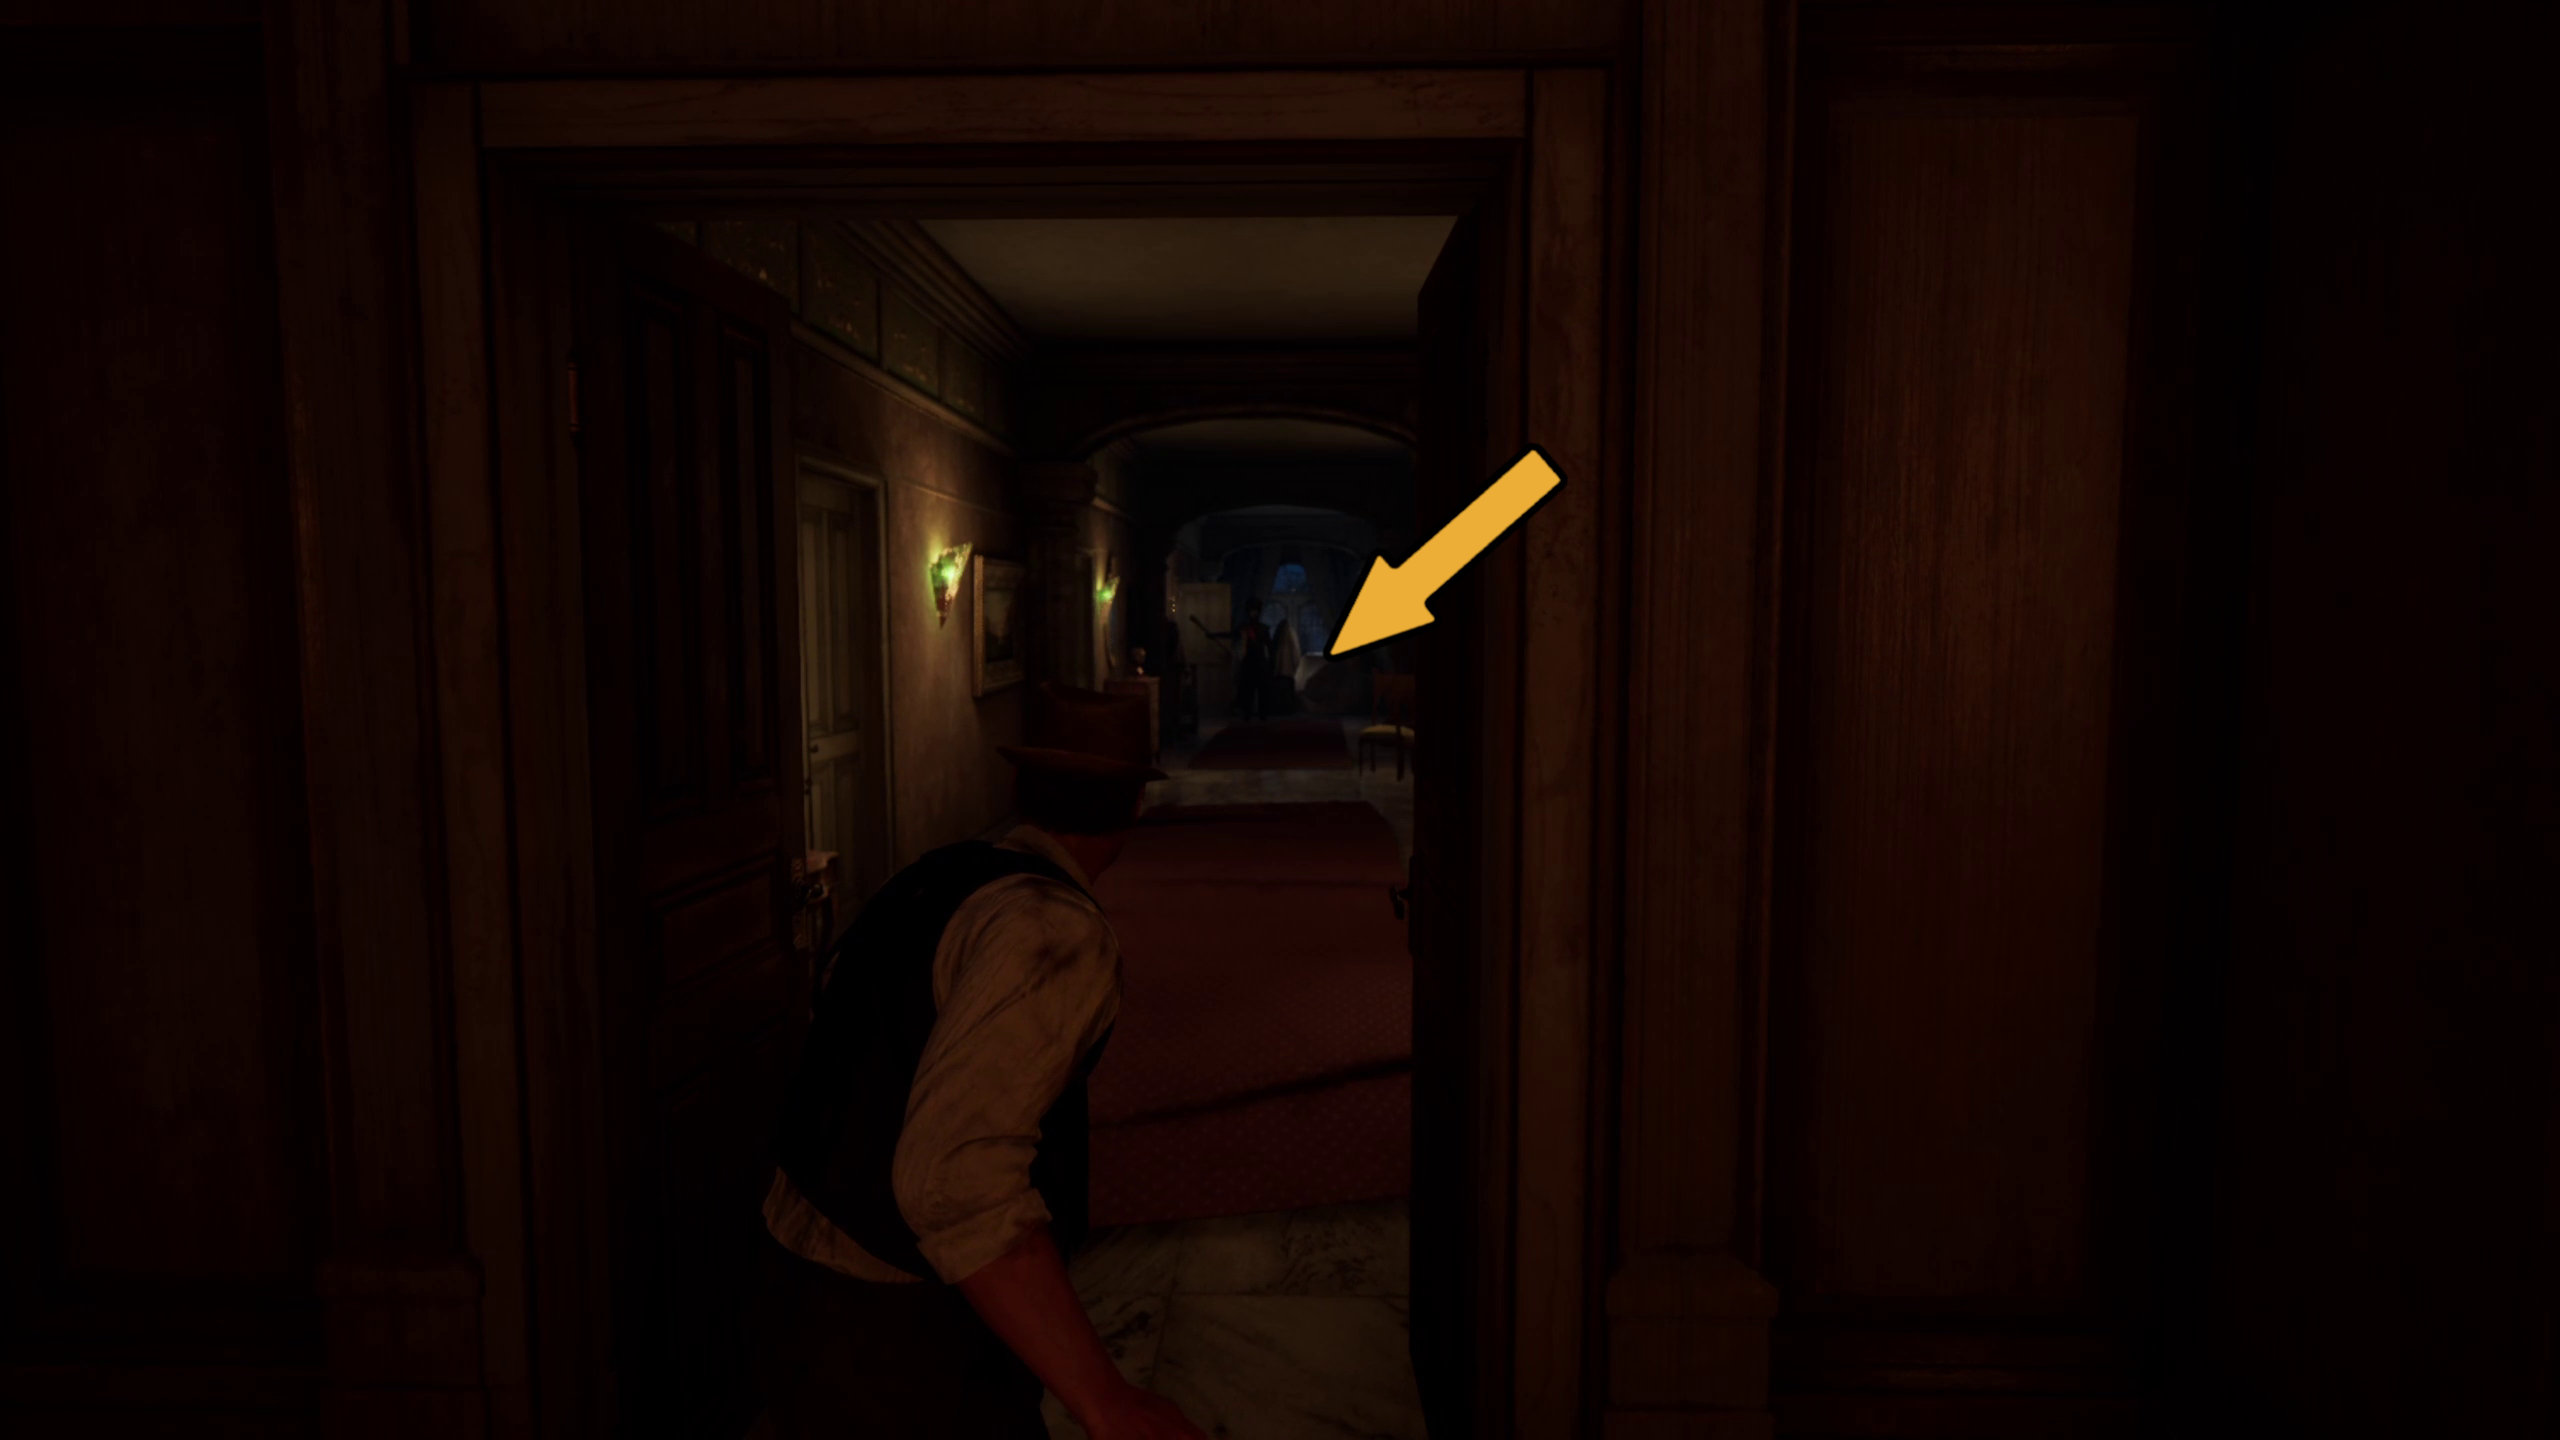
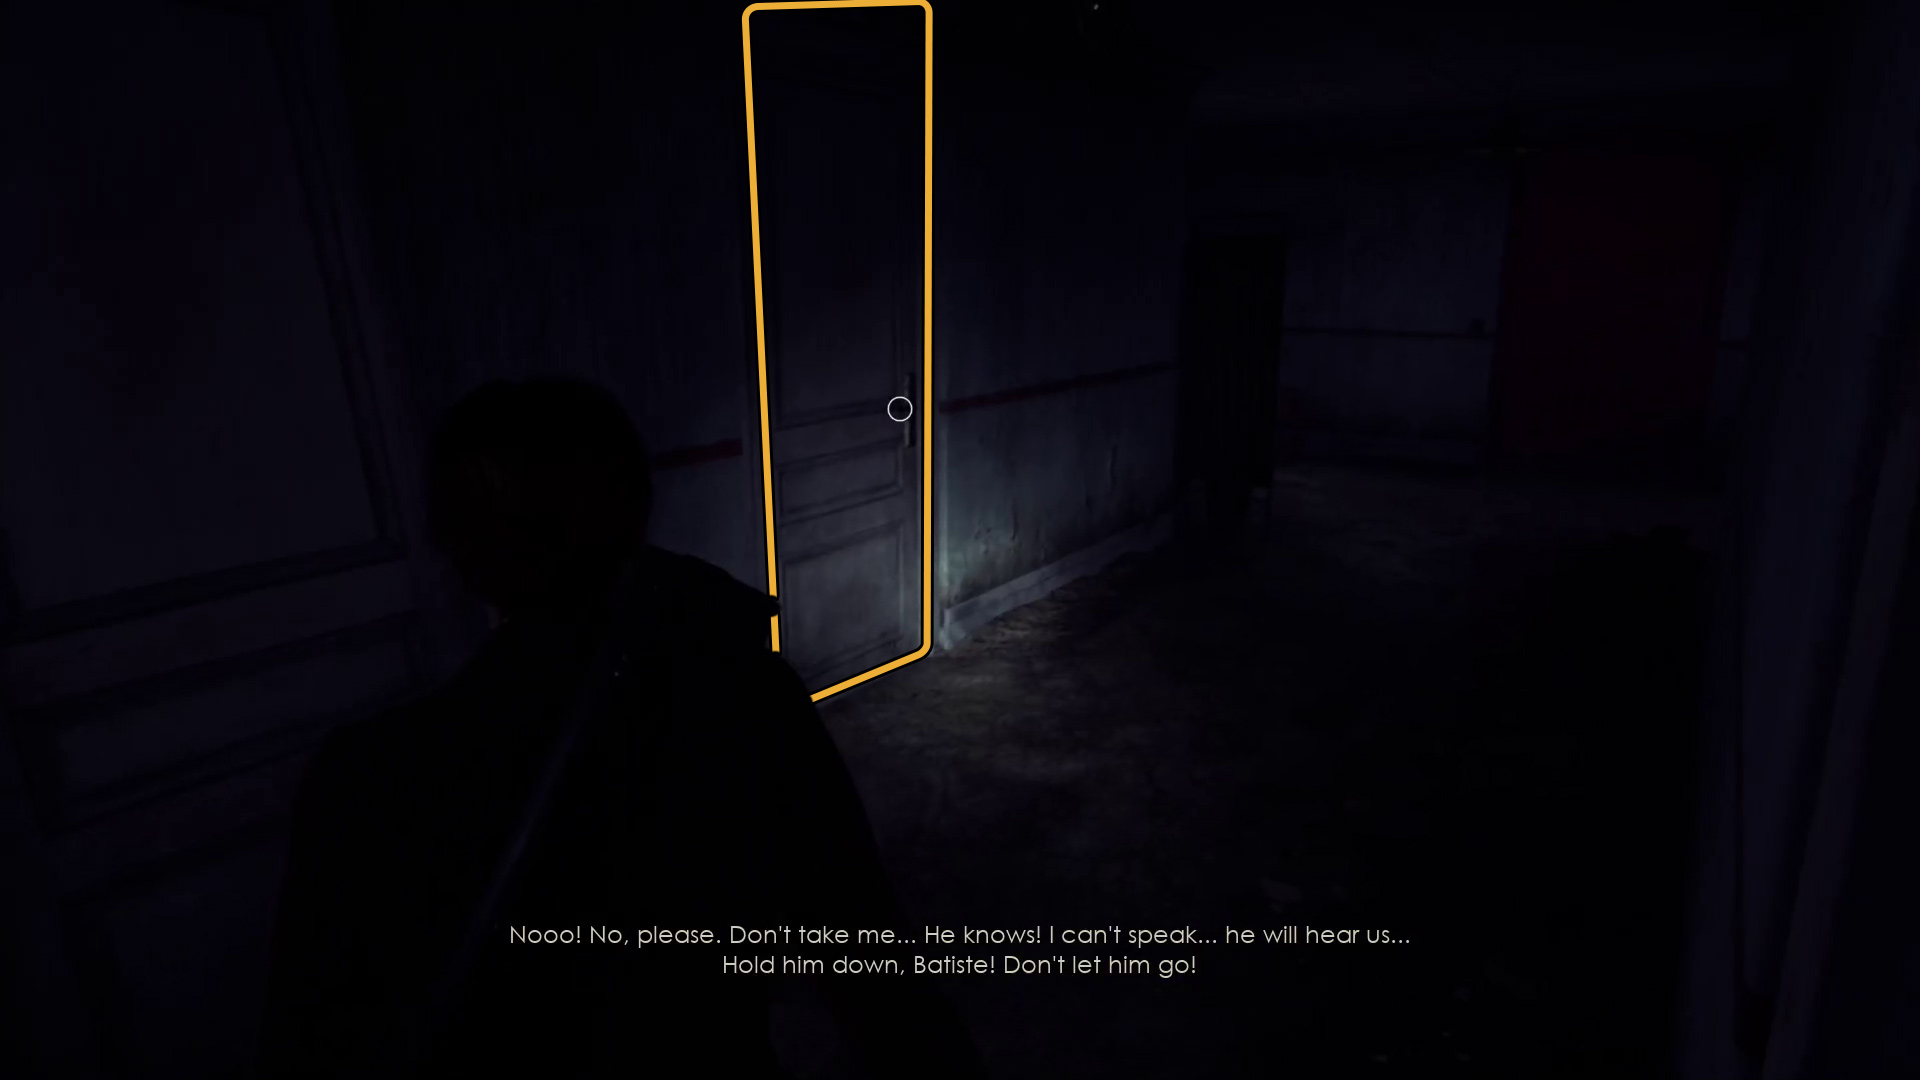
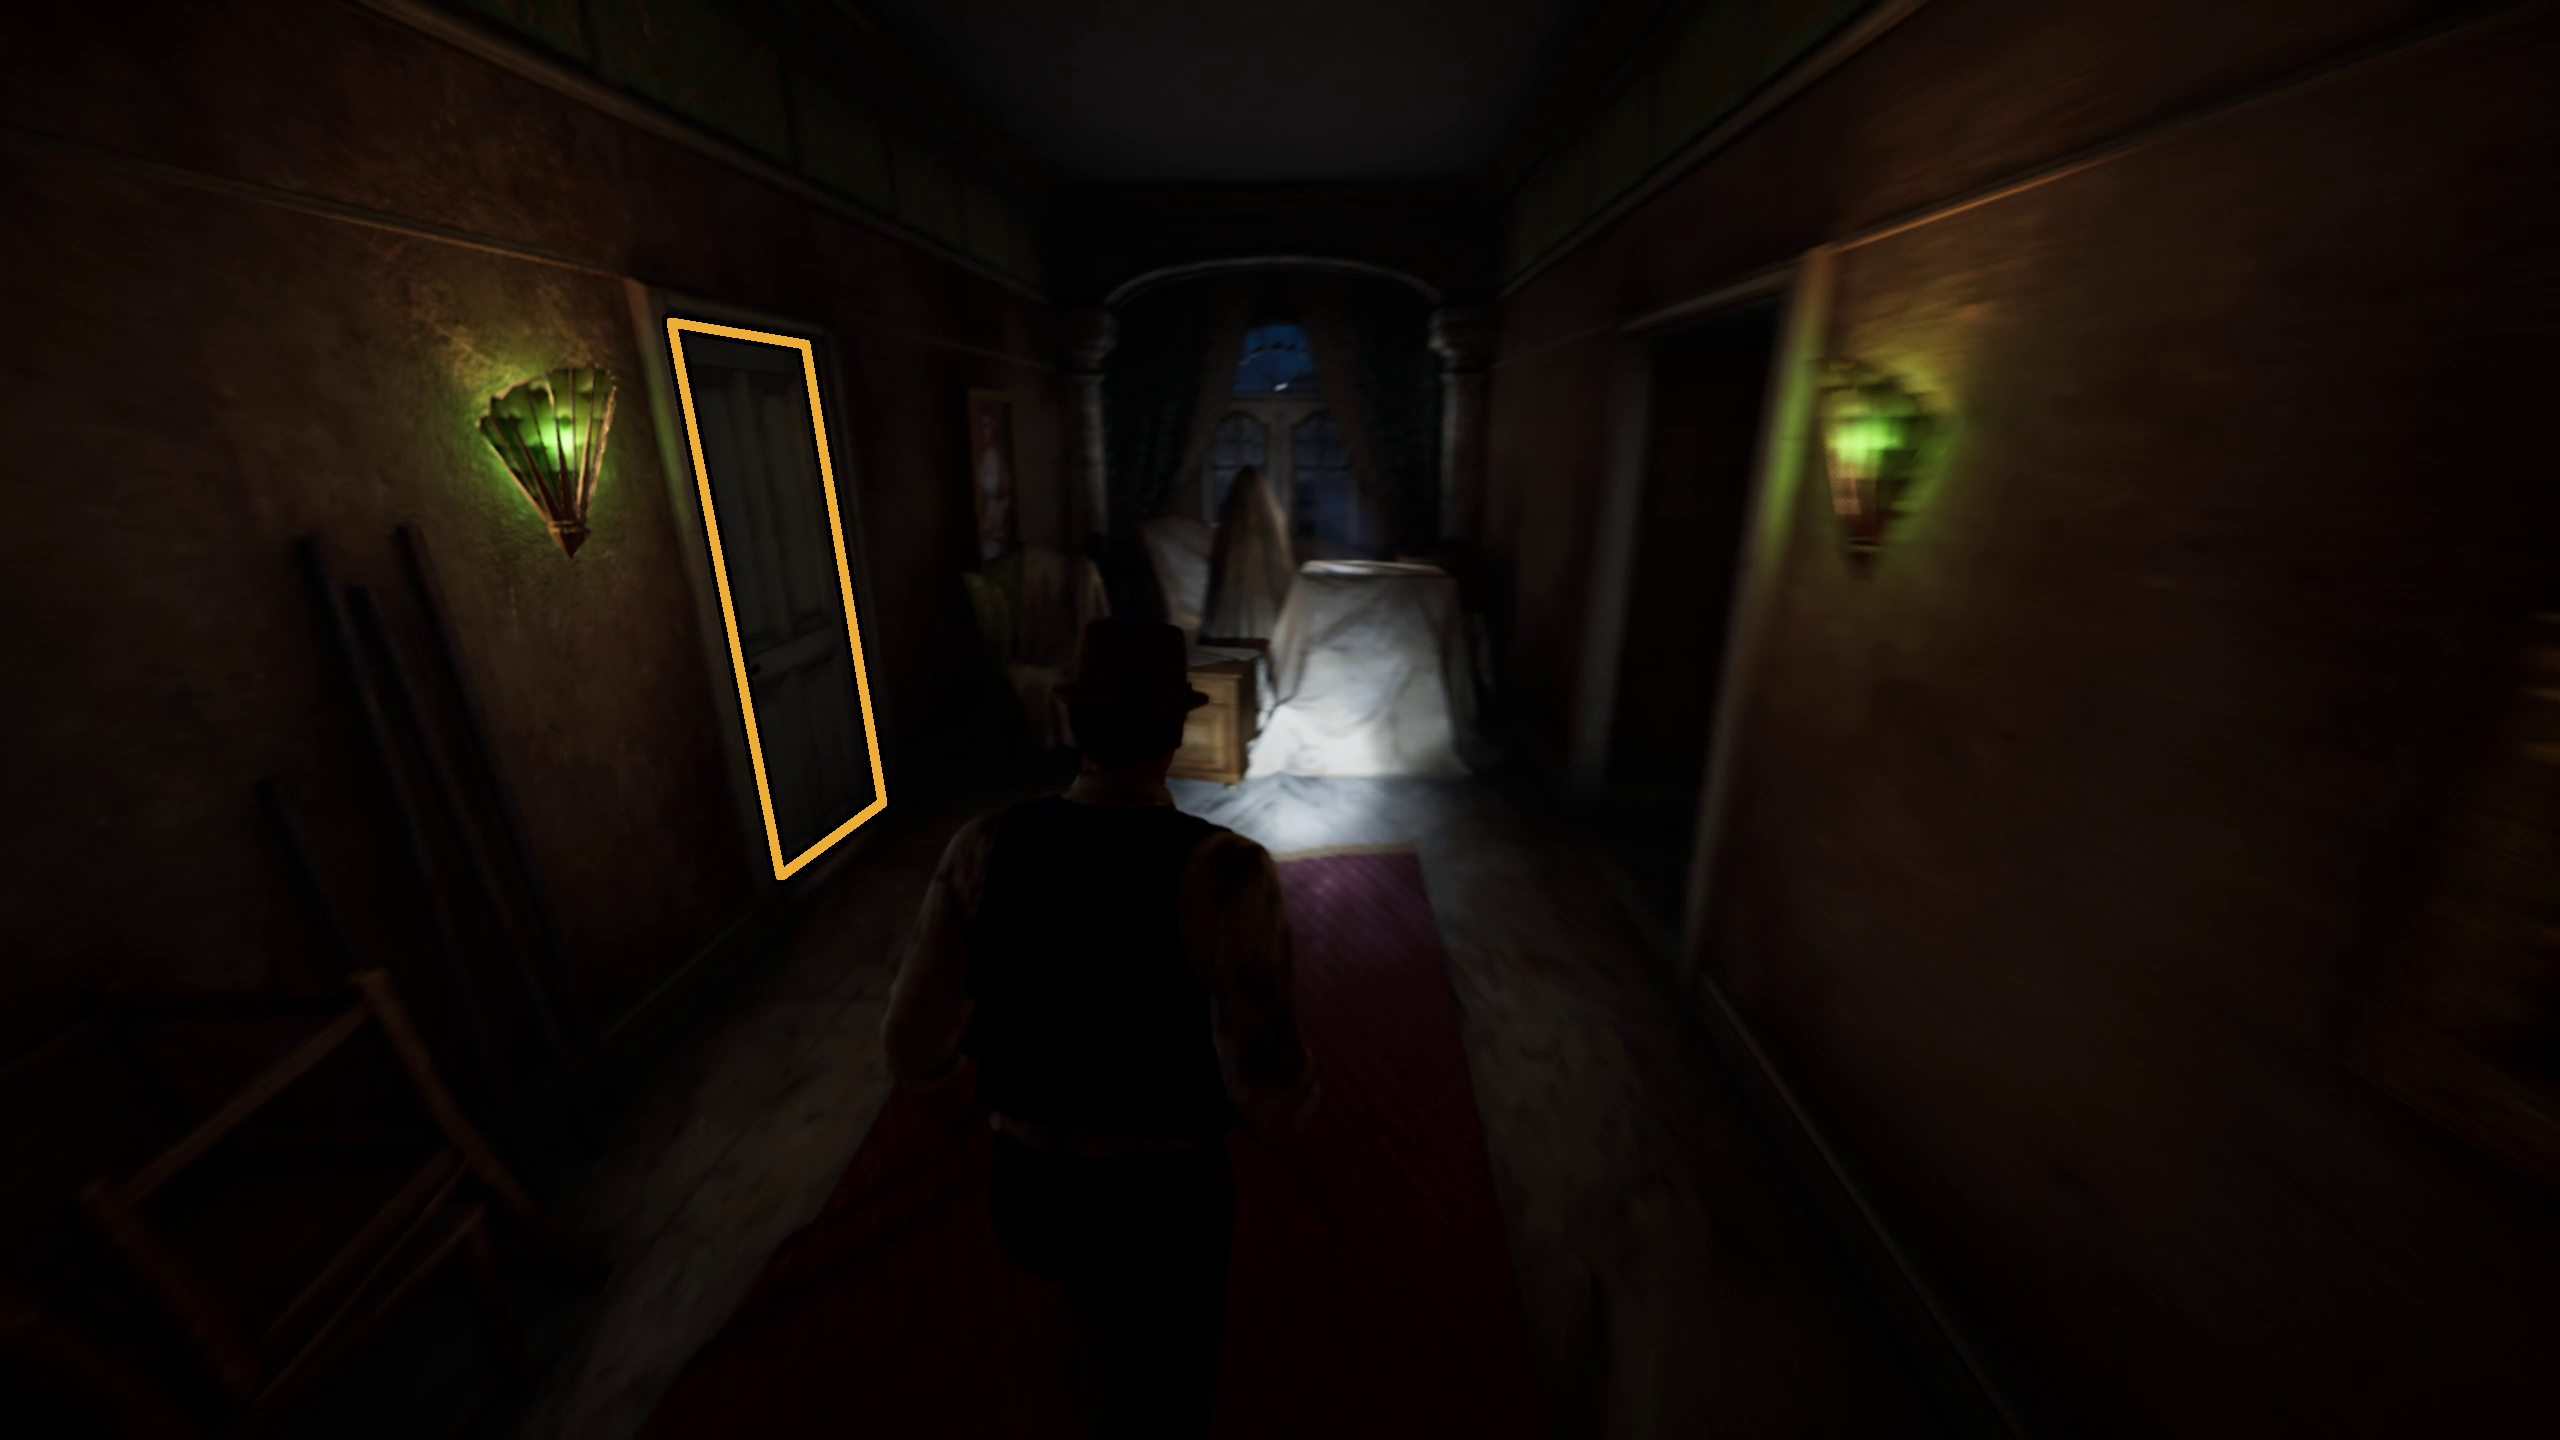
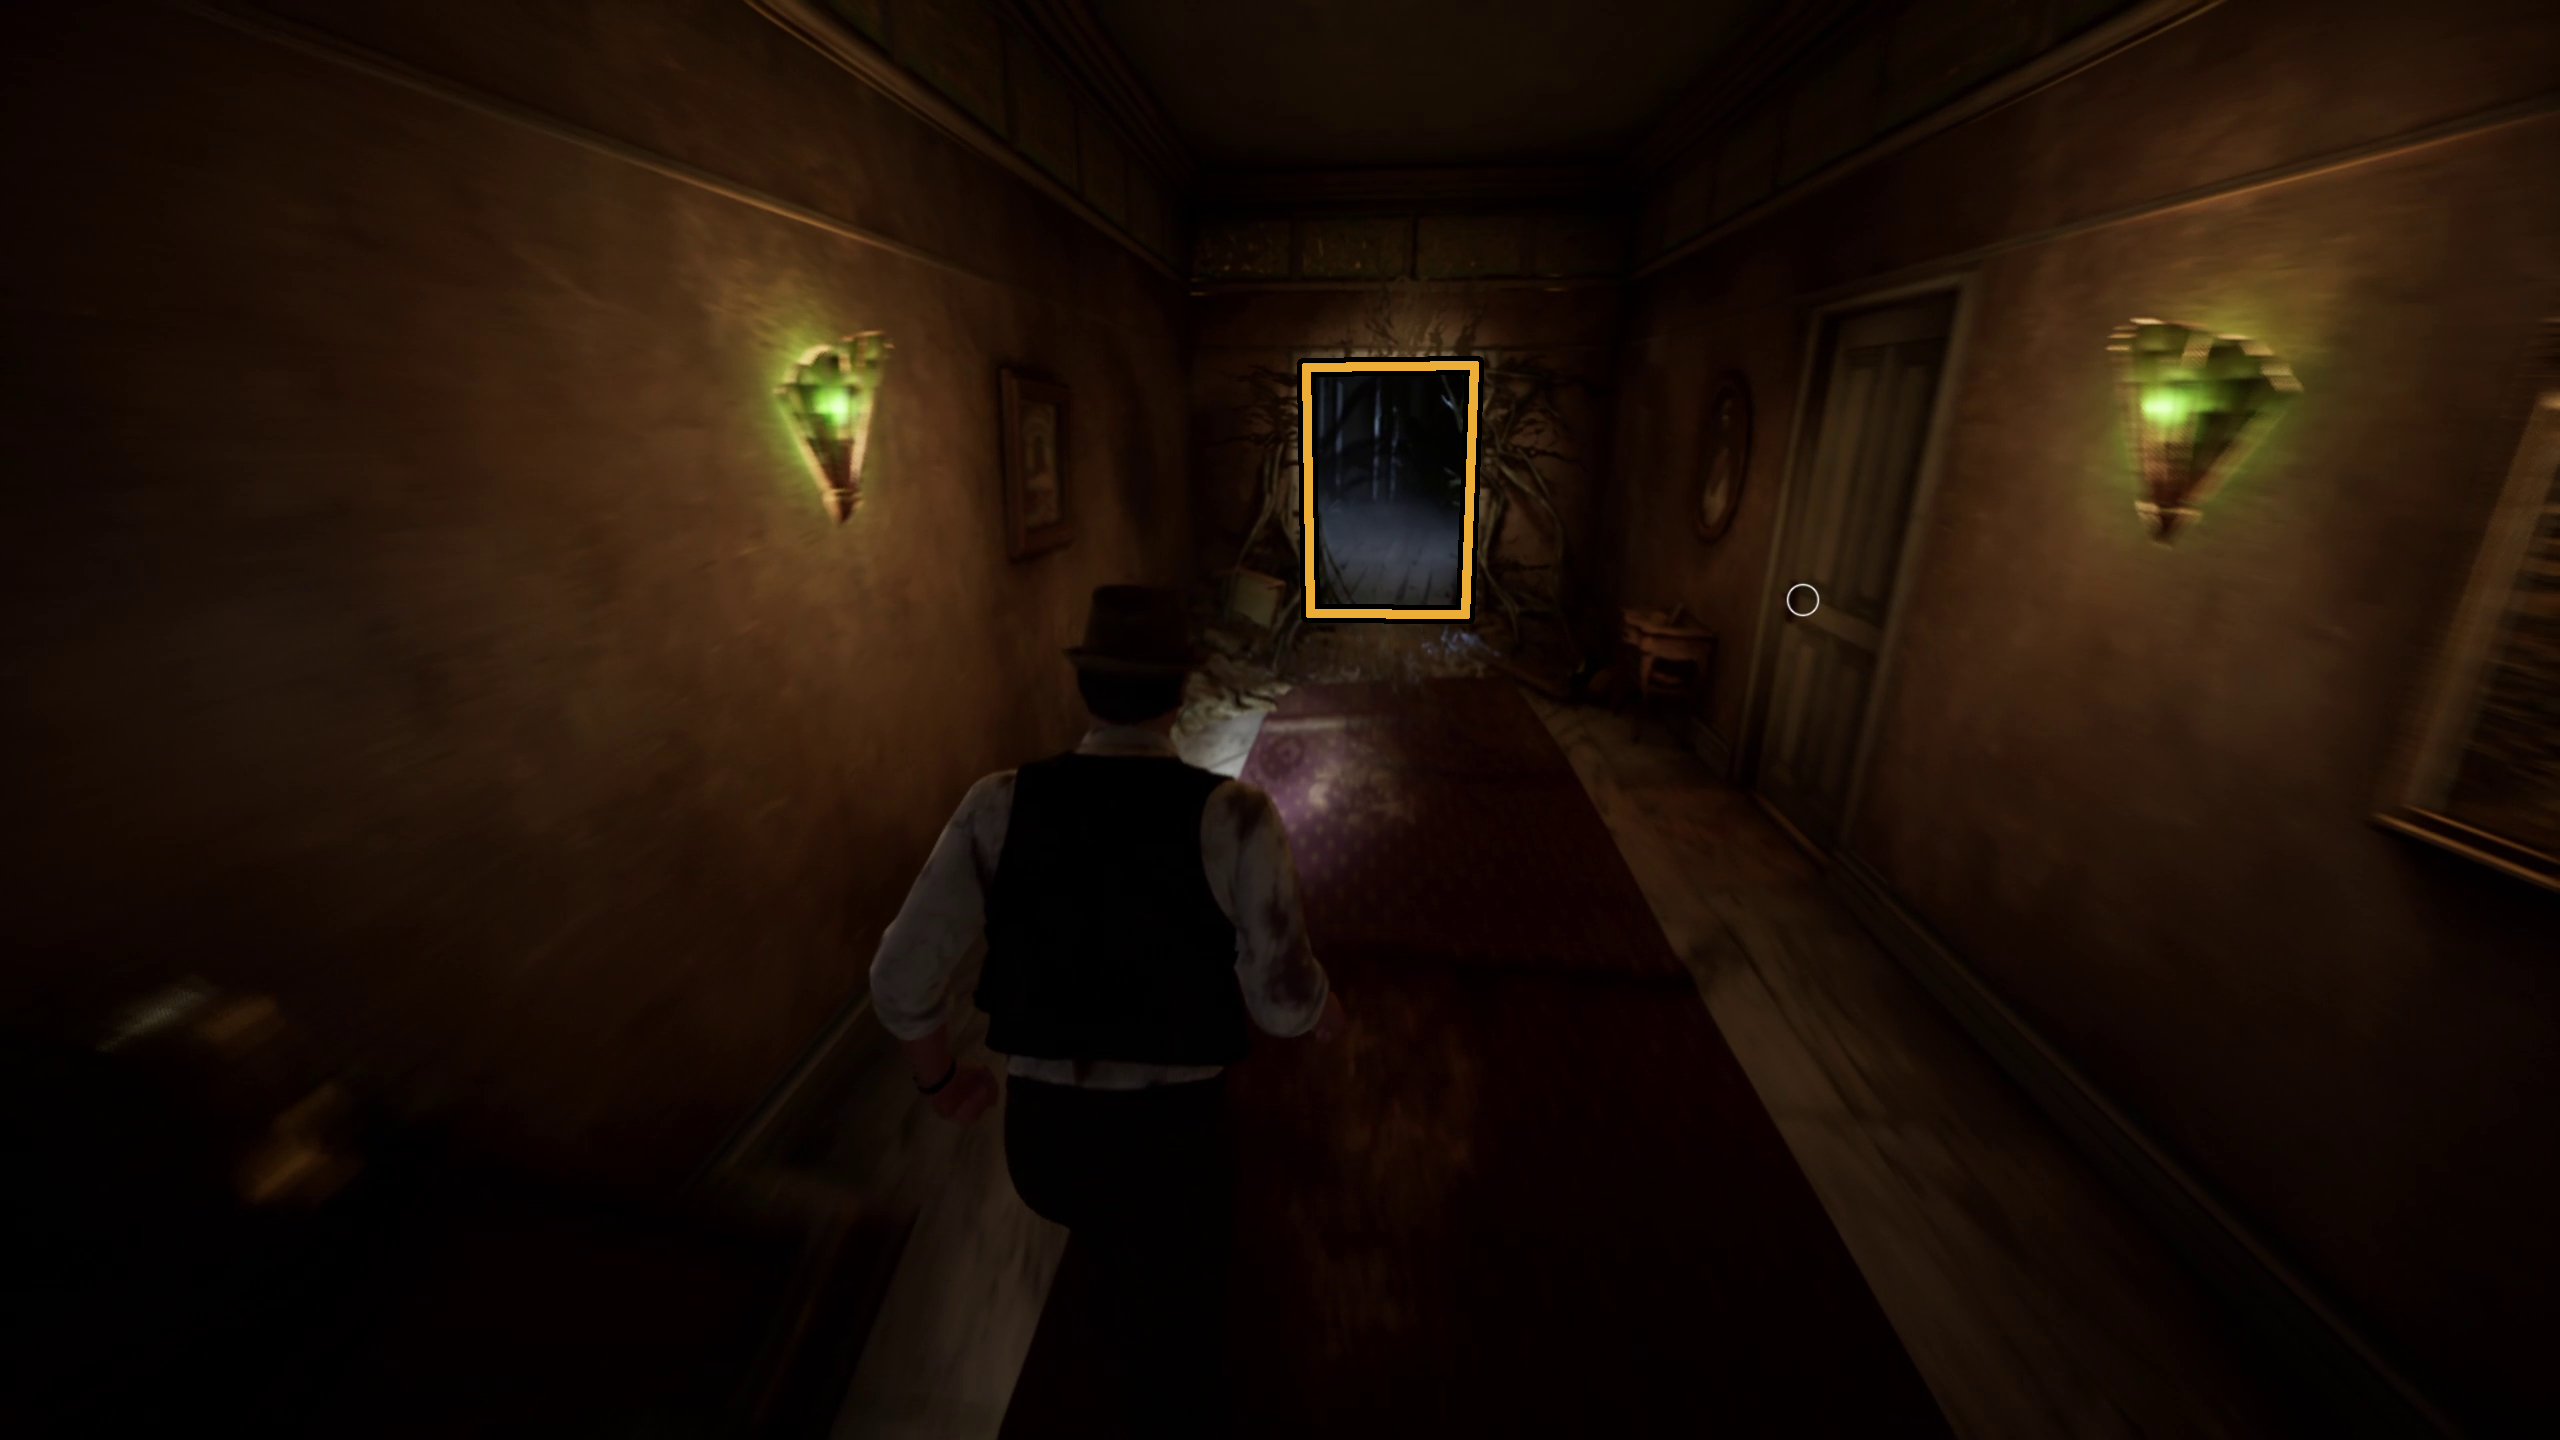
Unlock the 1st Floor Hallway door that you got the key for earlier (Image 15). Immediately, you will see the Dark Man at the end of the hallway, beckoning you to enter the Empty Room (image 16). You won’t be doing so yet, but it is worth noting.
Image 15Image 16
Instead of heading straight for the “Empty” Room, you should stop in both of the rooms leading to him.
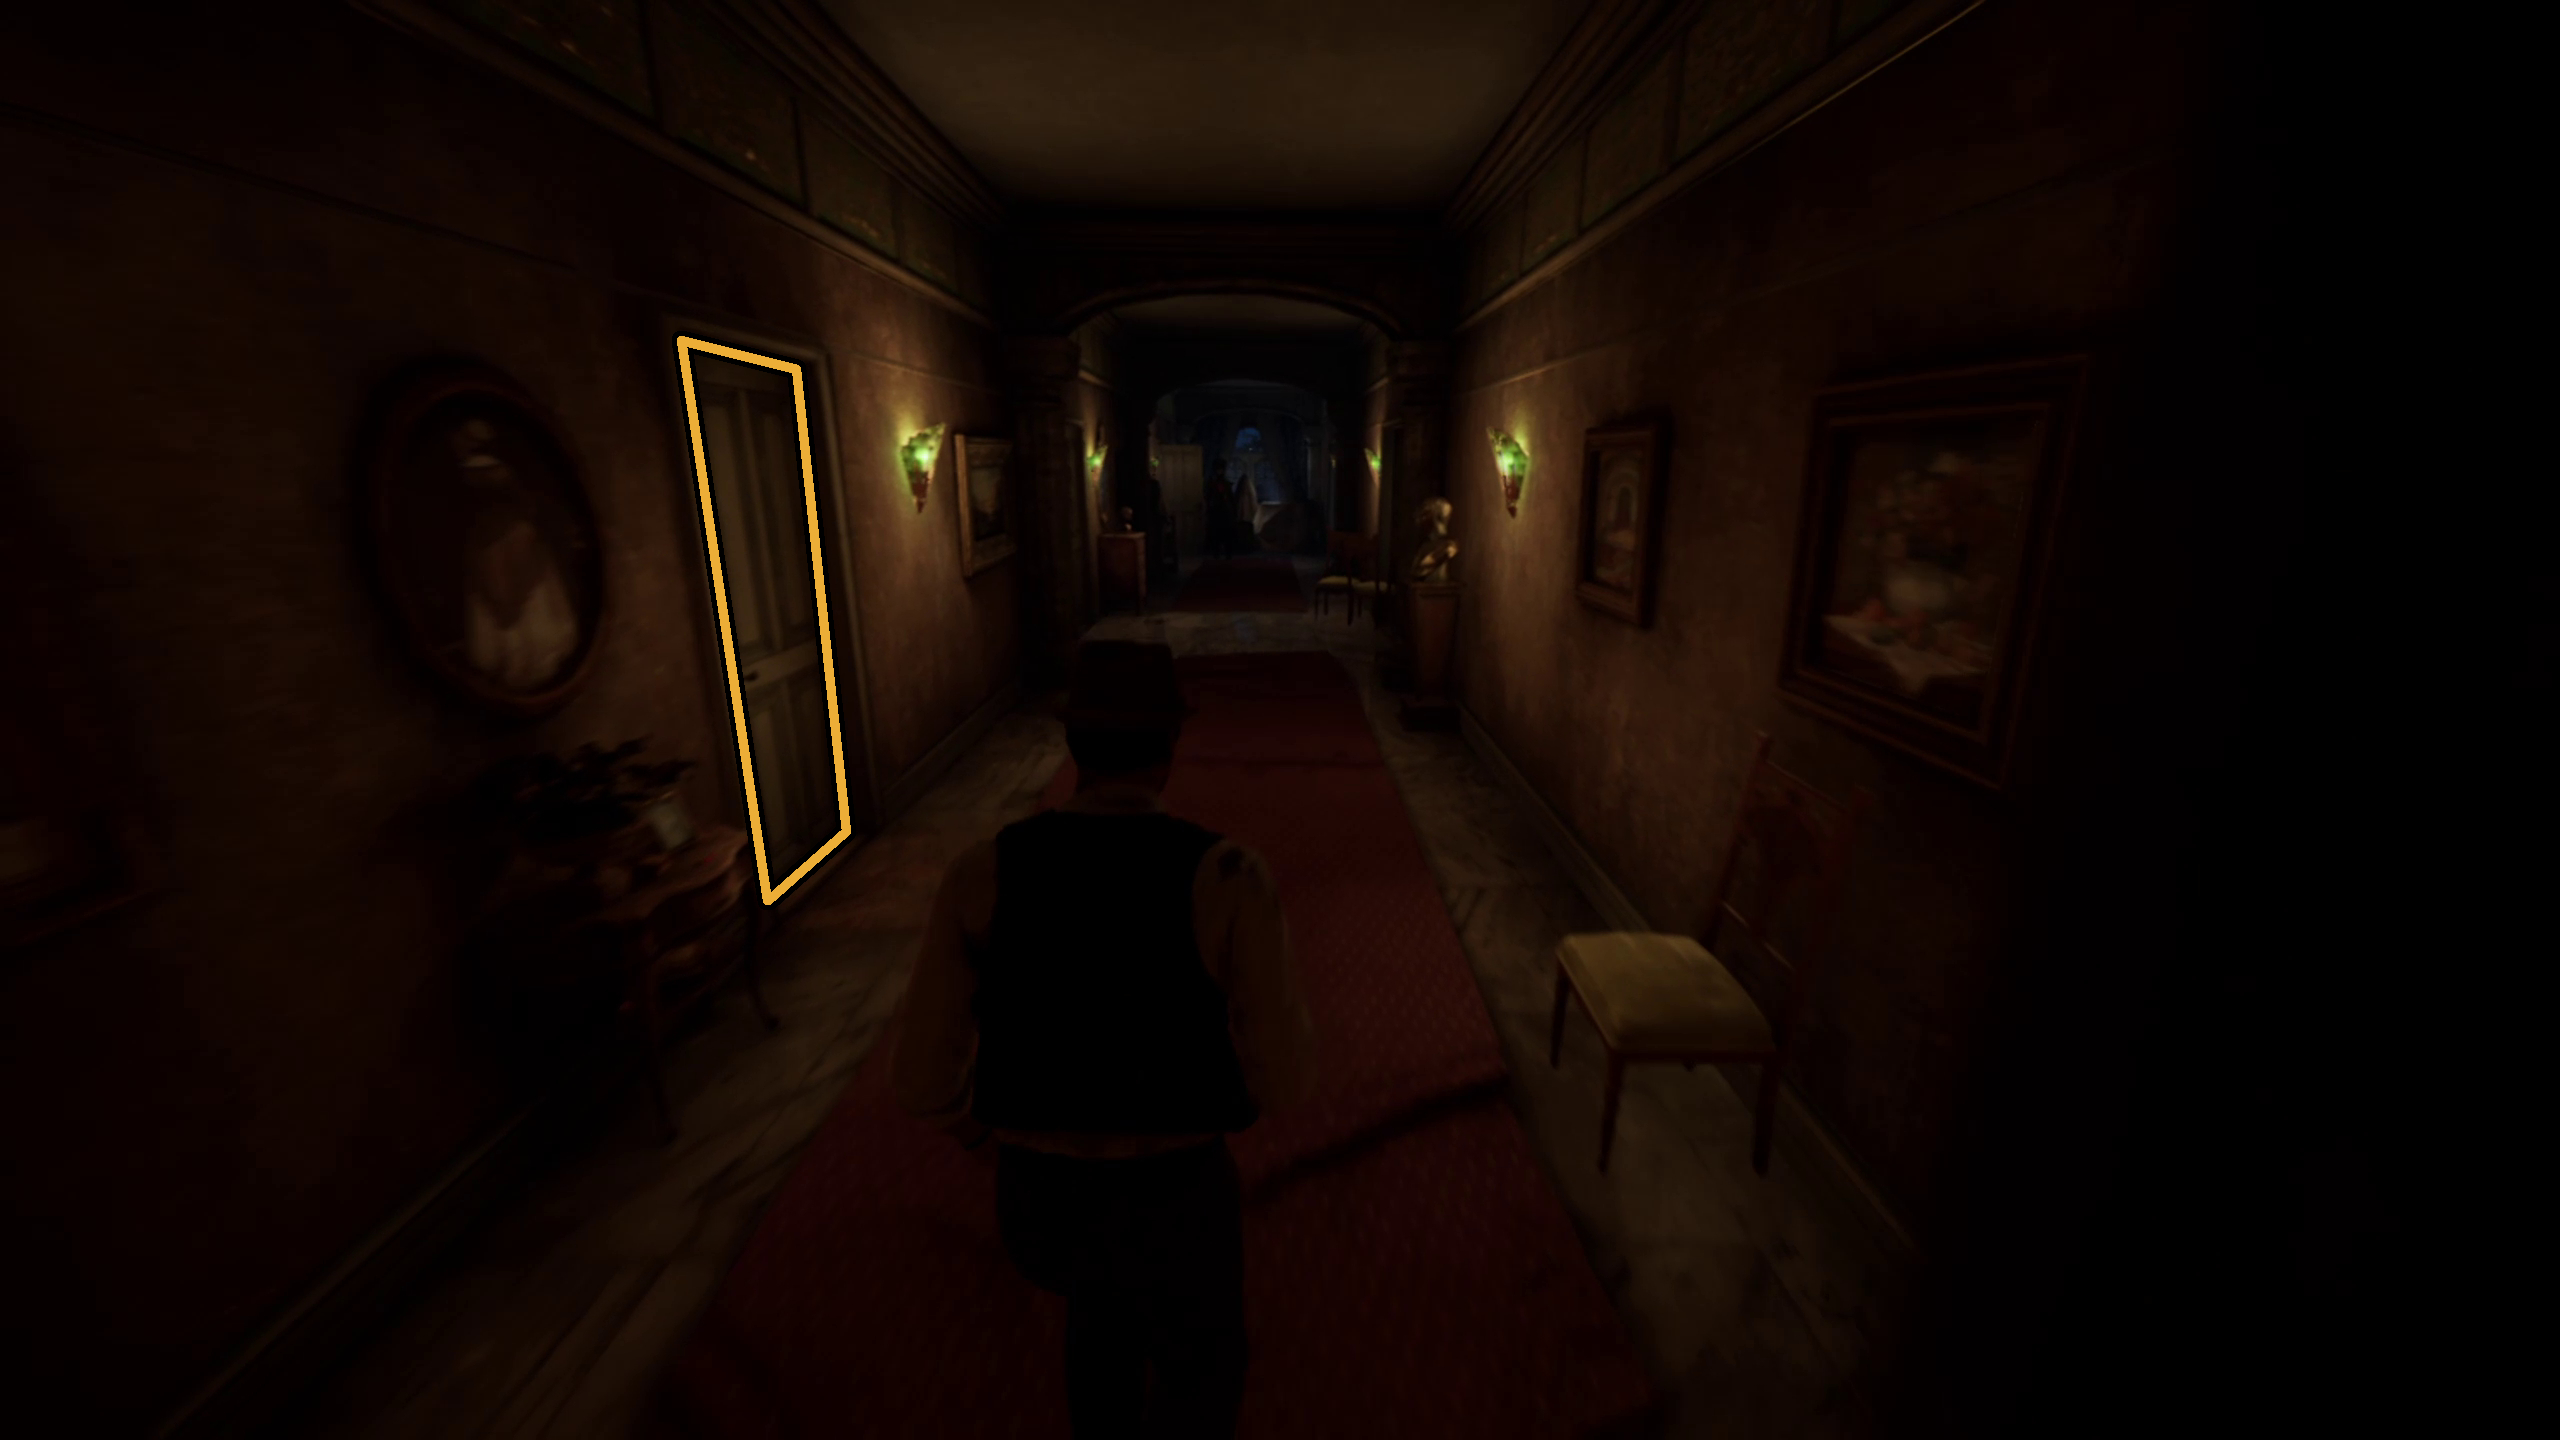
Edward should take note of the first room on your left, MacCafferty’s room (Image 17), because there is a vent at the end of the room that you will want to open later (Image 18). For both characters, you can grab the Moment of Clarity note.
Image 17Image 18
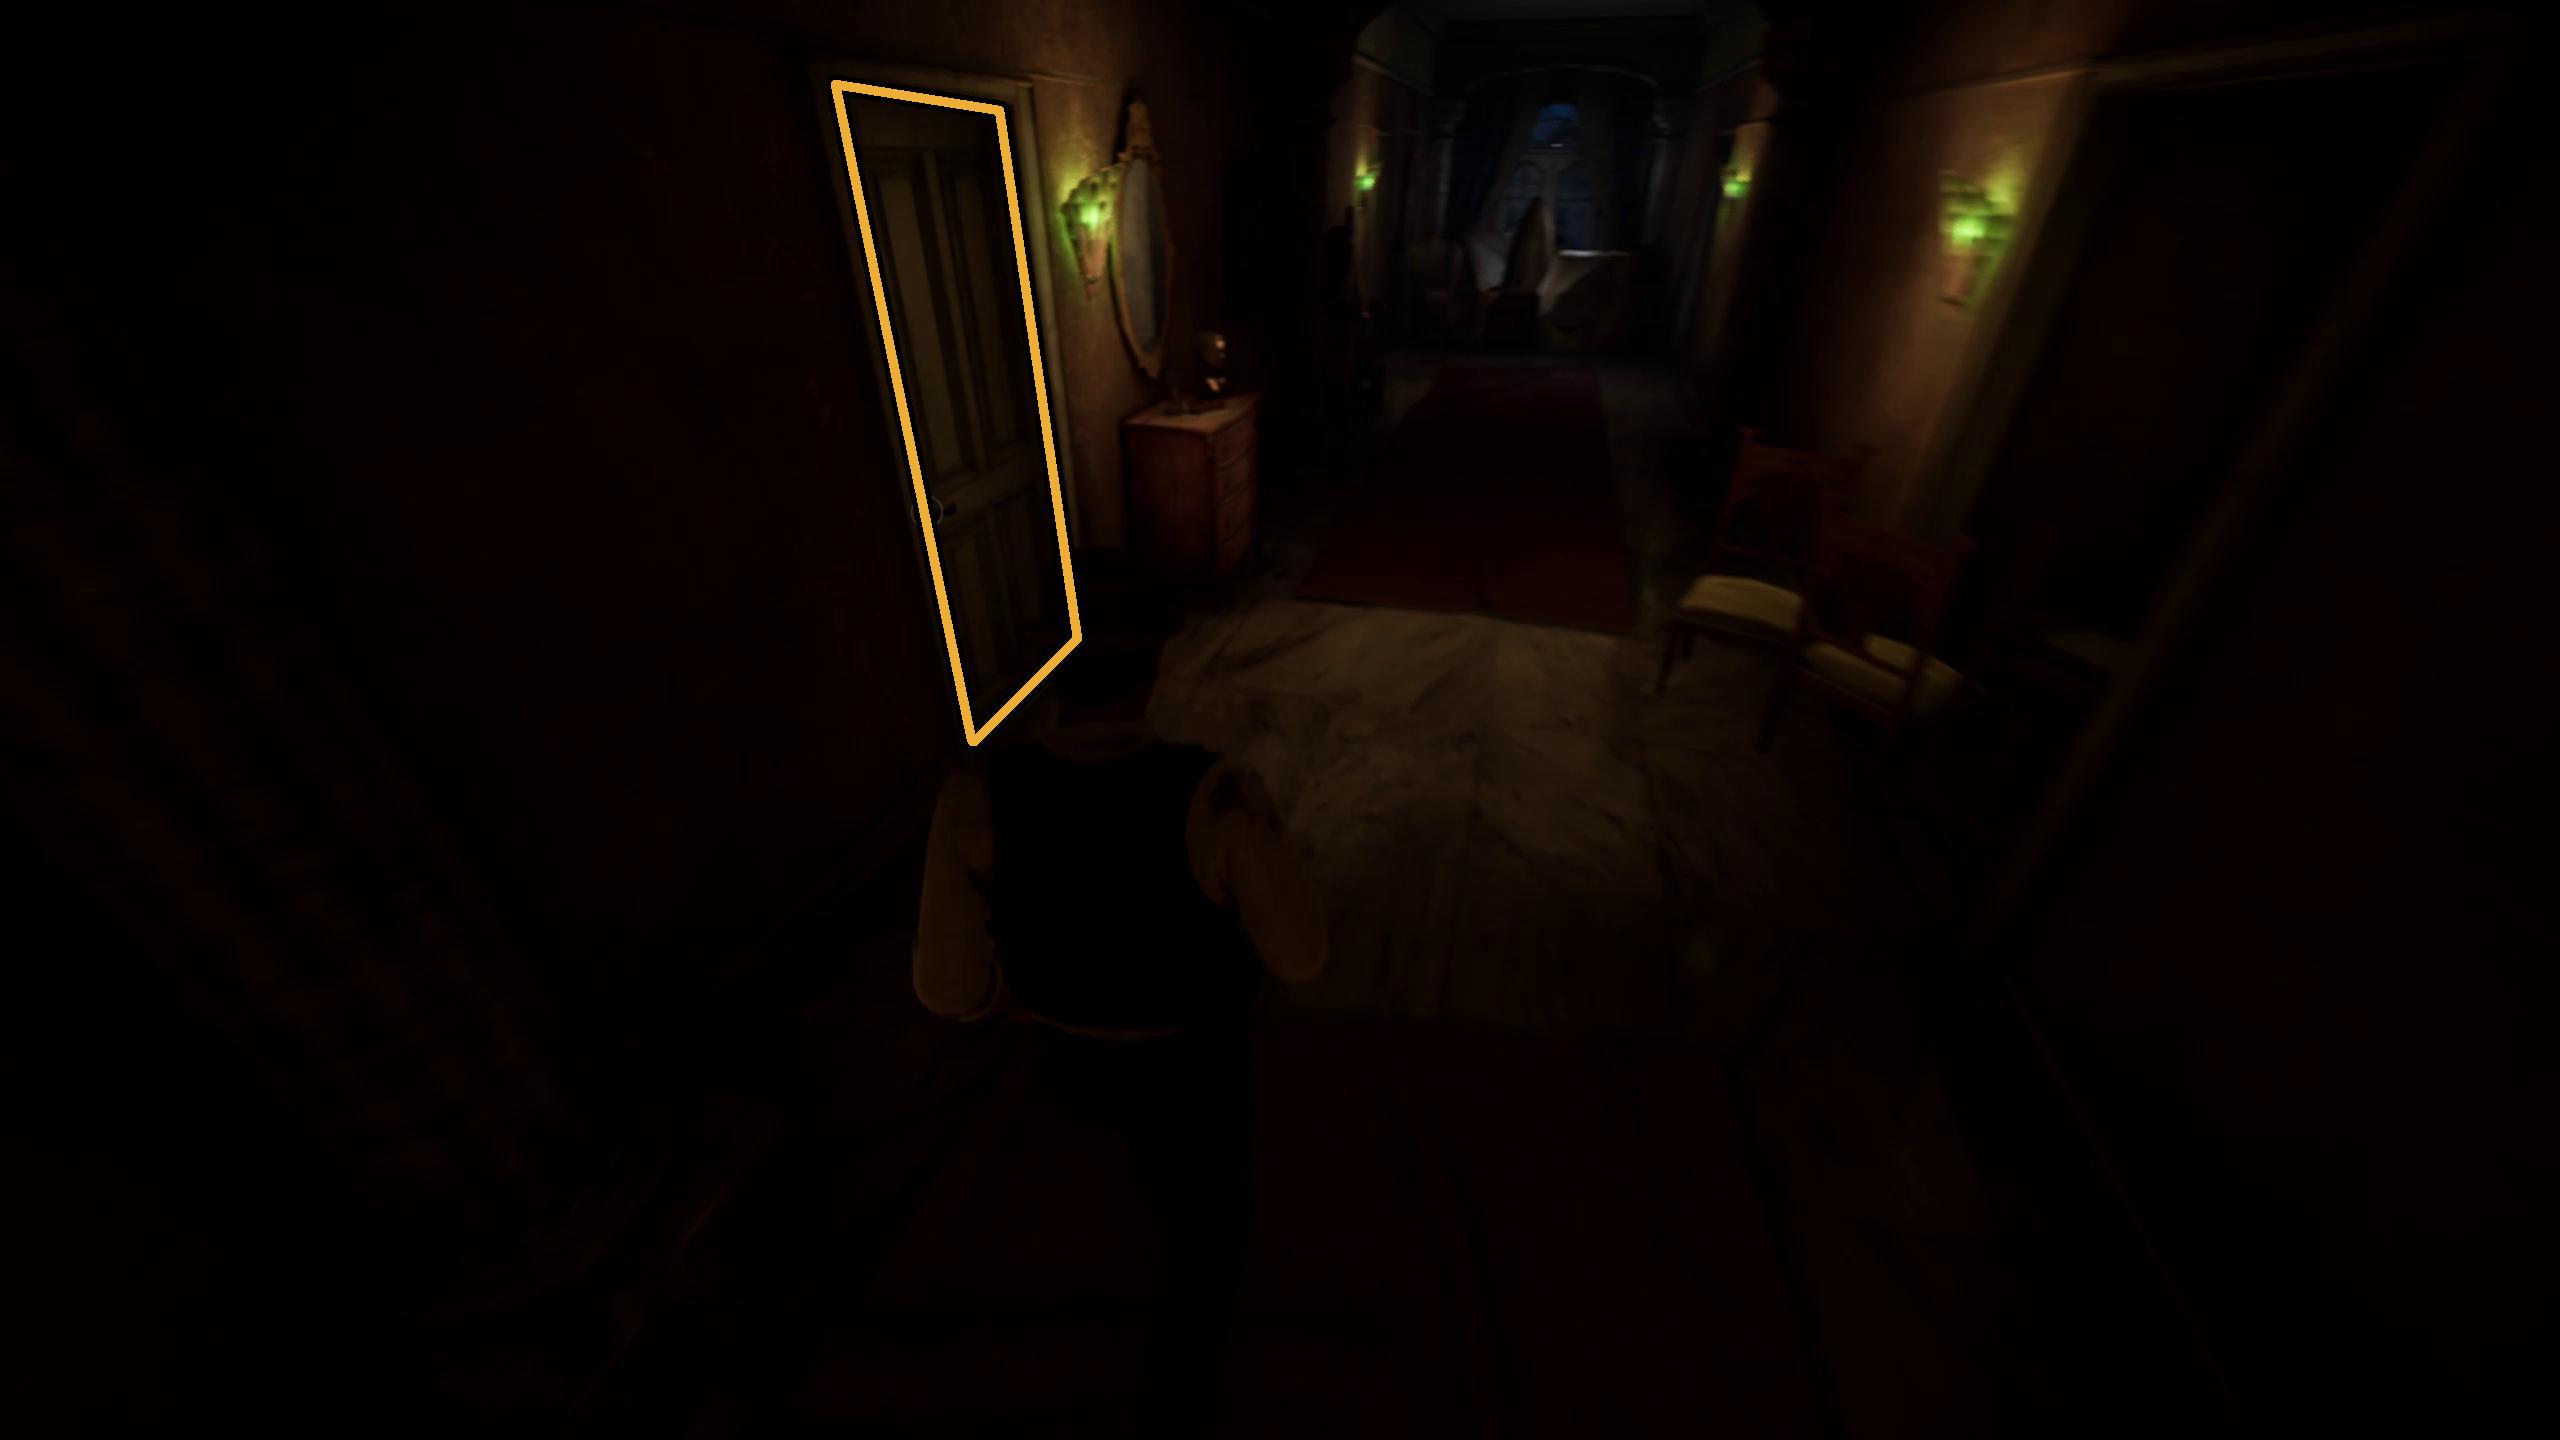
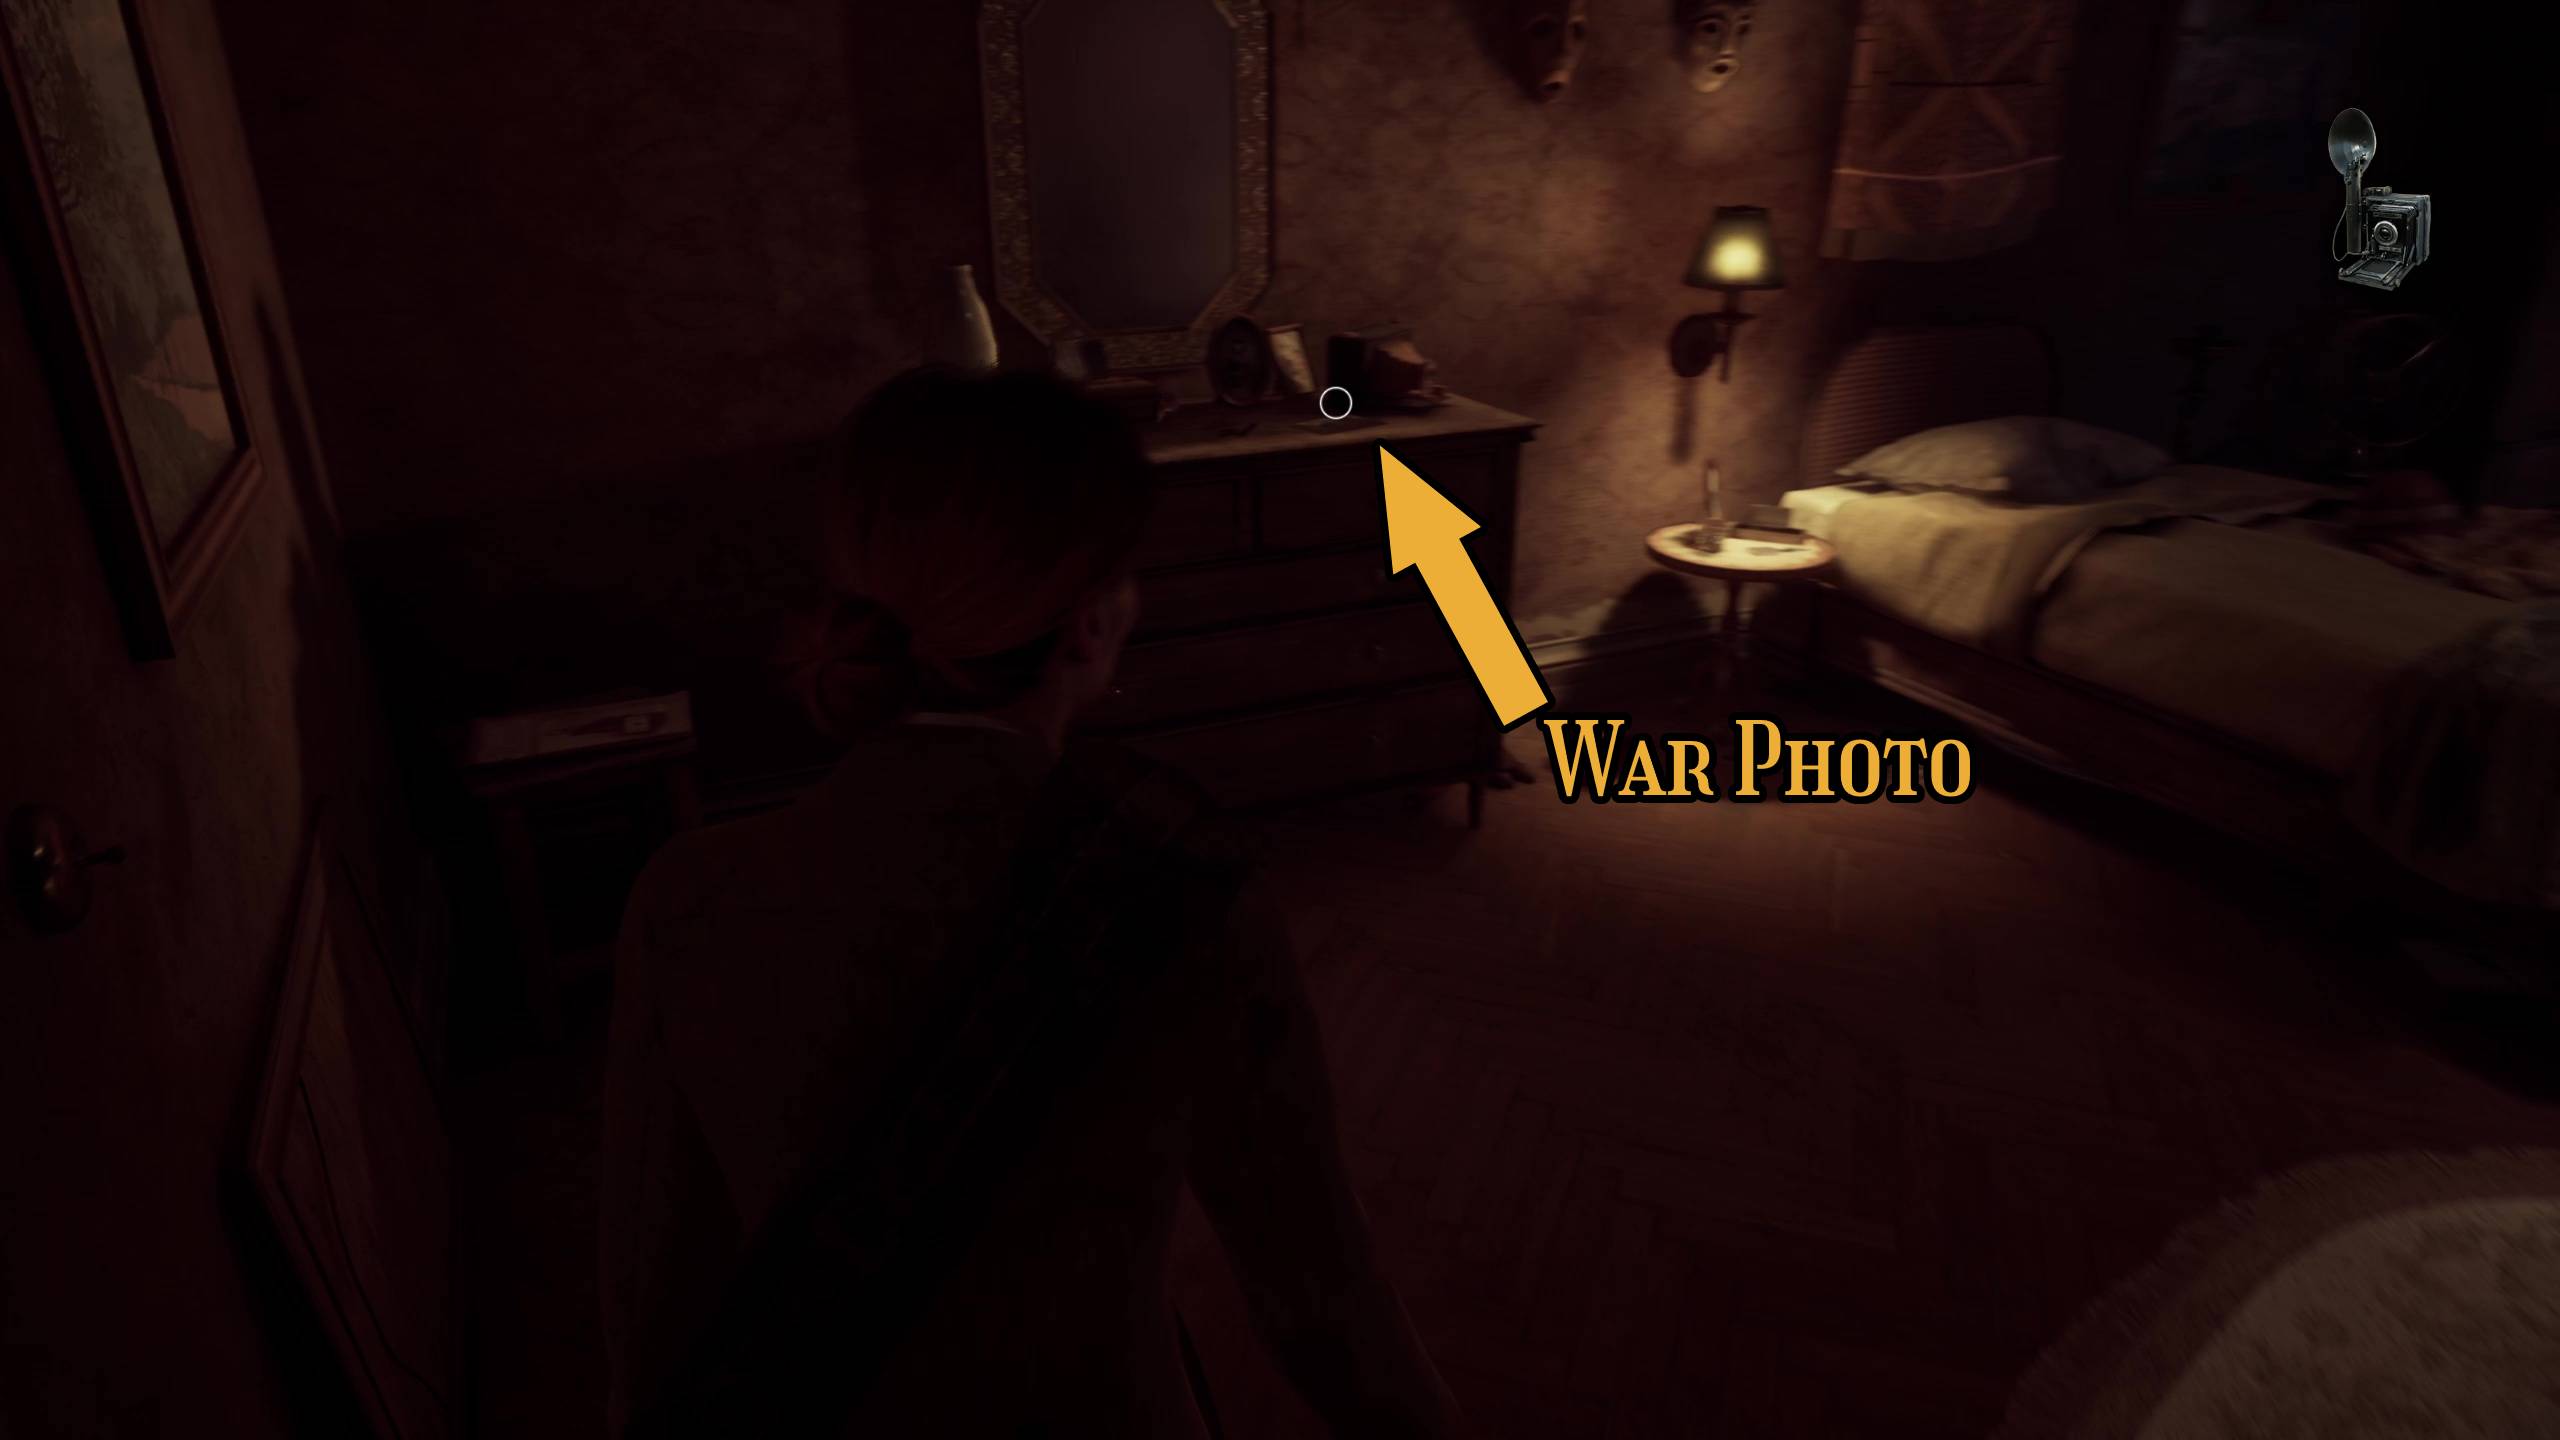
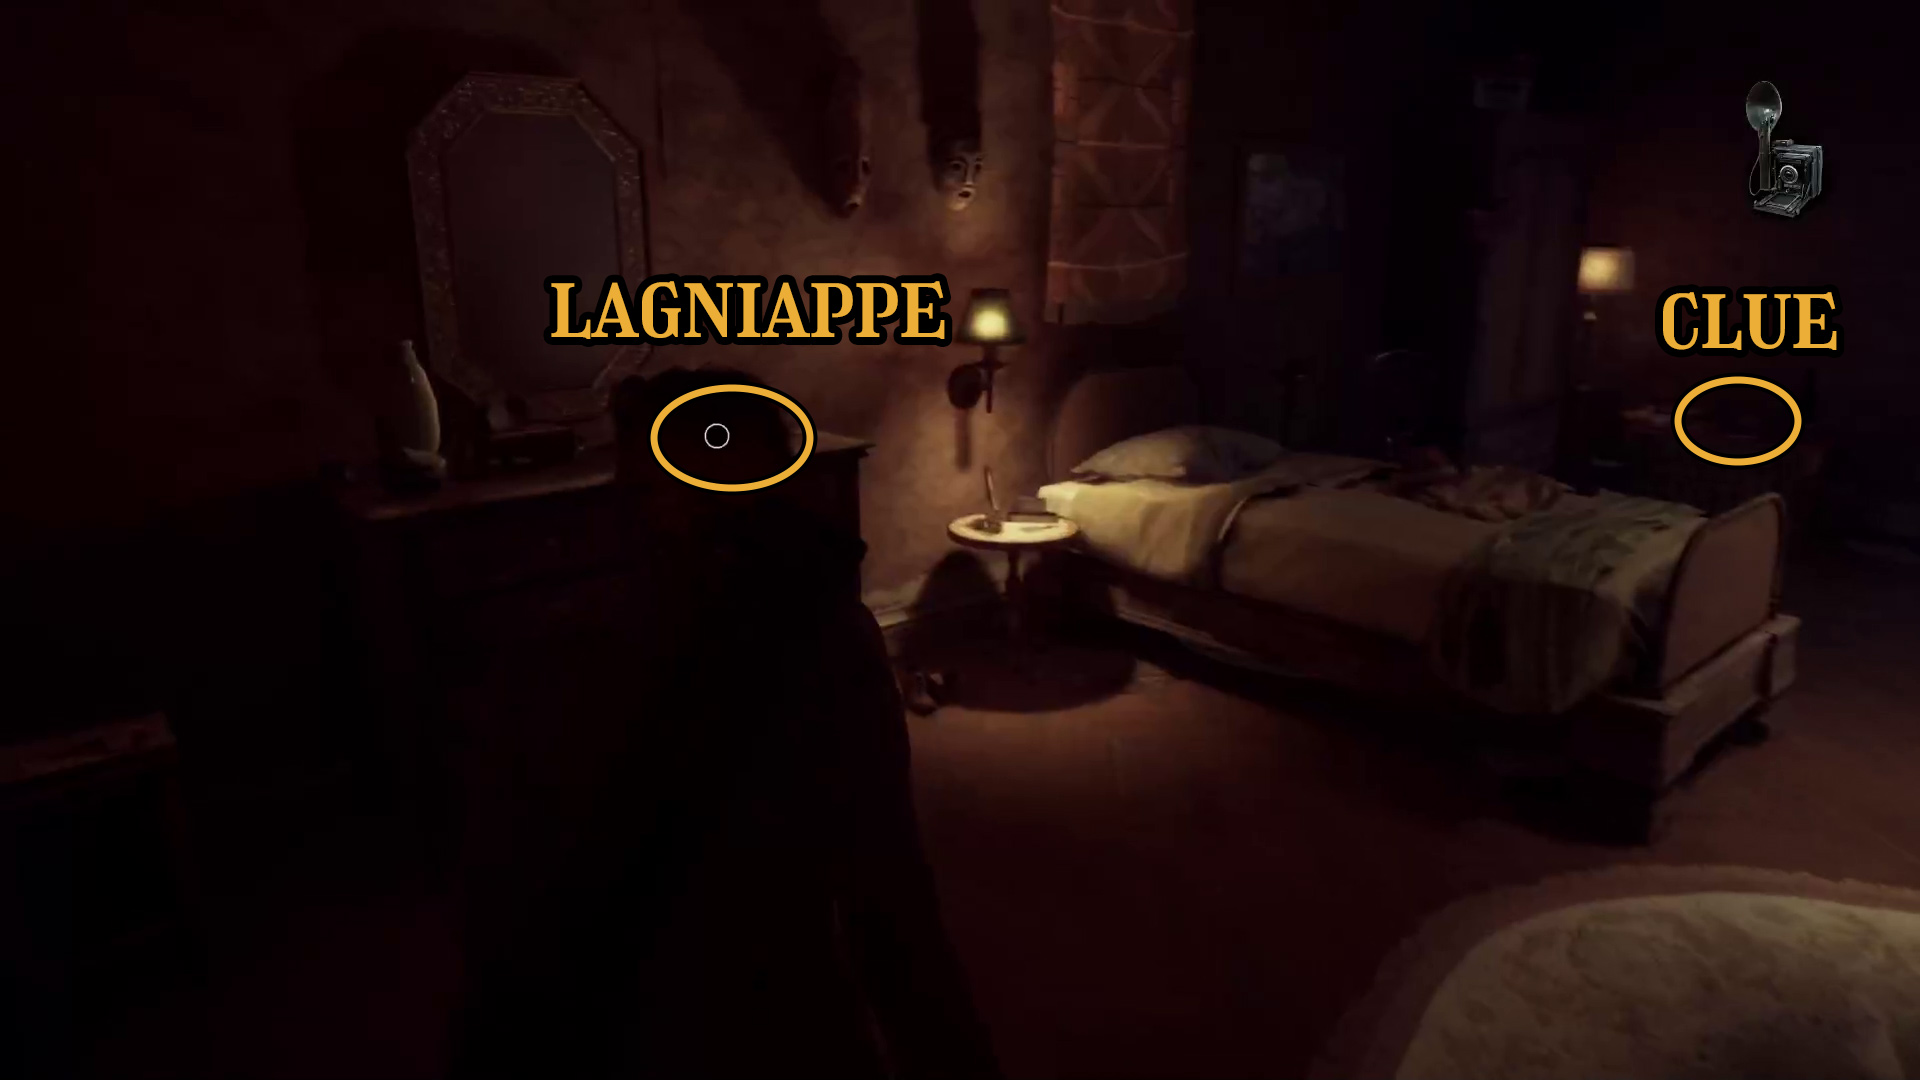
Emily, meanwhile, should pay attention to the second room on the left, Ruth’s room (Image 19). Once inside as Emily, look on Ruth’s dresser to find the War Photo Lagniappe (Image 20).
Image 19Image 20
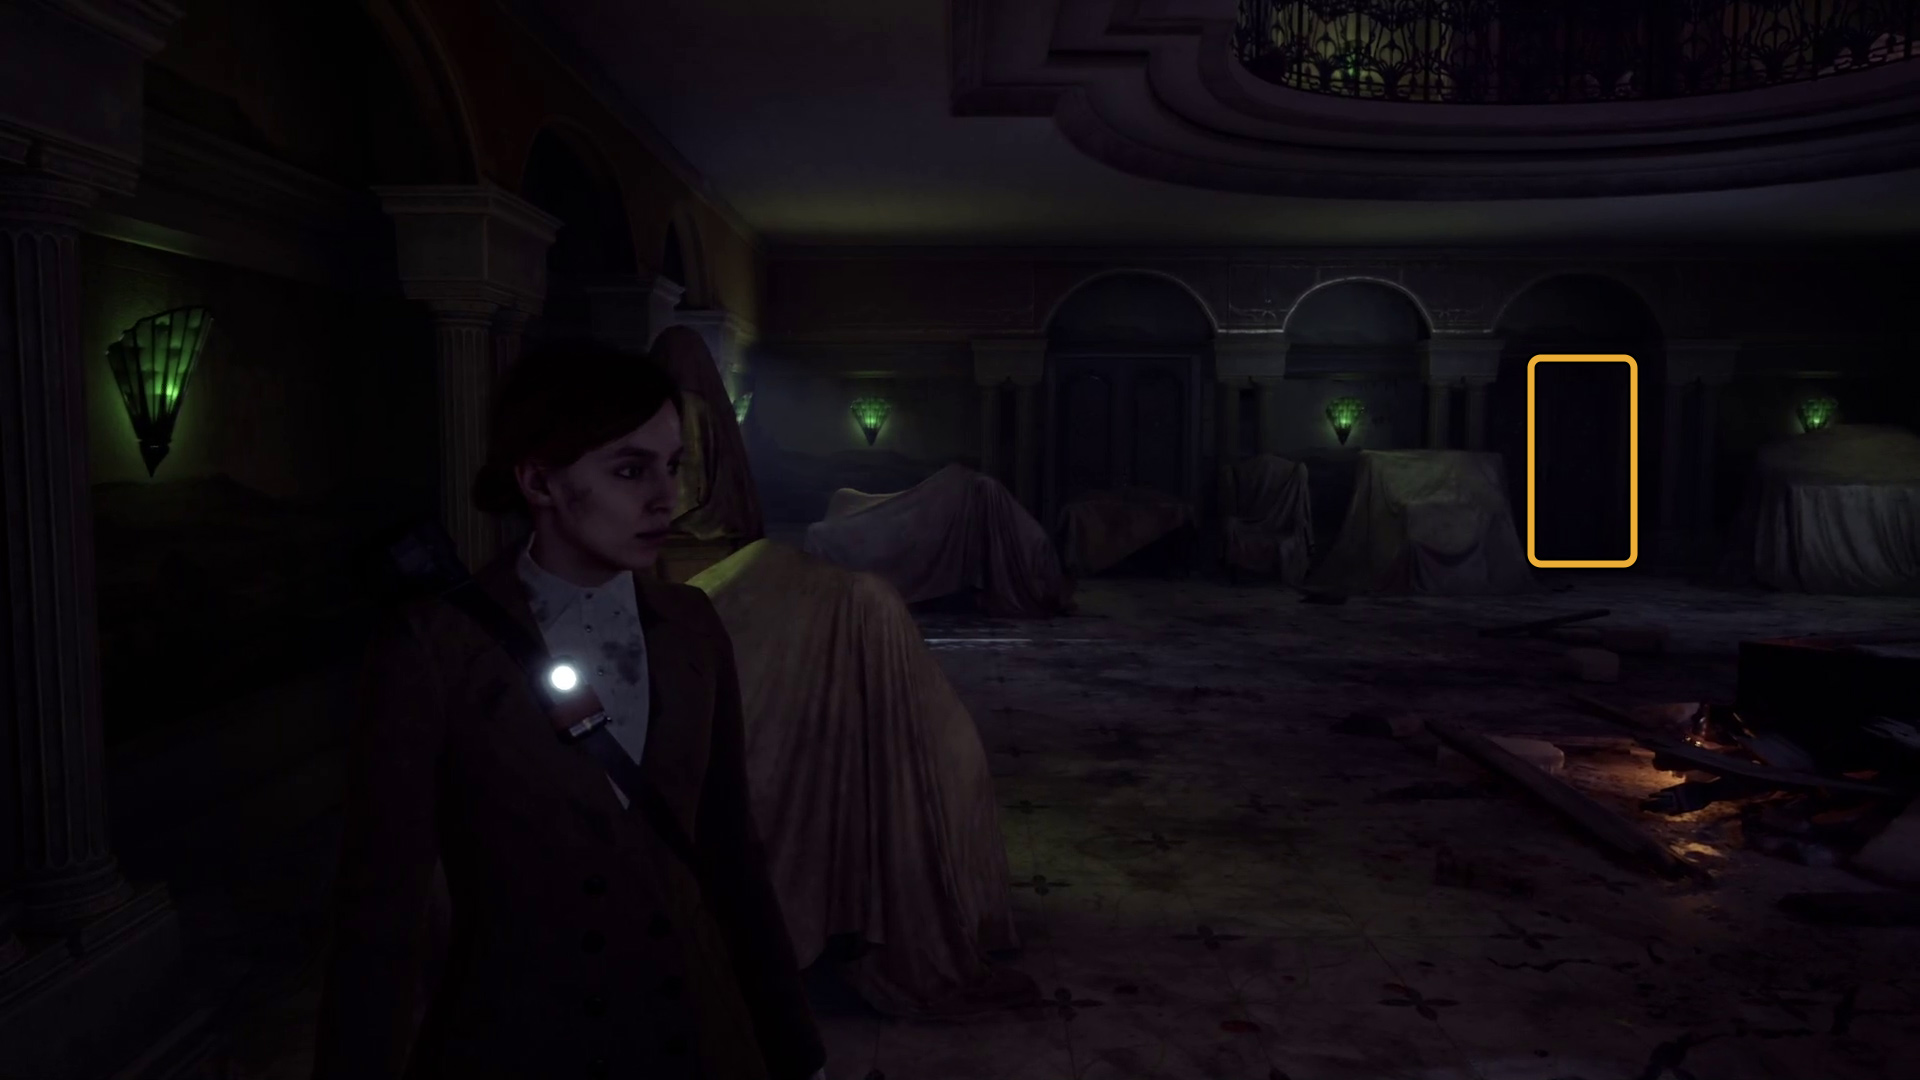
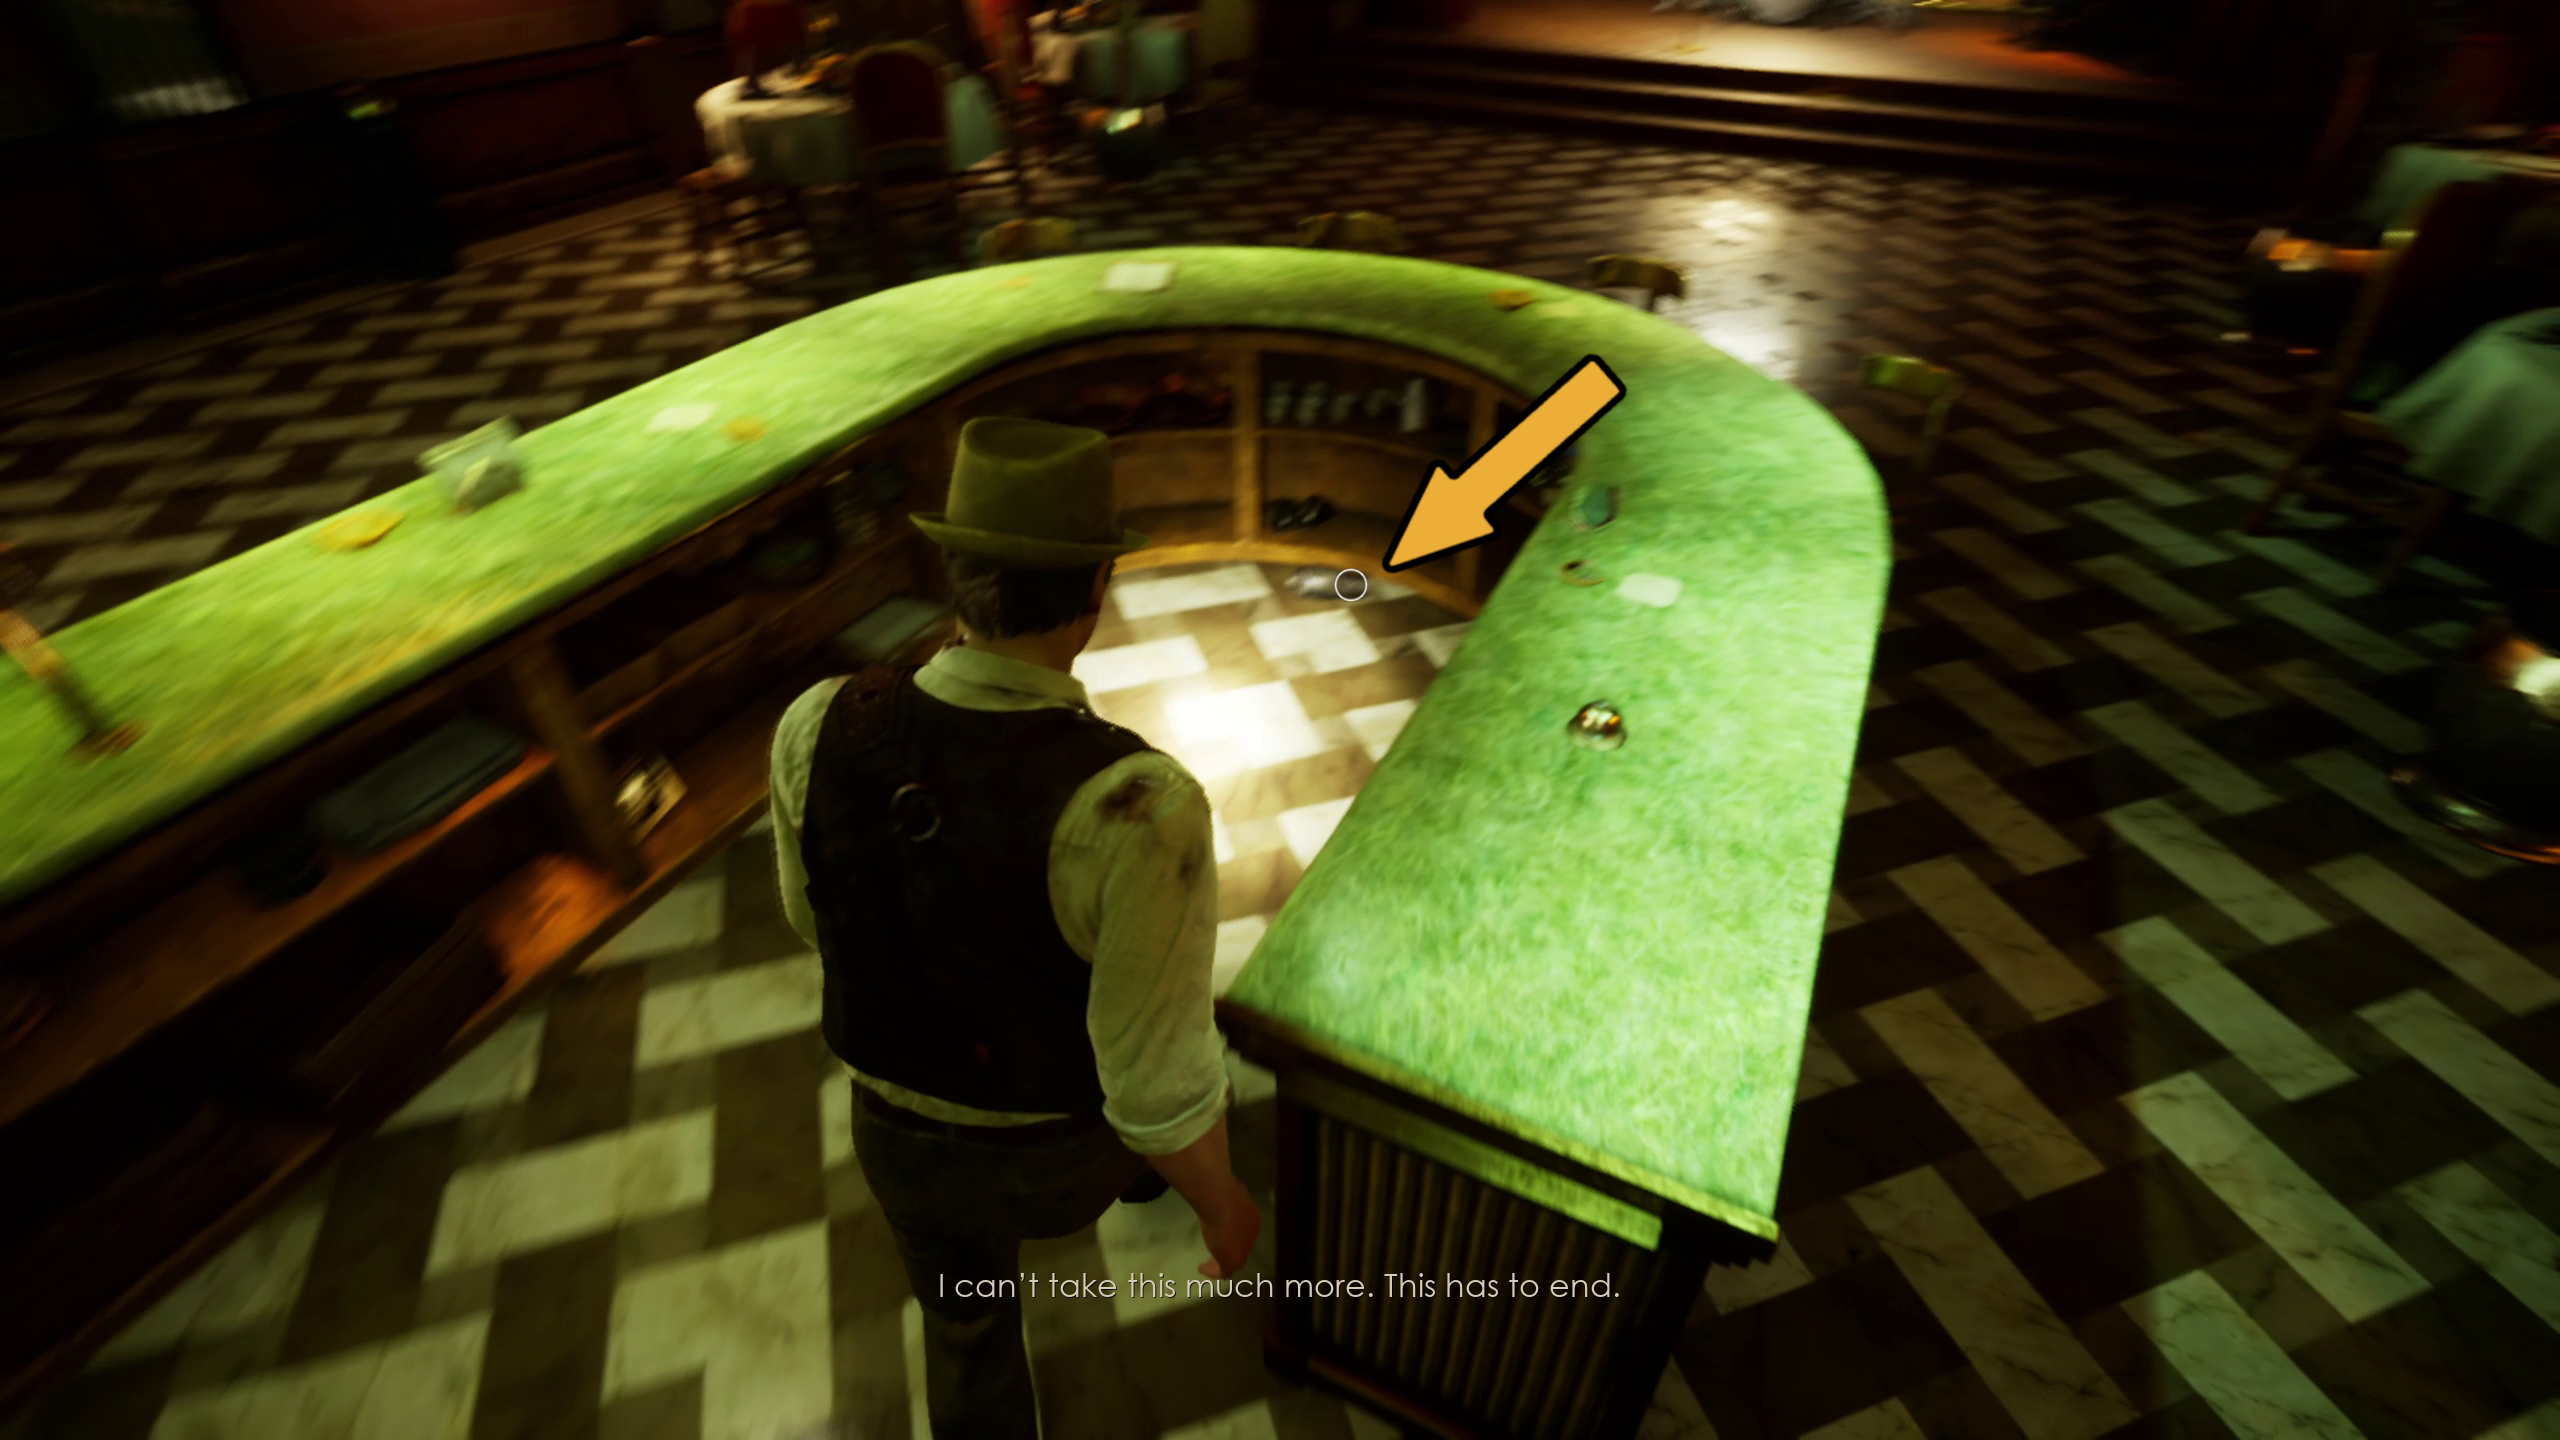
Once you’ve entered both of these rooms, it will trigger the event that causes the Grand Parlor to transform into a jazz club. Simply the hallway once again and go to the door to your right, which usually leads to the Grand Parlor (Image 21). While here, make sure to go behind the bar to grab the elusive Jangling Shaker Lagniappe (Image 22).
Image 21Image 22
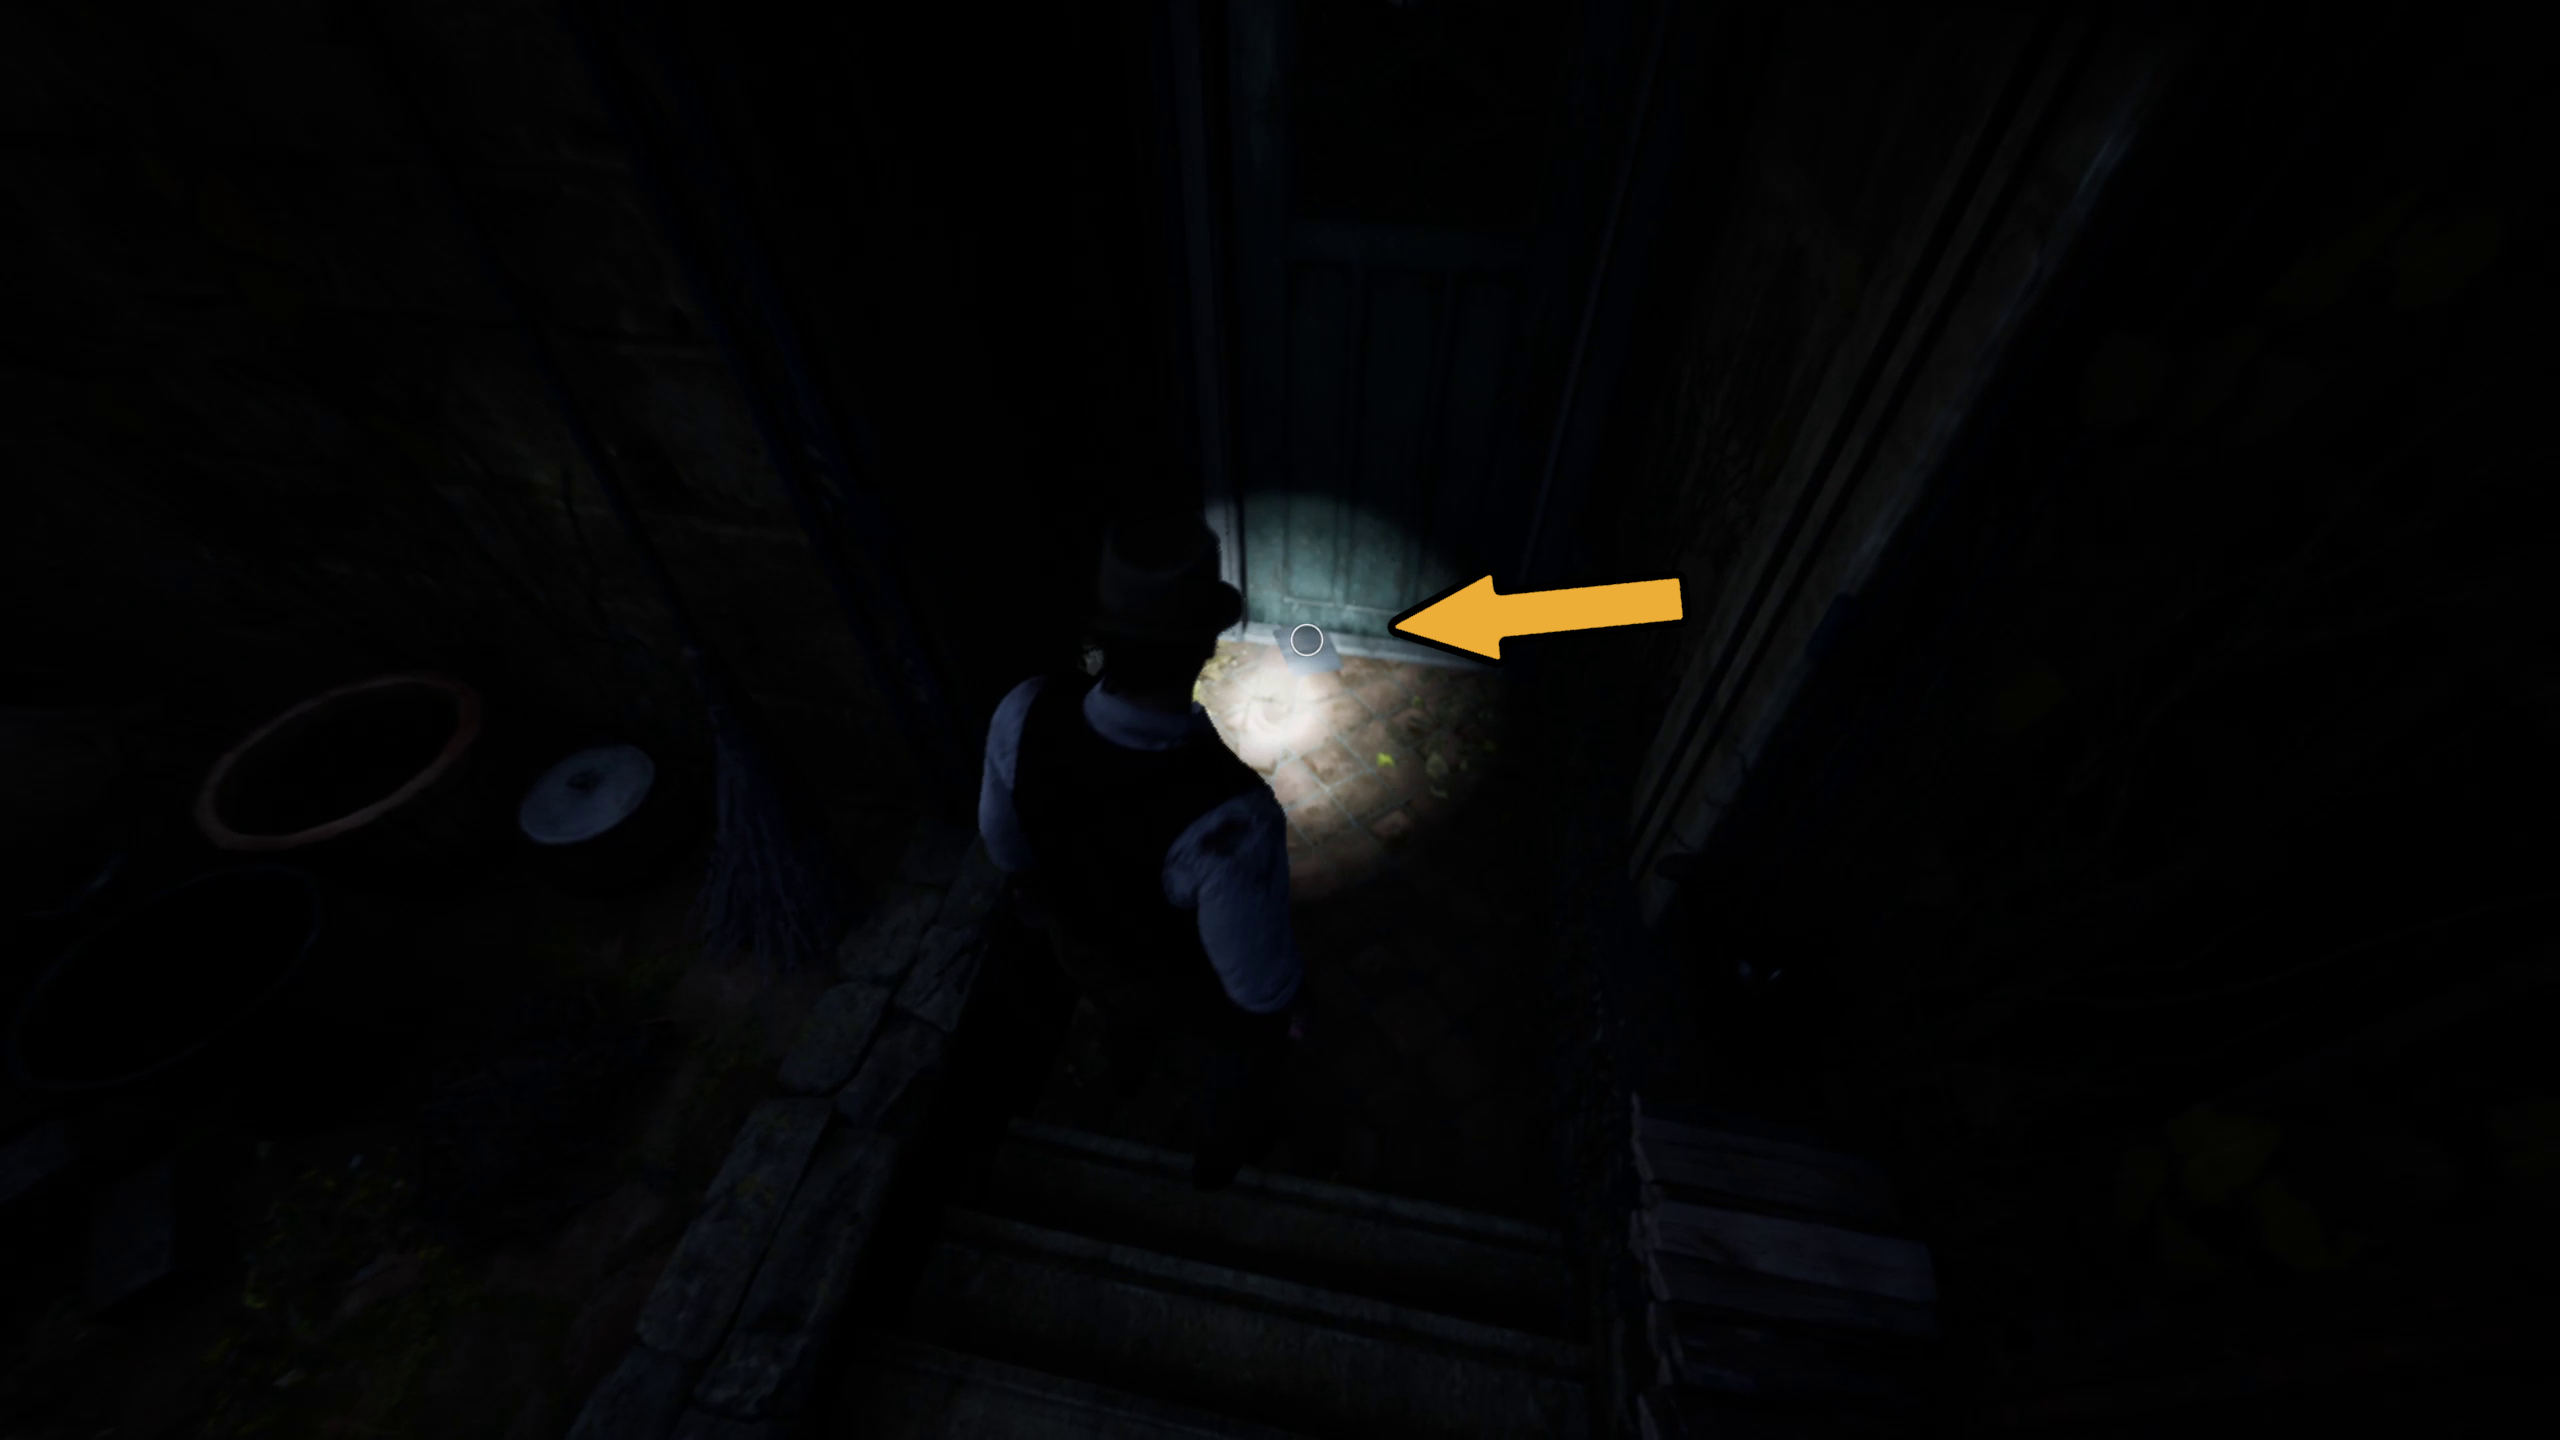
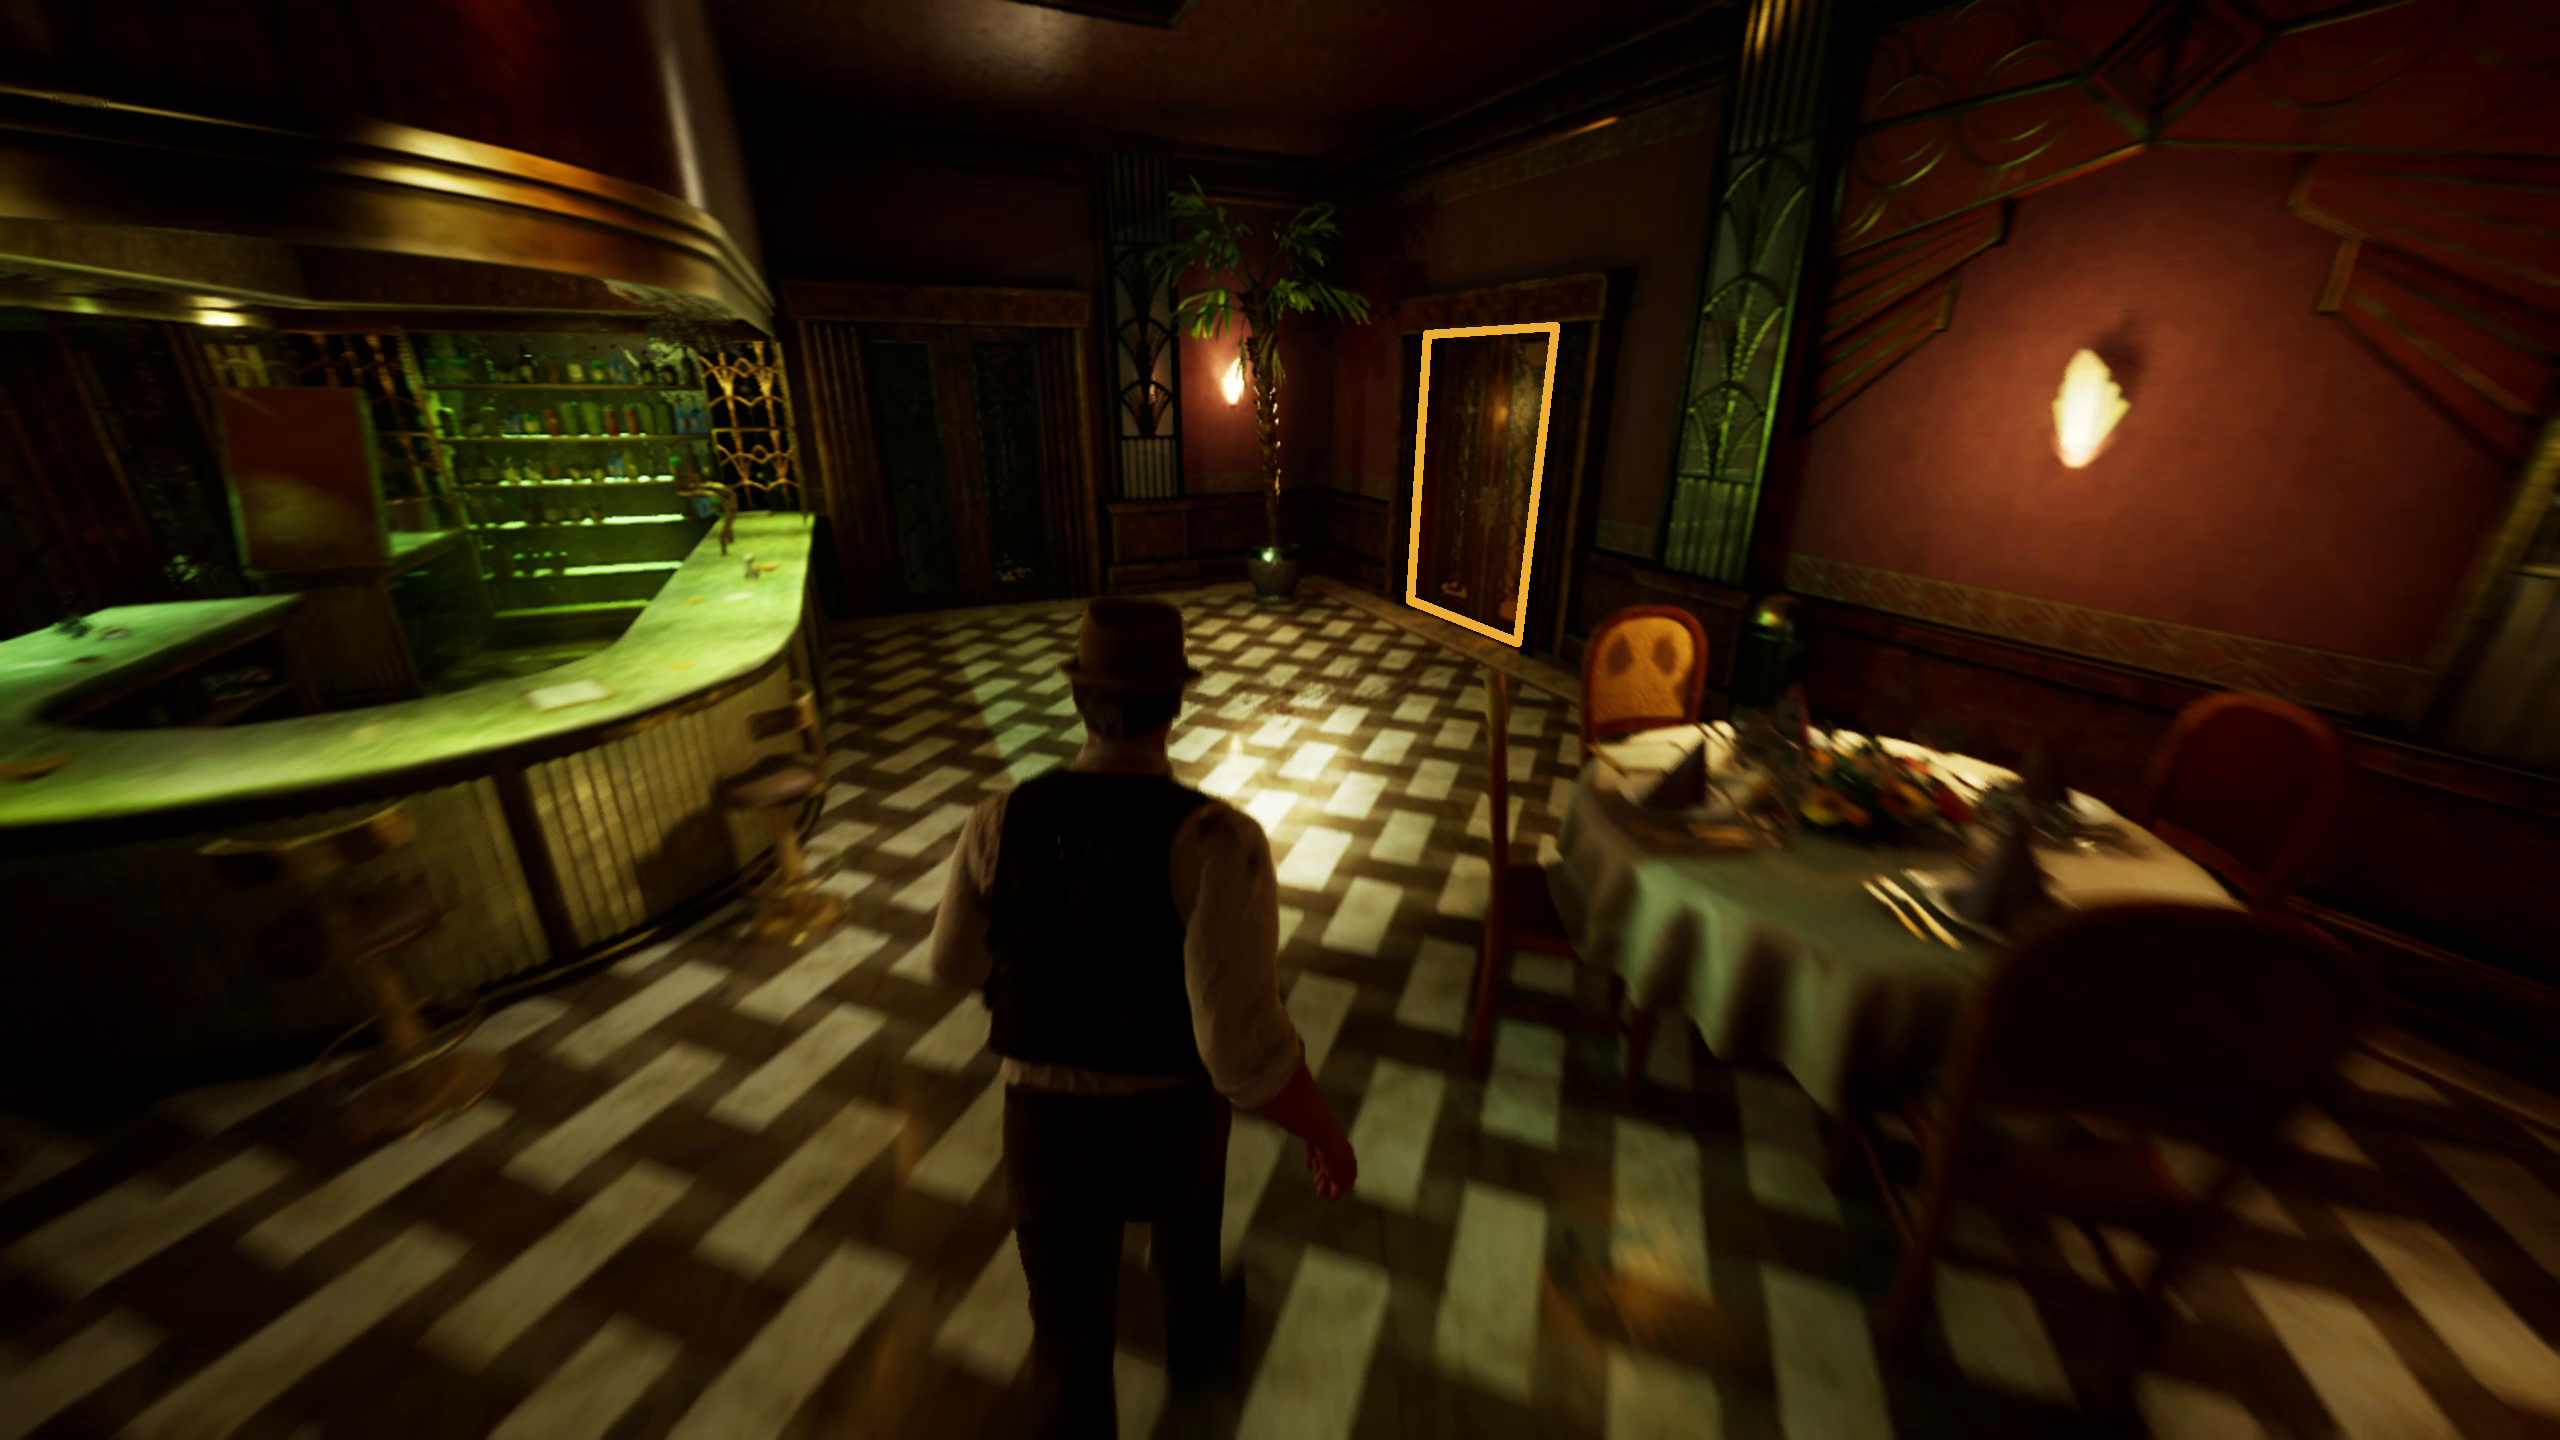
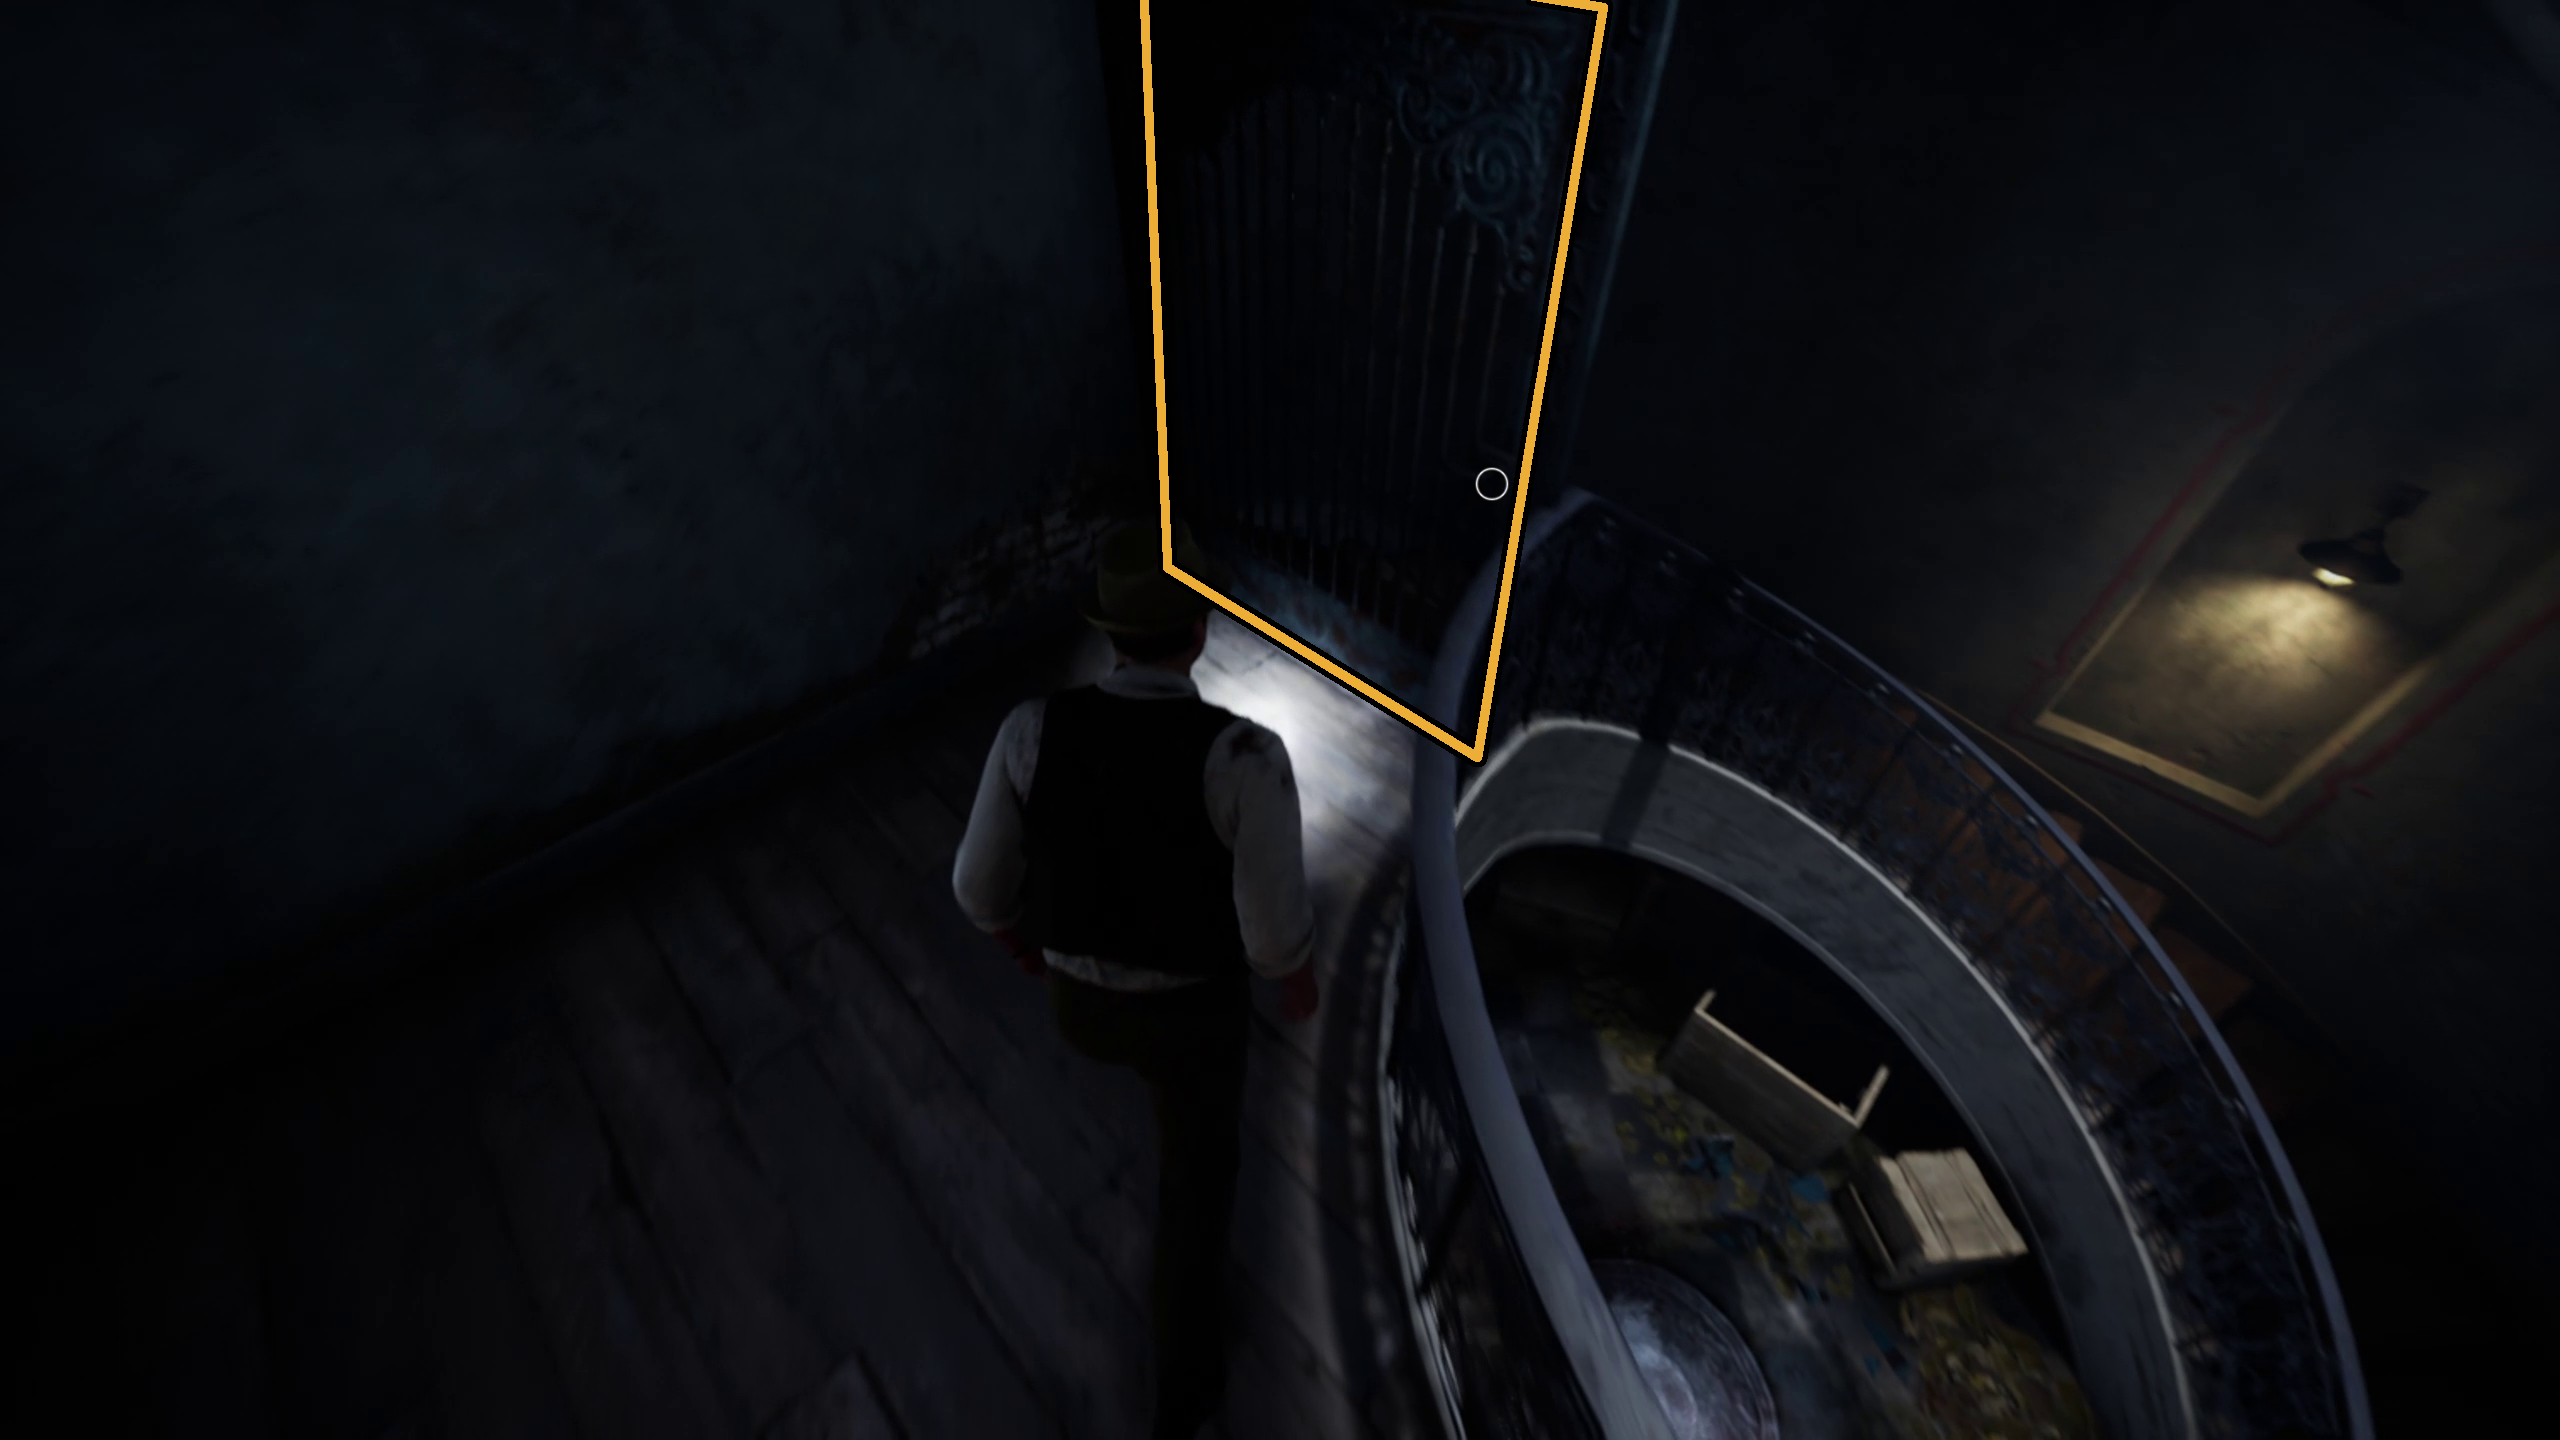
After that, you can exit the Grand Parlor/Jazz club out of the door at the far side from where you entered (Image 23). Now that you have the Stairwell Key from Dr. Gray’s office, you can use it to open the gate to your left, in order to reach the basement (Image X).
Image 23Image 24
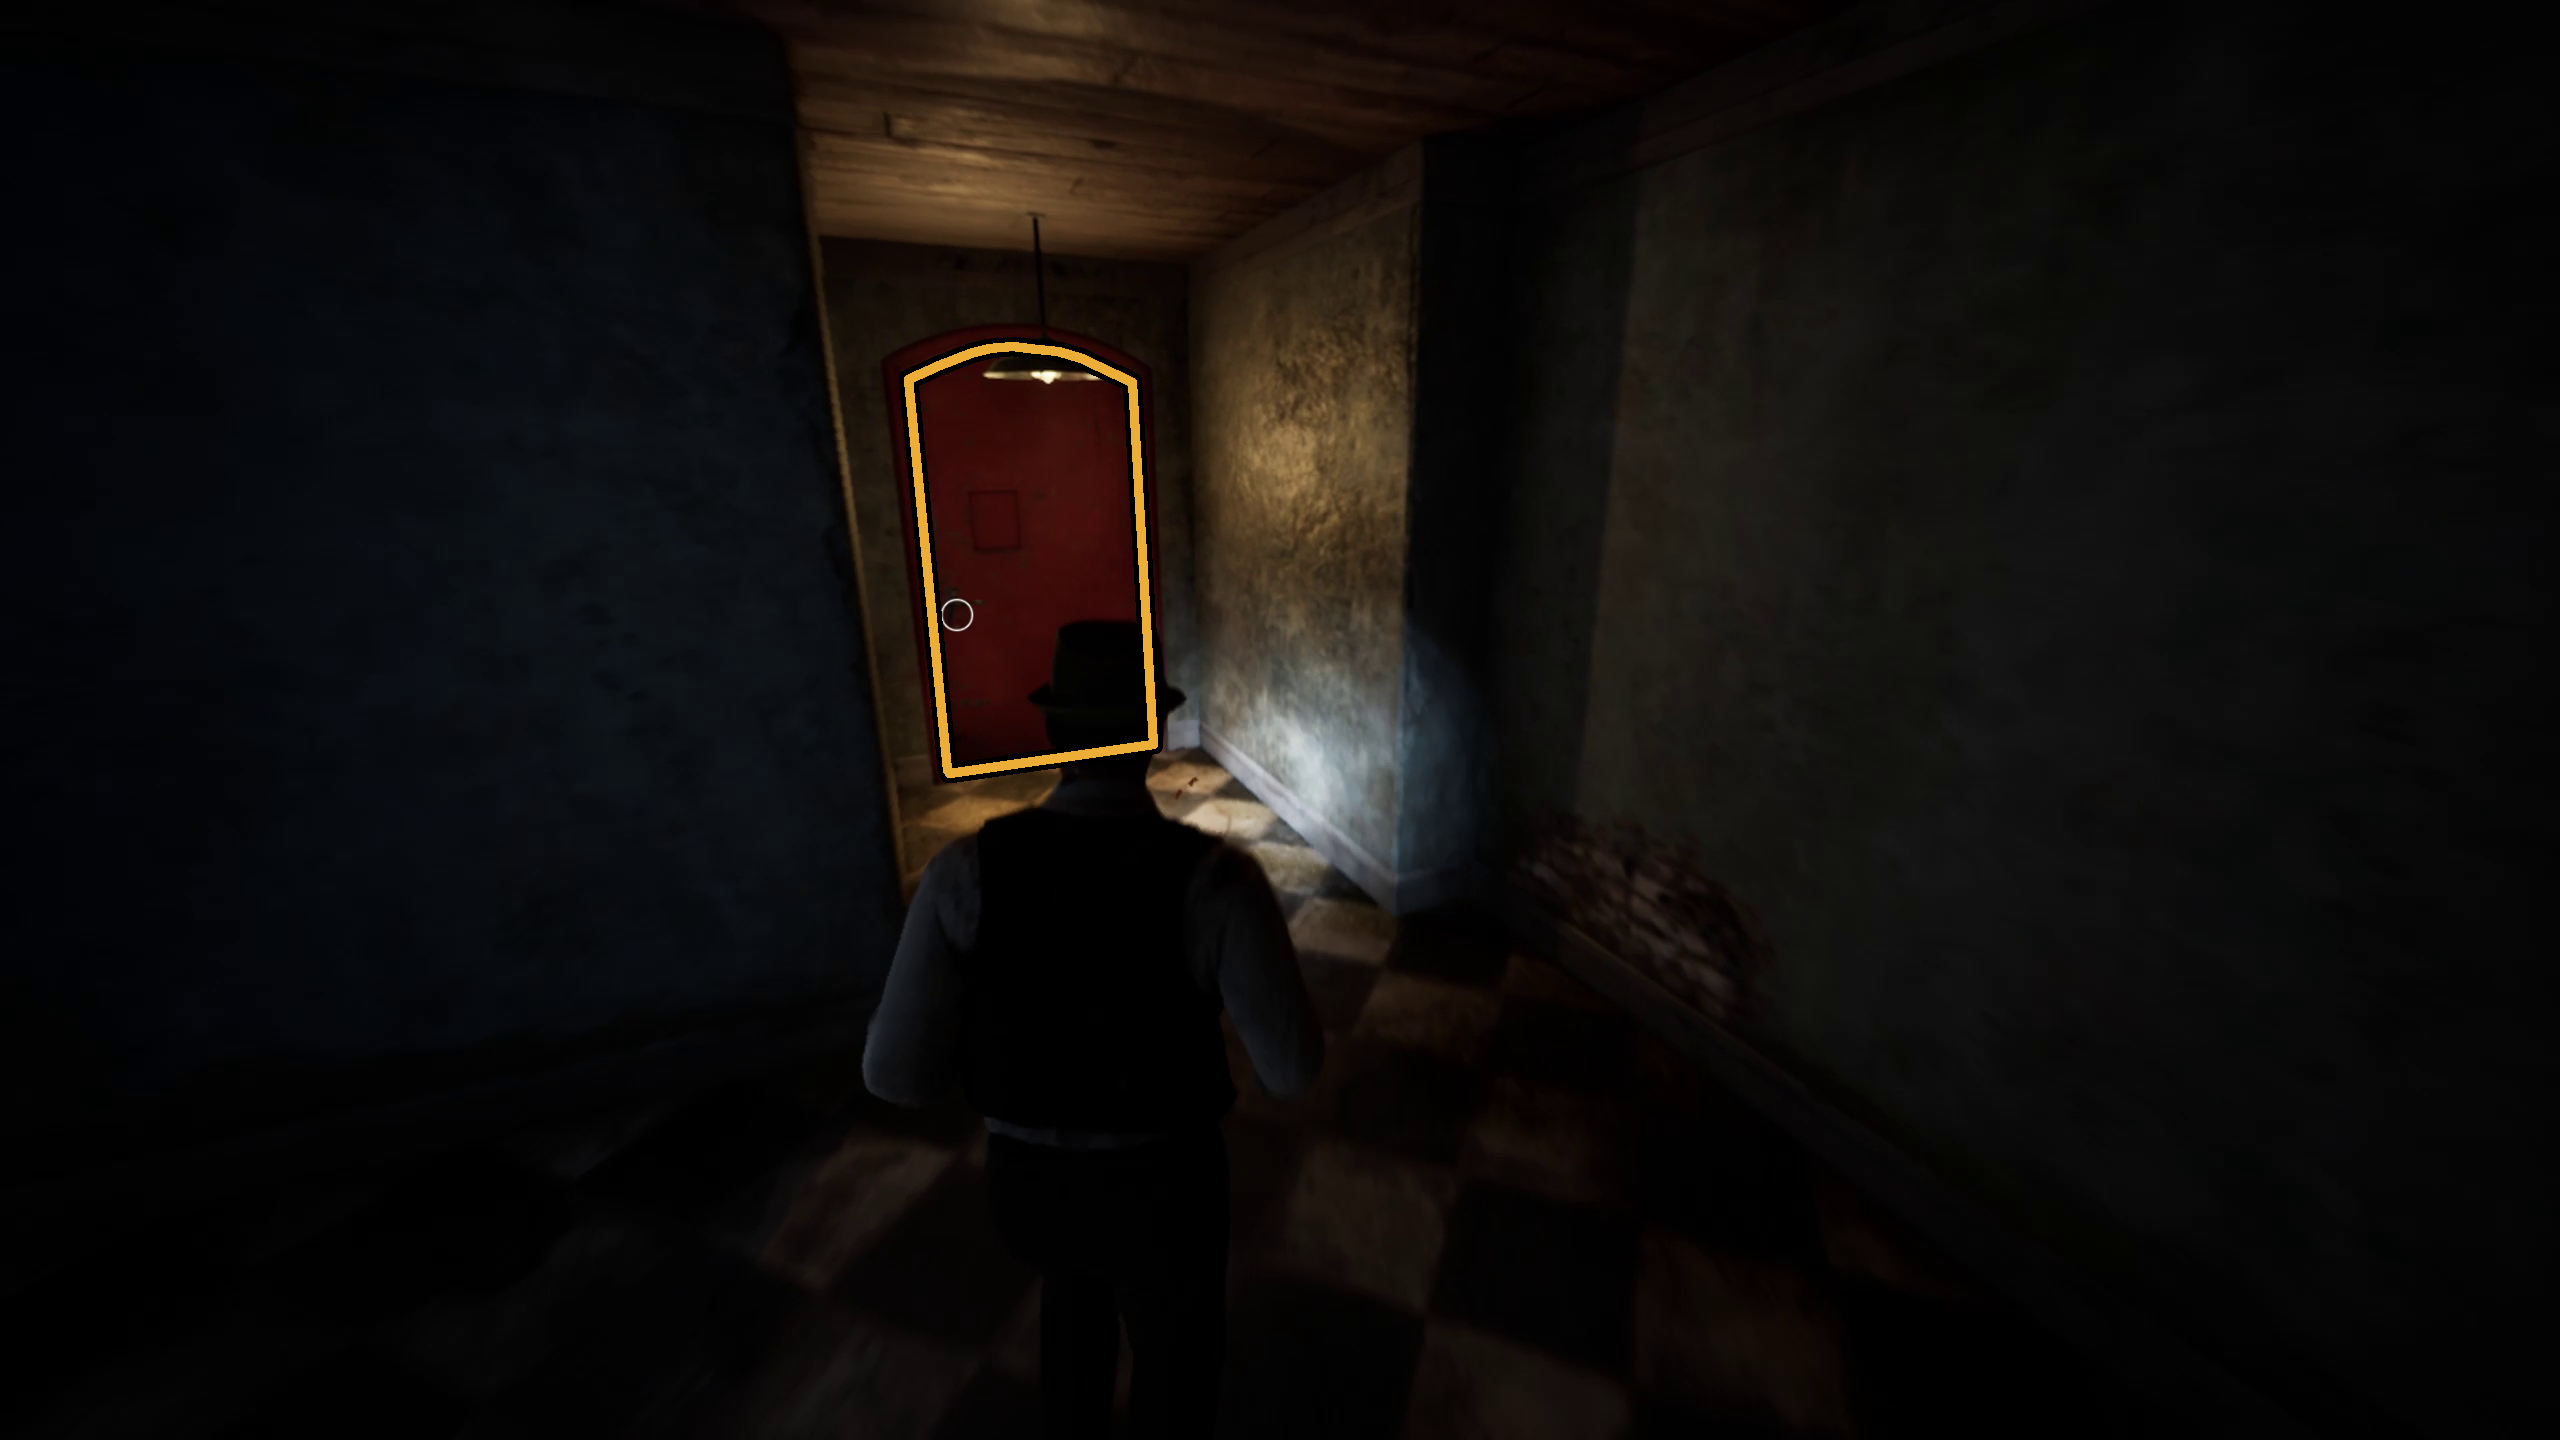
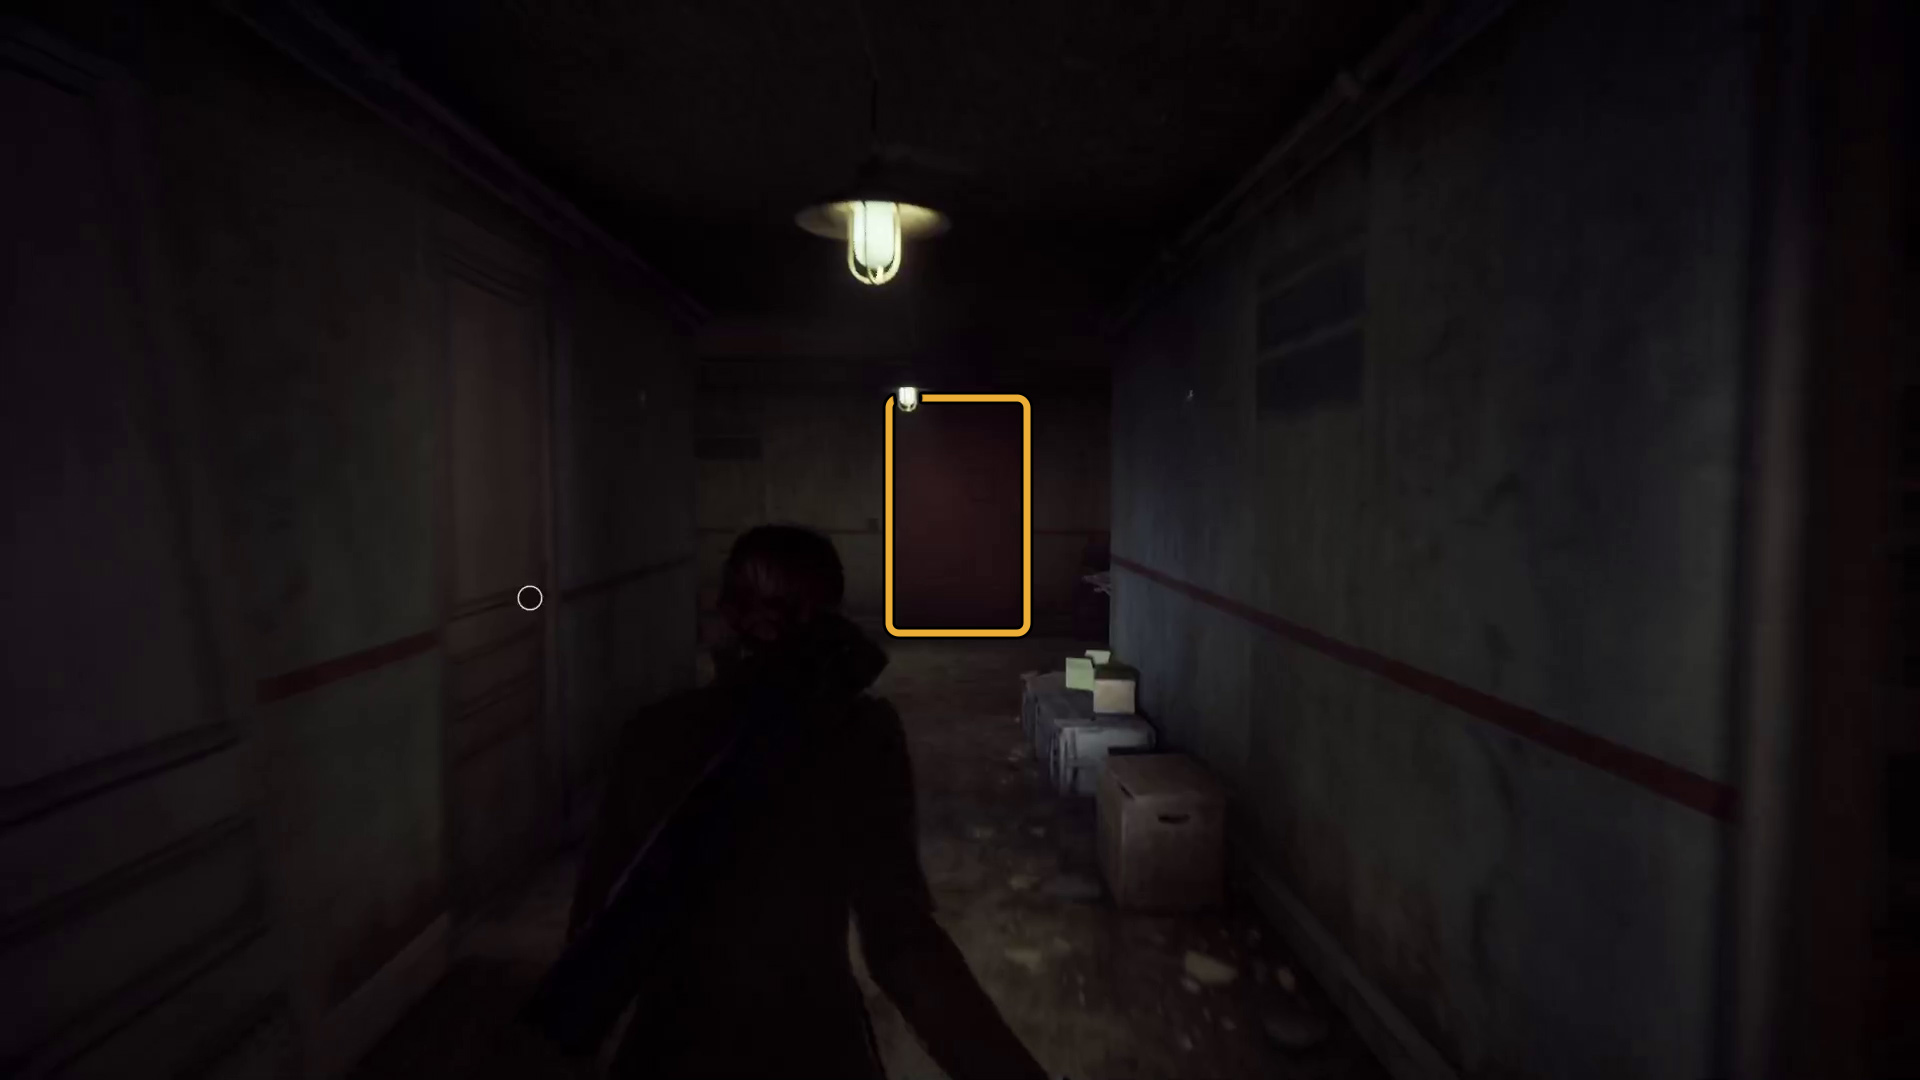
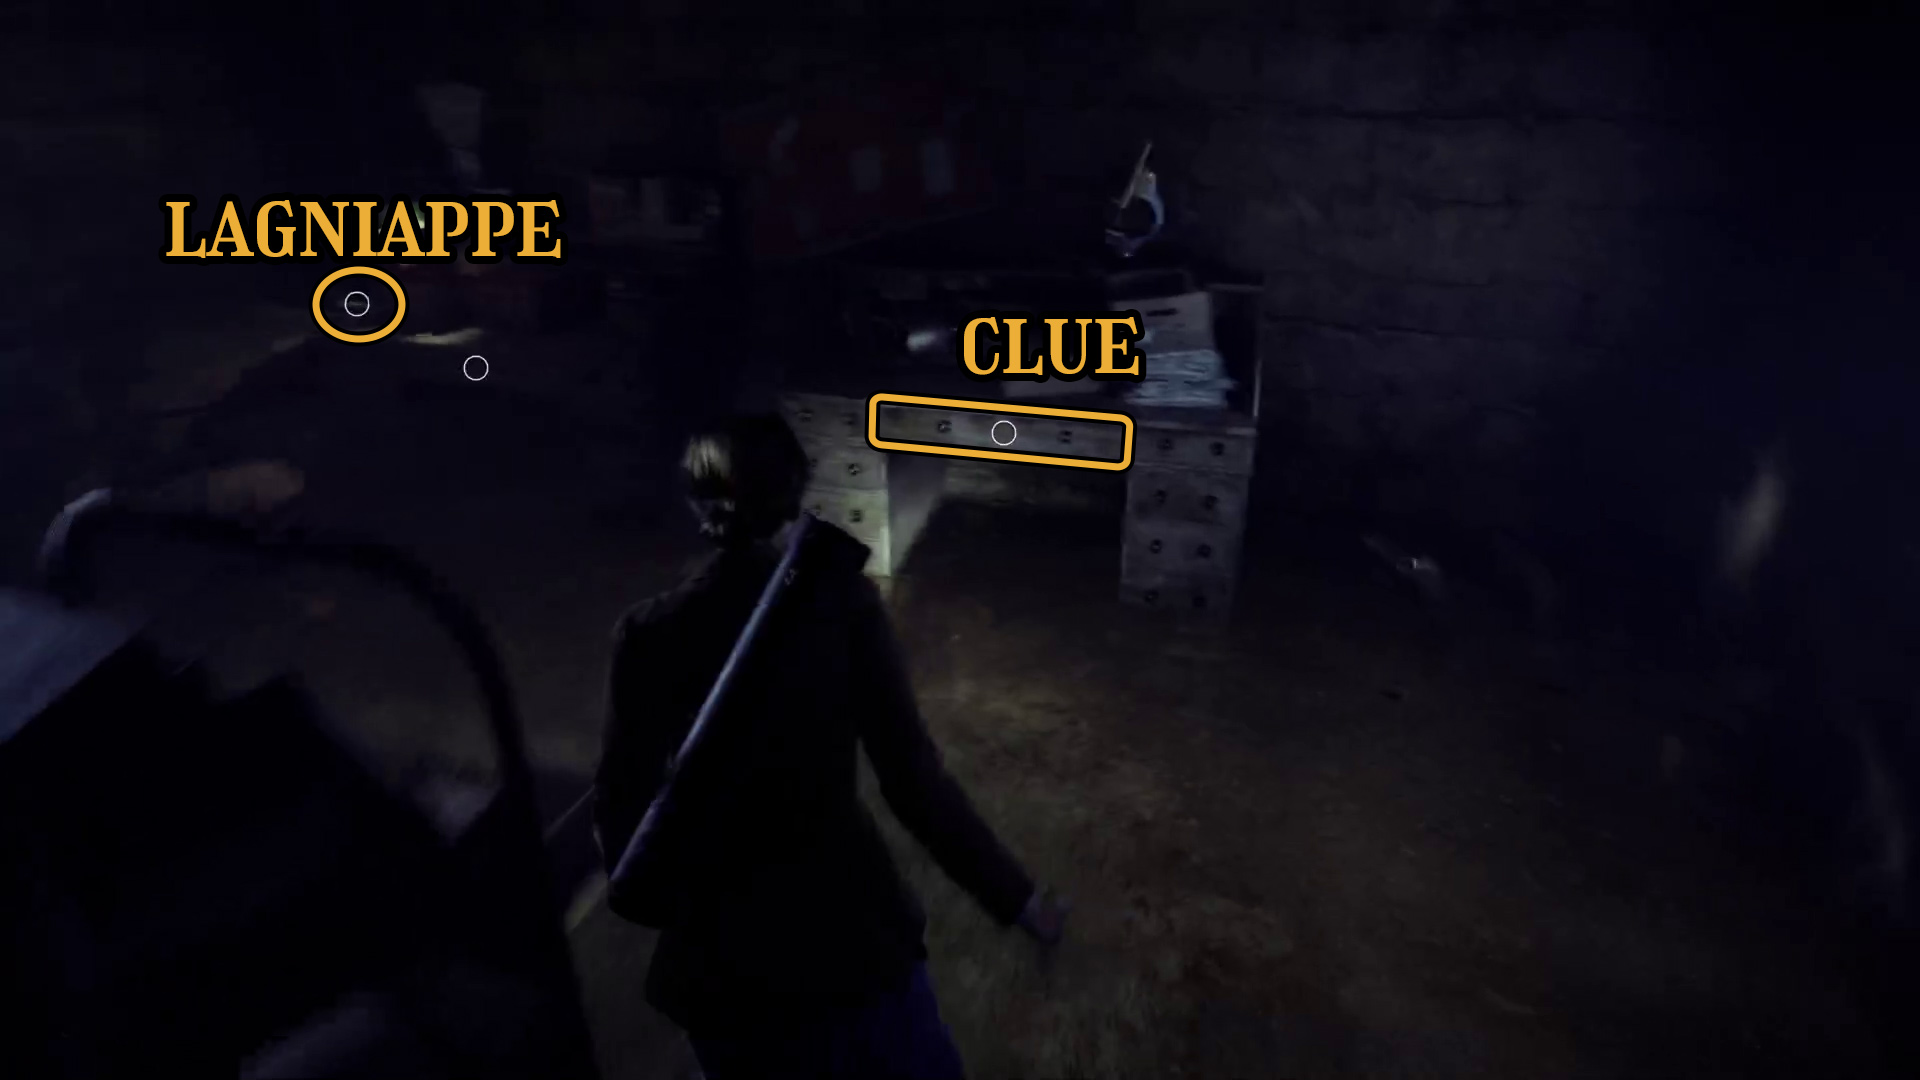
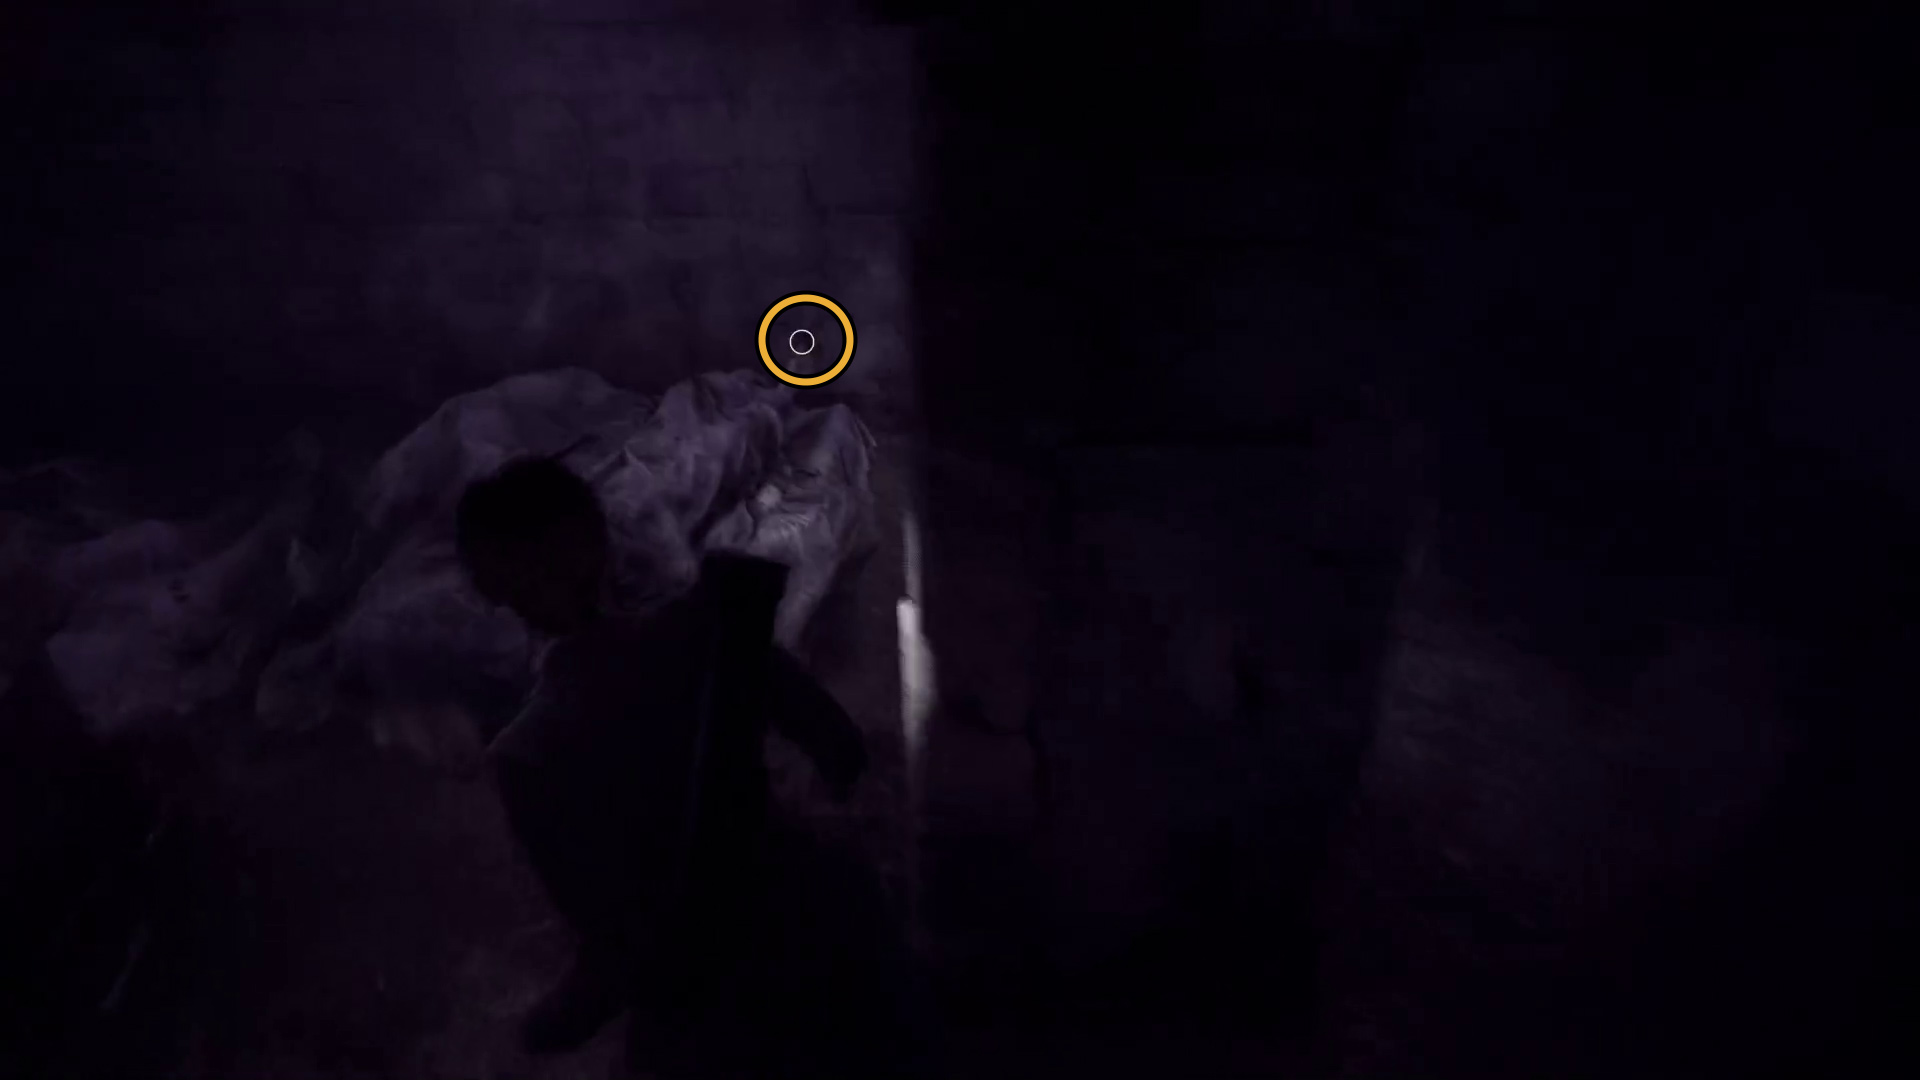
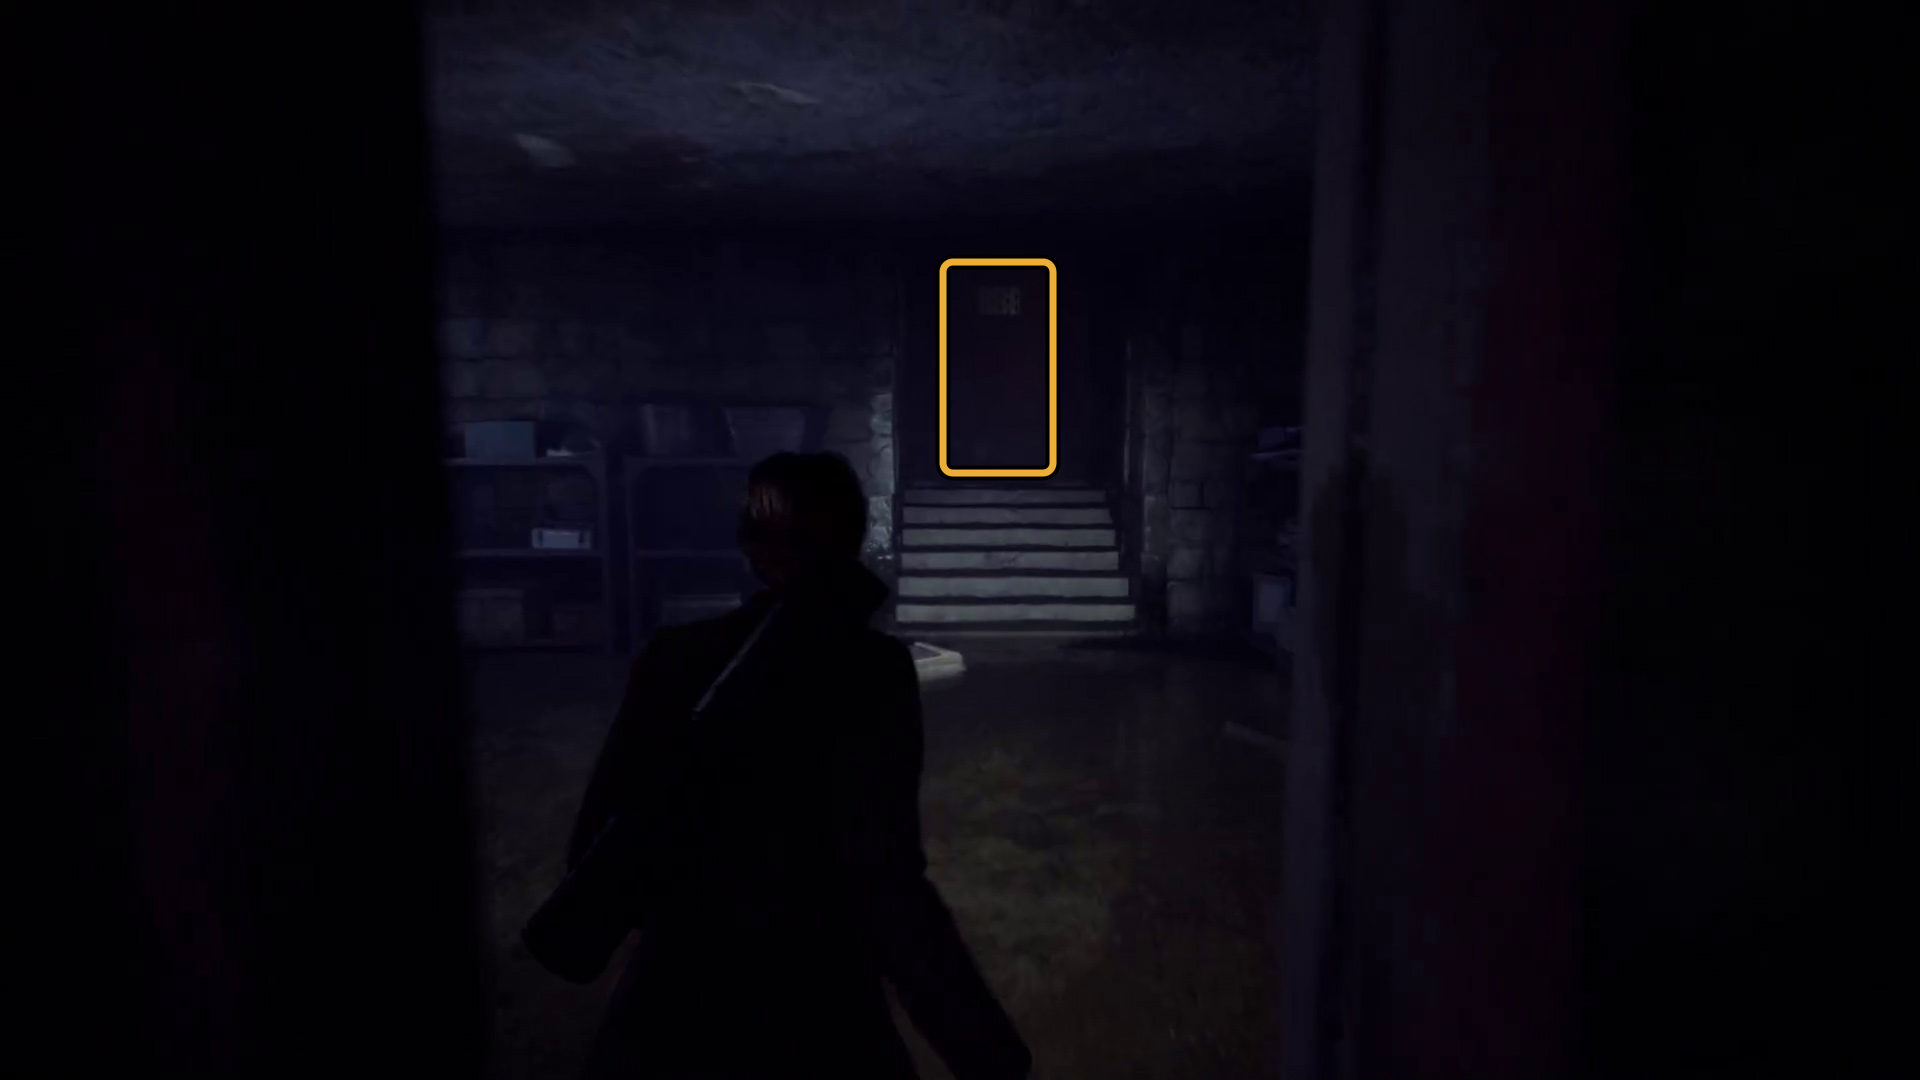
From here, you can head down the stairs and enter the Red Door leading to the Infirmary (Image 25). Immediately, look to your right in order to grab the Scapegoat Lagniappe (Image 26).
Image 25Image 26
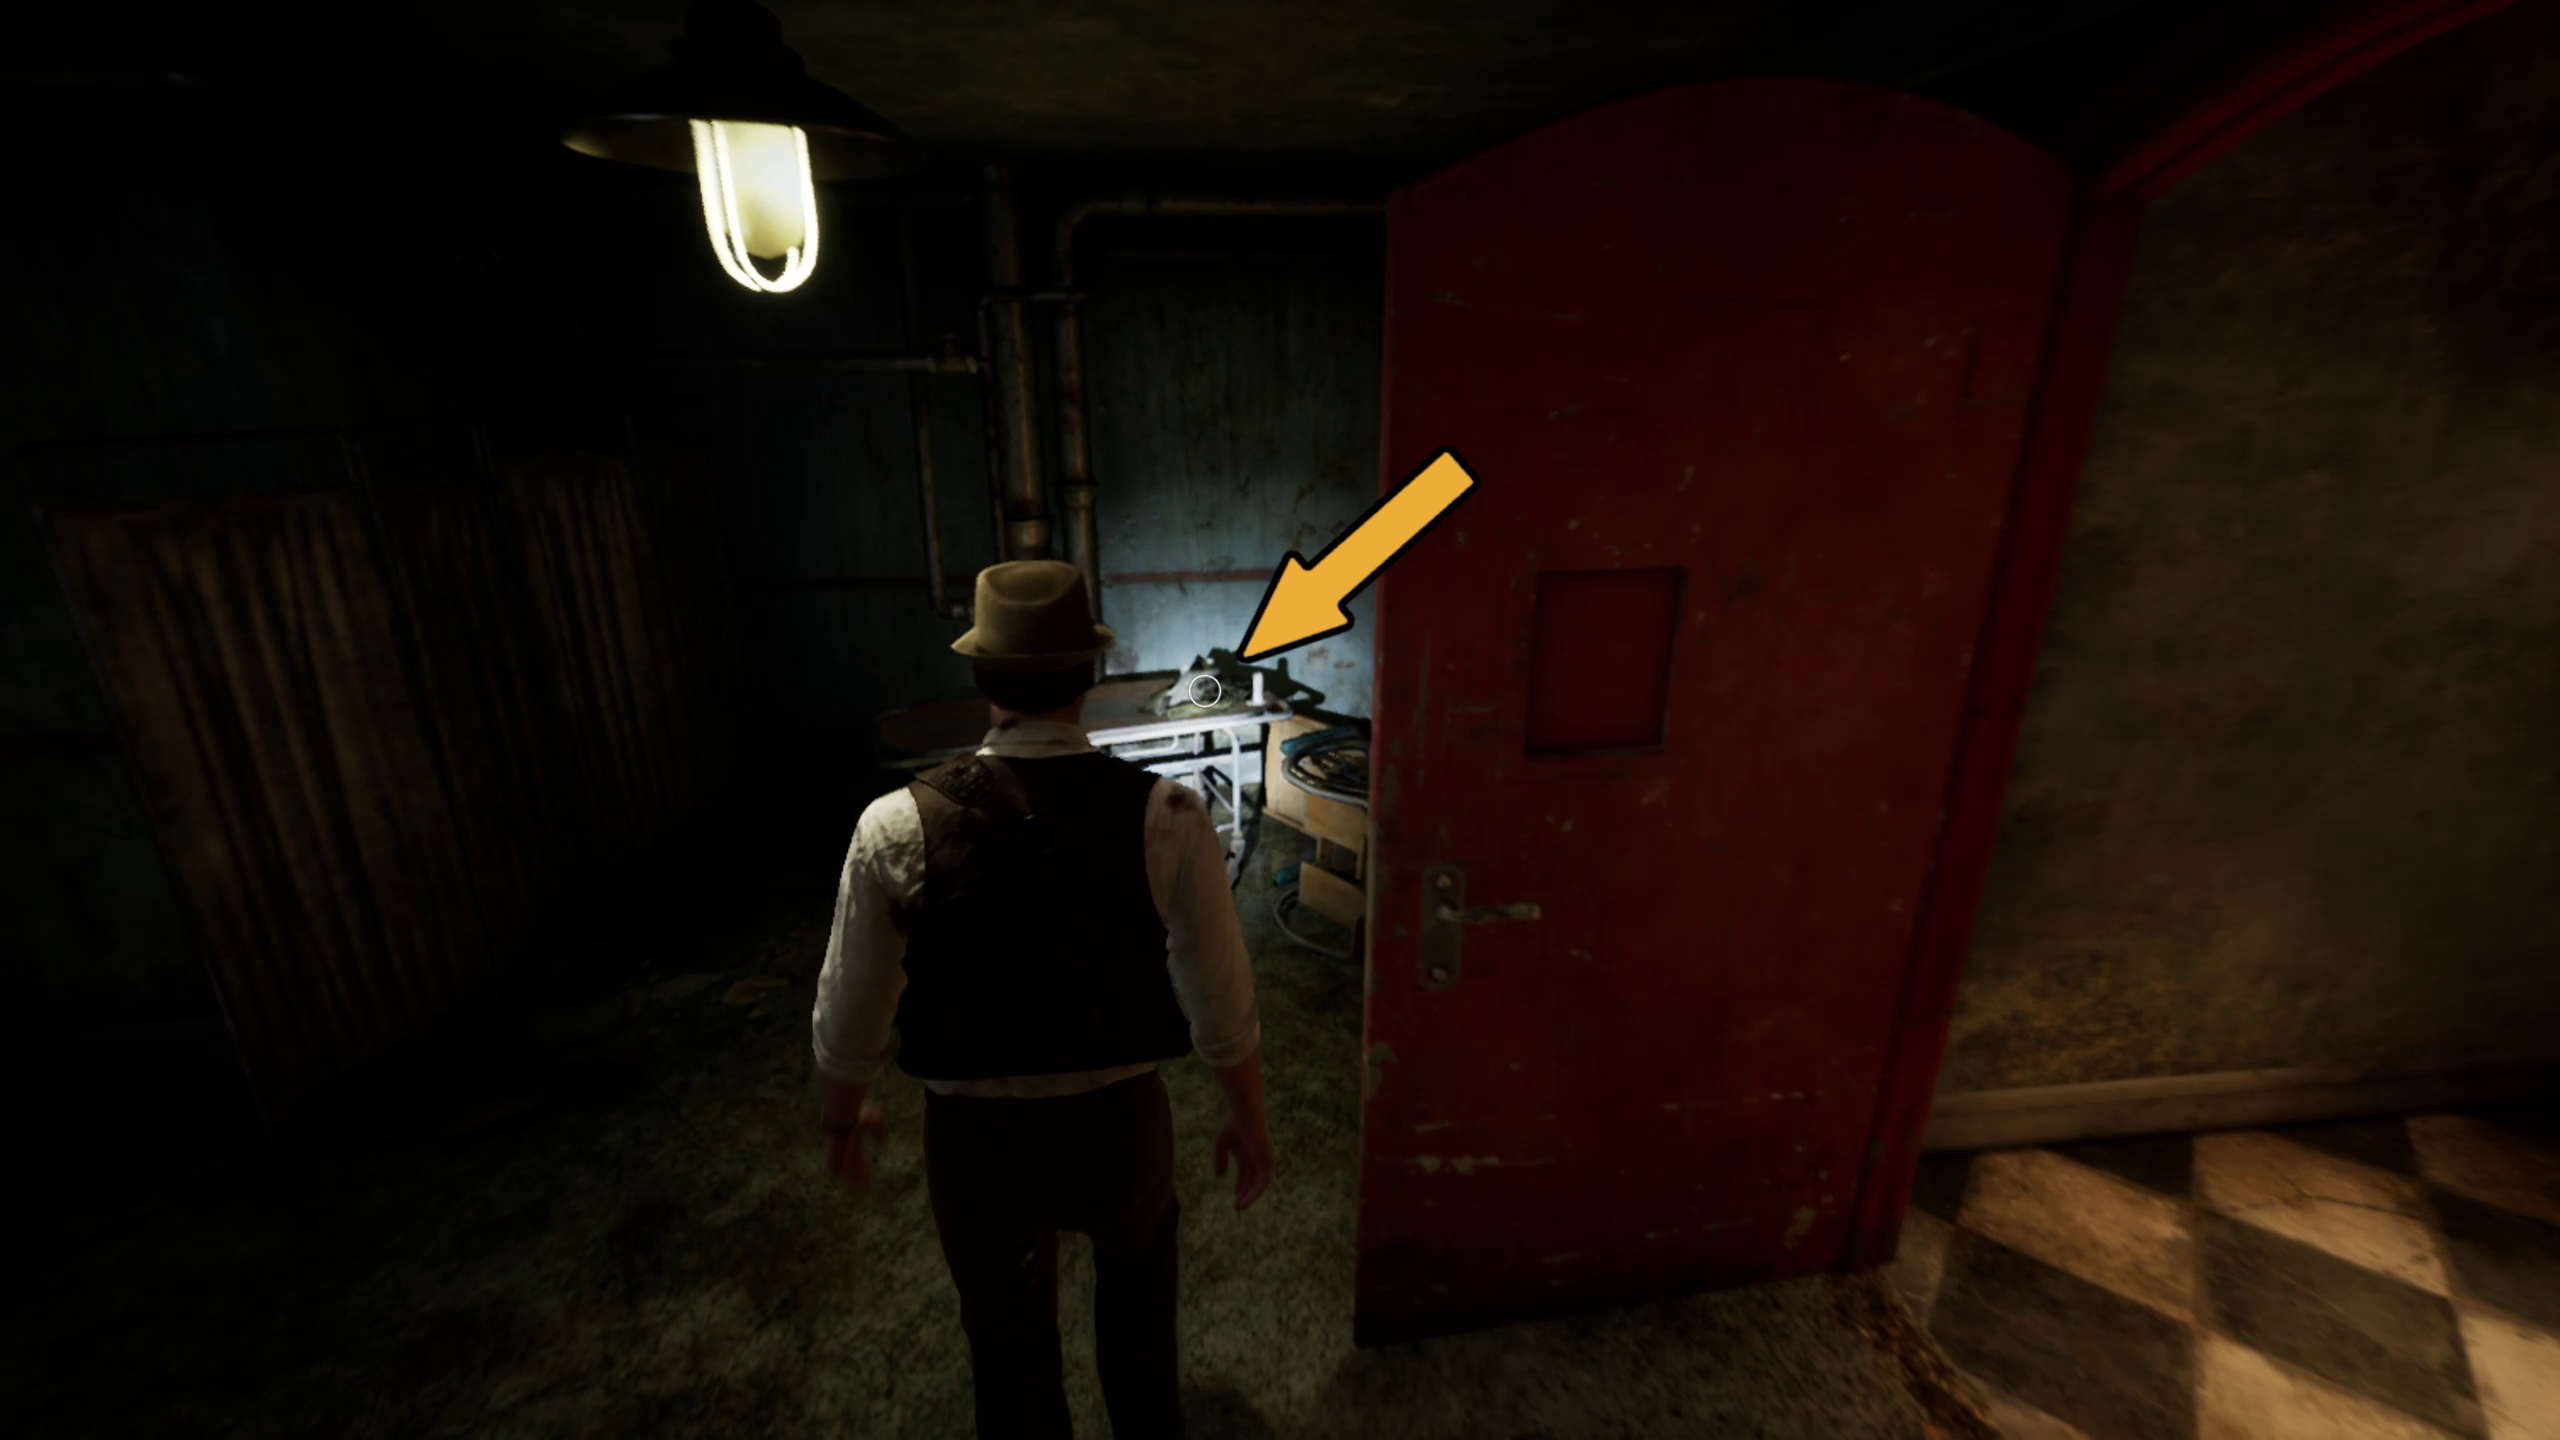
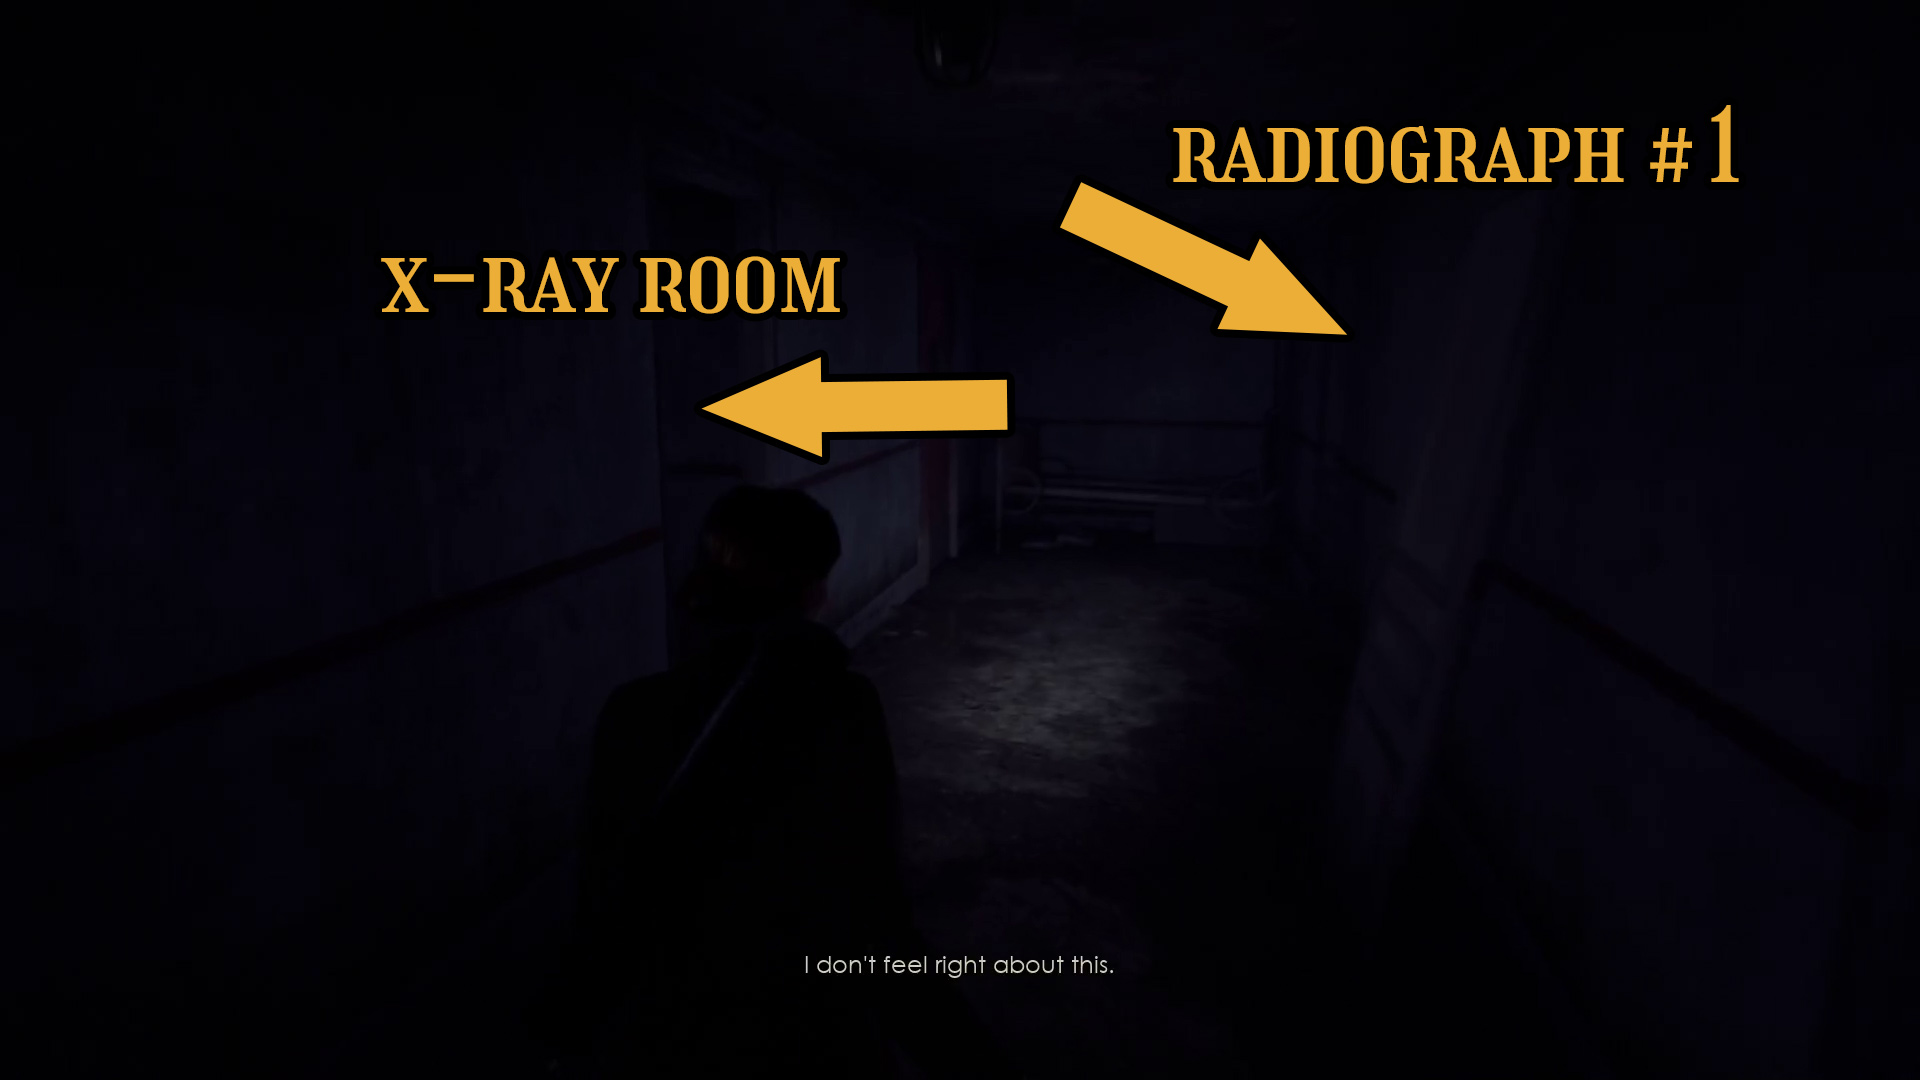
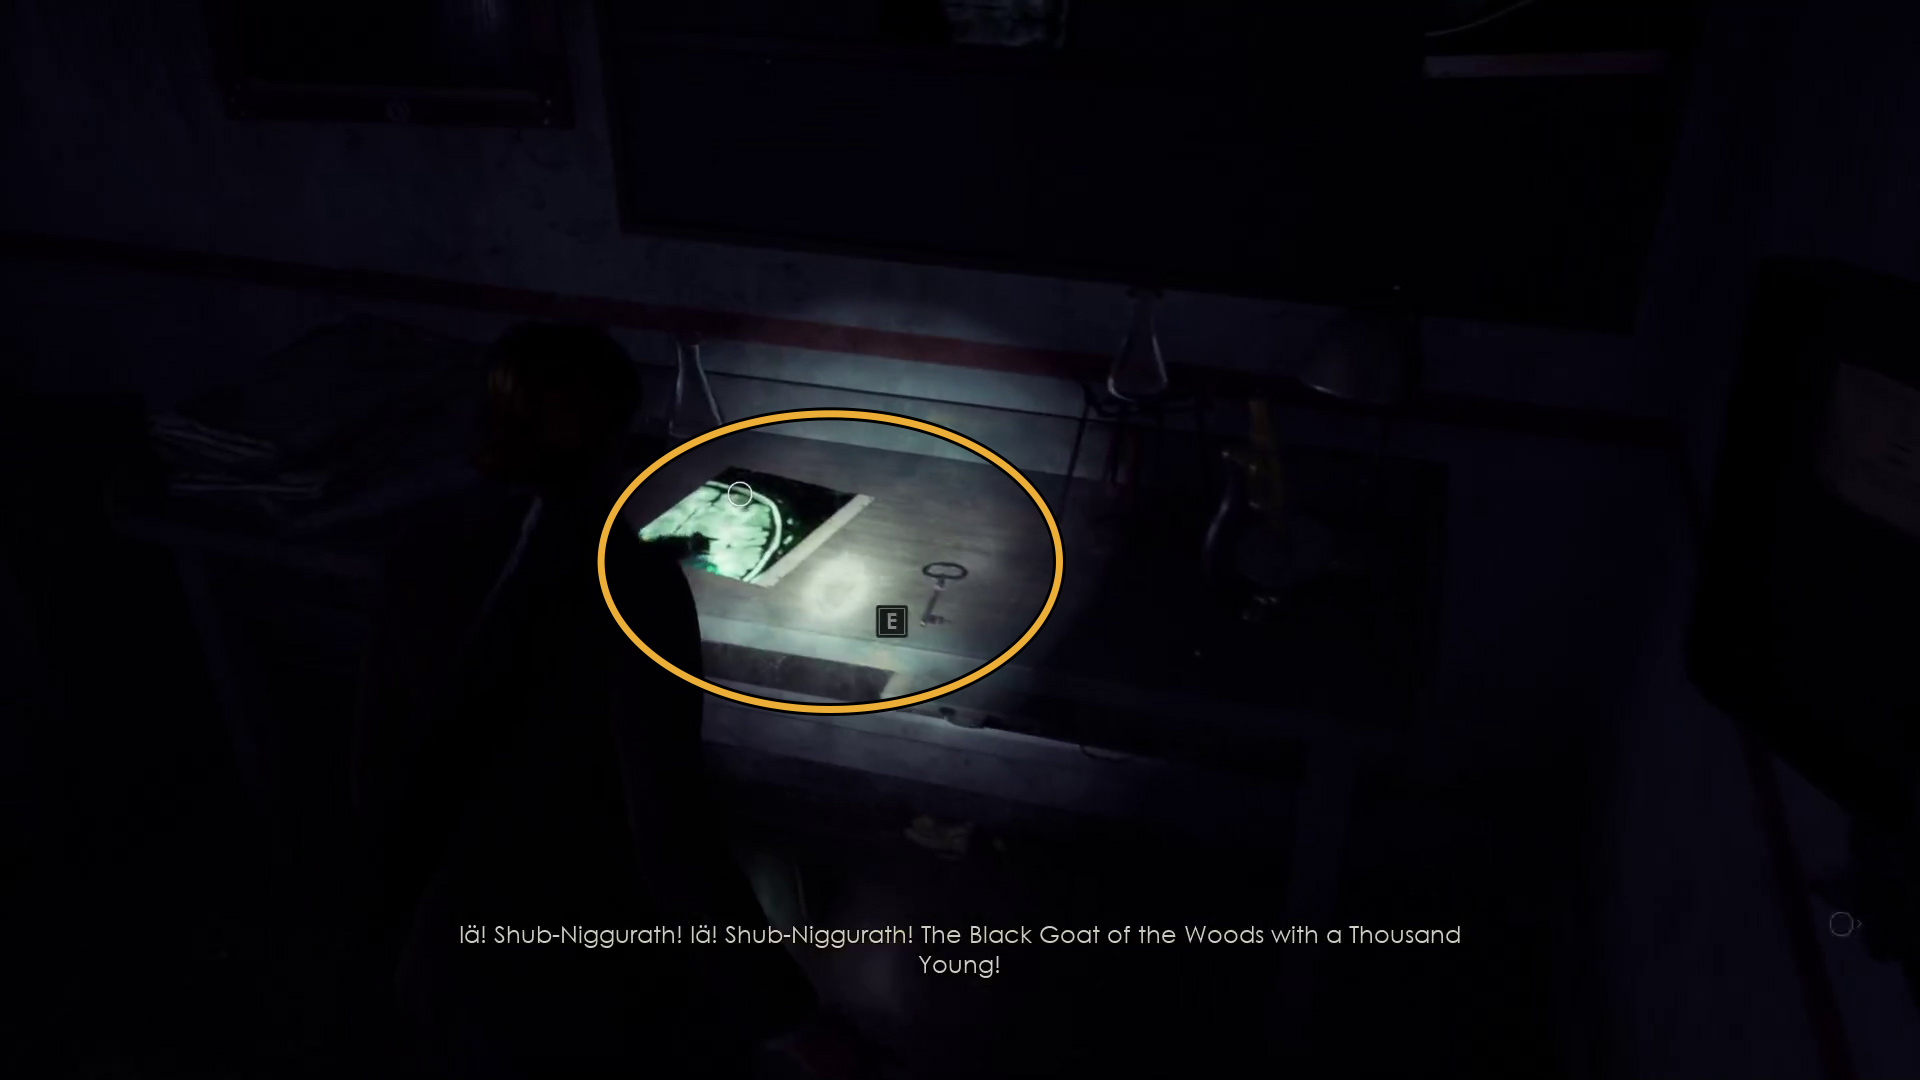
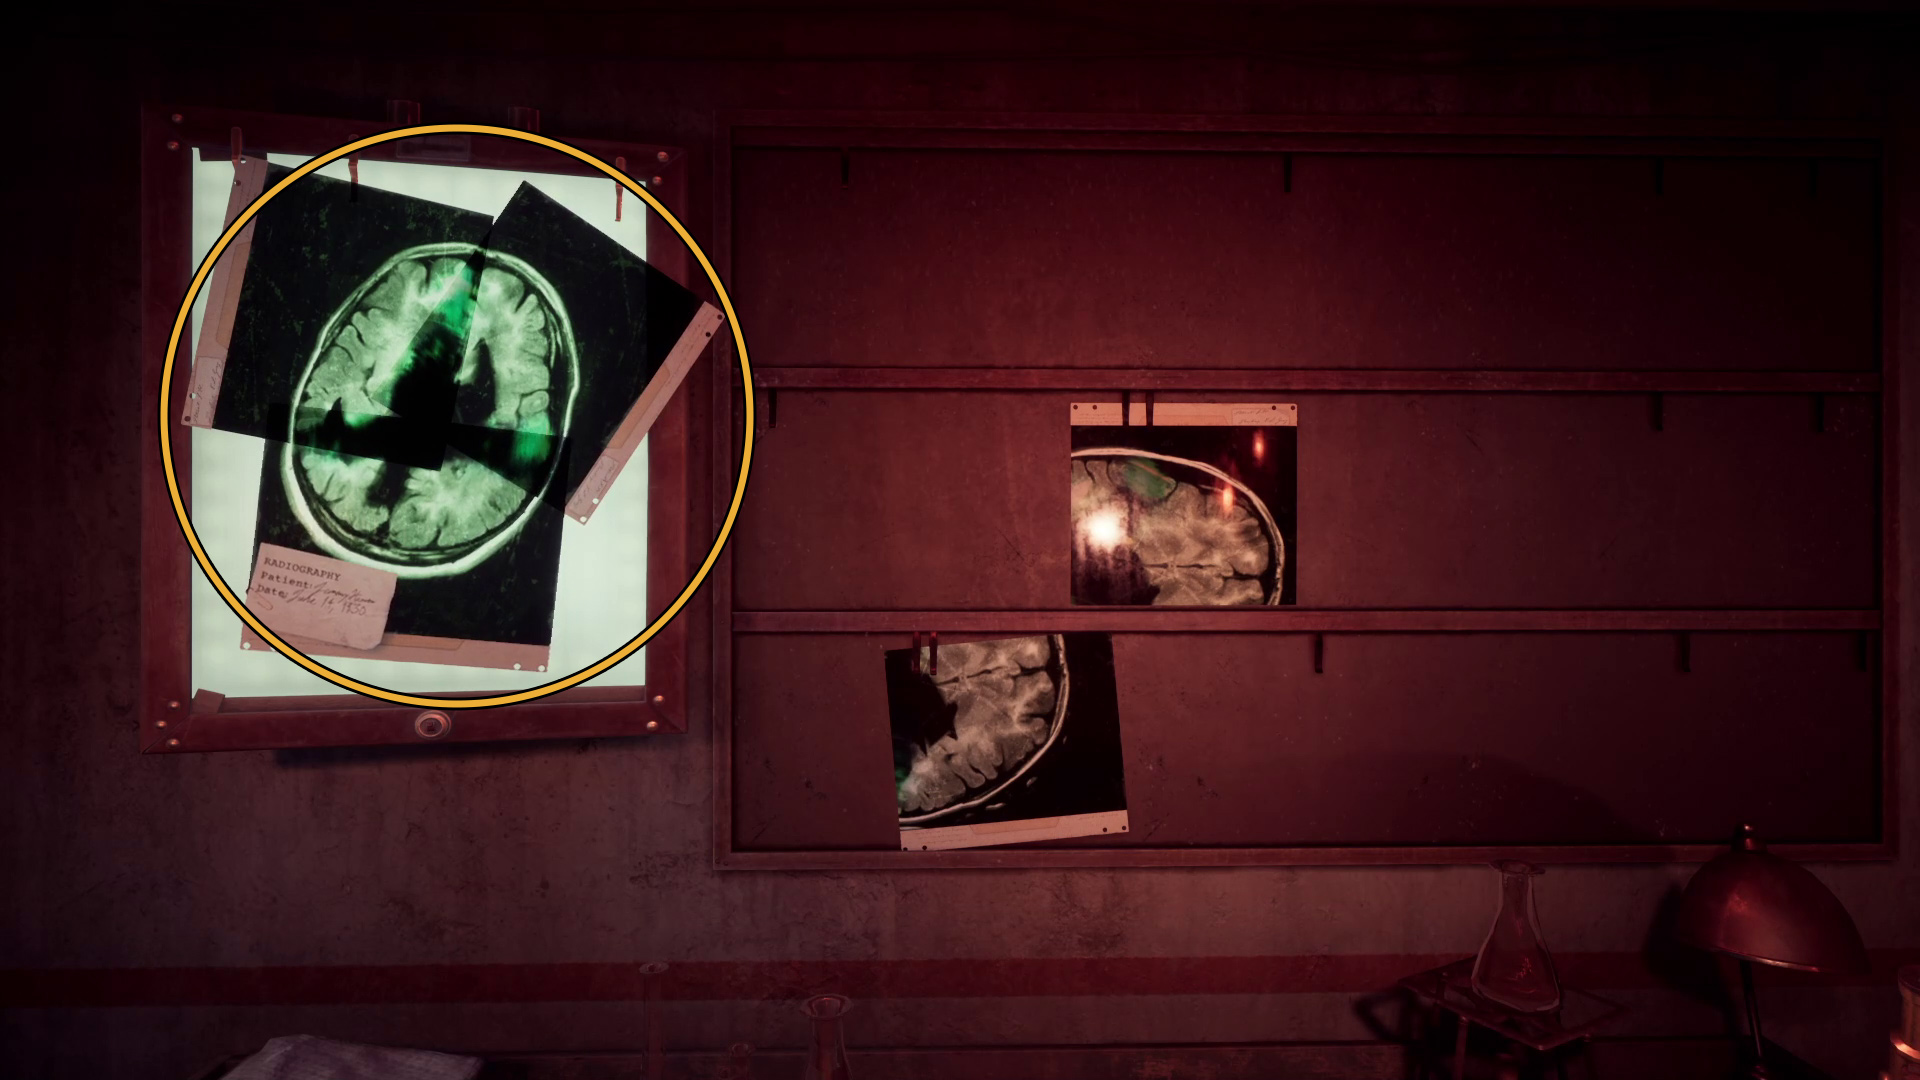
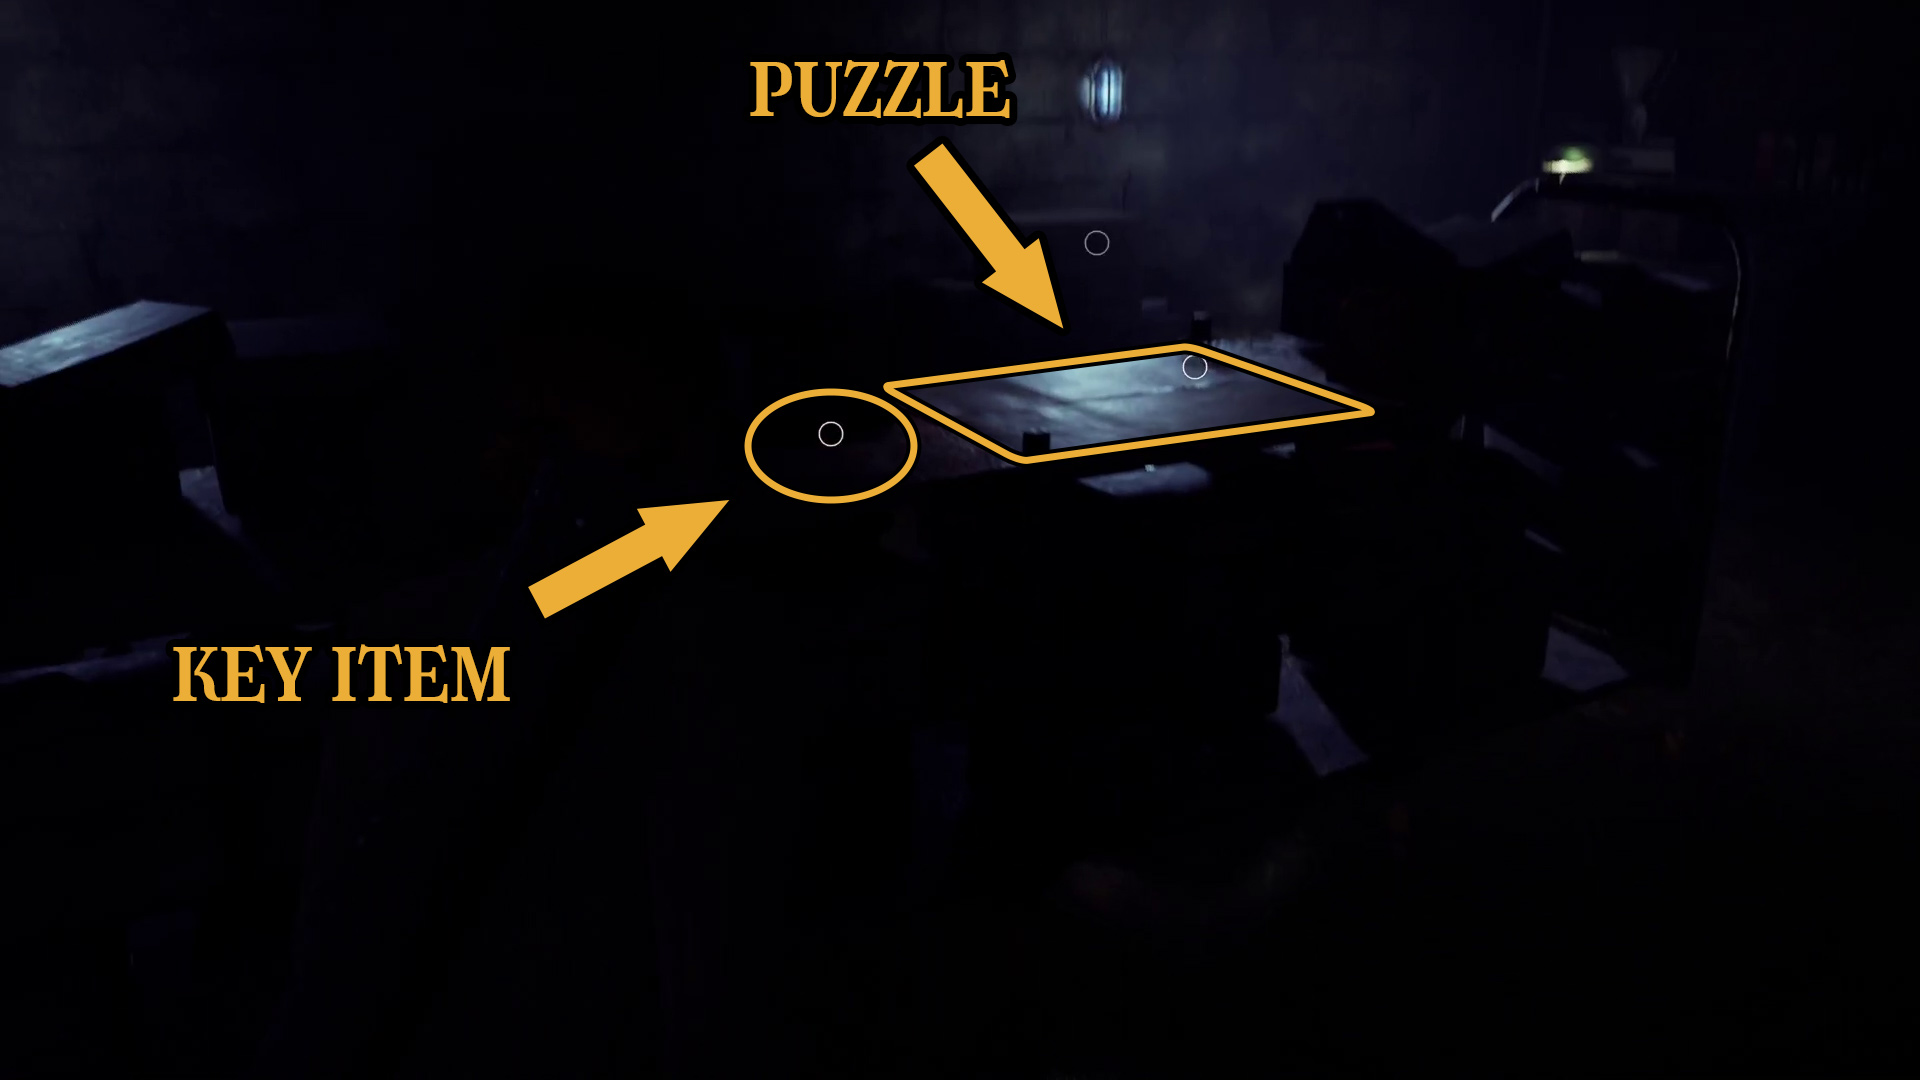
Head down the hall, and go through the doorway at the far end of the hall to find the Radiograph #1 key item (Image 27). You’ll have to wait through a brief scary scene before you can pick it up, however. Once it ends and you have the radiograph, leave the room go through the open doorway across the hall to the X-Ray room. There are two clues on the desks ahead (Image 28) — the Radiography Notes for the upcoming puzzle, and the If All Else Fails clue.
Image 27Image 28
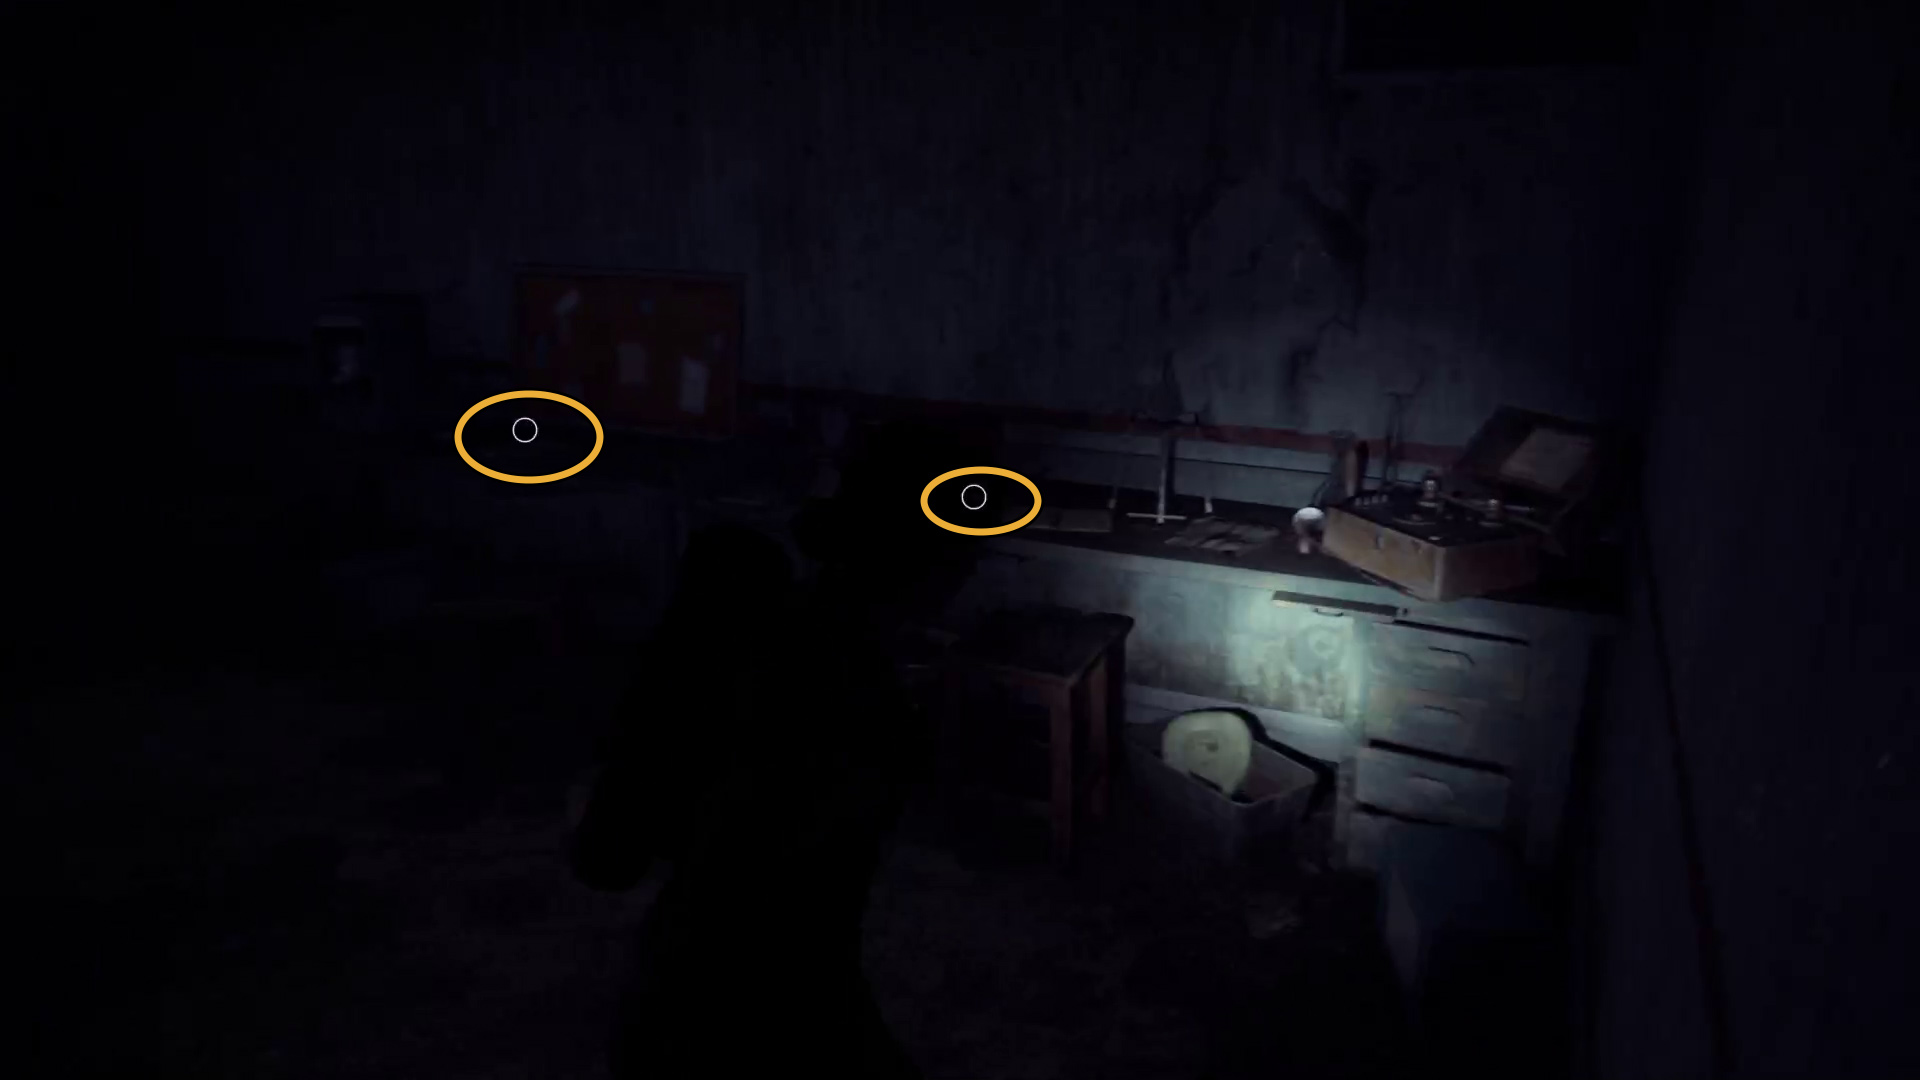
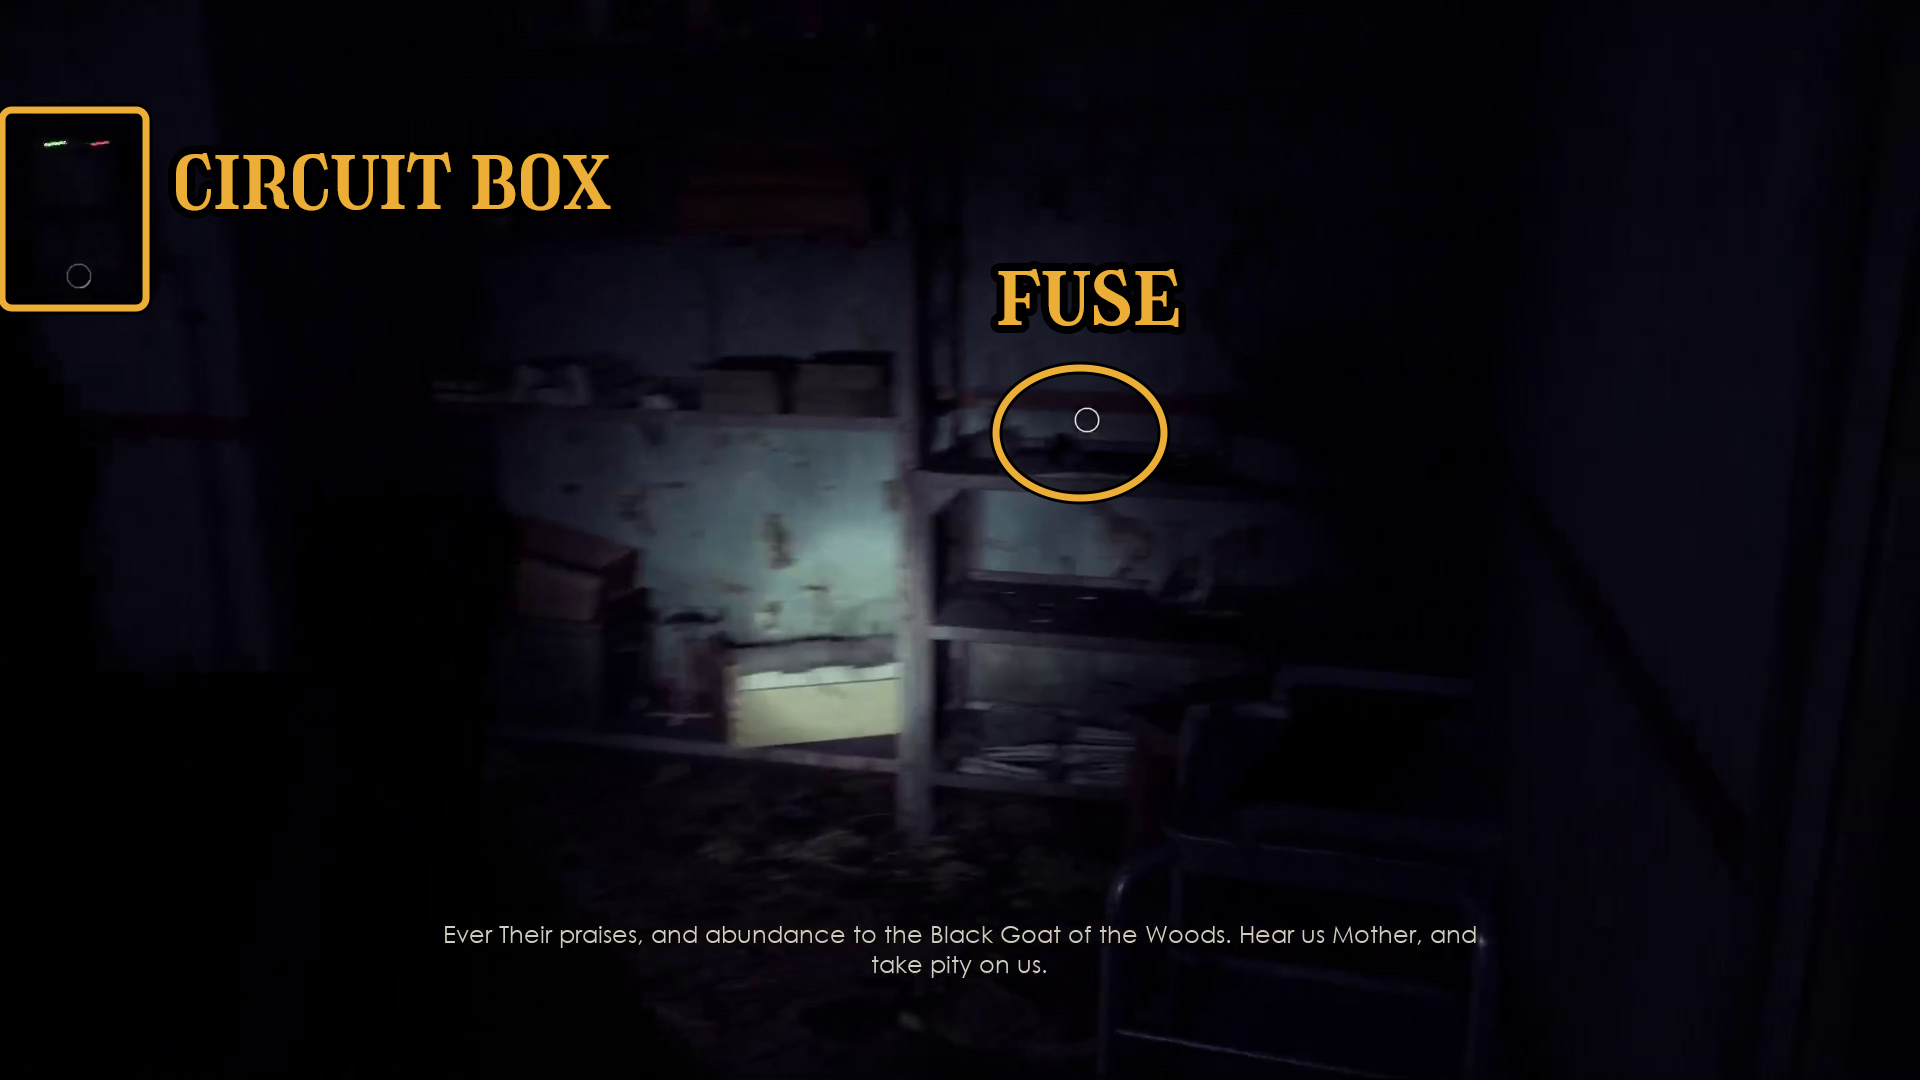
Go into the next room, and grab the Electrical Fuse from the table on the right (Image 29) — note the Circuit Box for later — then from the counter below the X-Ray display, grab the Radiograph #2 and the Surgery Room Key (Image 30).
Image 29Image 30
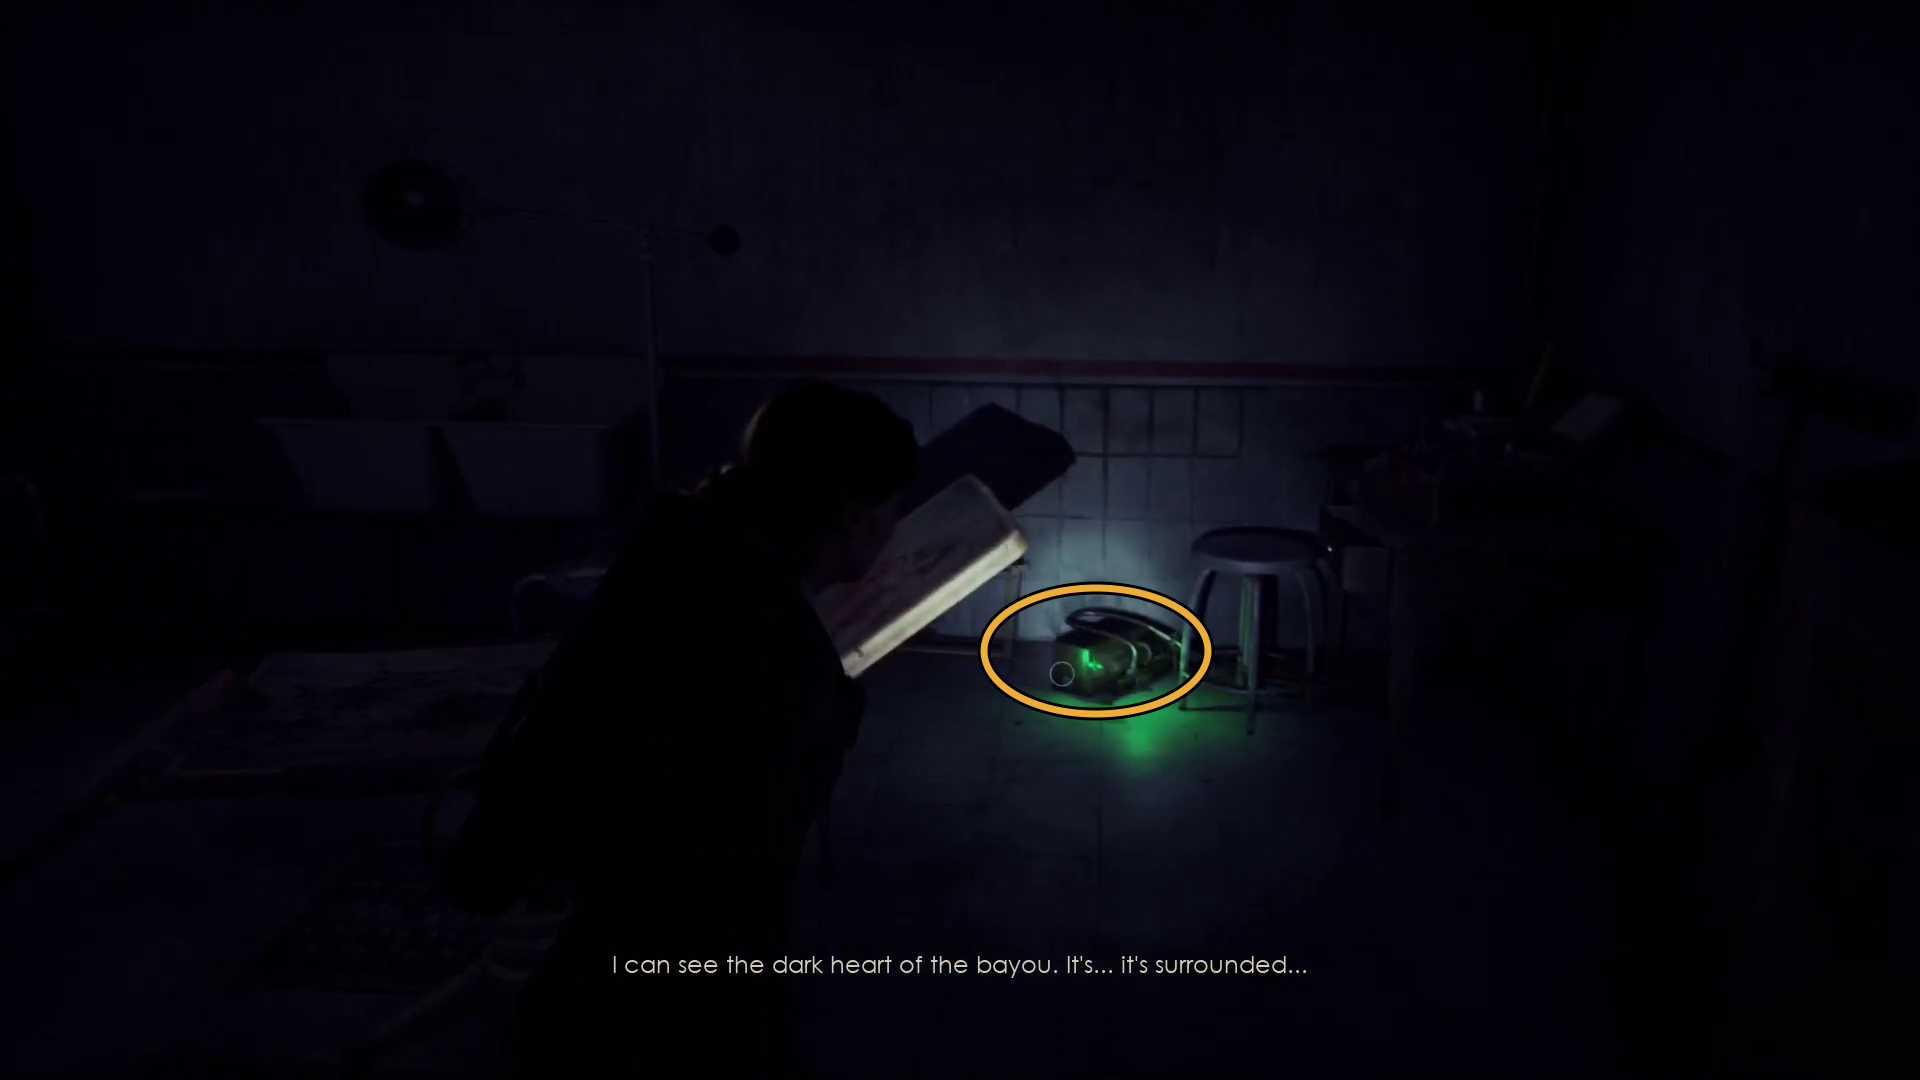
Now go back the way you came to the hall, and use the Surgery Room Key to go through the right-hand door on the opposite wall (Image 31). Inside, you’ll see a device on the floor playing a recording (Image 32) — interact with it to take an Electrical Fuse from it.
Image 31Image 32
That done, you can return to the room with the X-Ray display, and get the Circuit Box working.
You’ve picked up a few items that are required to being this puzzle, and then you’ve simply got to line up the switches…
Move the fuse switches in the following sequence: 1 – 2 – 4. If you mess it up, just press the Reset button.
After you’ve got the Circuit Box turned on, you can interact with the X-Ray Examination display to begin another puzzle.
Once again, you’ve got to add a few items to the puzzle first, and then you need to figure out how to arrange things… there’s a hint in one of the clues you picked up on the counter in the previous room.
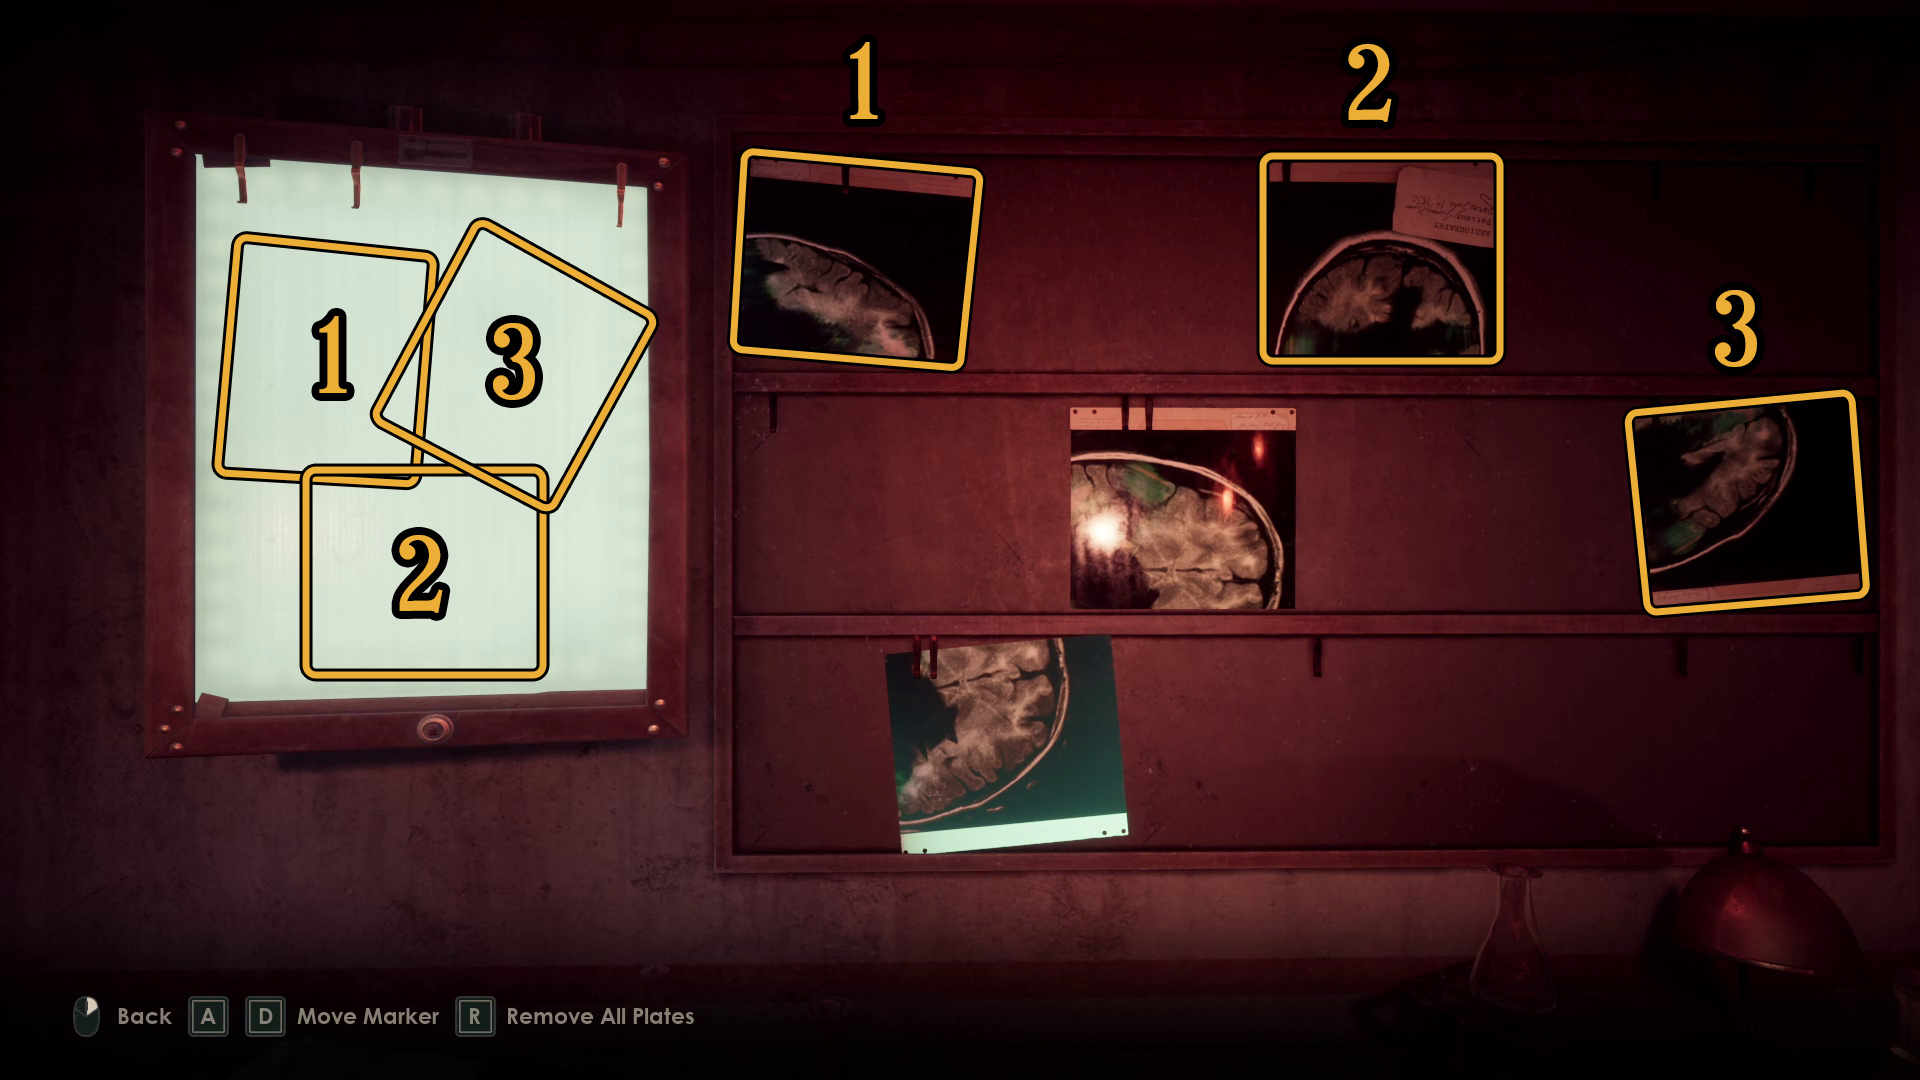
Put the indicated Radiograph plates on the display in their correct spots (Image 1). Rotate #1 90 degrees to the left, rotate #2 180 degrees, and rotate #3 about 45 degrees to the left — try to make the plates match Image 2 below.
Image 1Image 2
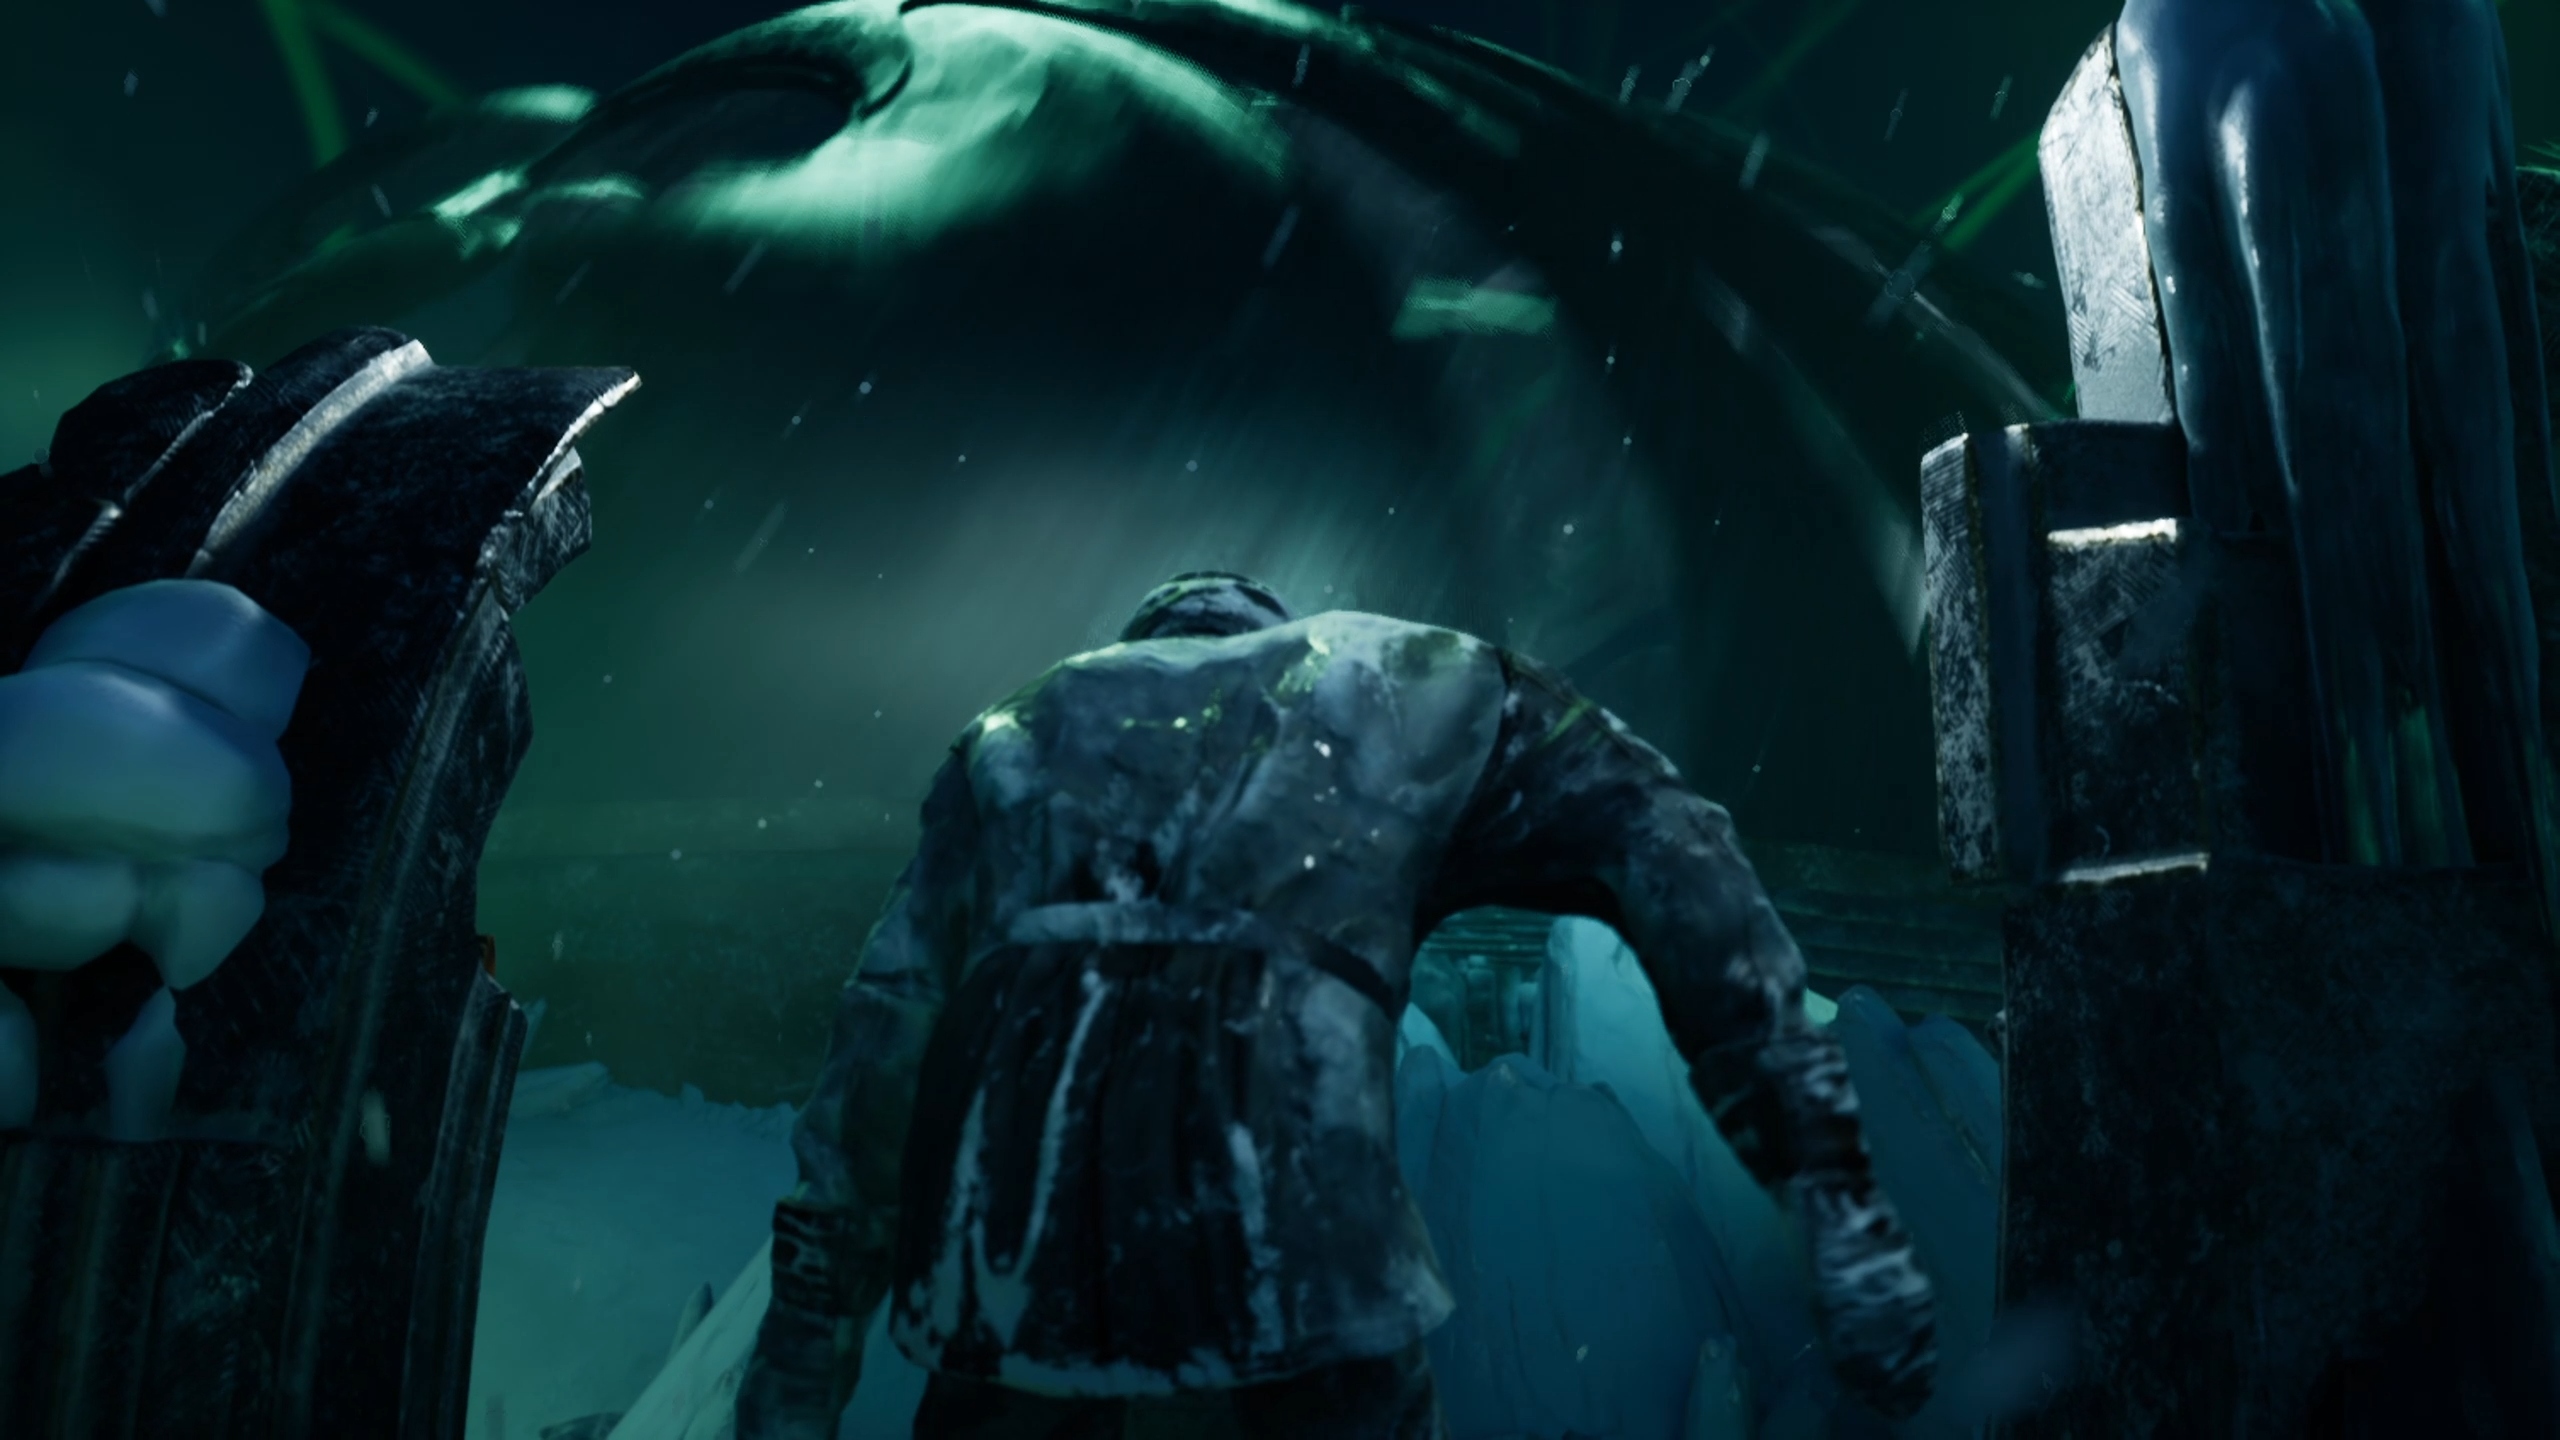
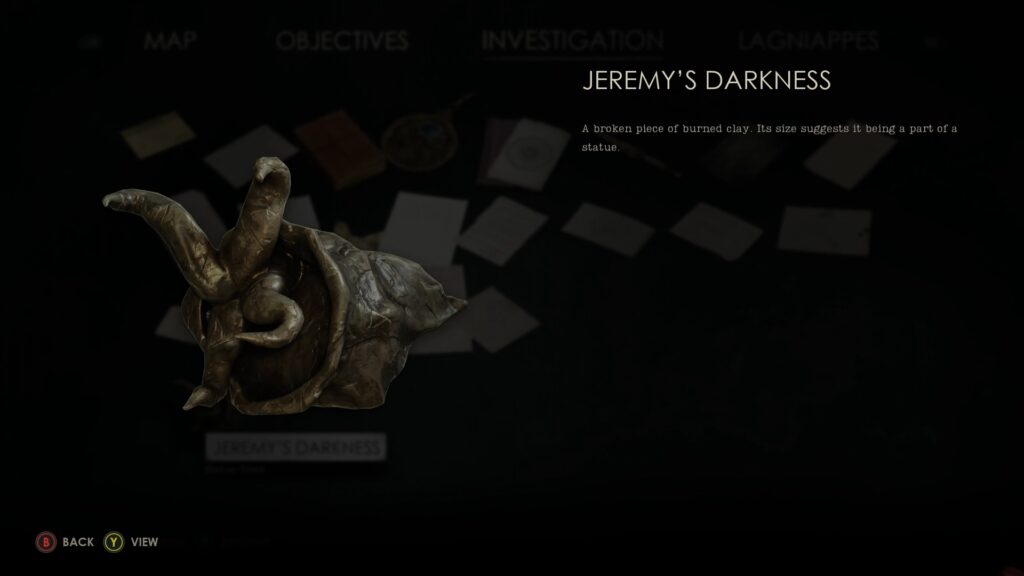
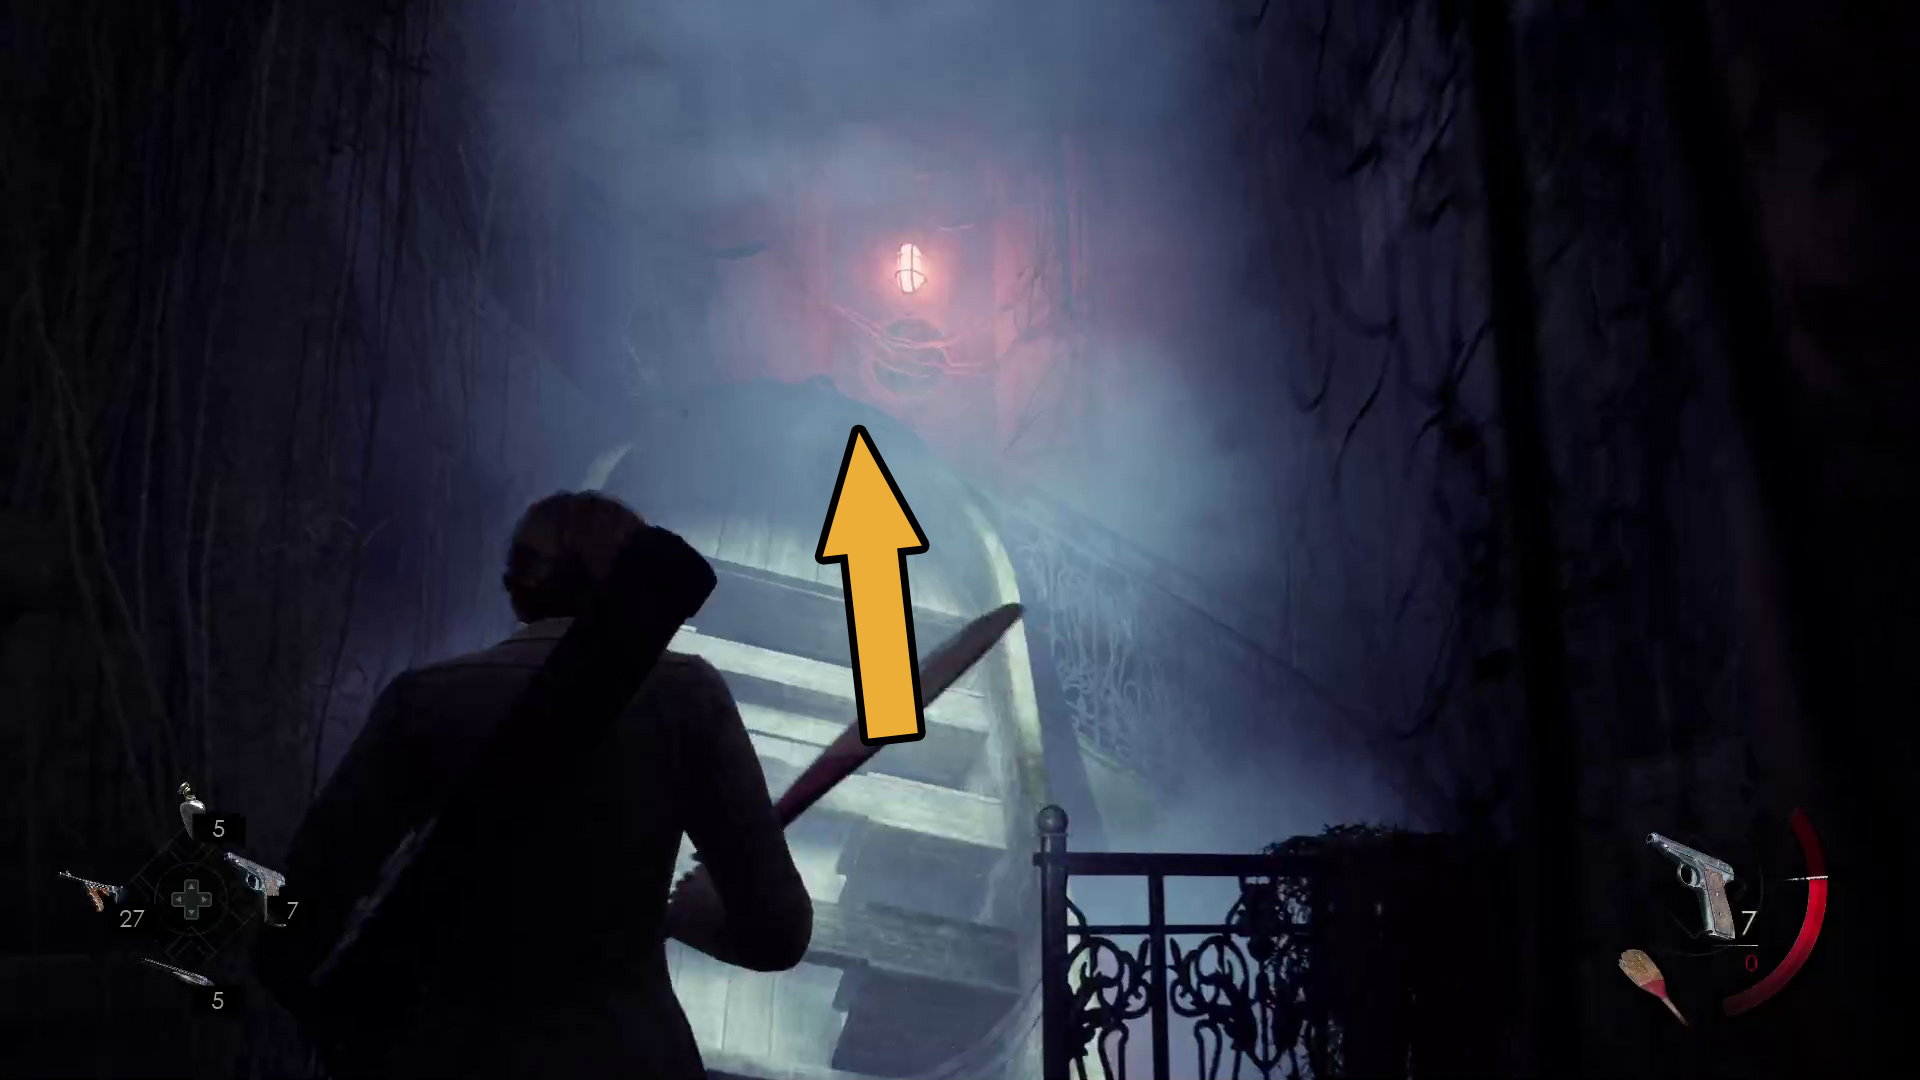
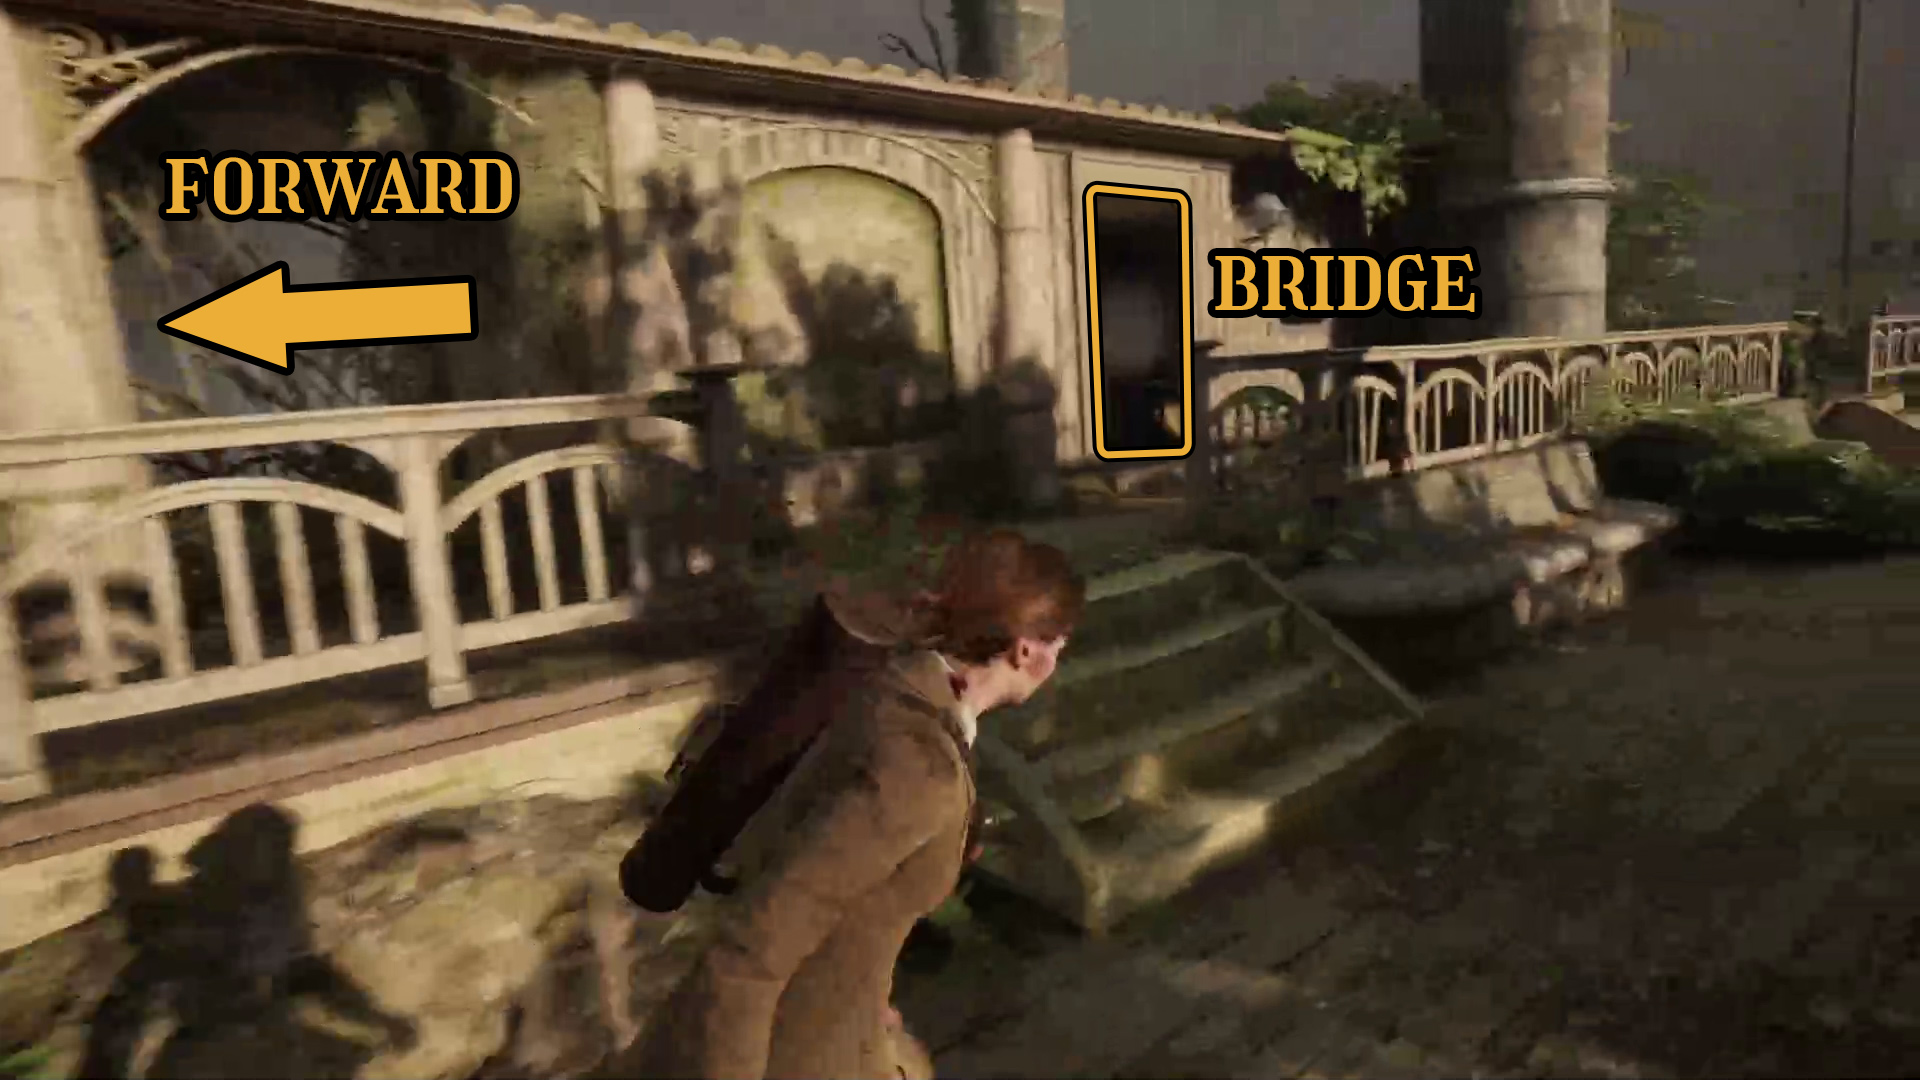
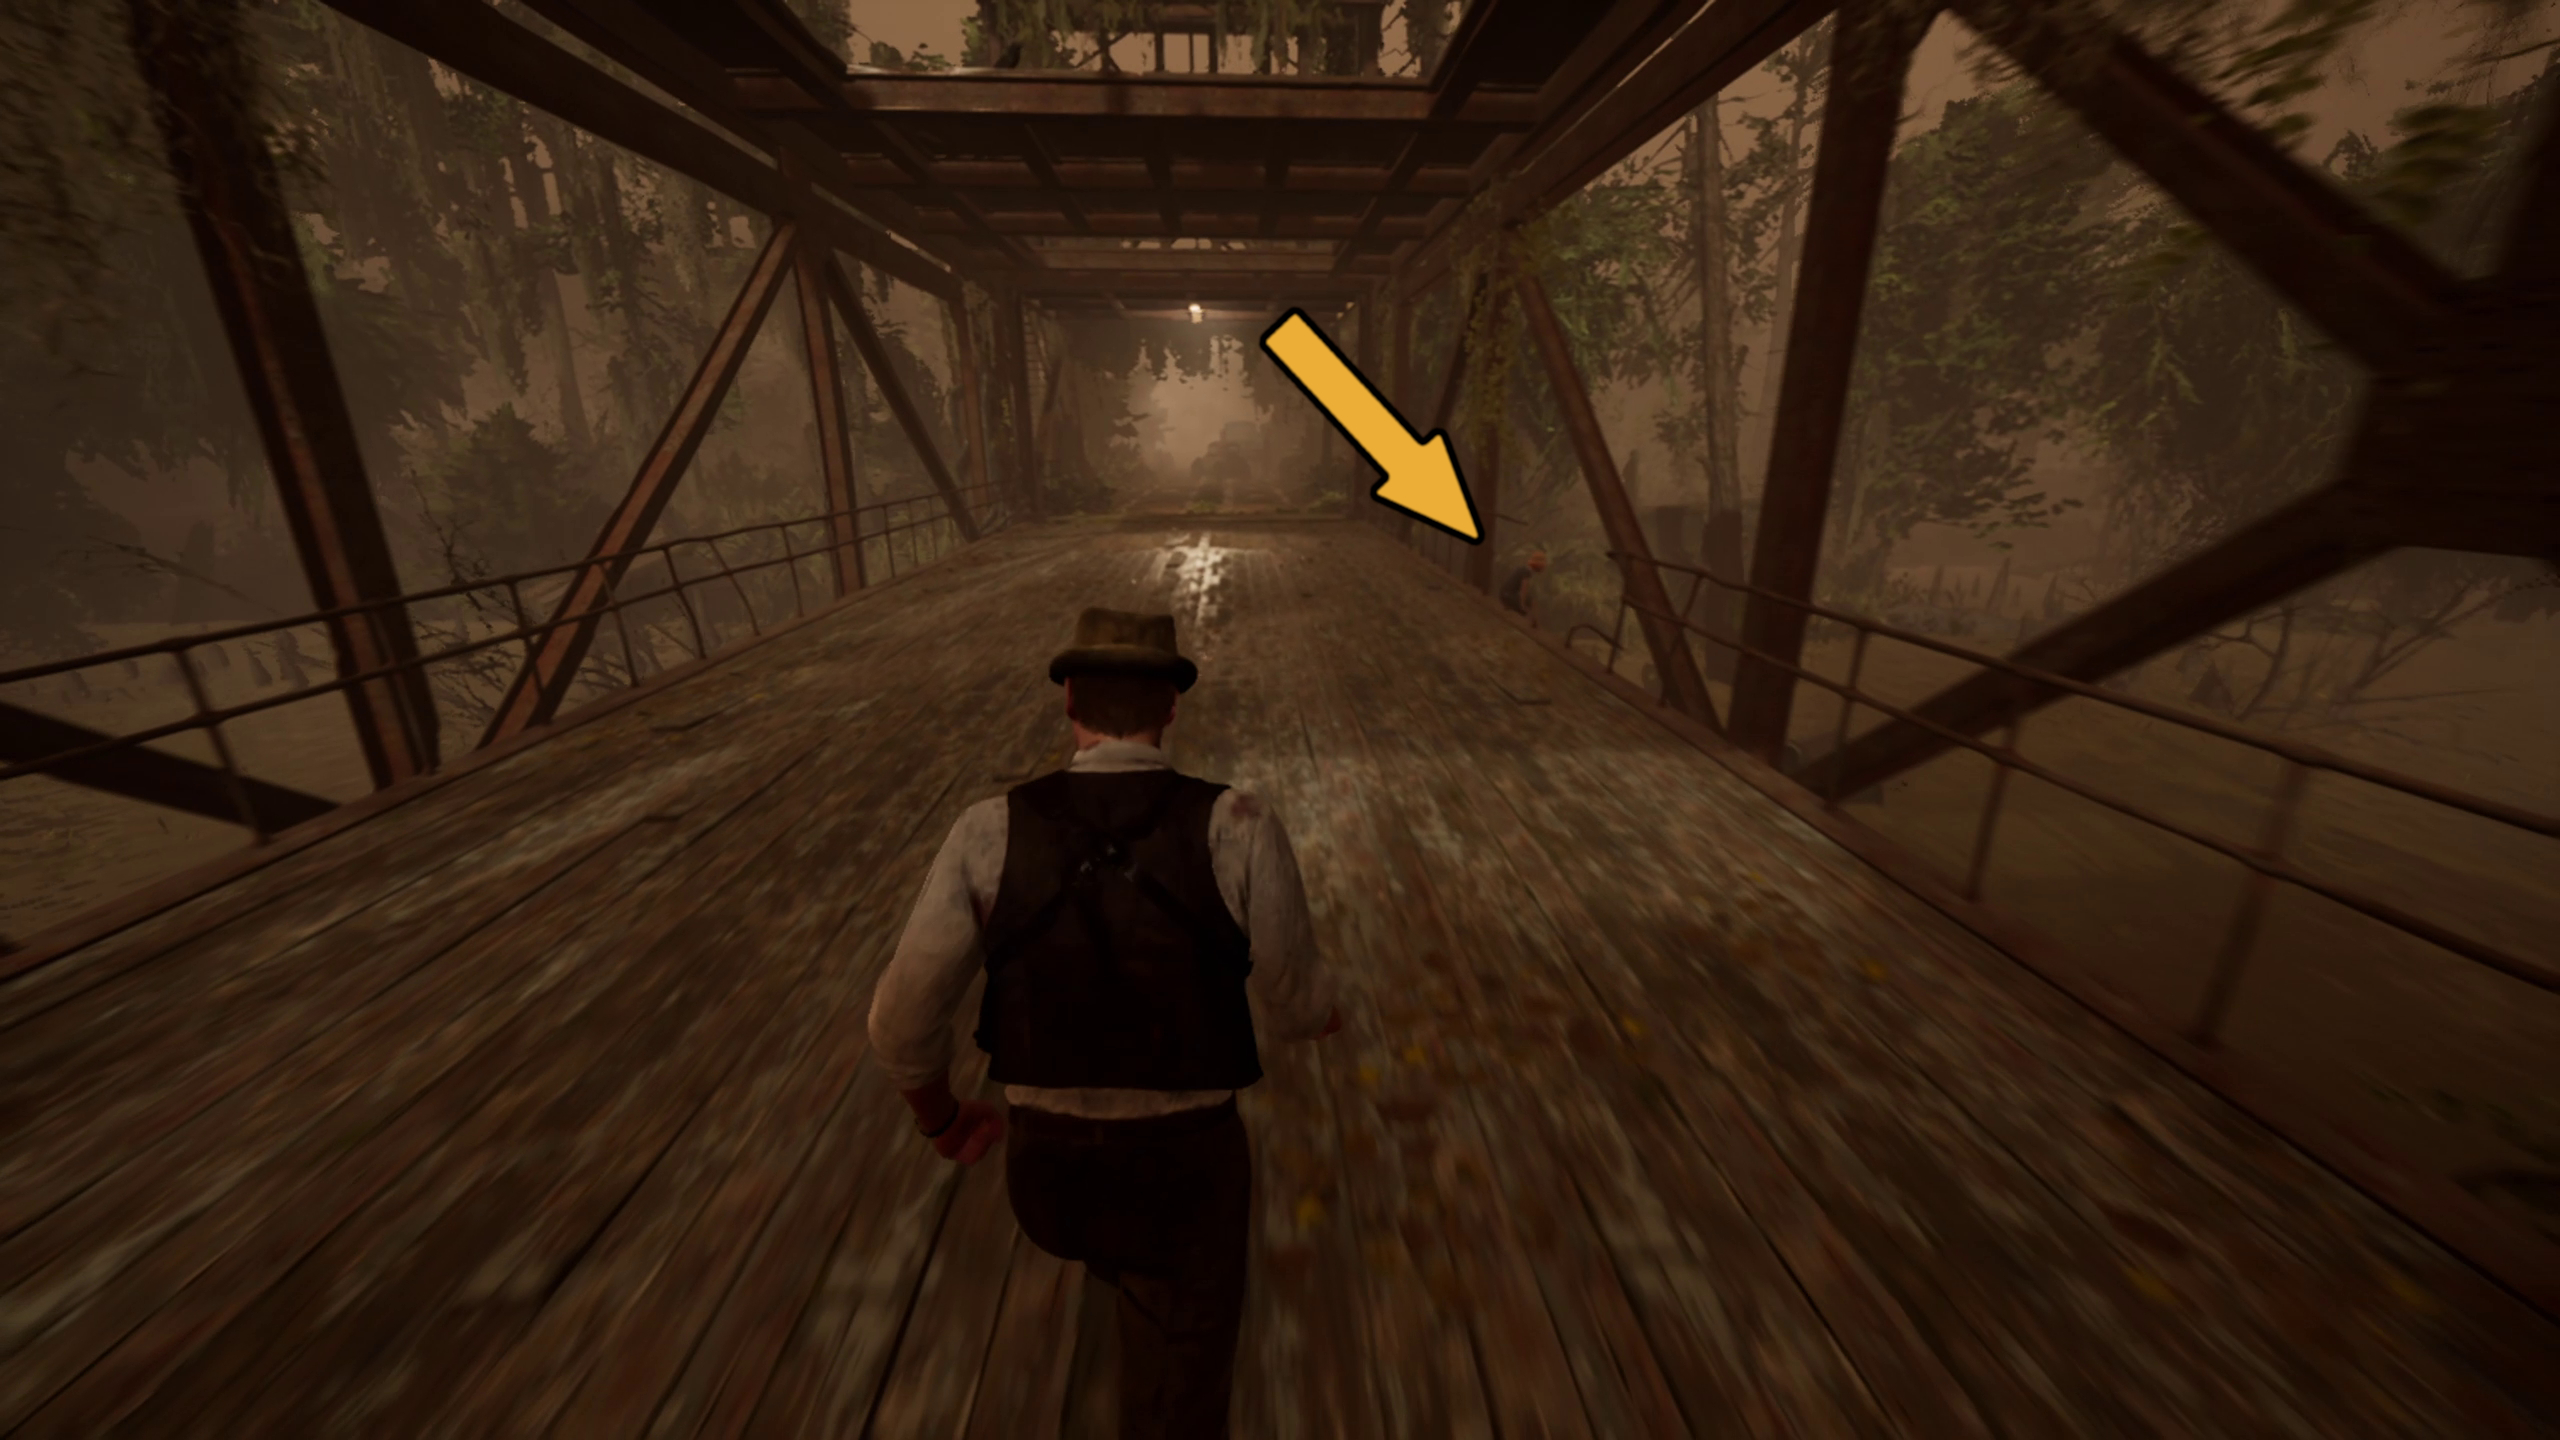
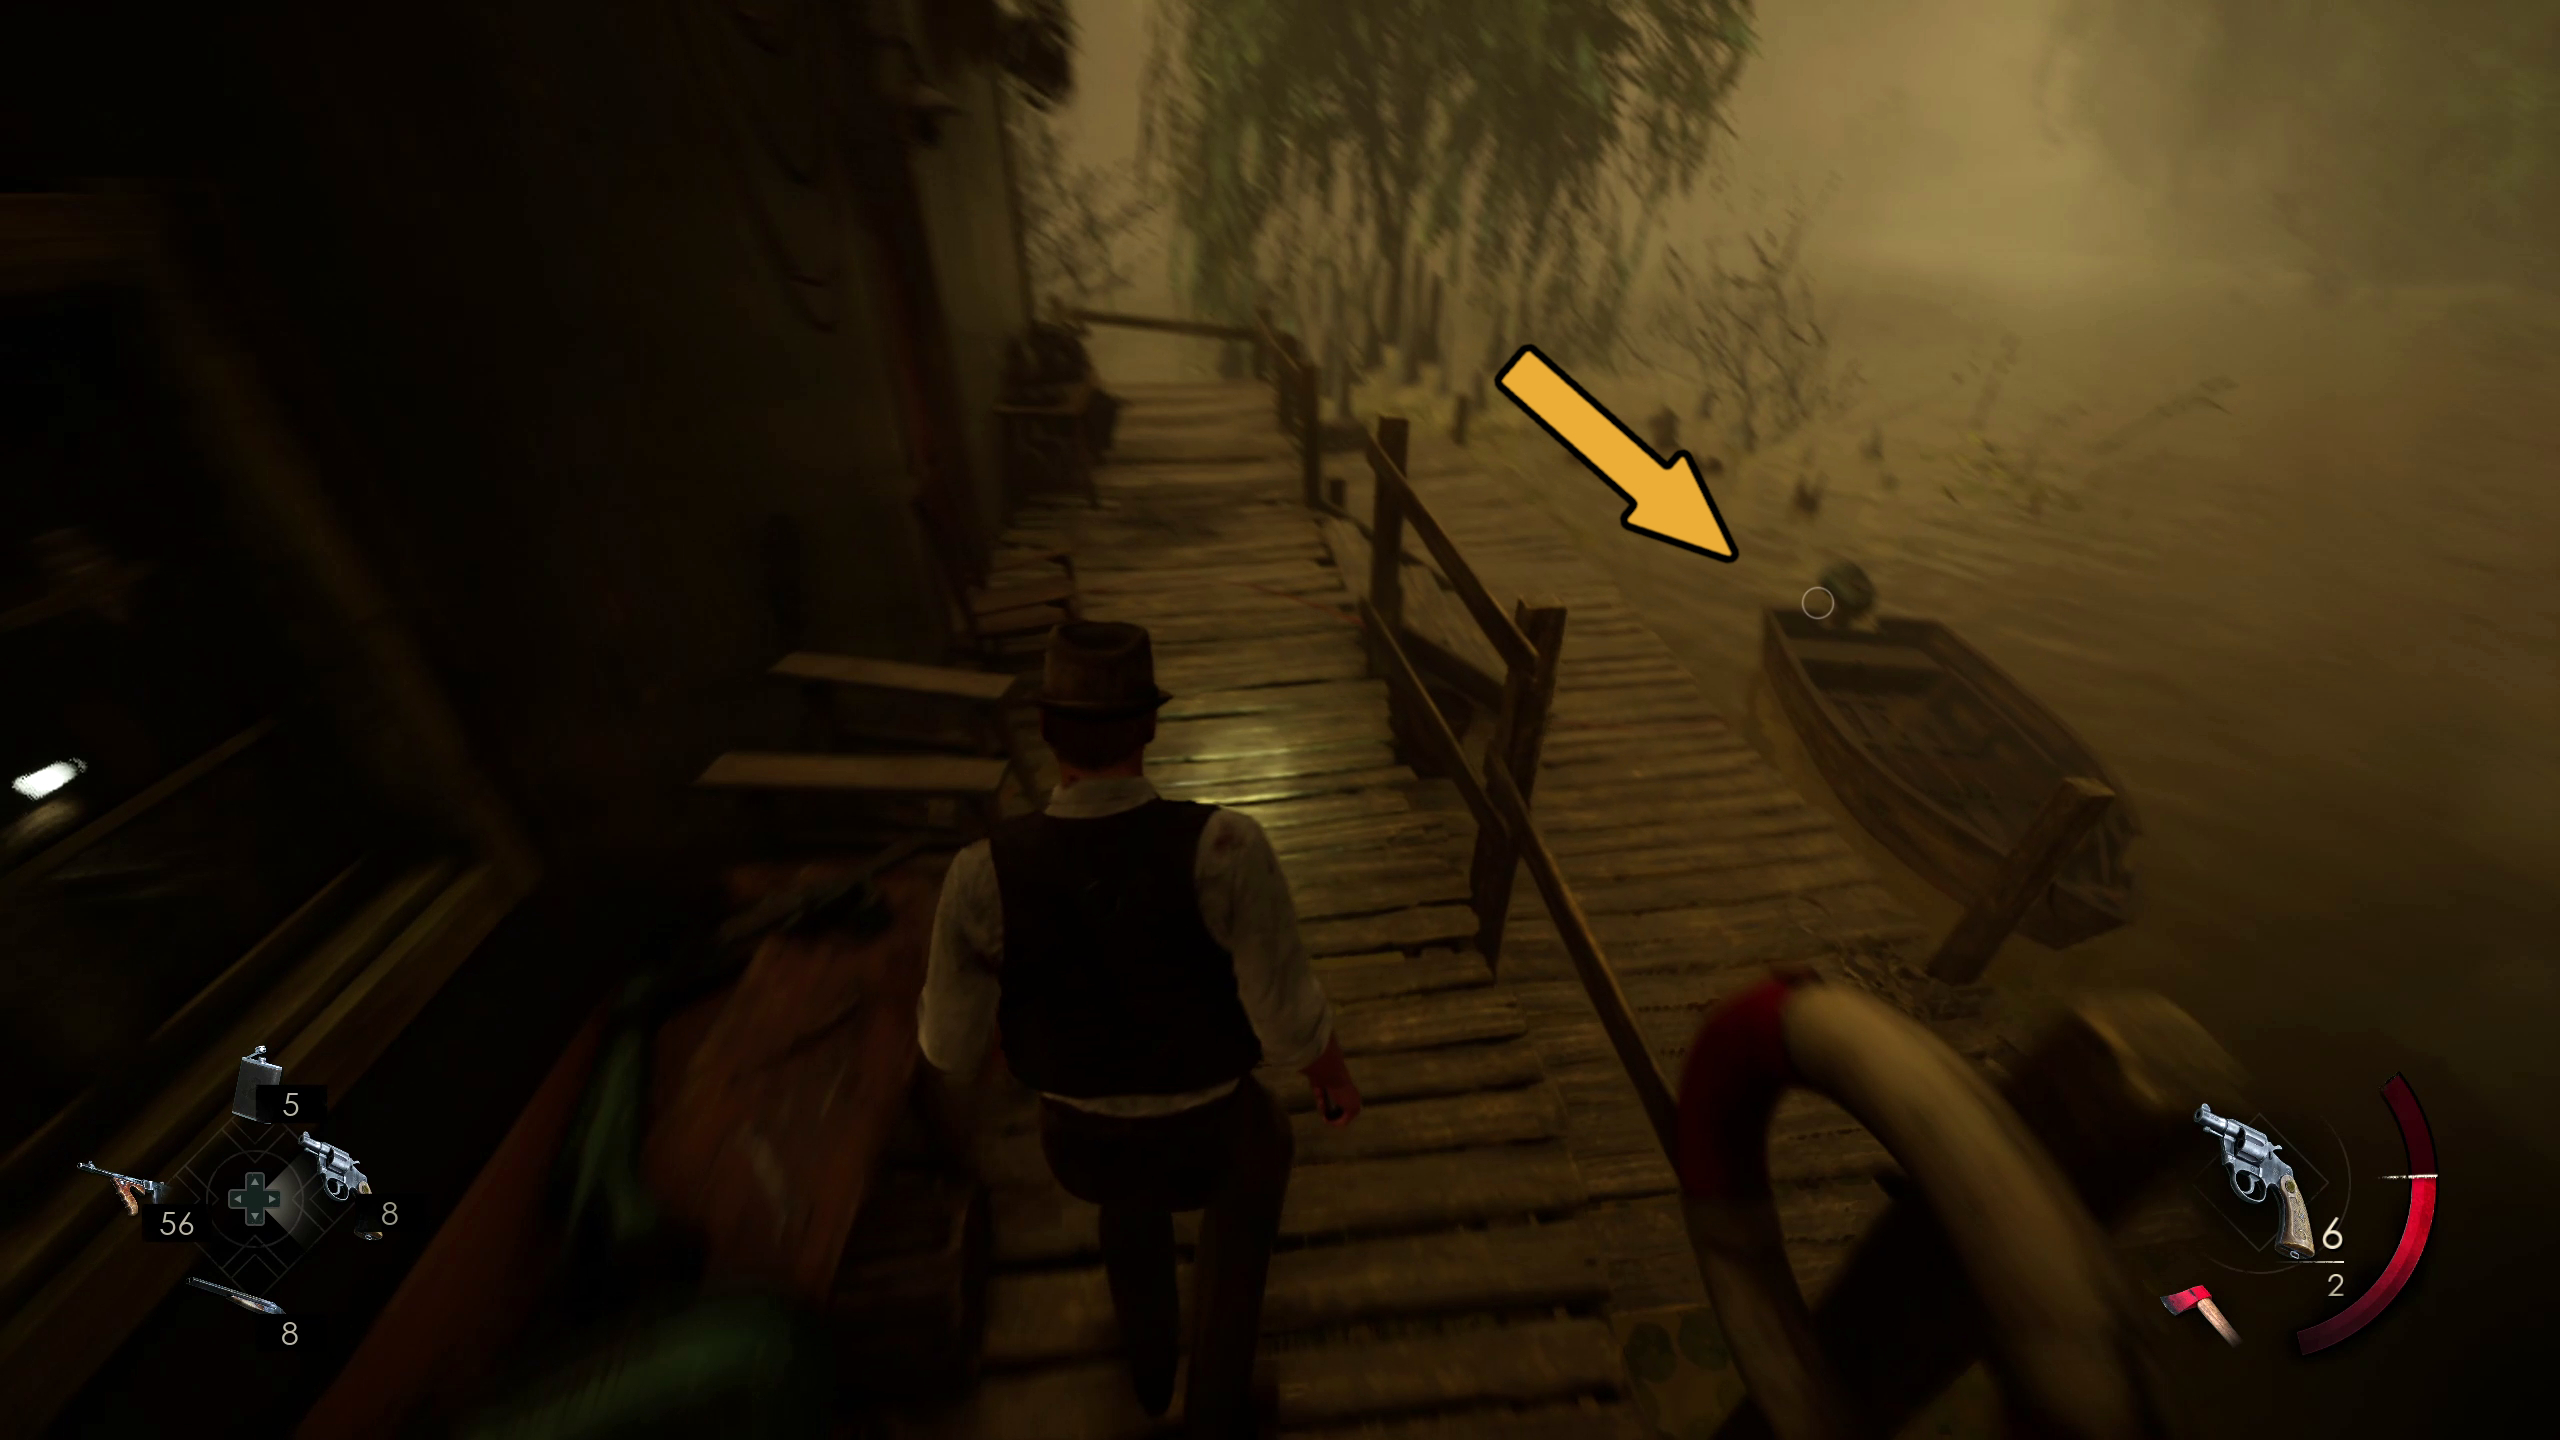
Completing the puzzle will grant you the key item Jeremy’s Darkness. Now you need to head to the attic — it’s simply, since you won’t be able to go anywhere else from this point. Go back the way you came, through the red door that leads to the spiral stairs (Image 33). Then make your way up the stairs — you’ll have to sometimes squeeze through narrow openings or smash your way through barricades with a melee weapon. When you reach the locked doors, turn around and go across the boat (Image 34) to continue further upwards. At the top of the stairs, you’ll be able to go through a door to the attic.
Image 33Image 34
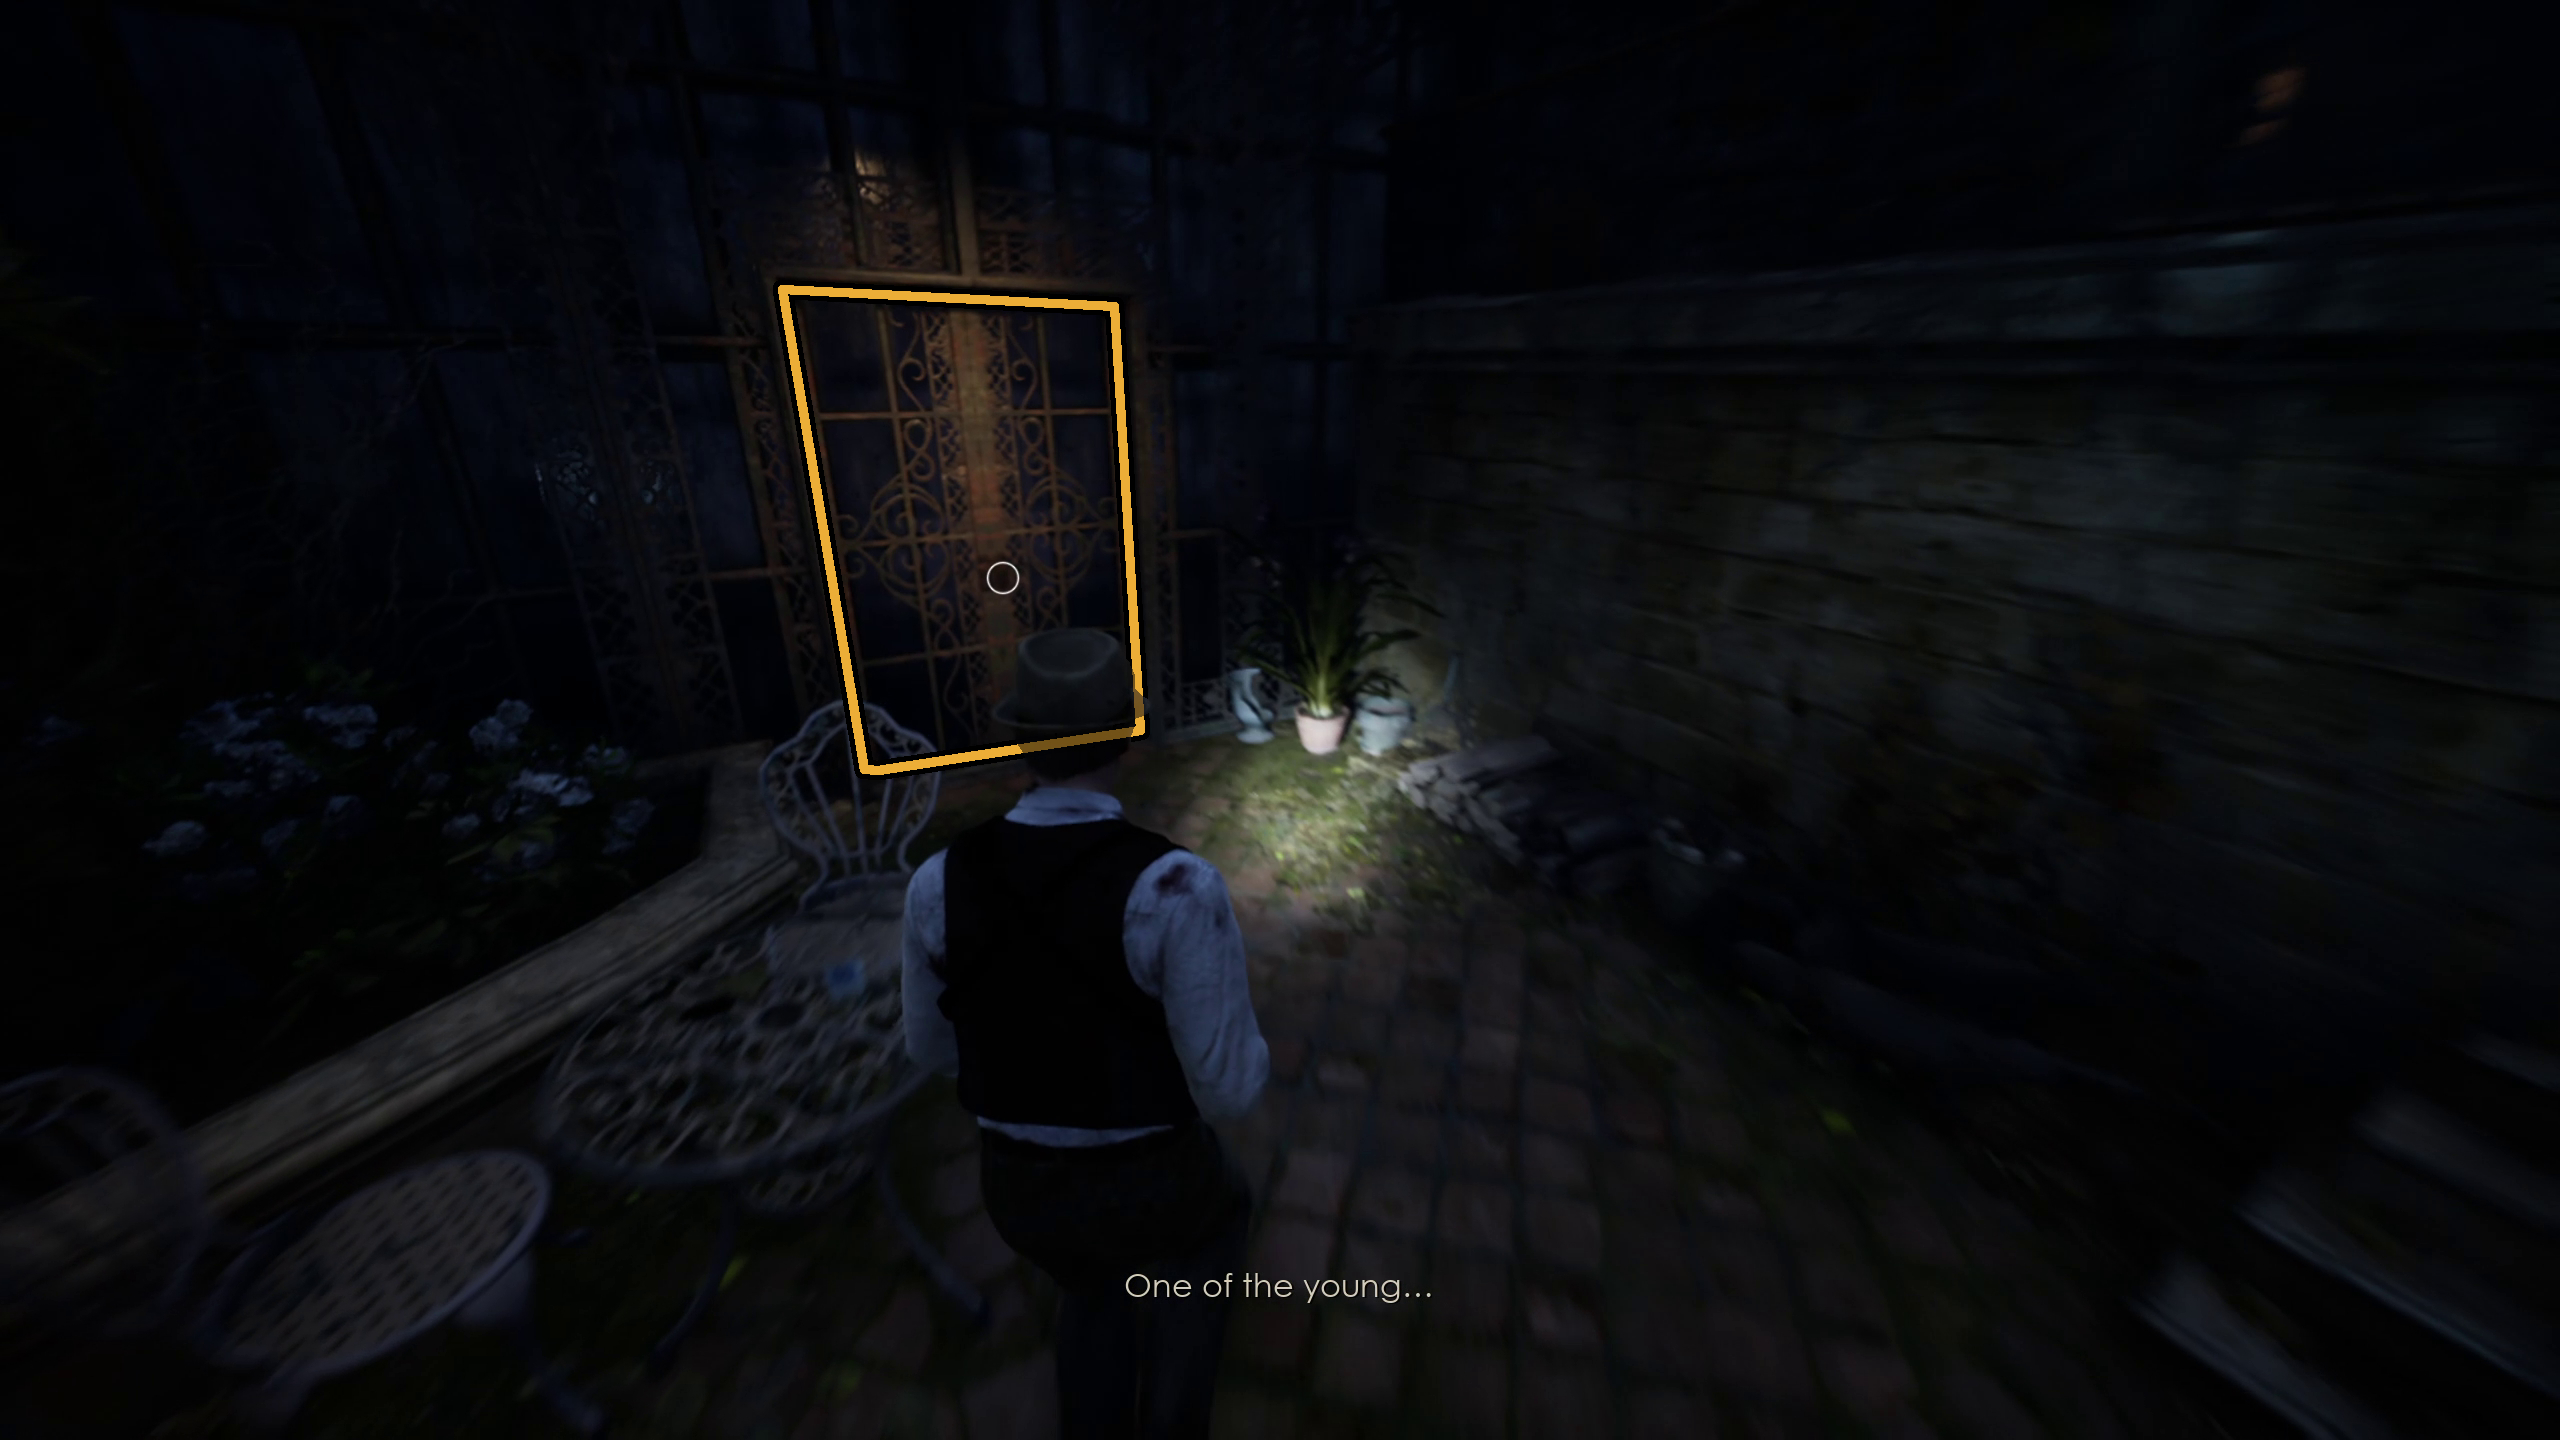
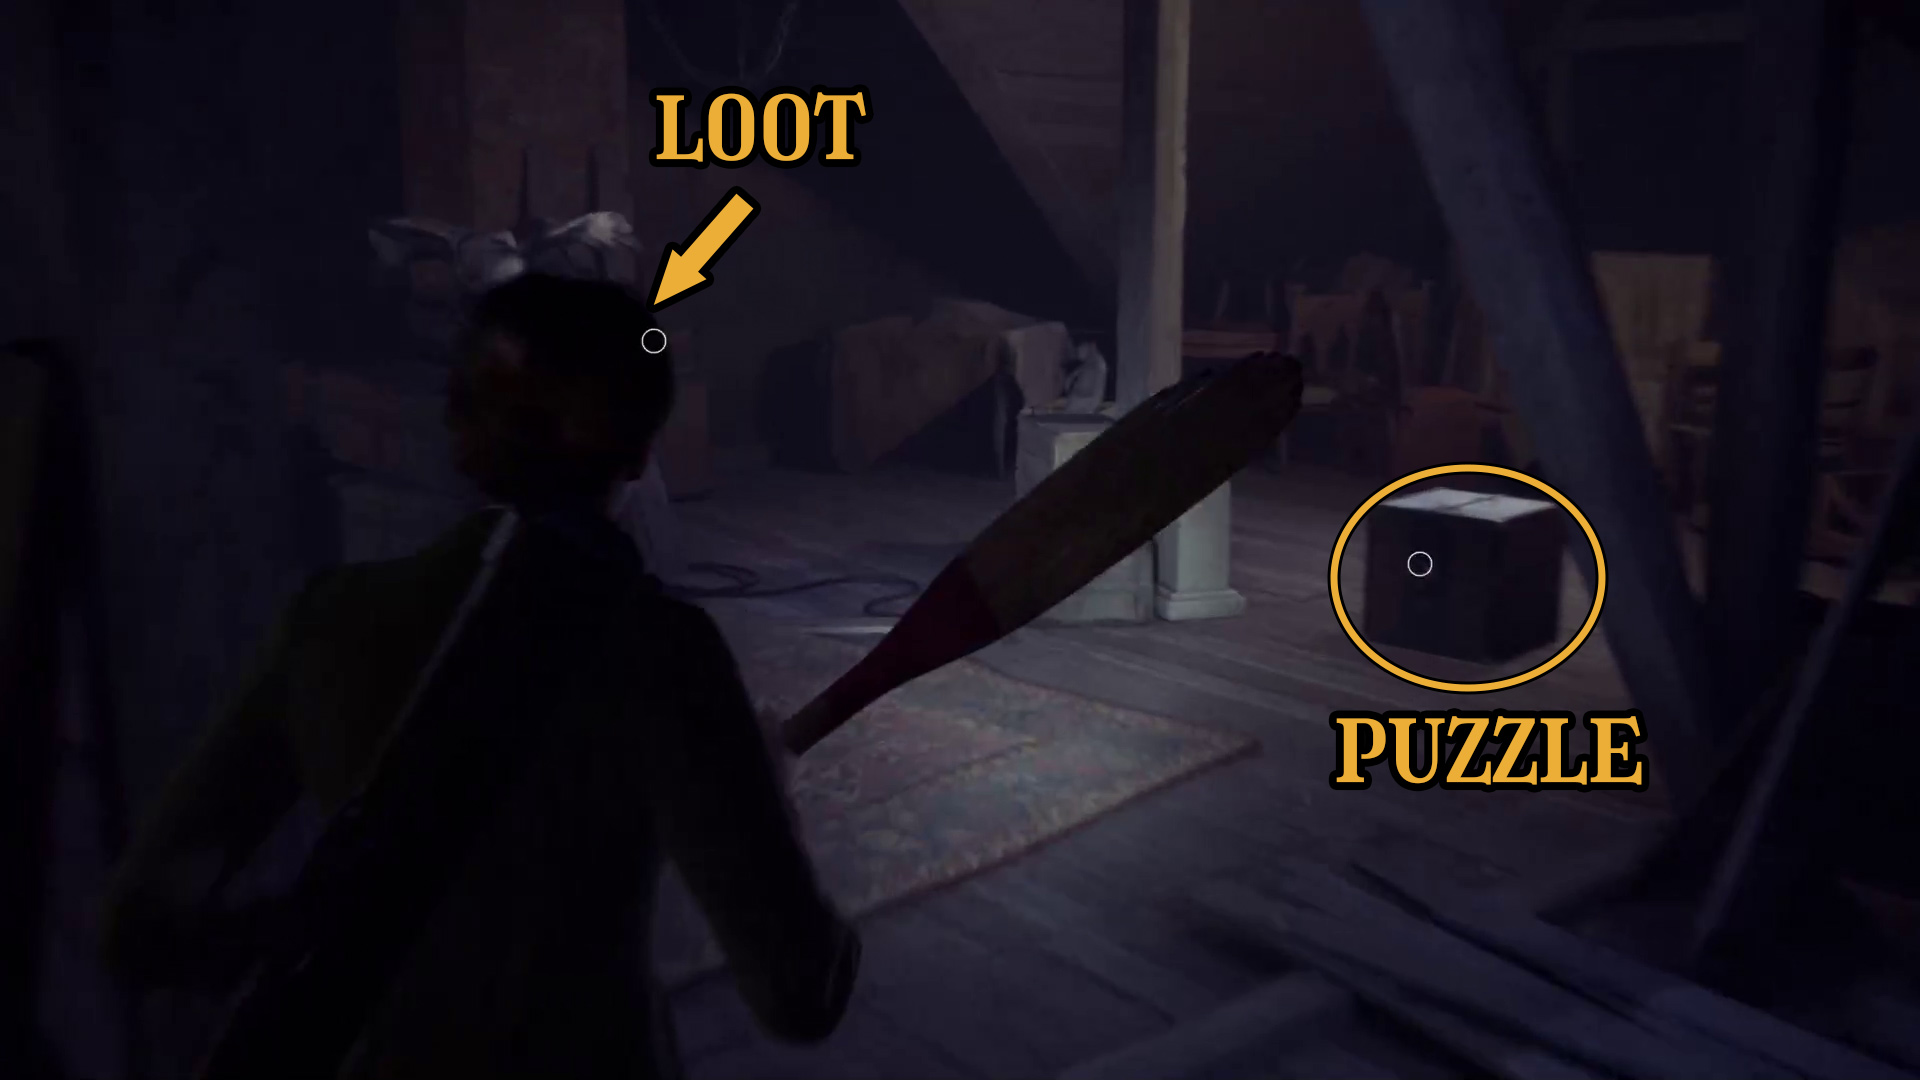
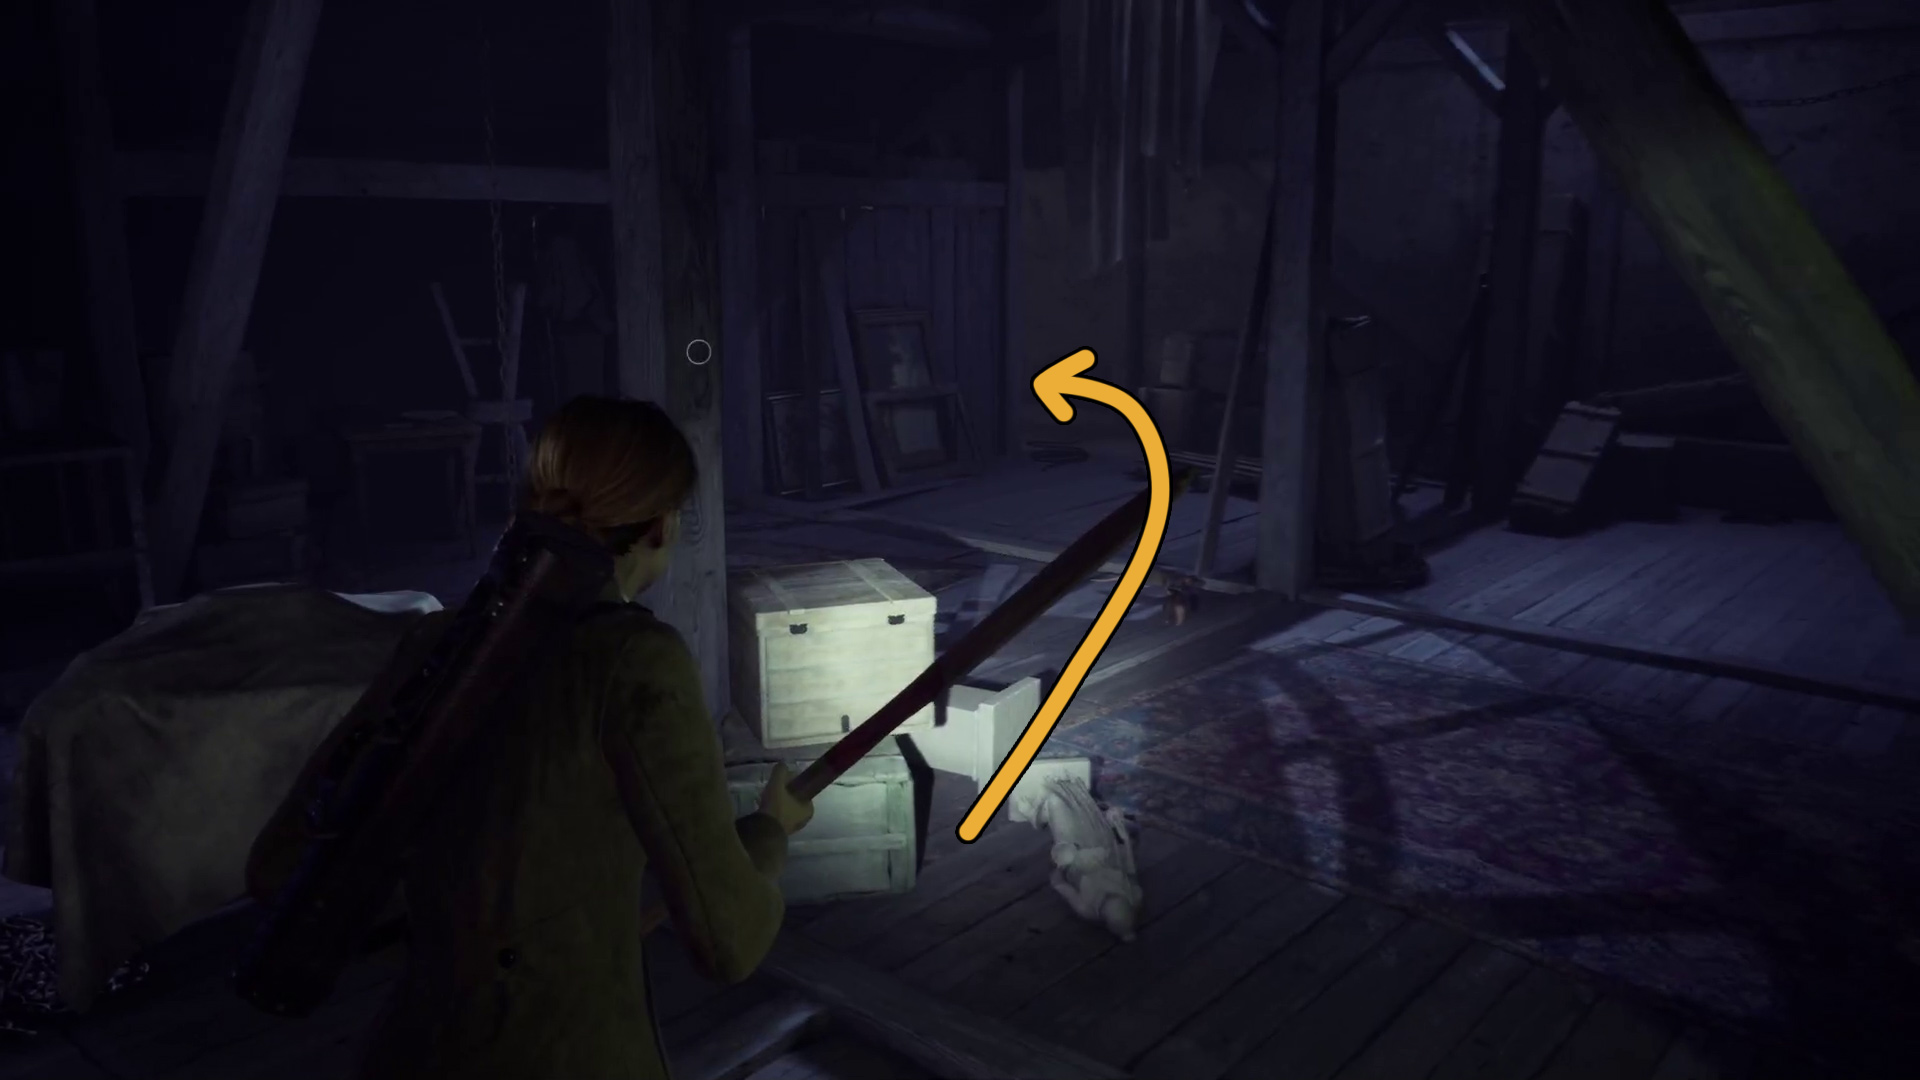
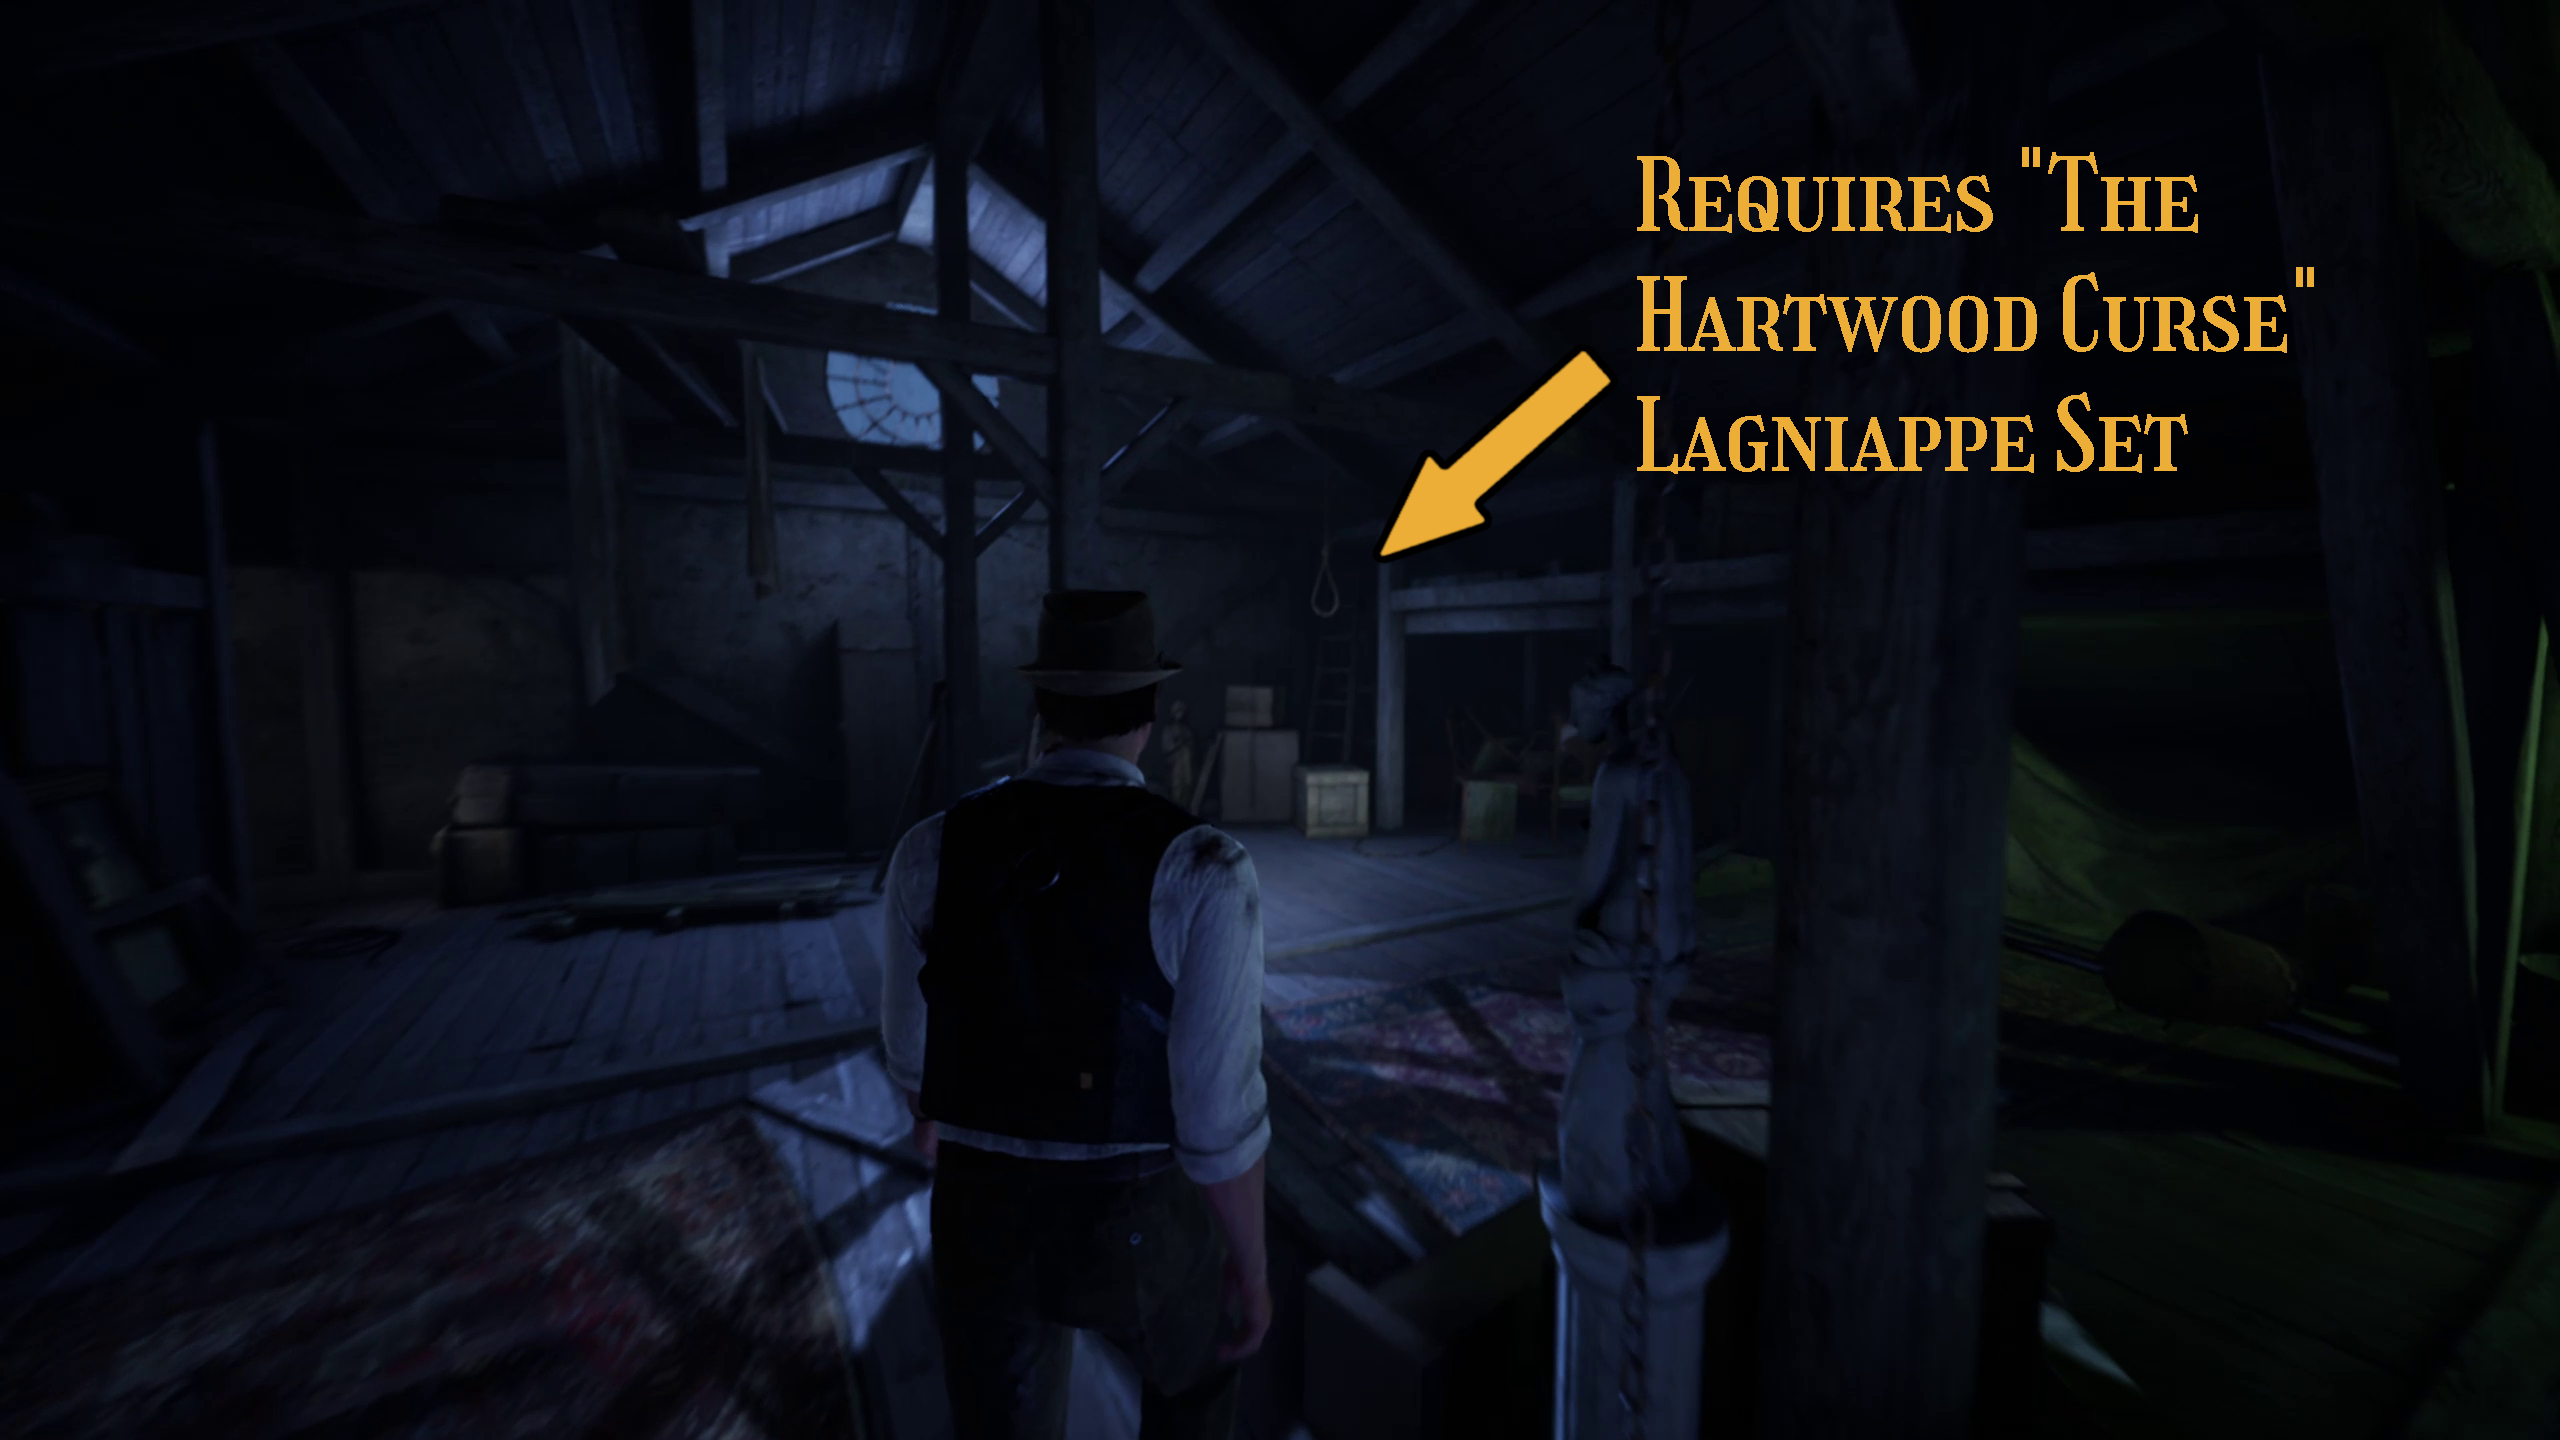
When you enter the attic, you can go left or right — to the left is a puzzle and some possible loot (Image 35), but first go to the right and around the corner (Image 36). Here, you’ll find the Tessellated Shard lagniappe next to a bust on a small table. If you’ve collected the entire The Hartwood Curse Lagniappe Set, then you will also be able to interact with the noose here, to reveal some secrets about said curse (Image 37). That done, go back the way you came and go check out the puzzle box in Image 35.
Image 35Image 36Image 37
The first bit is fairly simple, add a shape, then just move the shapes around until they all fit together nicely. Then take a look where you put together the puzzle — are there any clues here?
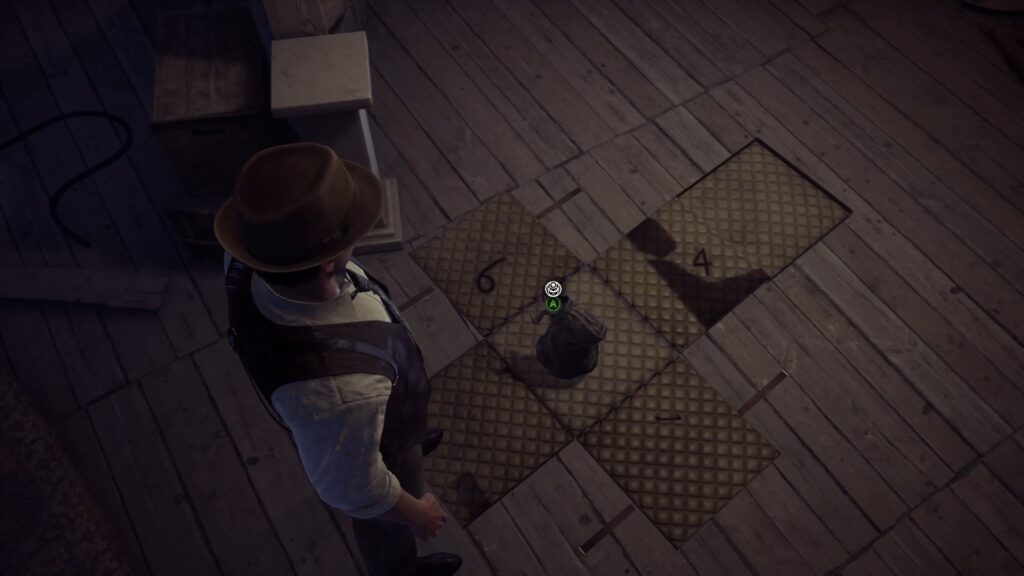
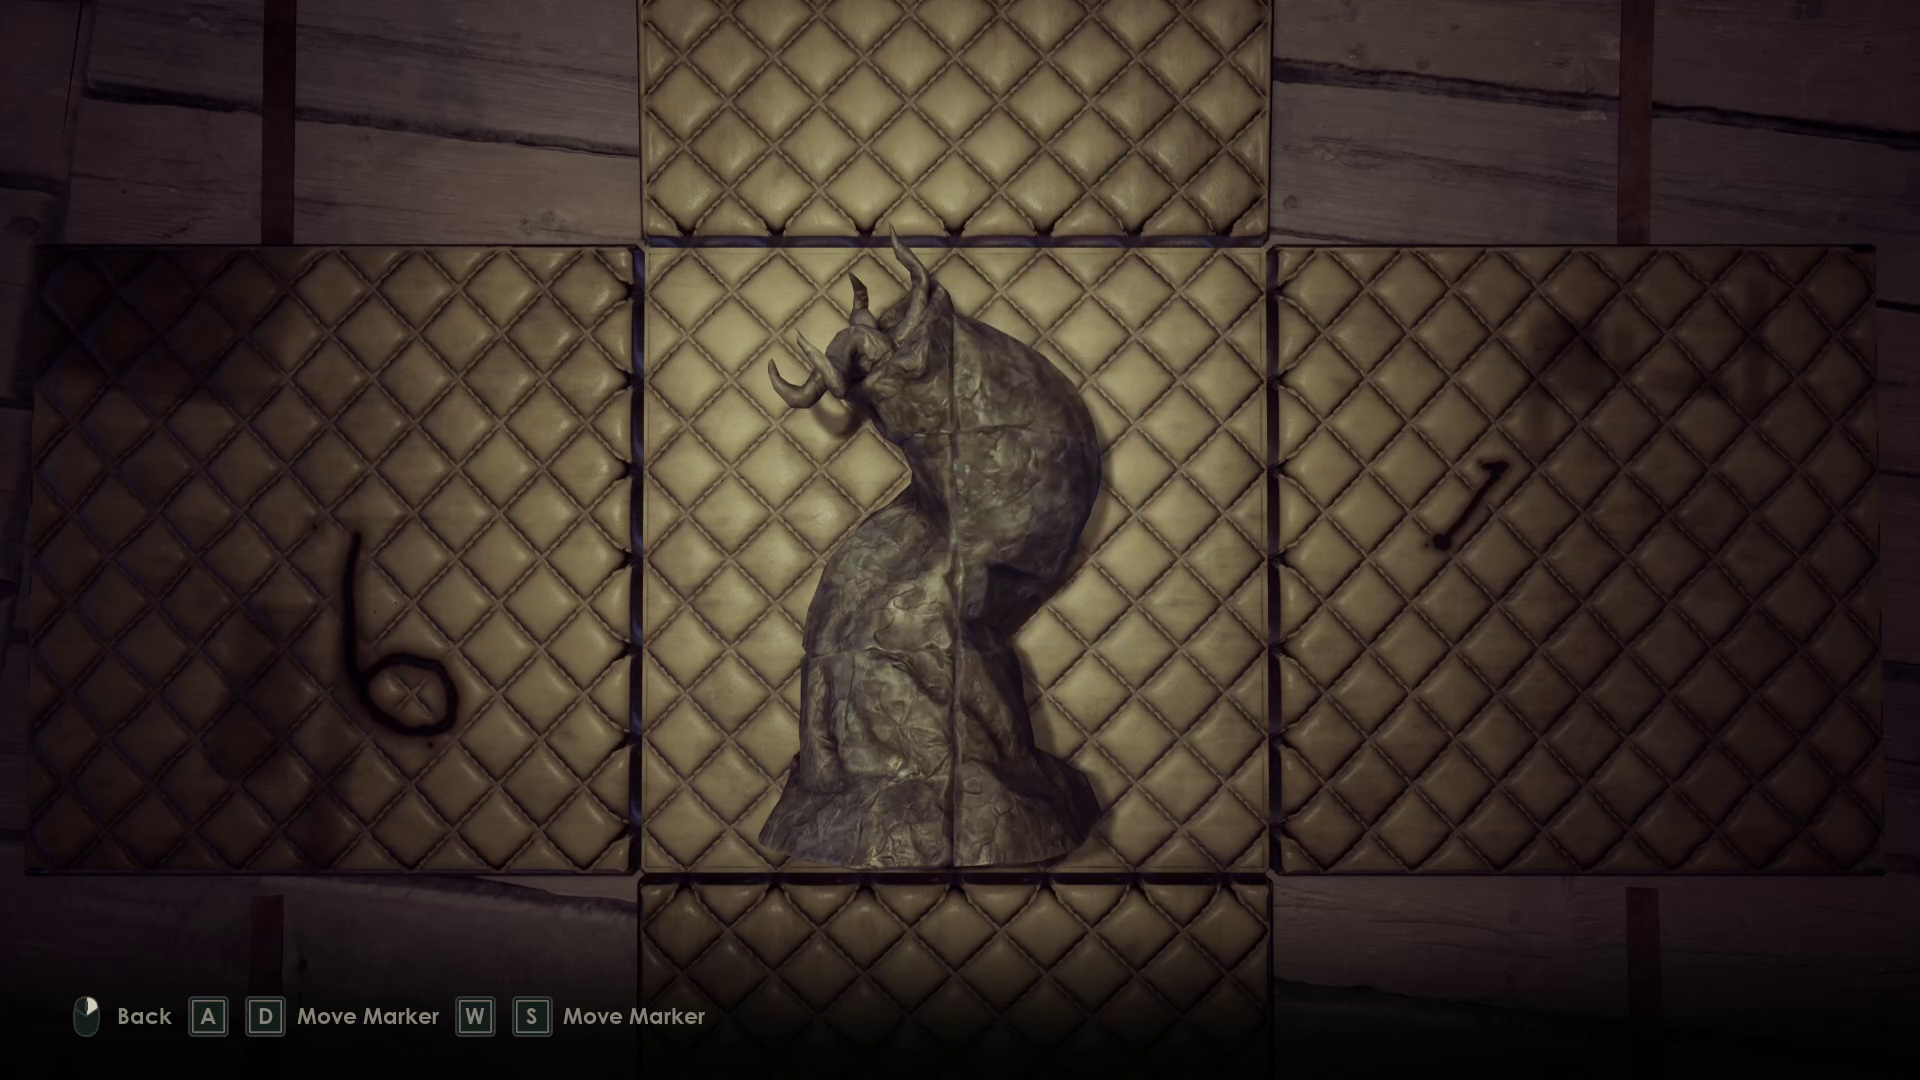
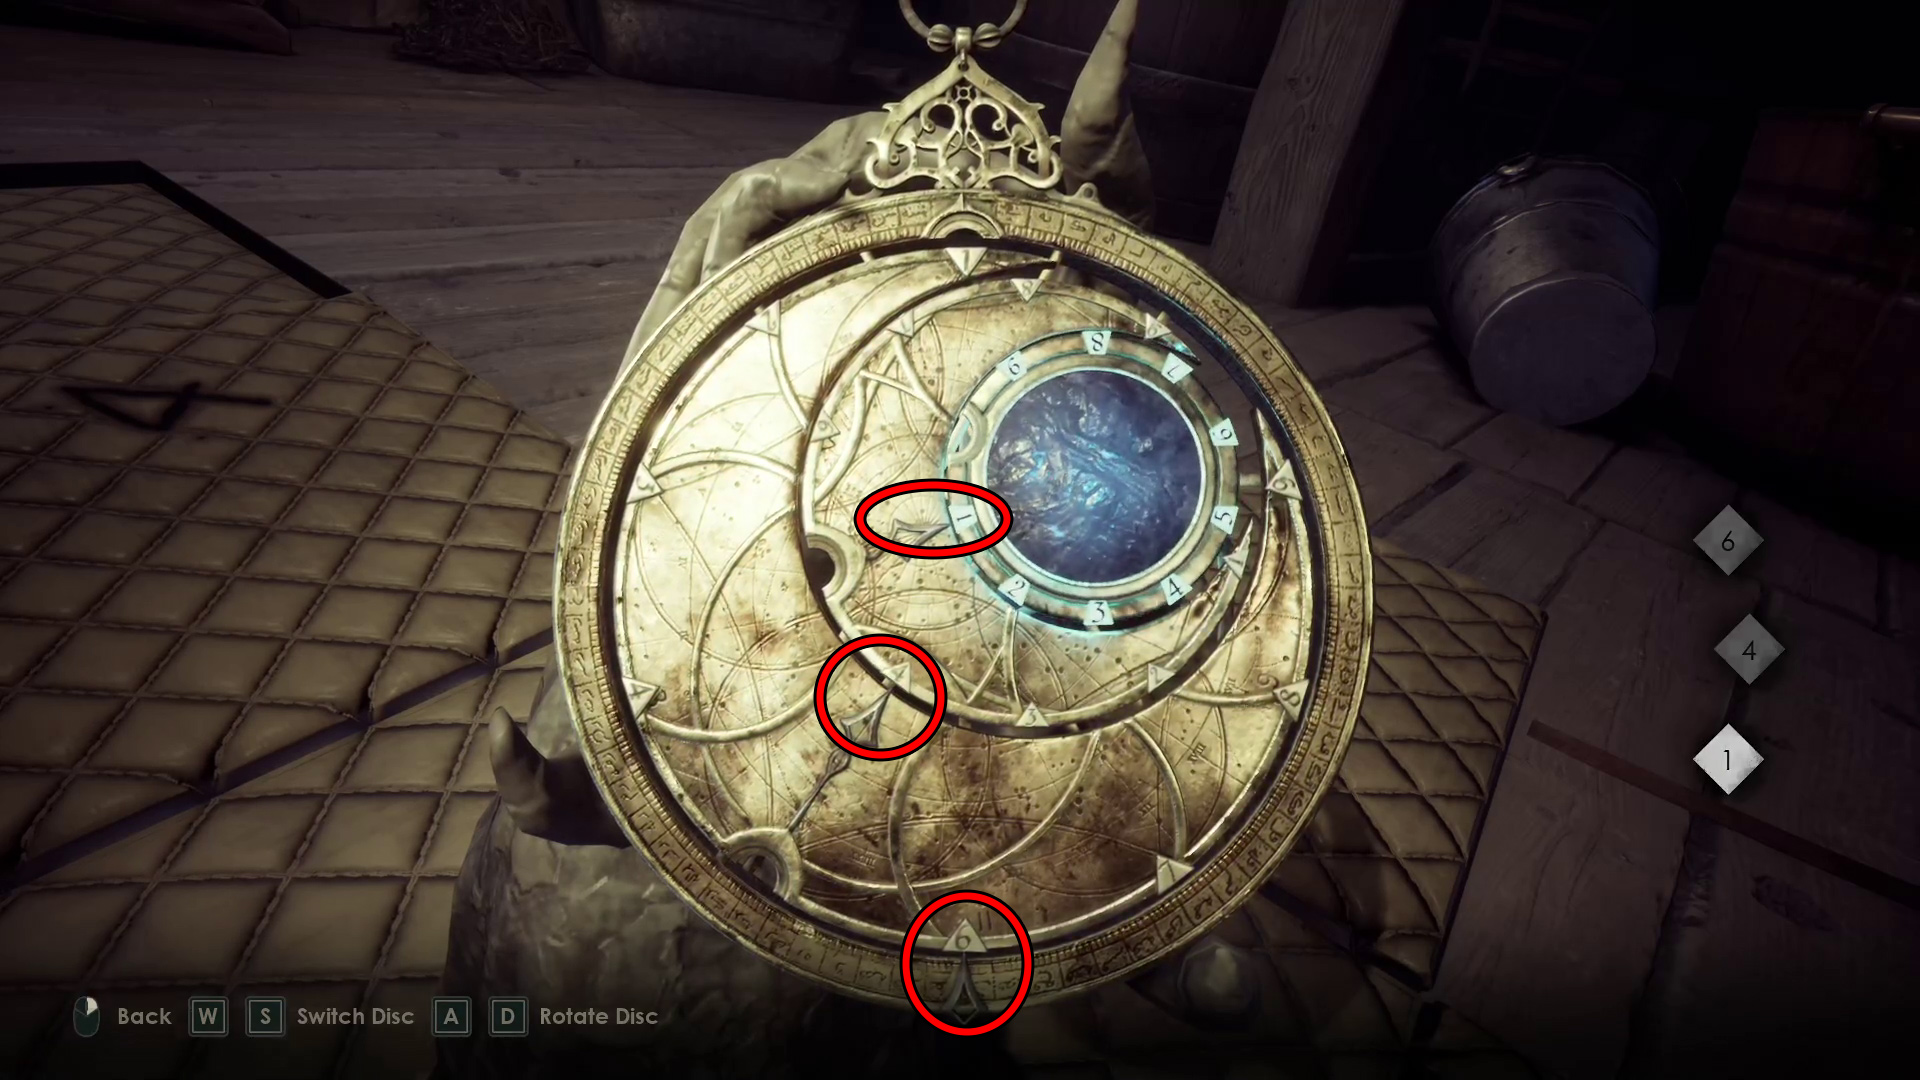
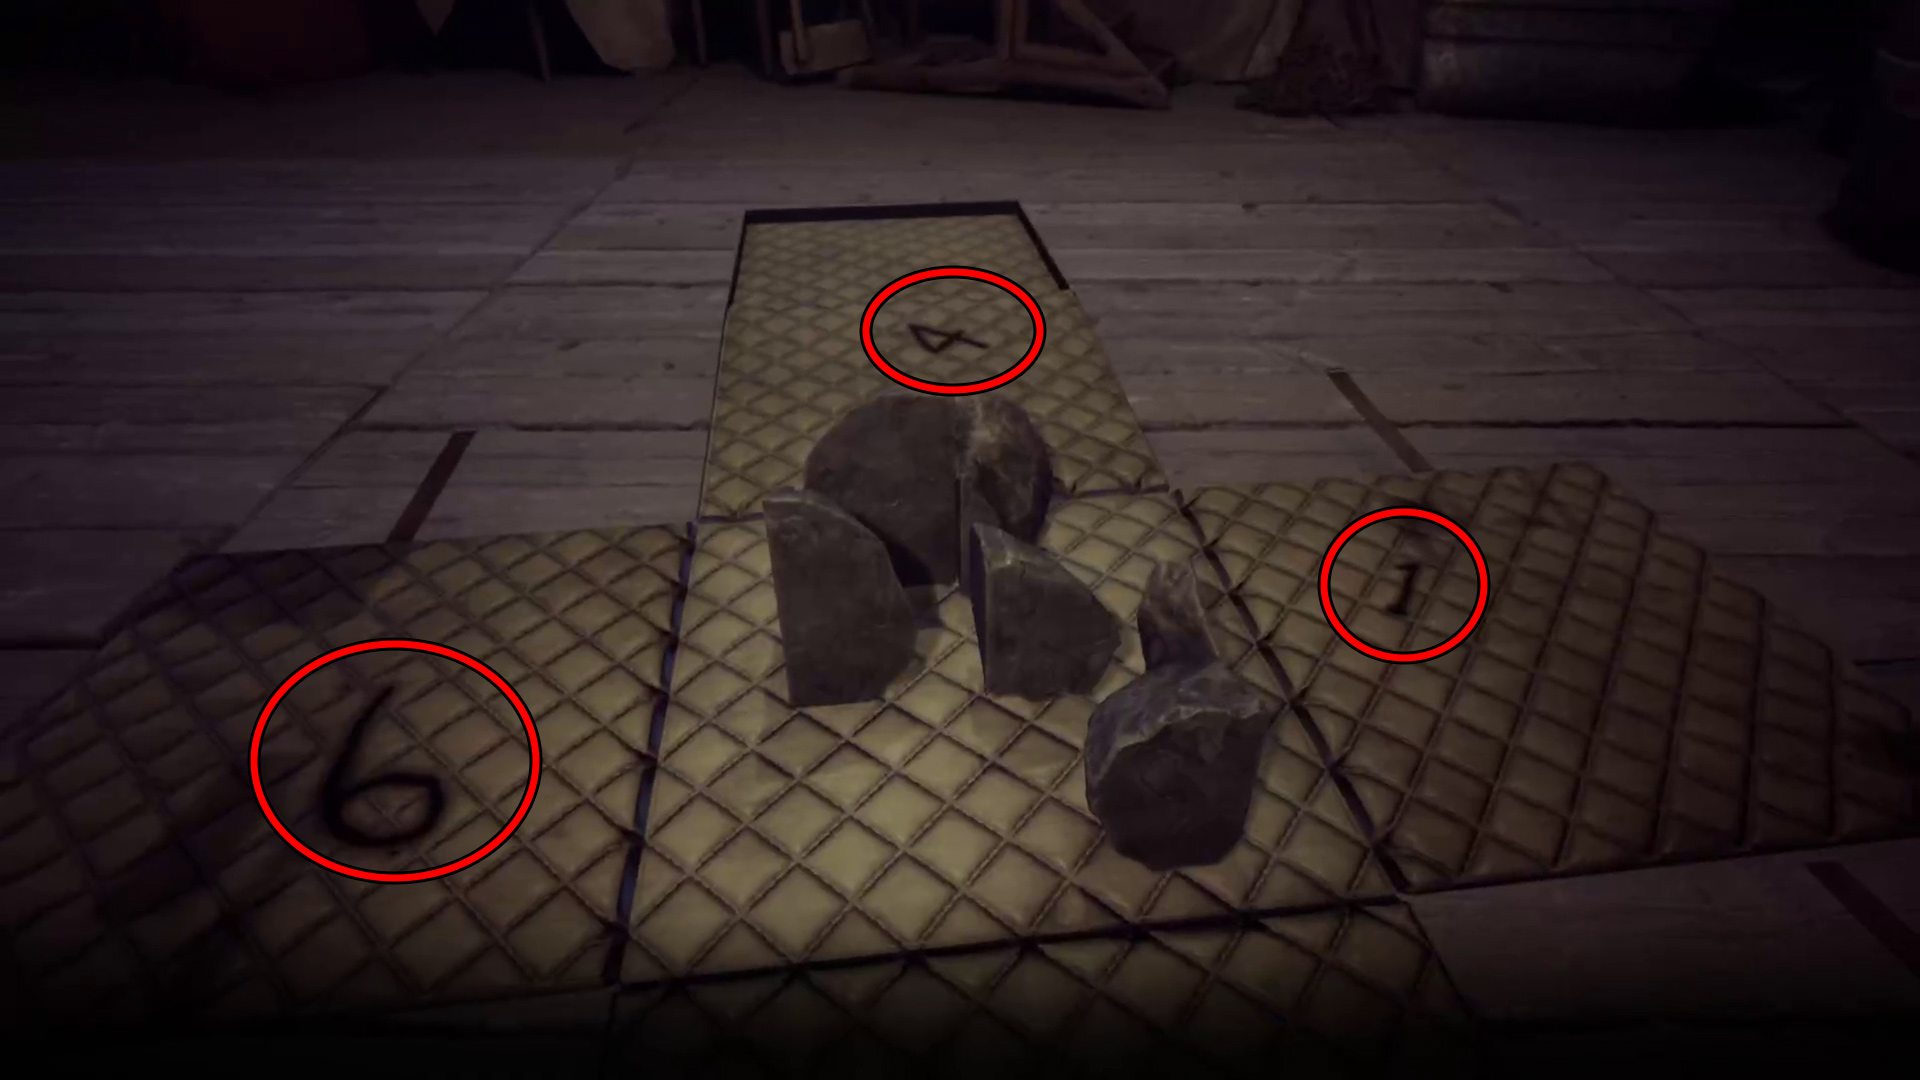
First, add Jeremy’s Darkness to the puzzle, then move the statue shapes around until you get it complete (Image 1). Then, you can interact with the statue to start a talisman puzzle — set the dials, outer to inner, at 6, 4, 1 (Image 2). This solution comes from the inside of the puzzle box (Image 3).
Image 1Image 2Image 3
Look for Jeremy
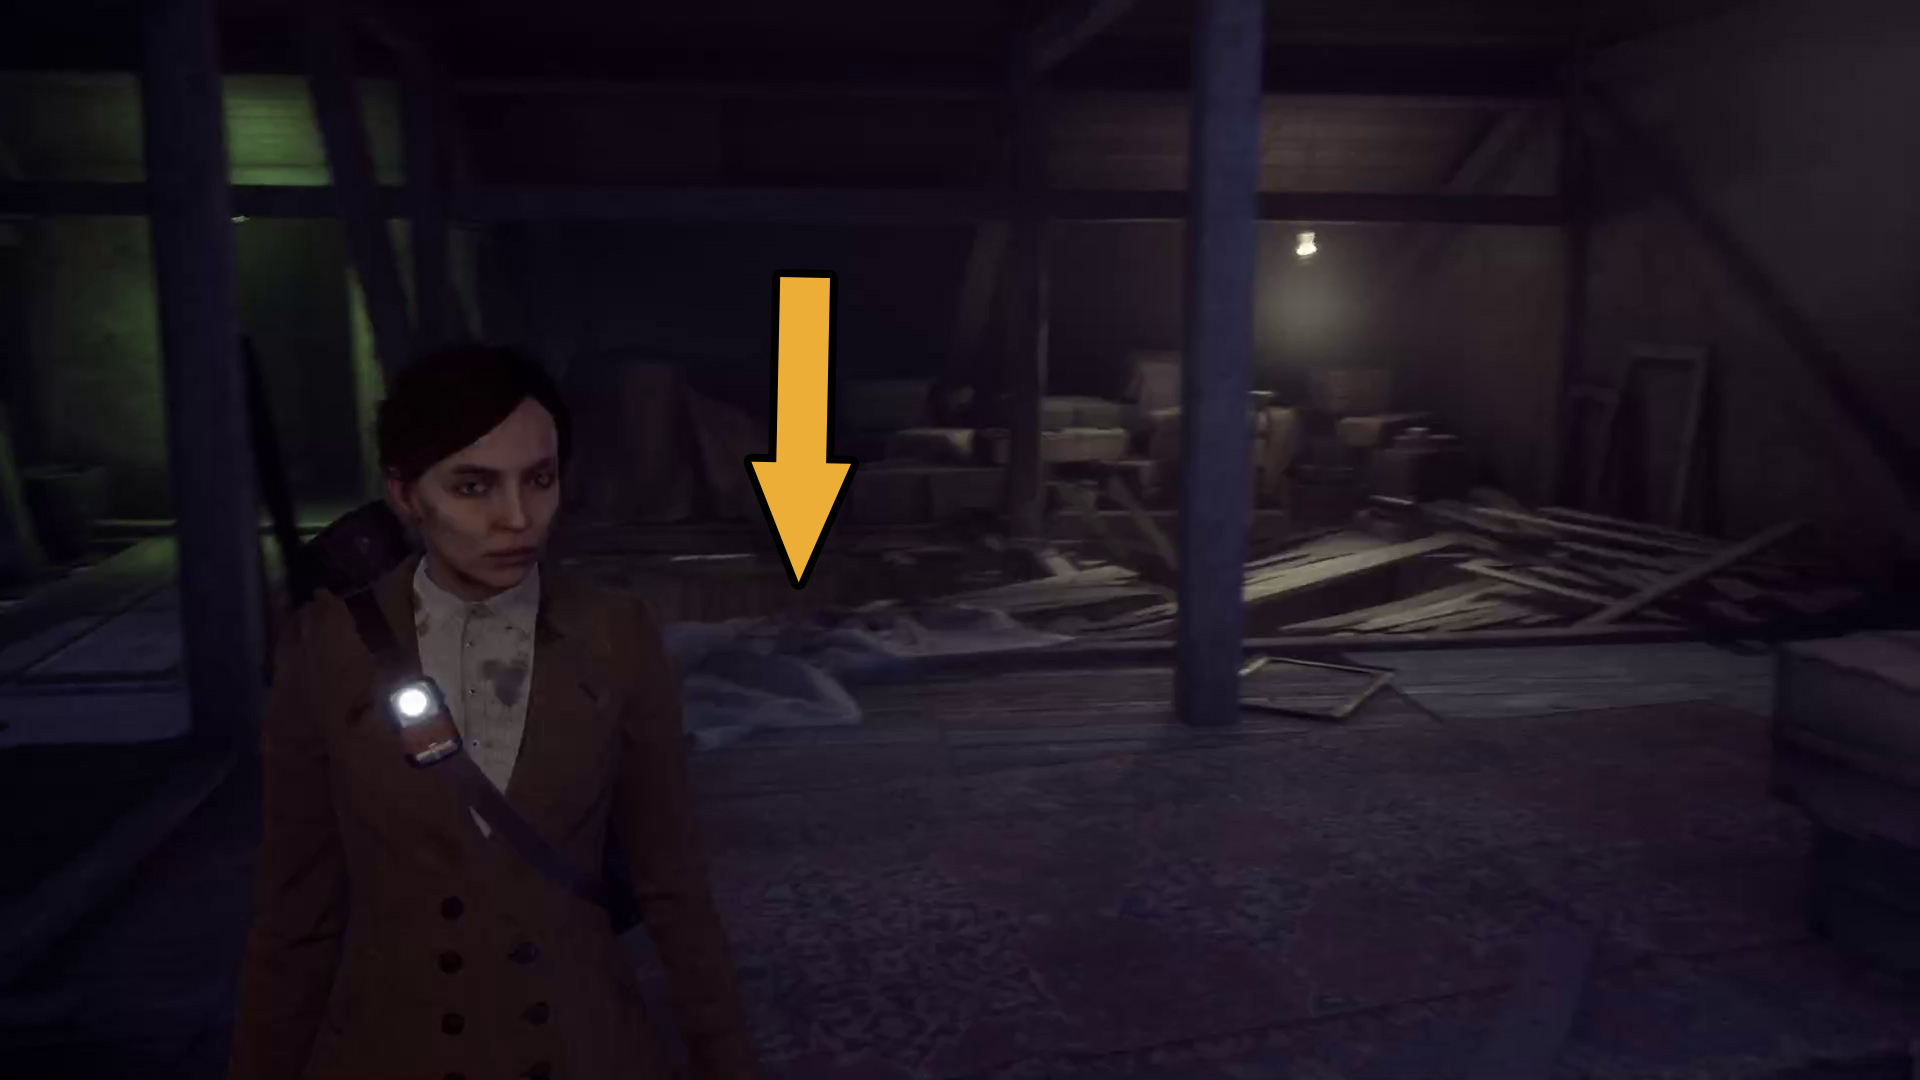
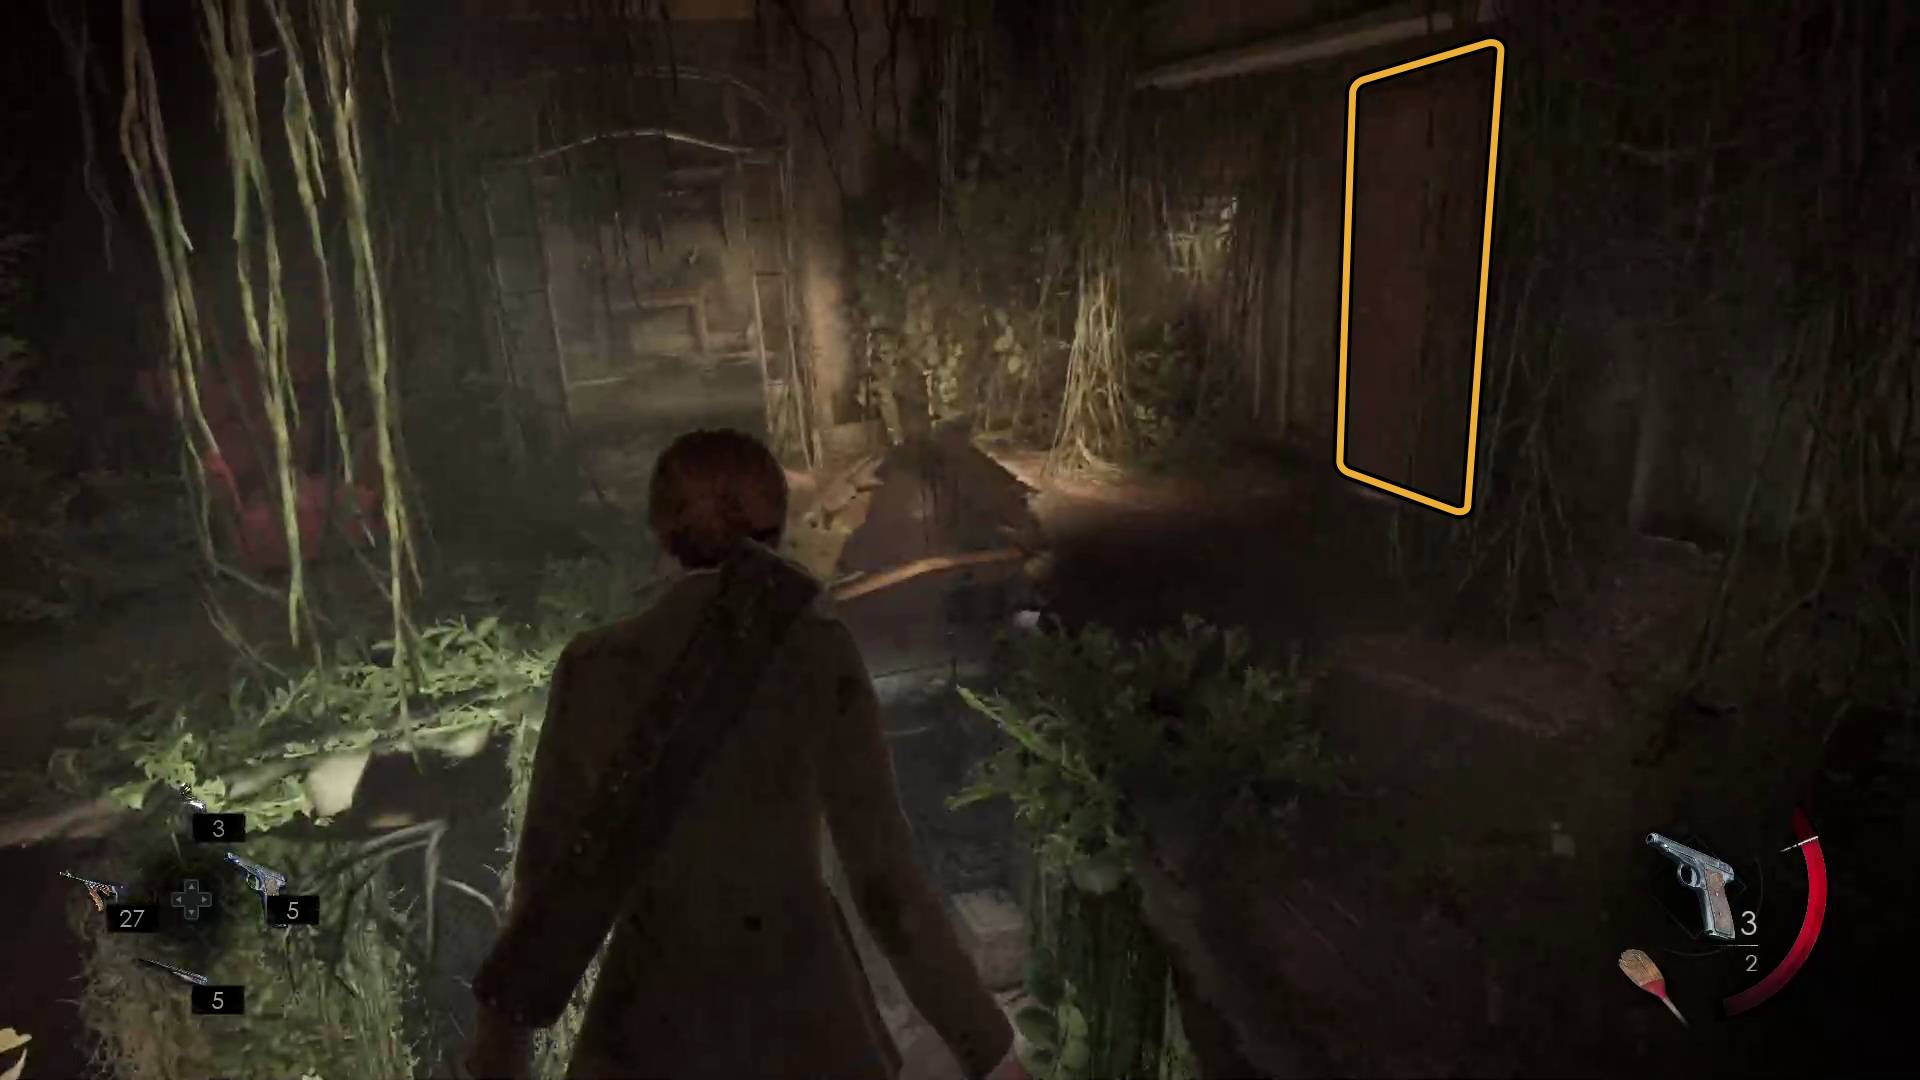
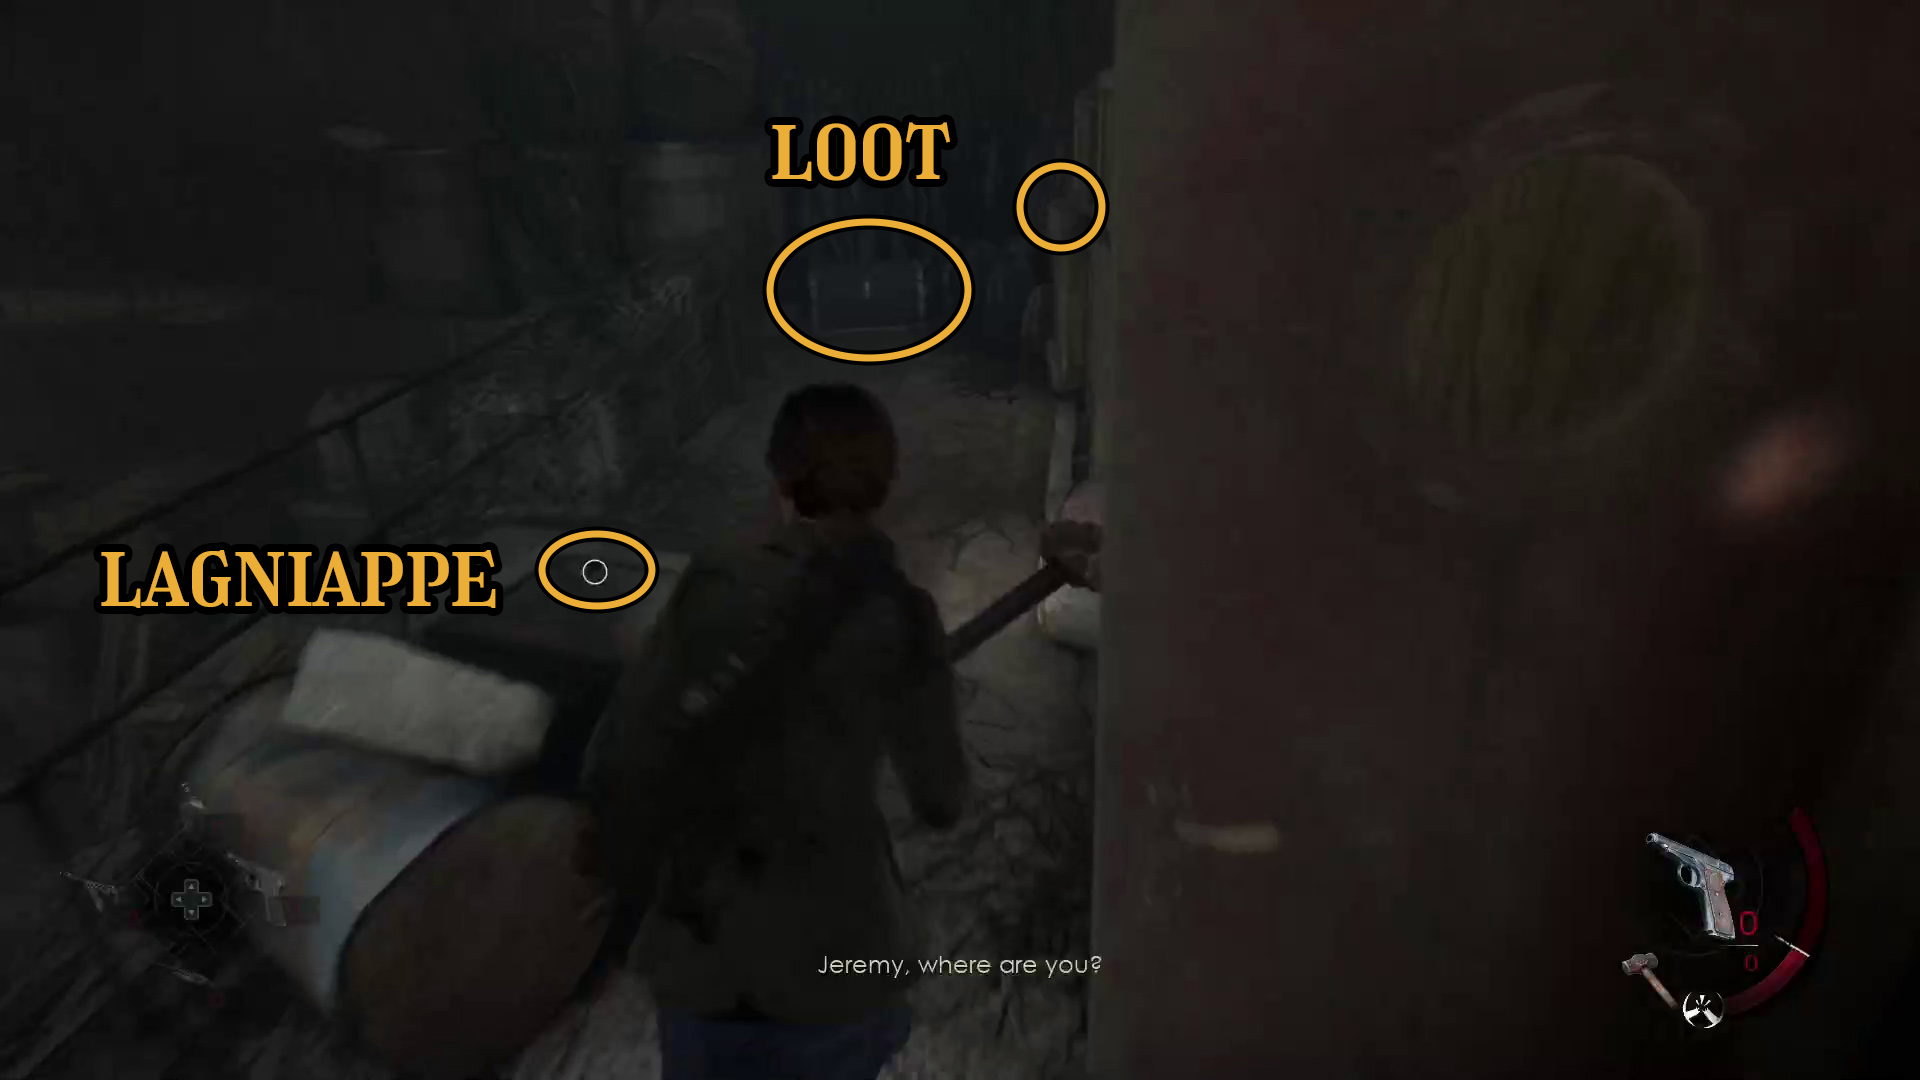
After solving the talisman puzzle, you’ll still be in the attic. Behind you is a spot you can drop down (Image 38), revealing that you’re actually in a steamboat. After a brief conversation with the disembodied voice of Jeremy, go through either of the exits to your right or left, and find the loot suitcase at the back of the boat. Then, continue into the steamboat (Image 39).
Image 38Image 39
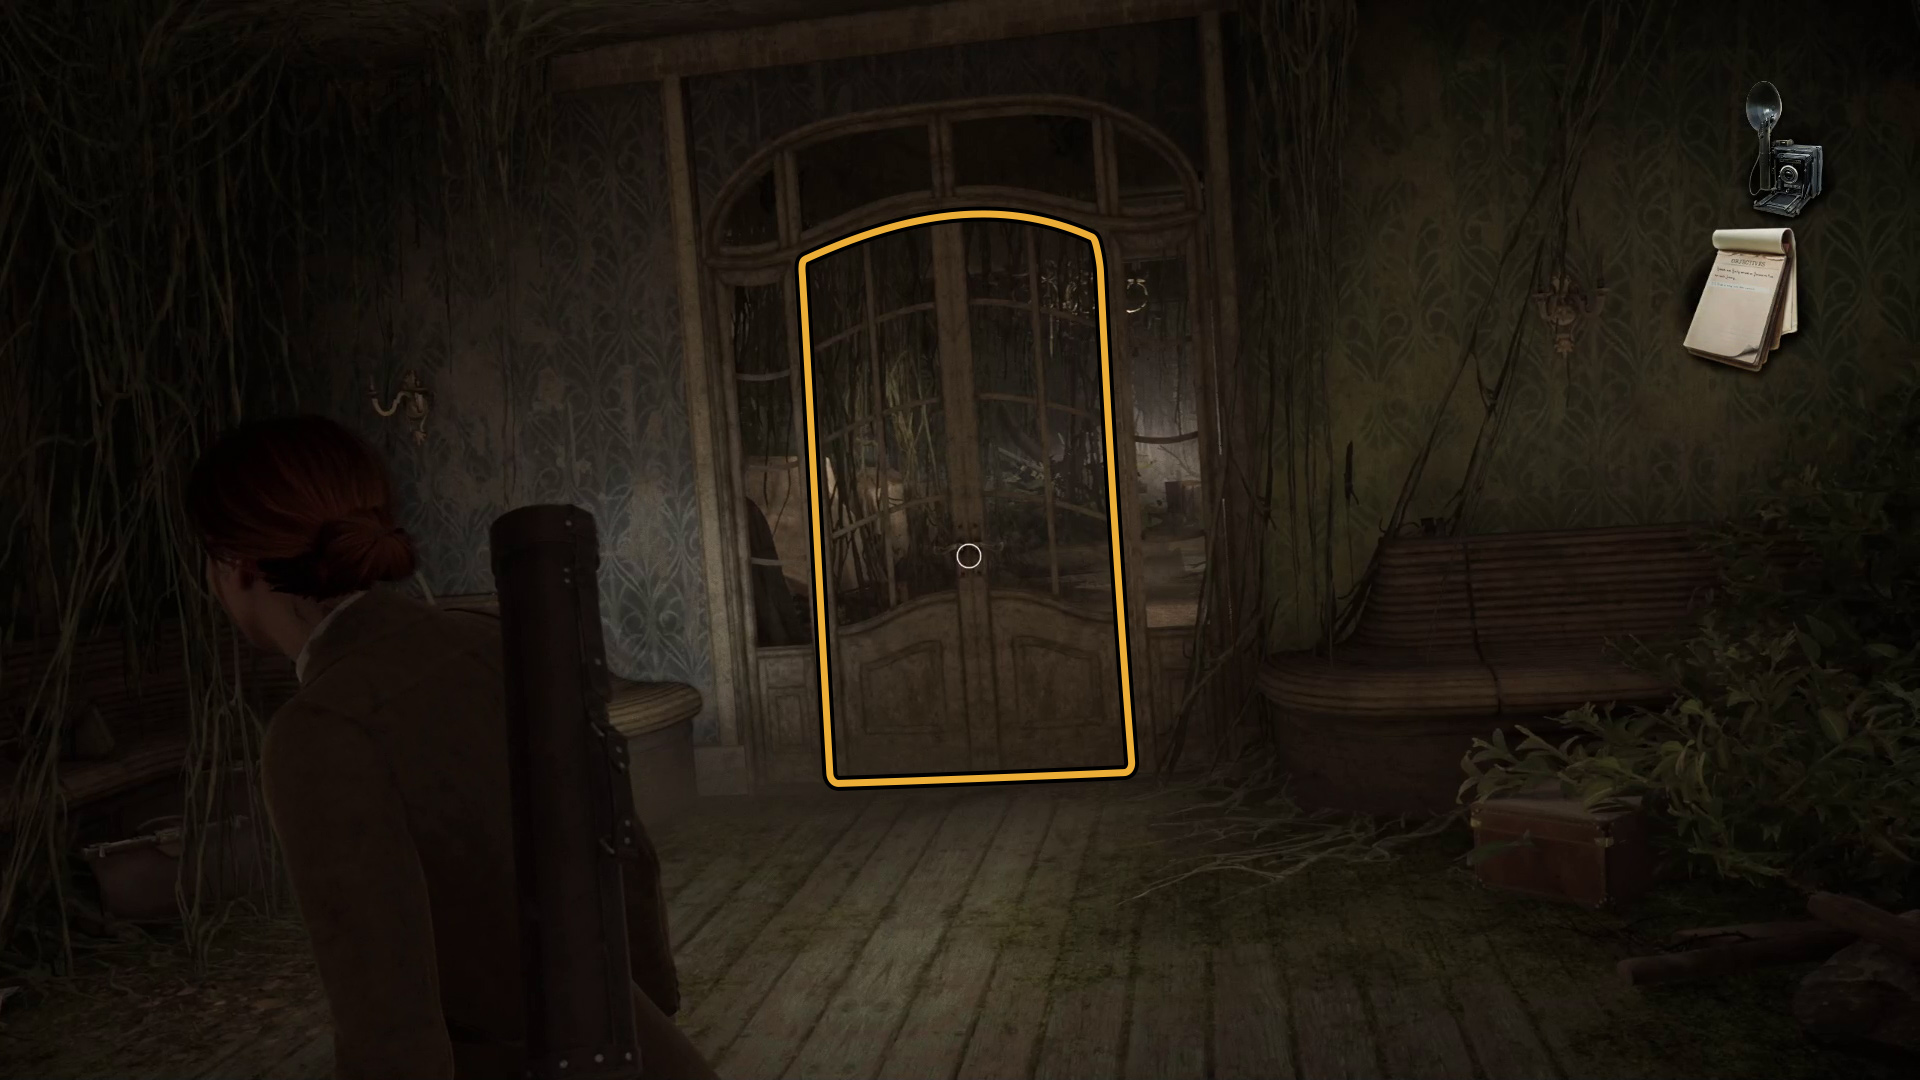
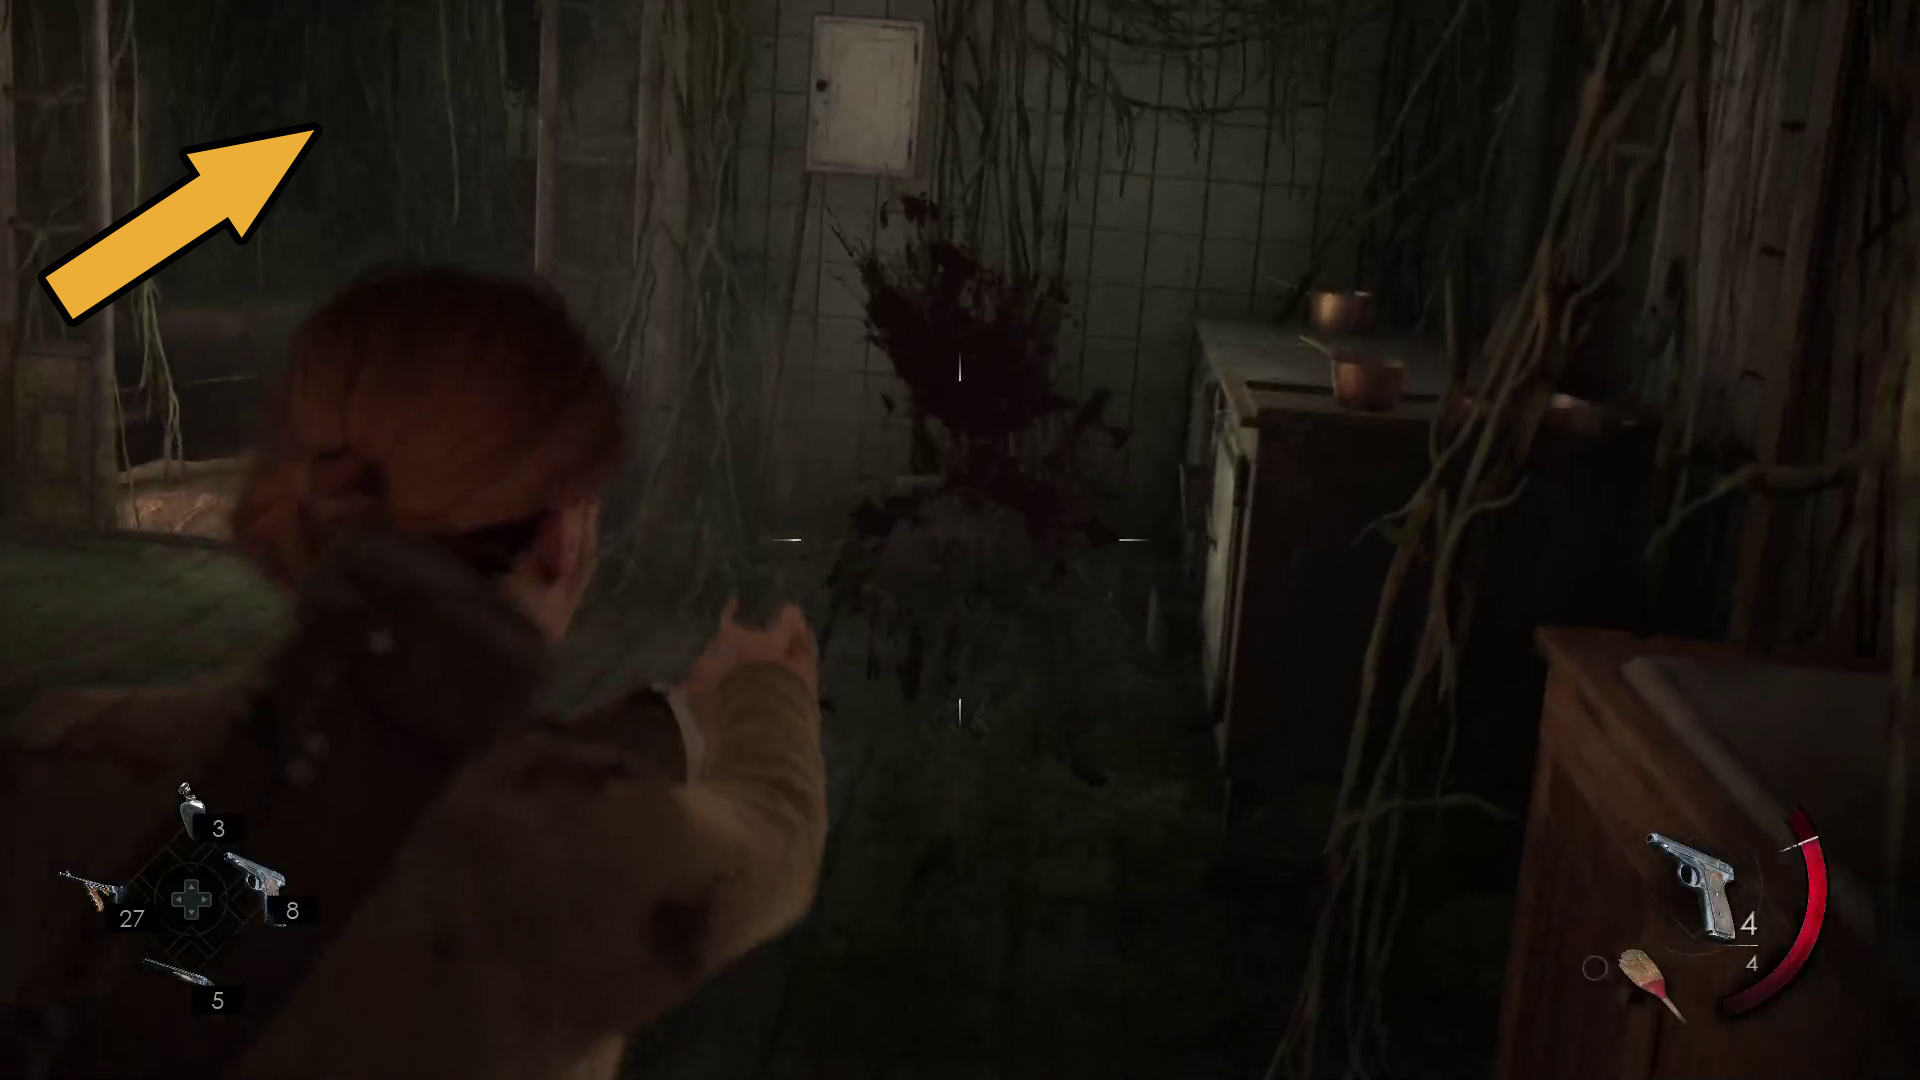
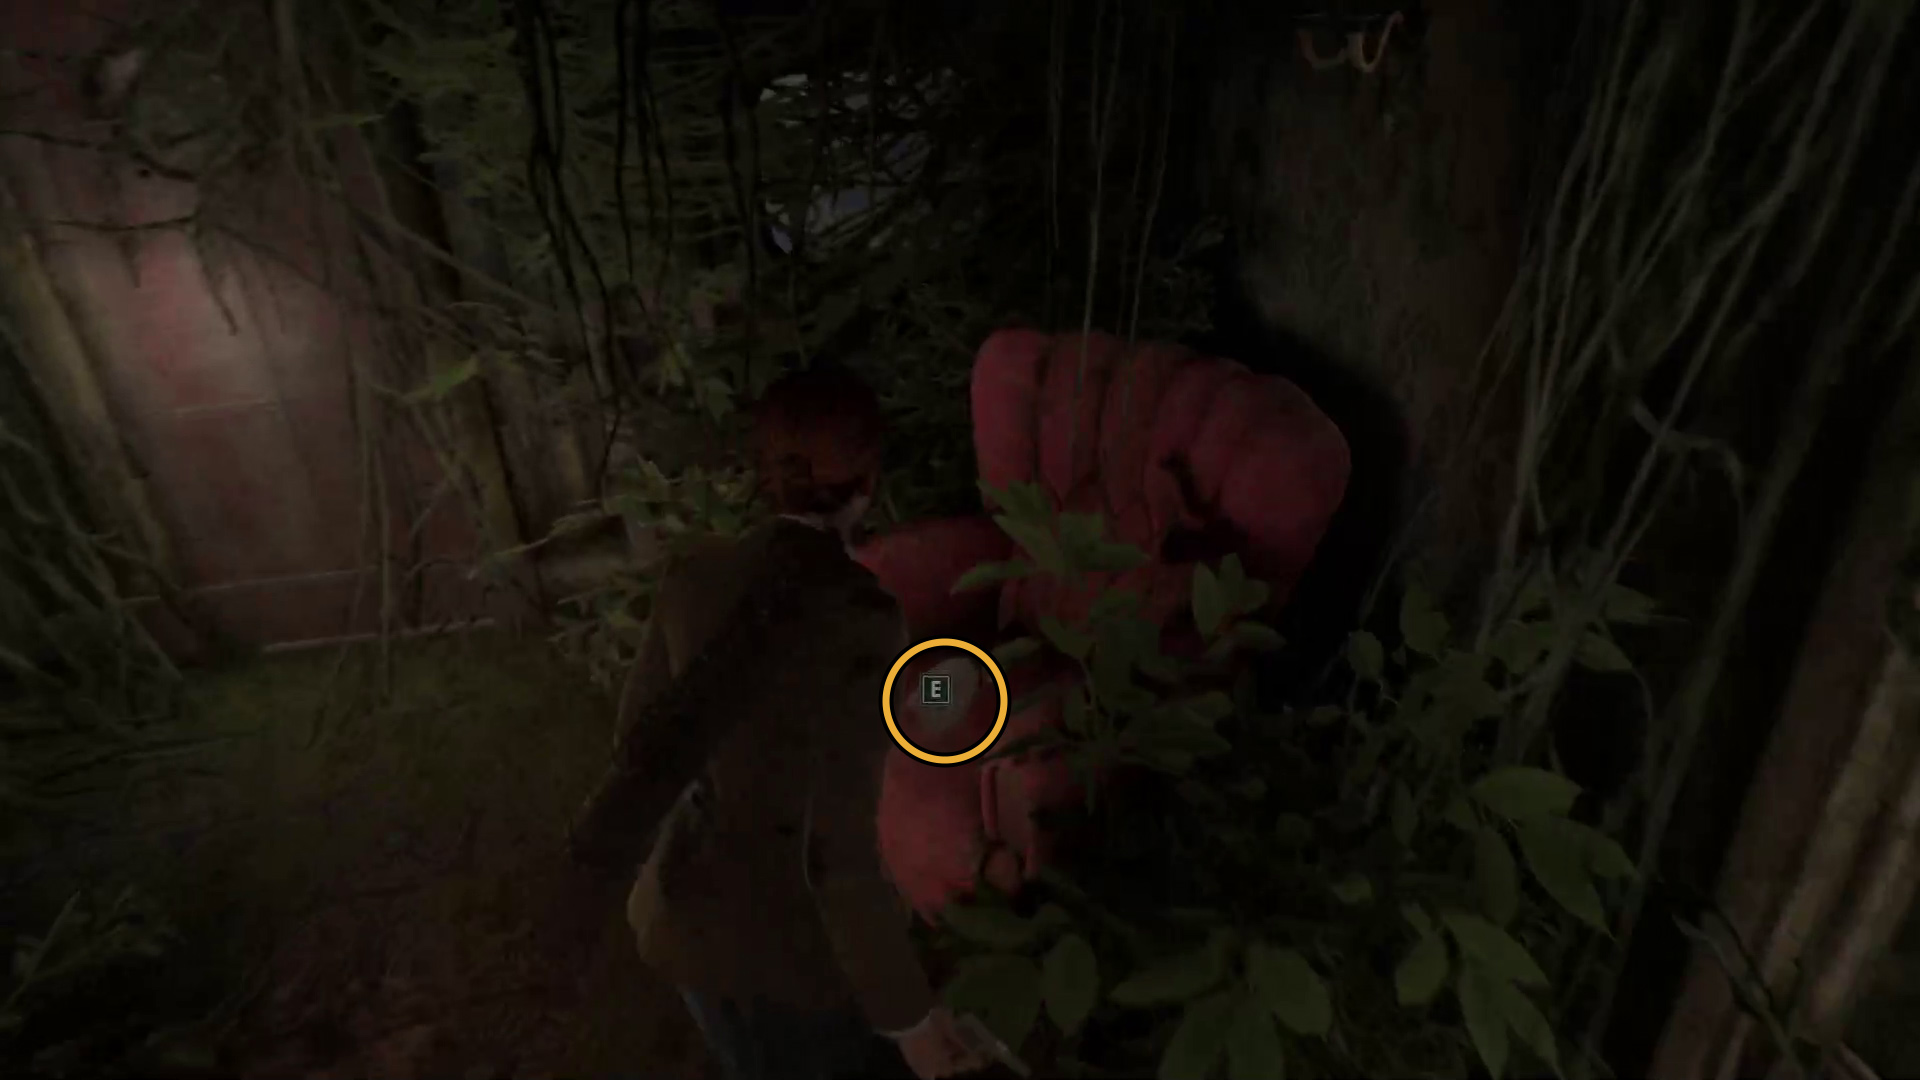
Make you rway through the vine-covered interior, and you’ll soon come to a doorway on your right that leads back outside. Head through and you’ll immediately come to another doorway — get your weapon ready, as once you get close to the item on the table just ahead an already-dead monster will drop onto the table, and another will scuttle around the corner and attack you (Image 40).
These little enemies — we’ll call them scuttlers — will show up throughout this steamboat section, and seem to take the same amount of bullets as the regular shambling enemies you’ve been fighting. They can leap at you and grab on, in which case you’ll have to mash the dodge button to get them off — if you hate mashing buttons, go into the settings and off Button Mash (Options –> Controls –> Button Mash).
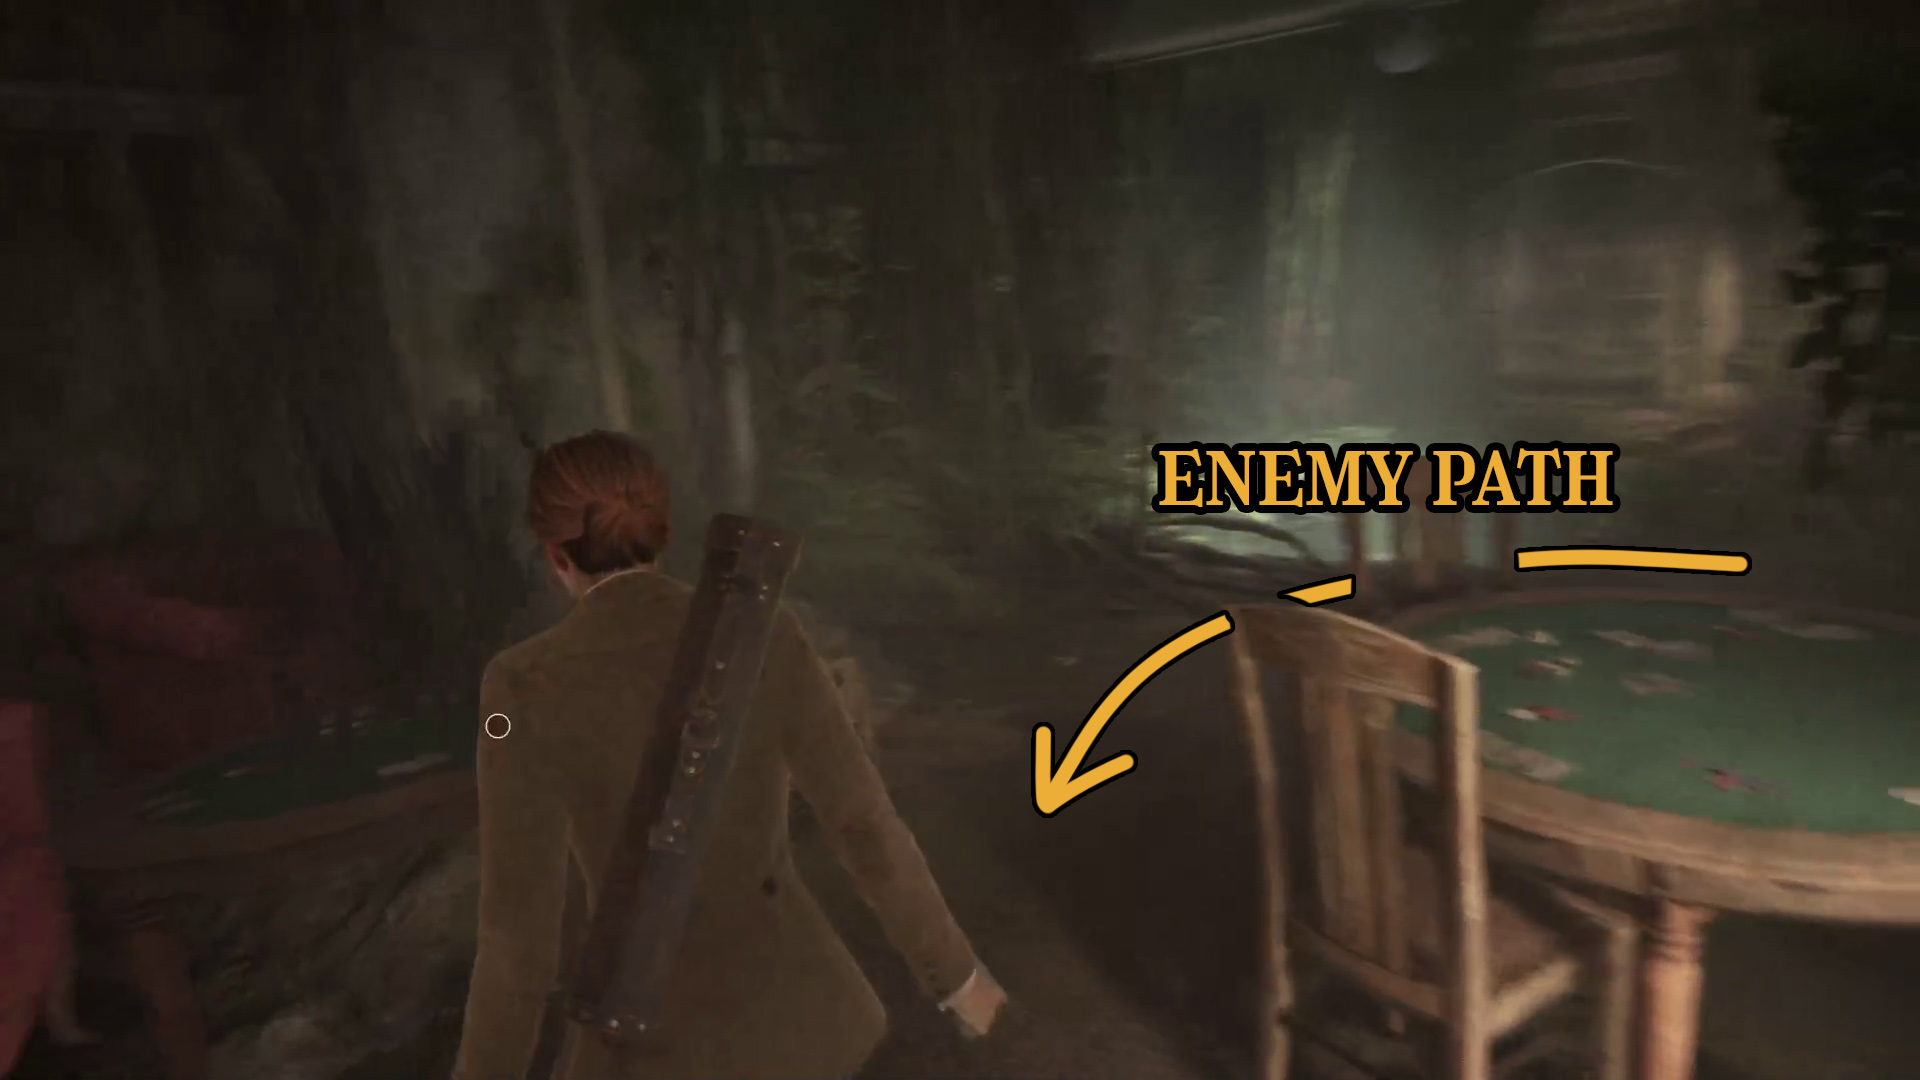
After dealing with the enemy, continue forward past the card tables and go through the door on the right (Image 41).
Image 40Image 41
Release the steamboat from the bayou and return it to the river
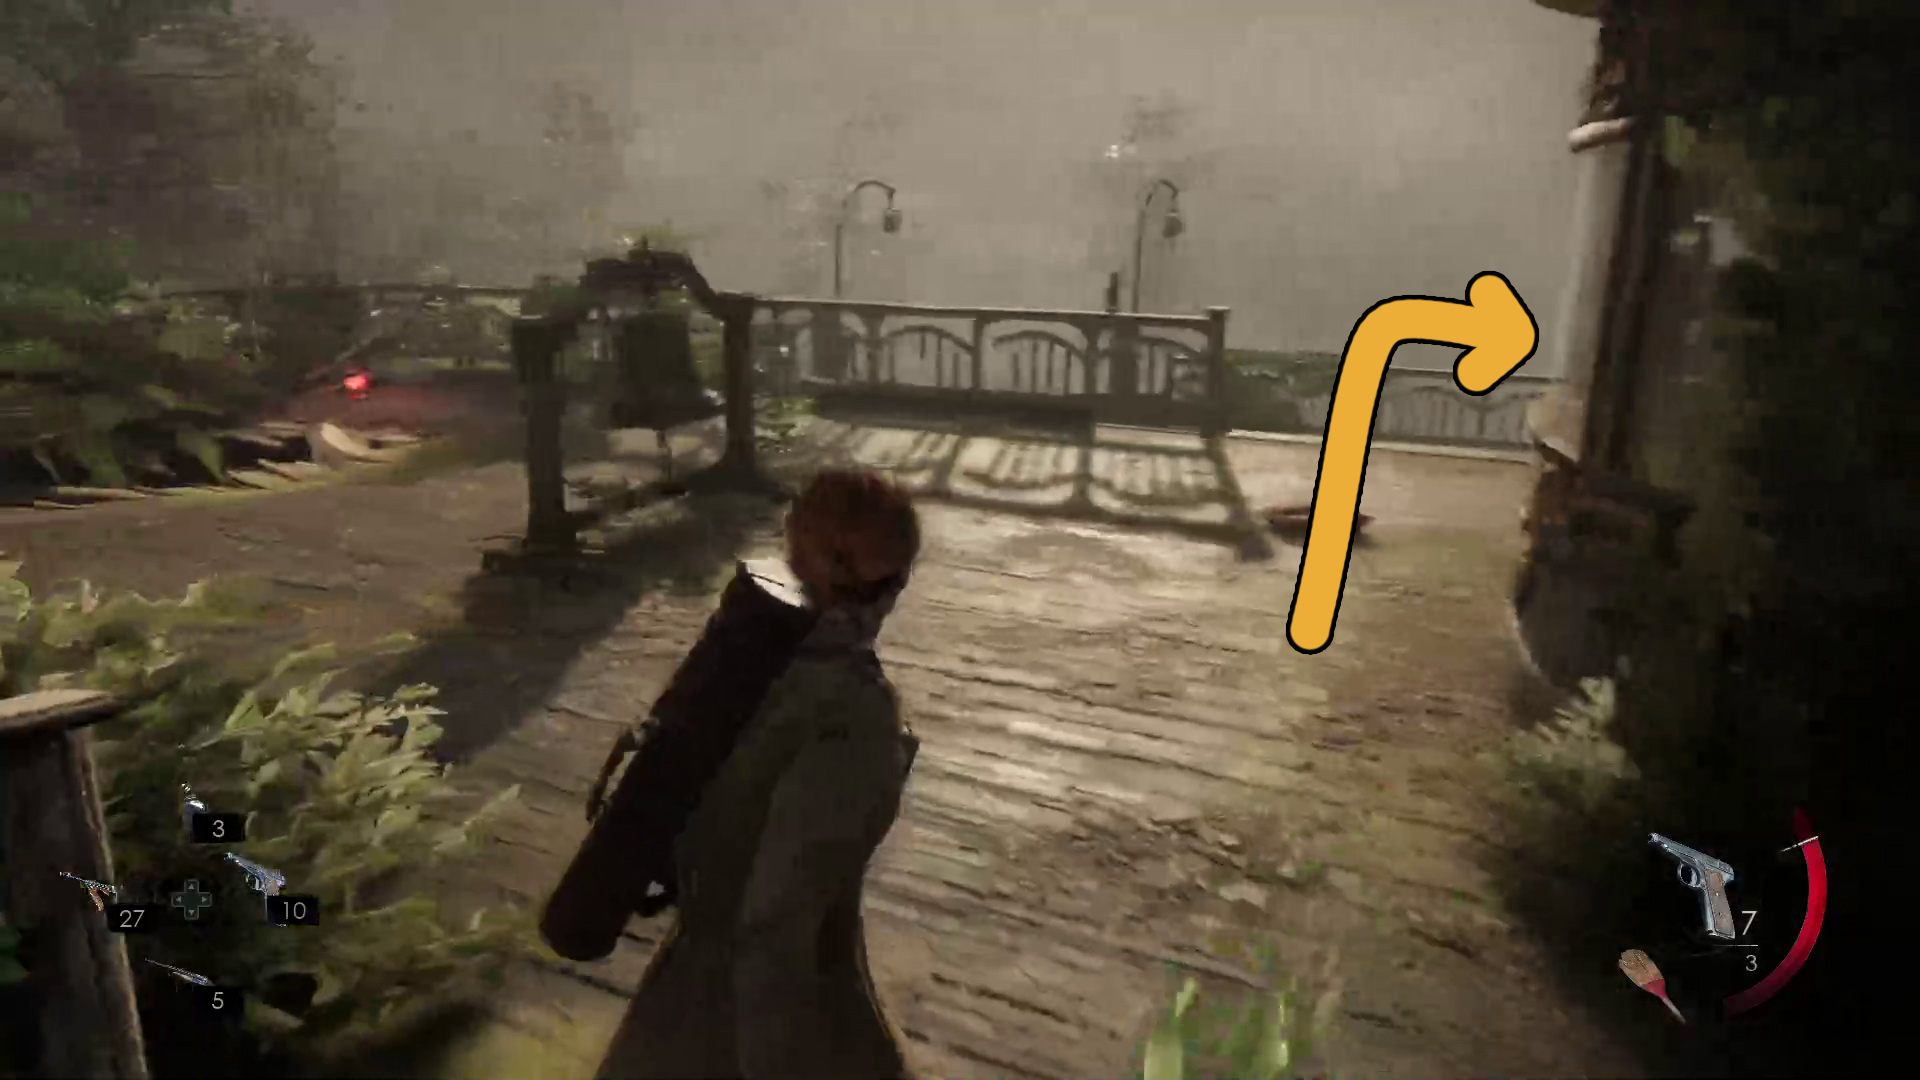
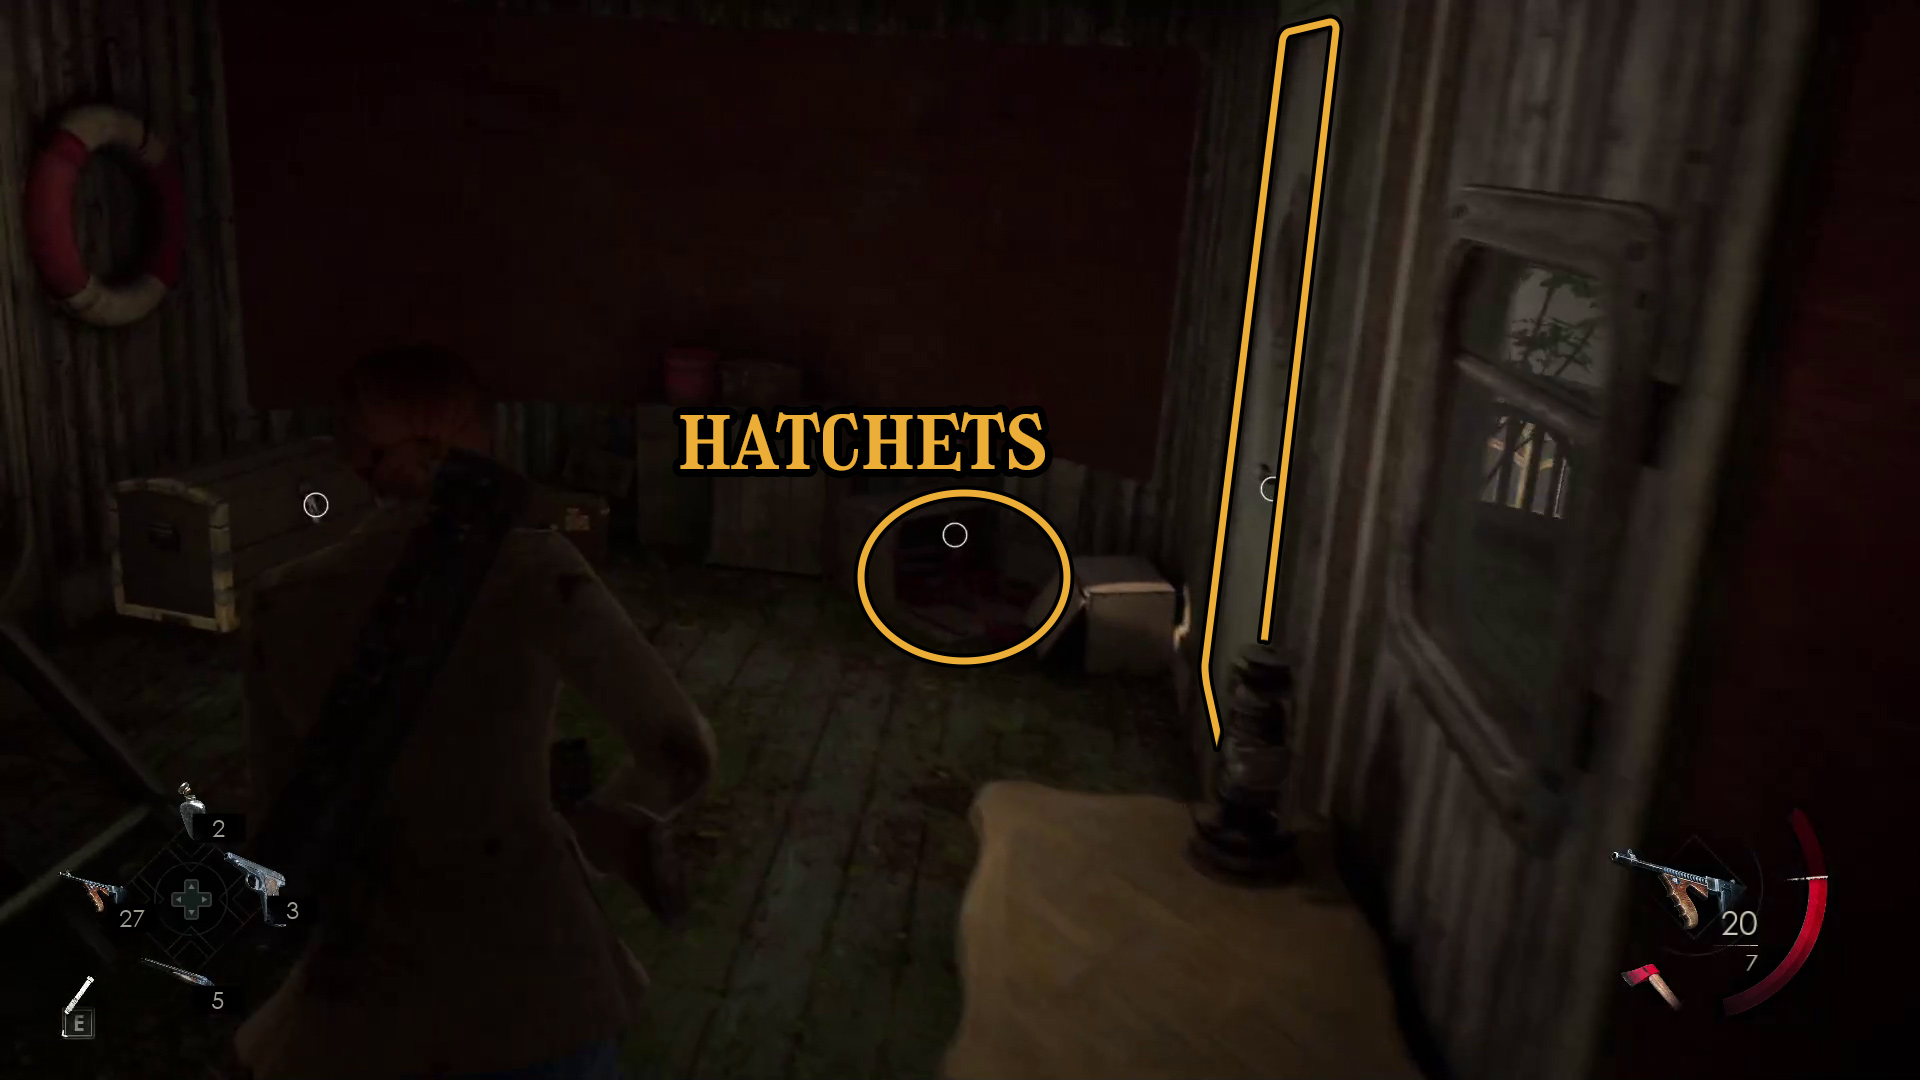
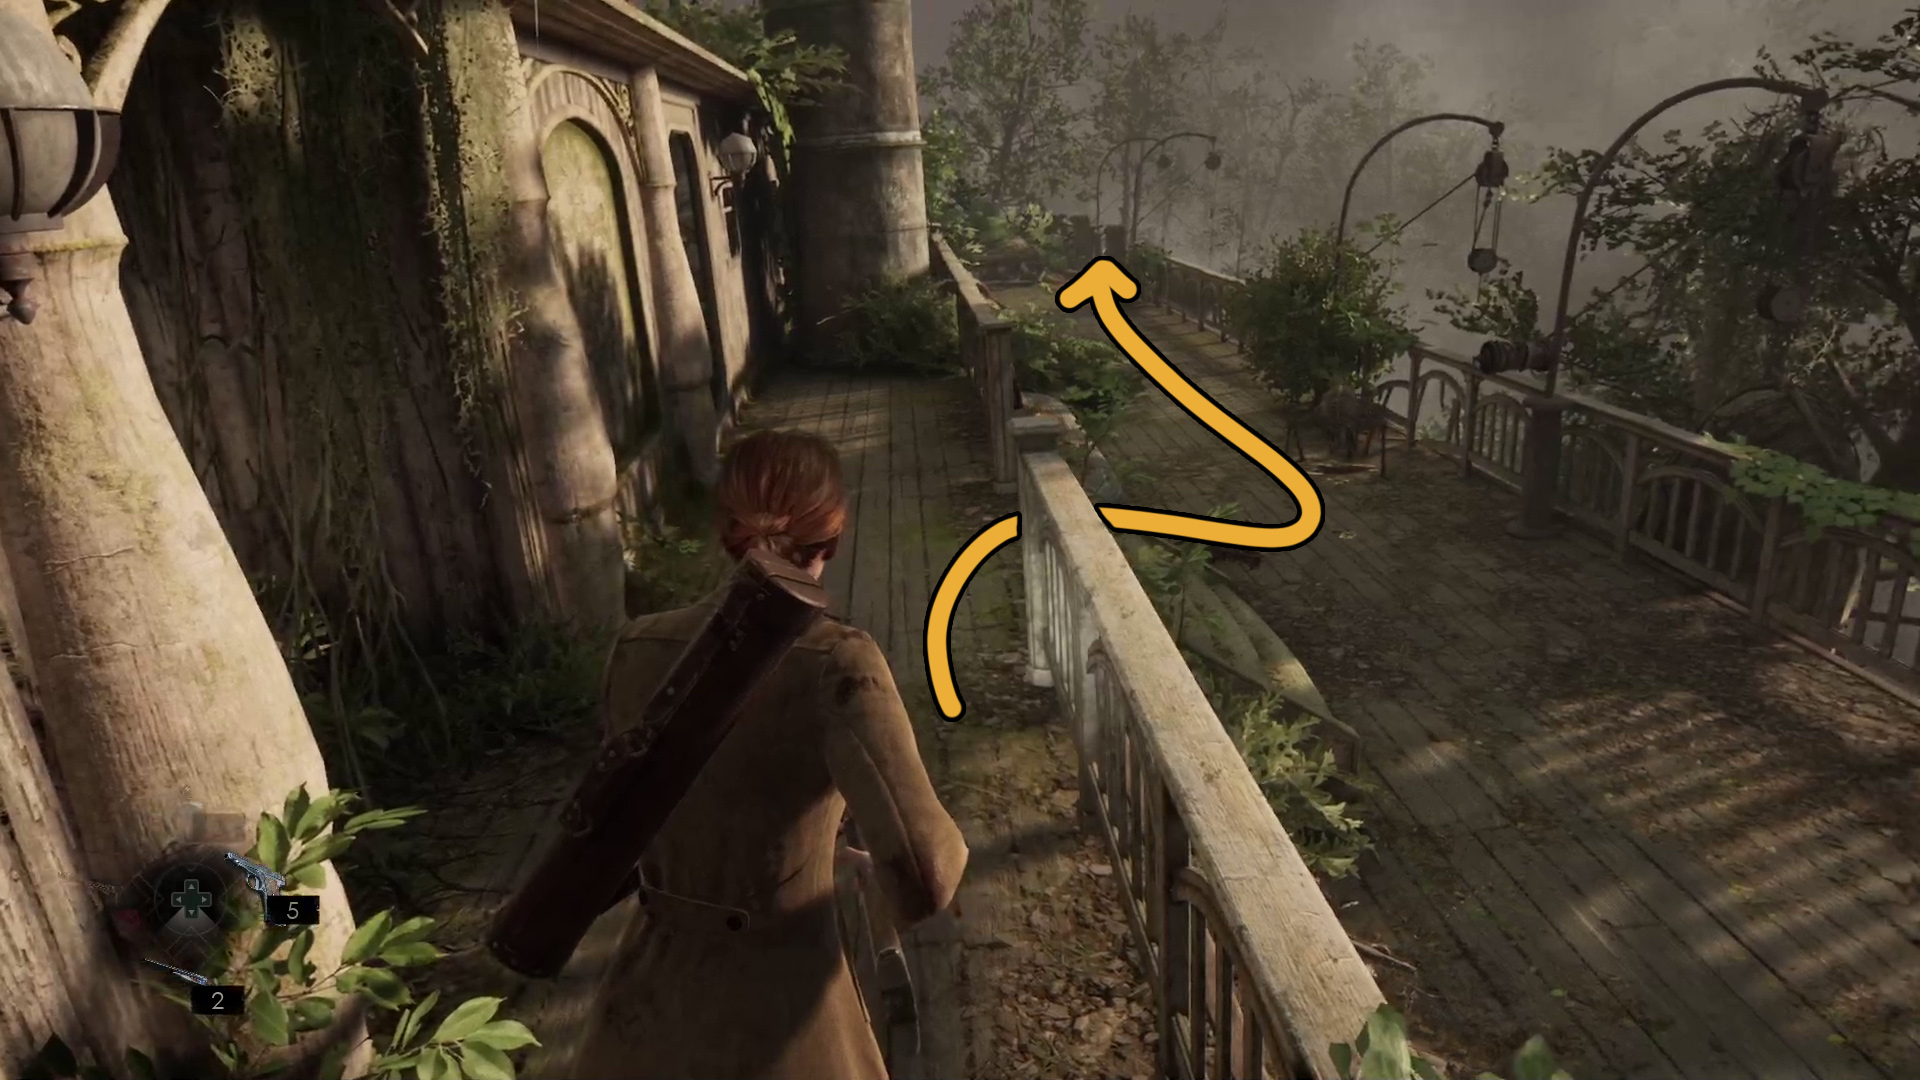
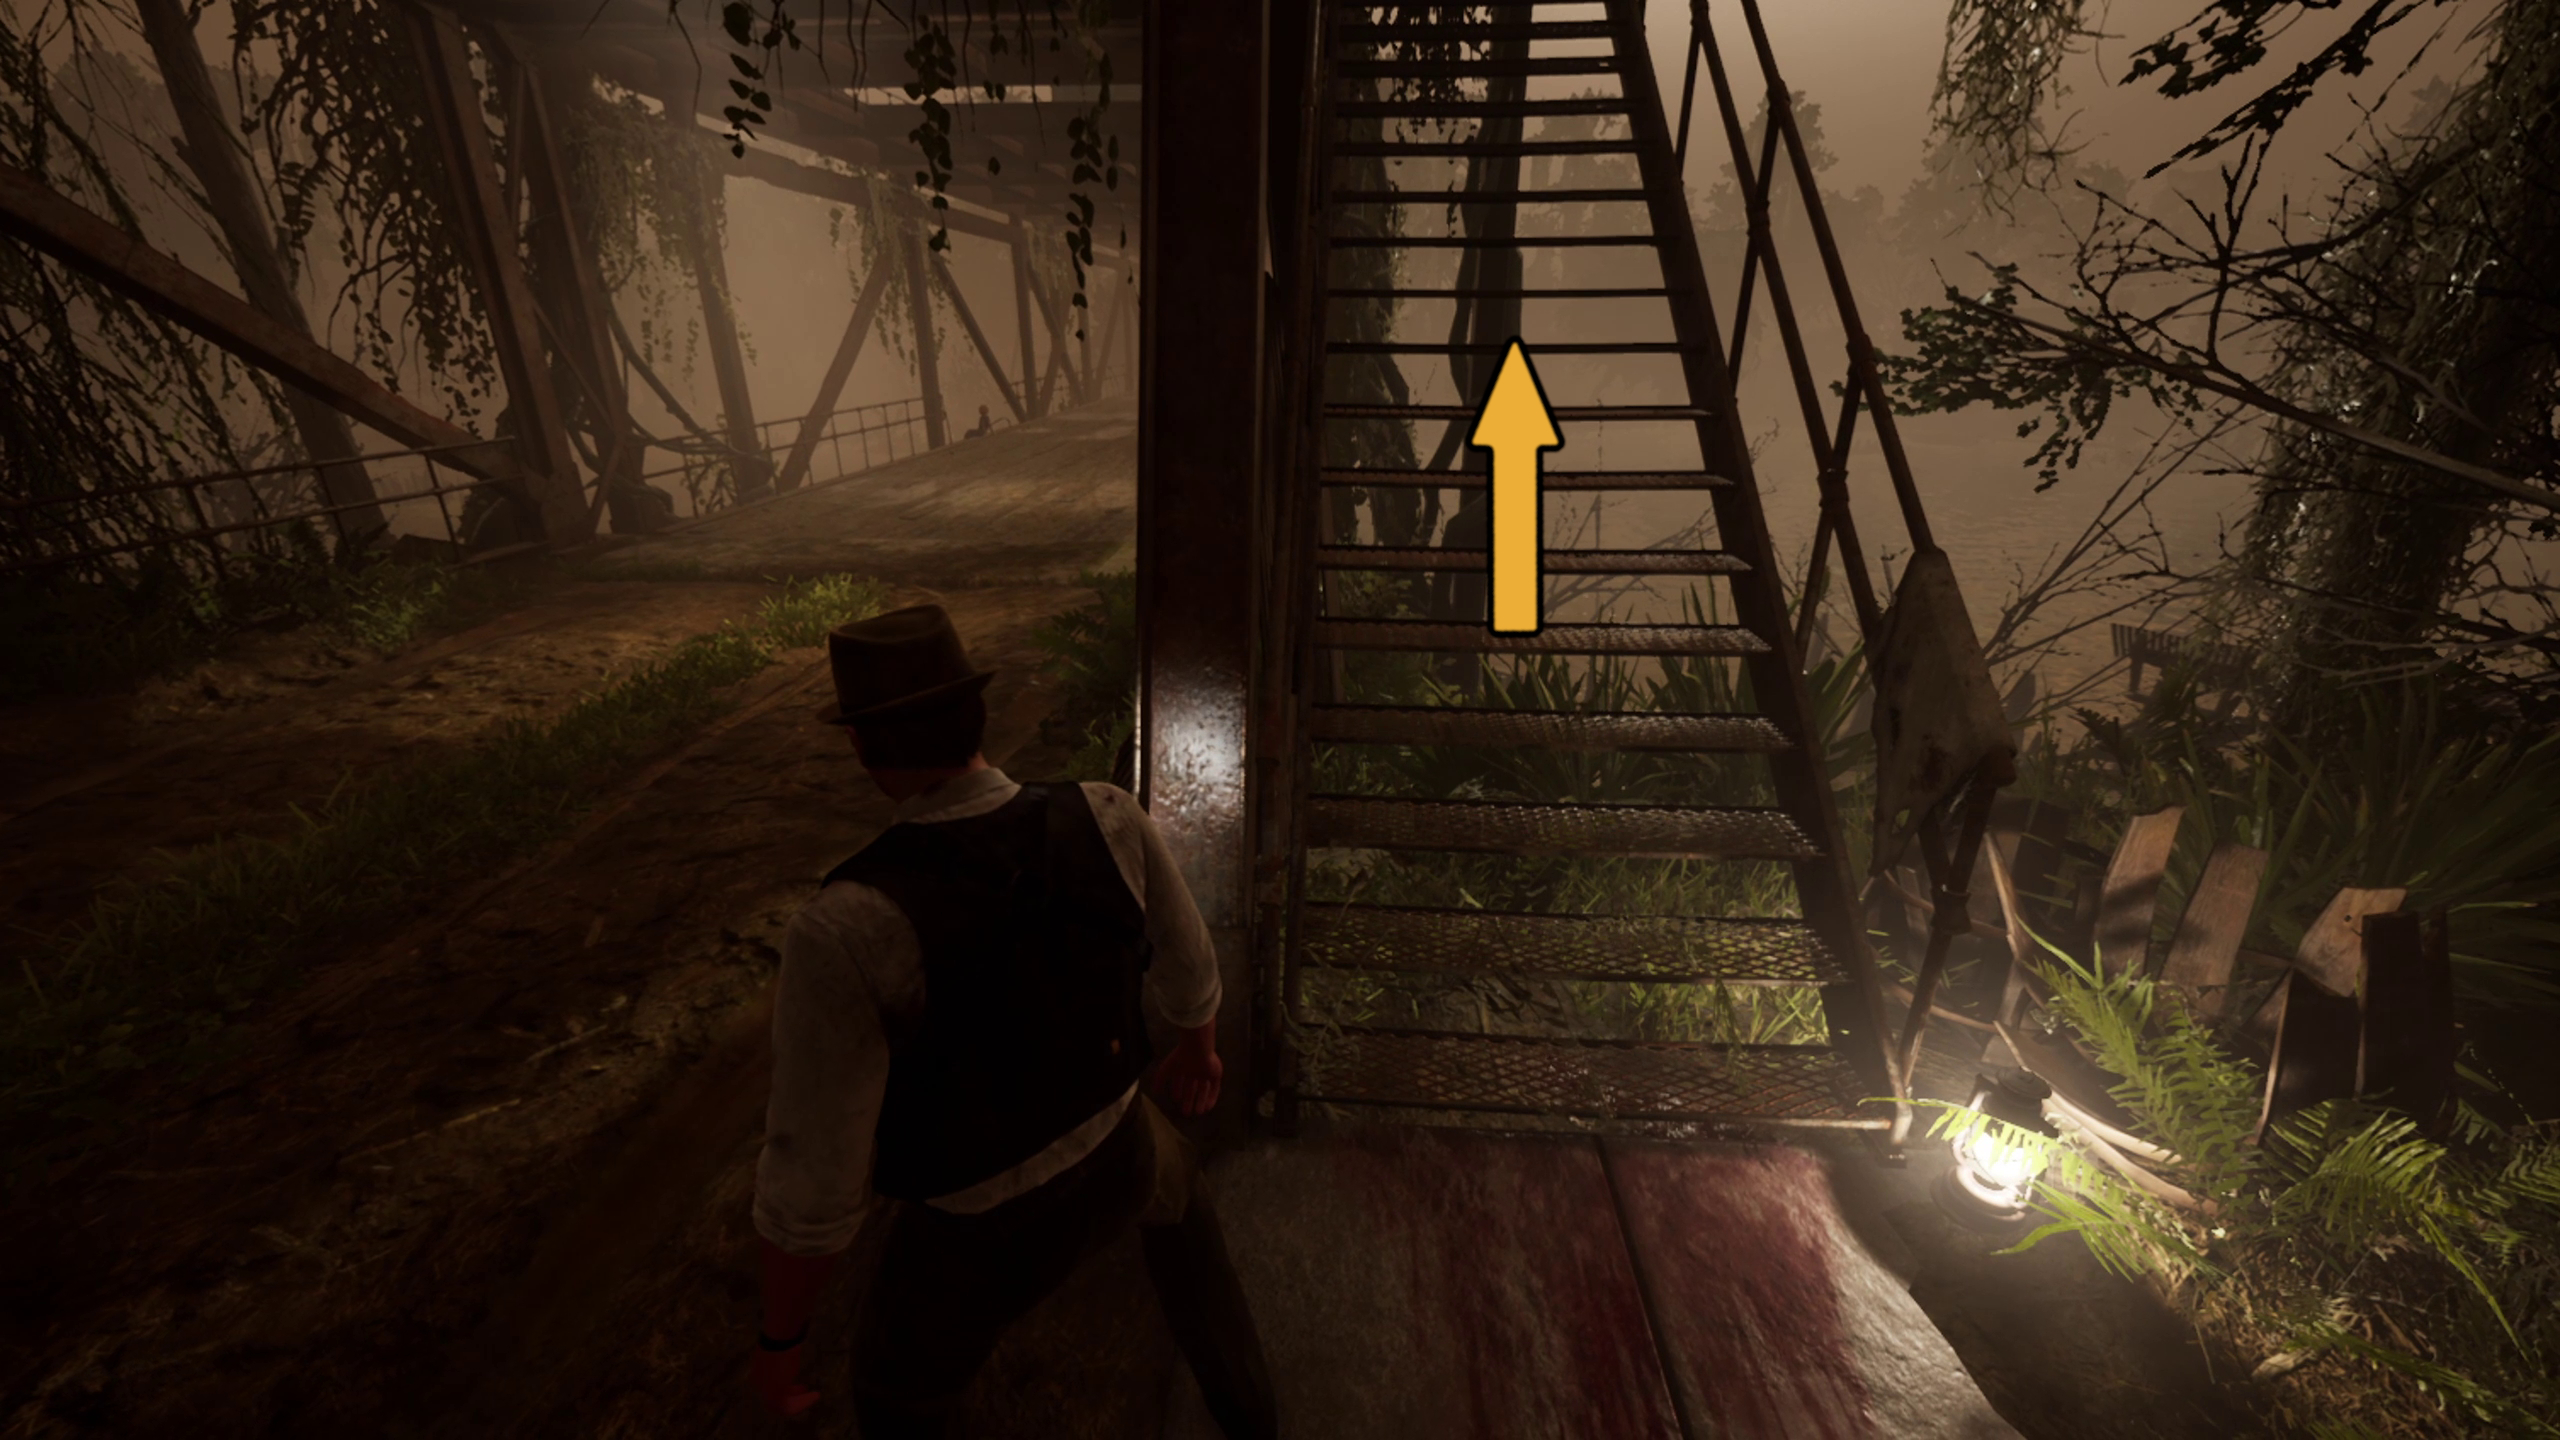
Just ahead are two sets of stairs (Image 42) that lead both up and down. First, take the stairs that lead down, and go around the corner to the right and through the red double doors. On a crate by the door is the Broken Compass lagniappe (Image 43), and at the far side of the little area are a few loot spawns. Grab it all, then go back up the stairs. Back on the middle deck, continue around the staircases, and head up the stairs to the top deck of the ship.
Image 42Image 43
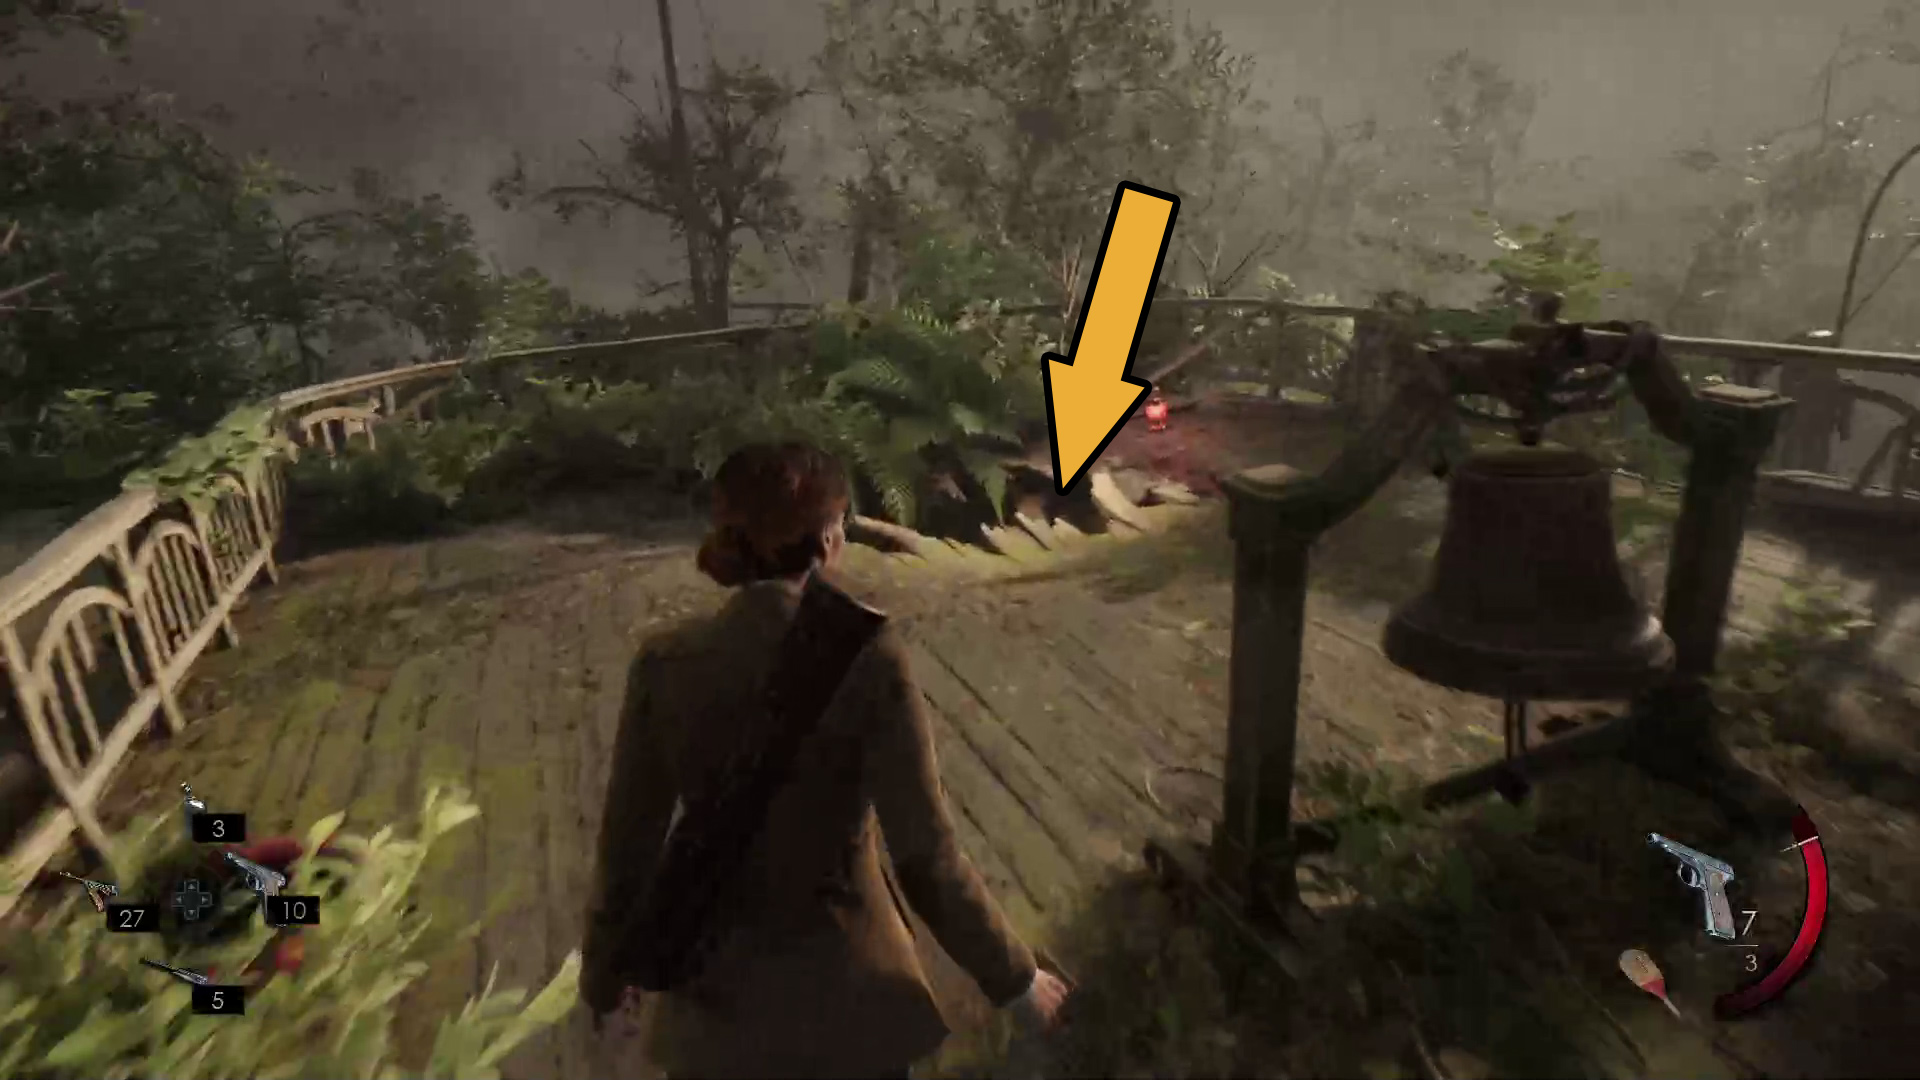
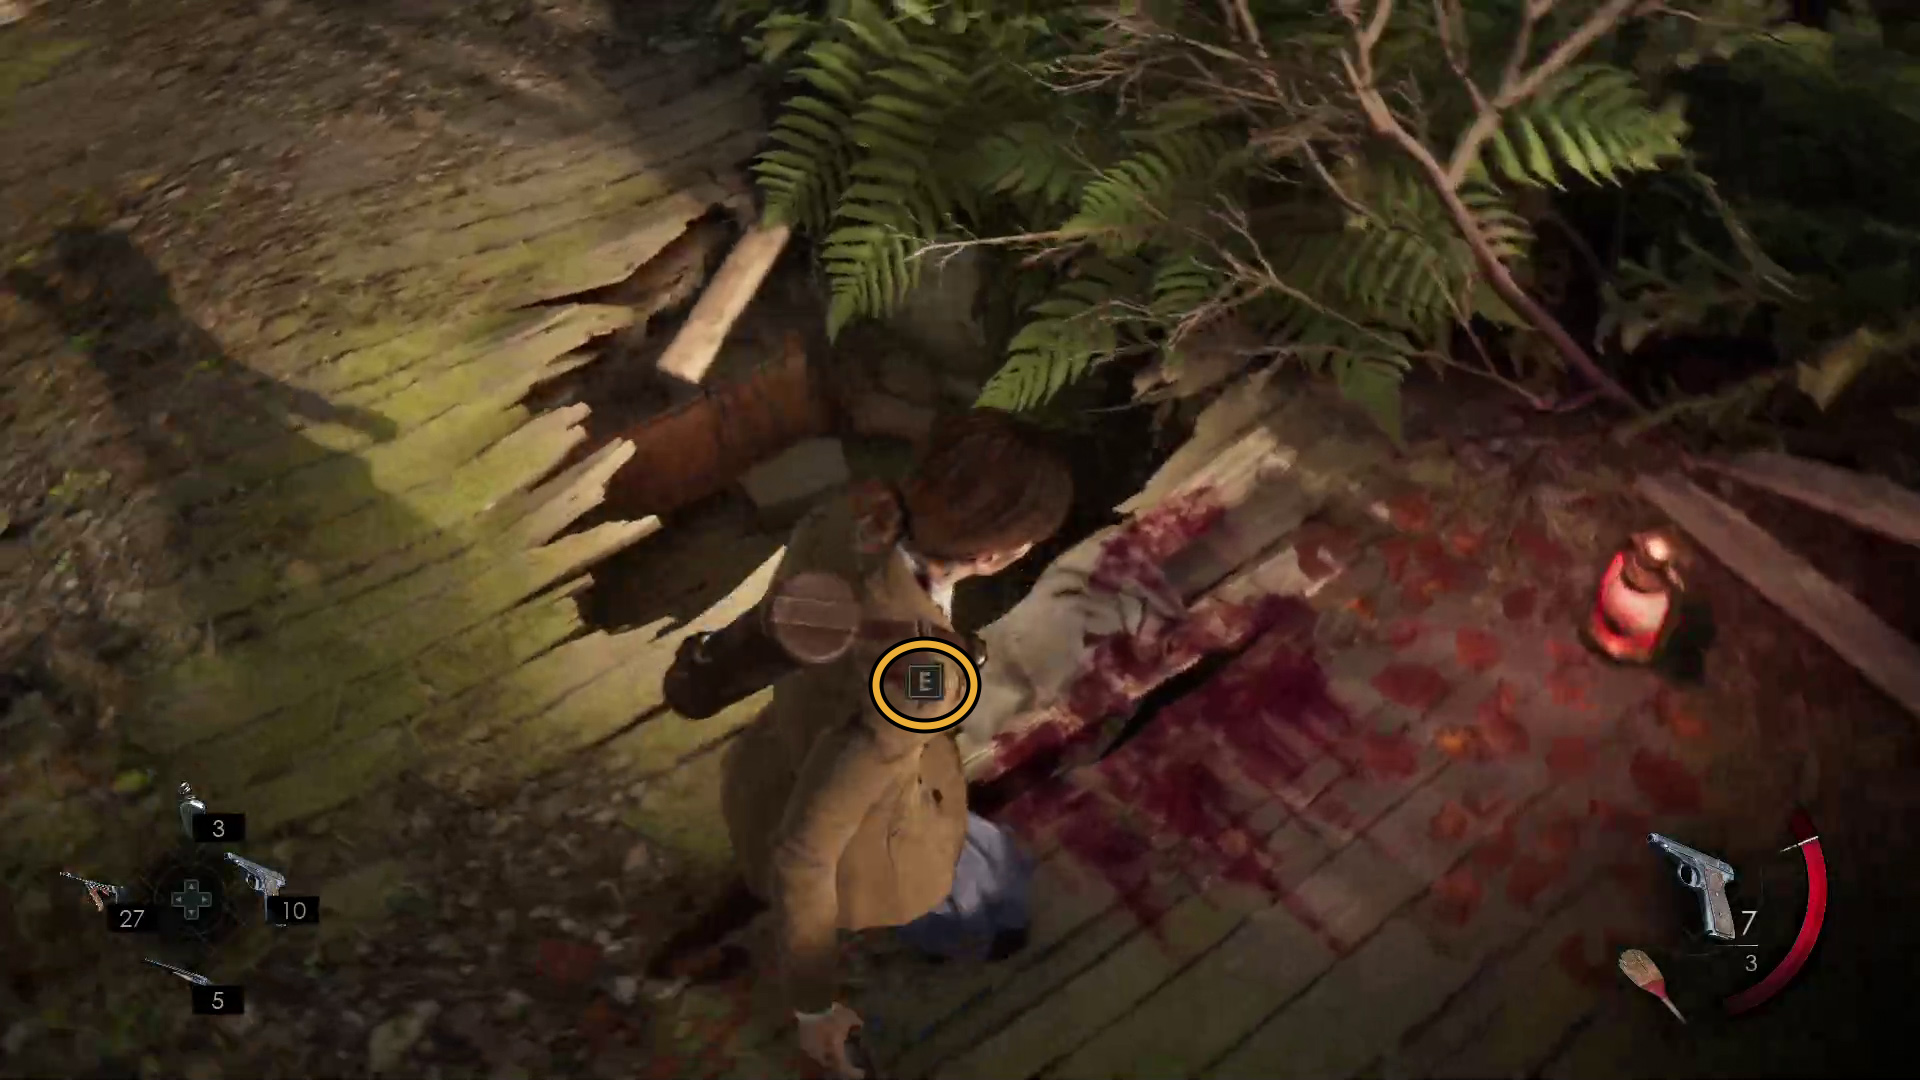
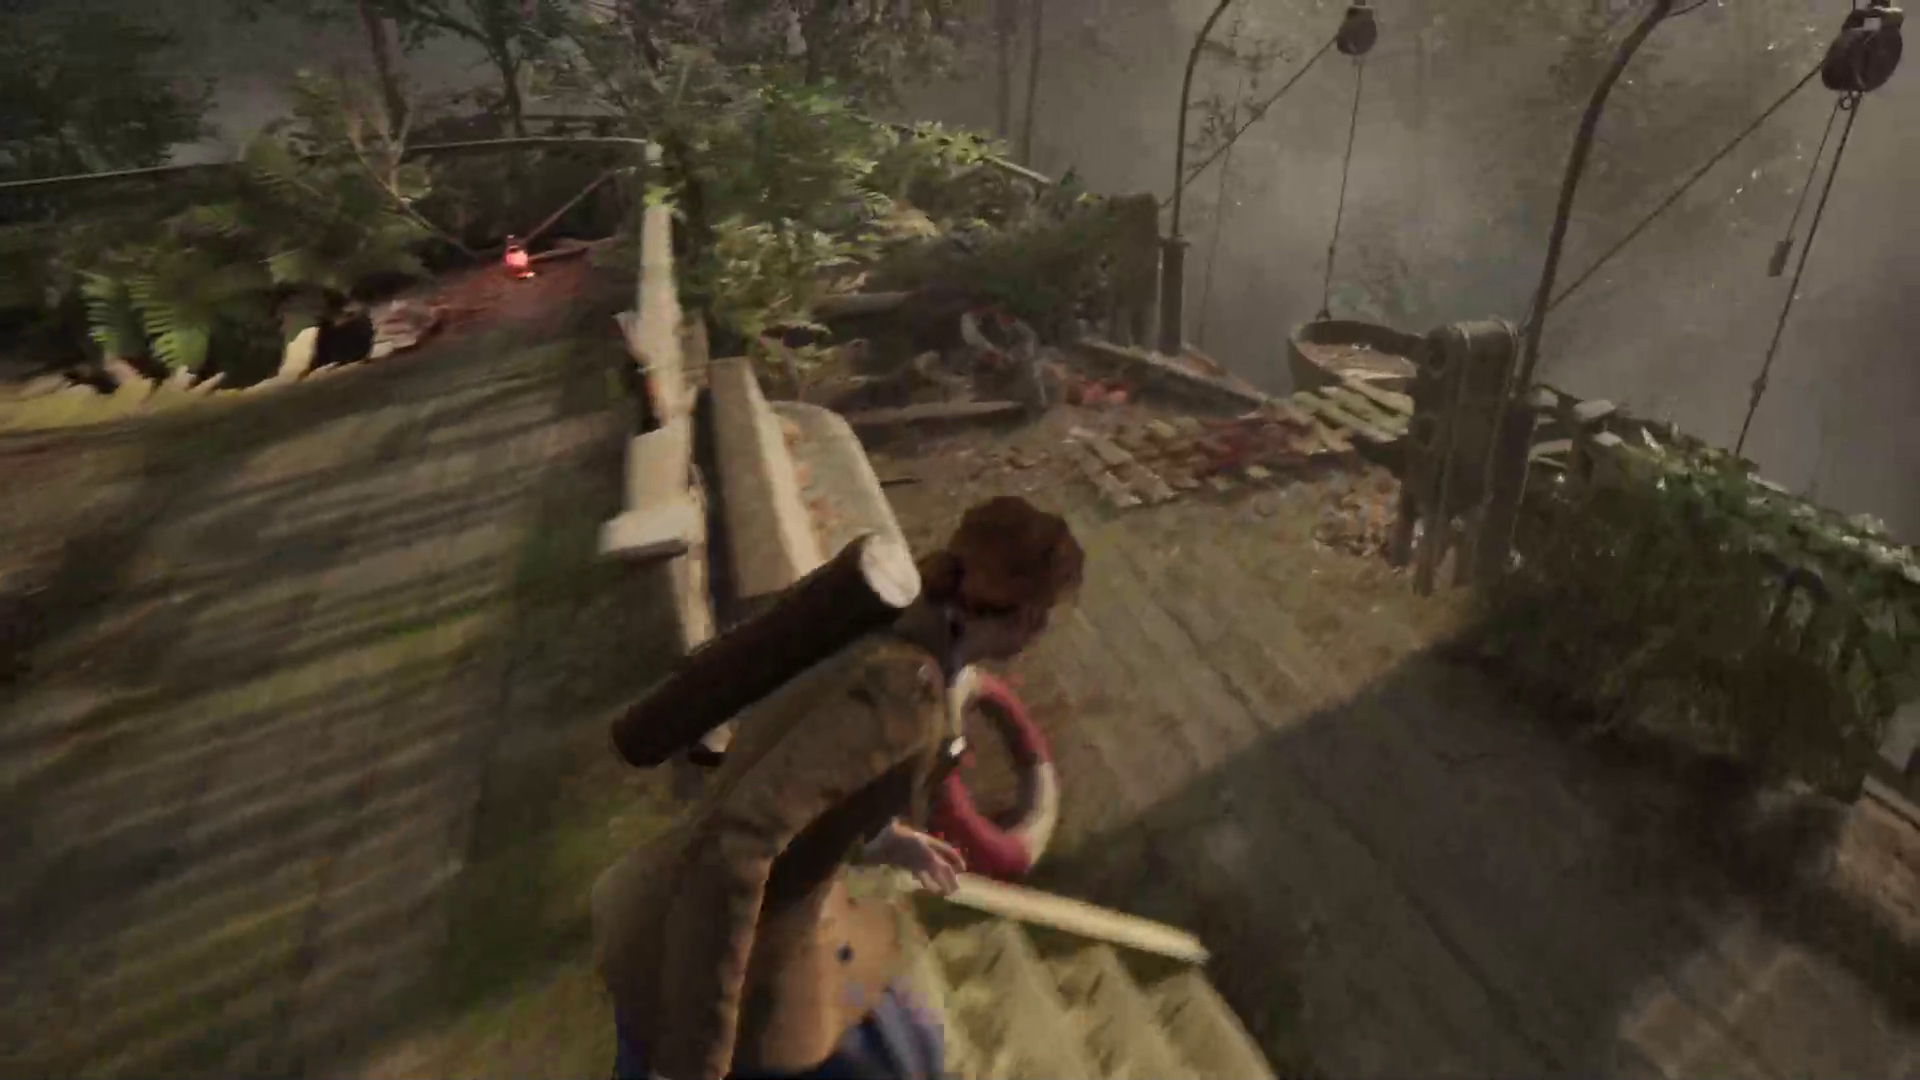
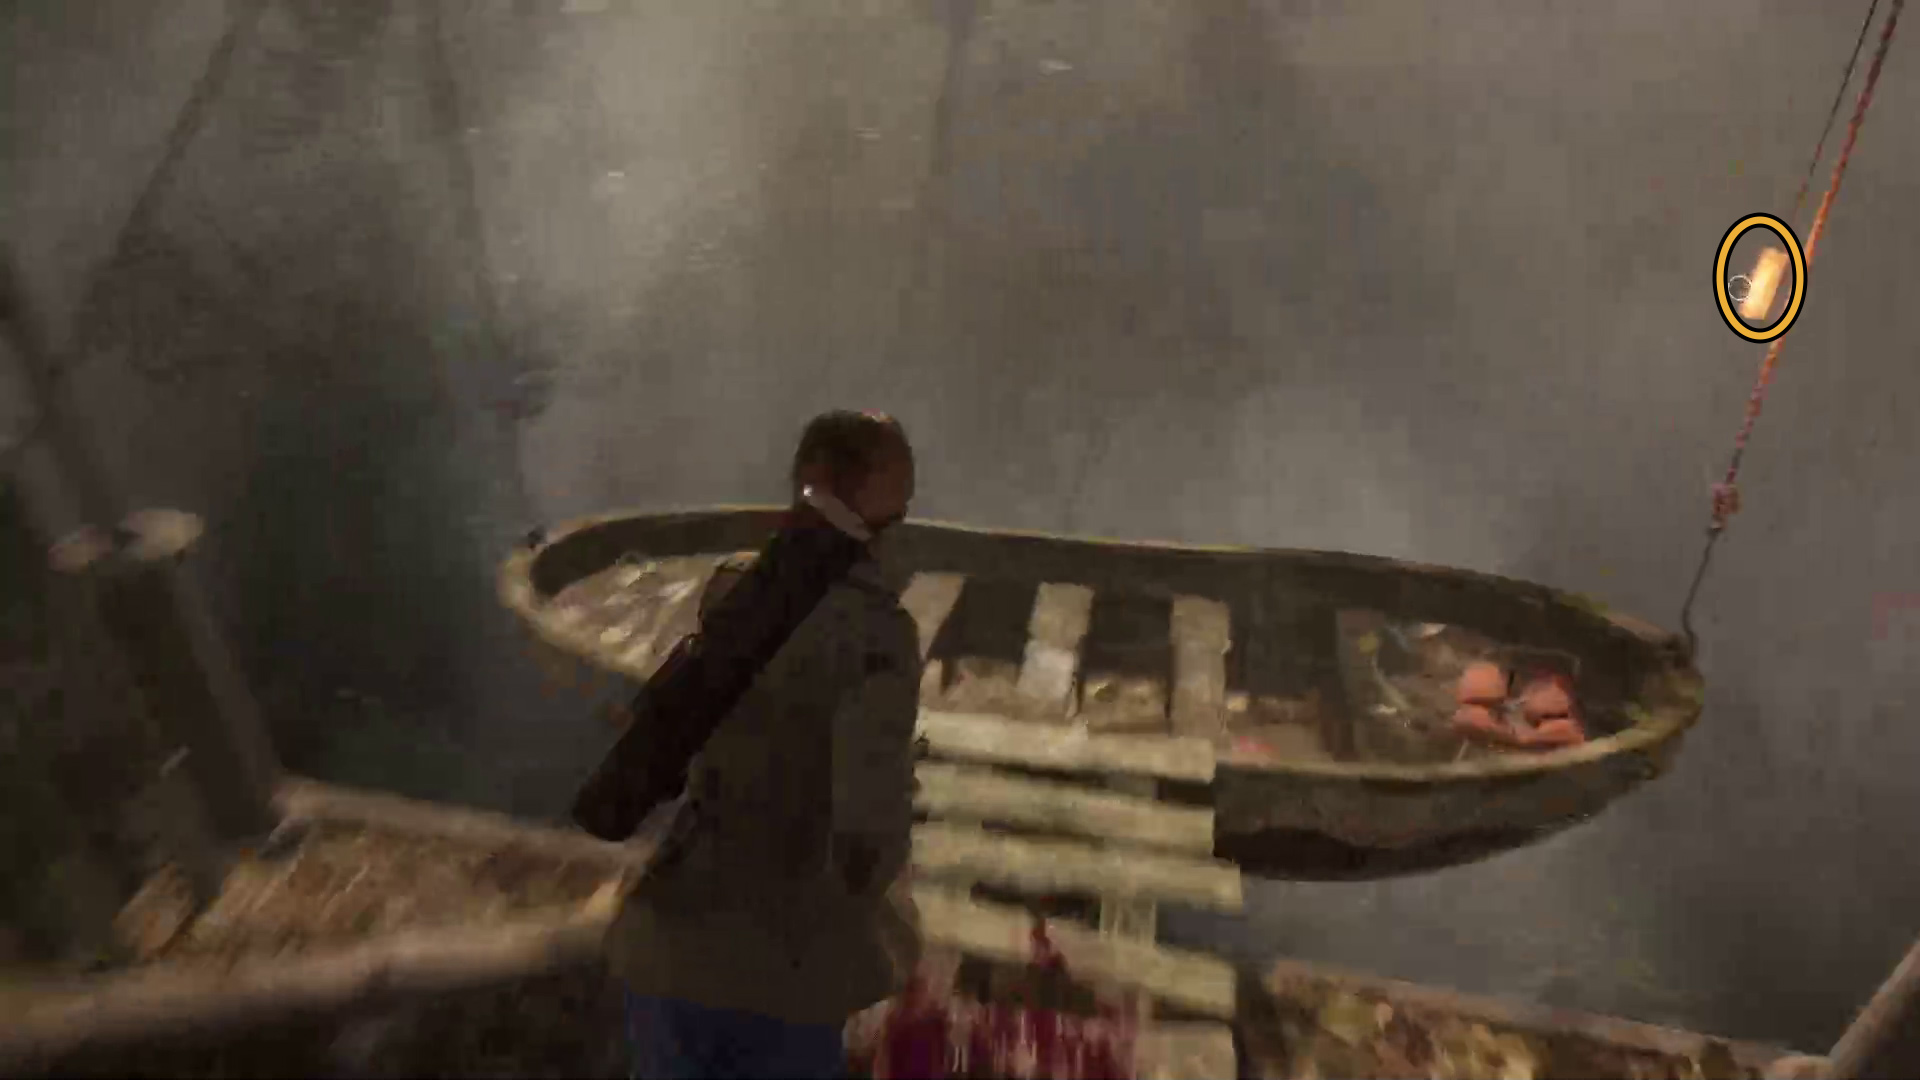
The left staircase is blocked, so head up the right one, and then turn left and go up the stairs just ahead to reach the area with the bell. There’s a red lantern past the bell, which indicates a spot you can drop down back into the boat (Image X). This drop can be a bit buggy — we had to stand to the side of the drop in order to get the prompt (Image X).
Image 44Image 45
After dropping down, use the Investigate button to find some nearby loot, but quickly take a look in the corner opposite where you dropped, as a scuttler will drop from the ceiling after a bit. Take it out, and go through the nearby doorway (Image 46) to find the Pallid Mask lagniappe on a chair (Image 47).
Image 46Image 47
Grab the mask, then go back into the previous room and unbolt the door on the left, then go through it and turn right to find the stairs again. Head back up to the top deck, back to where the bell is, and this time cross the deck and go down the opposite stairs (Image 48) — before turning right, look left and note the life boat (Image 49), which you’ll return to a bit later.
Image 48Image 49
You’ll come to another small set of stairs — you can go into the bridge to find an enemy and some loot if you want, but the way forward is to the left (Image 50). You’ll come to an open doorway on your right; go inside and loot the place, then leave the way you came in and go right (to continue the way you were originally heading). You’ll come to a door on your right — go inside and loot the place. Grab a fresh melee weapon before unbolting and leaving through the door opposite where you came in (Image 51).
Image 50Image 51
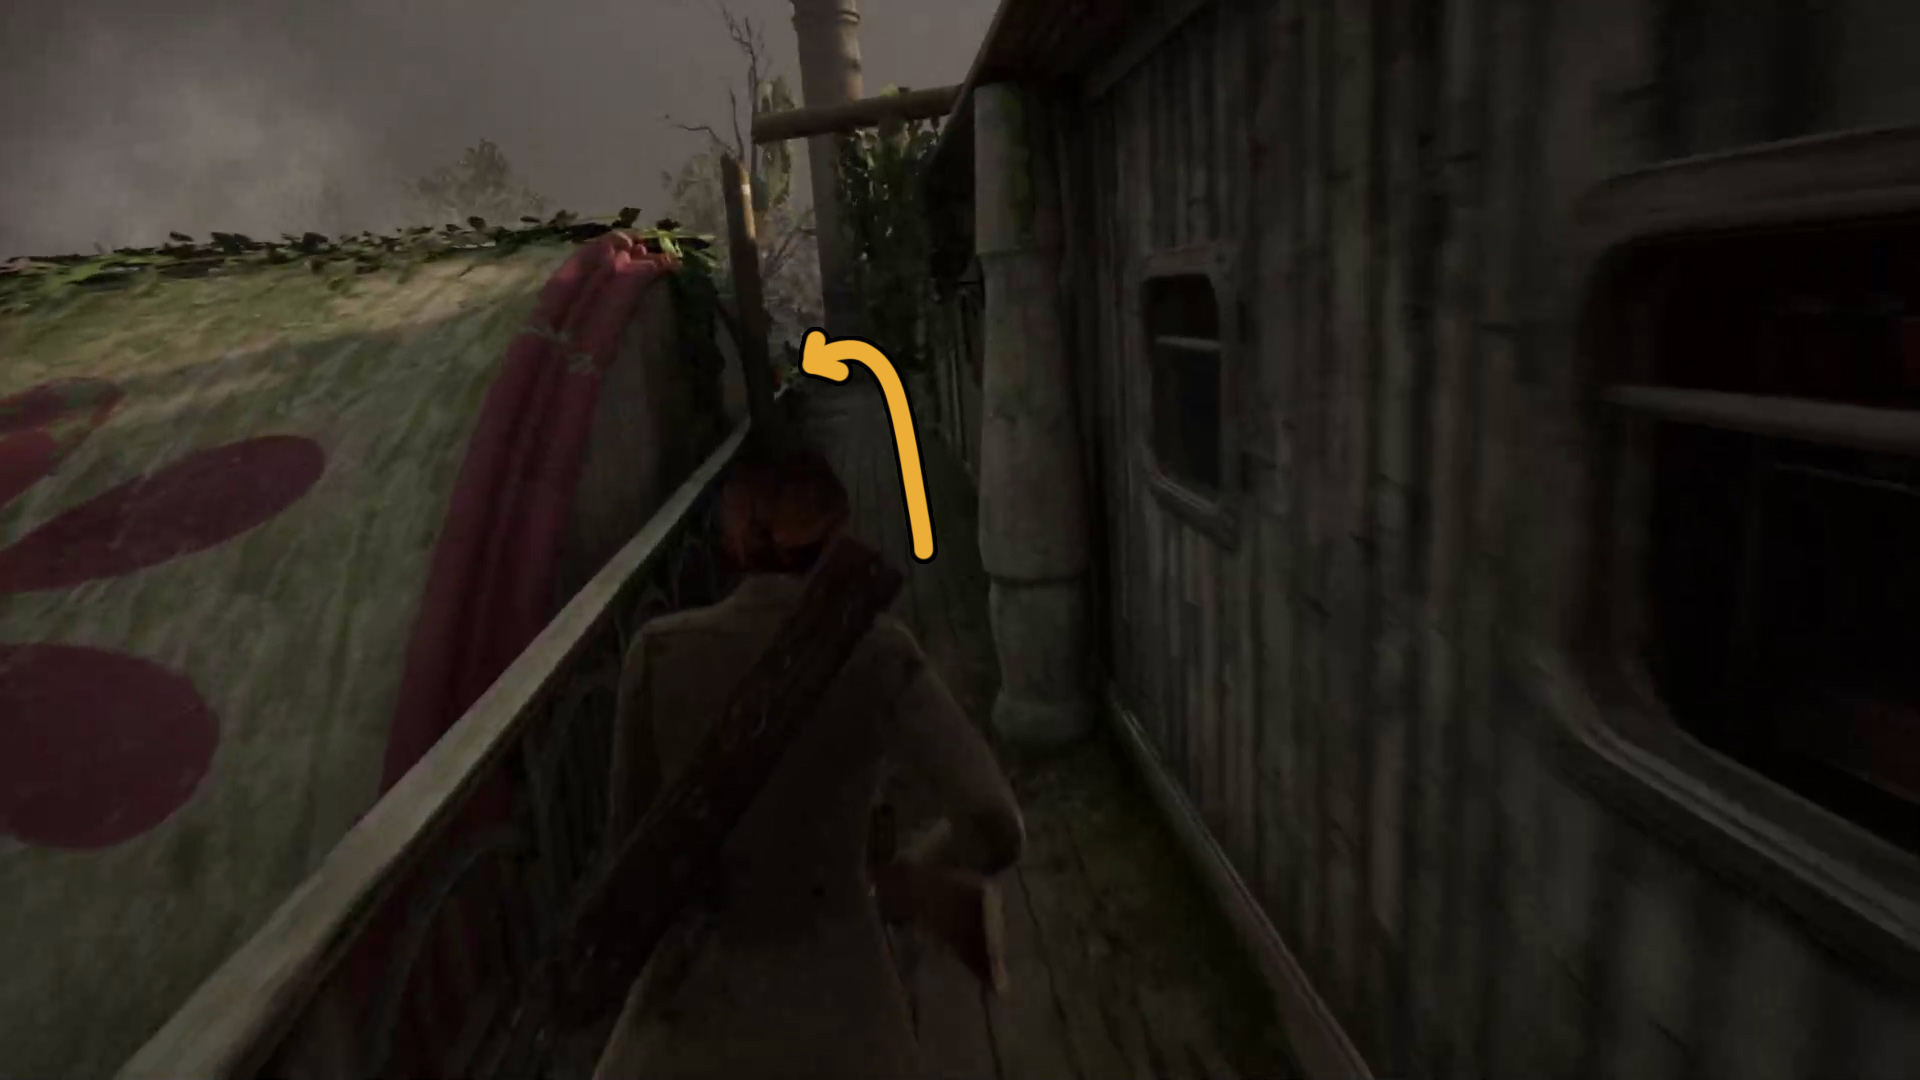
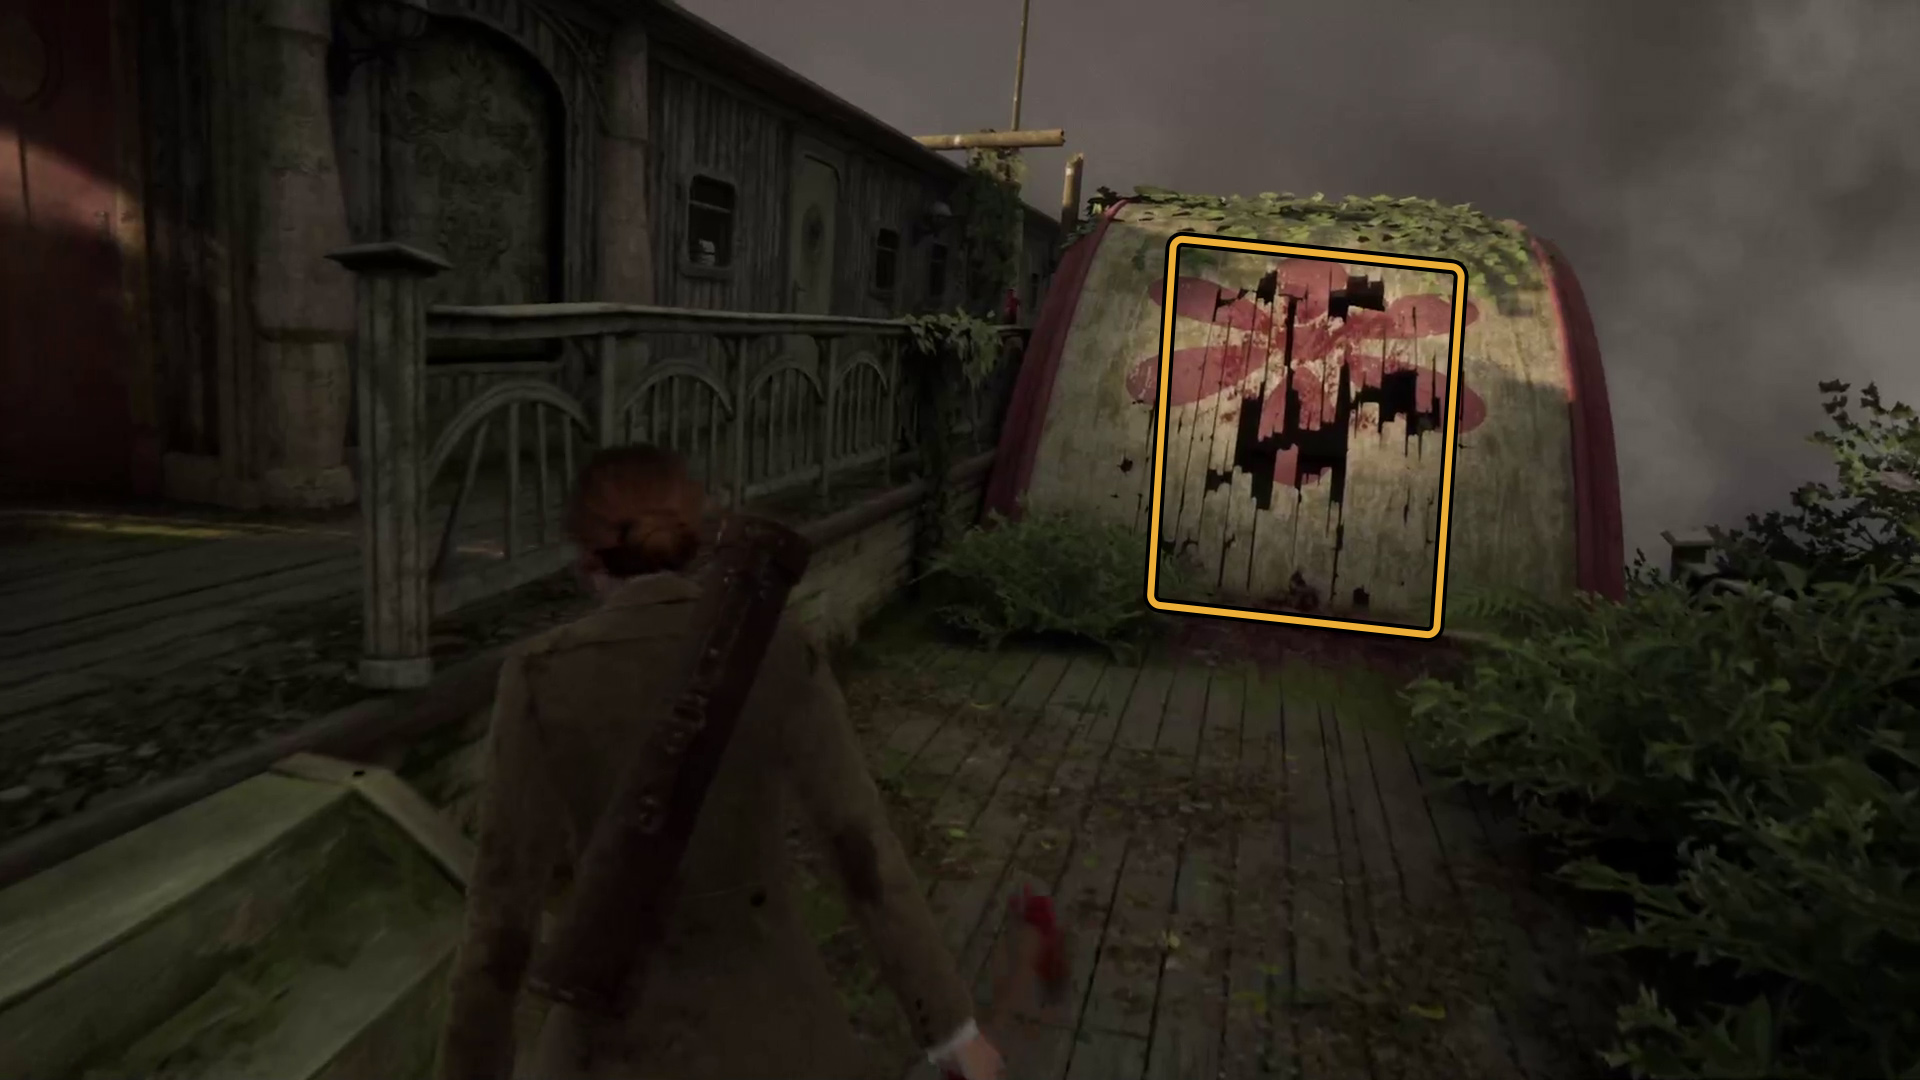
Turn right and head towards the front of the large curved structure (Image 52) — go down the stairs and use your melee weapon to break the damaged section of wood (Image 53). Go through the hole you opened and climb down the two ledges, then squeeze through the narrow gap to the left.
Image 52Image 53
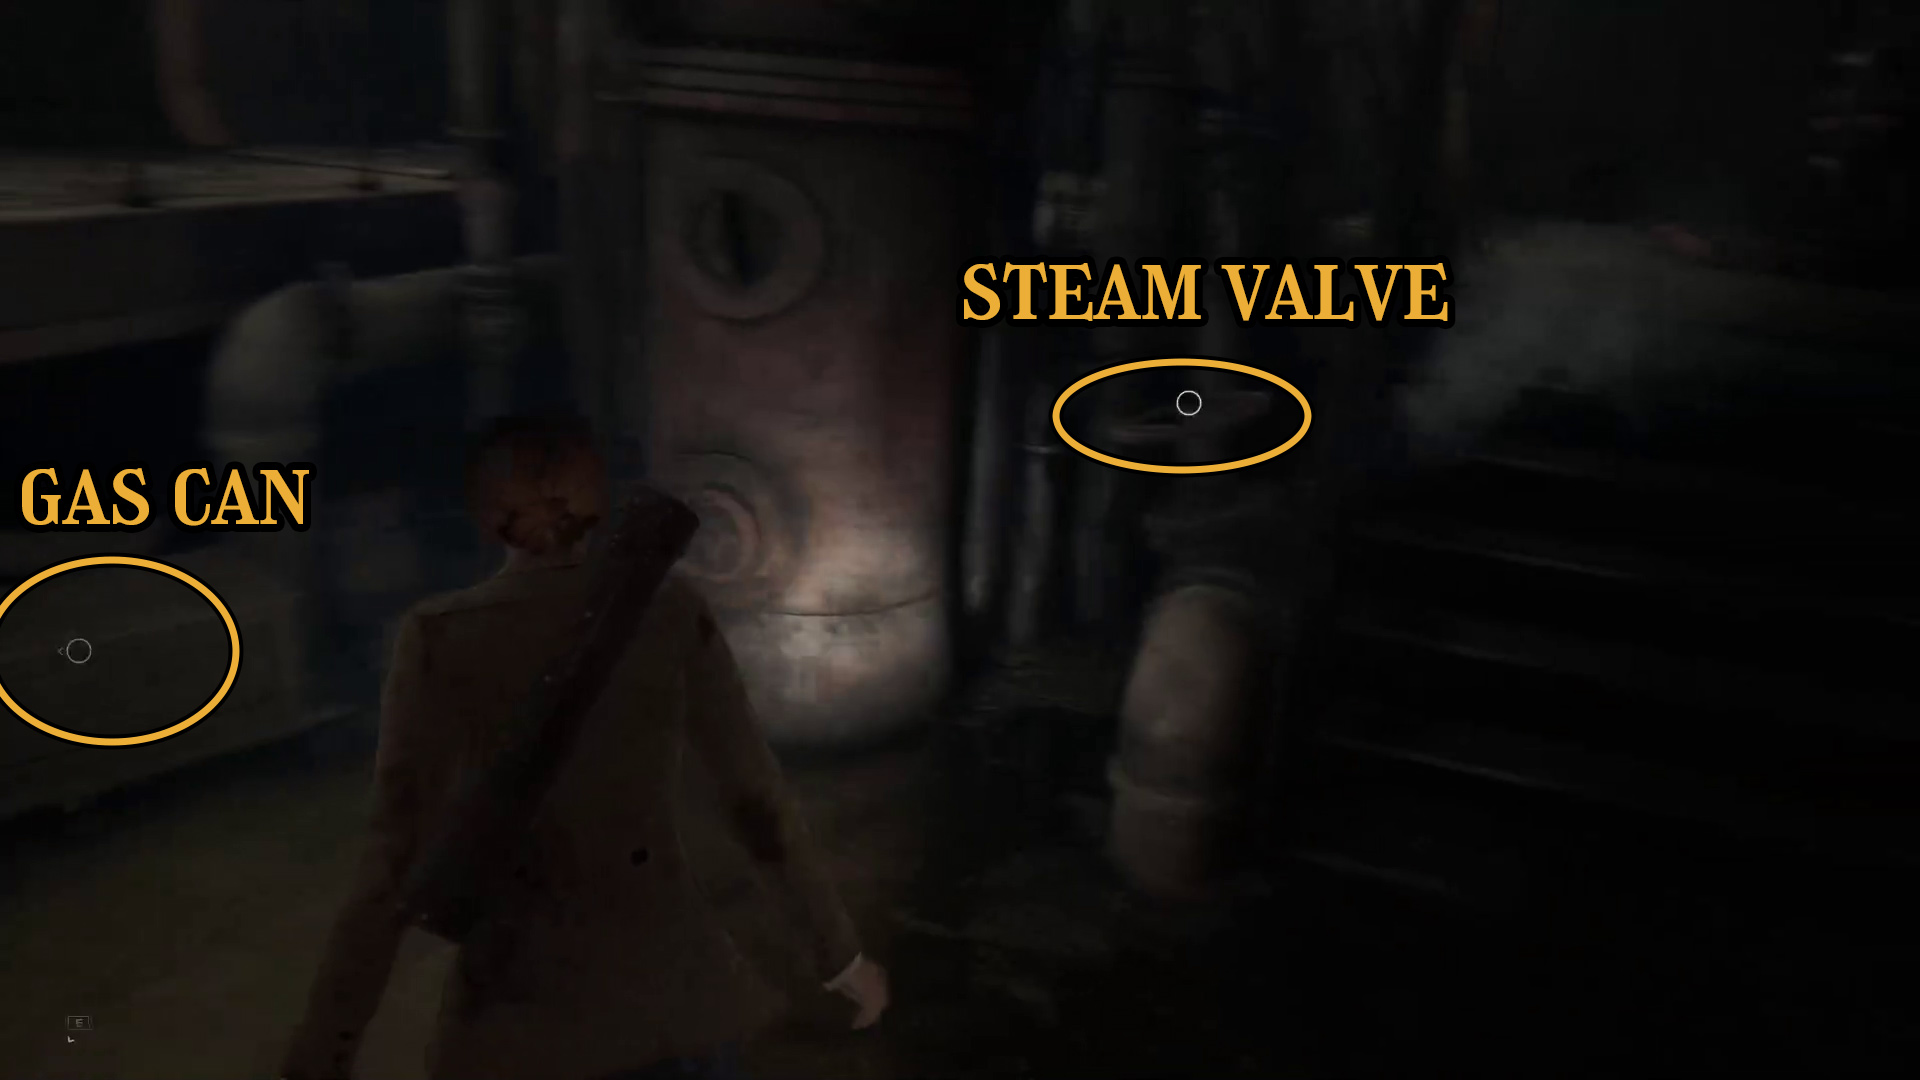
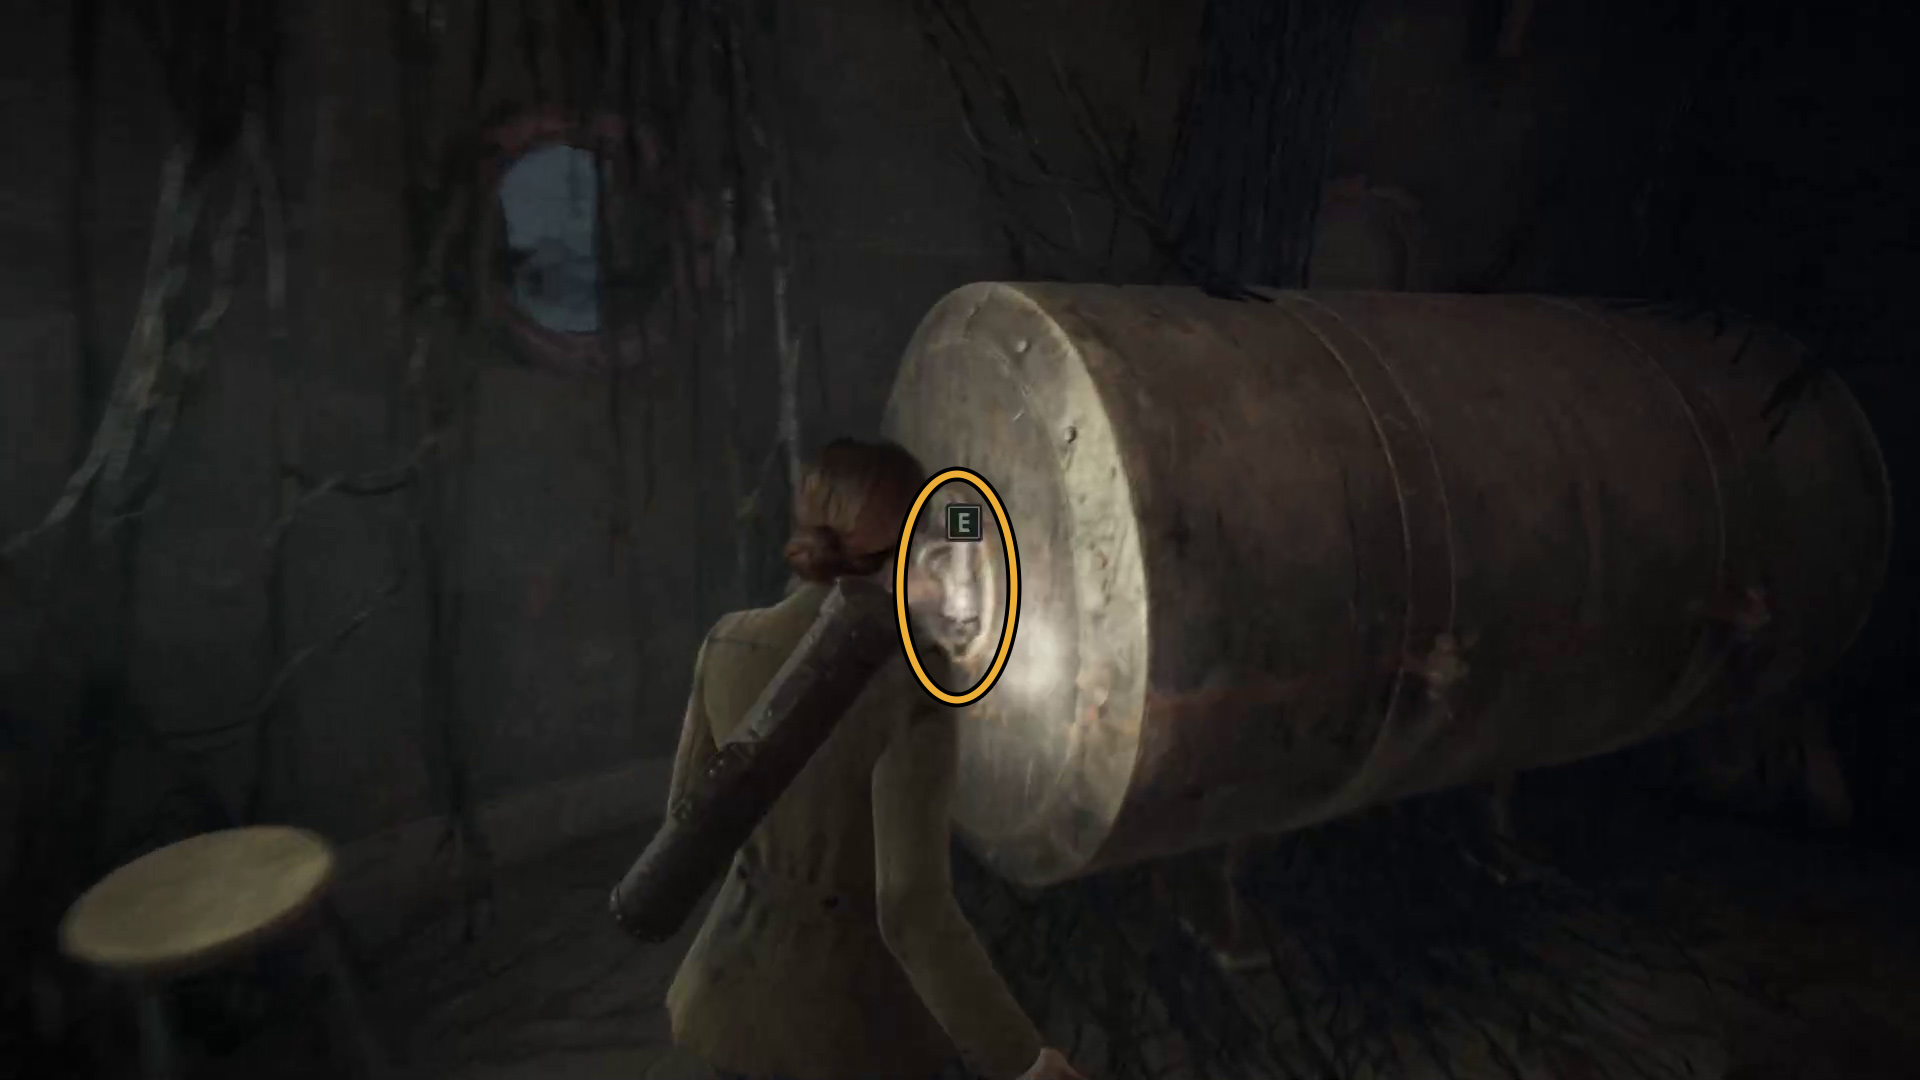
You’ll enter the engine room, where you can find a bit of loot. Next, grab the Empty Gas Can from the right-hand crate, then interact with the small wheel to shut off the steam (Image 54). Go up the stairs and use the Empty Gas Can on the Fuel Tank to fill the gas can (Image 55).
Image 54Image 55
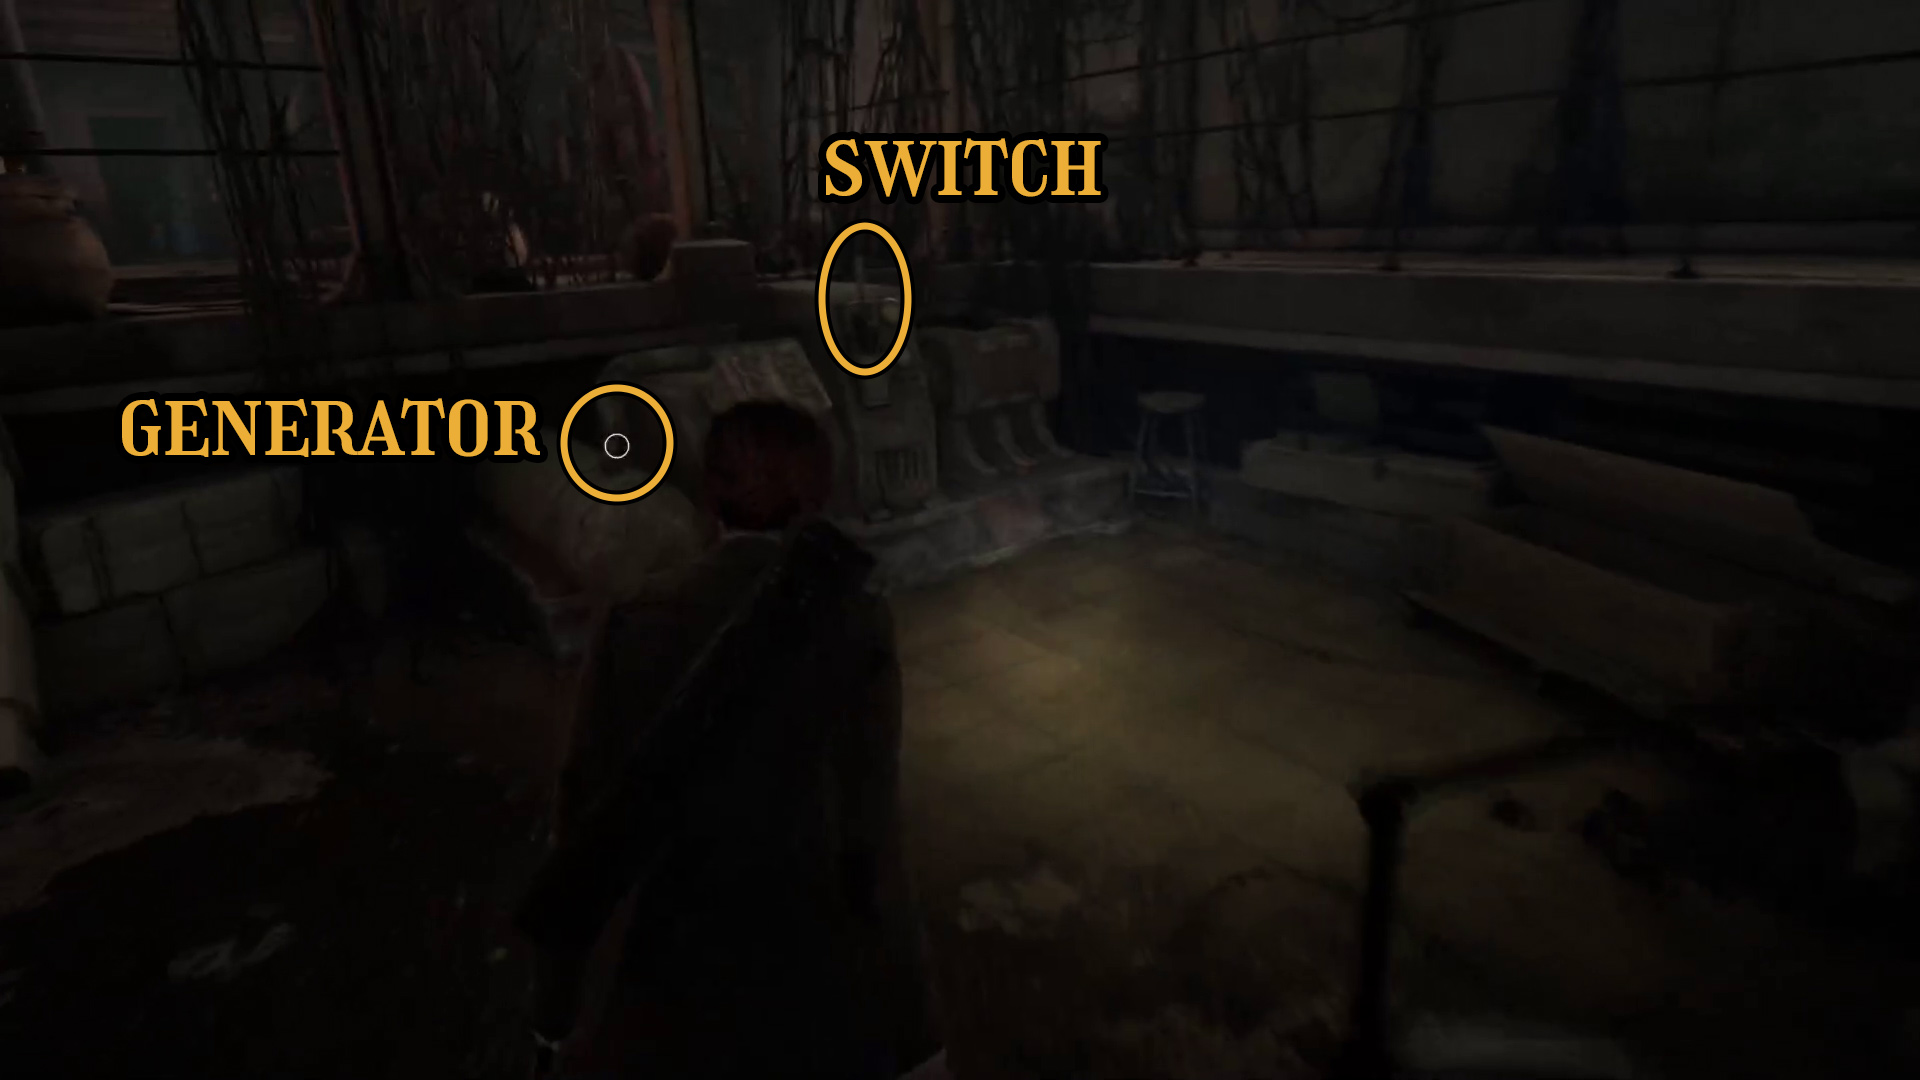
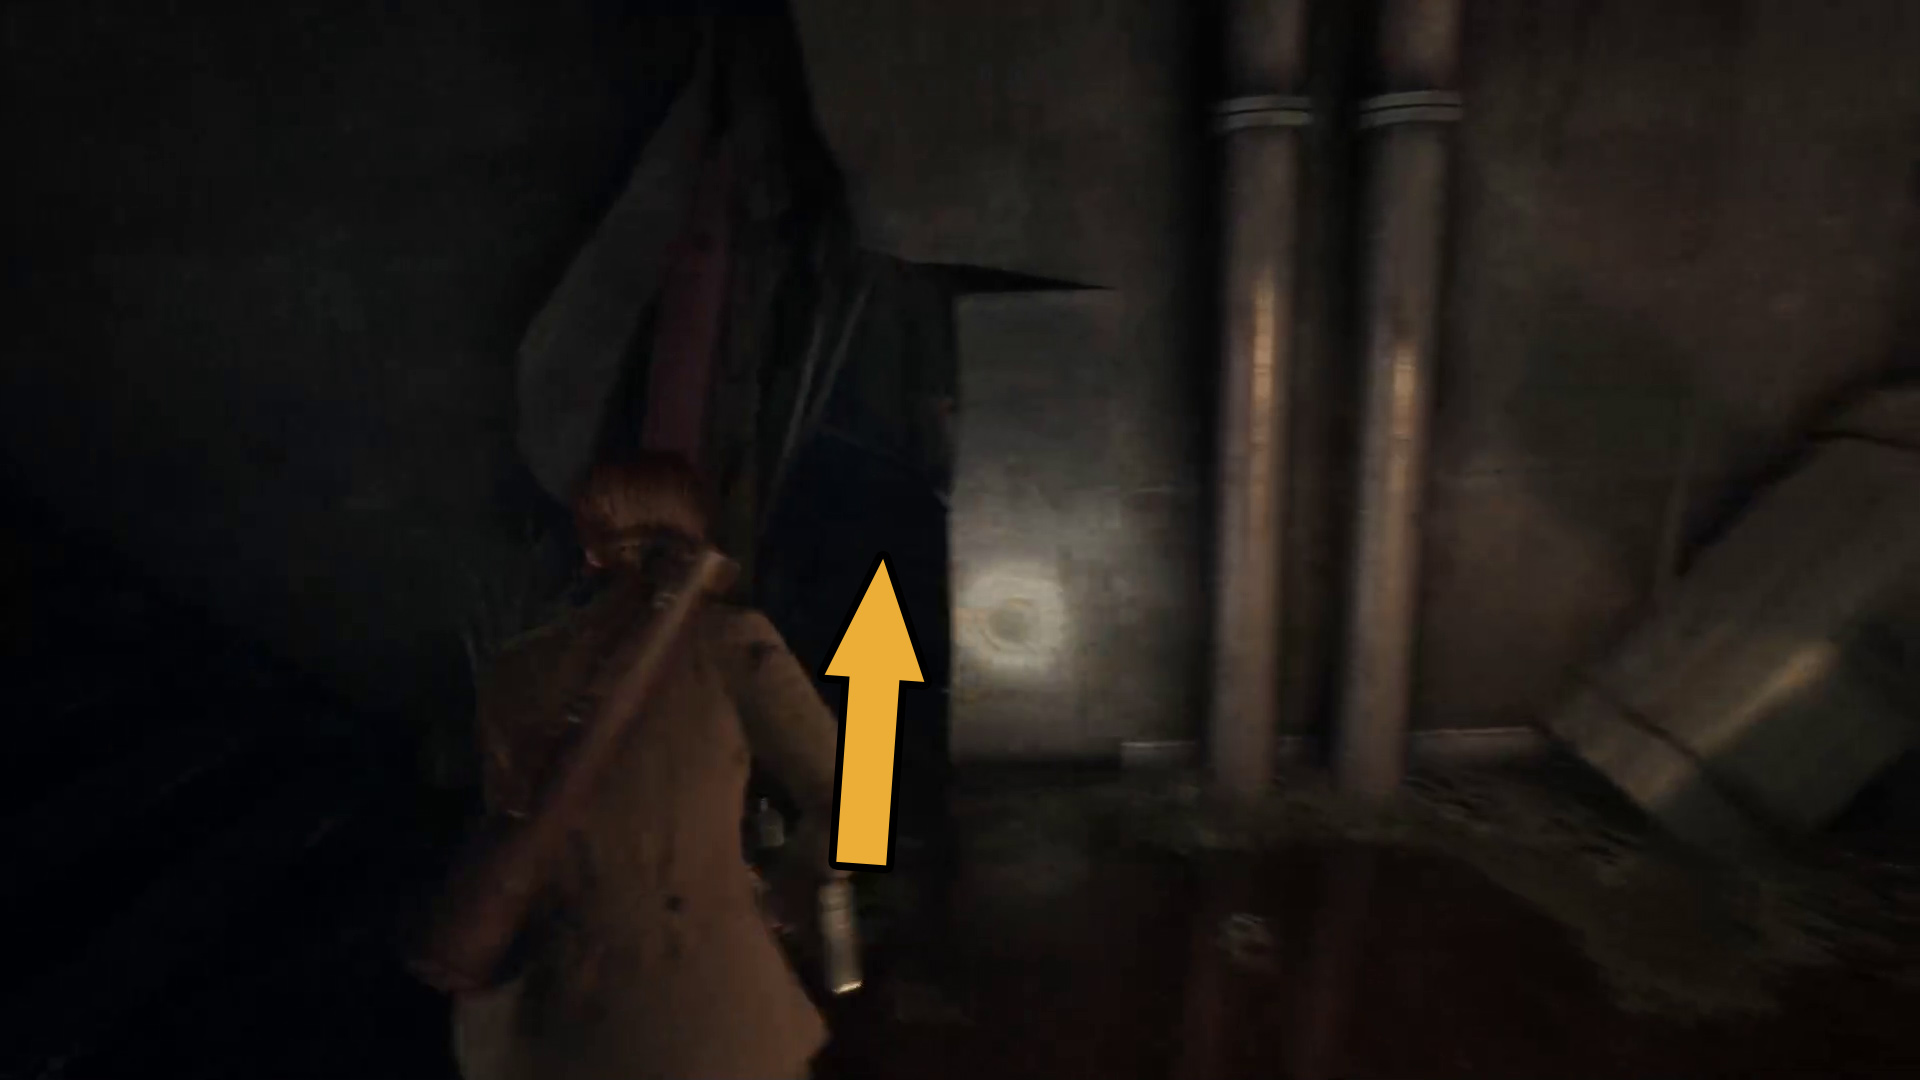
Go back down the stairs and interact with the Power Generator (Image 56), and use the Filled Gas Can on it. This will allow you to pull the Switch, starting the generator. That done, you can squeeze back through the gap you came through (Image 57) and climb back up the ledges to reach the boat deck again.
Image 56Image 57
Note: There are quite a few enemies in this next section — we’ll walk you through where they are, but you can also just try and sprint/dodge your way to the life boat mentioned earlier (Image 49).
Head up the stairs and use the molotov to your left to help deal with the scuttler up ahead (Image 58), then go through the doorway on your left, kill the scuttler, then continue forward around the outside of the ship’s cabin. Around the corner is another scuttler, and a second waits in the room with the open doorway on the left. Beyond them, down the stairs is another two enemies, and beyond them the life boat (Image 59).
Image 58Image 59
Walk out onto the life boat and press the button to lower the boat (Image 60) — ignore the enemies that appear as you descend, as they won’t attack you. When the boat stops, go through the doorway in the side of the boat, then climb down the ledge, collect any nearby loot, and cross the room to climb the ladder on the other side (Image 61).
Image 60Image 61
Turn left, and deal with the sitting enemy before they get up (Image 62) — a second enemy will come out of the left-hand doorway just ahead. Deal with them both (there’s a molotov to your left if you need it) and then continue forward into the engine room. Circle the room to clear the loot, then interact with the engine (Image 63) to complete your current objective.
Image 62Image 63
Take a look Inside the Empty Room
Now you will need to return to the 1st Floor Hall, just across the hall from Reception, and go through. Since you visited the 1st Floor Hall earlier, you should have already gone through the first two rooms in the Hall, finding and noting different things based on your character.
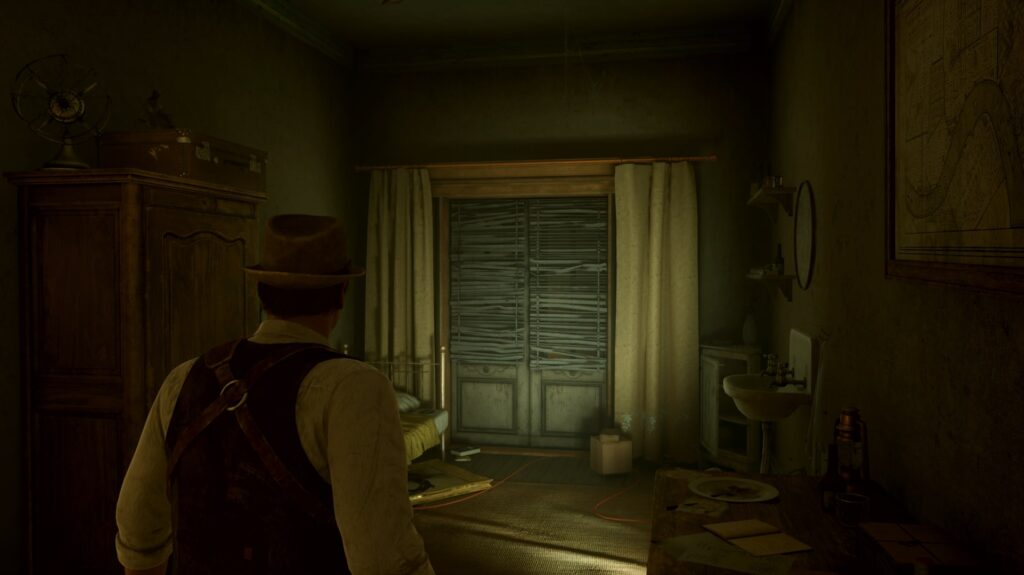
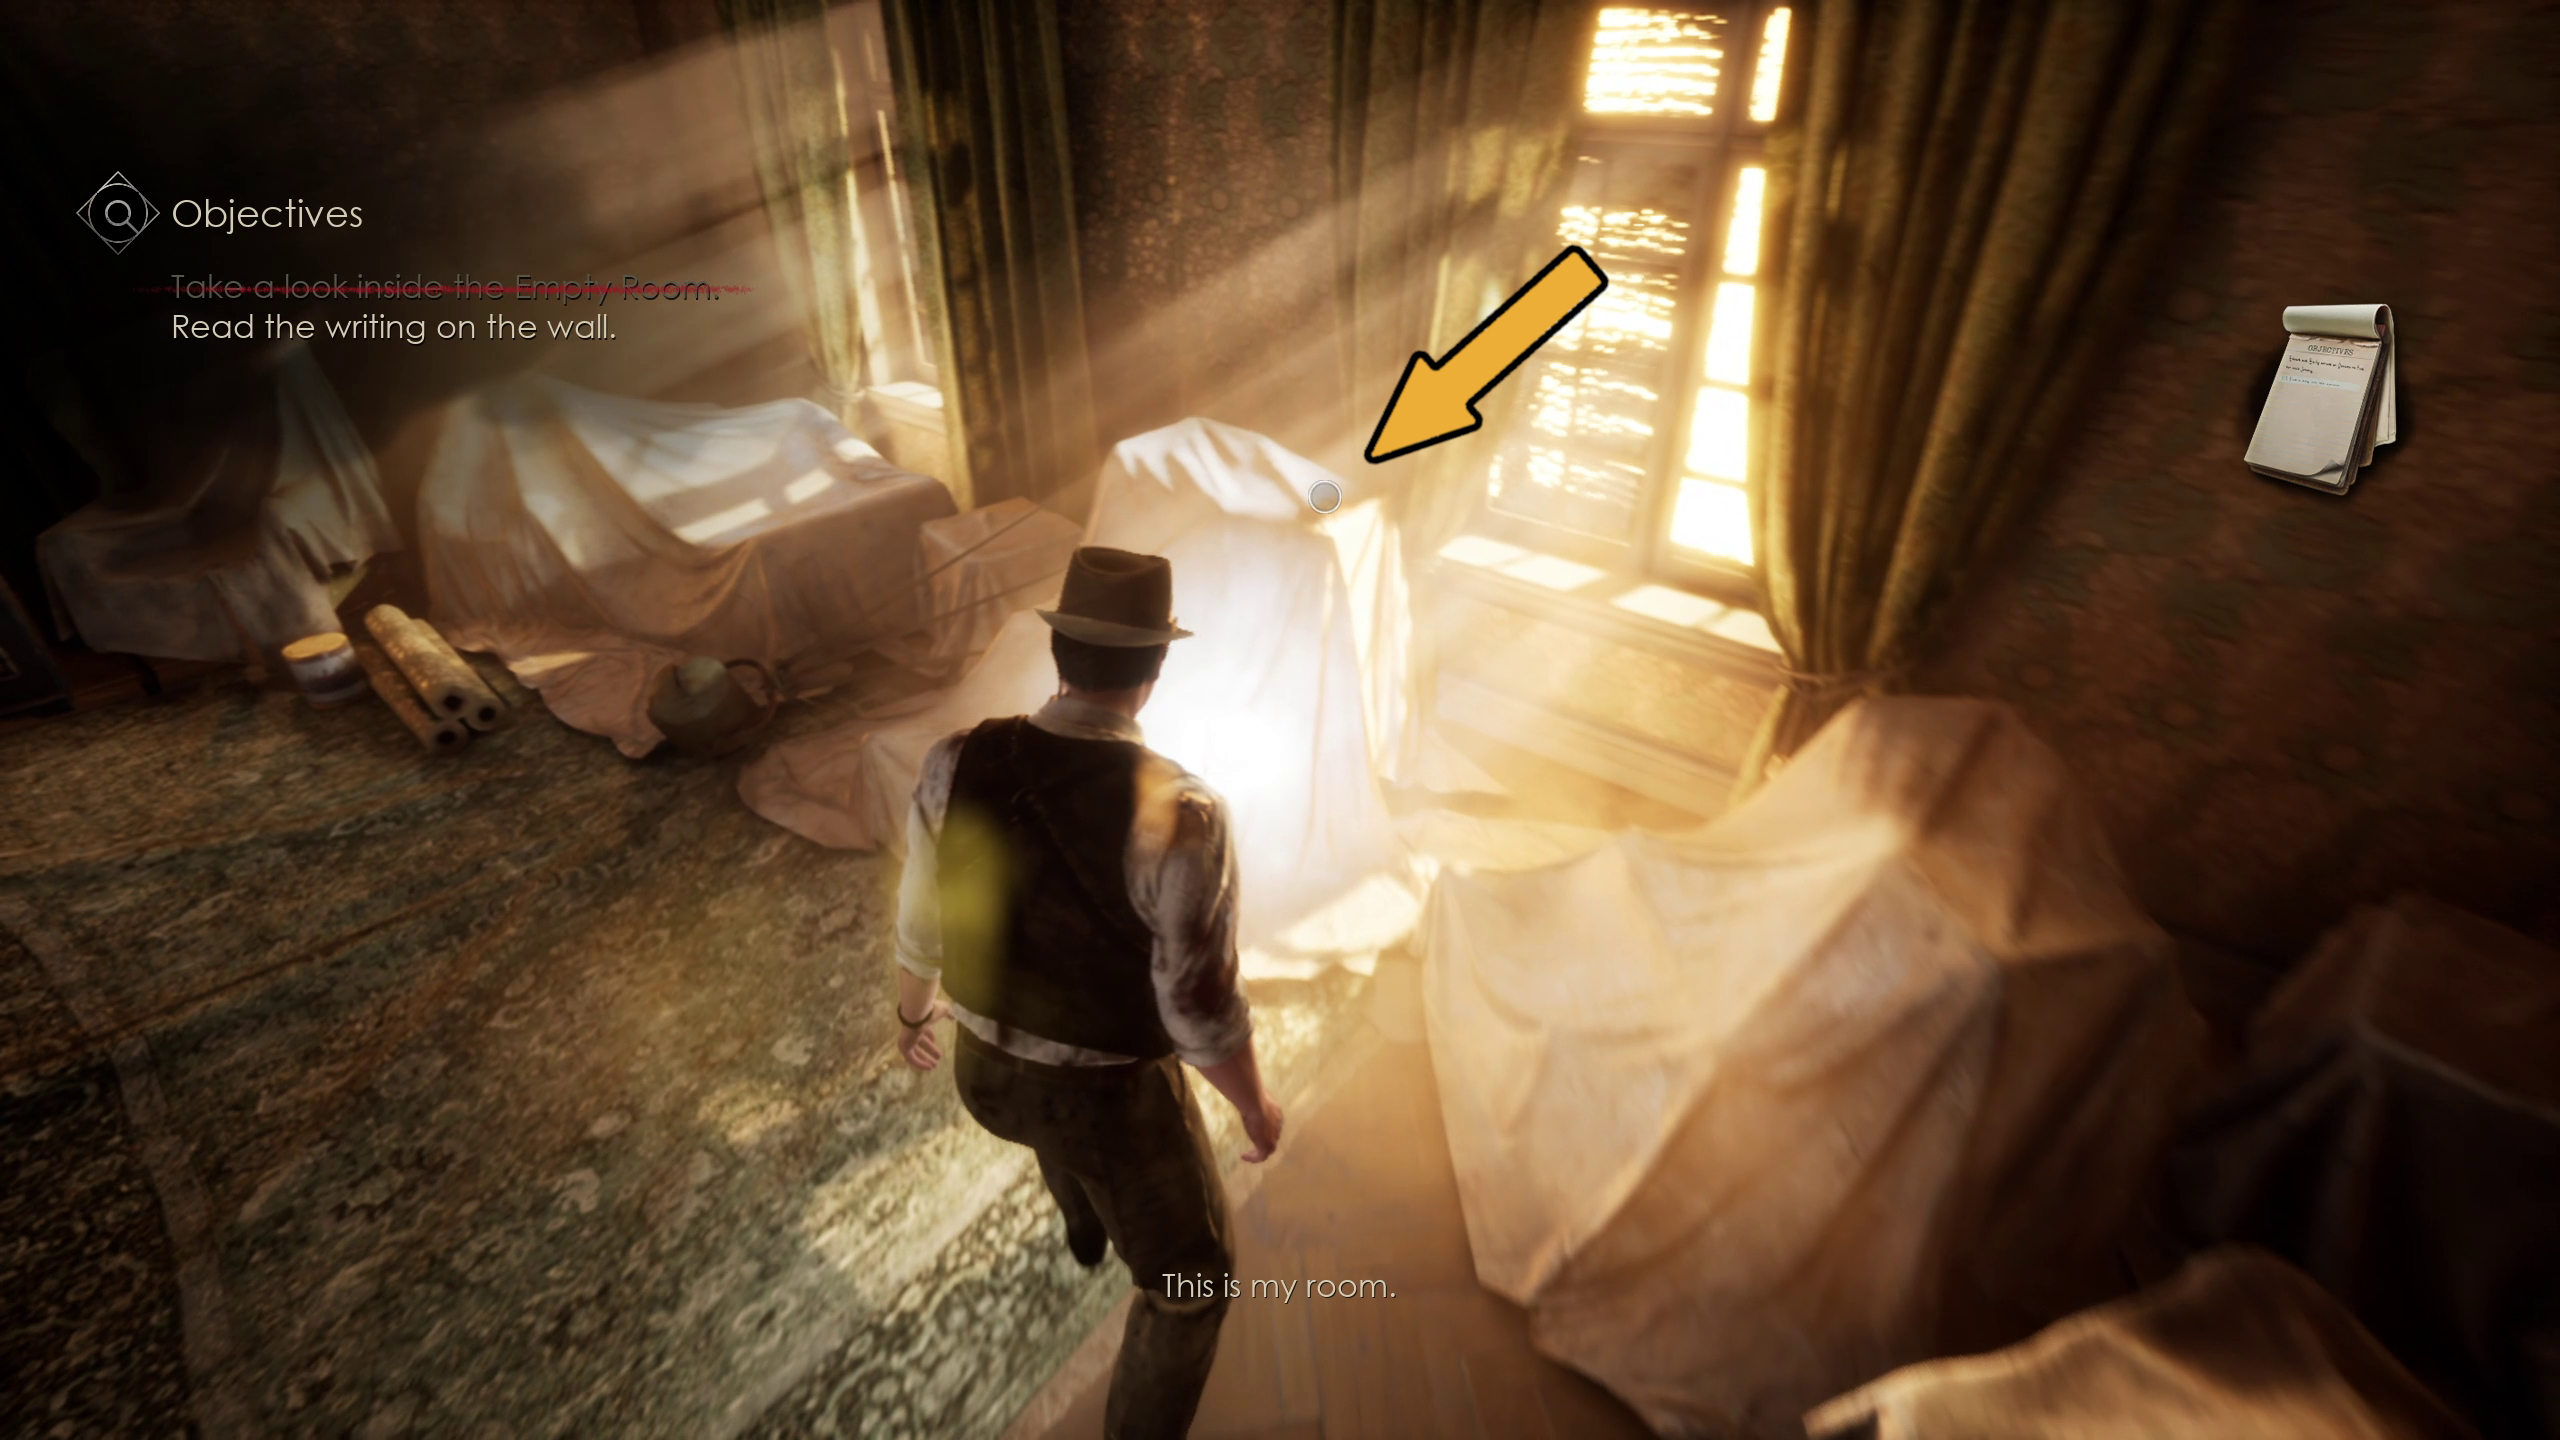
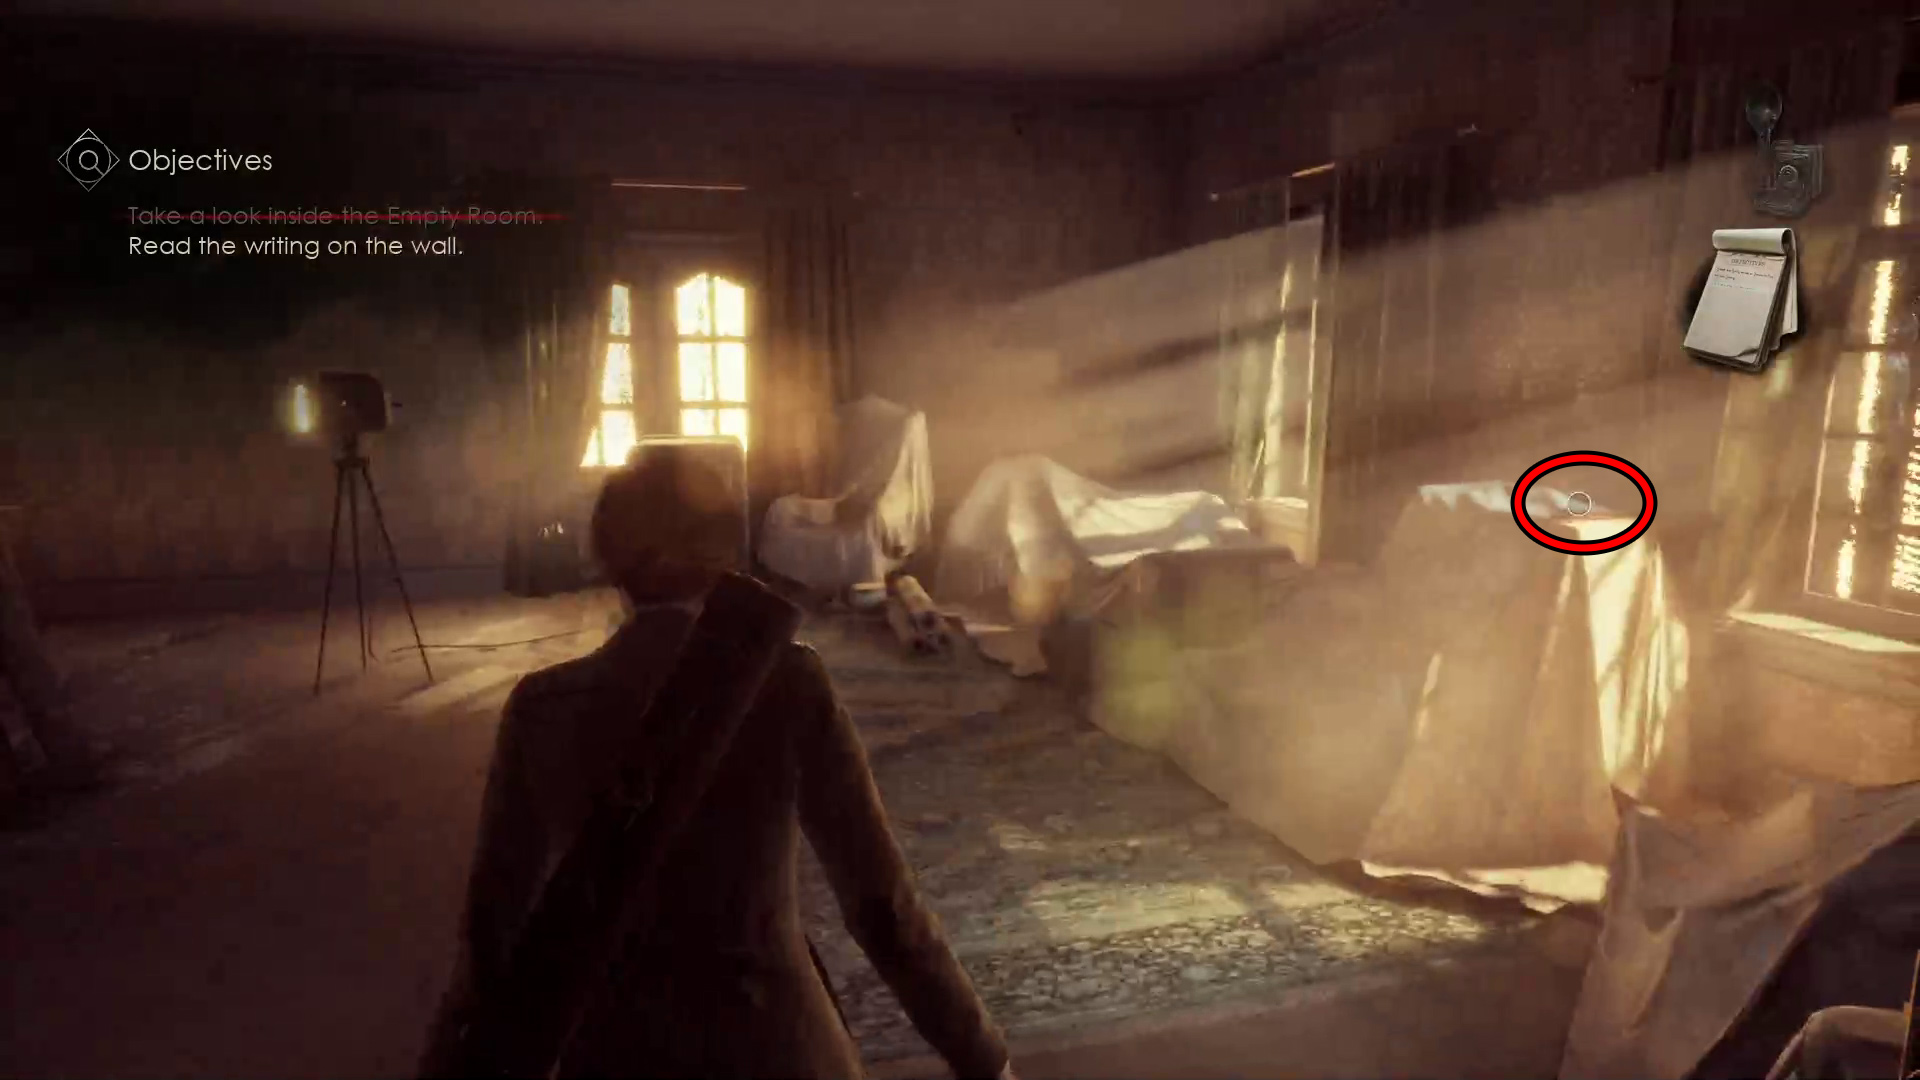
Now, the routing will change a bit depending on your character, but you can start by going to the Empty Room, the last door the left at the end of the Hallway (Image 64). When here, make sure to grab the Ashes of Indigo Lagniappe by the window, sitting on a piece of canvased furniture (Image 65).
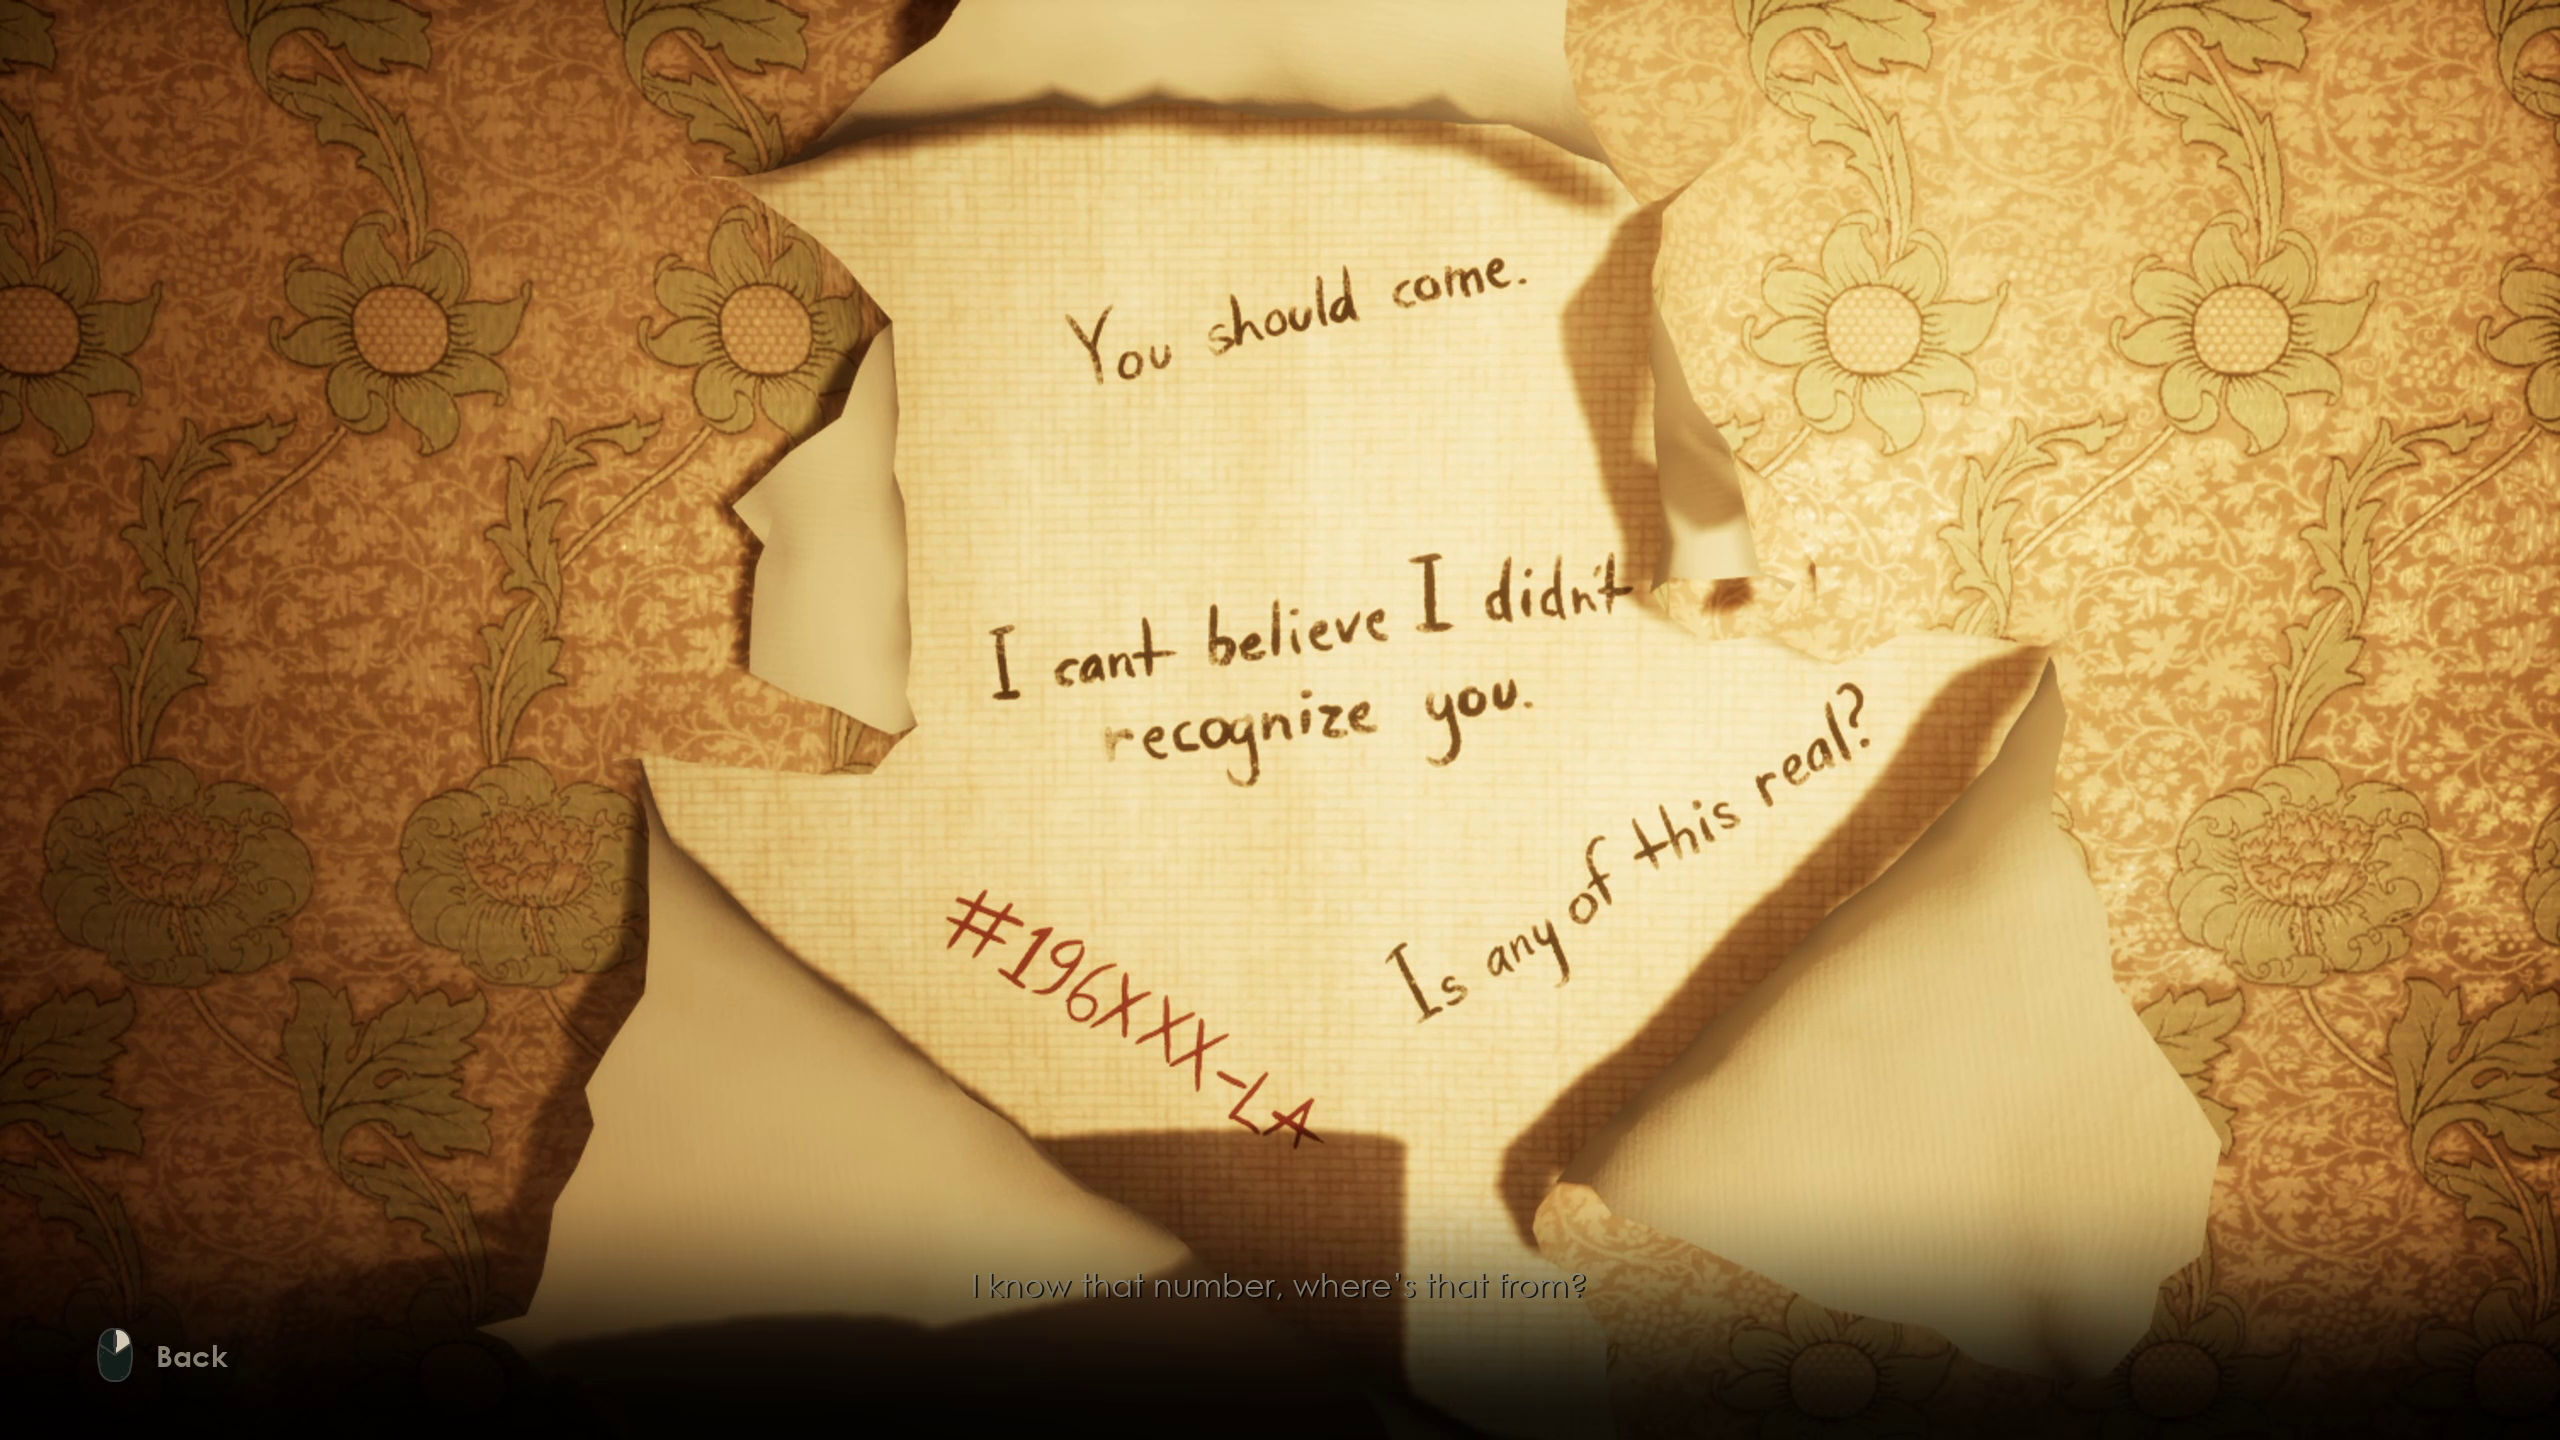
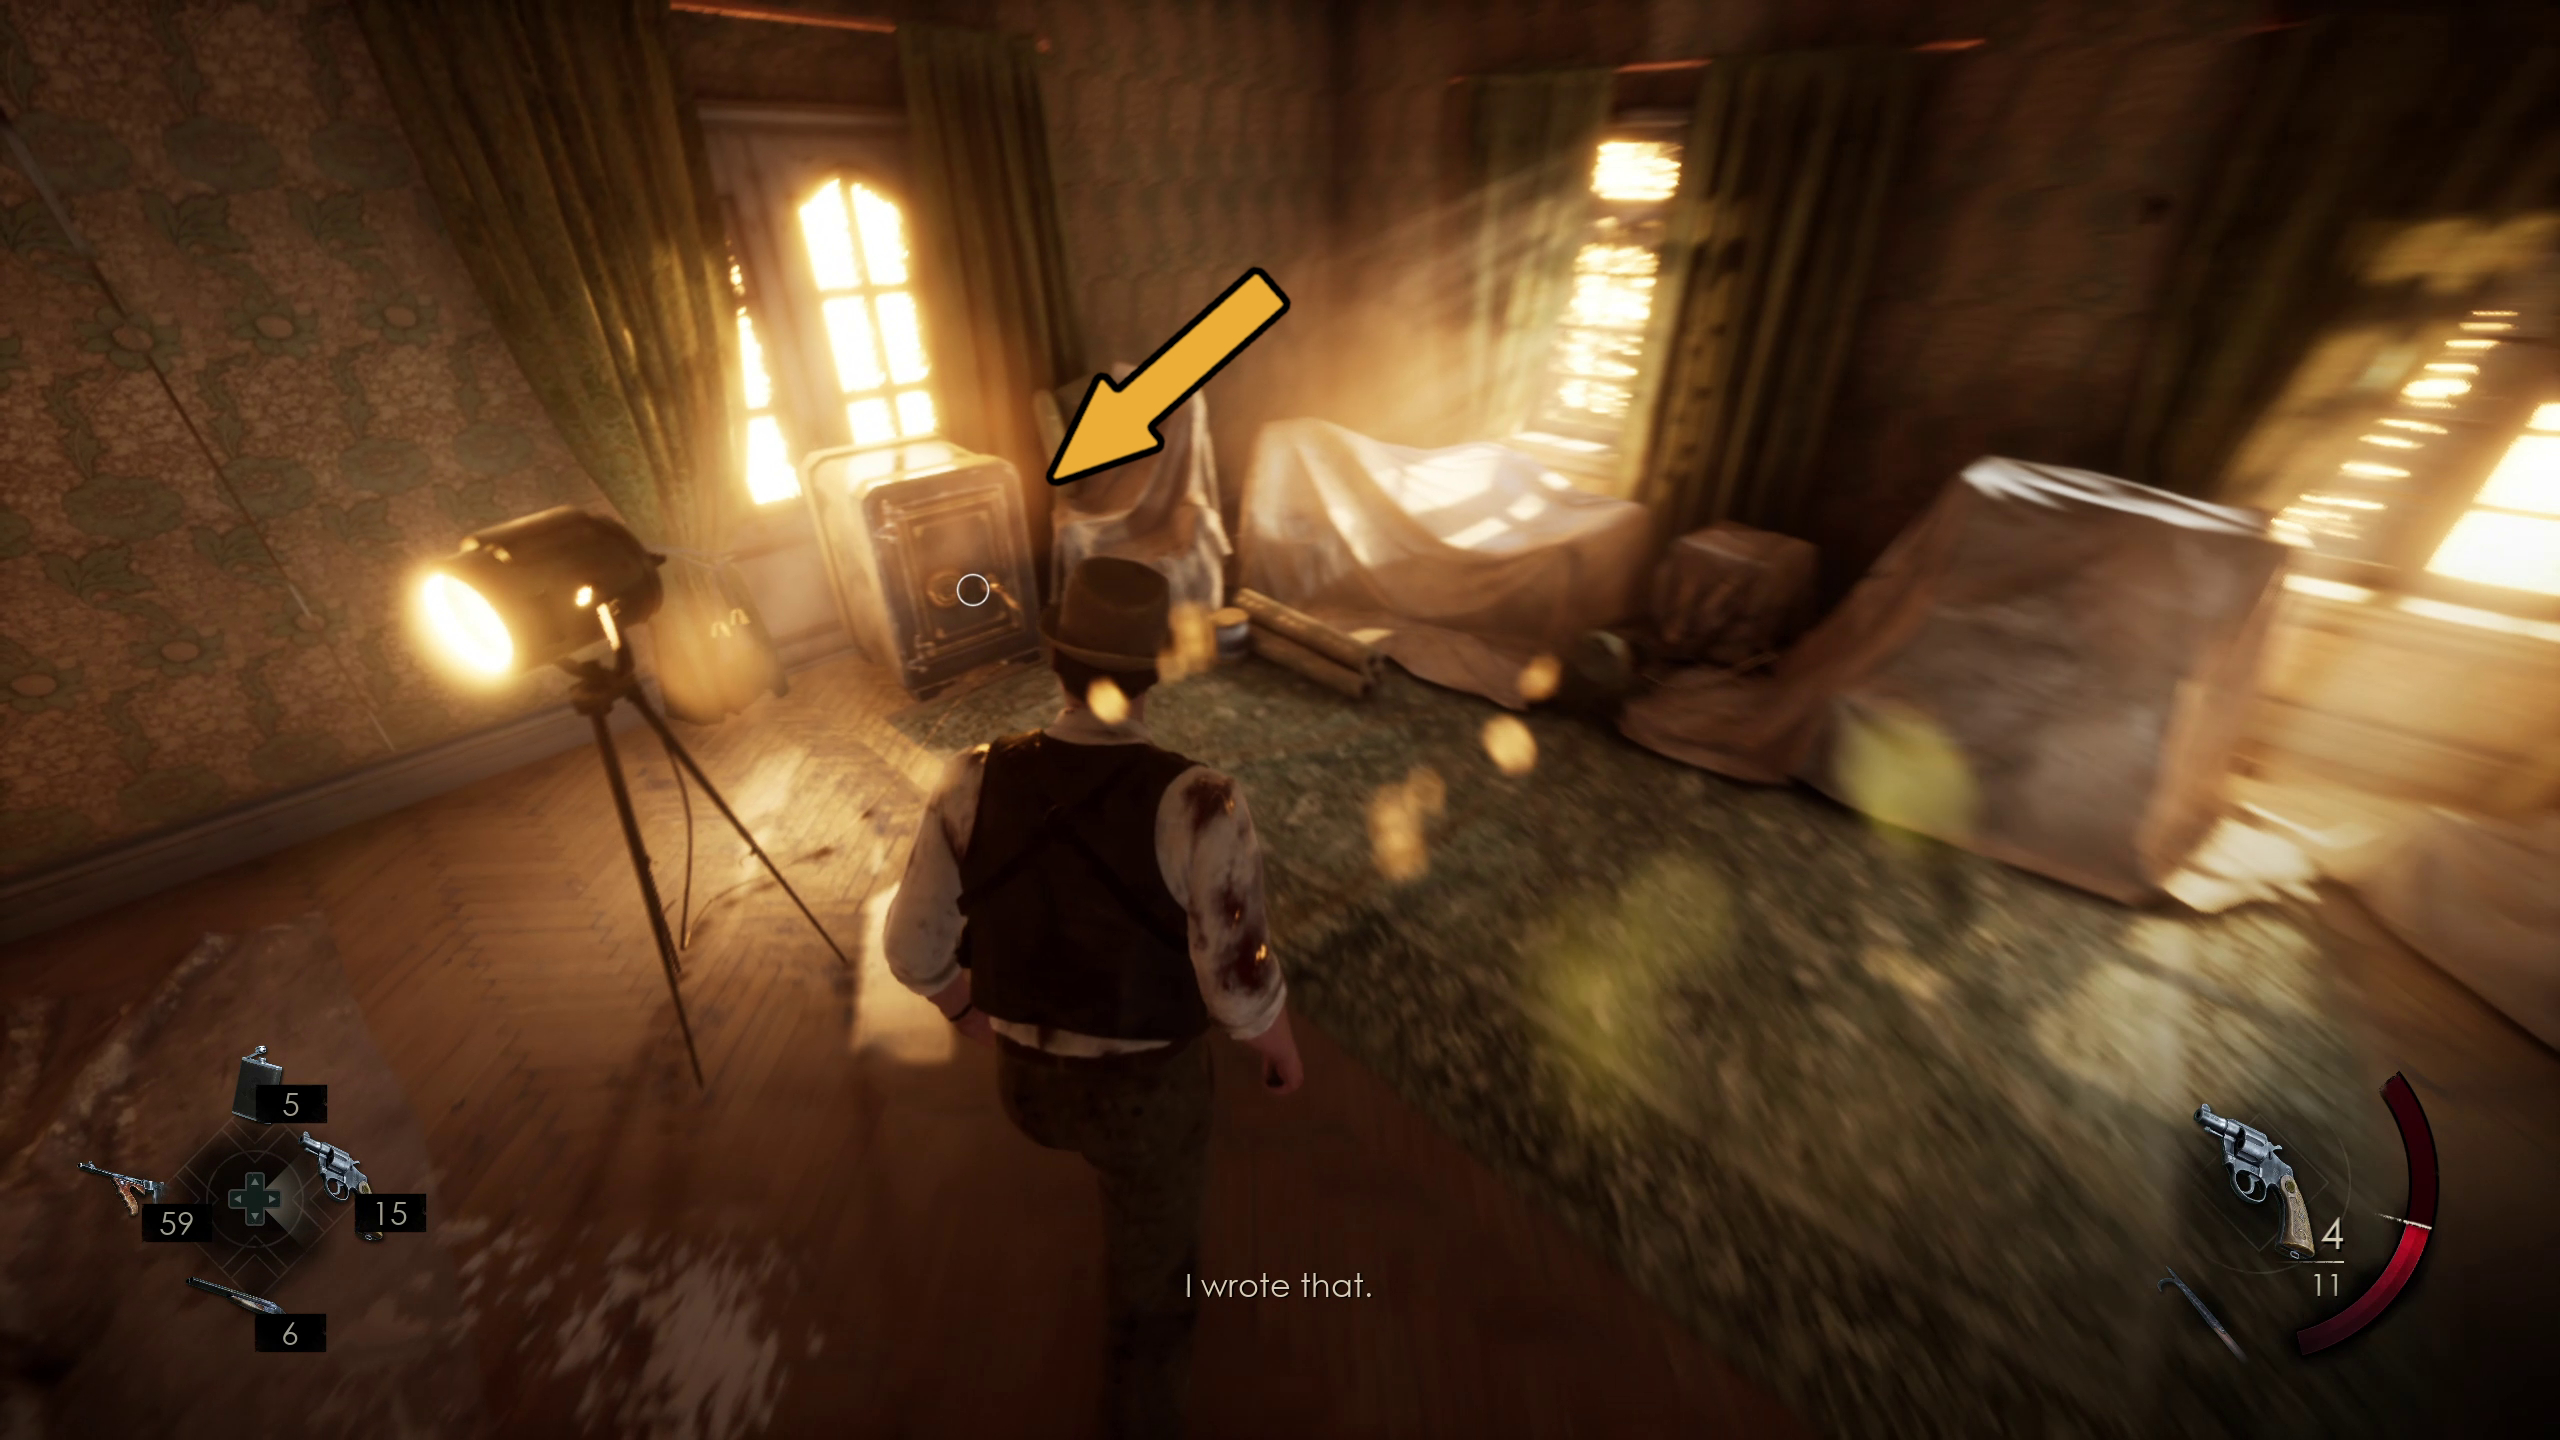
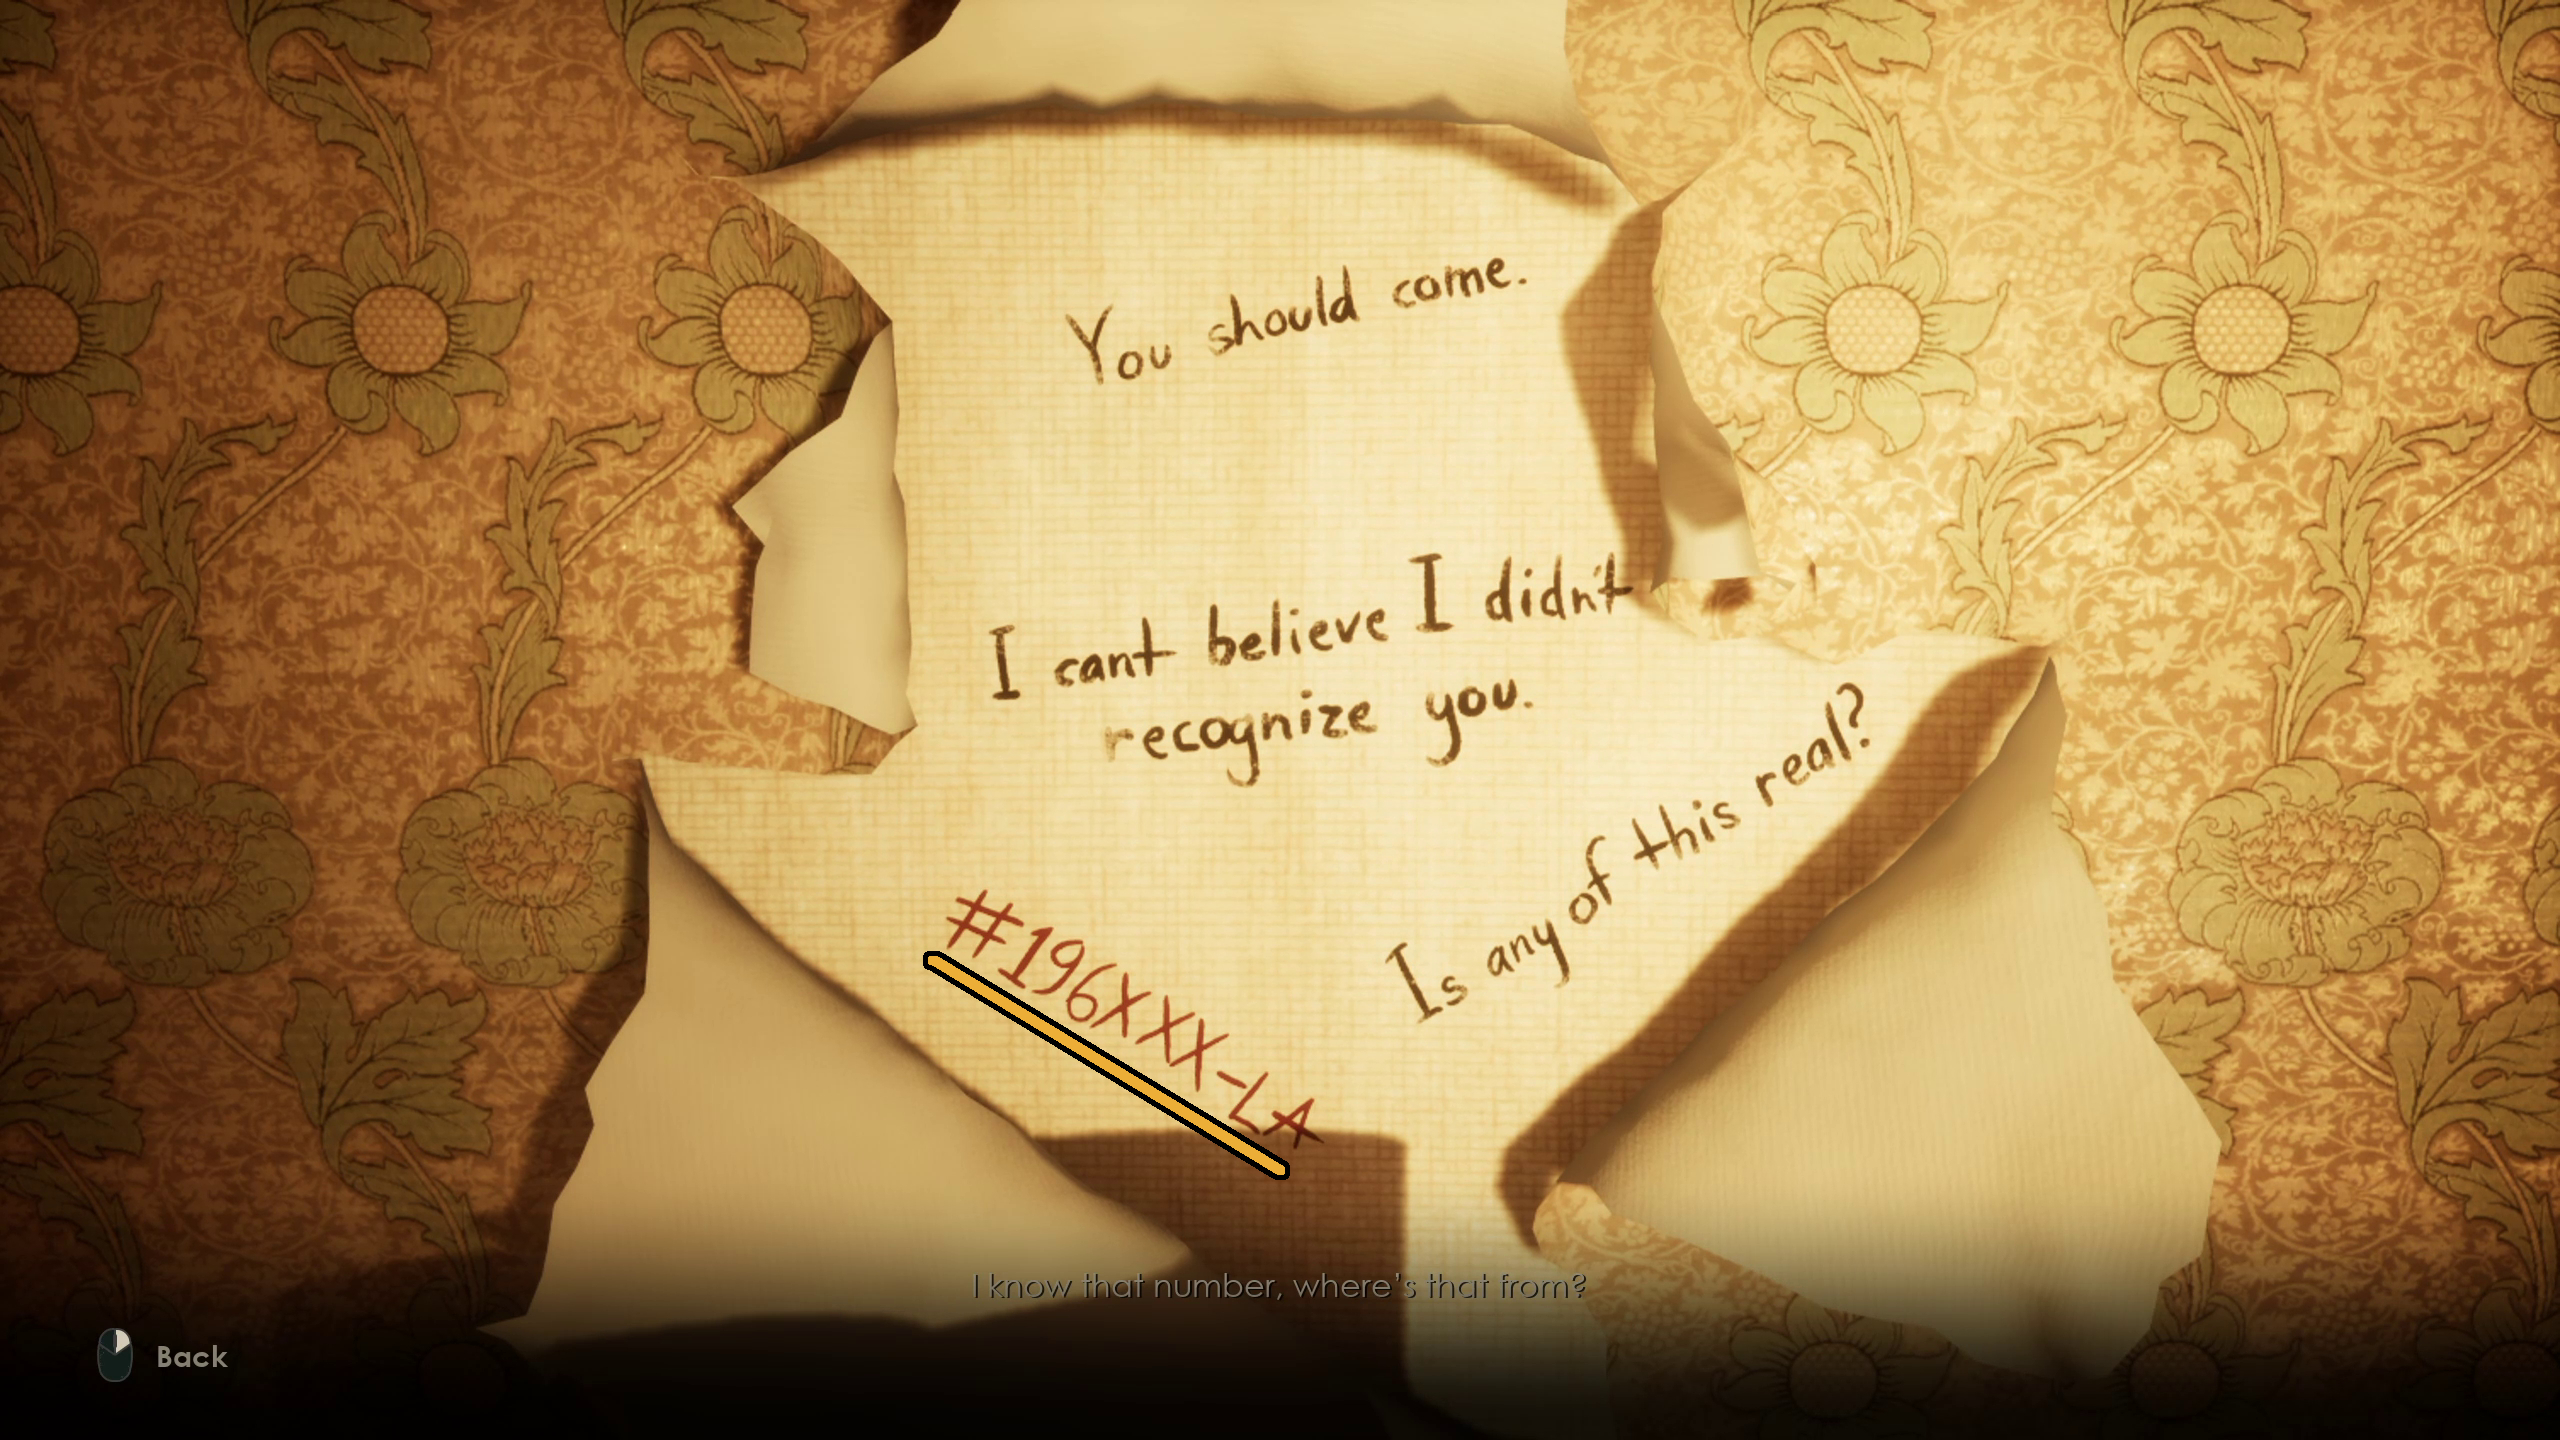
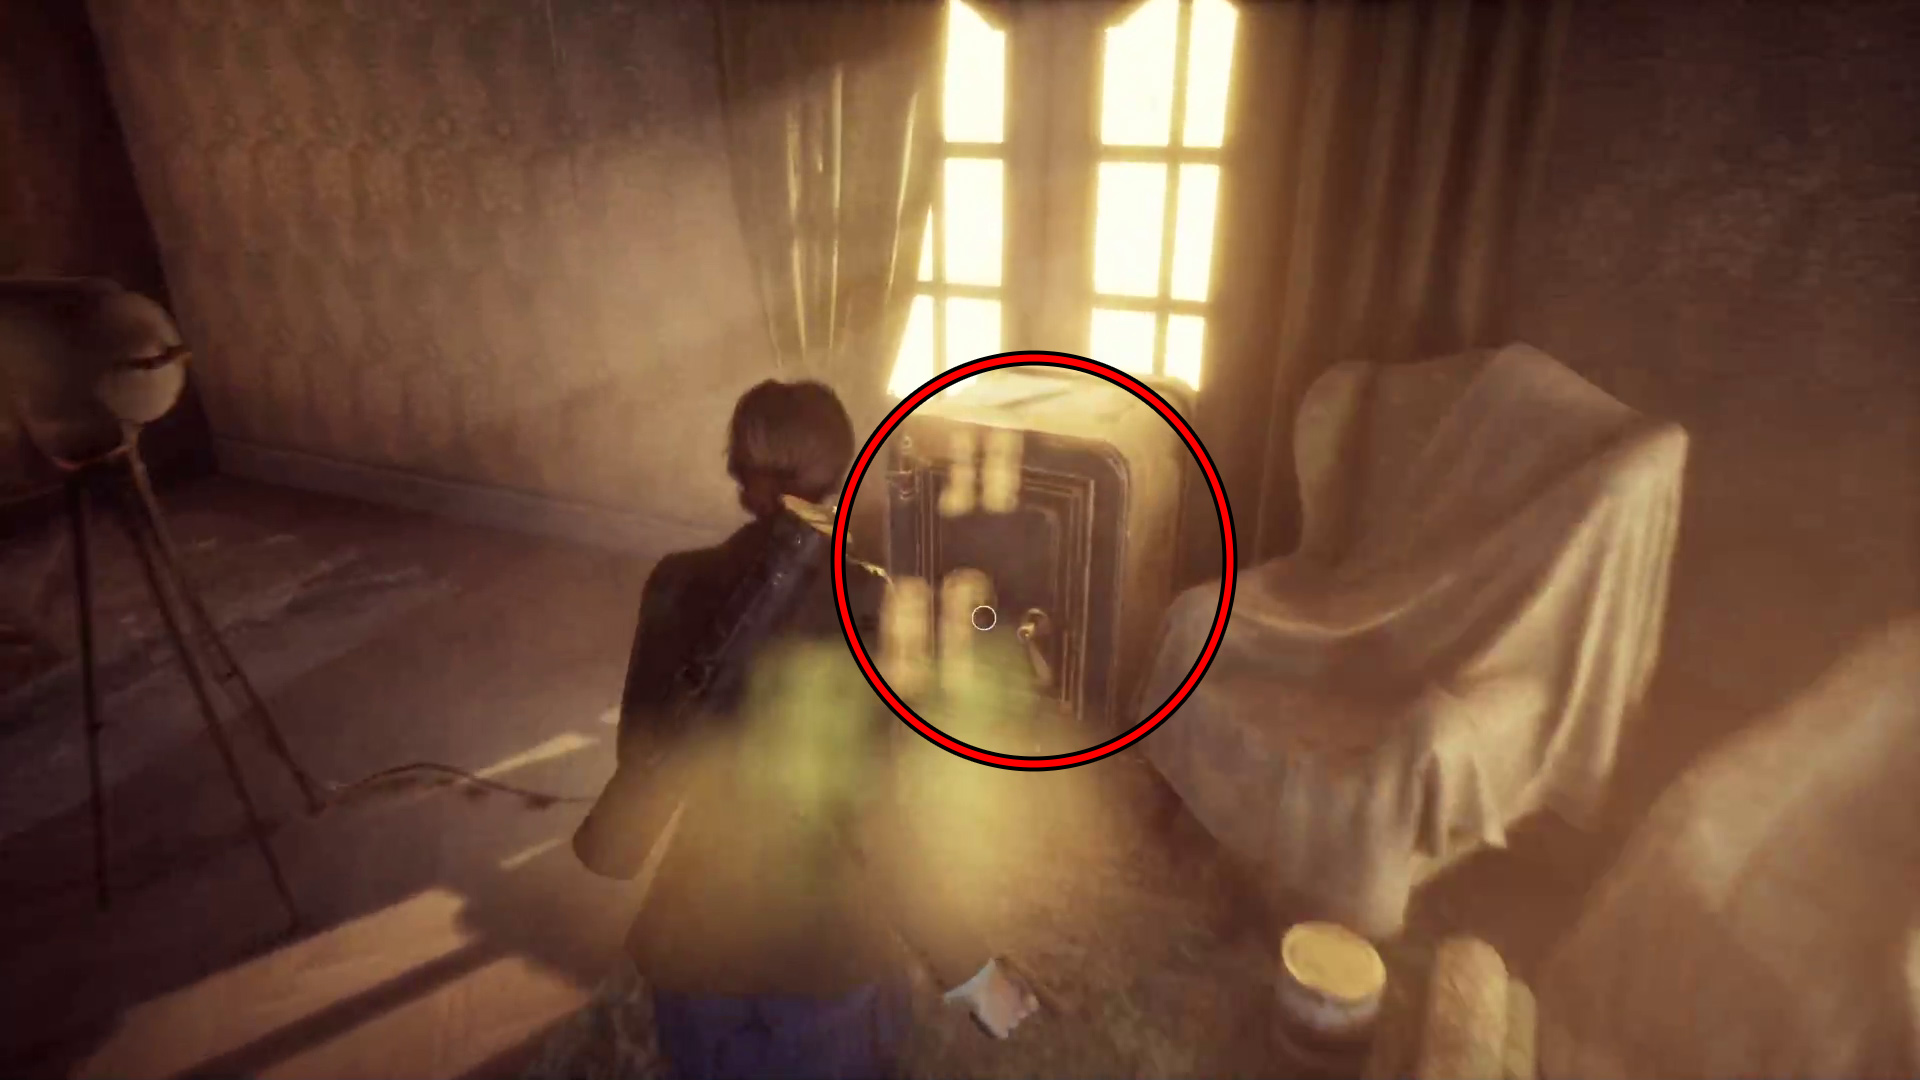
In the Empty Room, the wallpaper will be peeling off the wall. Tearing it open will reveal a series of cryptic messages, while you will need to use to somehow figure out what’s going on (Image 66). Somehow, you’ll also need to open the safe in this room (Image 67).
Image 66Image 67
The writing on the wall seems very personal to you. Maybe you can find something in your own belongings?
You will notice that, amidst the messages, there is one that seems to indicate a number: “#196XXX-LA”. The XXX indicates what the safe combo will be, but in order to determine what that actually is, you should open your inventory. The very first item is Edward’s Private Investigator liscense, titled “Edward Carnby, P.I.” It’s number is “#196694-LA.”
By filling in the gaps, you can determine that the safe combo is 6 – 9 – 4 (left, right, left). This will give you the PIcayune coin.
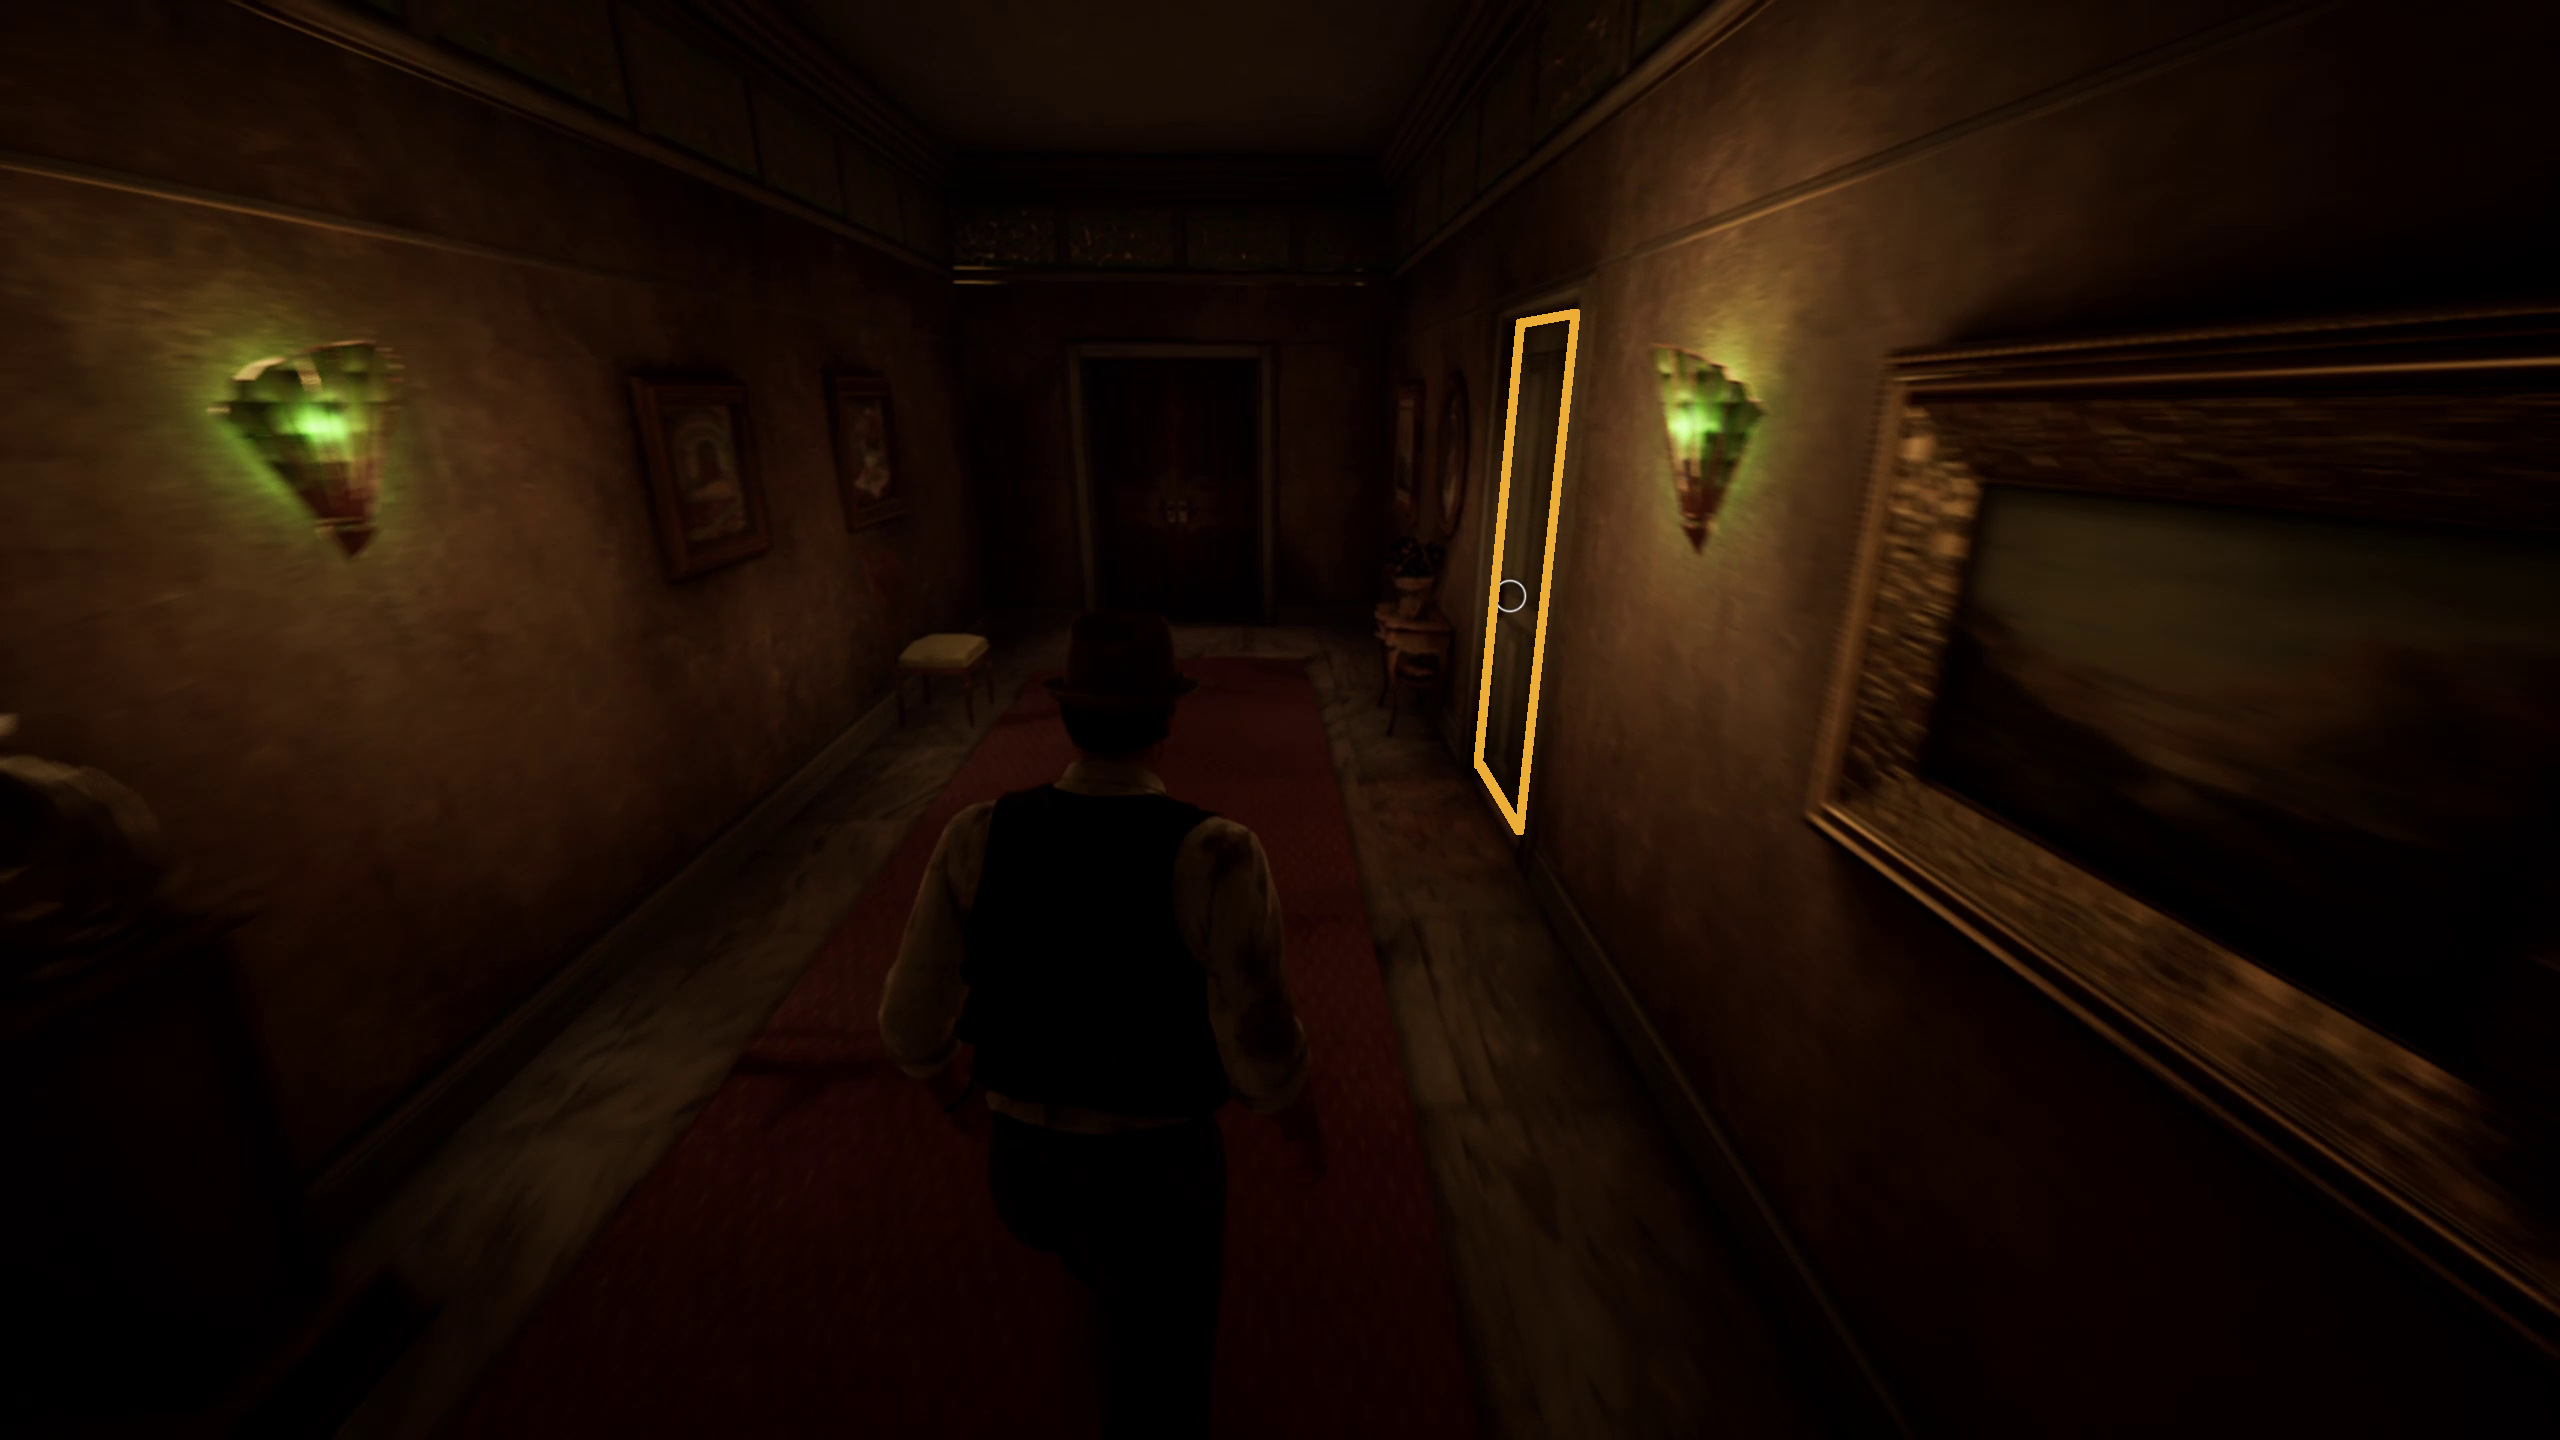
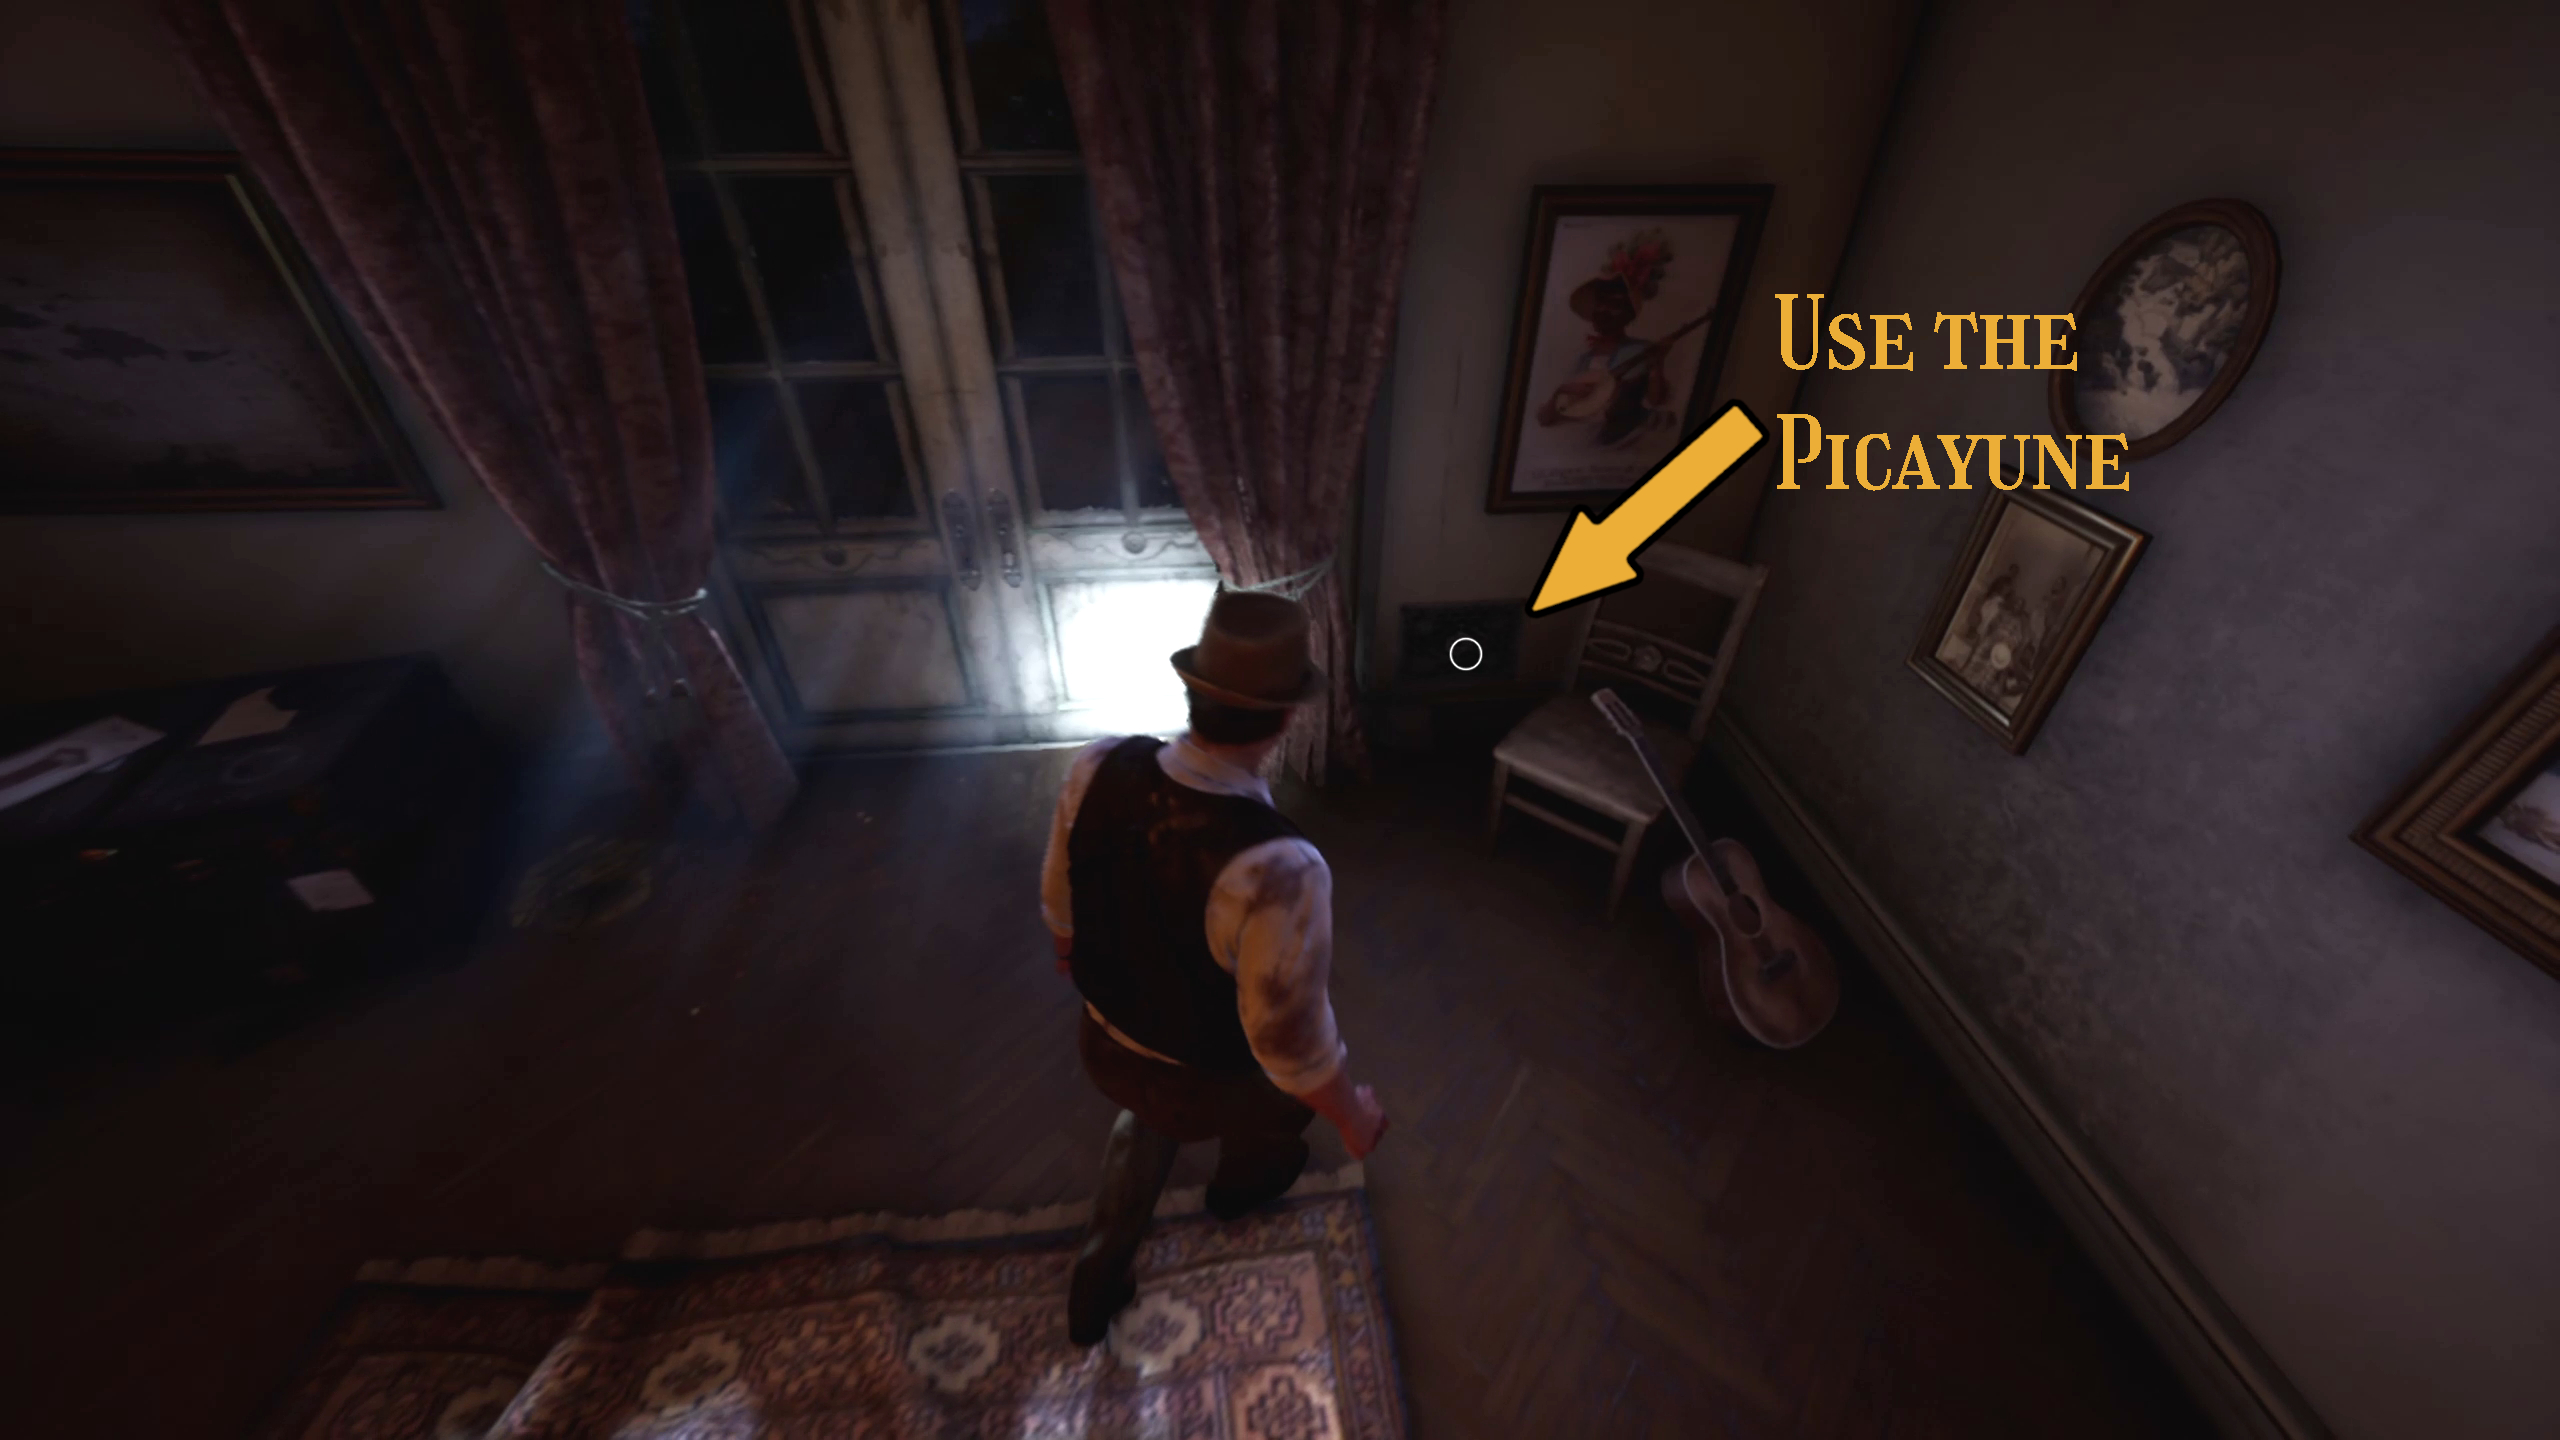
Using the item you retrieve from the safe, you should take it back to MacCafferty’s room at the beginning of the 1st Floor Hallway (Image 68). Go to the back corner of the room, and use the Picayune coin to unscrew the vent cover (Image 69). This will give you “The Missing Drawing”, but all will not be as it seems after this…
Image 68Image 69
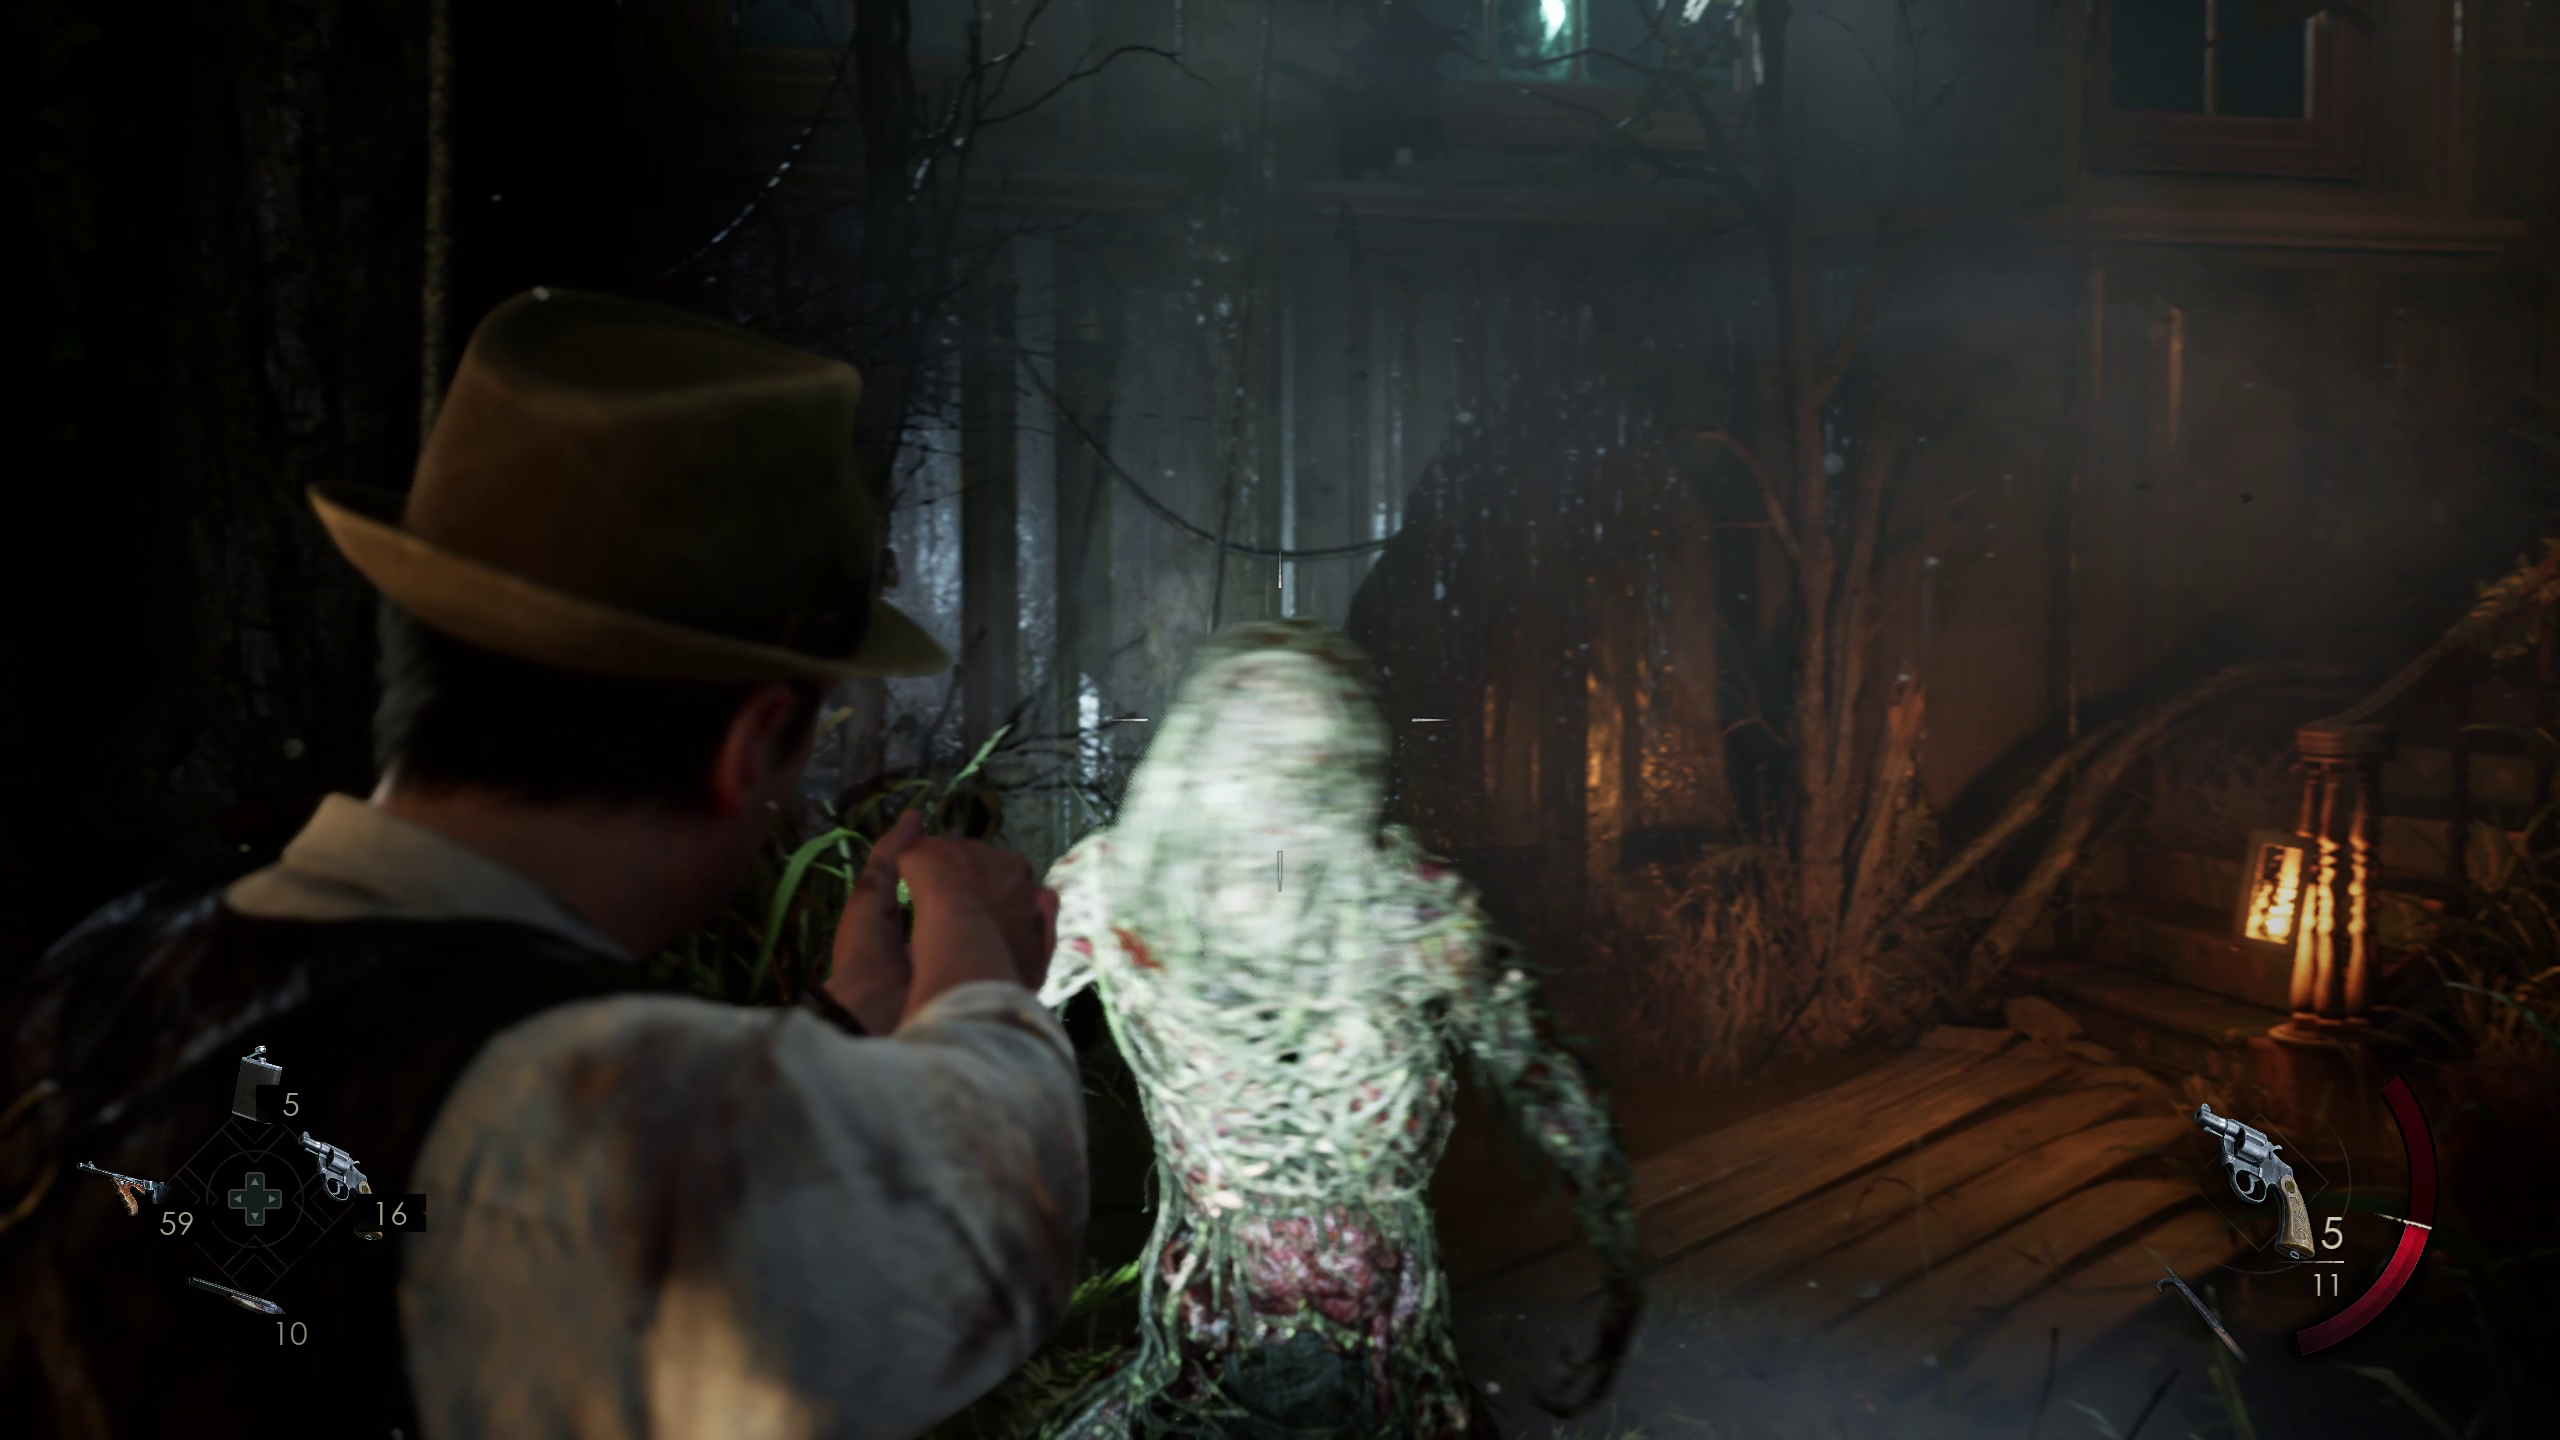
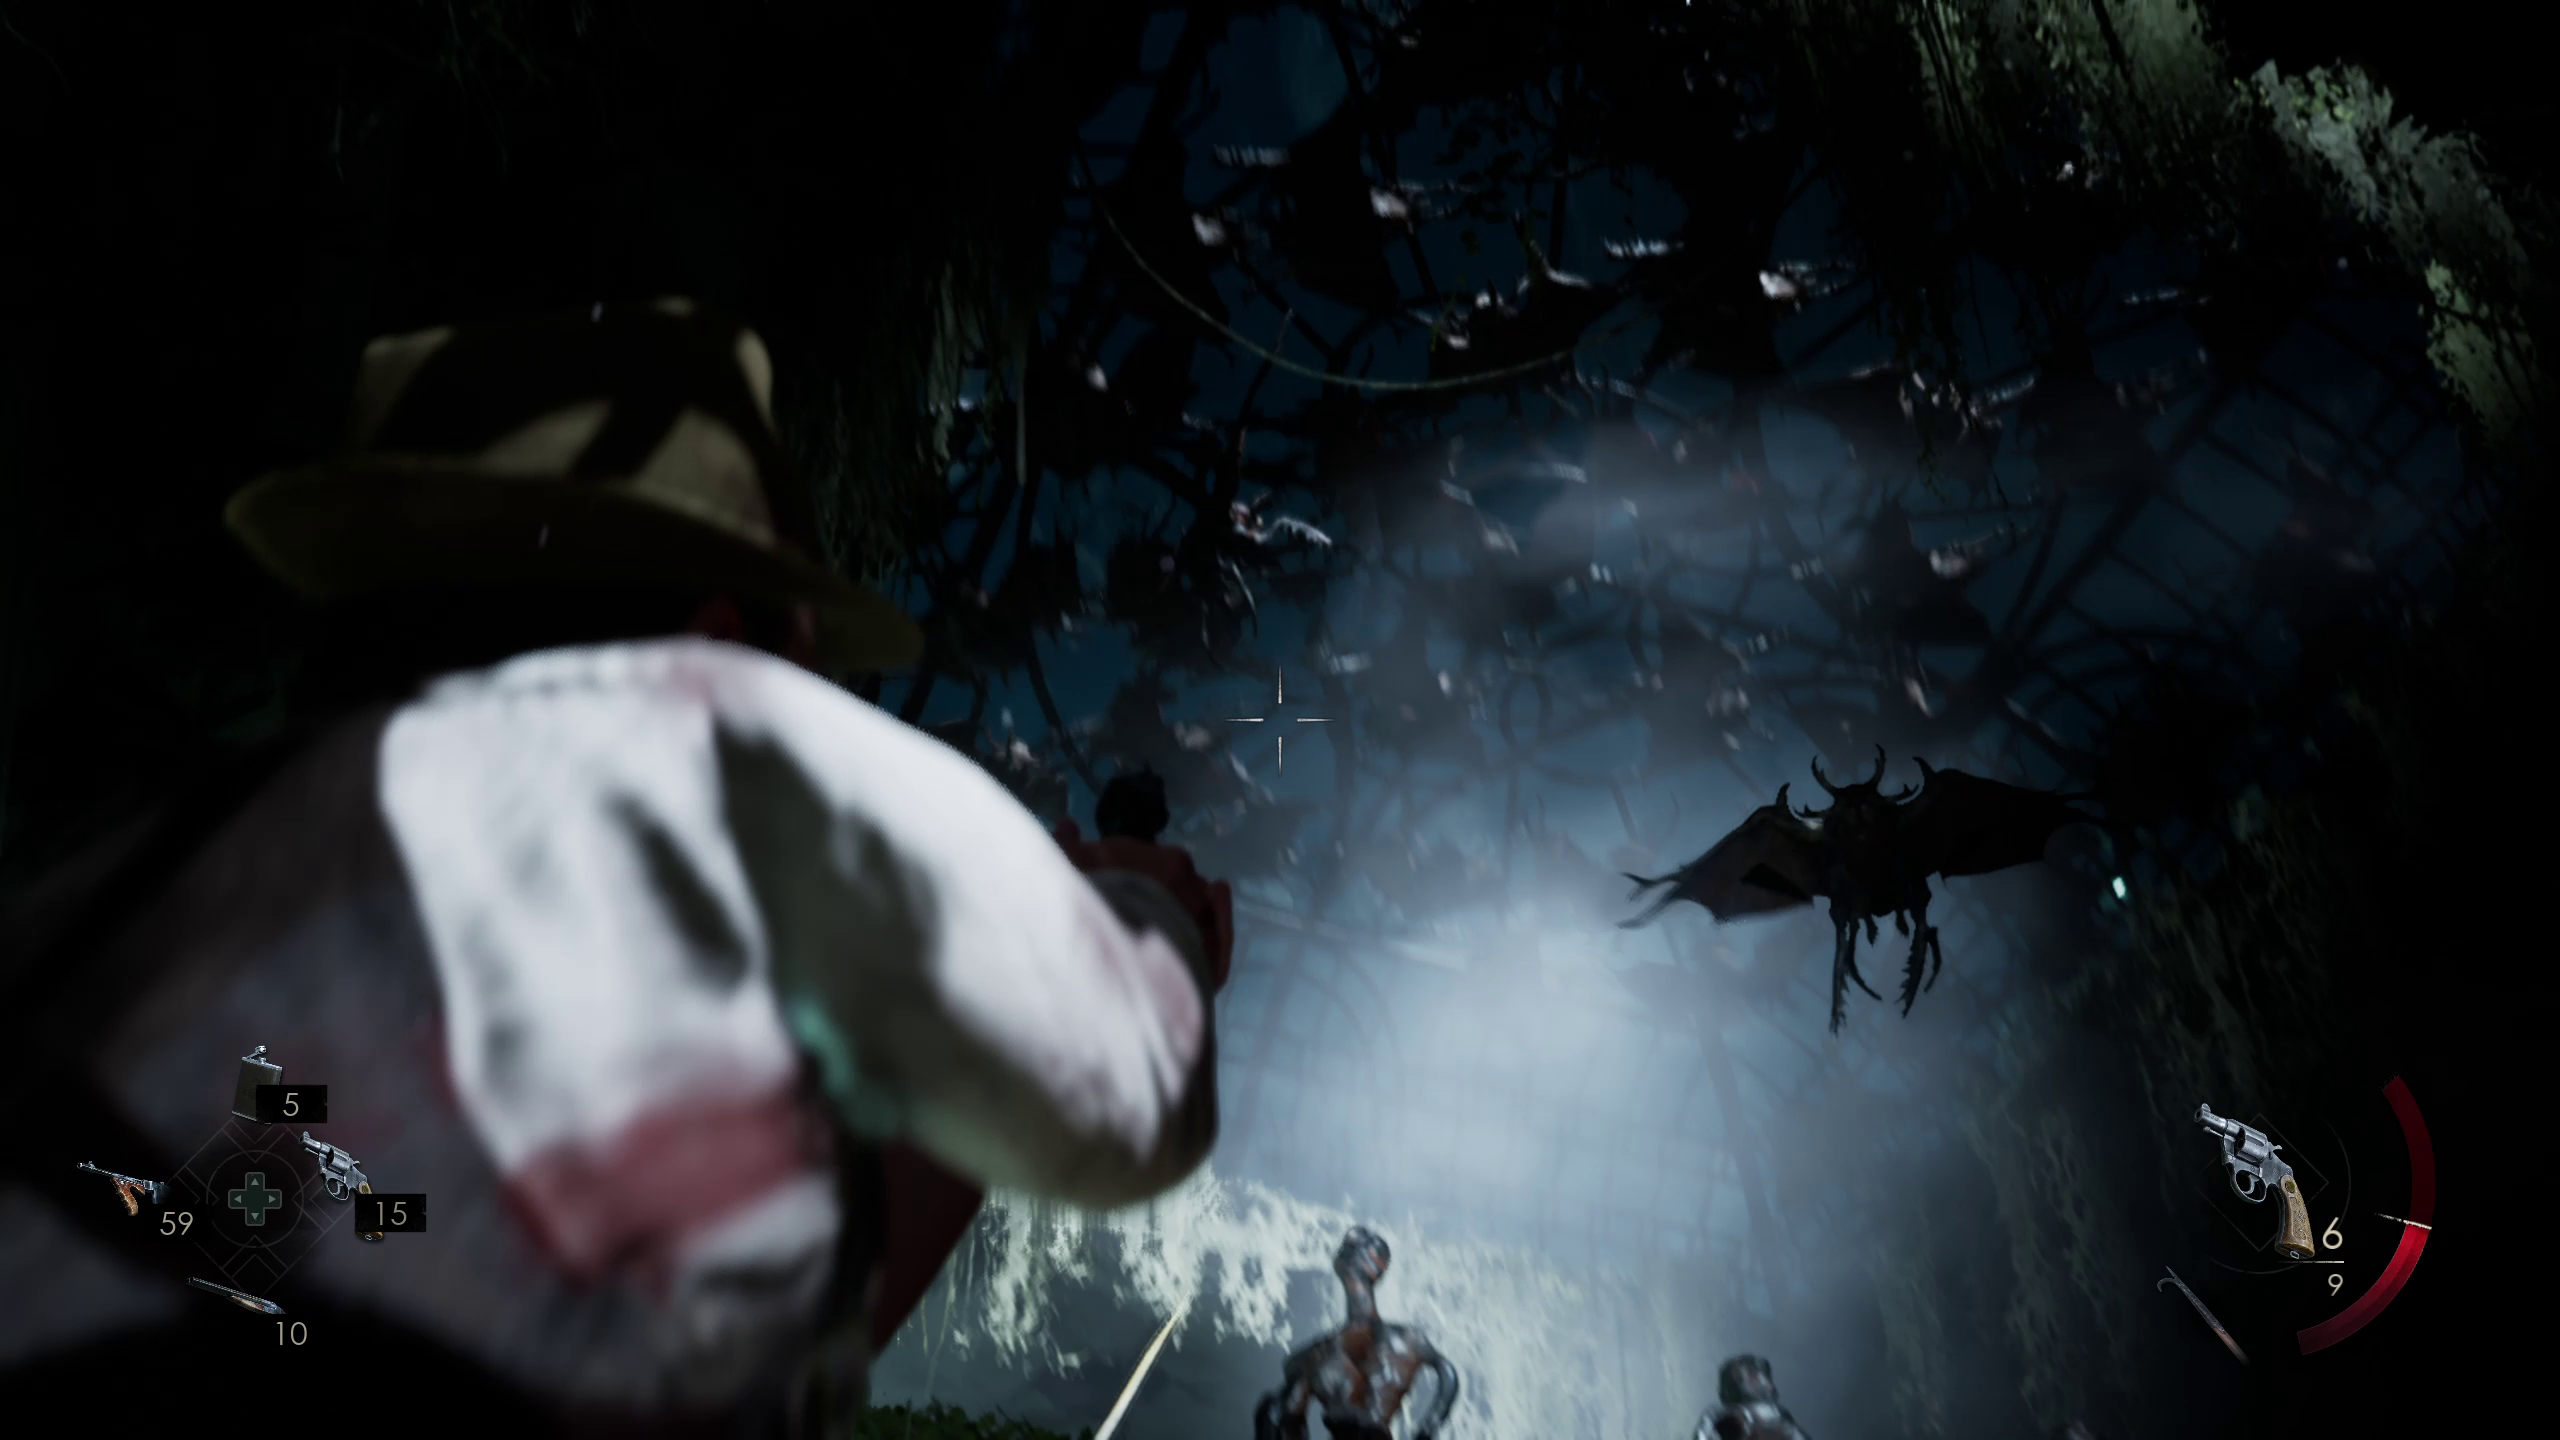
Once you reenter the hall, you will see that Derceto has changed once again. The Stair Hall is now reminiscent of a bayou (Image 70). You will need to traverse this new environment and head up the stairs, but watch out for the monster on the lower floor (Image 71), as well as the bats that will continuously swarm you after you go up the stairs and to the altered Gallery (Image 72).
Image 70Image 71Image 72
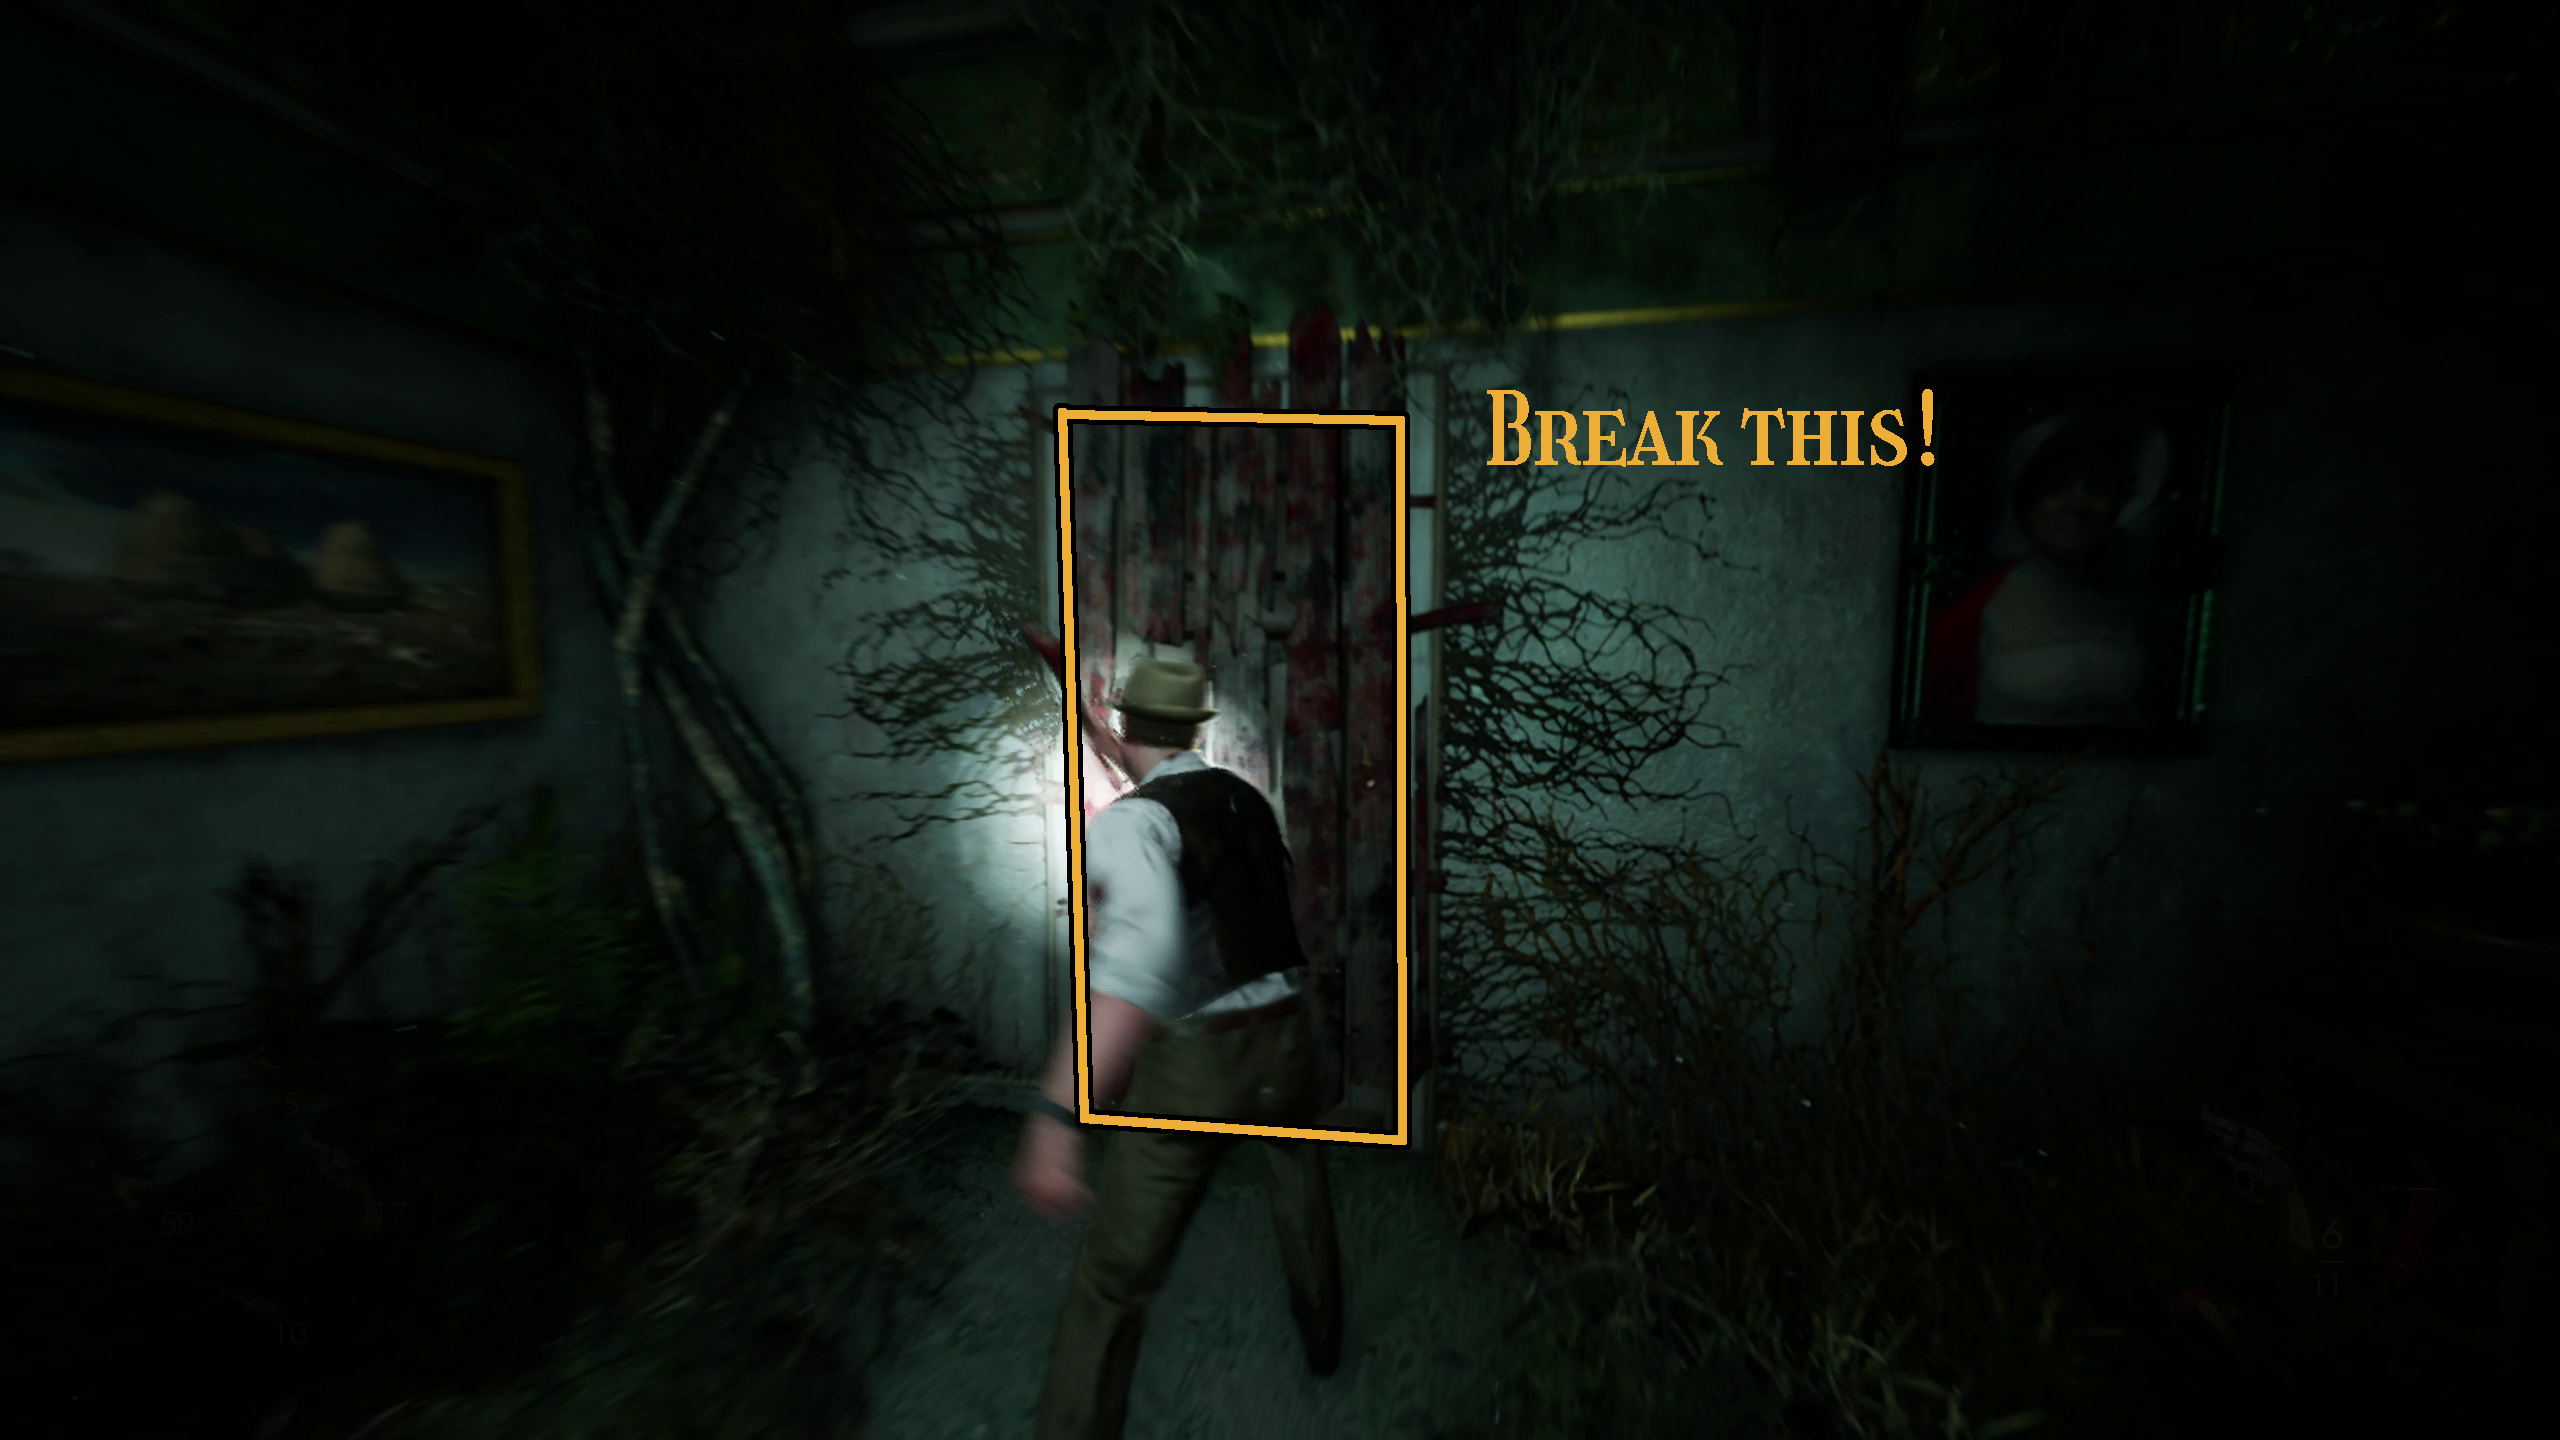
Once you are up top, you will need to break the boards blocking your way to the Sitting Room while being swarmed by bats (Image 73). Thankfully, there are plenty of melee weapons around. Once you’ve broken the boards, you’ll be able to enter the safety of the sitting room, and then you should head into Grace’s Room (Image x) directly to your right in order to complete the next puzzle (Image x).
Image 73Image 74Image 75
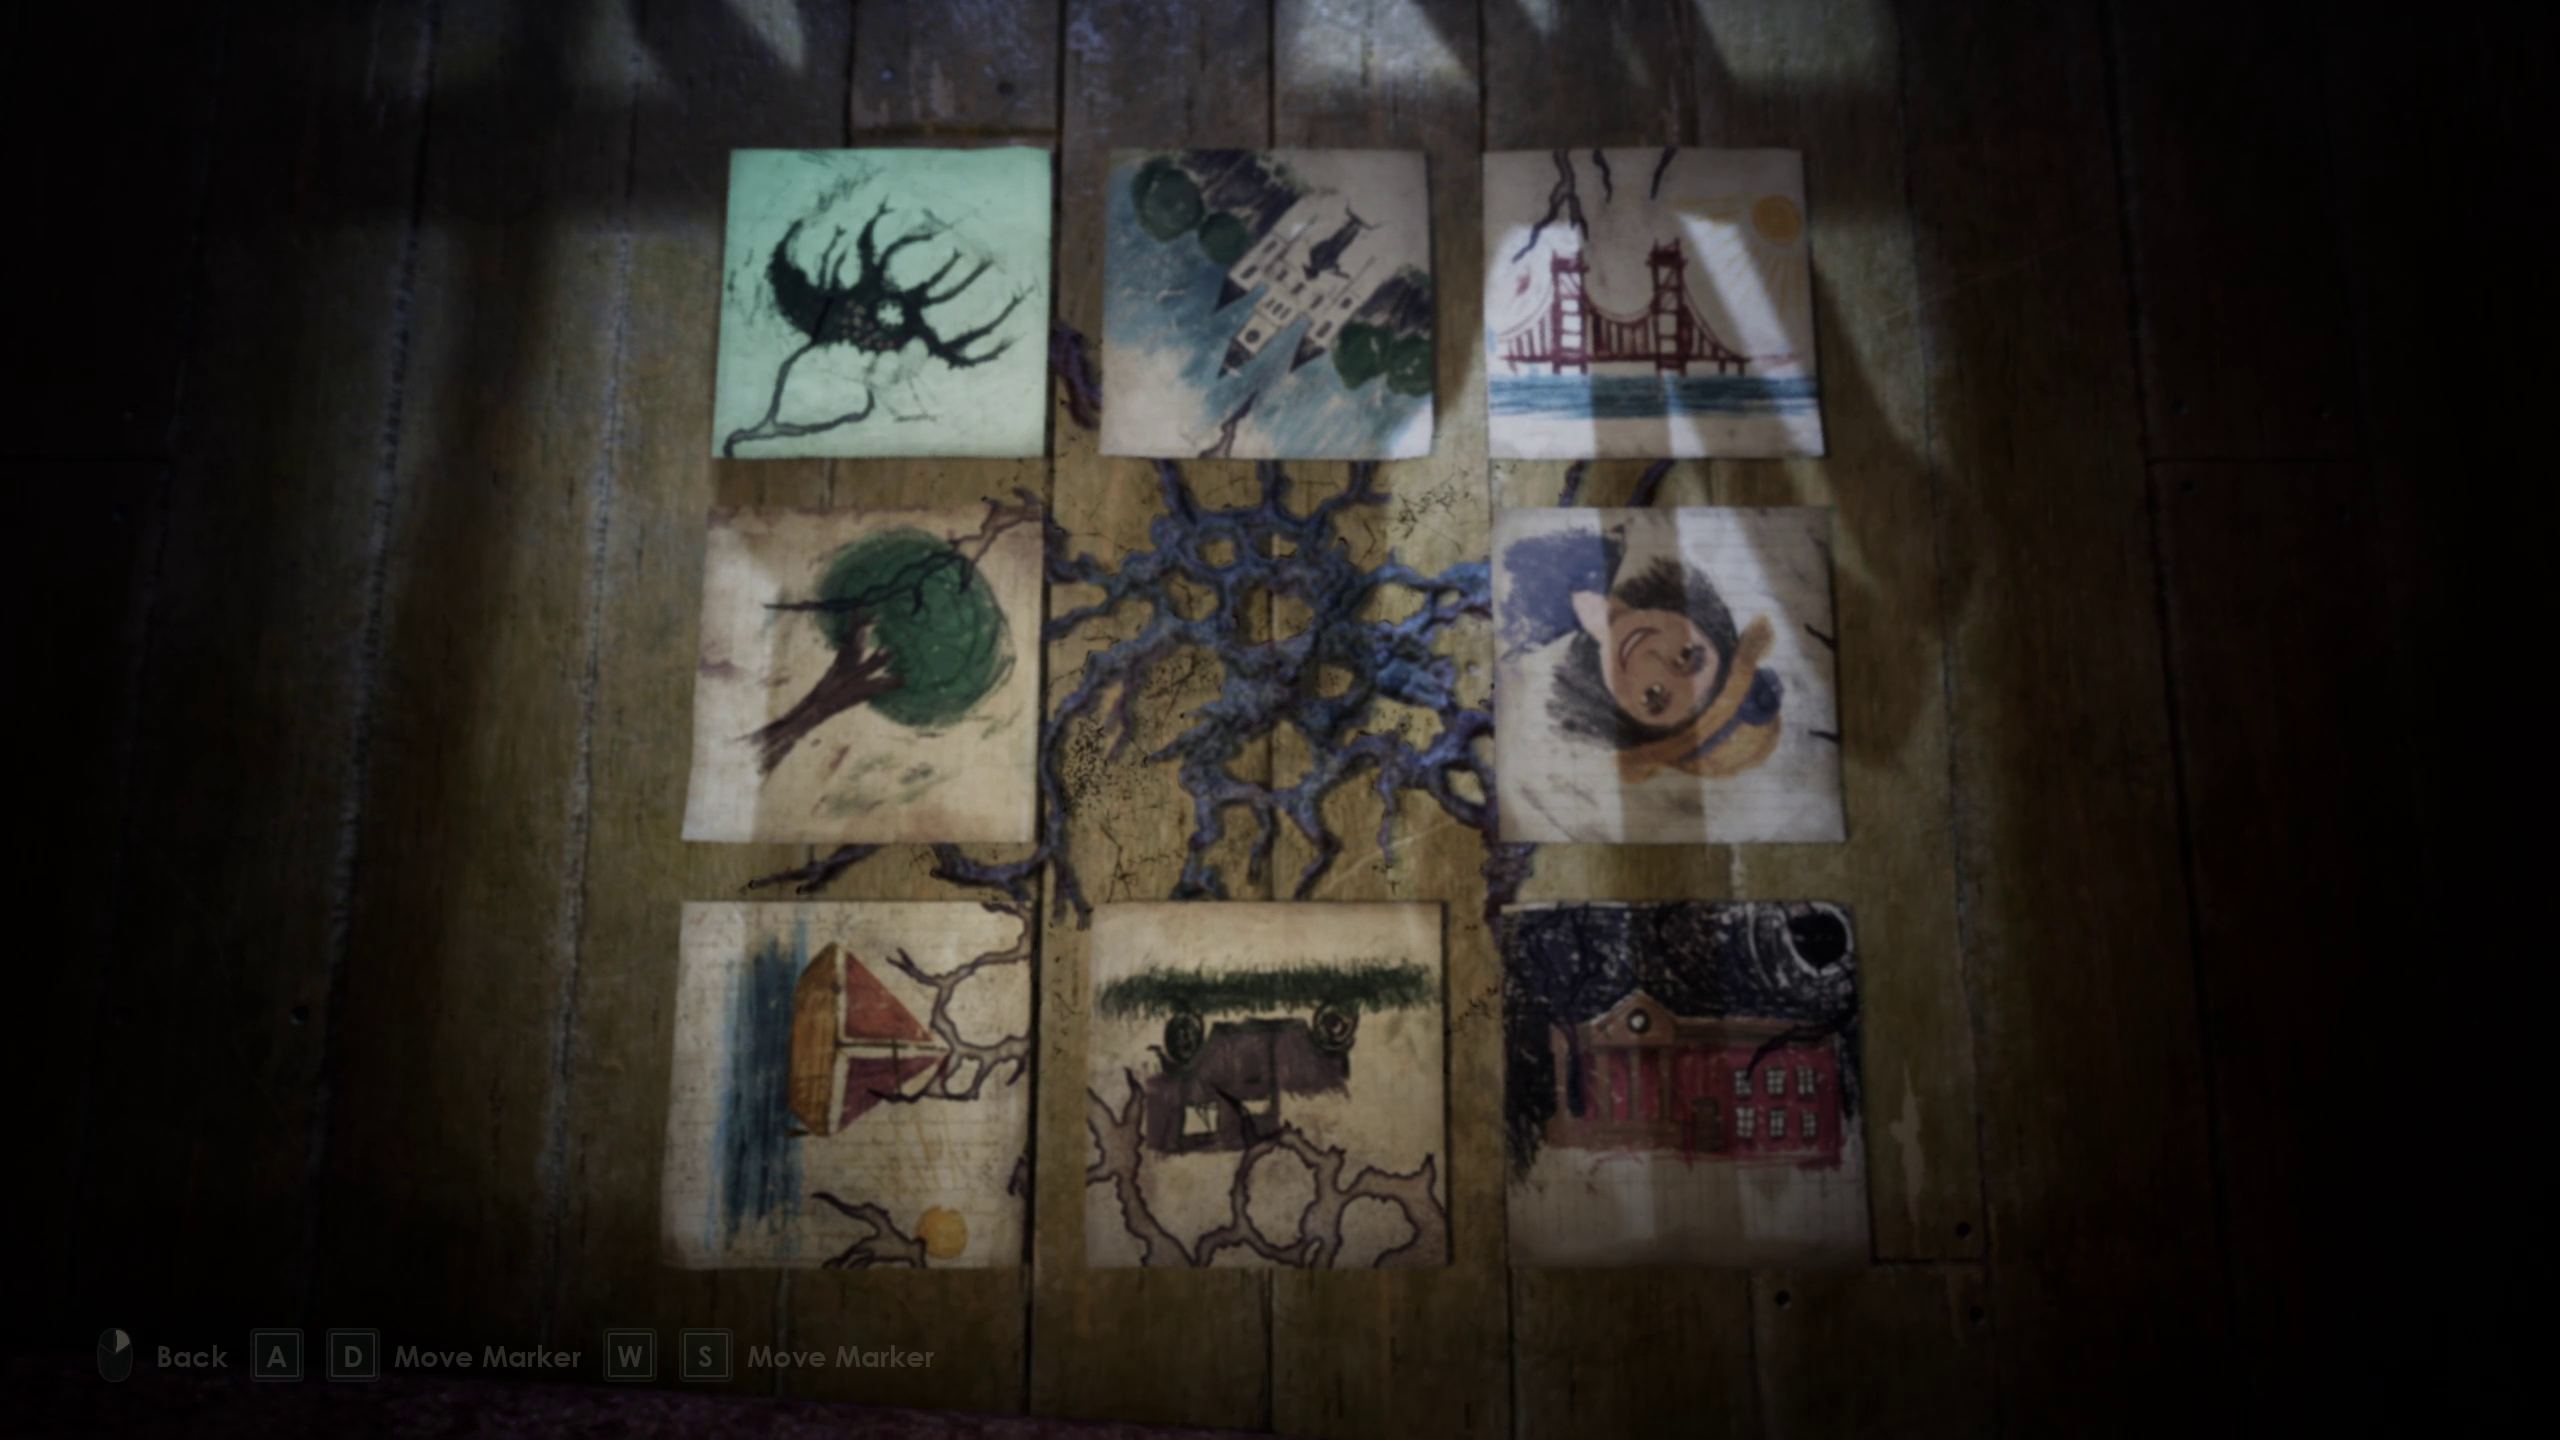
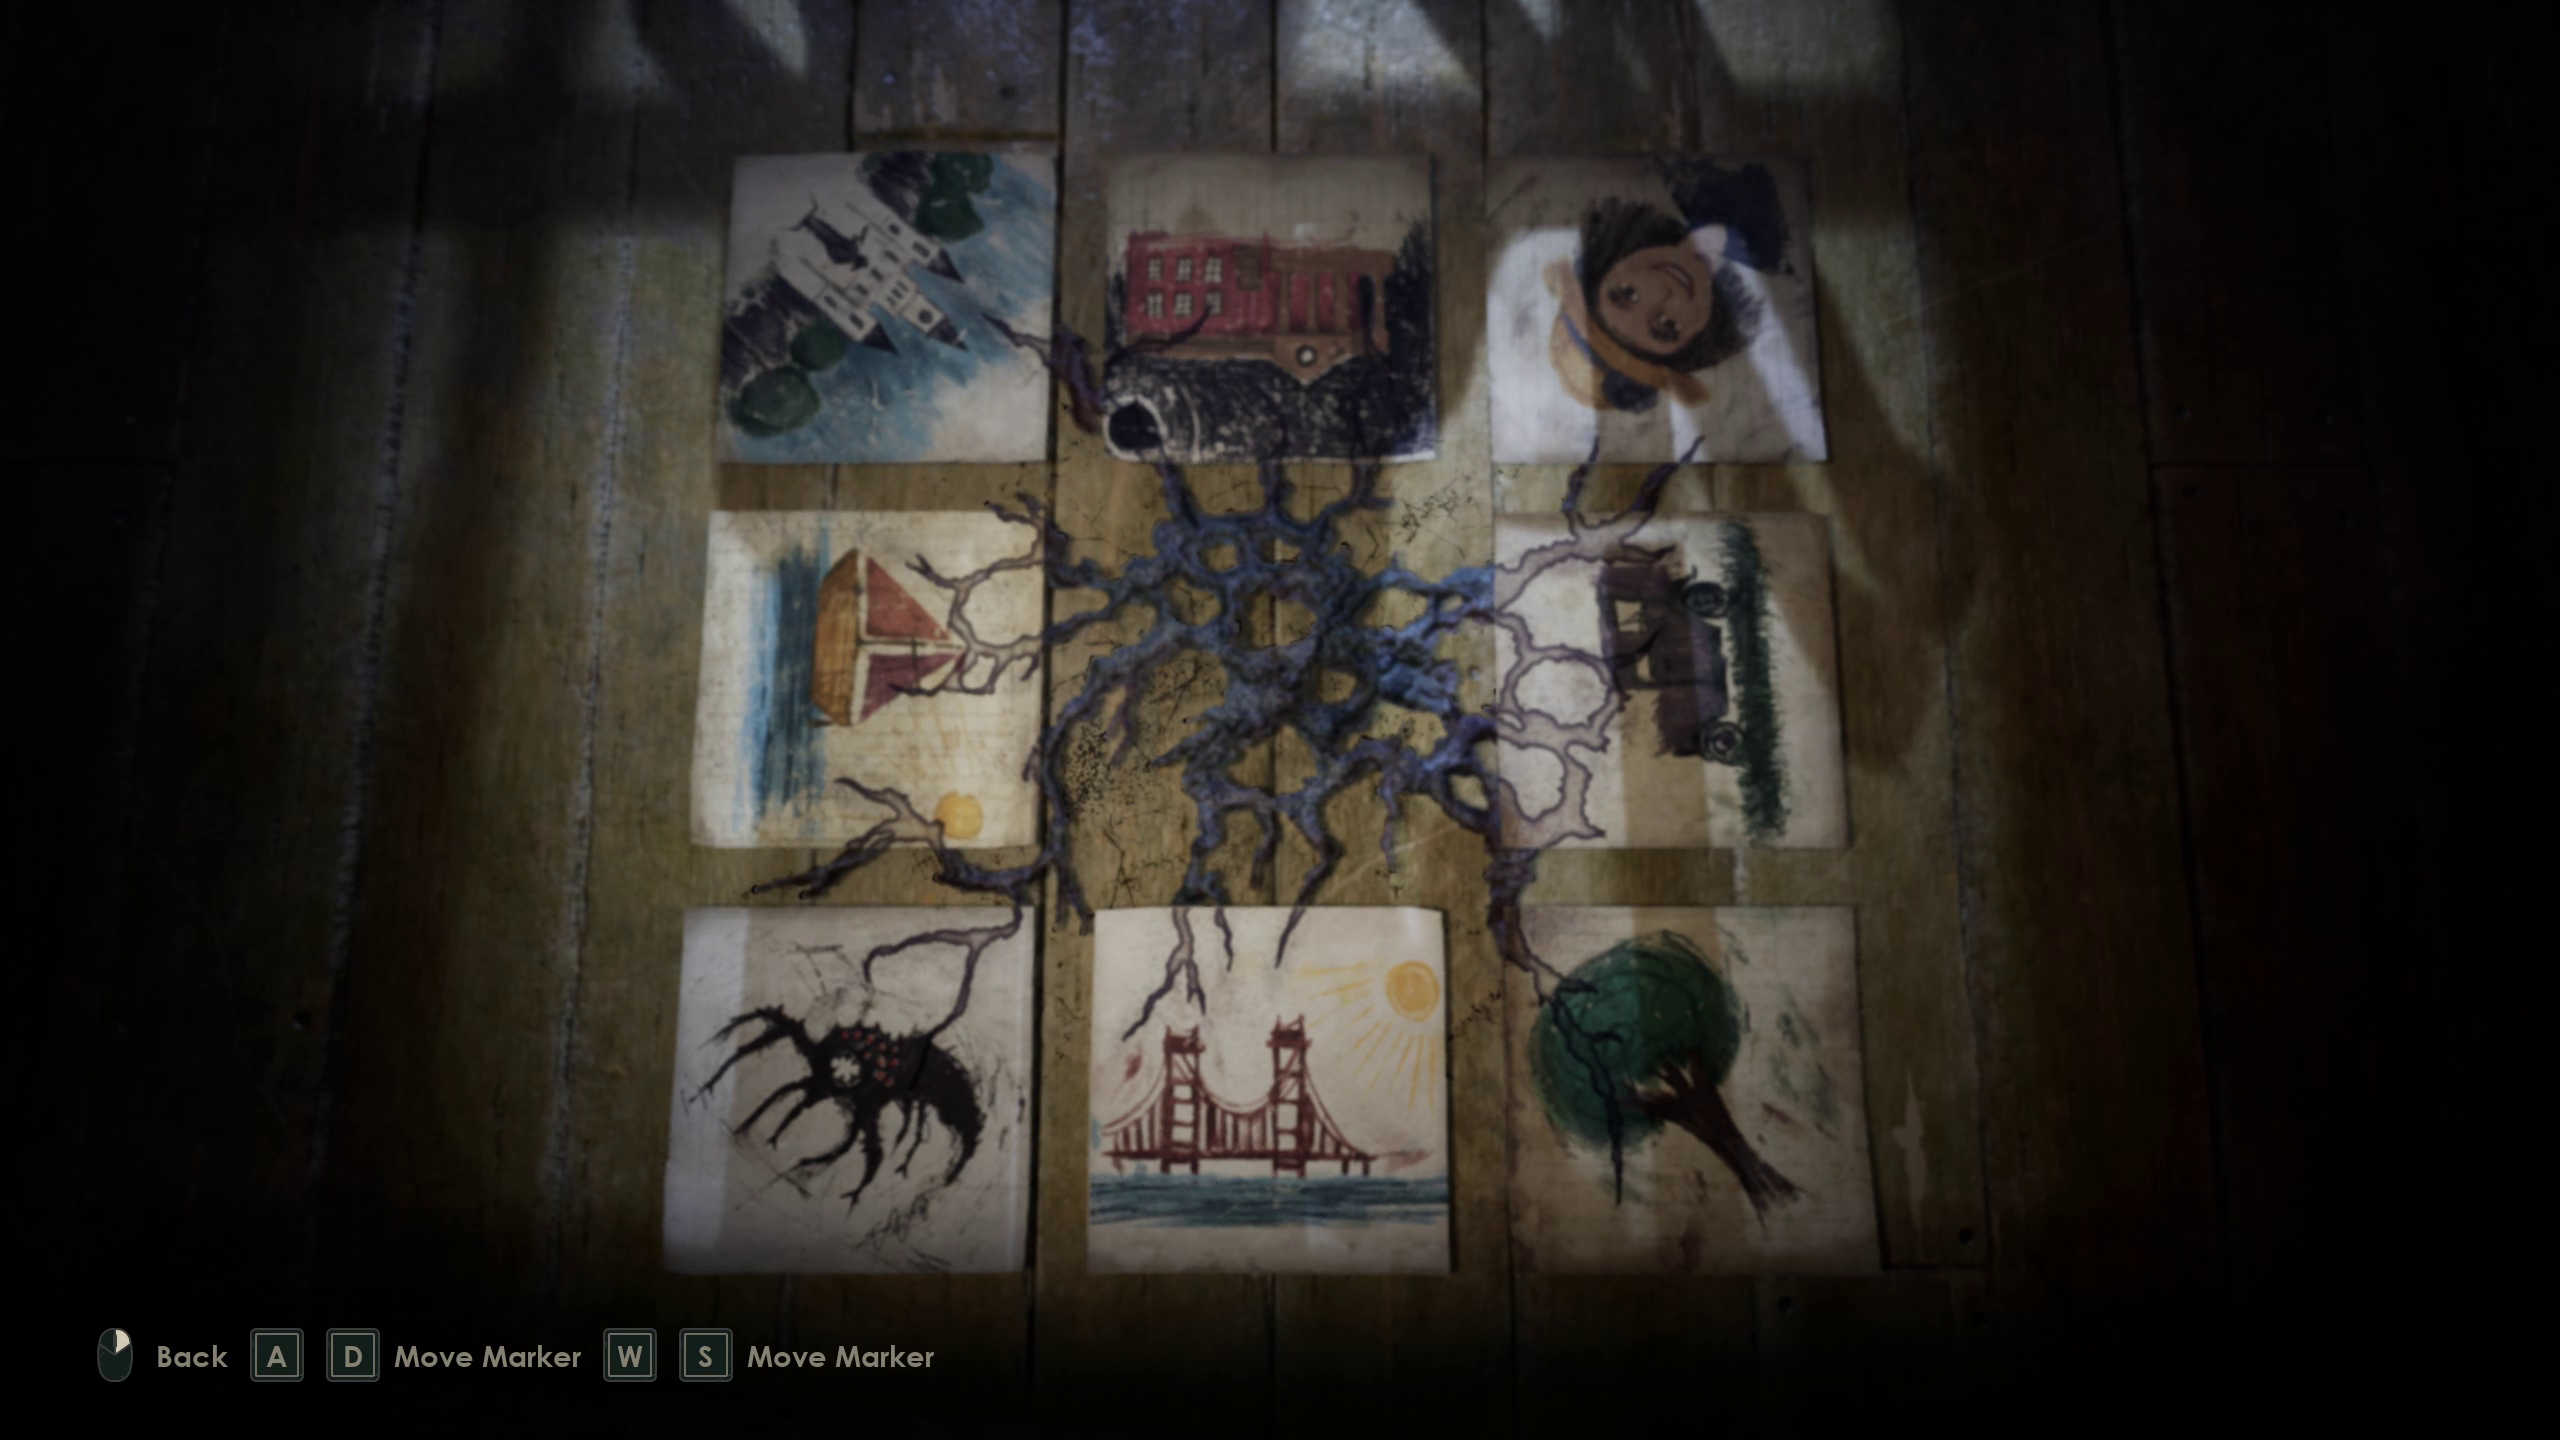
The pictures on the floor in this room must go in some kind of order. So how can you determine where each picture should go around the rot?
You can use the tendrils of dark rot in order to properly line up the drawings. The tendrils are pretty exact matches, and you can tell on most images whether they belong on the corners or the side of the rot. The pictures should end up being arranged as follows, which will cause the Talisman to automatically complete itself to bring you to the next area.
Piece Together the Clues
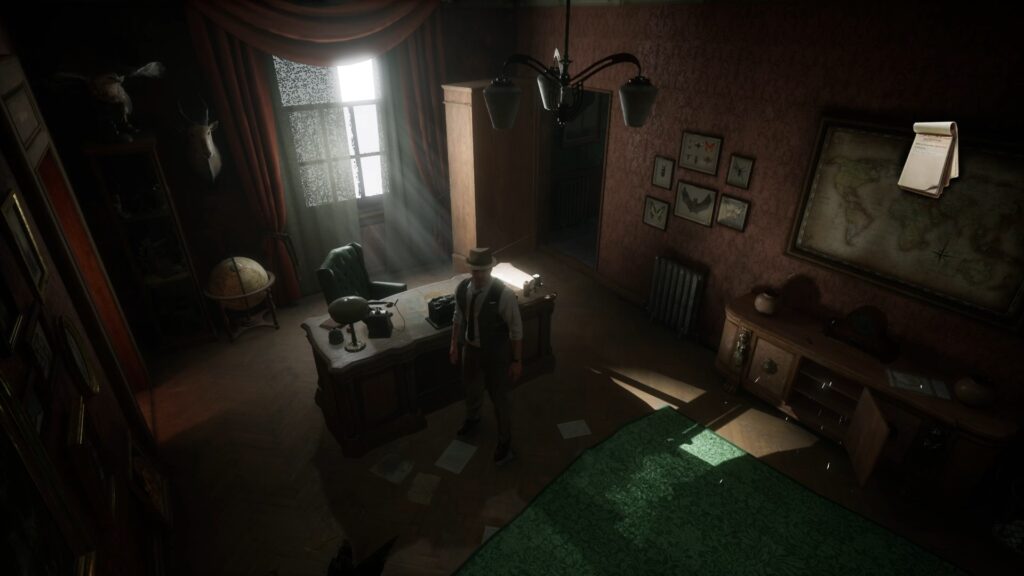
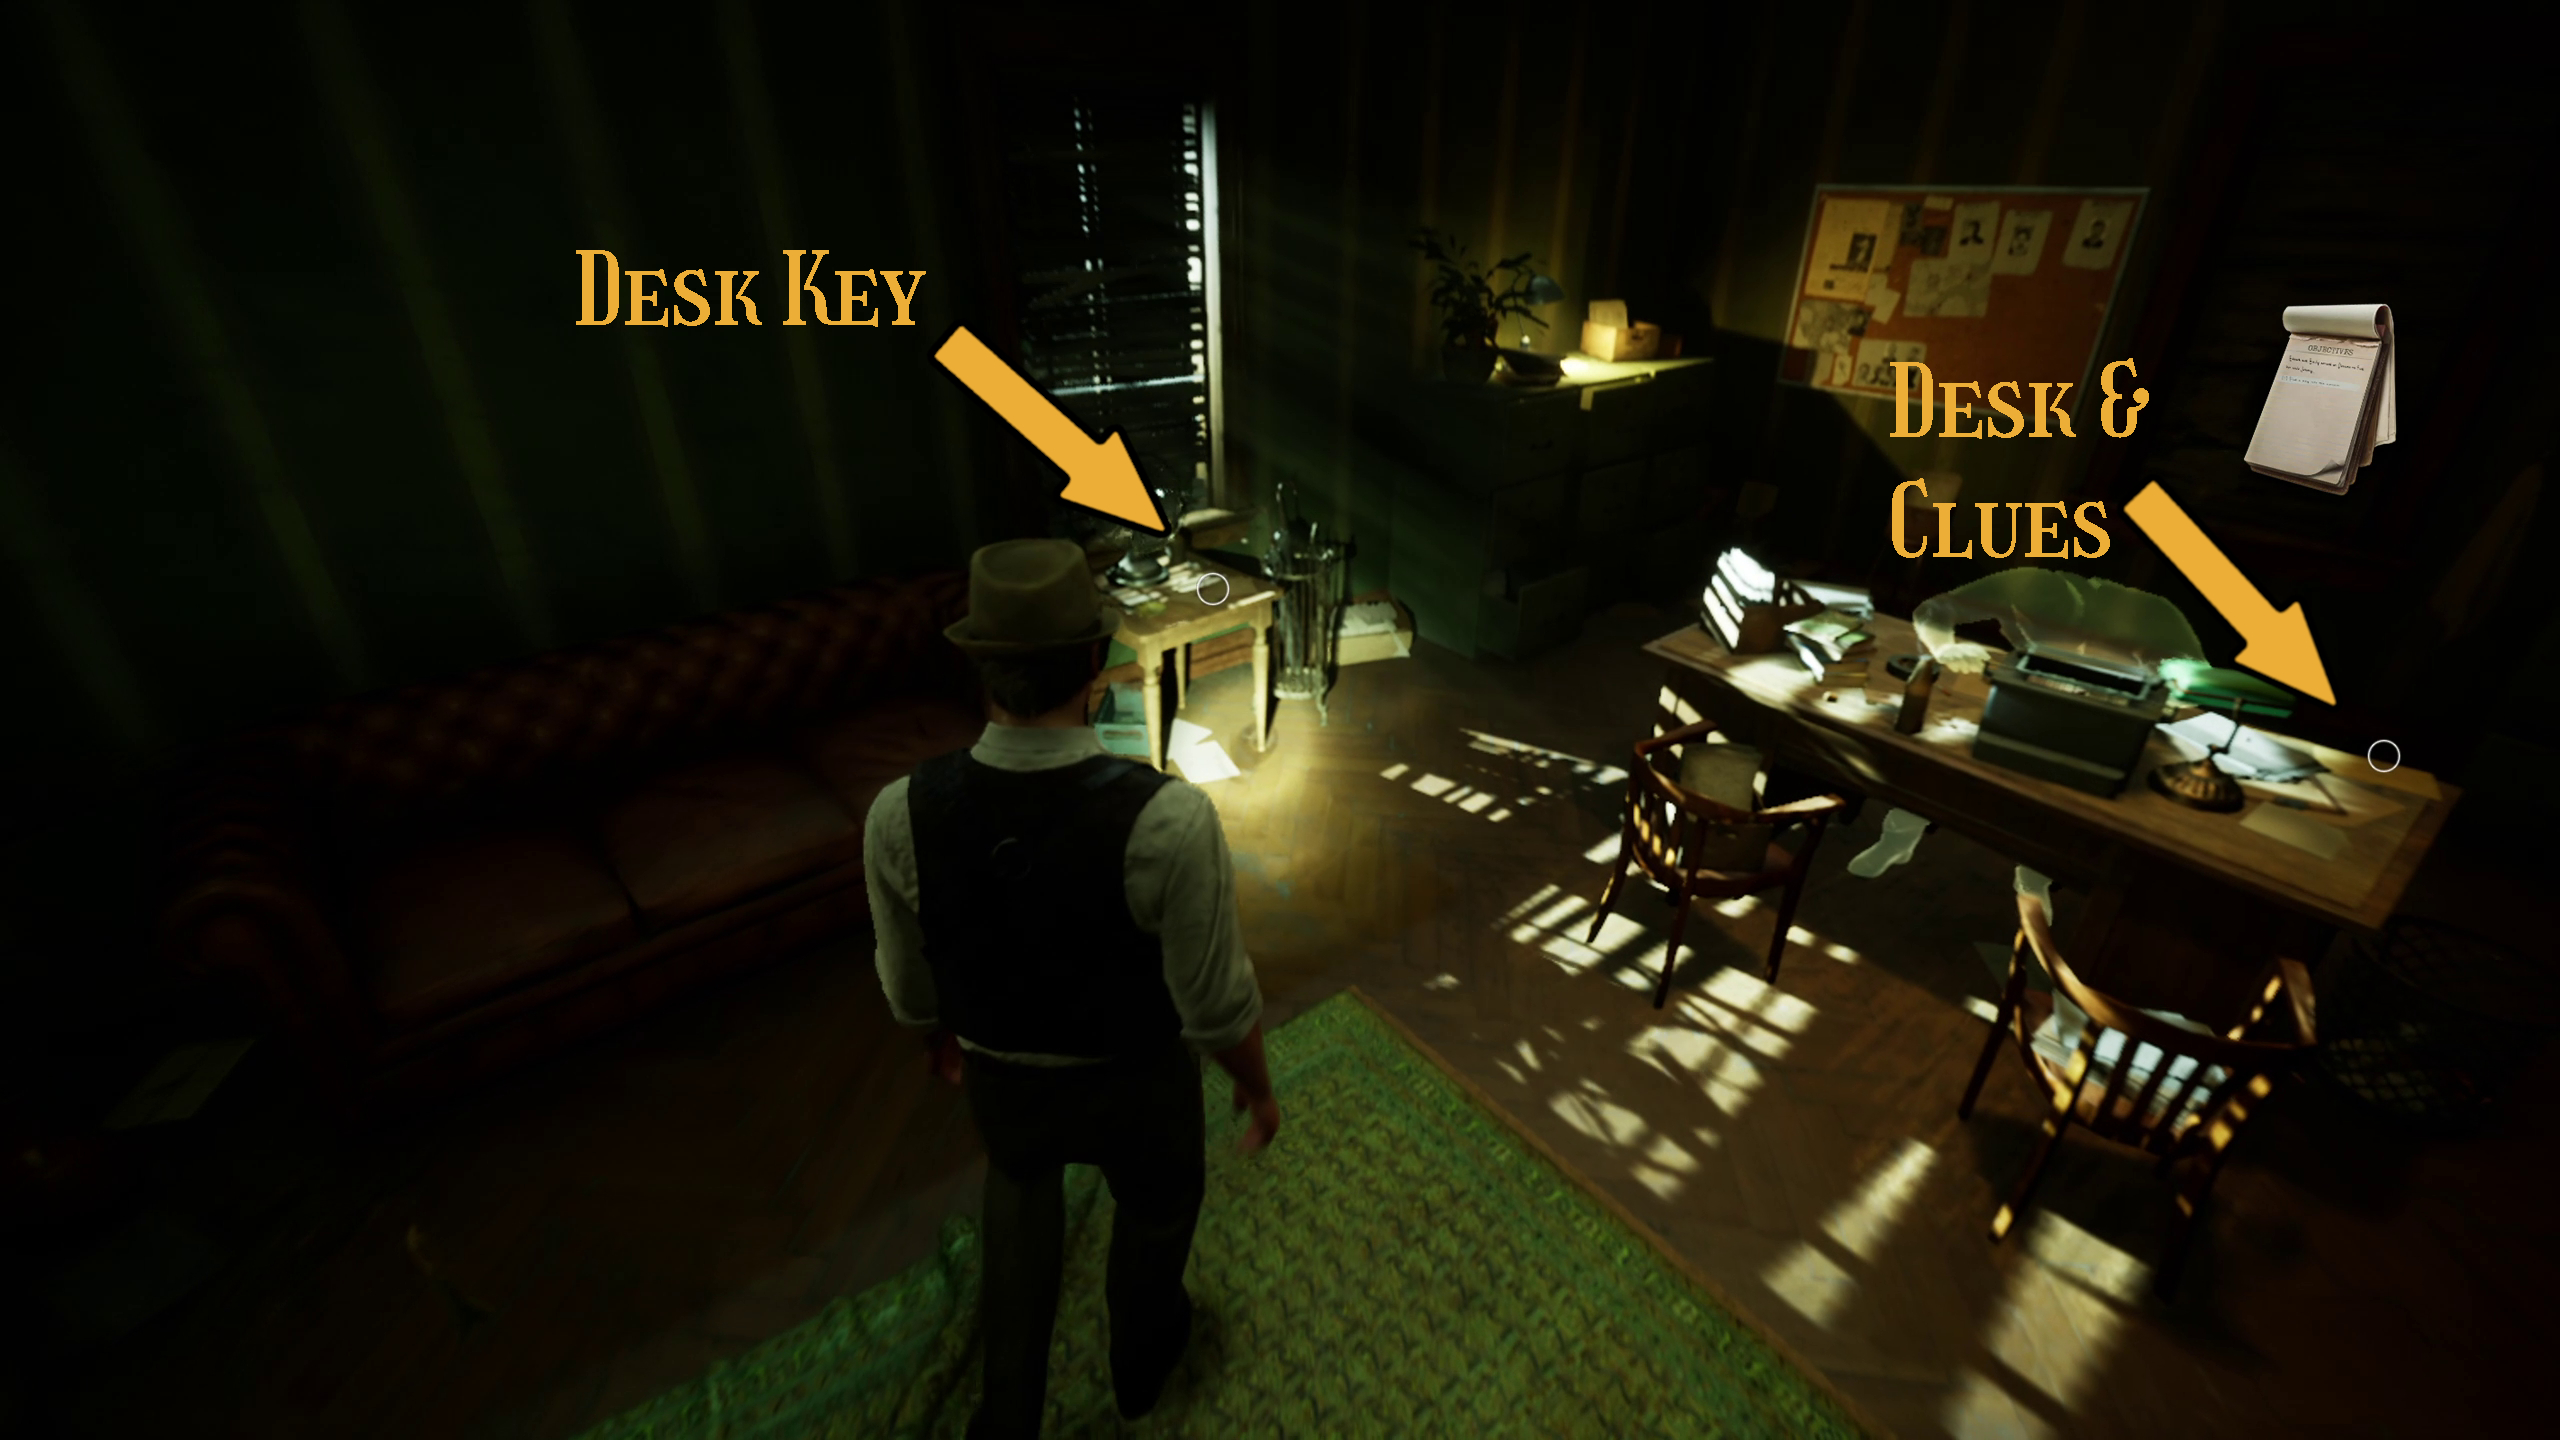
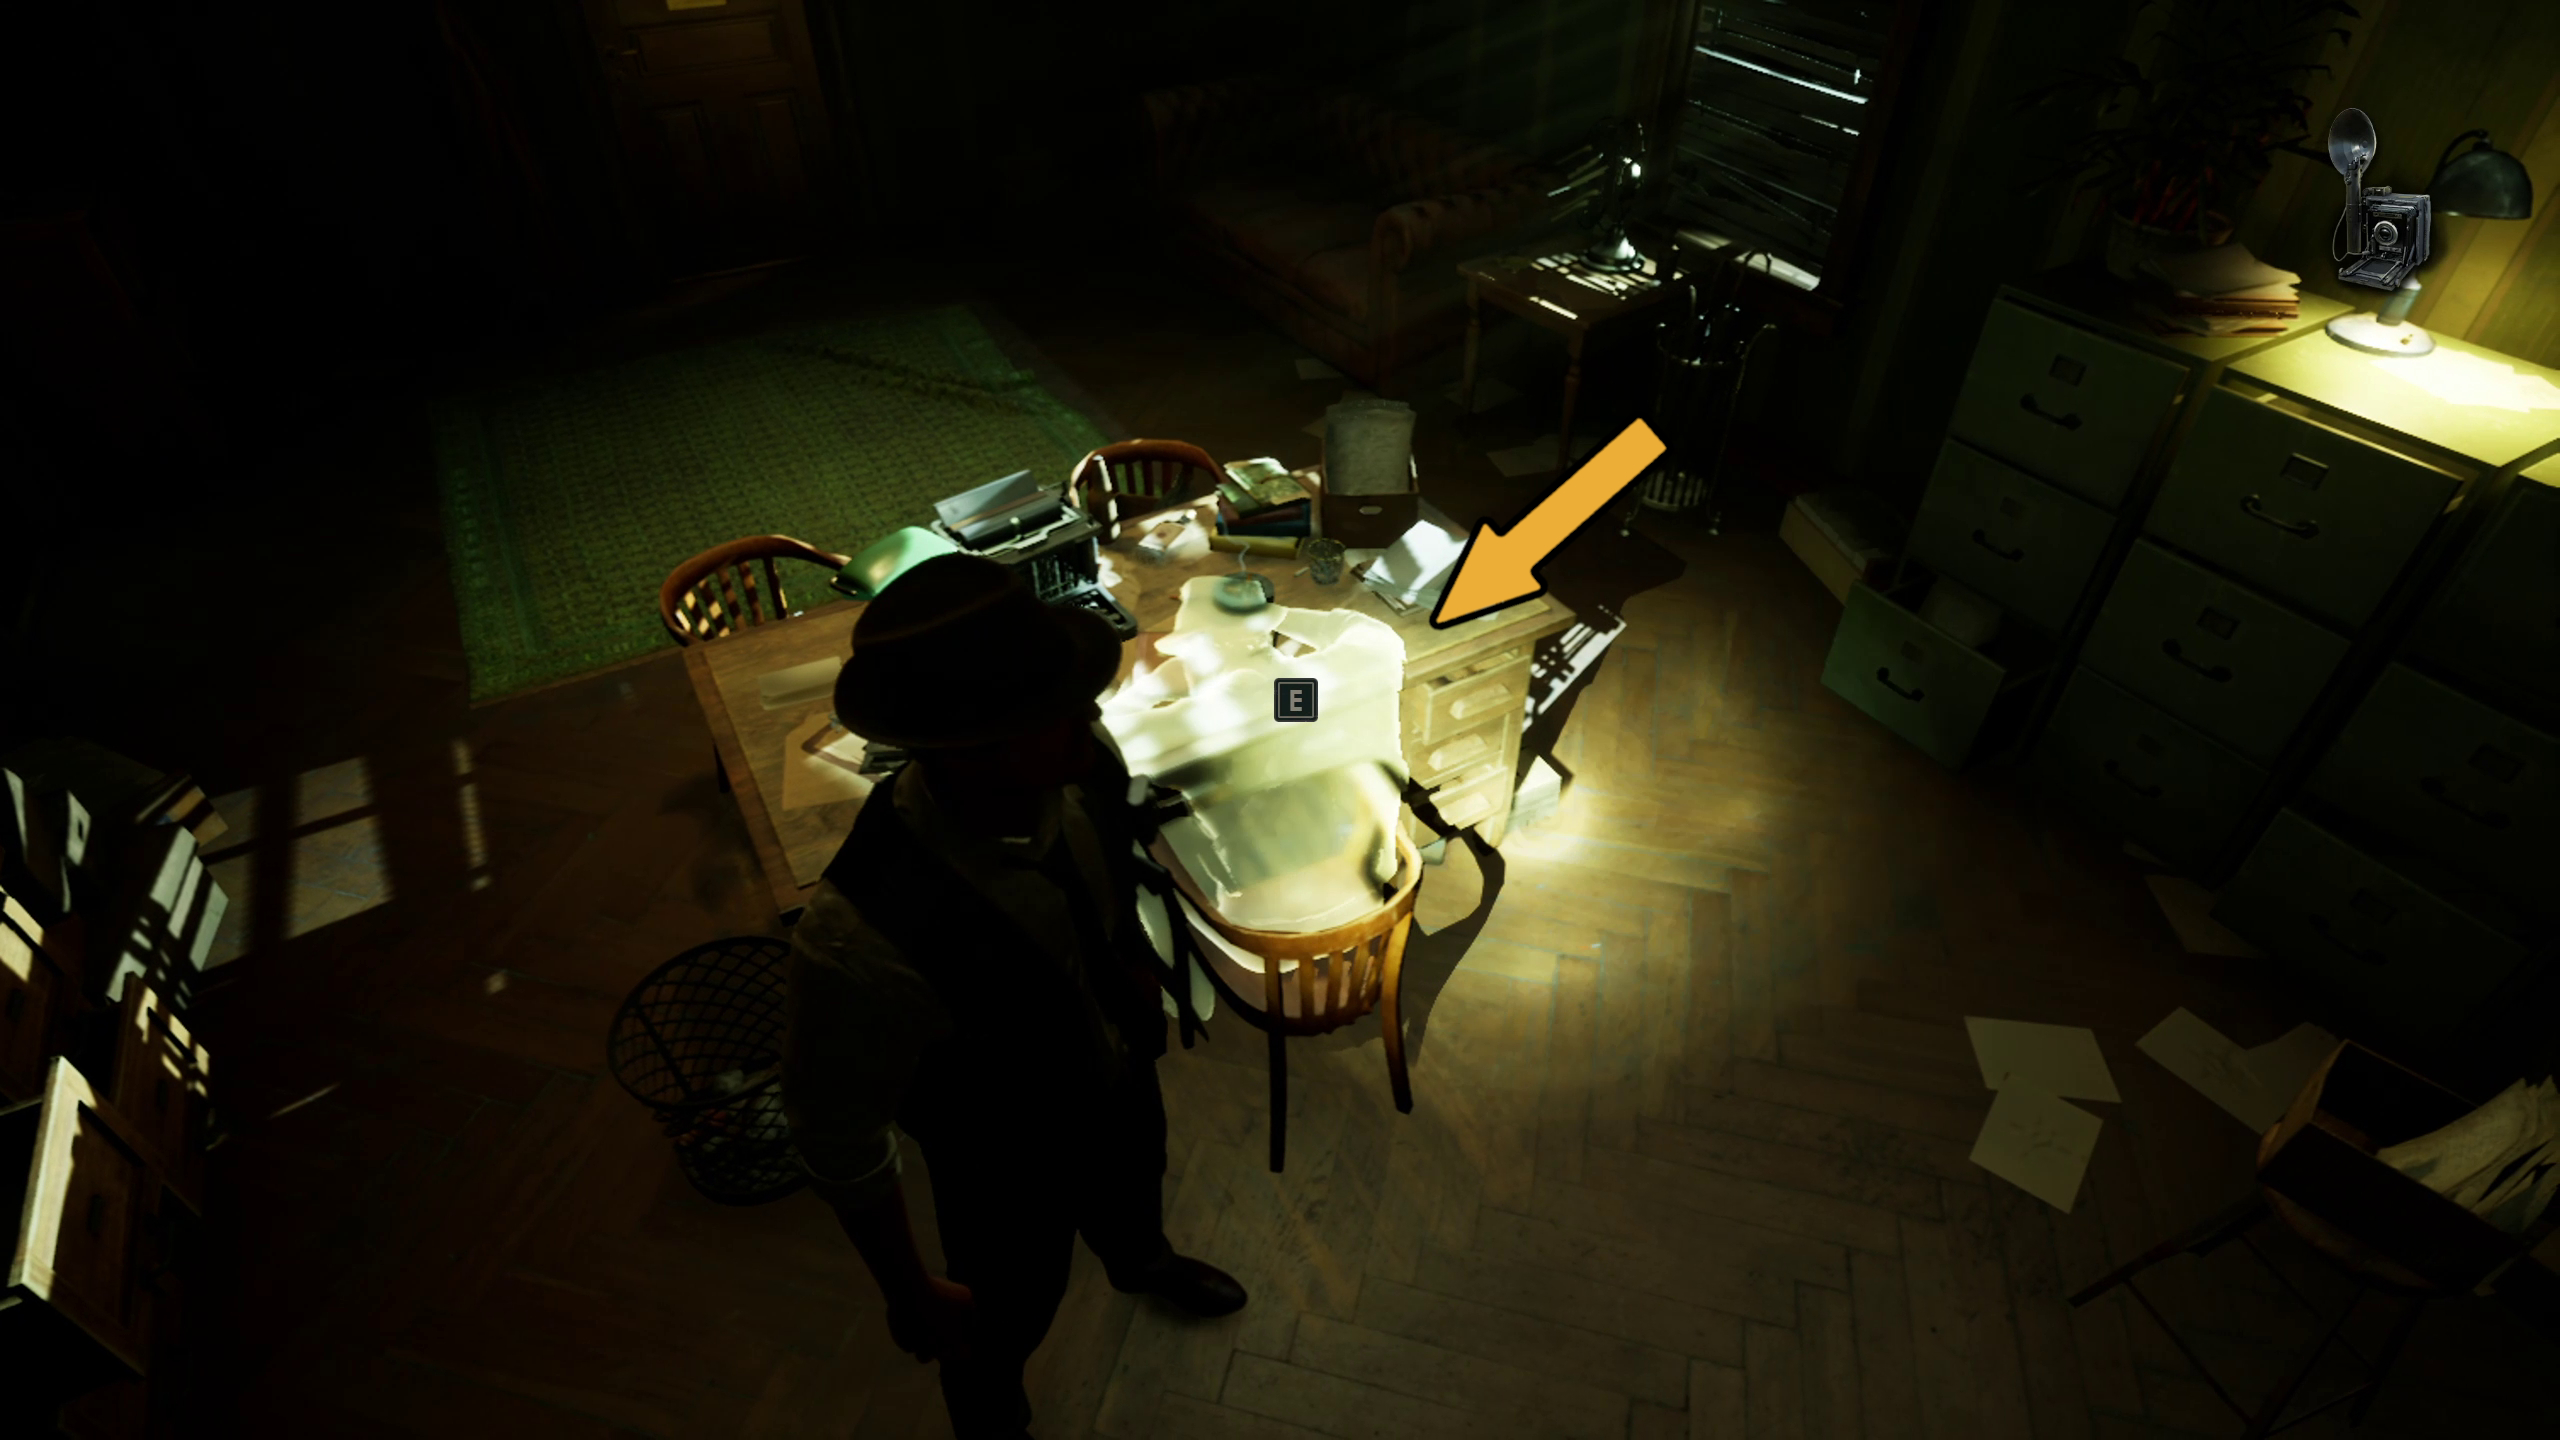
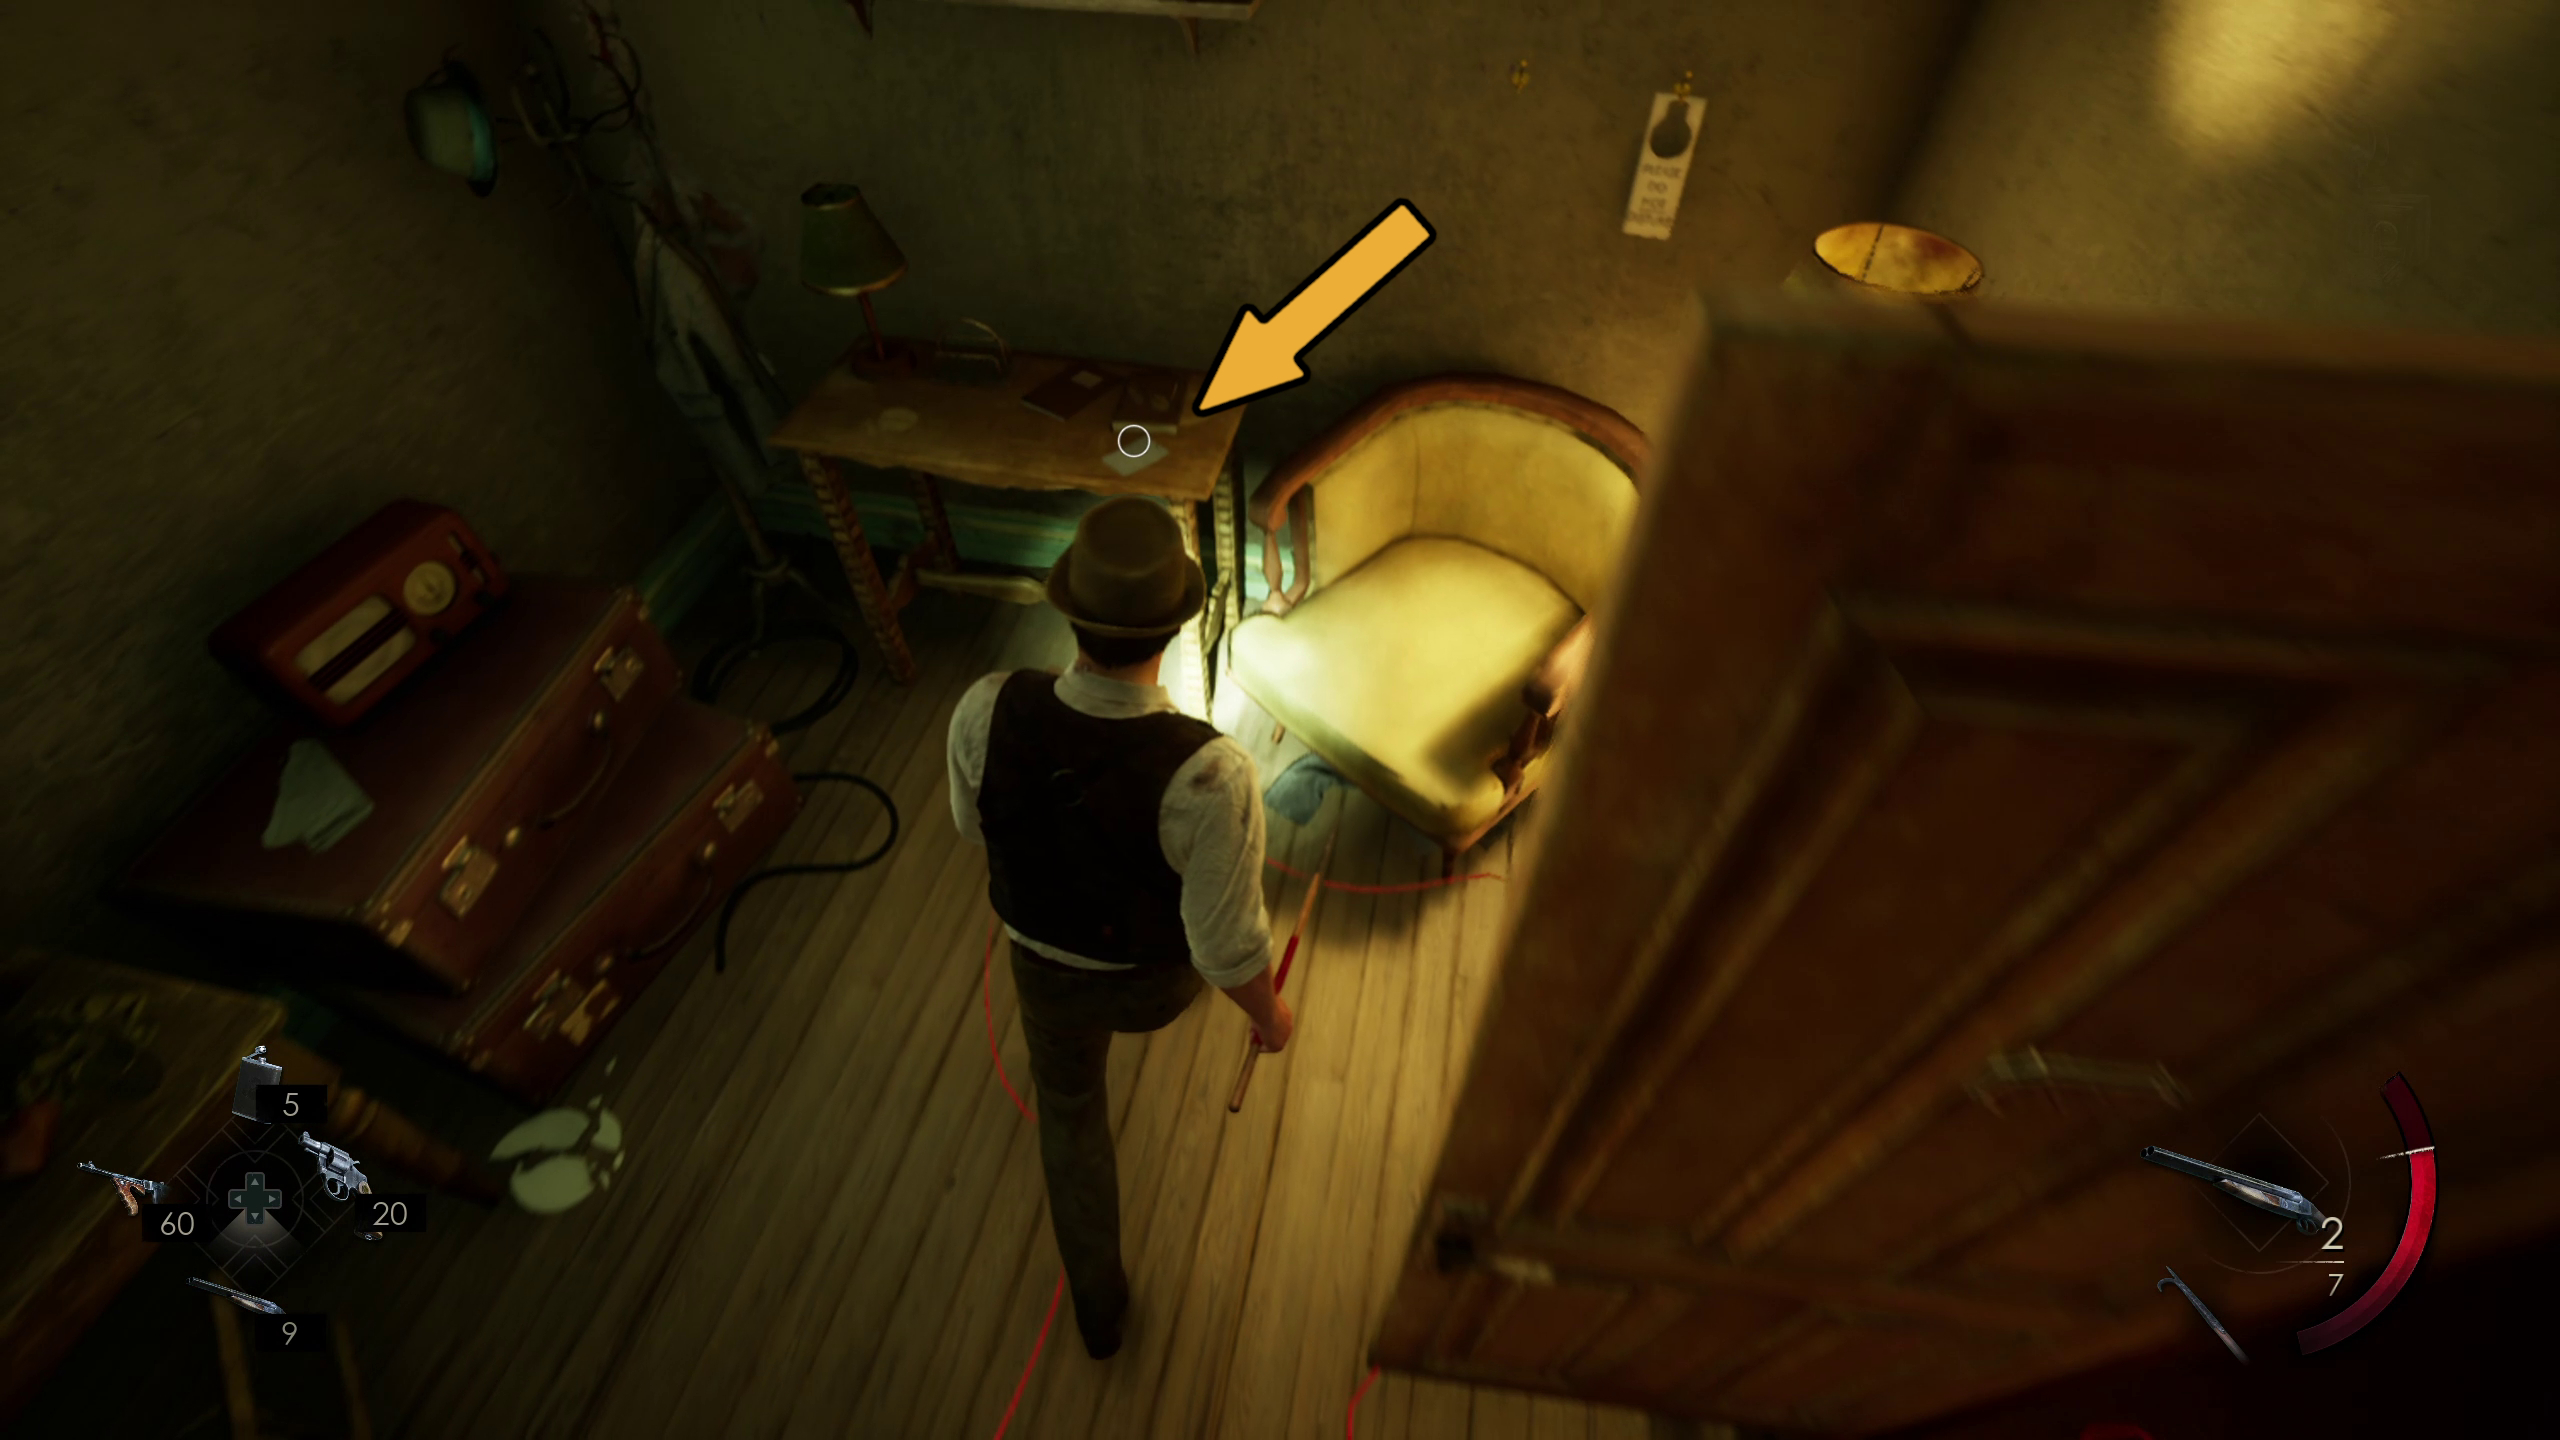
You will soon find yourself back in Edward’s office in New Orleans, a memory of your his making. But what does he need to remember? Let’s find out. To start, you’ll need to grab the Desk Key from the table next to the couch, and then you can grab the papers from the desk and use the Key to take two papers from within the desk drawer (Image 76). While you do so, interact with Edward’s spectre, as you will have to wait for the dialogue from that to finish before completing the puzzle to piece together the clues (Image 77.
Image 76Image 77
You’ll need to figure out what case Edward was working on. Maybe piecing together your clues on the corkboard will help.
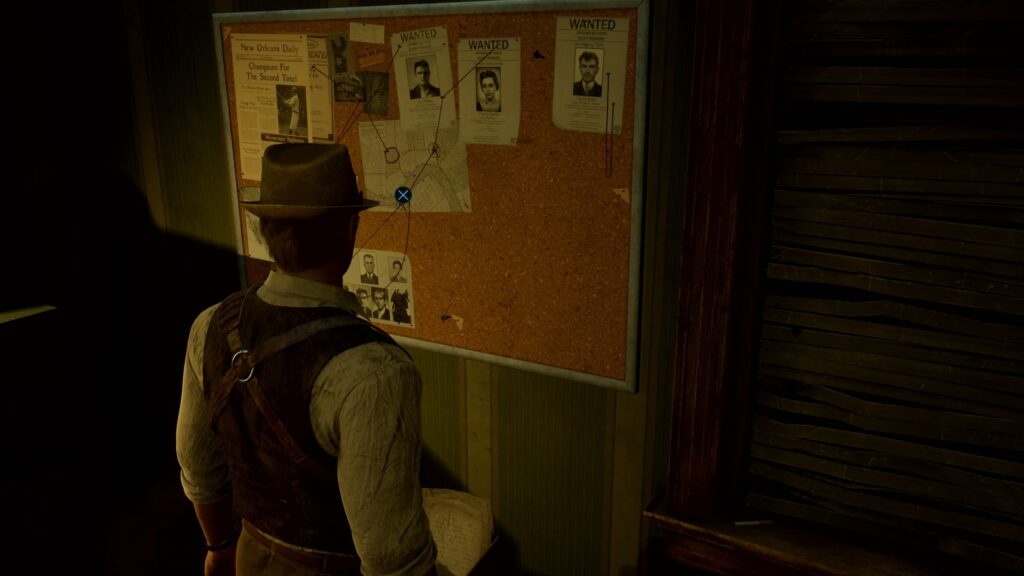
After Edward is done talking to his spectre, go to the corkboard behind the desk. Place all 3 clues (one from on top of the desk, 2 from with), and then flip over the leftmost and middle clues. This will complete the puzzle, and red threads will connect and flow from the board.
Find the Painting
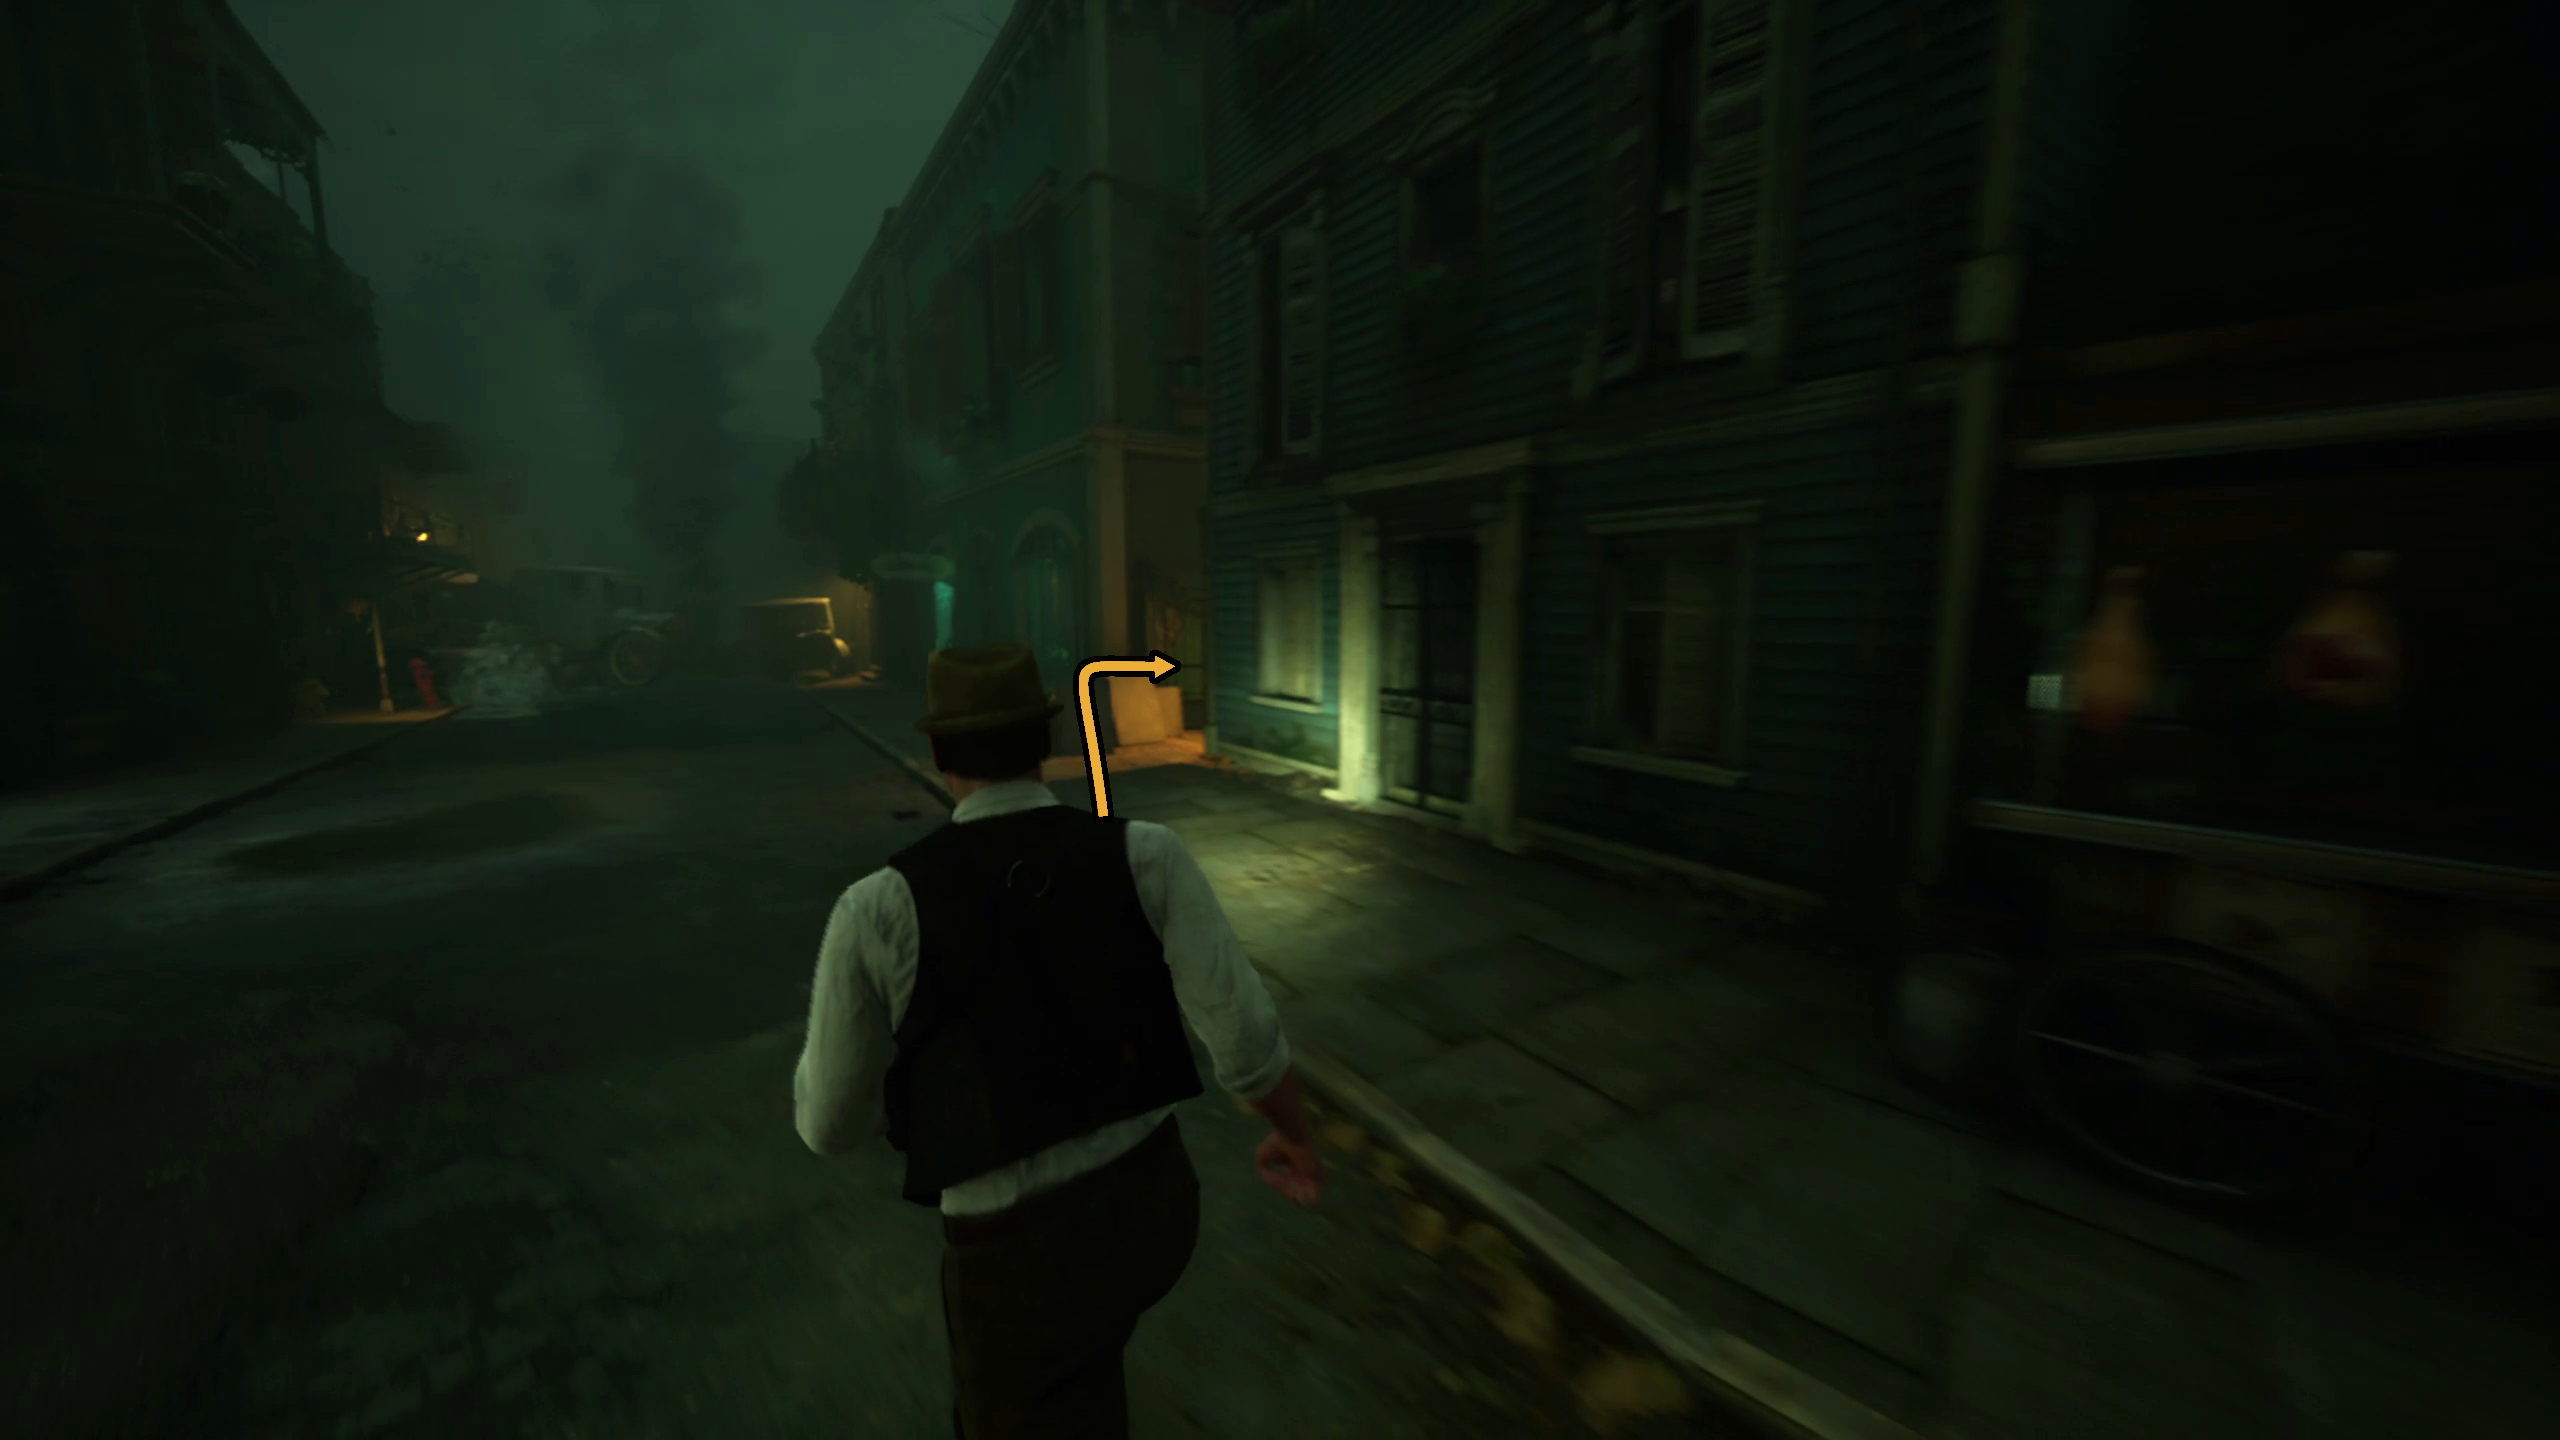
Once you’ve completed the clue, a red thread will weave out from the corkboard, leading you through the streets of the French District in New Orleans. Since the pathway is fairly straightforward, you probably don’t need to follow the thread.
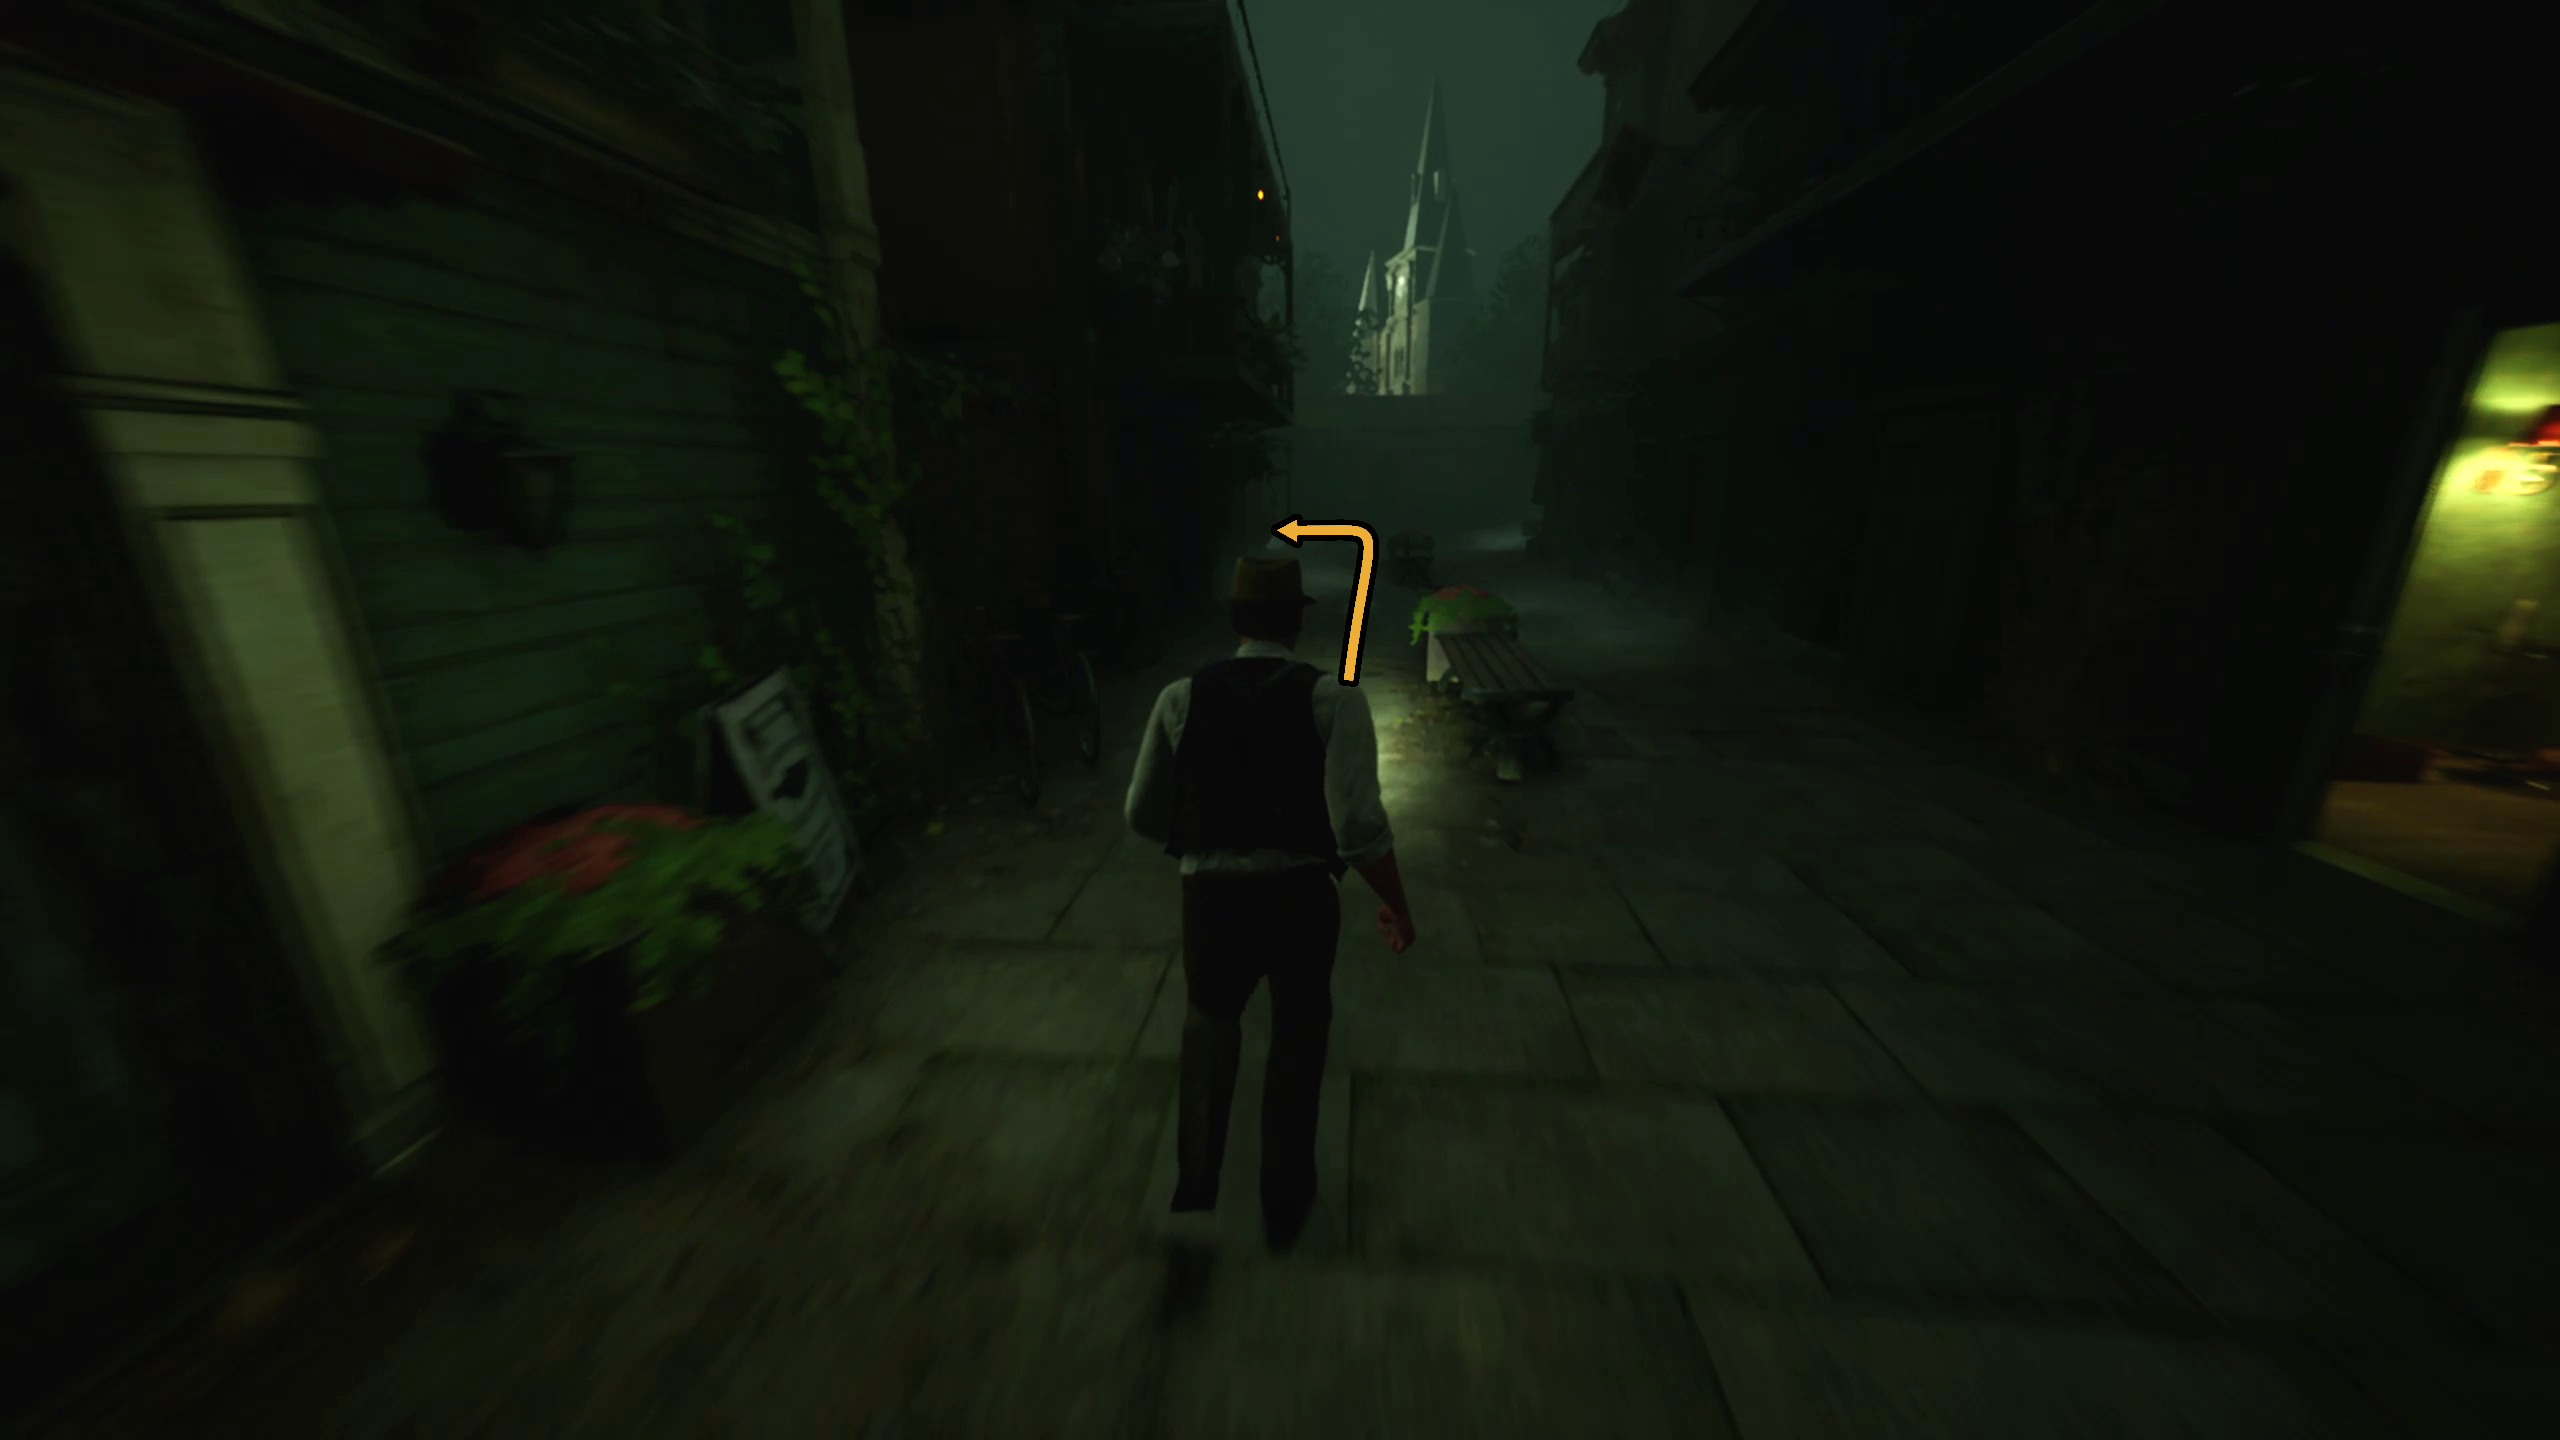
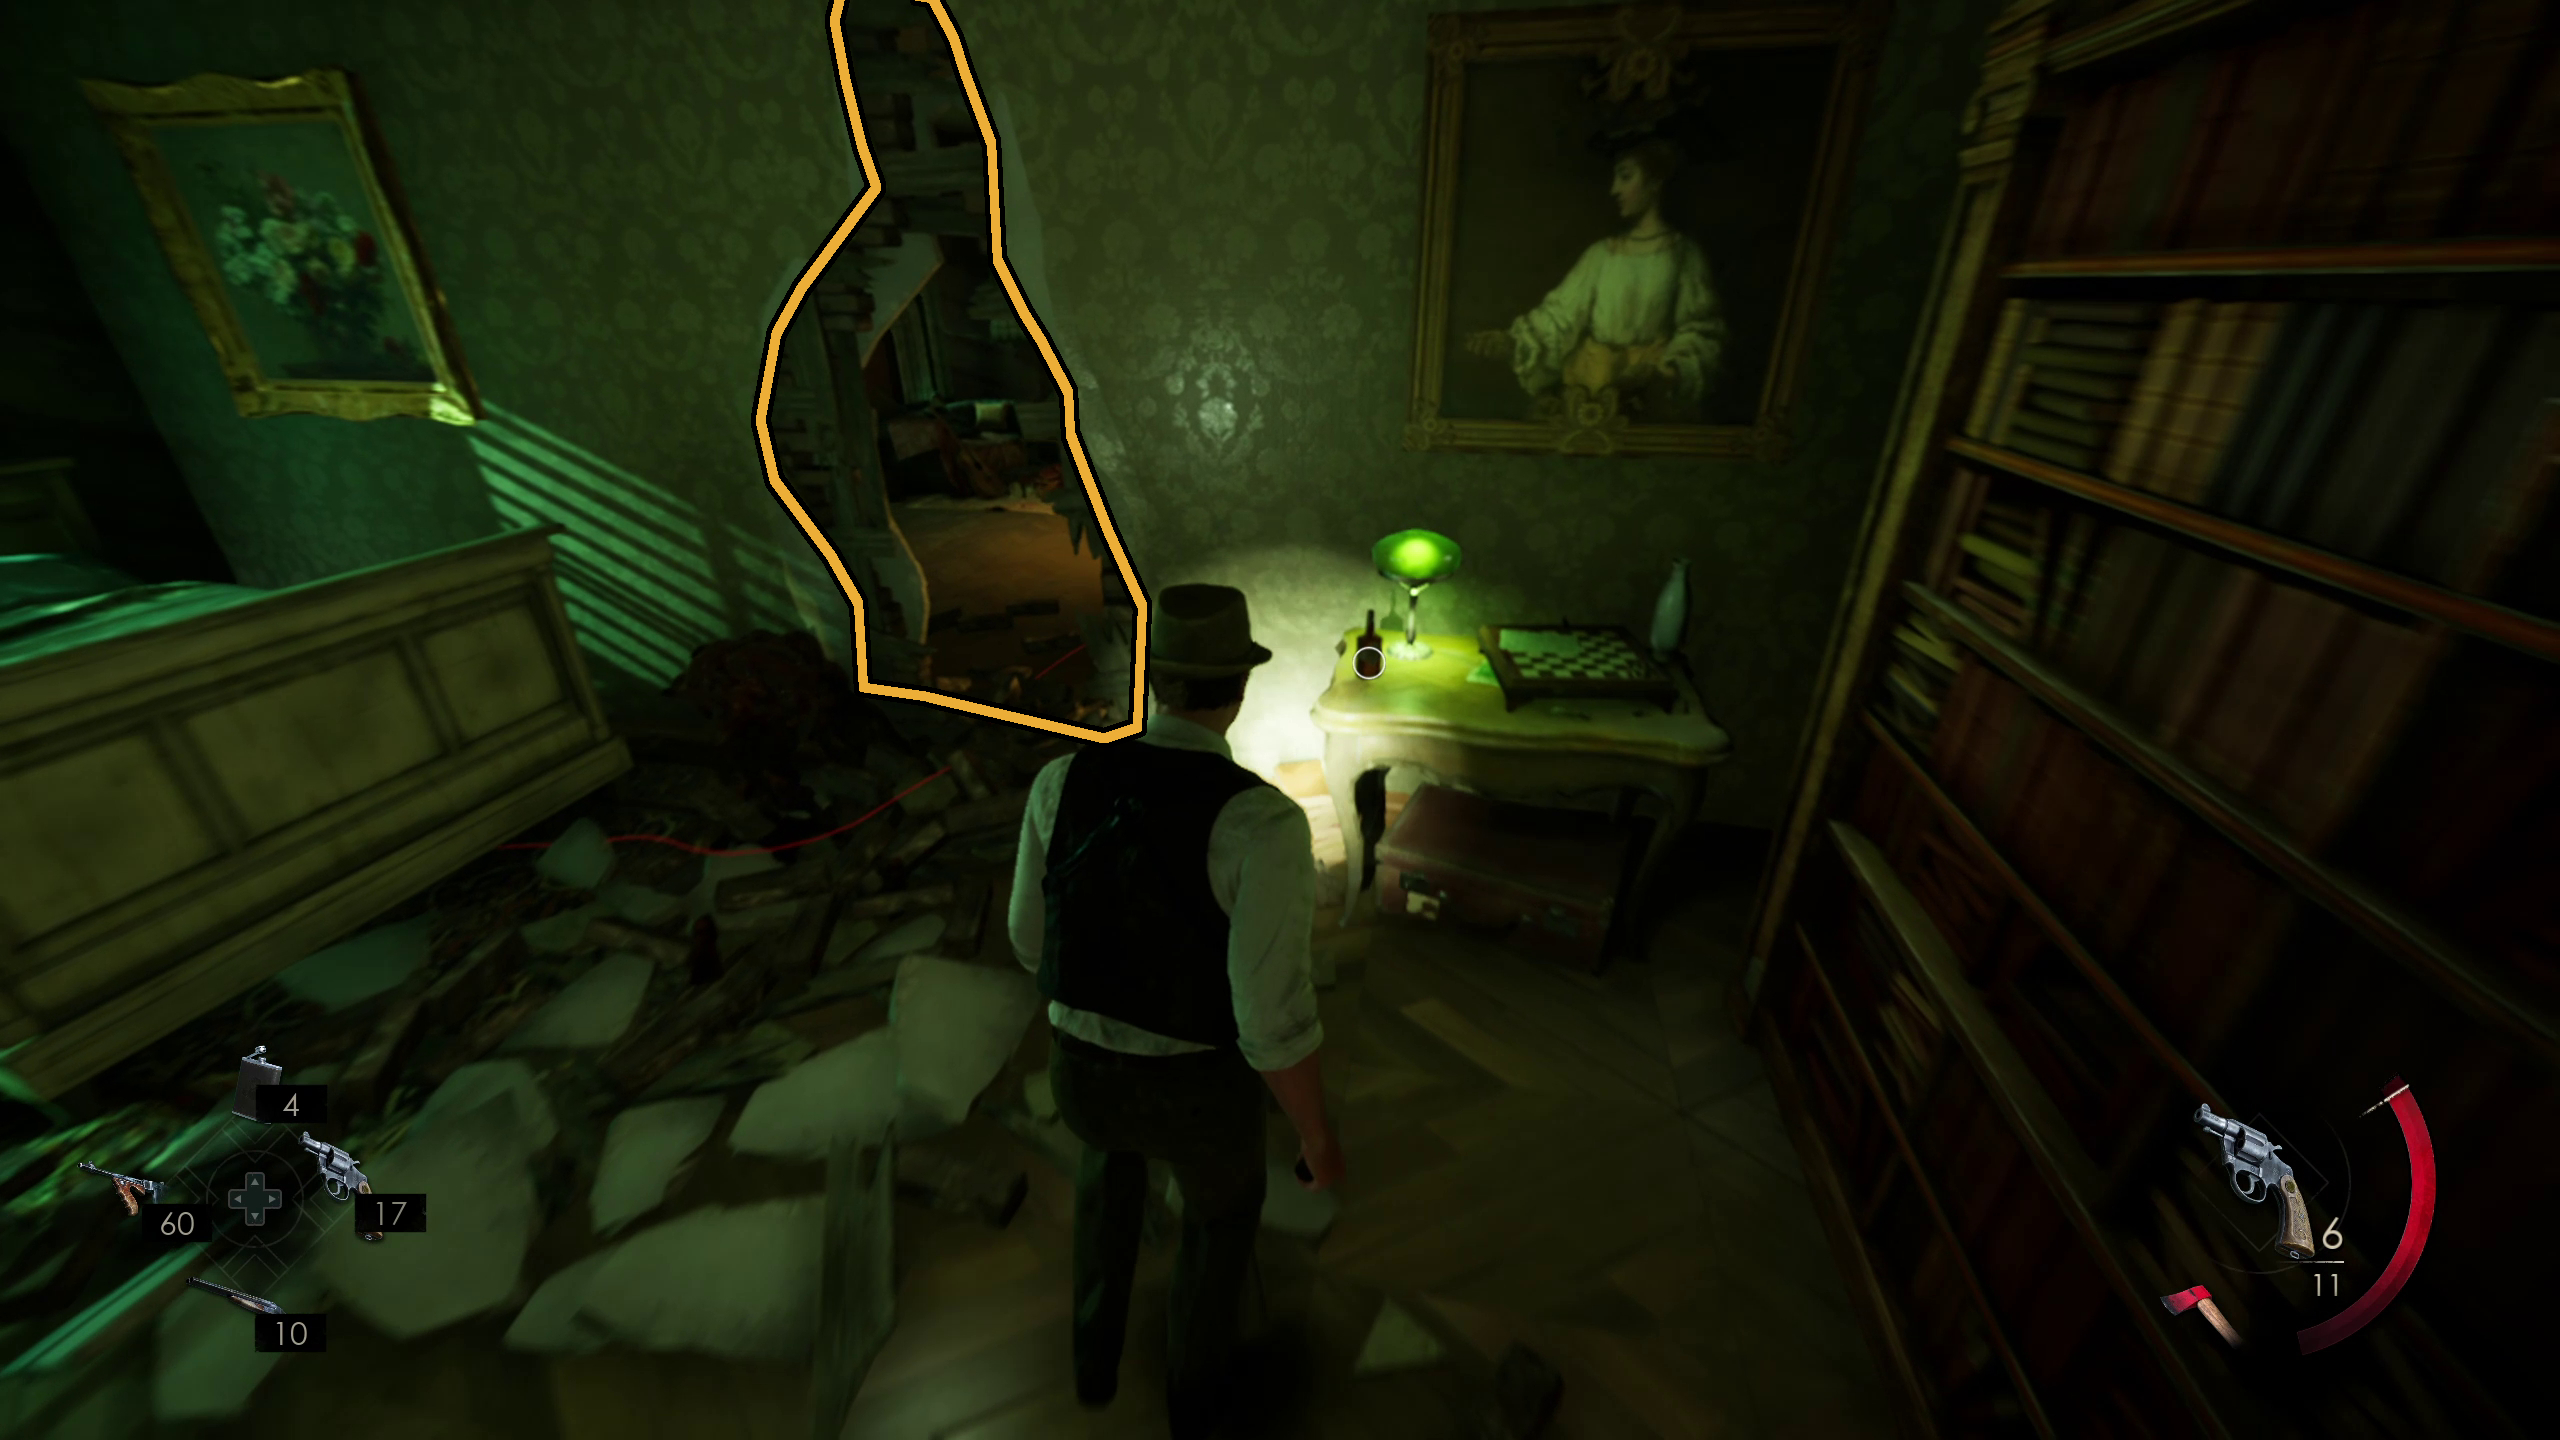
Instead, leave the office, go down the stairs, and go out the door and onto the streets. Go to your right, then take a left when you reach the street (Image 78). You’ll come across an alley to your right adjacent to an art dealer, which you should go into (Image 79). If you need ammo, you can take your time to root through trash cans along the way.
Image 78Image 79
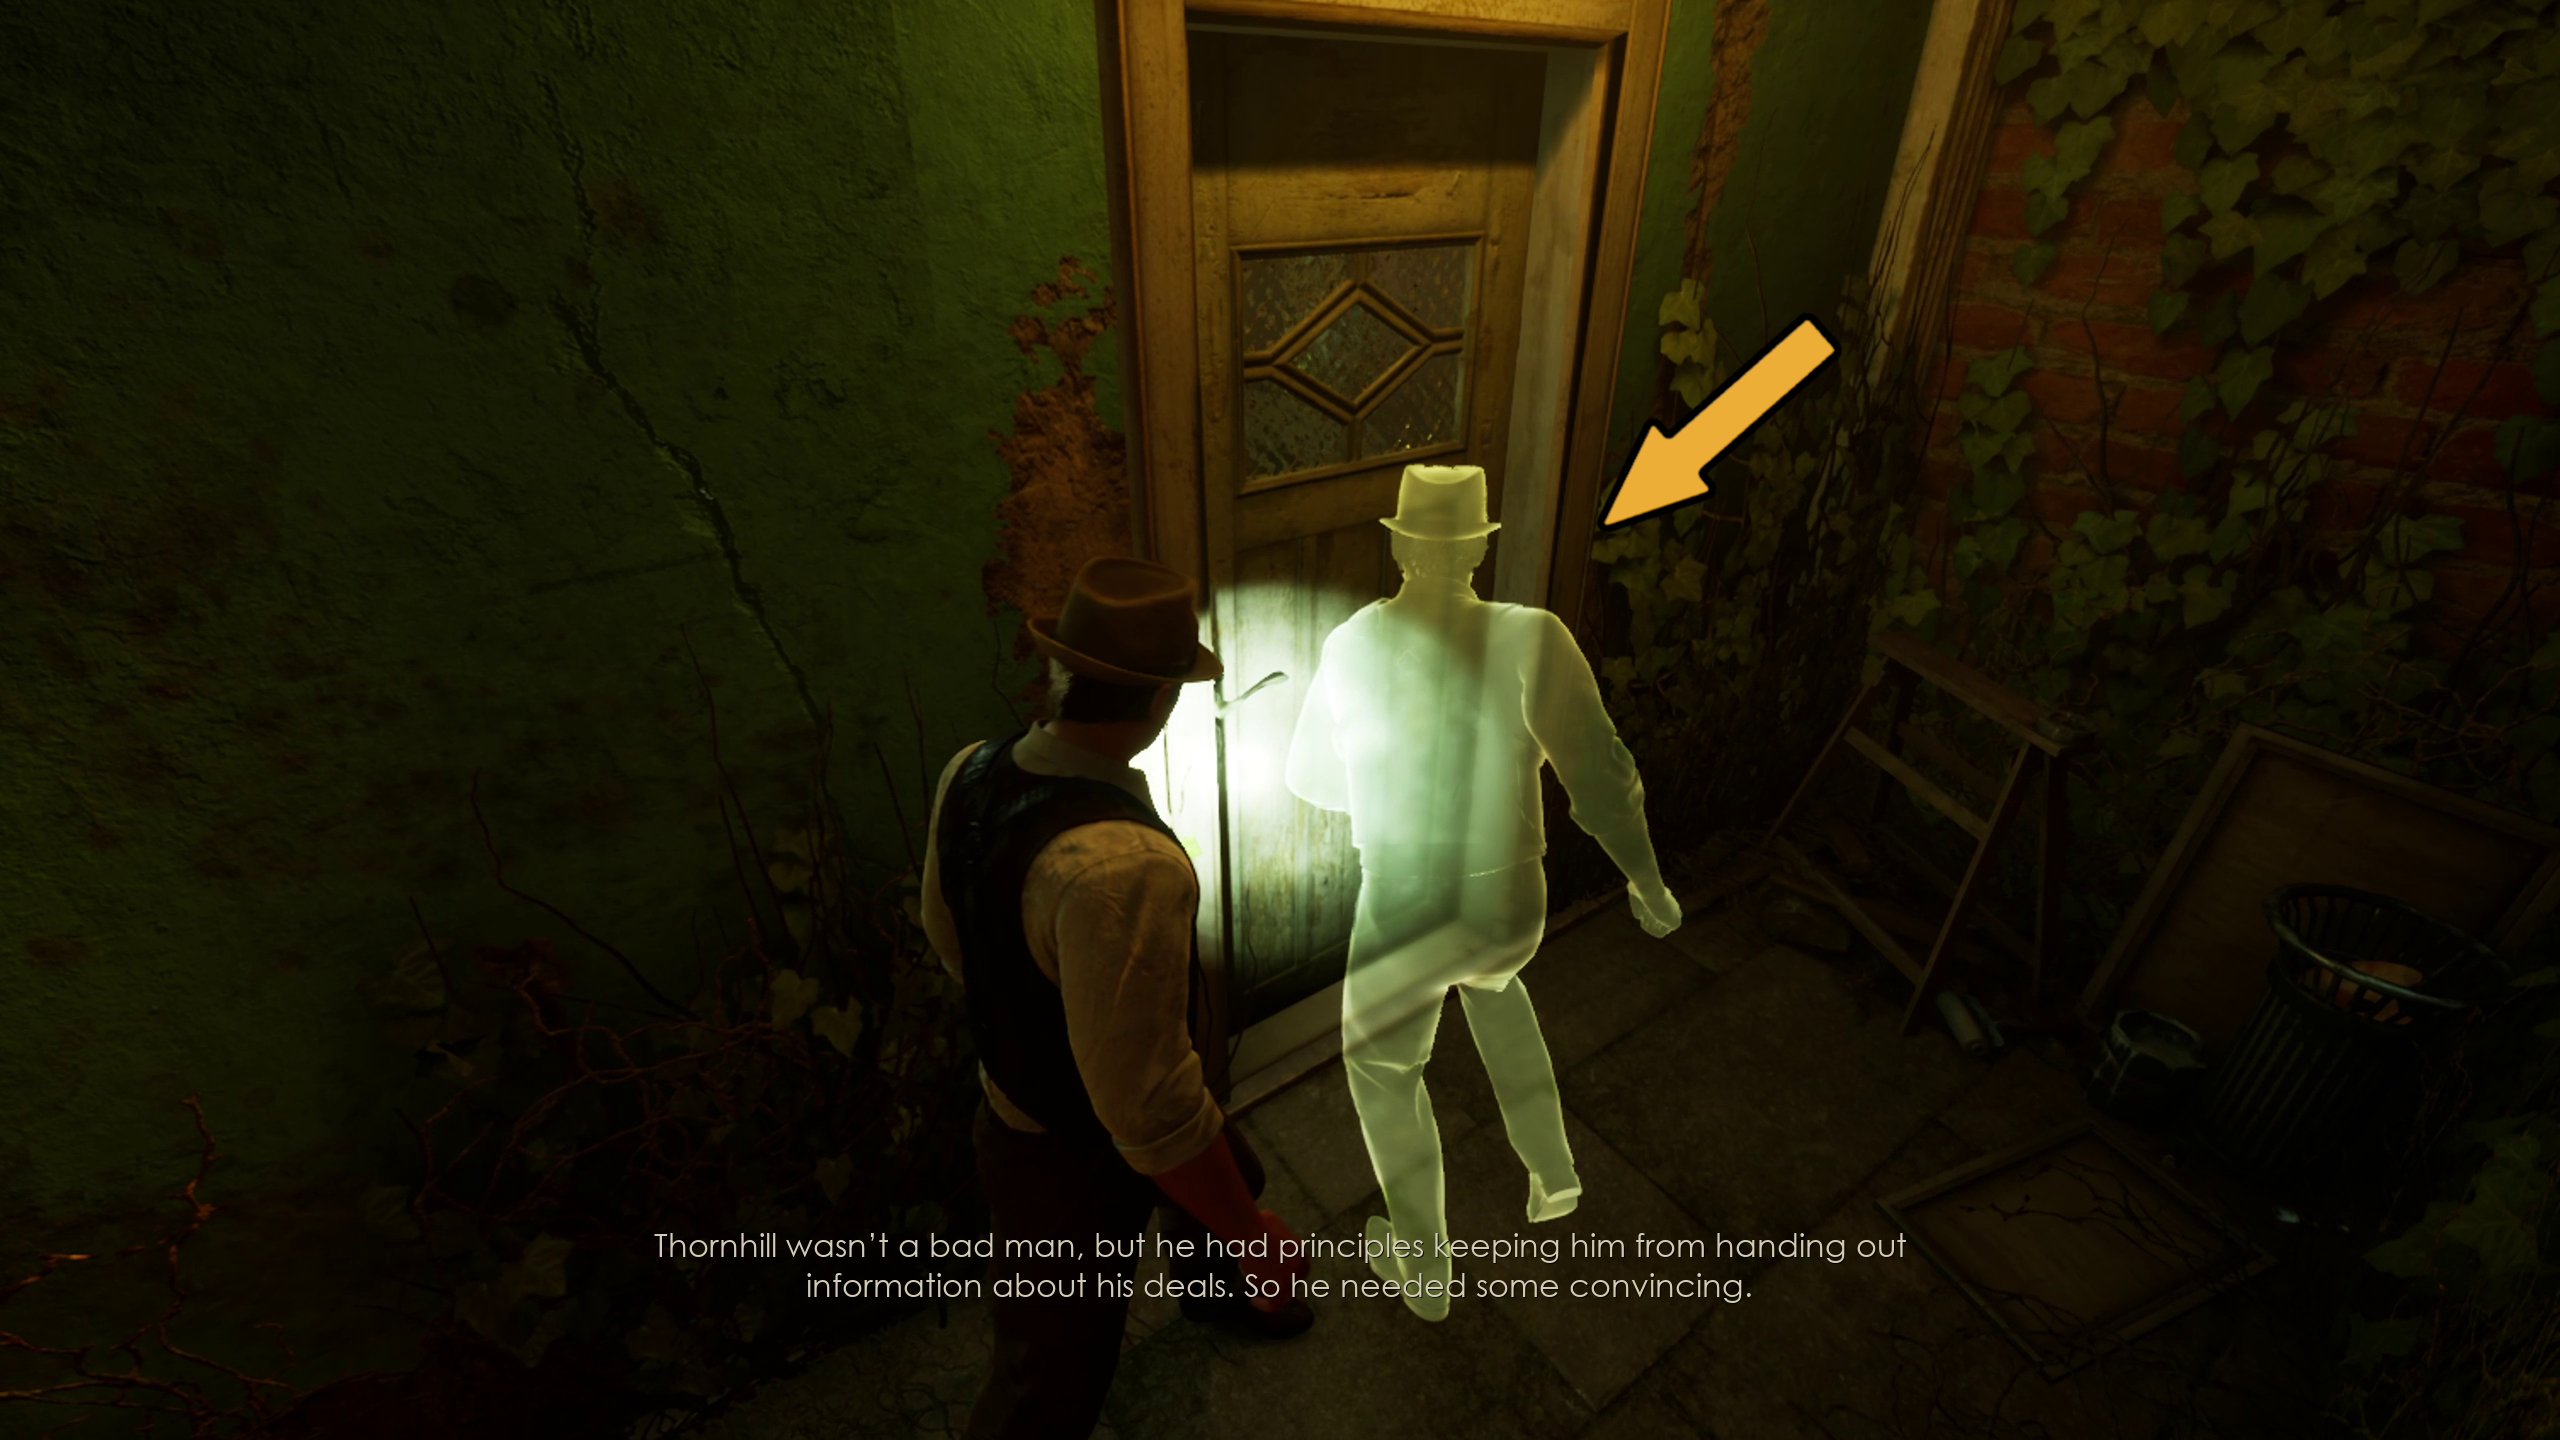
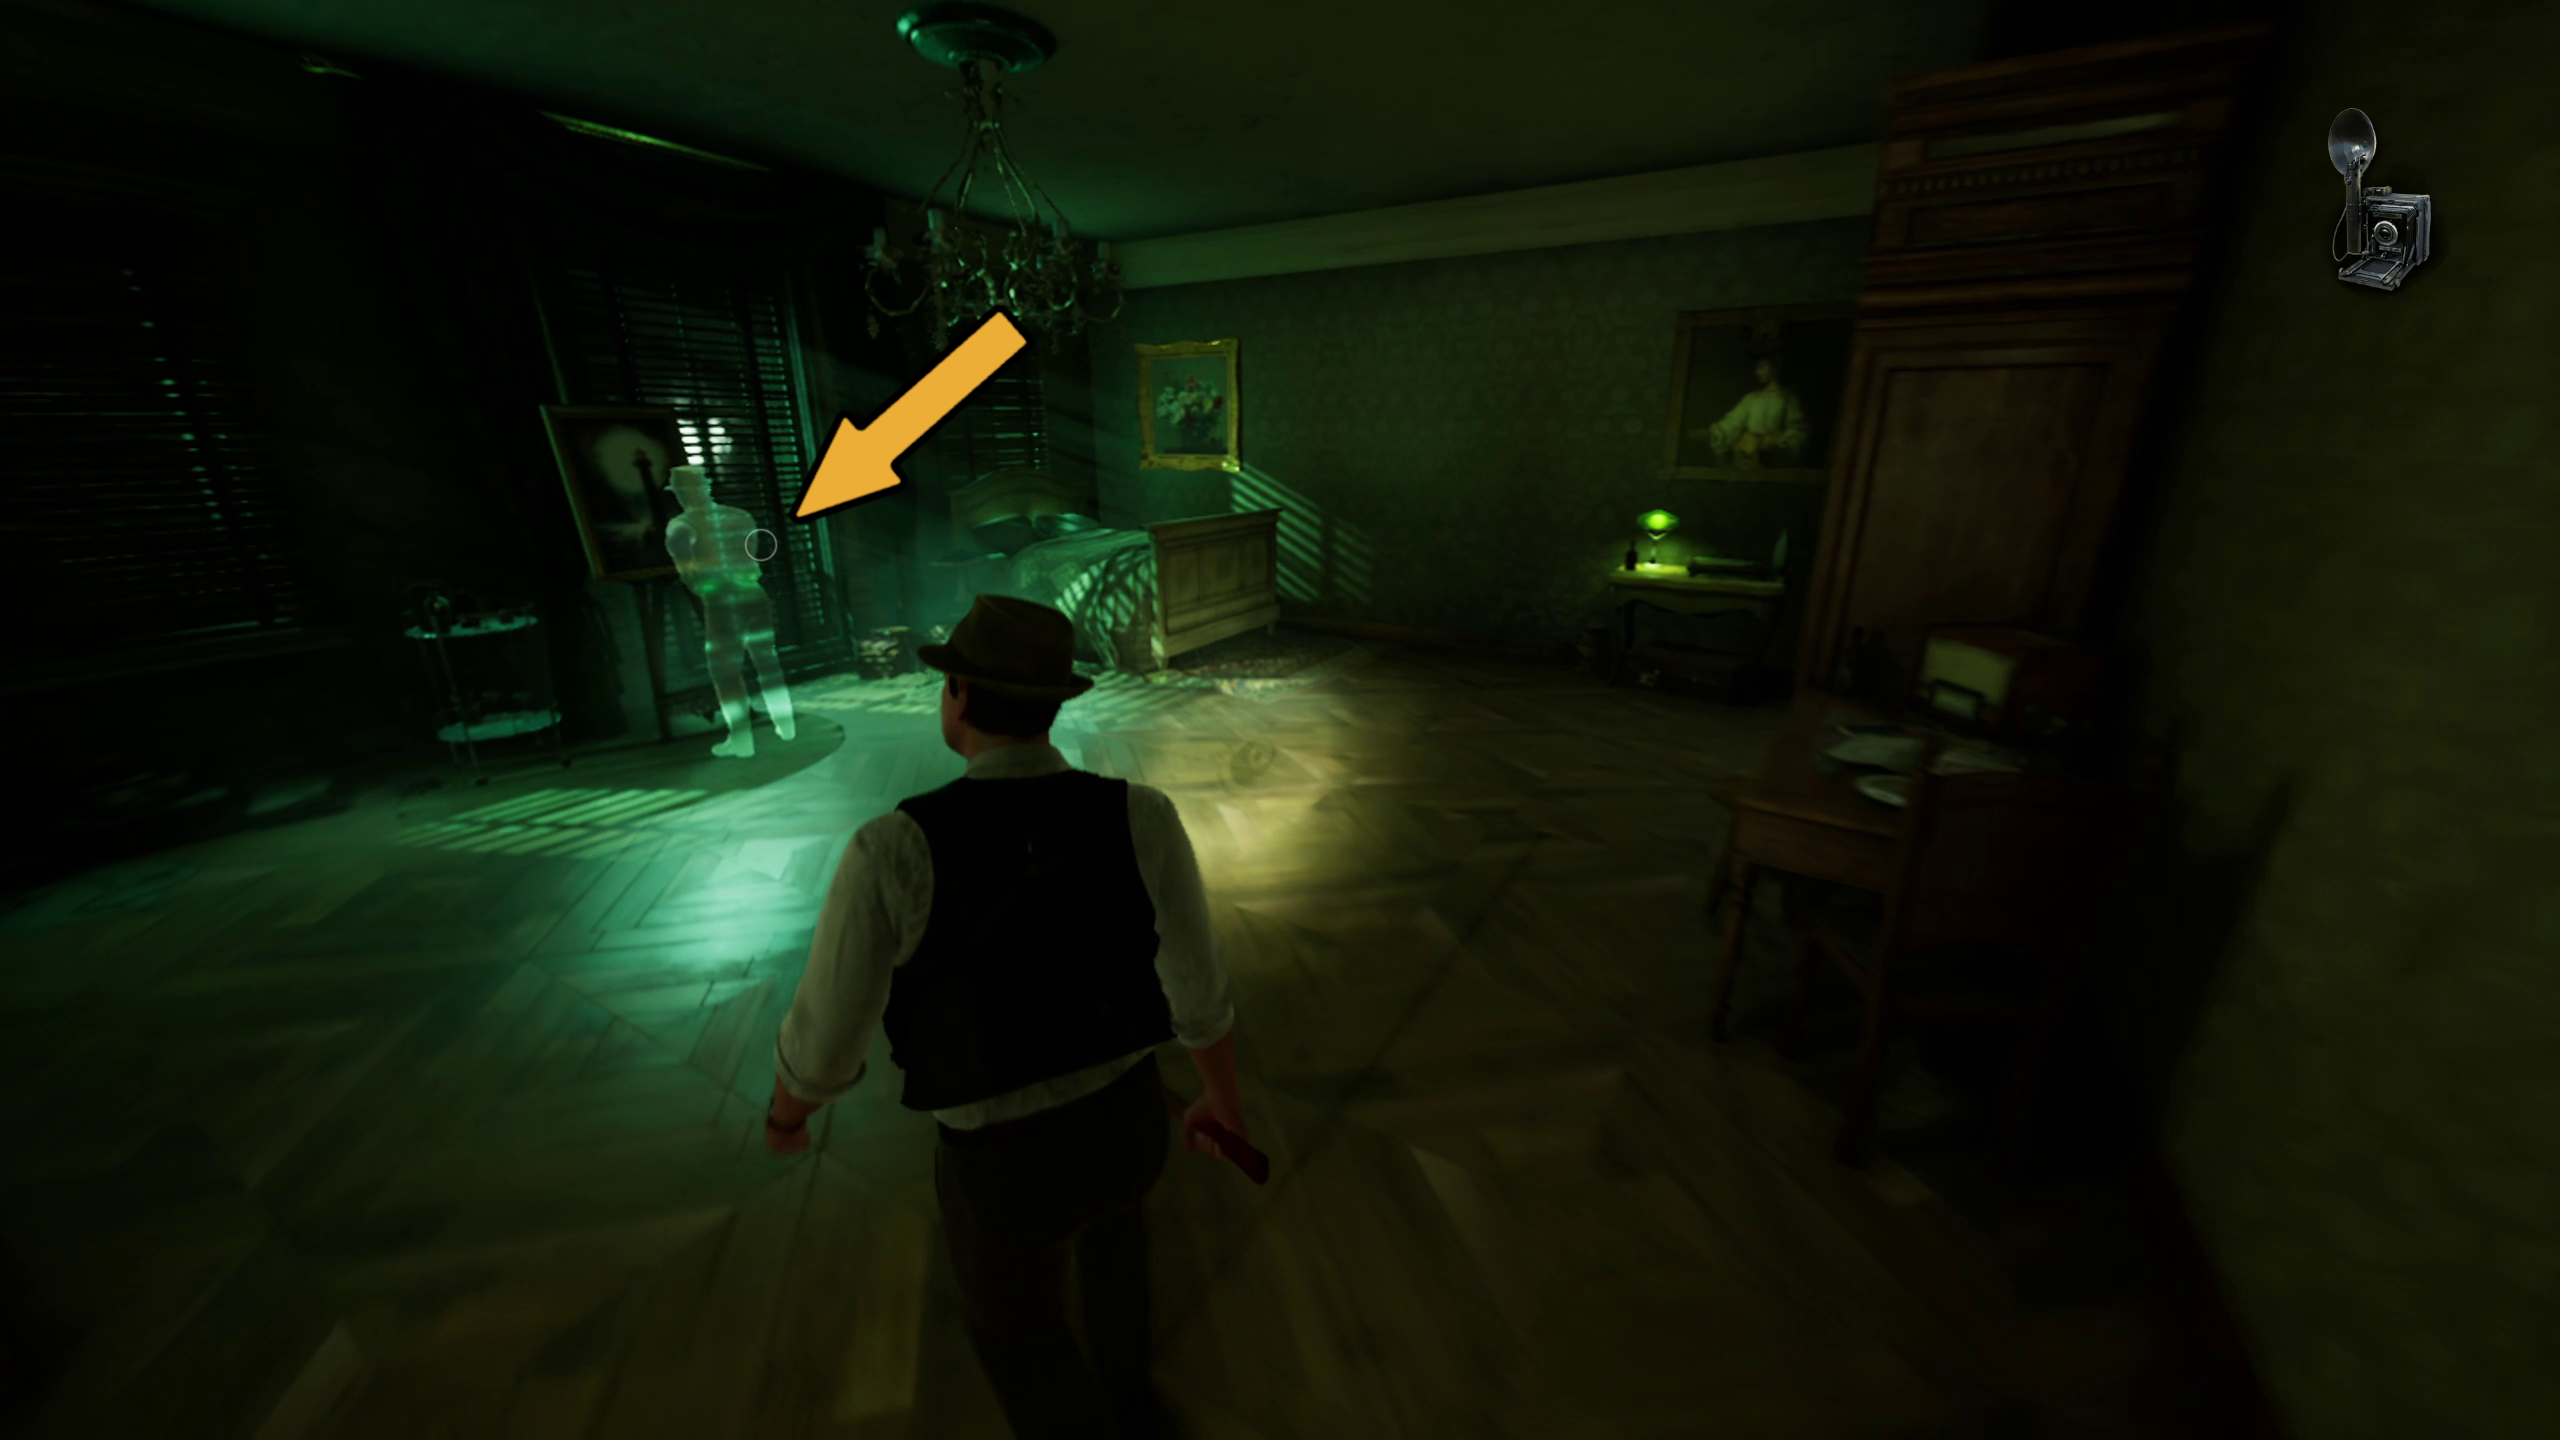
You’ll come across your spectre again, bashing in the door leading into the art dealer, who you’ll need to interact with (Image 80). Then, you can go inside and up the stairs to encounter one more spectre standing in front of the painting that you came here for (Image 81).
Image 80Image 81
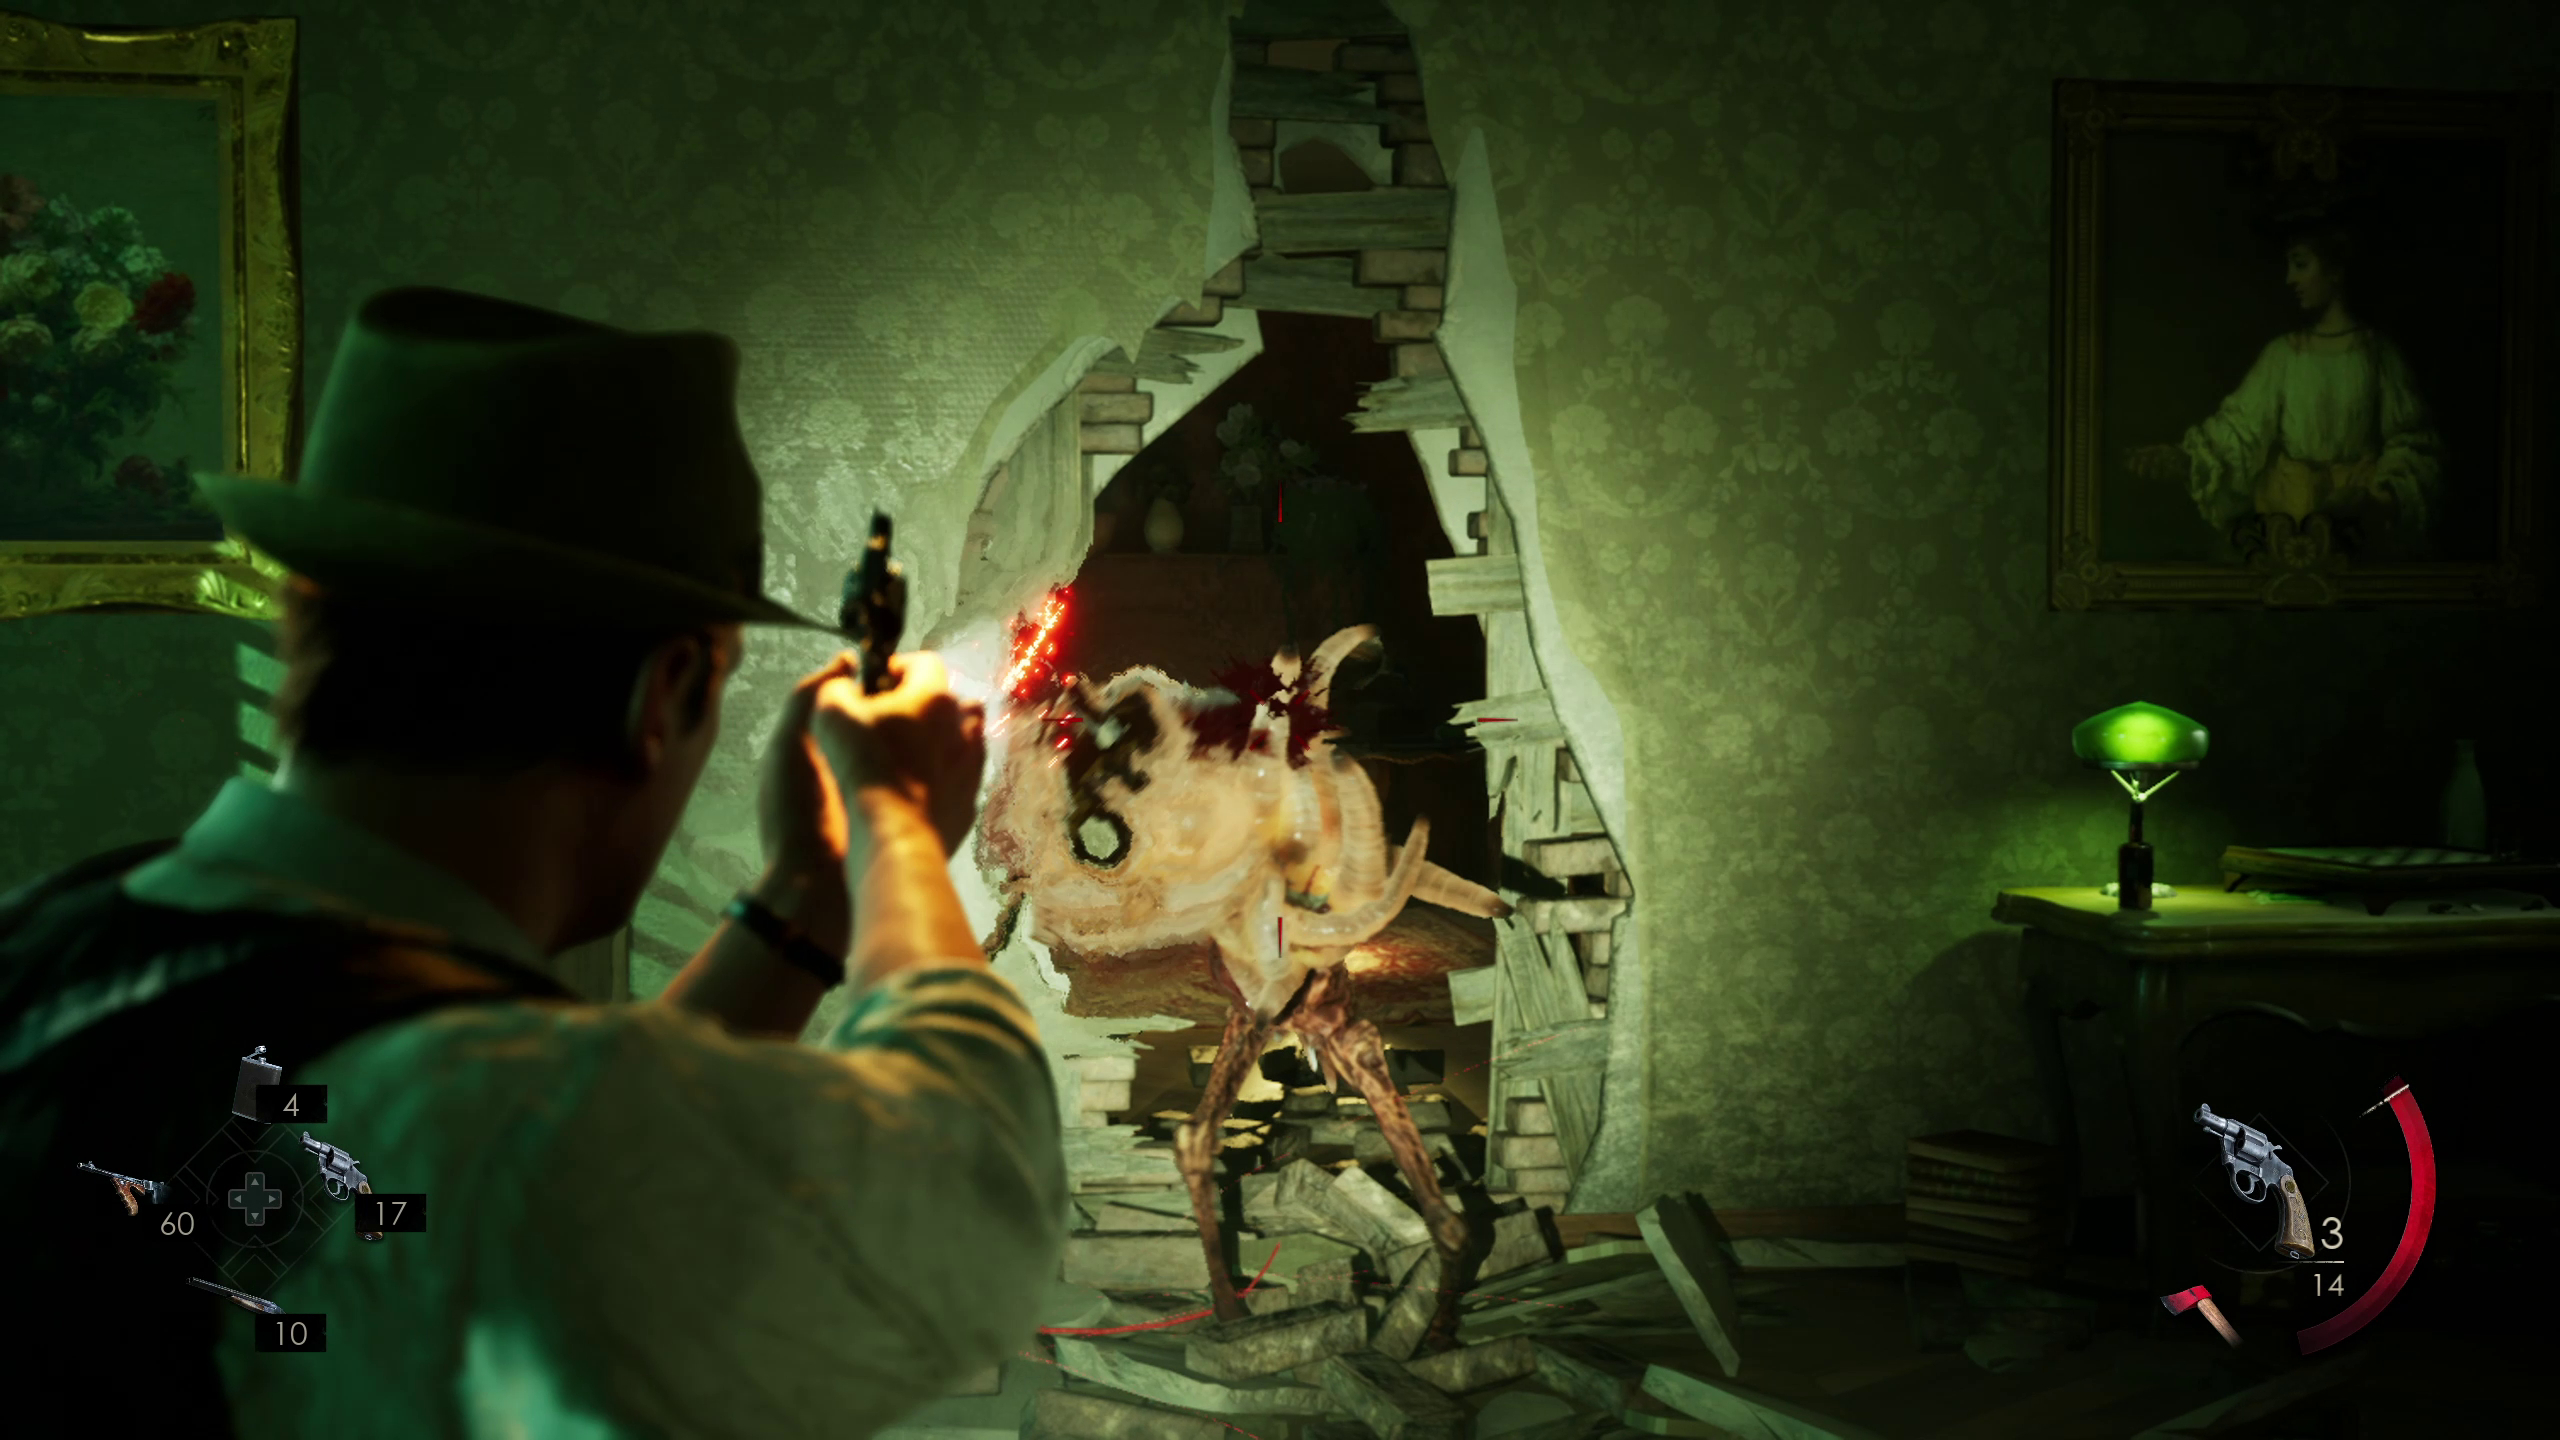
Once you’re done monologuing to yourself to try to remember what happened next, the wall to the right of the painting will burst open, revealing a monster ambushing you (Image 82). Dispatch the monster, then go through the hole it made and out onto the balcony of the room (Image 83) to take a ladder back down to street level (Image 84).
Image 82Image 83Image 84
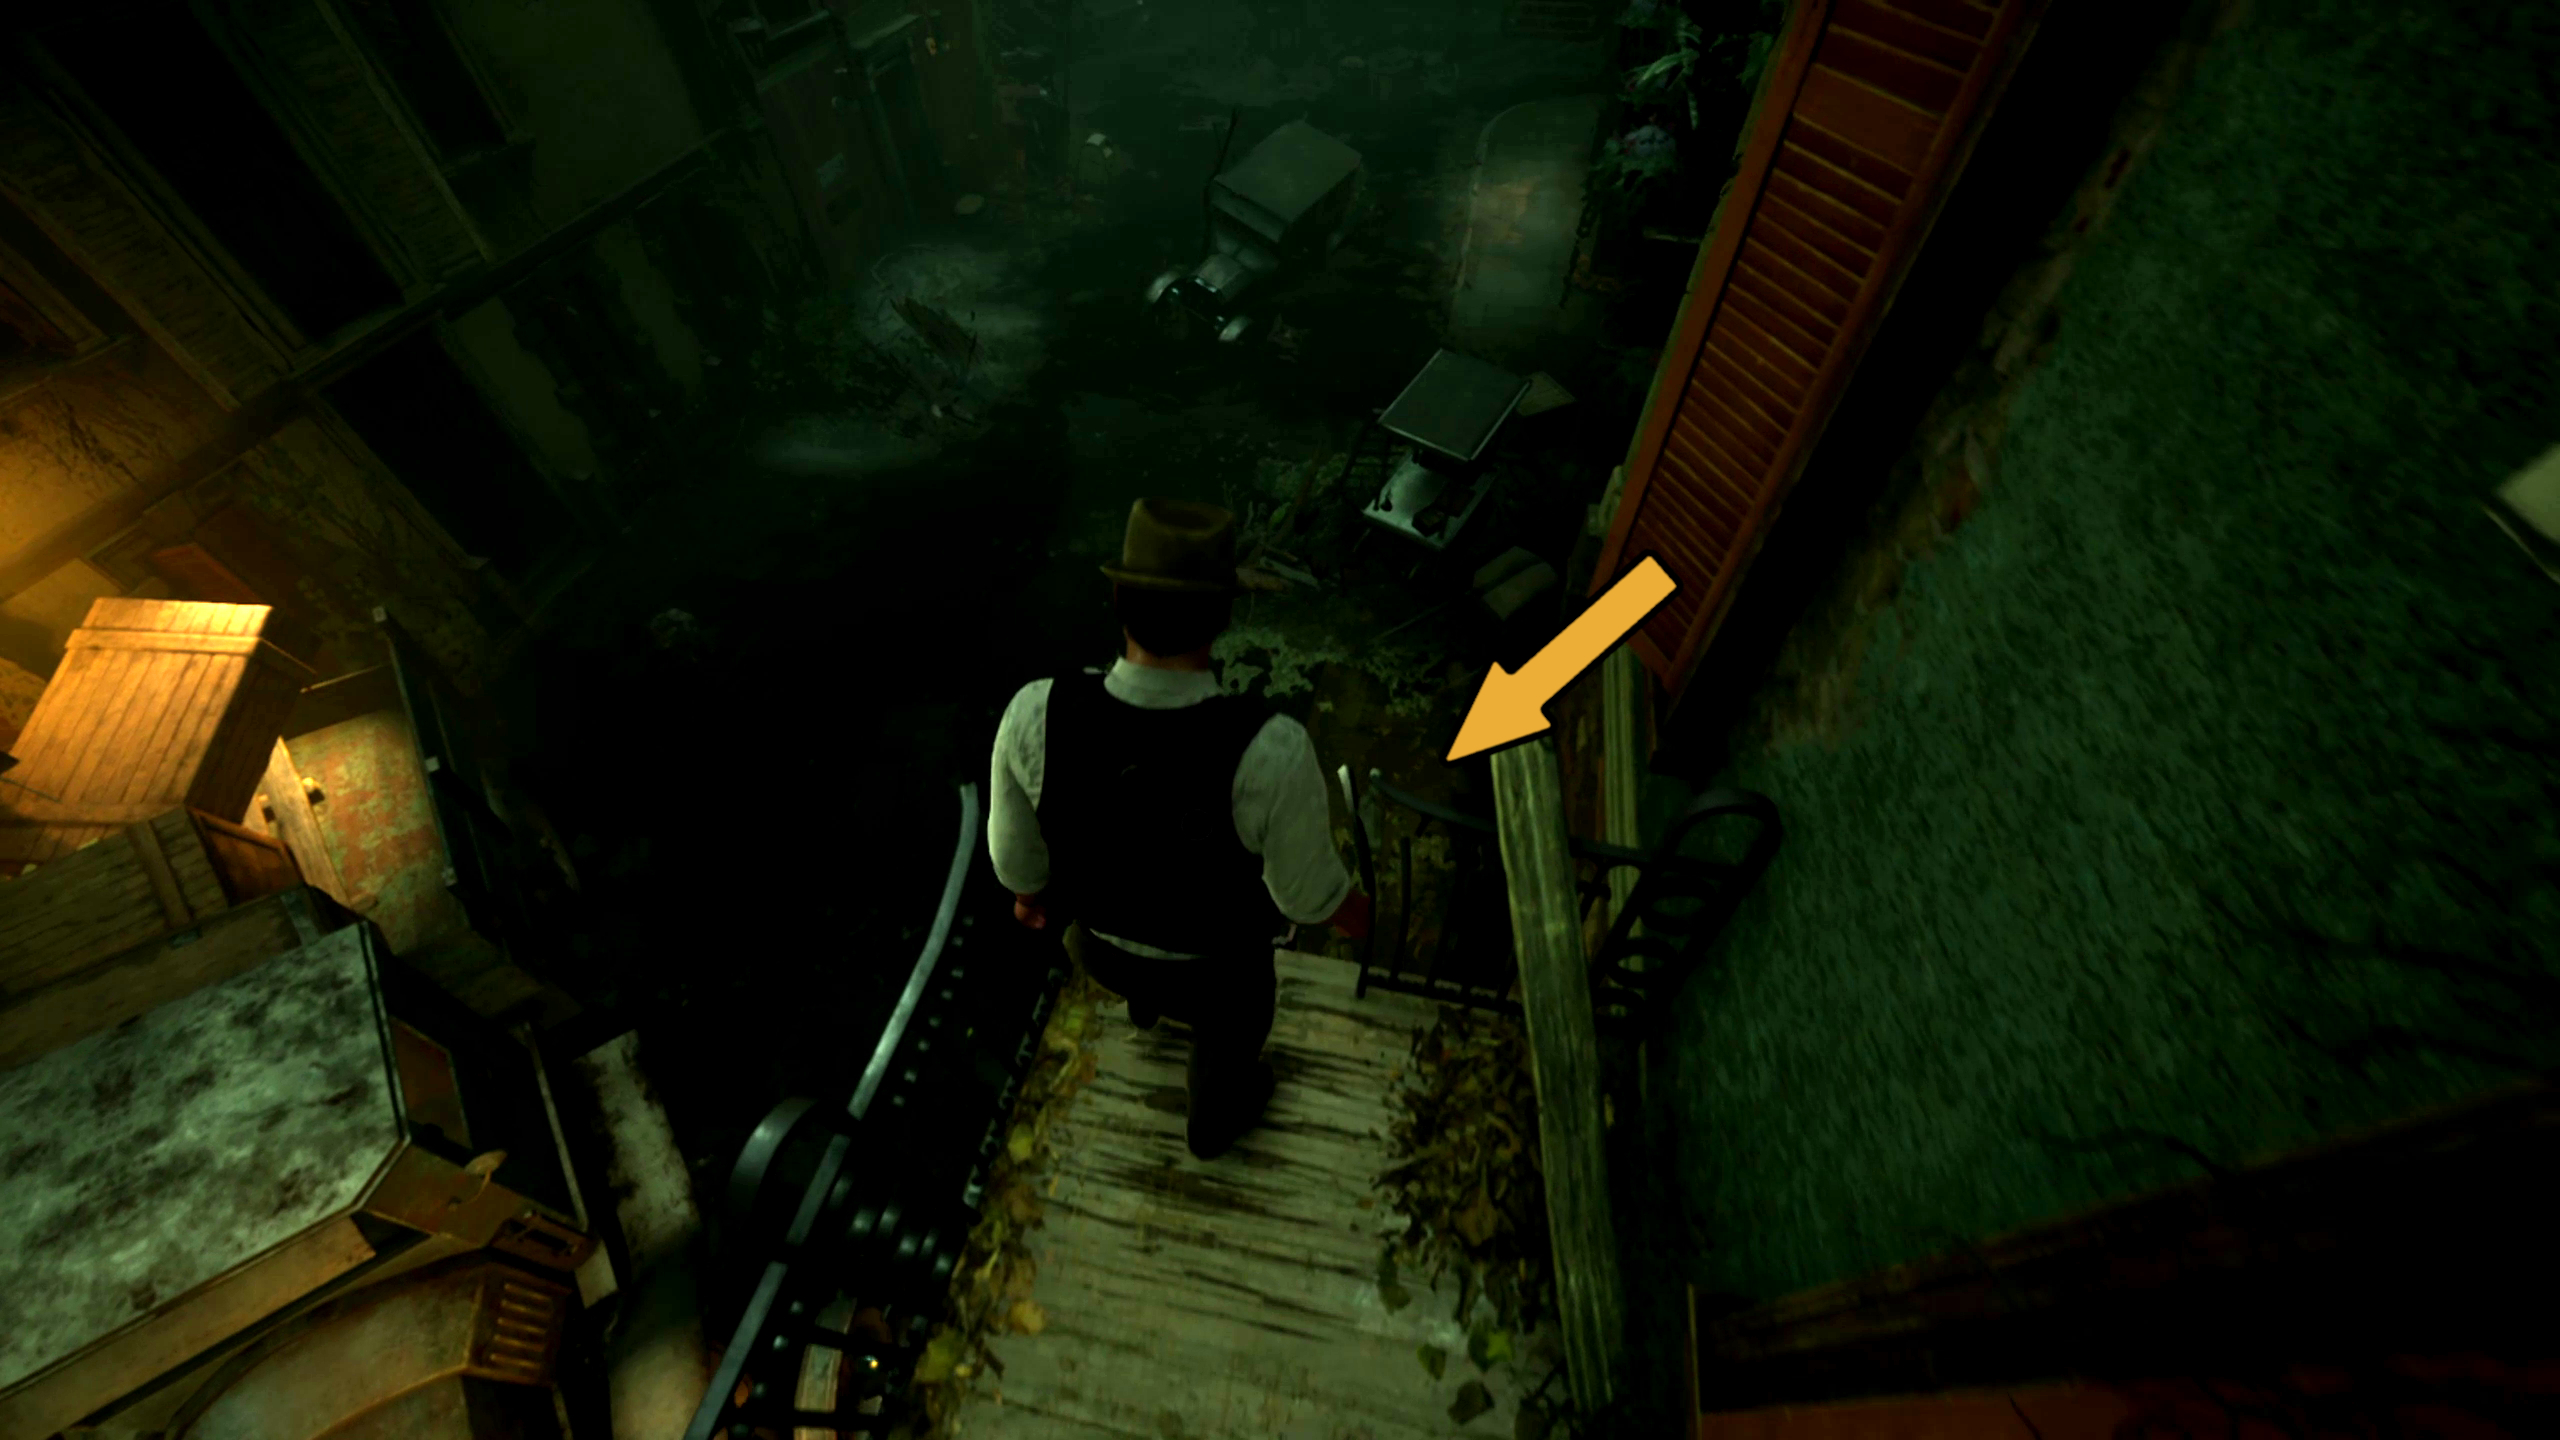
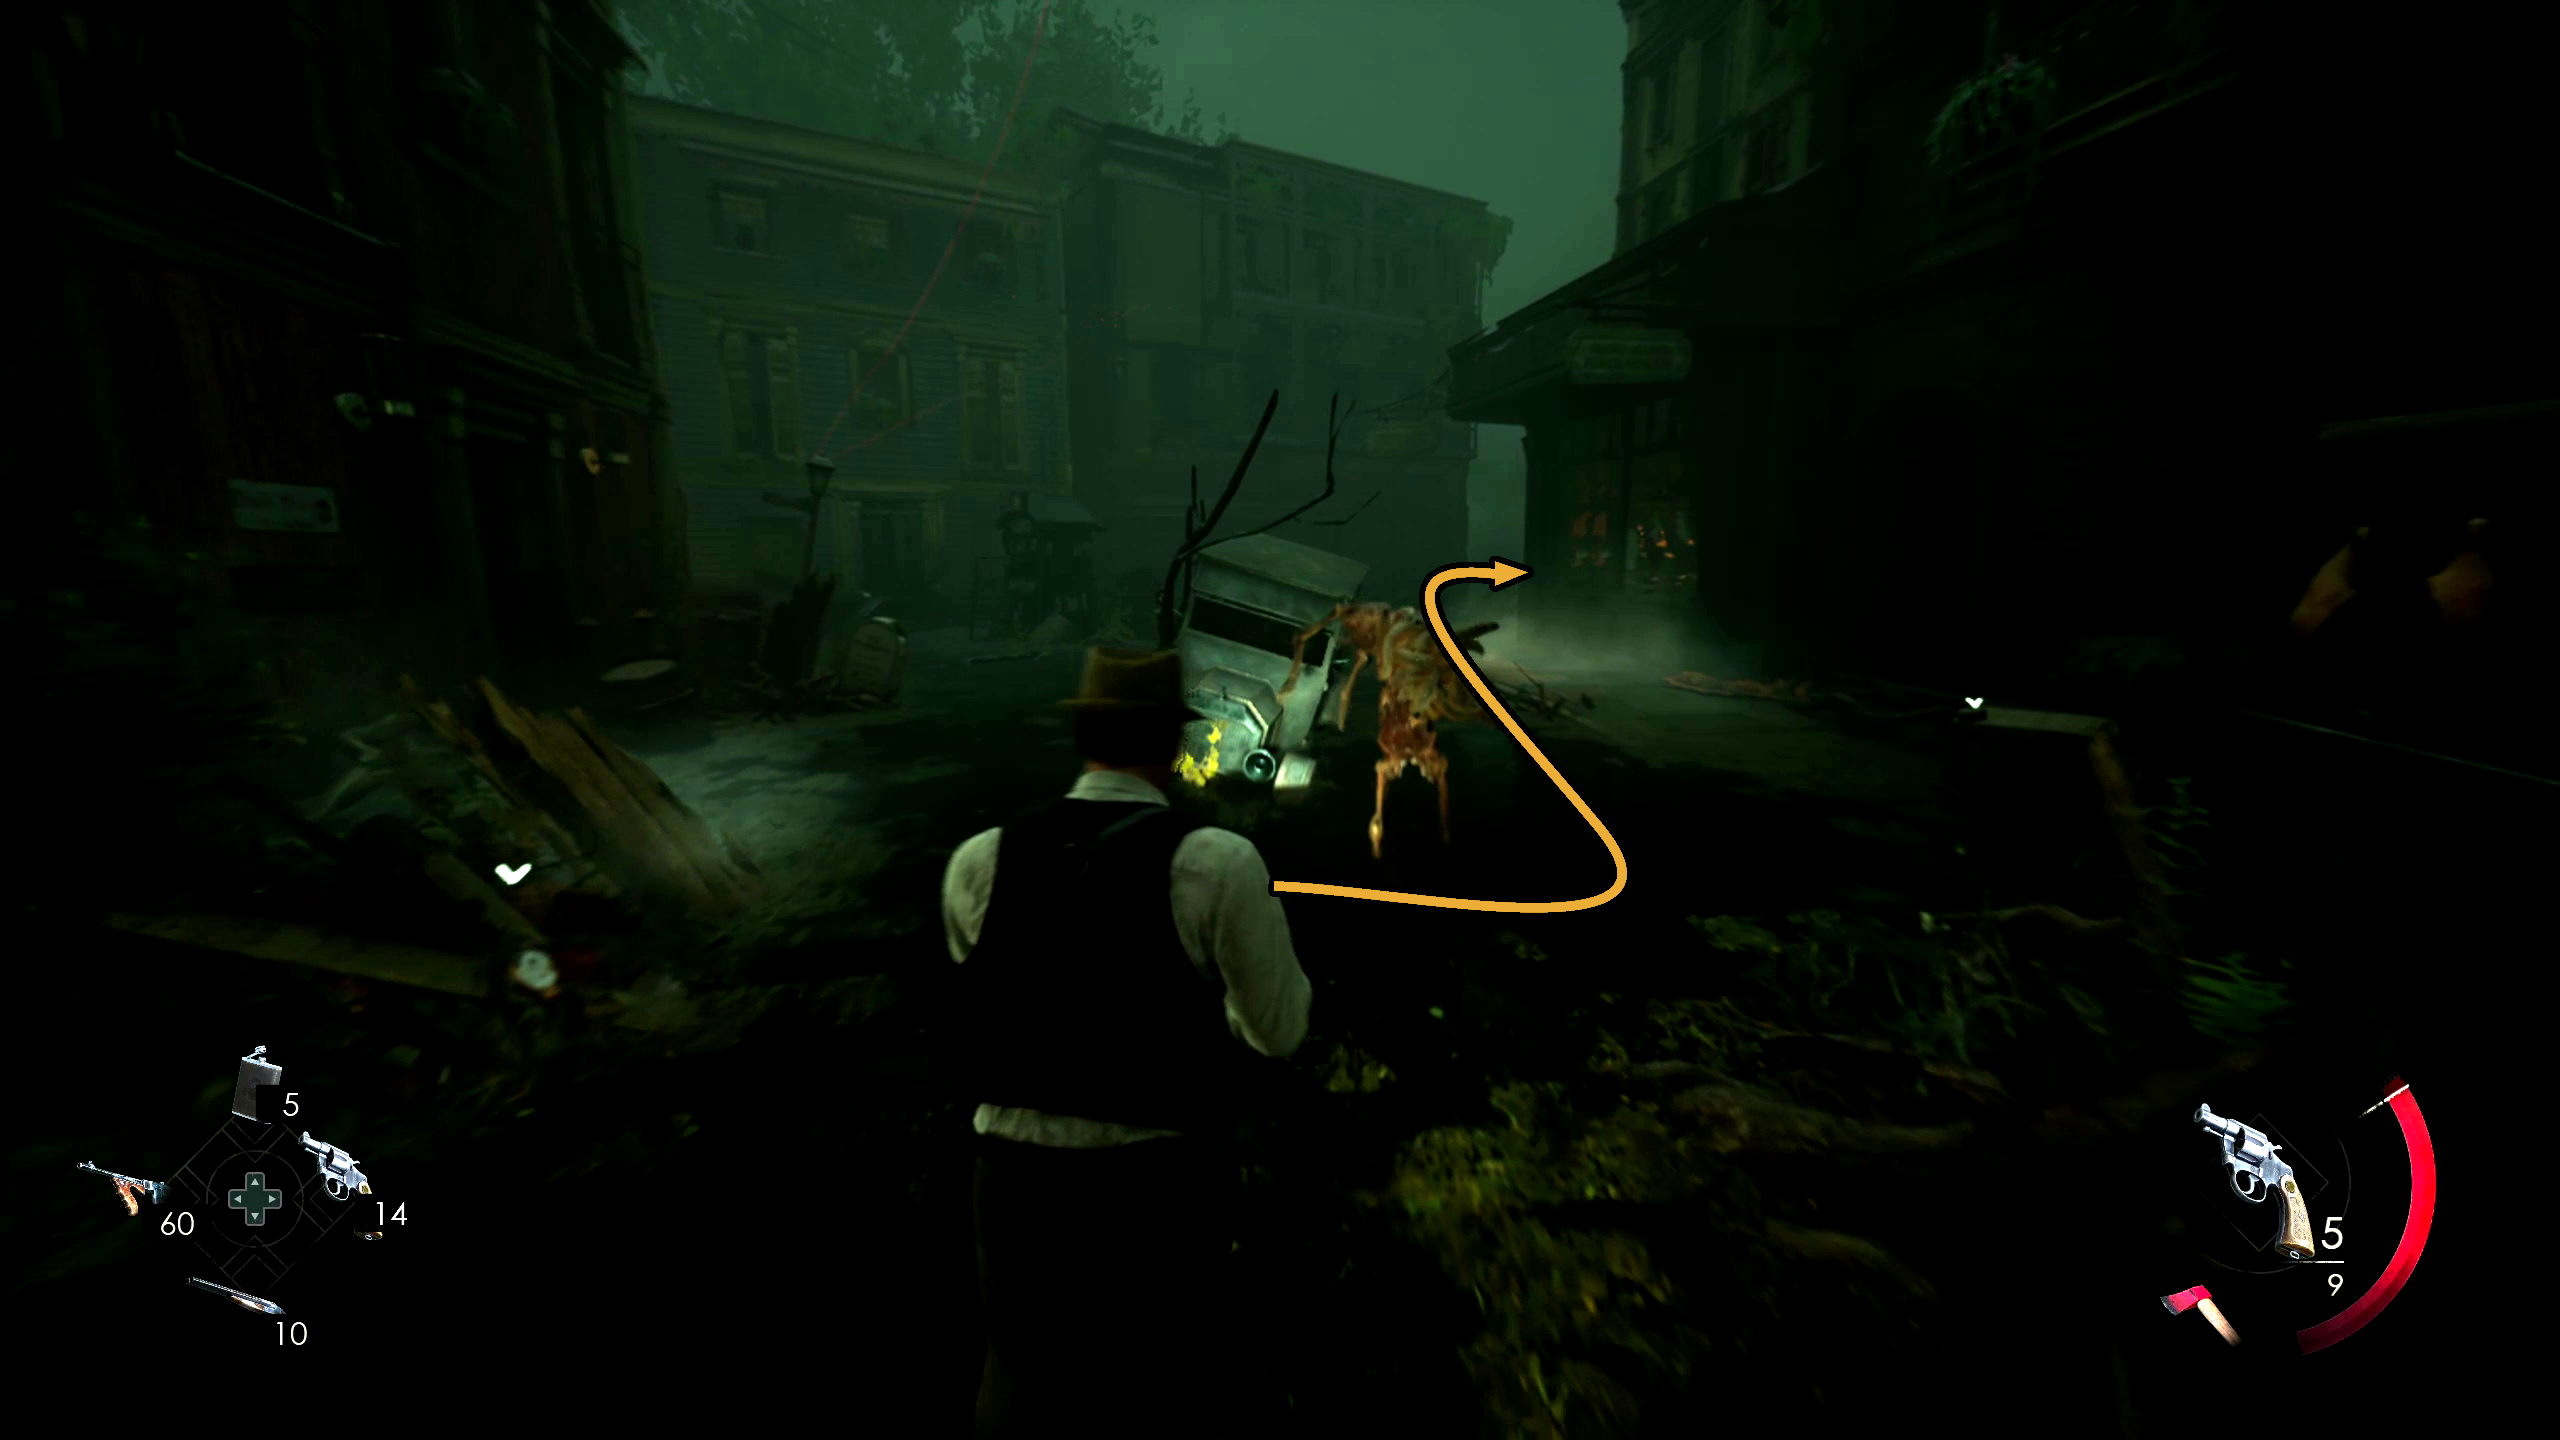
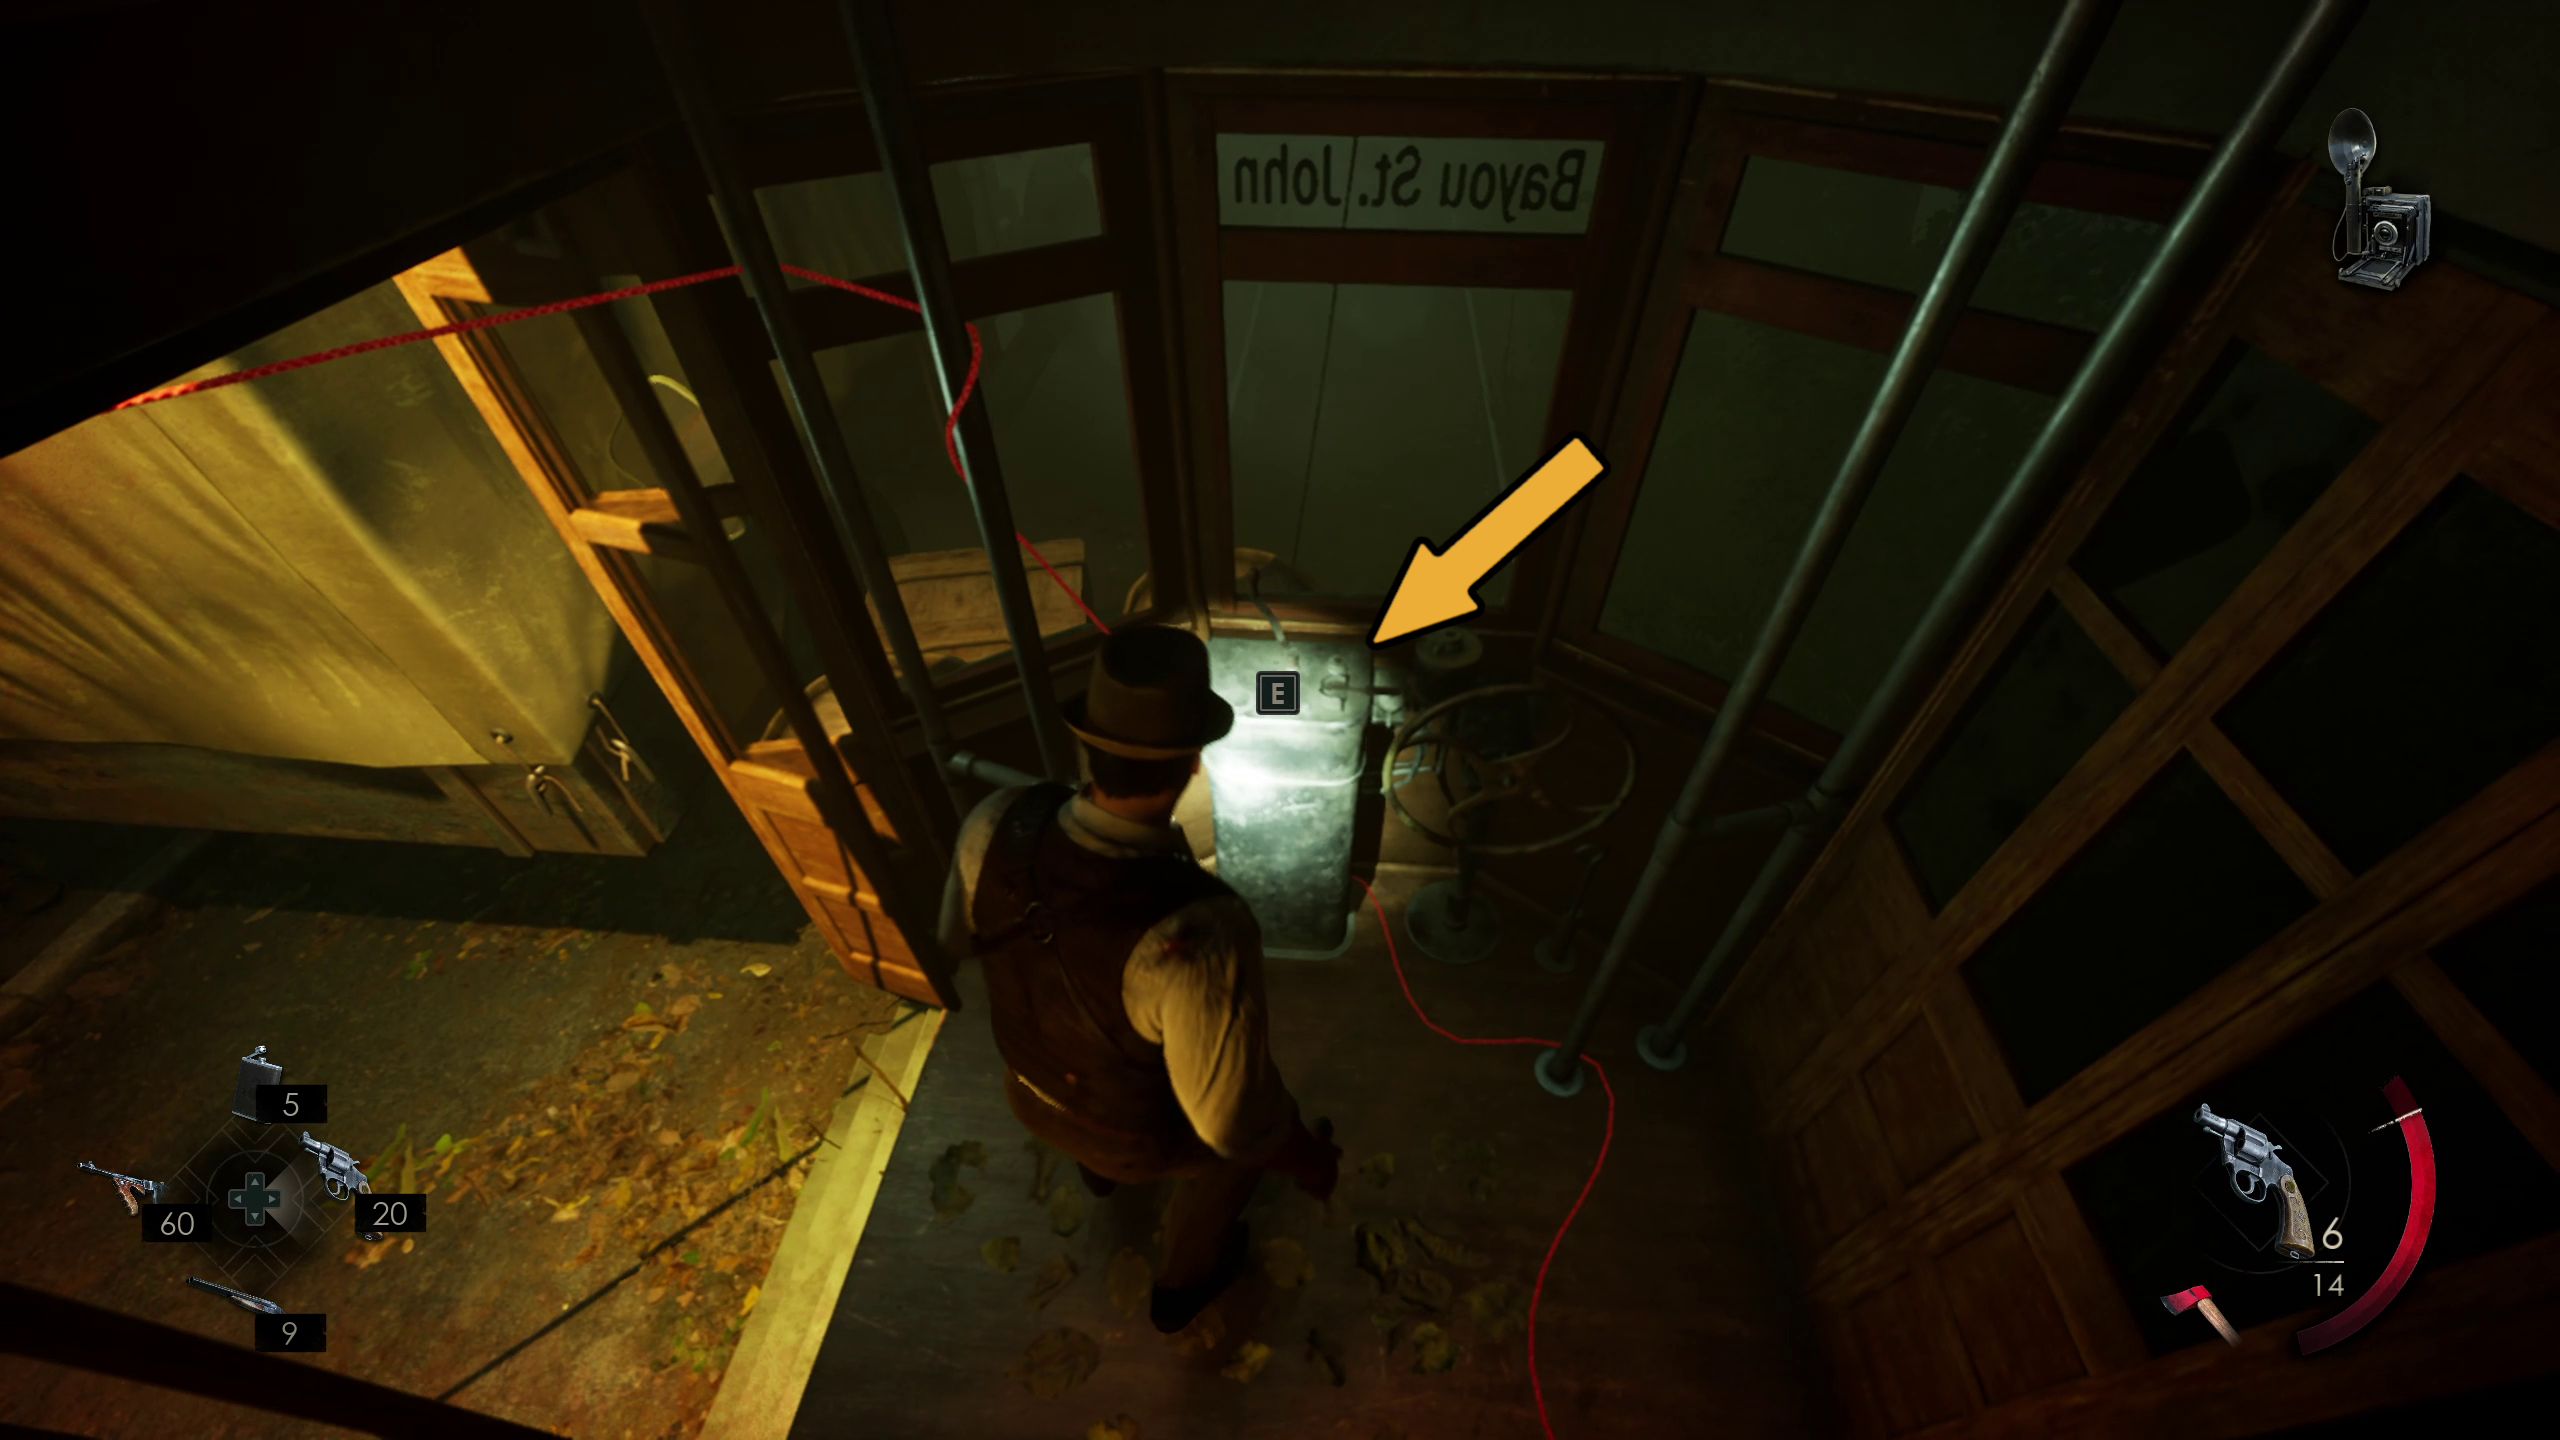
Once you’ve descended, you will be ambushed by a lot of enemies in the flooded street. Dispatch or run past them until you reach a fork in the road, and the turn right (Image 85). Keep going forward until you reach a tram car (Image 86), which you can enter and close the doors of in order to lock any remaining pursuers out (Image 87).
Image 85Image 86Image 87
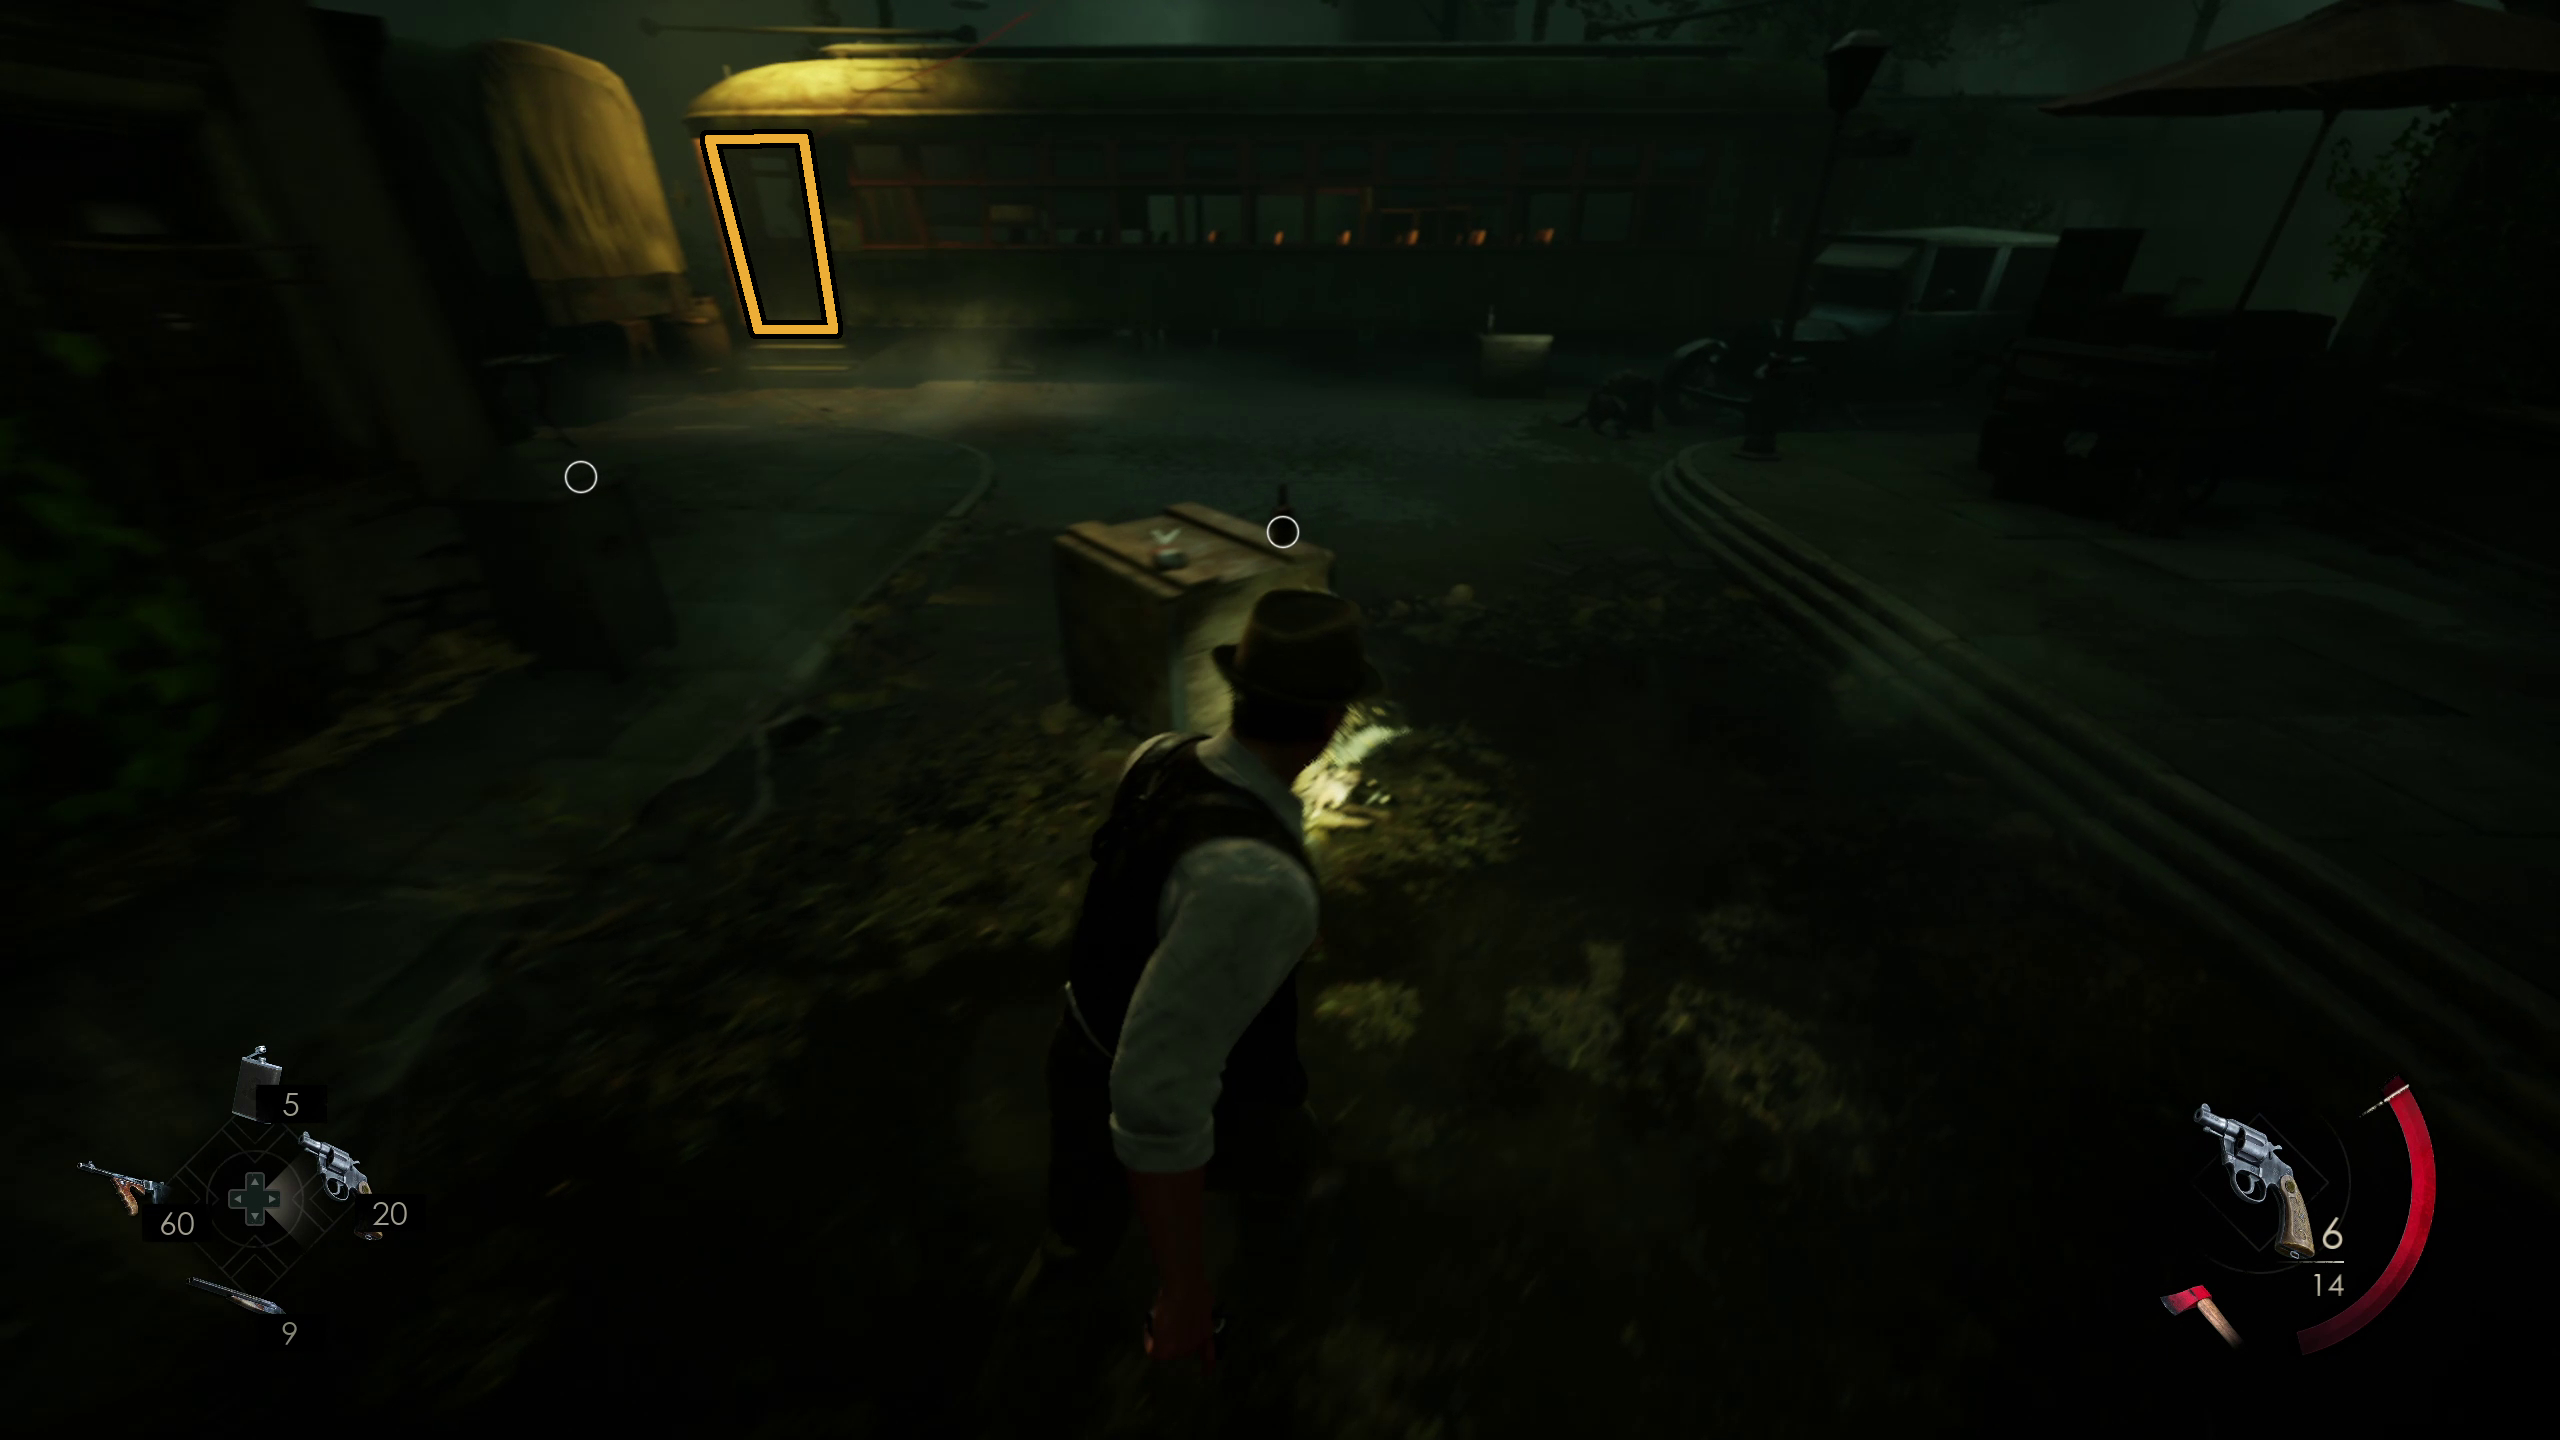
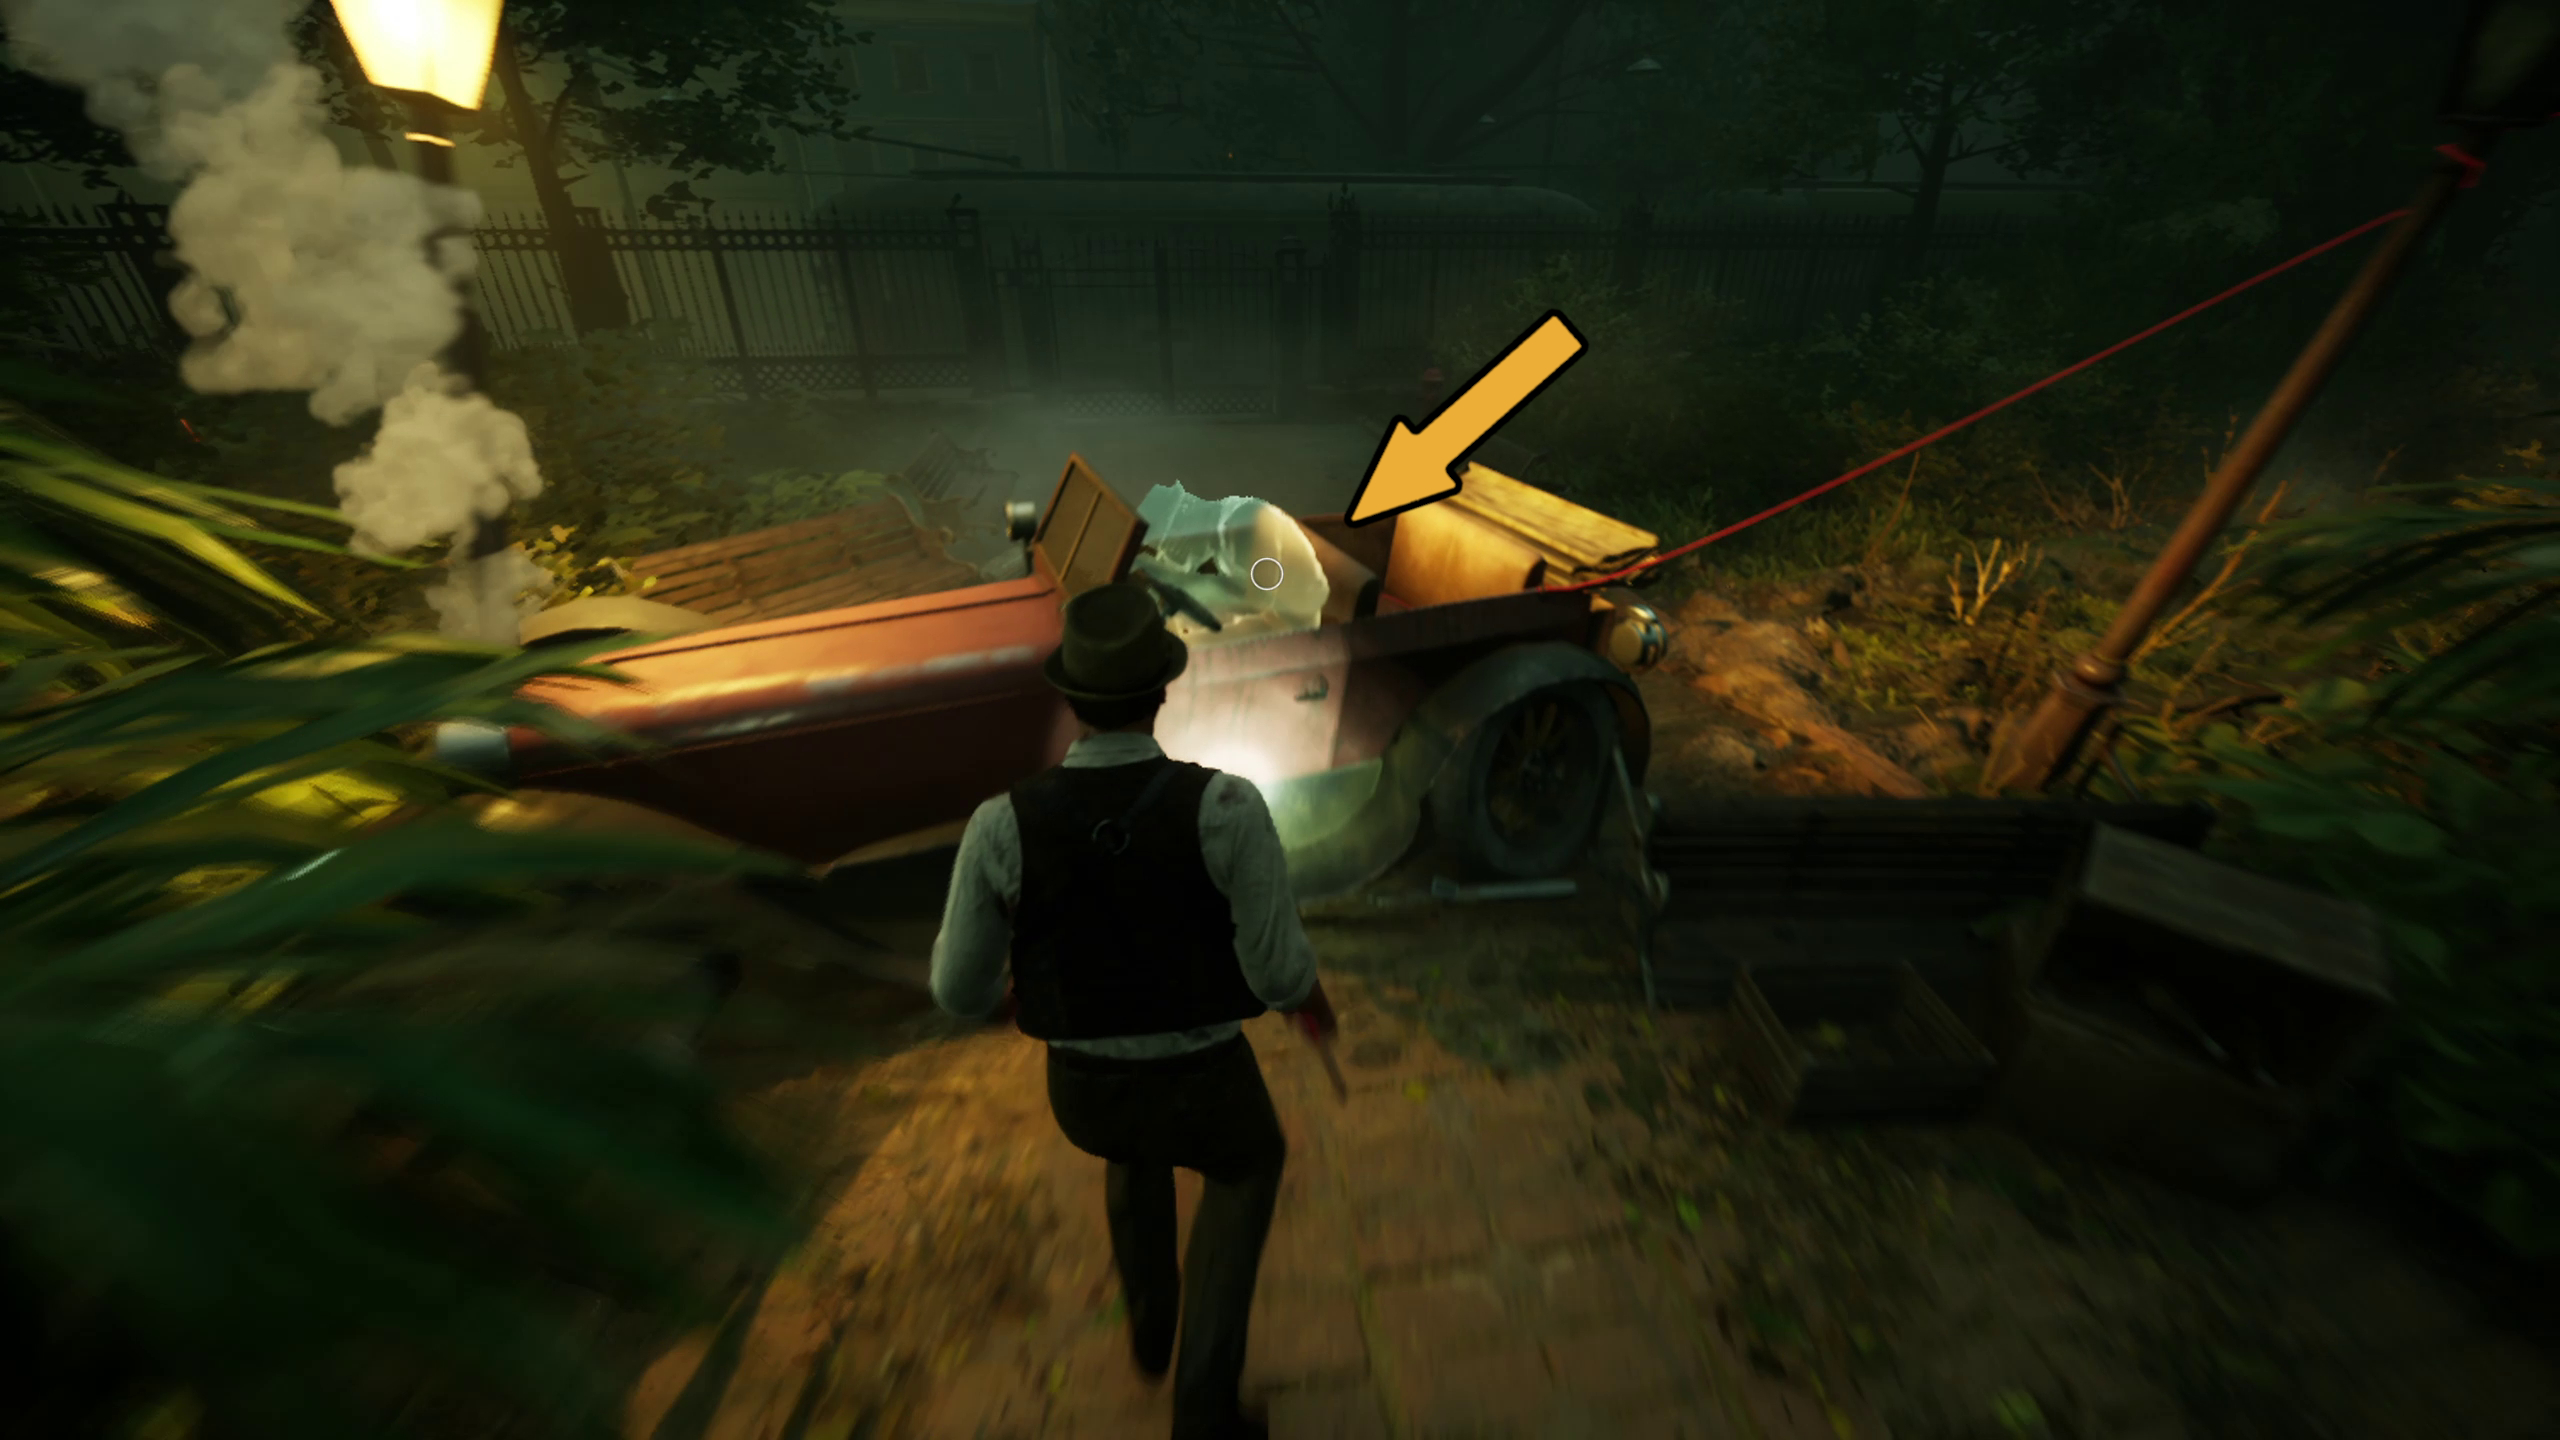
Go through the tram car and out the other side, and then enter the park to your right (Image 88). From here, go forward toward the statue until you see a crashed car to your right, containing another spectre you can interact with (Image 89).
Image 88Image 89
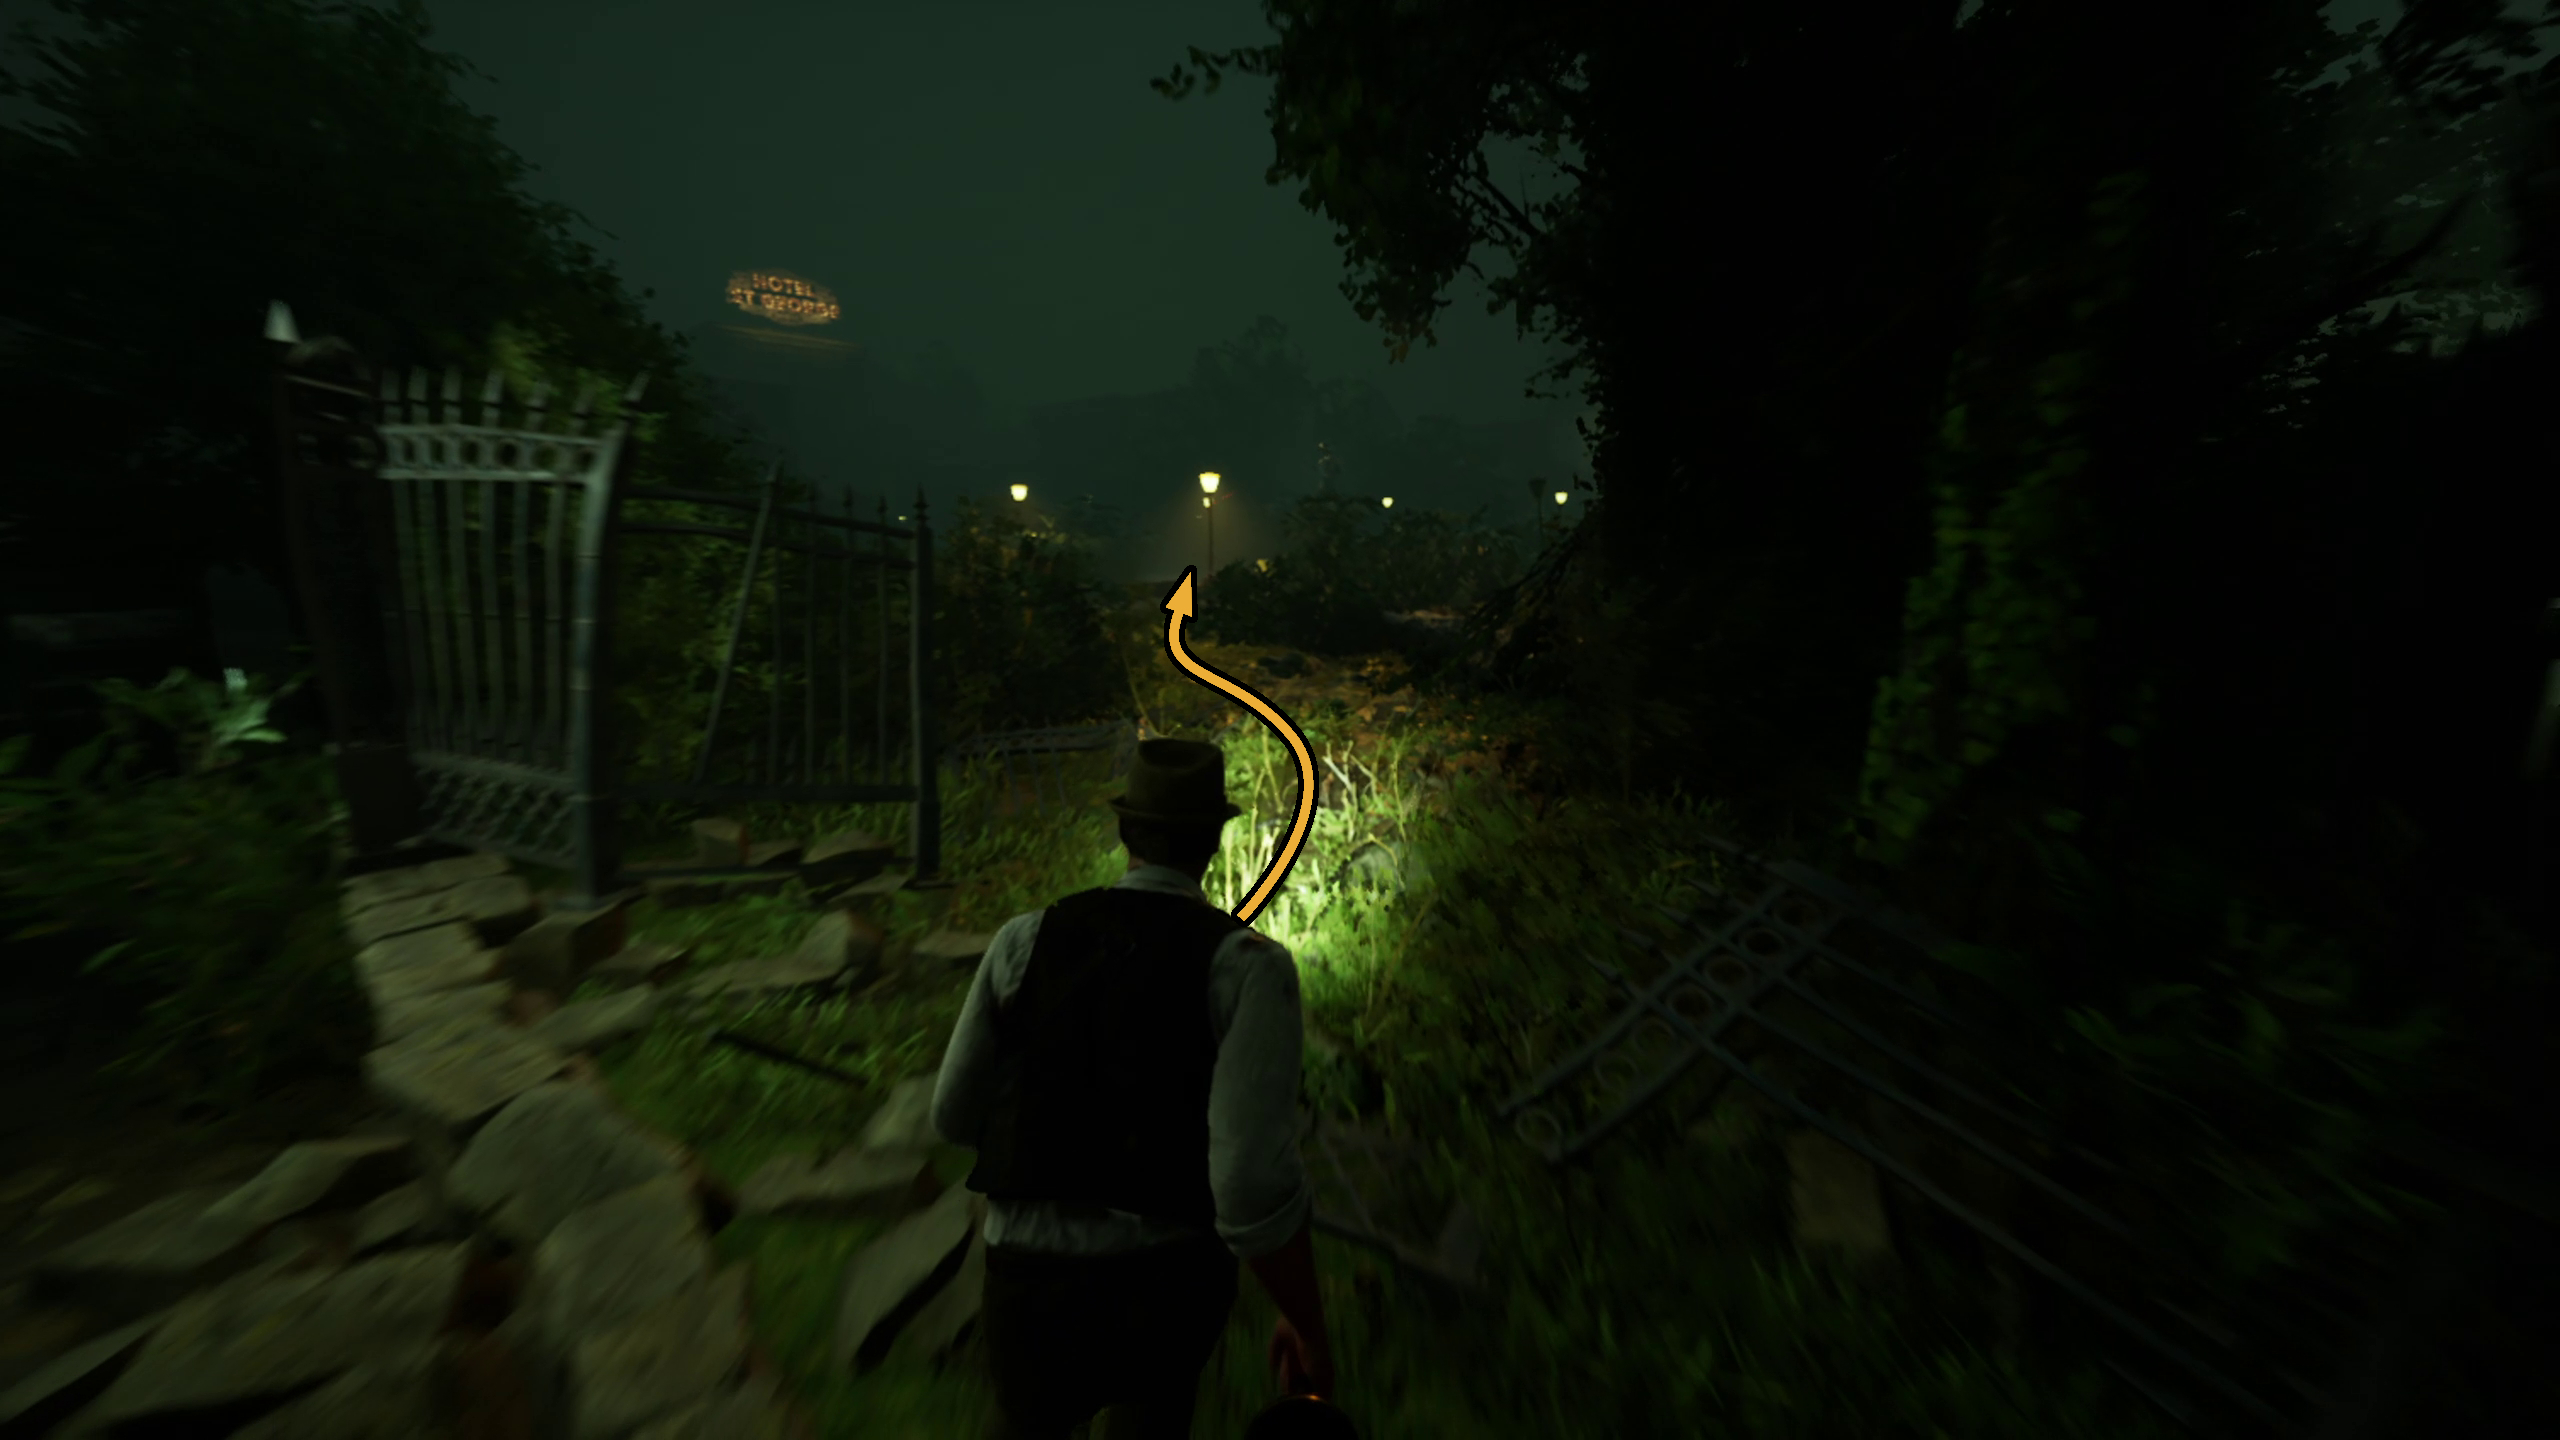
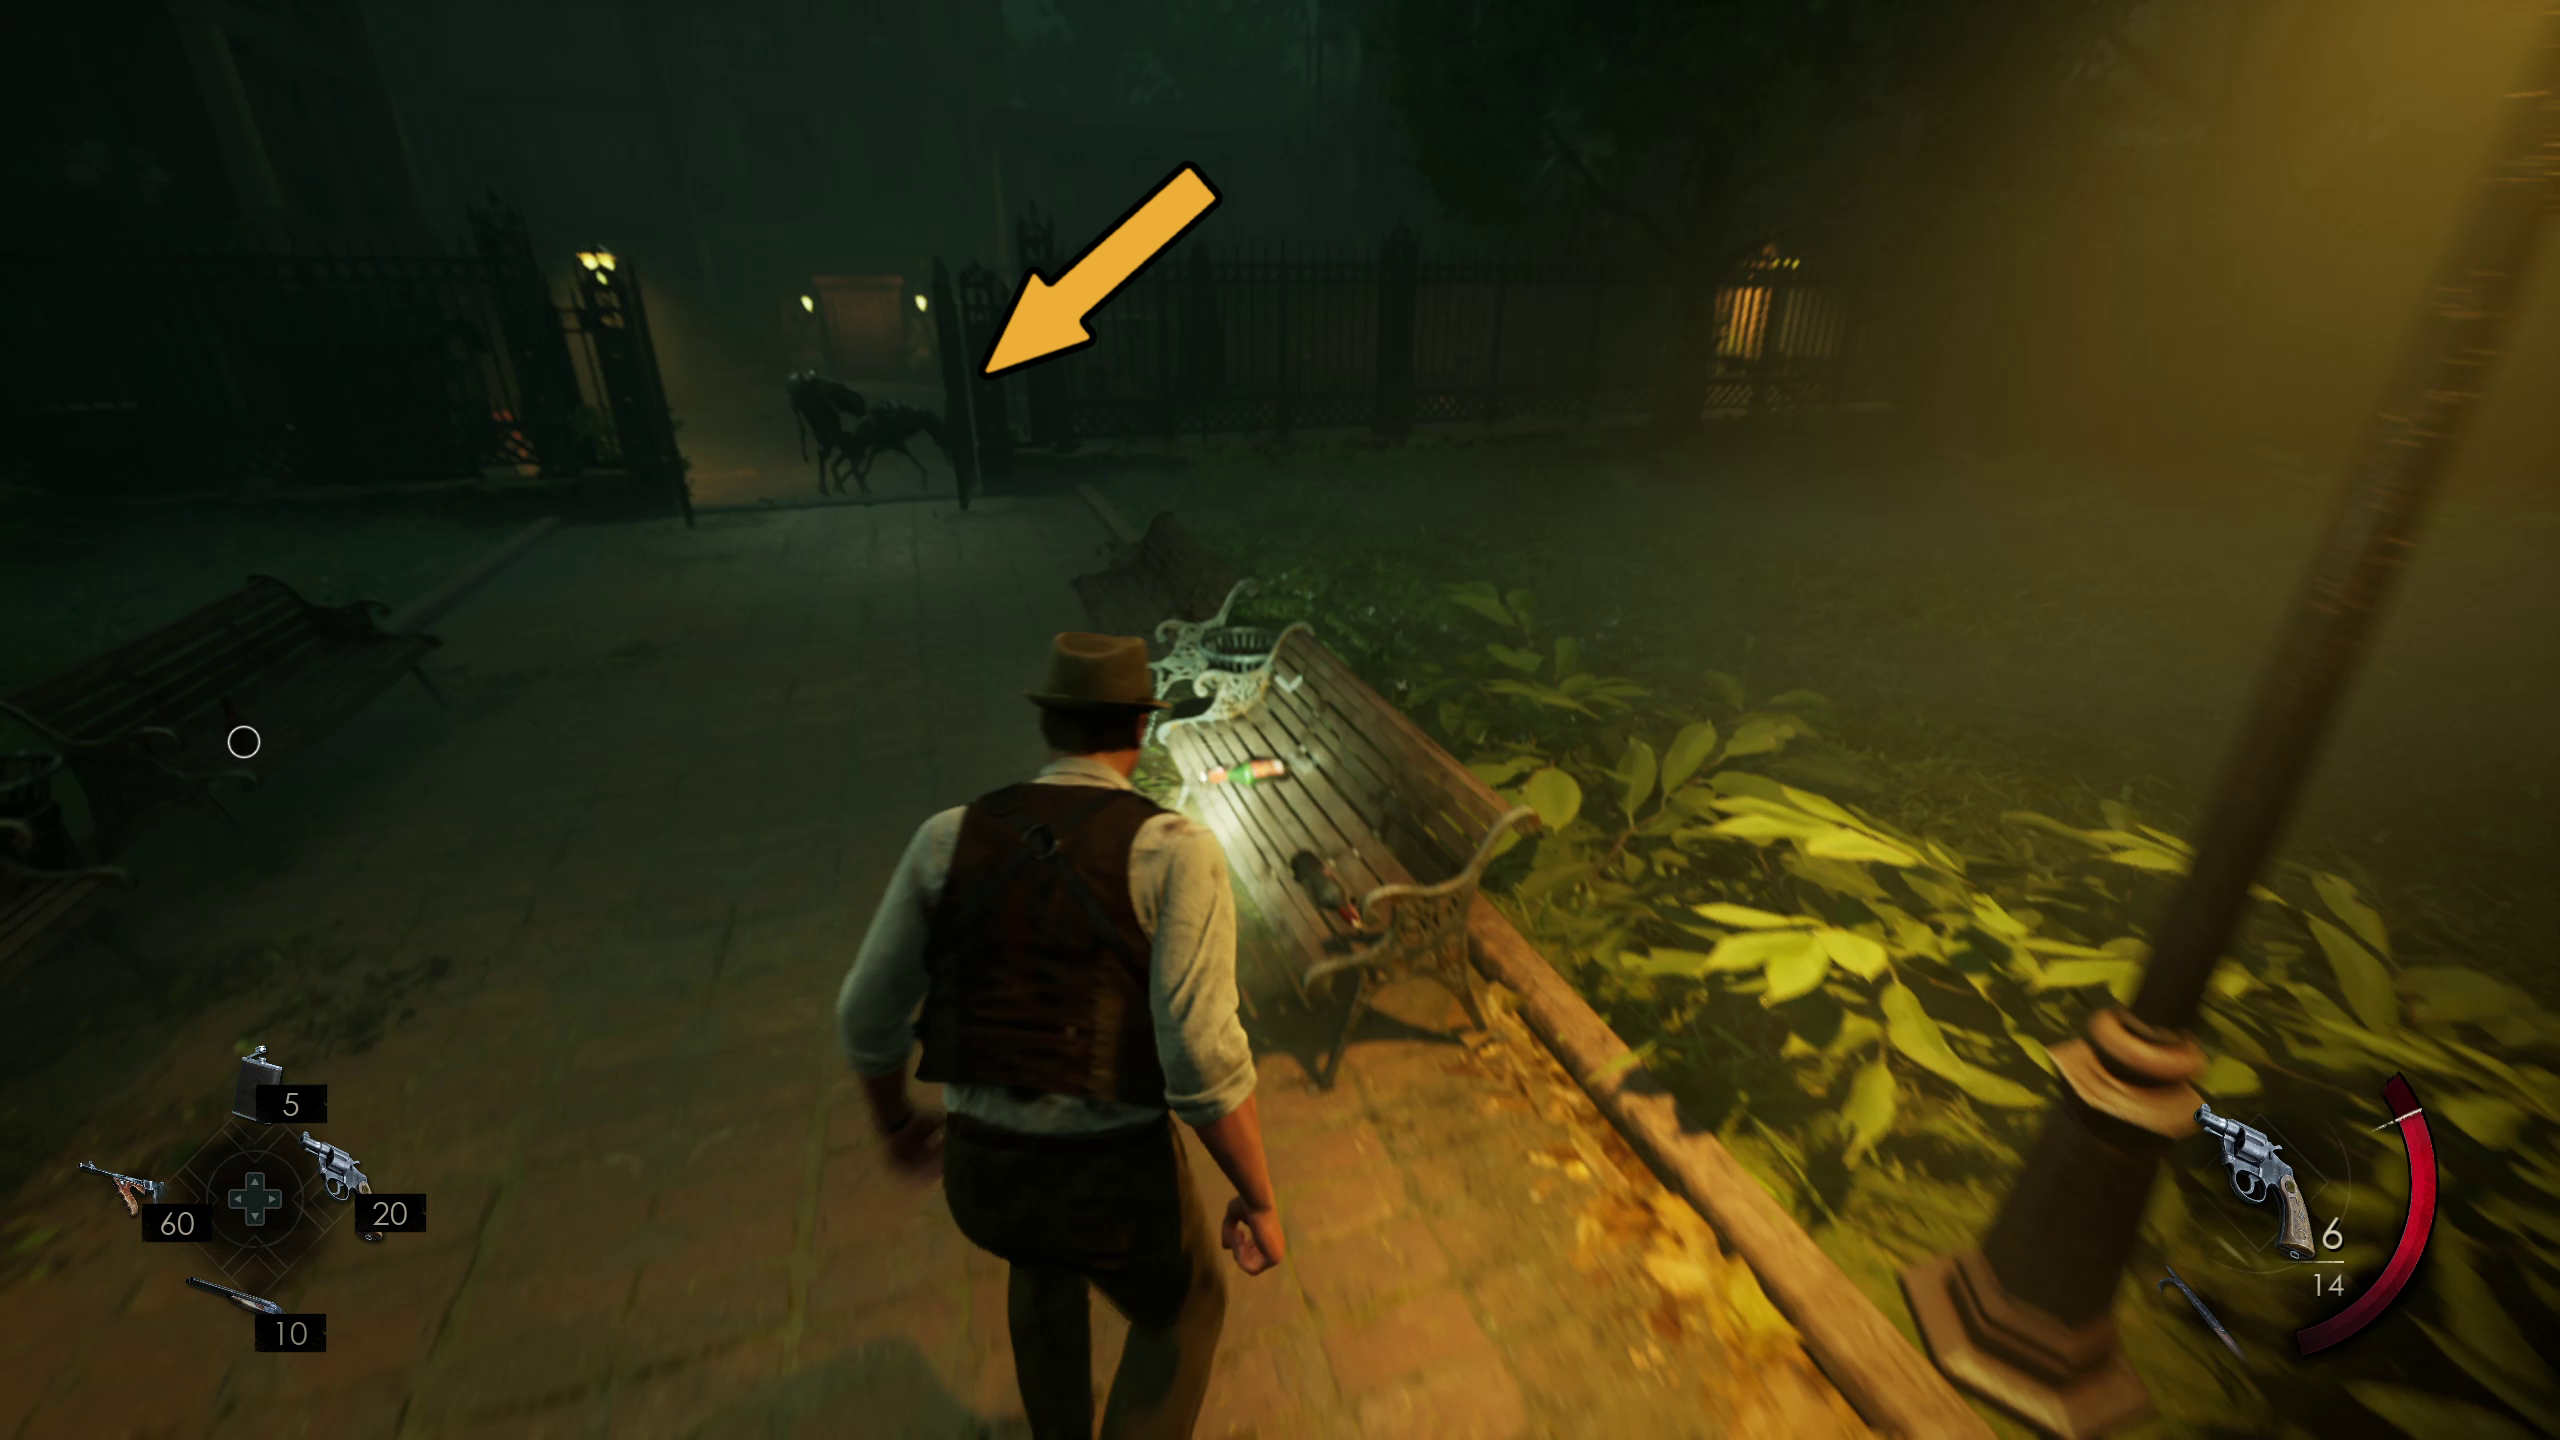
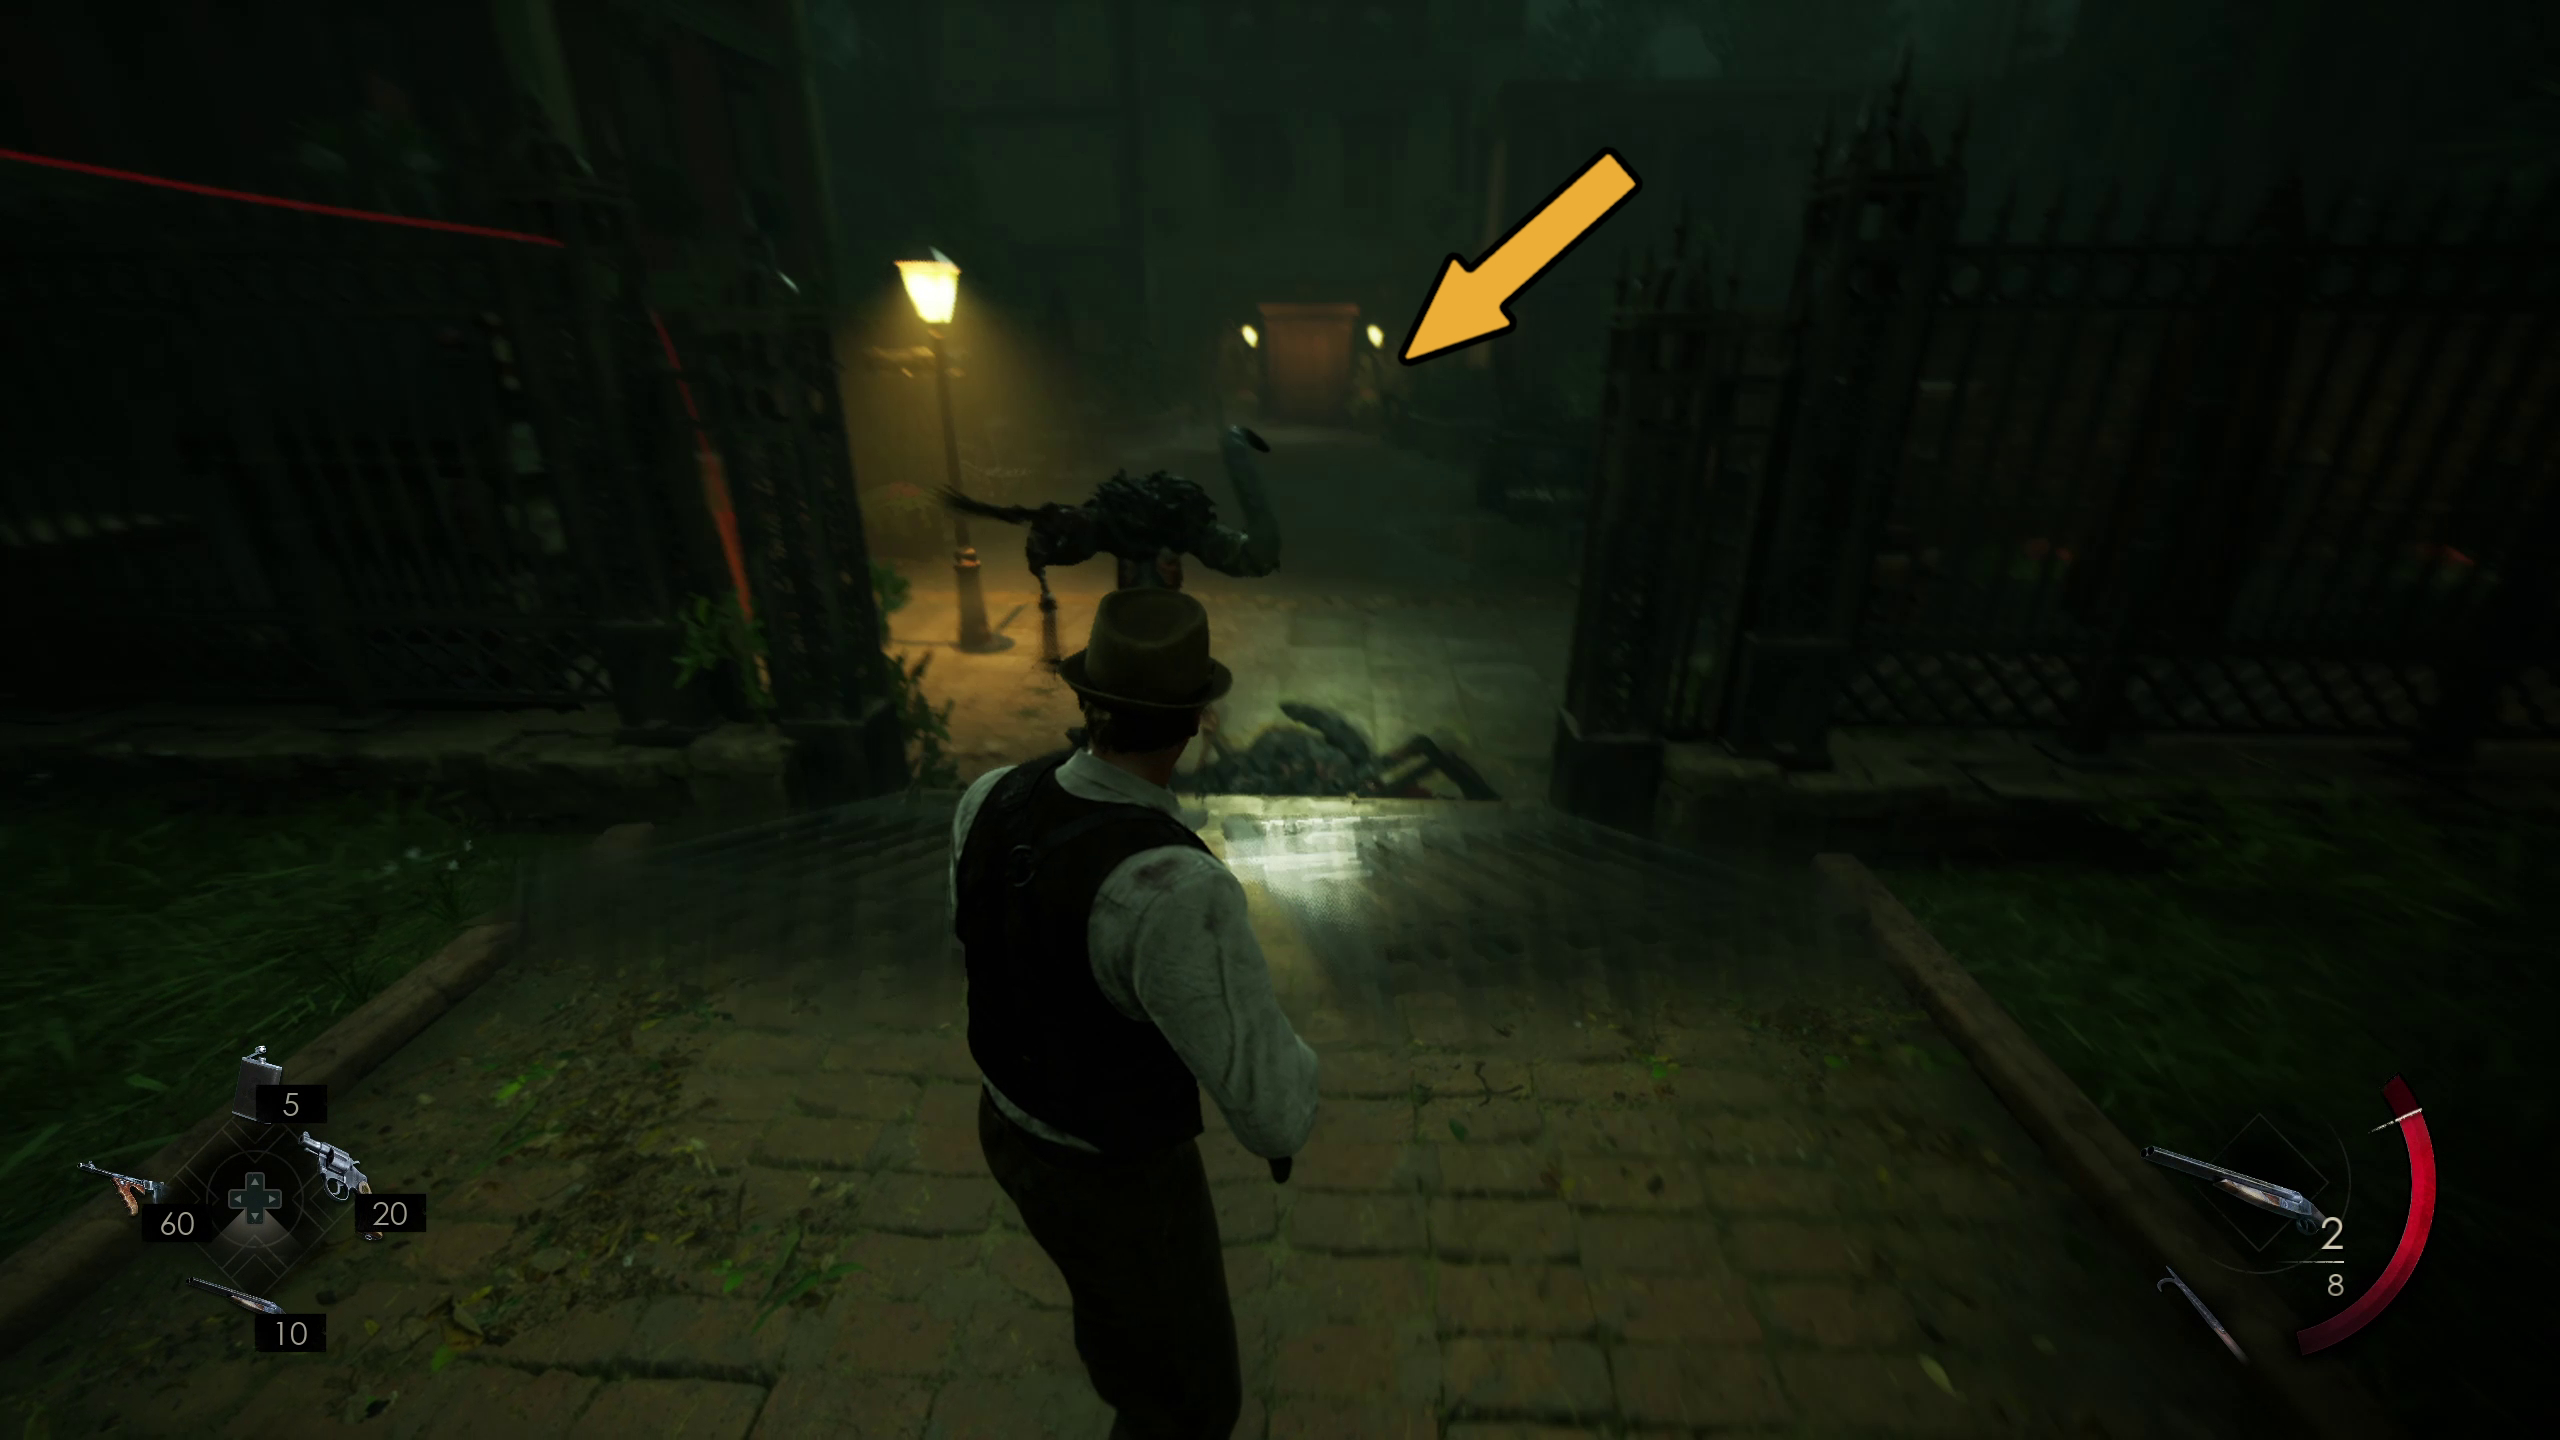
While you are talking about your memory, 2 enemies will attempt to ambush you after breaking open the gate at the opposite side of the park (Image 90). If you are quick enough, you can go through the gate when they do in order to progress. Otherwise, you will need to wait for a third enemy to come along to completely break the gate down before moving into the Hotel St. George (Image 91).
Image 90Image 91
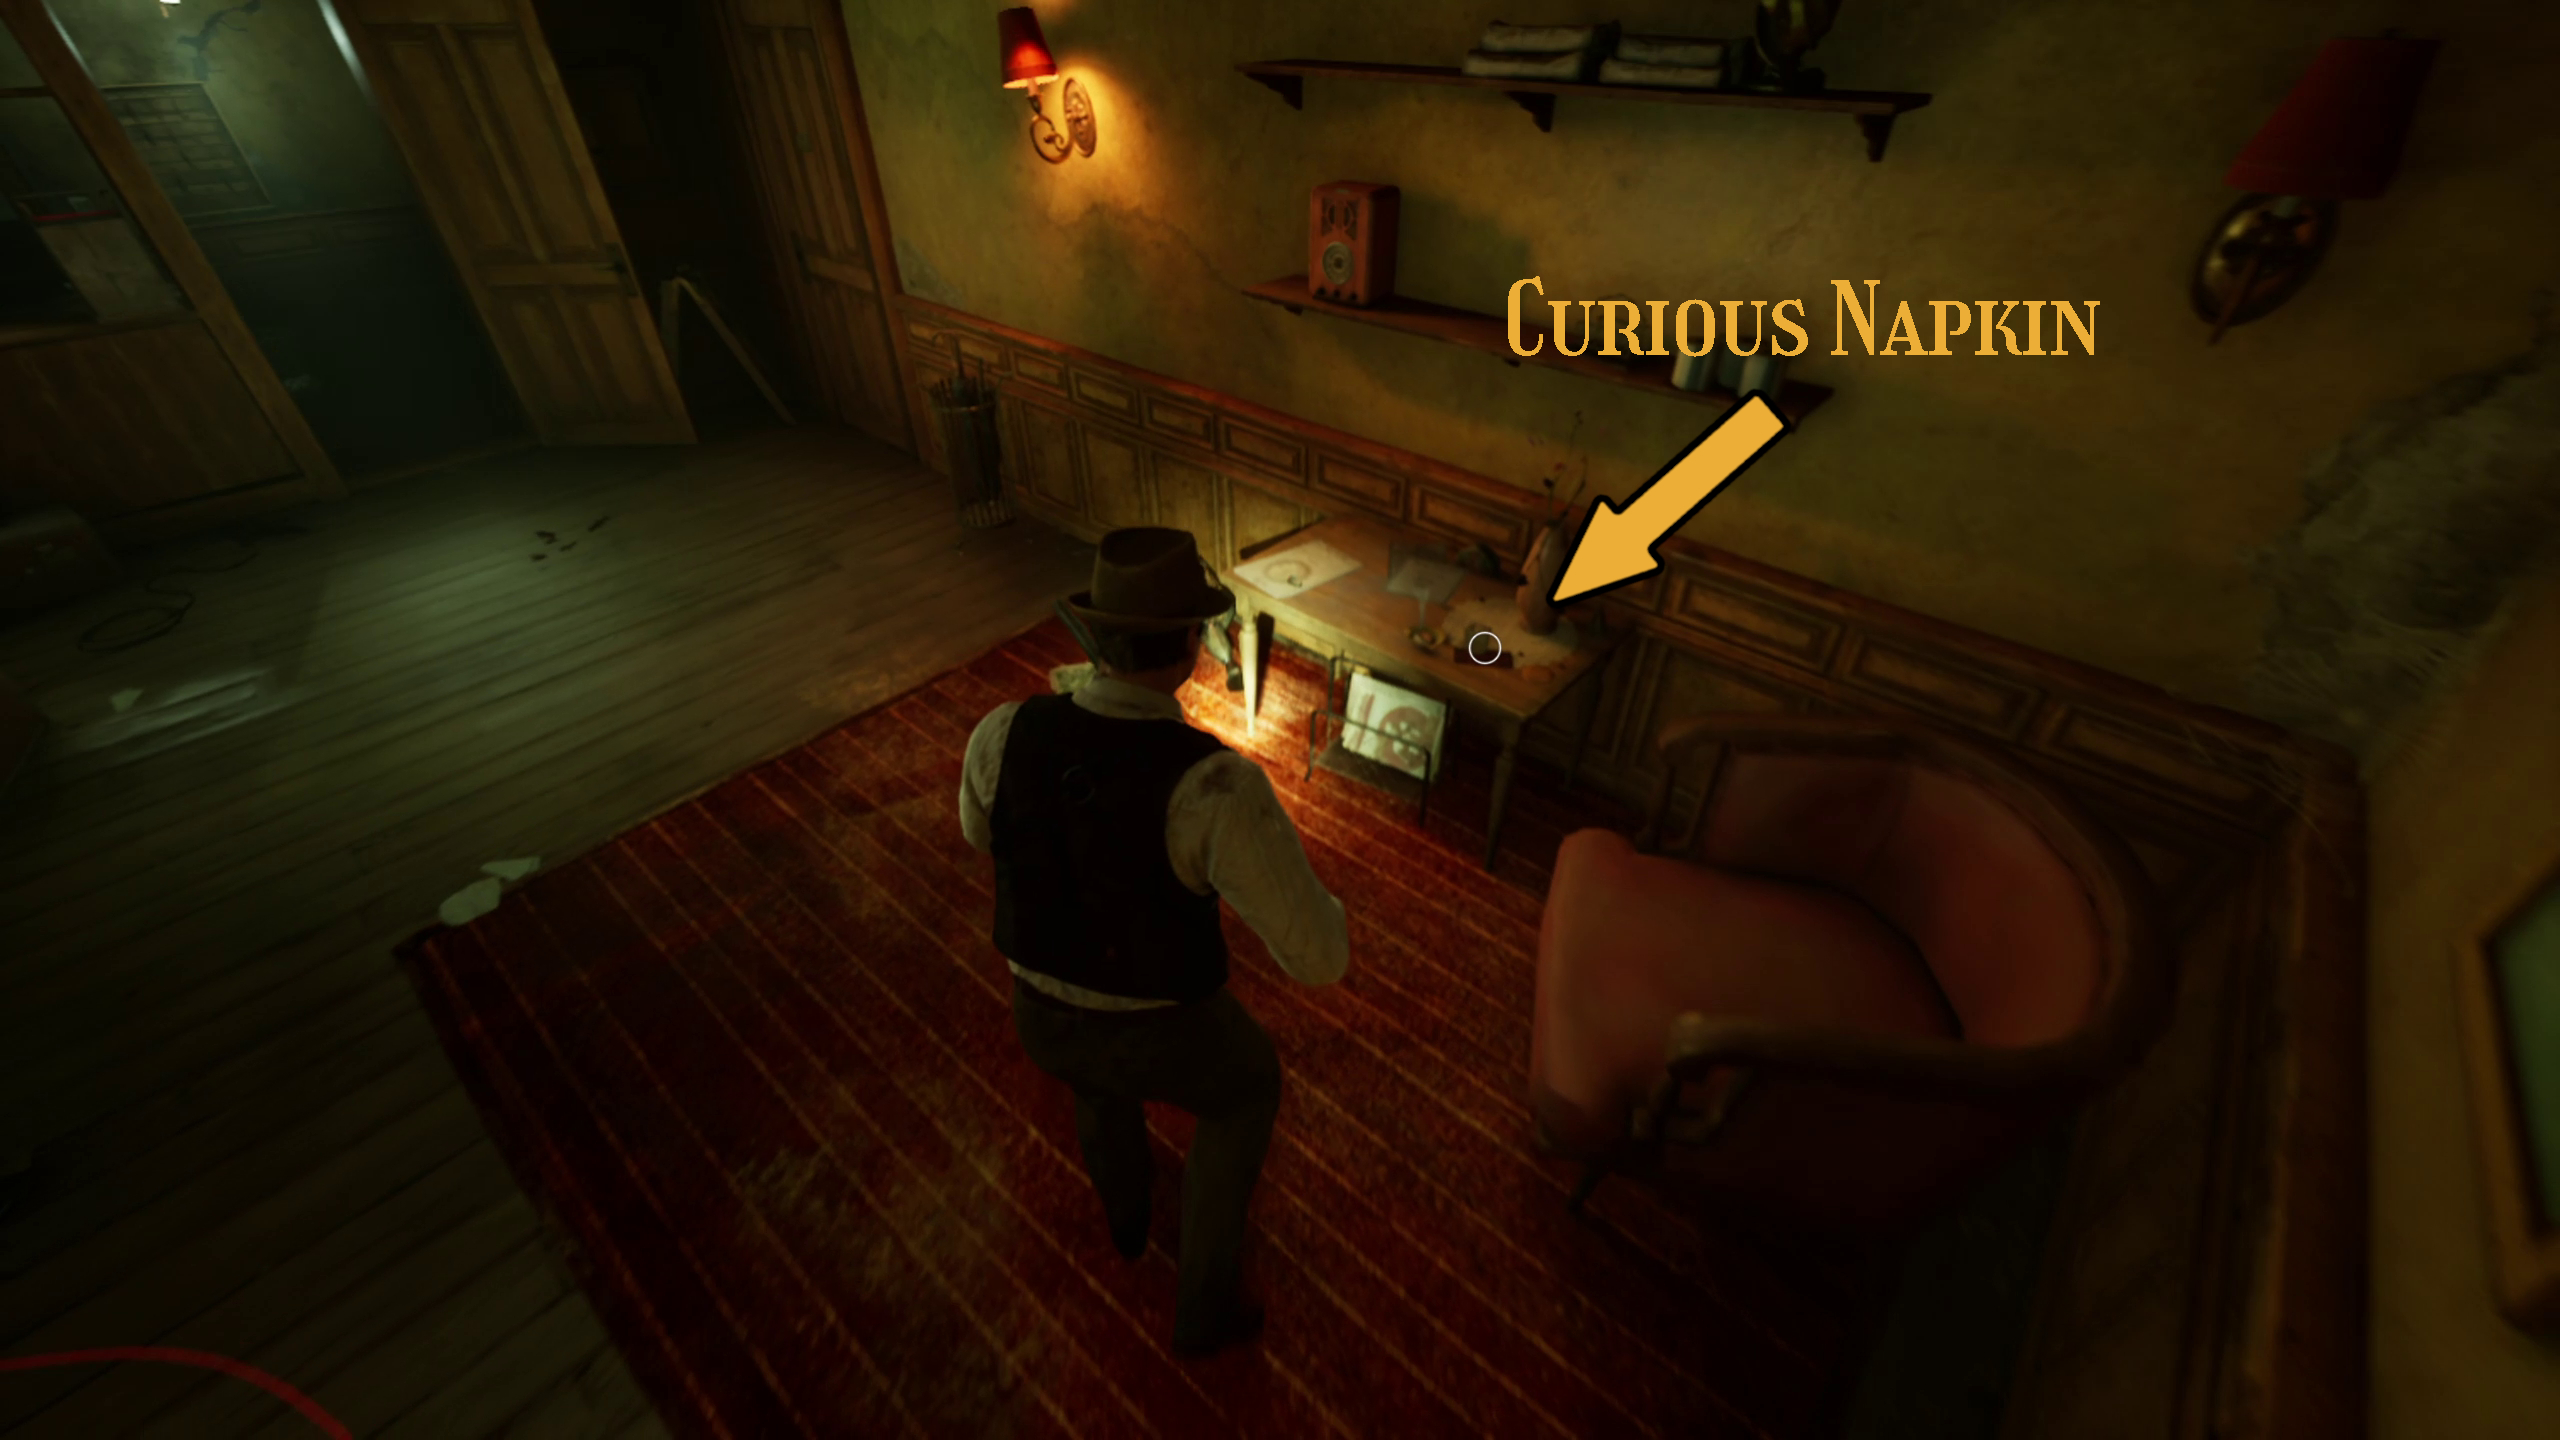
From here, go into the St. George Motel and look to your right to find the Curious Napkin Lagniappe (Image 92), and then you can go behind the front desk to speak to your spectre more and grab some loot (Image 93).
Image 92Image 93
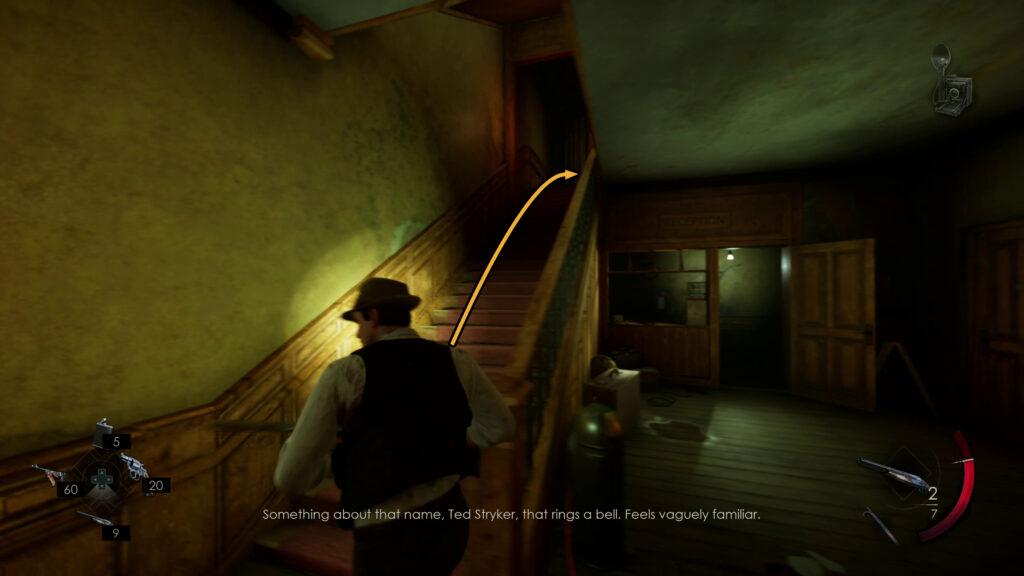
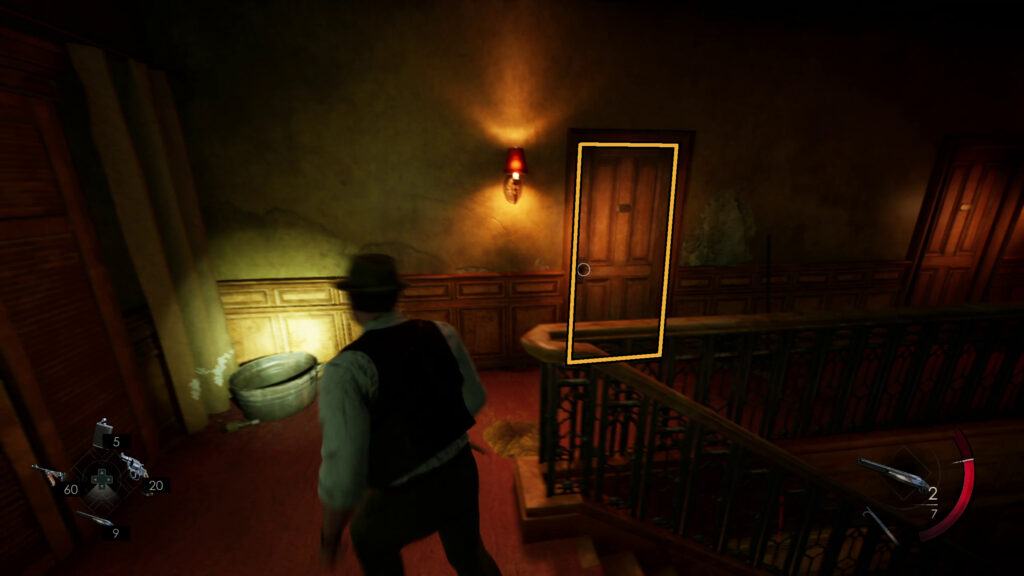
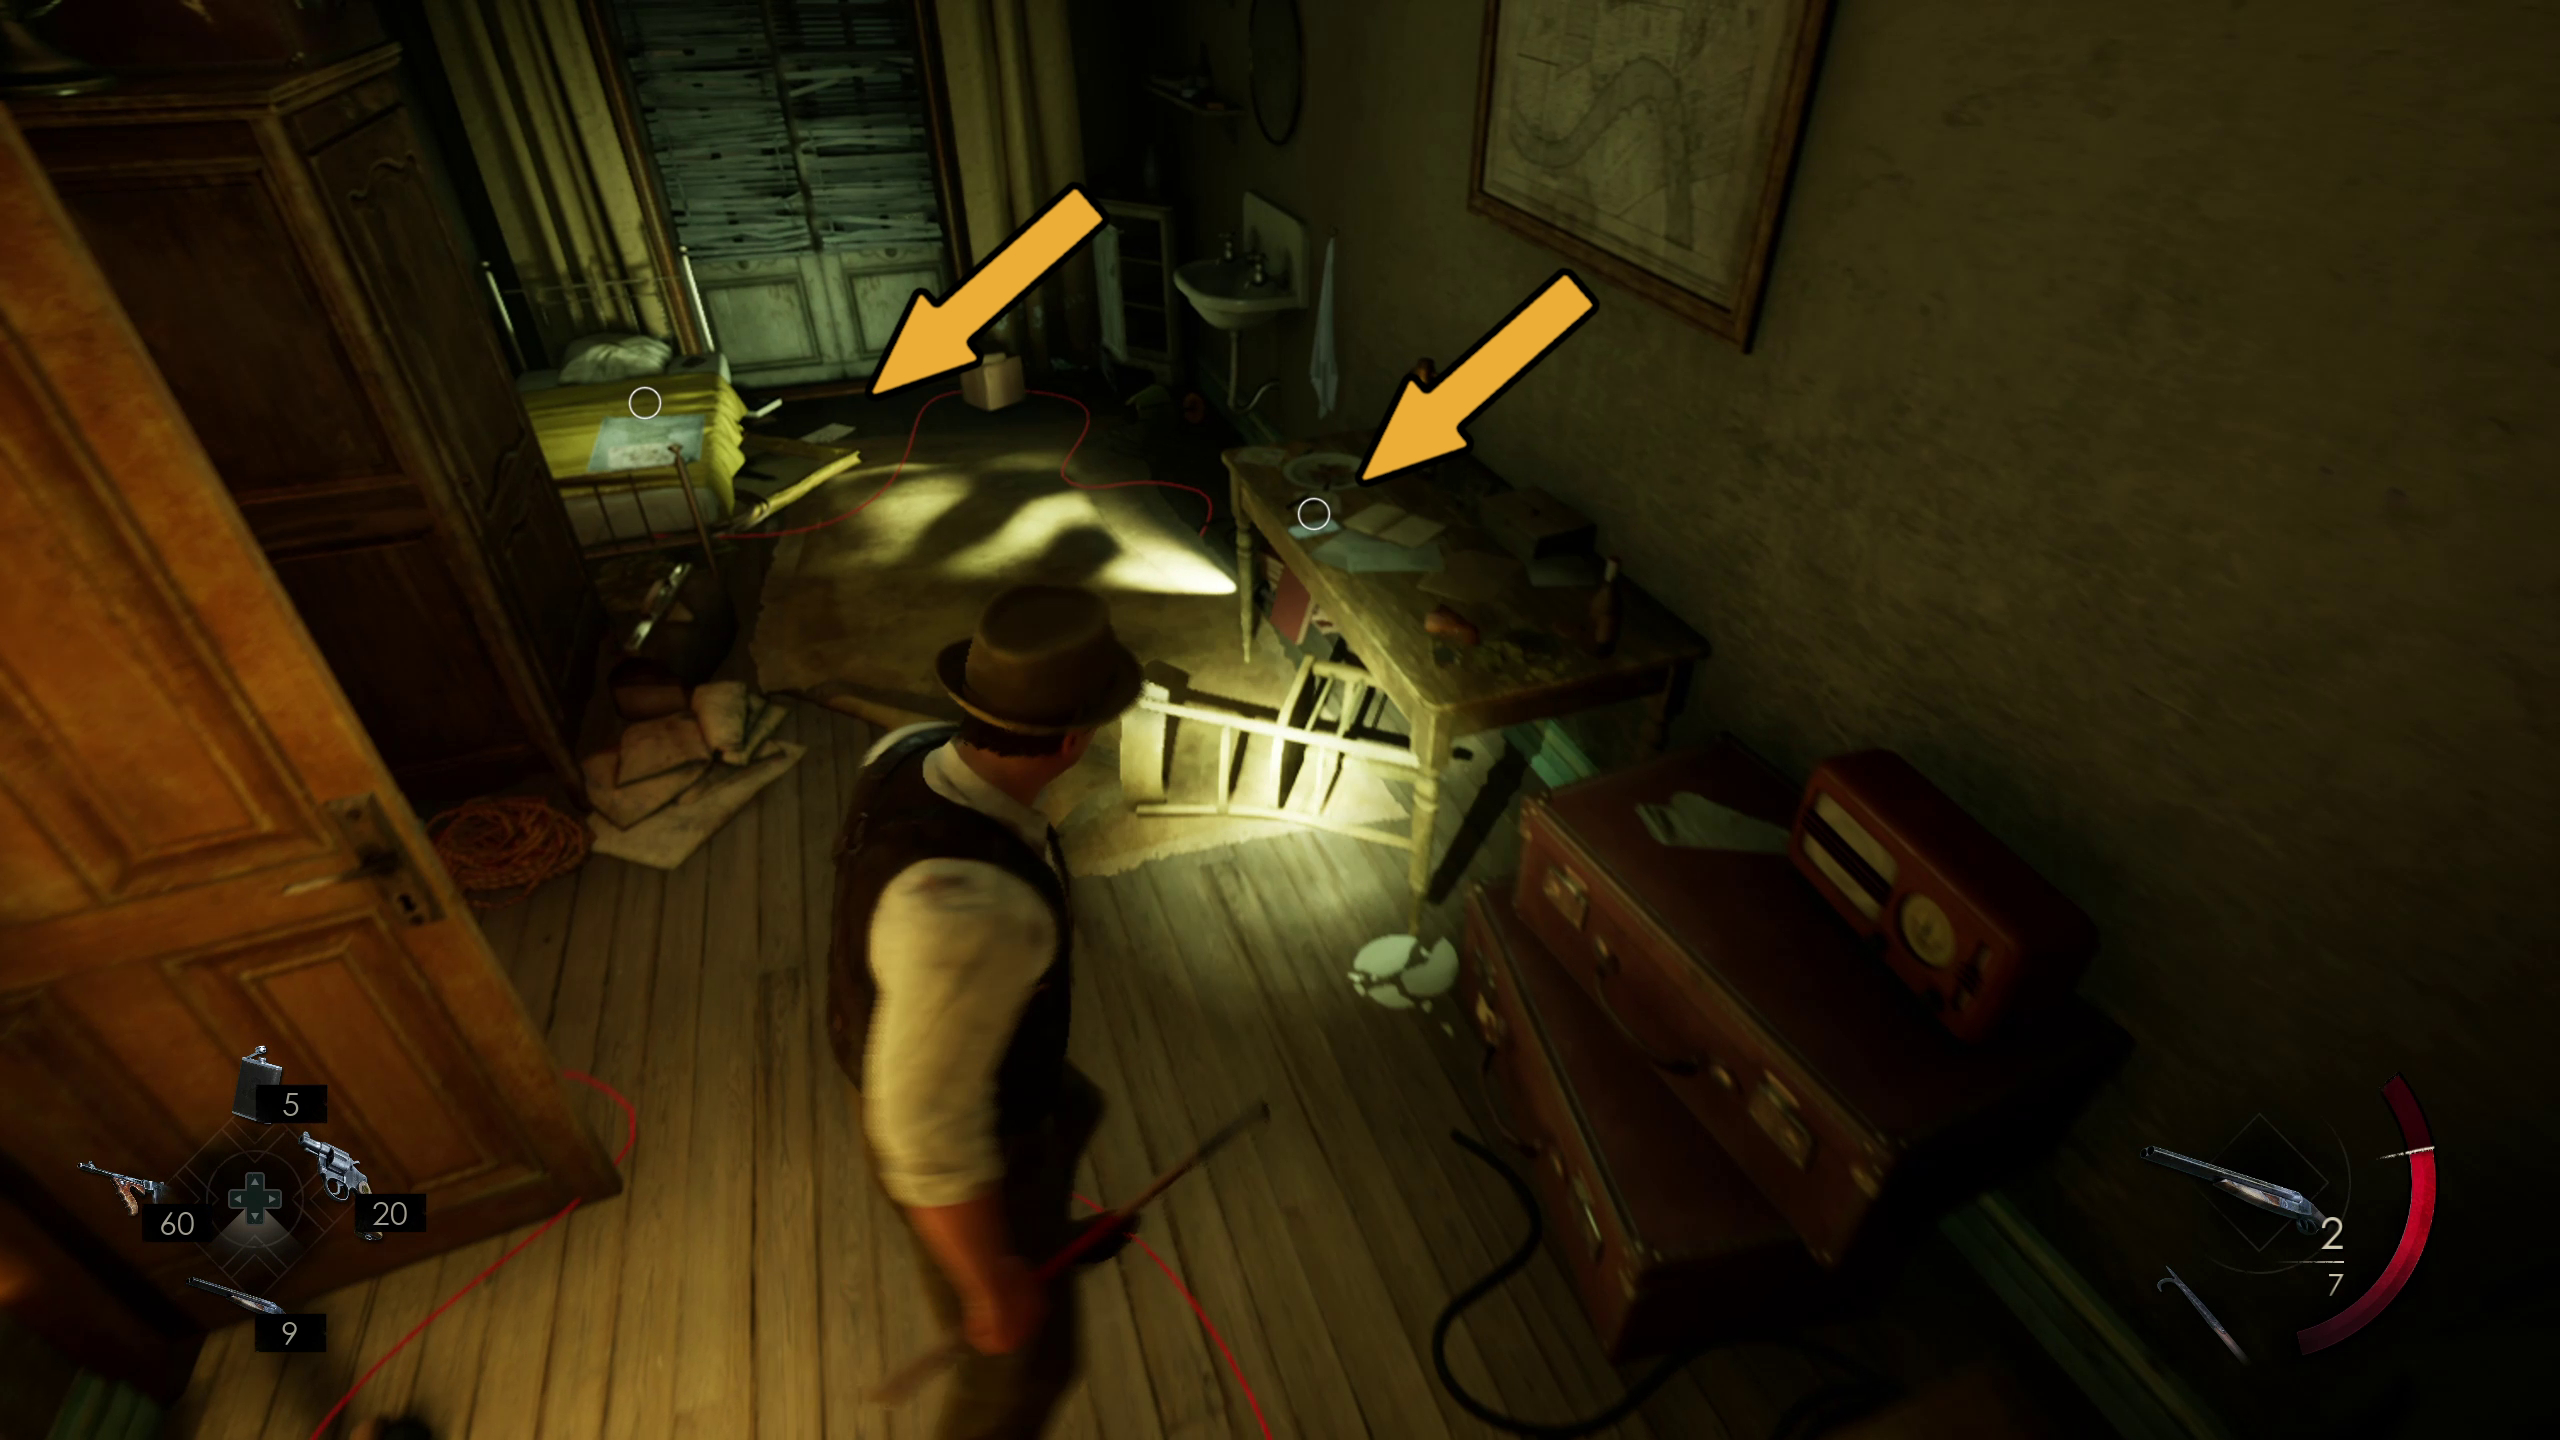
After you grab that, go up the stairs twice until you reach the third floor (Image 94). Once there, enter the first door on the floor (Image 95) to reach the next point of your memory. Here, you will need to piece together clues in order to determine where Edward eventually tracked his mark down to.
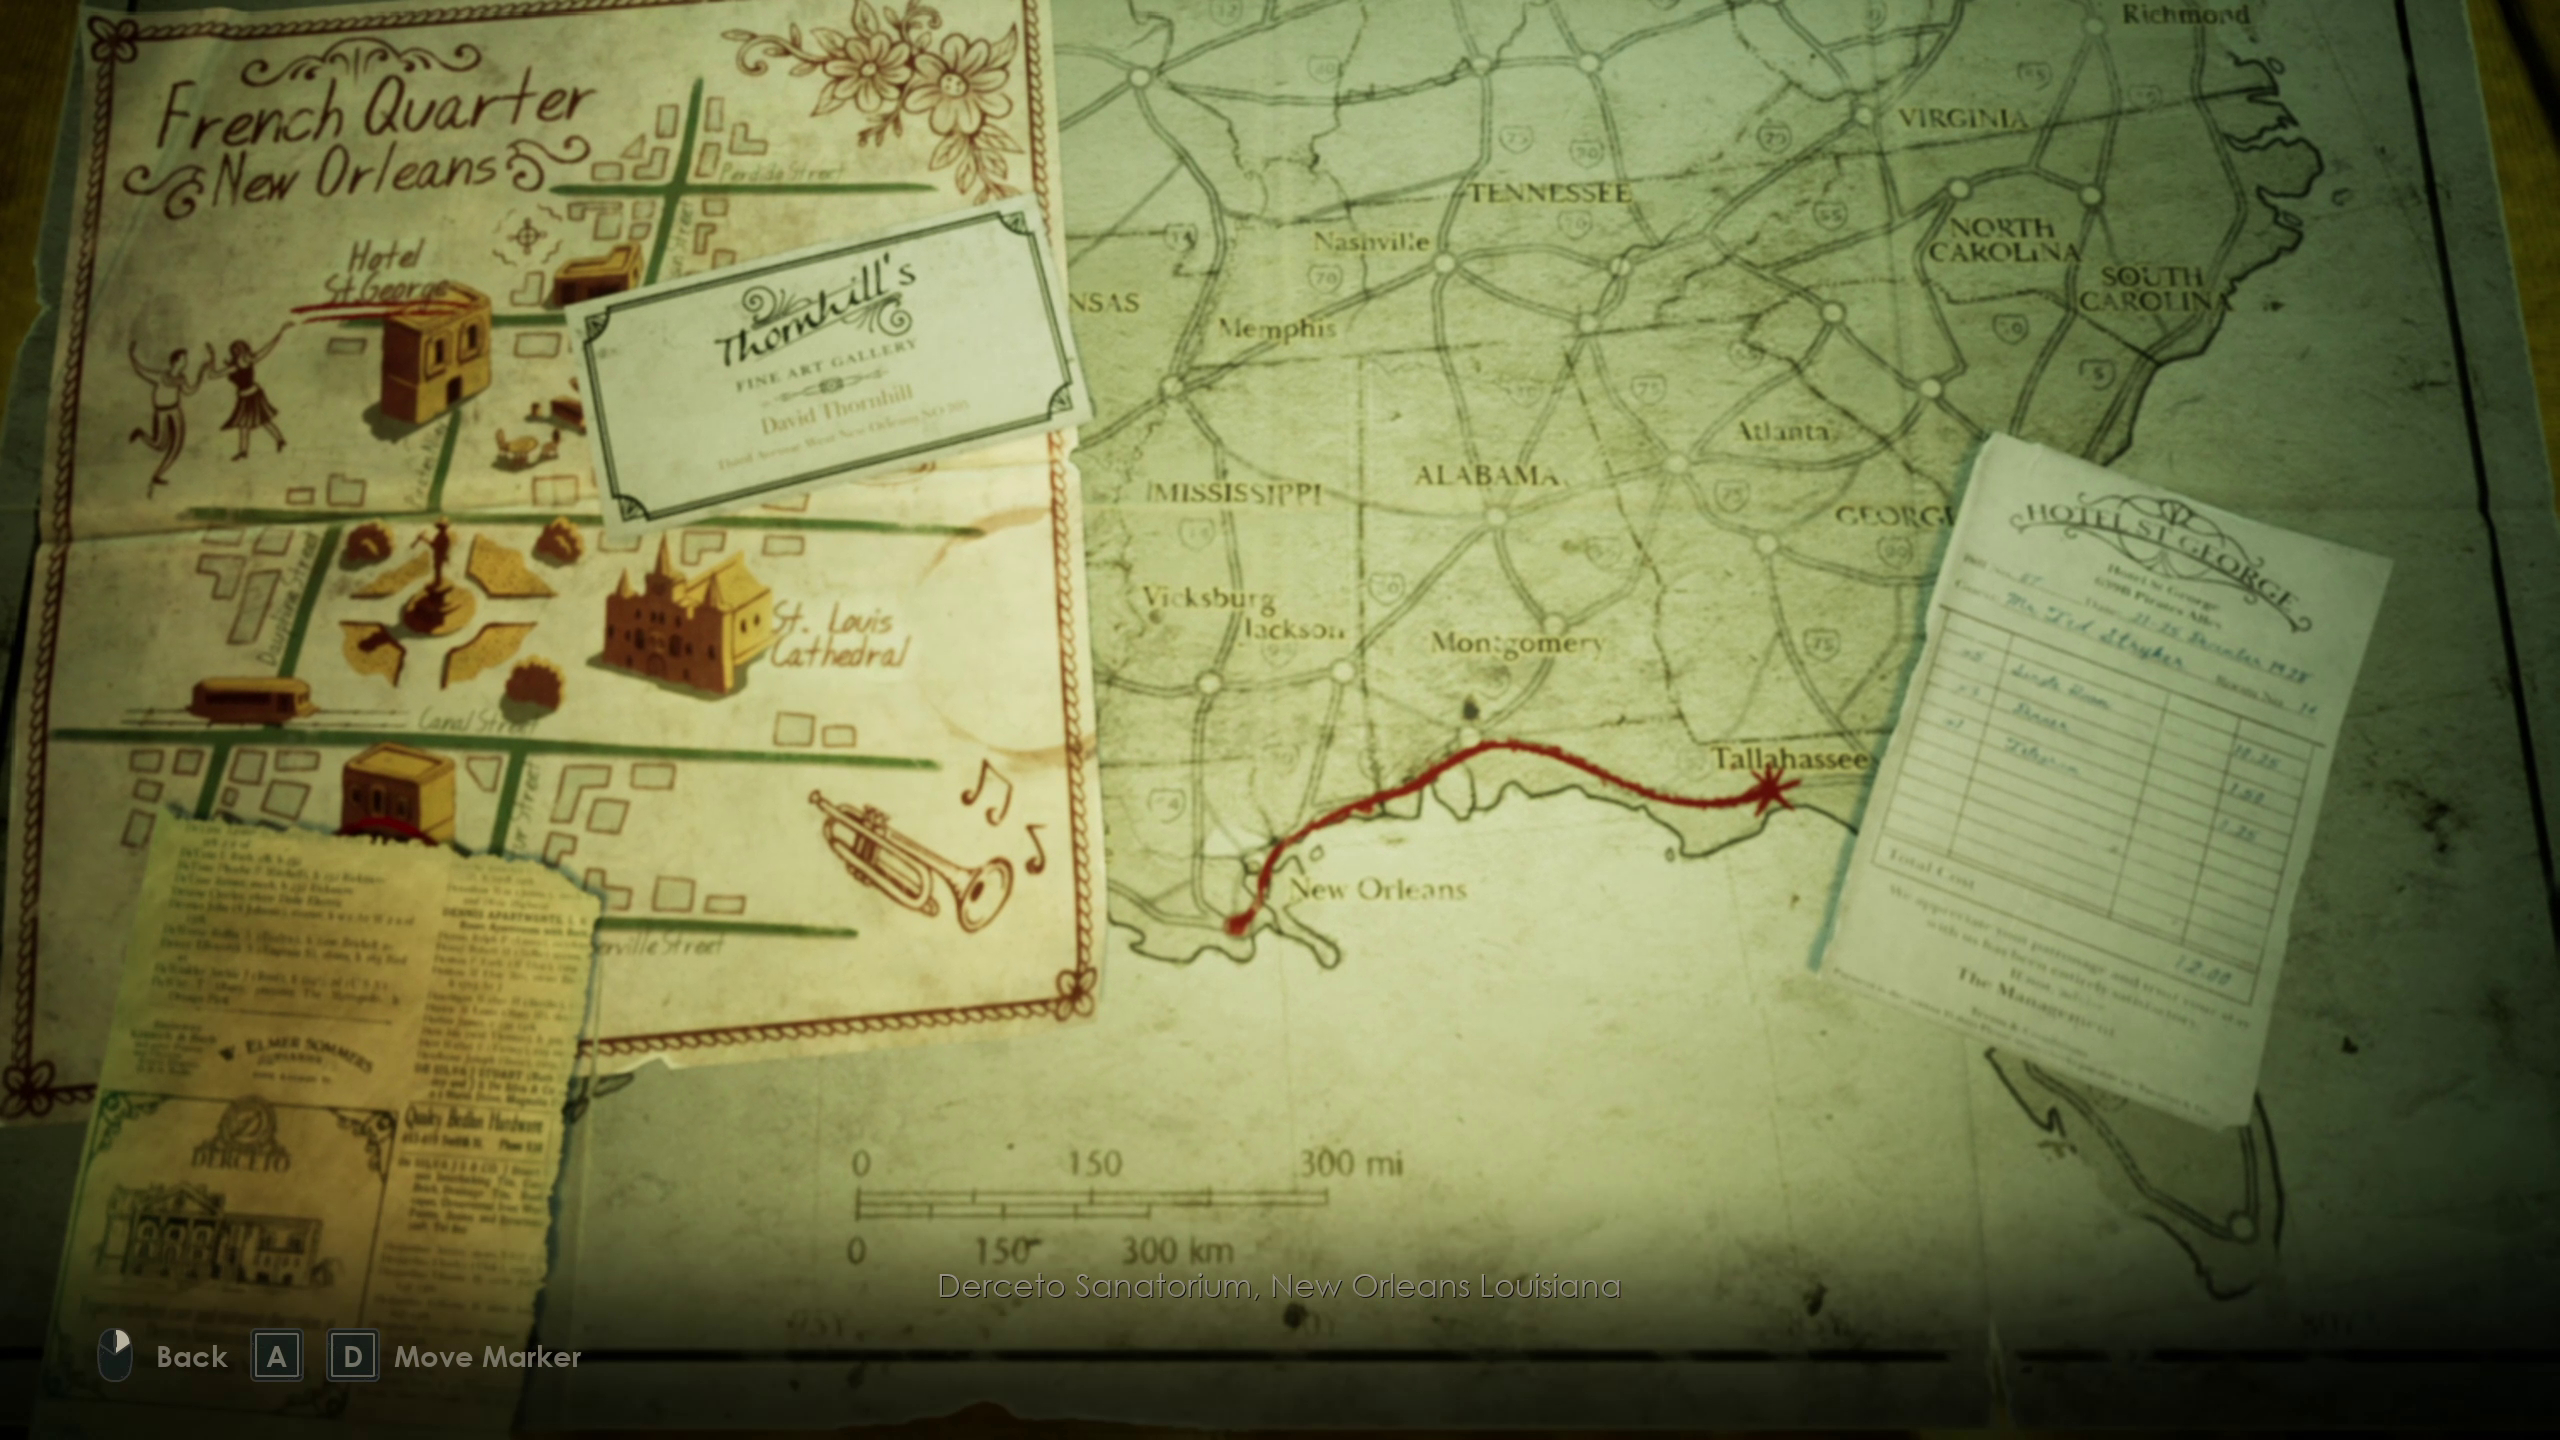
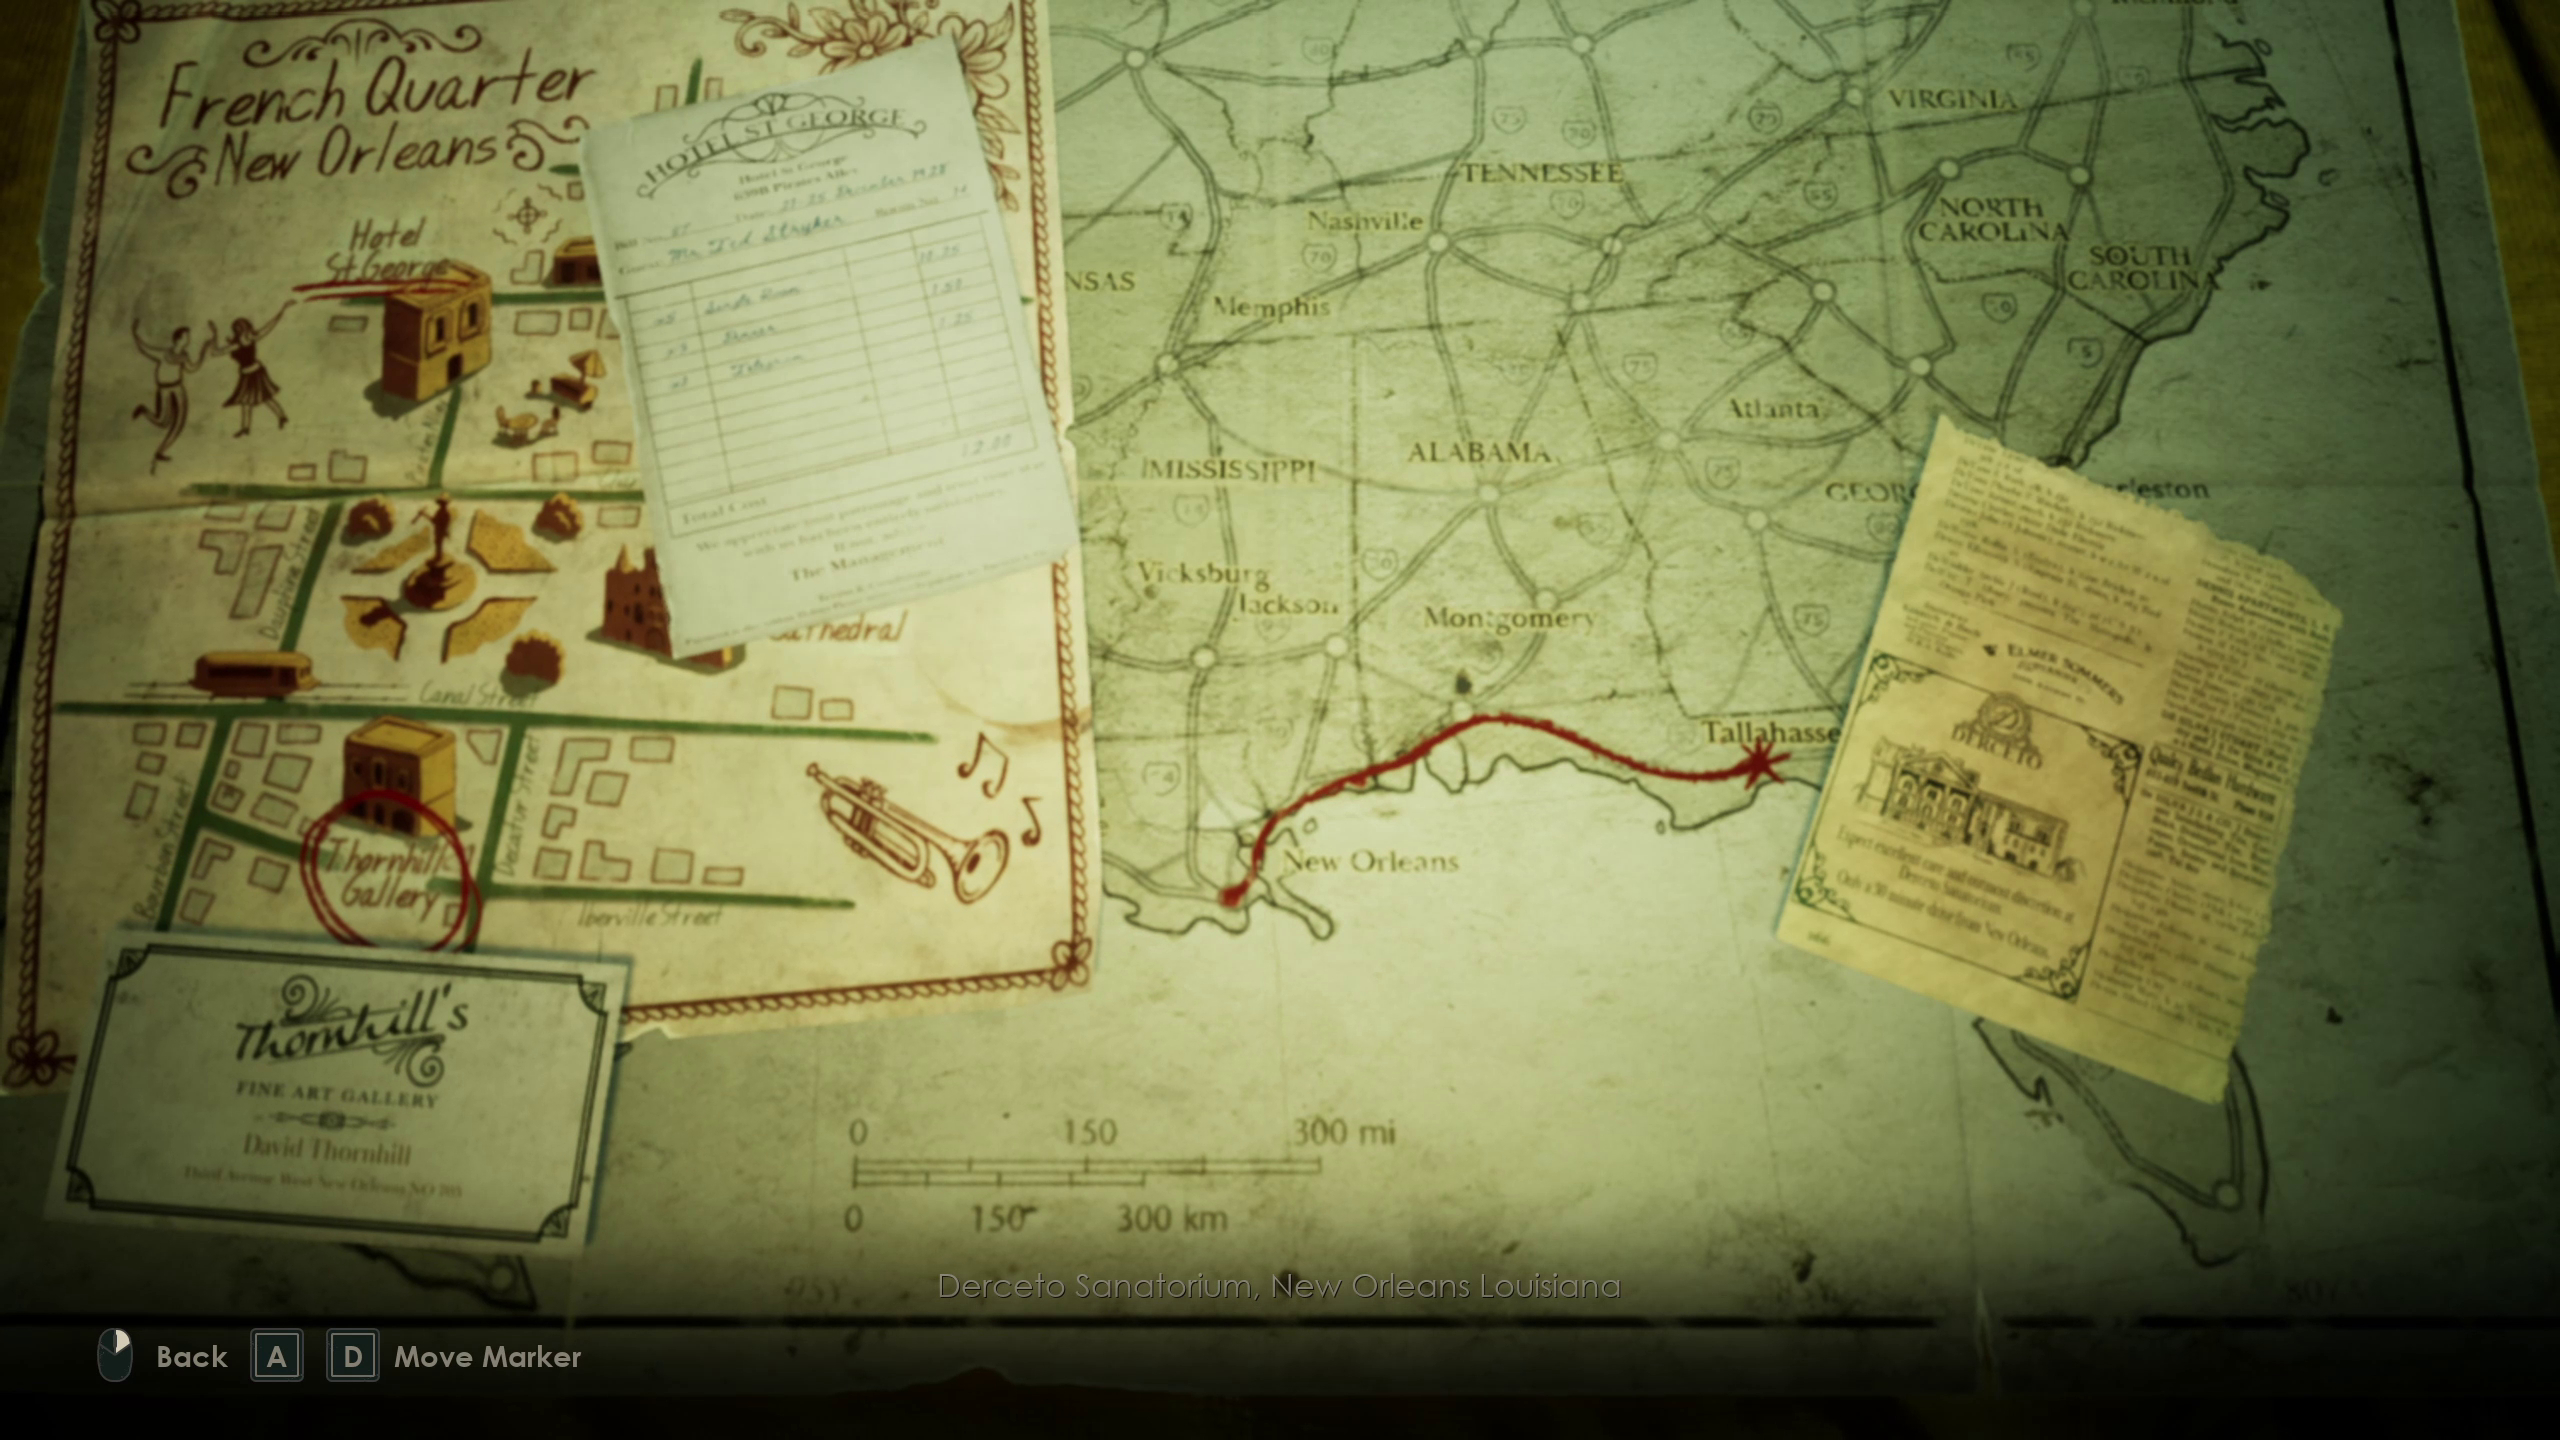
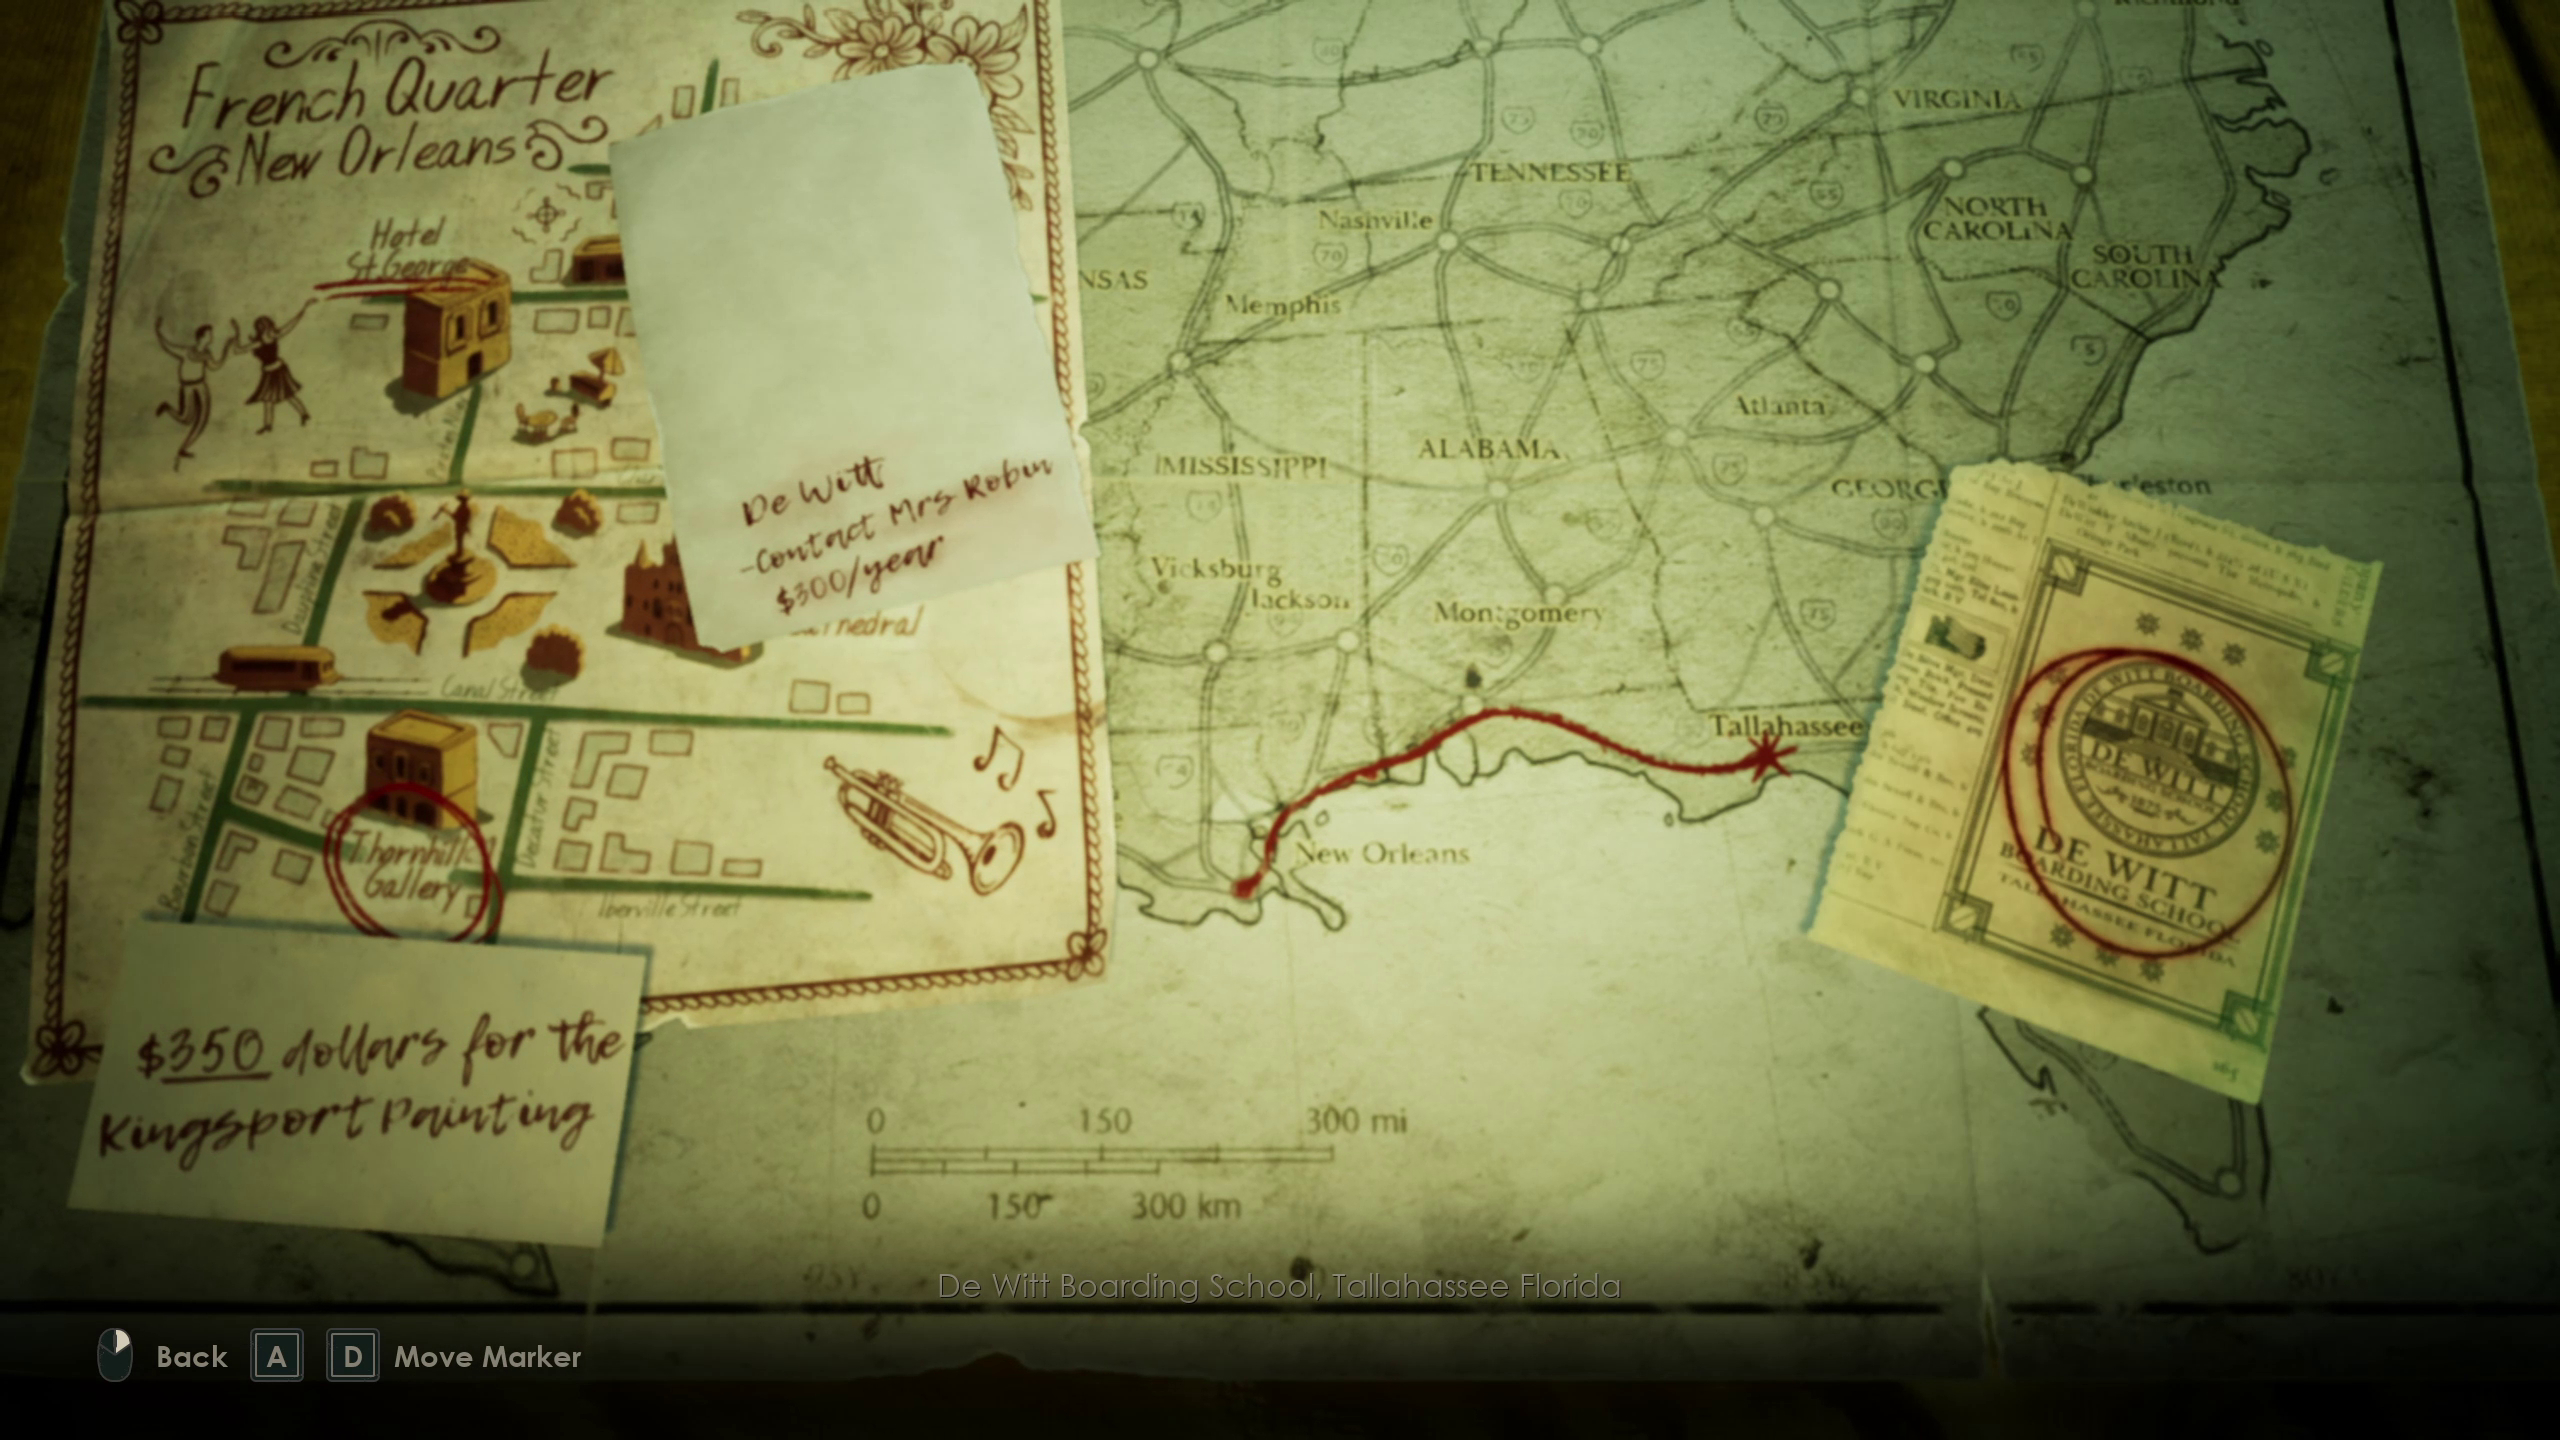
You’ll need to piece together the various clues in this room in order to determine where to go next. First, gather everything up, then put it on the map to see what you can learn.
First, you will need to take the three clues and place them in the correct places on the map. The clue pertaining to the Thornhill Gallery goes to the far left, the St. George Hotel flyer goes in the middle, and the advertisement for Derceto to the far right. Once they are in position, you just need to flip each over to solve the puzzle.
Pearl River Bridge
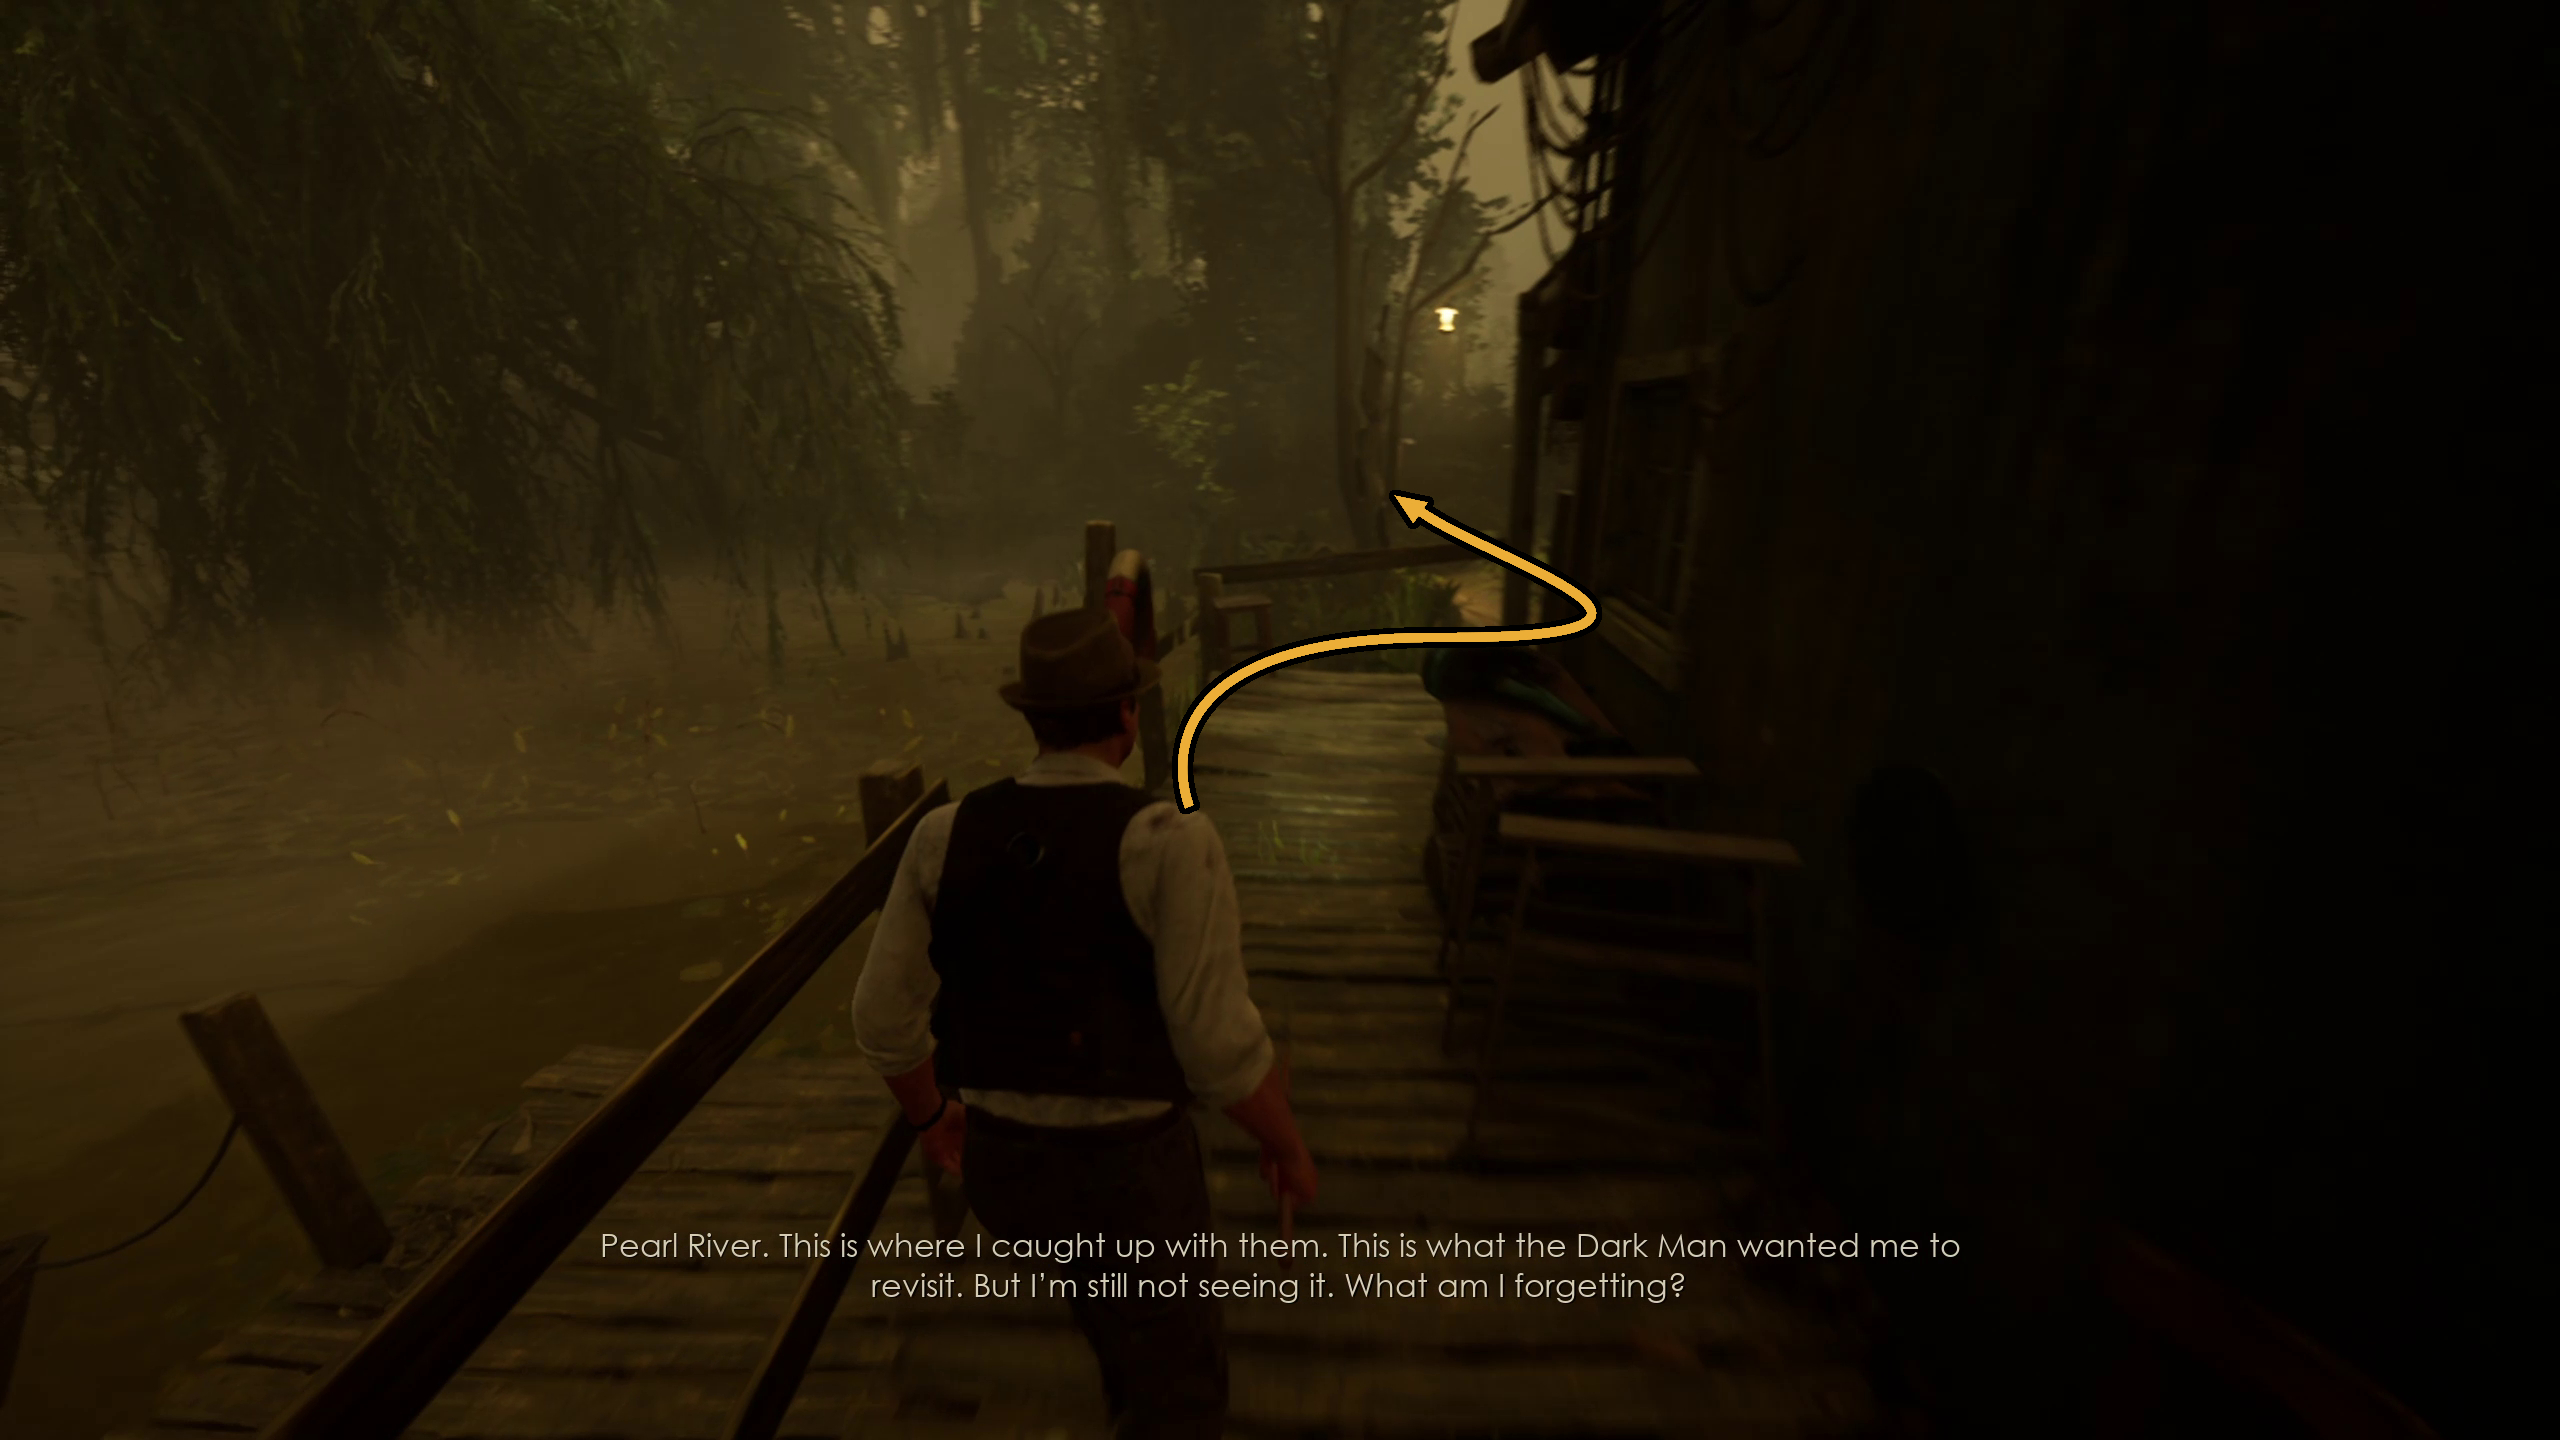
Once you leave the room, you will be in a new place. From just outside a swamp hut, you can see a bridge, which Edward will identify as the Pearl River Bridge, where he caught up with his mark.
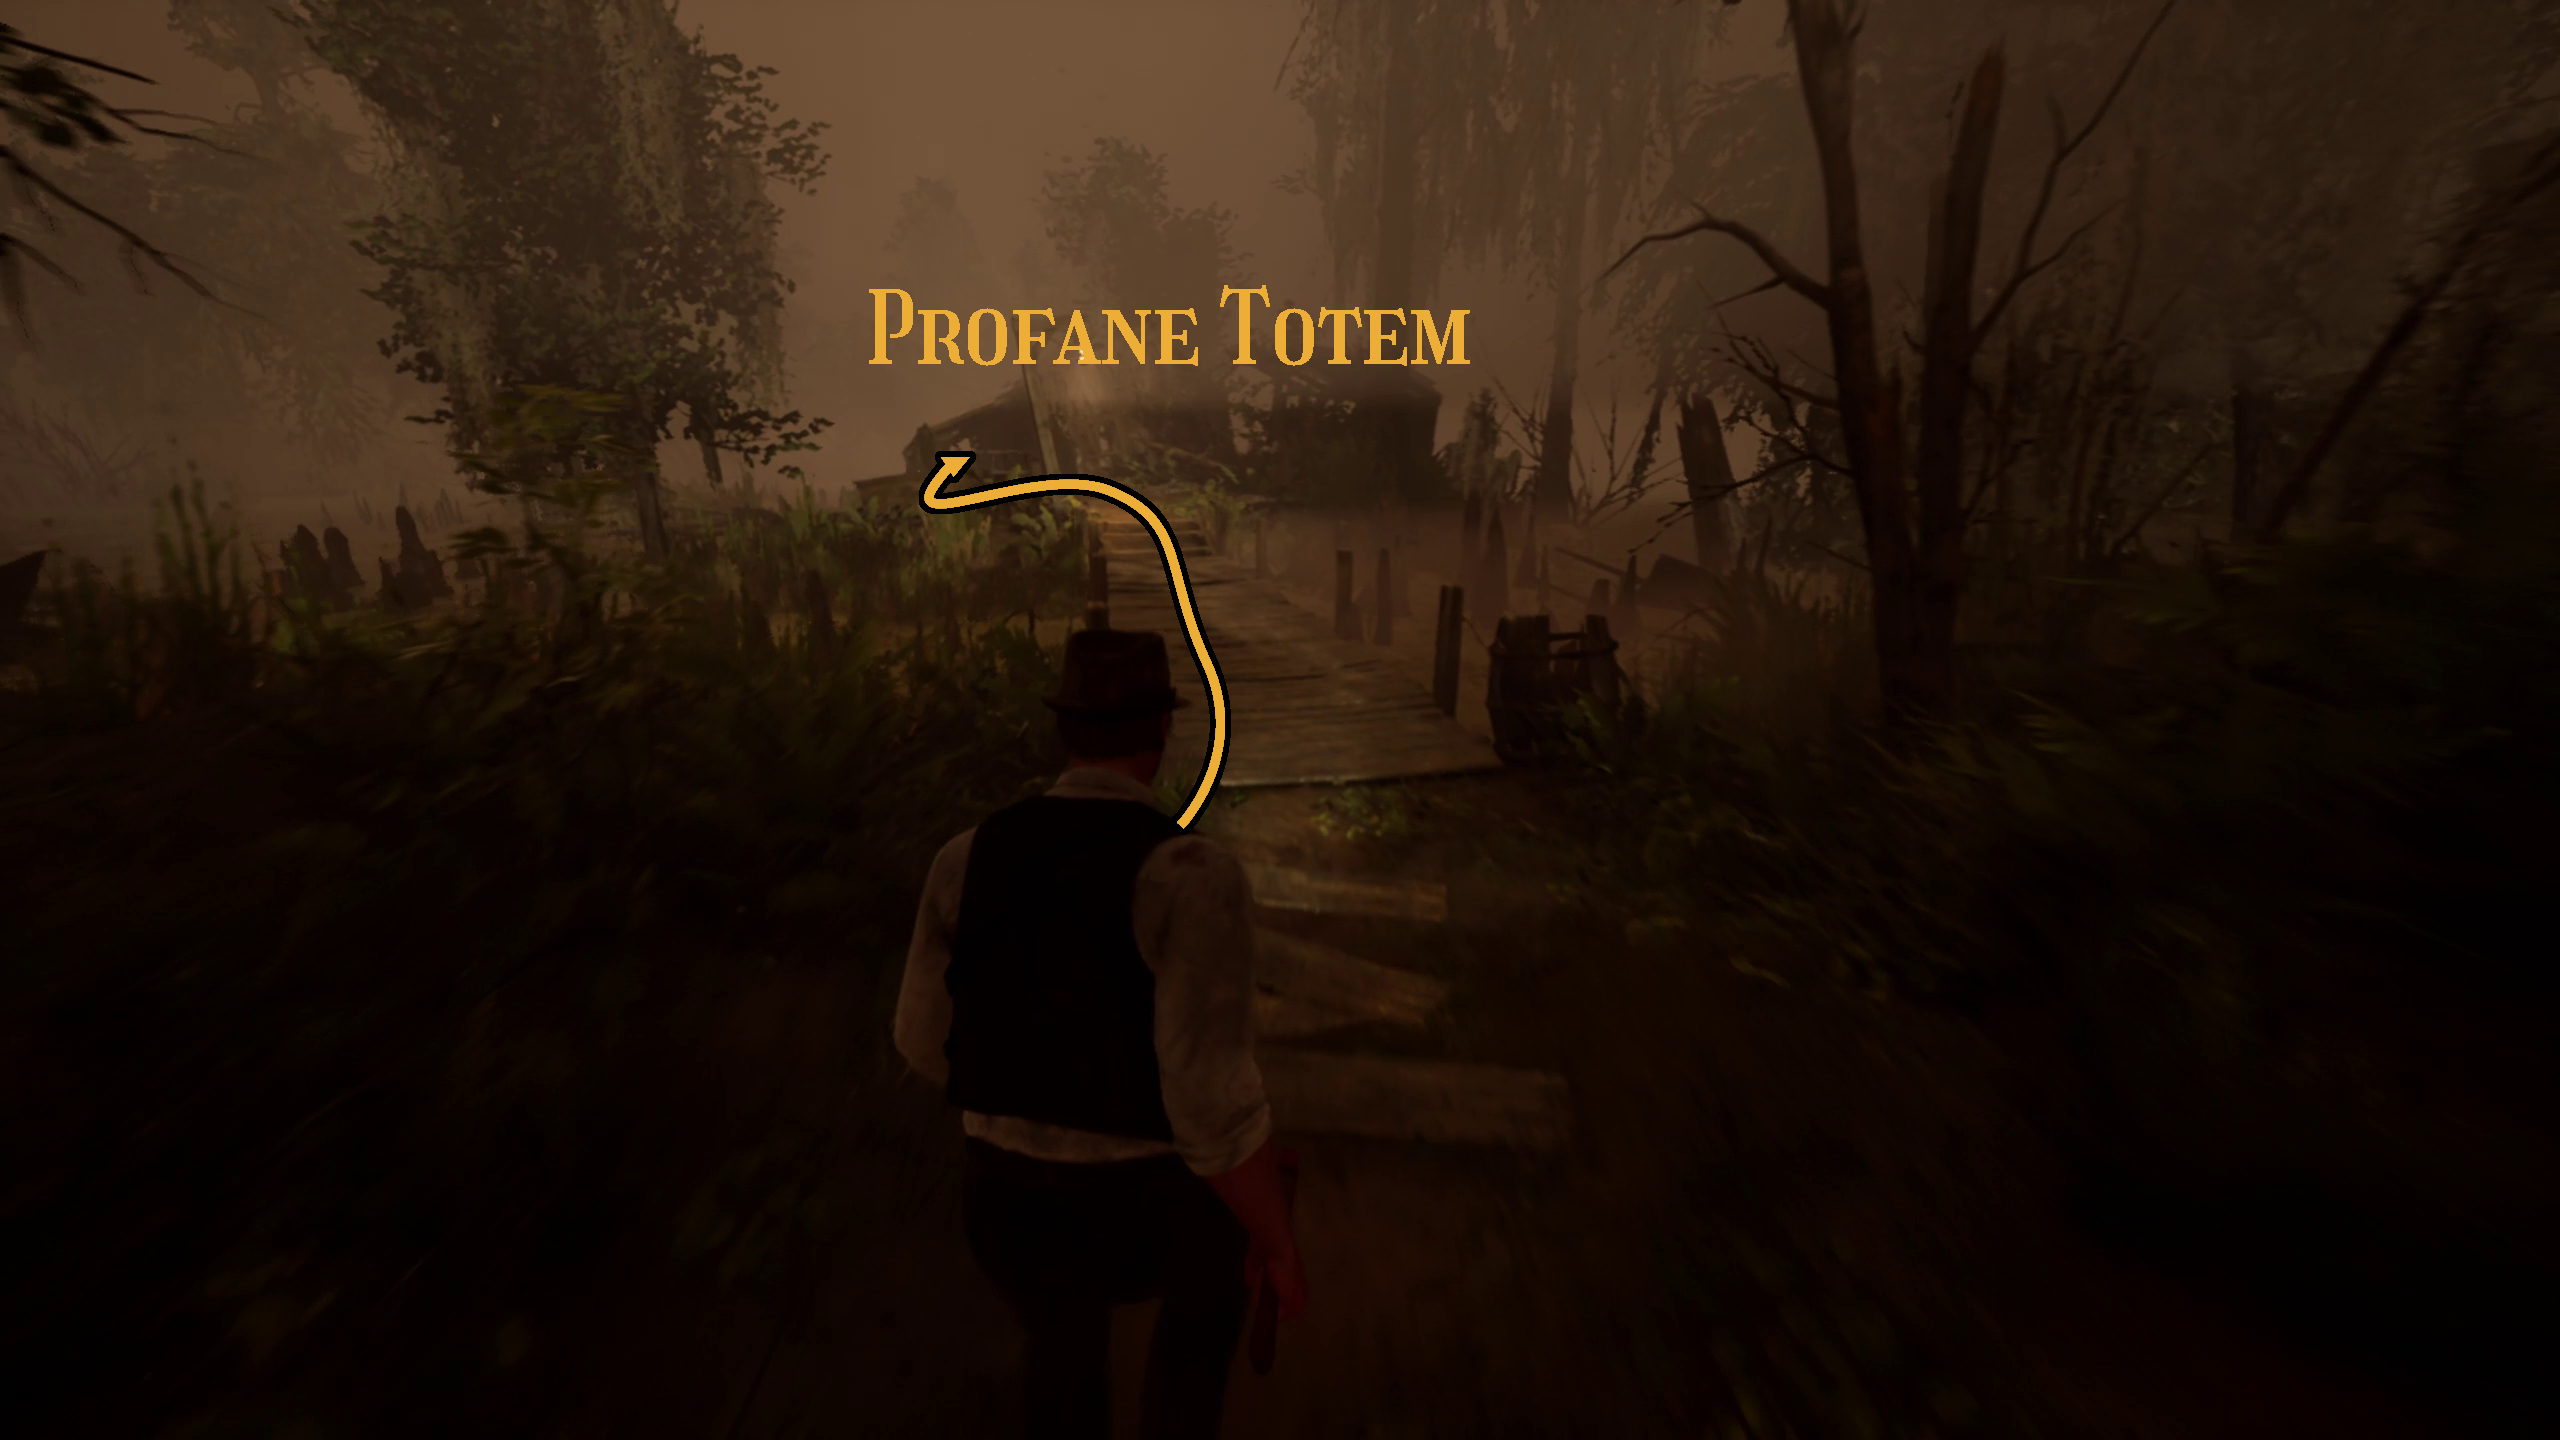
Outside, turn to the right and follow the path under the bridge (Image 96) until you reach a fork in the road. Take the left path toward the swamp hut, where you’ll be able to acquire the Profane Totem Lagniappe (Image 97). Be prepared for a single enemy to ambush you on the way back, though.
Image 96Image 97
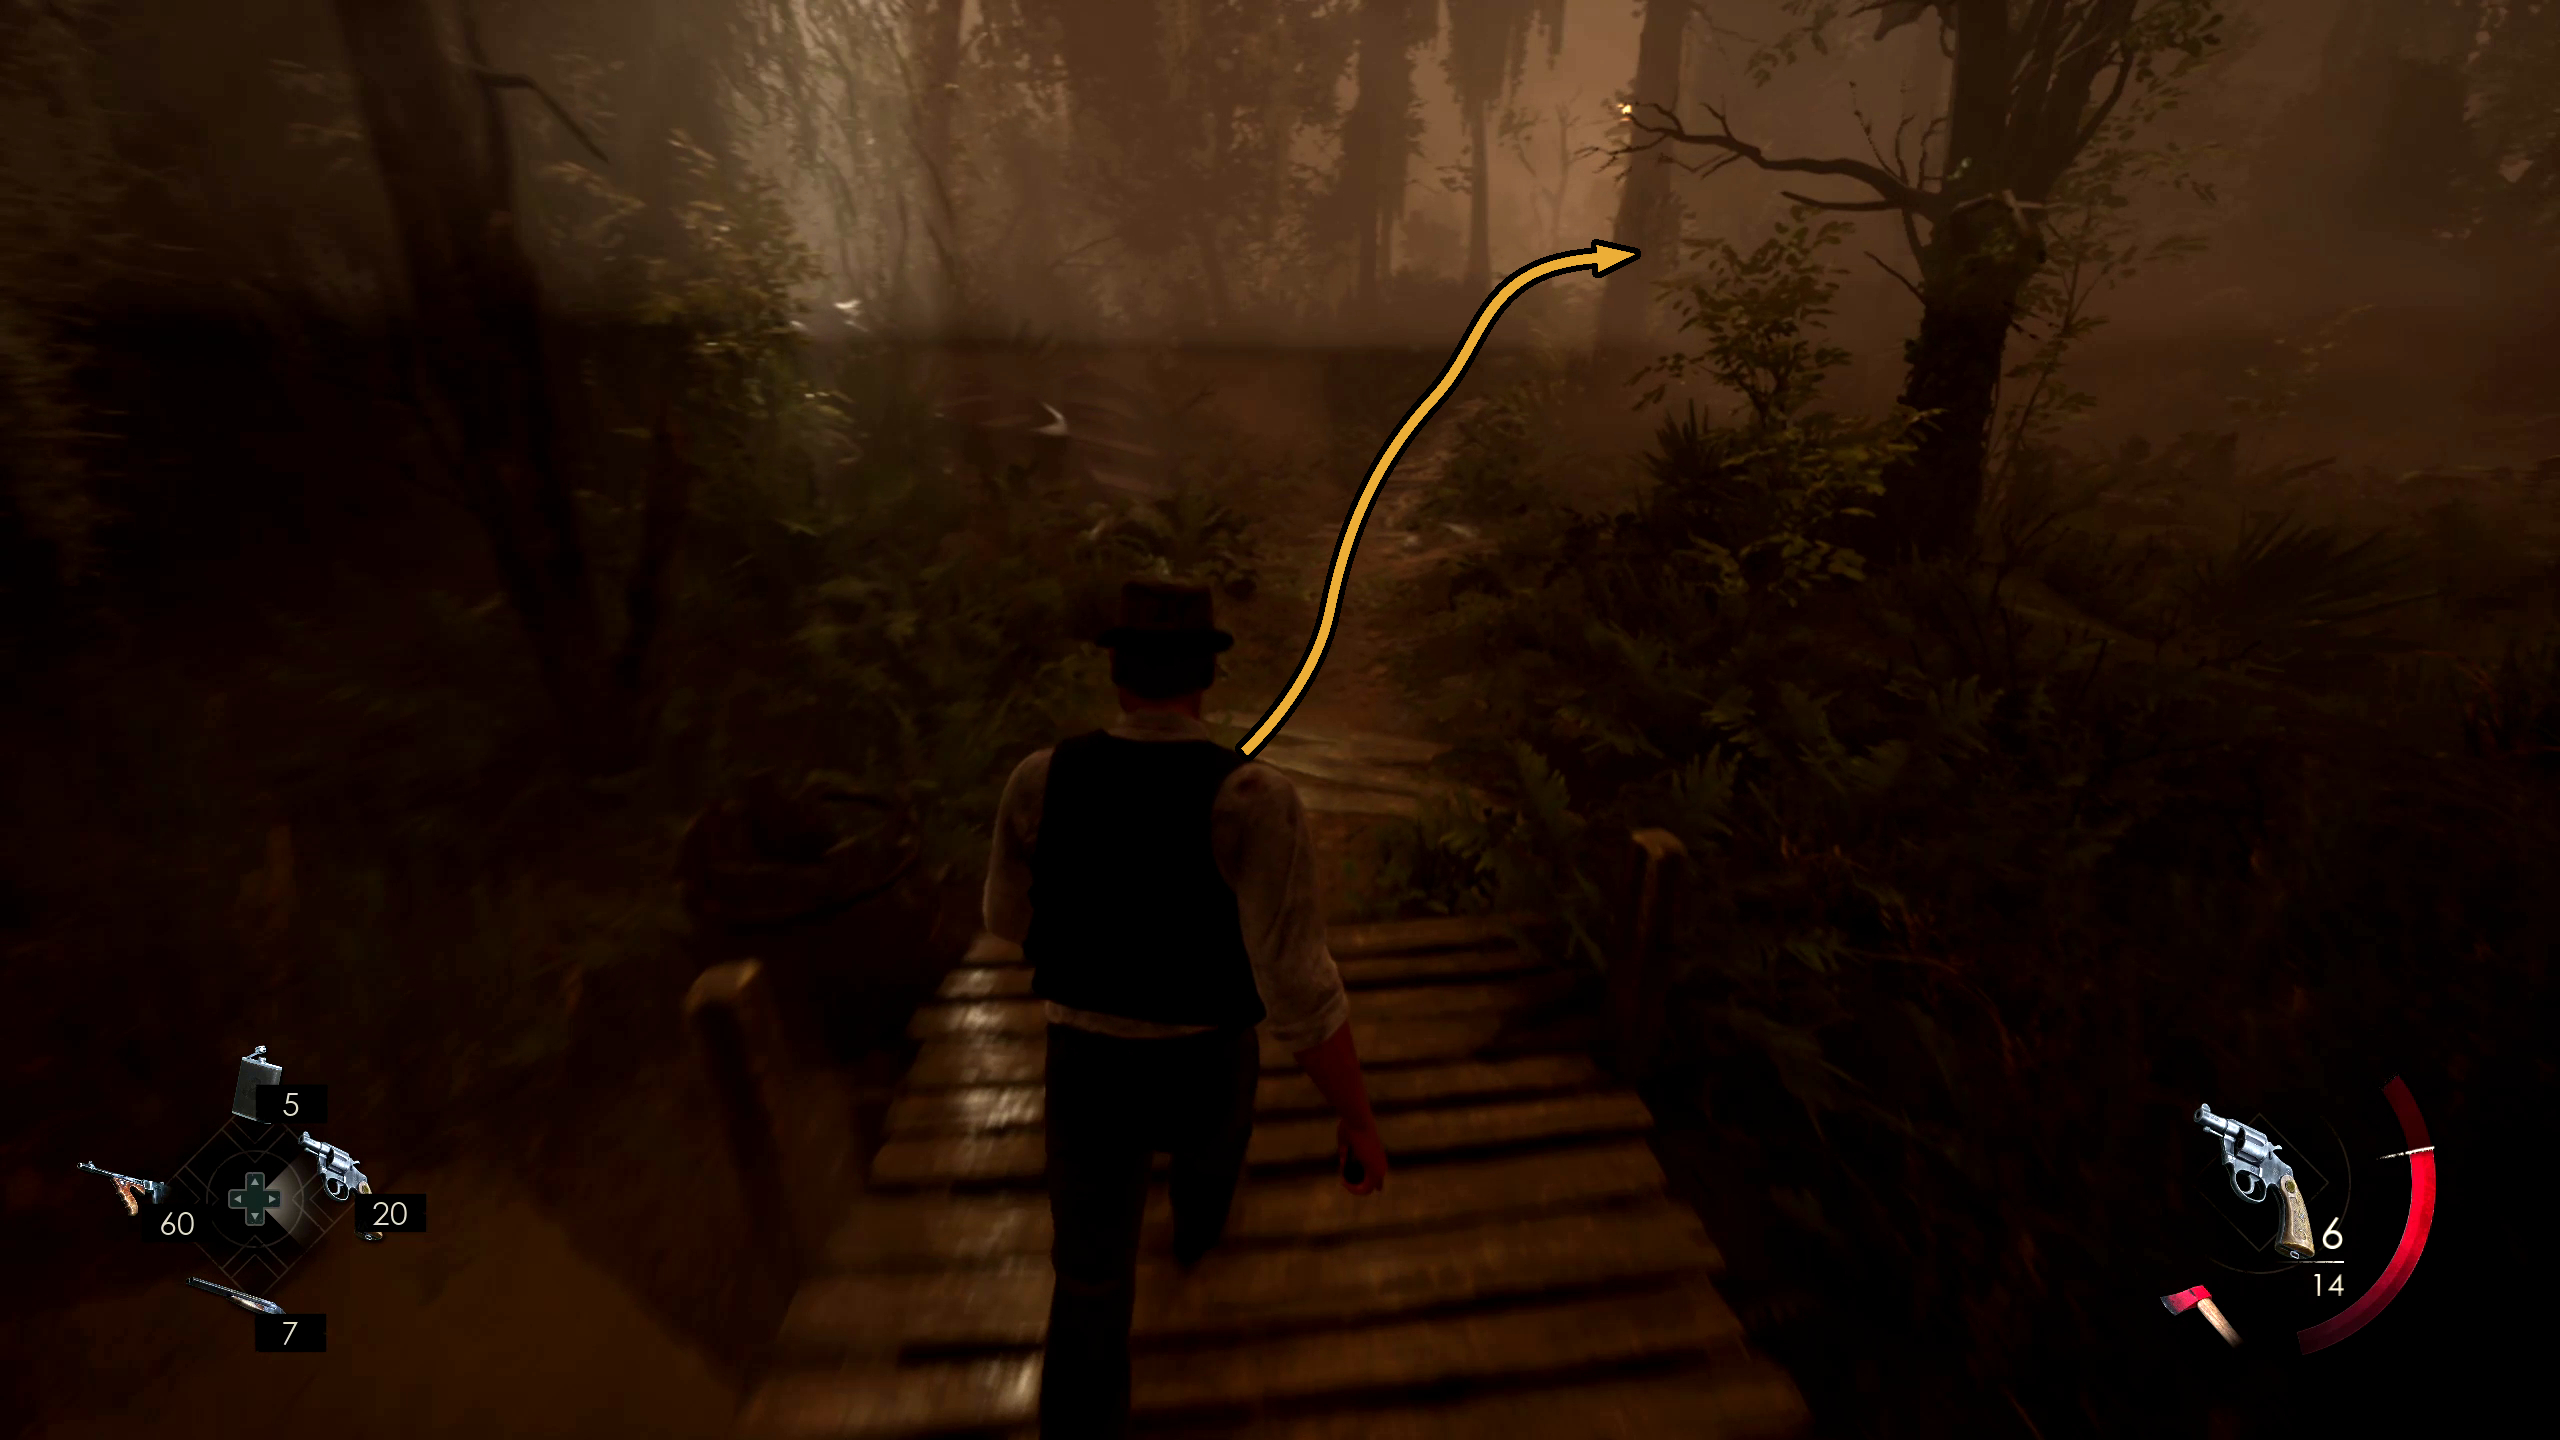
After grabbing that, head back and take the other fork in the path, to the right of where you came from (Image 98). This will bring you to the Pearl River Bridge, and you can go on it (Image 99). Here, you will see a surprise visitor: Grace, who will give us some revelations about Edward’s past…
Image 98Image 99
Find a Way to Raise the Bridge
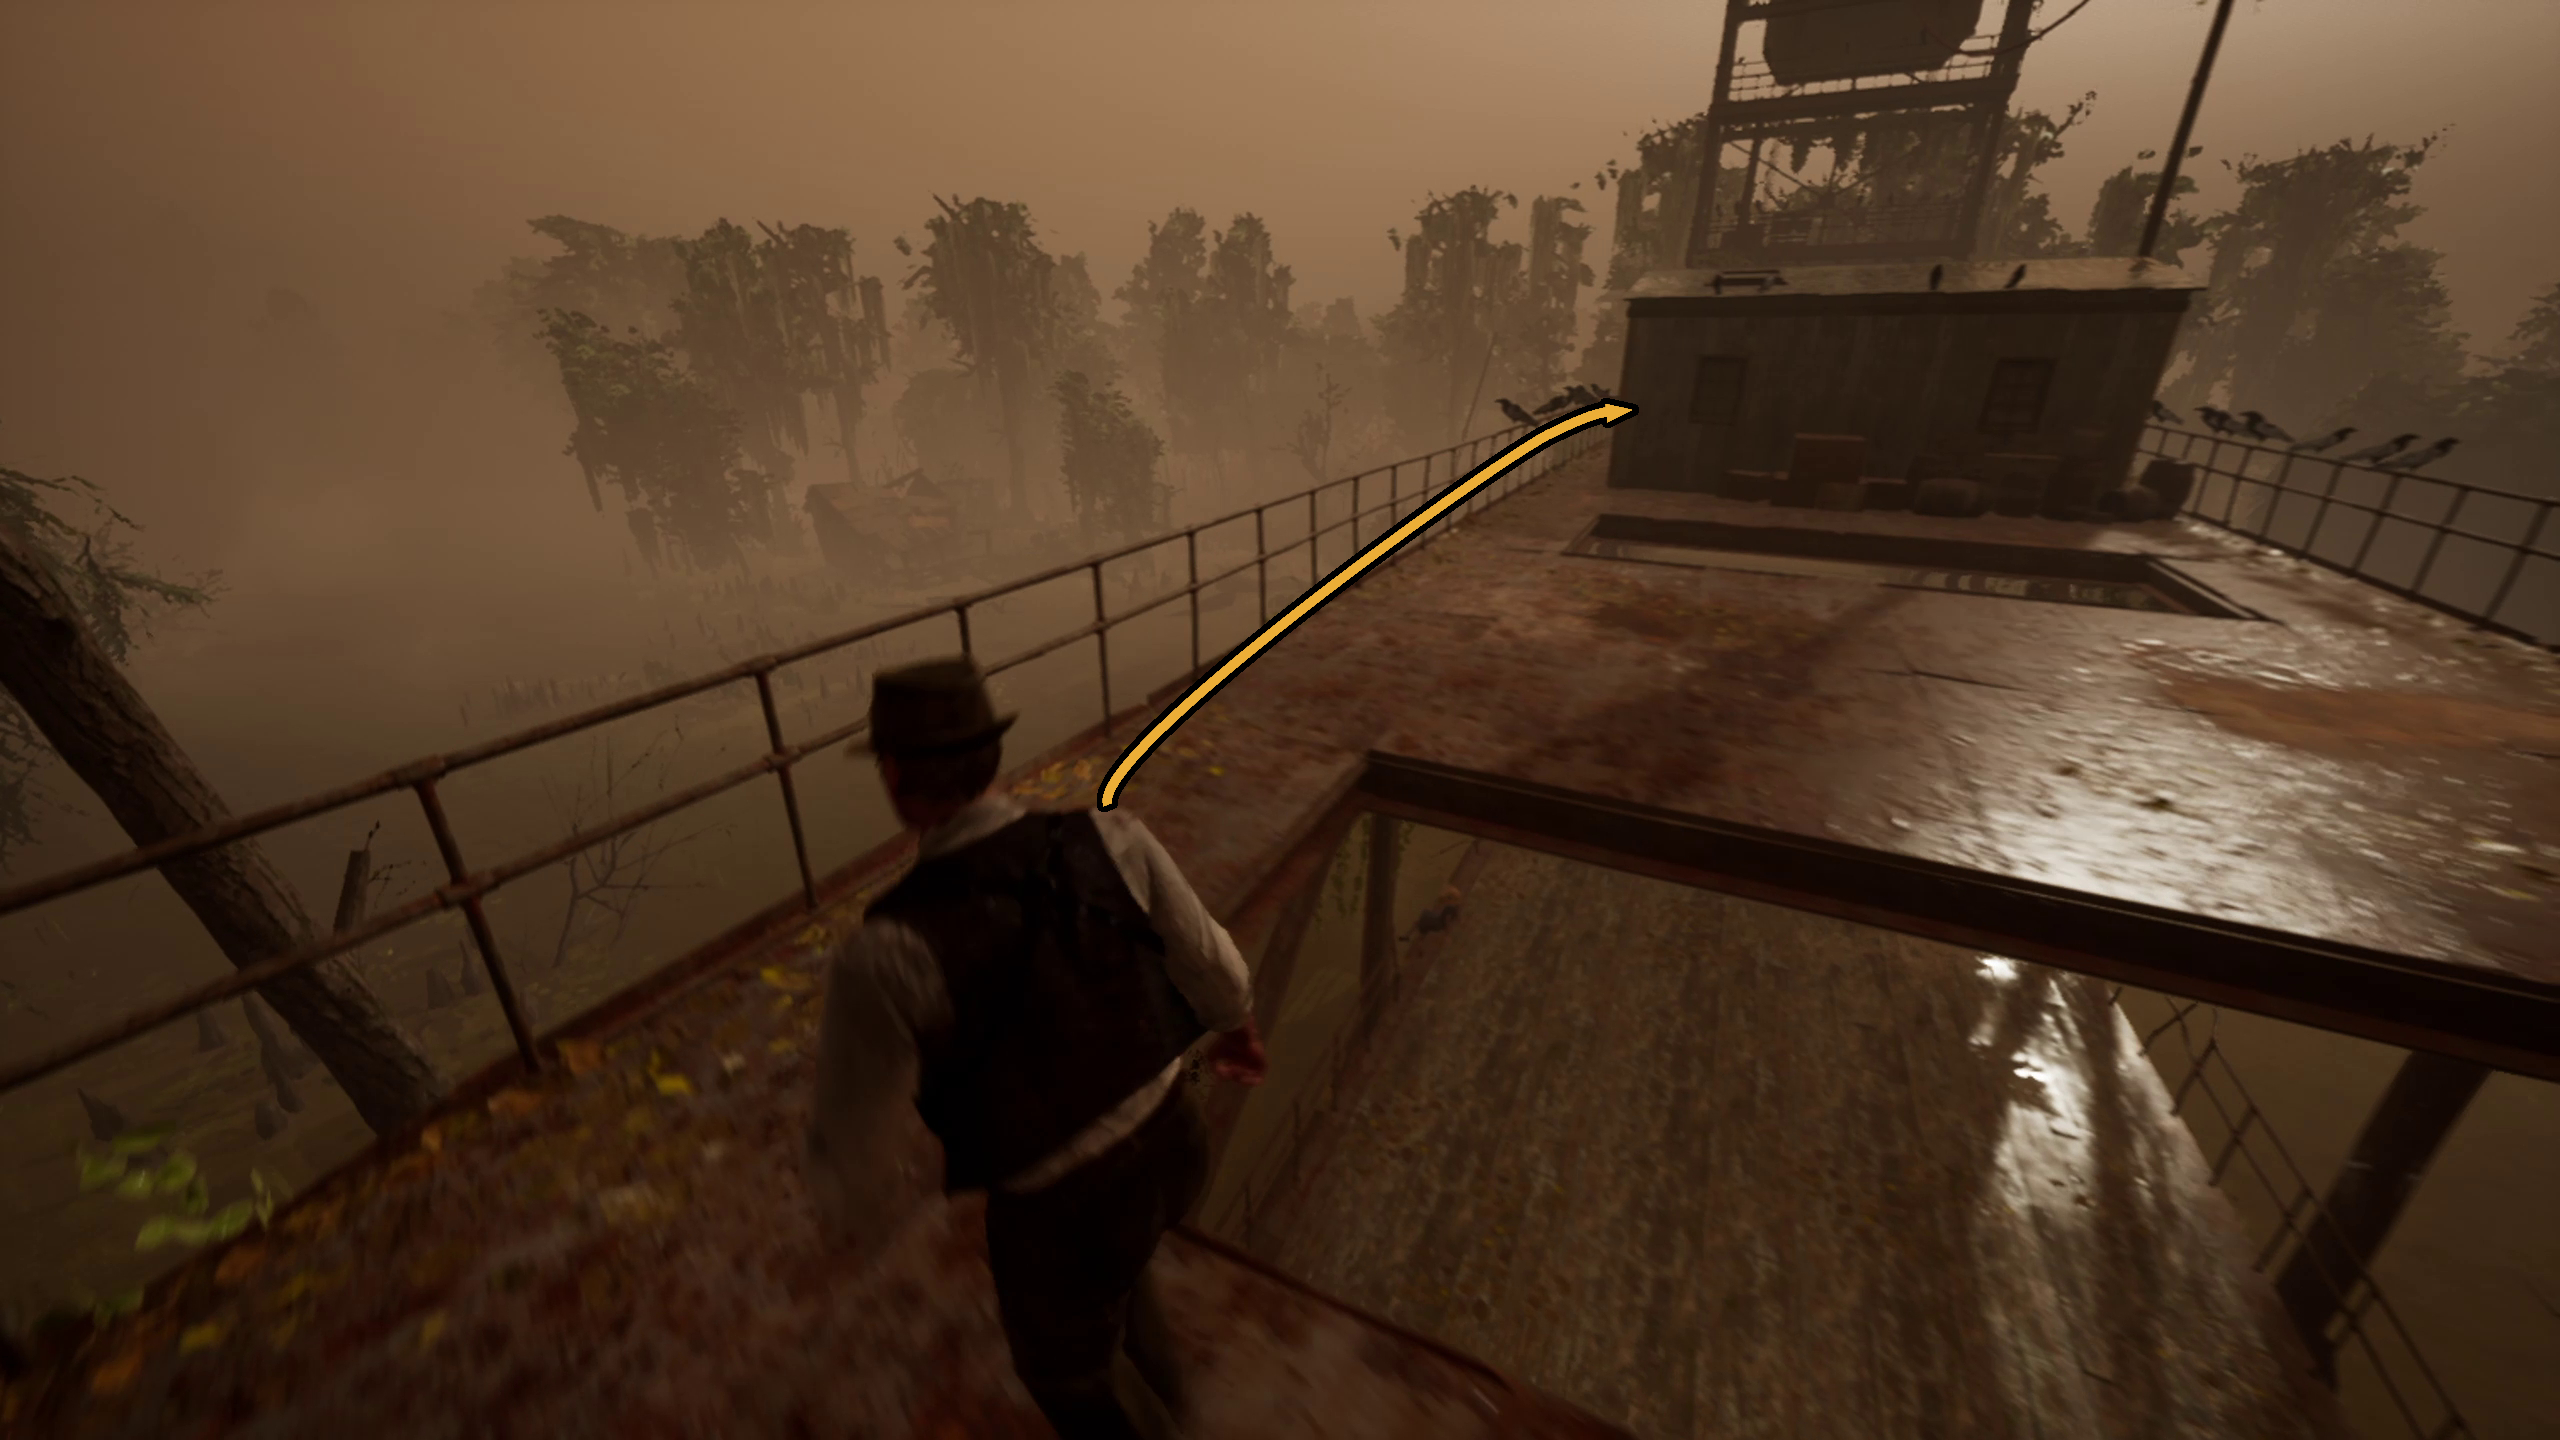
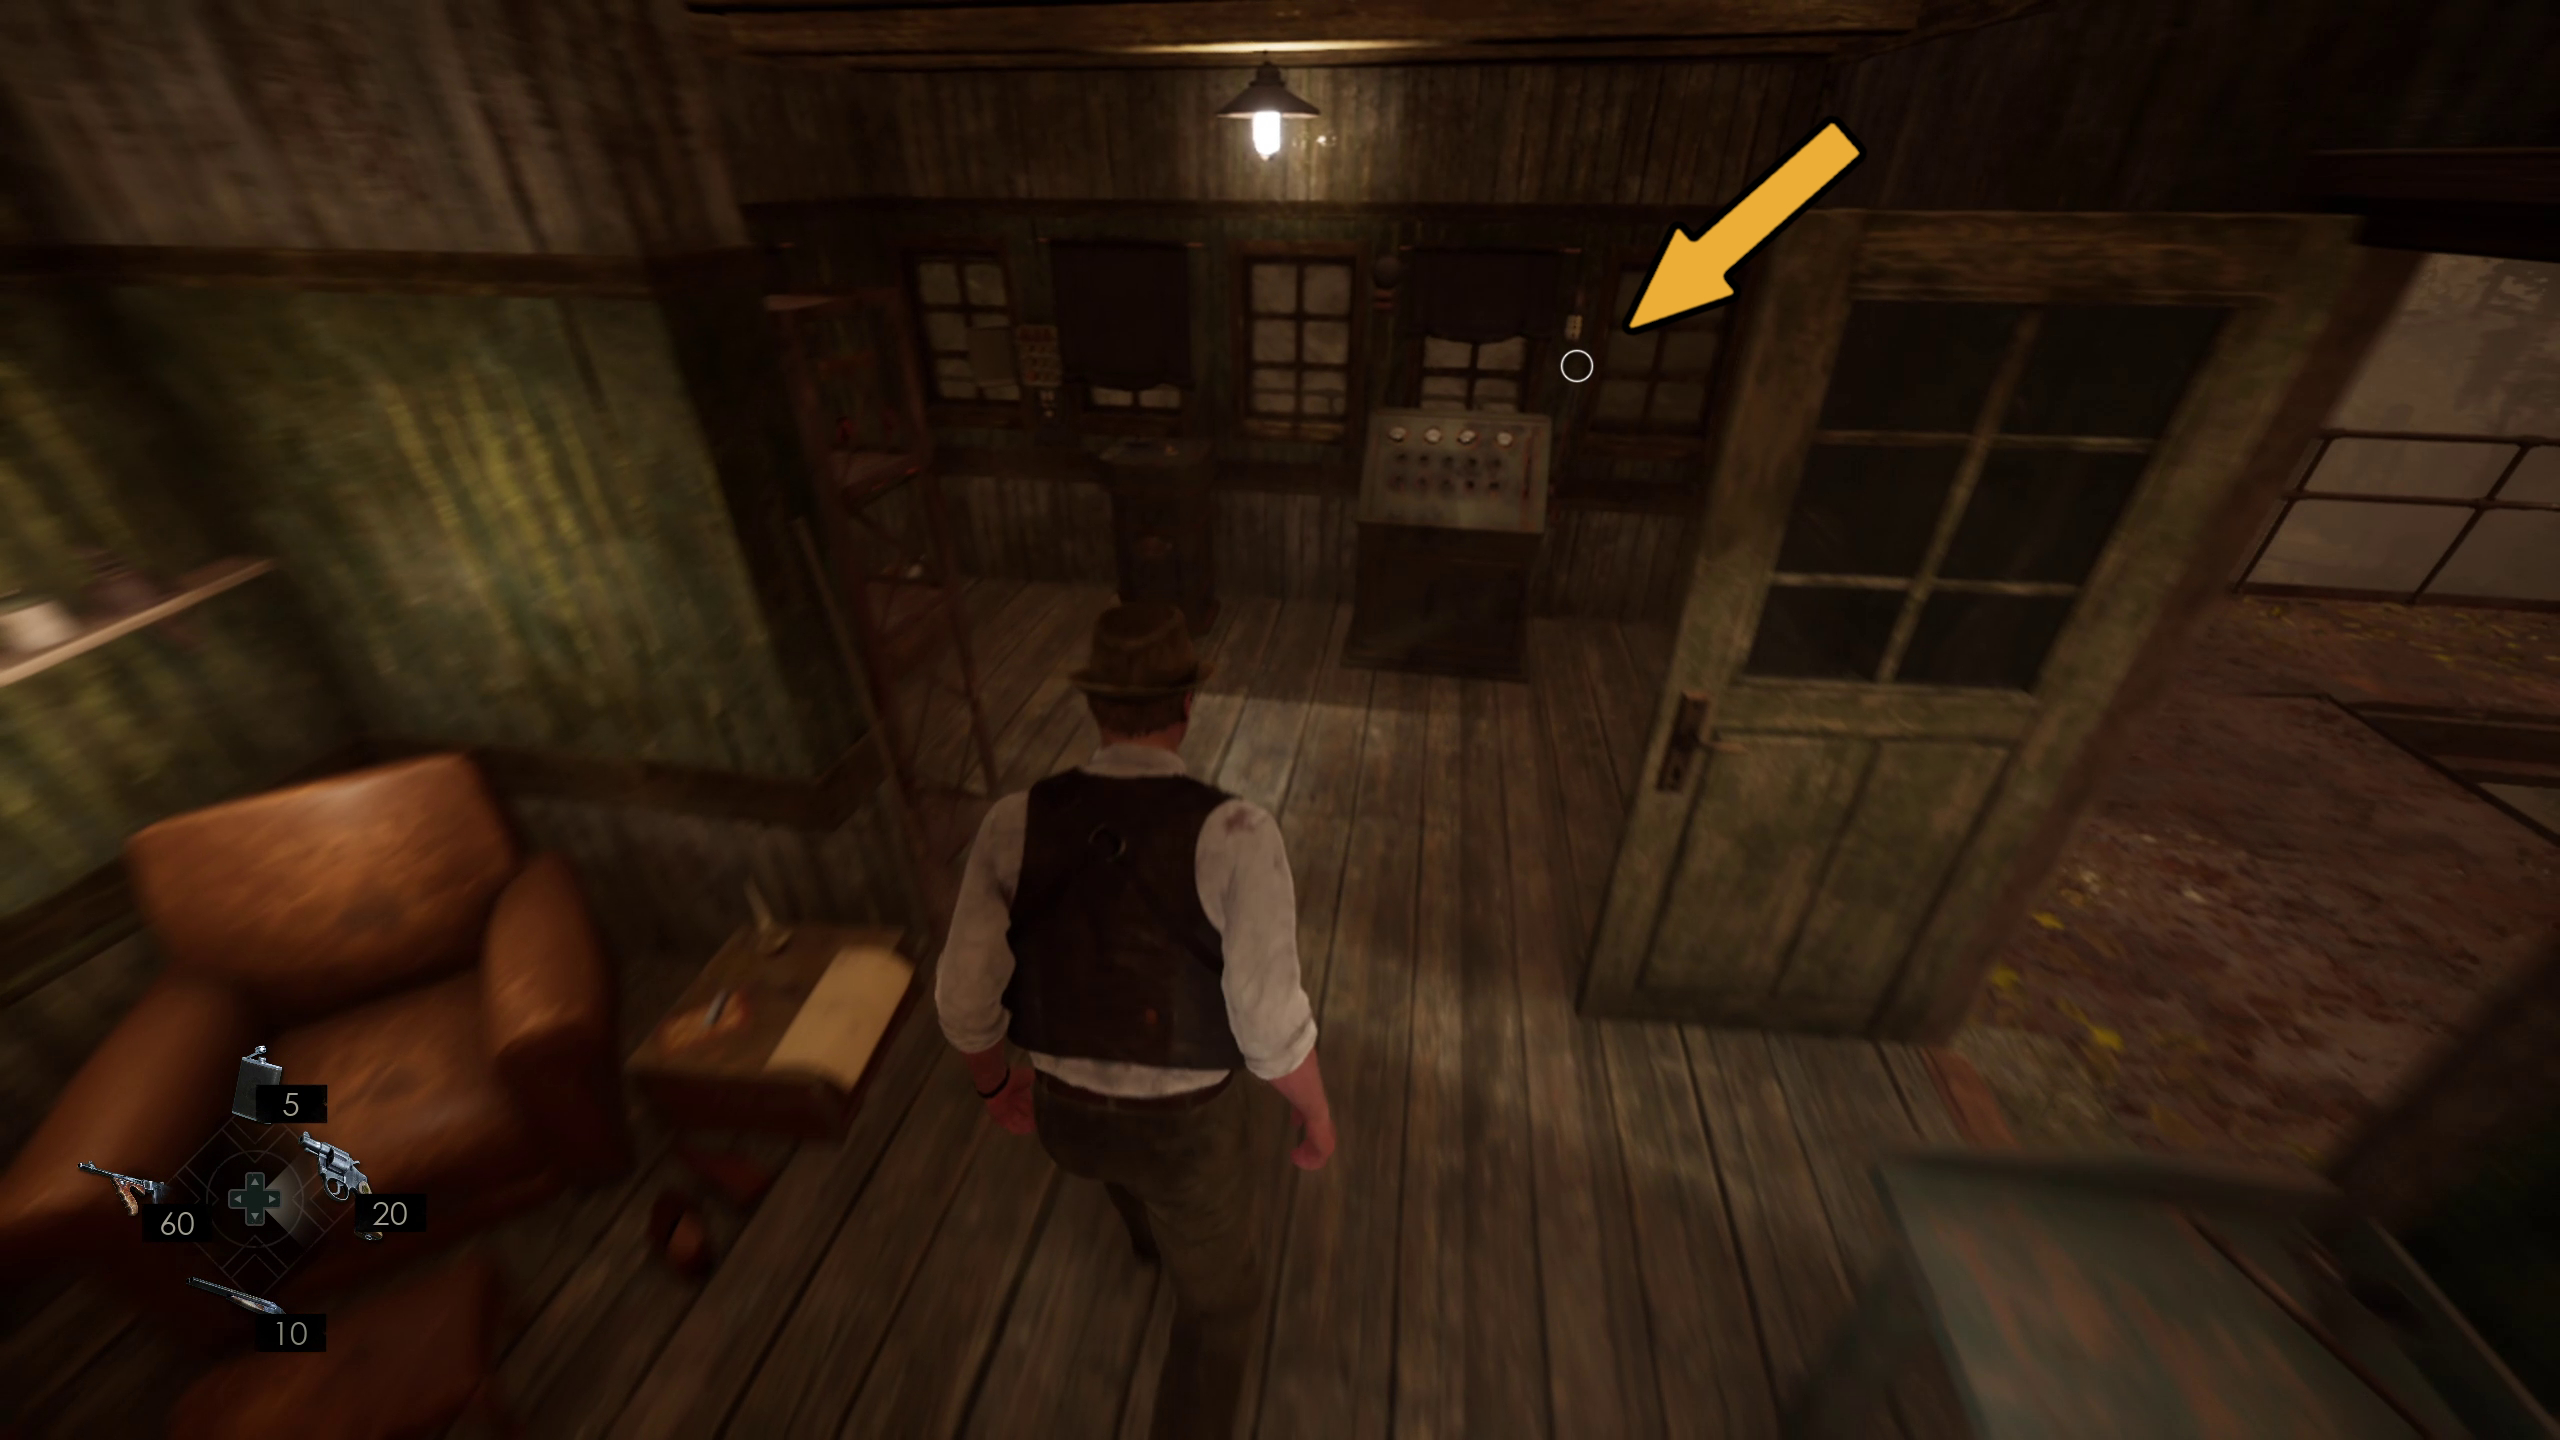
After talking to Emily, you’ll have a task: rescue her and her father from the sinking car. To achieve this task, you will first need to raise the bridge. Go to the opposite end of the bridge from where you came from and go up the stairs (Image 100). Go to the building in the center of the bridge (Image 101), and then go inside to pull the lever to raise it (Image 102).
Image 100Image 101Image 102
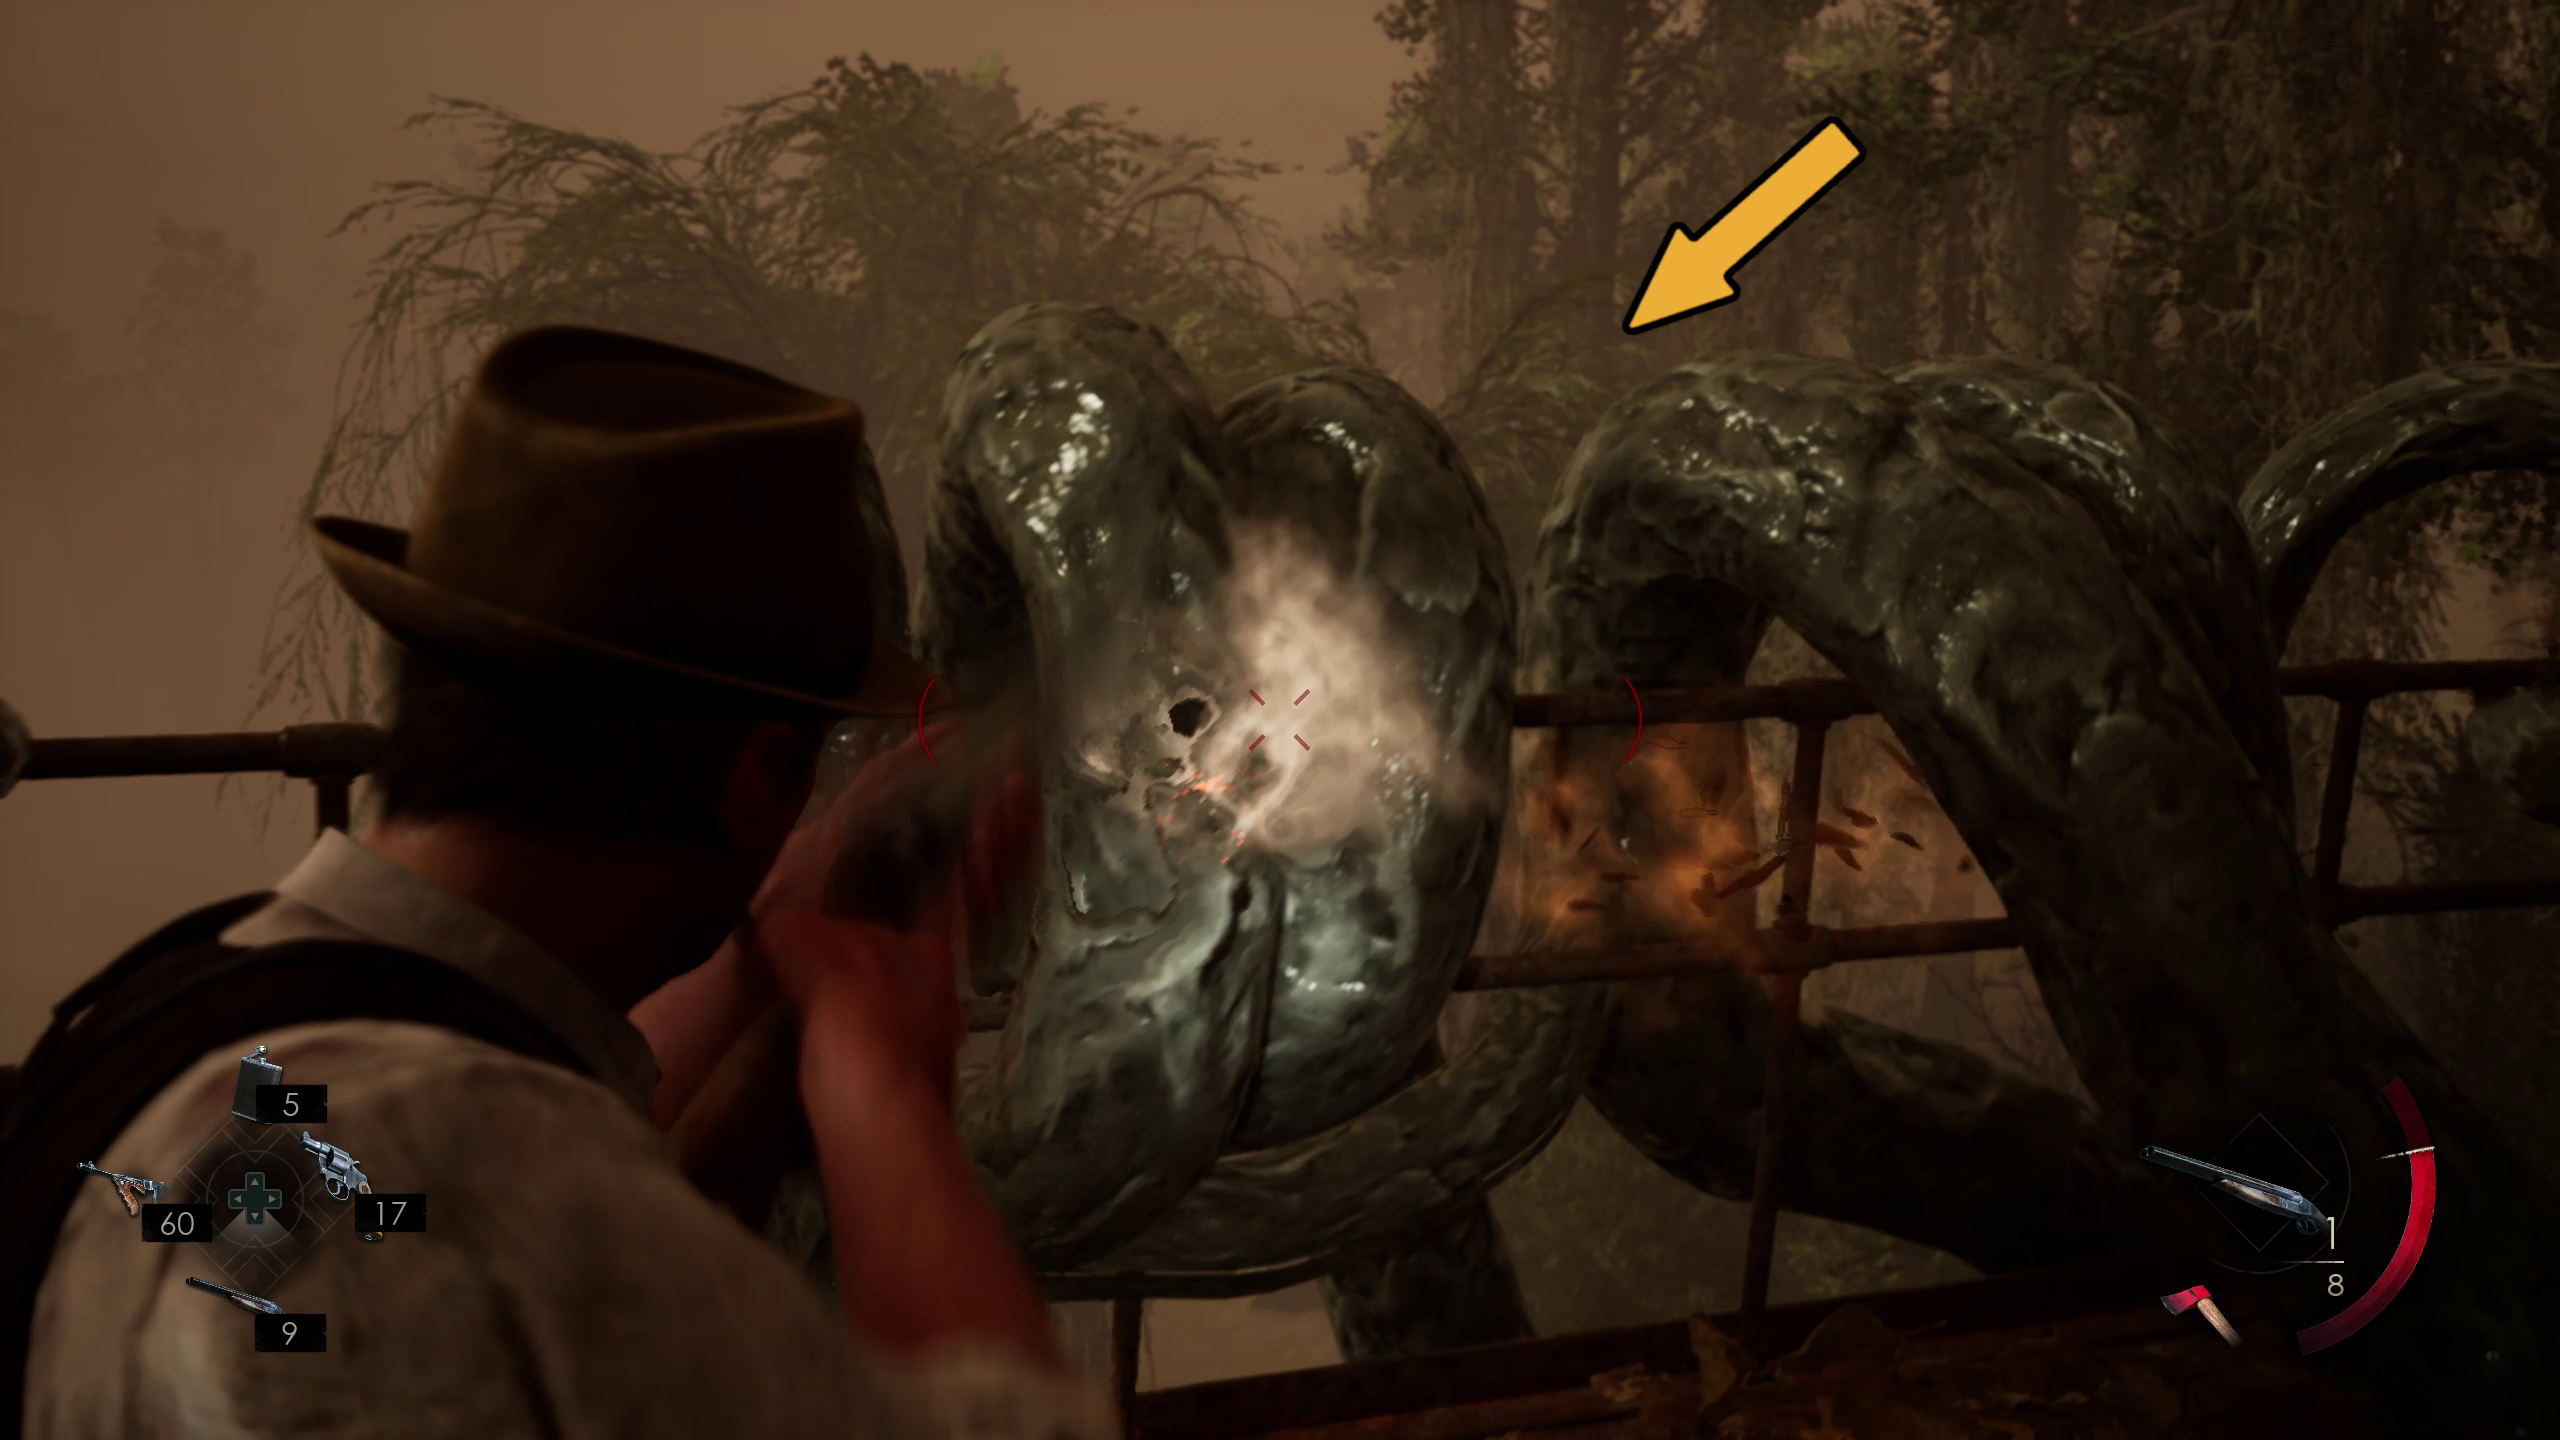
The bridge will start to raise, but be immediate stopped. Looking outside, you will see black tentacles coming up from the lake to grab the bridge and prevent it from rising. There are 3 of these vine-like things that will reach up, 2 back where you came from and 1 in front. Luckily, all it takes to destroy them is to shoot them a few times (Image 103). Unluckily, you will have to do so while being swarmed by bats (Image 104).
Image 103Image 104
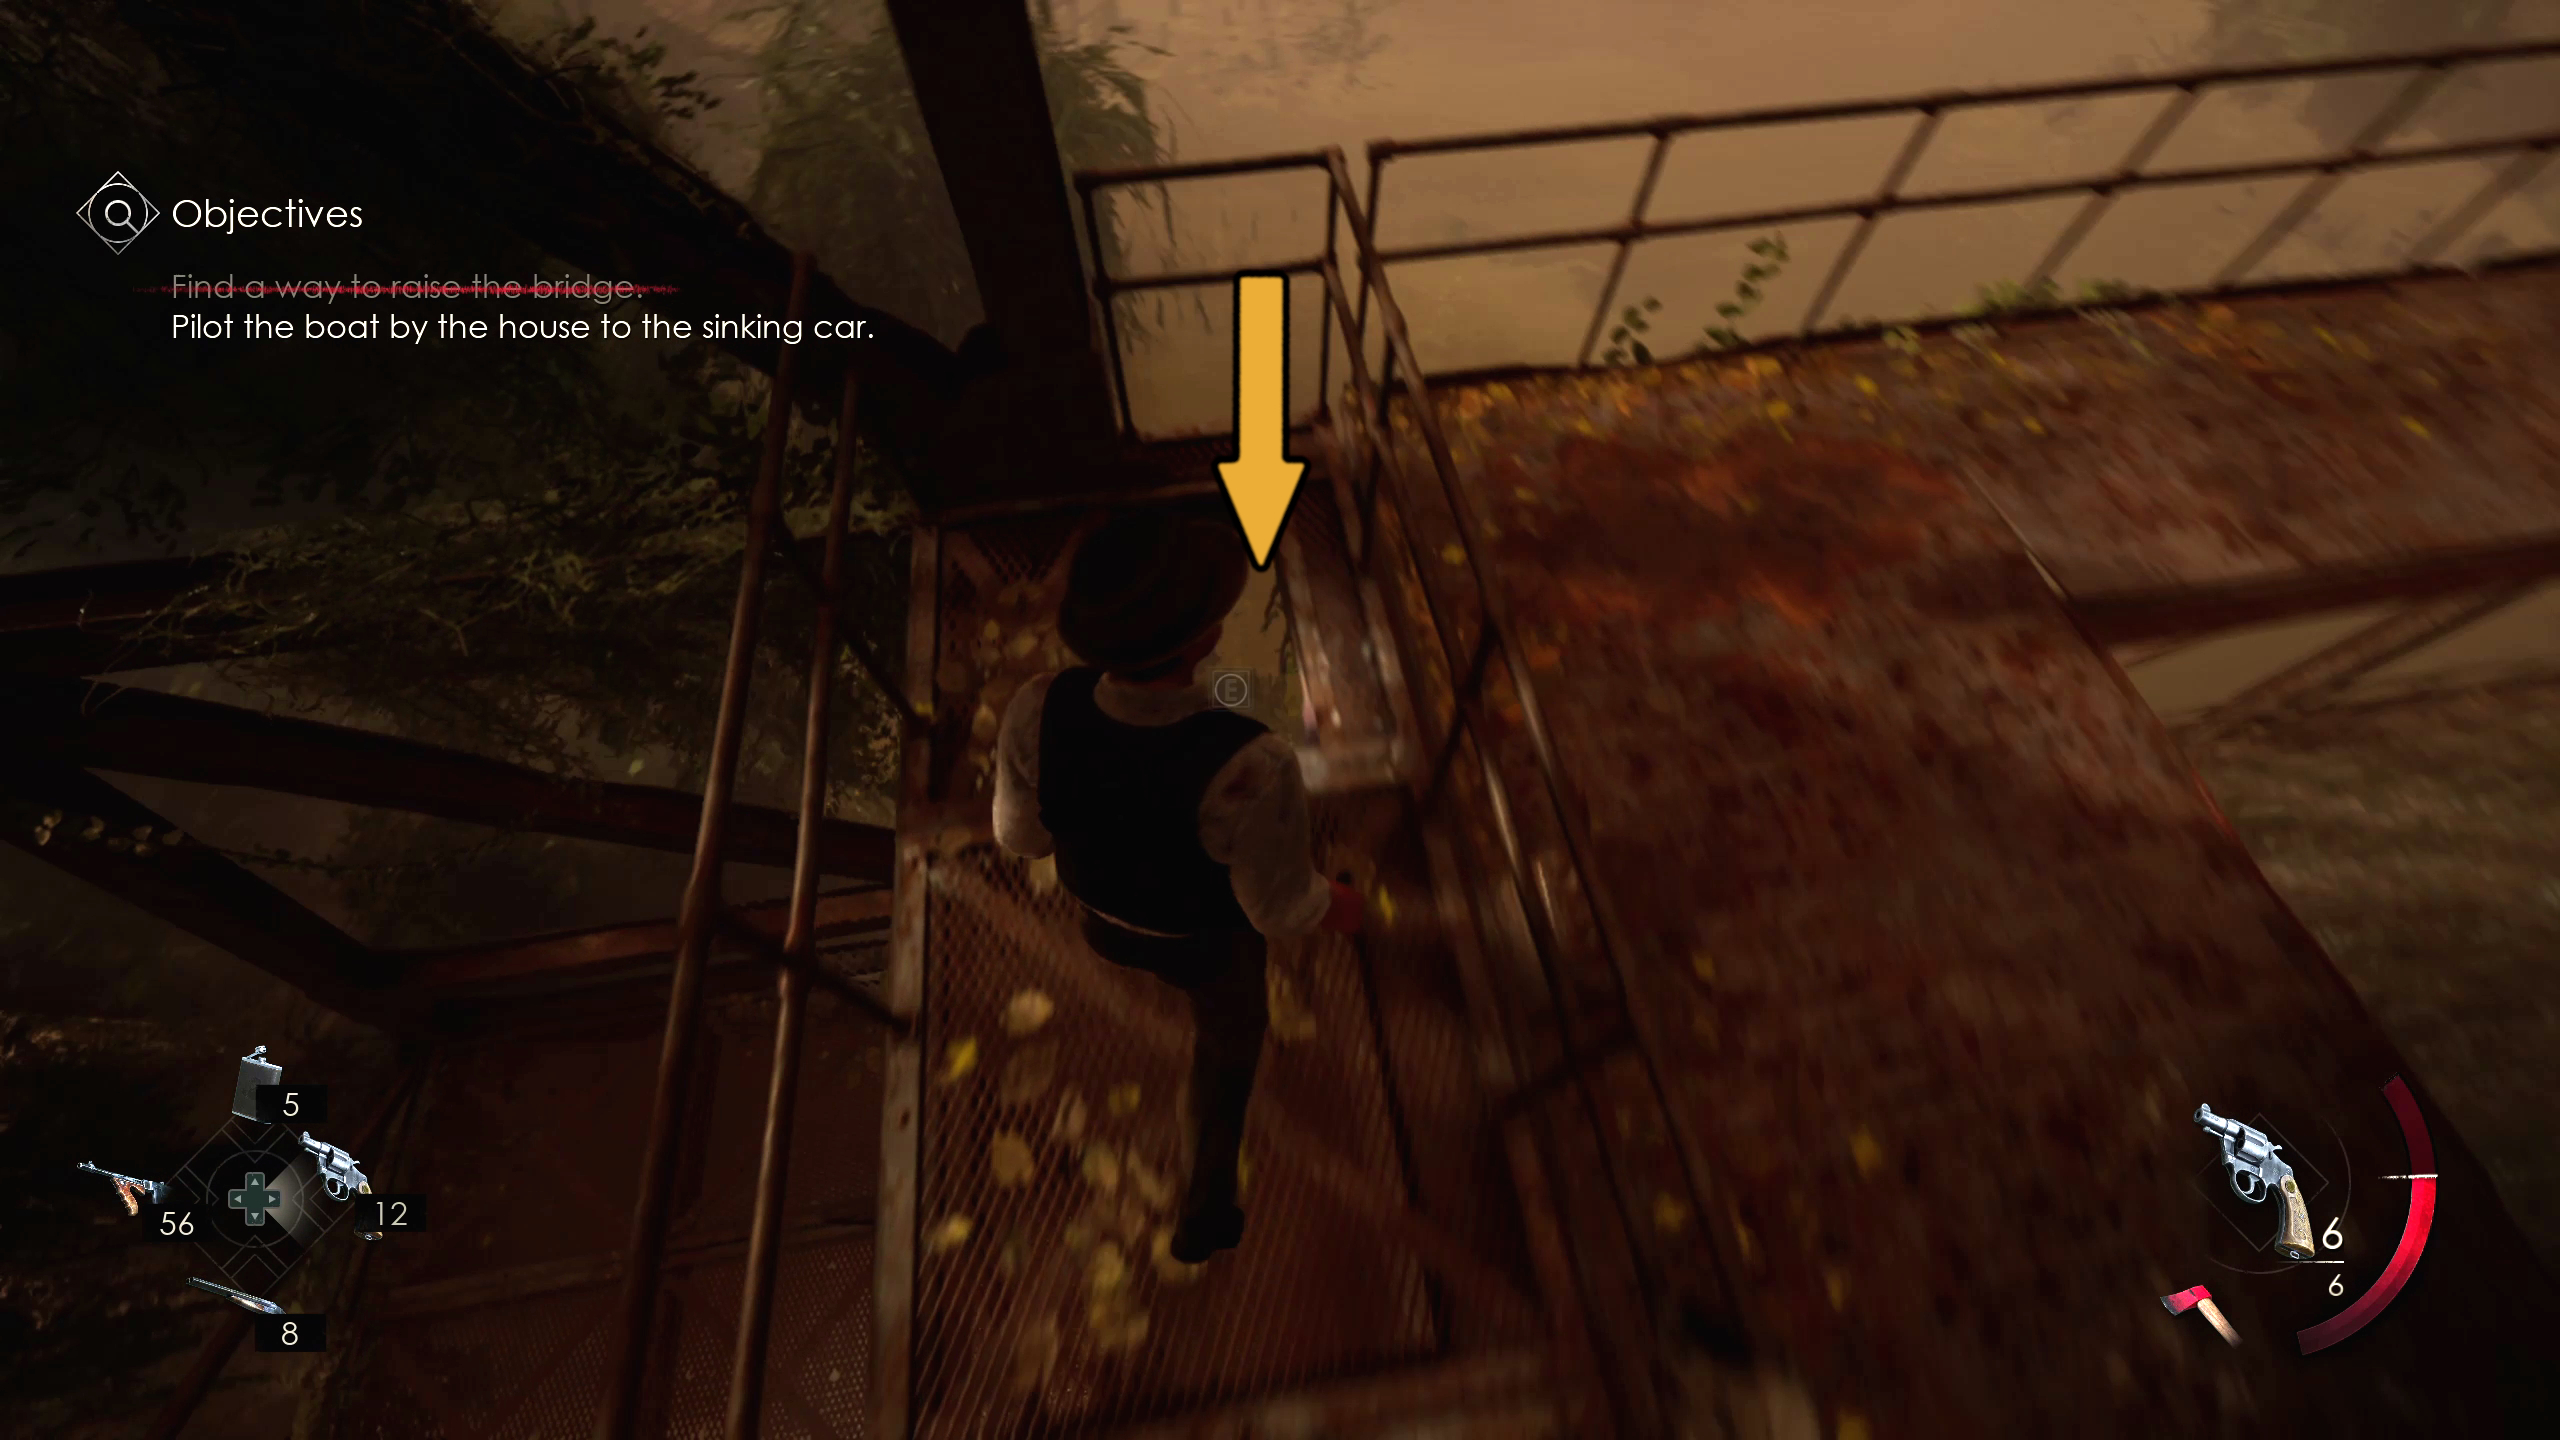
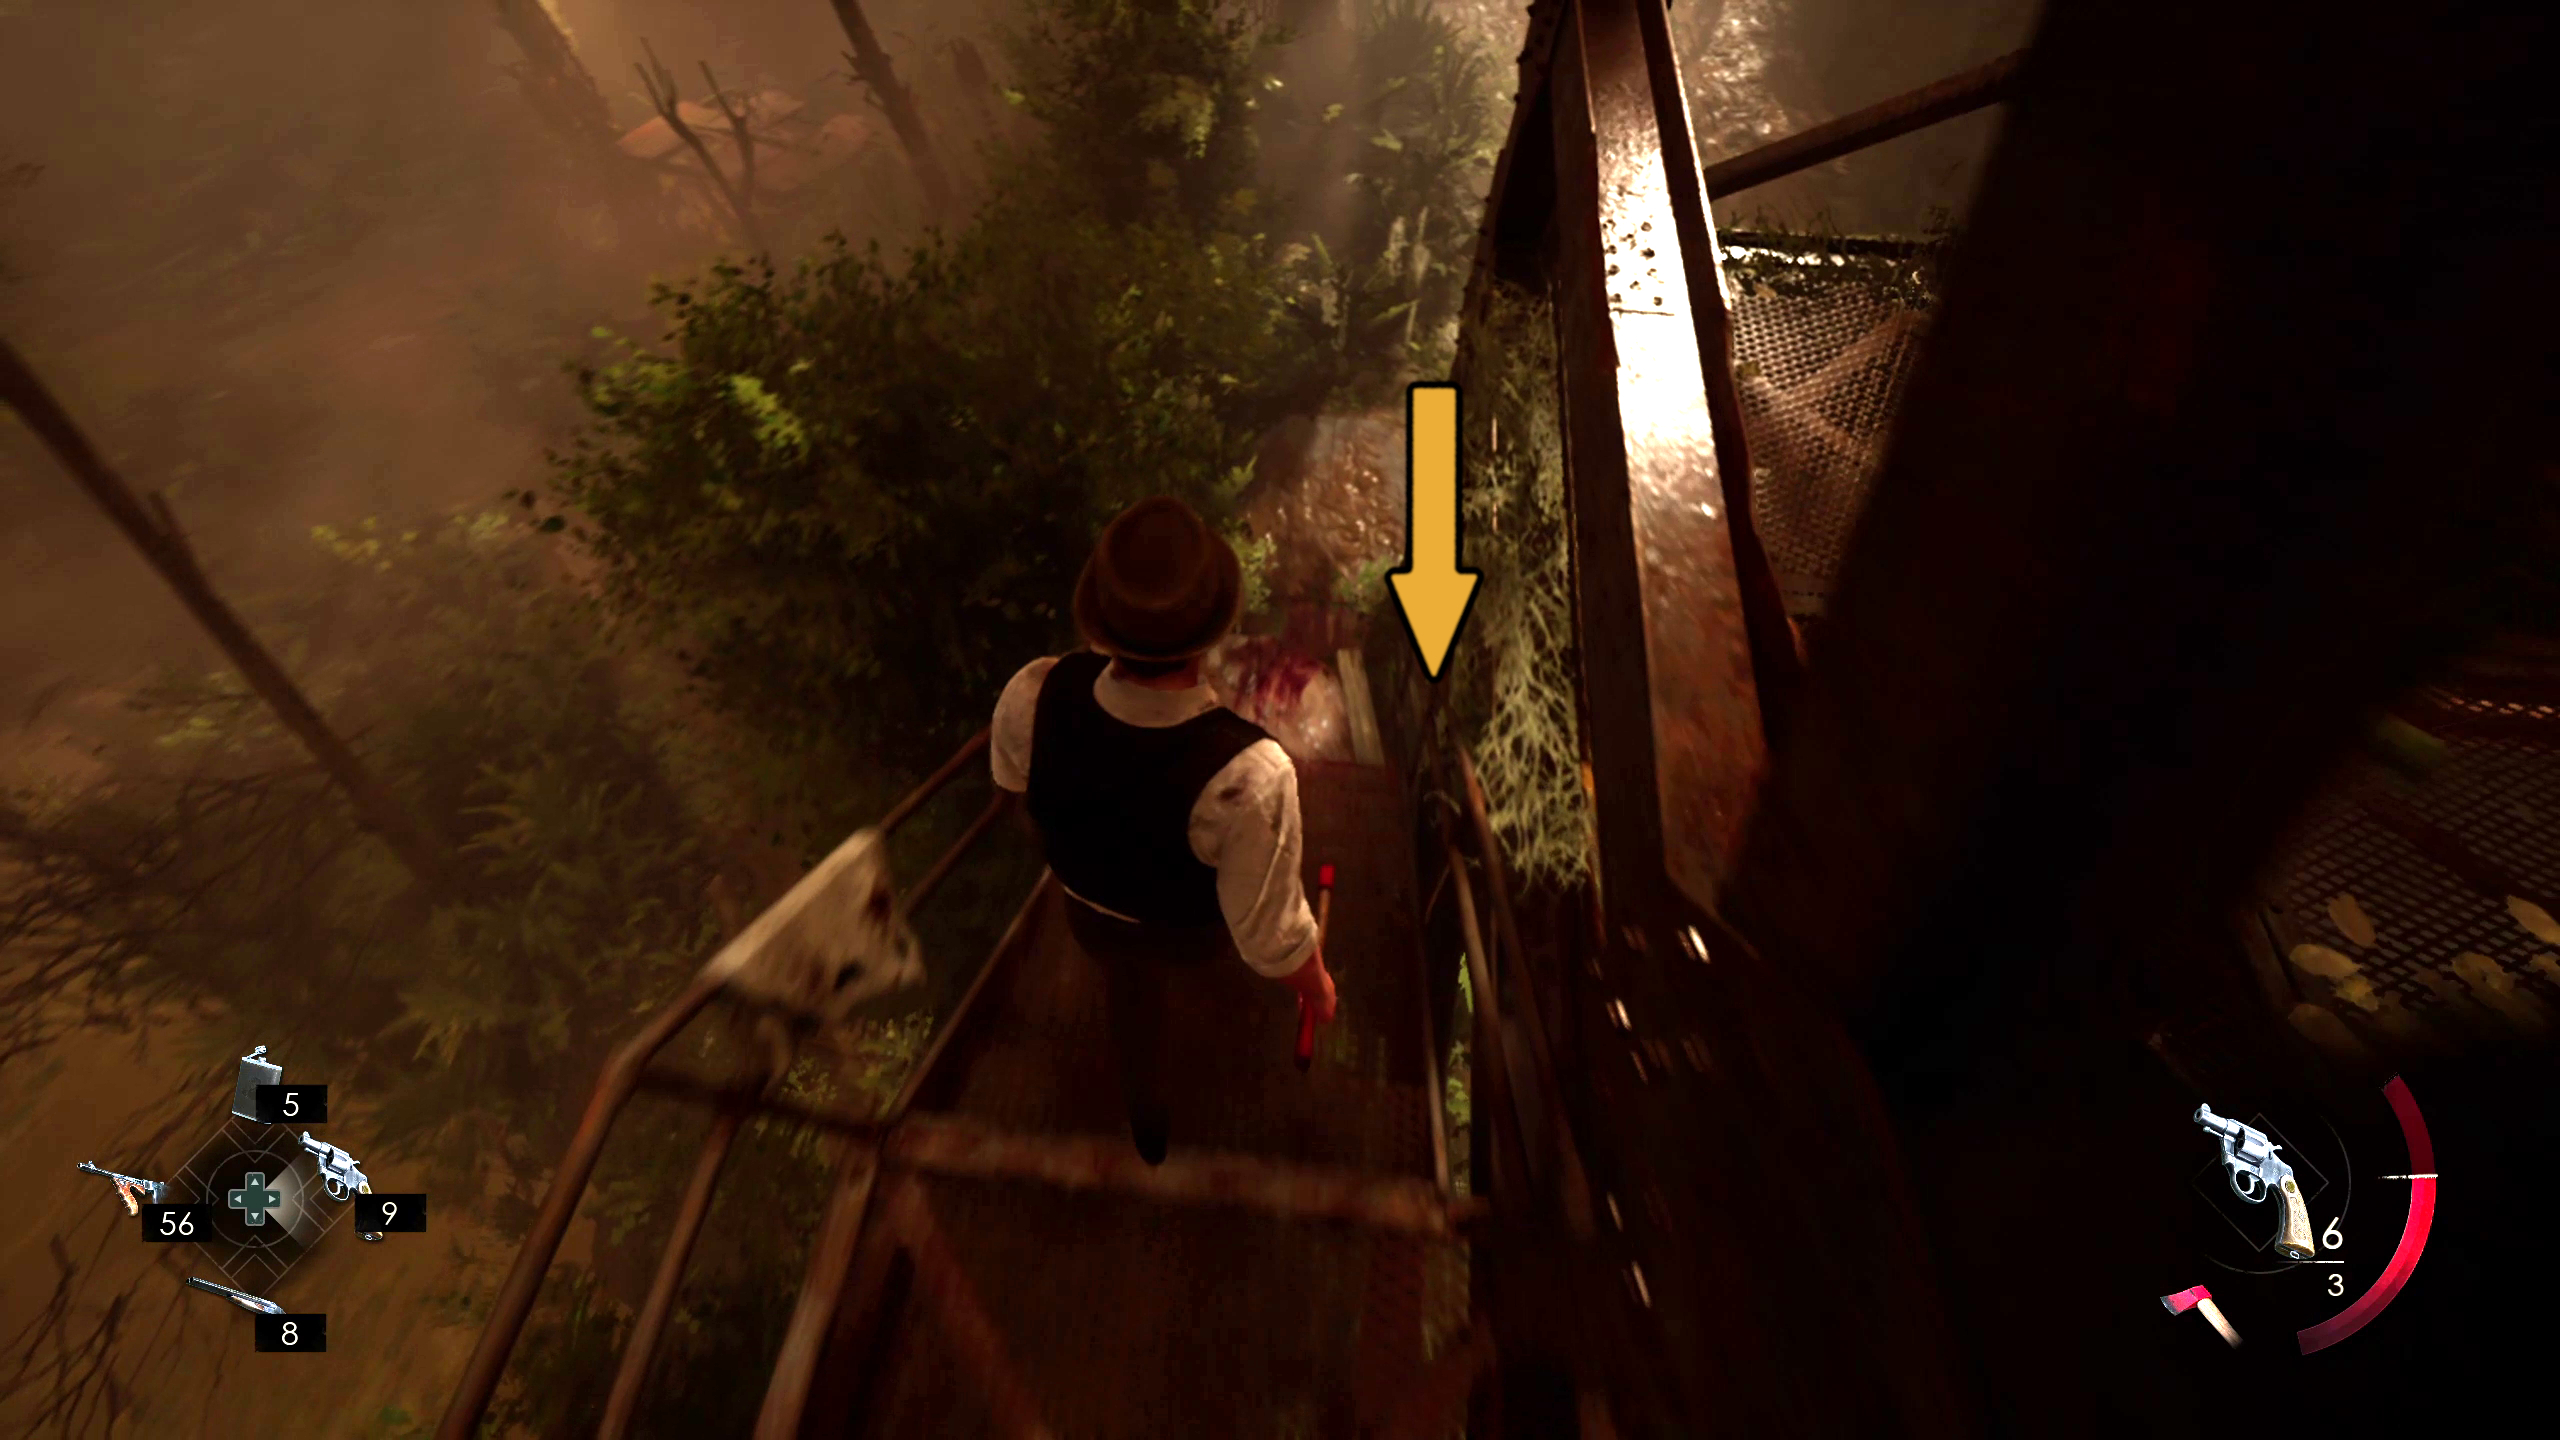
Once you’ve destroyed all three of the tendrils on the bridge, you can go to the opposite end of the bridge you came up onto (the side the door to the house in the center is facing) and descend the ladder (Image 105). Then, navigate to the destroyed stairs and hop down (Image 106). Be aware that, in addition to the bats that will be swarming you, a burrower will also be at the ready to pounce at you here.
Image 105Image 106
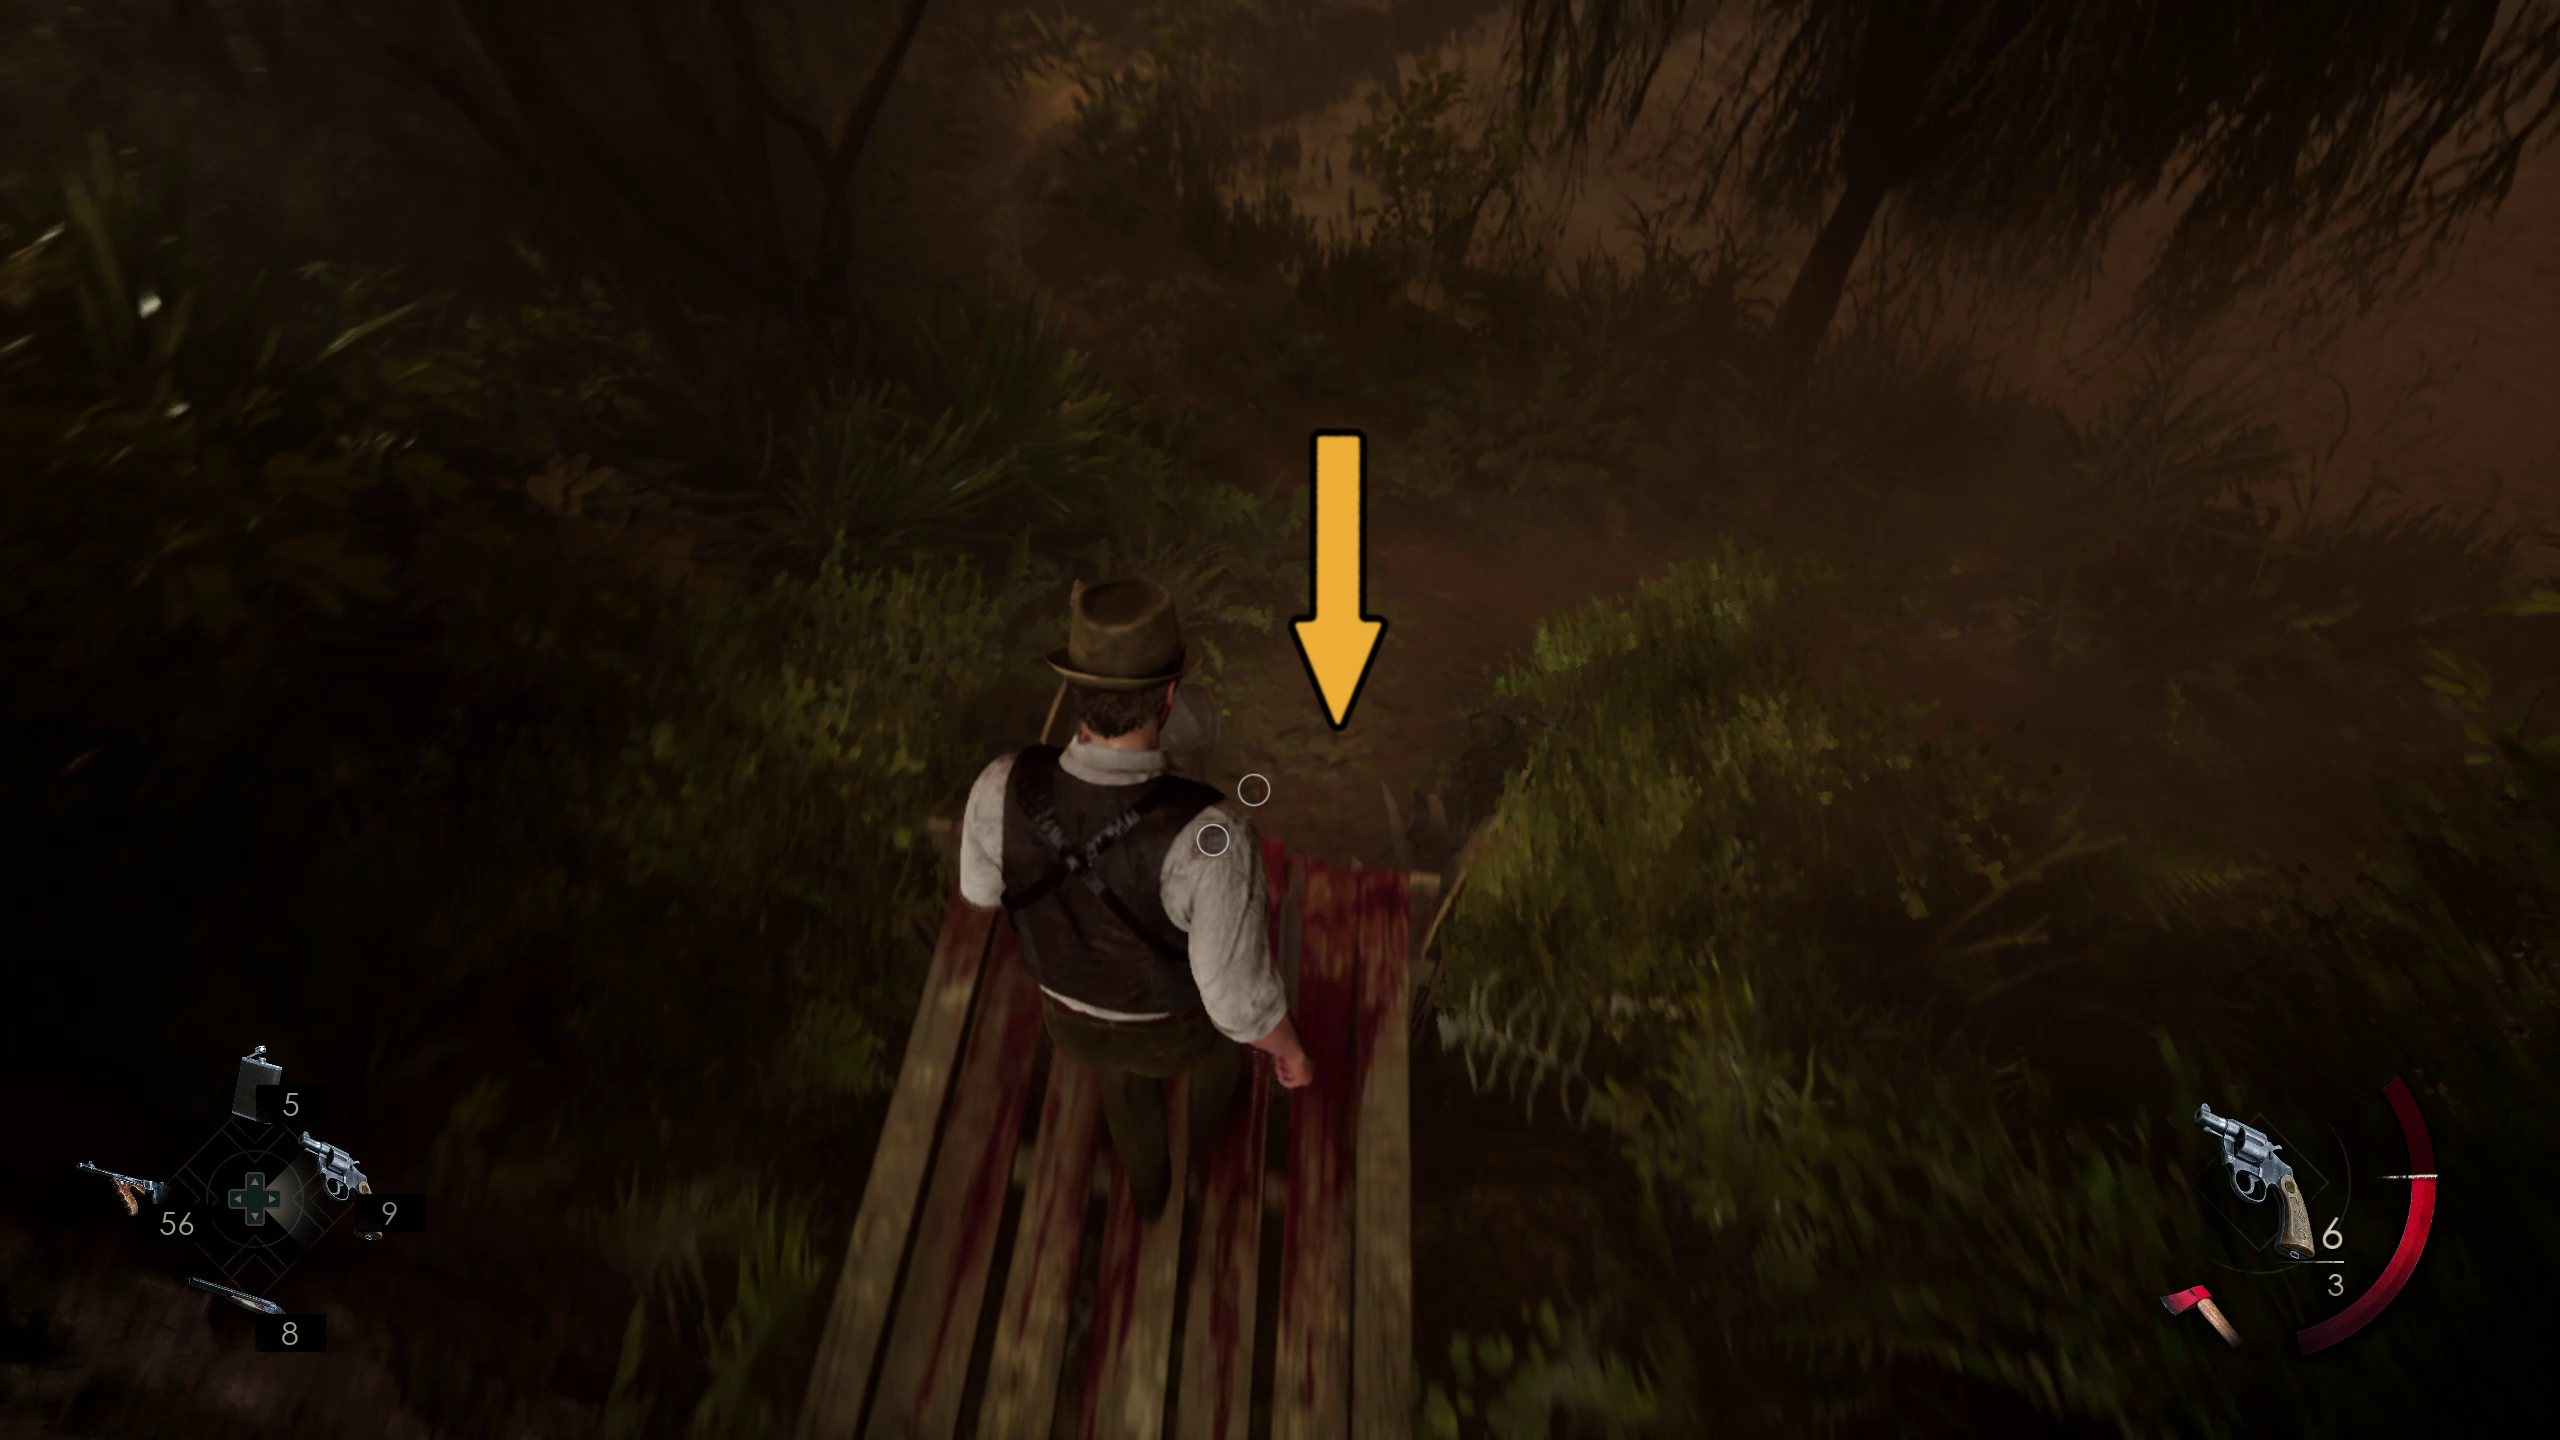
Look across the street from where you jumped down to locate another jump down (Image 107). This one leads back to the hut that you came out of after solving the map puzzle. Just go up to the moored boat and interact with it in order to try to rescue Grace and her father (Image 108).
Image 107Image 108
After a disturbing cutscene you will find yourself back in Derceto, being aided by Emily and chastized by a certain rude housekeeper. Now that you’ve completed this memory, it is finally time to Pay Dr Gray a visit in his apartment.
Emily
Read the writing on the wall
In this room, you’ll need to solve a puzzle to progress. Before you do so, however, you can grab the Ashes of Indigo lagniappe from on top of the covered furniture on the right side of the room (Image 109).
Image 109
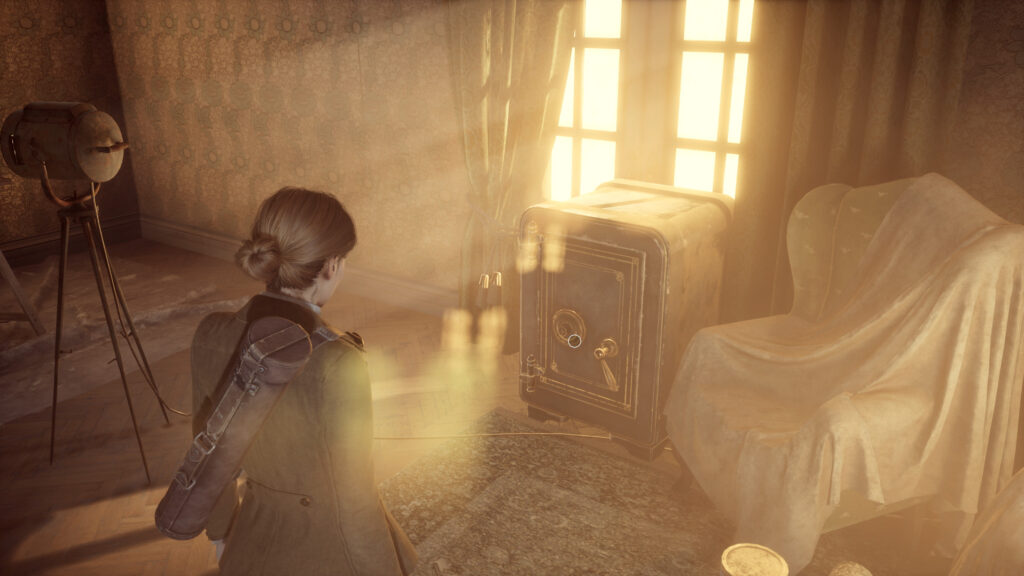
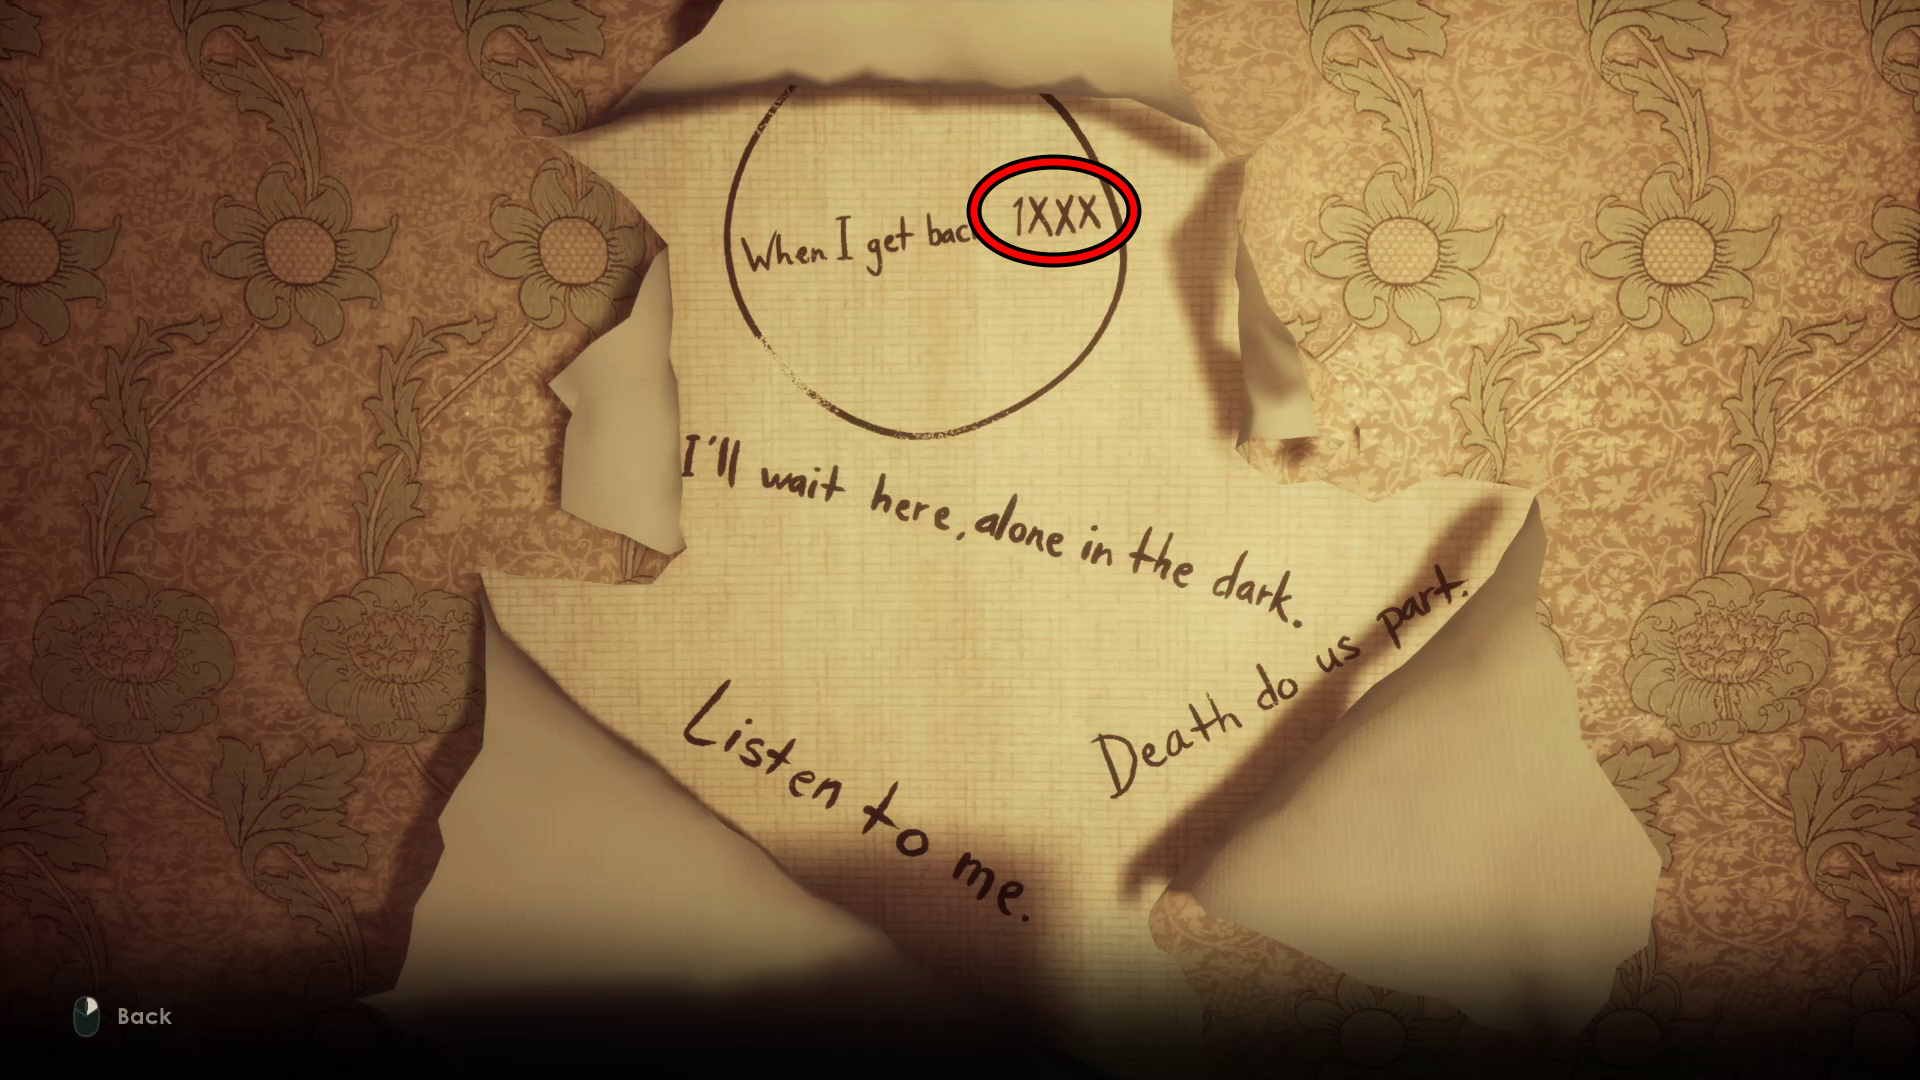
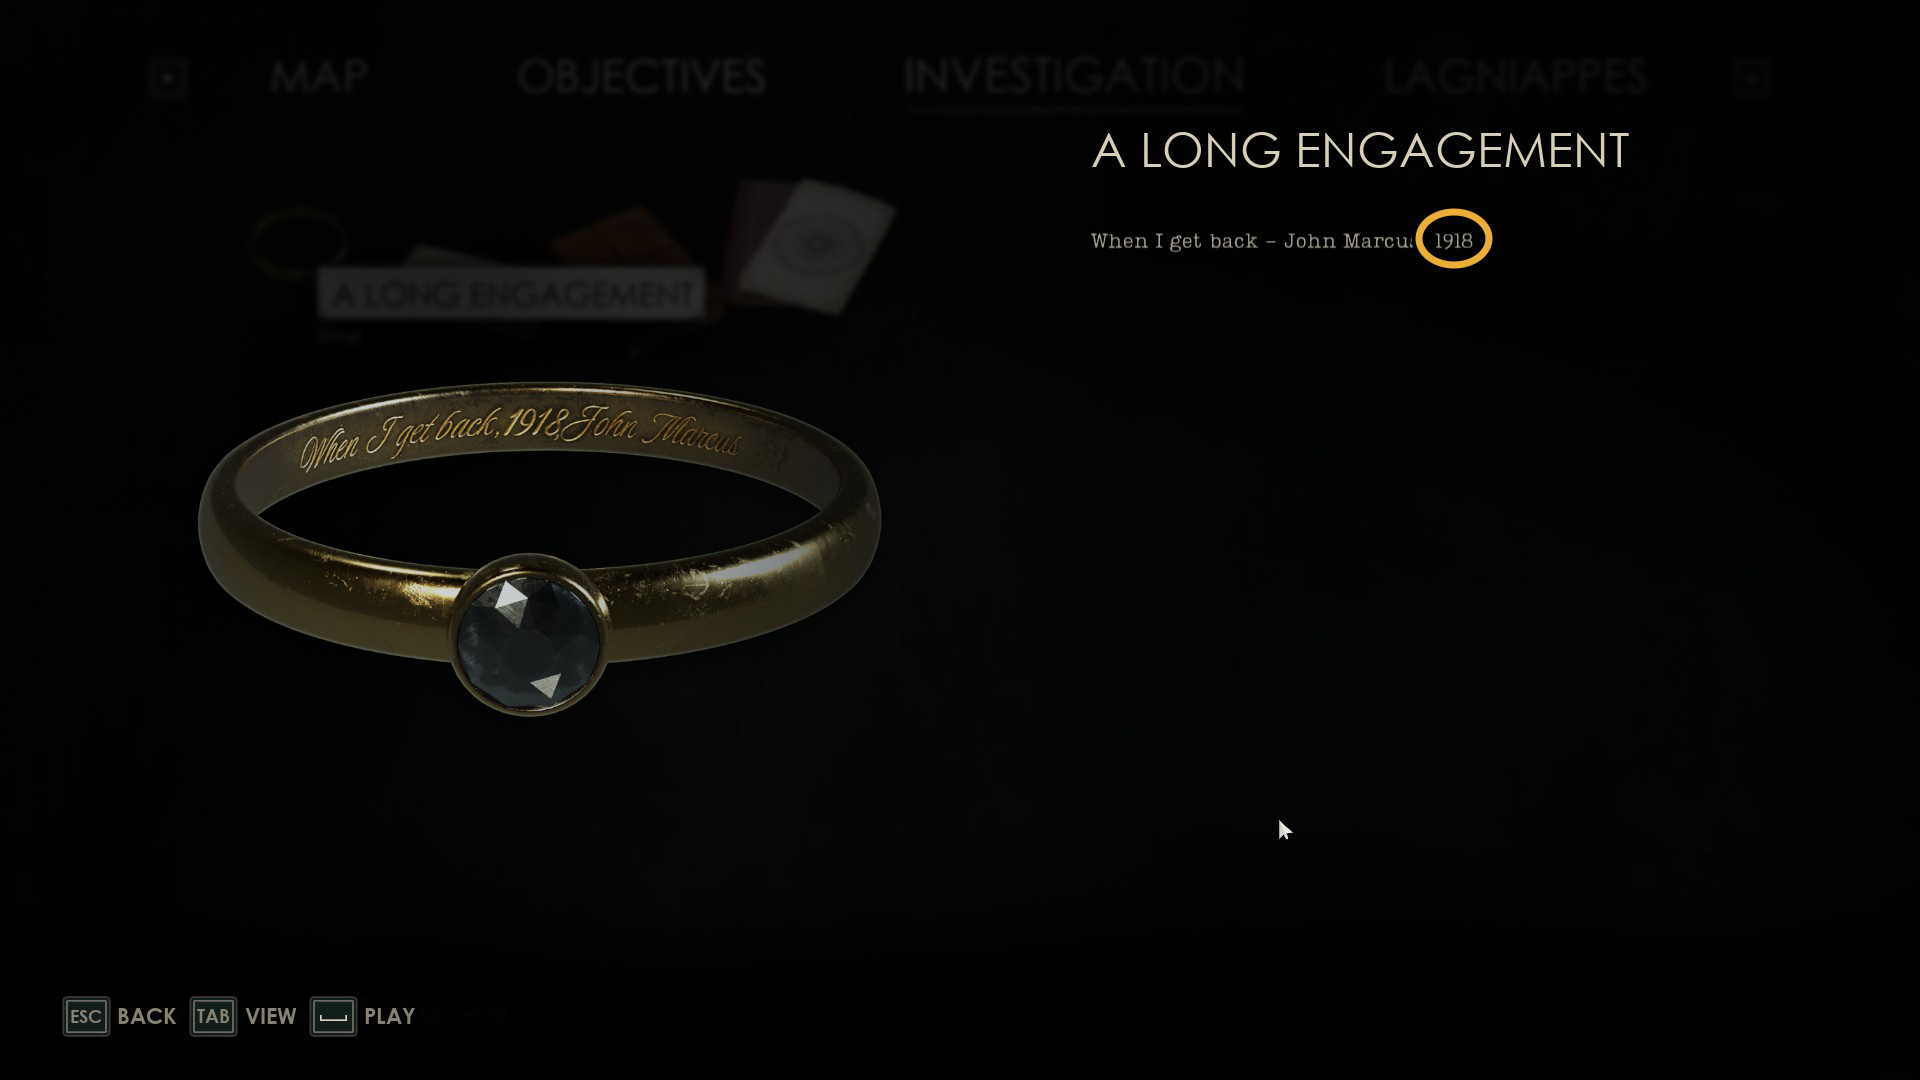
You need to find the combination to the safe. Peel the wallpaper off the wall and take a look at the writing on the wall — the only relevant part is “When I get back, 1XXXX”. The shape the text is in is a hint that should help you find the missing numbers, which are in your inventorys somewhere…
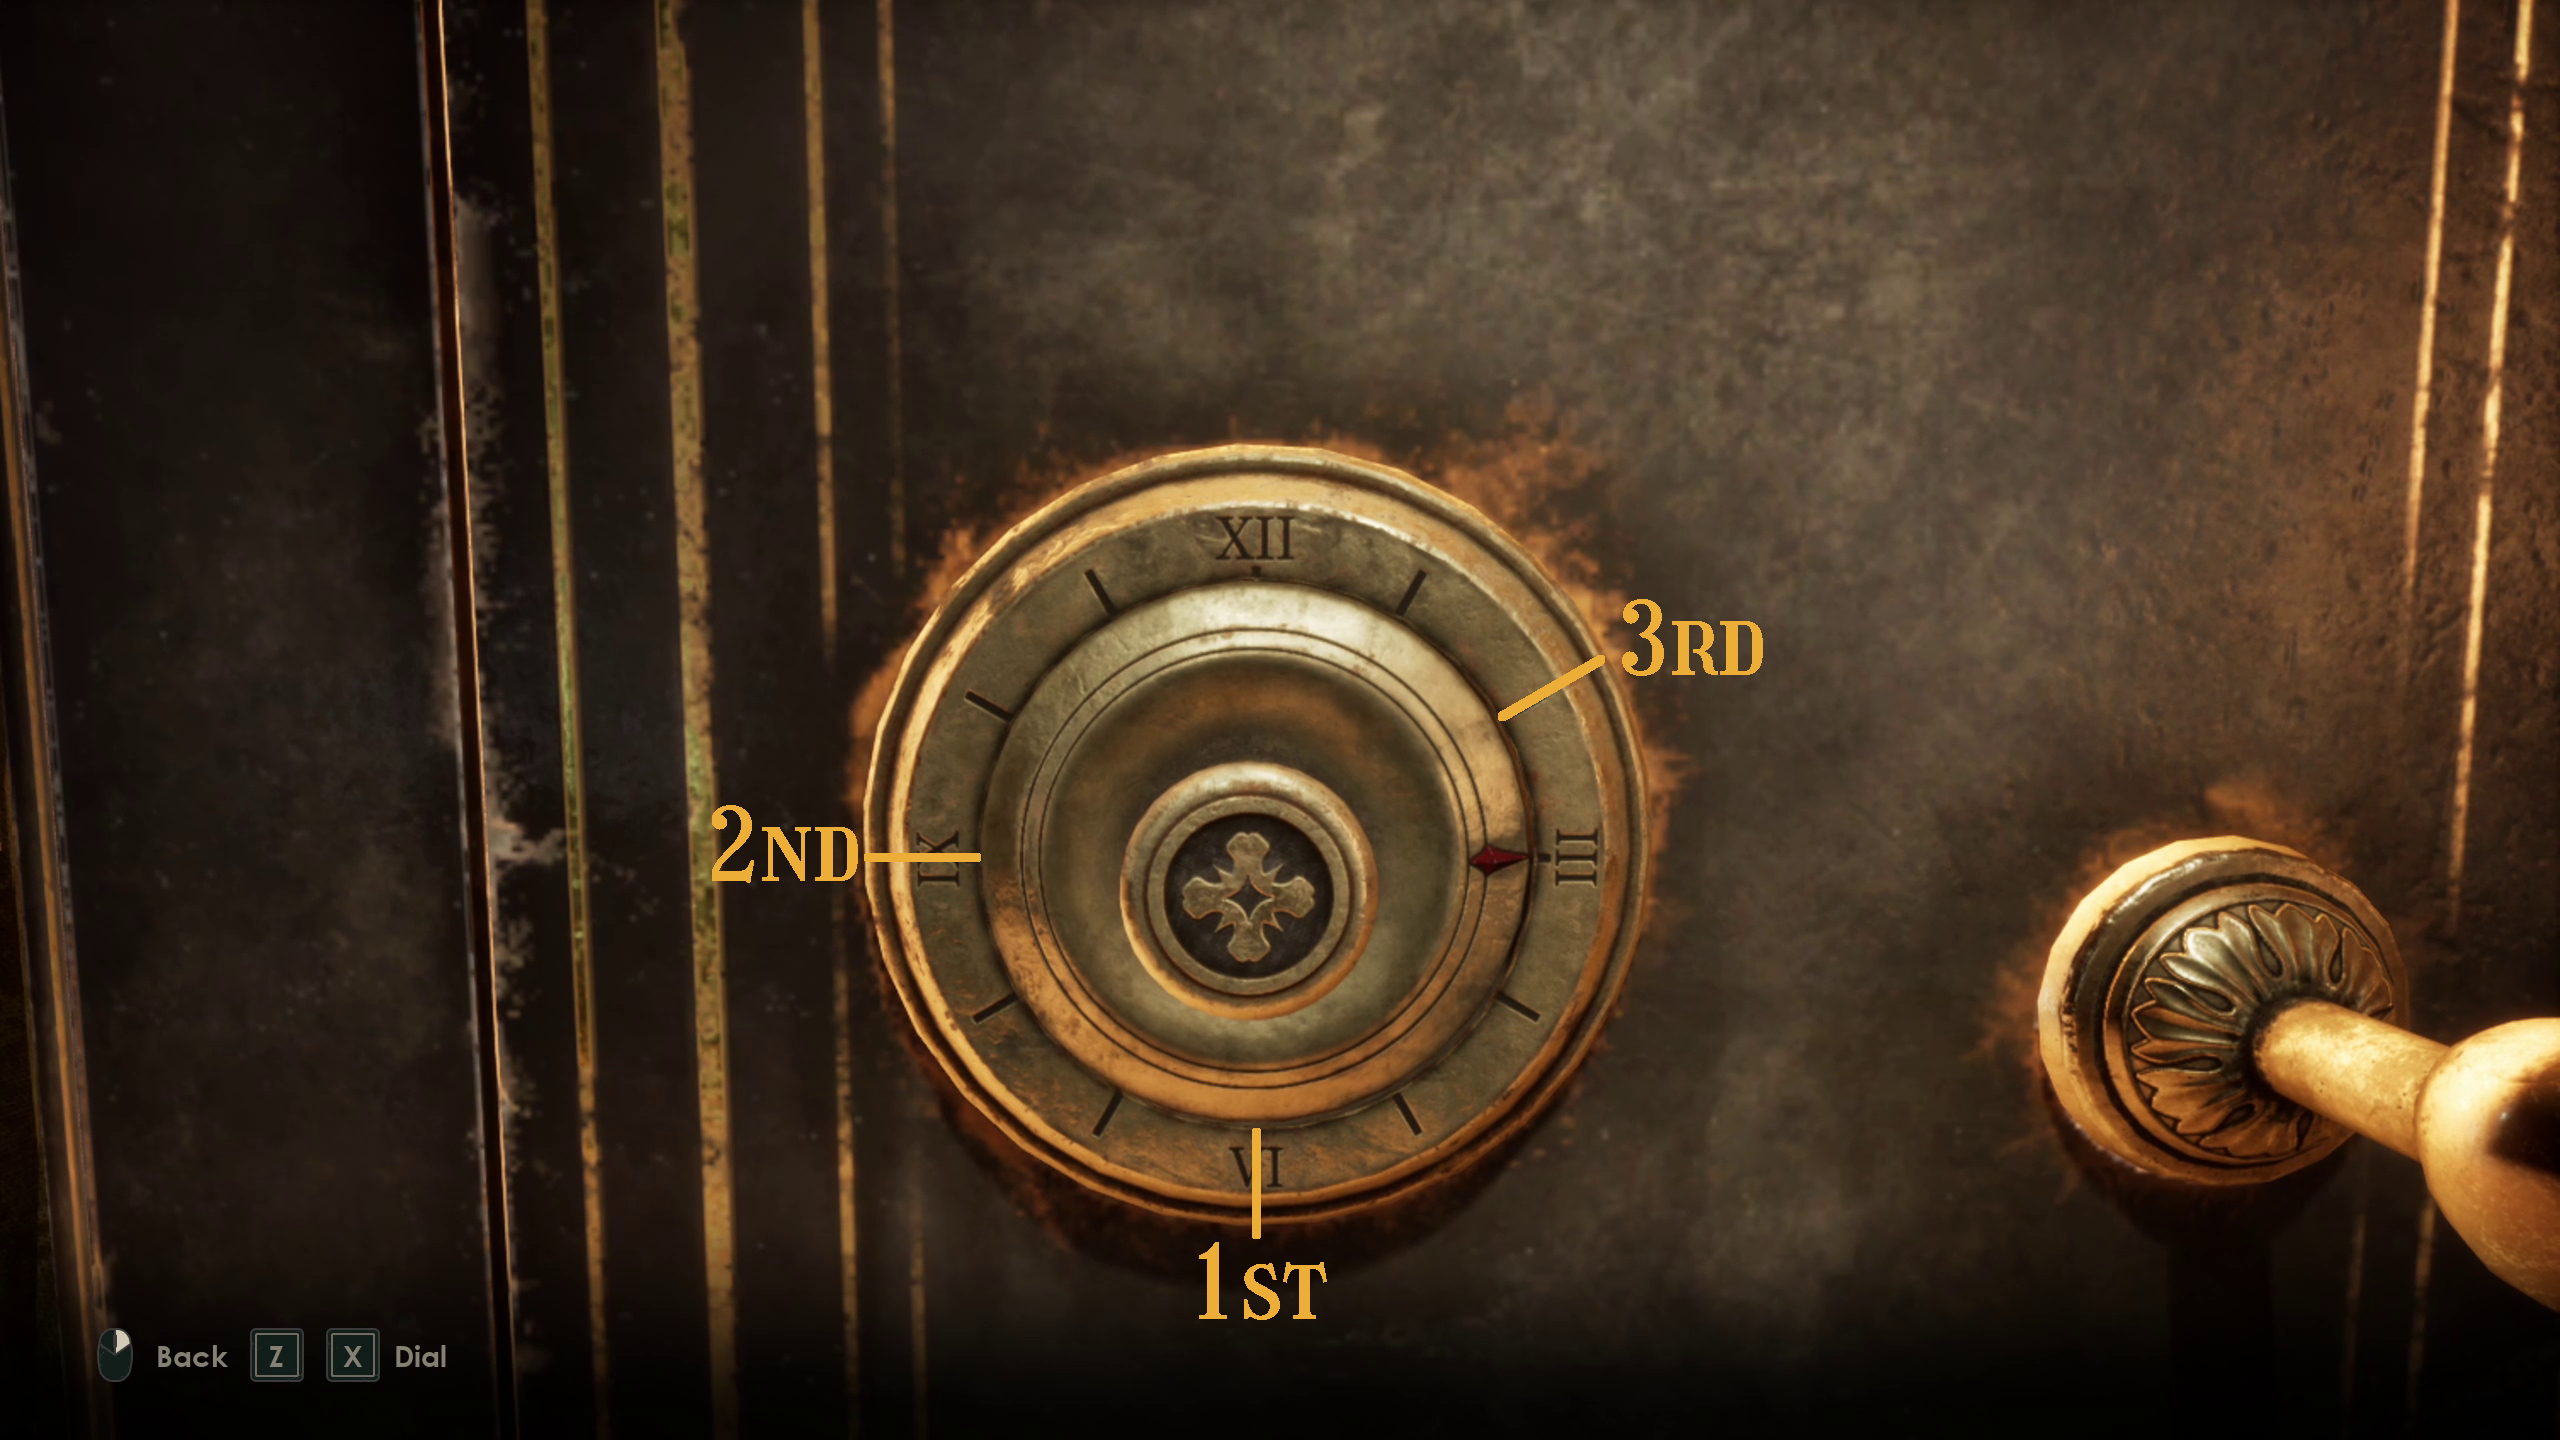
Interact with the safe (Image X), and input the combo 918 — go left, right, then left when inputting the numbers. This combo comes from the clue on the wall and the A Long Engagement item.
Inside the safe, you’ll find the Flash Bulb and the To Emily.
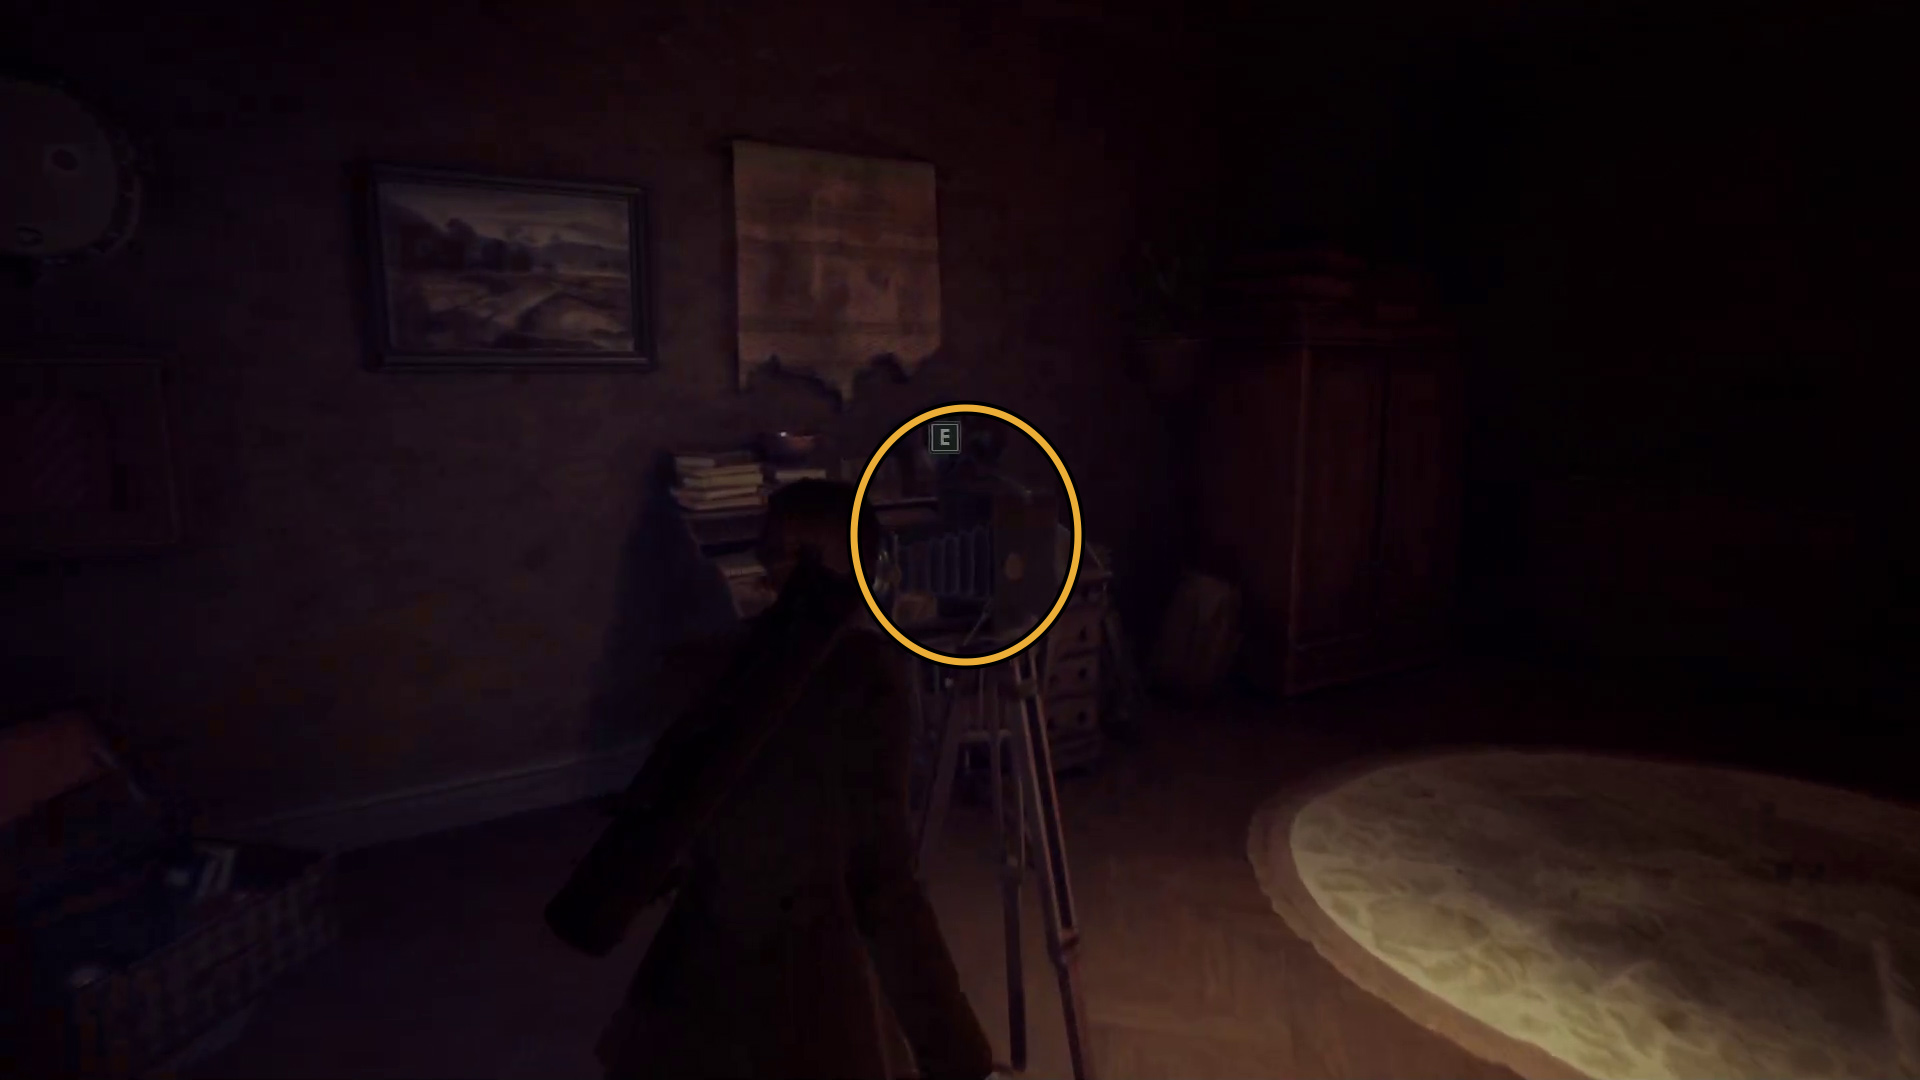
Now that you have the Flash Bulb, go back down the hall to Ruth’s room, which will be the first door on your right. Inside, grab the War Photo lagniappe from the dresser if you haven’t already, and Henry Cassel’s Zoetrope clue from the trunk in the corner (Image 110). When you’re ready, interact with Ruth’s Camera (Image 111) and put the Flash Bulb in it to send yourself somewhere new.
Image 110Image 111
Find your fiancé
After using the camera, you’ll find yourself in a WWI trench. There’s only one way forwards — continue through the trench and you’ll eventually come to a covered section where you can find some loot (Image Image 112). Keep heading through the trench until you come to an area you have to crouch through (Image Image 113) — press the indicated button and shuffle under the wreckage.
Image 112Image 113
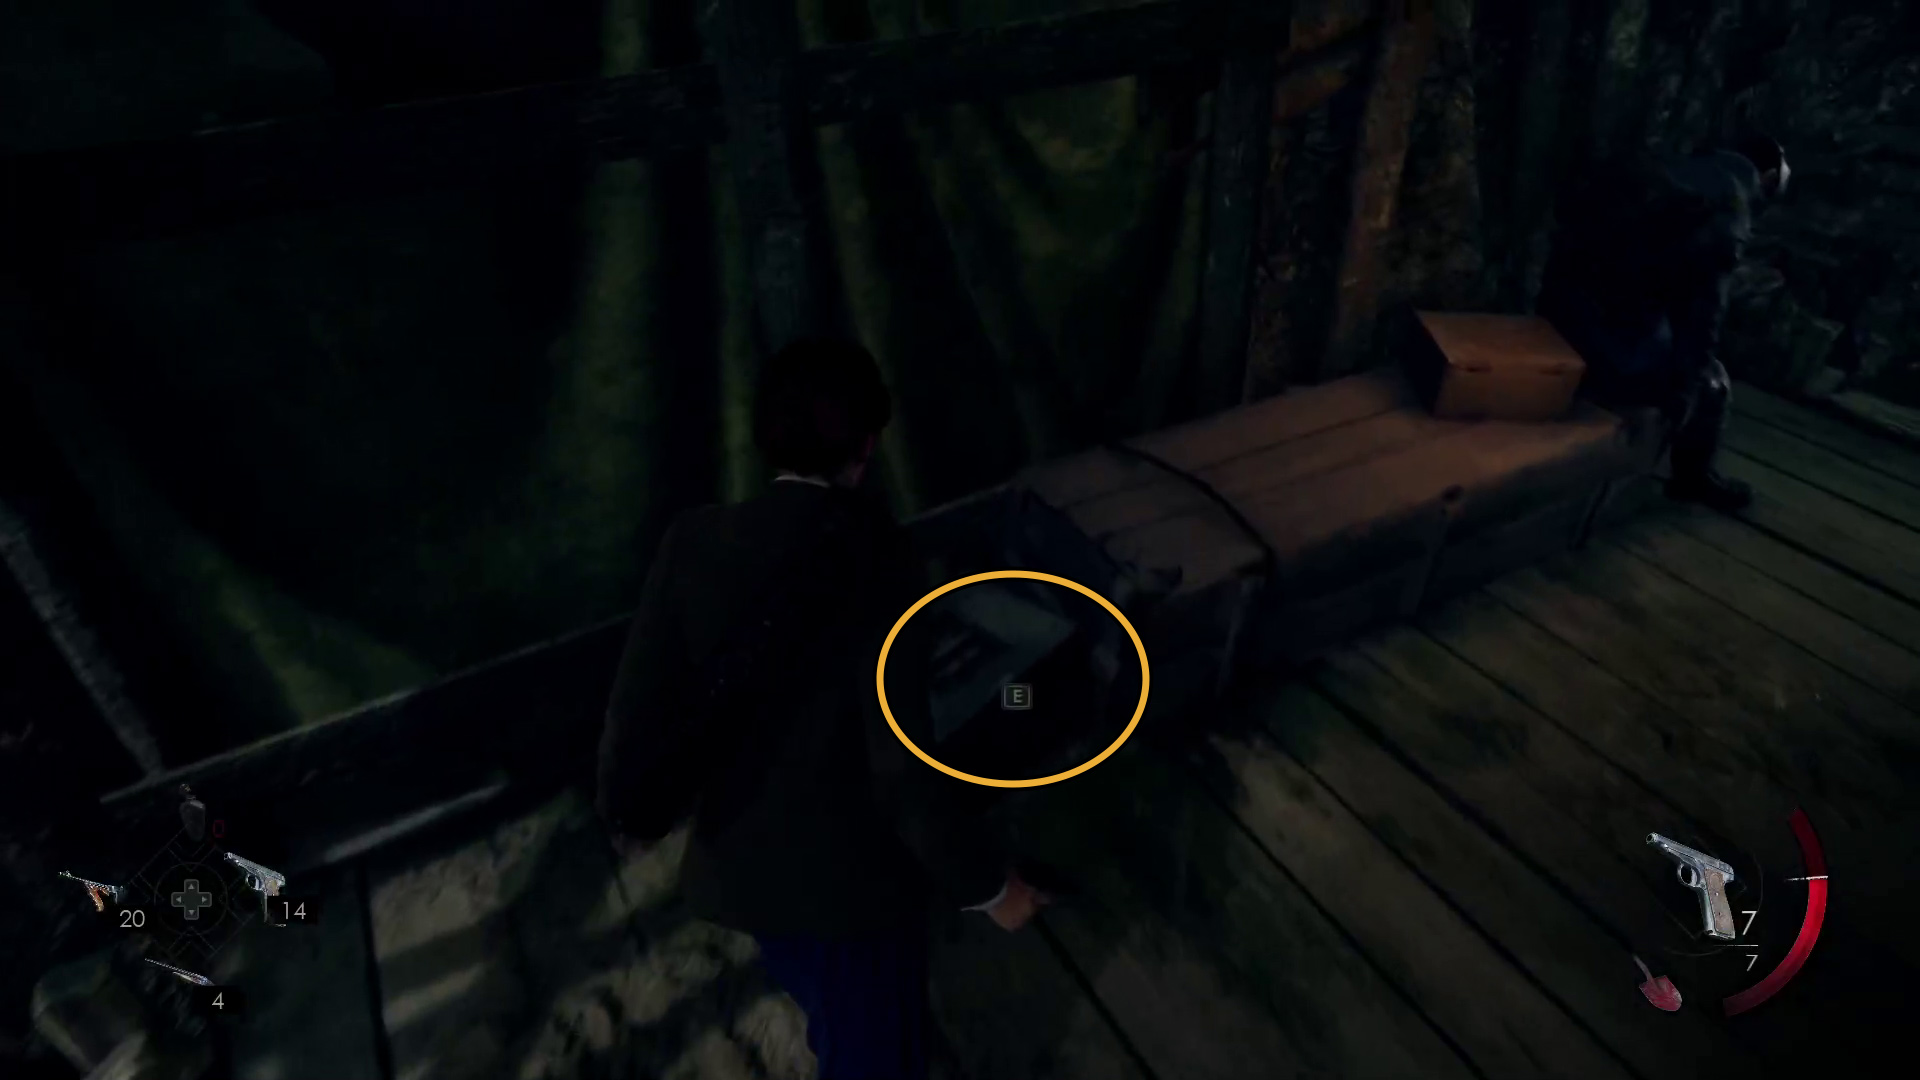
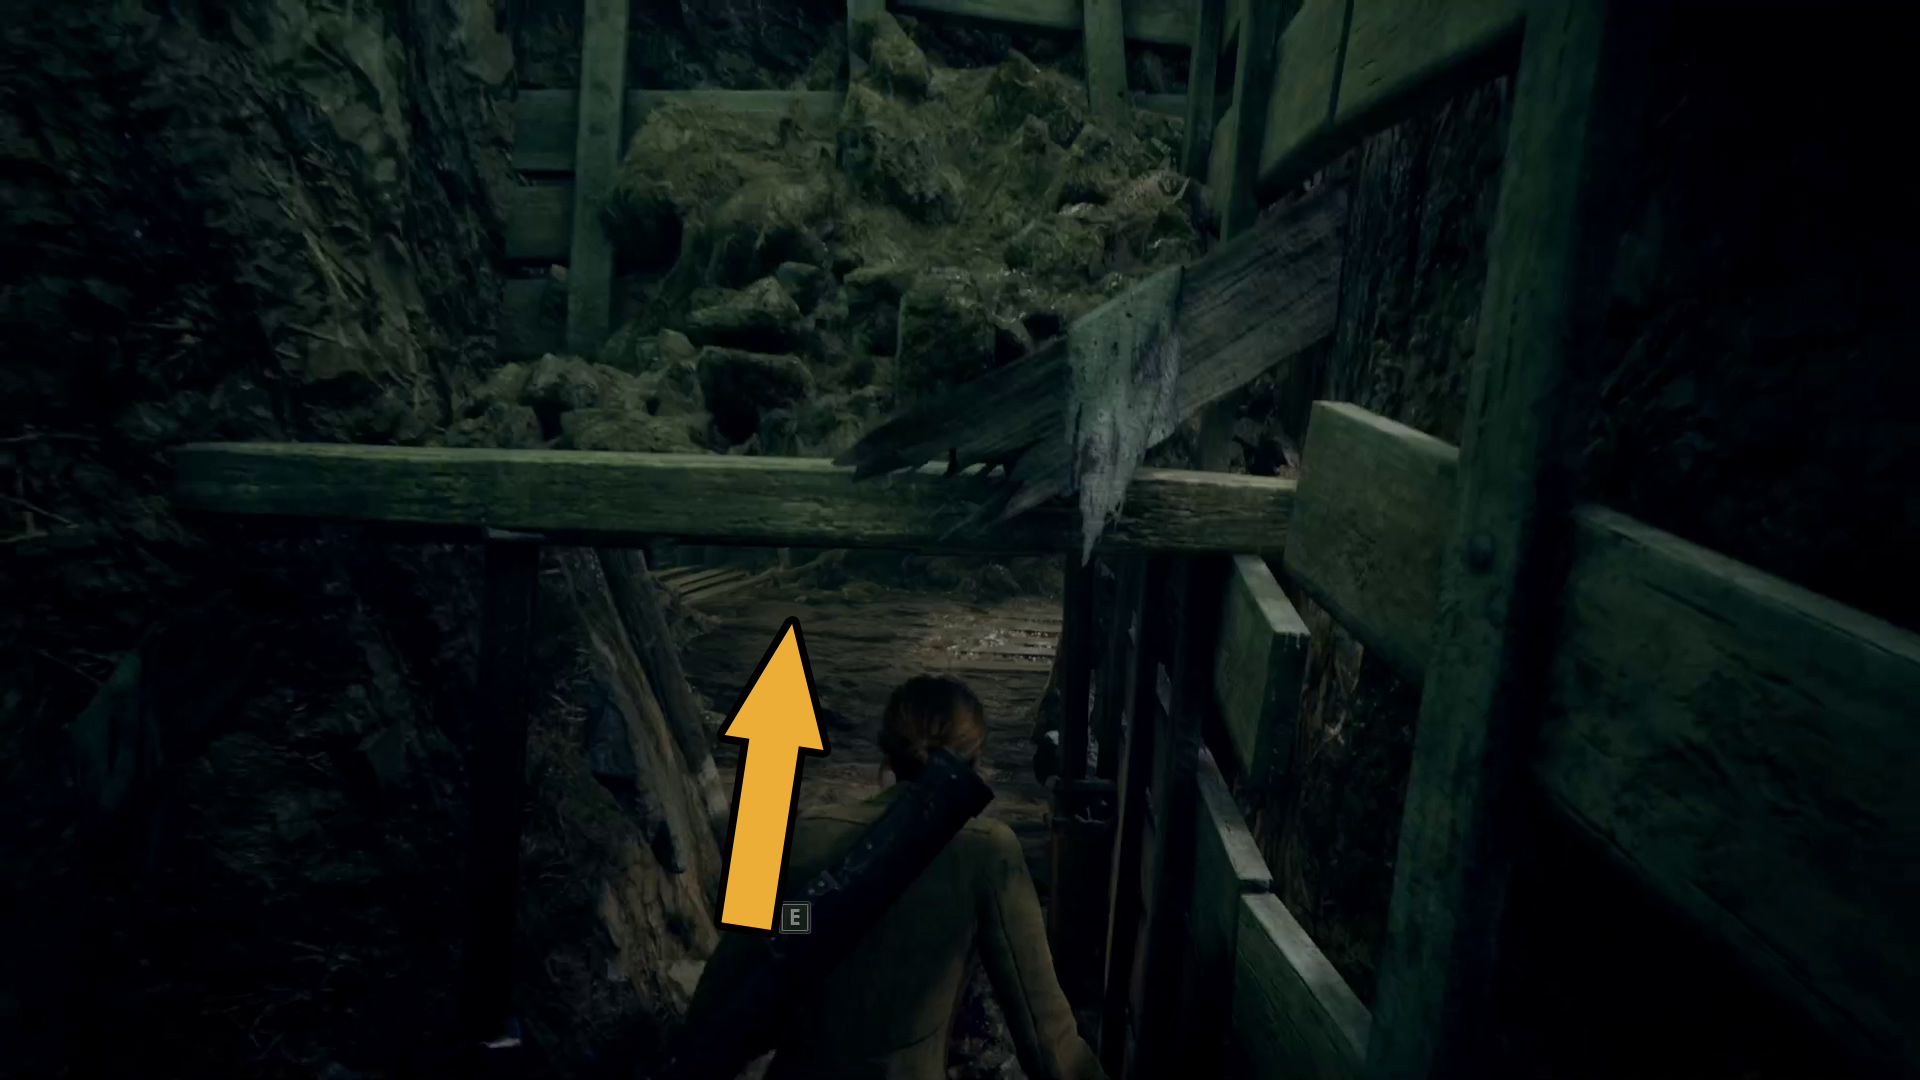
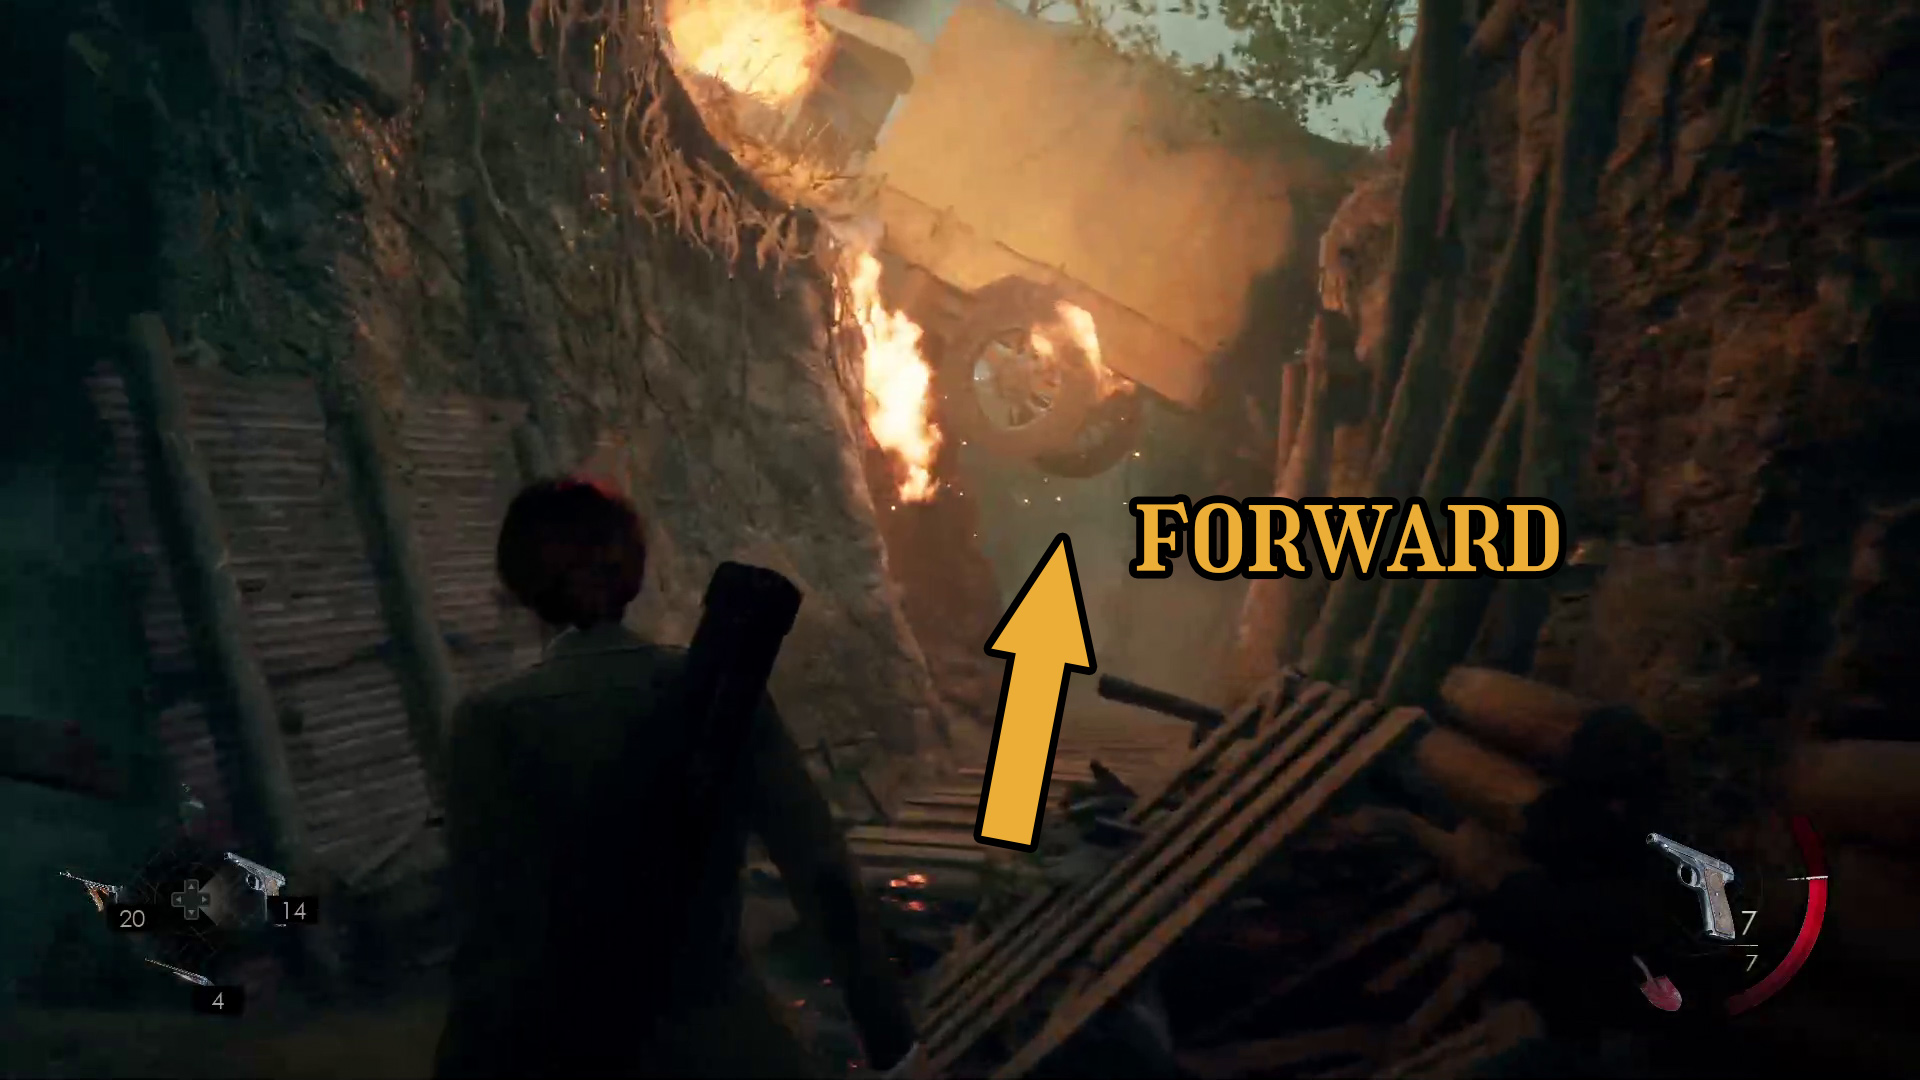
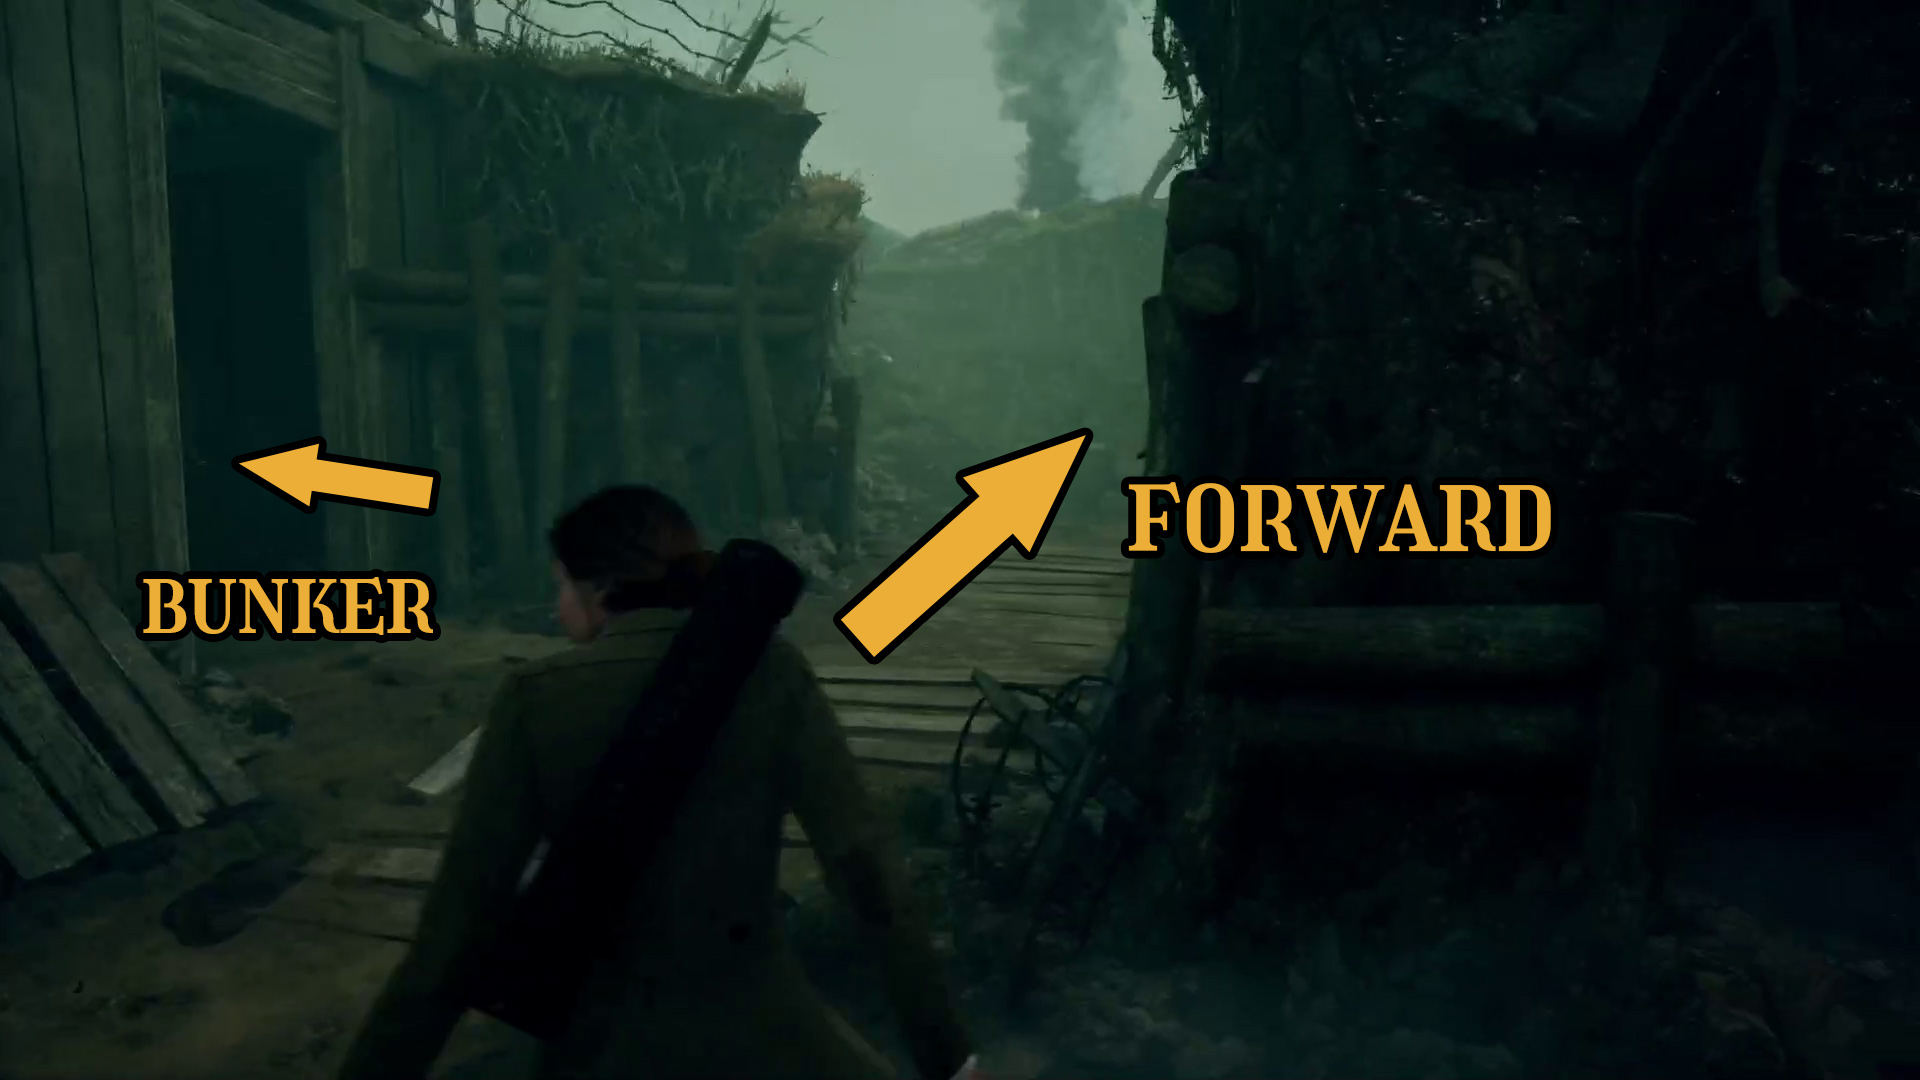
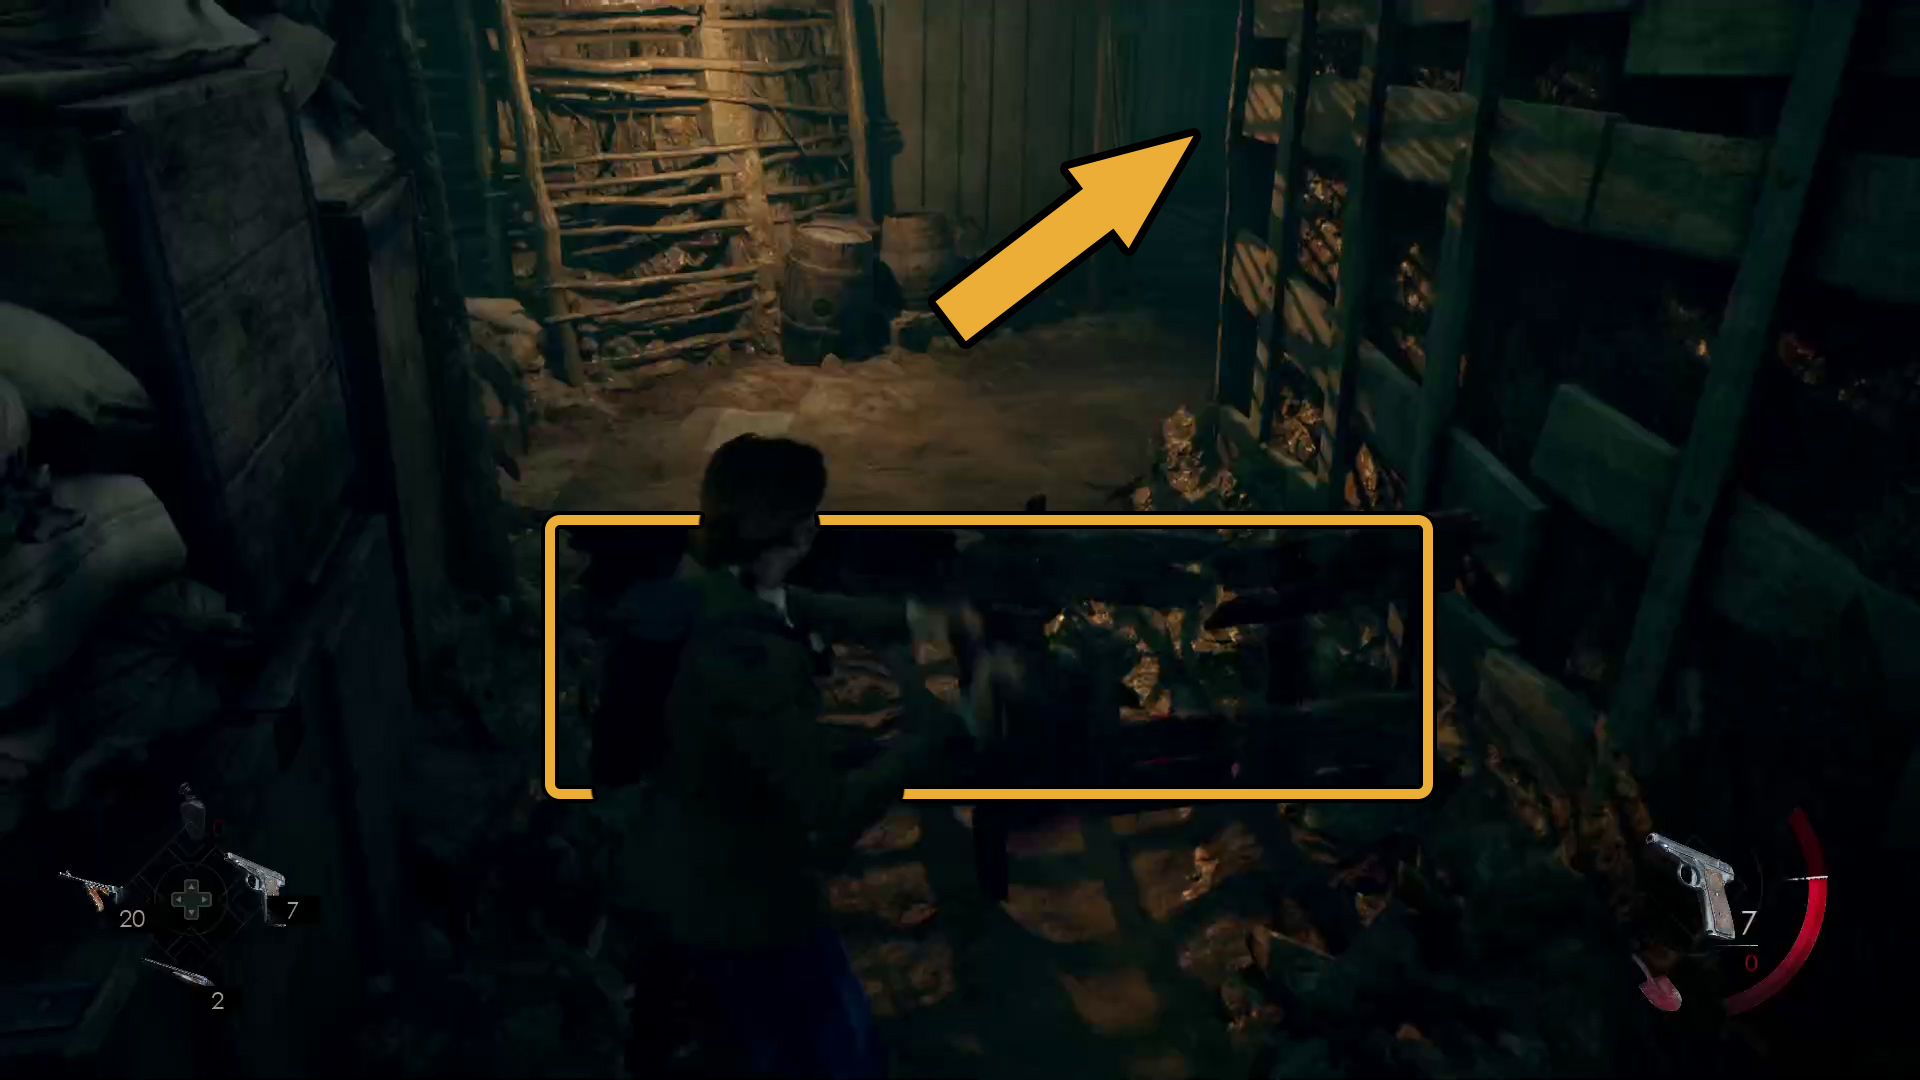
You’ll come to a T intersection — first, go right and check the box there for loot, then head the other direction. You’ll soon hit another intersection, but there’s nothing to the left, so continue under the burning vehicle (Image 114). Ahead on the left is a small bunker you can loot before going further in the trench (Image 115). A slight right will take you into another covered area — tap the Examine key as you move through this area so you don’t miss any health/ammo.
Image 115Image 116
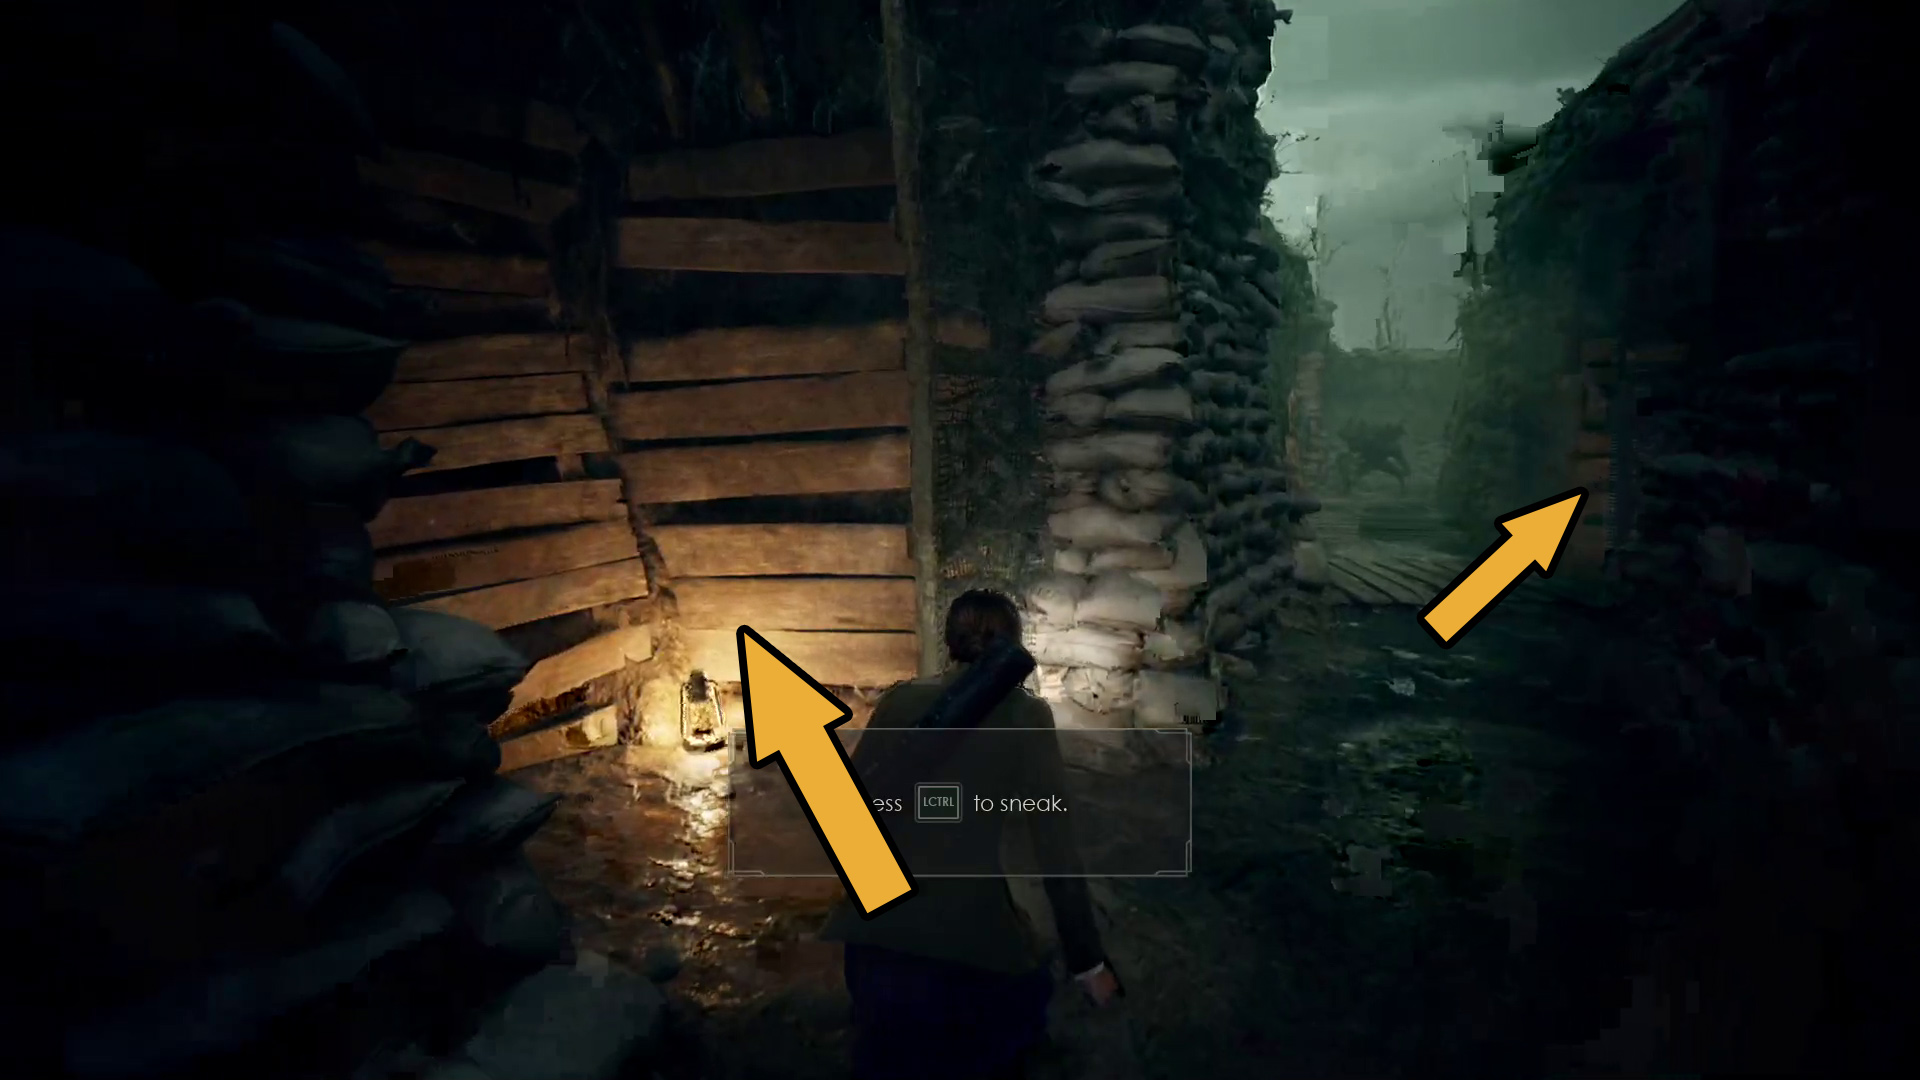
Eventually, you’ll leave the covered area. The left is a dead end, so go slightly right and continue through the trench once more. Your character will gasp and pause for a moment as some shells land nearby — around the next corner is an enemy you’ll want to sneak past.
Note that in all of these stealth sections, you can shoot a clip or two into the monster and it will run away — if you’re low on ammo, simply reload your save at the next autosave point and you’ll get some ammo replenished. We’ll explain how to sneak in the walkthrough, since shooting the thing is straightforward.
On the left and the right are places you can hide (Image 117) — make sure you’re crouched, and hide in one of the indicated spots. (We had a bug where sometimes the left-hand spot wouldn’t work, but if it fails your save point is very close, so don’t sweat it). Wait for the monster to walk past, then sneak out of your hiding spot and continue down the trench, which will curve right. On the left ahead is a spot you can squeeze through (Image 118).
Image 117Image 118
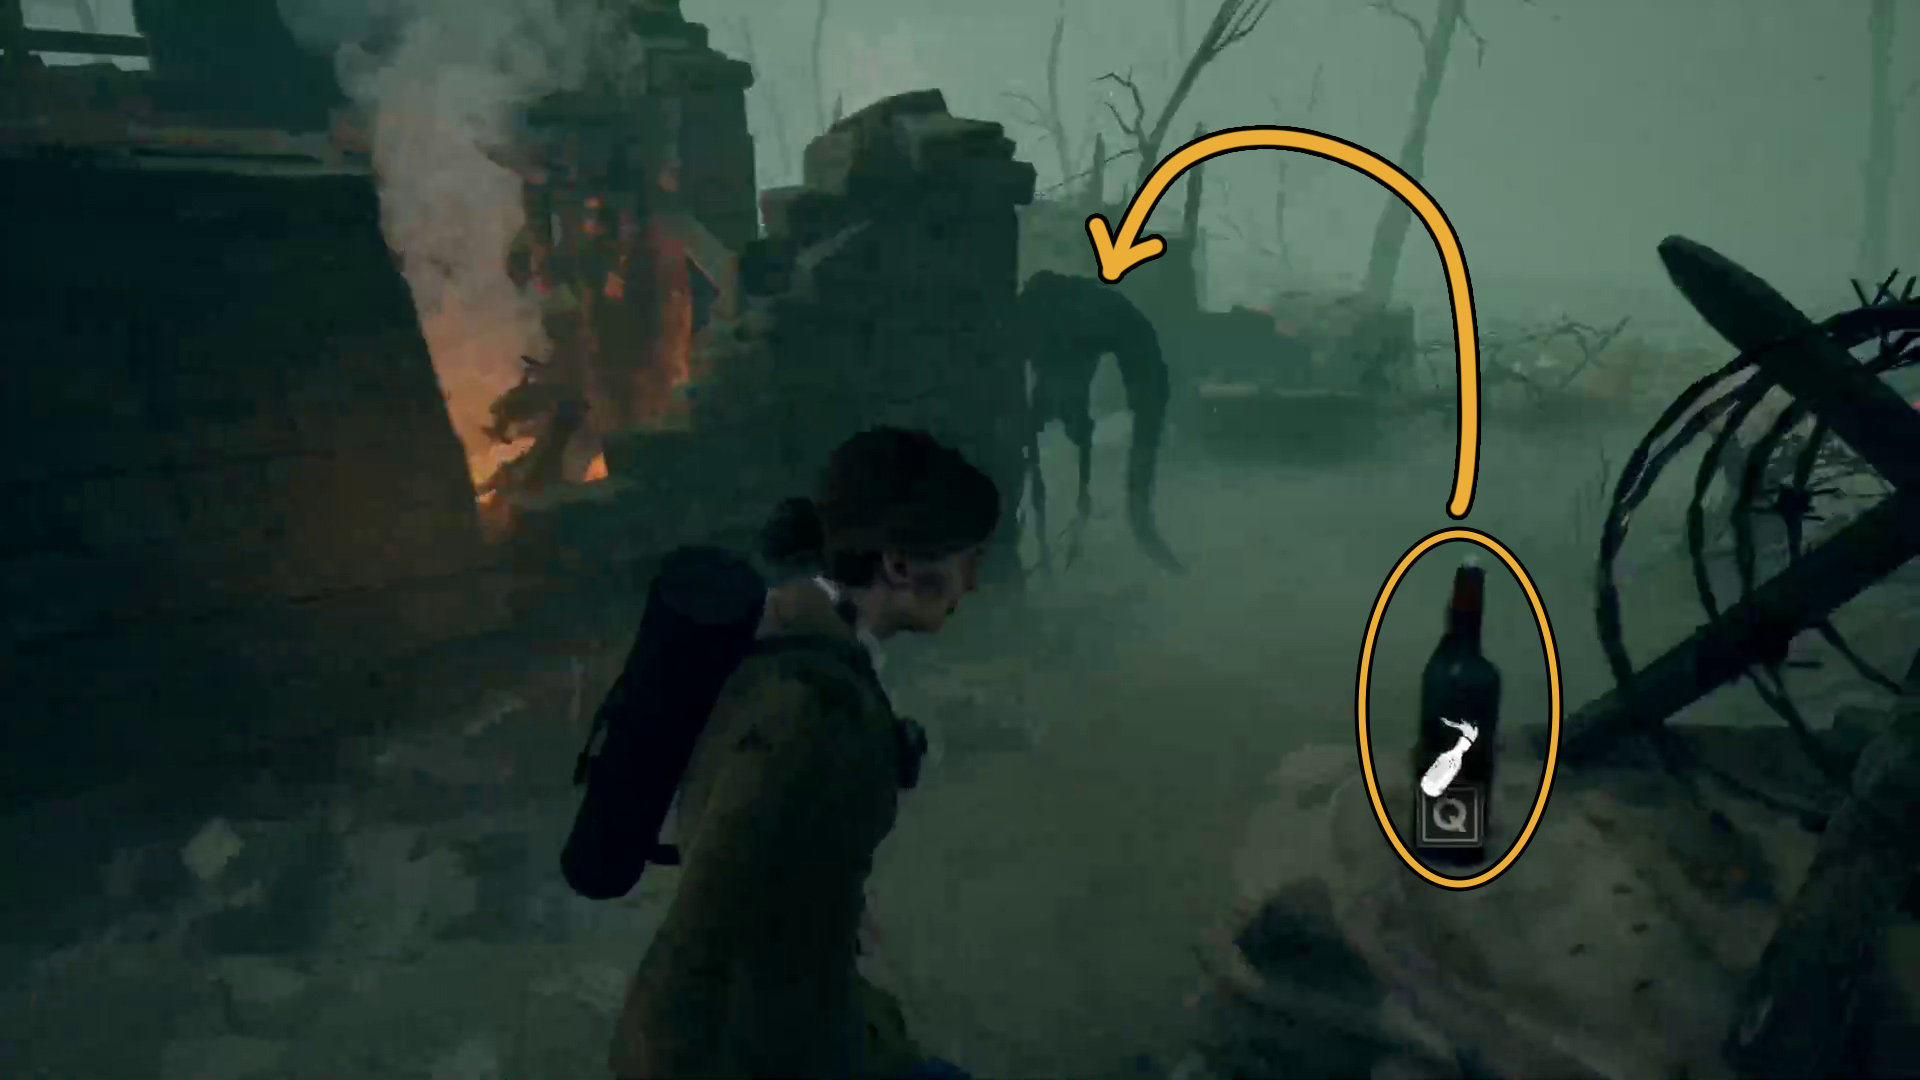
Ahead are two ledges you can climb up, and then ahead around the corner is an enemy you can molotov (Image 119). To the left of the enemy is some loot, and past it on the right is the way forward (Image 120). Follow the path to a ledge, then press the indicated button to climb down.
Image 119Image 120
Start sneaking, and move right. There’s a melee weapon if you don’t have one, and on your left you’ll see a low breakable wall (Image 121). Once the monster is on the other side of the area, break the wall with your melee weapon and continue forward (Image 122.
Image 121Image 122
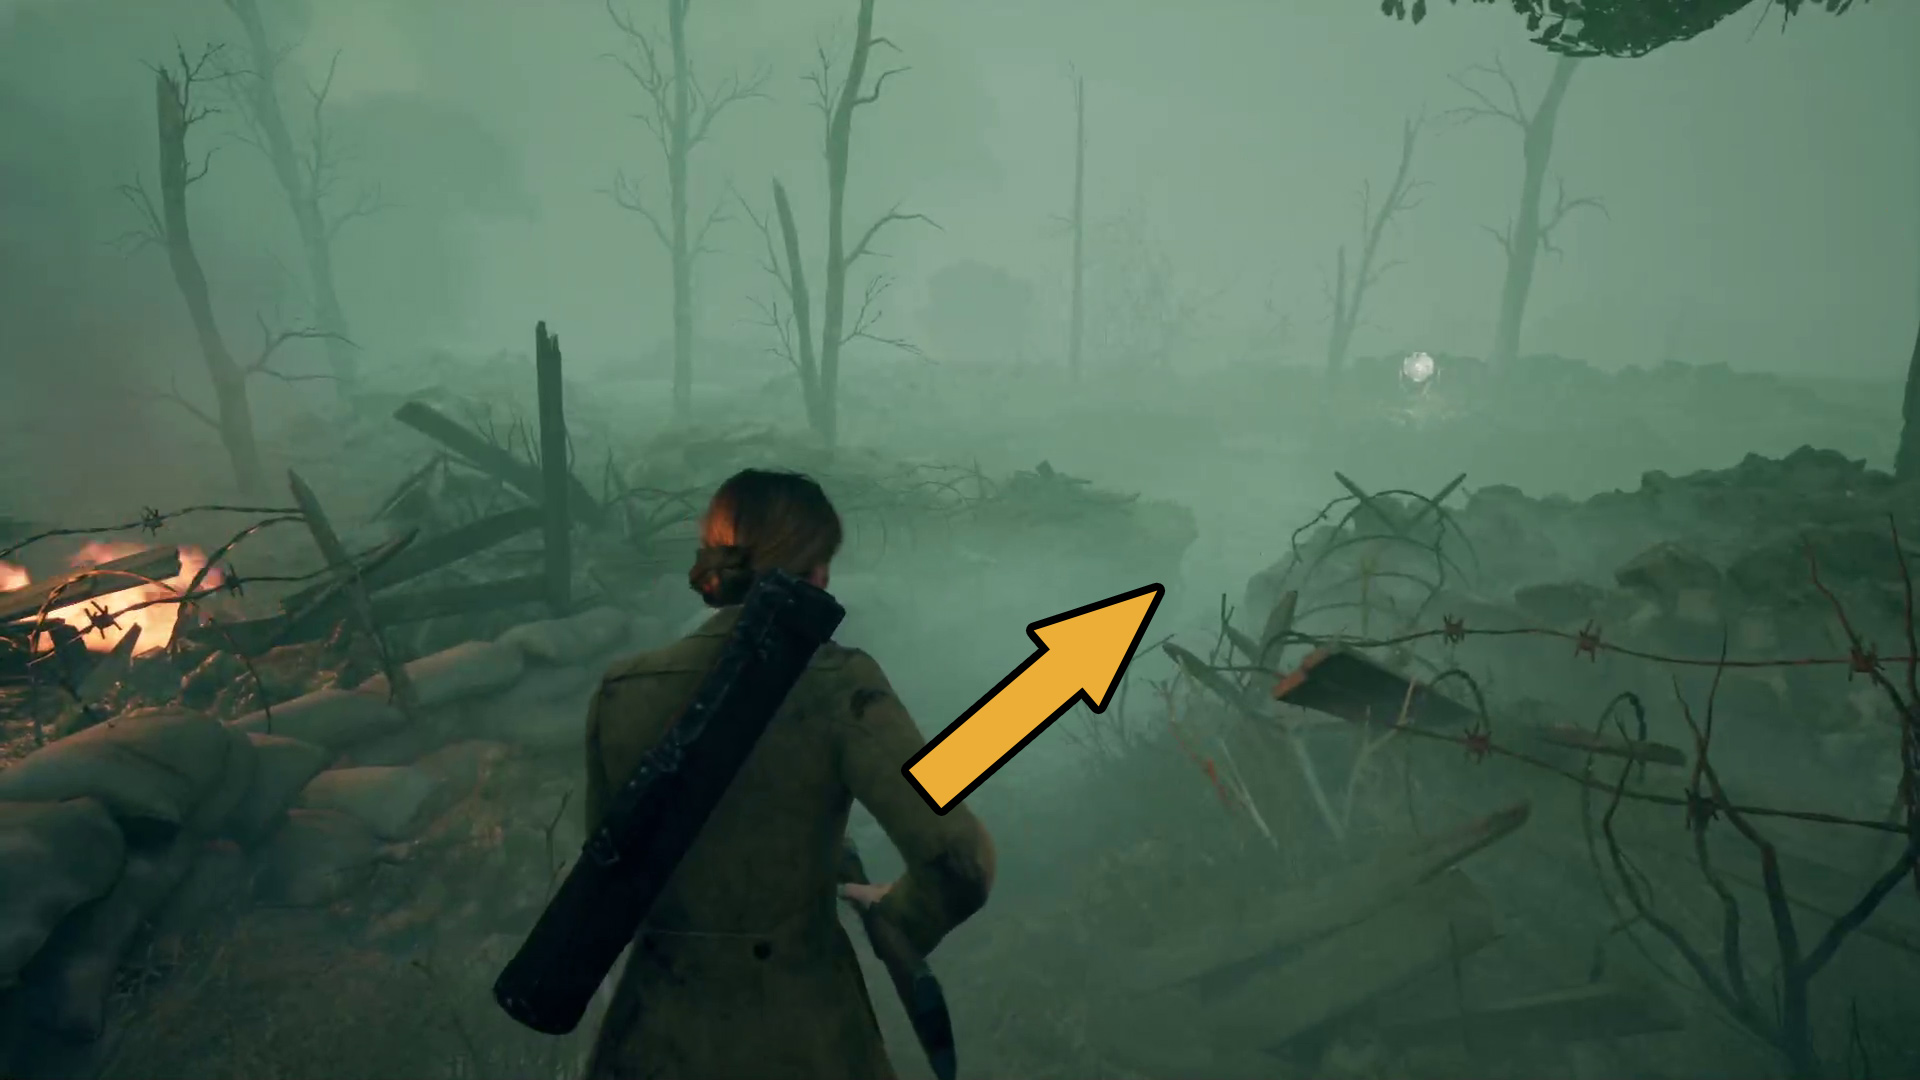
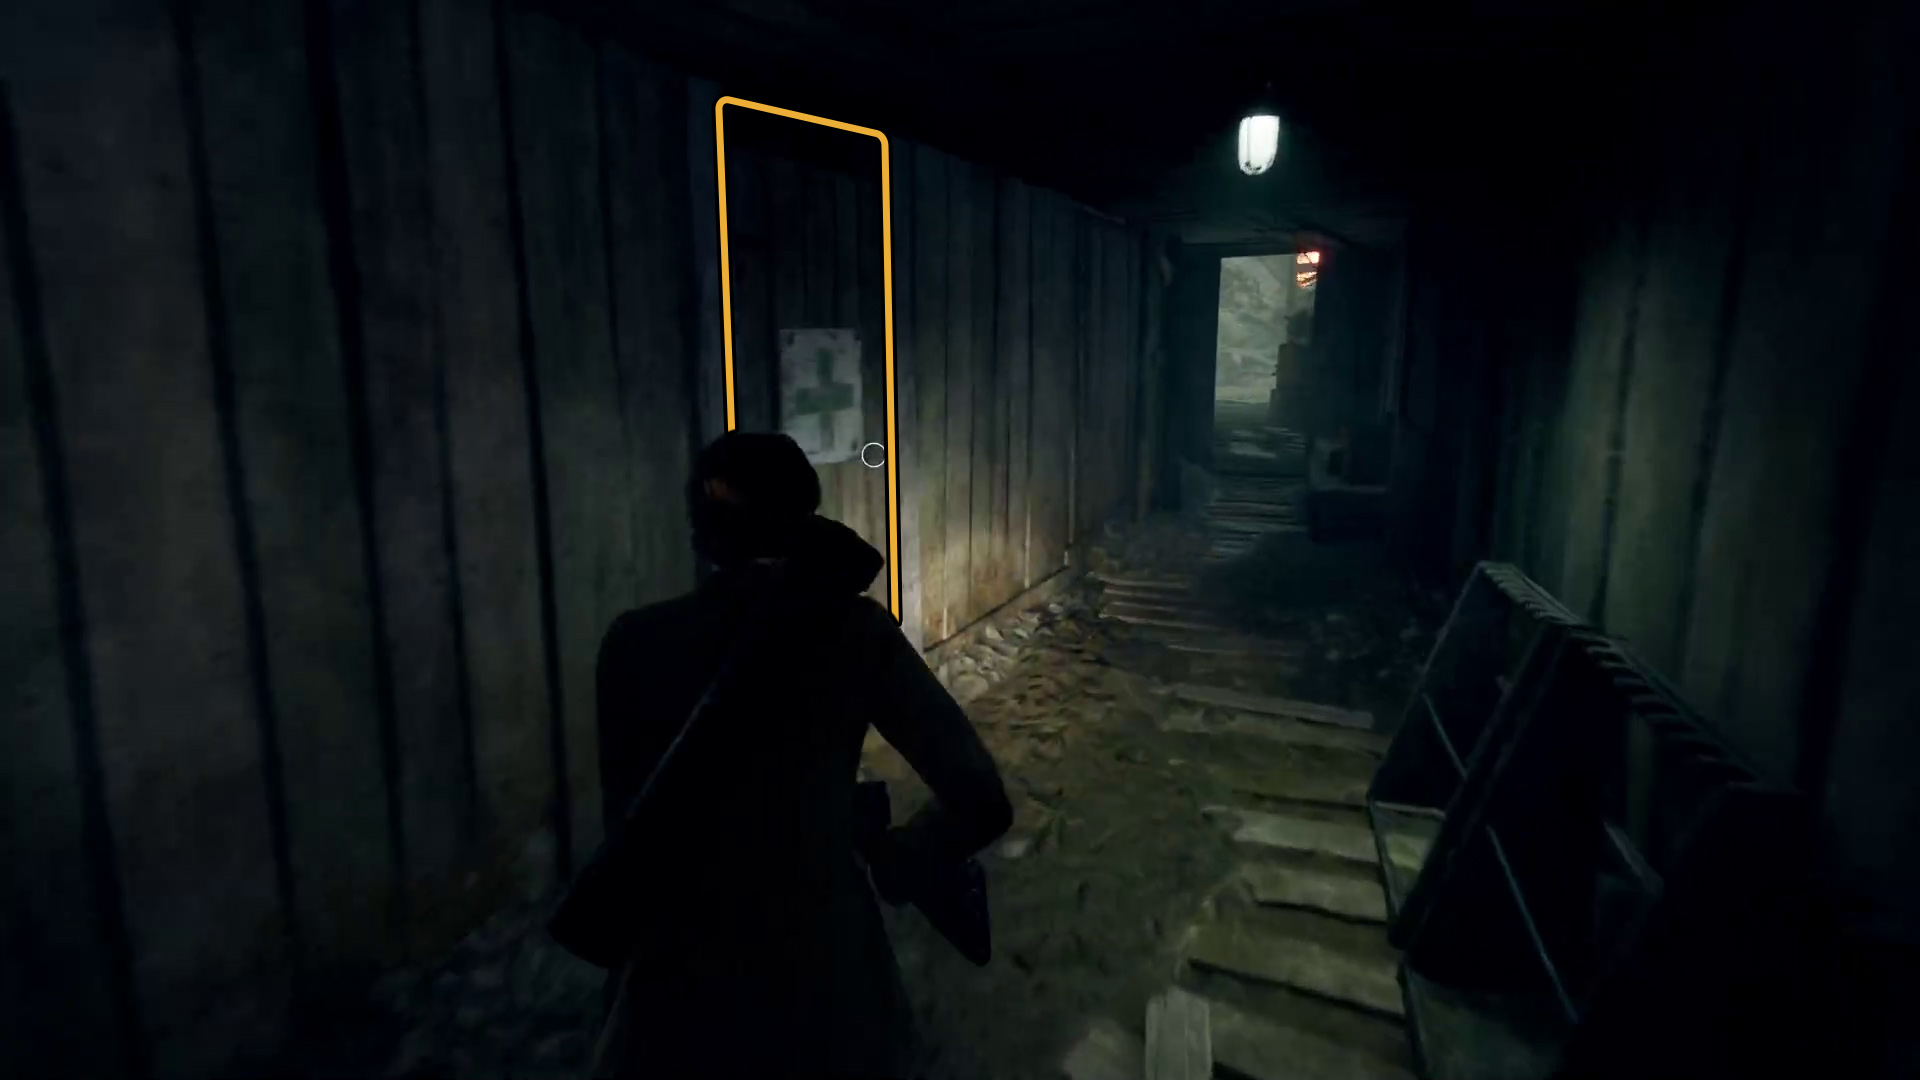
Follow the “To the Trench” sign and go right, then at the next intersection again follow the sign an go left. Continue through the corridor and you’ll see a door marked with a green cross (Image 123) — inside you should be able to find some loot. Leave the room and go left to continue forward, then turn left when you see the plane crash and start sneaking — the monster is here again. Hide by the corner and wait for it to go down the left-hand path, then go down the trench it just came from (Image 124).
Image 123Image 124
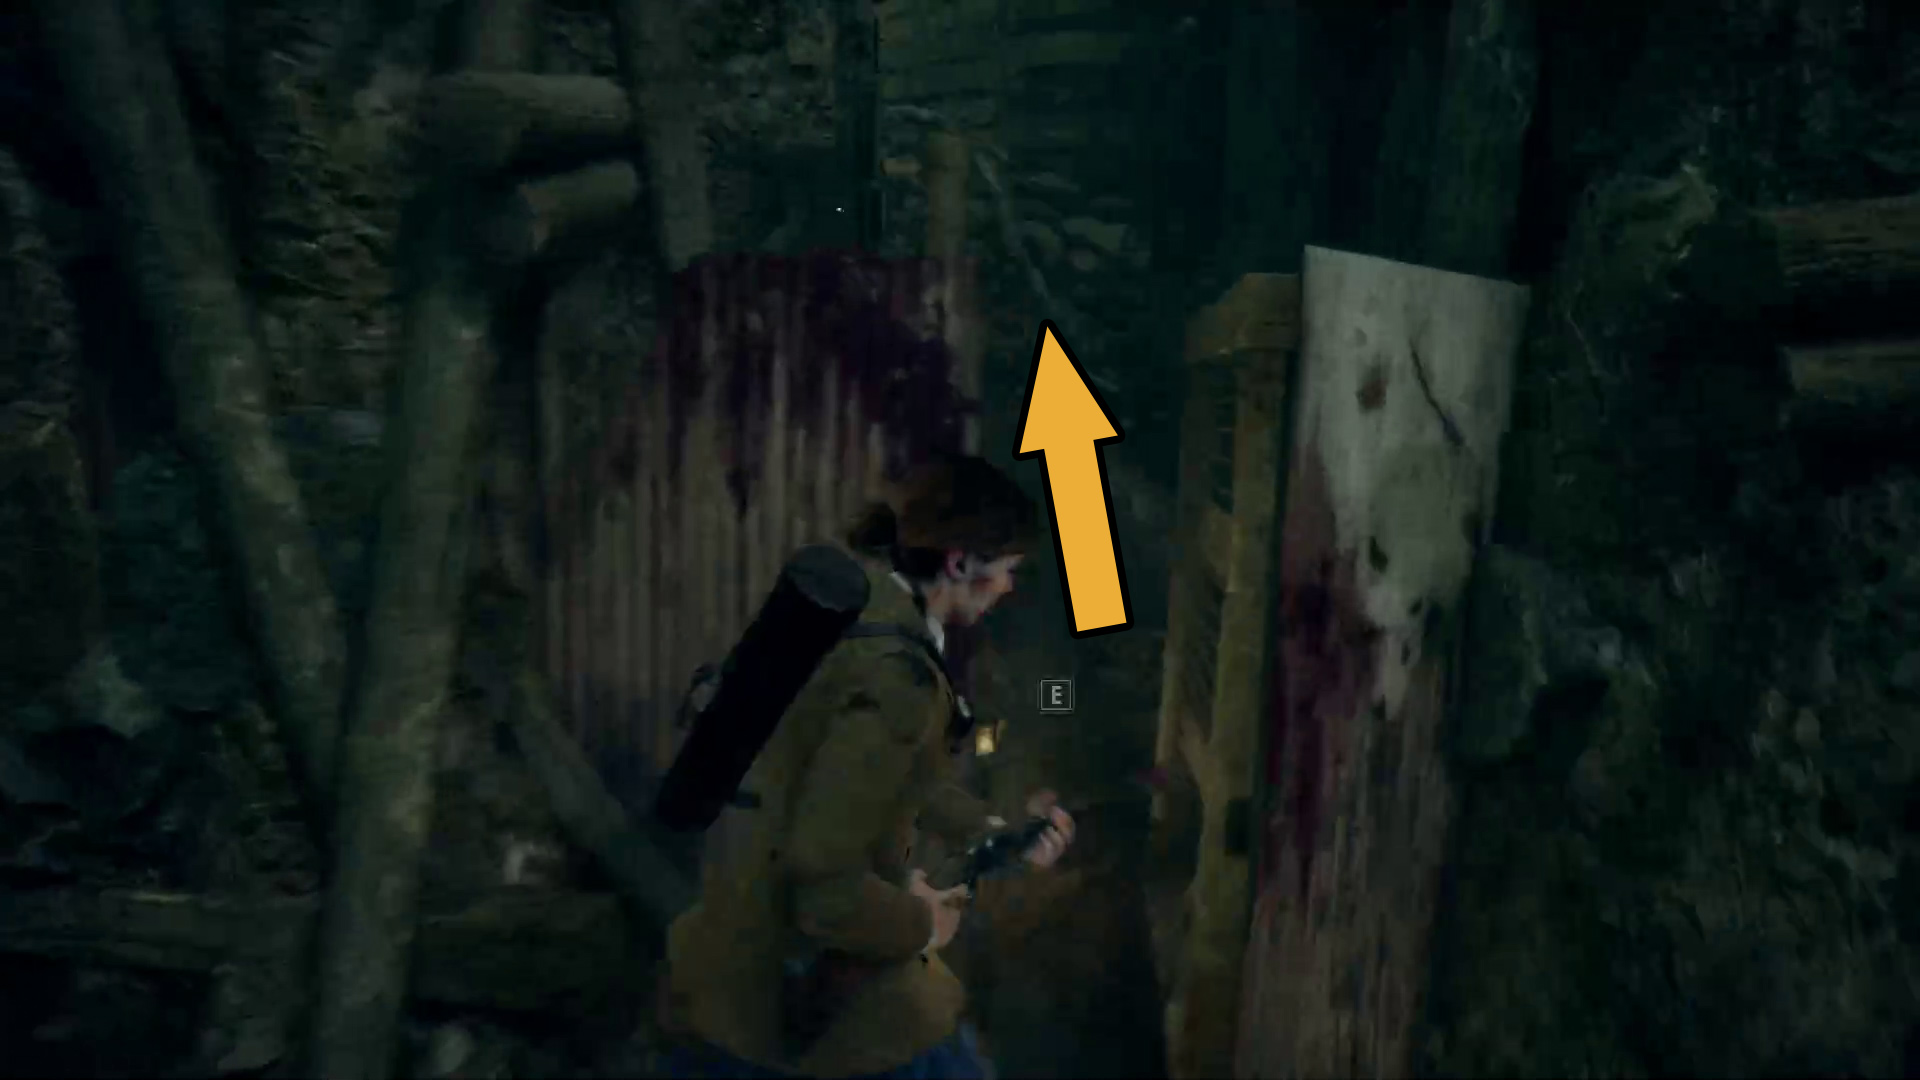
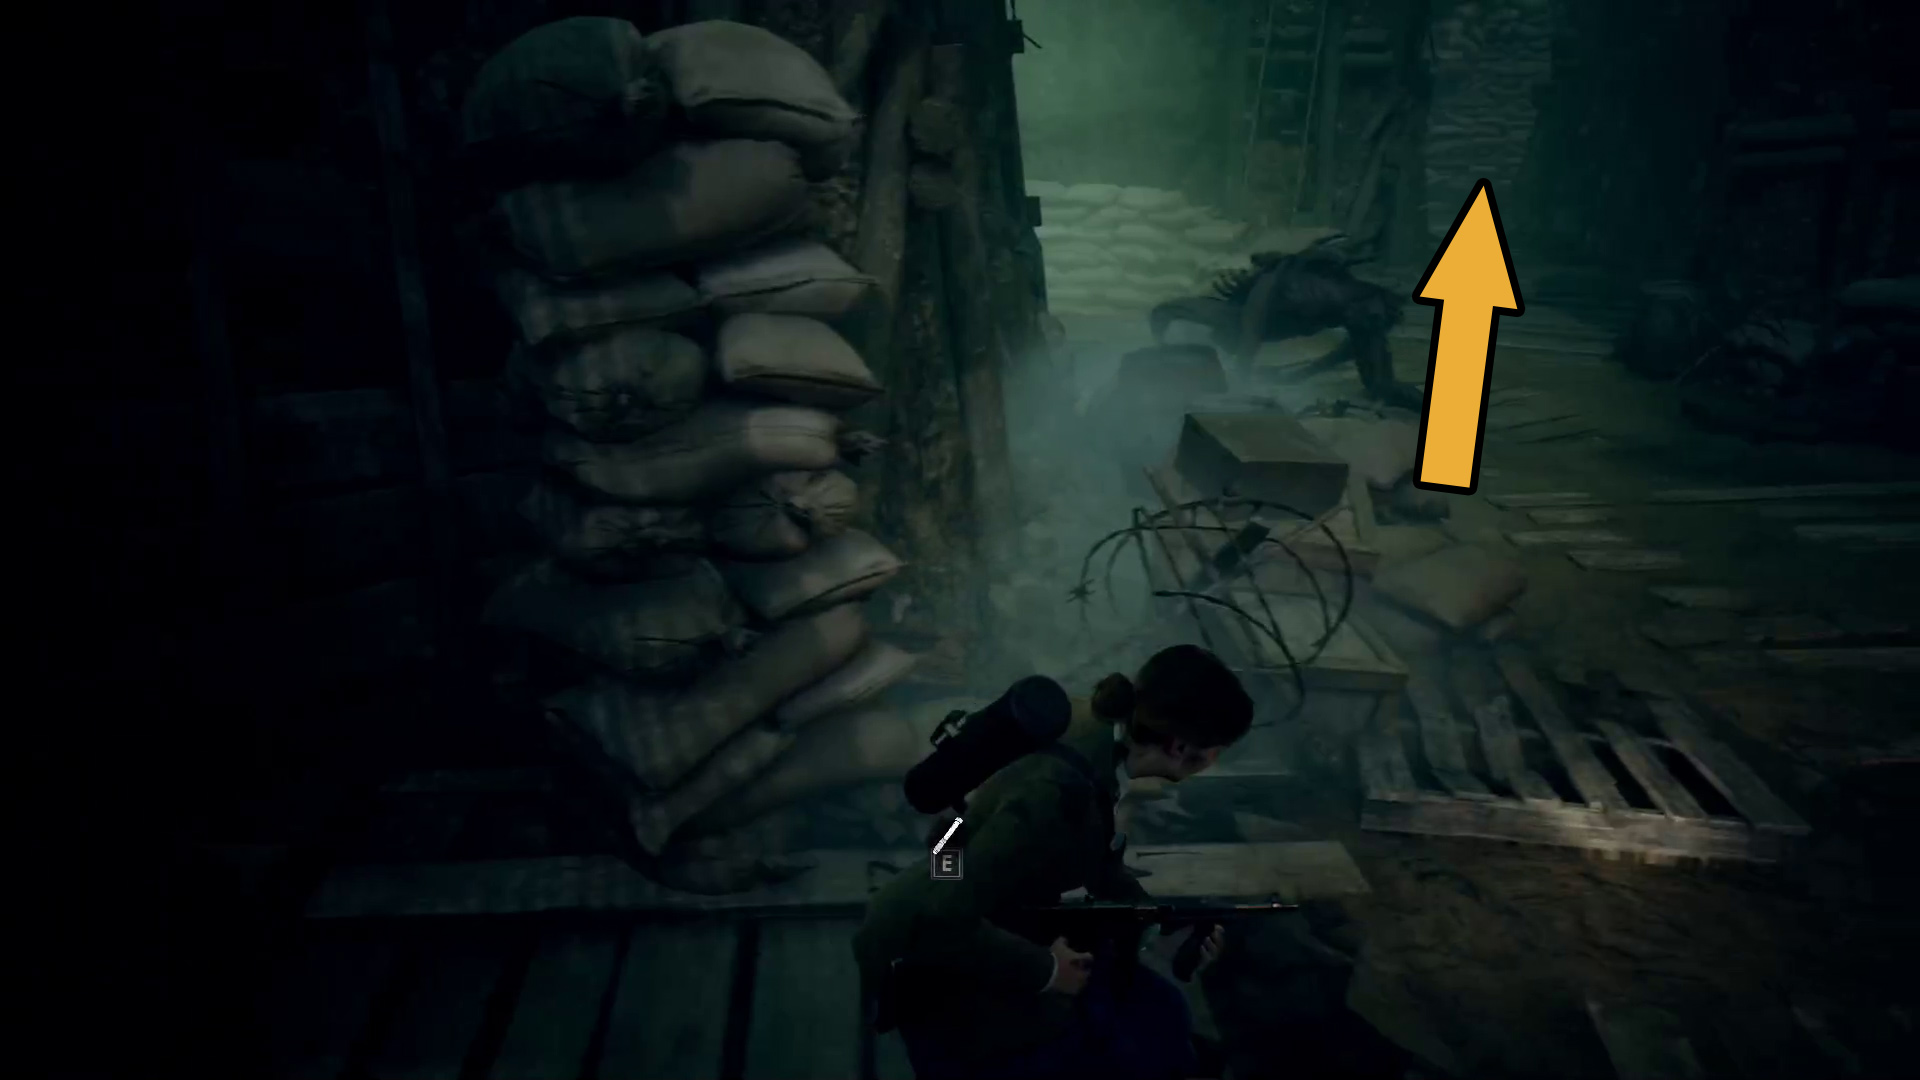
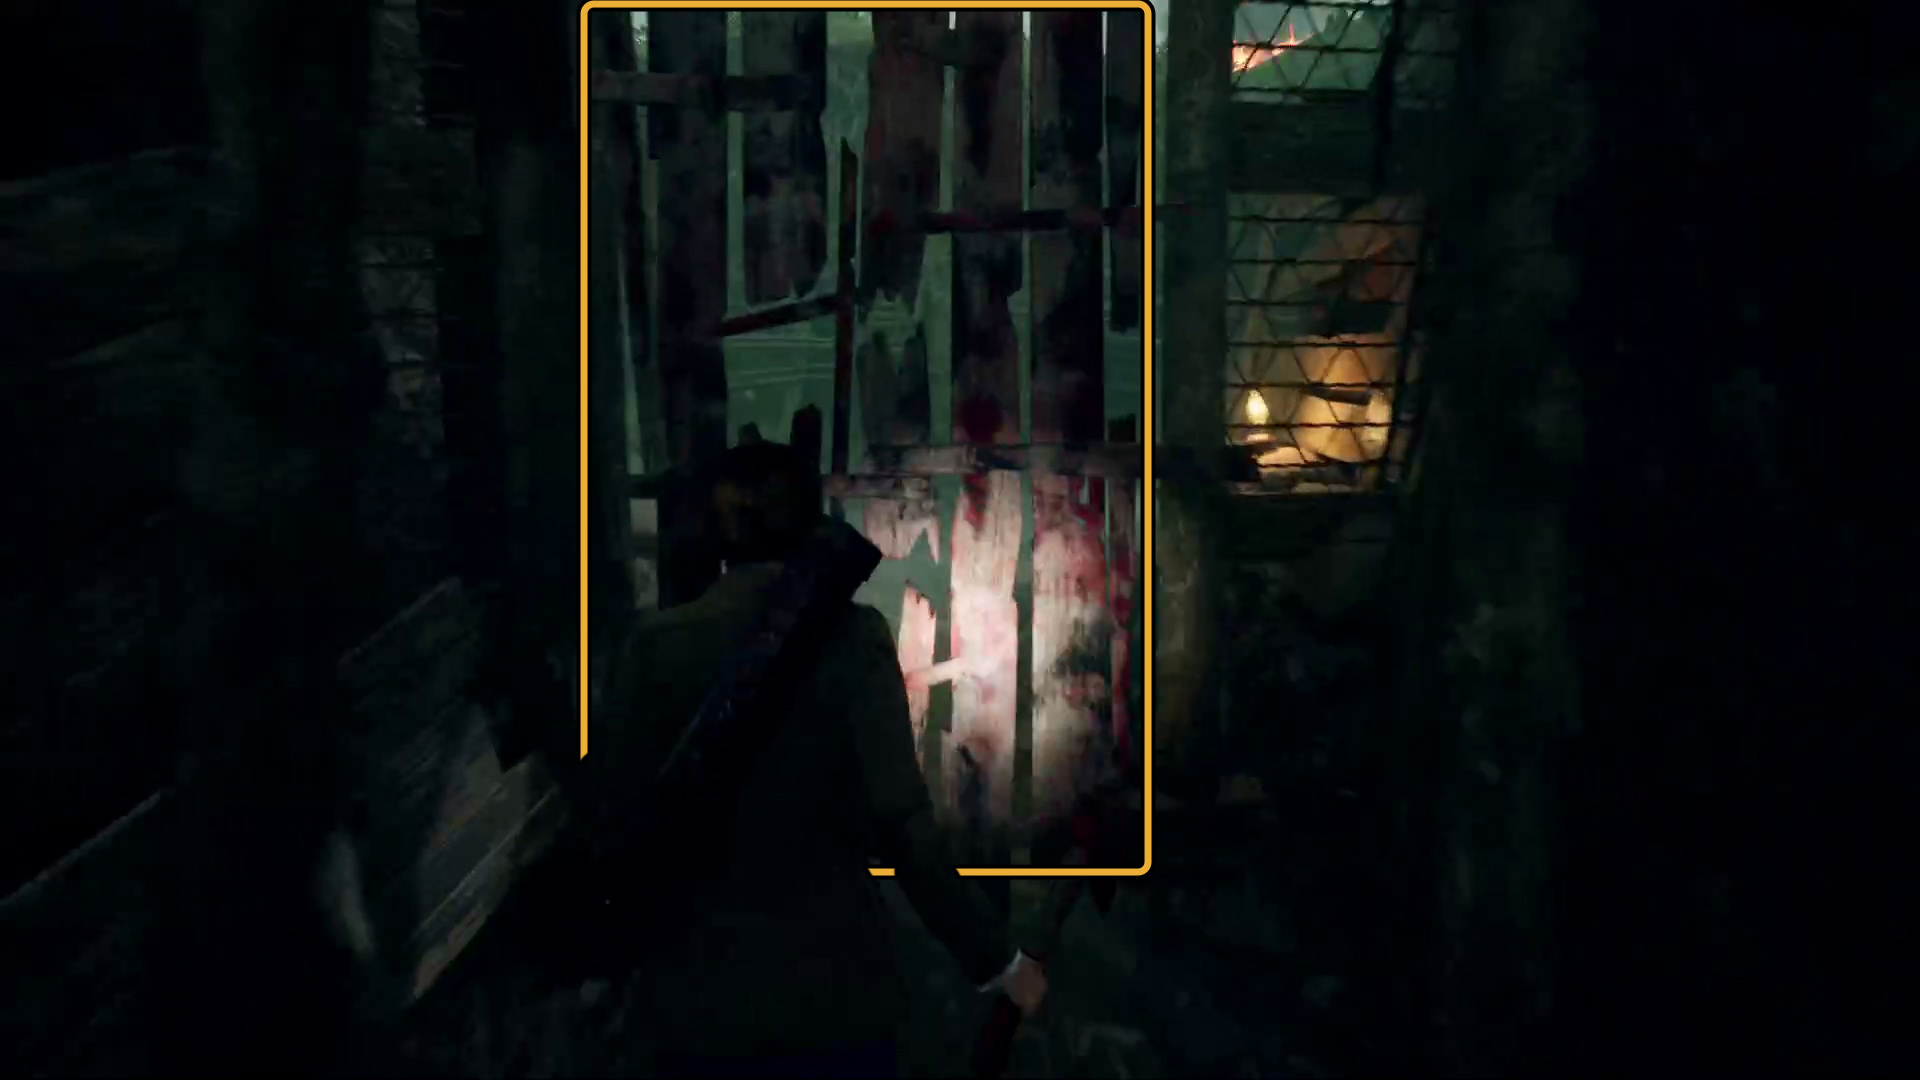
On the right, halfway down the trench, is a barricade you can destroy with a melee weapon (Image 125). If you need another melee weapon you can find one further down the trench, but make sure you hide near the barricade and wait for the monster to pass first. Through the barricade, turn right and squeeze through the opening, then go left and run through the trench until you hit a dead end. Here, you can squeeze through yet another narrow gap (Image 126).
Image 125Image 126
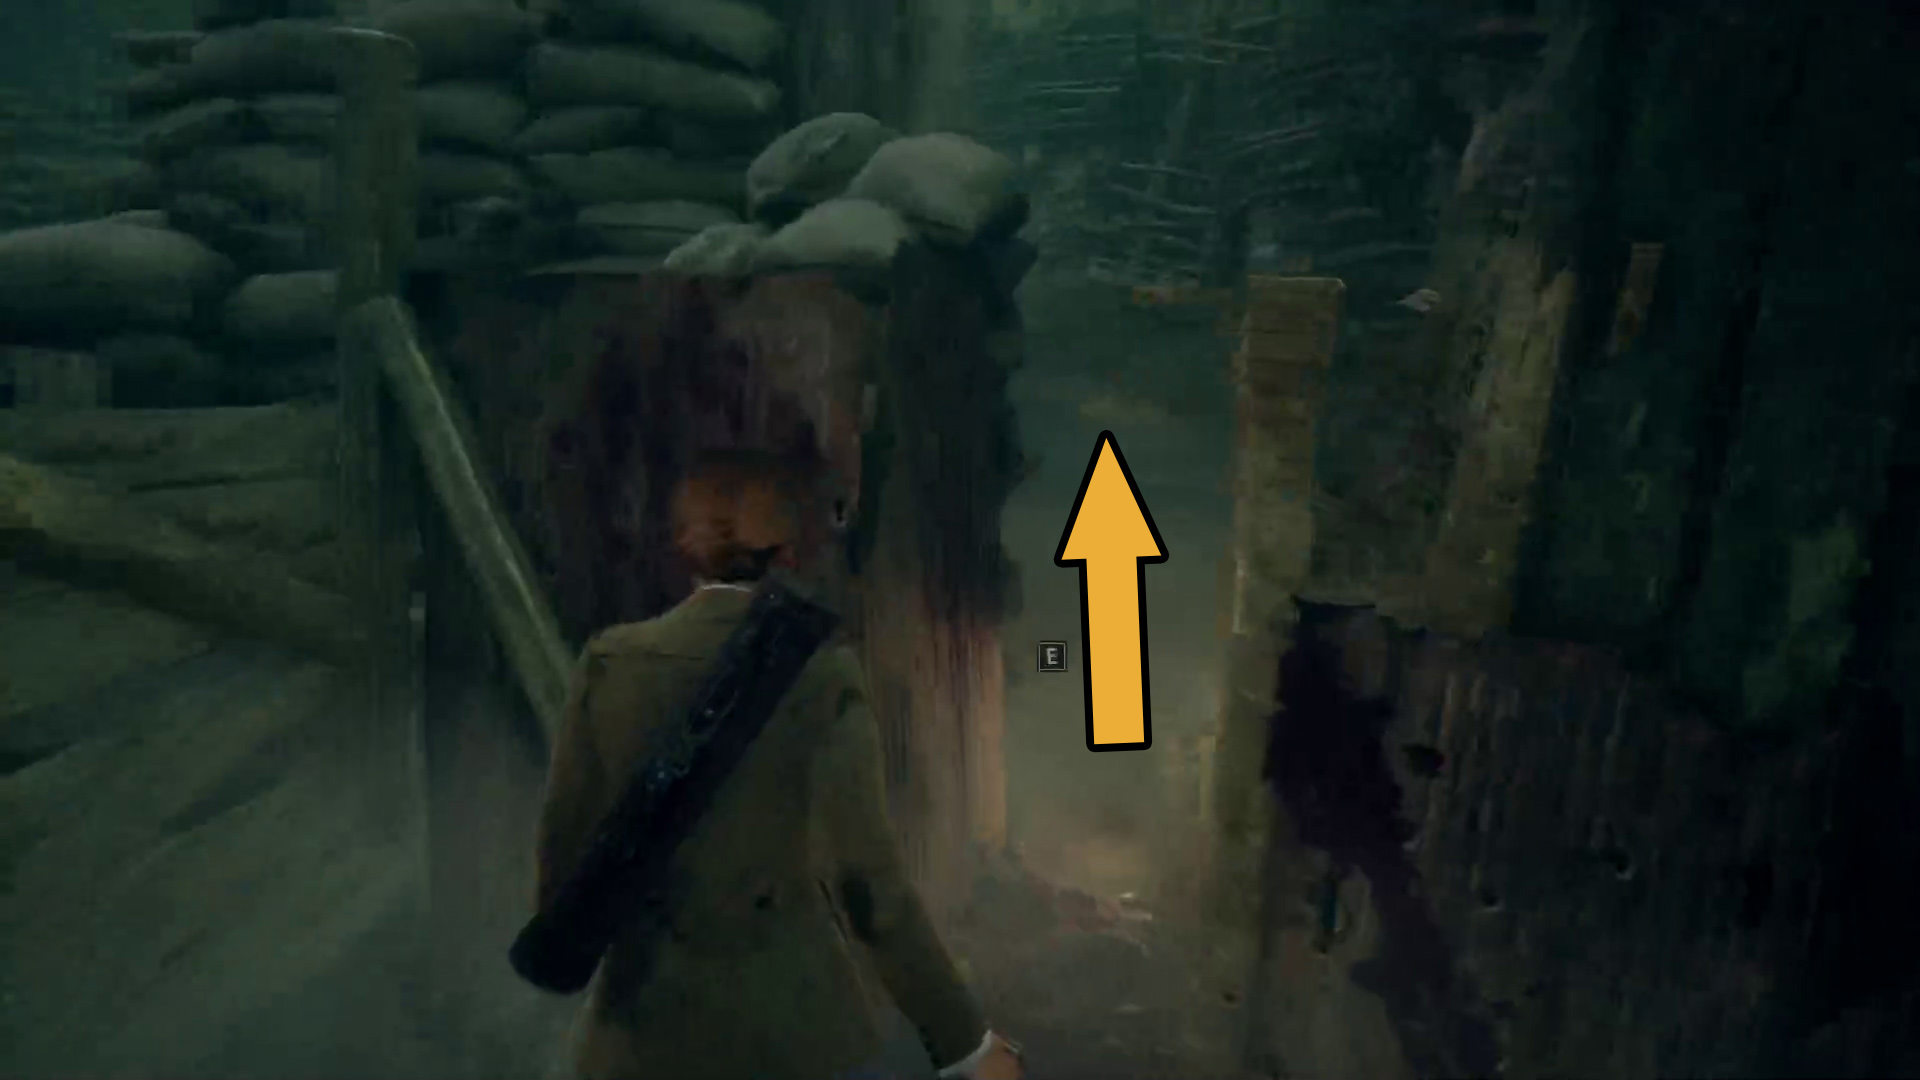
Continue forward to the ledge and climb down via the indicated button, then go right and run into the covered section of trench. The door will close behind you, so don’t worry ab out the monster chasing you. Head straight through the trench and interact with the door at the far side to start a brief cutscene. When it ends, move forwards towards the frozen scene until another cutscene begins.
Find out where you are
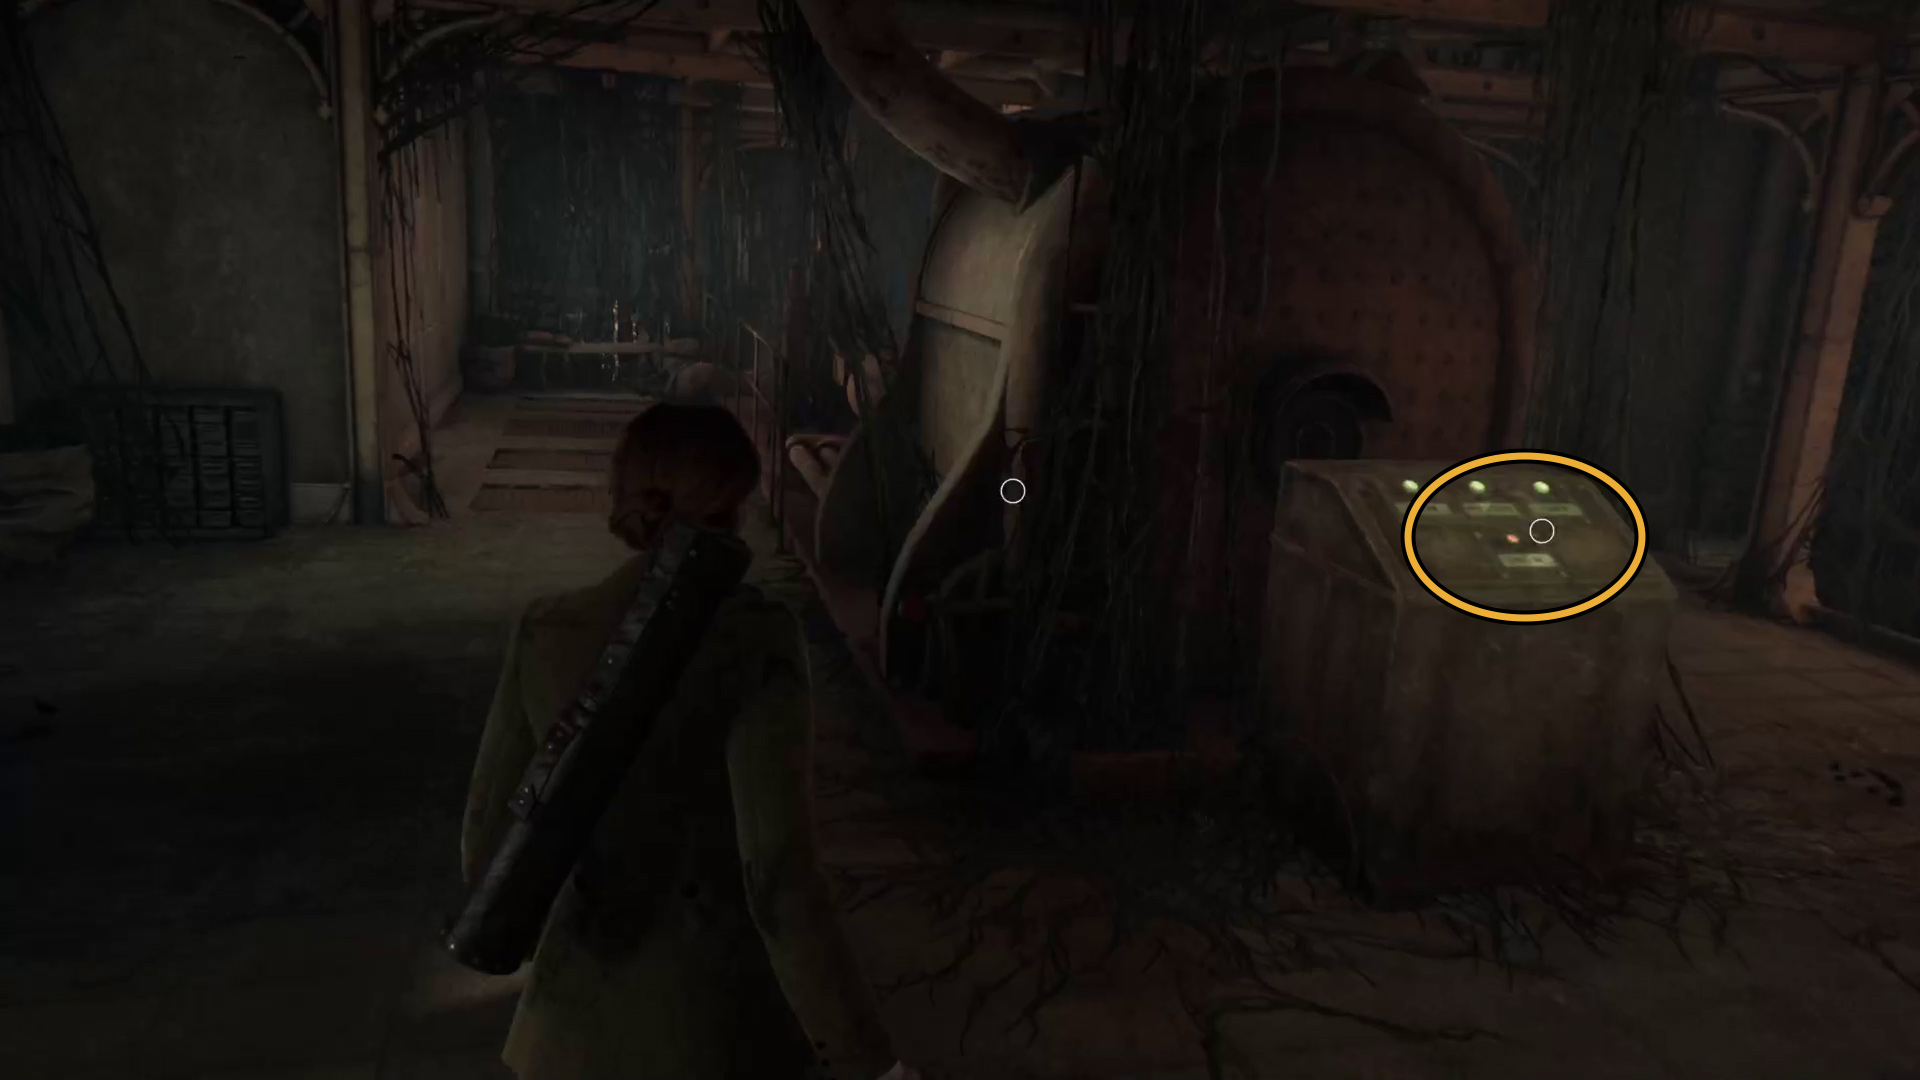
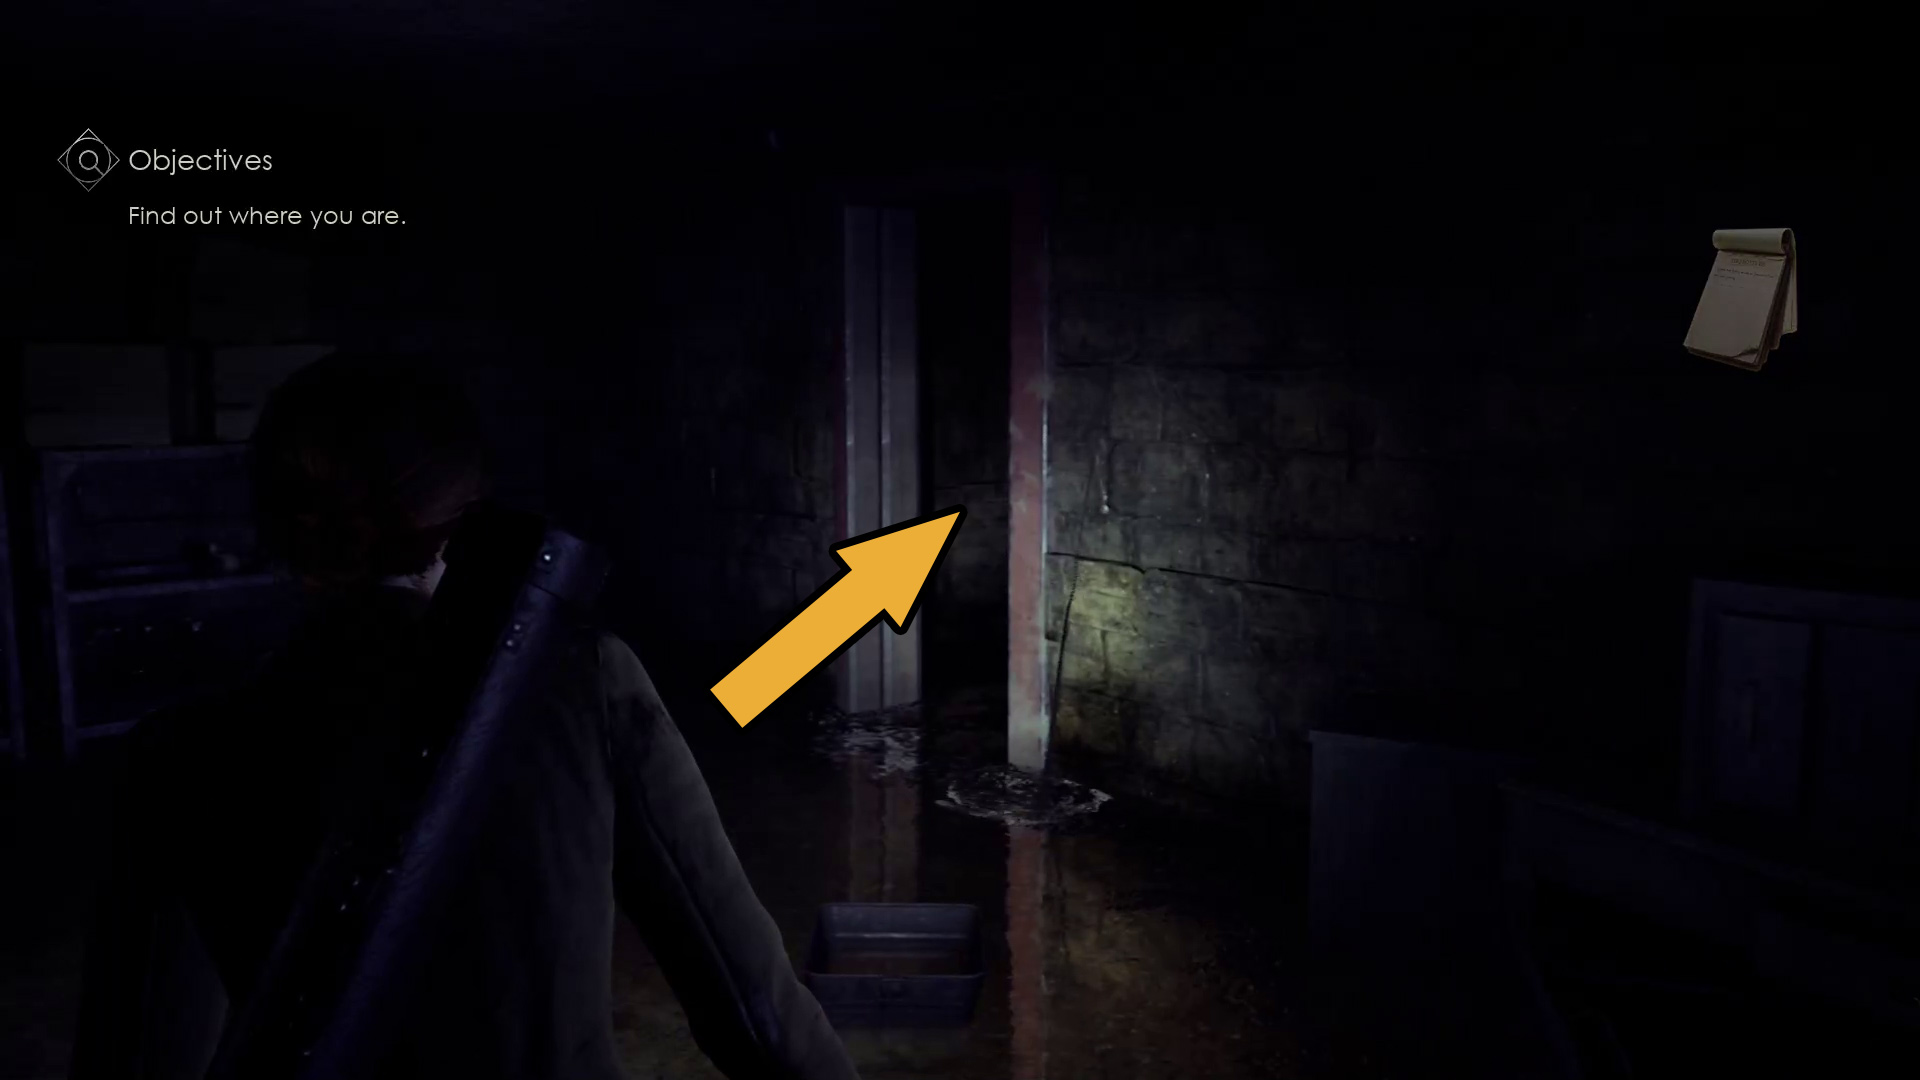
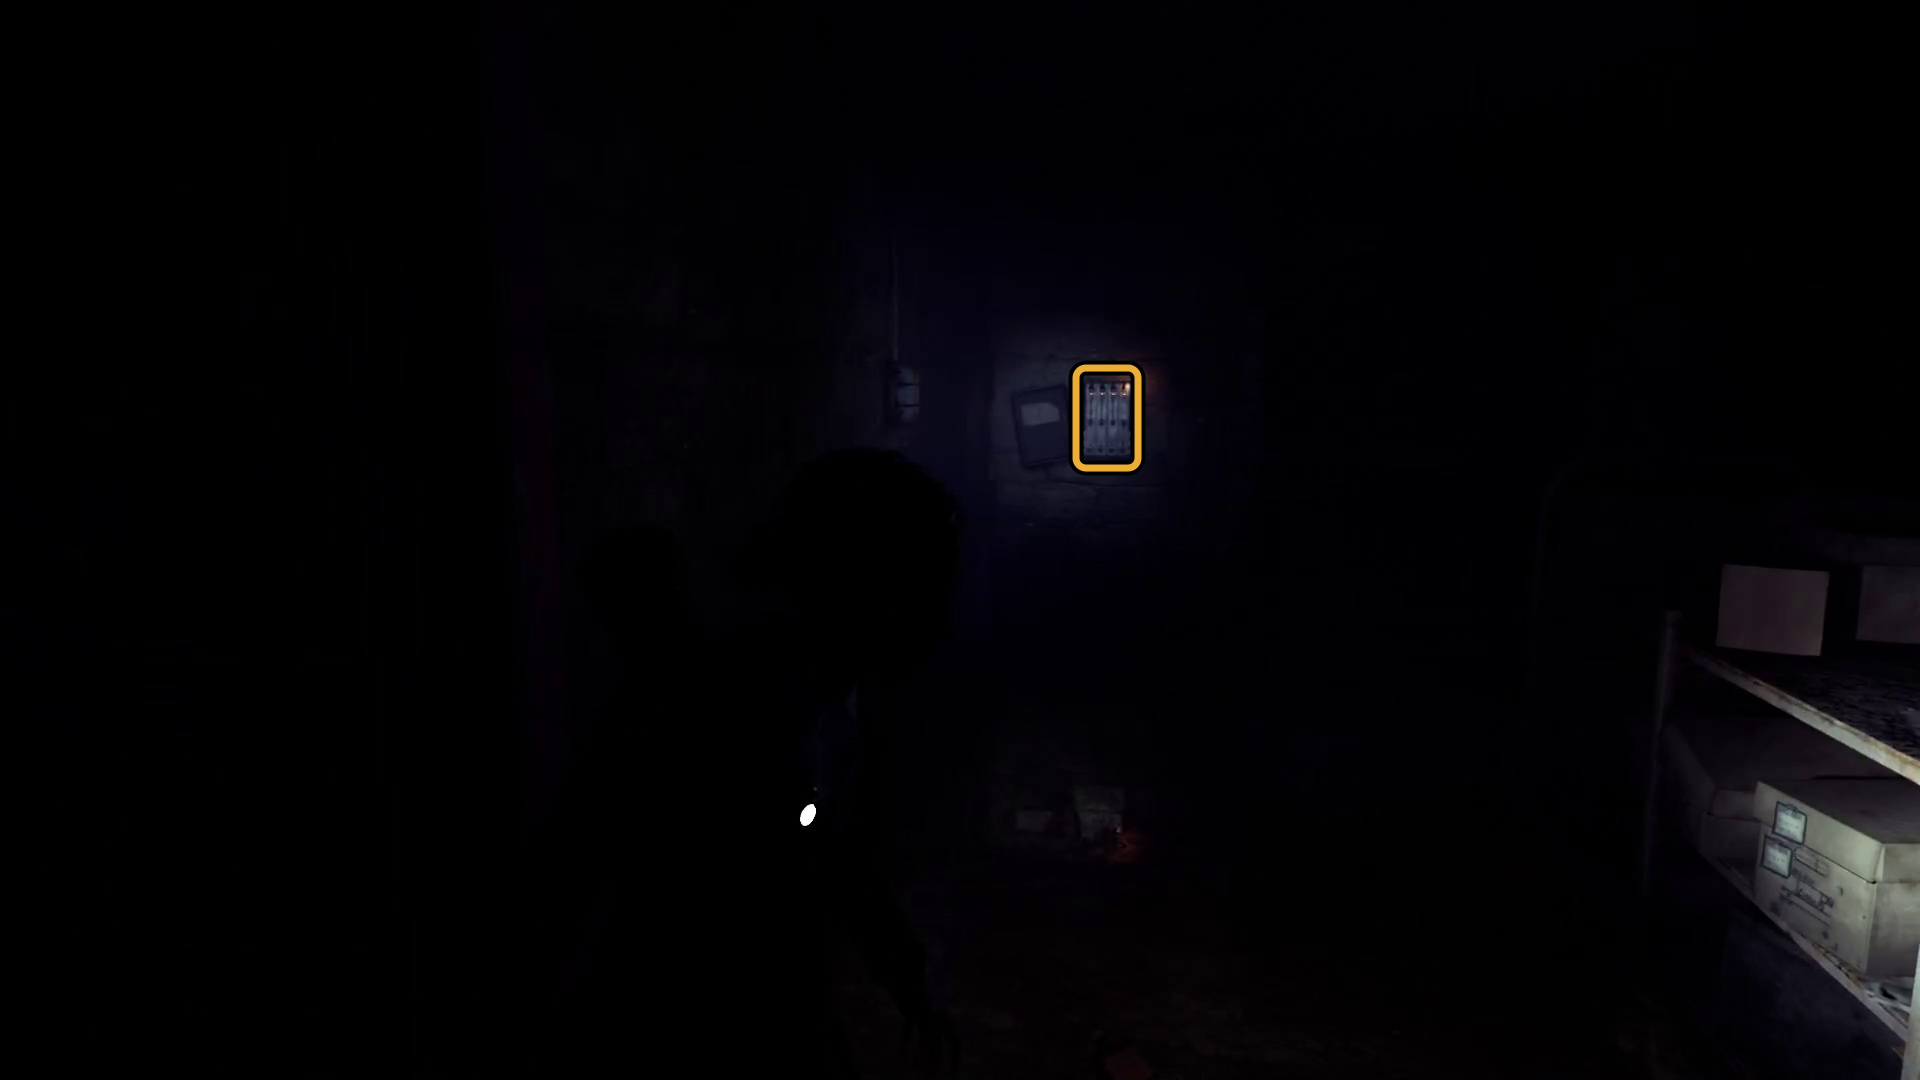
When the cutscene ends, you’ll find yourself in a wet room. Note the door to your left — it’s locked, but we’ll go through it later. For now, go through the doorway on the right (Image 127), and your flashlight will go out briefly. Turn it back on when you can, and keep moving through the room with the bodies and into the laboratory. On the left is a fuse box (Image 128) — head over and interact with it to begin the puzzle.
Image 127Image 128
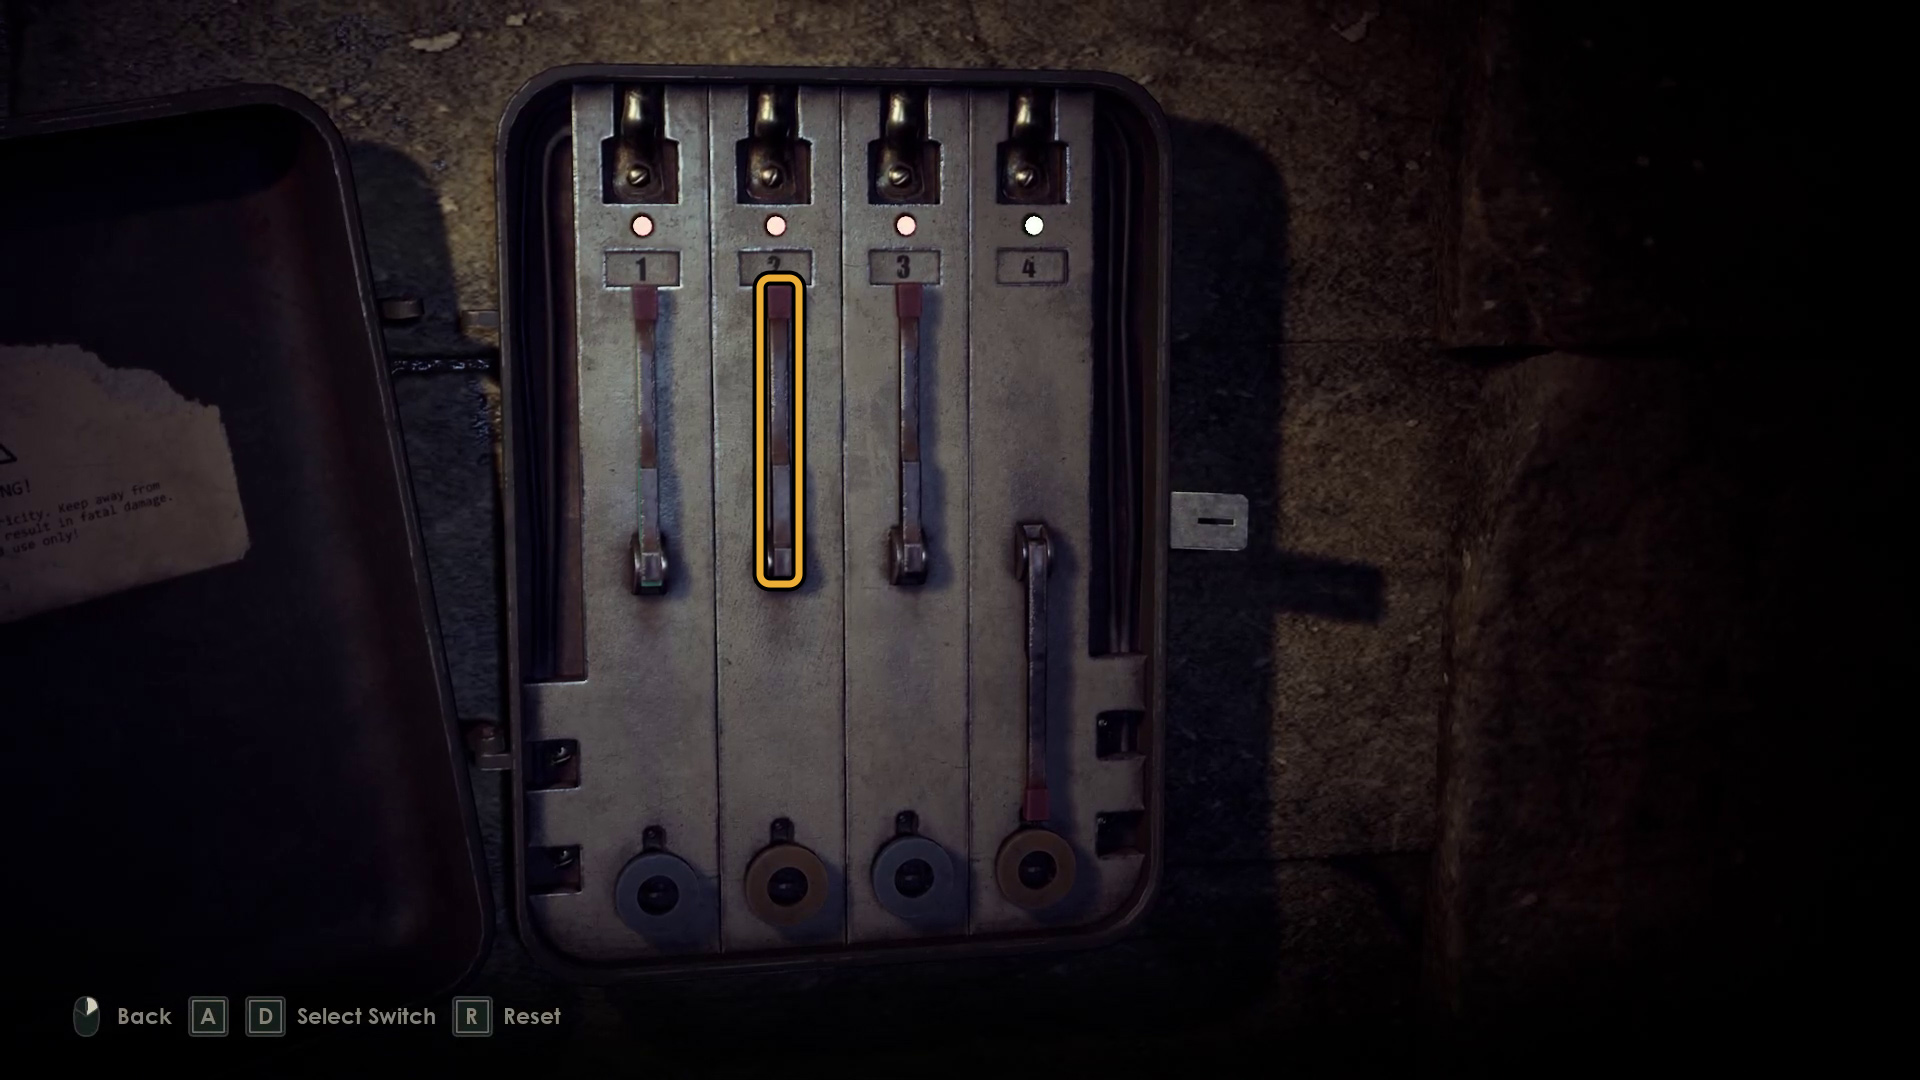
You only have to throw one of the switches to solve this puzzle.
Select the #2 lever and move it to switch all 4 fuses to on.
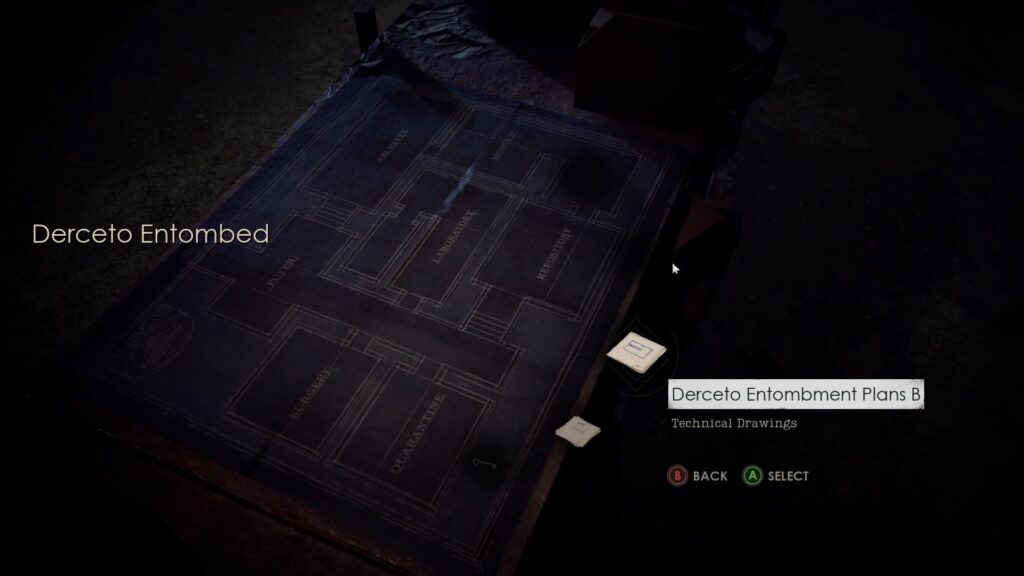
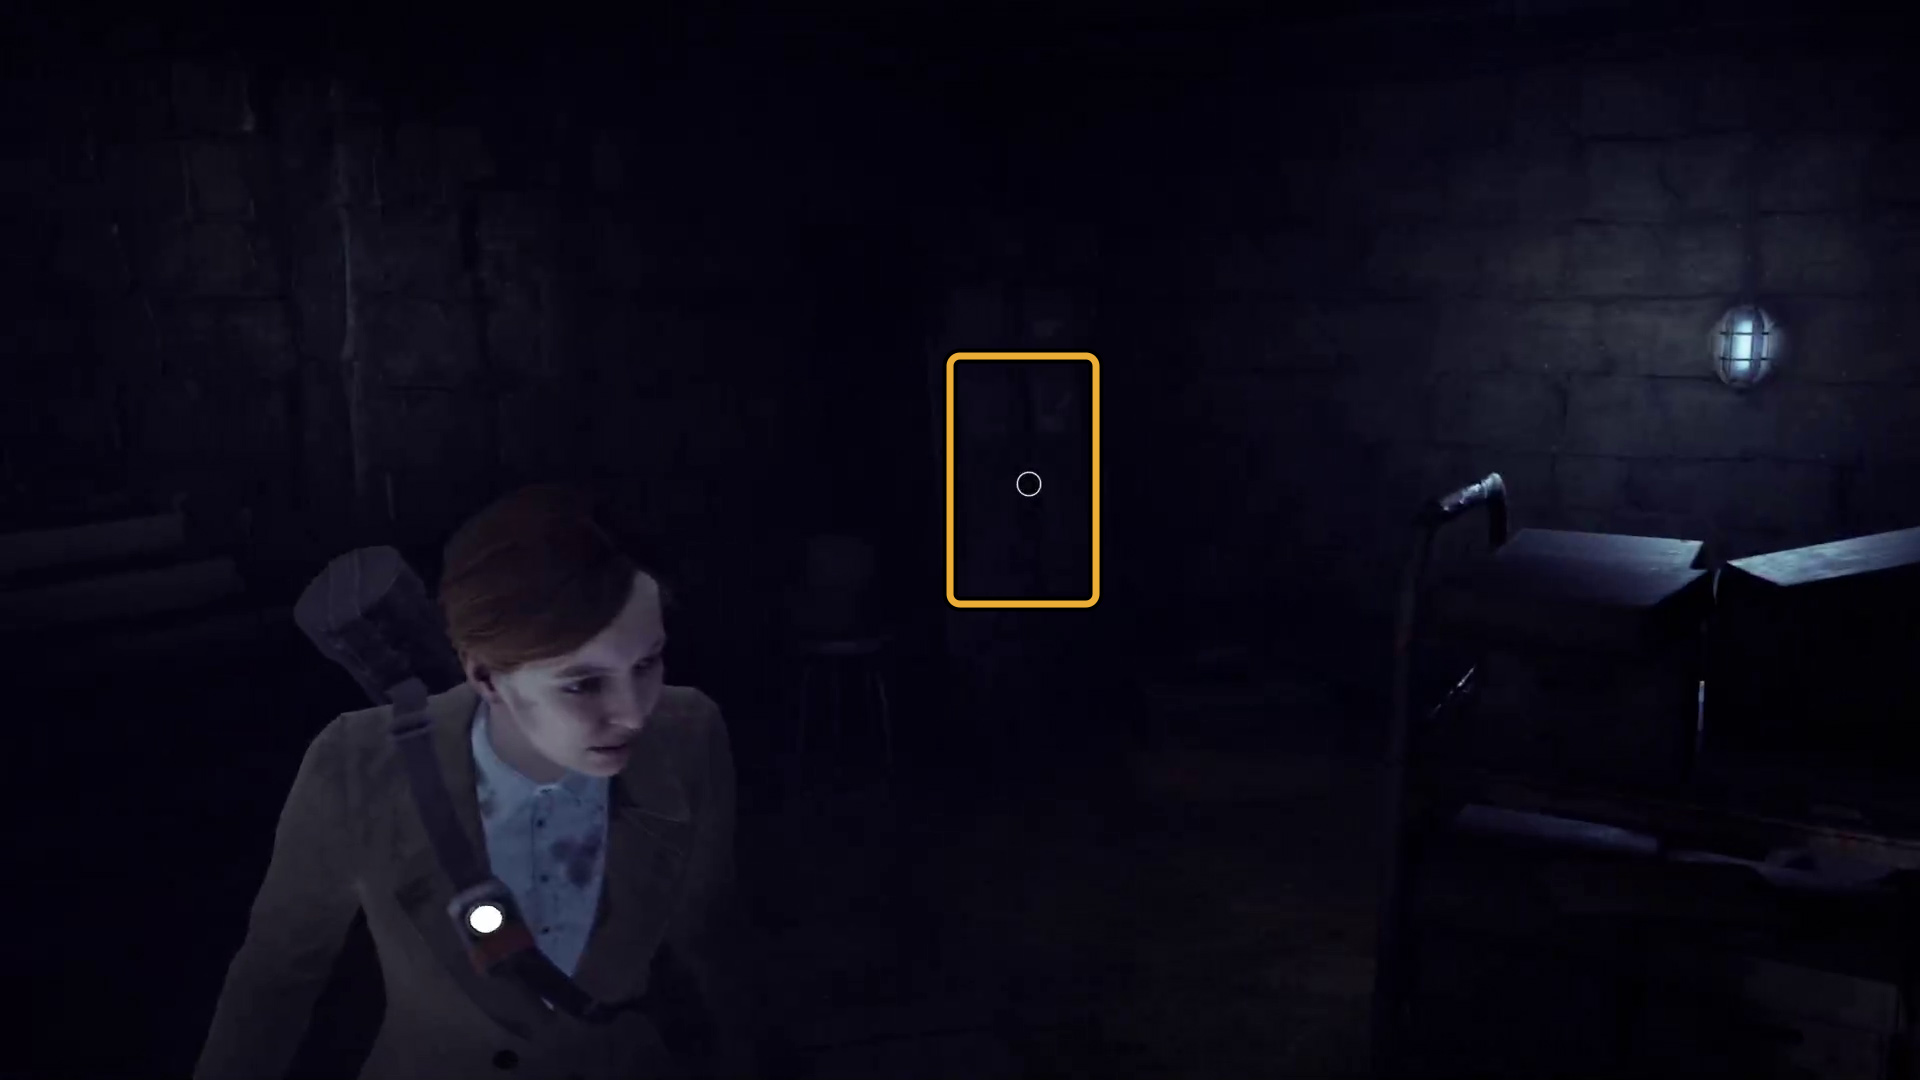
After getting the lights on, you can start picking up the items in the lab, starting with the Decerto Entombment Plans B in the cabinets to the right of the fuse box (Image 129). On the shelves in the middle of the room are the Derceto Entombment Plans A key and the Decerto Entombed plans (Image 130), which is another puzzle you need to solve — but don’t start the puzzle yet.
Image 129Image 130
Instead, check the nearby table drawer for the Closing the Refuge clue, and grab the Box of Biscuits Lagniappe from the other table (Image Image 131). Check the rest of the lootable boxes and drawers in the room, and then when you’re ready, go over to the central shelf and interact with the Decerto Entombed puzzle.
Image 131
Pay attention to the labels on each drawing, and make sure you’ve got them all right side up!
First, interact with the puzzle and use the Decerto Entombment Plans A and Decerto Entombment Plans B on it. This will place all the drawings on the puzzle, and you then need to arrange them as seen below. From top left to bottom right, the sheets are:
Yellow folder
Foyer
Archive
Surgery
Laboratory
Morgue (doors on top and bottom)
Quarantine
Repository
Morgue (doors on left and top)
Get out
When you solve the puzzle, a cutscene will begin. After it ends, you’ll receive The Truth key item, which will unlock the door we noted in the room you woke up in (Image 132).
Before you do so, however, walk over to John’s body, and grab the Toe Tag Lagniappe (Image 133). That done, you can go up the stairs and unlock/go through the door.
Image 132Image 133
Pay Dr Gray a visit in his apartment
The goal now is to get to Dr Gray’s apartment, which is on the Second Floor.
If you are playing as Emily, you’ll need to go through the Stair Hall on the First Floor to get there. We’ll walk you through this process in the following section.
If you are playing as Edward, the route to Dr. Gray’s apartment is even more straightforward.
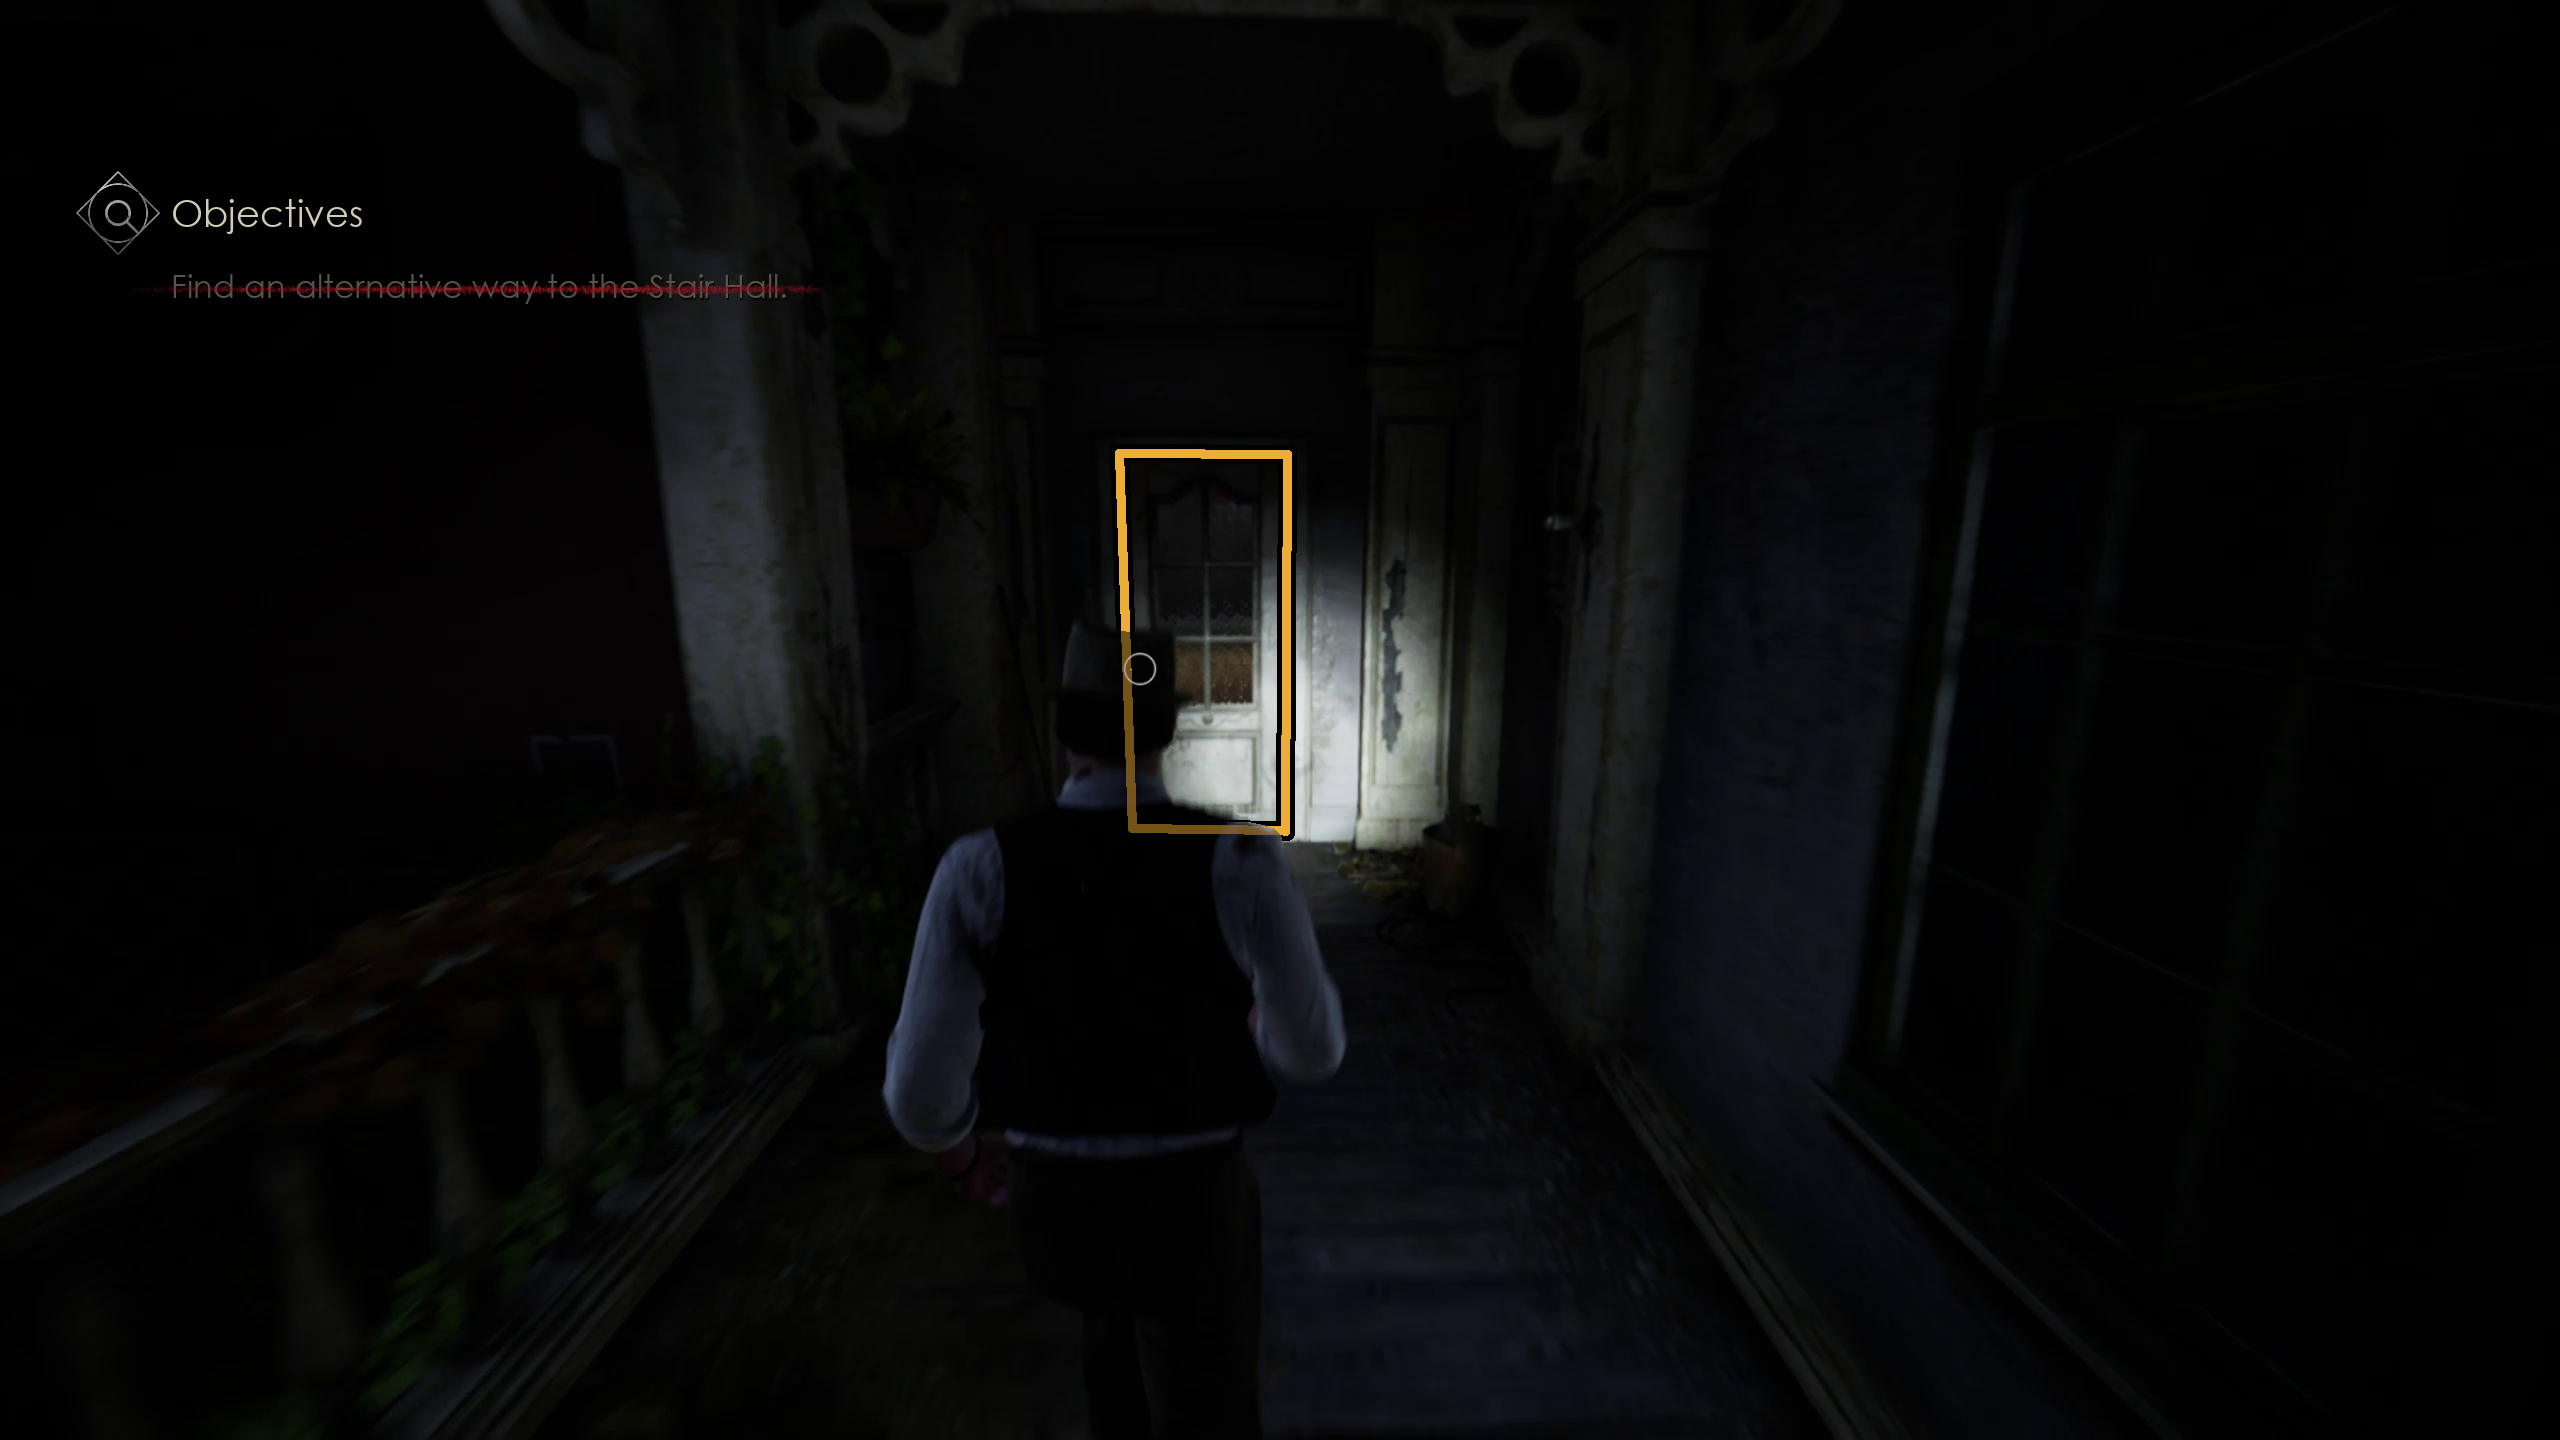
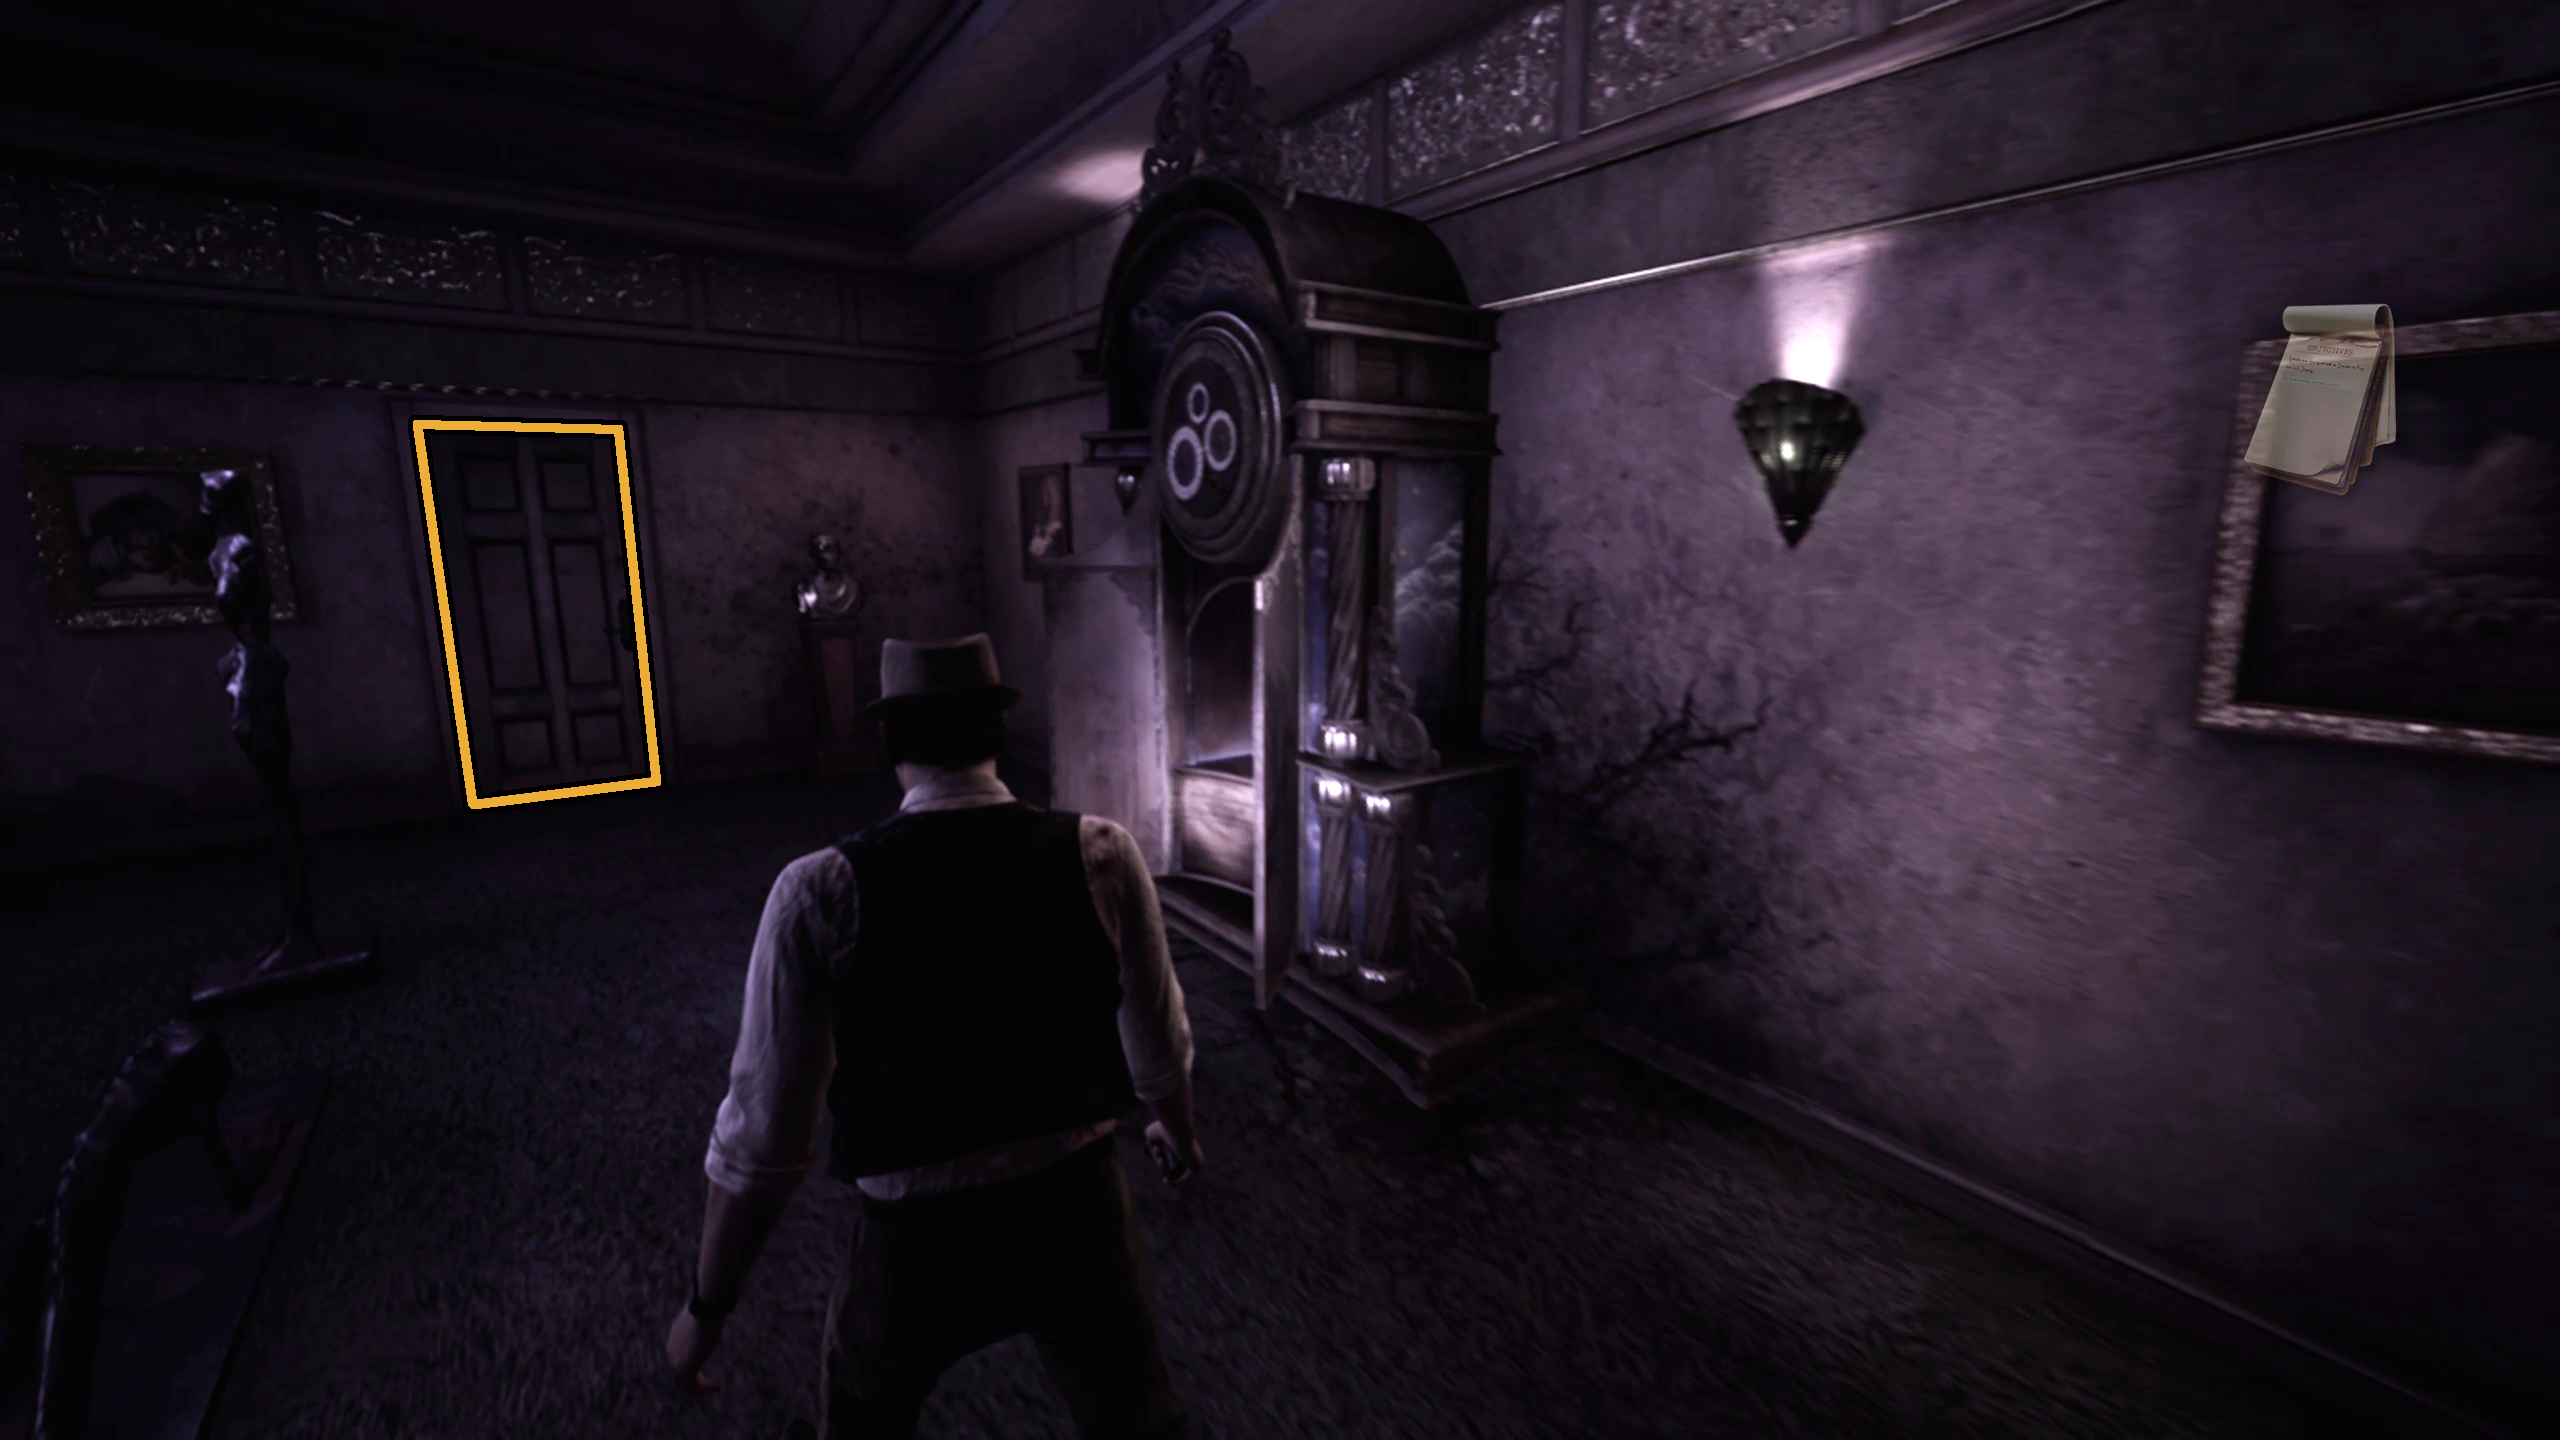
Turn right and go through the door at the far end of the hall (Image 1), then continue up the stairs and through the gate. Go through the door on the same landing as the gate (Image 2), and continue across the Grand Parlor through the door on the opposite wall.
Image 1Image 2
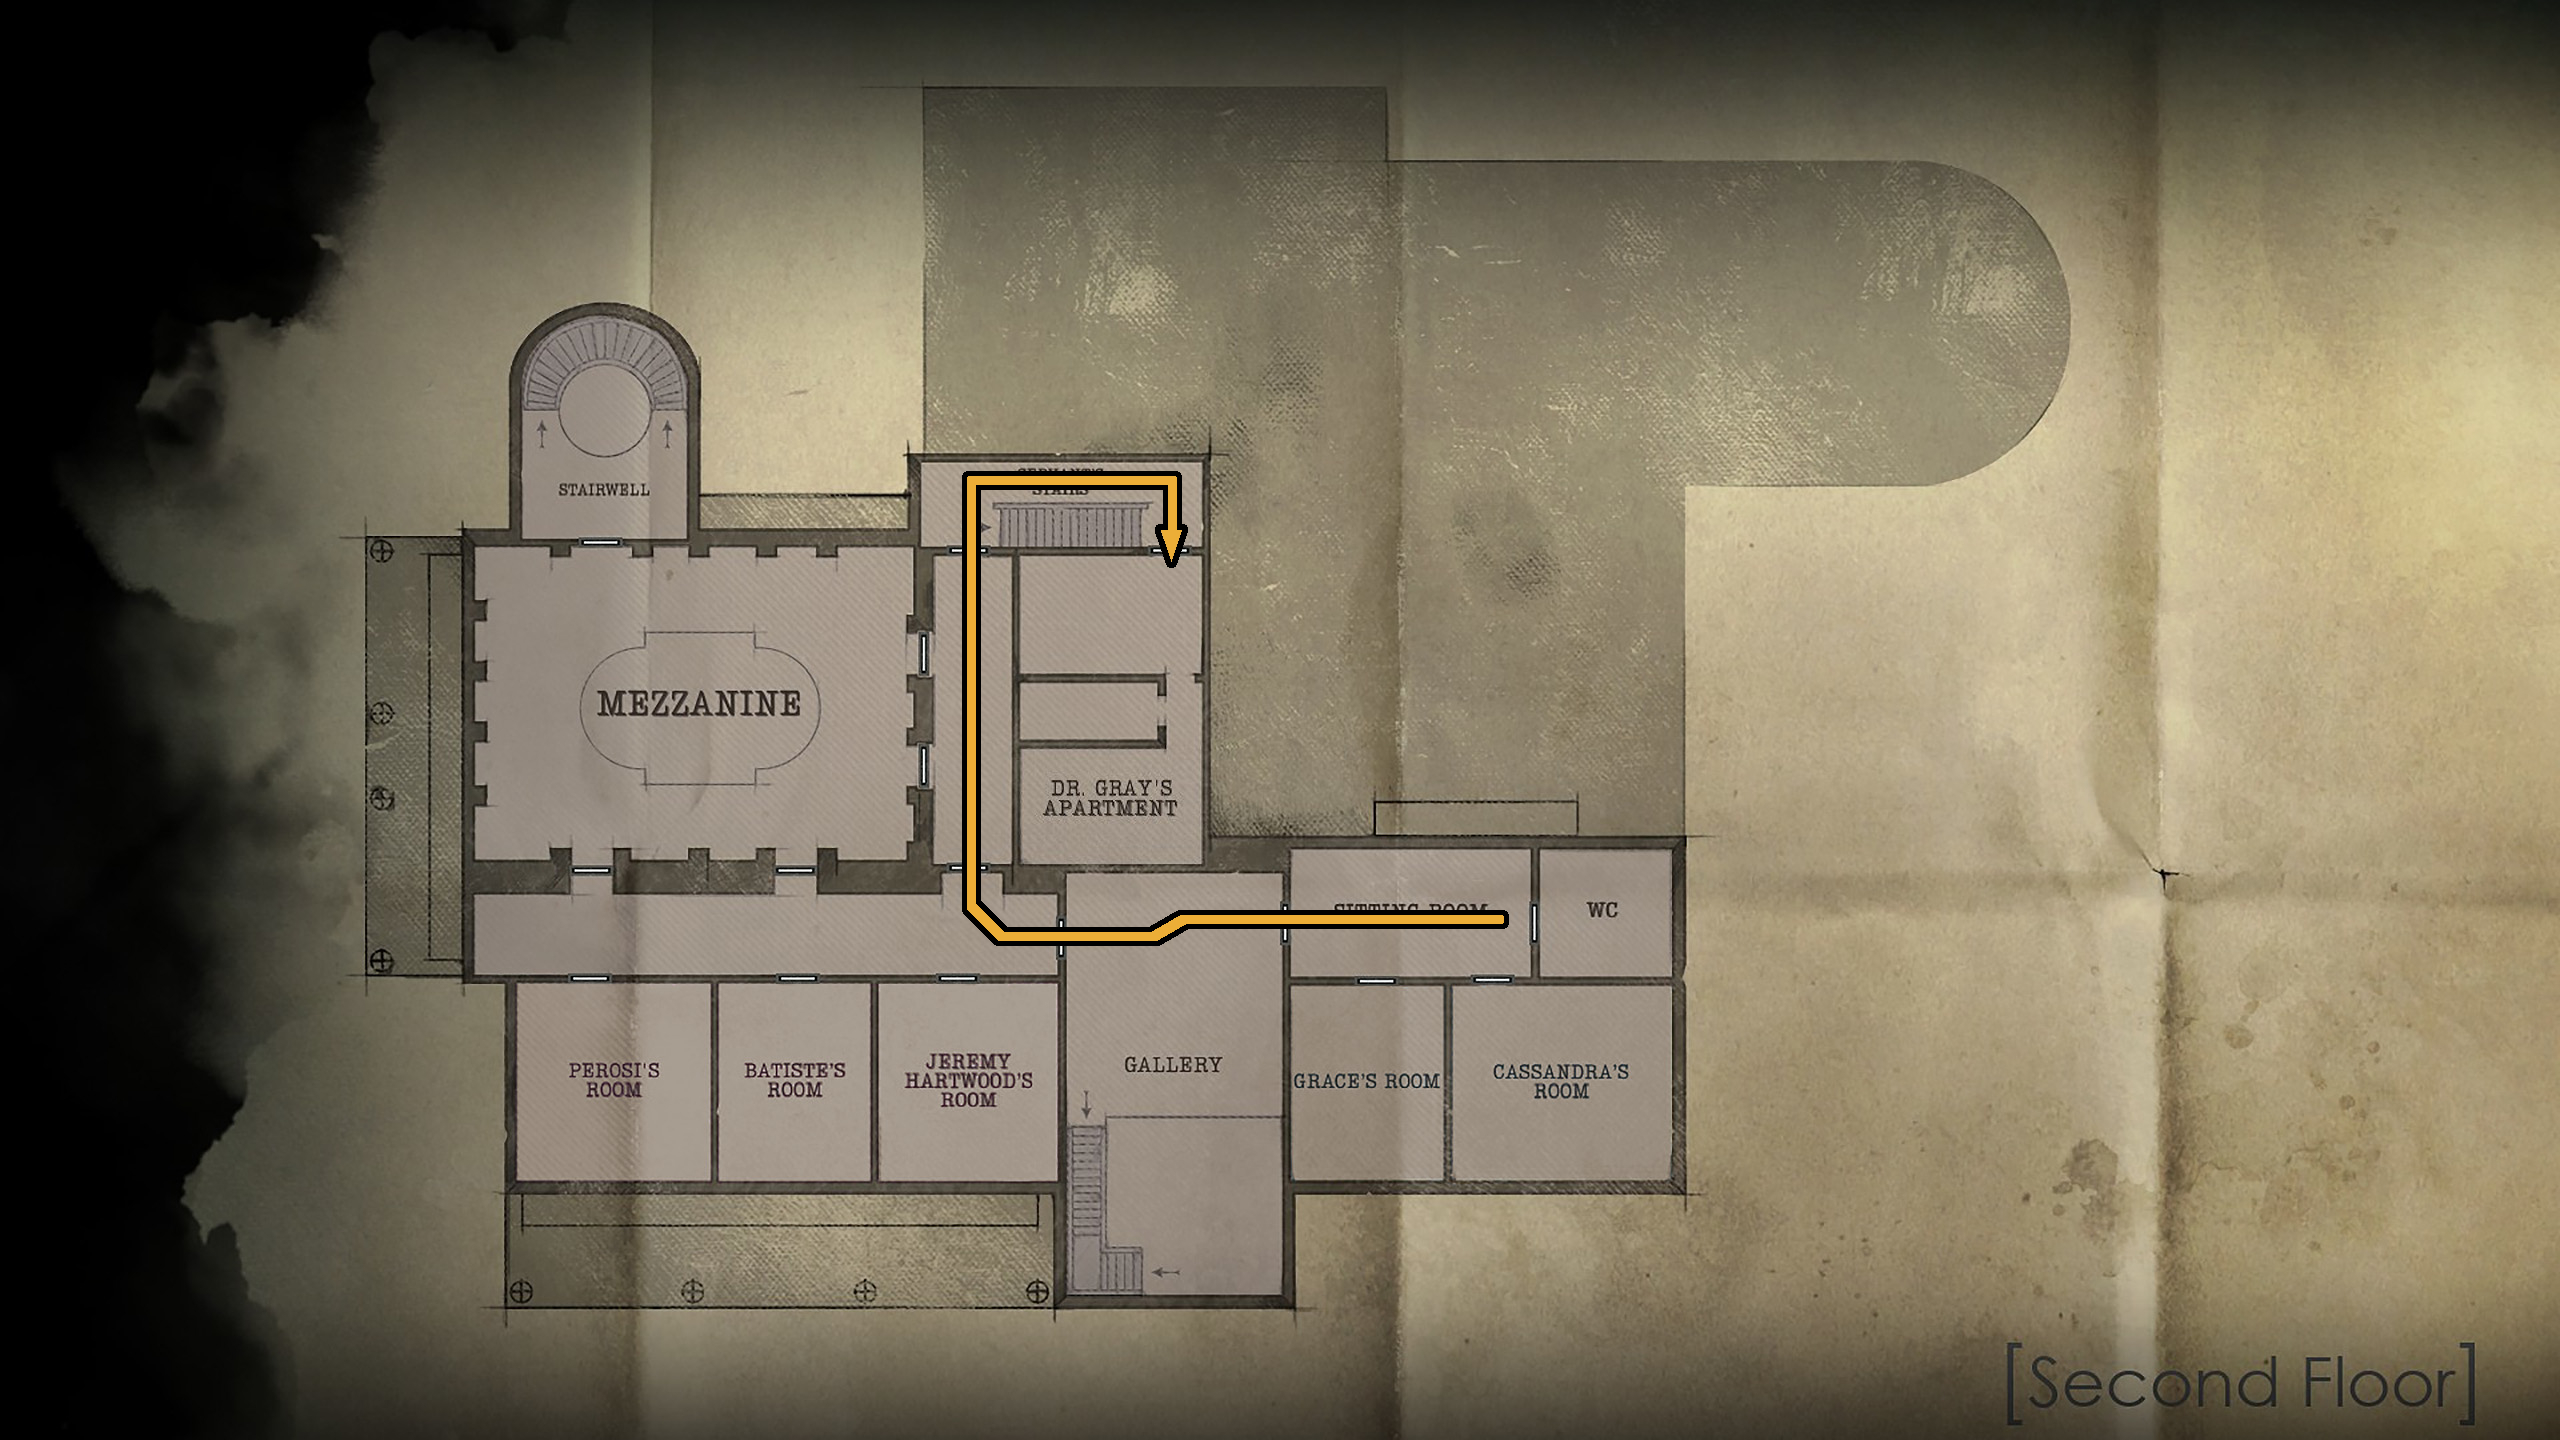
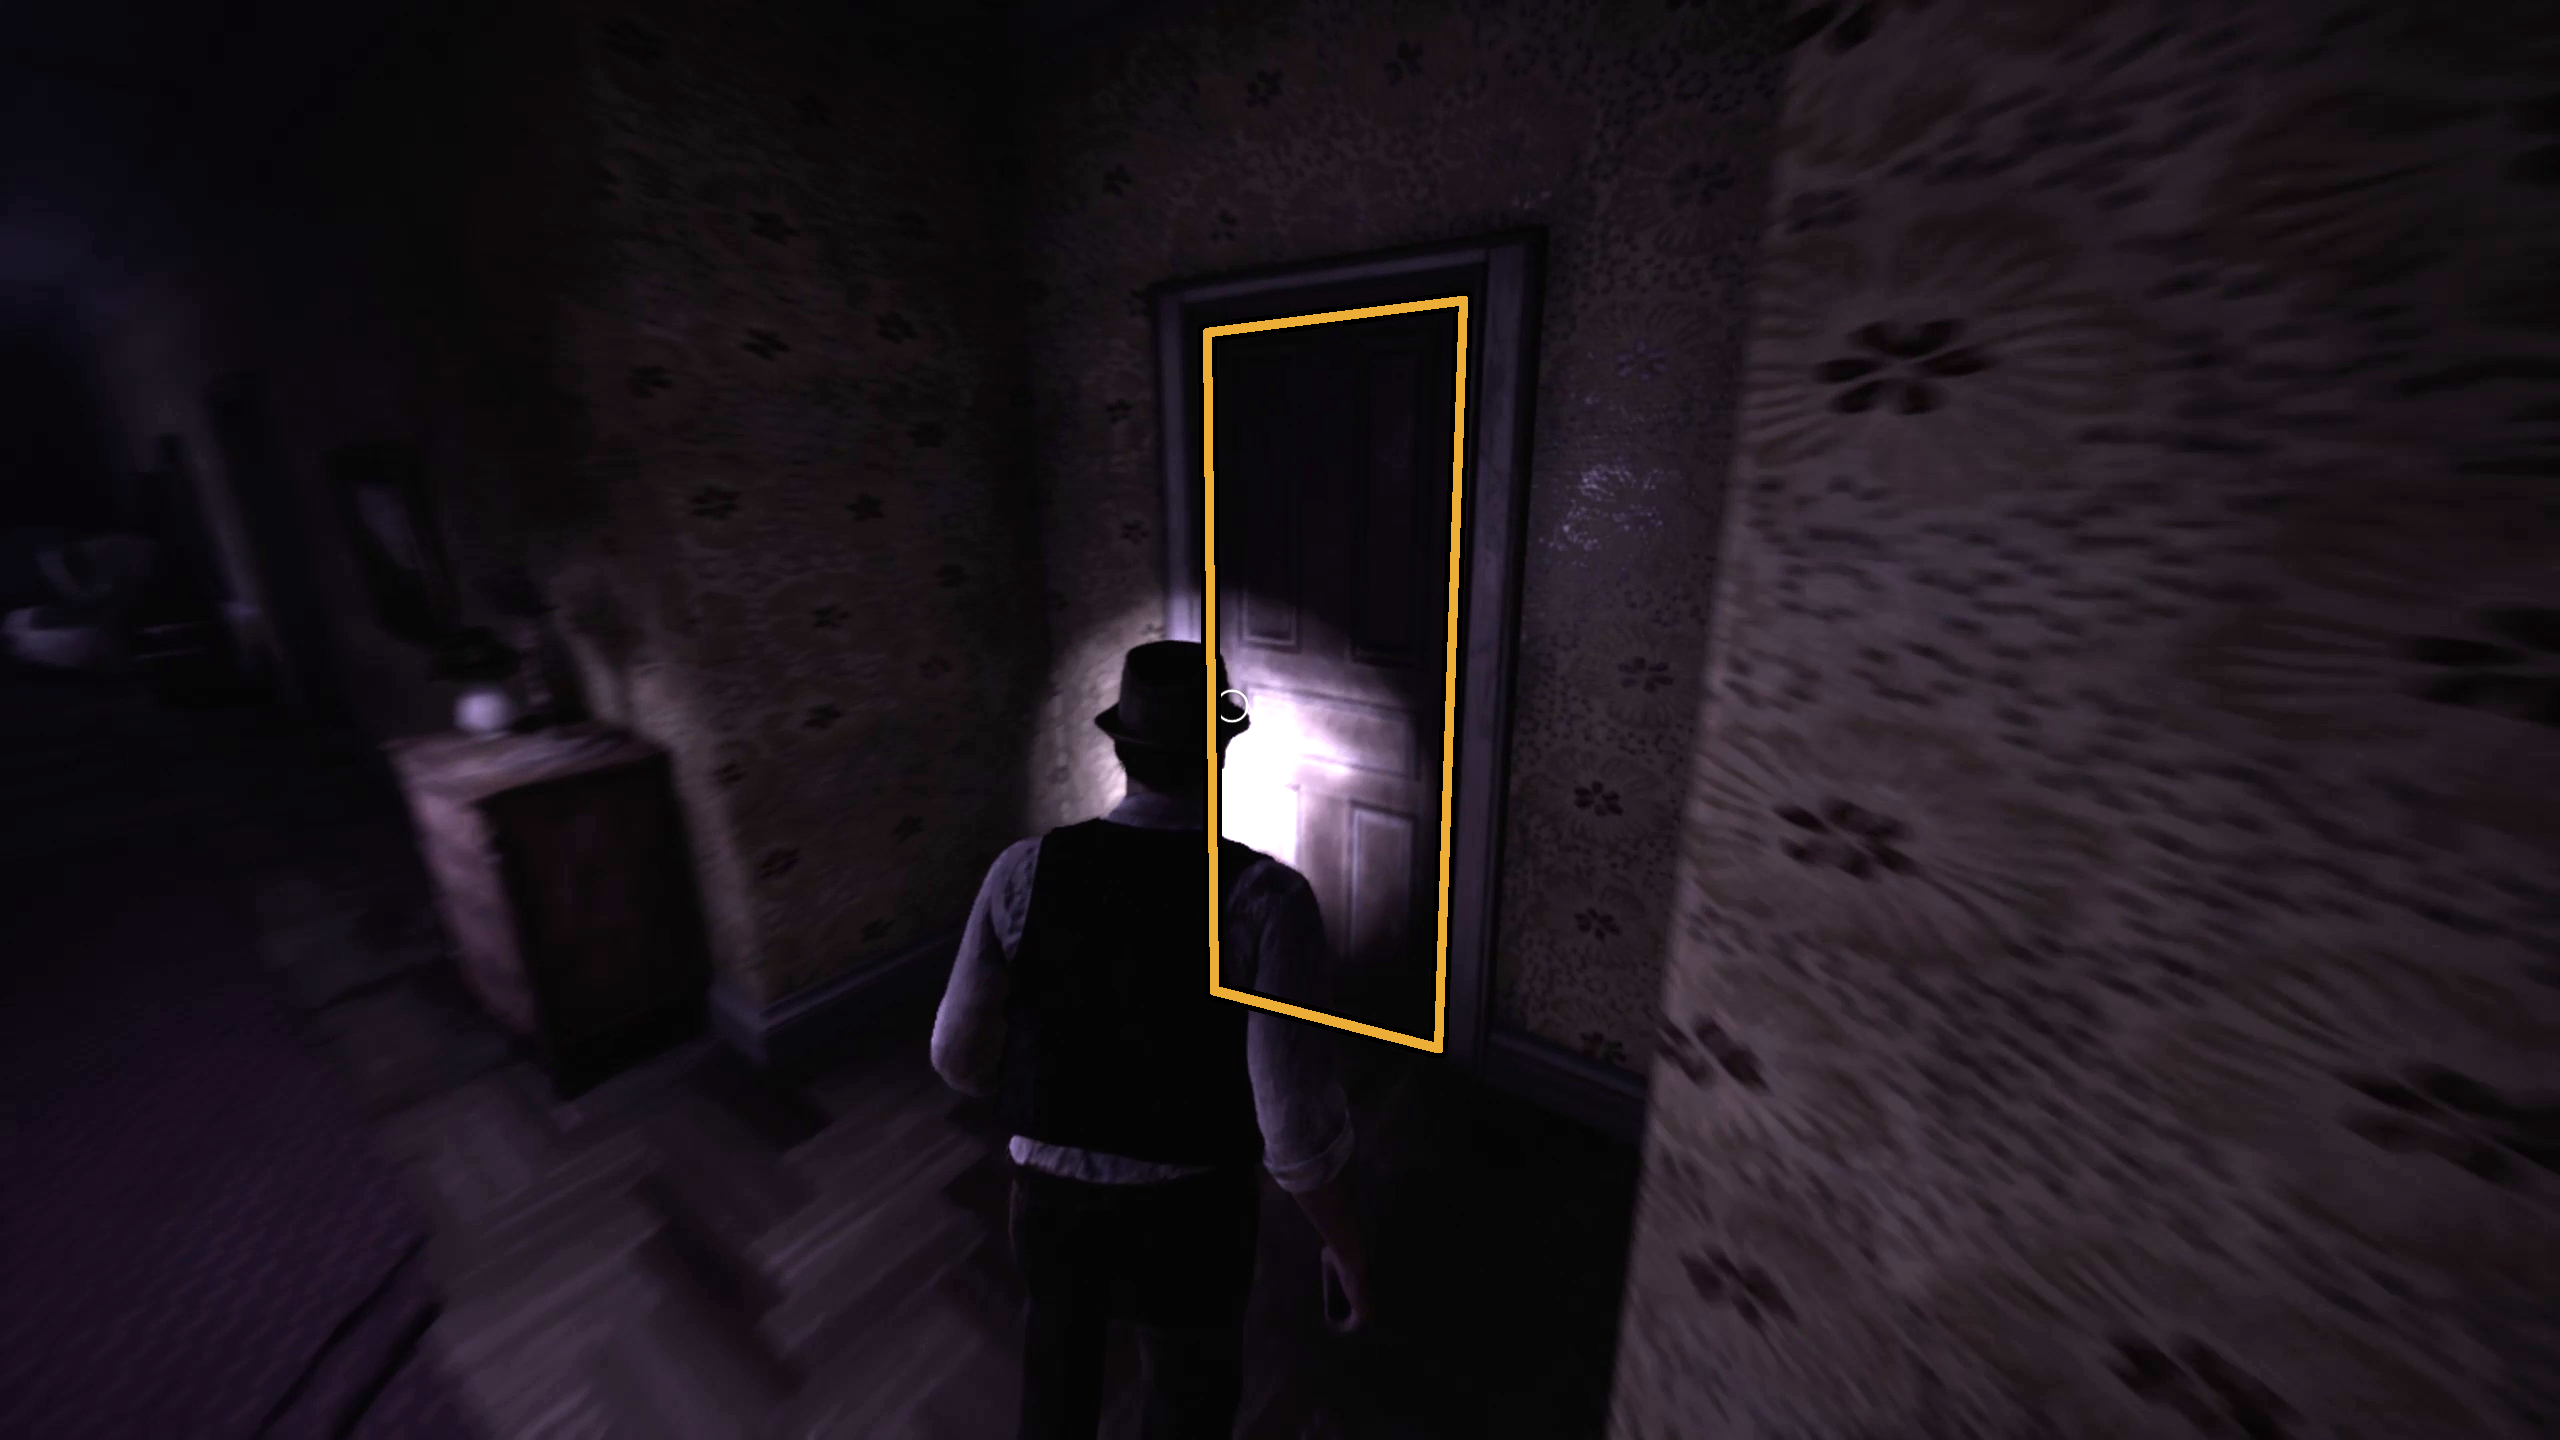
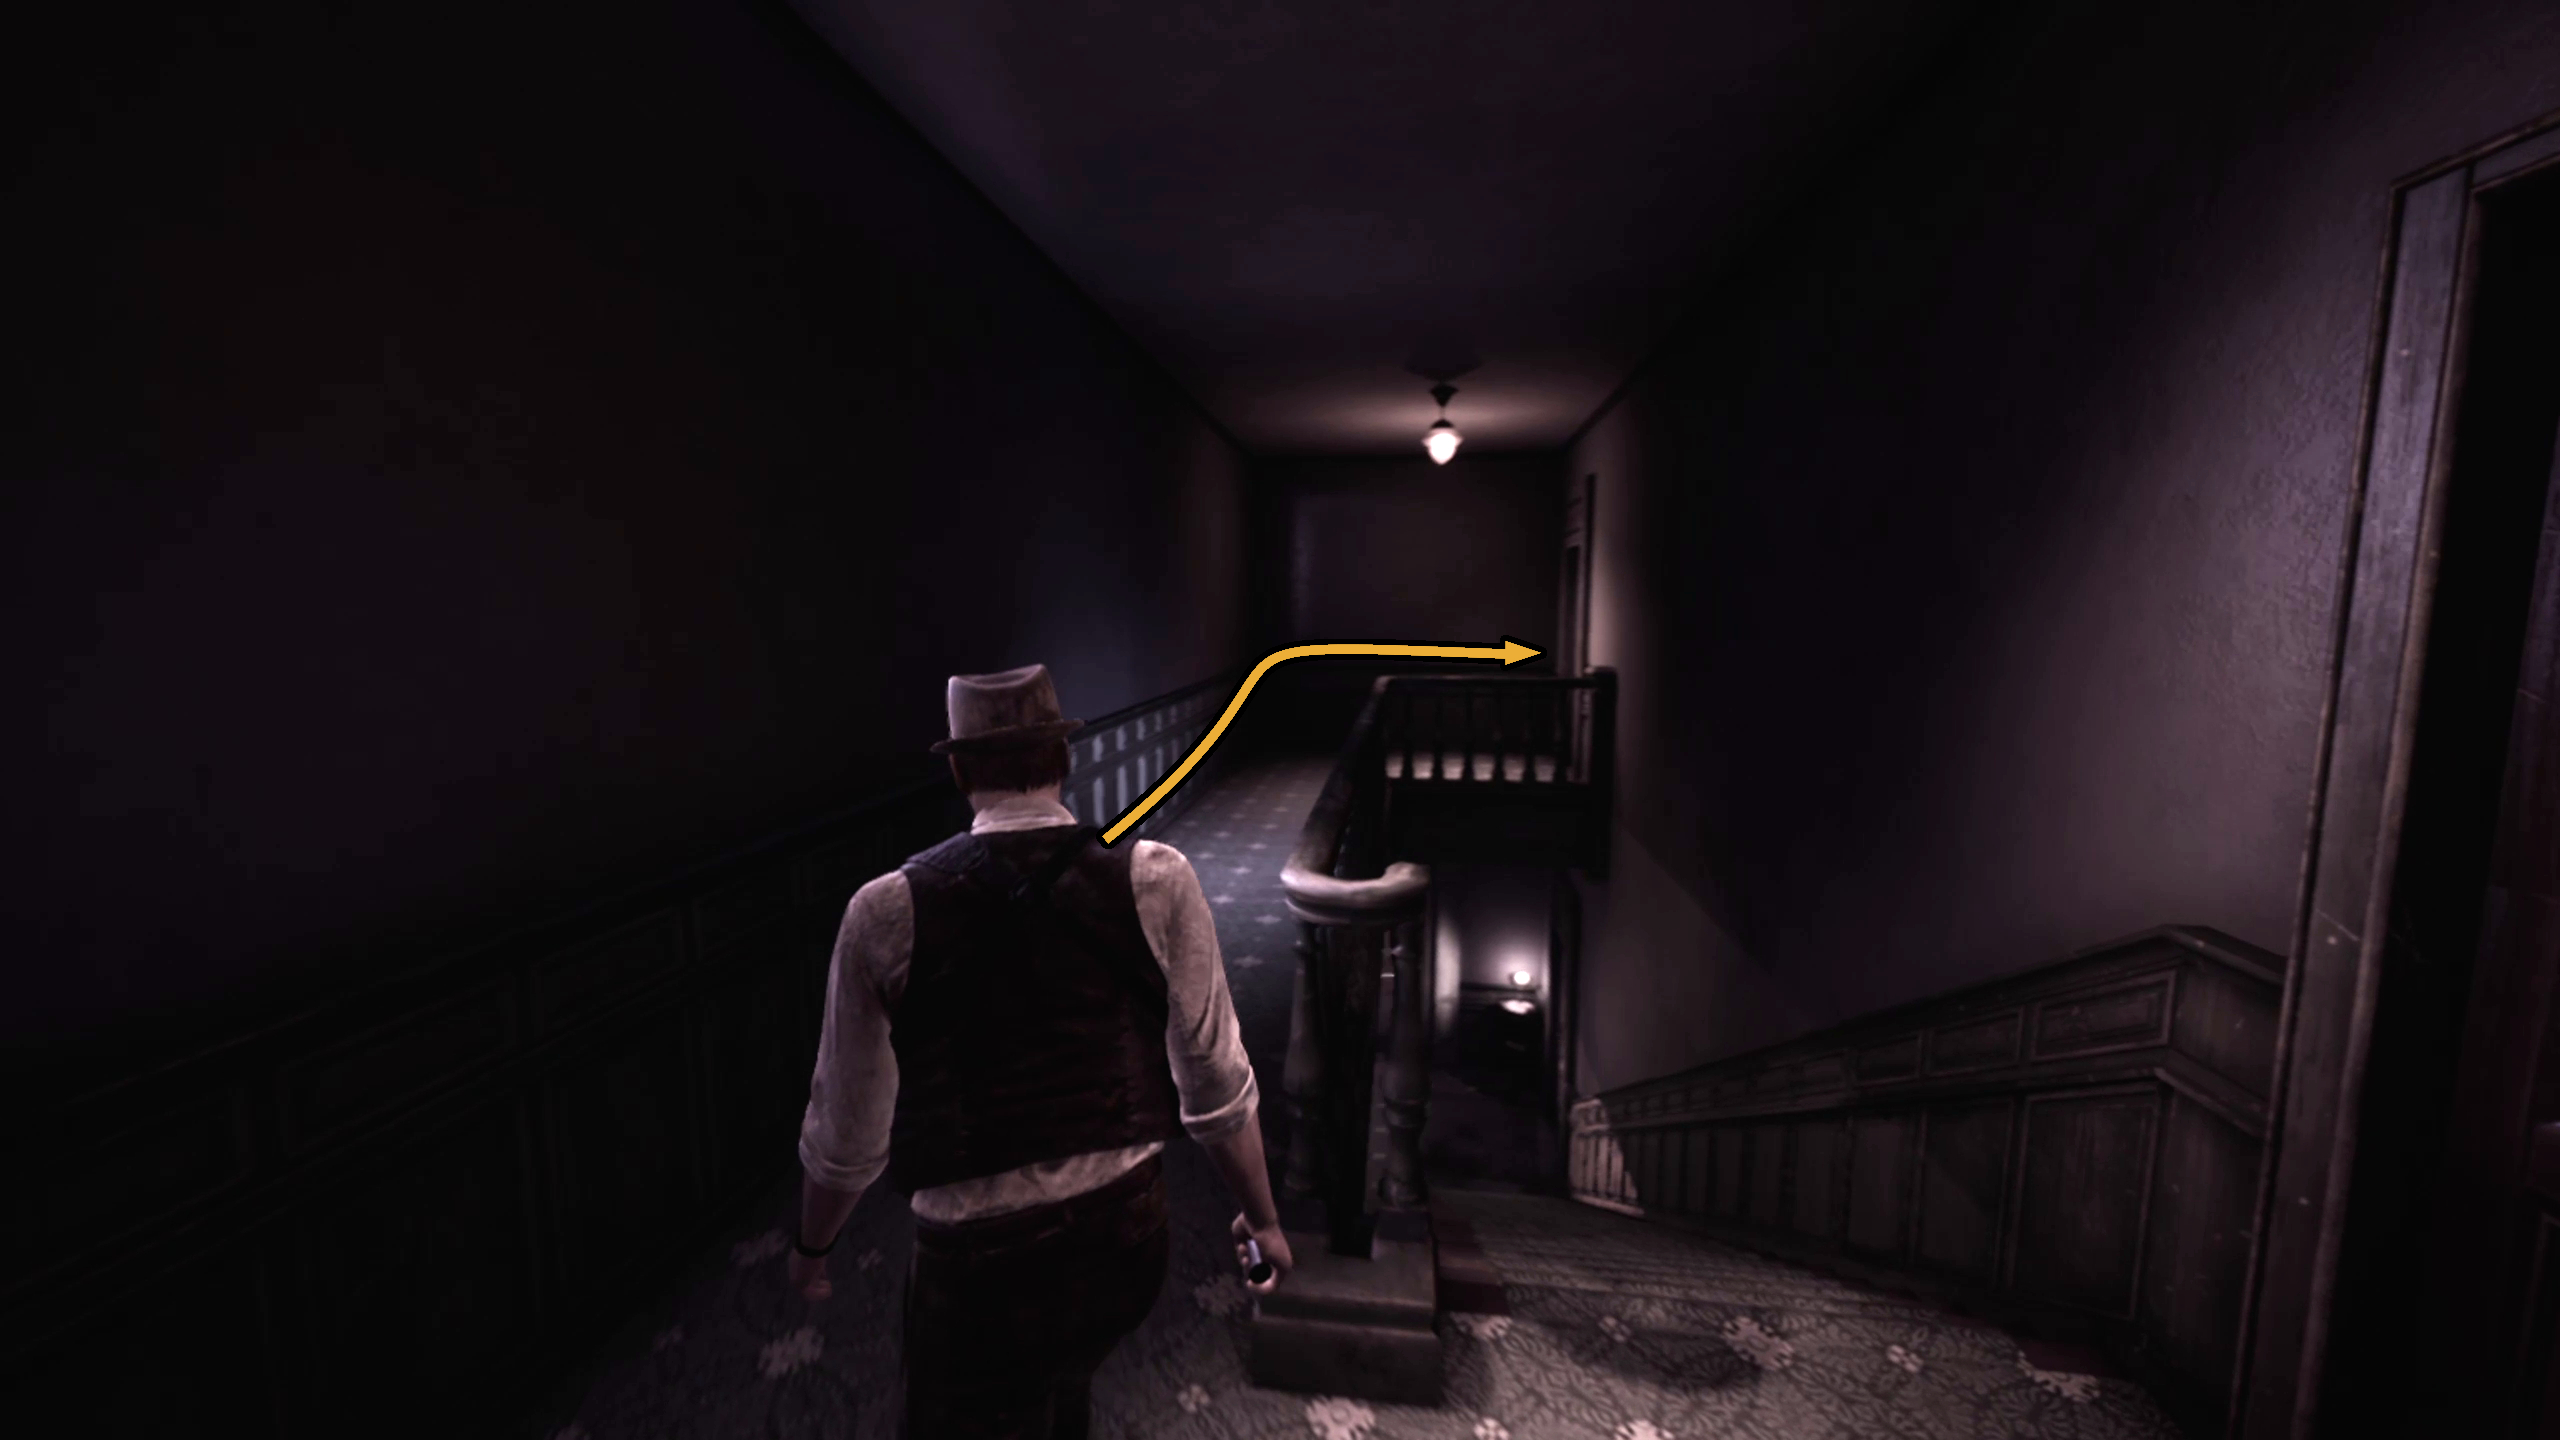
Turn left, and the door at the far end of the hall will open — head through, then go right and go up the stairs. At the top of the stairs, go straight and into the door on the left (Image 3), then take an immediate right and go through the door there. Go straight through the hall and through the door that opens ahead, then turn right and go through the door at the opposite end of the stairwell (Image 4).
Image 3Image 4
Leave the sitting room and go across the Gallery to go to the 2nd Floor Hallway (Image 1). Turn to the right and go through the door (Image 2) in order to enter the Mezzanine hall.
Image 1Image 2
Keep going through the door at the far end (Image #), and then turn to the right and go to the door on the other end of this floor, which will be Dr. Gray’s Apartment (Image 4).
Image 3Image 4
Help Detective Carnby/Emily look for clues
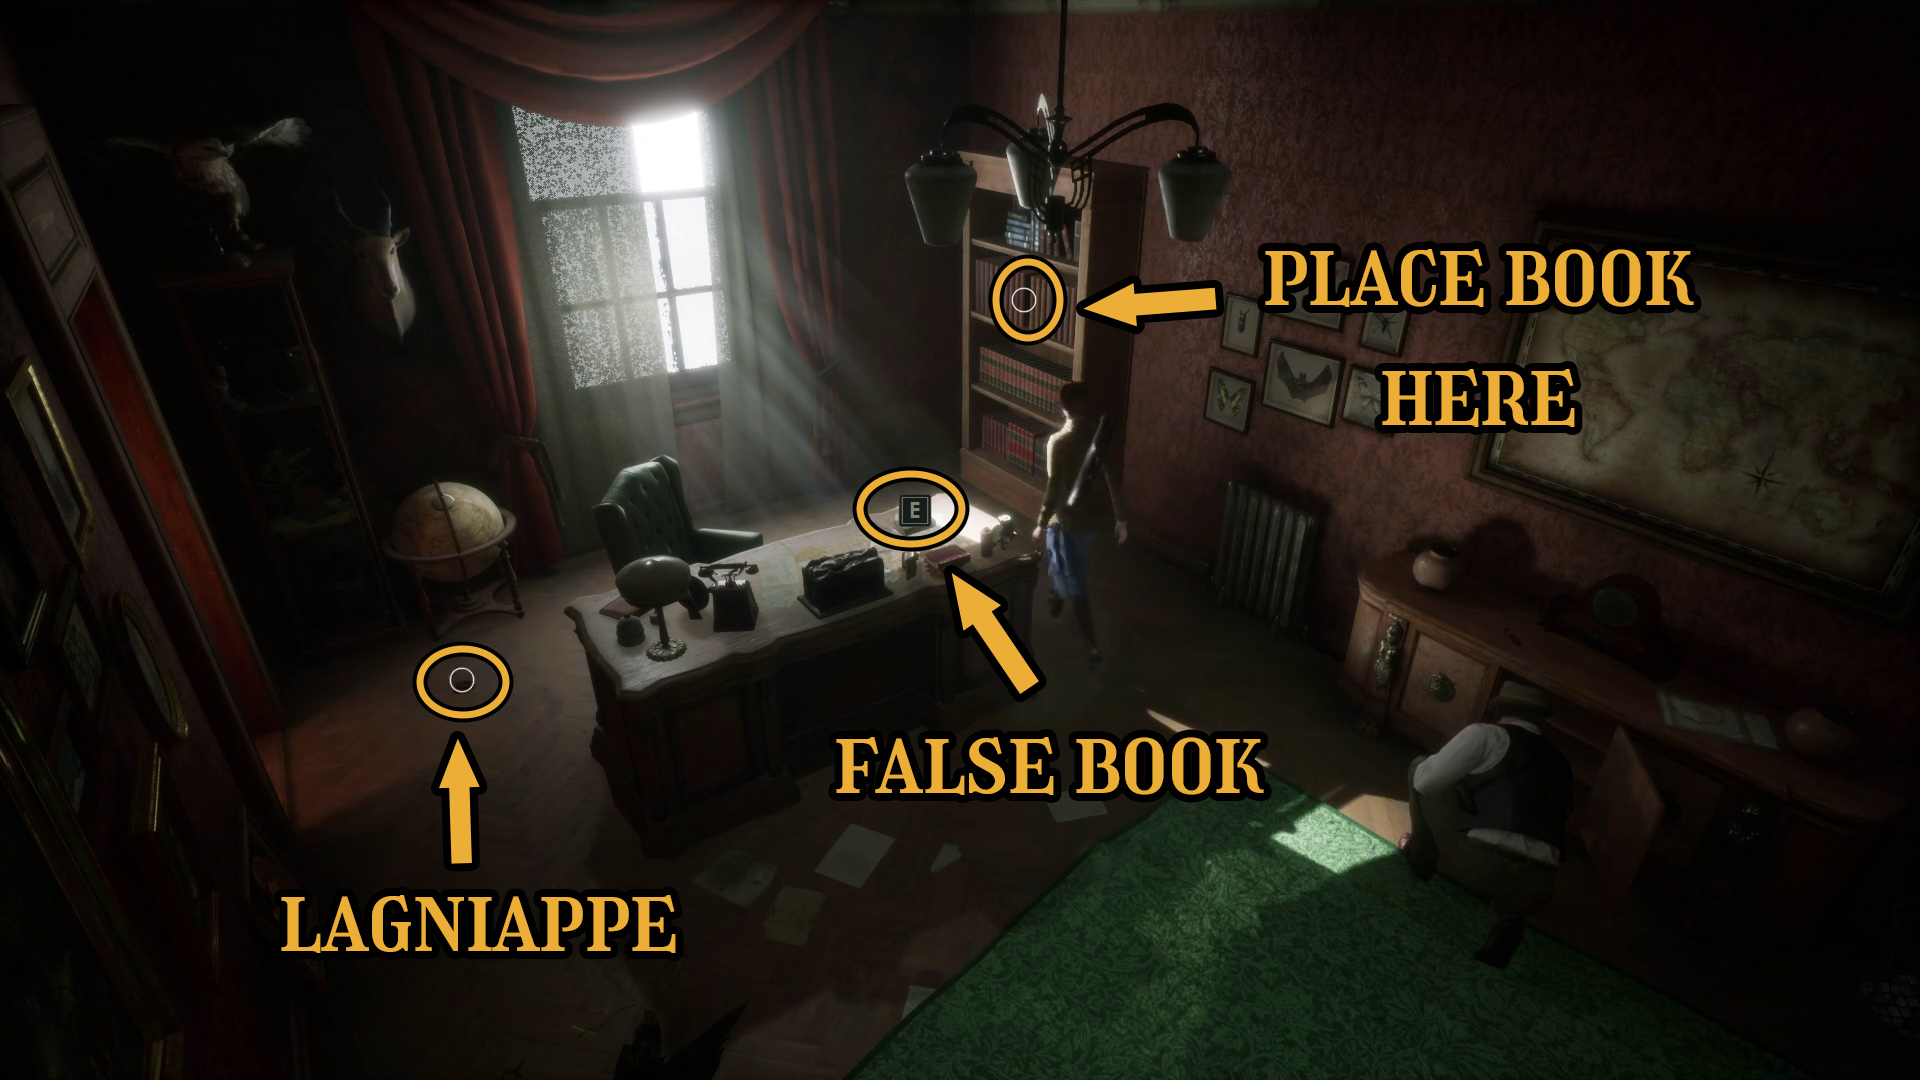
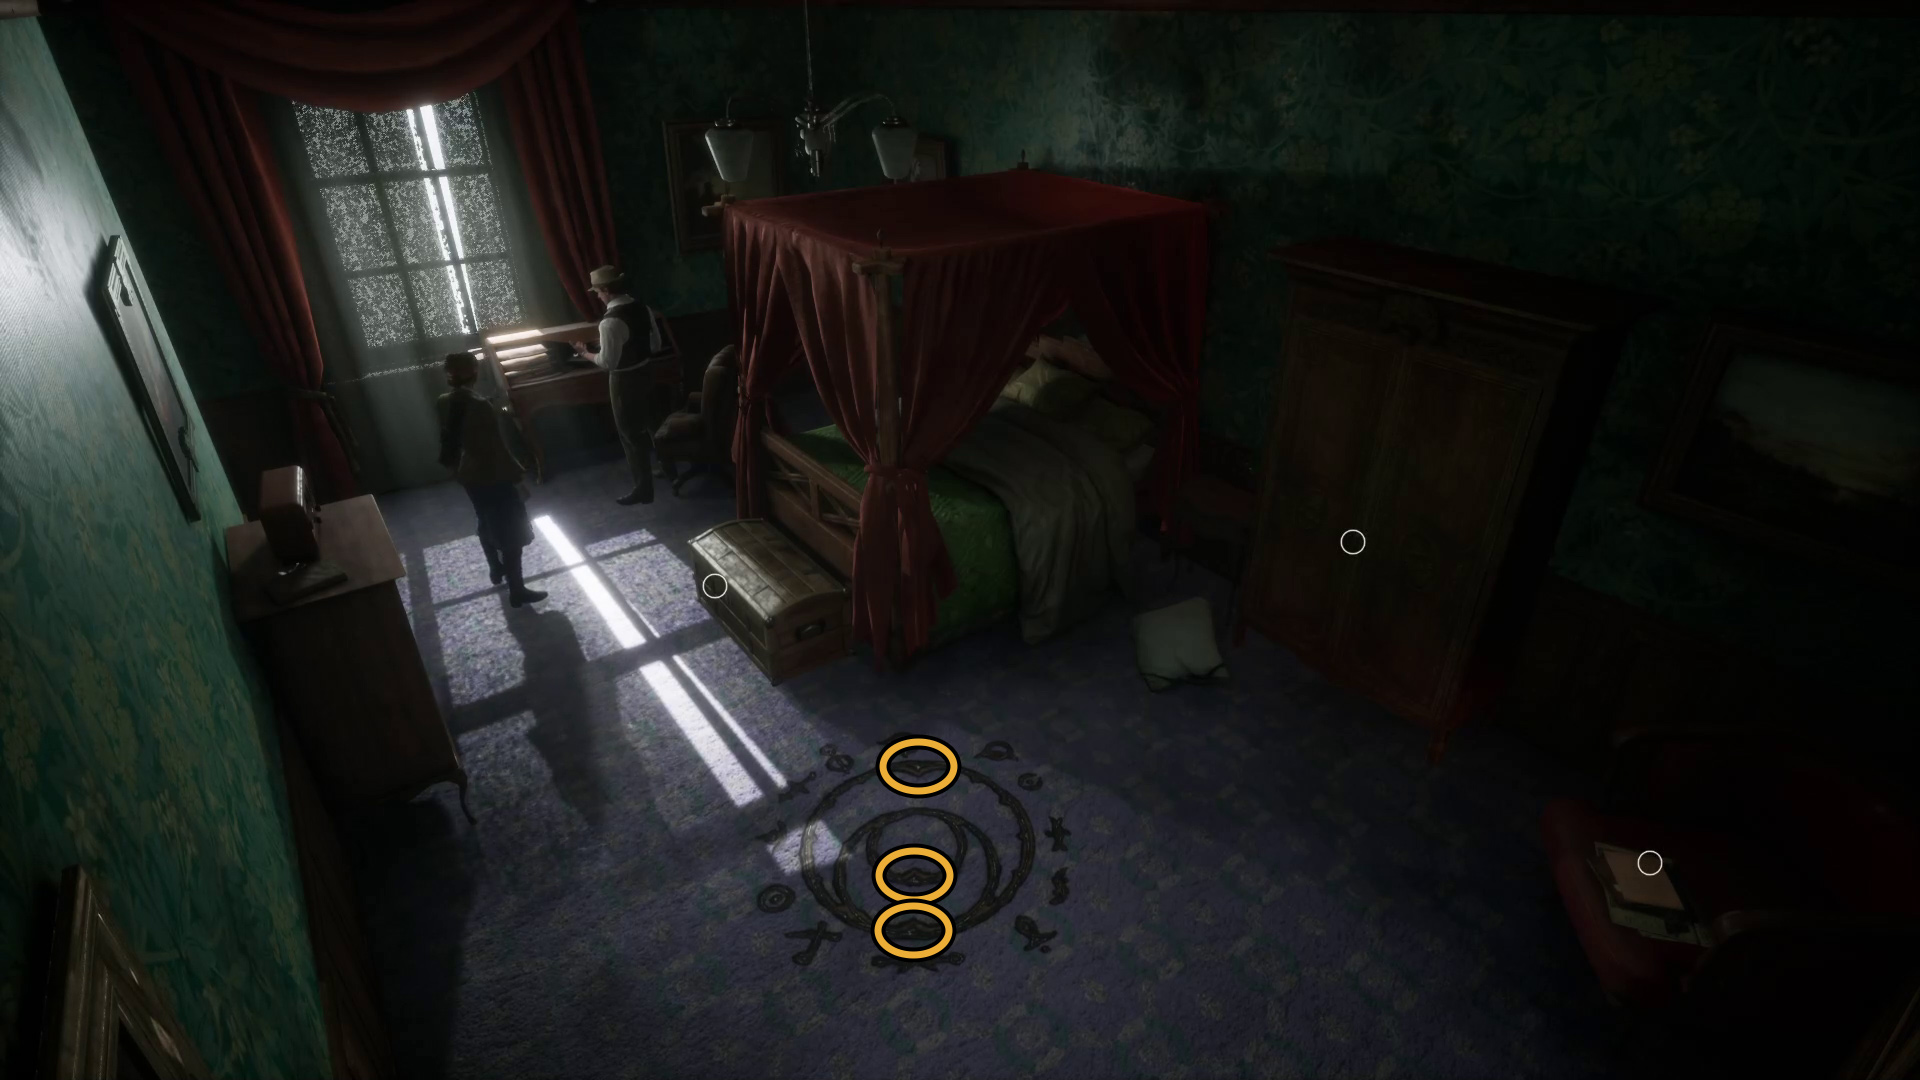
You’ll have a brief conversation with Emily/Edward as you enter the apartment — after the required convo ends, make sure you walk over and talk to them until the option goes away if you’re achievement hunting. Then grab the False Book key item from the table, and grab the Toy Talisman Lagniappe that appeared on the floor after you picked up the book (Image 134). Next, use the book on the empty spot on the bookcase. This will reveal a passage into the next room — head on through!
Image 134
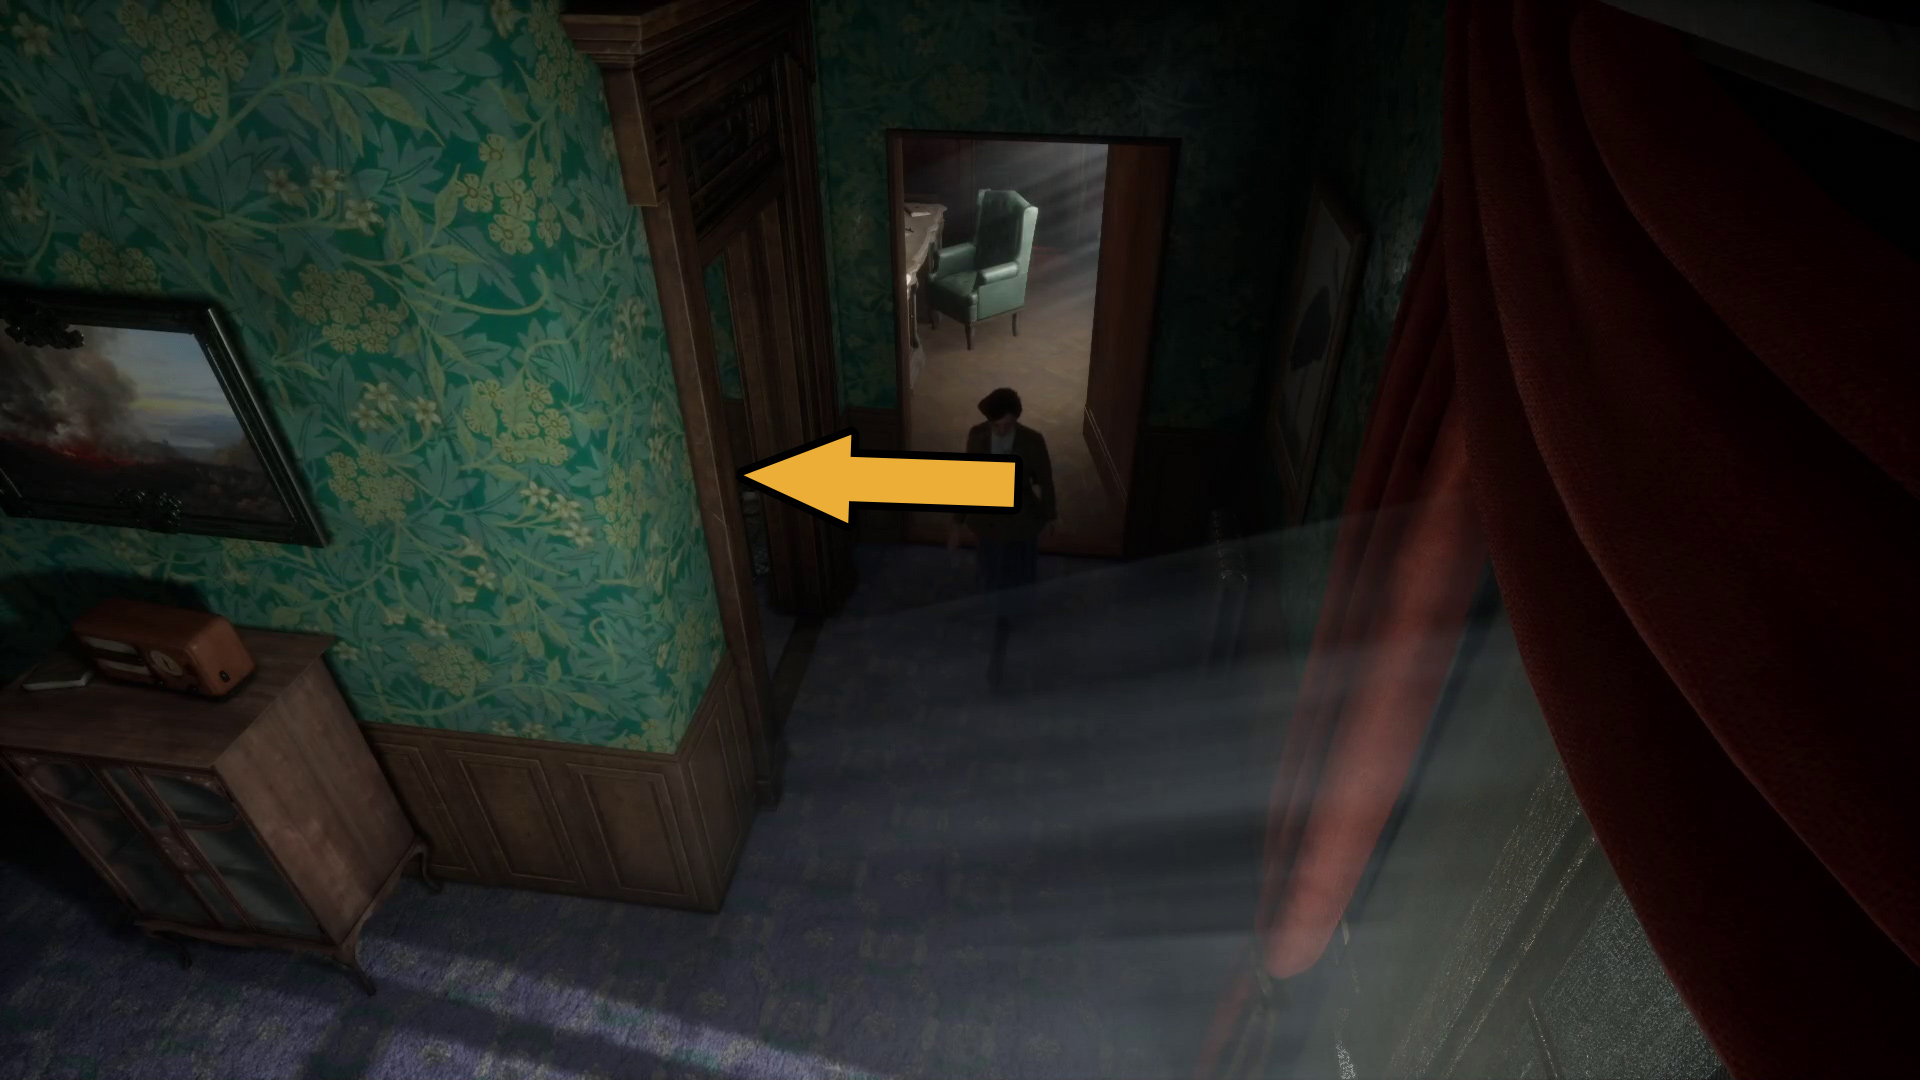
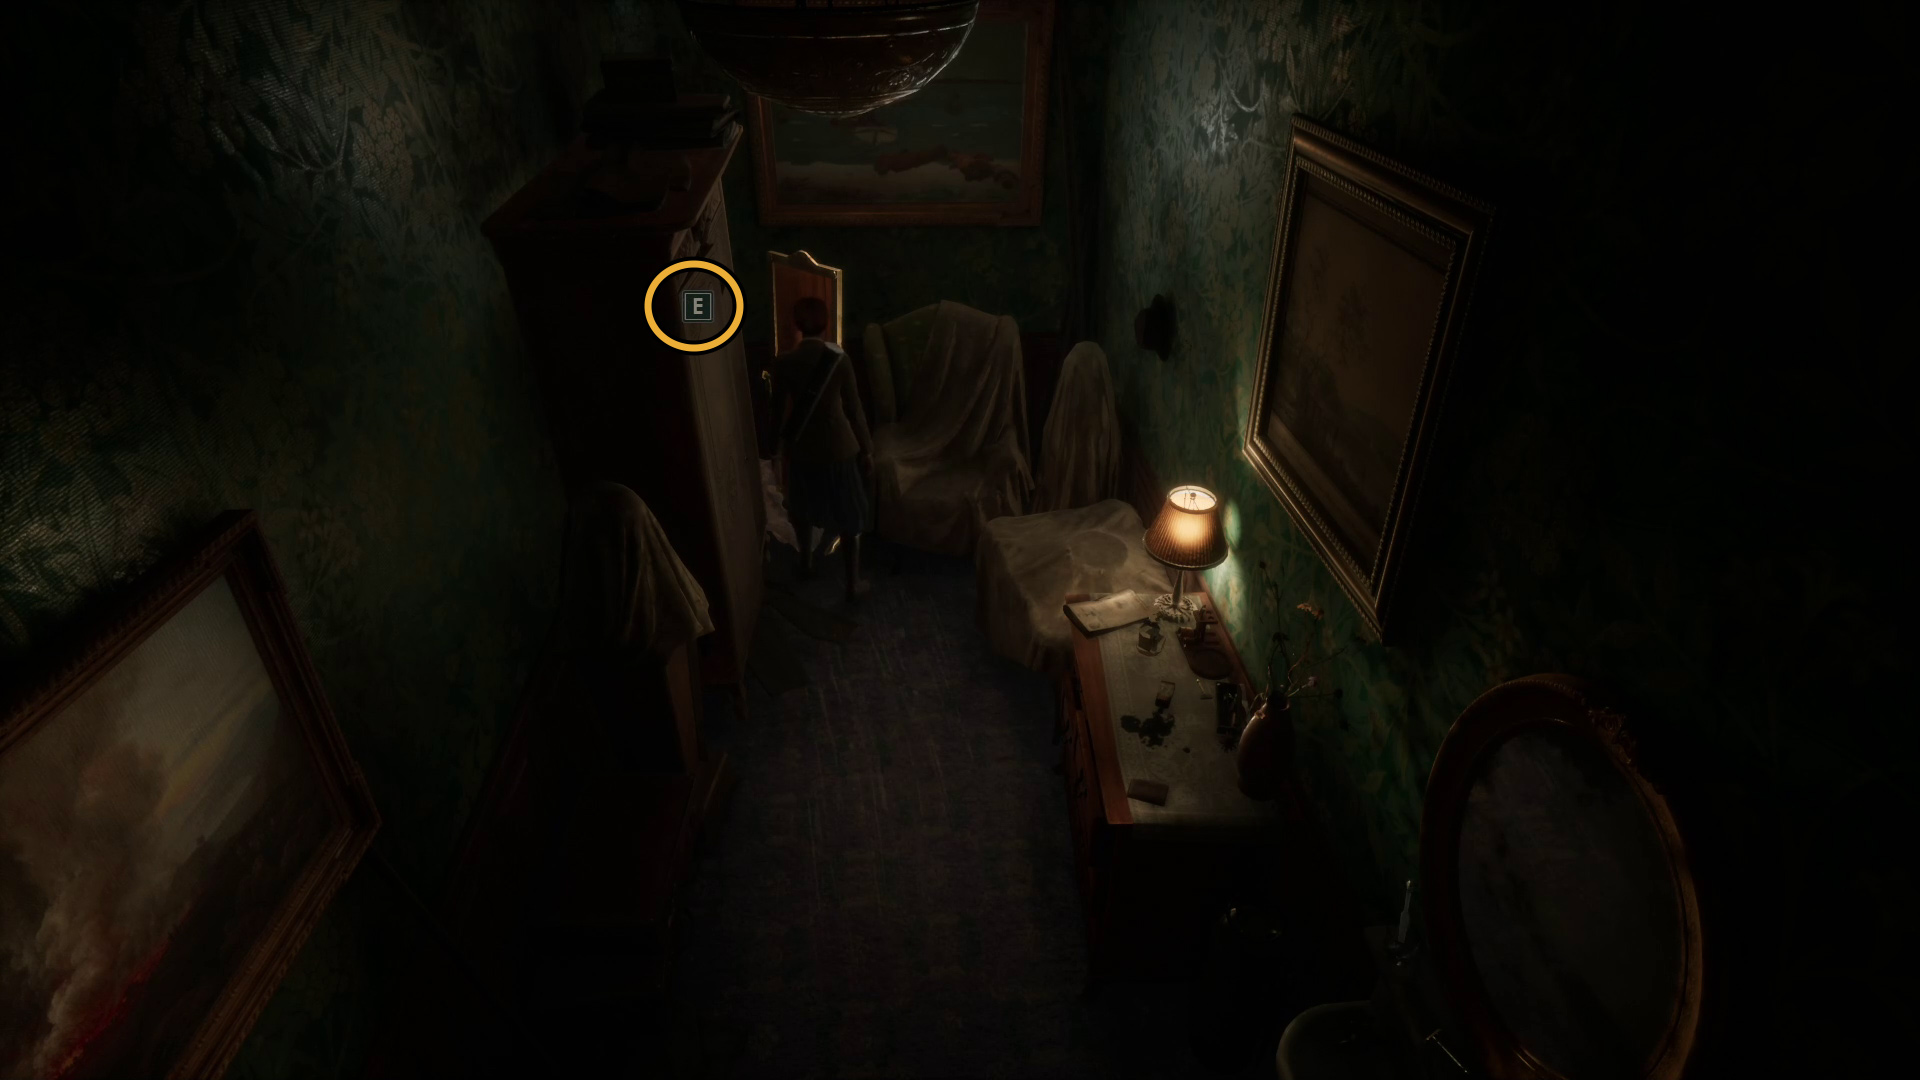
The camera will shift — let go of the controls to reset them to the current space. Don’t continue all the way into the next room, but instead go “left” into the closet (Image 135). Interact with the mirror, and it will reveal a key. Stand in the crack between the mirror and the armoire (Image 136), and you’ll be able to pick up said Furniture Key.
Image 135Image 136
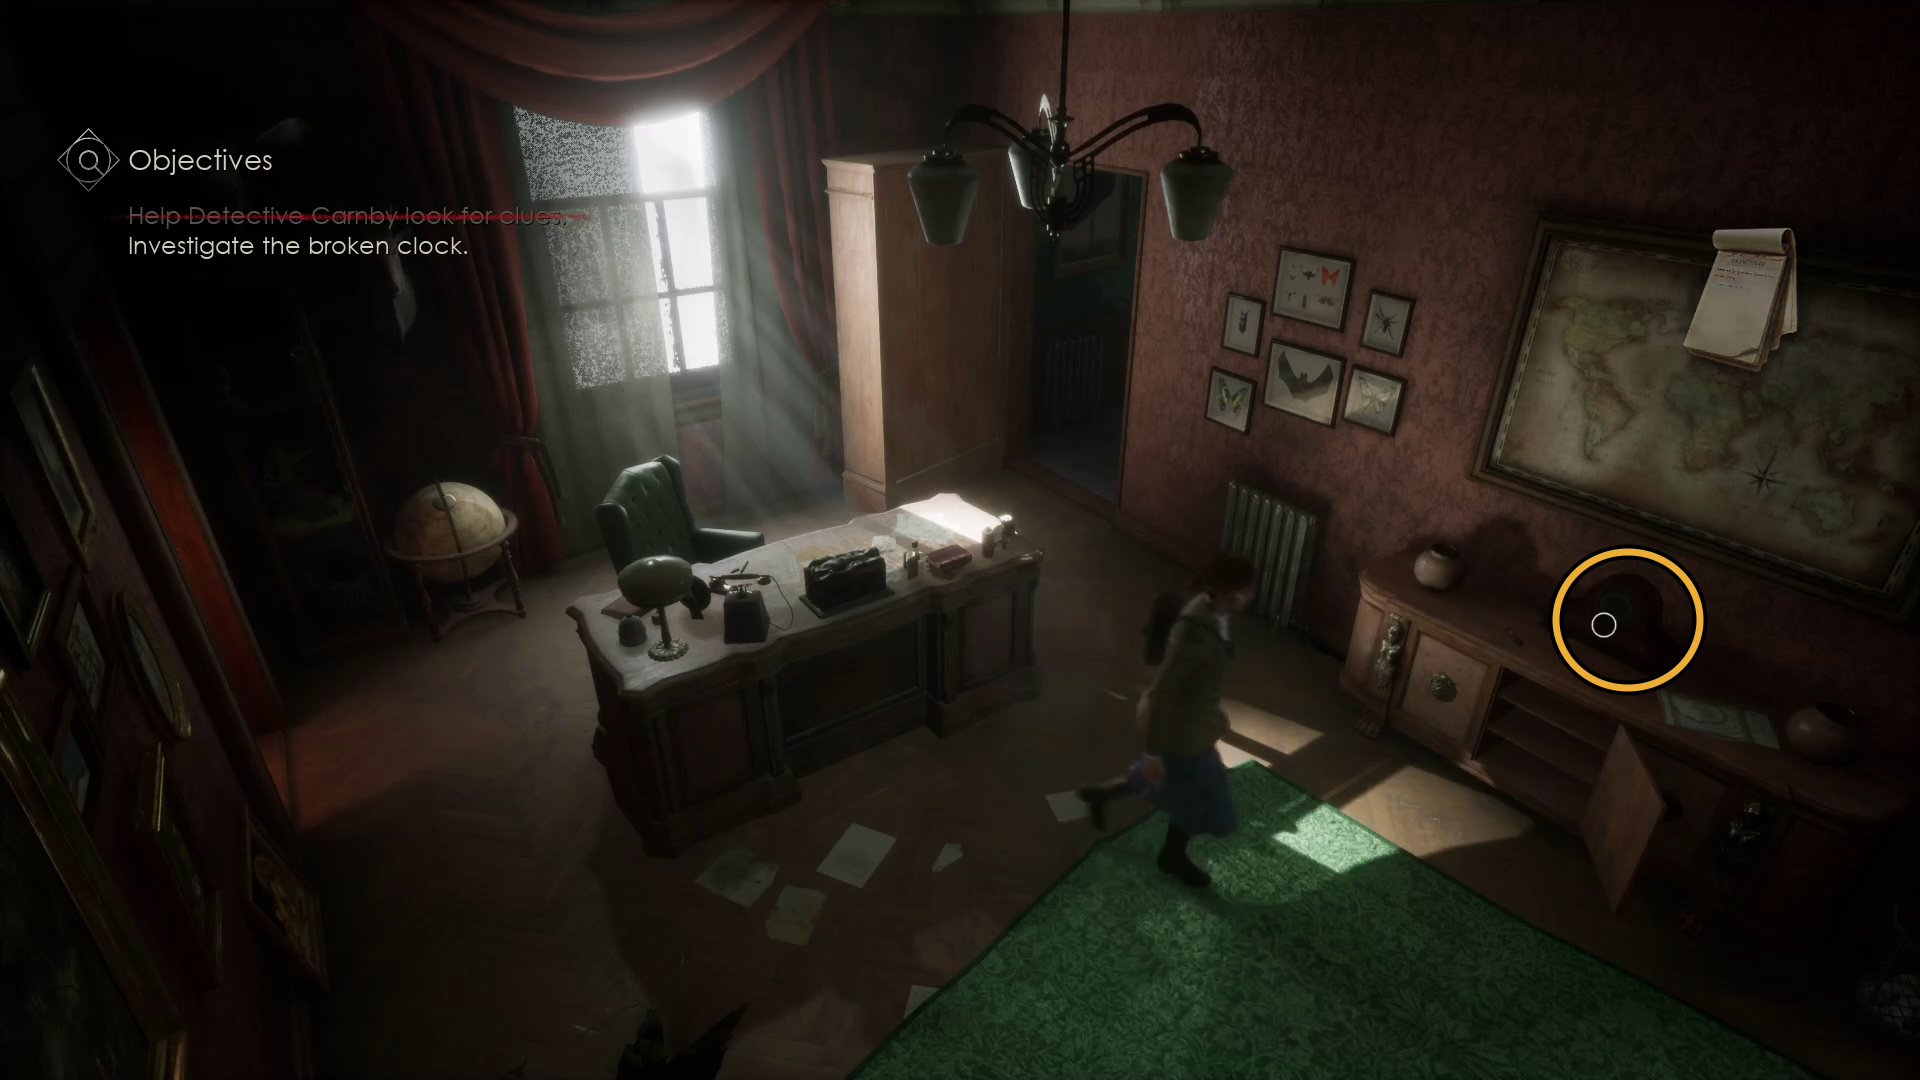
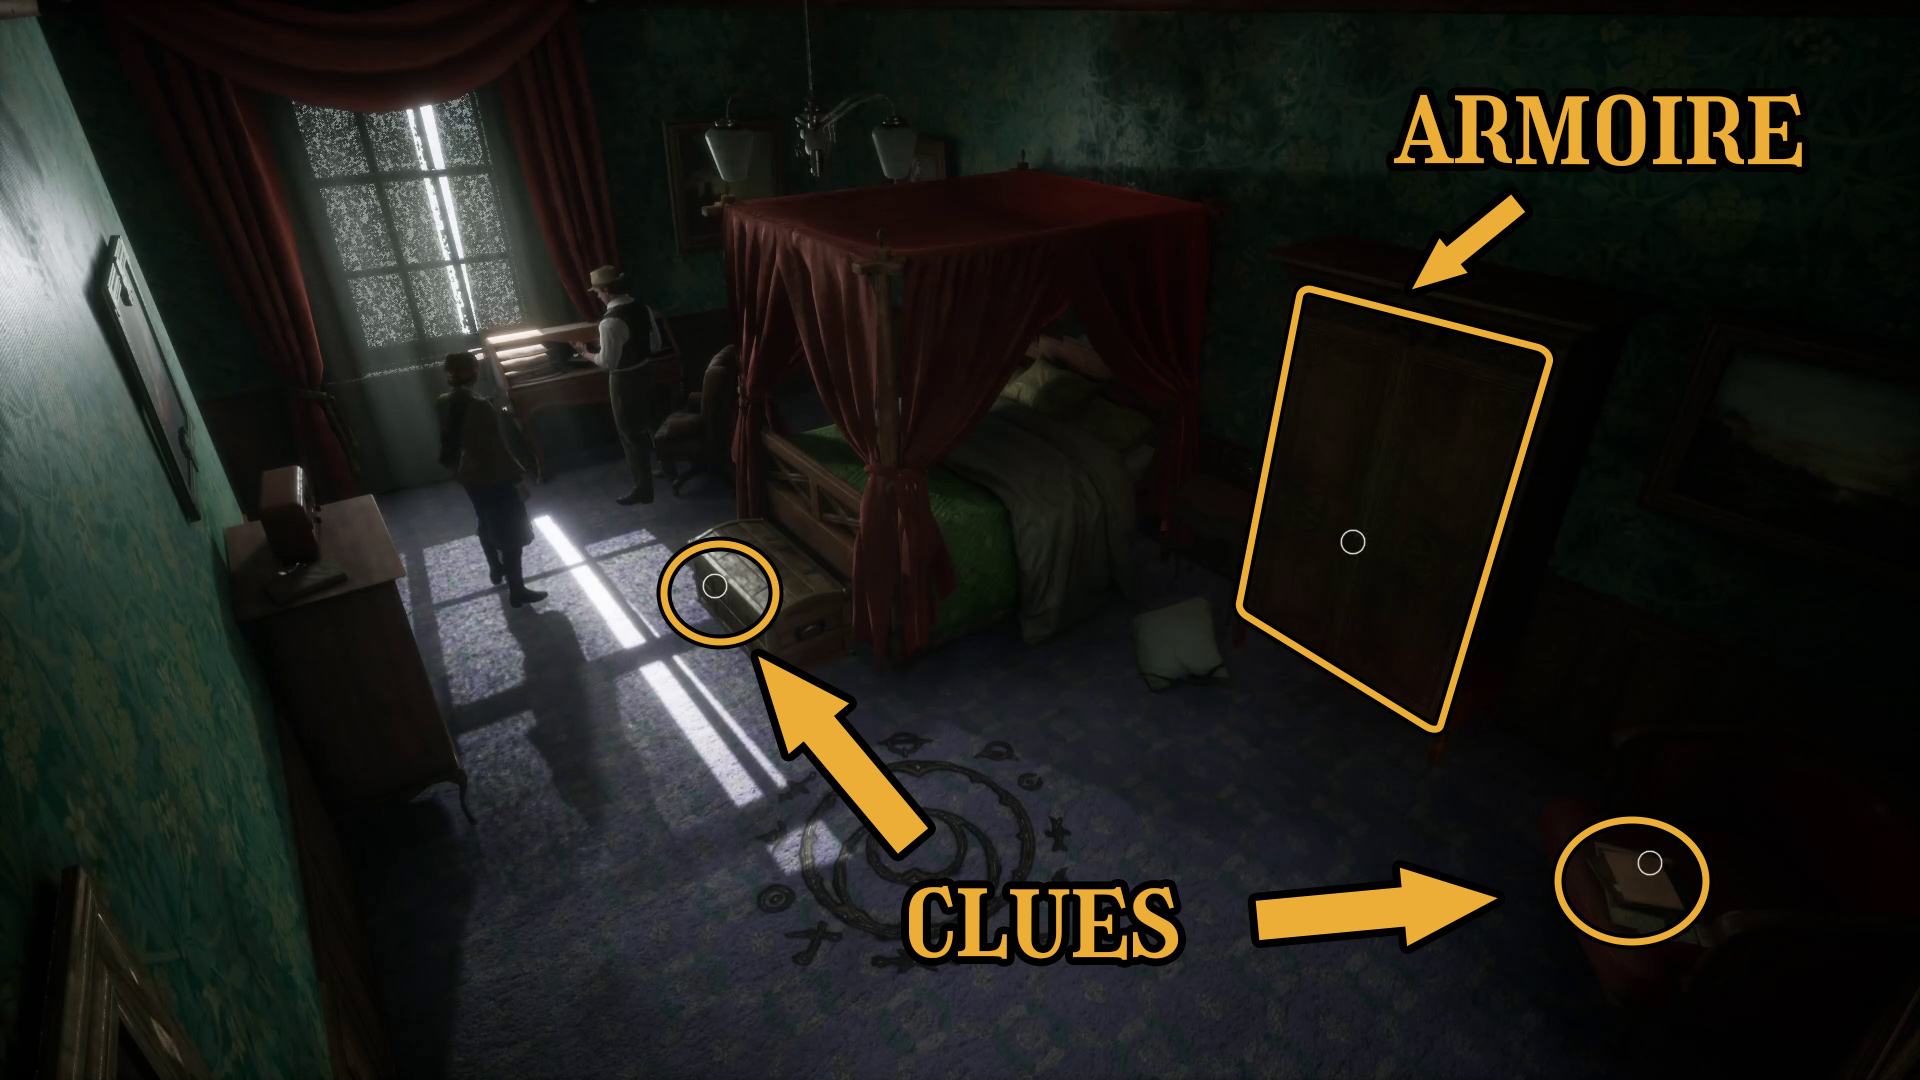
Leave the closet and go “down” so you can see the next room, and talk to Edward/Emily until you can’t anymore. Then open the foot locker to find the First Meeting – Transcript clue, grab the Snake Dagger clue, and use the Furniture Key on the armoire (Image X). After you use the Furniture Key, the phone on Dr. Gray’s desk in the other room will start to ring. Head back into the room, and you’ll lose control of your character and enjoy a spooky phone conversation. When the conversation ends, you can interact with the broken clock to start a puzzle (Image X).
Image 137Image 138
Investigate the Broken Clock
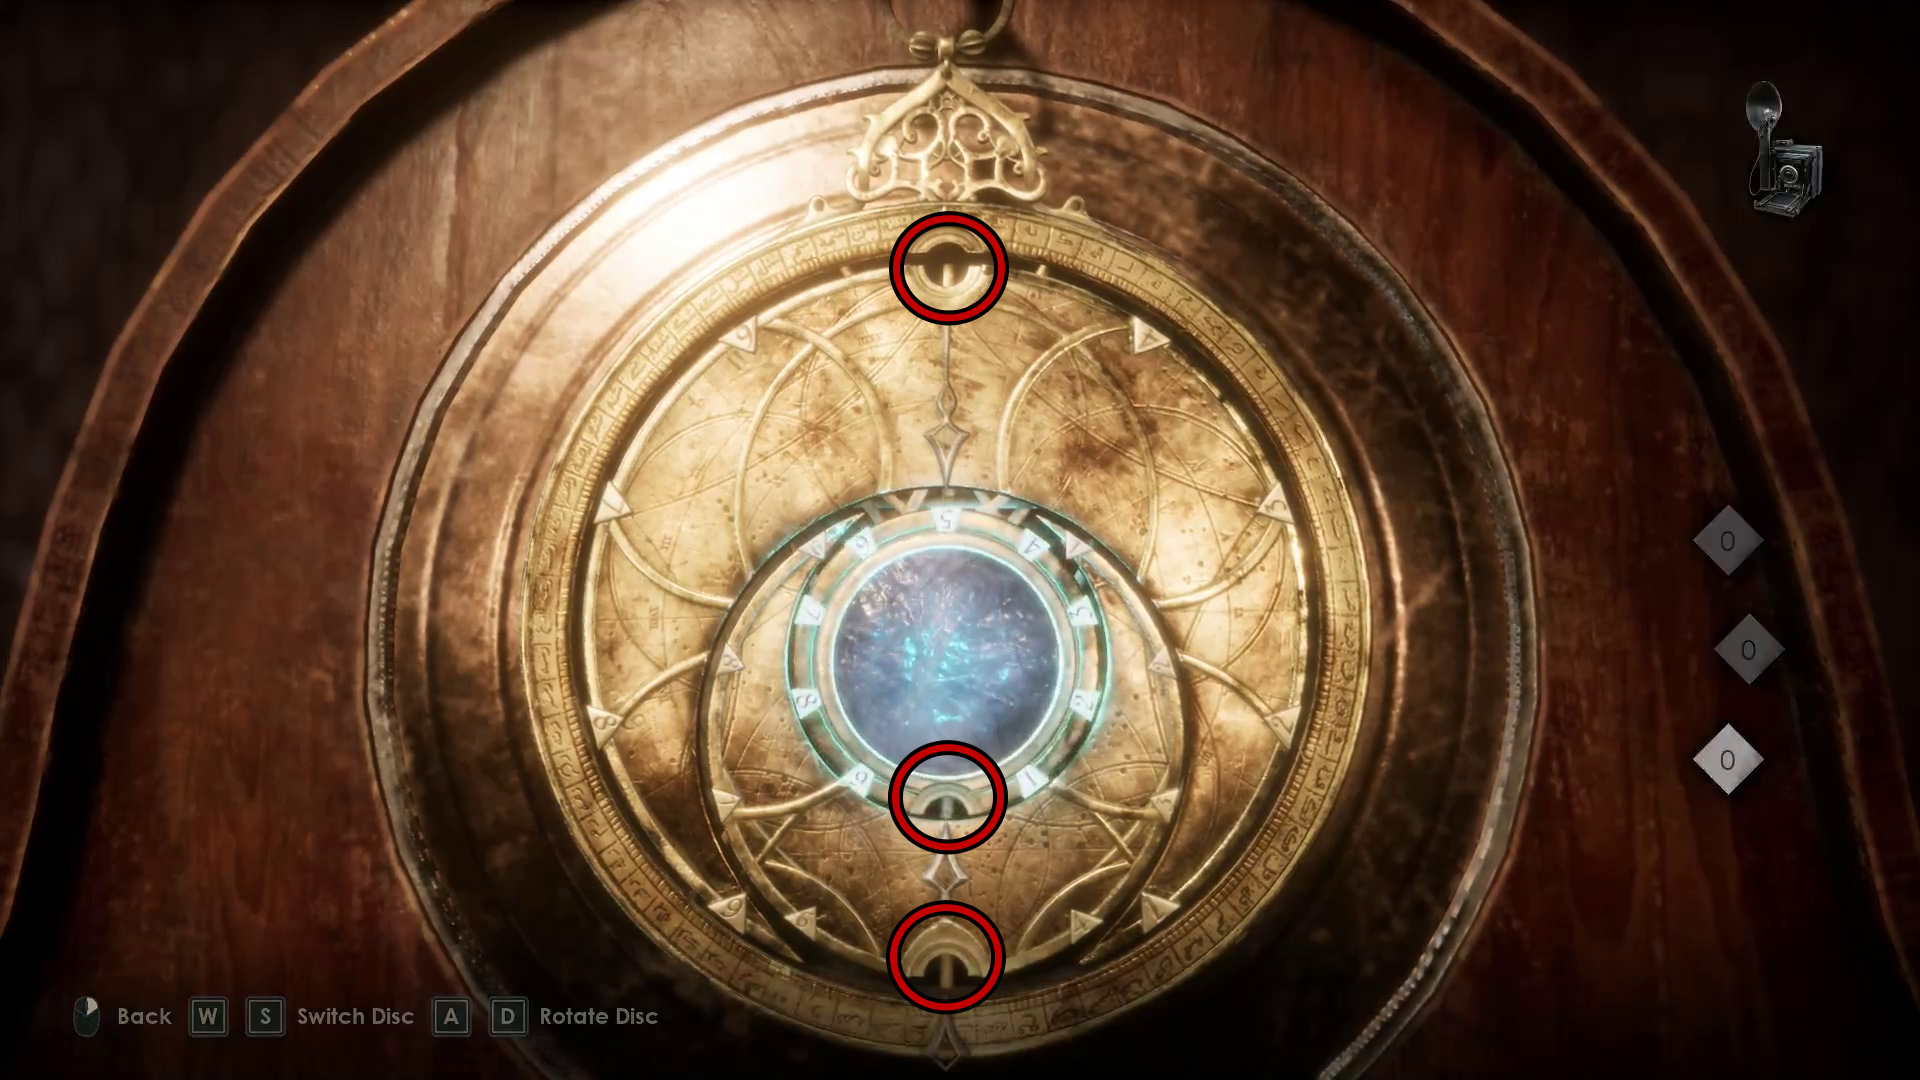
Now you’ve got to use the clue or clues available to you to figure out how to use the talisman on the clock.
The puzzle solution is on the floor in the bedroom.
Set all of the talisman segments to 0 — you can also line them up by the location of the half-circle notches (Image 1). This solution comes from the floor in the bedroom, which shows how the half-circle notch in each segment should be aligned (Image 2).
Image 1Image 2
Enter the gate to another world
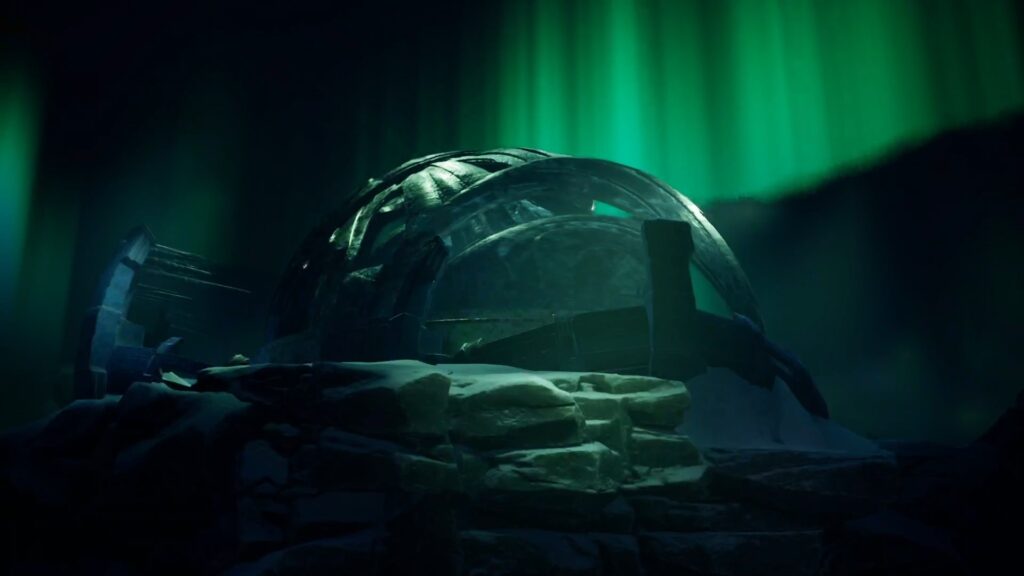
After solving the puzzle, go back into the bedroom and another conversation with Emily/Edward will occur, and you’ll complete an entire objective (enter a gate to another world) without ever having to touch the controls!
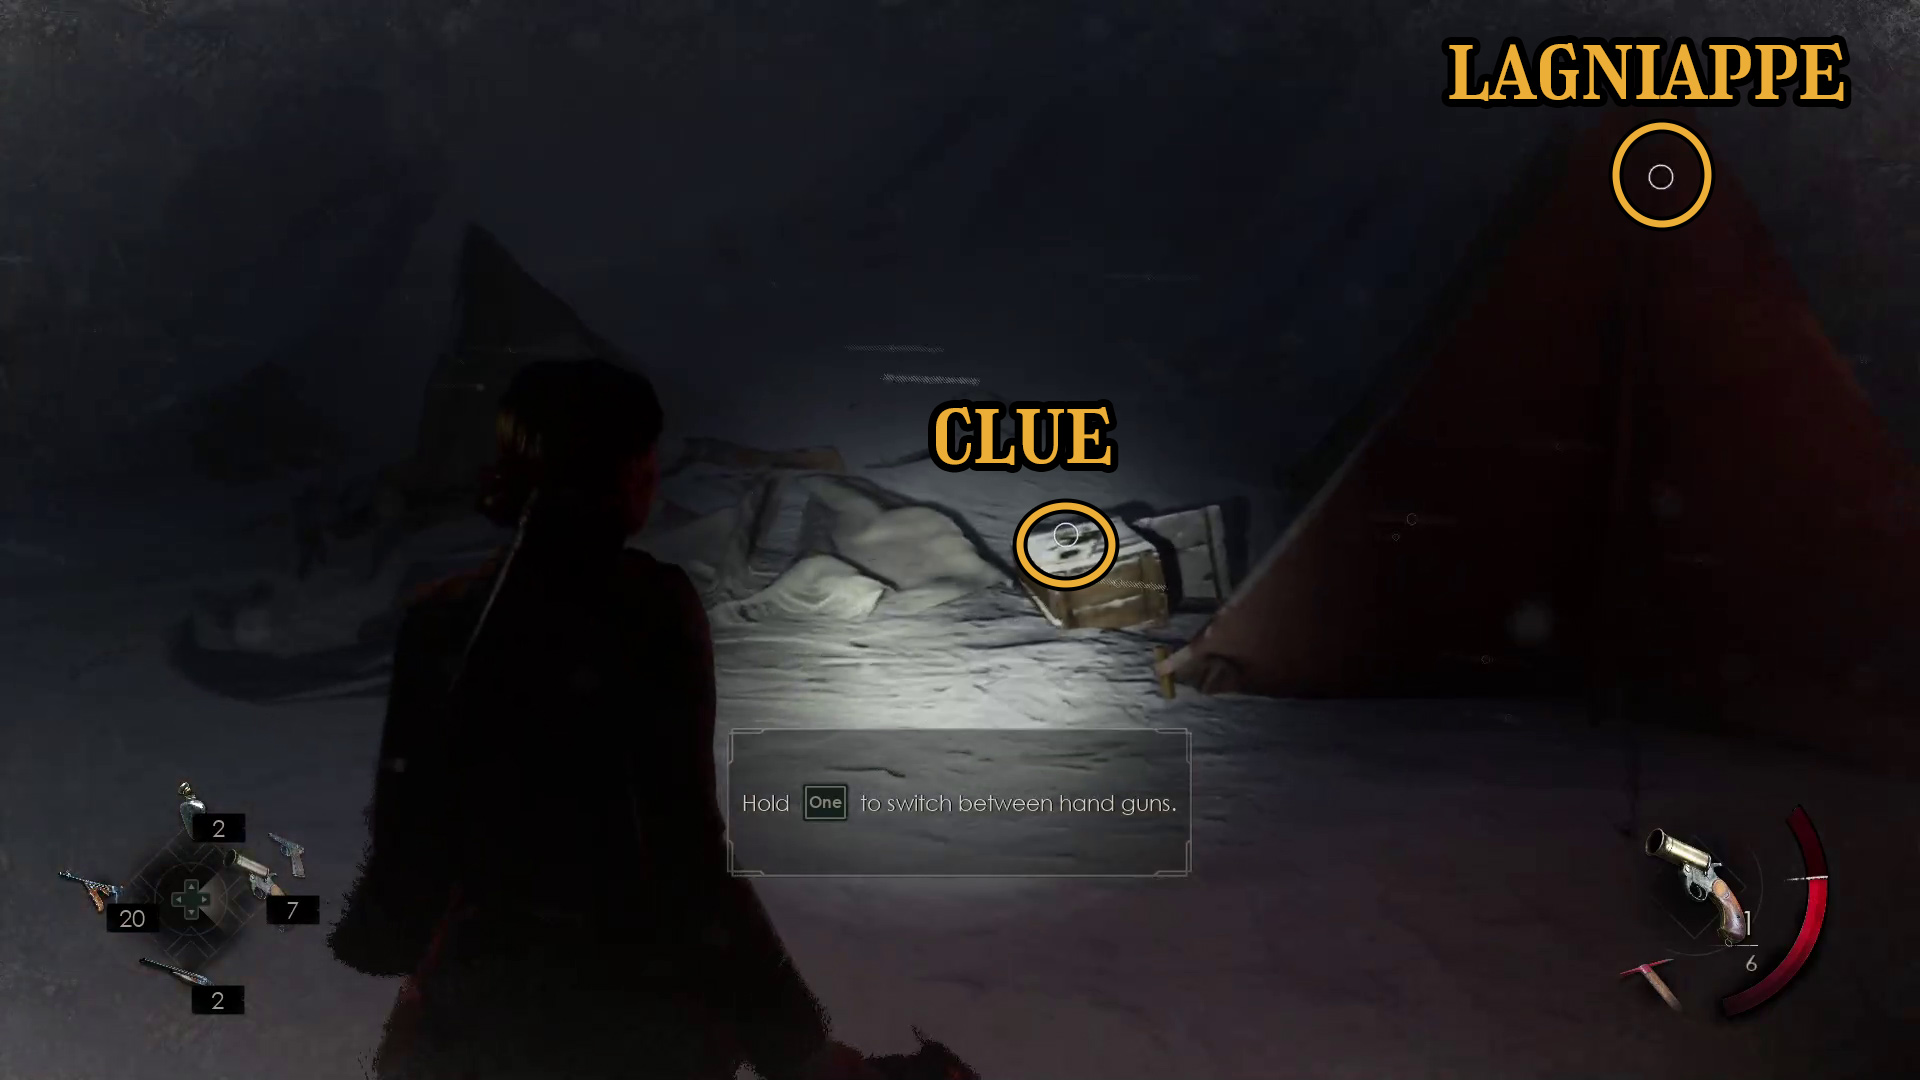
In the icy other world, walk forward while holding the Investigate key to not miss any possible loot that spawns. Turn right to find a hole that leads outside. By the fire just ahead is a flare gun and ammo for it (Image 139) –to swap between the hand gun and the flare gun, hold the hand gun hotkey. On the tent to the right of the fire is the Sallow Offering Lagniappe (Image 140), and you’ll find The Greenland Expedition clue on the crates to the left of the tent.
Image 139Image 140
Light your way forward/Keep going
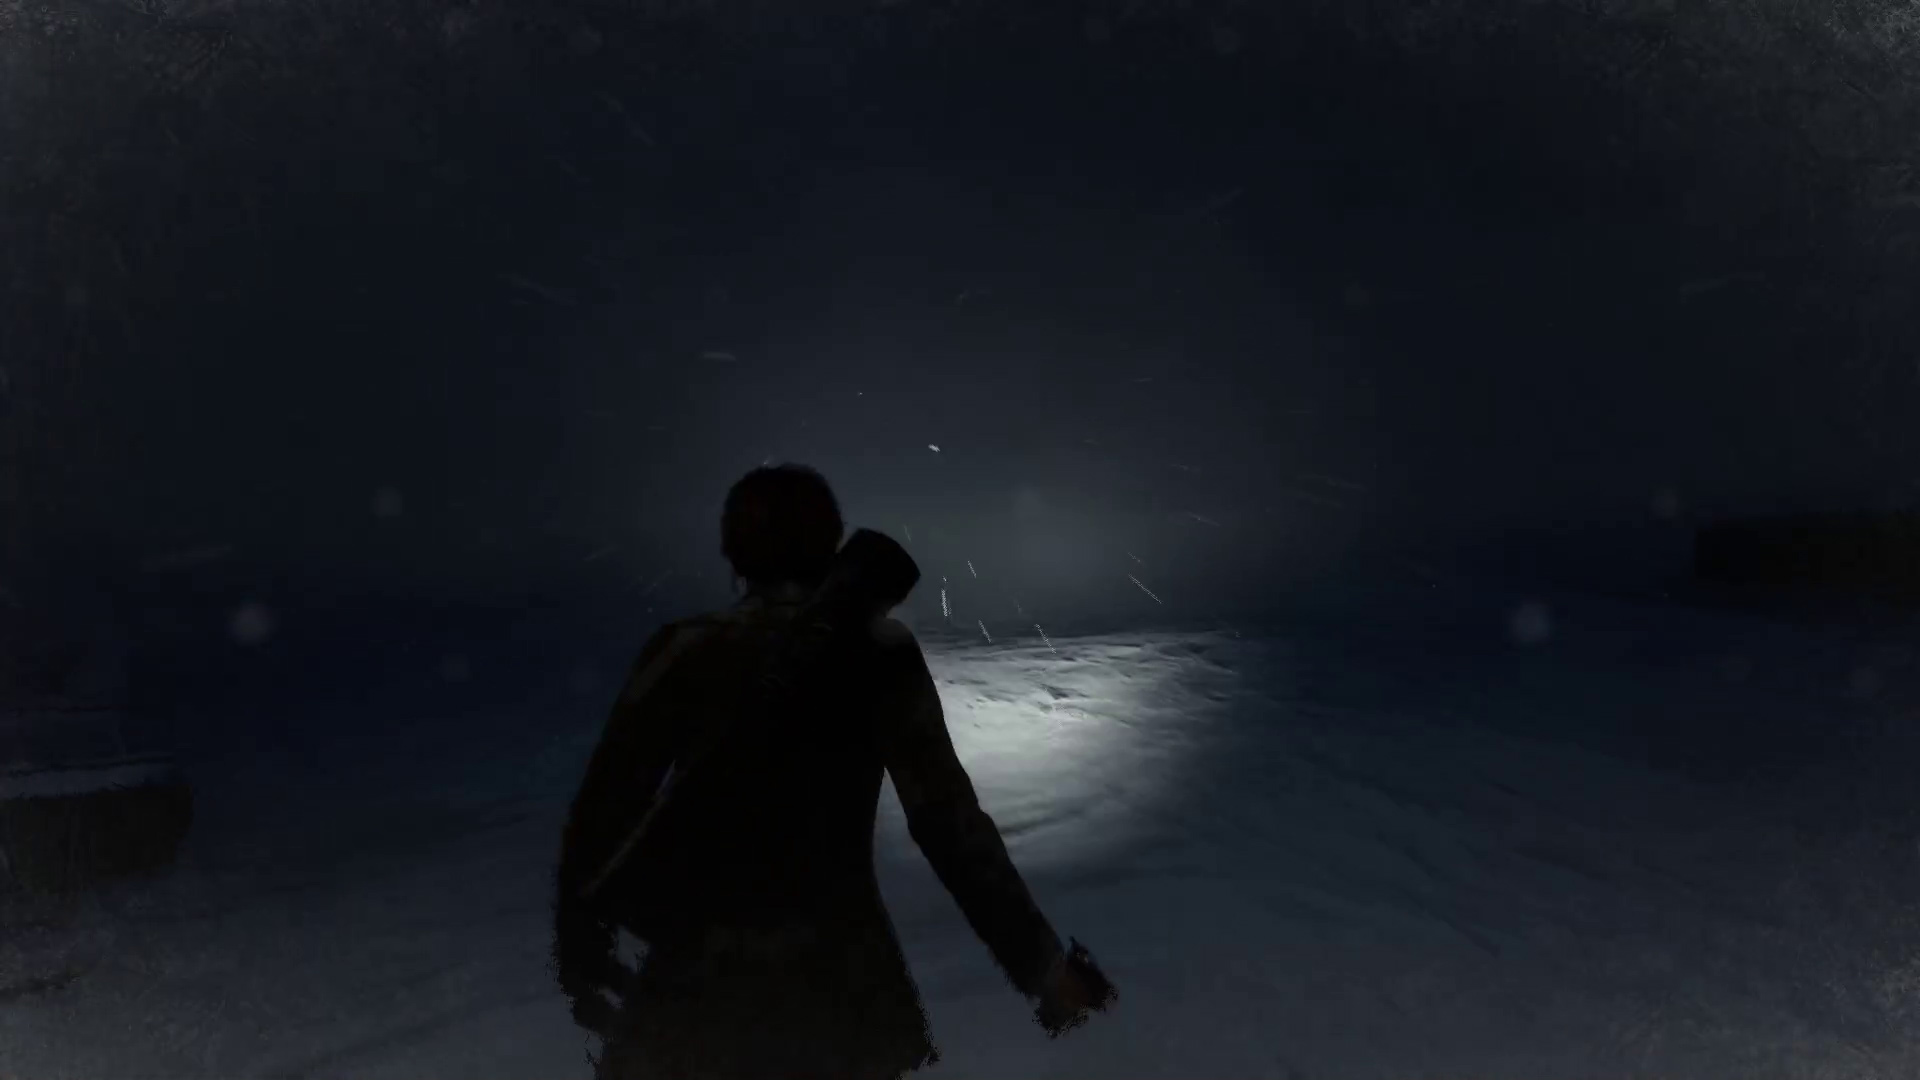
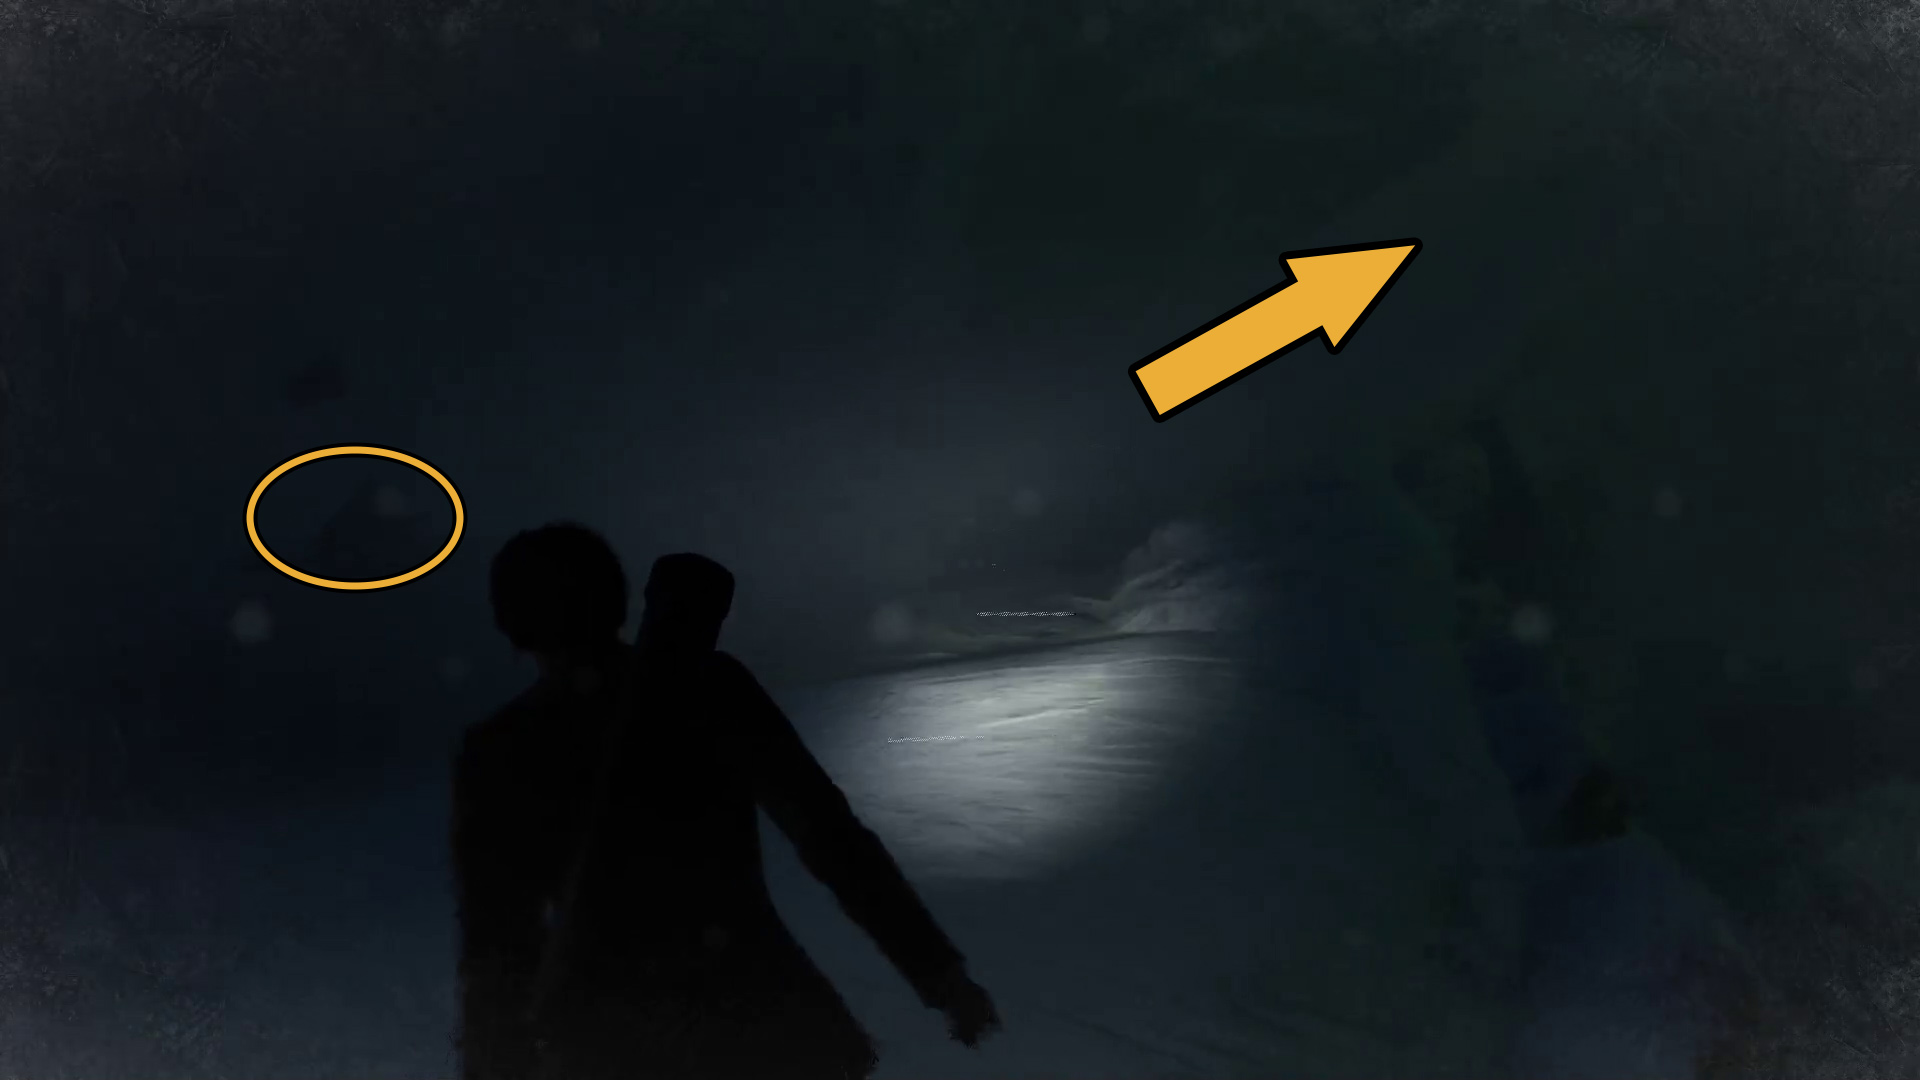
Now you need to head out into the snow. Theoretically, the flare gun is supposed to help you navigate here, leading you to camps with lanterns you can light… but it really isn’t necessary. Simply head straight into the wind, away from the camp (Image 141). If you get turned around, just face the direction the wind is coming from and keep going. Don’t stop until you reach the cliff edge. From there, turn left, check the nearby camp for loot, then follow the path up the hill (Image 142).
Image 141Image 142
Investigate the ruins
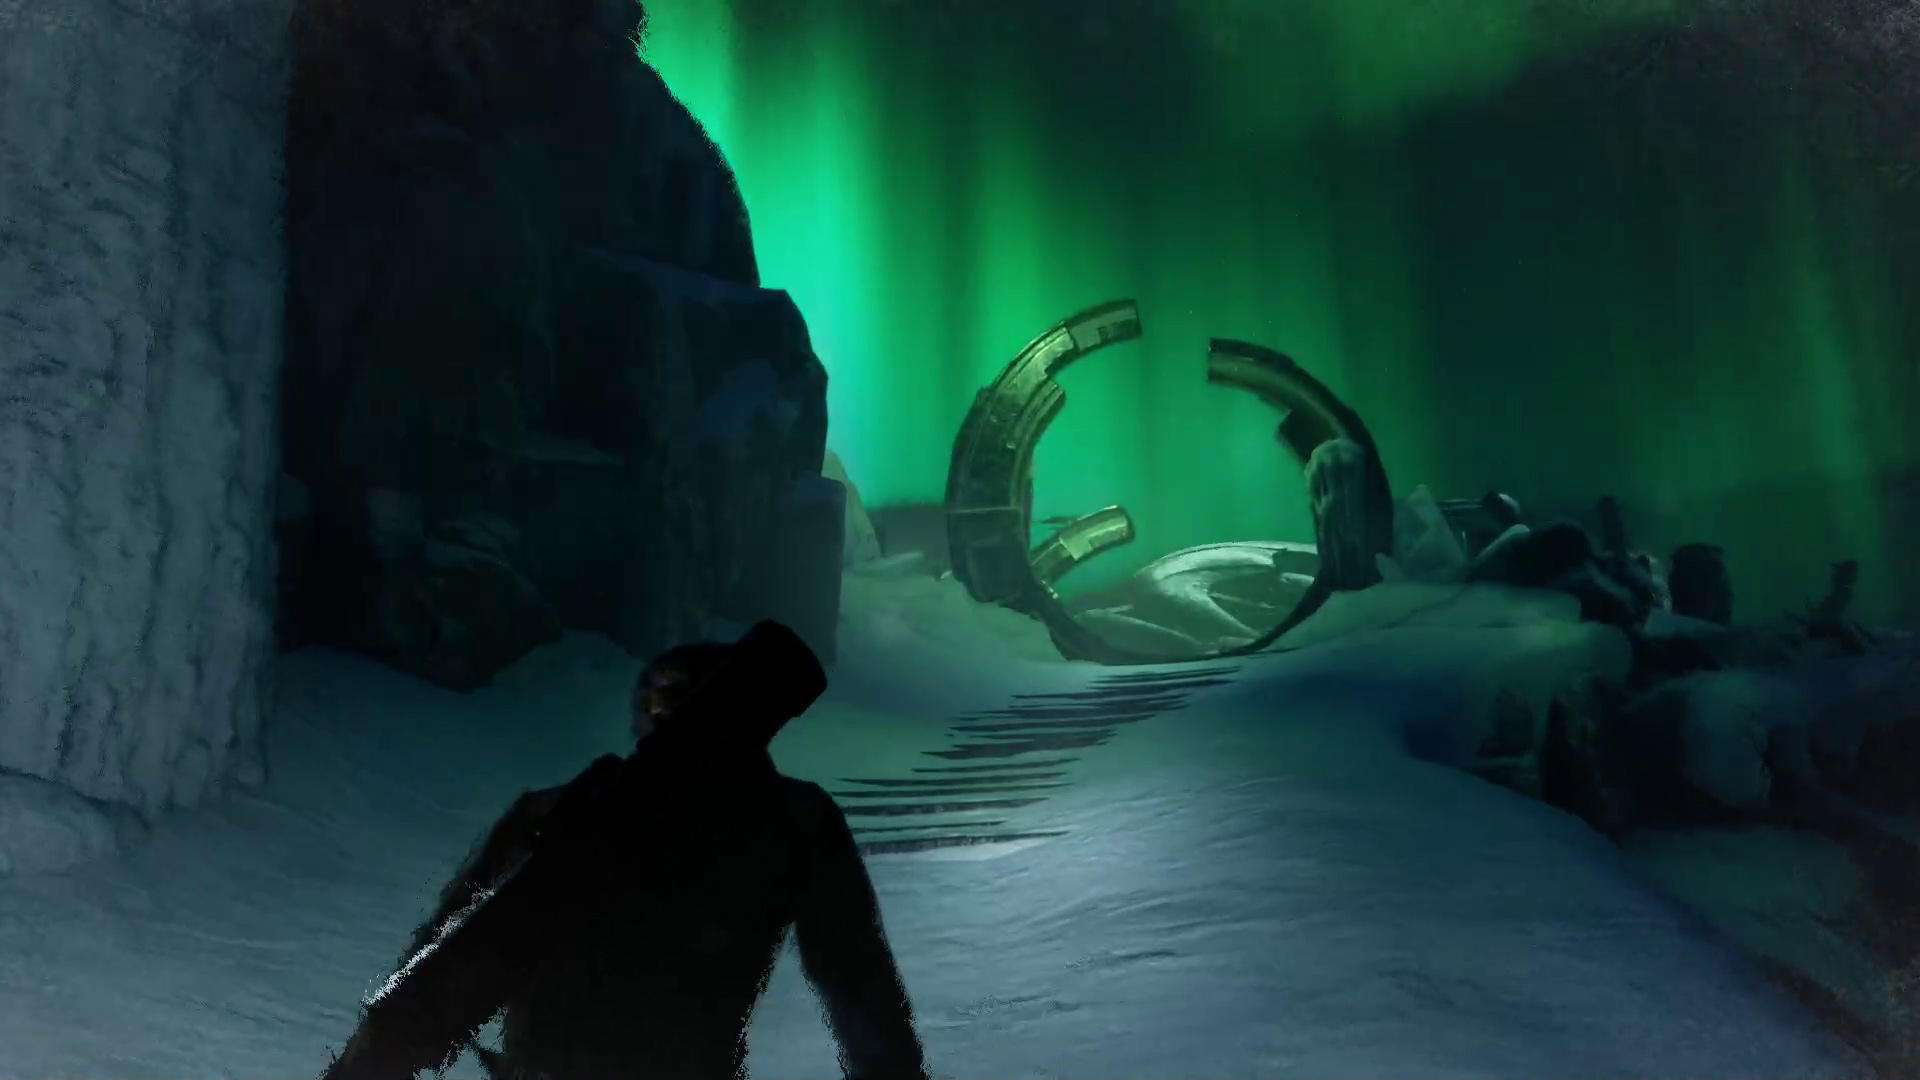
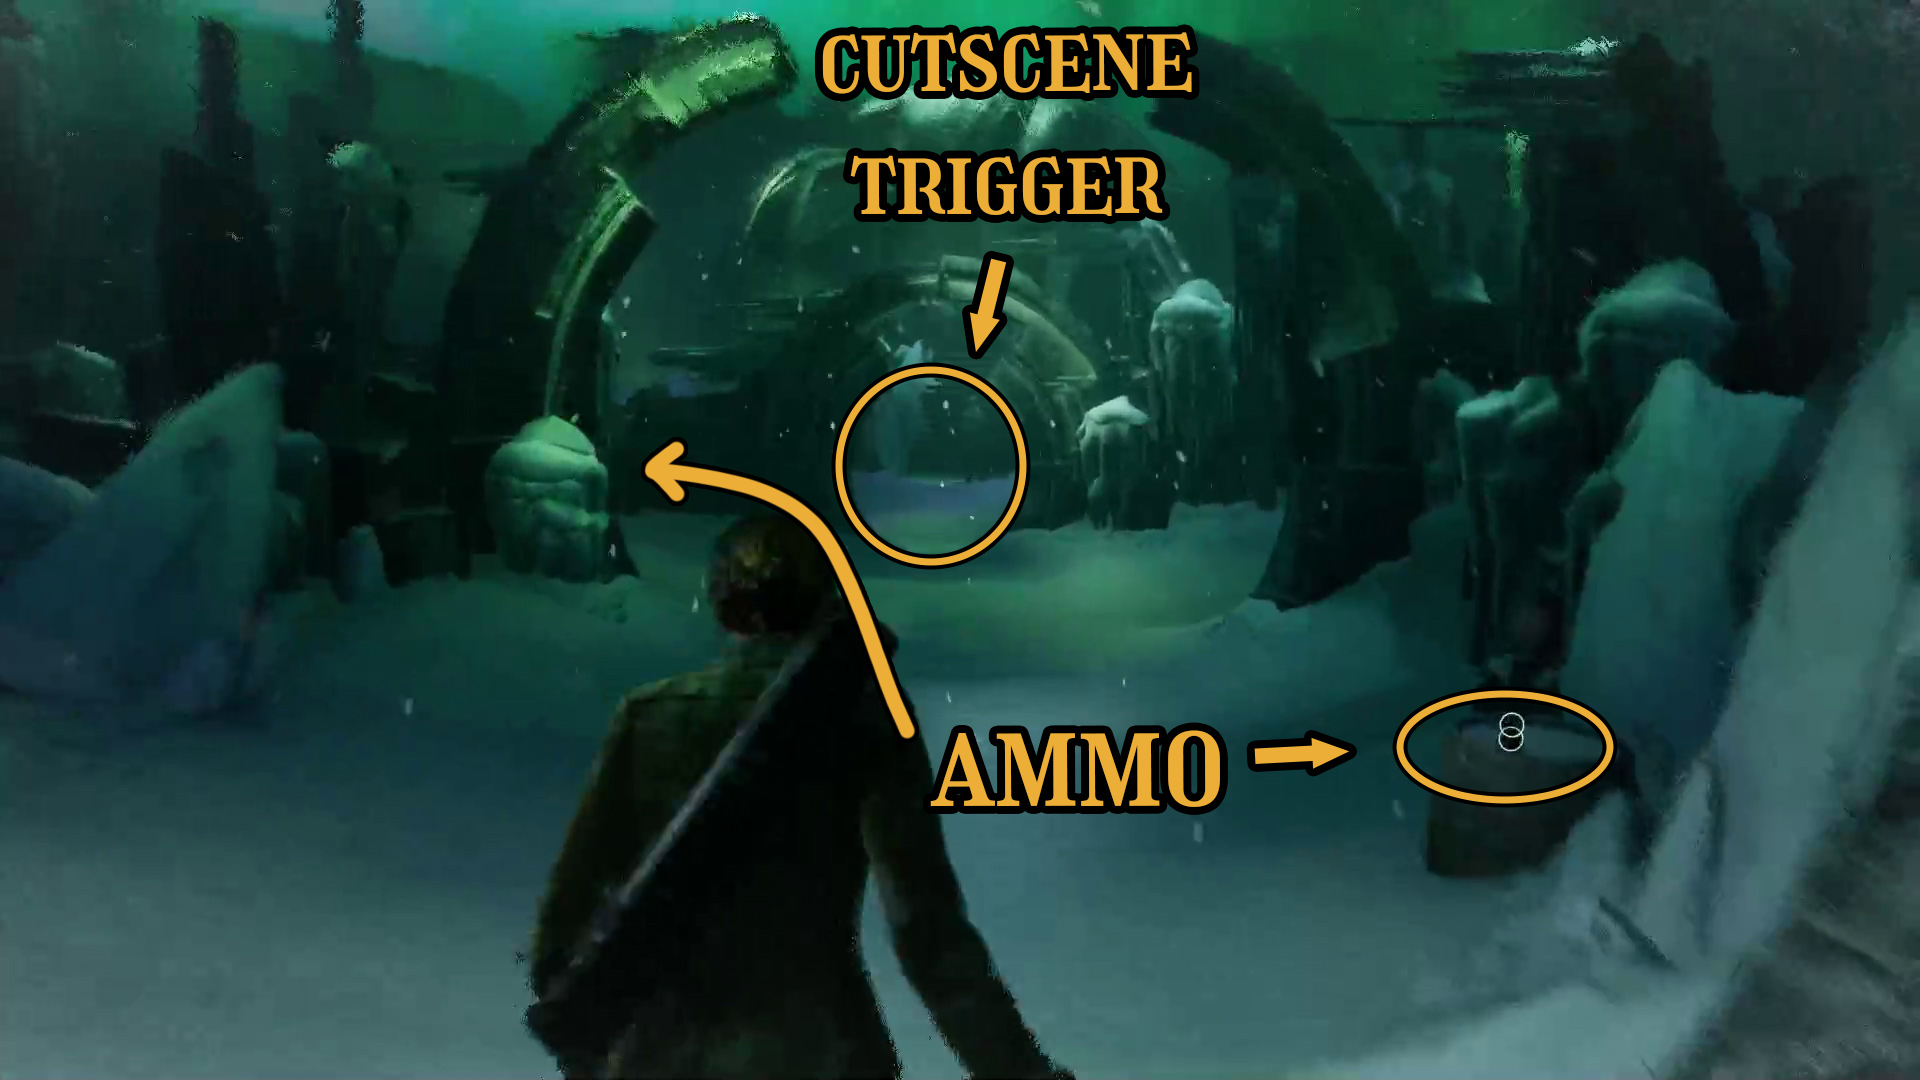
About halfway up the path, you’ll find some boxes with loot at the base of a red flag — you’ll need ammo soon, so stock up! Grab the nearby icepick as well if you don’t have a fresh melee weapon. When you approach the top of the path, you’ll notice your character starts to walk slow (Image 143); make sure you avoid returning here when in combat with the upcoming enemy. Upon reaching the top of the path, grab the ammo from the barrel on your right and around the corner on the left, then continue forward through the second circular archway to trigger a brief cutscene (Image 144).
Image 143Image 144
Kill Jacob van Ostadte
Jacob is pretty slow, and if he gets close you can simply spam the dodge button to get away from him — put enough bullets in him, and he’ll go down after not too long. We’ve got a more detailed guide on facing Jacob if you need more help:
Once Jacob goes down, you can check the area for any bullets you either didn’t grab or couldn’t pick up before — you can find ammo on top of barrels scattered around the area. When you’re ready, continue forward up the stairs and onto the platform (Image X).
Align the Stars
Once in the Stellarium, you’ll need to solve a puzzle.
You need to interact with the little post near the entrance to the Stellarium, and somehow activate it. Then, you’ll need to do as the objective says, and “align the stars”.
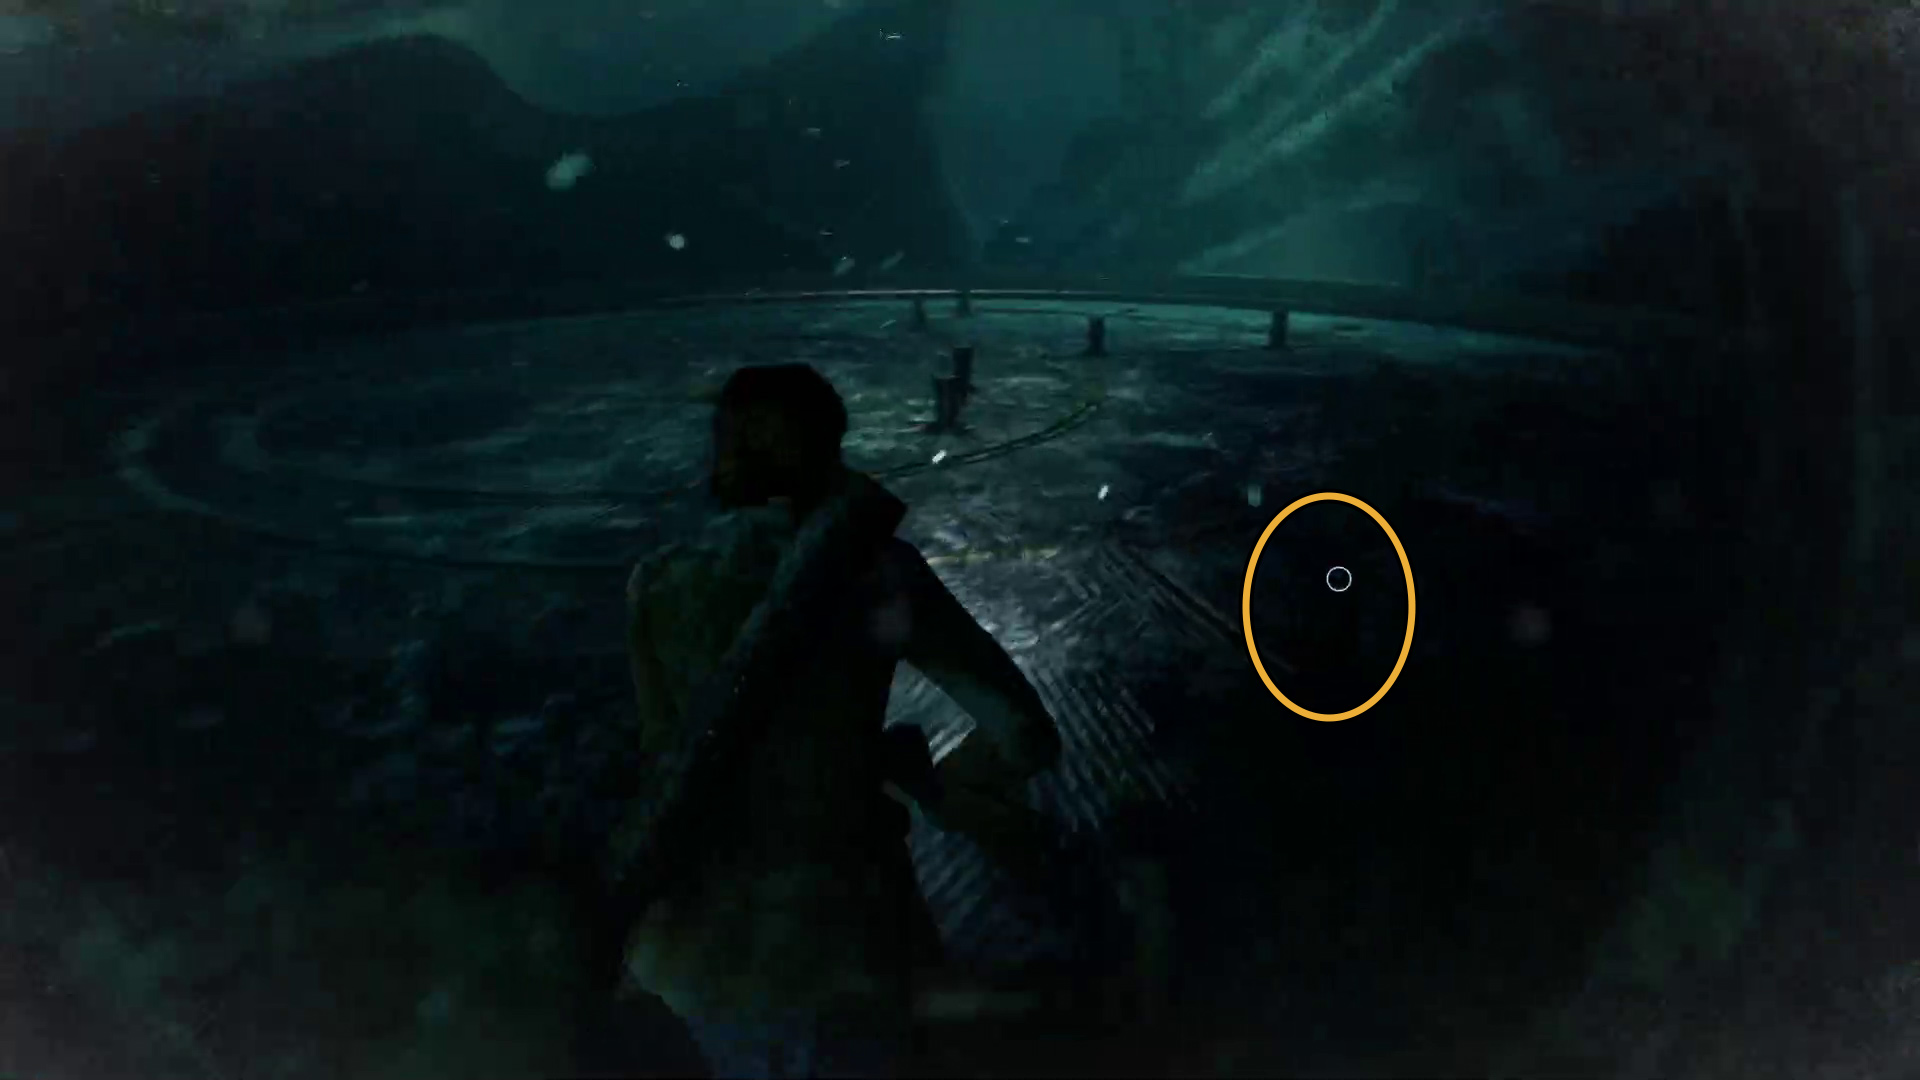
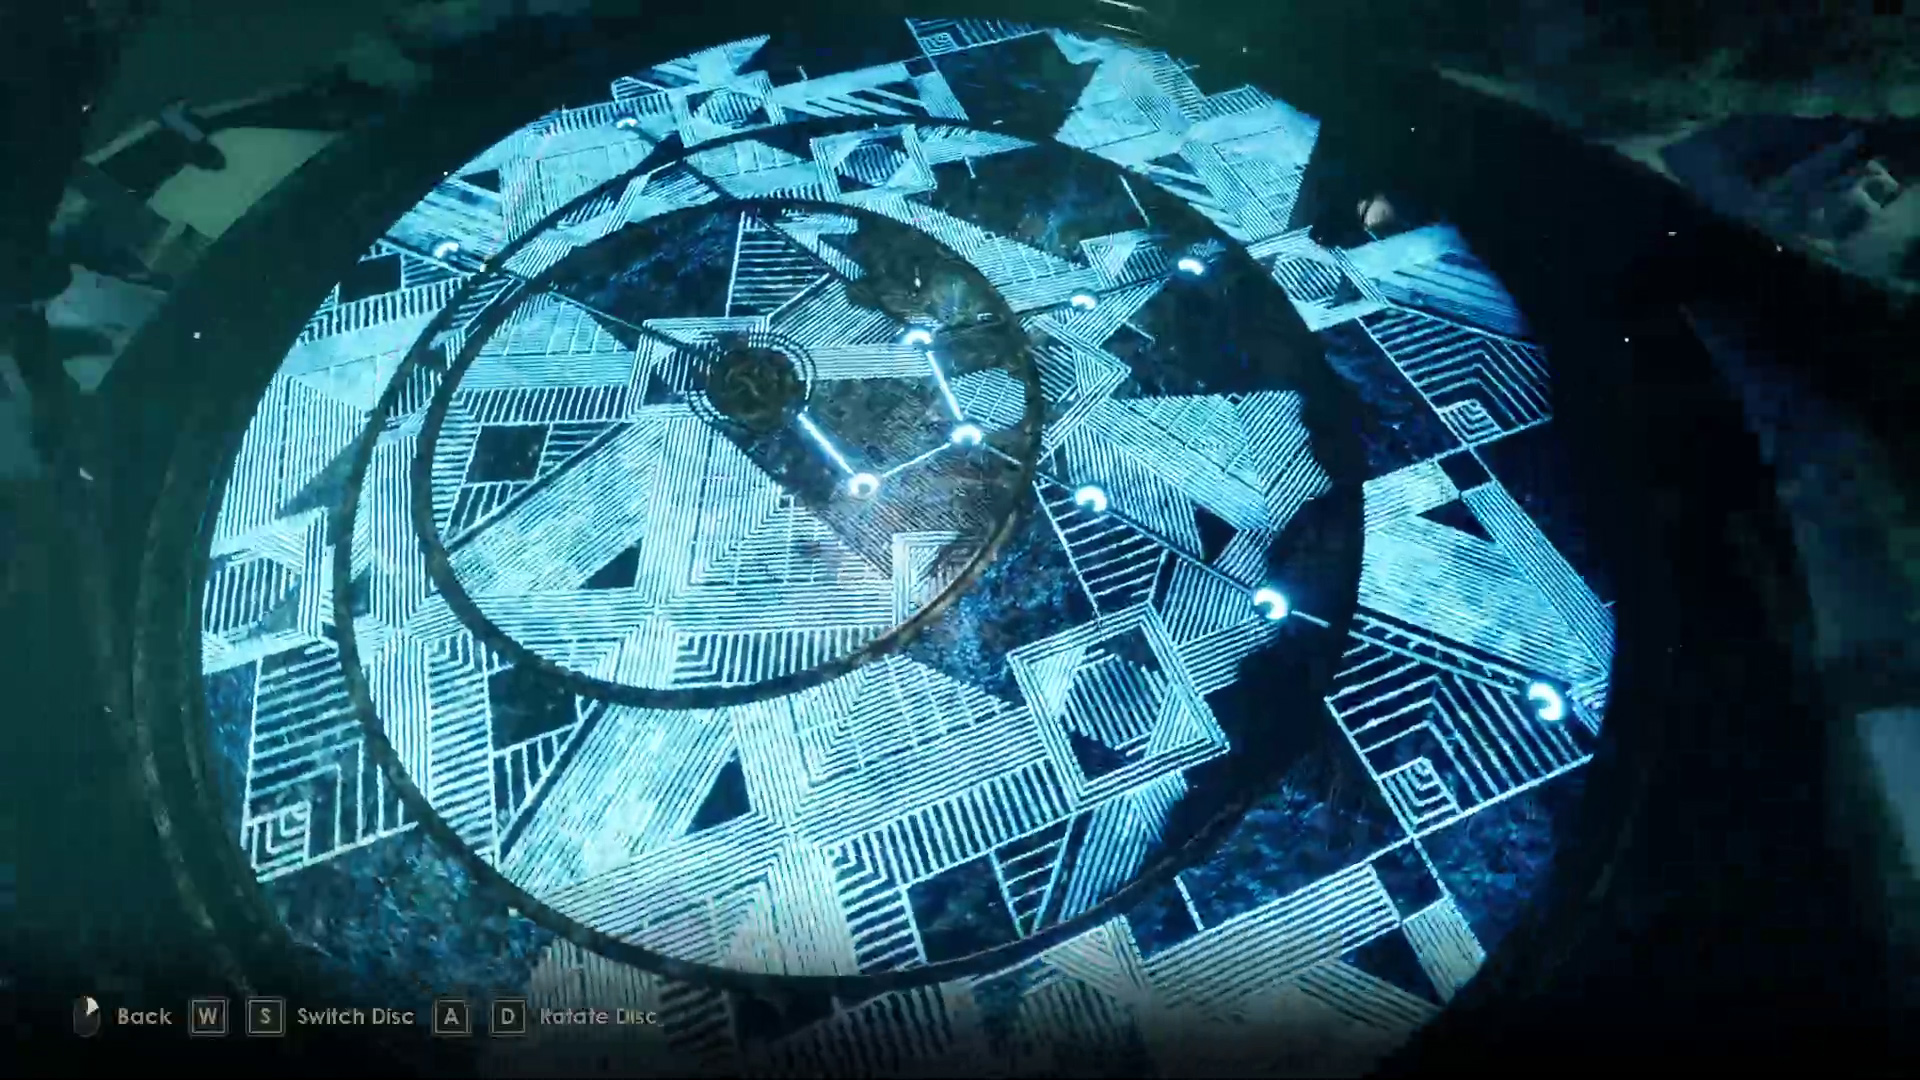
Interact with the small post (Tight Lid) near the entrance to the Stellarium (Image 1), and use the Sacraficial Dagger on it. It will open, and you can then use the Talisman on it. Doing so will let you rotate the three discs (Image 2). Rotate the discs as described:
Outer disc – Right x2
Middle disc – Right x4
Intter disc – Left x2
Image 1Image 2
Kill Jacob van Ostadte
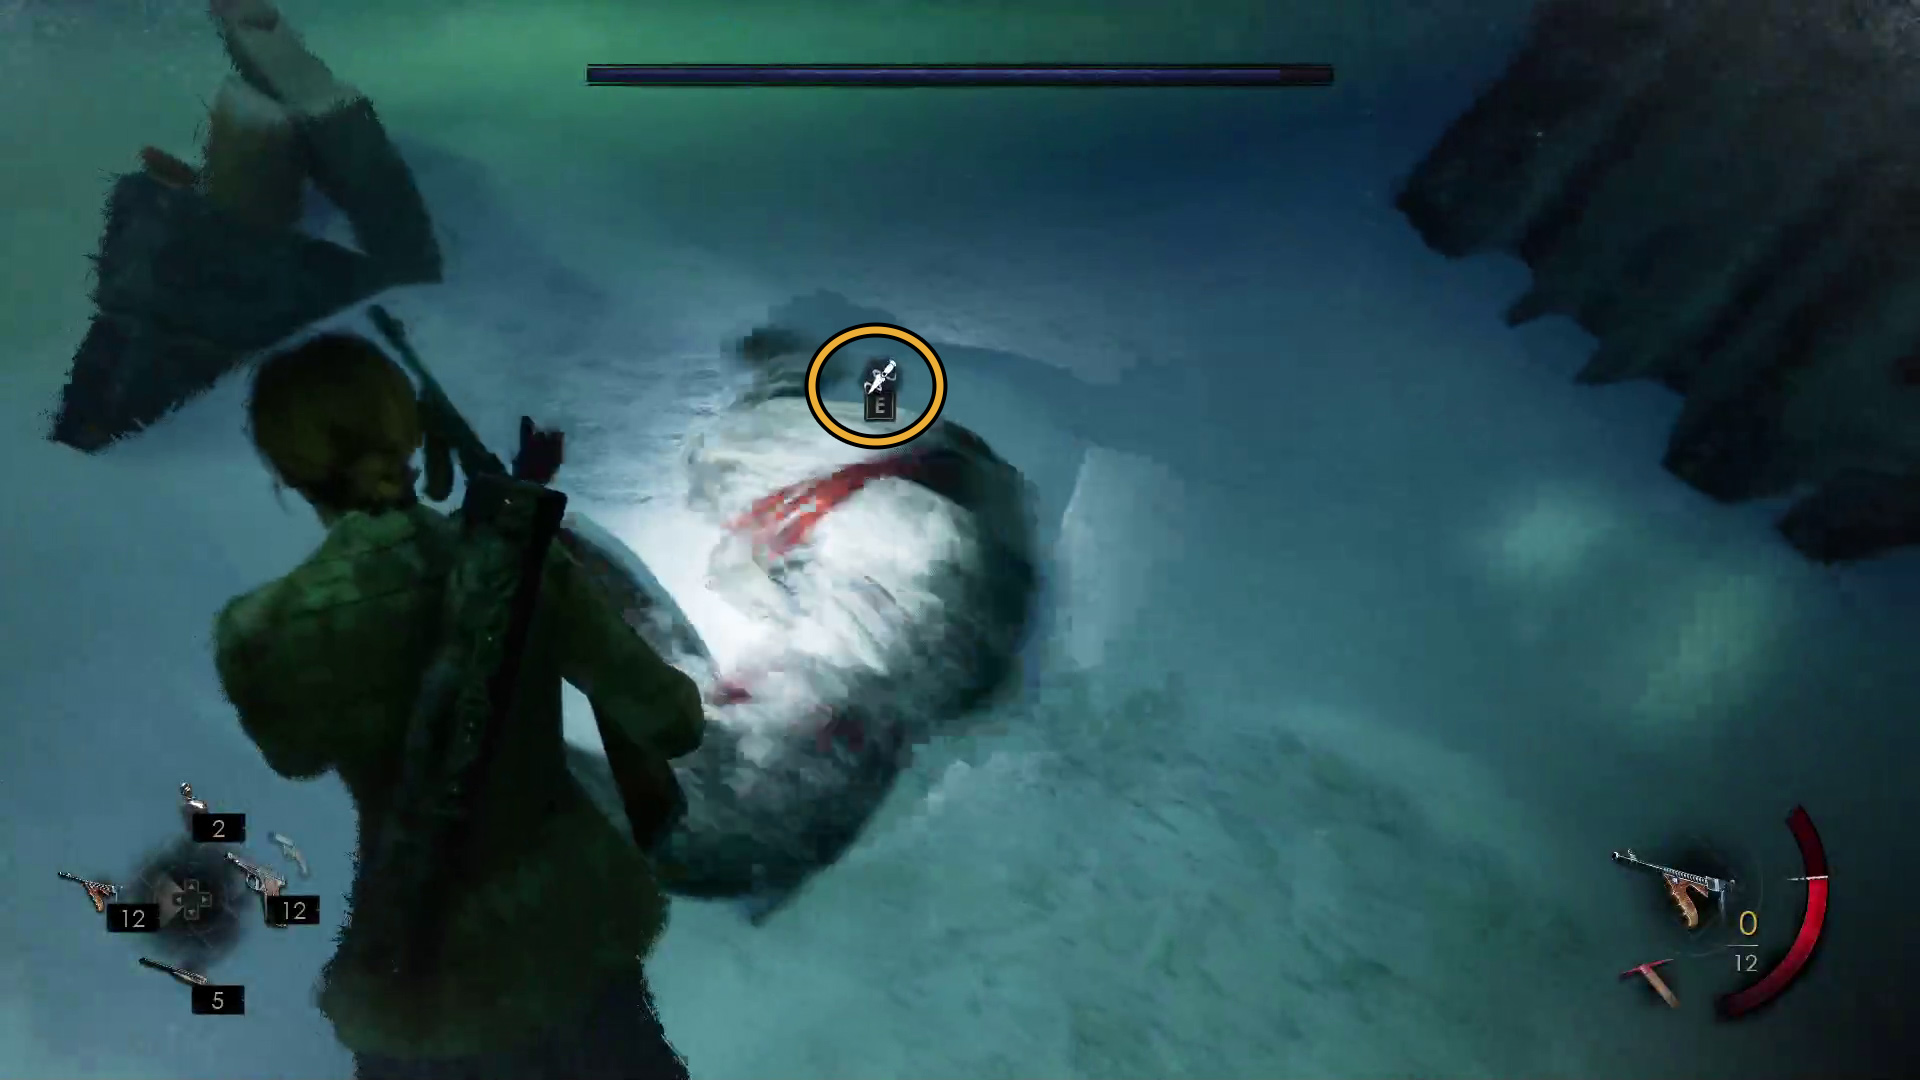
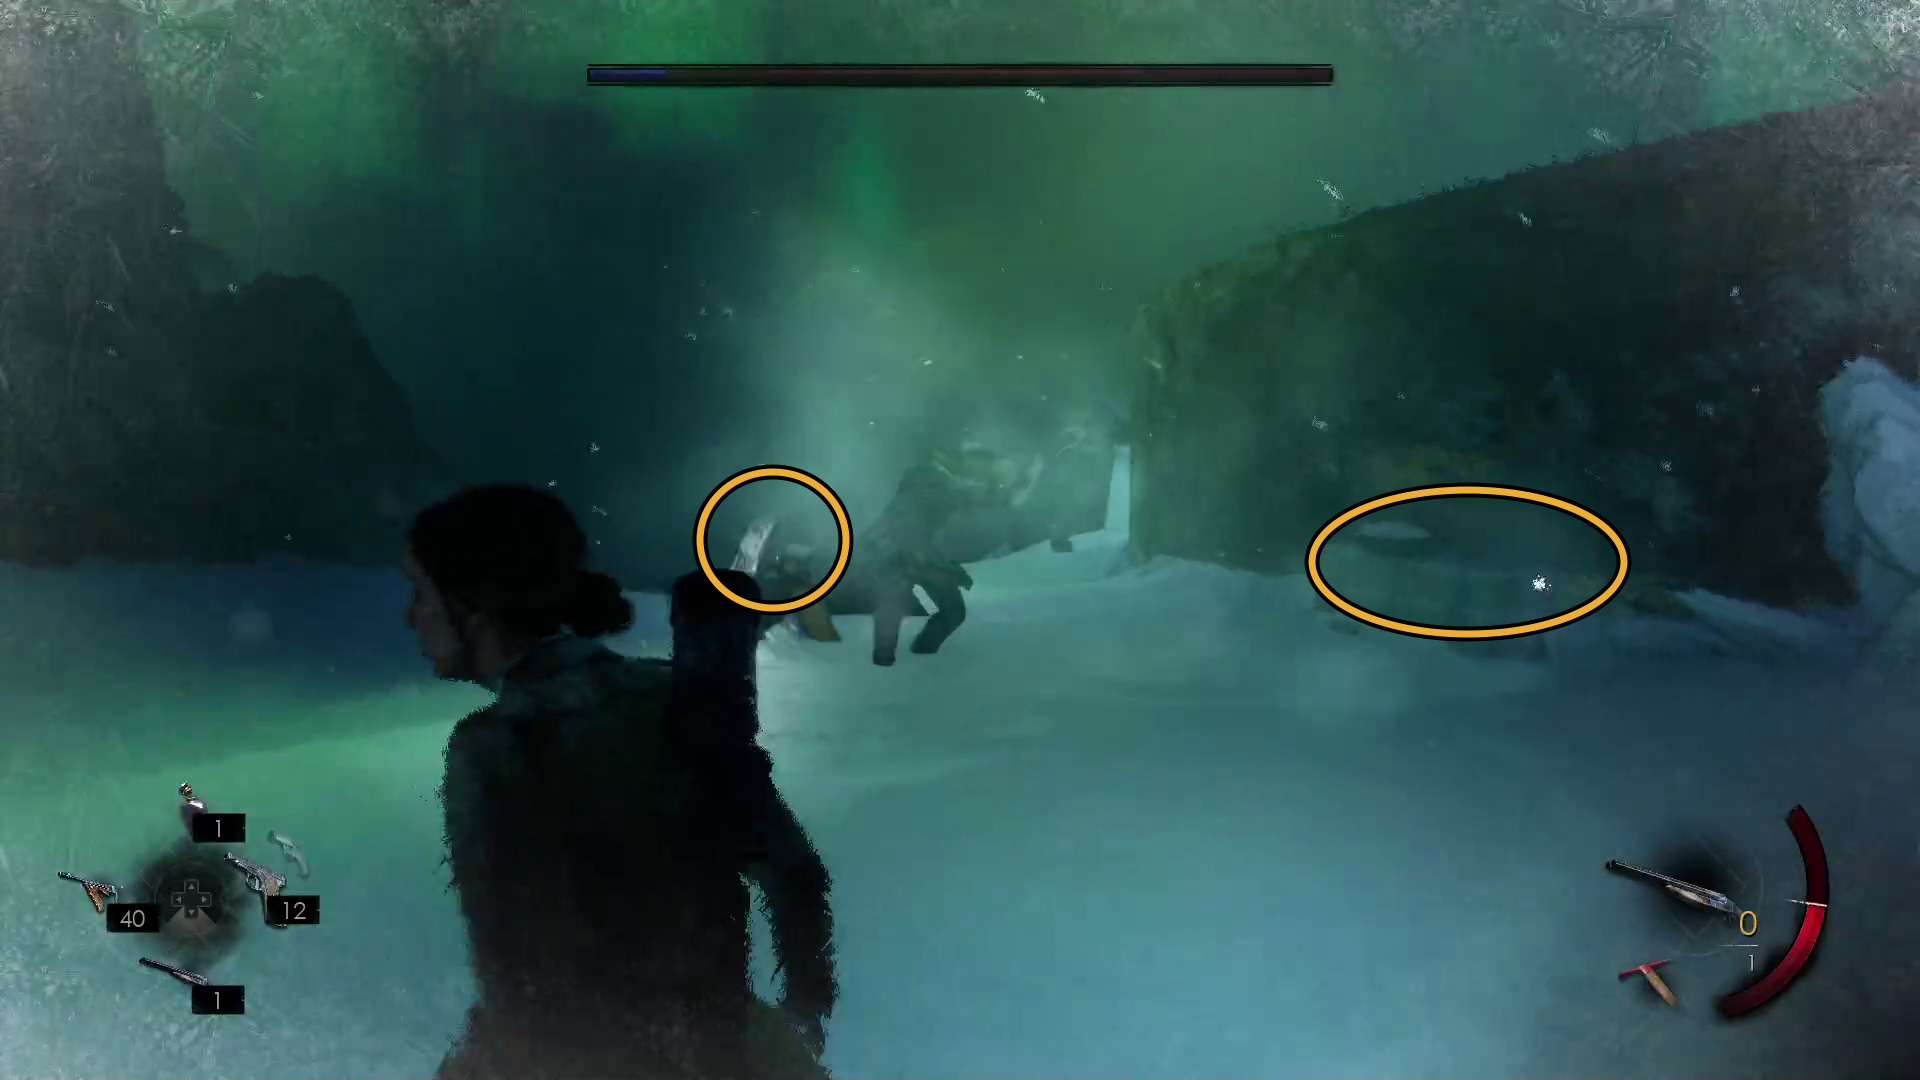
Didn’t we already do this? This time, Jacob’s a bit more dangerous, as his attacks have more range — but the same principles apply. Kite him, spam dodge if he gets close, and shoot him until he goes down. This time, however, you’ll need to interact with him each time he falls down (Image 145) — presss the indicated button and you’ll use the Sacraficial Dagger on him, taking away a big chunk of his health. There is ammo in the middle of the boss arena and on one side (Image 146), plus some throwables you can use. Note that even when Jacob’s healthbar is zero, you’ll have to walk over and use the dagger on him a final time to actuall kill him and trigger the next cutscene.
Image 145Image 146
During the series of cutscenes, you’ll enter Chapter 5.
Unabashed FromSoftware fanboy still learning to take his time with games (and everything else, really). The time he doesn't spend on games is spent on music, books, or occasionally going outside.