As you work on breaking the Dark Man’s contract in Chapter 4 of Alone in the Dark, there will come the time for you to Temper Manic Behavior. In order to do it, you’ll need to go through a portal inside a closet in Dr. Gray’s Apartment. Only instead of Narnia, you’ll end up on the frozen coast of Greenland.
After a quick jog through a raging snowstorm there, you’ll reach a majestic alien device guarded by one Jacob van Ostadte. You’ll need to be pretty diligent with collecting the Lagniappes present in the game to know who he really is and how he’s connected to the story. But at face value, he’s just a fellow who’s been afflicted with a light case of face tentacles and really doesn’t appreciate you crashing his one-man party.
As such, you’ll be forced to deal with Jacob in order to advance the story. This guide will tell you just how to do it.
General Tips
Keep moving as you reload to put some distance between yourself and Jacob.
Make use of the ammo boxes scattered around the arena.
During Round Two, don’t forget to stab Jacob with the Sacrificial Dagger every time he falls down.
Combat Strategy
Round One
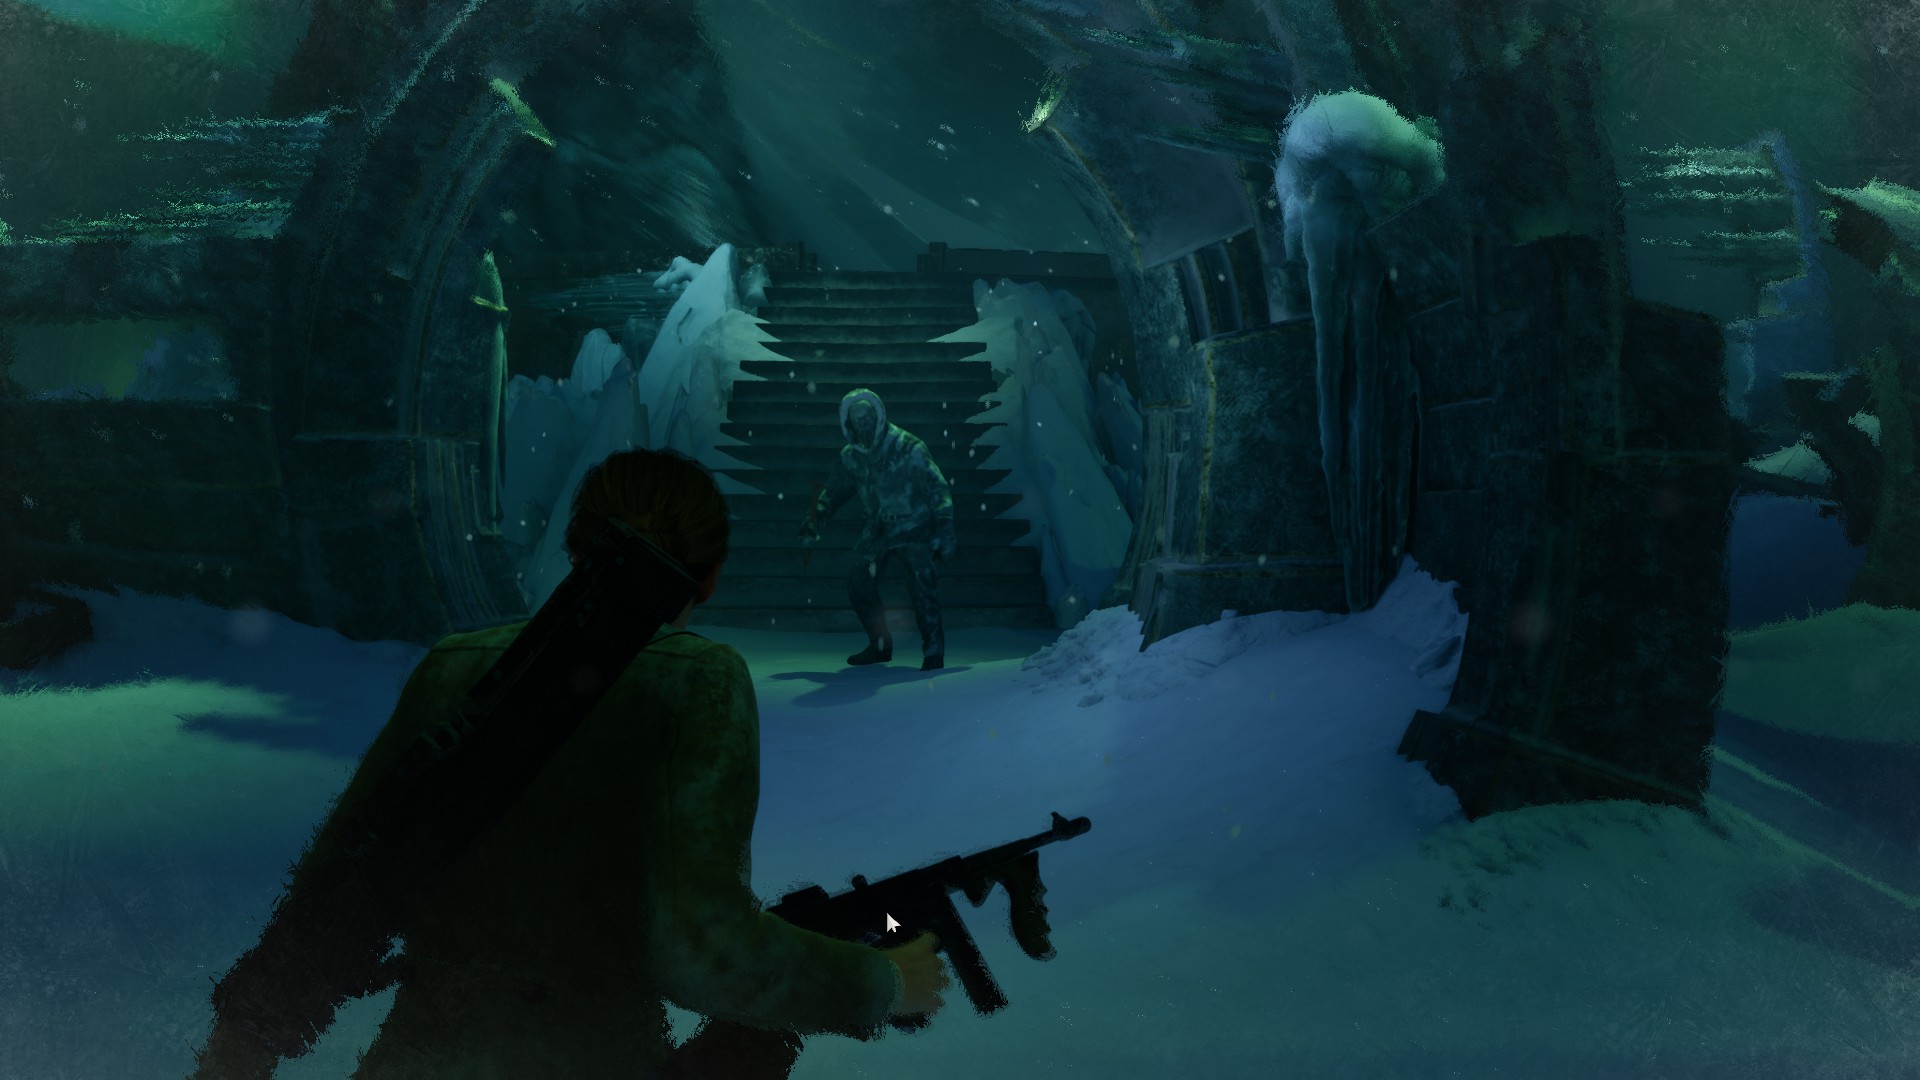
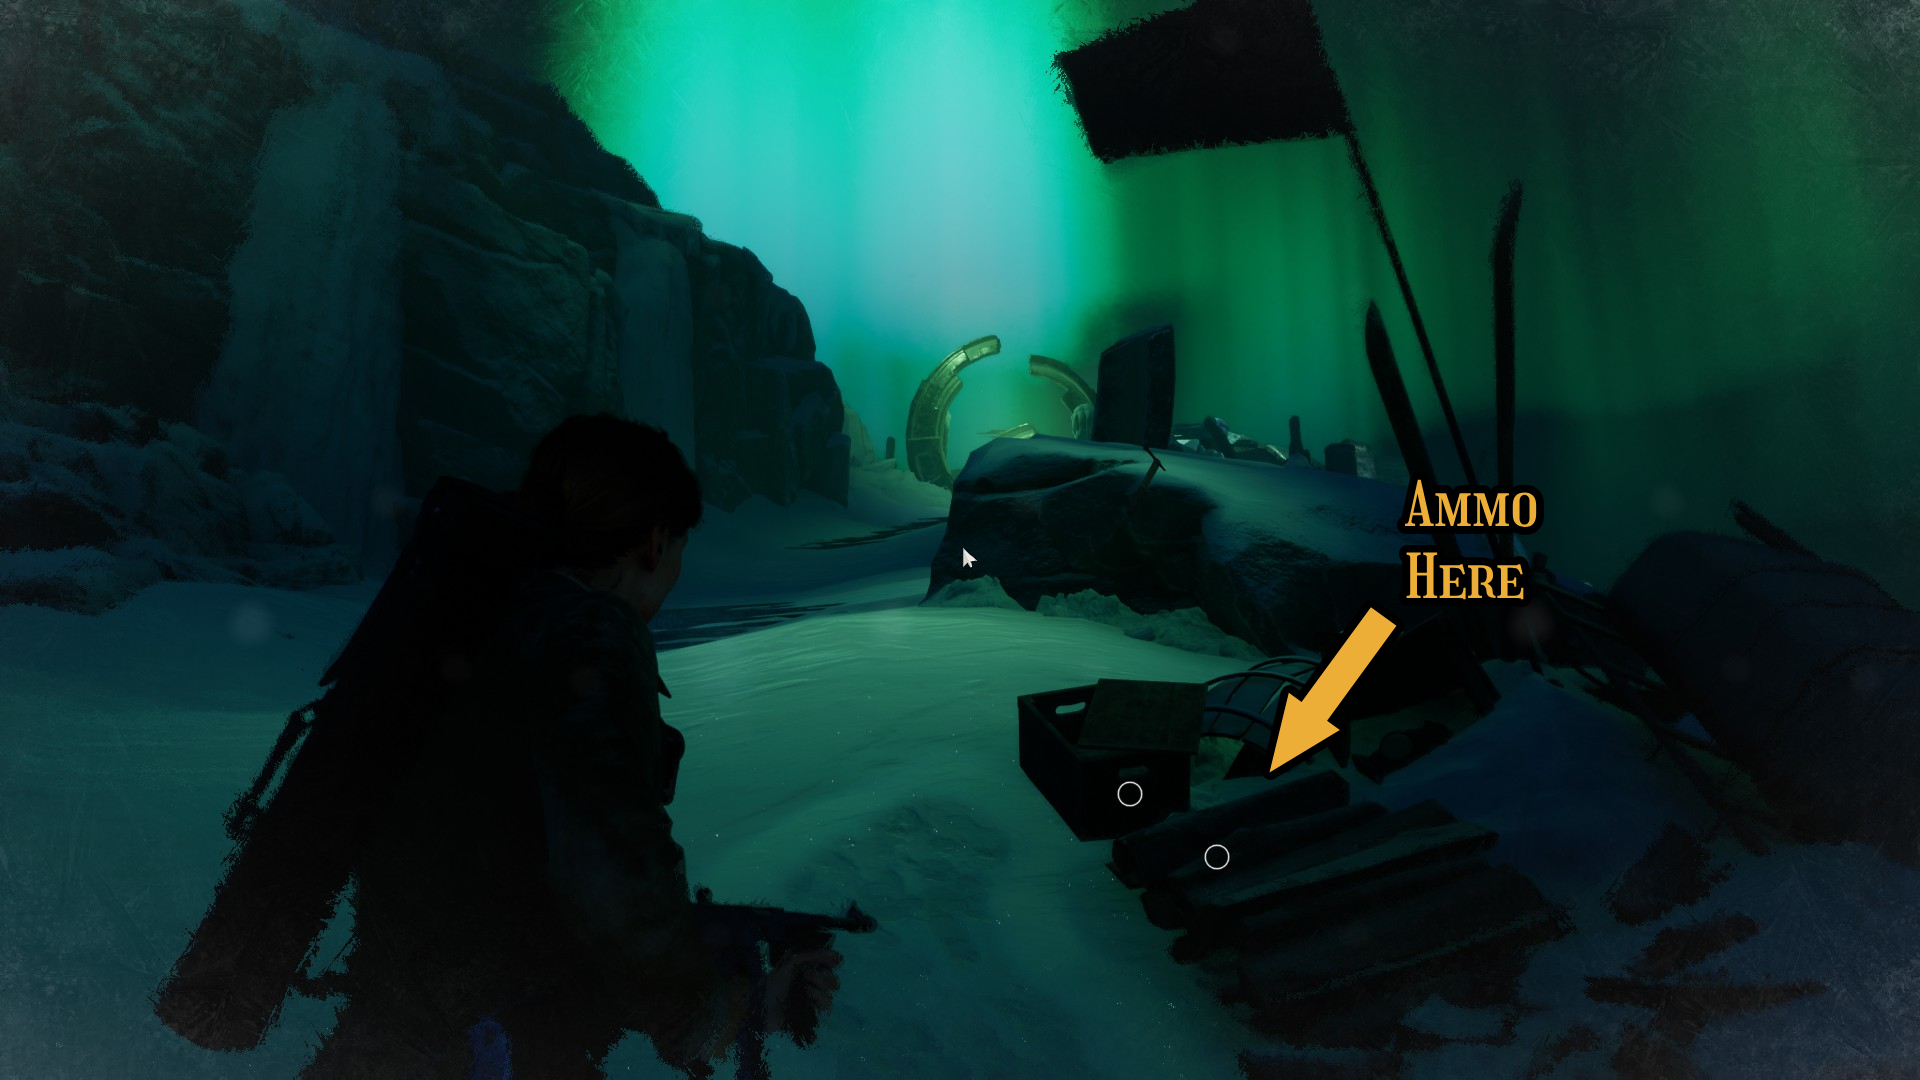
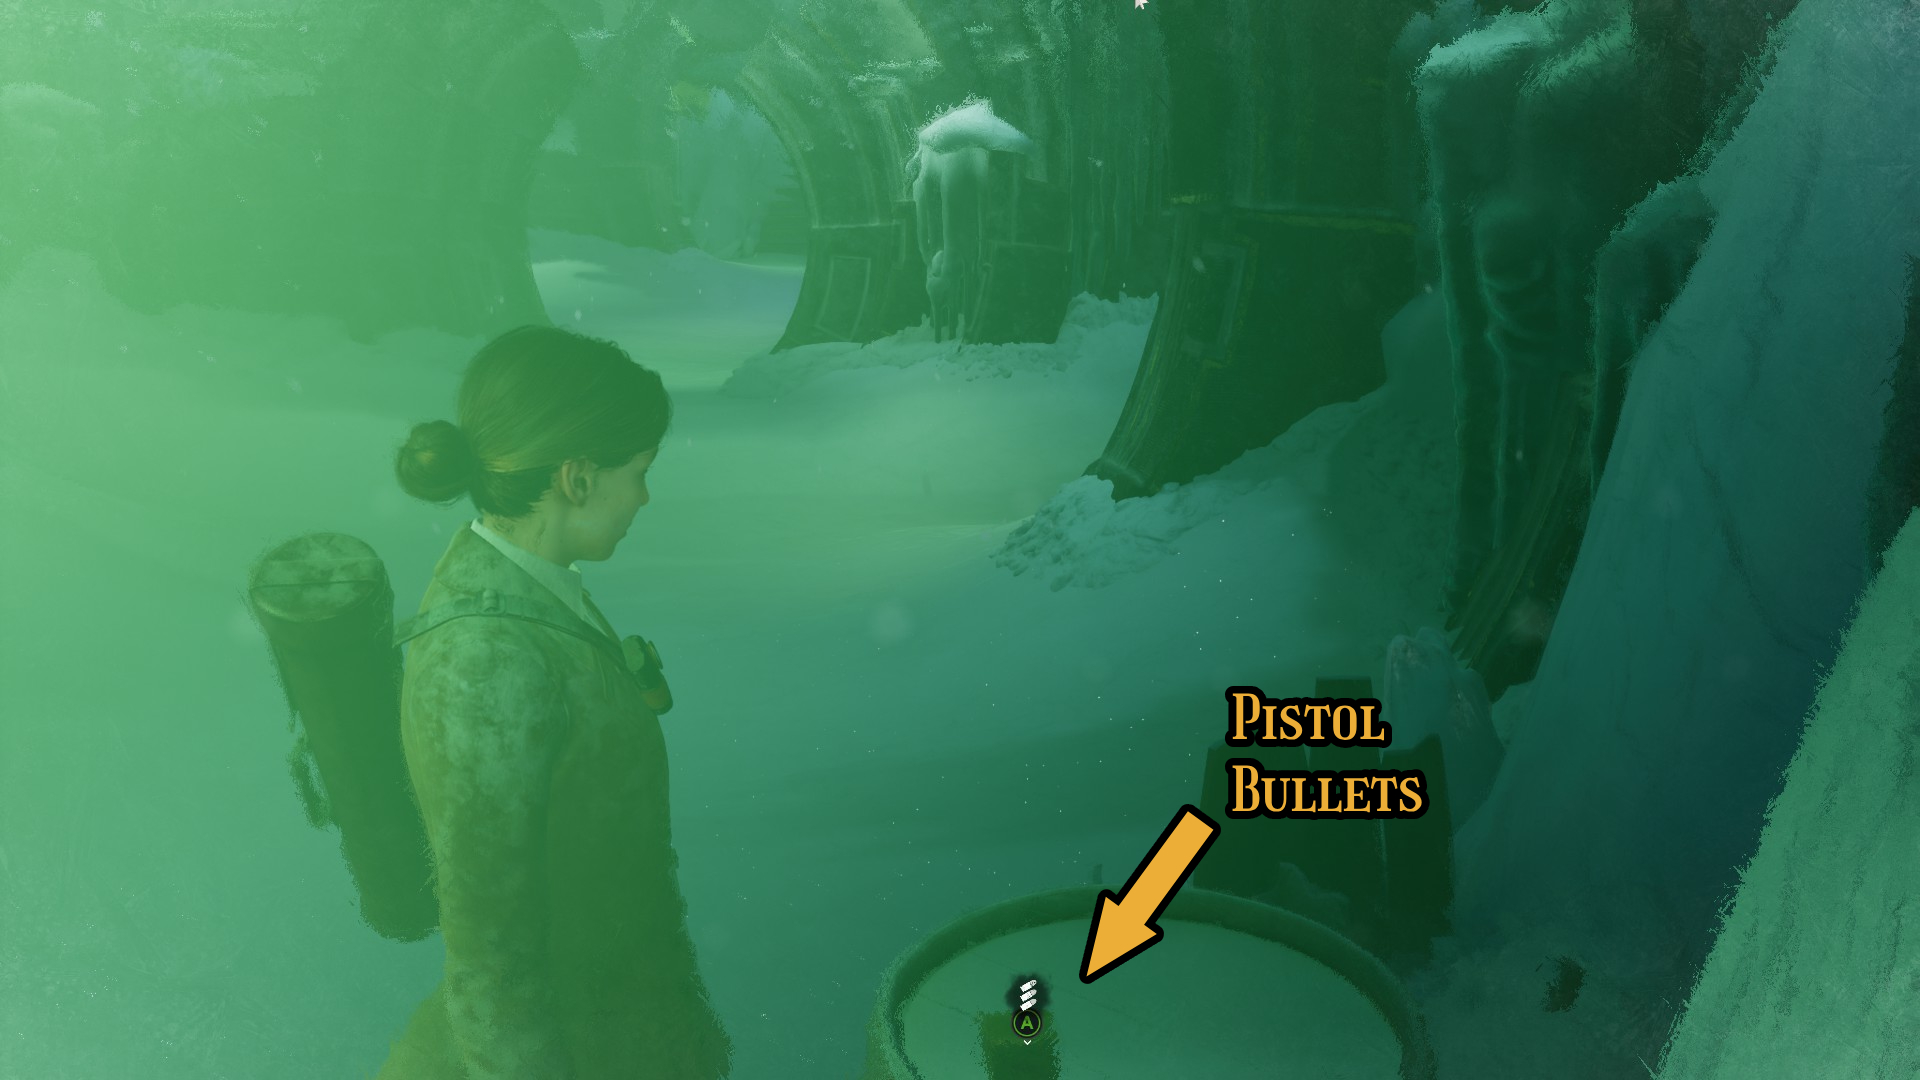
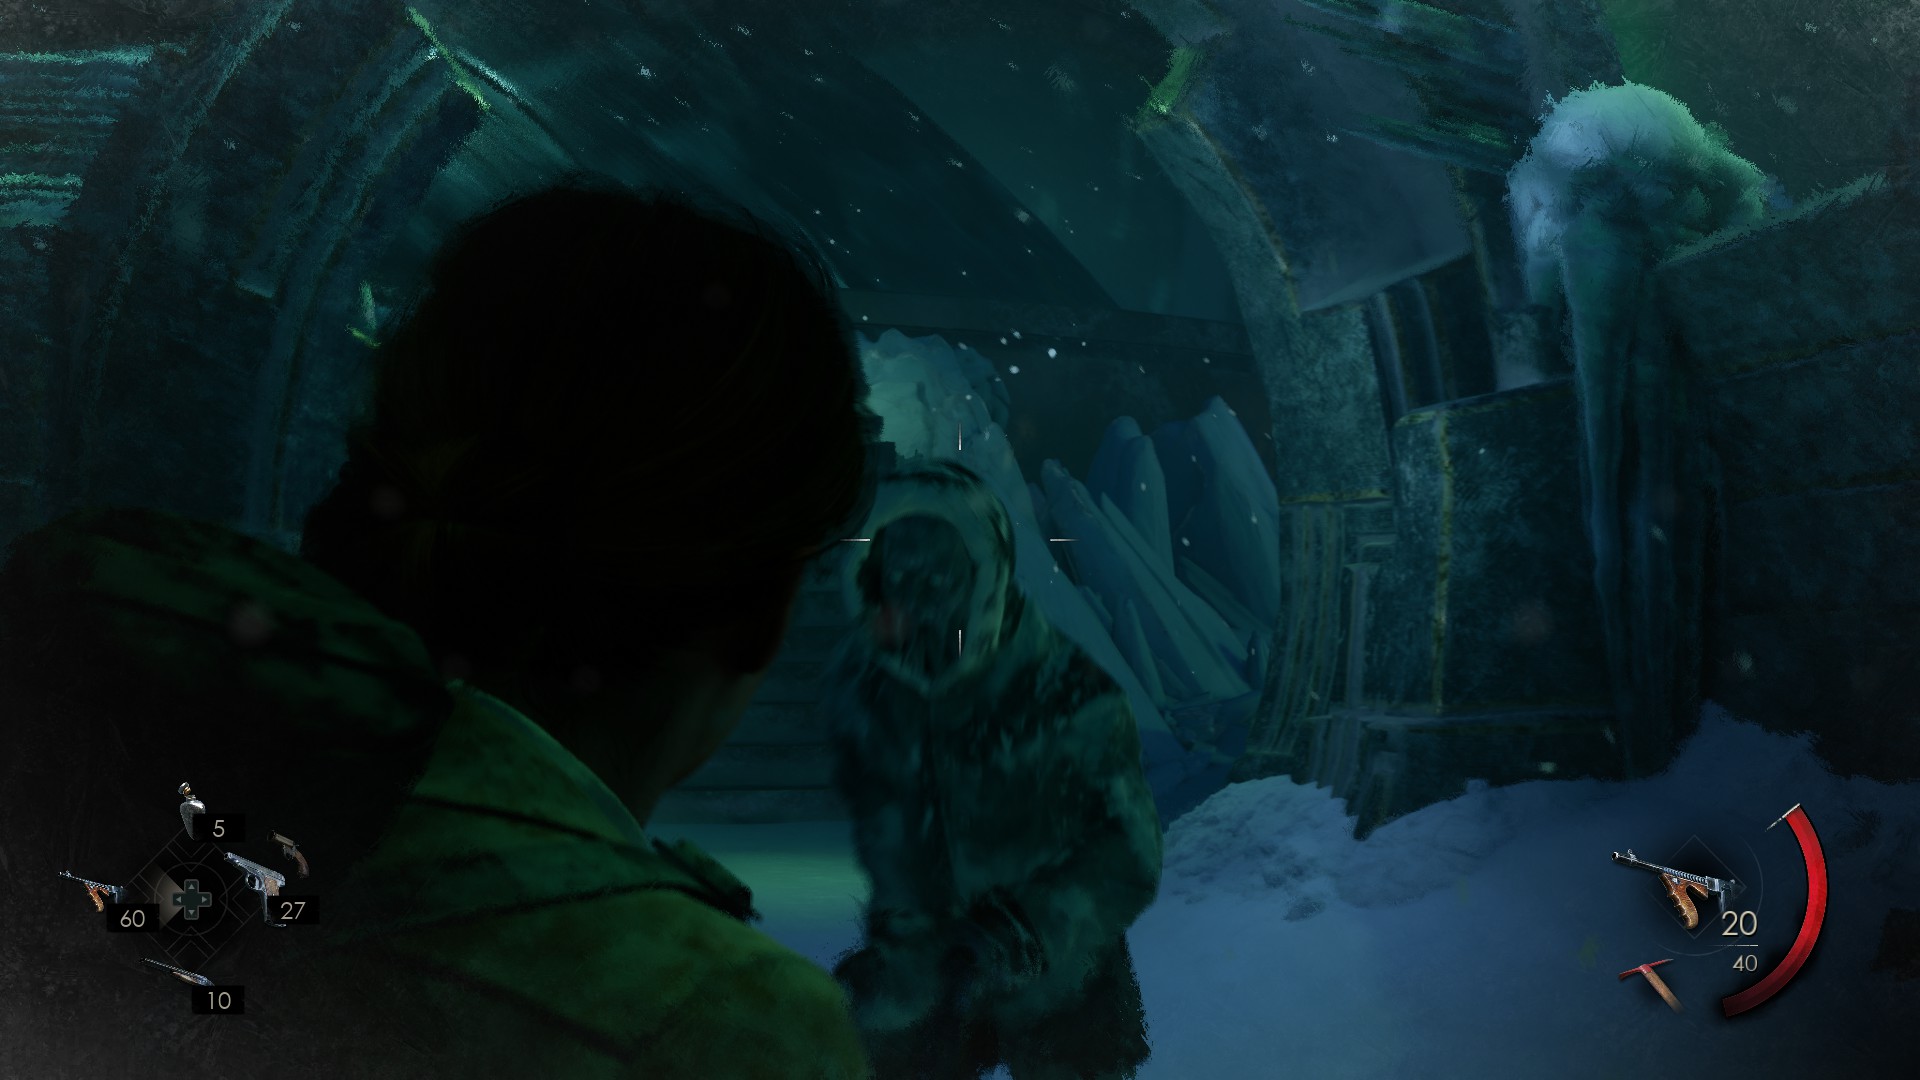
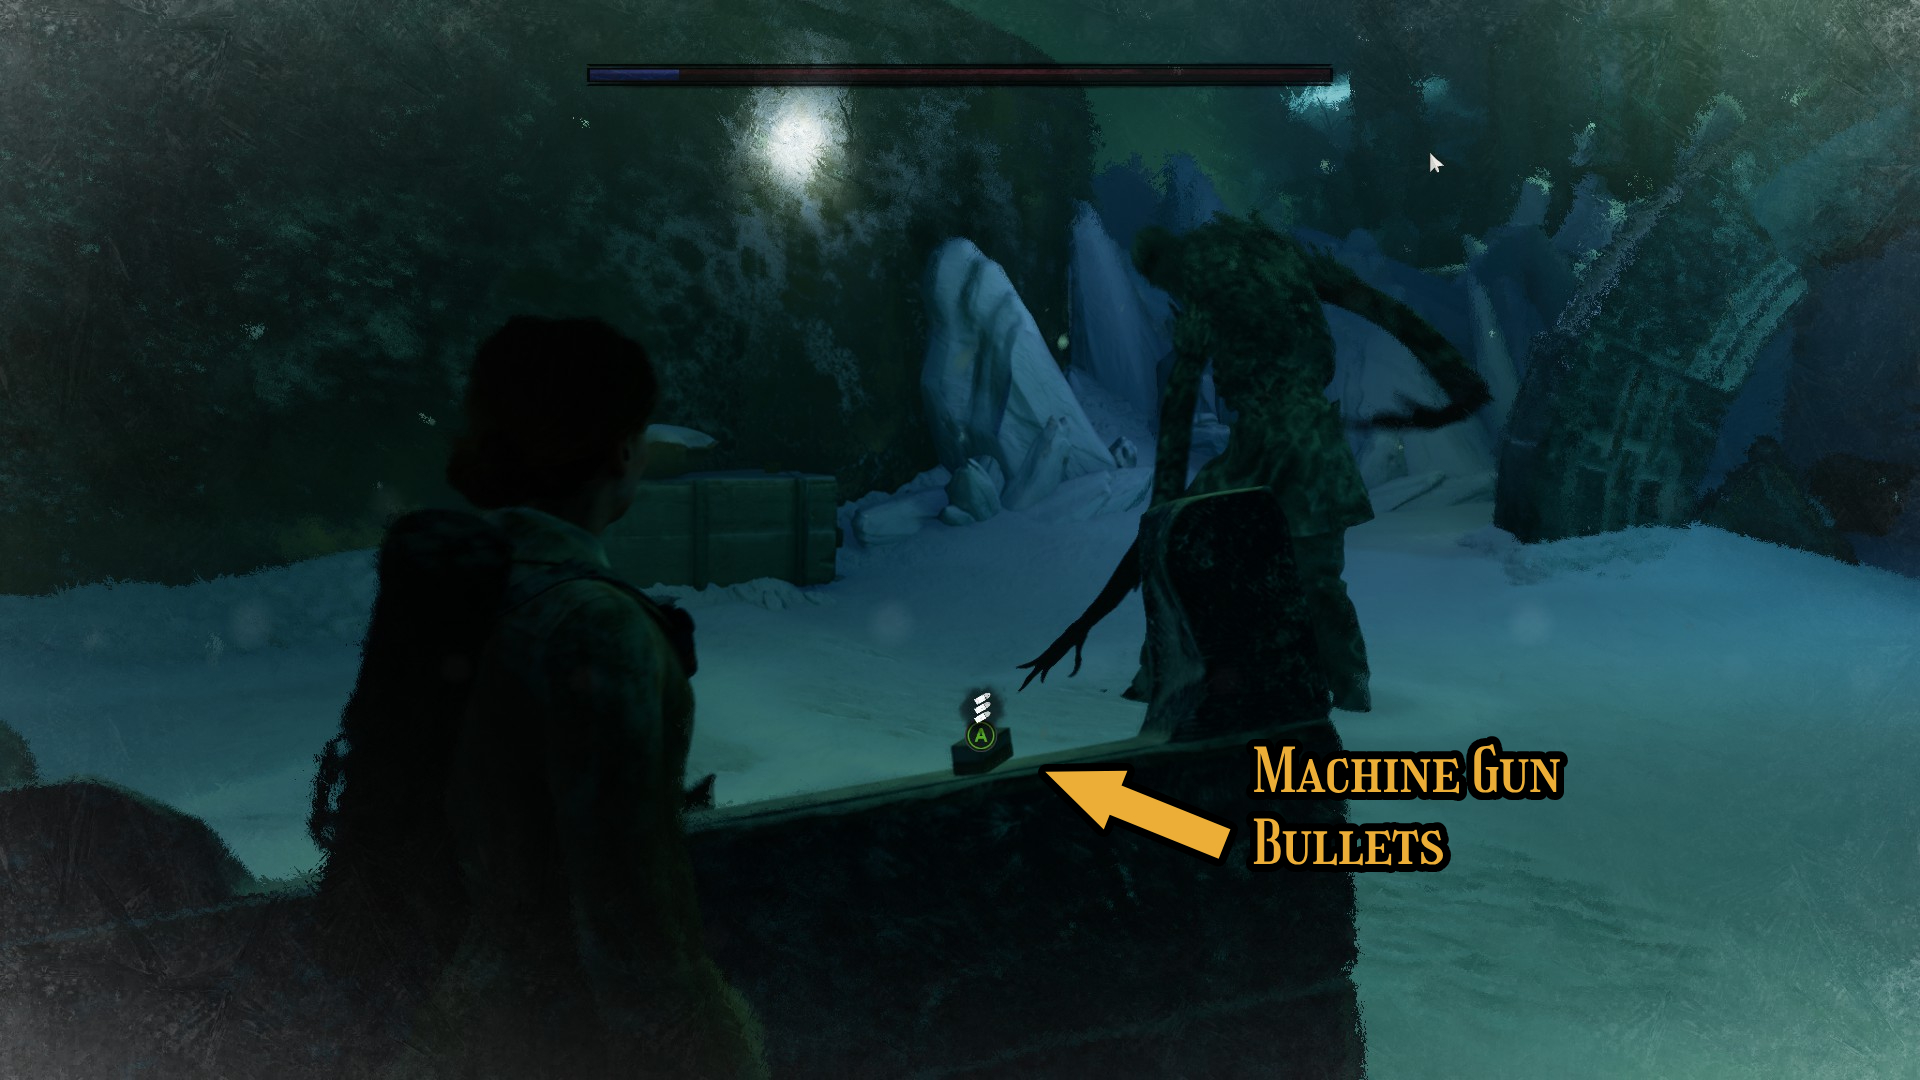
As you first approach Jacob, you’ll exchange a few words and then he’ll attack you in his mostly humanoid form. If you’re running low on ammo going into this section, there’s a spot slightly back down the hill (around the final flare refill location) that may have some (see image 1 below), depending on your difficulty settings. But even if you don’t get lucky there, the barrel immediately to your right as you enter the alien structure will have a generous amount of pistol bullets (see image 2 below).
(1)(2)
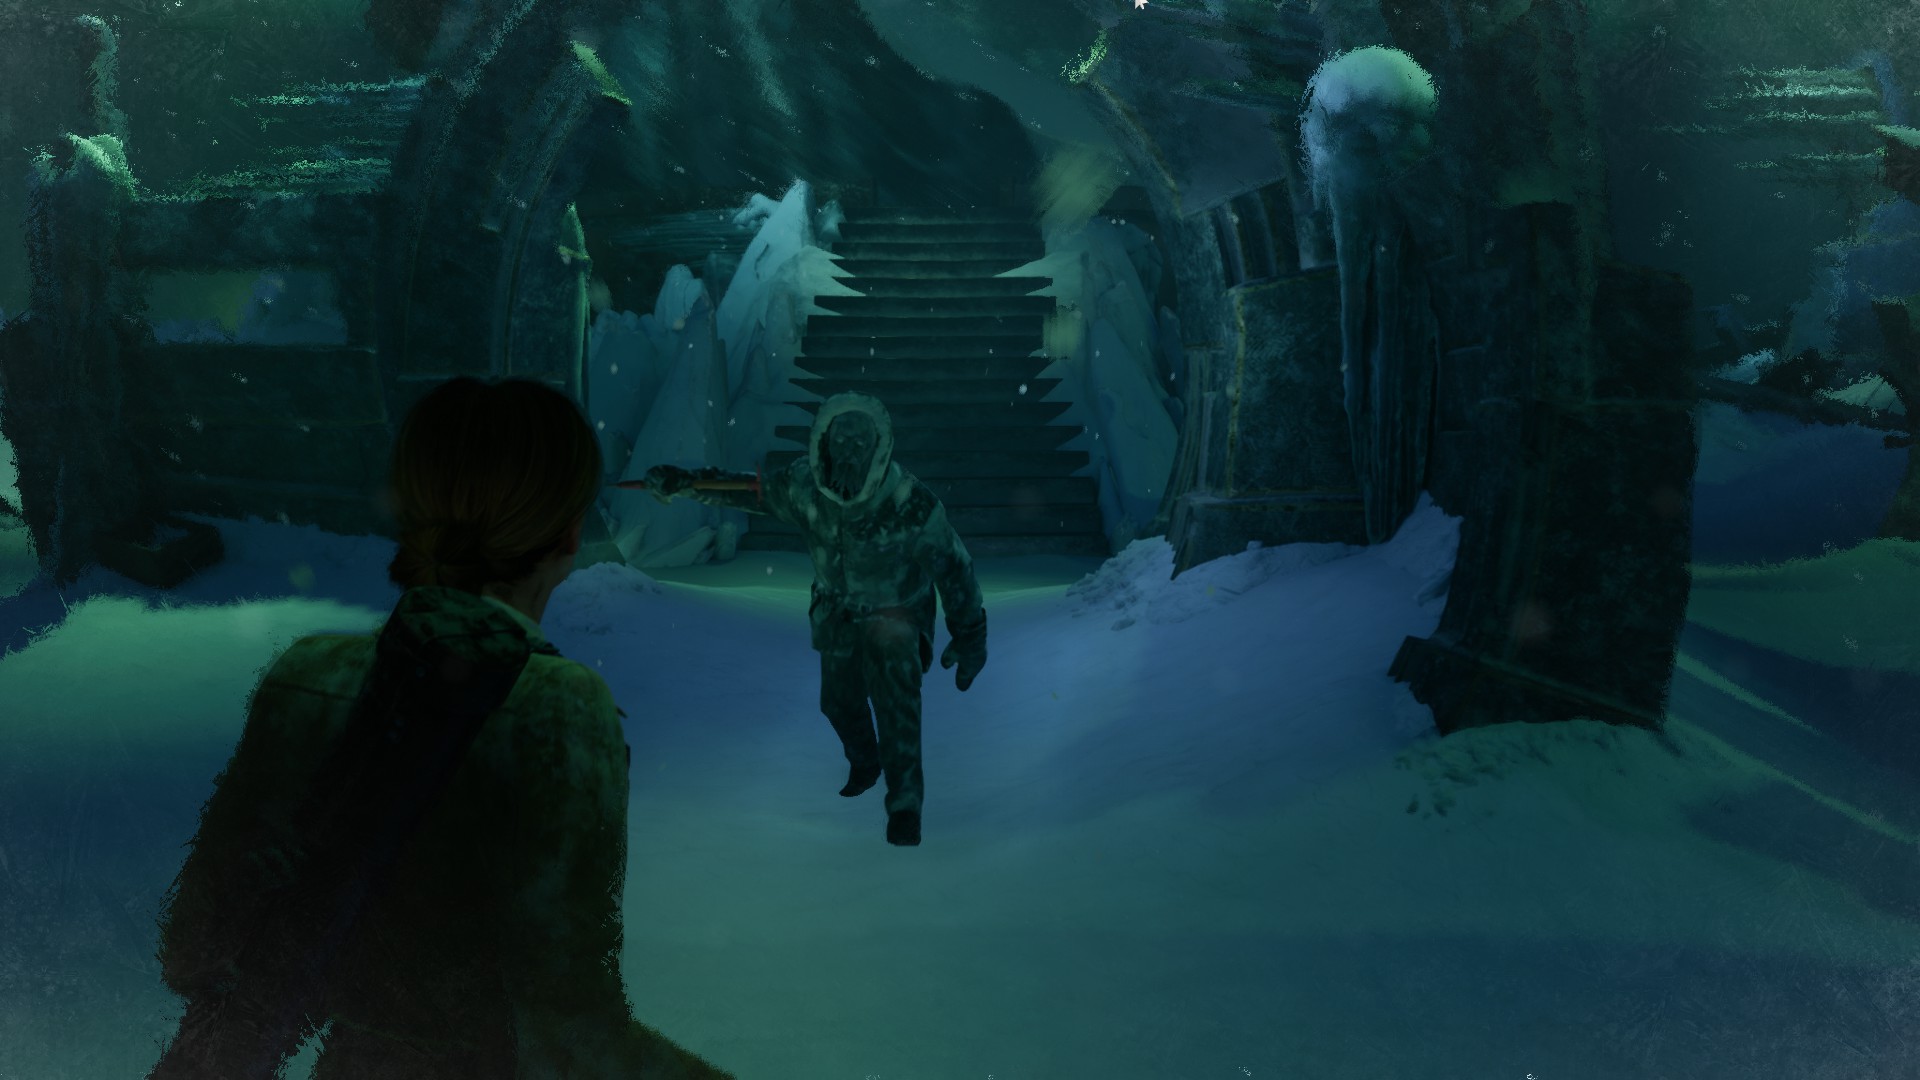
Fighting Jacob here is quite simple. After all, he’s the one who brought a melee weapon to a gun fight. As the battle starts, he’ll run at you (image 3). Keep your cool and pump him full of lead (image 4). Regardless of the difficulty, he’ll go down very fast (image 5).
(3)(4)(5)
Just in general, the machine gun works best for Jacob – it’s fairly accurate, pumps out a lot of damage and doesn’t take forever to reload. This last point is quite important as Jacob is a melee enemy, so you’ll want to keep your distance from him. If you feel comfortable with it, you should consider weaving in some dodges as you’re running away – the dash that comes with the dodge will help you cover more ground. Slowing down to reload something like the shotgun can lead to you taking a lot of unnecessary damage. But if you do run out of bullets without downing Jacob, consider quickly swapping to another weapon to finish him off.
If you miss your opening shots and Jacob gets too close for comfort, simple dodge out of the way and put some distance between you two to try again.
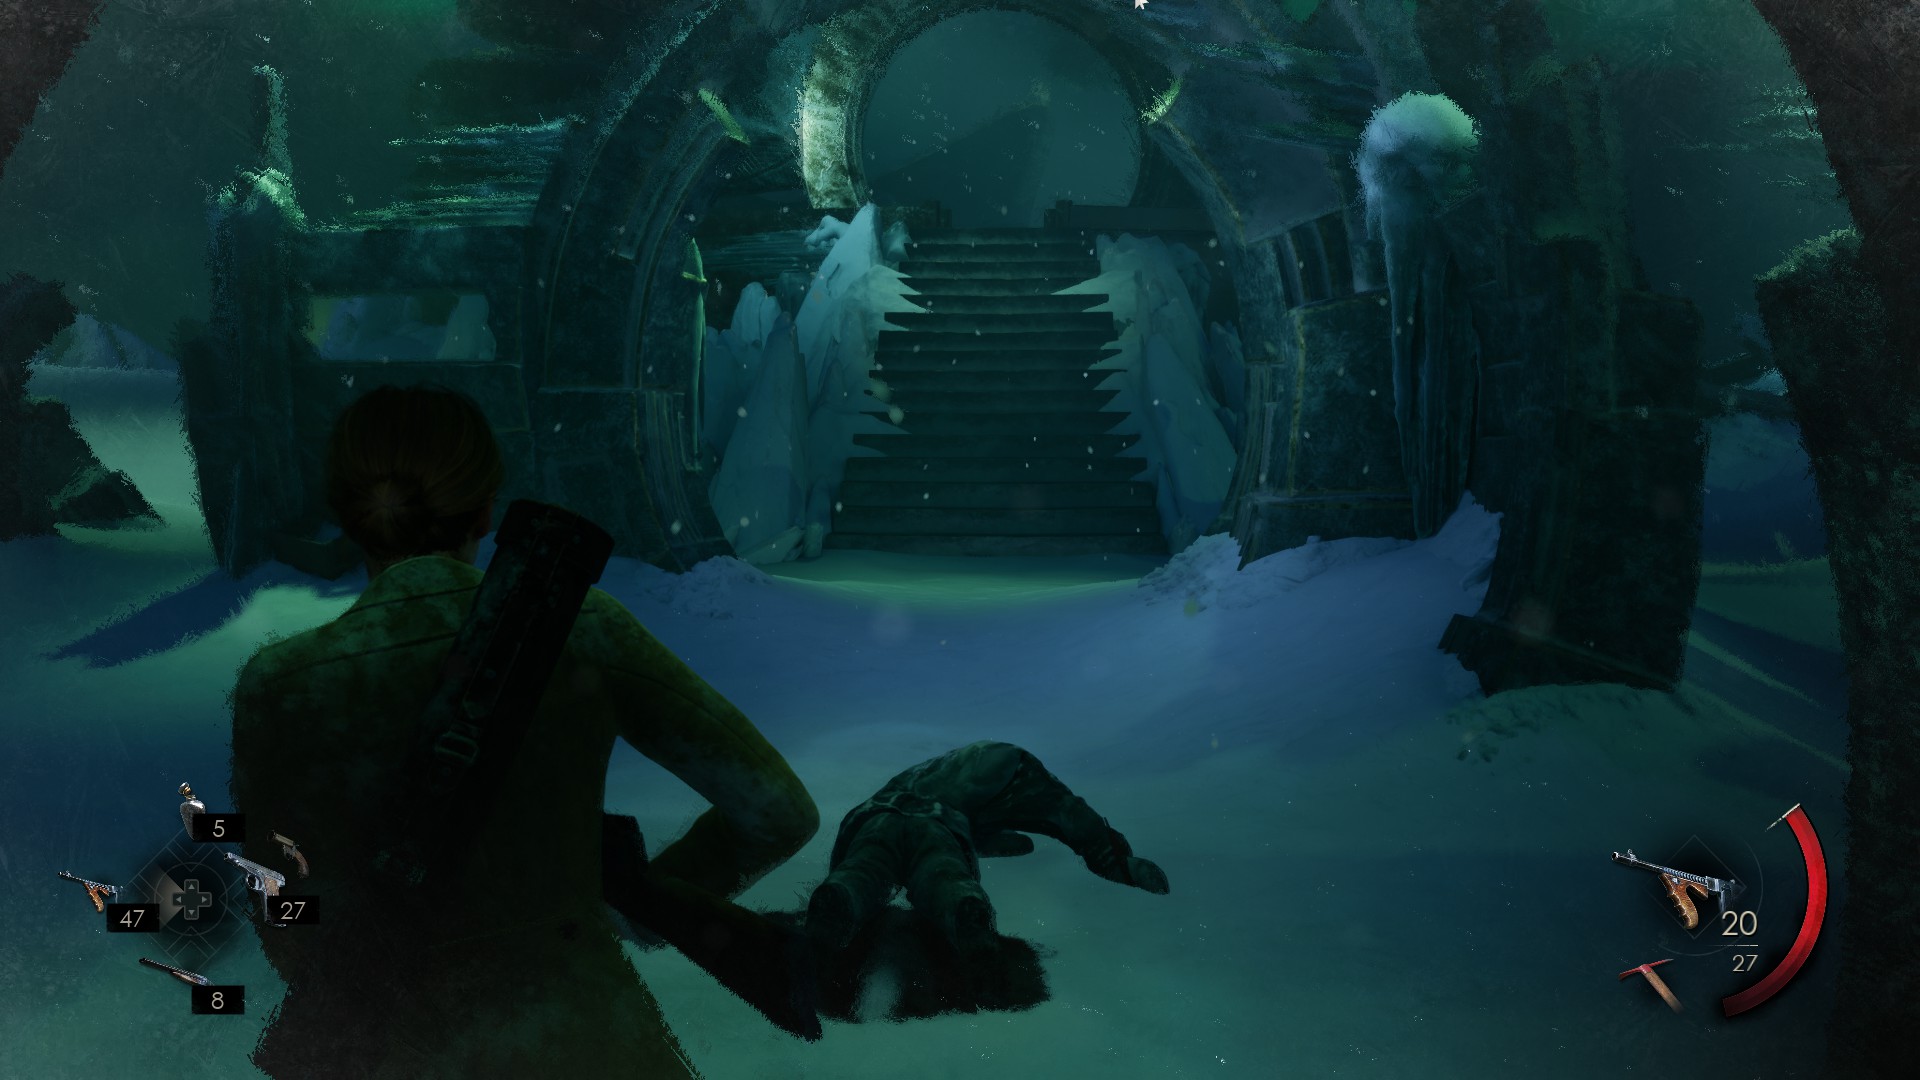
Intermission
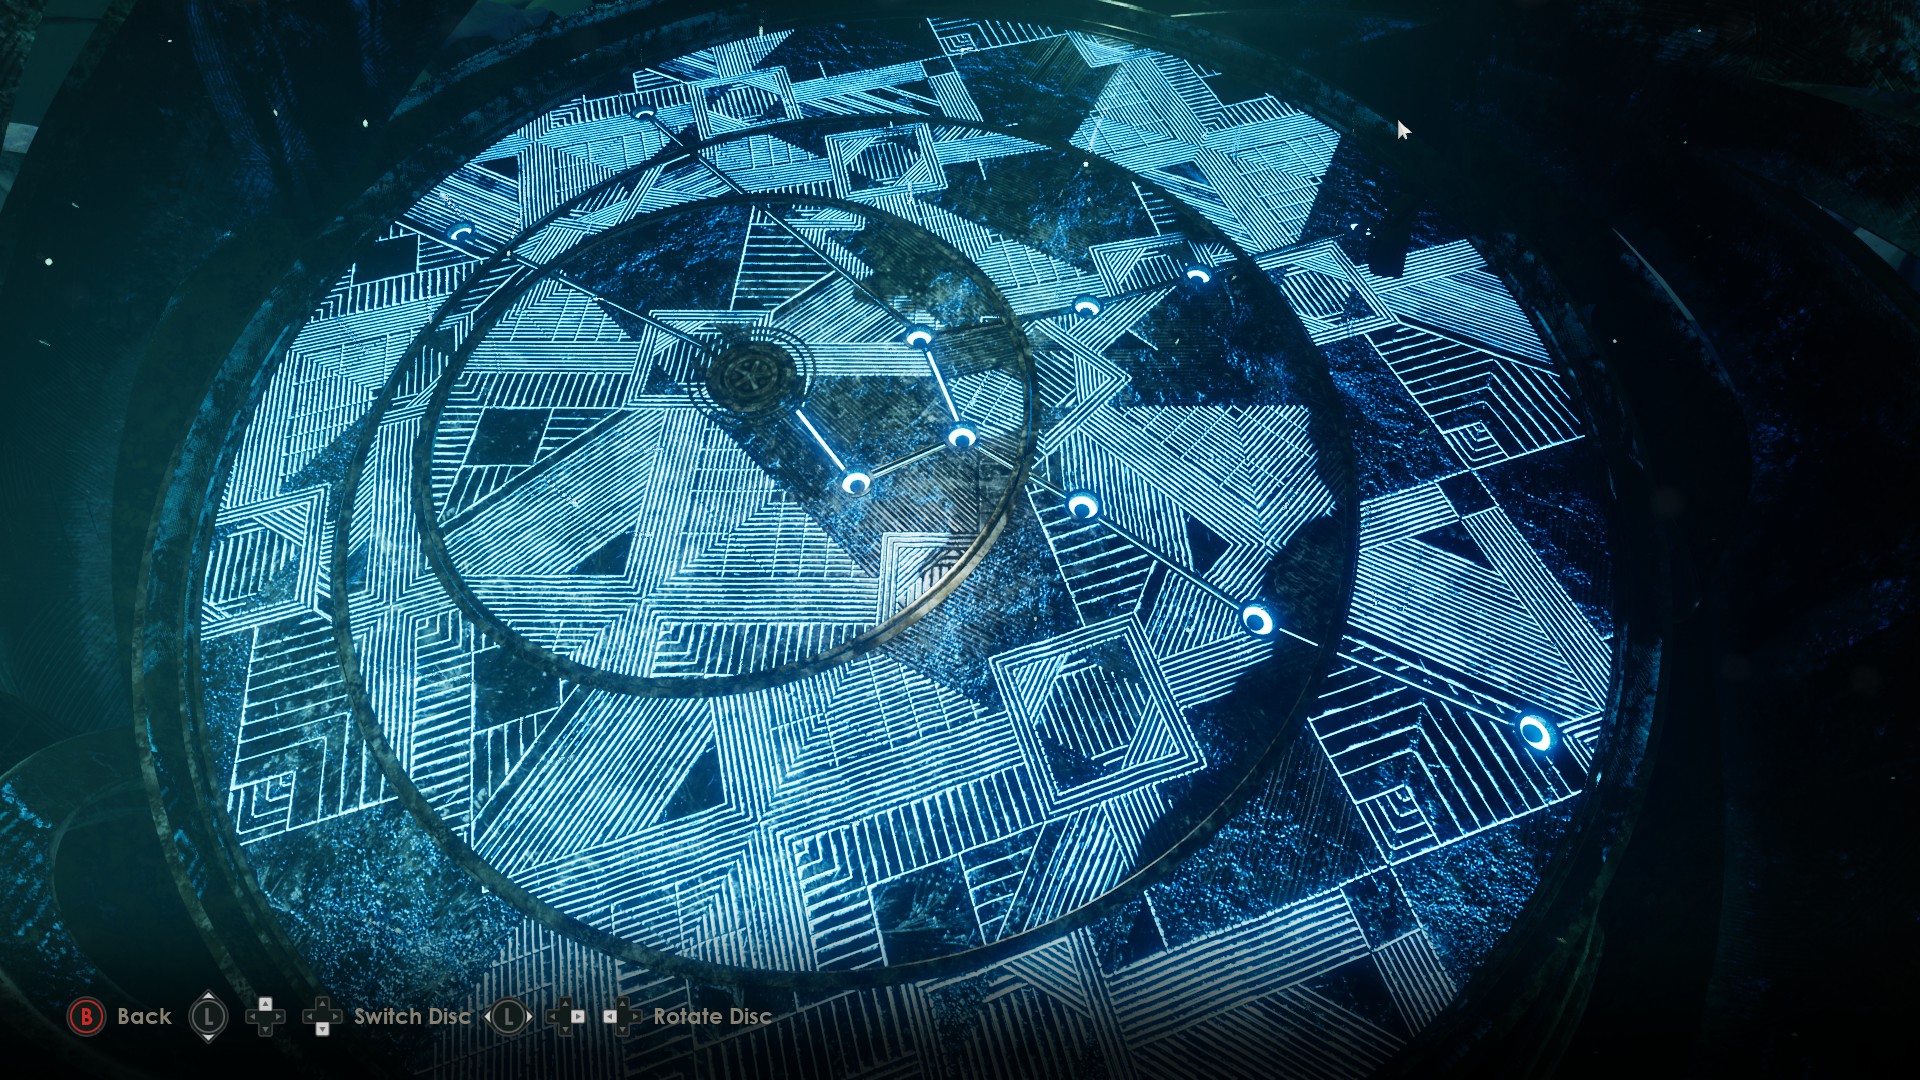
Once Jacob is down, you’ll be able to proceed to the Stellarium where you’ll need to align the stars in the shape of the Taurus constellation that should be familiar to you by that point. Check out our walkthrough for a detailed guide on how to do it, but in brief, you have to rotate the three circles until the starting image 6 below looks like image 7.
(6)(7)
Round Two
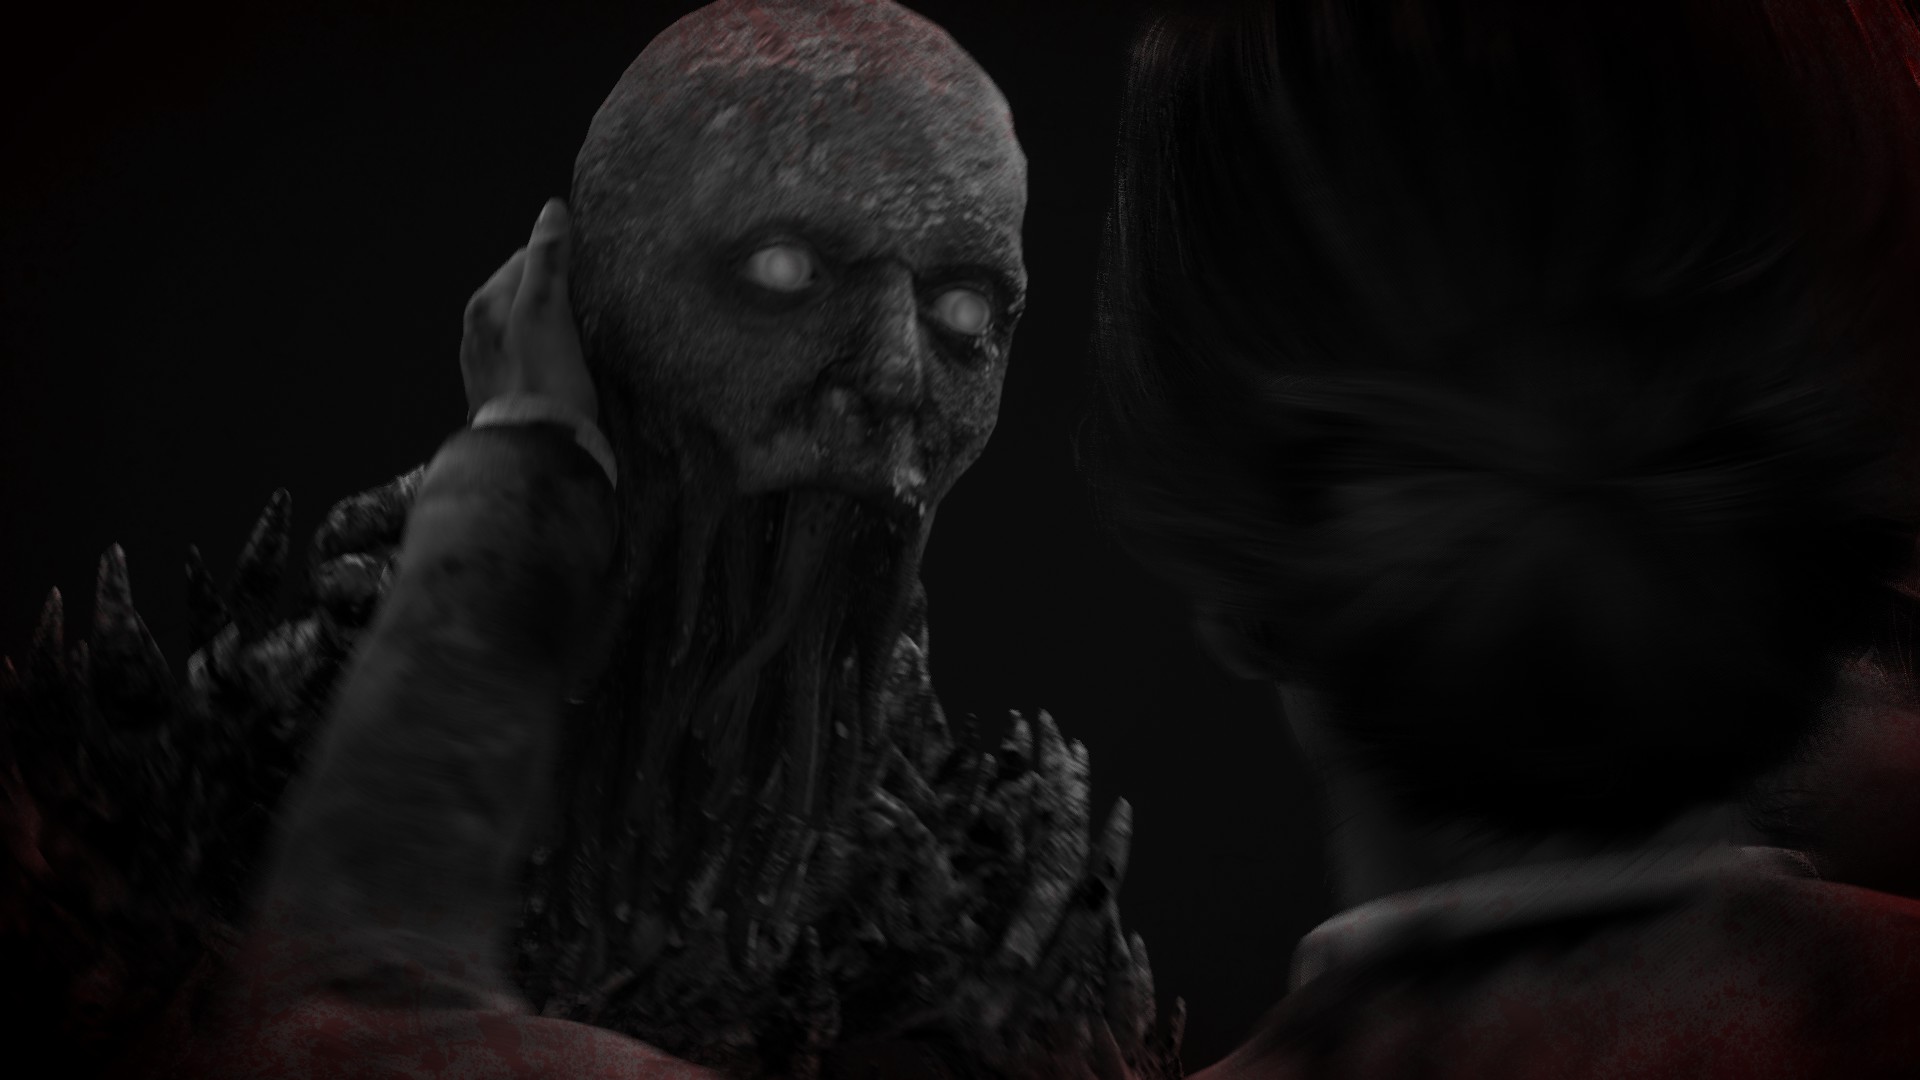
This is where the real fight begins. After your first encounter, Jacob has taken a turn for the worse and abandoned his humanoid shape in favor of that of a stretched-out monstrosity. Fret not. Following the tried and true motto of “if it can bleed, we can kill it” will let you prevail over Jacob without too much issue.
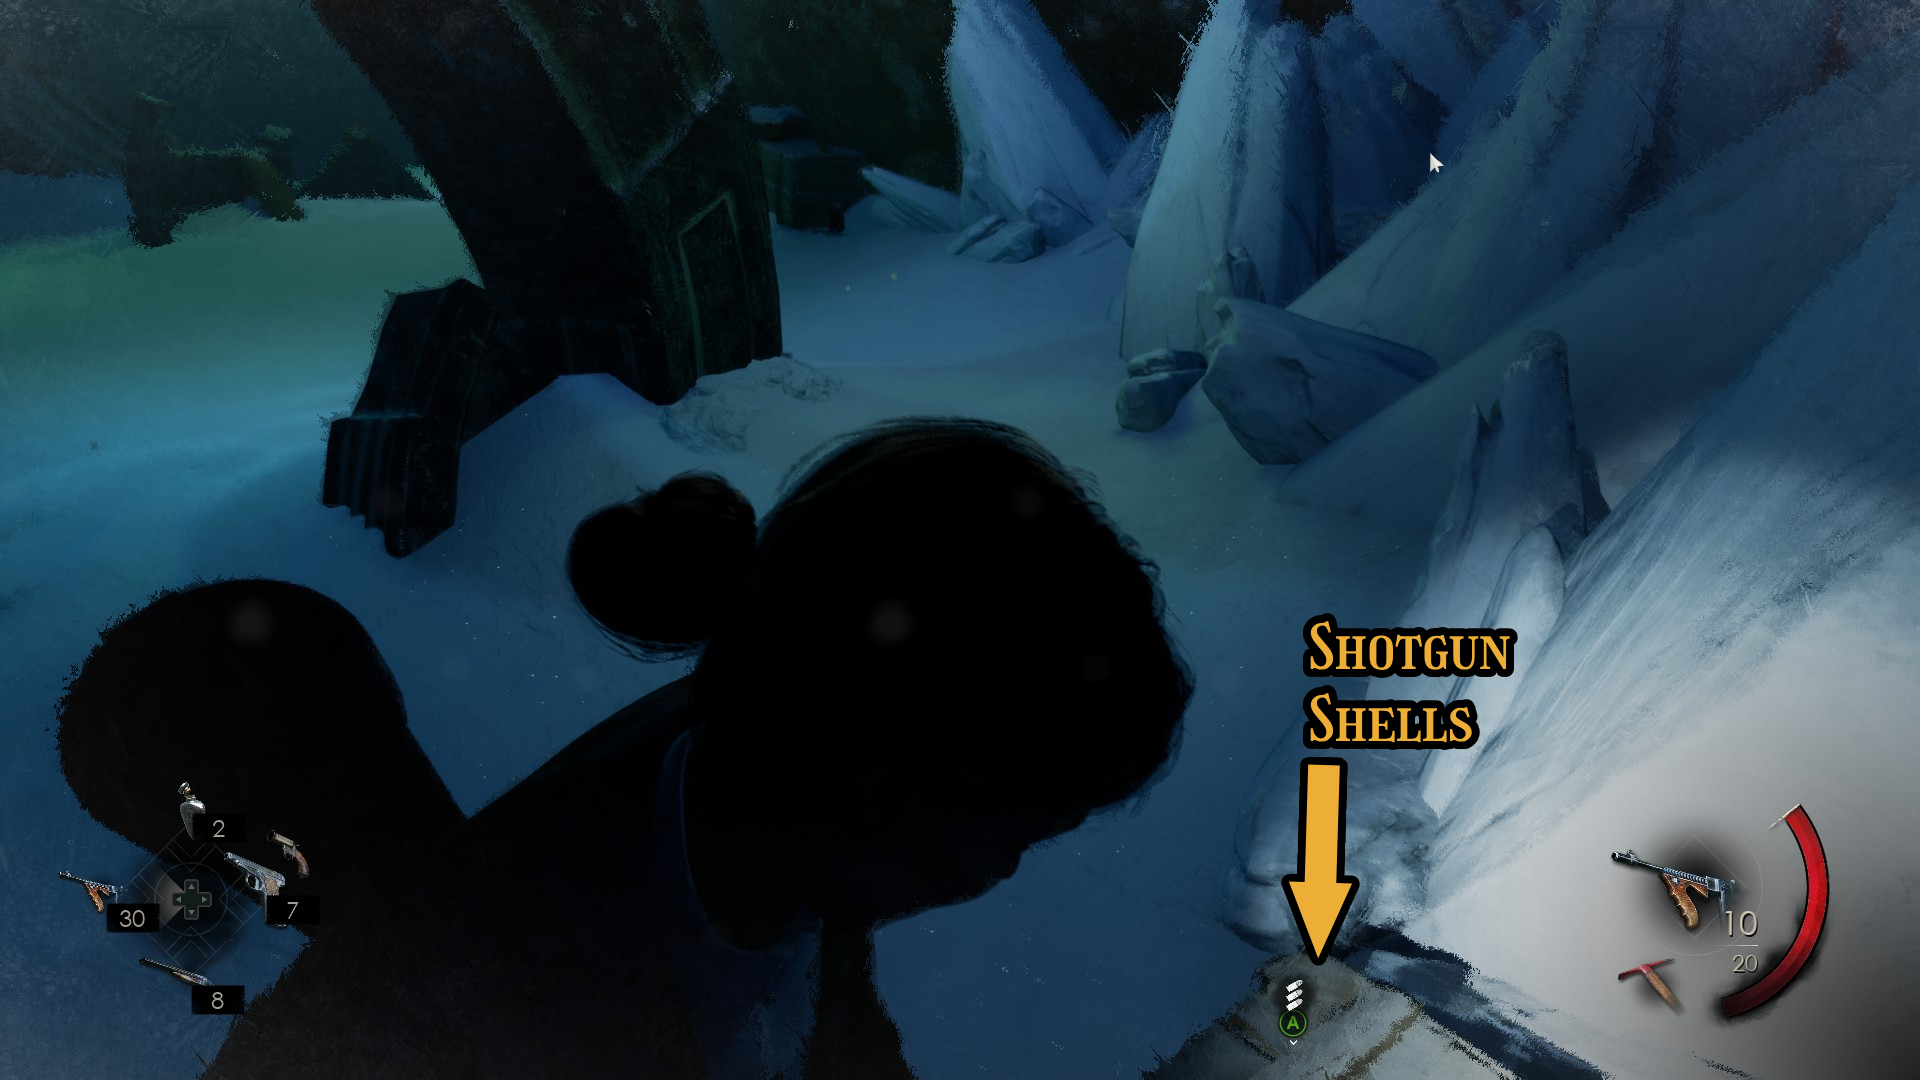
The machine gun still works best here. In fact, it works even better, as for Round Two, the arena generously offers ammo refills for the pistol, shotgun, and machine gun. Which means you can unload with no worries of running out. In our tests, the spot in the middle of the arena stocked machine gun bullets (8), the box by the near wall had pistol bullets (9), and the box further away offered shotgun shells (10).
(8)(9)(10)
The general strategy also remains the same – run away from Jacob until you feel safe to turn around, take aim, and start blasting. As you’re doing that, he’ll chase you around and try to either scream at you or hit you with long attack combos that lock him into place. Both these moves are pretty slow, so it shouldn’t be difficult for you to avoid him long enough to get some shots in.
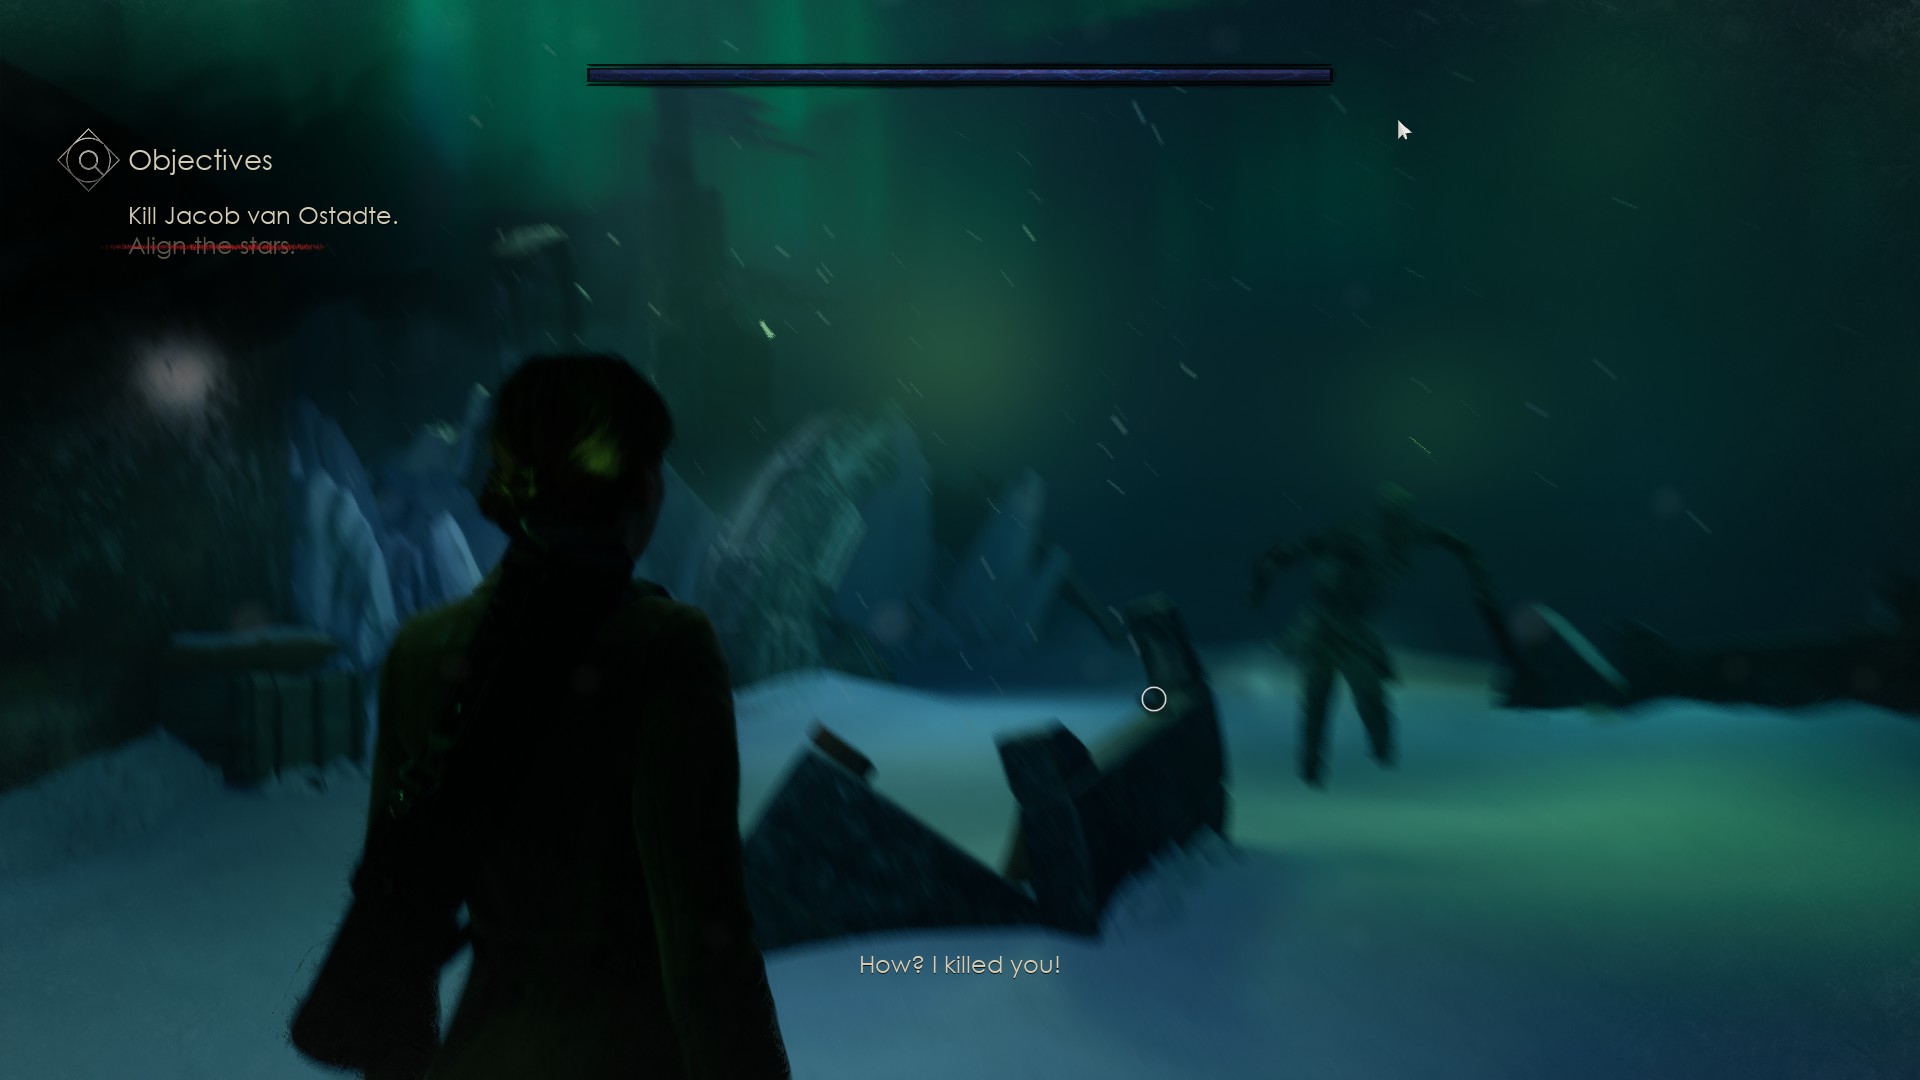
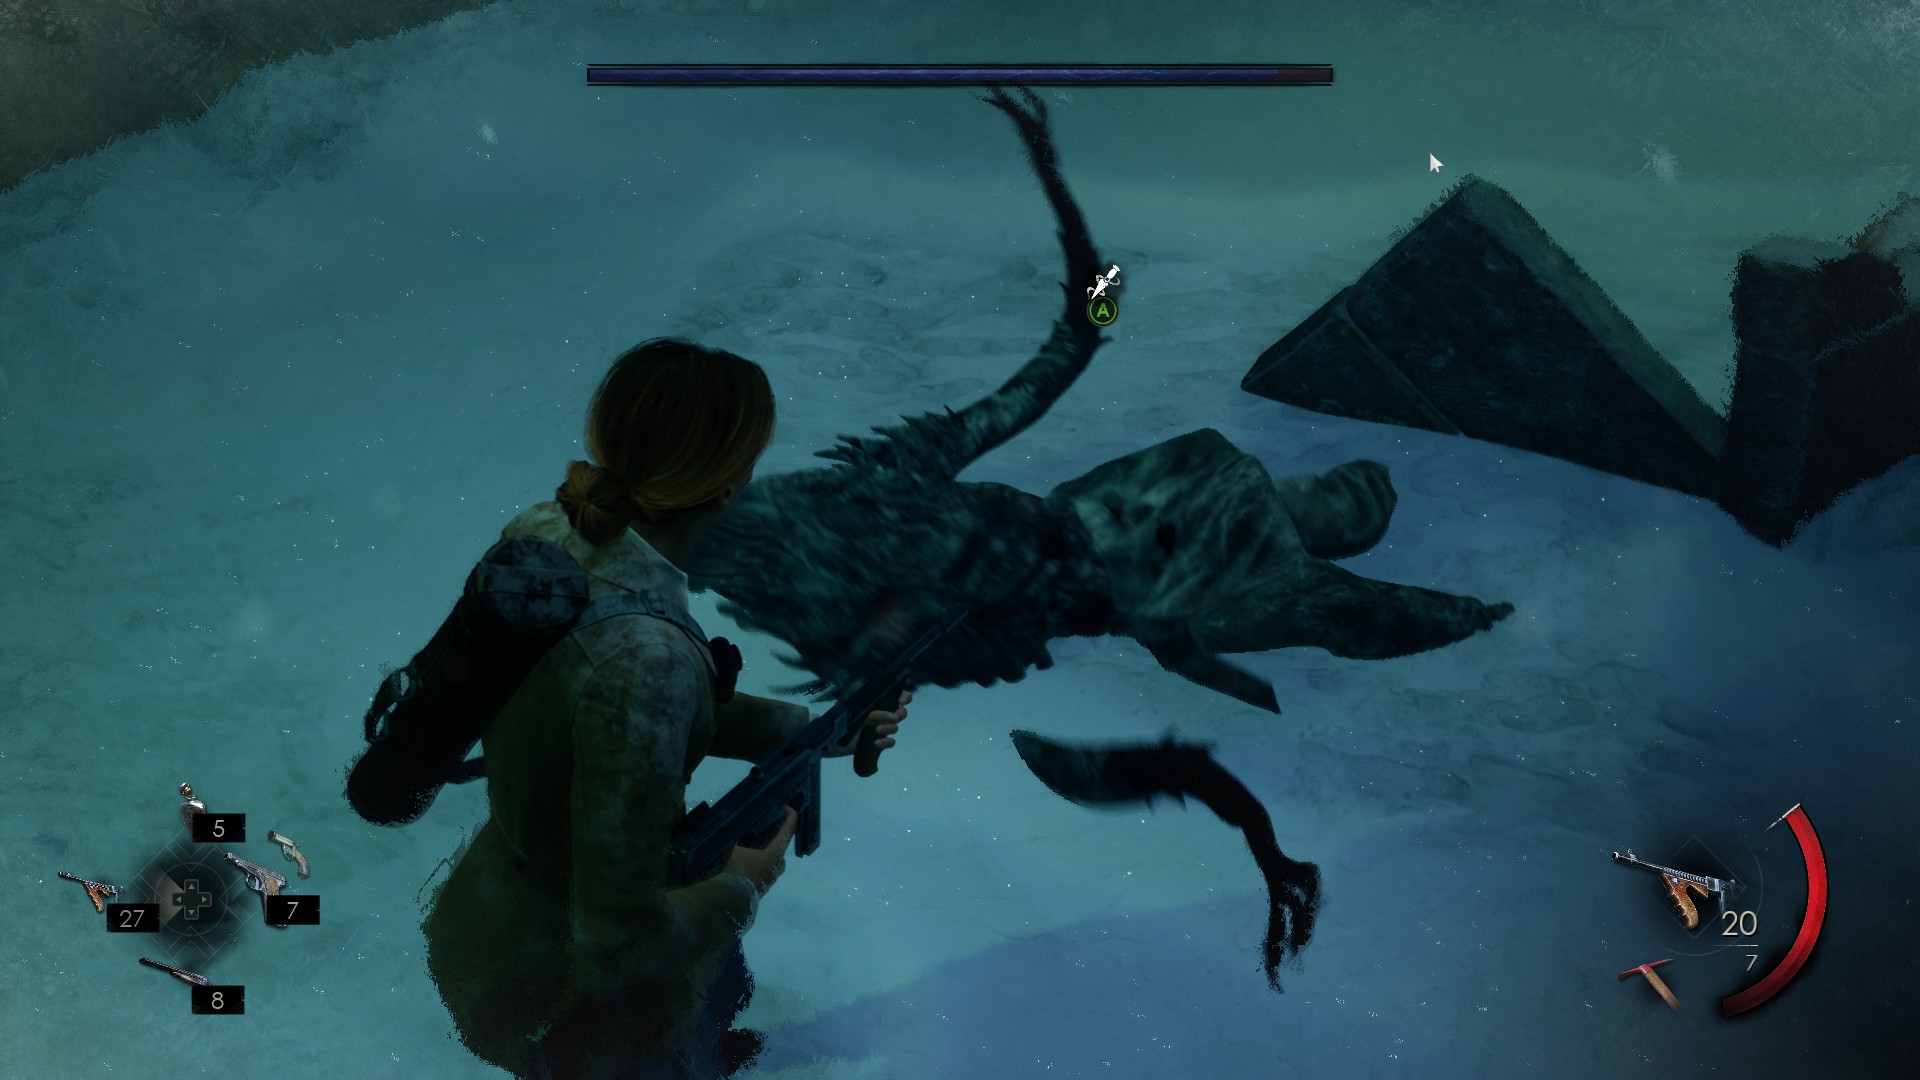
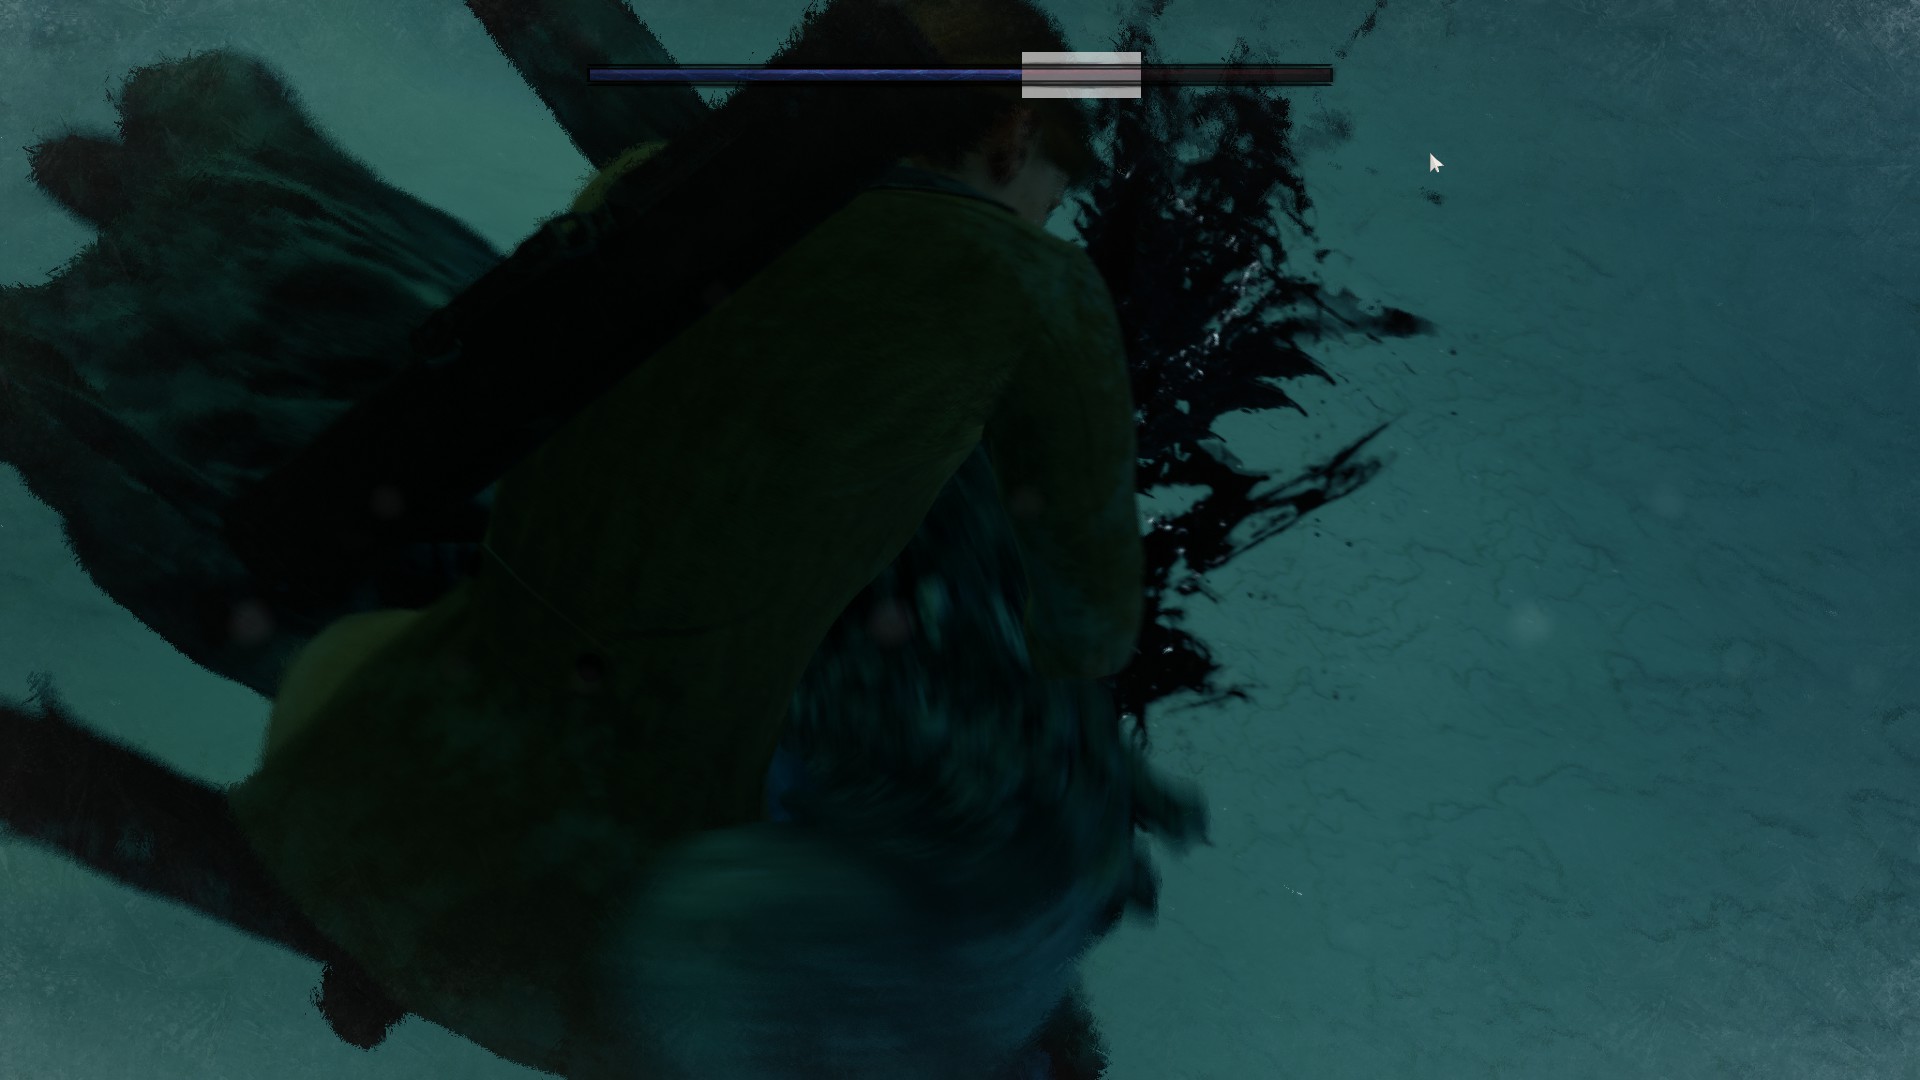
Once you’ve damaged him enough, Jacob will fall down. This is where you need to approach him and press the Use button to stab him with your Sacrificial Dagger (see images 11-12 below). If you don’t do it fast enough, Jacob will eventually get up and you’ll have to repeat the process. Do this several times and you’ll defeat Jacob, severing his connection to Jeremy and kicking off Chapter 5 with a couple of exciting cutscenes.
(11)(12)
Your difficulty settings don’t matter all that much for this fight. From what we can tell, the only difference lies in how hard Jacob hits you. On Easy he barely tickles, while on Hard he can kill you in two hits. But seeing how easy it is to avoid him, this shouldn’t be much of a factor.
The Modern vs Old-School setting also comes into play in this fight. If you’re playing on Modern, you’ll see Jacob’s health bar during the second round of the fight. On Old-School, you’ll just have to spray and pray.
Share this article:
Val Hull
Resident role-playing RPG game expert. Knows where trolls and paladins come from. You must fight for your right to gather your party before venturing forth.