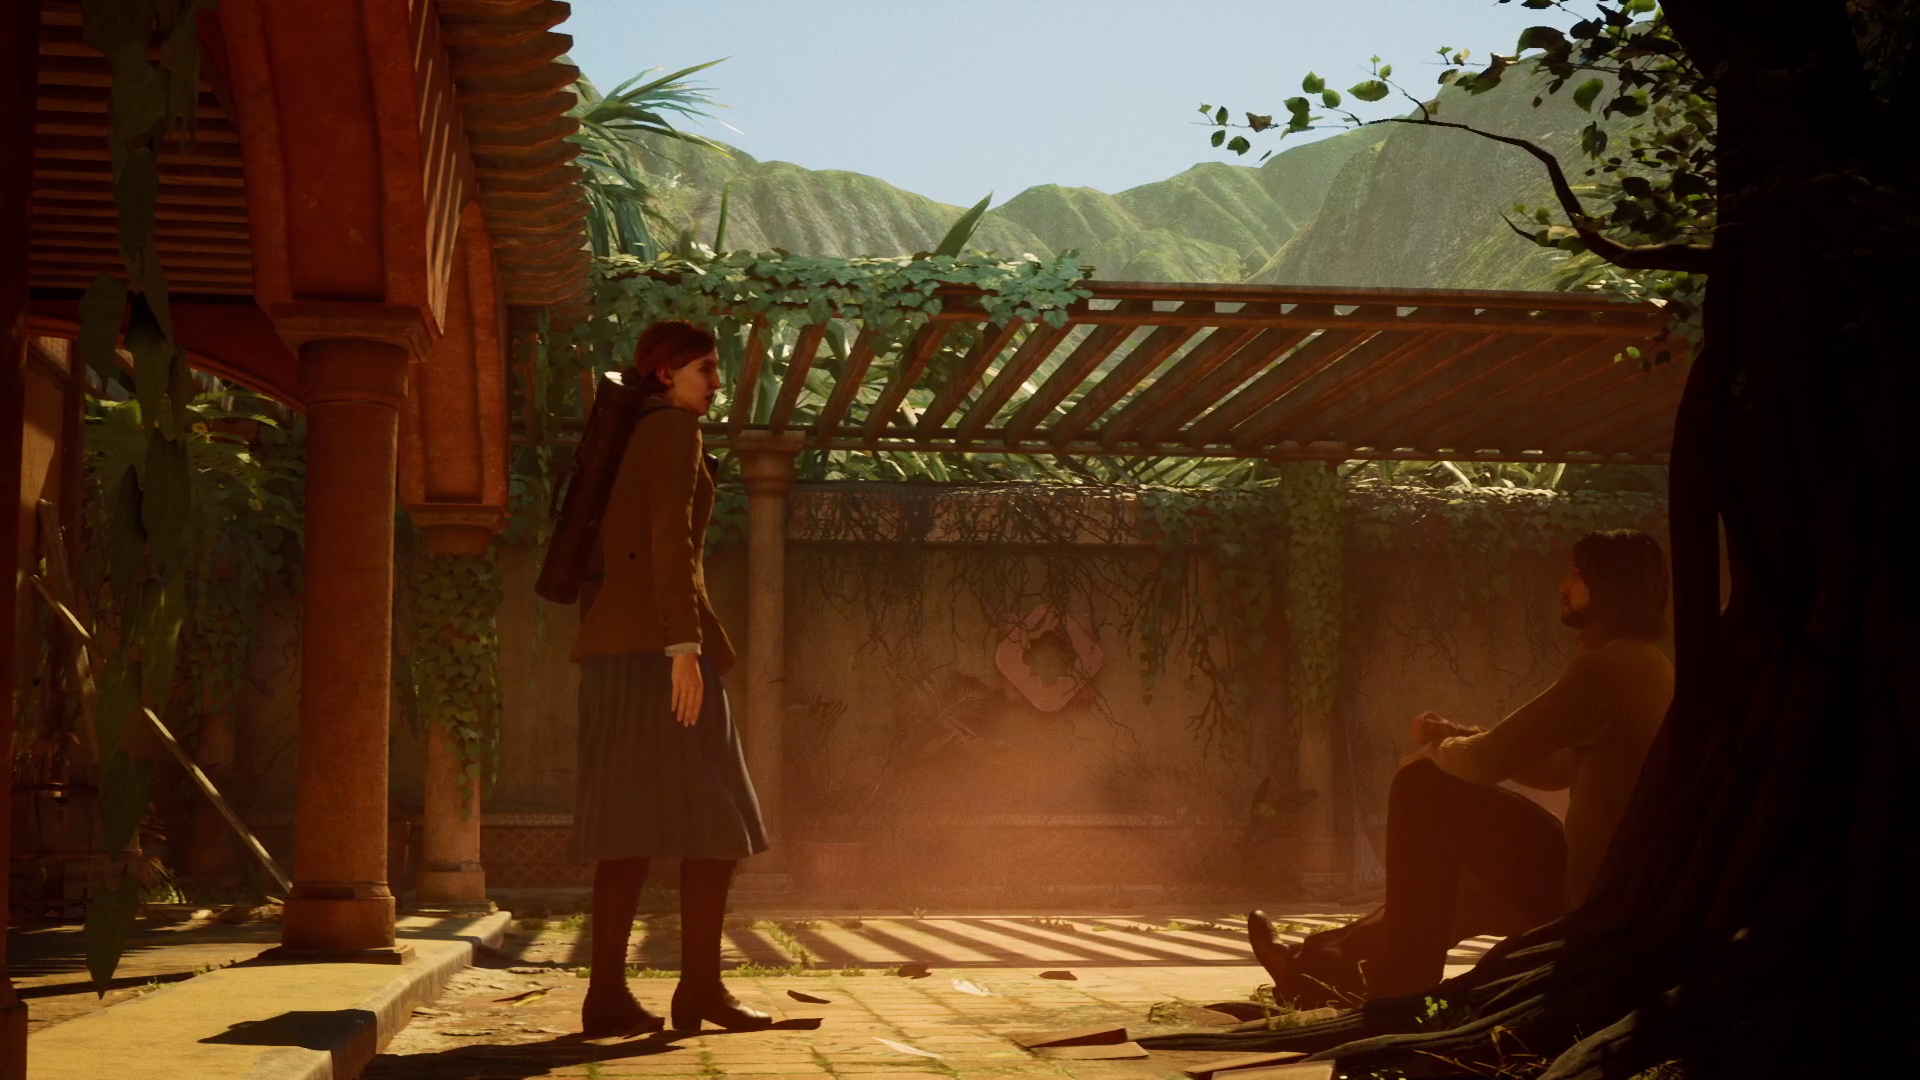
This chapter begins with you meeting what seems to be a real person, but in the form of a figment of Jeremy’s imagination. Not confusing at all. Enjoy the chat, and the pleasant library that follows, as it precedes one of the more challenging sections of the game.
Look for answers inside the great library of Taroella
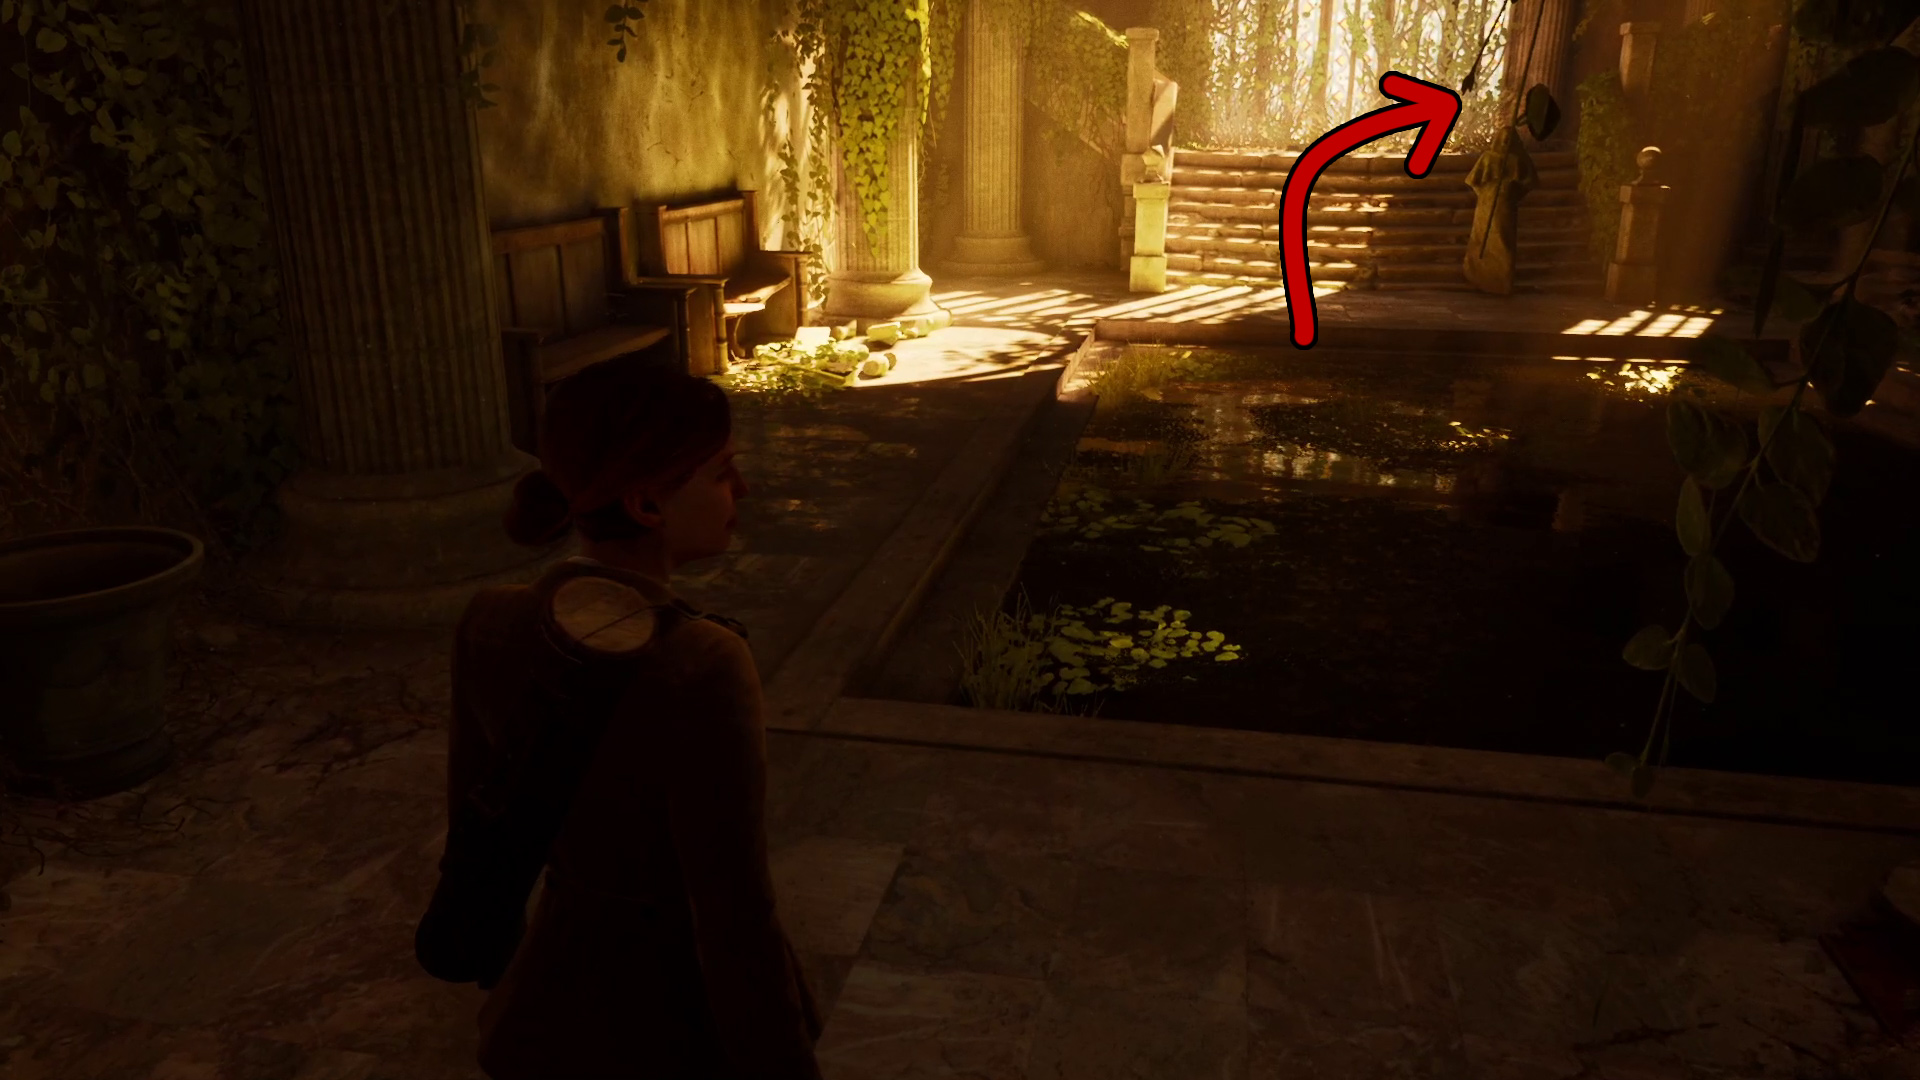
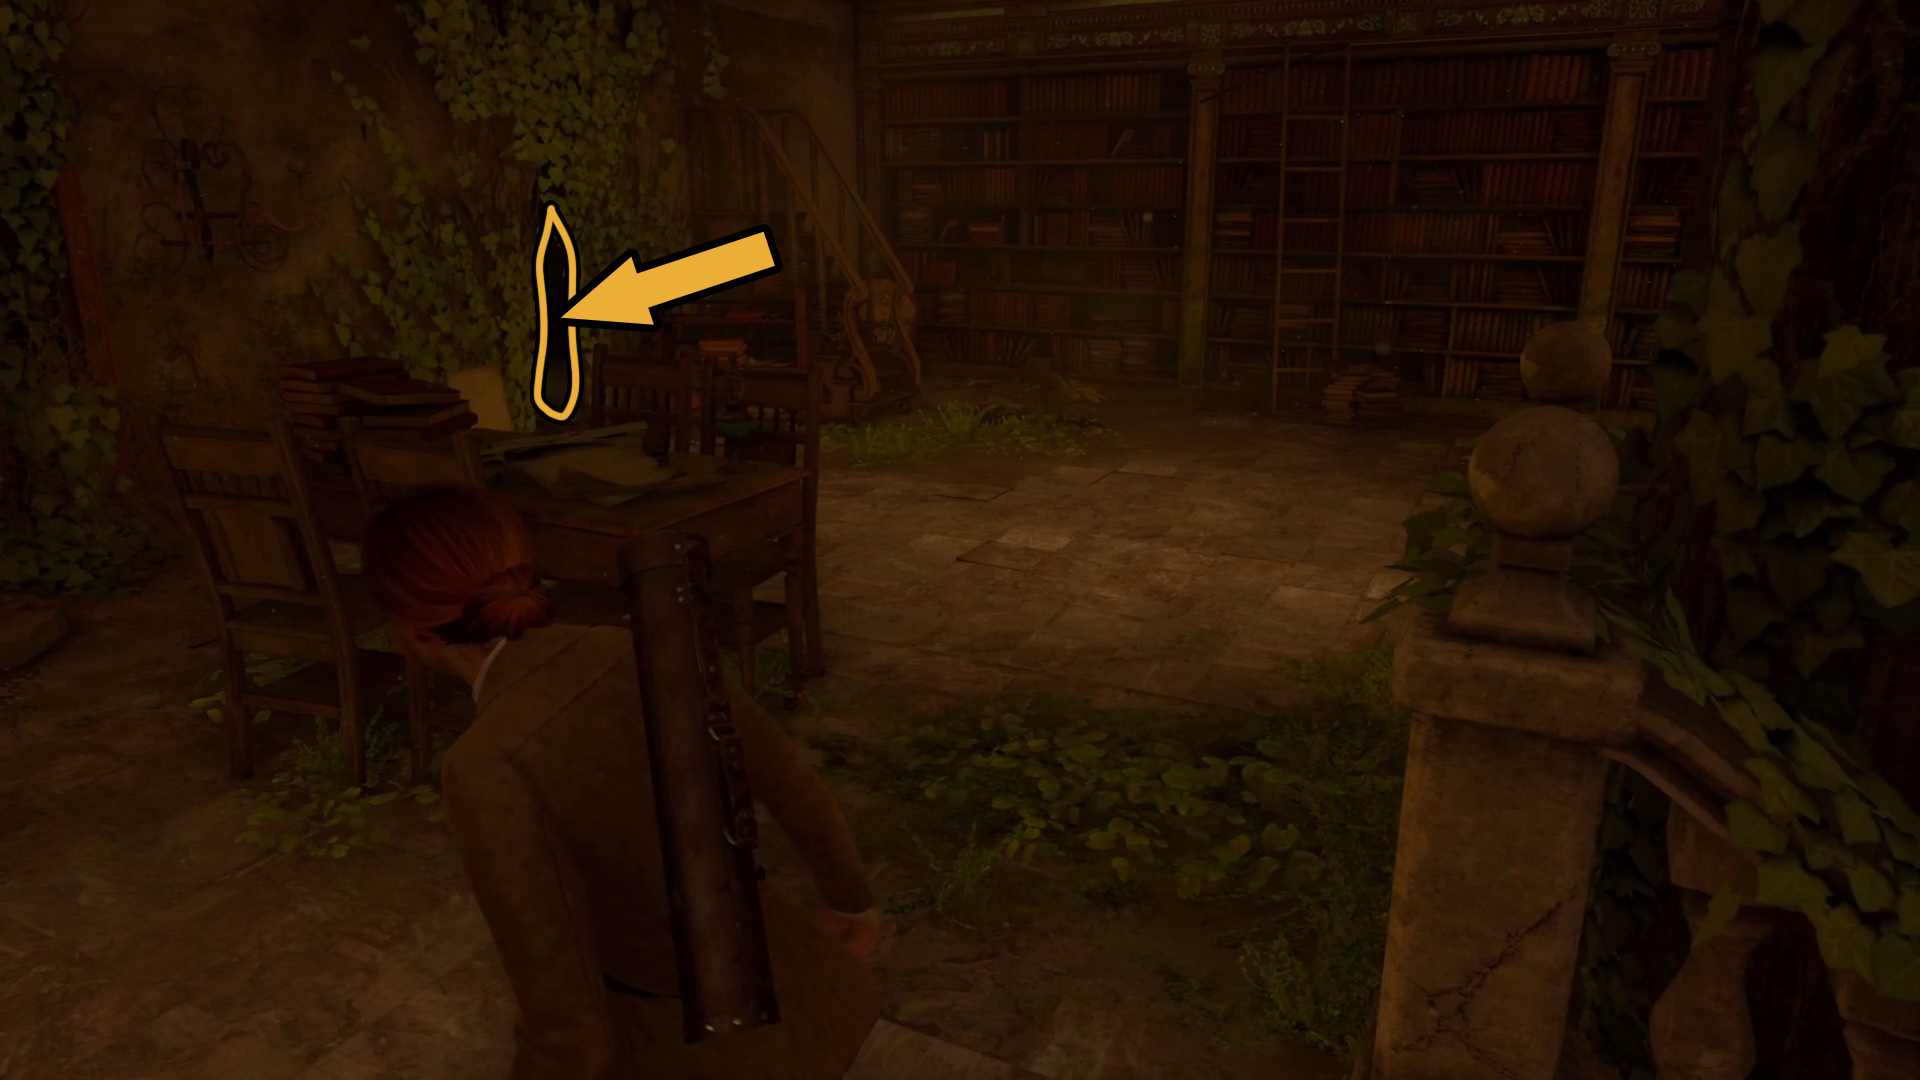
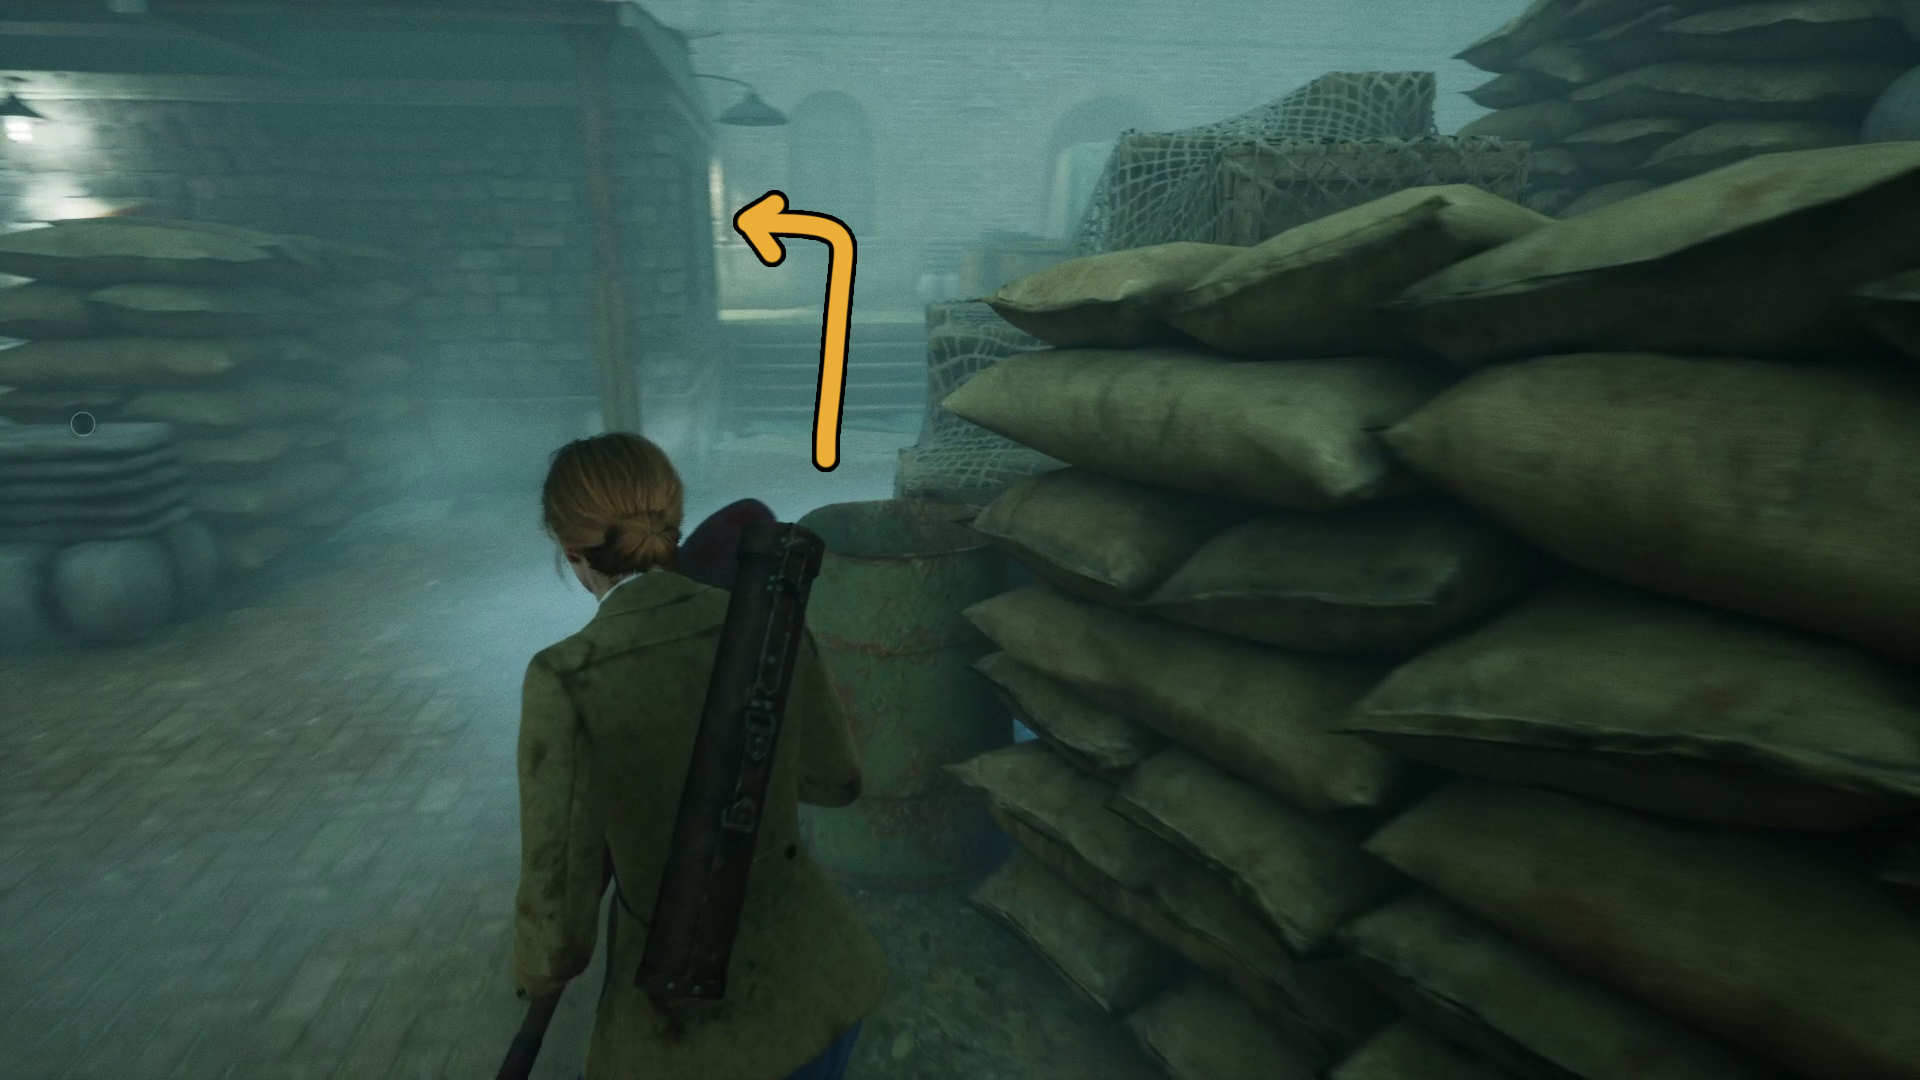
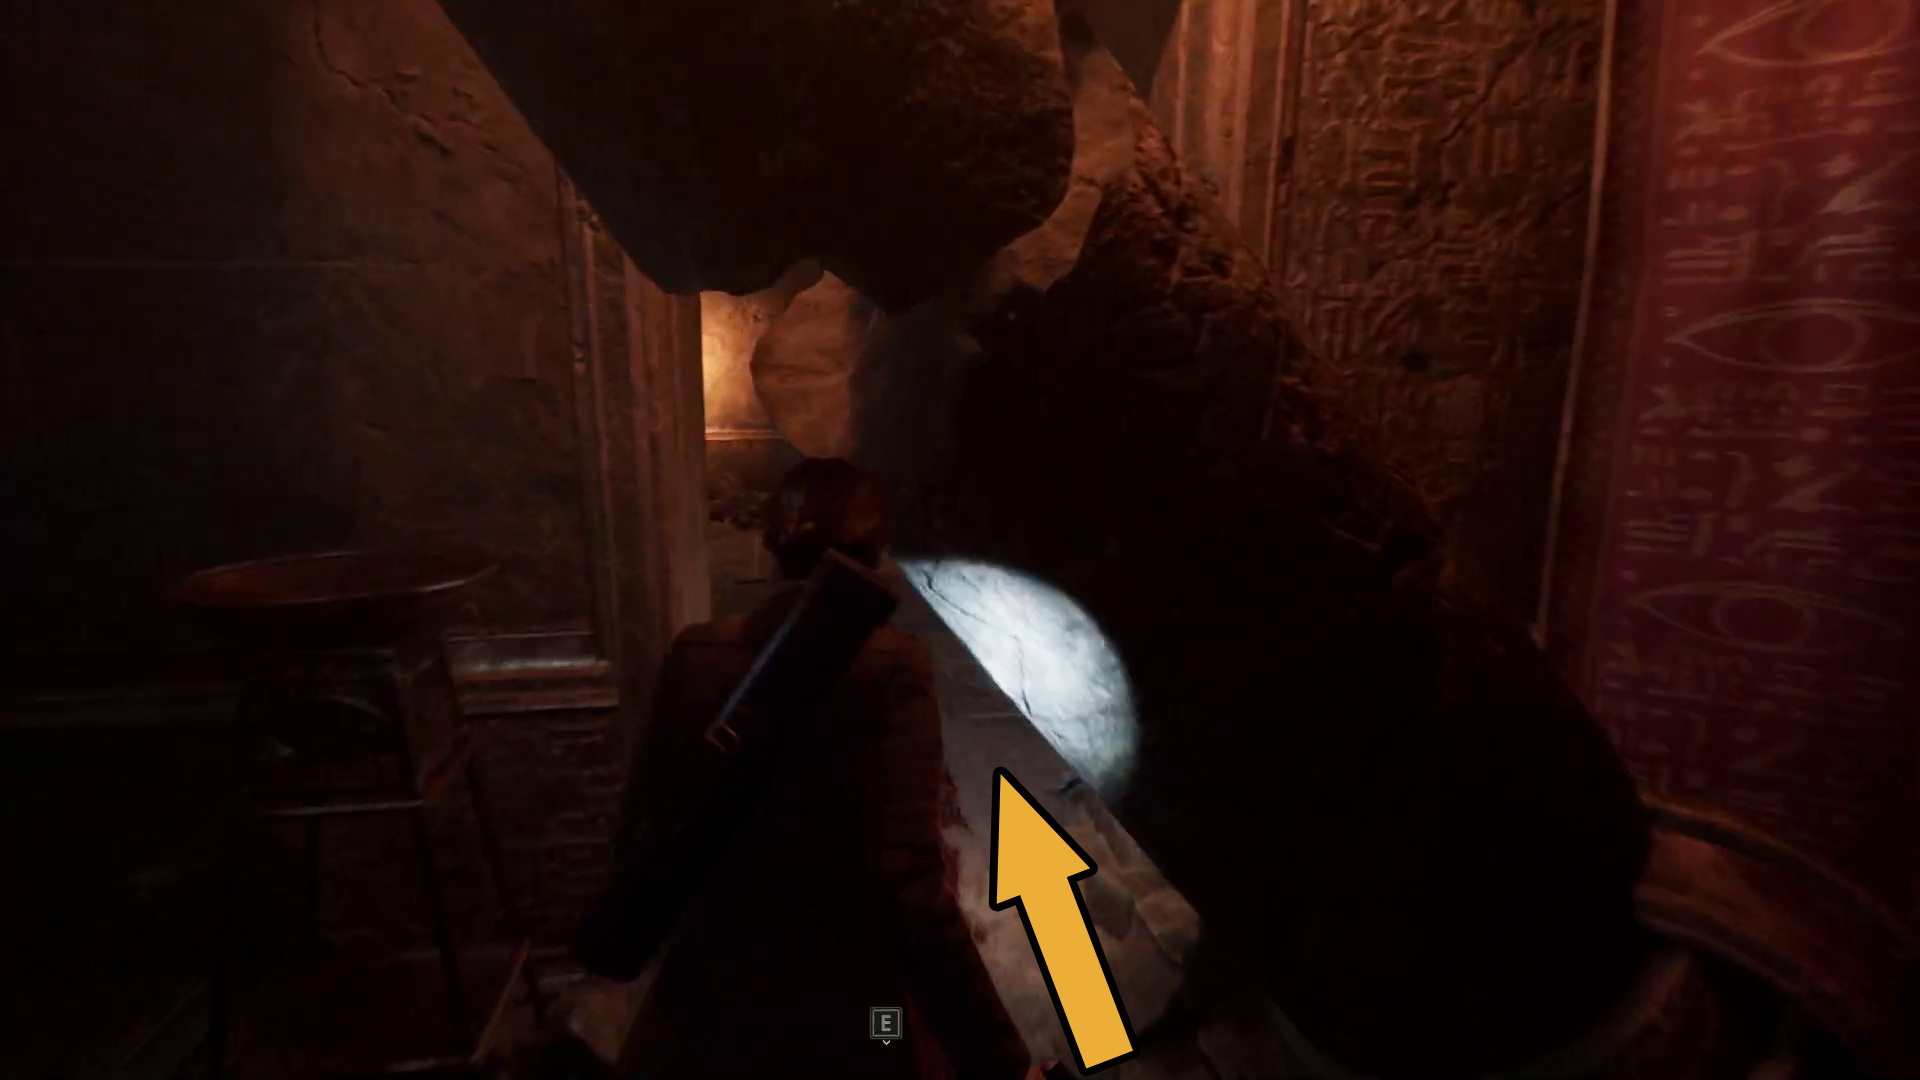
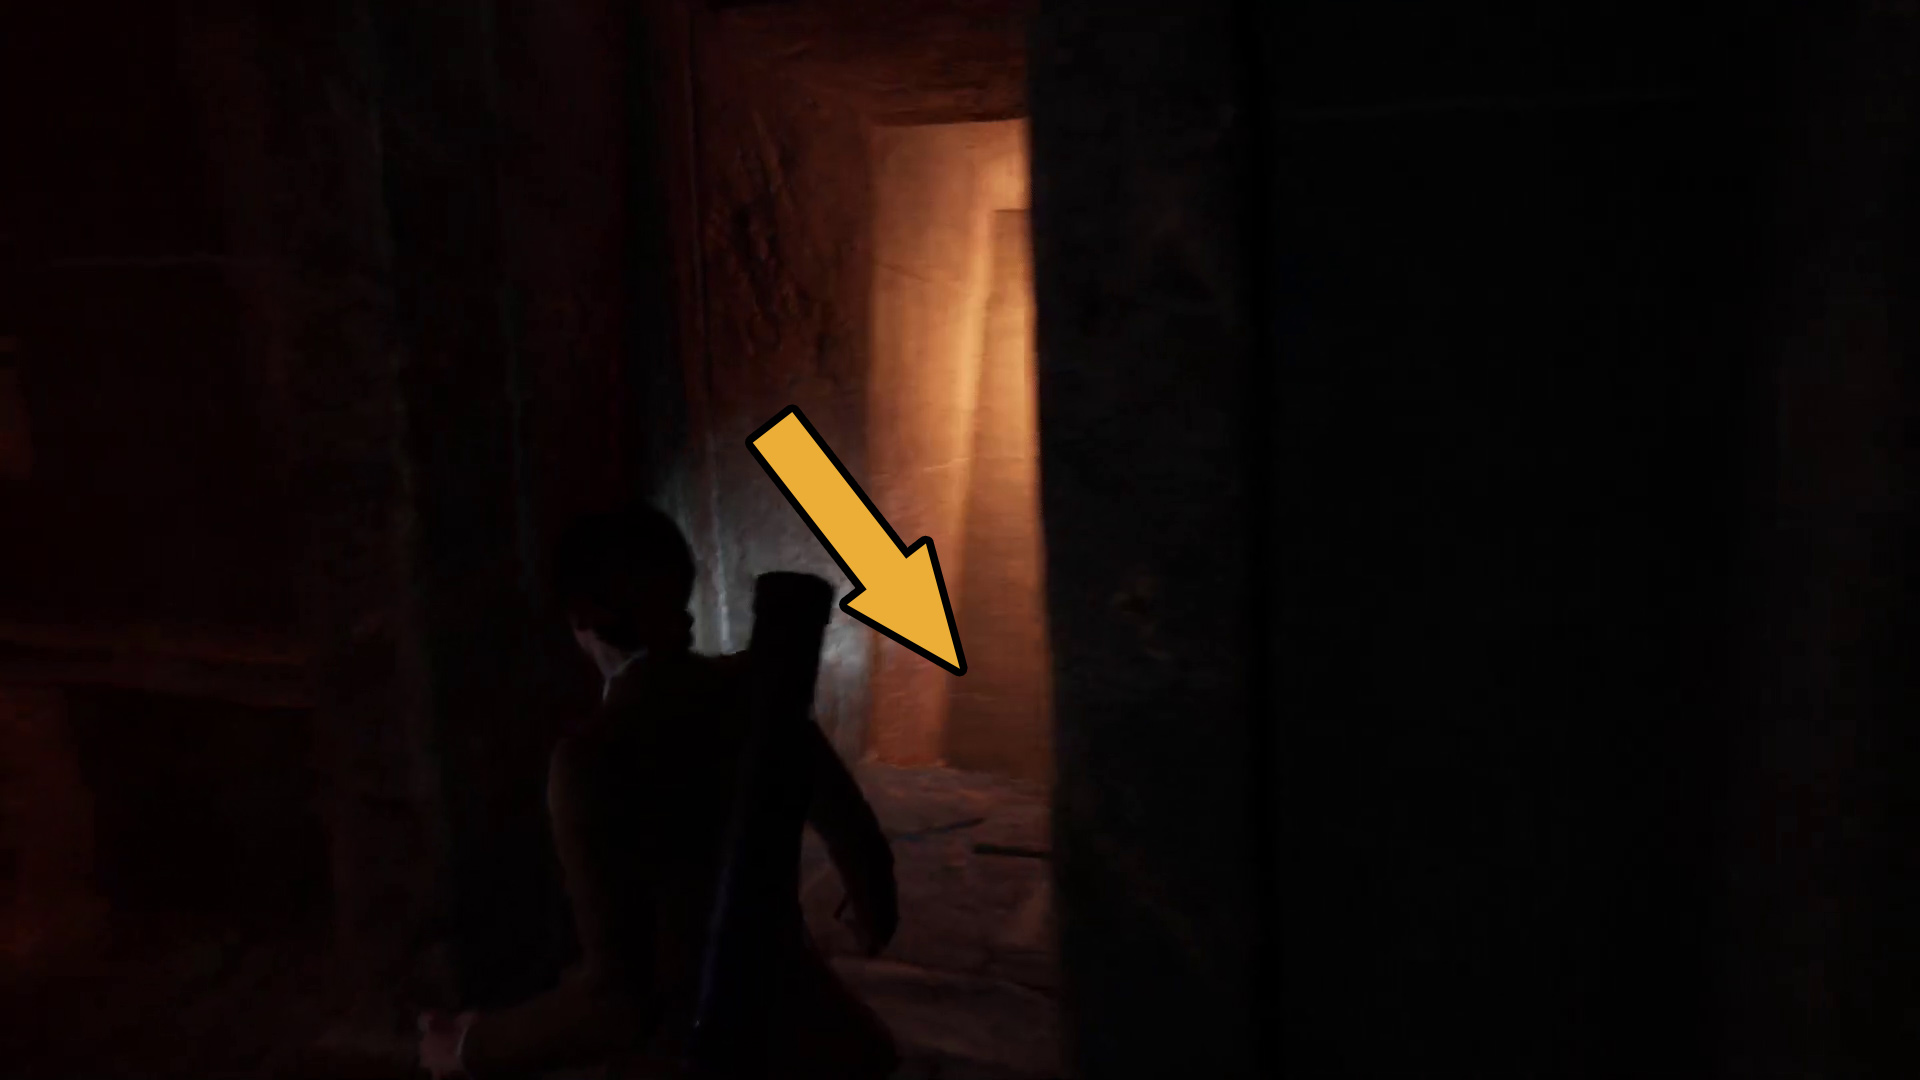
Once the cutscene with Juan ends, you can chat with him a bit more if you like (or if you’re trying to get the Chatterbox achievement). When you’re ready, turn around from Juan and go around the corner to the left, then go through the door to enter the library. Head through the first room to the hole in the floor, and you’ll find a spot you can jump down (Image 1). Continue down the ruined hallway, and in the next area just keep going forward, around the hole in the floor and then climb the ledge and go through the small crack in the wall. You’ll come to a room with a small pool — go up the stairs and to the right (Image 2).
Image 1Image 2
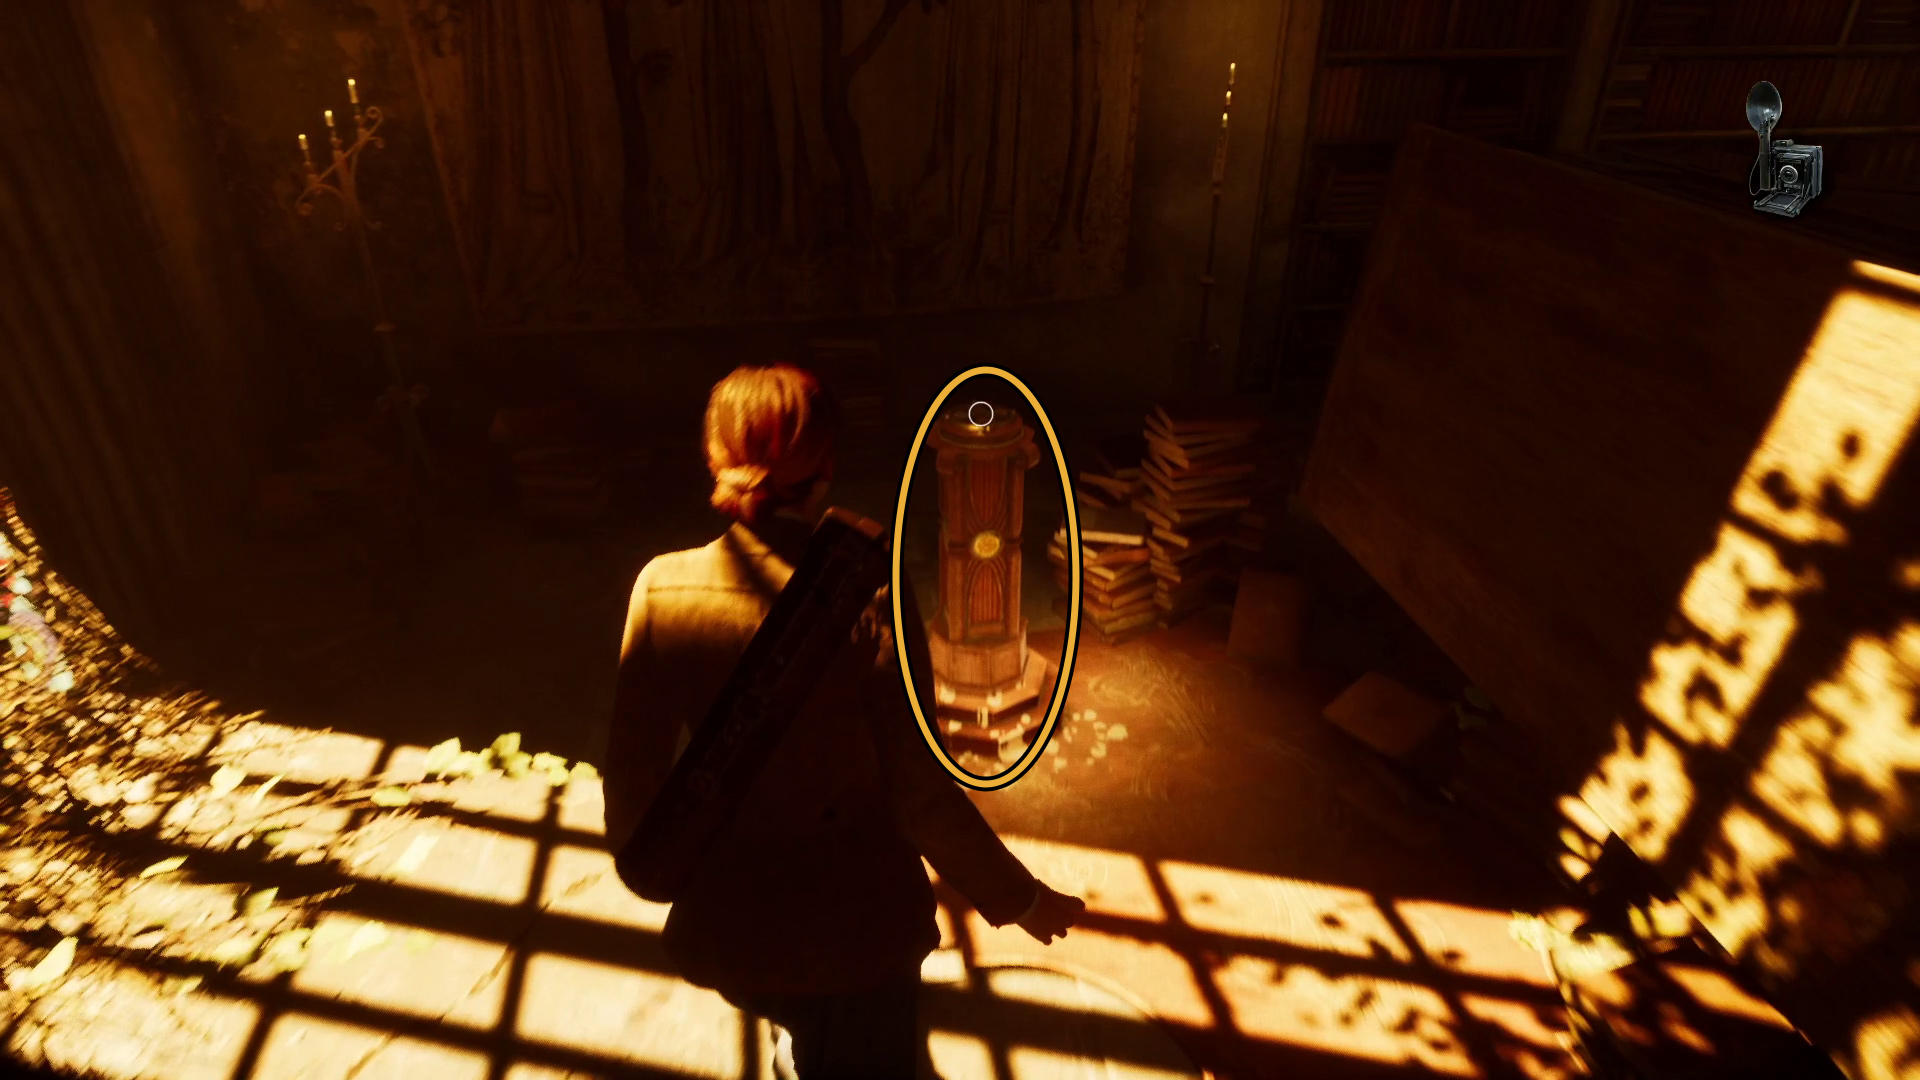
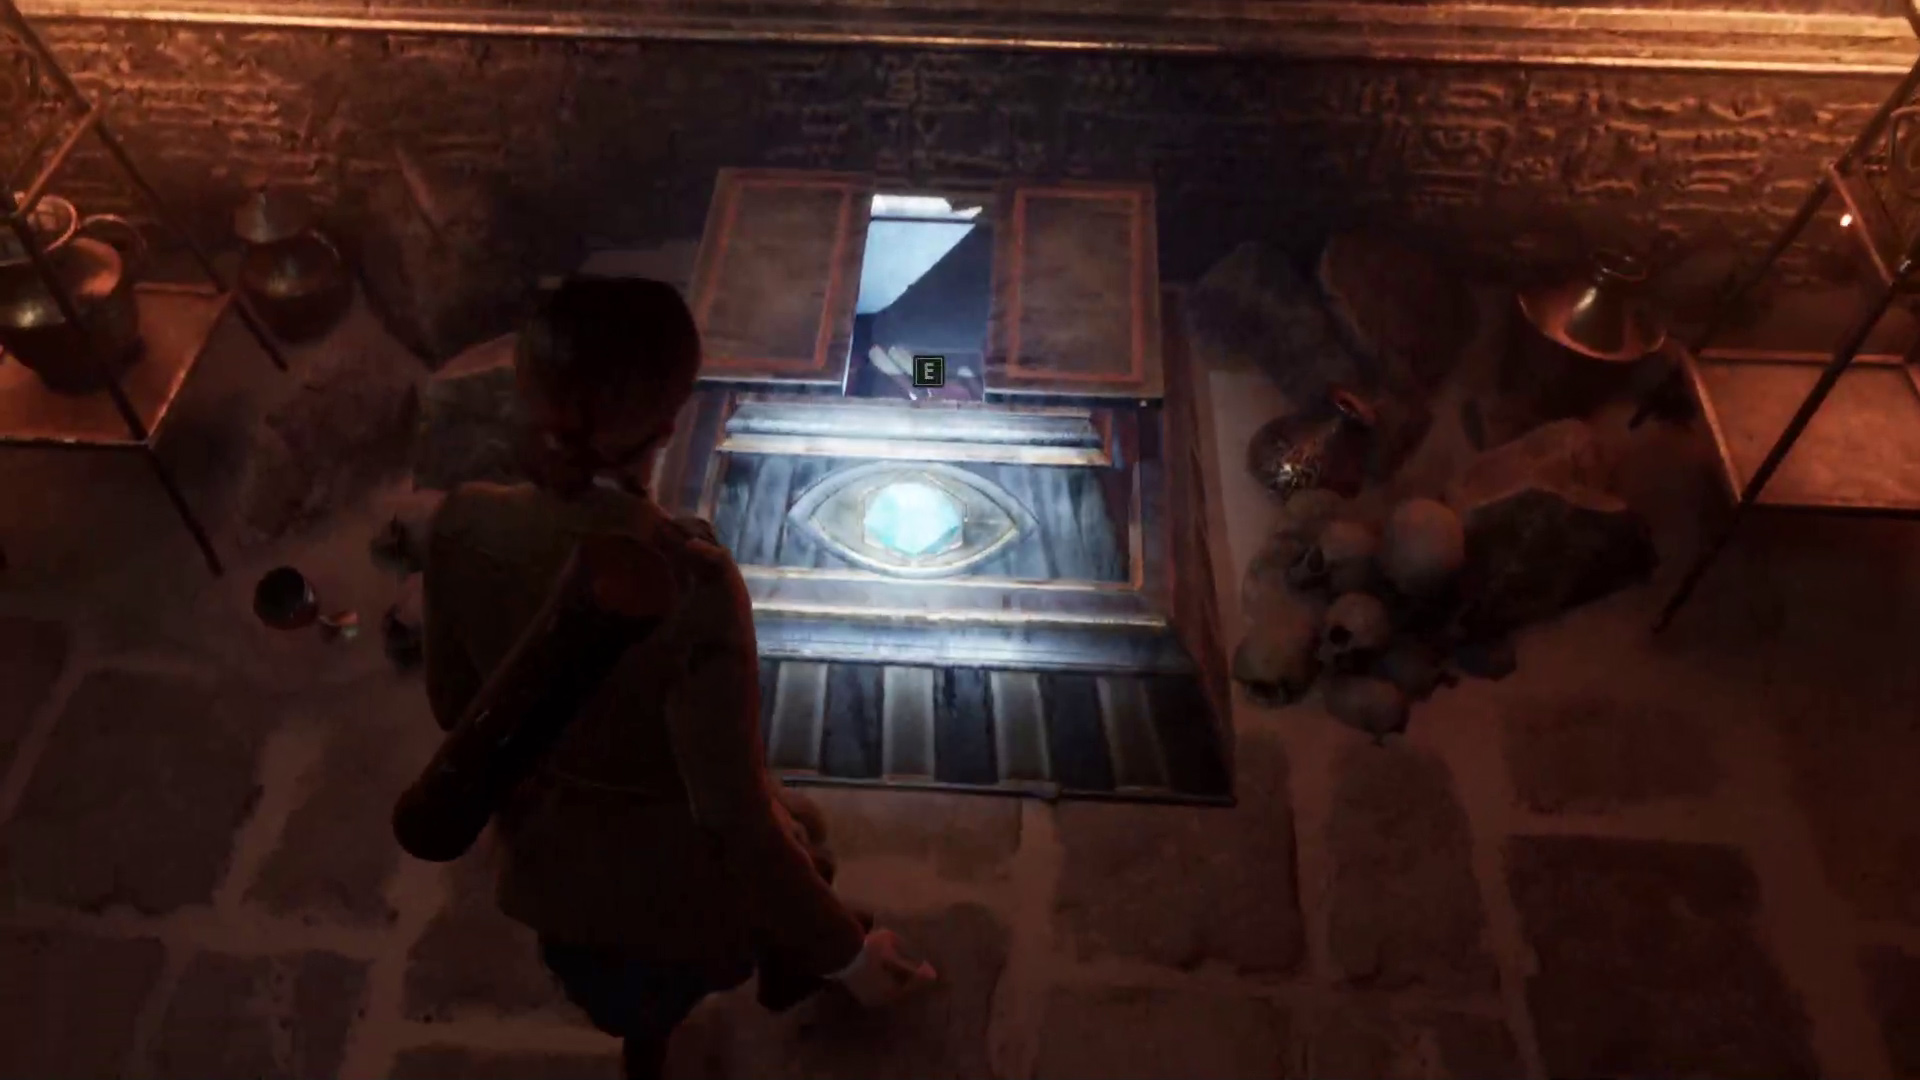
You’ll see a small pedestal you can interact with (Image 3) — make note of it, as you’ll need to come back to it later once you get the requisite key item. For now, head around the corner to the right and continue through the books until you can go right. On your right, you’ll see a book on a table (Image 4) — investigate it to find the clue The Great Library.
Image 3Image 4
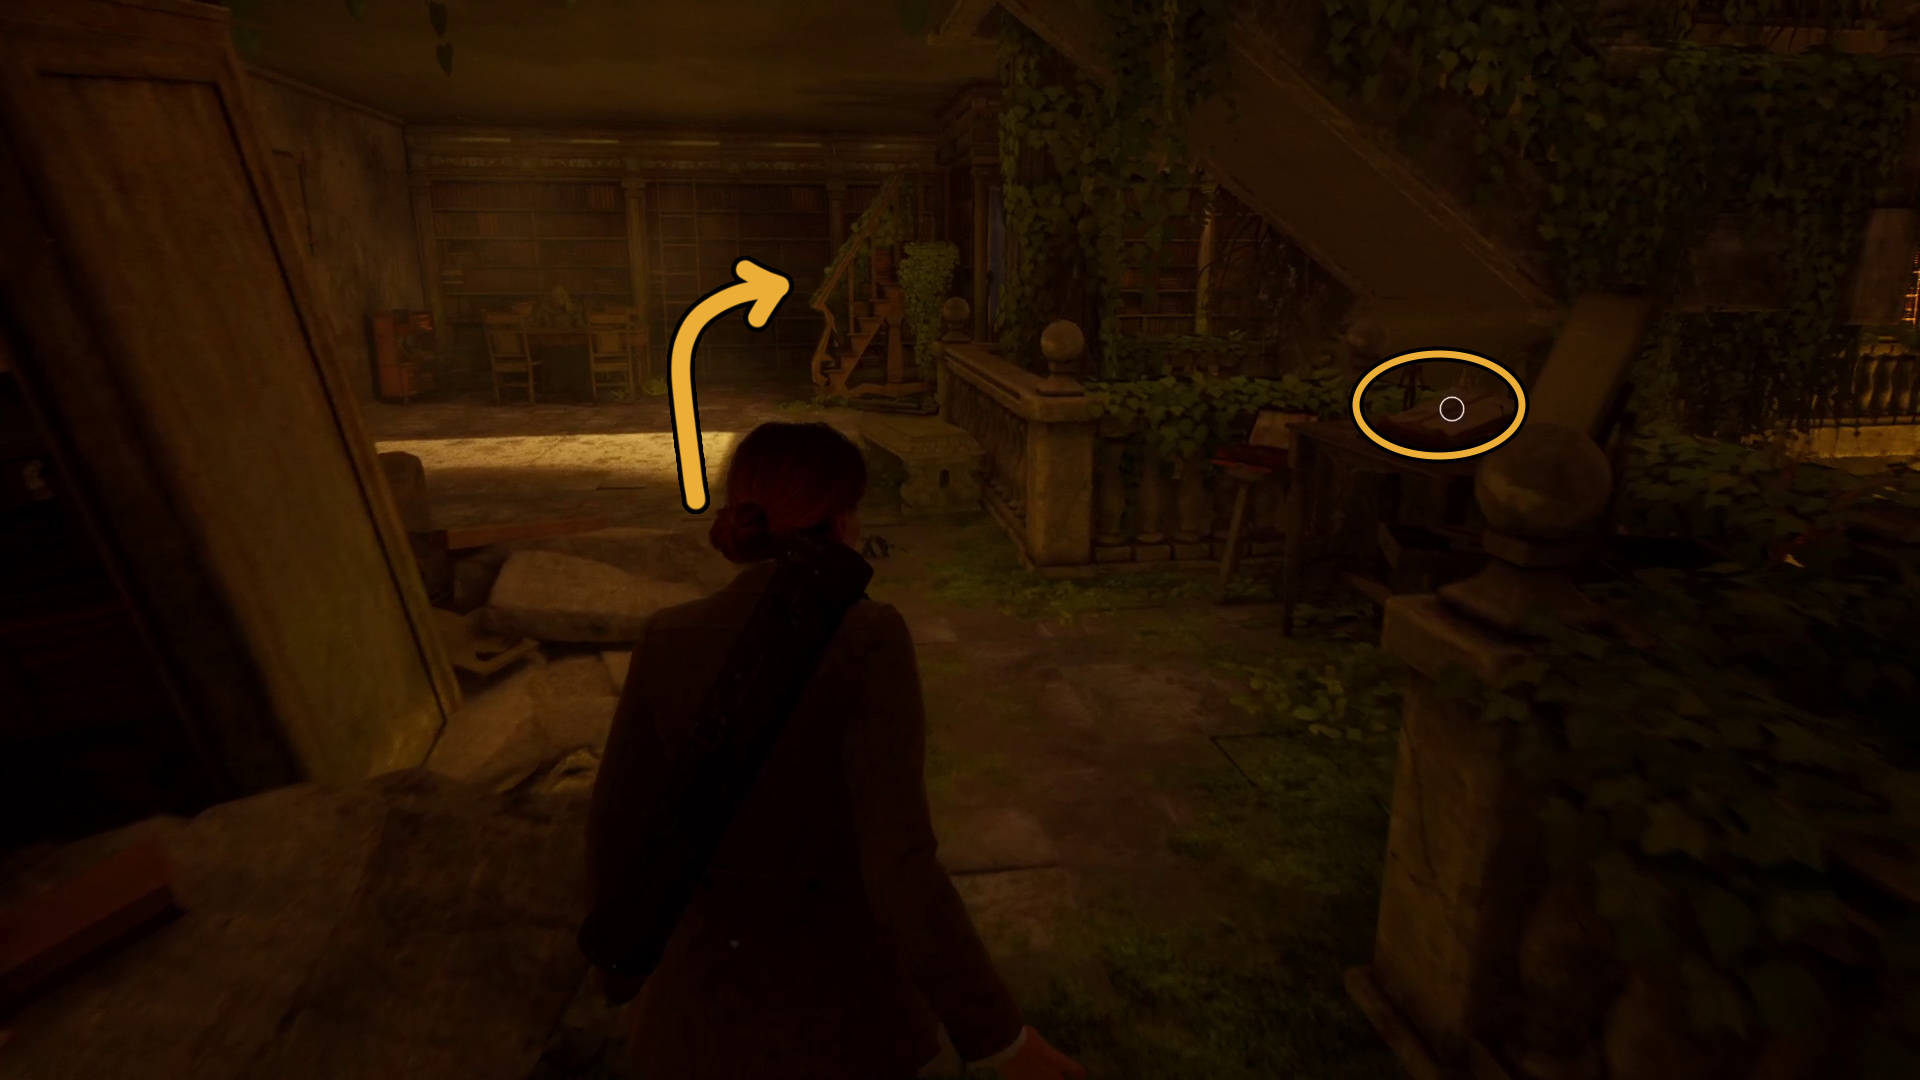
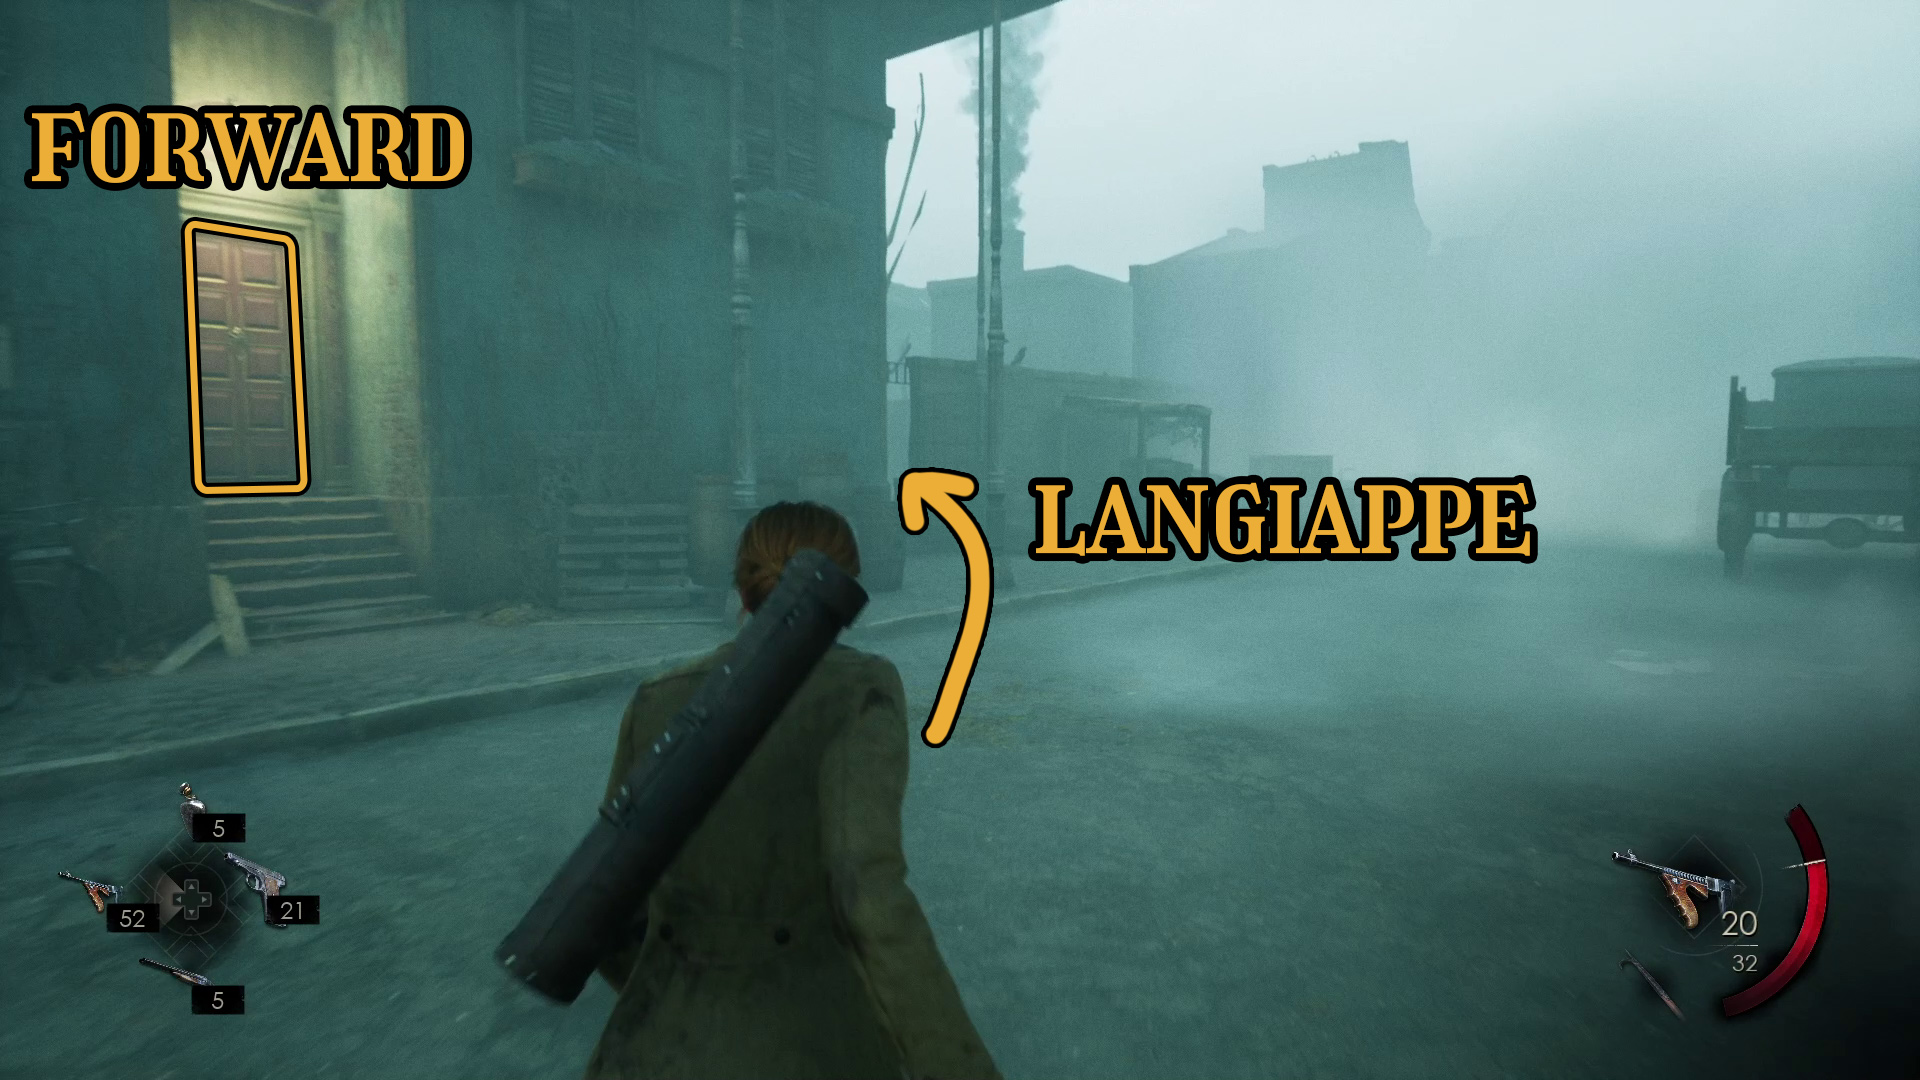
Continue past the table and go right around the bookshelves, then up the stairs (Image 5). At the top of the stairs, look past the table to your right and you’ll see a hole in the wall (Image 6) — walk up to it and interact with it to squeeze through. Inside, you’ll find the Unmasked EvilLagniappe on a table.
Image 5Image 6
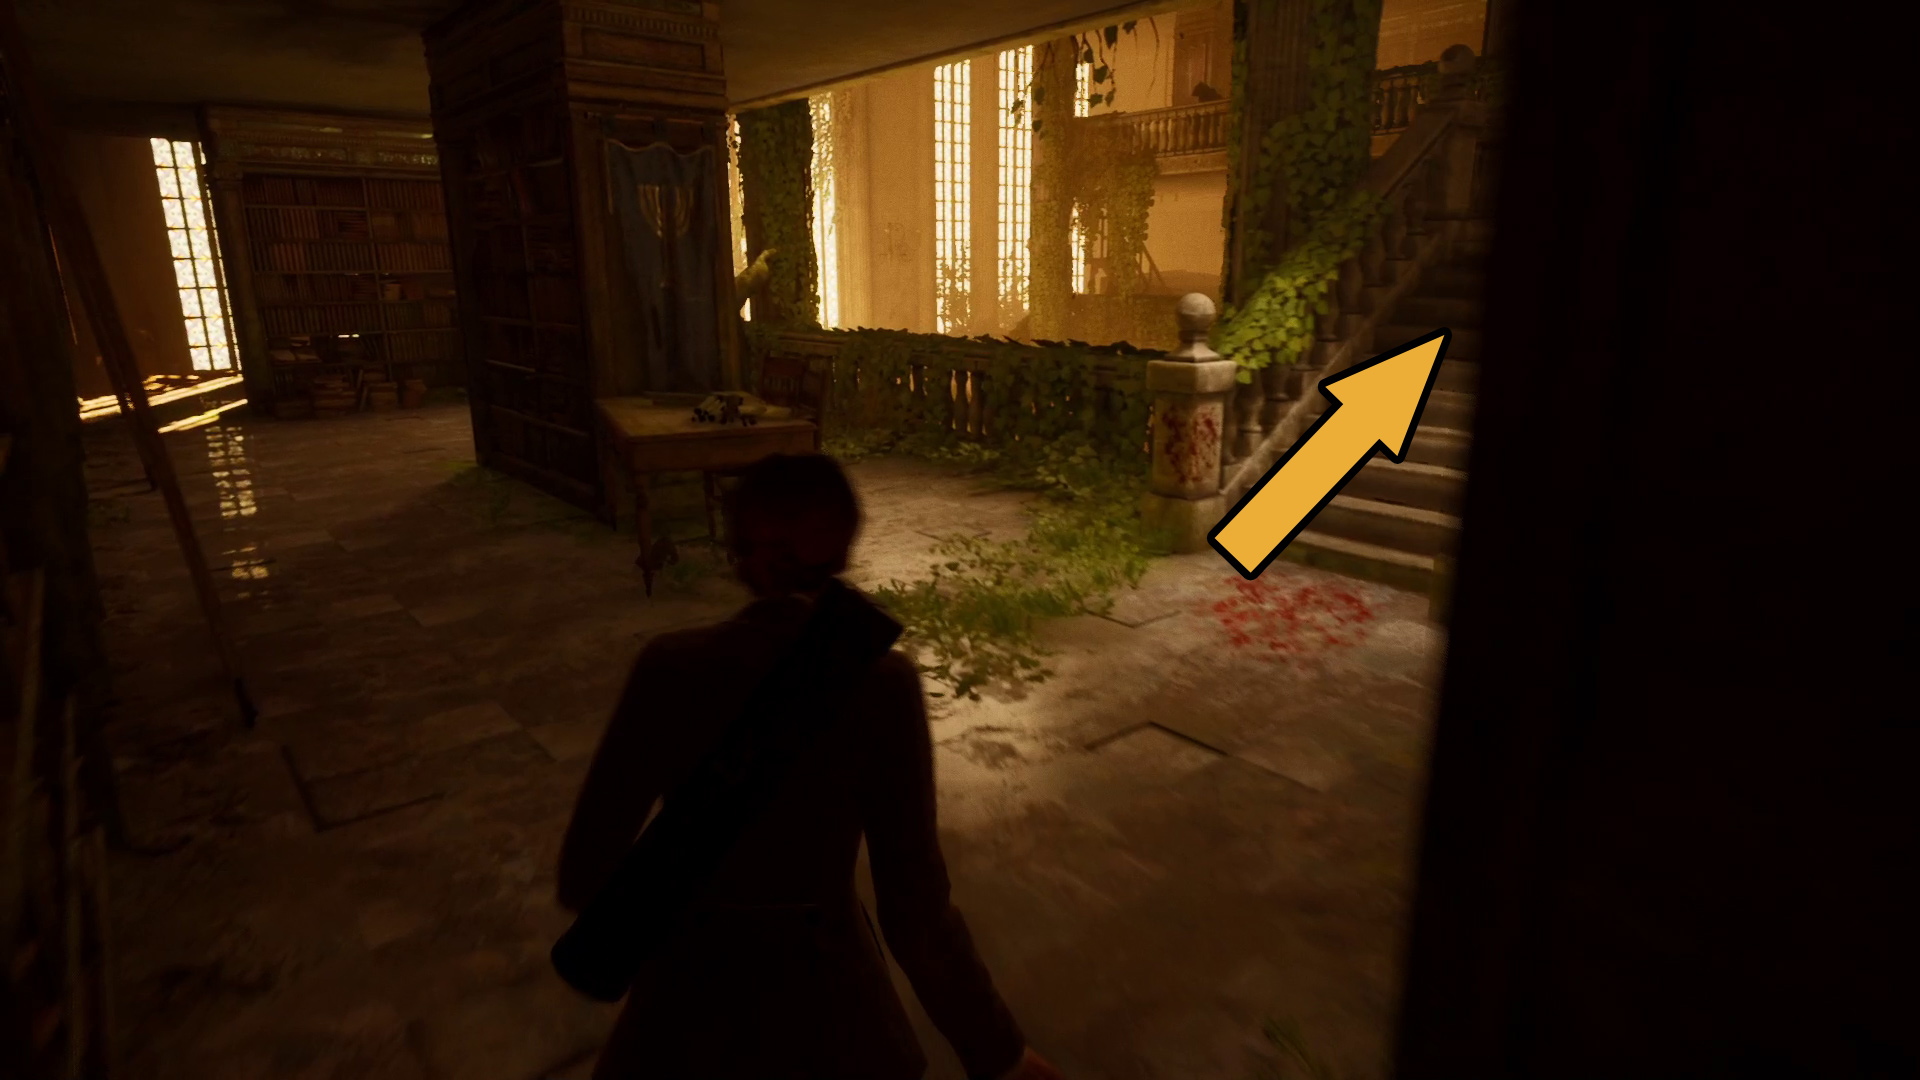
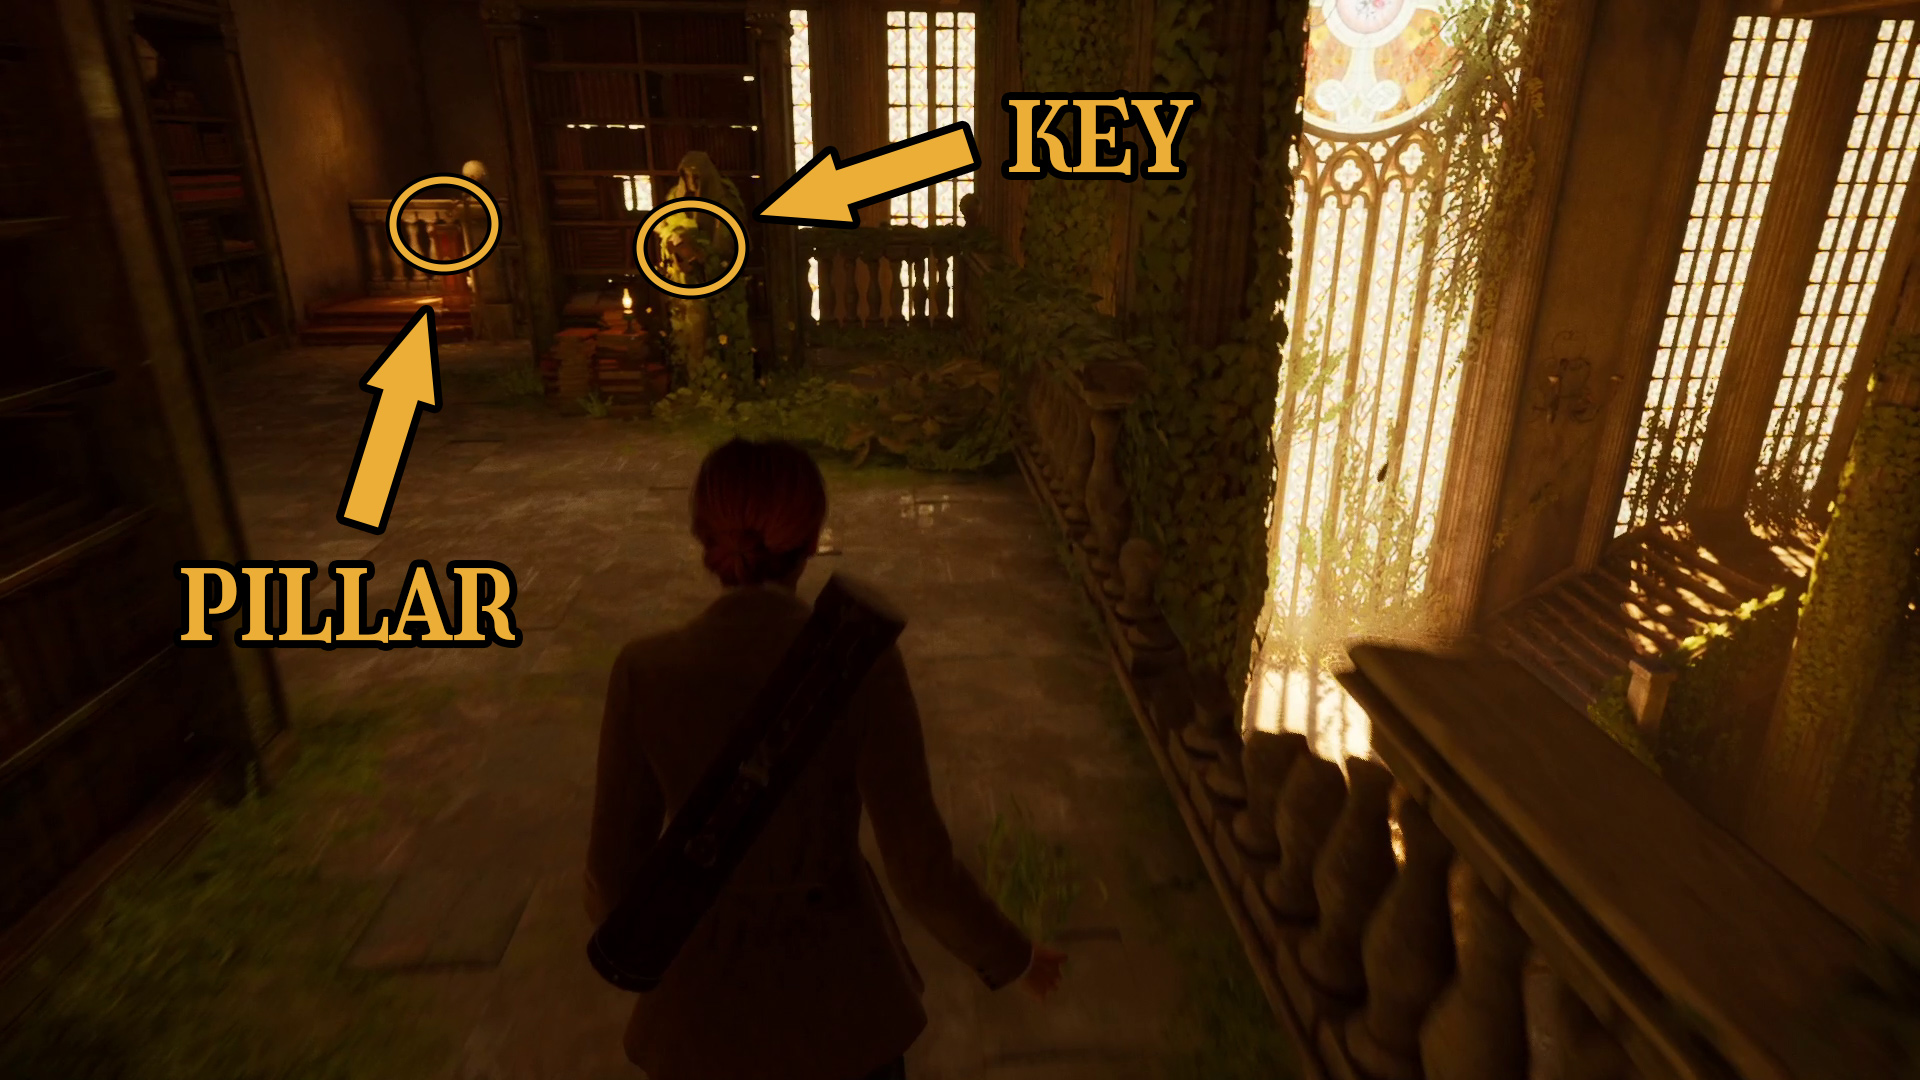
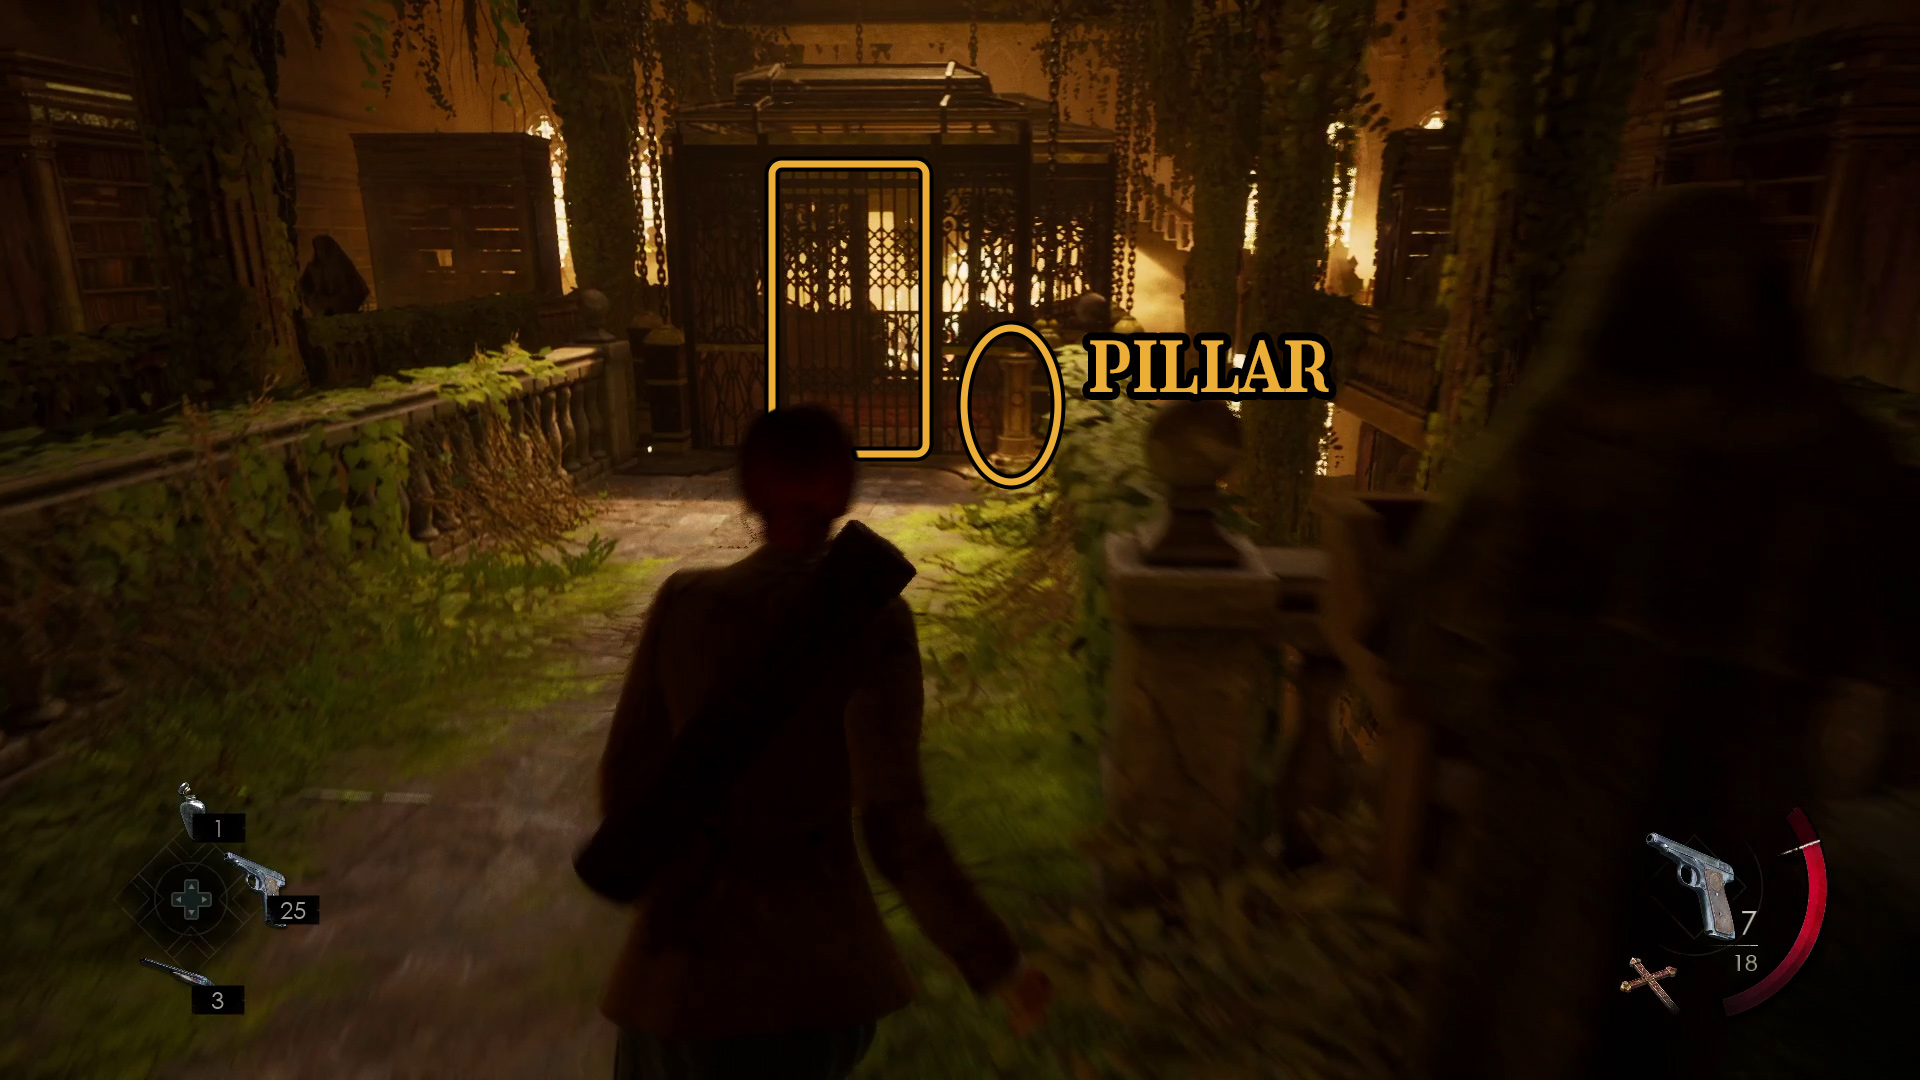
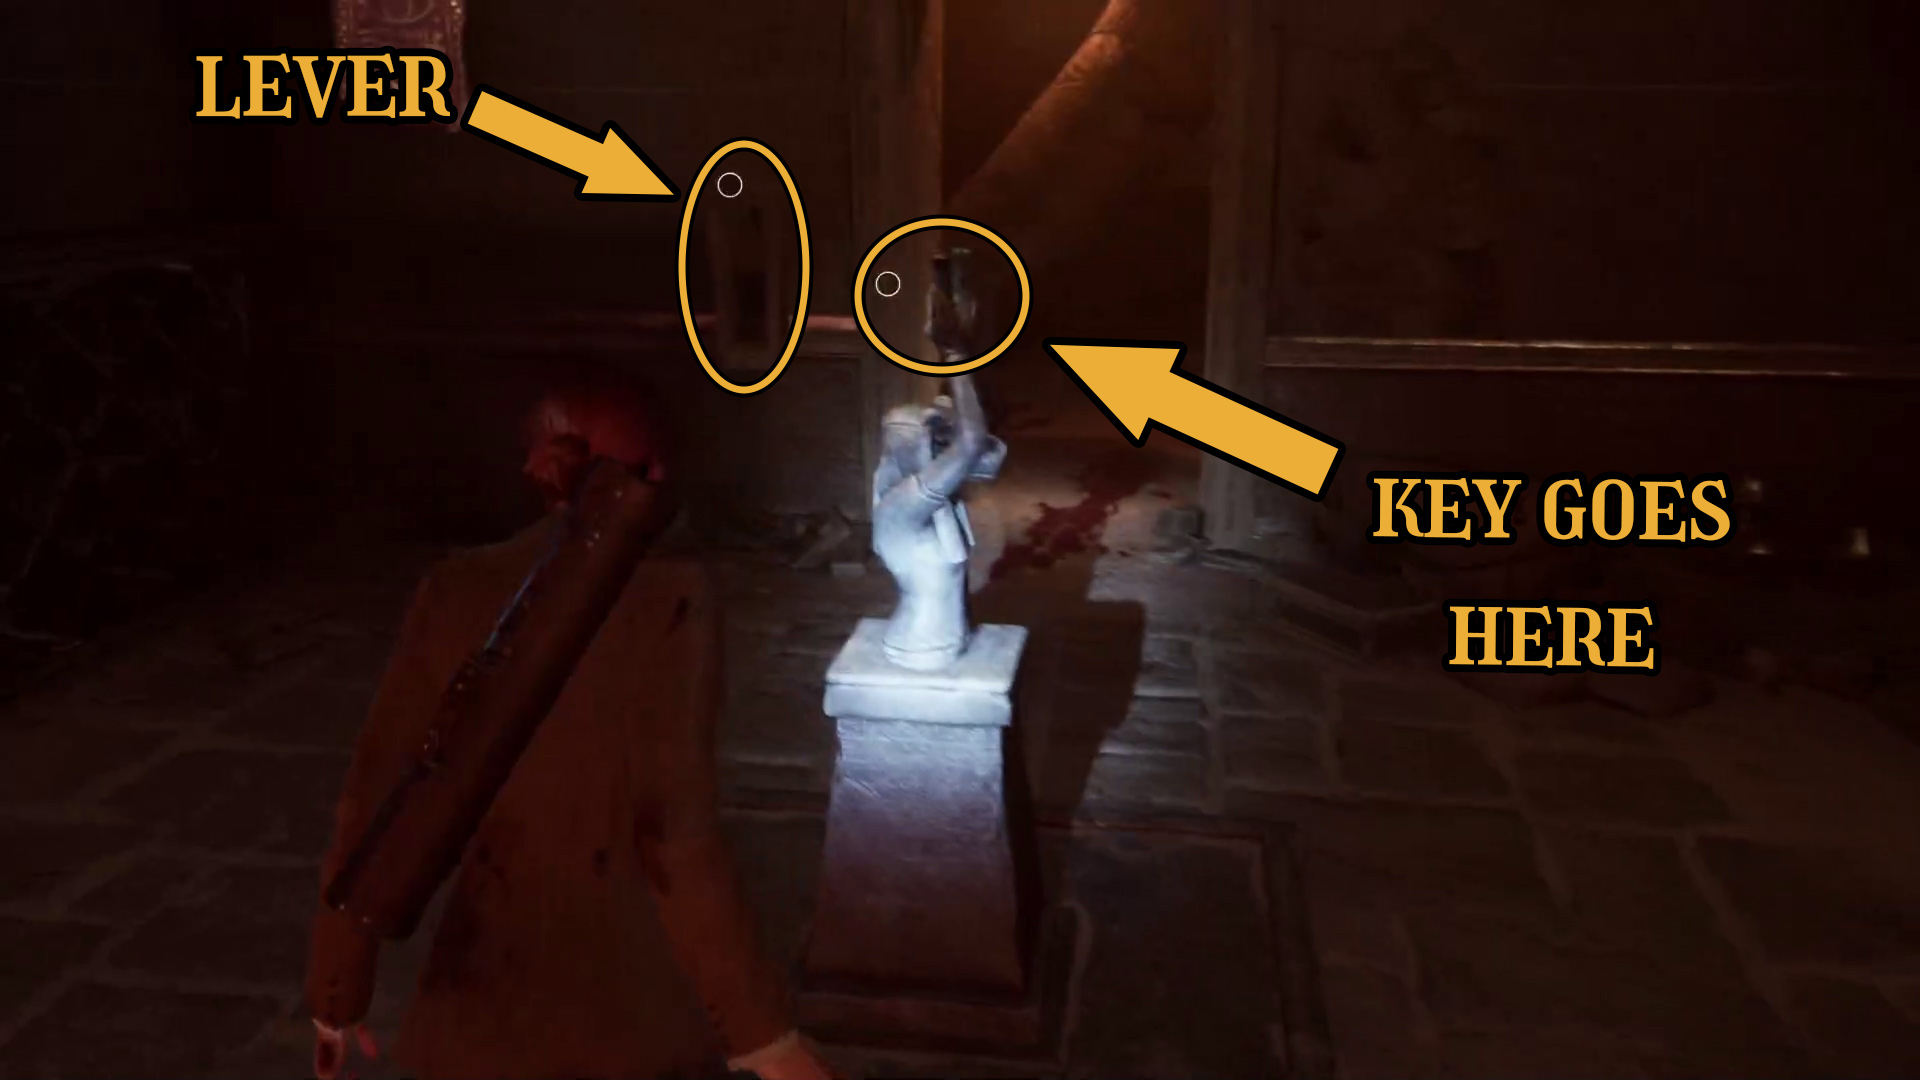
Leave the hole and go straight towards the statue holding the key (Image 7), then prepare for some action. Once you take The Key of Hubertus from the statue’s hands, a brief cutscene will play, and then you’re going to have to run for your life — you may want to read ahead here before grabbing the Key (or else just pause the game once you do).
Image 7
Find a way inside the caged room
In this next section, you’ll be facing off against the Dark Man, so you’ll need to be prepared. This Walkthrough should be useful for most players, but if the Dark Man is giving you extra trouble, we also have a special guide just for him.
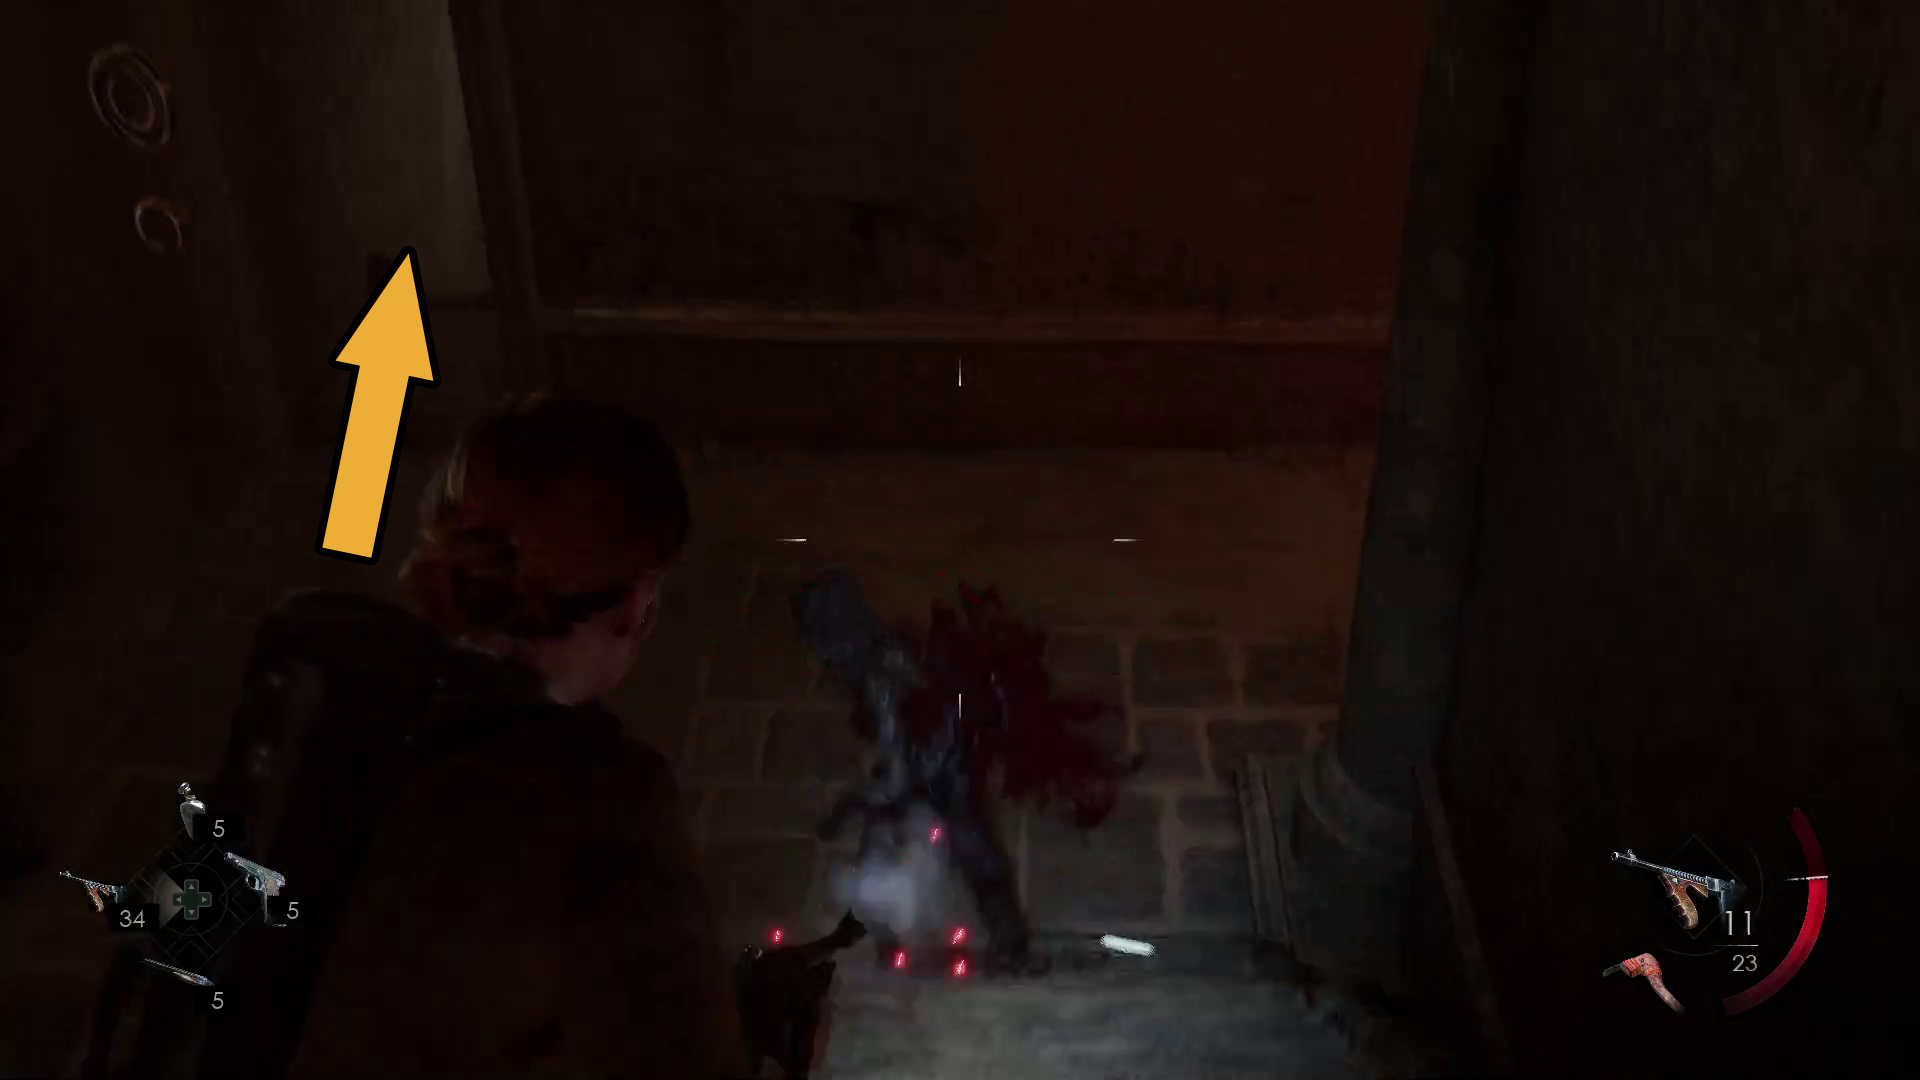
When the cutscene ends, you should be ready to instantly turn away from the Dark Man, as looking at him will cause you to take more damage when you are in his black mist. When you’re in the mist, keep him off your screen! You also can’t heal the damage he does while your healthbar is purple.
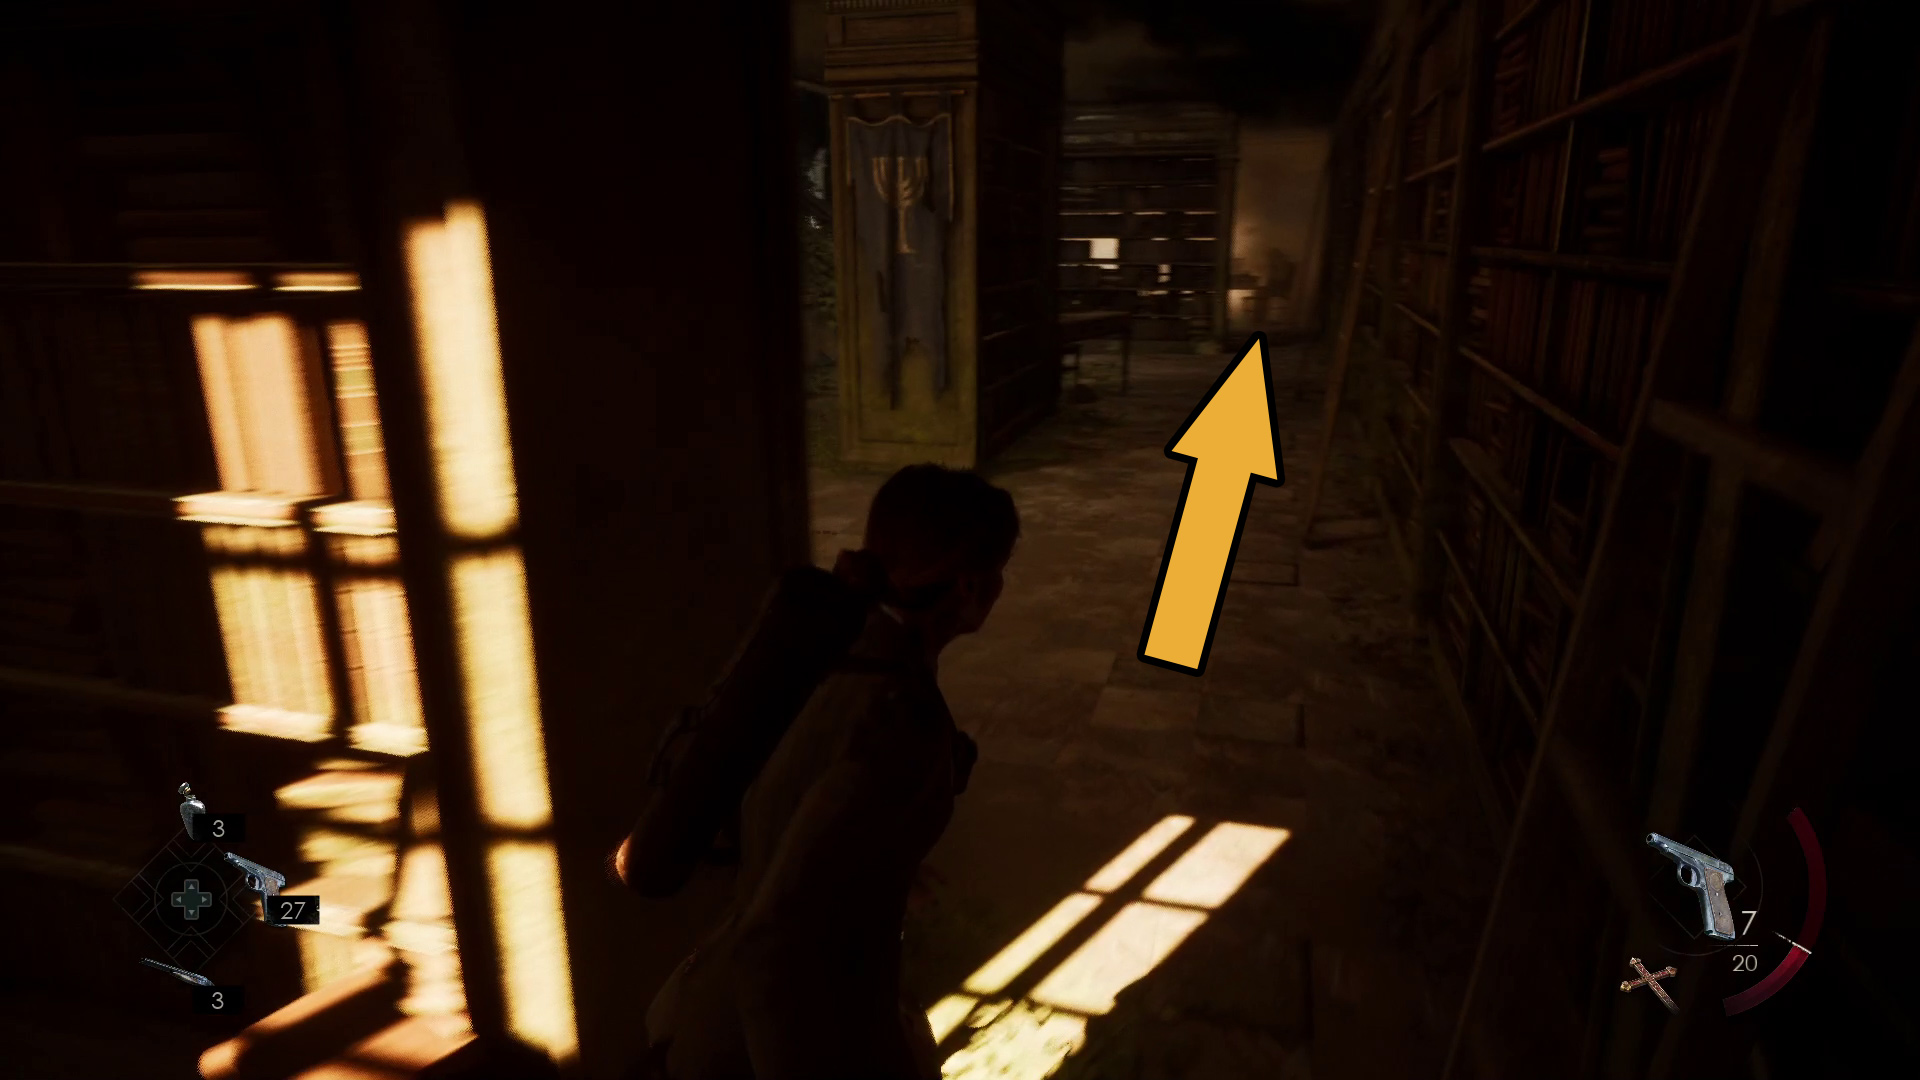
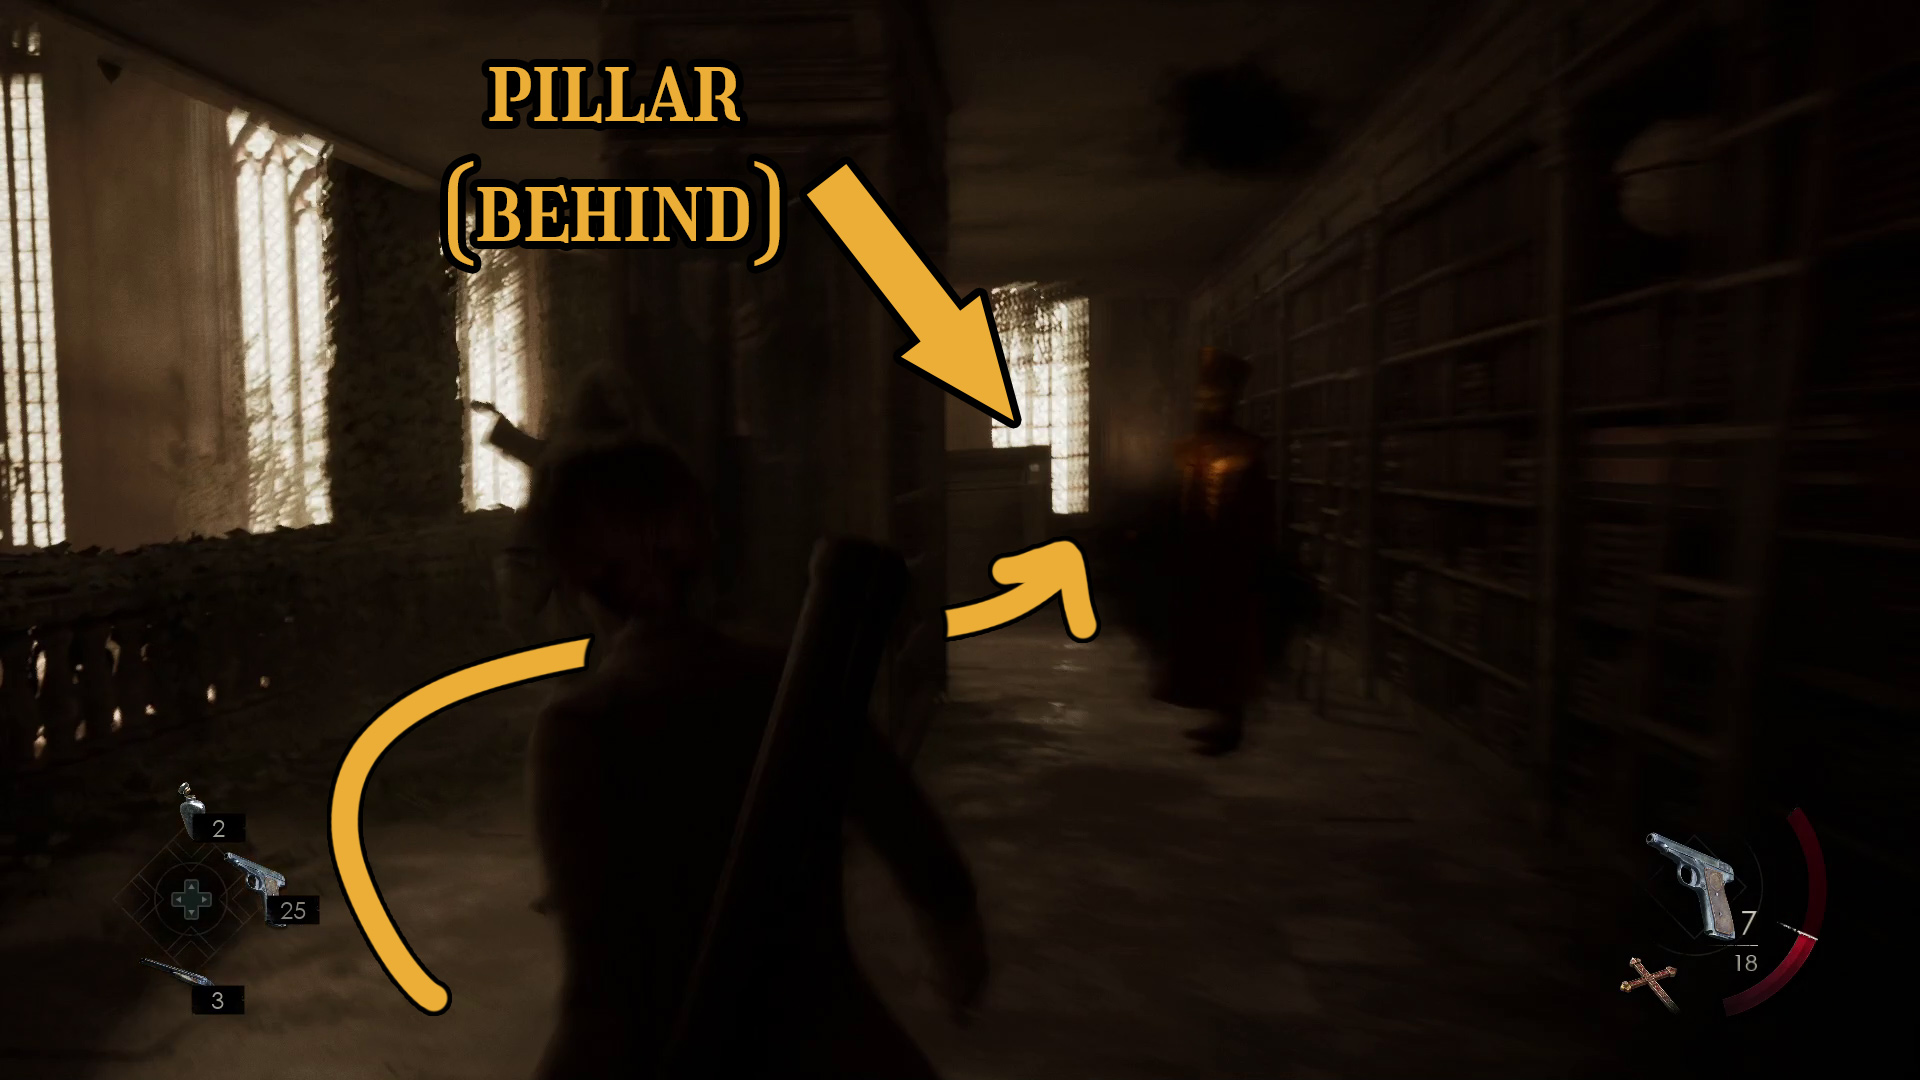
Go to the pillar behind the statue (Image 7) and insert the Key of Hubertus — doing so will cause a ladder to drop down to the pillar (Image 8. Head down the ladder, then turn left and go in the direction indicated (Image 9).
Image 8Image 9
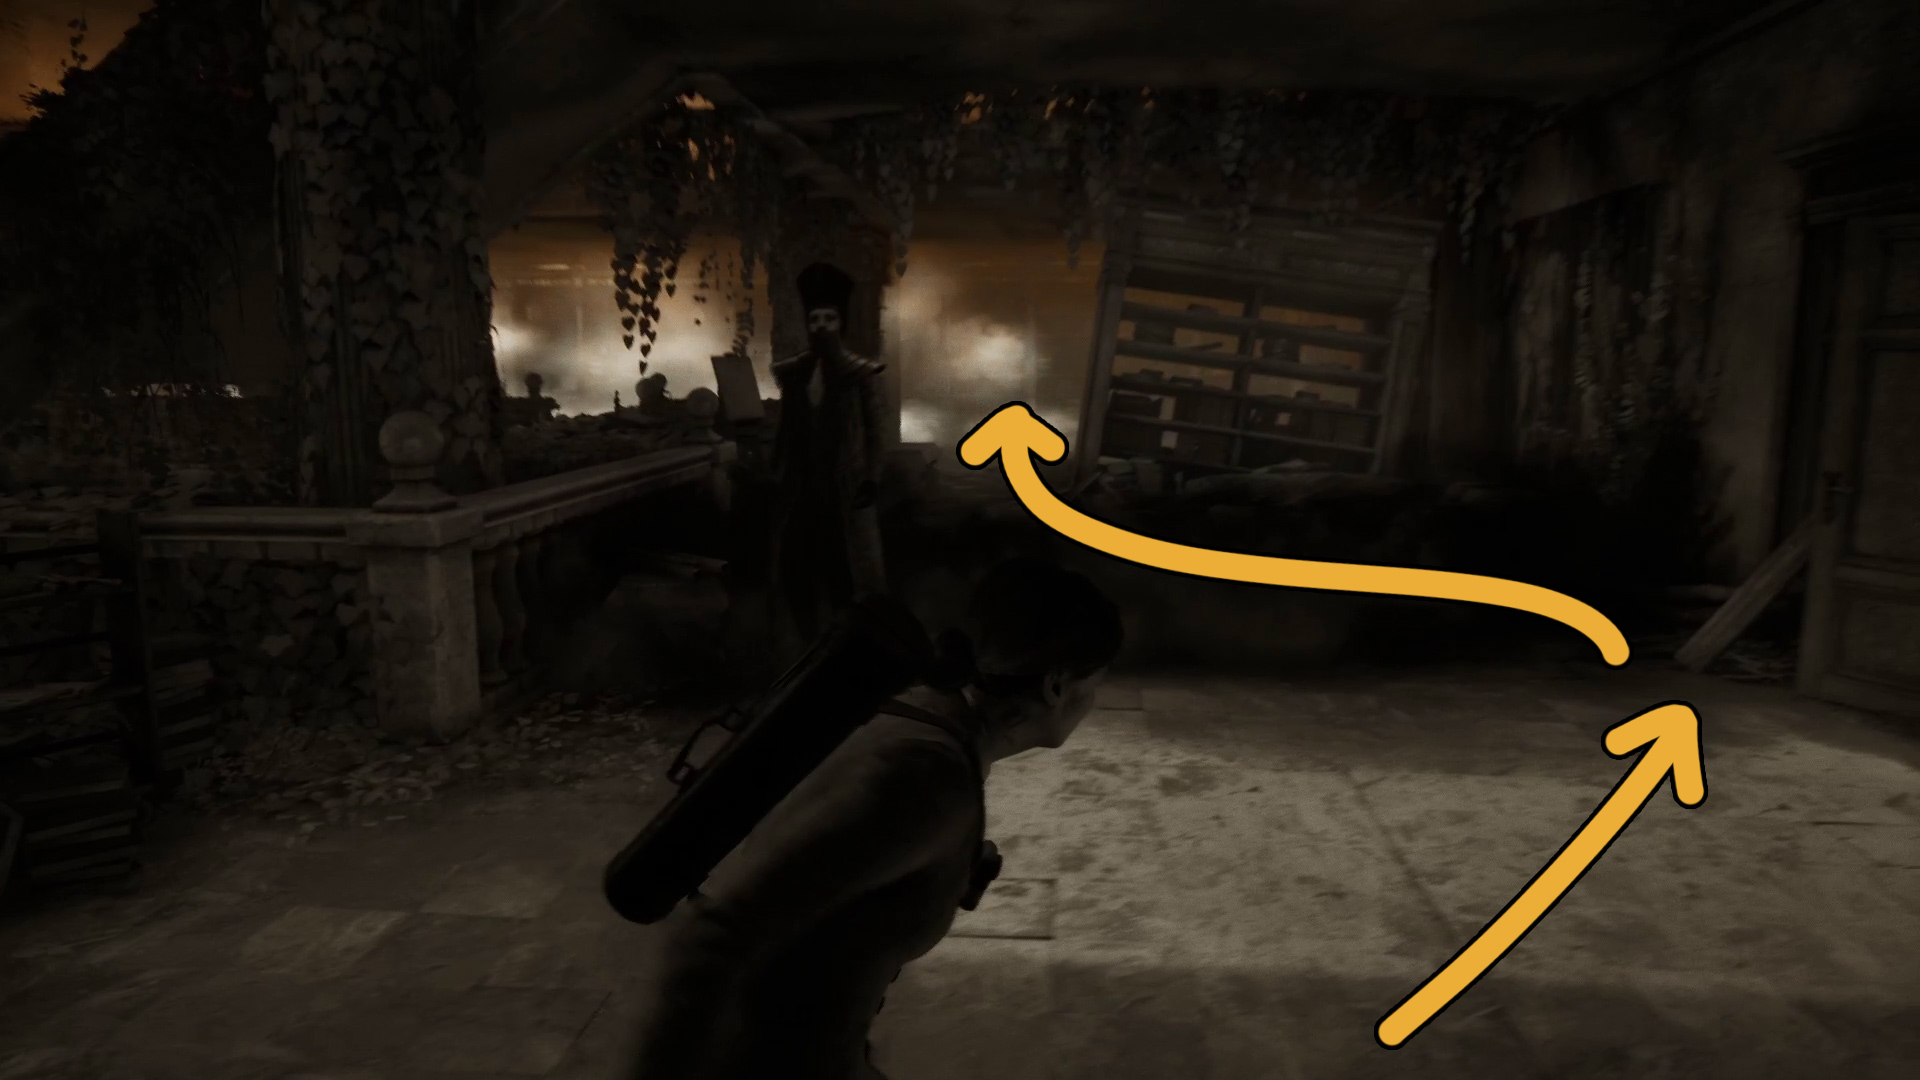
Make your way past the stairs you went up earlier, and then you’ll have to turn left to continue — but another version of the Dark Man is ahead. Wait till he gets fairly close, then go around him to the right — making sure you keep him off your screen while in his mist — and continue forward (Image 10). Take a left at the far wall and you’ll see another Dark Man, who you can avoid by going around him to the left (Image 11). Behind the fallen bookcase is another pillar you can use the Key of Hubertus on. A ladder will drop from above, and you can climb up.
Image 10Image 11
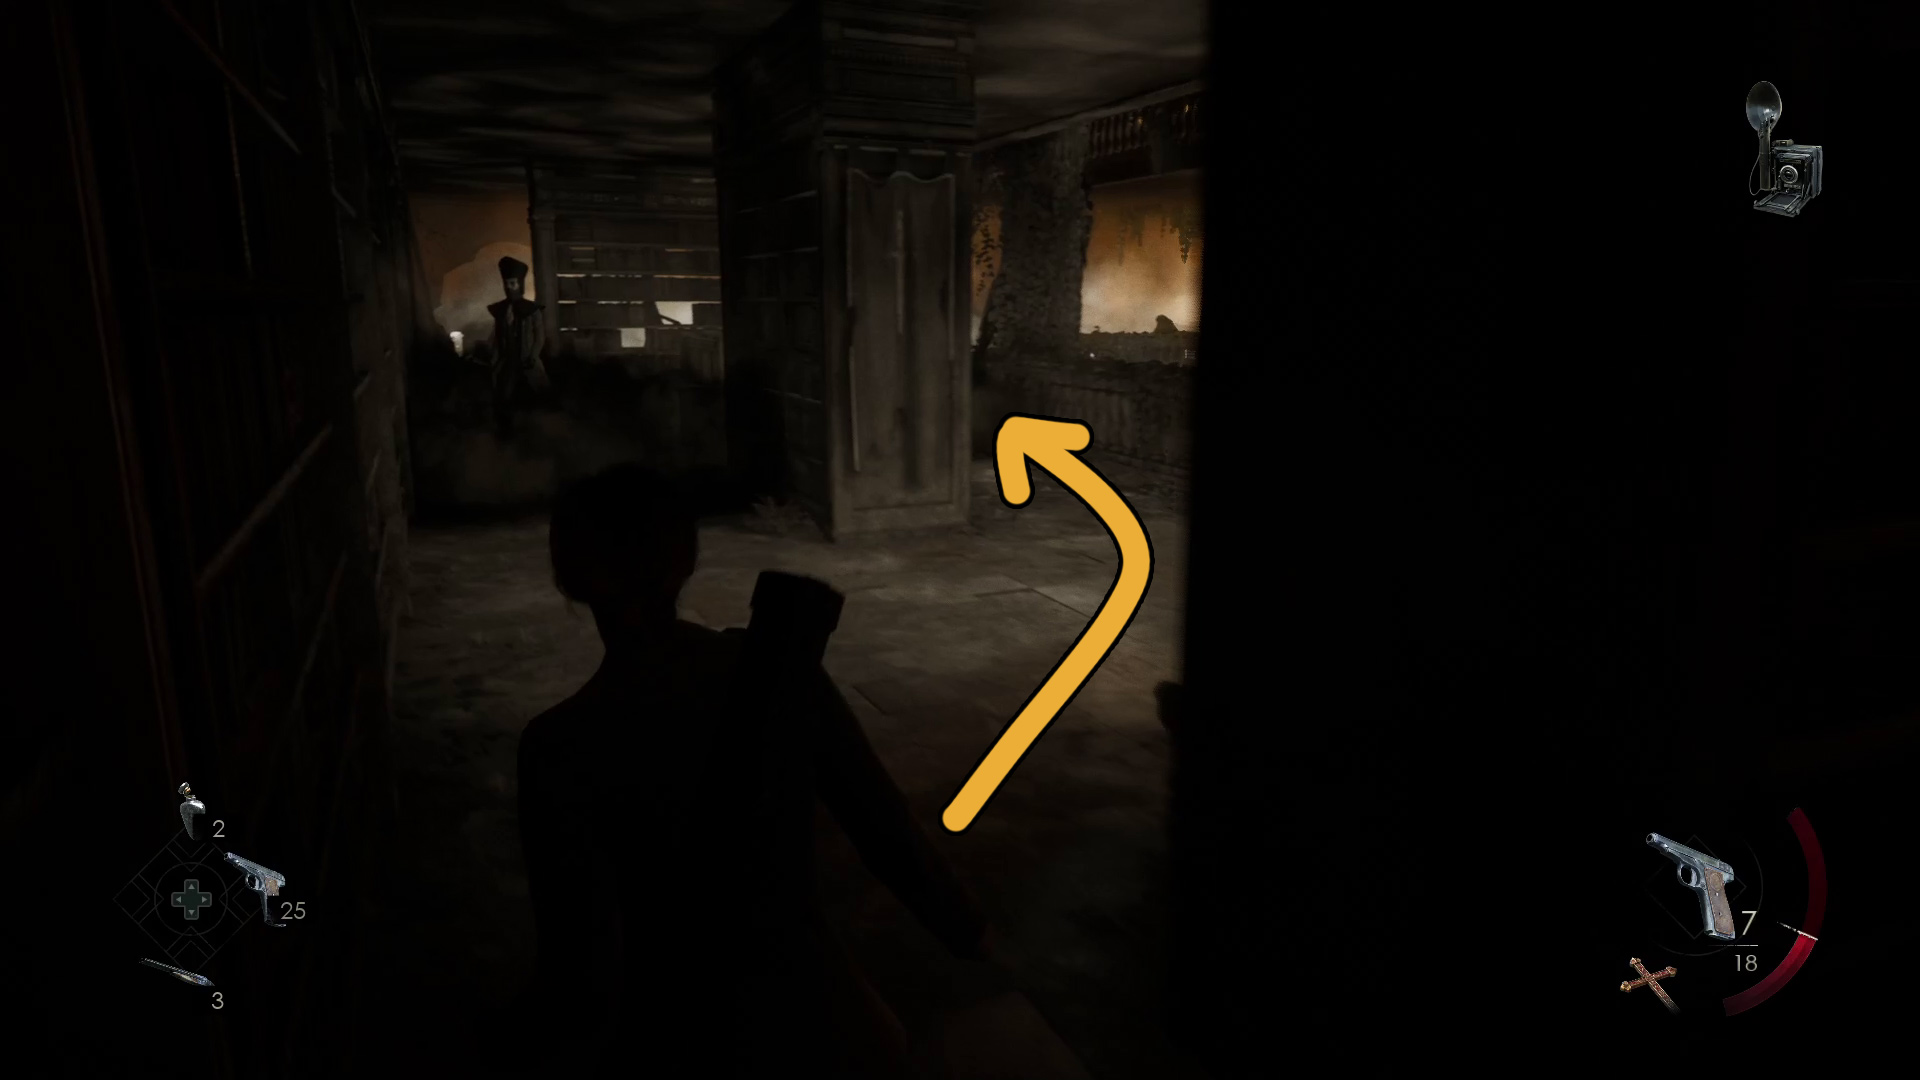
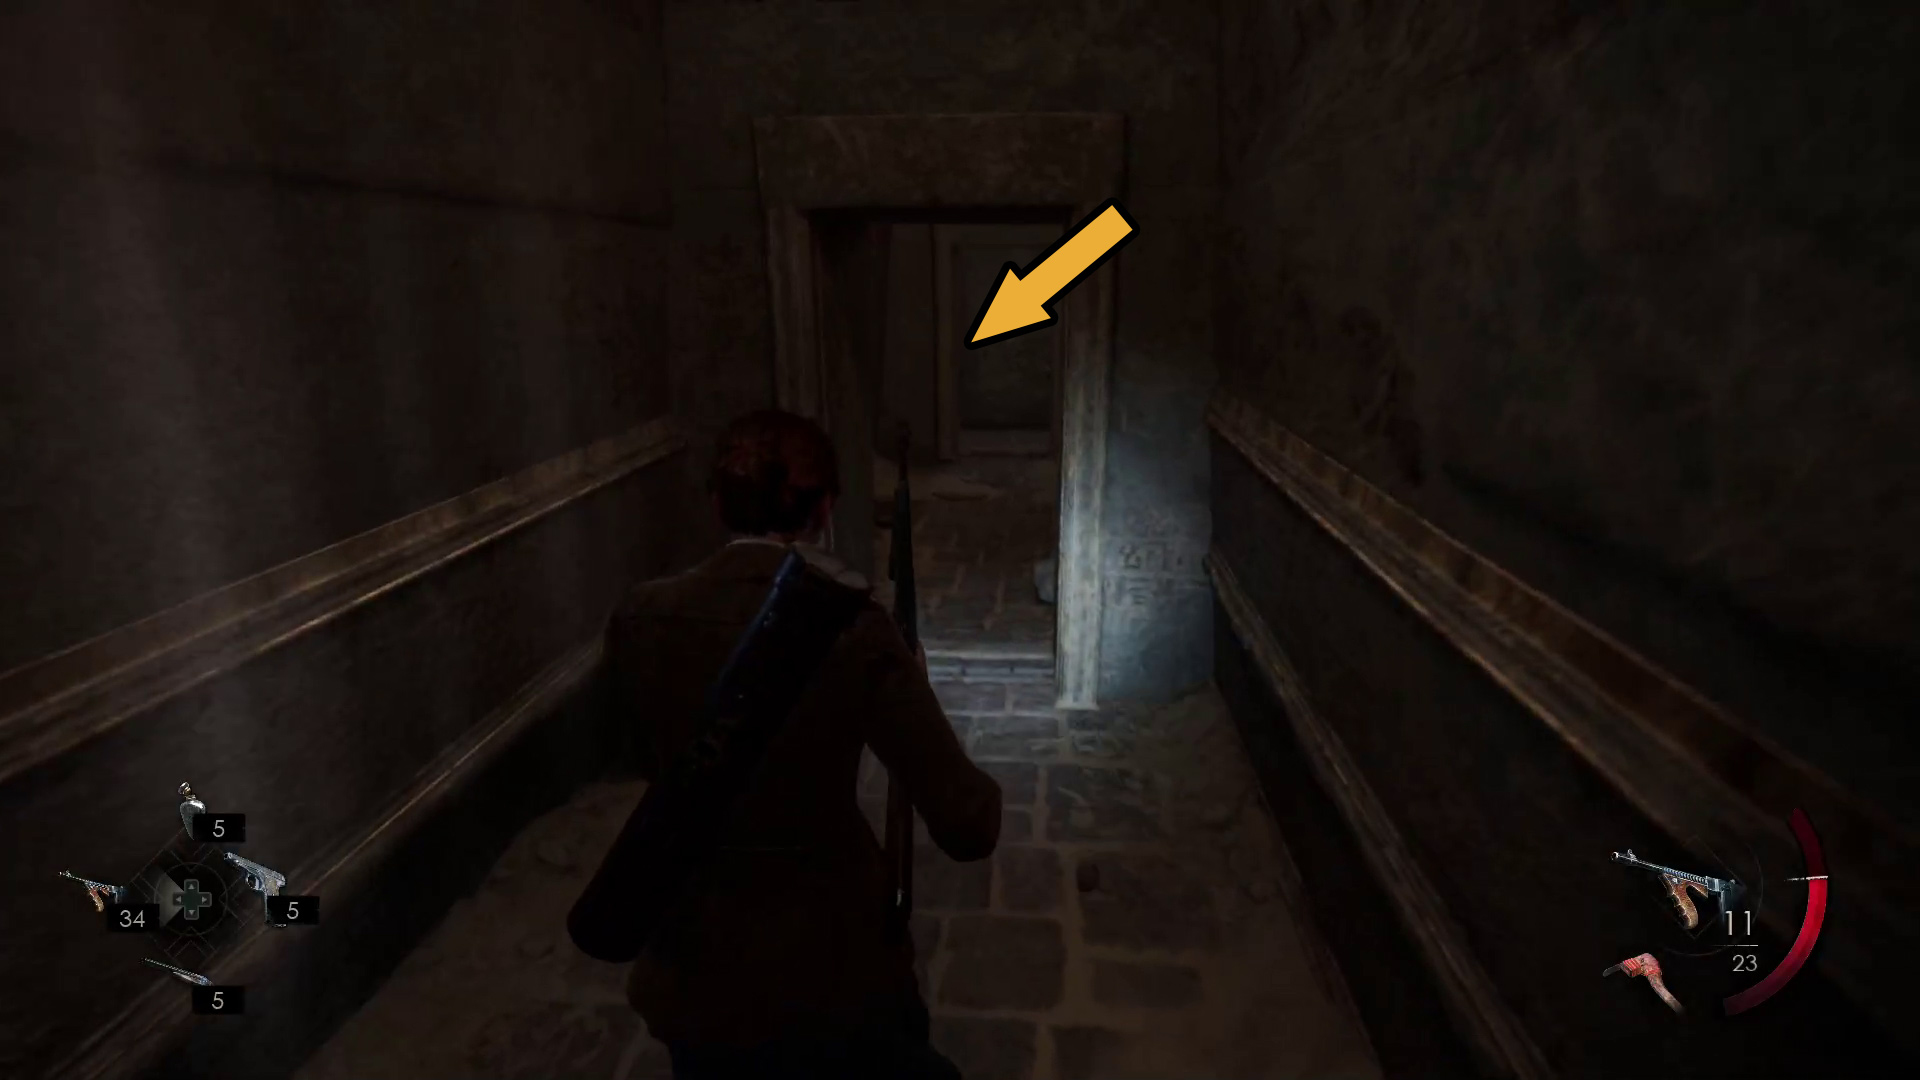
To your right at the top of the ladder is another Dark Man, but this one is easily avoided by hugging the right side (Image 12). Ahead is a doorway — the pillar is visible through a hole in the wall, but it’s guarded by another Dark Man. Go through the doorway (Image 13) and turn left — you’ll see the Dark Man between you and the pillar. Wait for him to “activate” and start spewing mist, then go back through the doorway and wait for him to go past. Once he’s past the door, you can go back through, go left, use the pillar, and climb the ladder.
Image 12Image 13
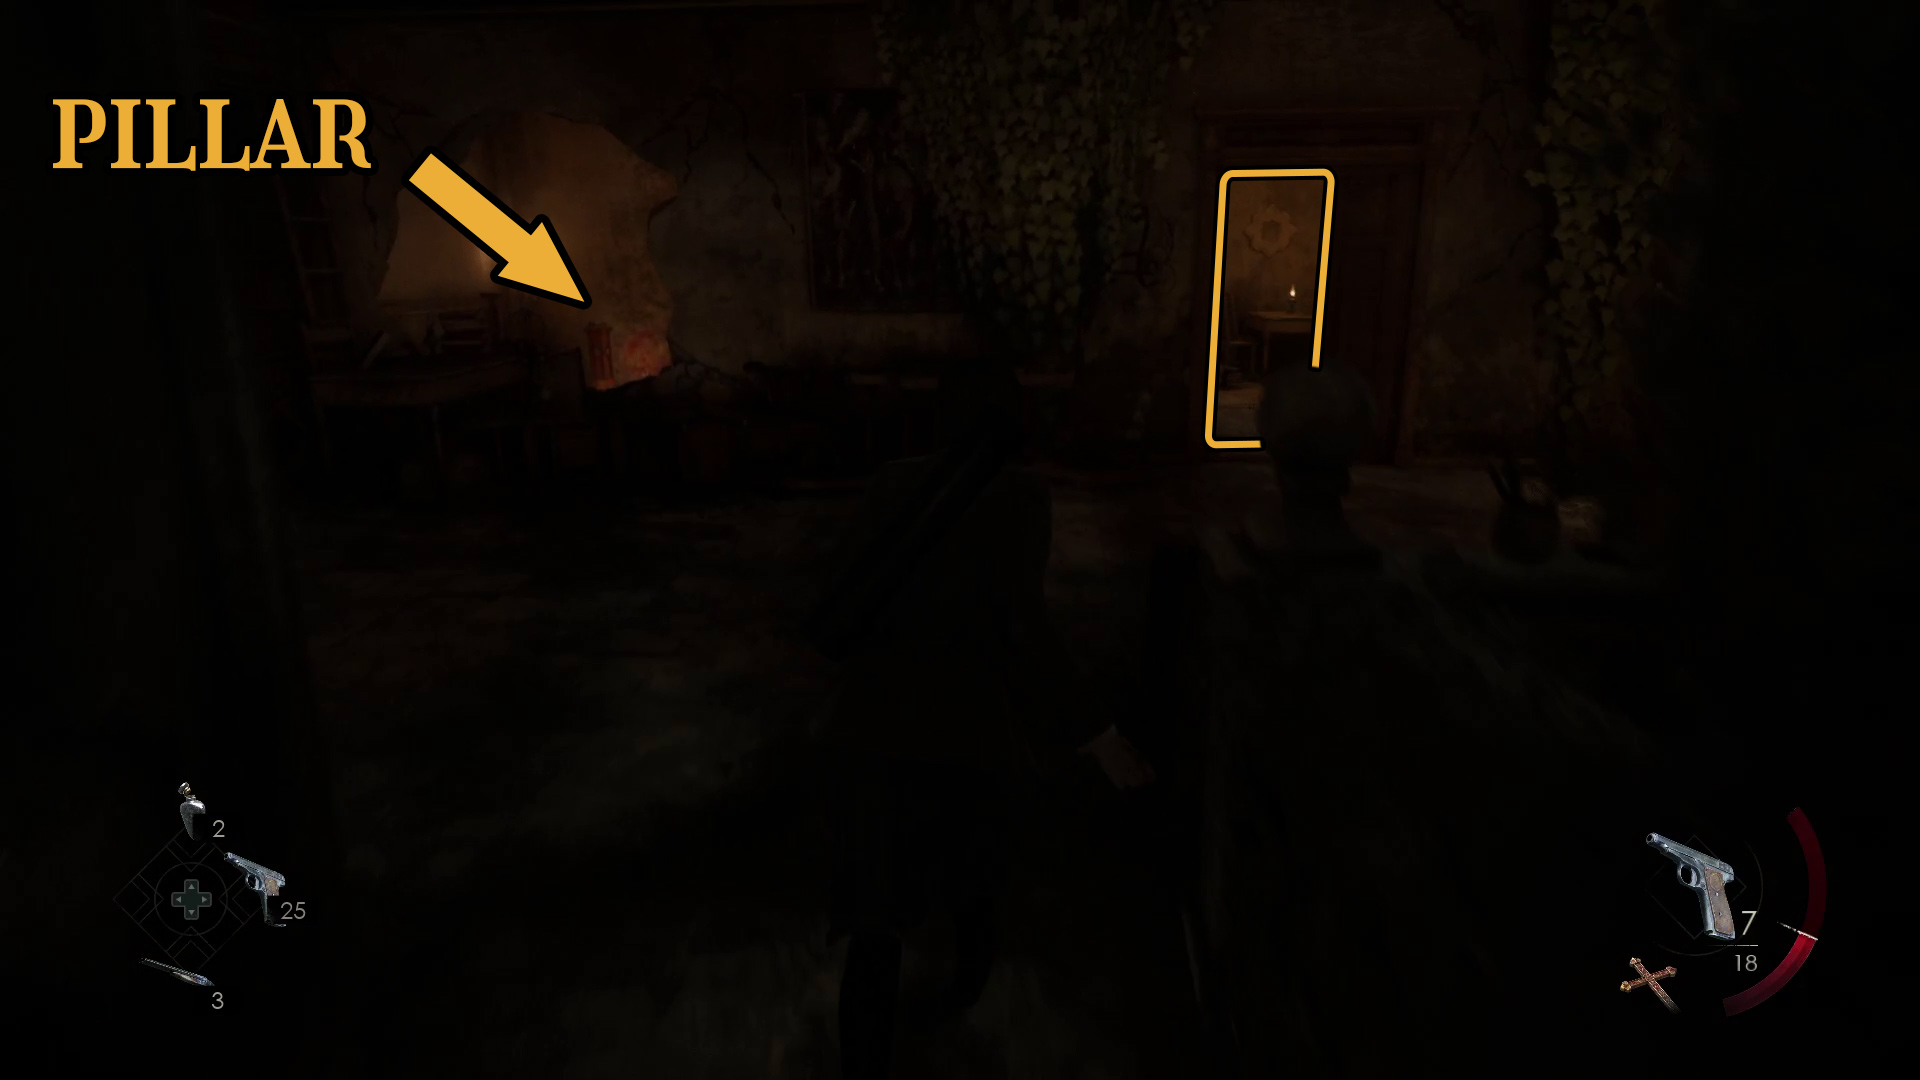
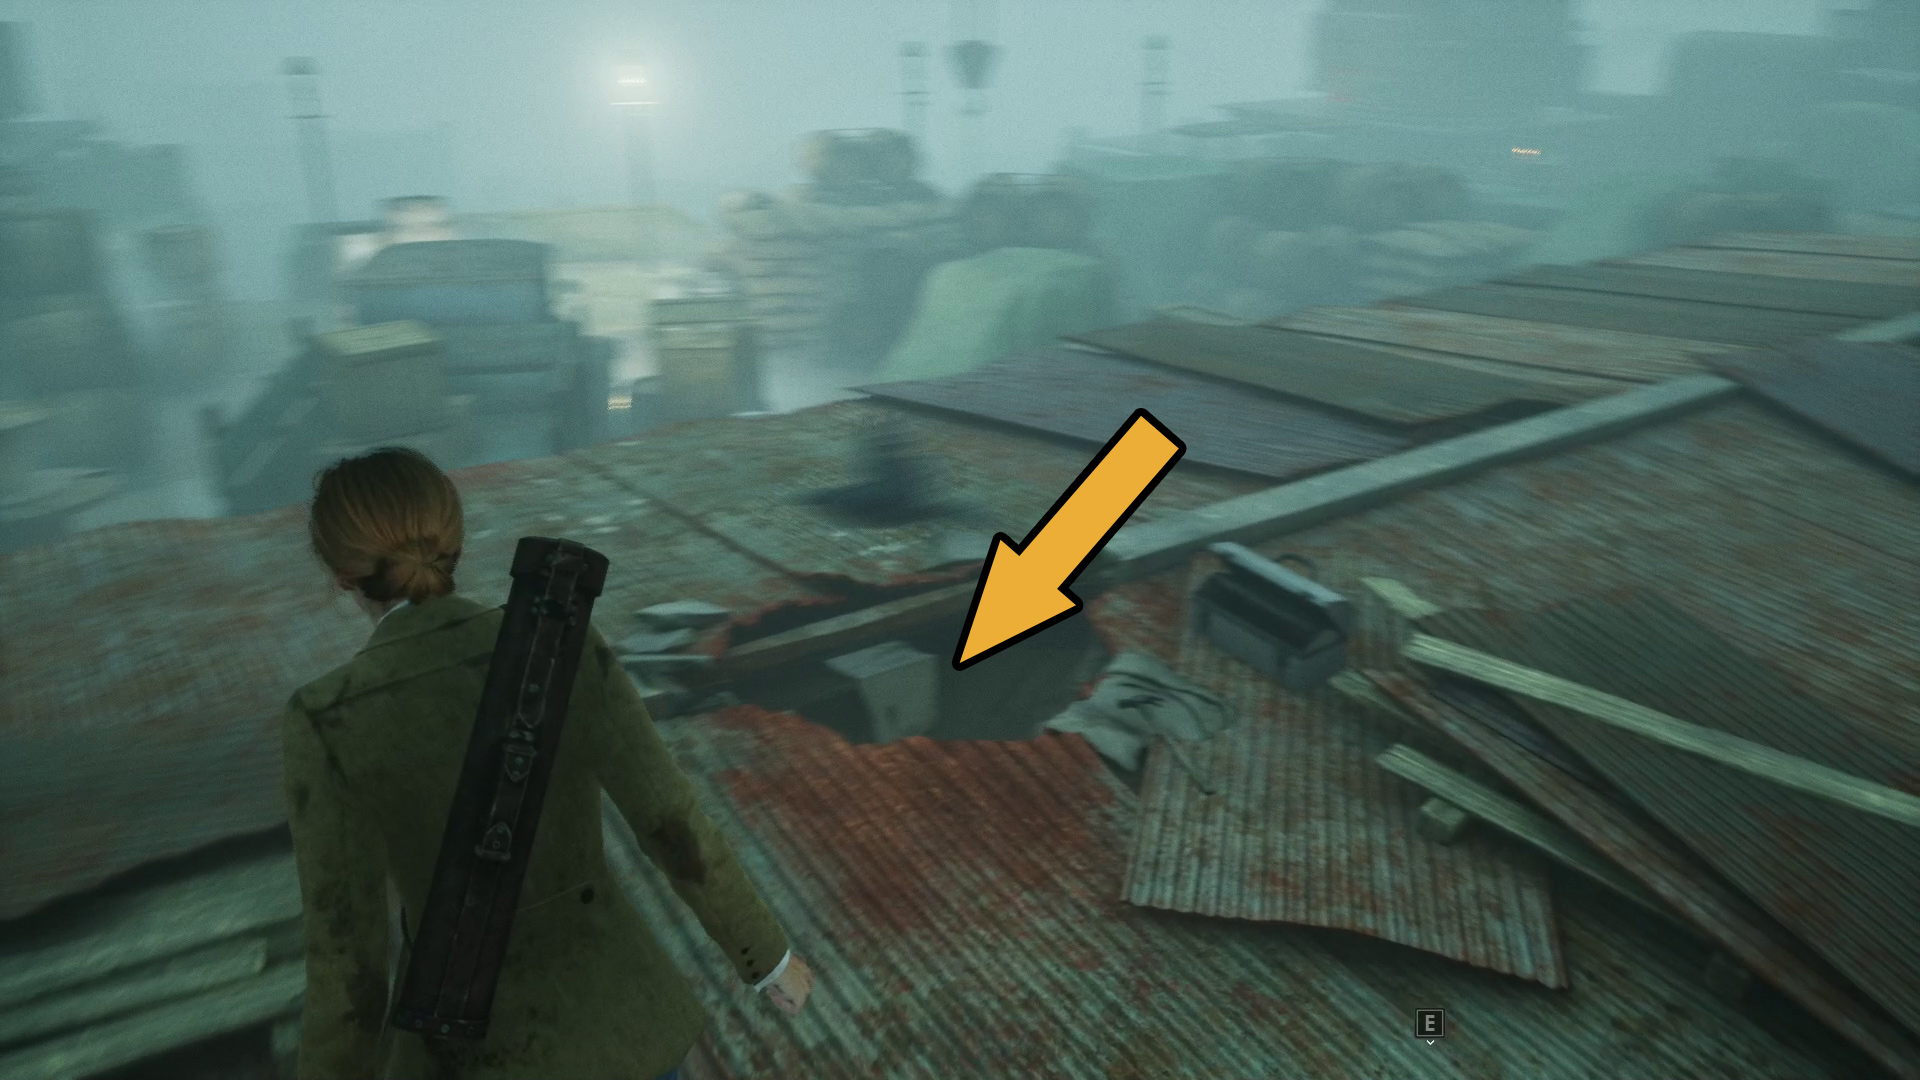
At the top, continue forward through the next room, and at the far end go through the door on the right. Continue straight (Image 14) and then up the stairs, and make your way around the room to the cage in the center (Image 15), where using the Key of Hubertus on a final pillar will open the room. In the caged room, interact with the case on the right to begin a fairly long cutscene.
Image 14Image 15
Look for the address to the Dark Man’s show inside Pregzt Shipping Company
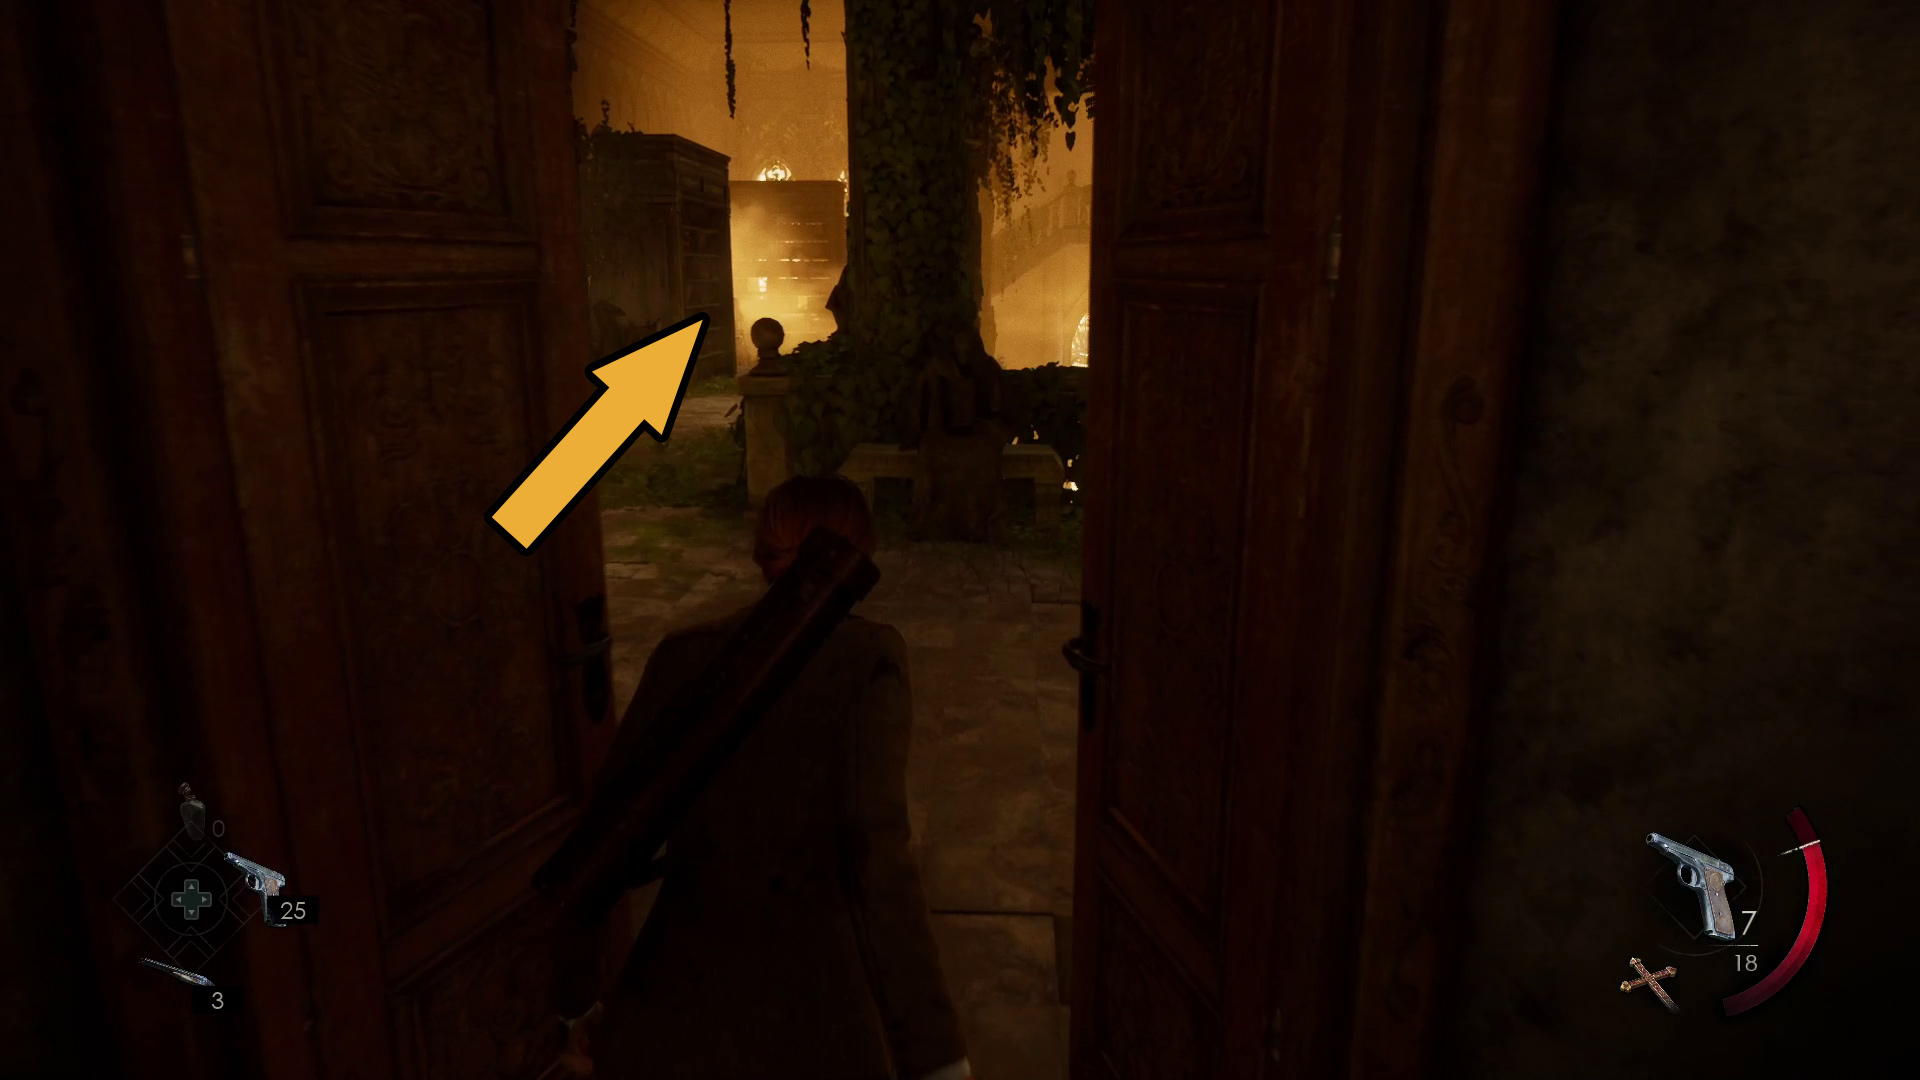
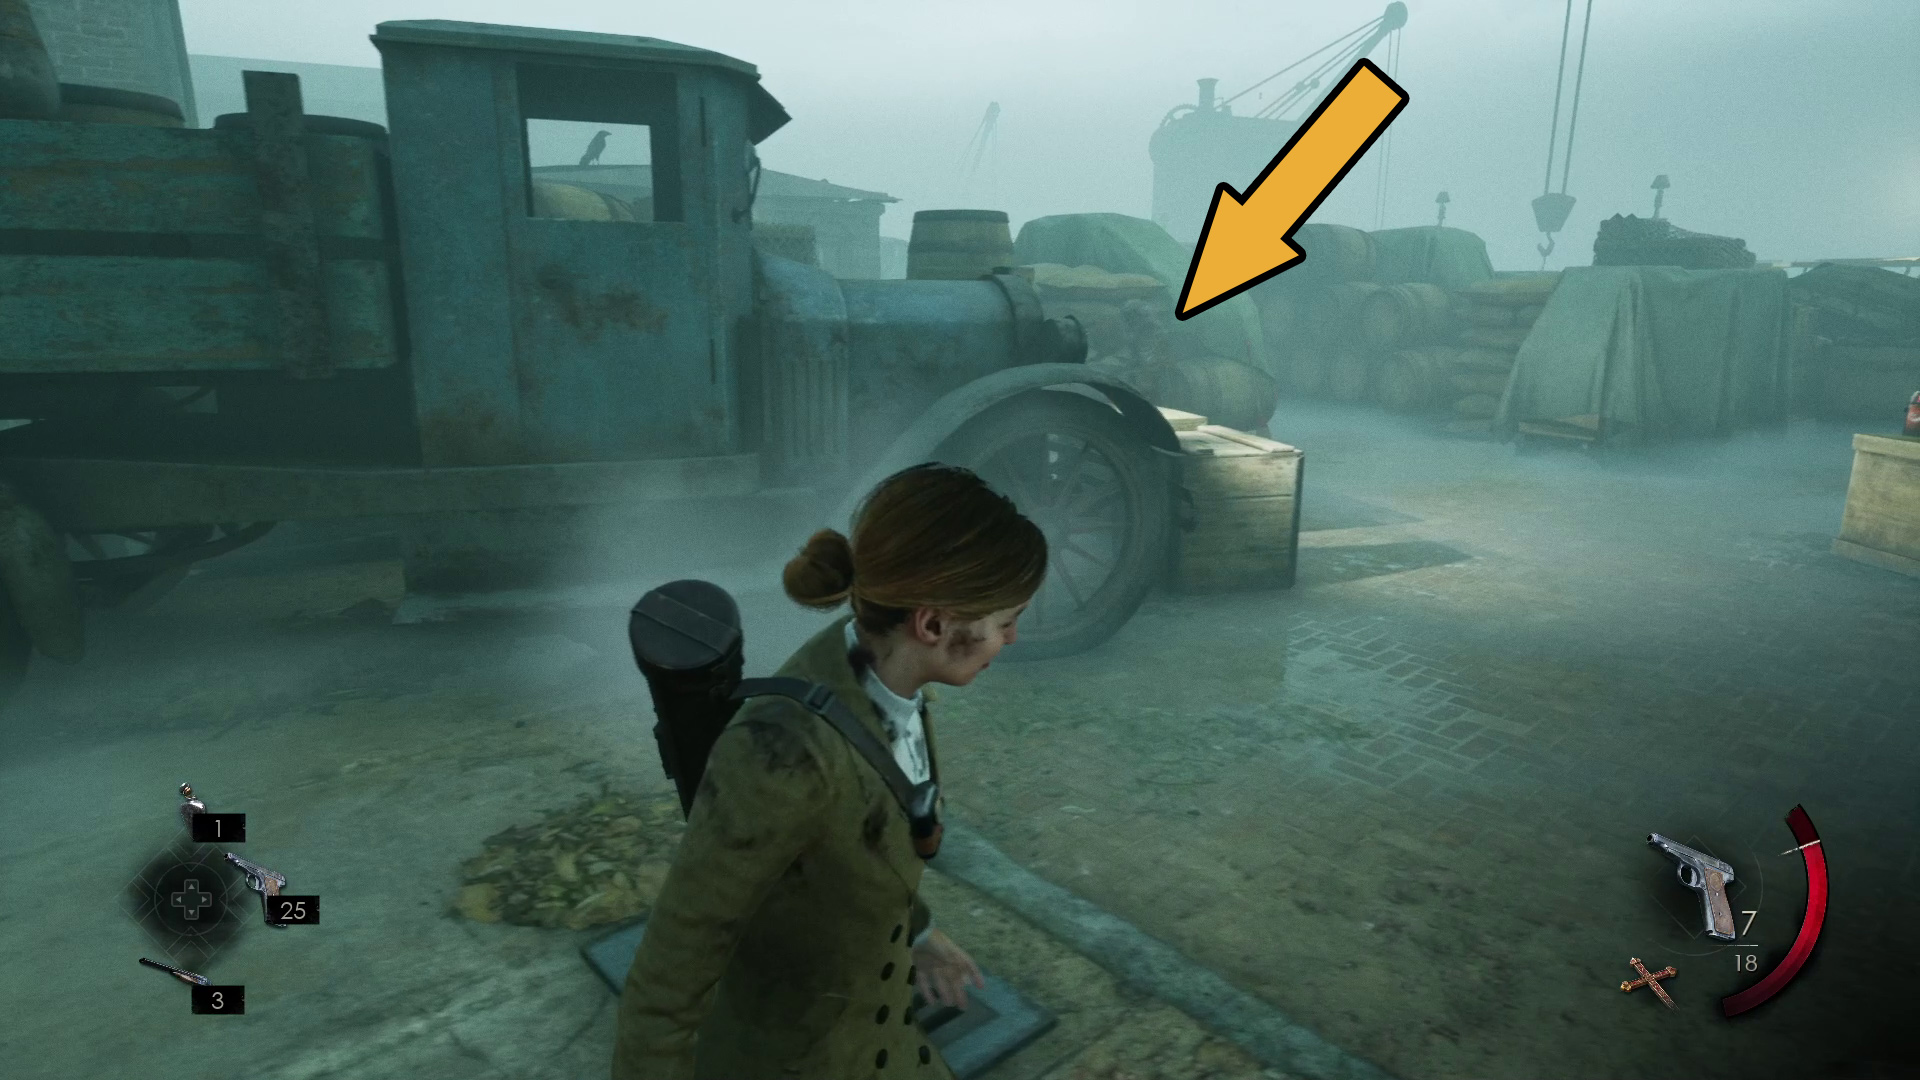
When the cutscene ends, you’ll receive the Matchbook Lagniappe, and you’ll find yourself in front of the Pregzt Shipping Company. Naturally, you can’t get in through the front door, so don’t even try. Instead, take a peek around the truck on your right, where you should see a patrolling enemy (Image 16). There are a number of throwables behind you, including a molotov cocktail, so use them to deal with the enemy and then proceed towards the small building past the truck (Image 17-A).
Image 16Image 17
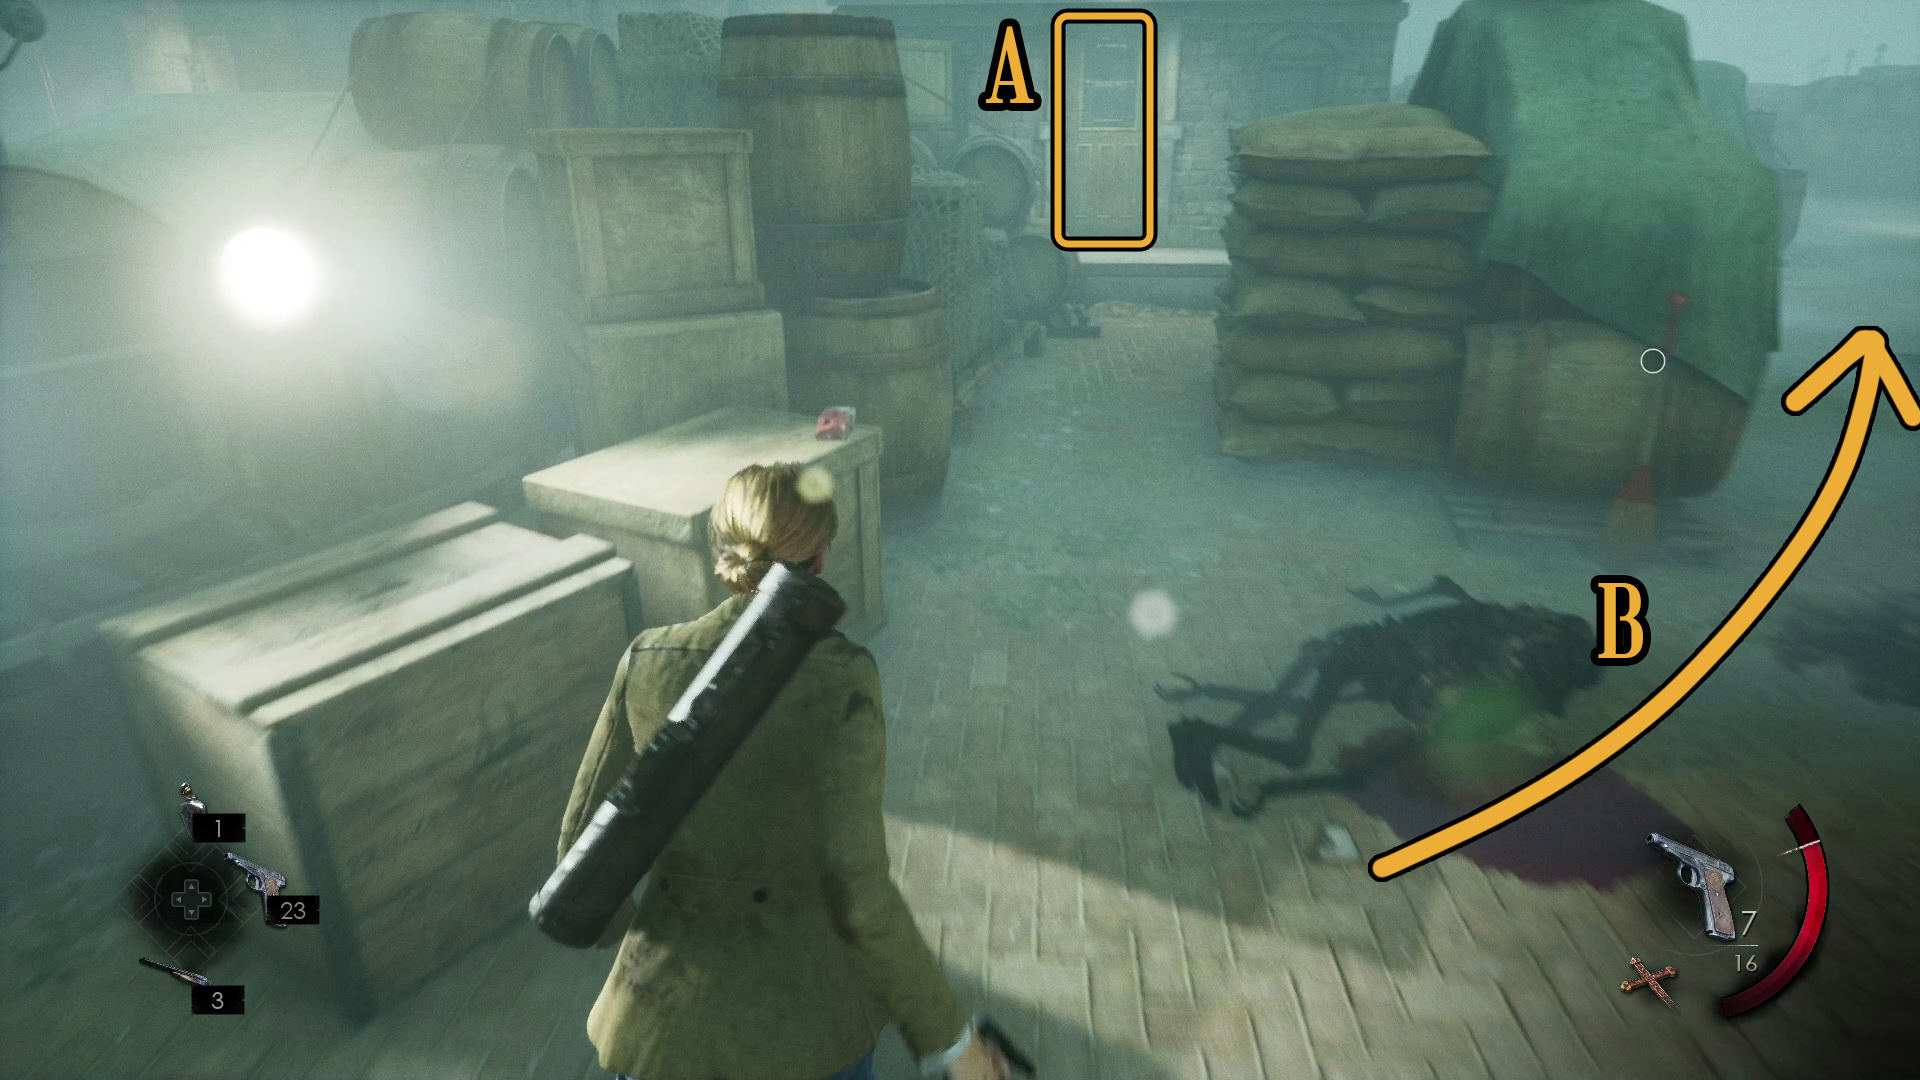
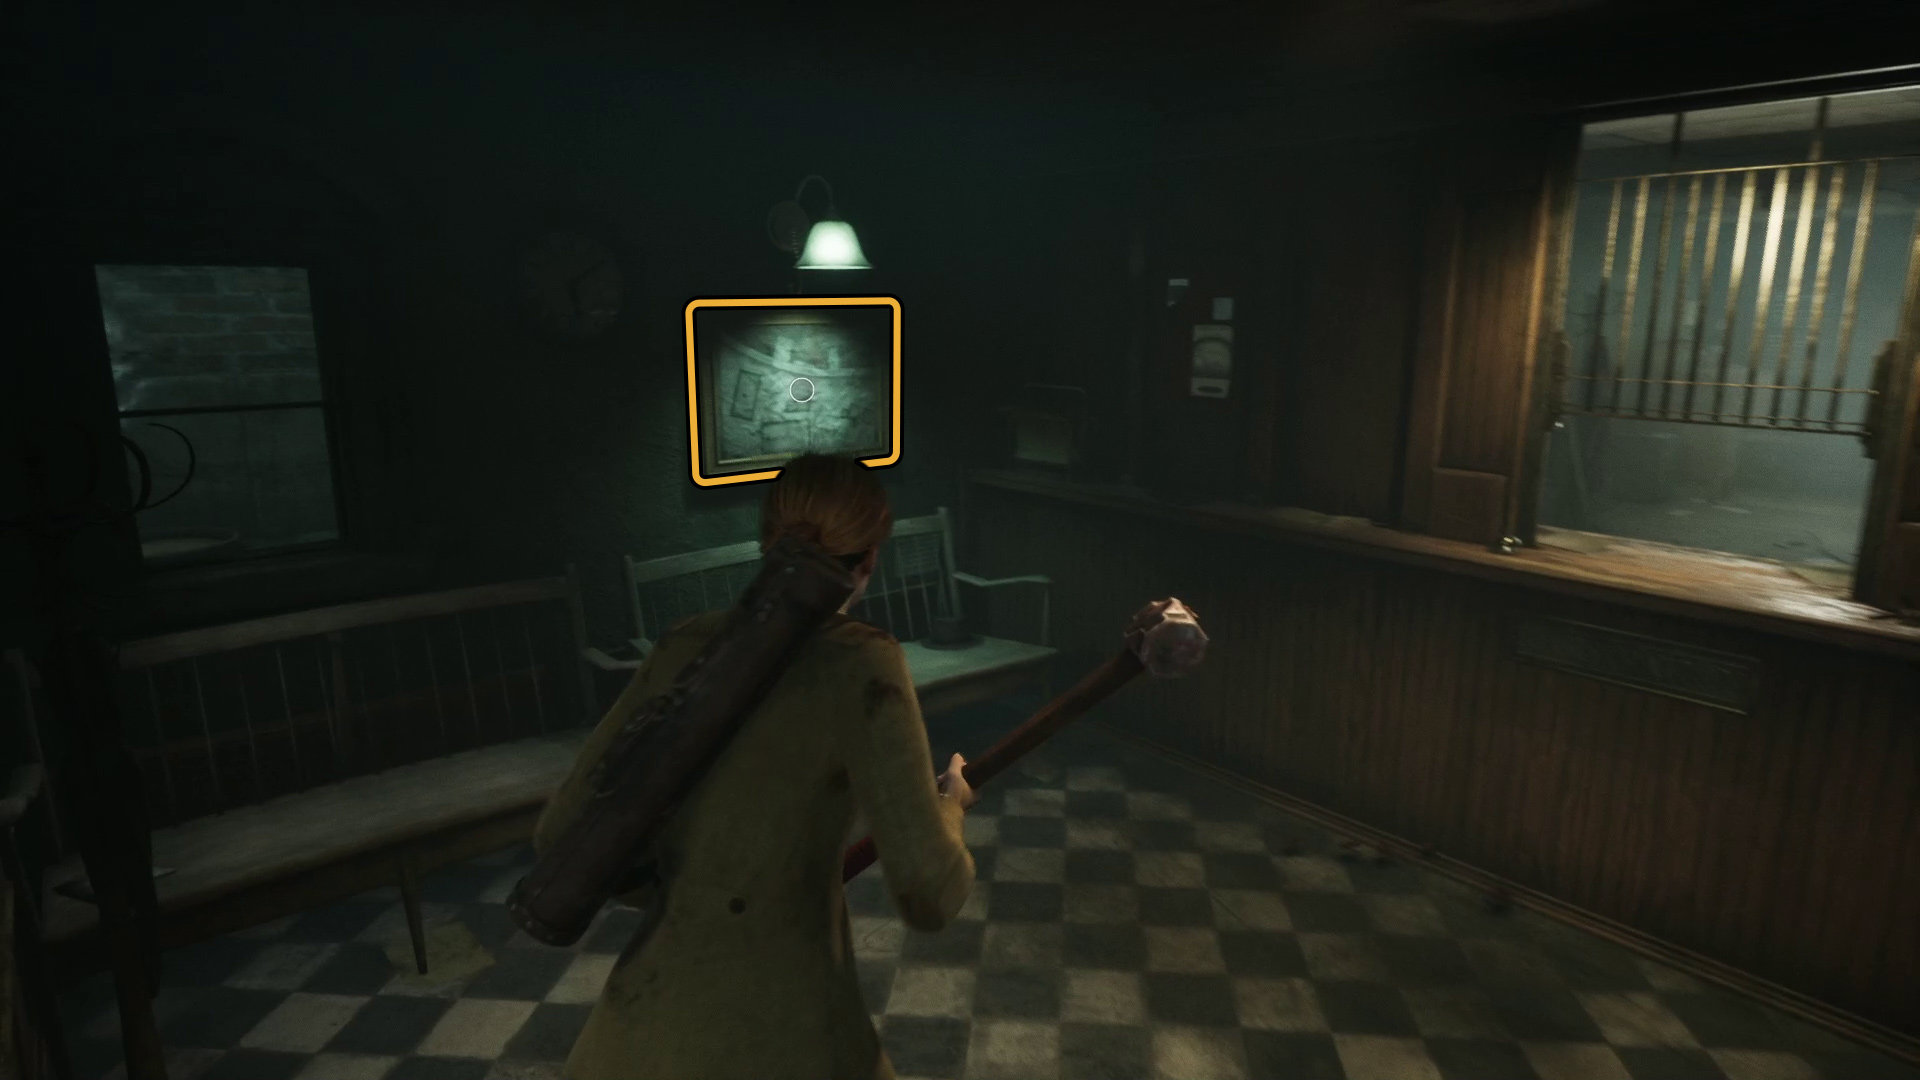
Watch out for the enemy that will break open the door as you approach — once again, there are lots of throwables plus a melee nearby if you want to save ammo. Take ’em out and loot the building, making sure you snag the New Orleans Docks – Pier #11 clue from the wall (Image 18) — then leave the building and go around the stacked up stuff, making your way to the back of the building (Image 17-B). Hug the left “wall” of stuff, make your way past the locked door, and go up the stairs at the back of the building (Image 19).
Image 18Image 19
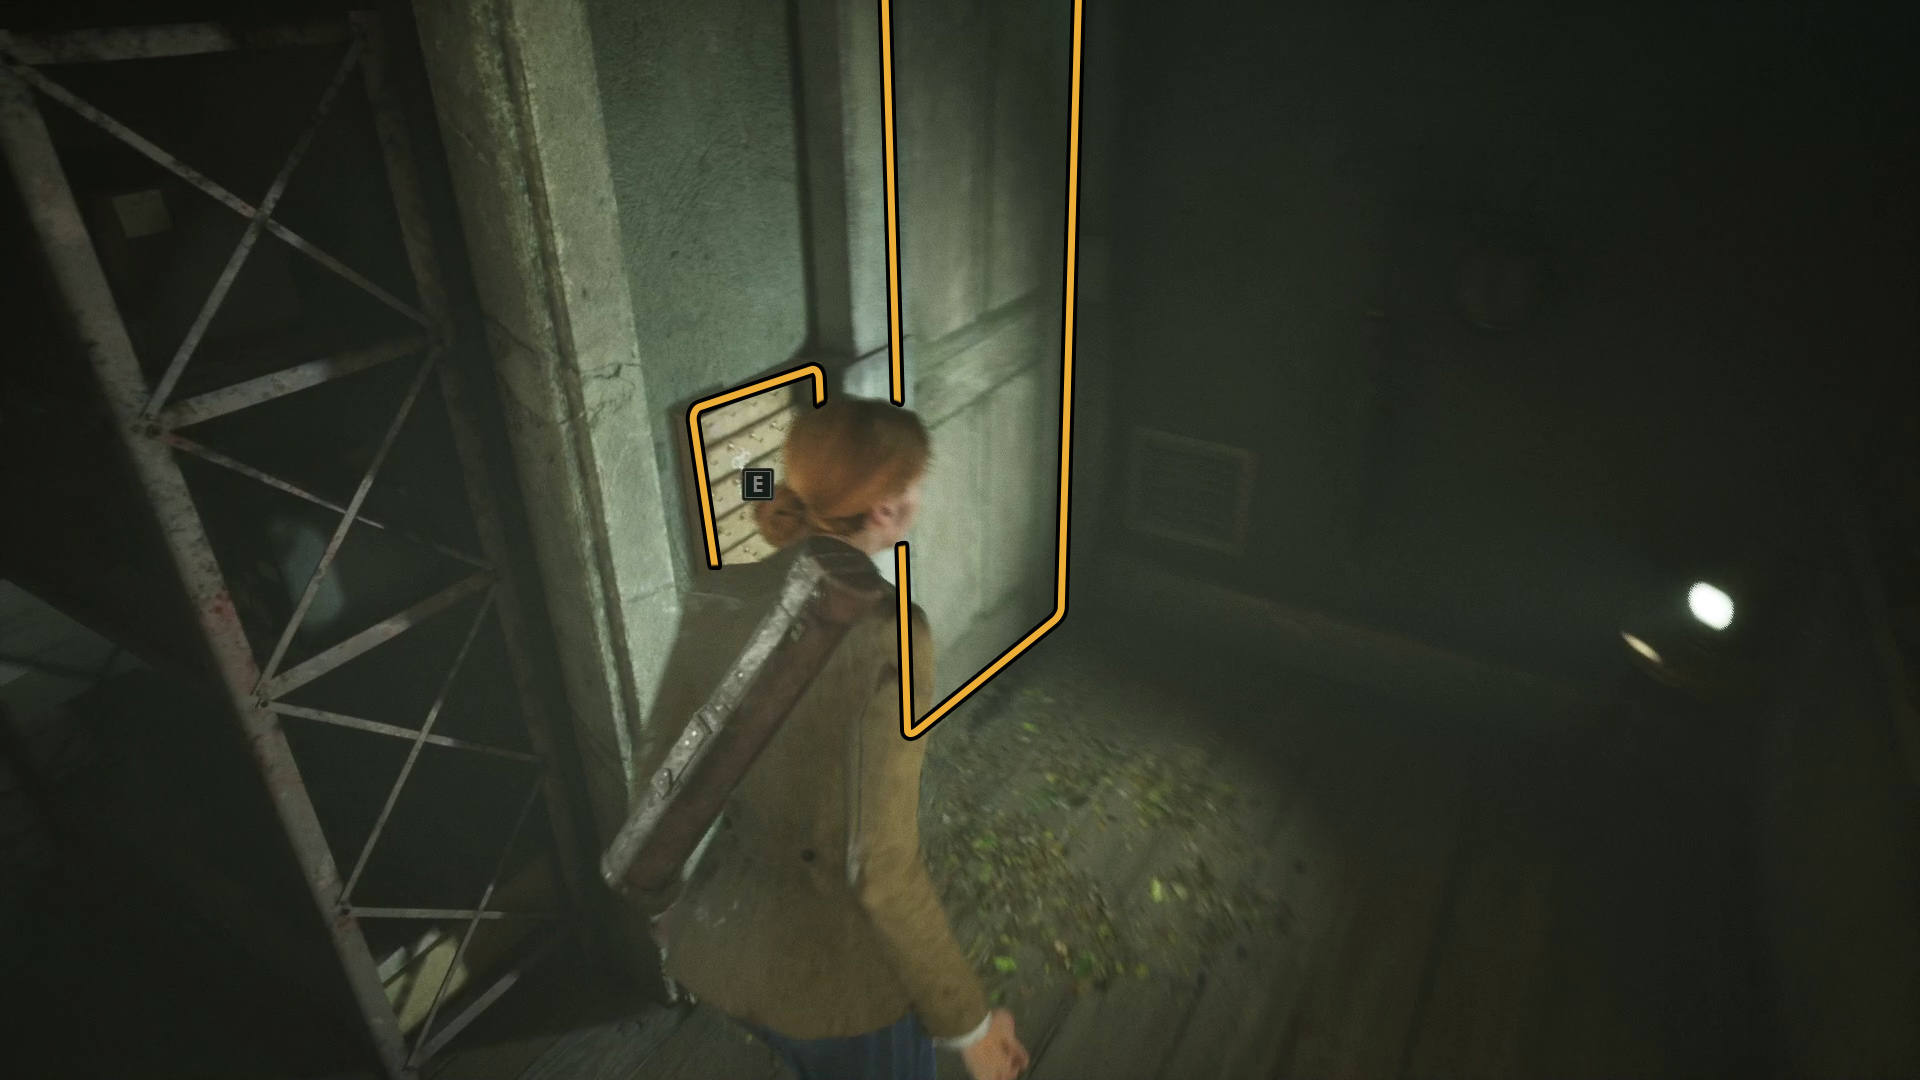
You can then climb up the ladder to get on the roof (Image 20) — just ahead is a hole you can interact with to climb down into the building. Inside, head towards the counter and turn left, and you’ll see a door (that’s your exit) — next to it is a key rack (Image 21). Interact with the keys to find the Stevedore’s Key, then go through the door.
Image 20Image 21
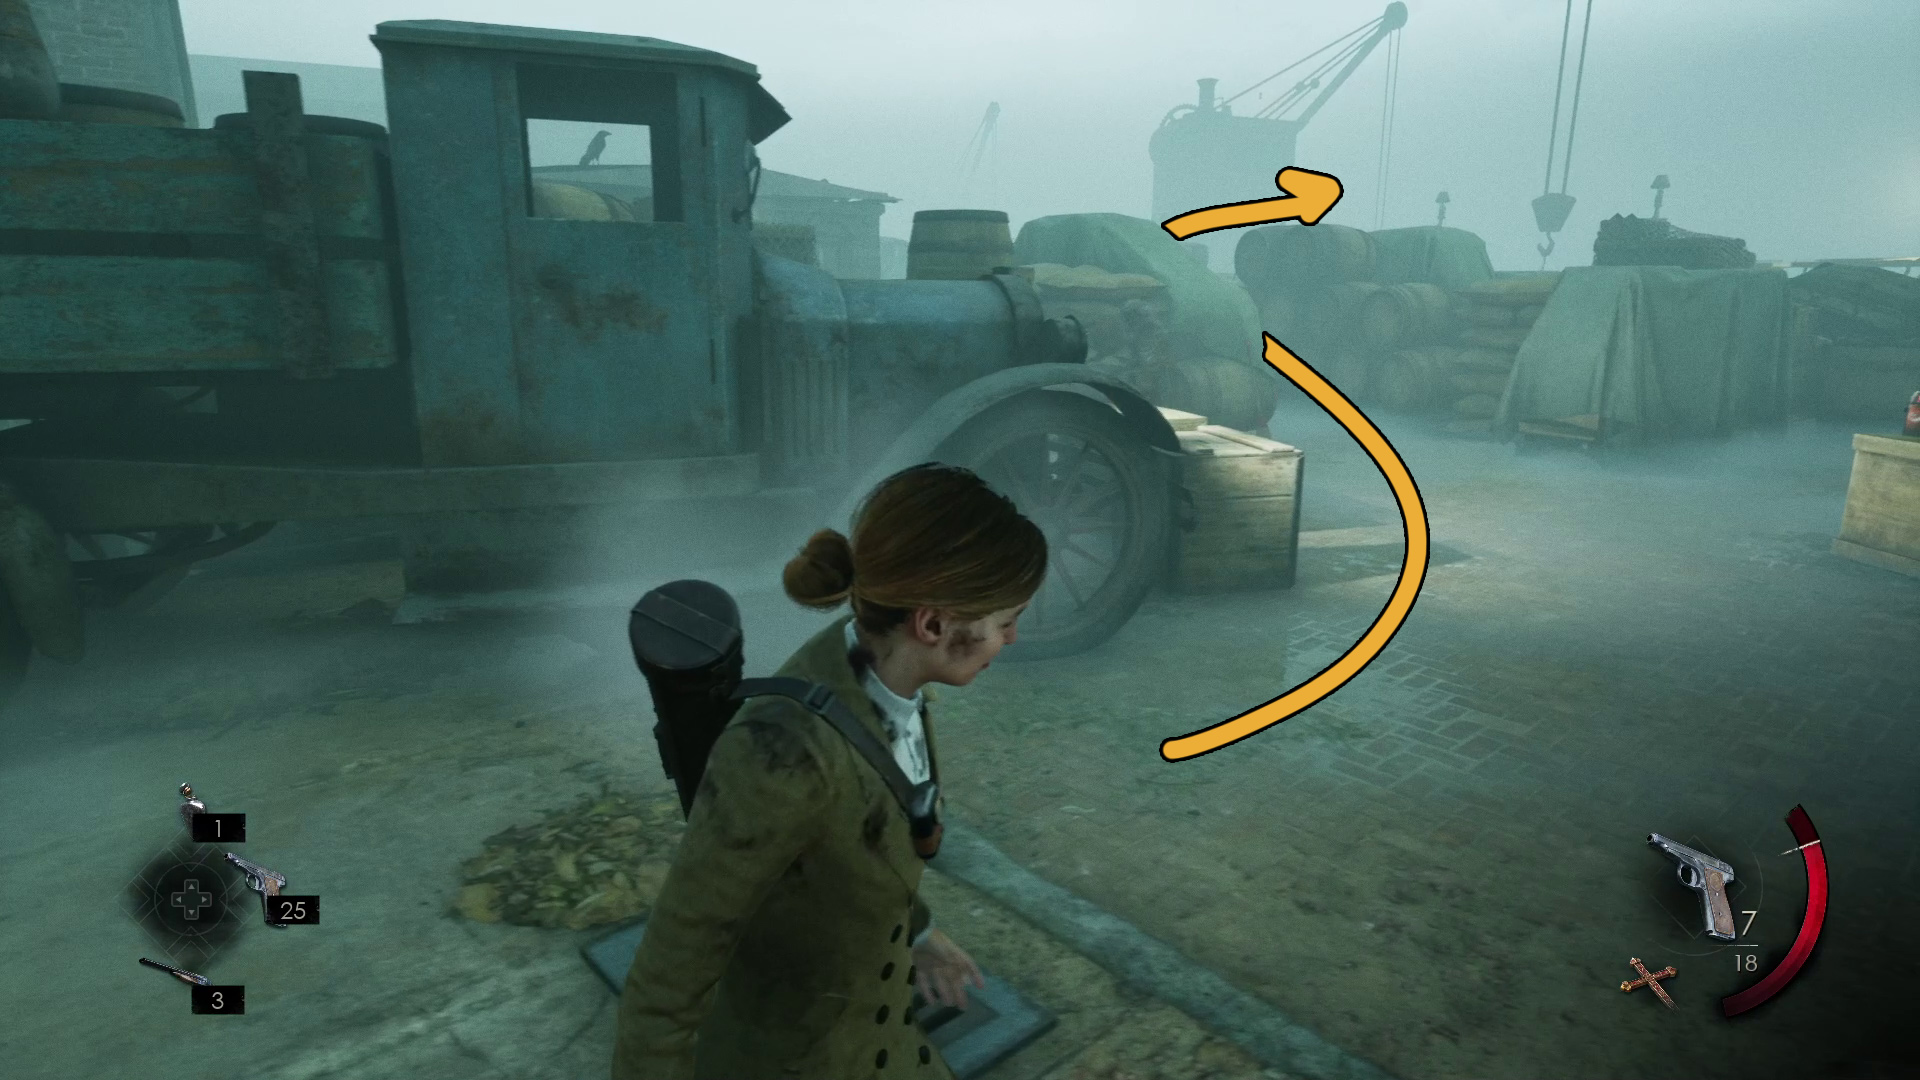
You may be attacked by an enemy upon leaving the building, so be ready. Go down the stairs and then take a slight right and head towards the nearby crane (Image 22). You’ll have to go around some barrels, and then you can continue to the crane’s controls (Image 23).
Image 22Image 23
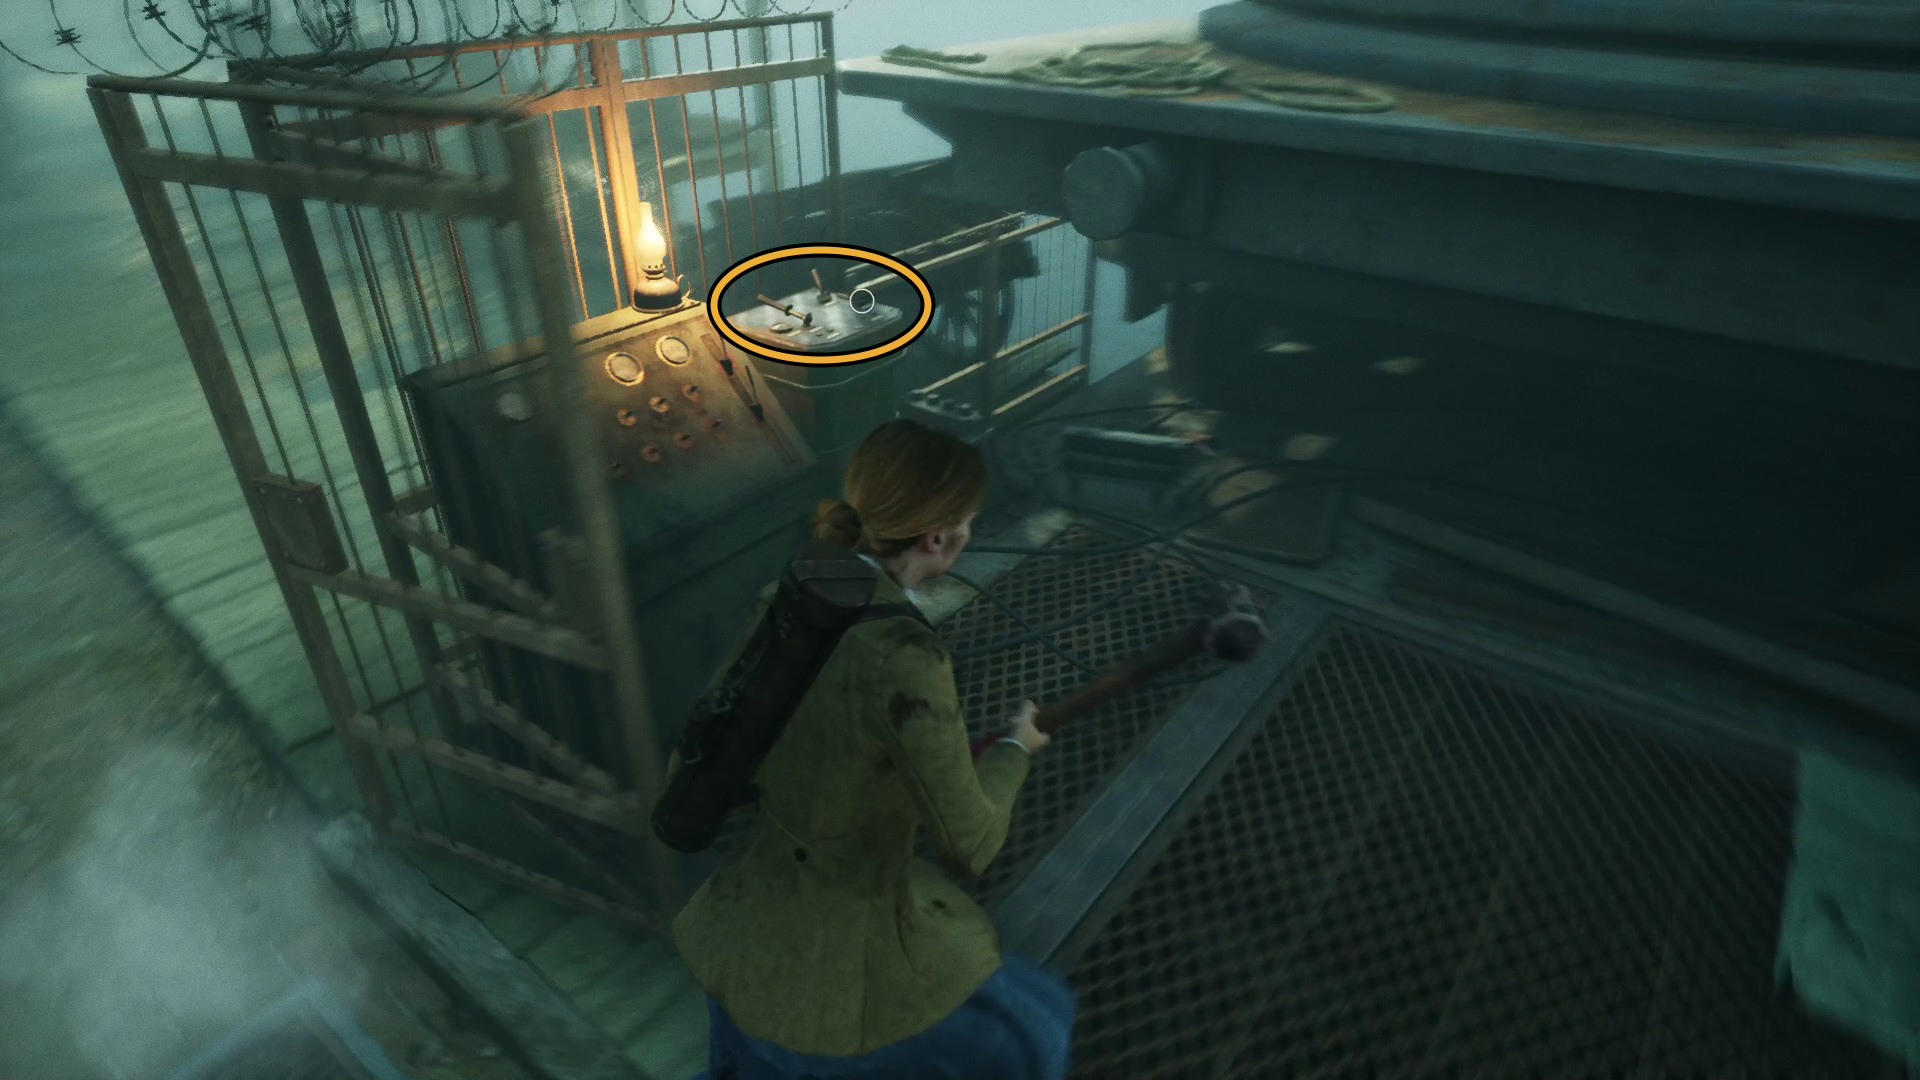
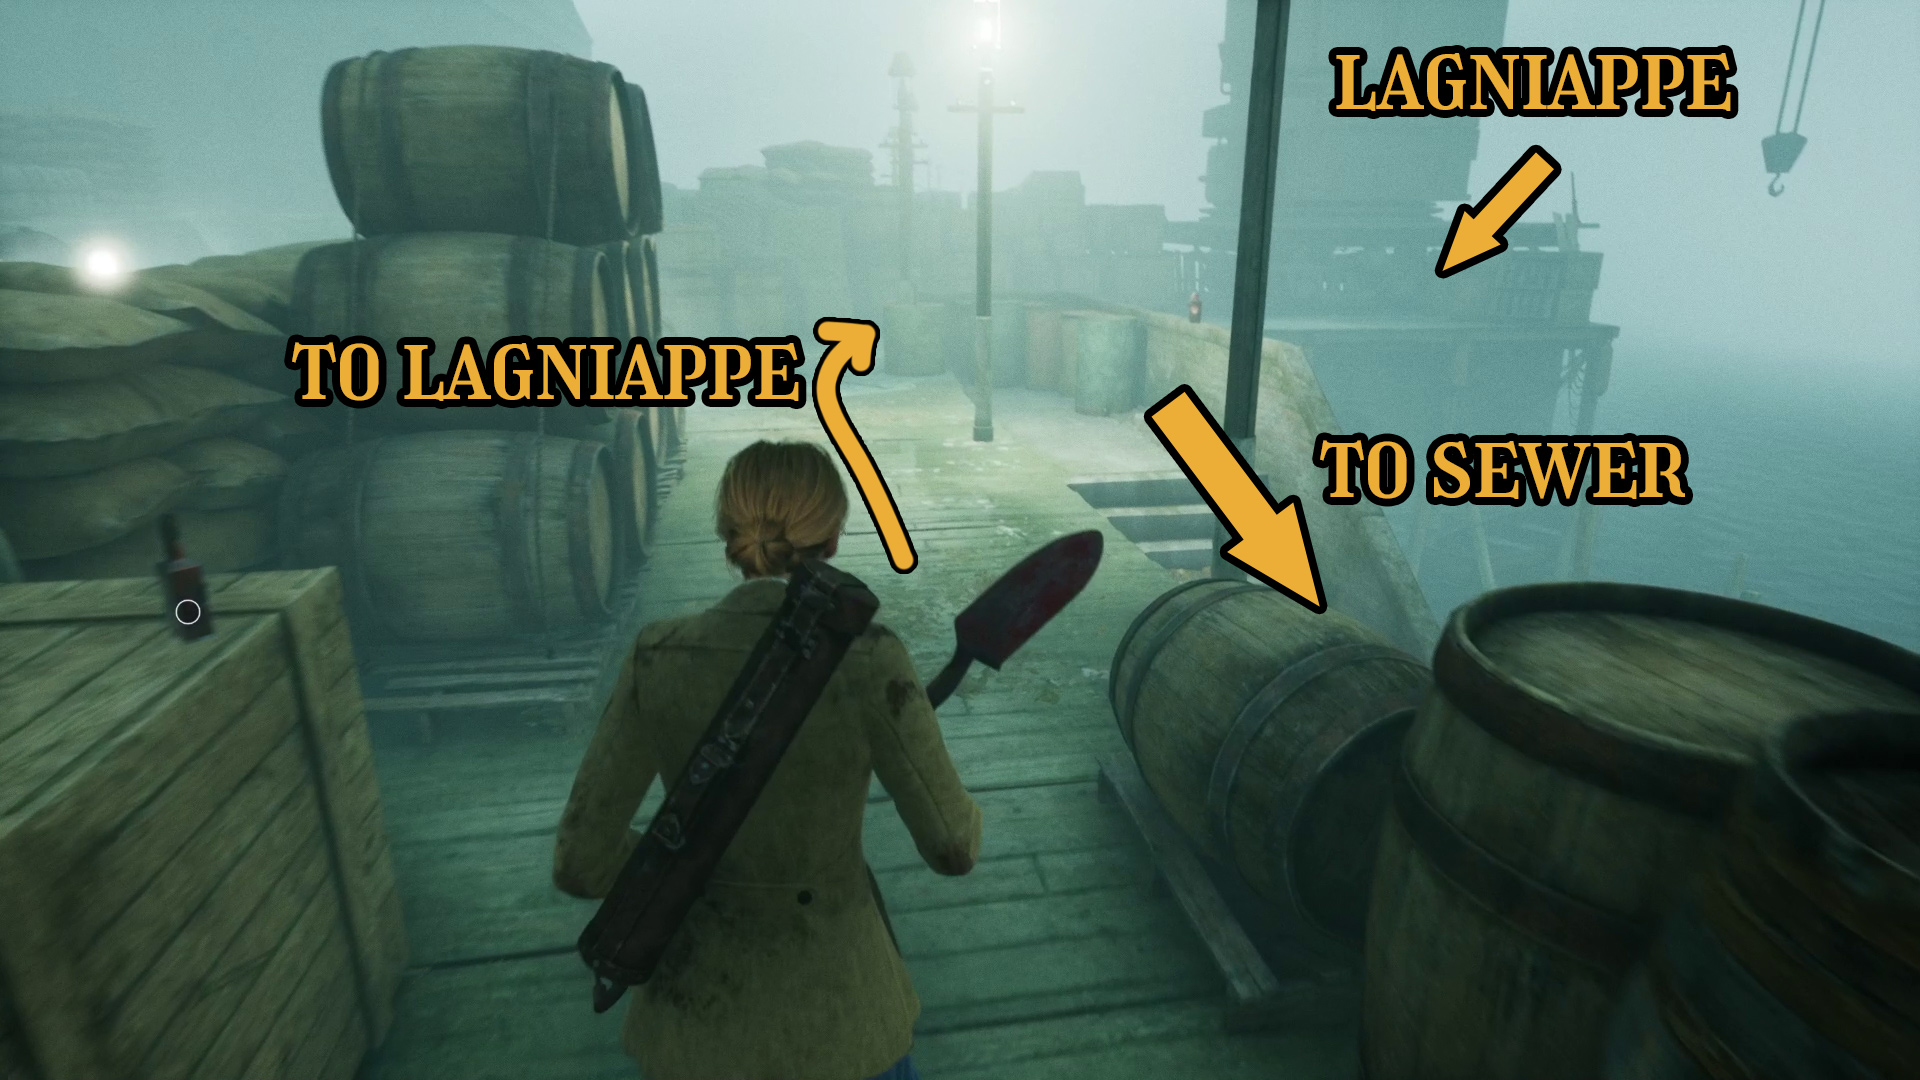
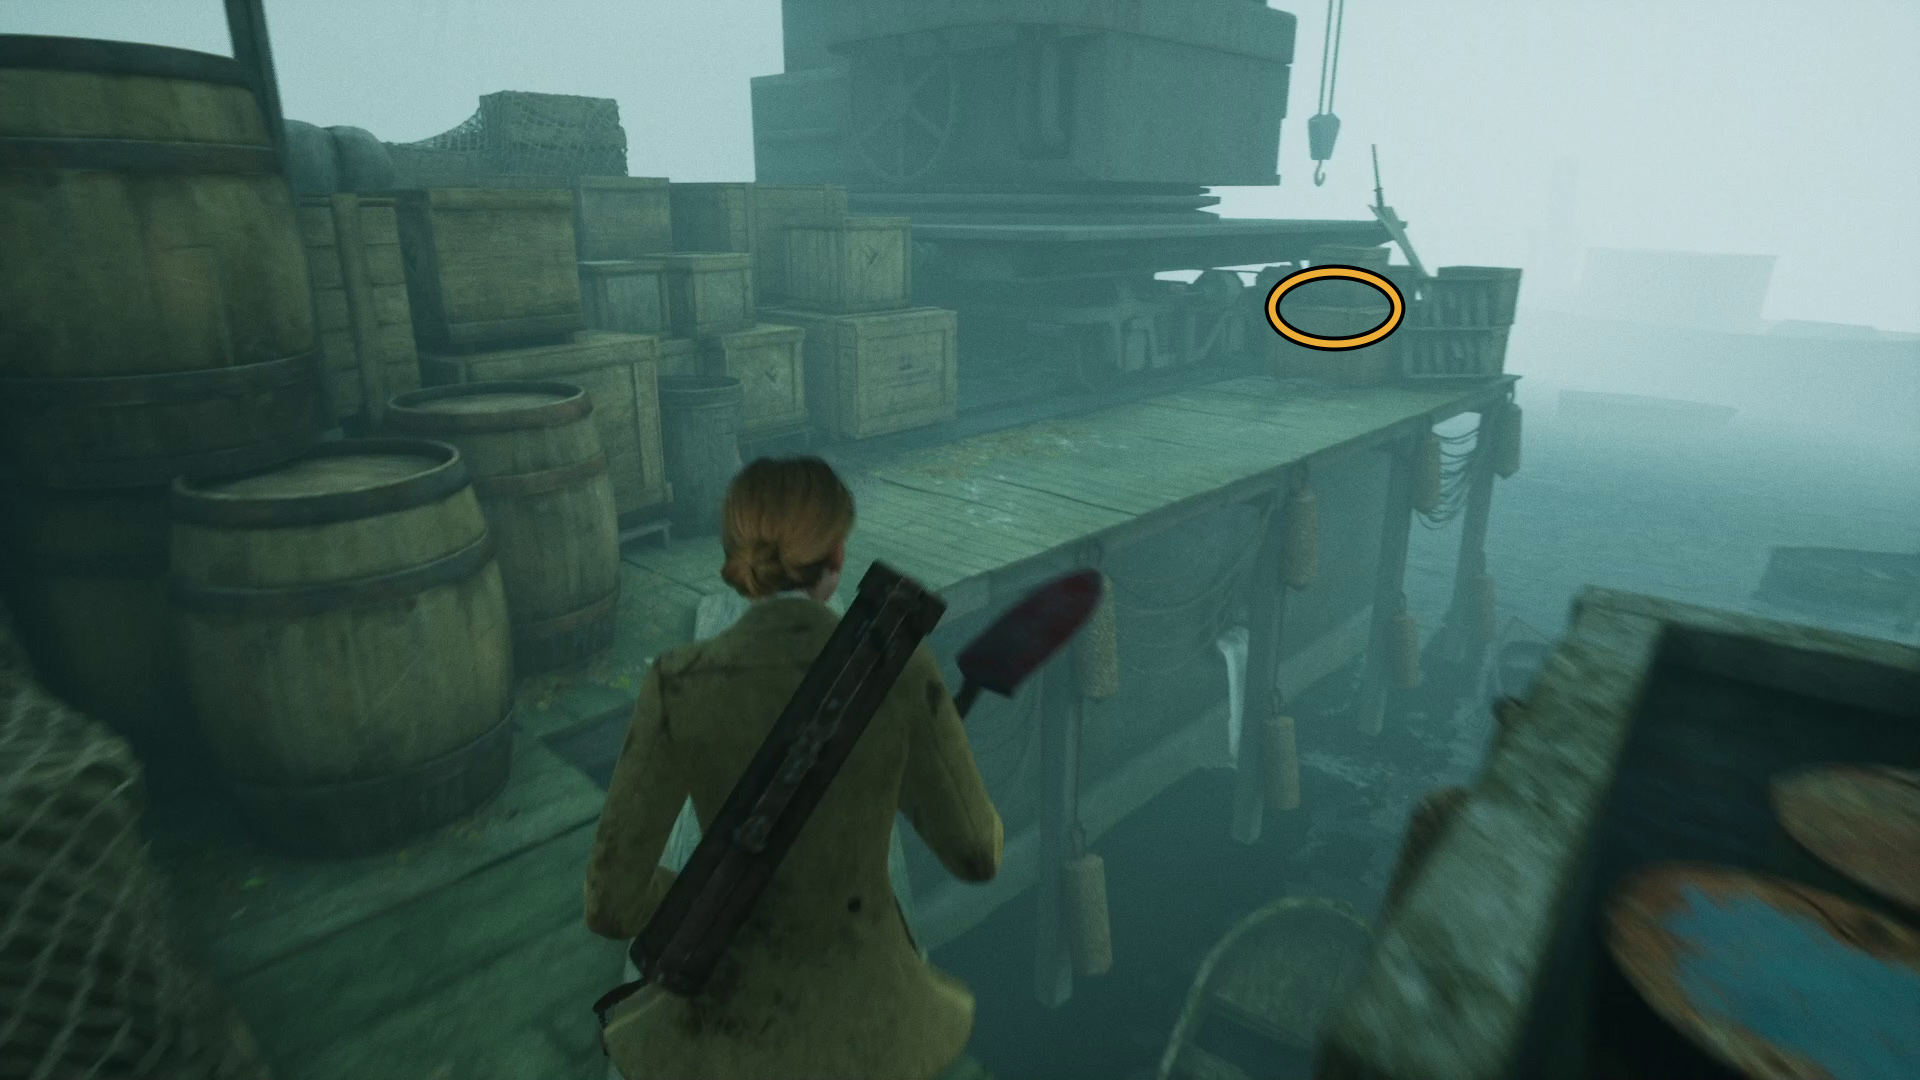
Interact with the controls (Image 24) and use the Stevedore’s key, and you’ll raise the load of cargo blocking the nearby stairs. Note that doing this will release a ton of enemies from the sewers below, so be aware the location of the molotov directly opposite the controls before heading over to deal with the enemies (Image 25). After handling the enemies from the sewer, head past the stairs and towards the other crane to get the Typewriter Ribbon Lagniappe (Image 26) — then go back the way you came and head down the stairs and into the sewer.
Image 24Image 25Image 26
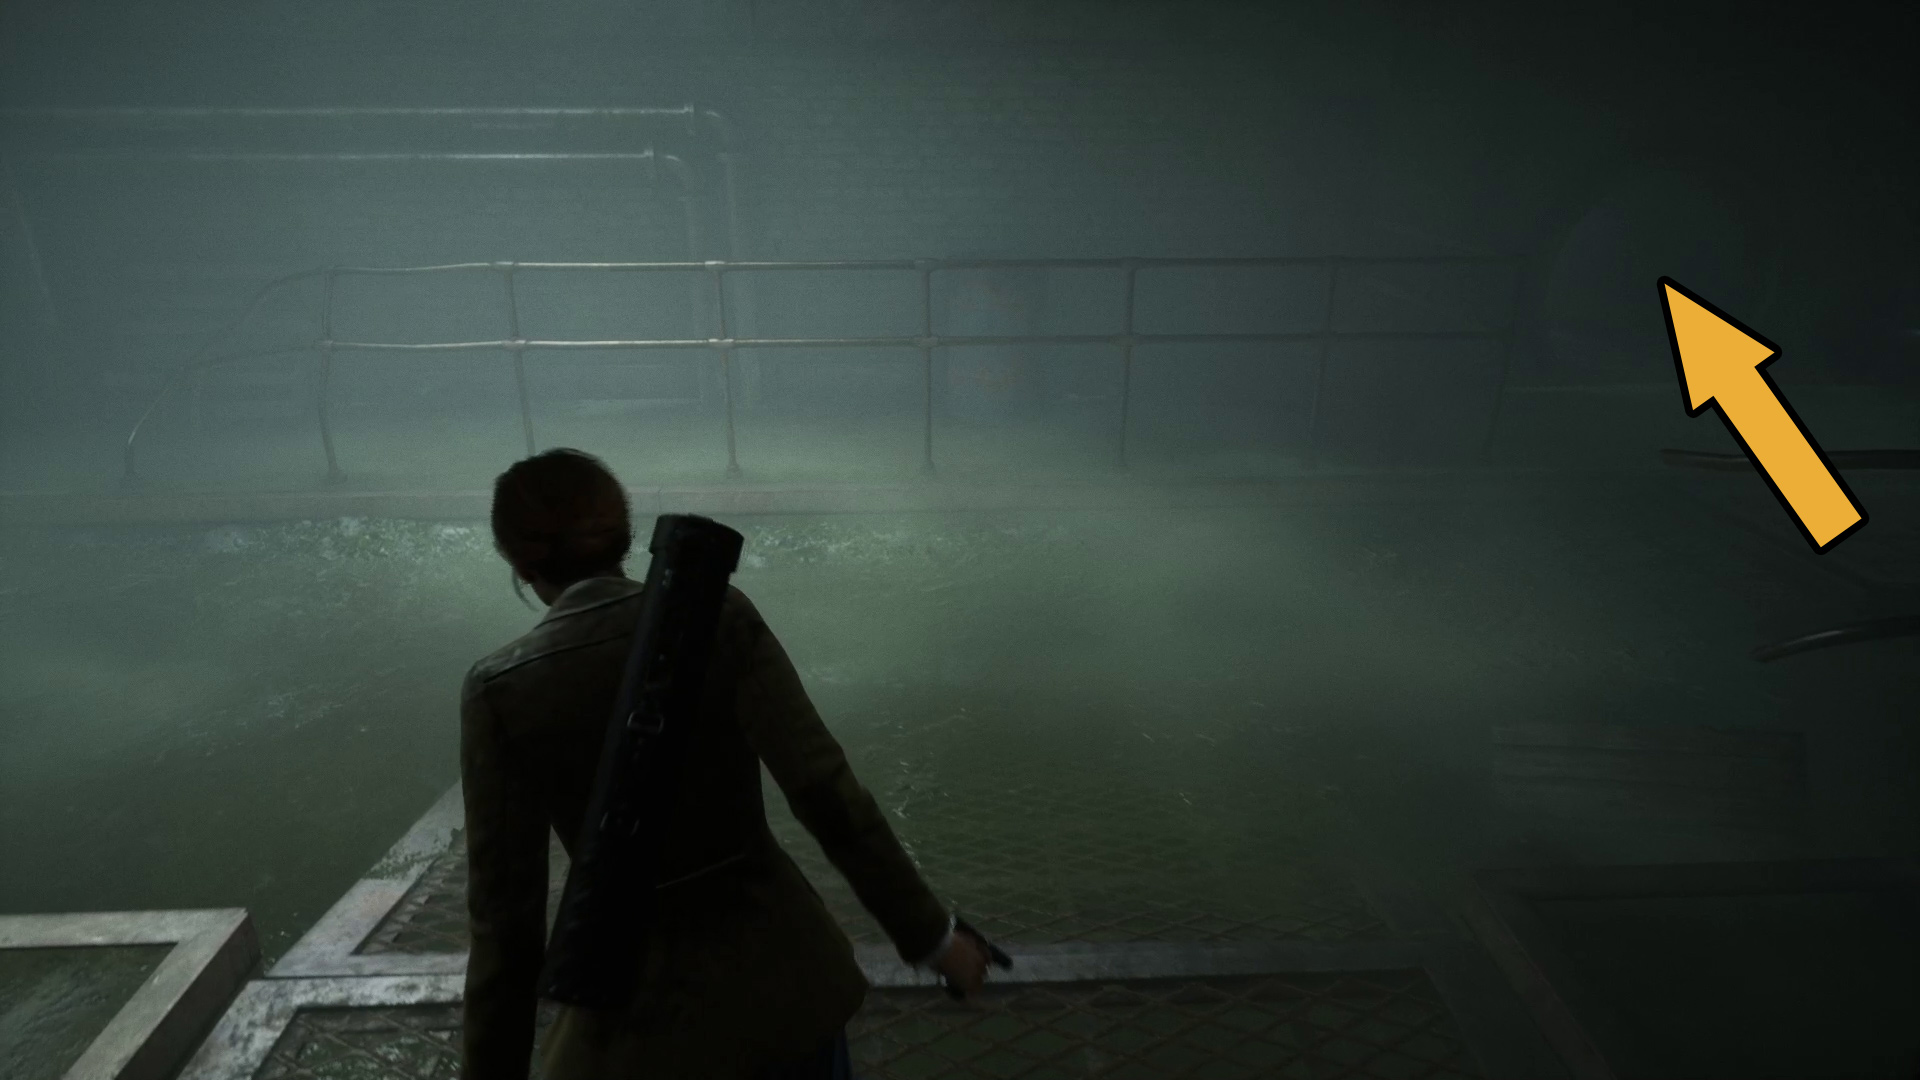
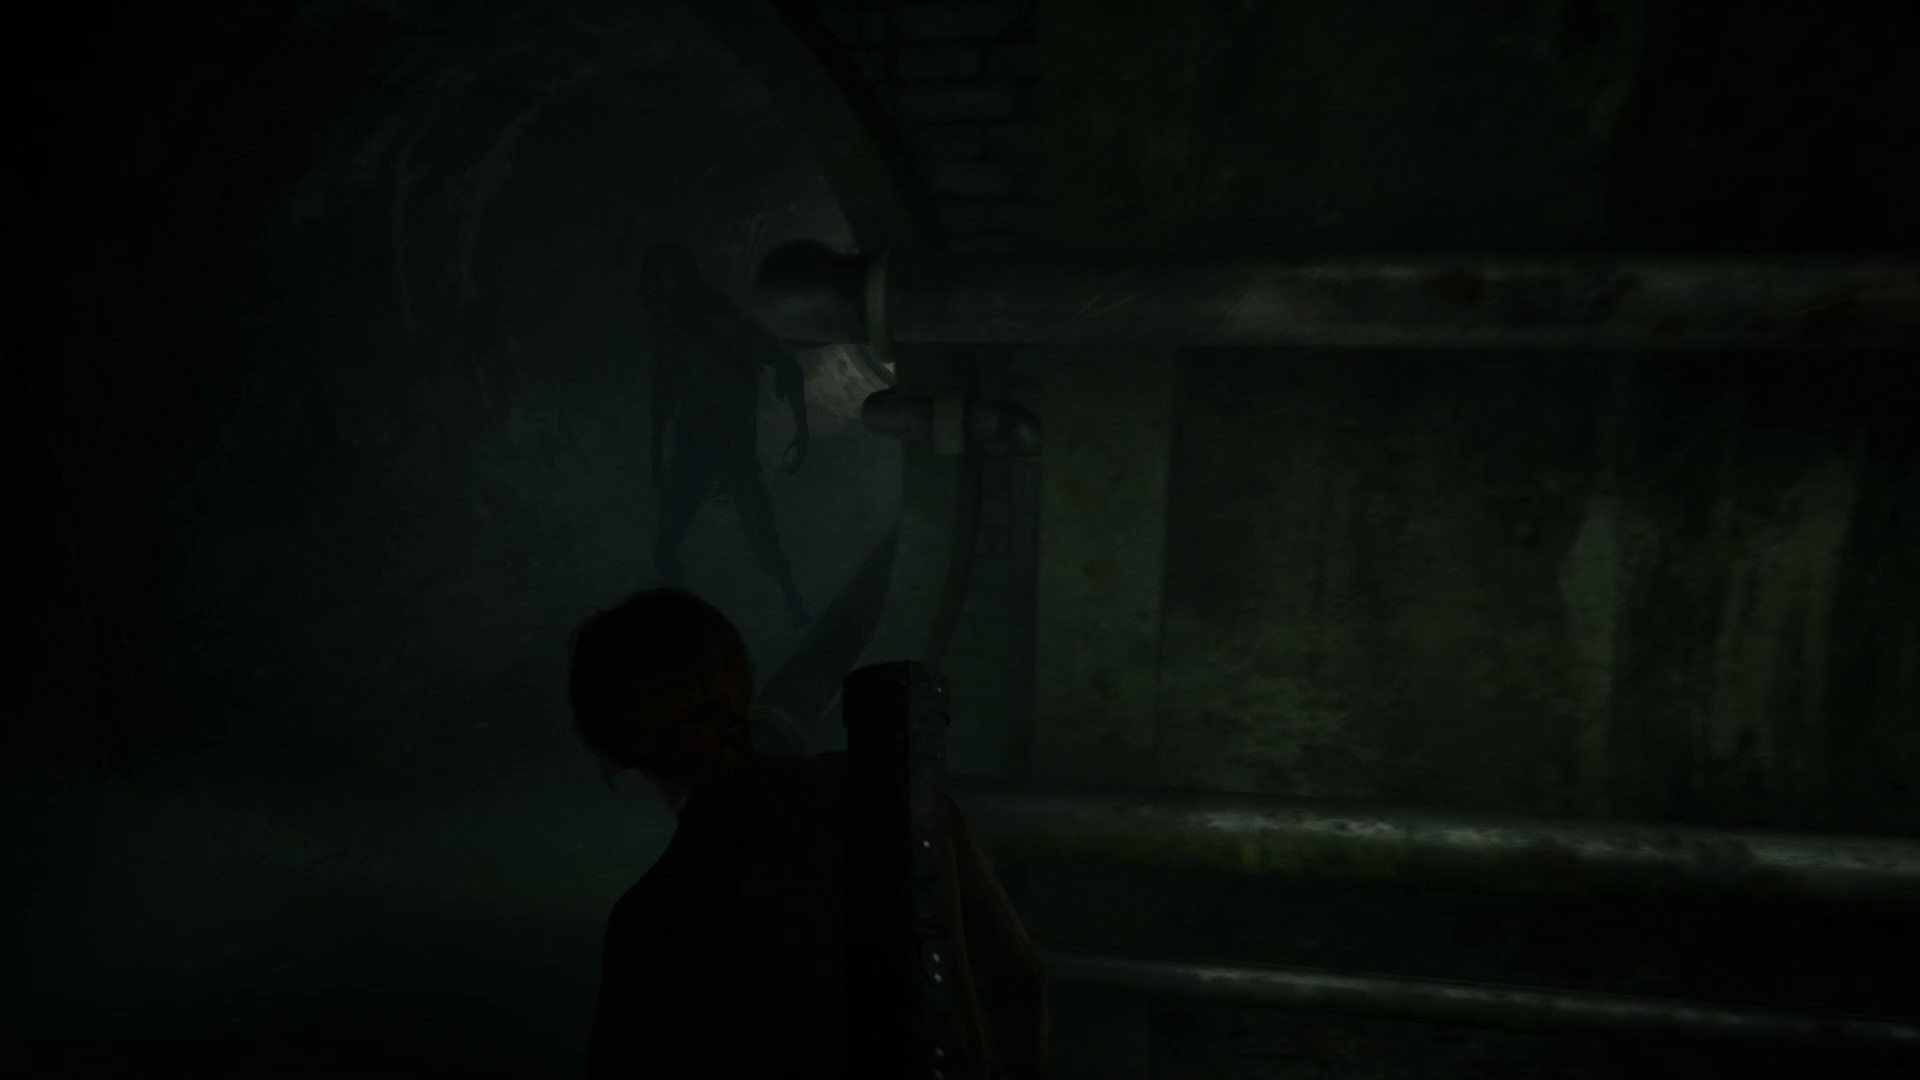
Once you start going down the stairs, more enemies will spawn behind you and run towards you, so make your way quickly into the sewers. When you enter the large tunnel, across from you and slightly to the right is a smaller tube (Image 27) — run over to it and press the indicated button to enter it. Continue forward into the next tunnel. When you exit the small tube, check the barrels on your right for loot, and then start sneaking — there’s an enemy you can avoid in the dead-end tunnel on the right just ahead (Image 28).
Image 27Image 28
Go straight down the tunnel until you reach the intersection with the dead end, then turn right and continue down the next branch of the tunnel. You don’t have to sneak, but there is an enemy around the corner to the right at the next intersection (Image 29). You have to go past this enemy to proceed — if you don’t want to fight them, you can grab a throwable from the tunnel you just came down and throw it opposite the tunnel the enemy is in (to make it get out of your way).
Image 29
However you deal with the enemy, go through the tunnel it was guarding. In the next room, you can go down the dark tunnel to the left to find some loot — that done, head on up the ladder to enter the warehouse. In the left corner opposite where you came up the ladder (Image 30), you can find the Severed Horn Lagniappe (Image 31). Take your time holding the examine key and wandering the first floor here, as there’s a lot of loot to find.
Image 30Image 31
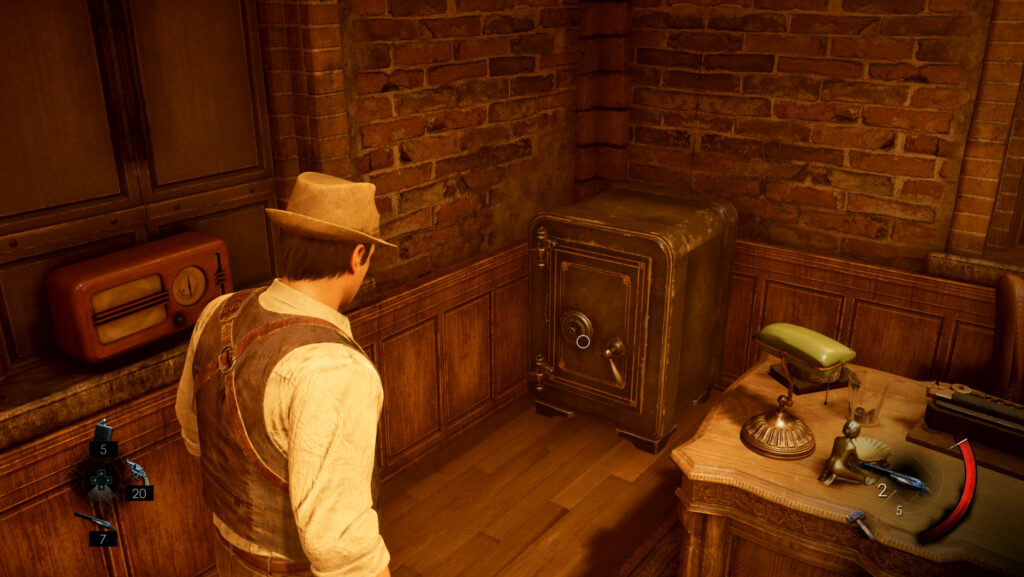
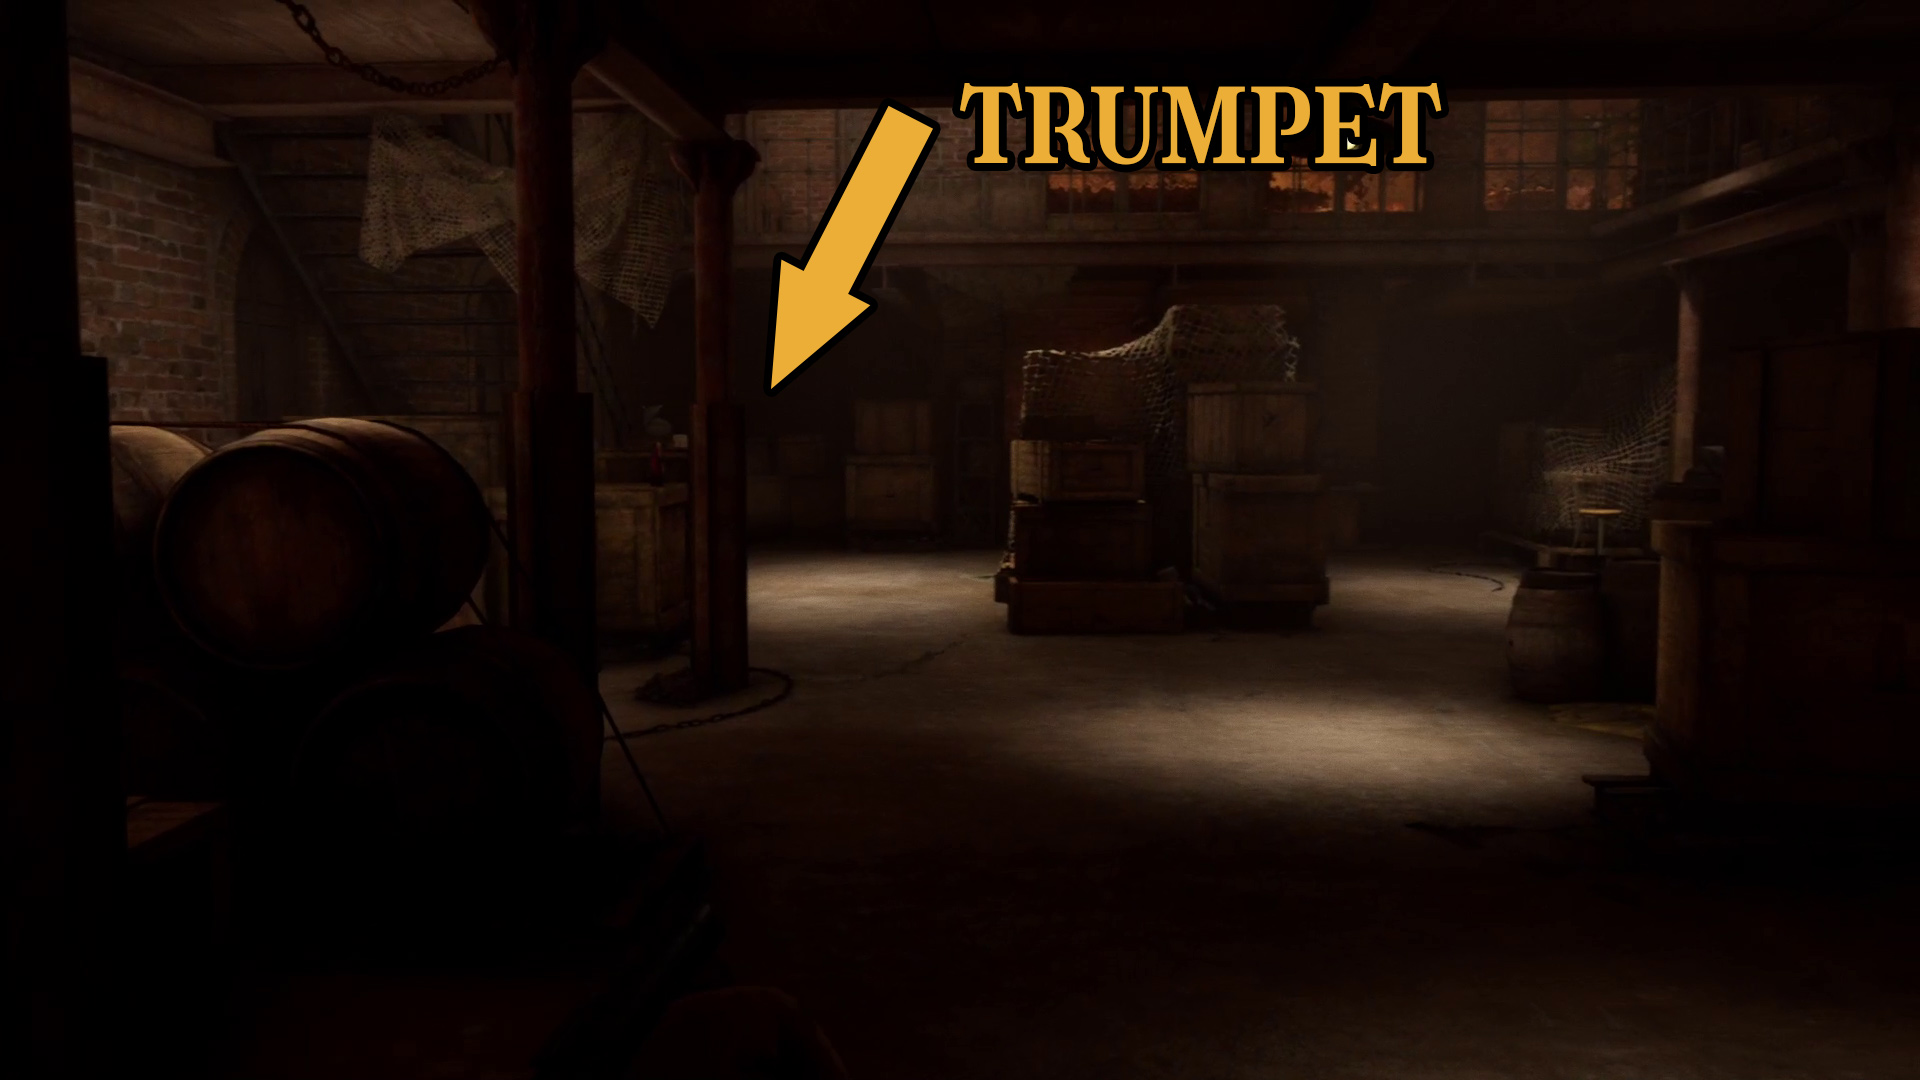
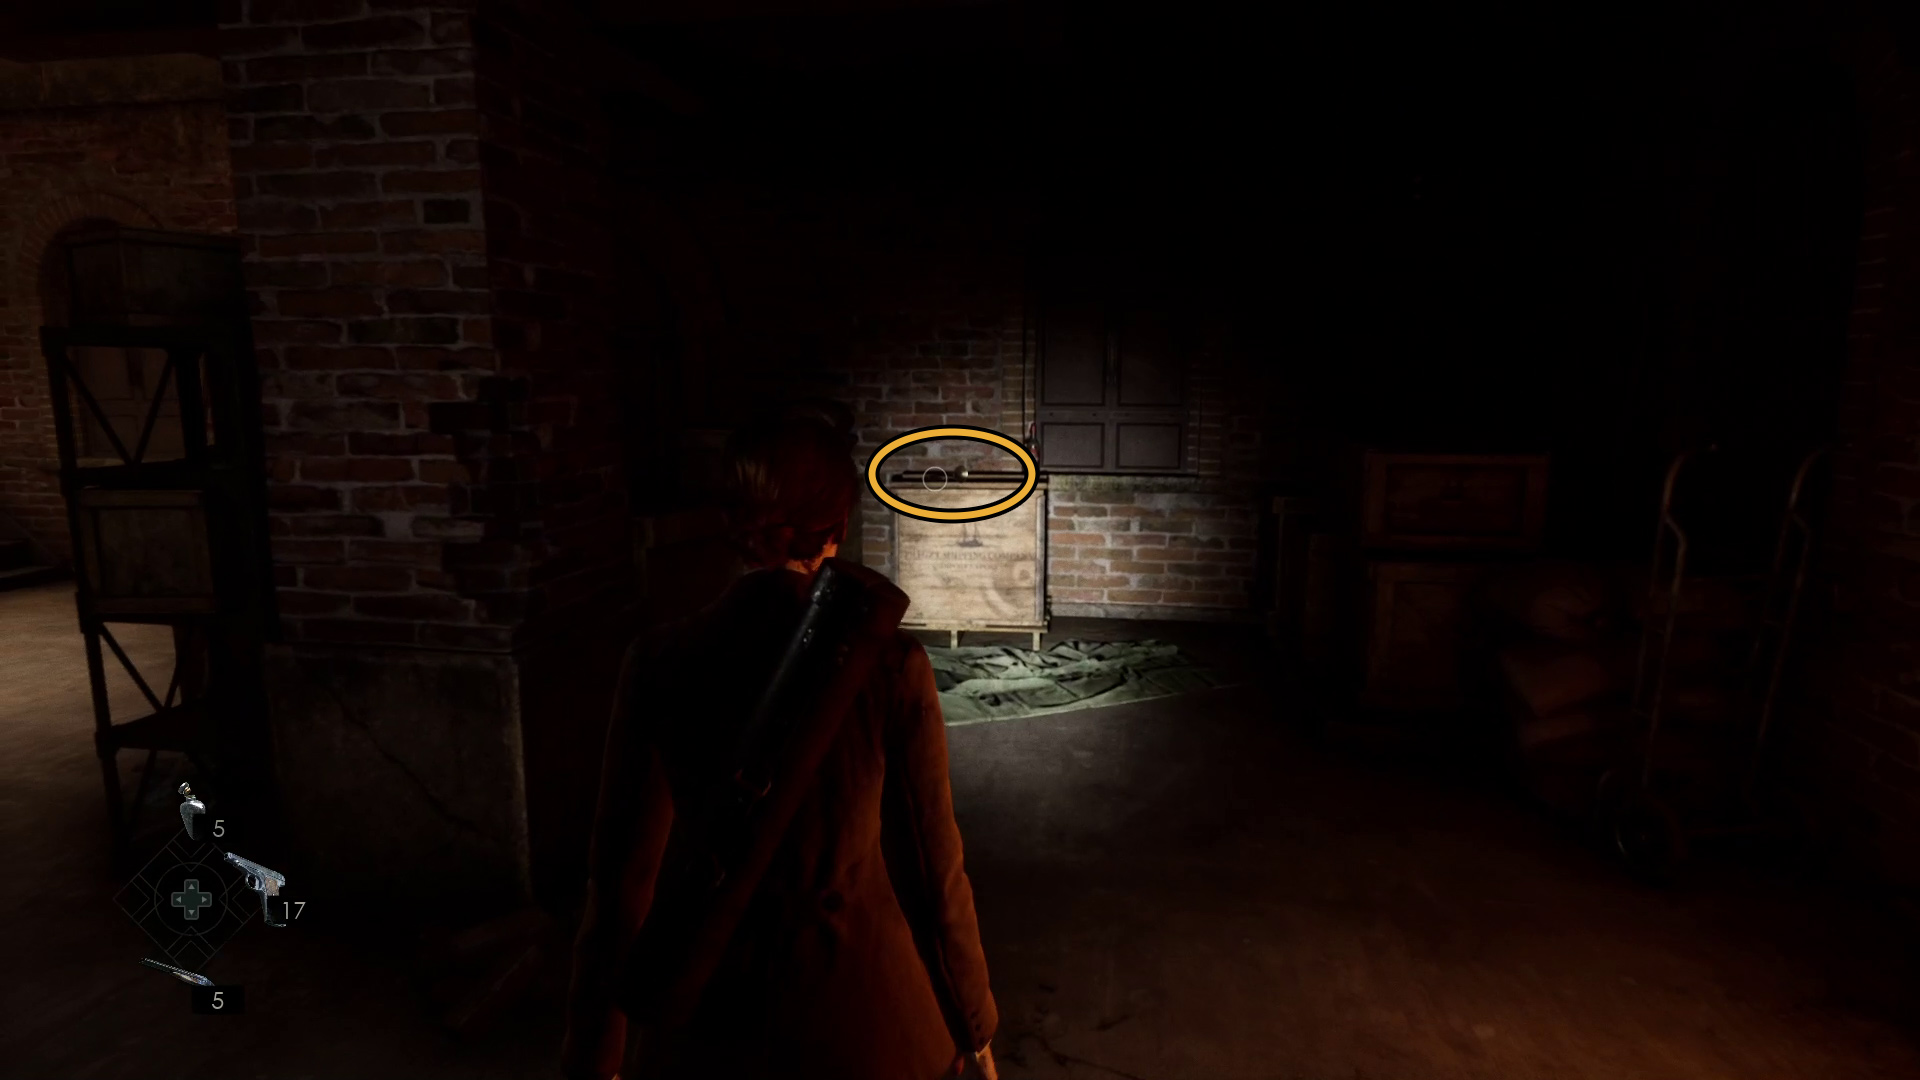
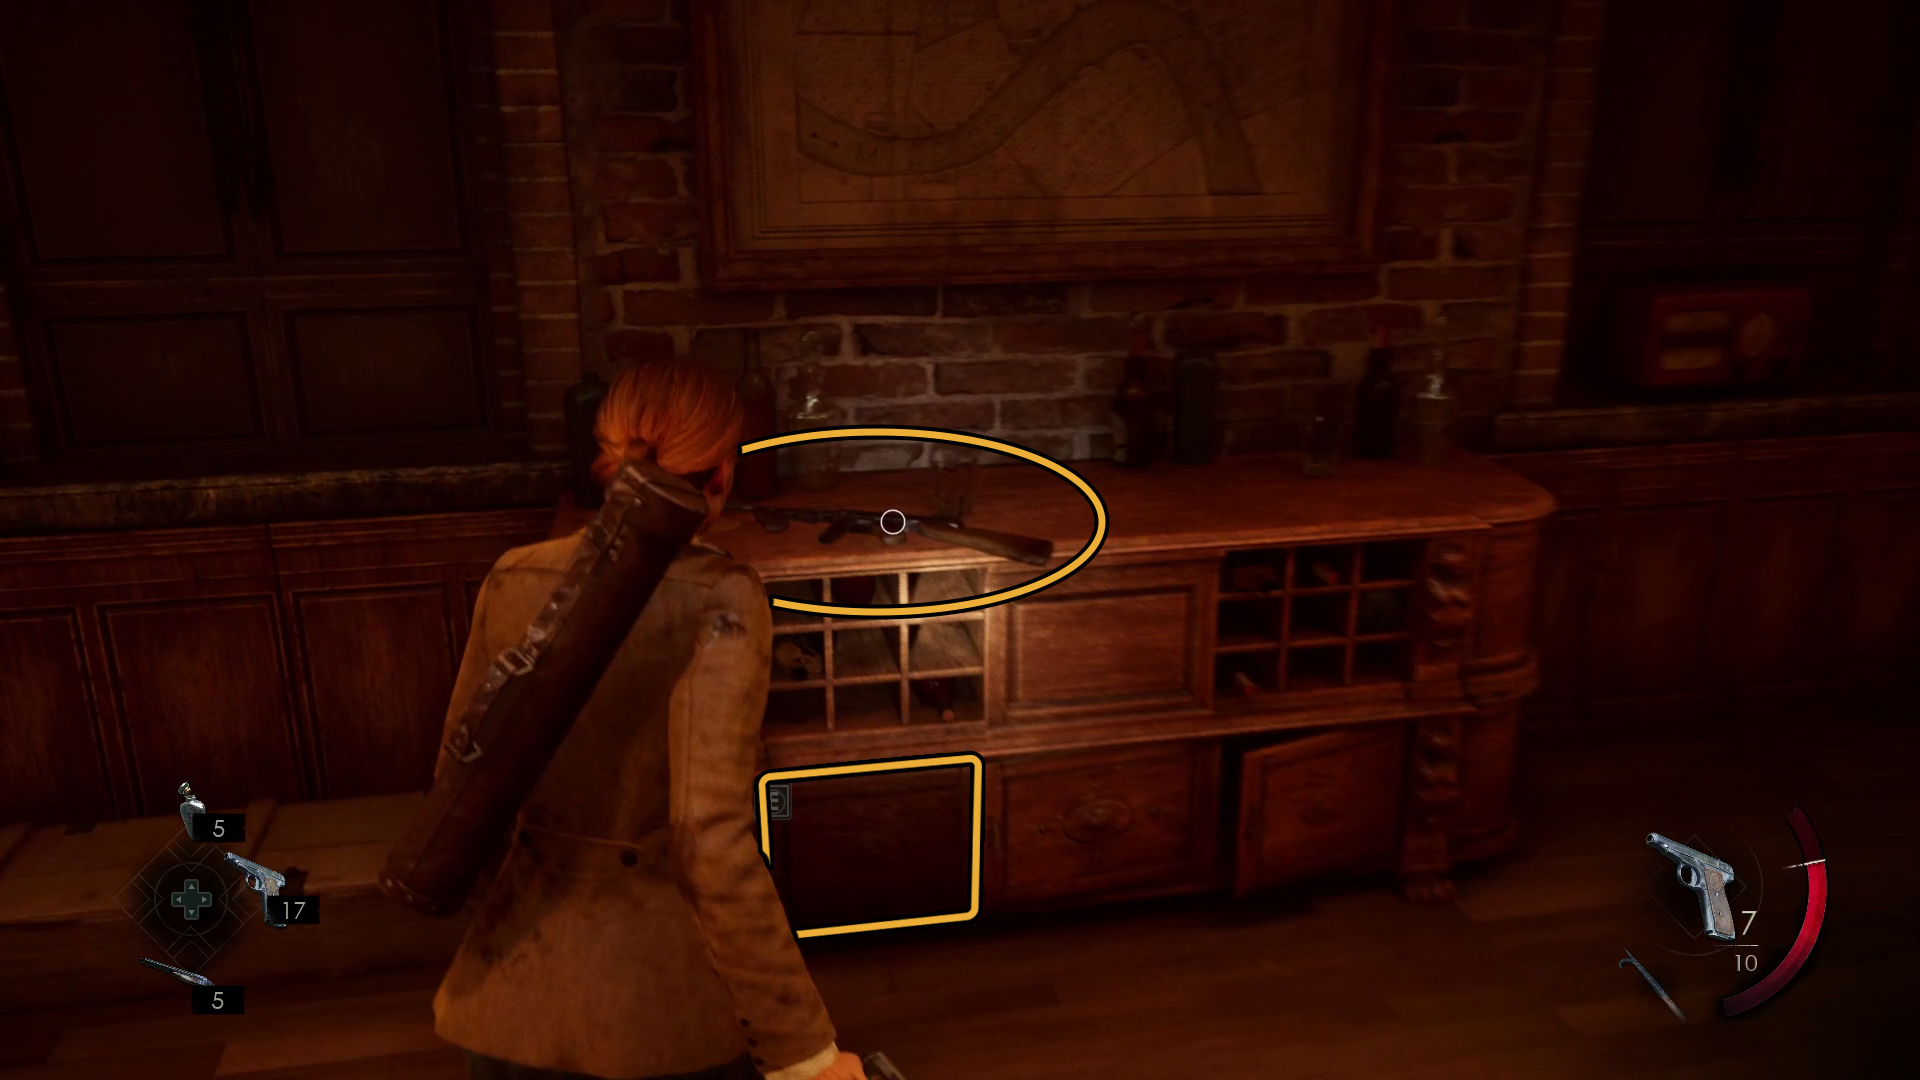
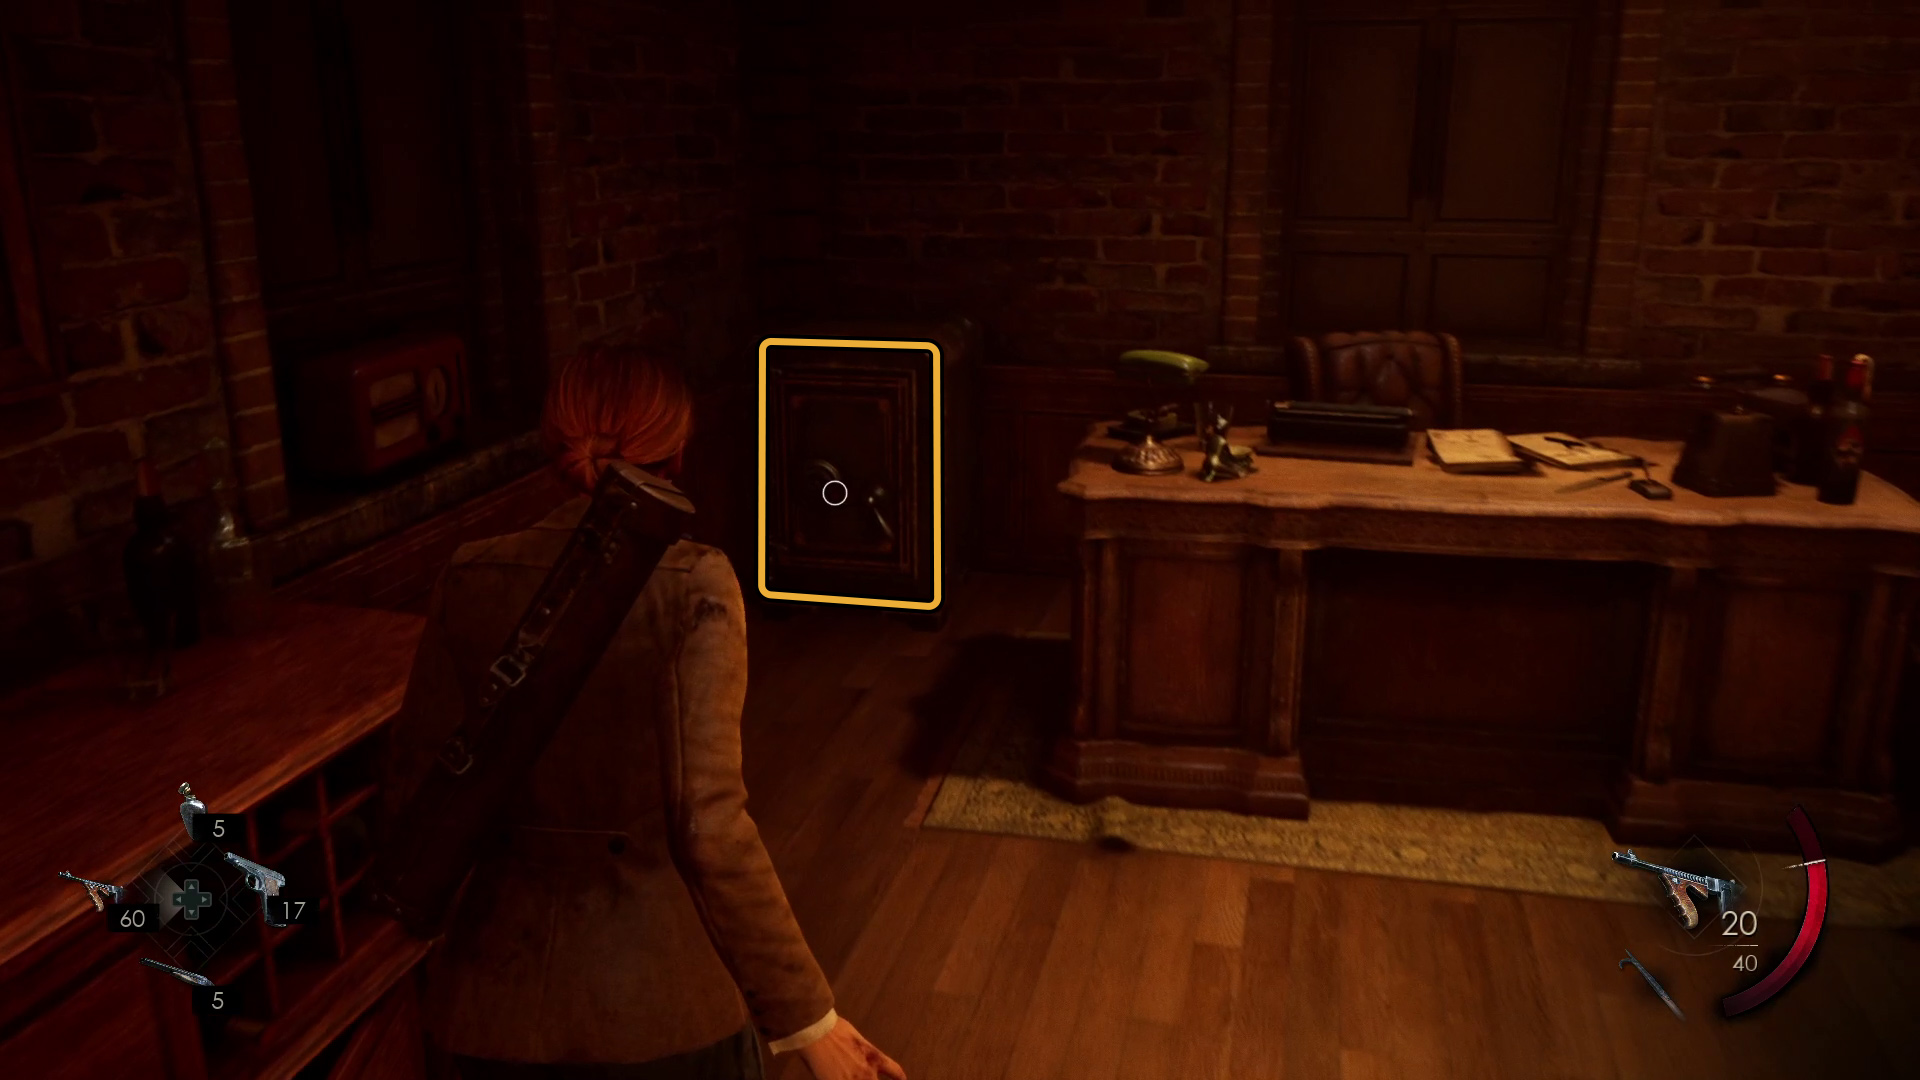
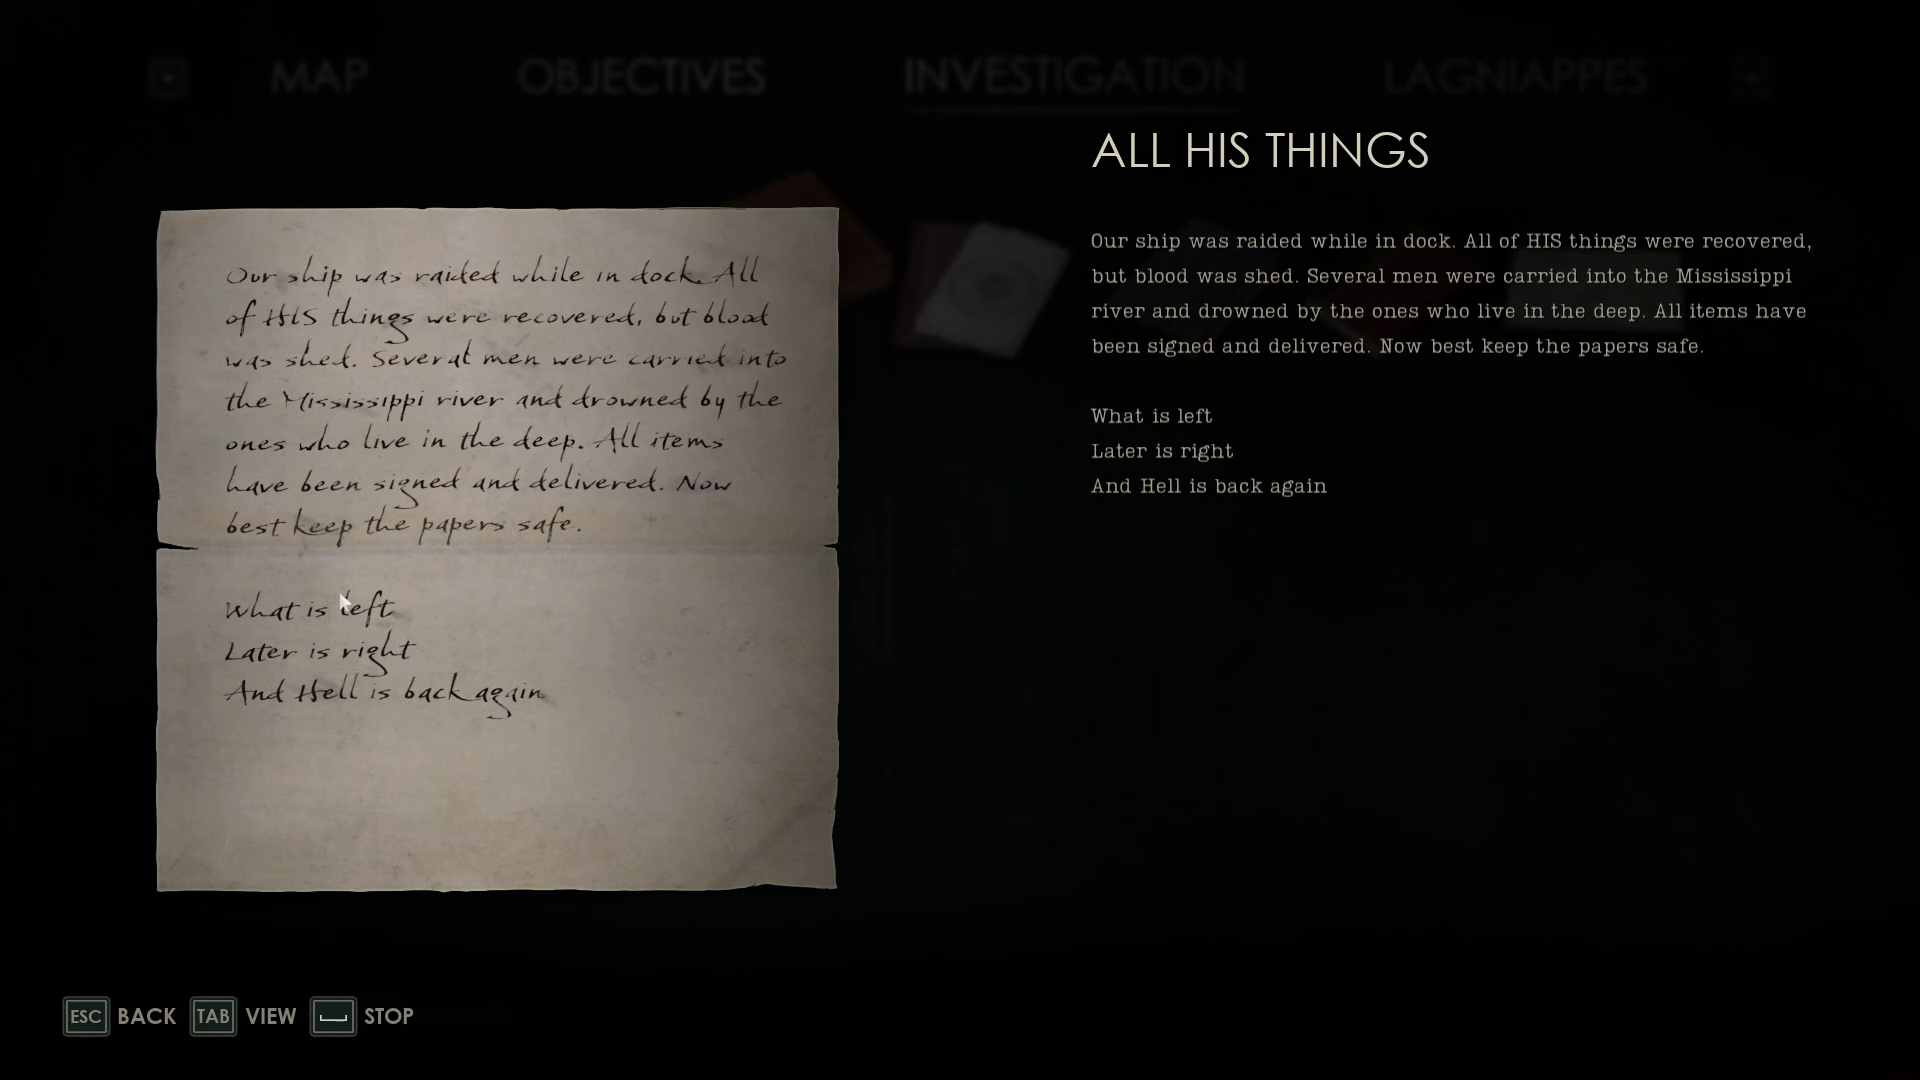
That done, you can head up the stairs to the second level of the warehouse. Continue around the catwalk to the office on the other side of the warehouse. Inside on the left, you’ll find the Tommy Gun, and in the cabinet below the iconic weapon, the All His Things Clue (Image 32). Turn right, and you’ll see a safe you need to open to continue (Image 33).
Image 32Image 33
Warning – If you’re playing as Edward, it’s possible that the cabinet the clue is in won’t be accessible. If this occurs, you can check out Puzzle Hint #1 for the necessary clue.
The safe combo can be found in the All His Things clue.
The last three lines of the All His Things clue are the solution to the puzzle. Think about how locker combinations work, and consider how you could translate “What”, “Later”, and “Hell” into a locker combo.
What = 4, Later = 5, Hell = 4. Enter 454 by rotating the dial left to 4, right to 5, then left back to 4.
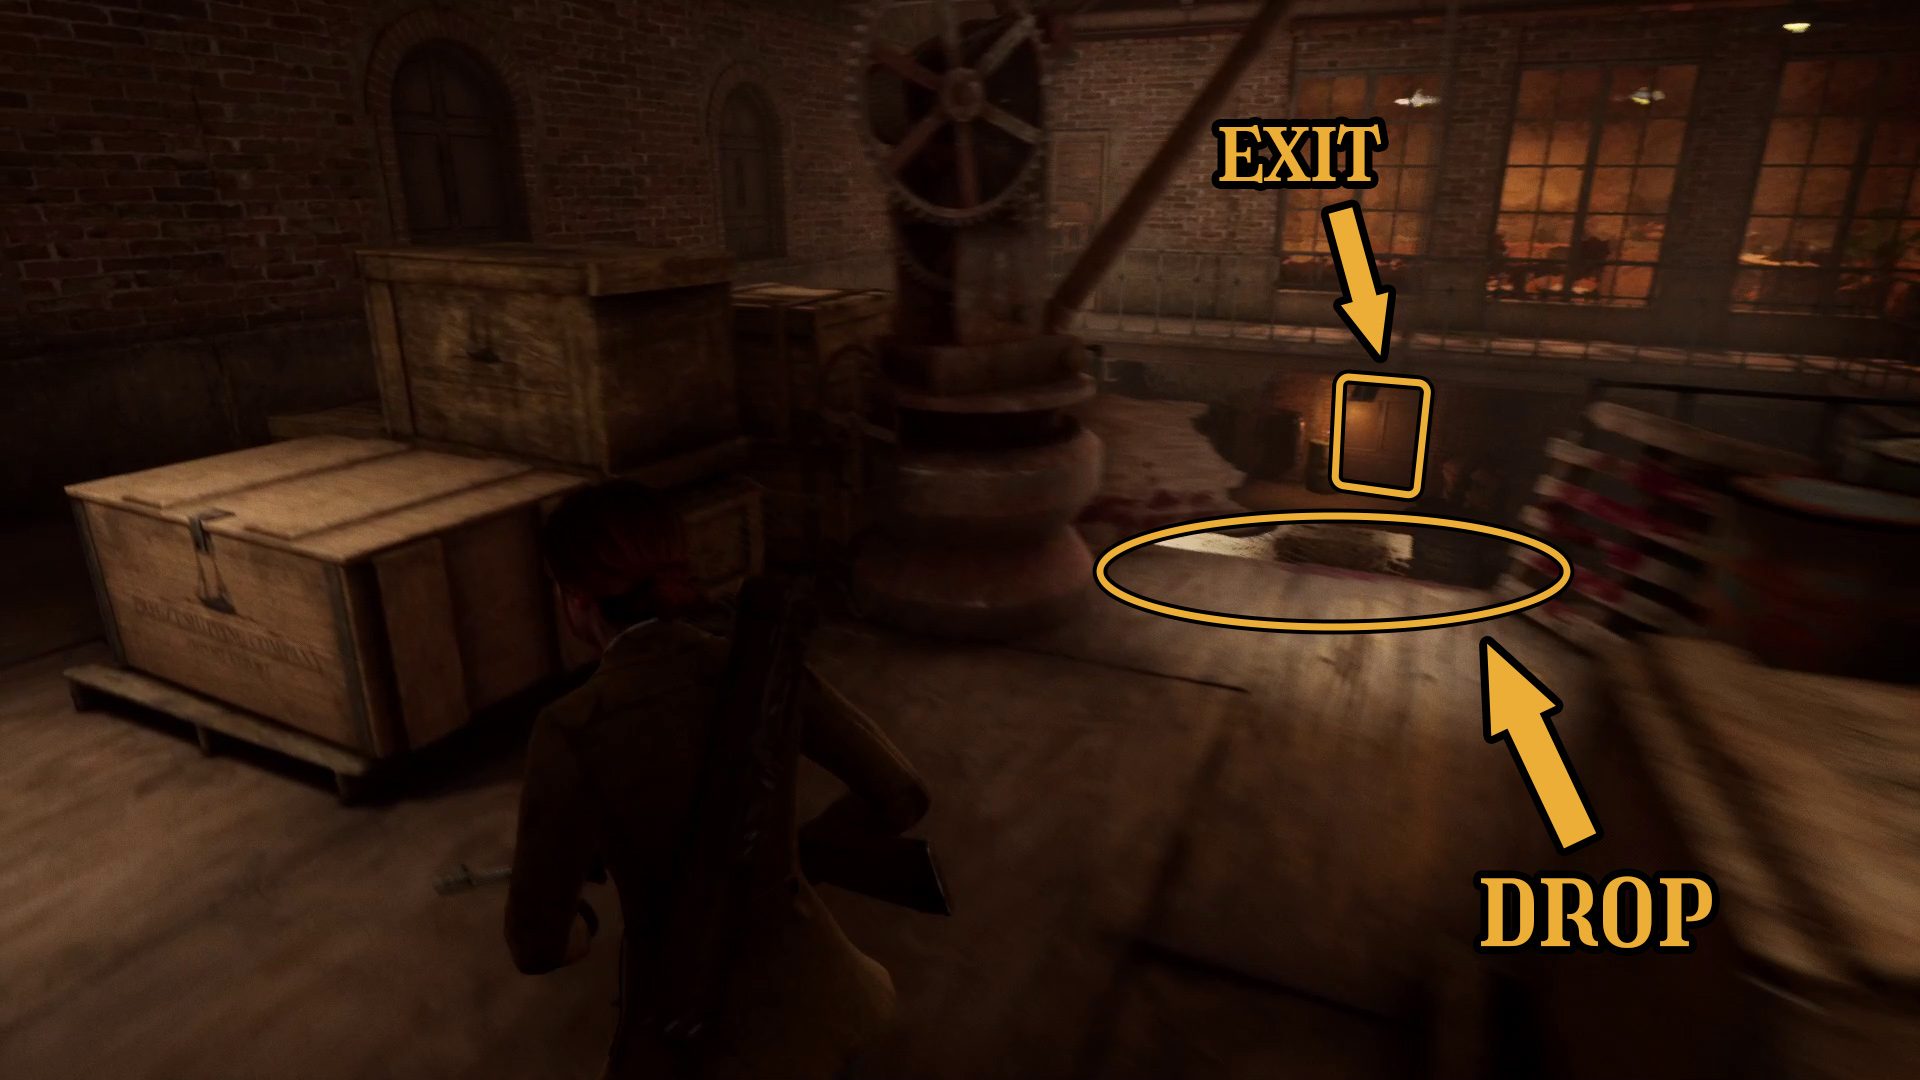
Once you’ve got the safe open, you’ll receive the Cargo Manifest clue. Check for potential loot on the round table in the office if you haven’t yet, then leave the office and go back the way you came. When you get to the other side of the room, take a look at Image 34. After you go down the stairs and get close to the exit, a huge amount of enemies will come pouring out of it.
While you can theoretically fight them, it’s better to run back up the stairs, wait for the enemies to climb the stairs, then go down the drop and run out of the exit. They can get stuck in the doorway, so you may have to run down and pull them out of the doorway yourself. Once you’ve got the enemies running up the stairs, hop down the drop, then head through the exit and sprint towards the now-open gate that’s straight ahead from the warehouse exit (Image 35) — the enemies won’t chase you through the gate.
Image 34Image 35
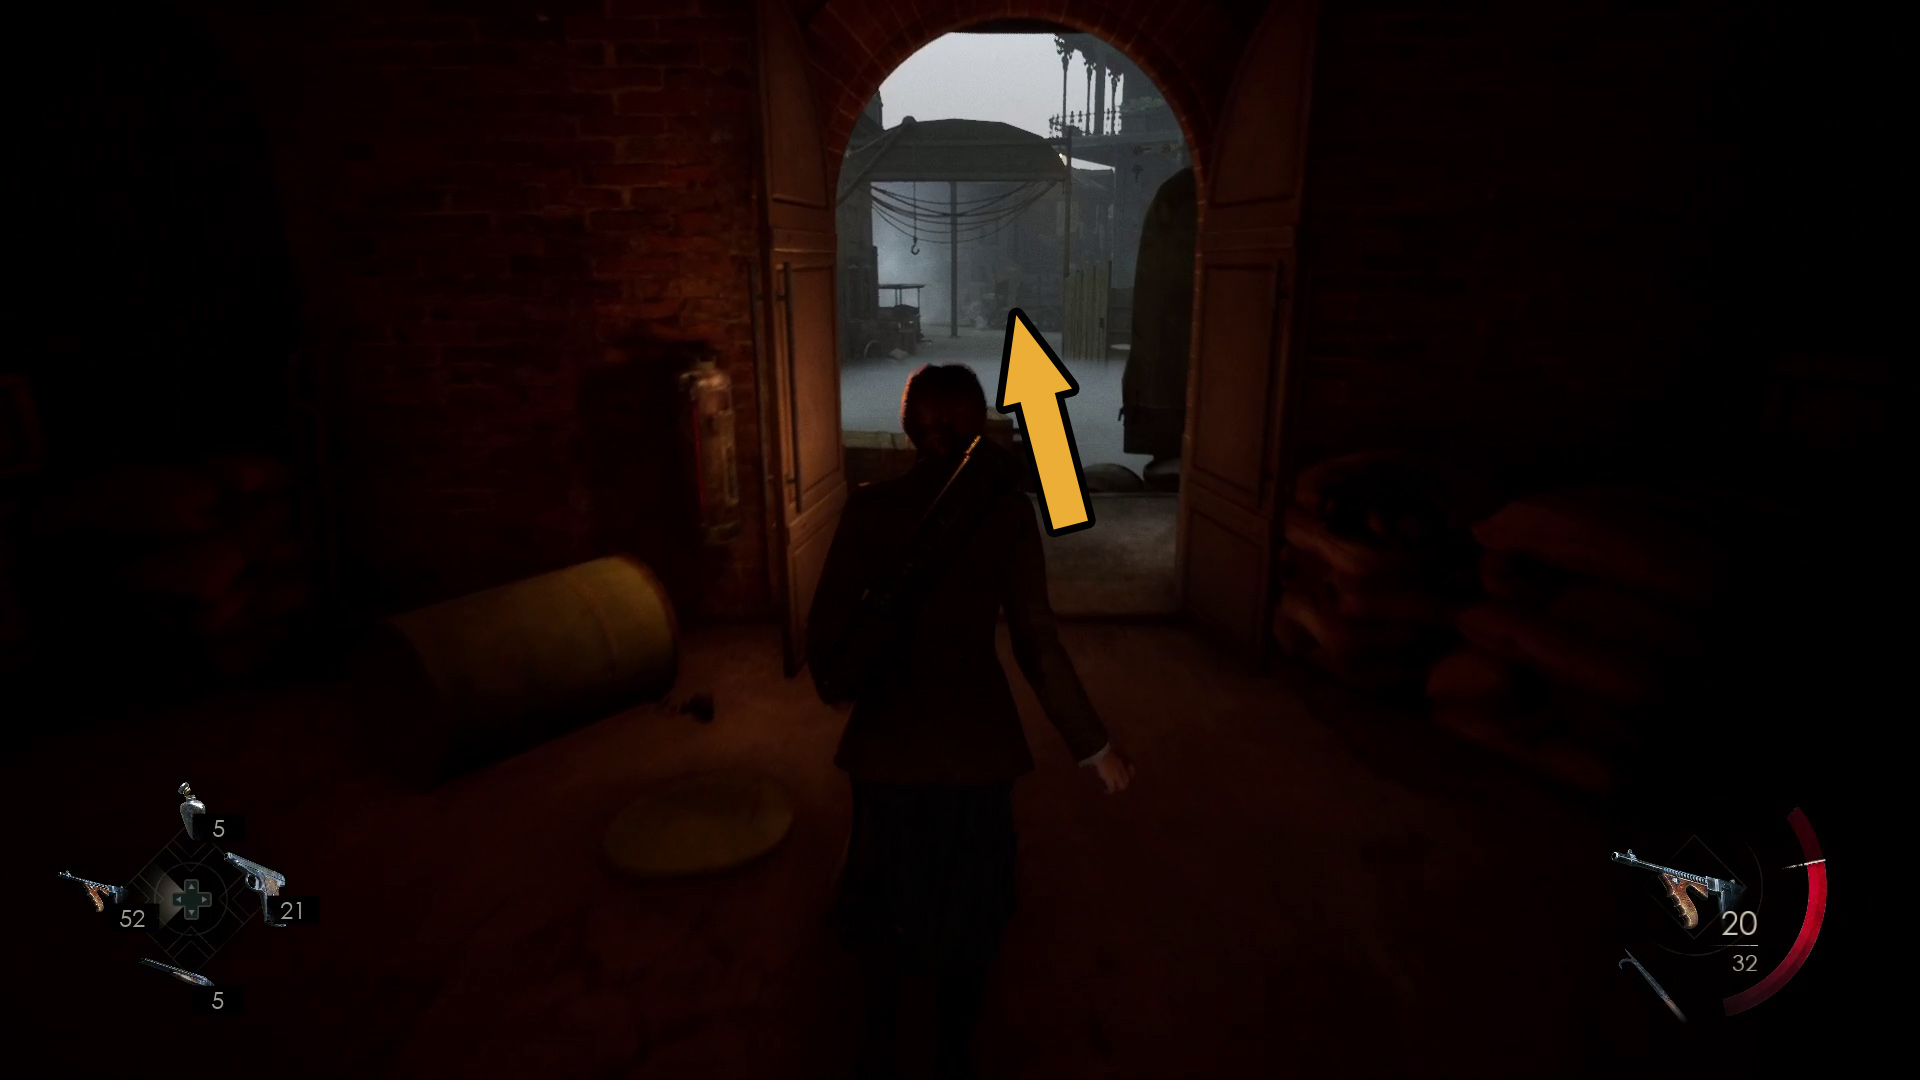
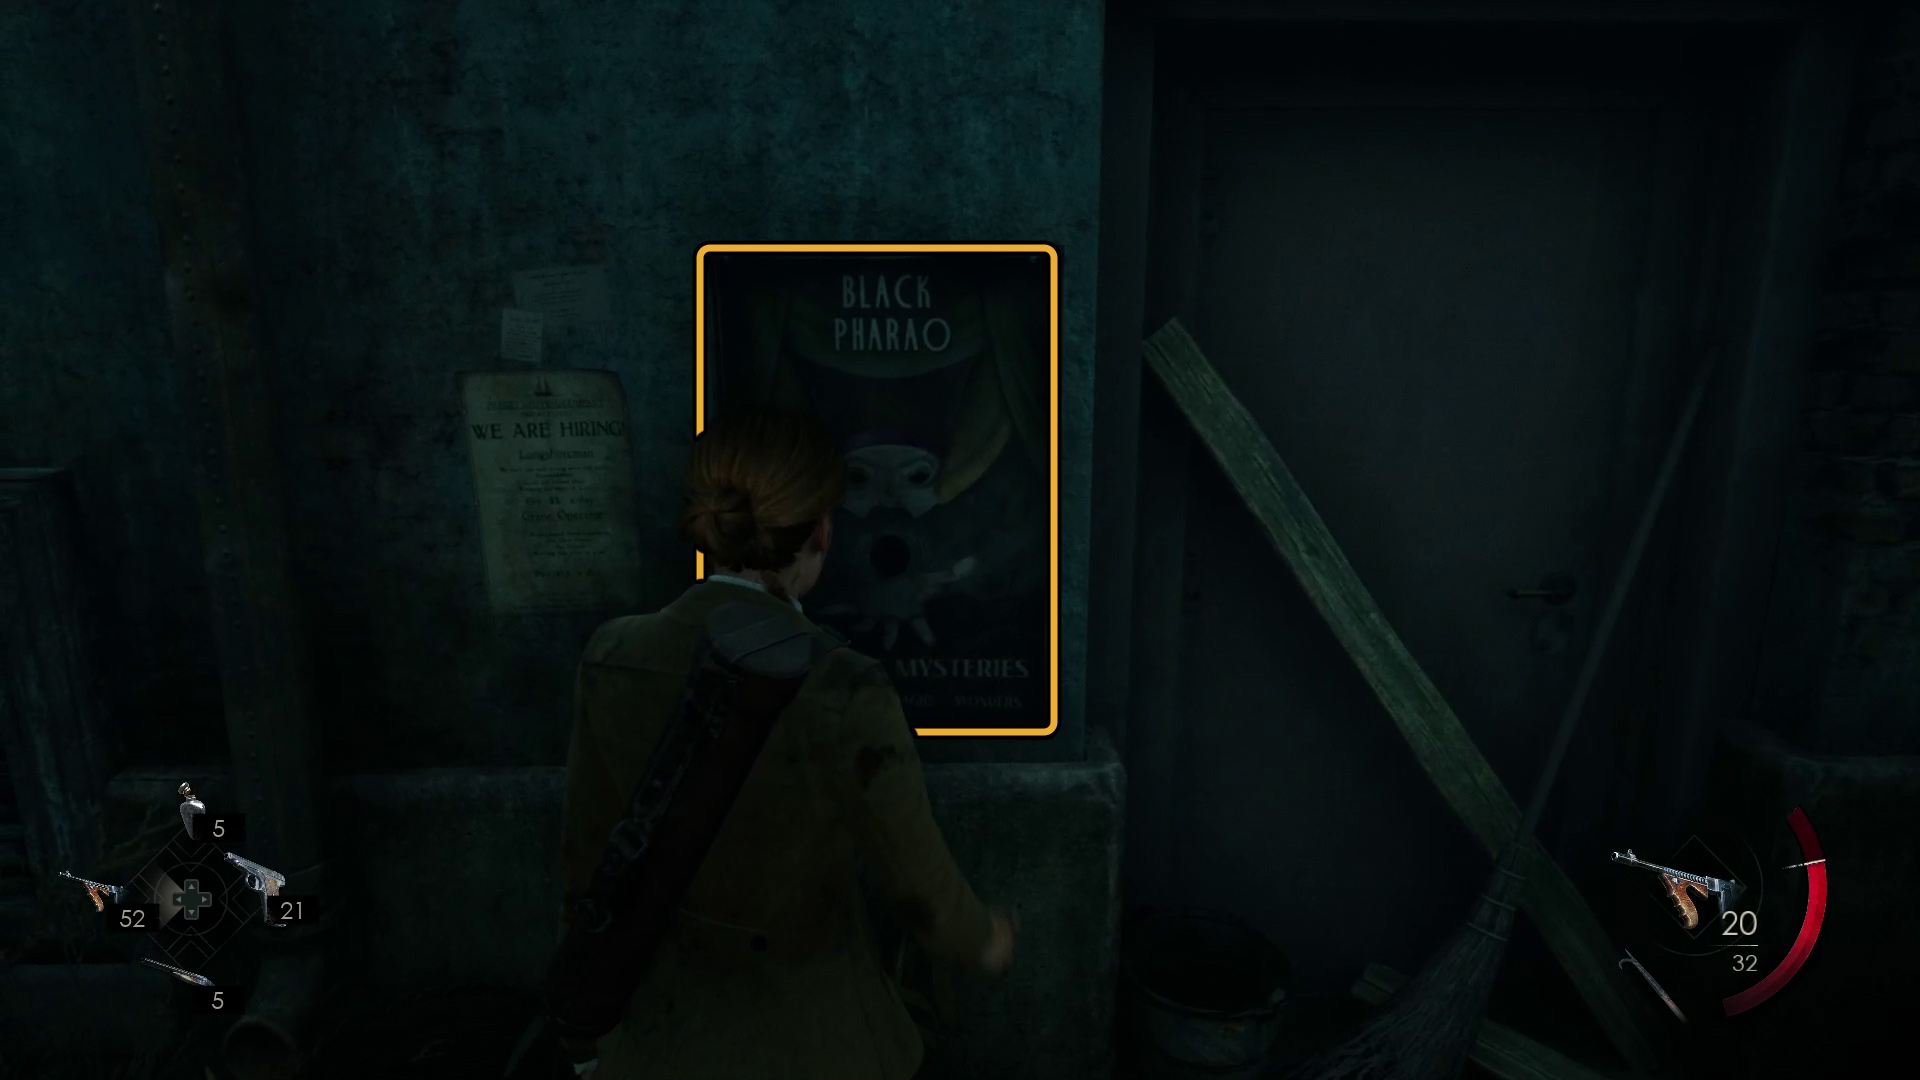
You can see the theater straight ahead, and the door up the stairs is the way forward, but first you should head into the side yard to the right of the door (Image 36) — on the left wall just inside the yard is a poster, the Witness the Black Pharaoh Lagniappe (Image 37). Grab it, check the rest of the yard for loot, then head through the door to the theater.
Image 36Image 37
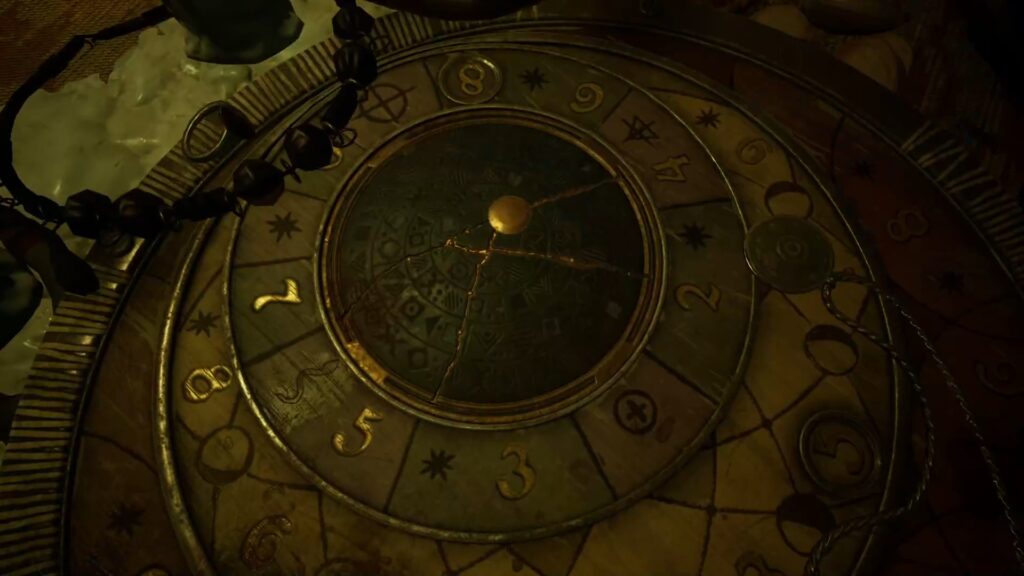
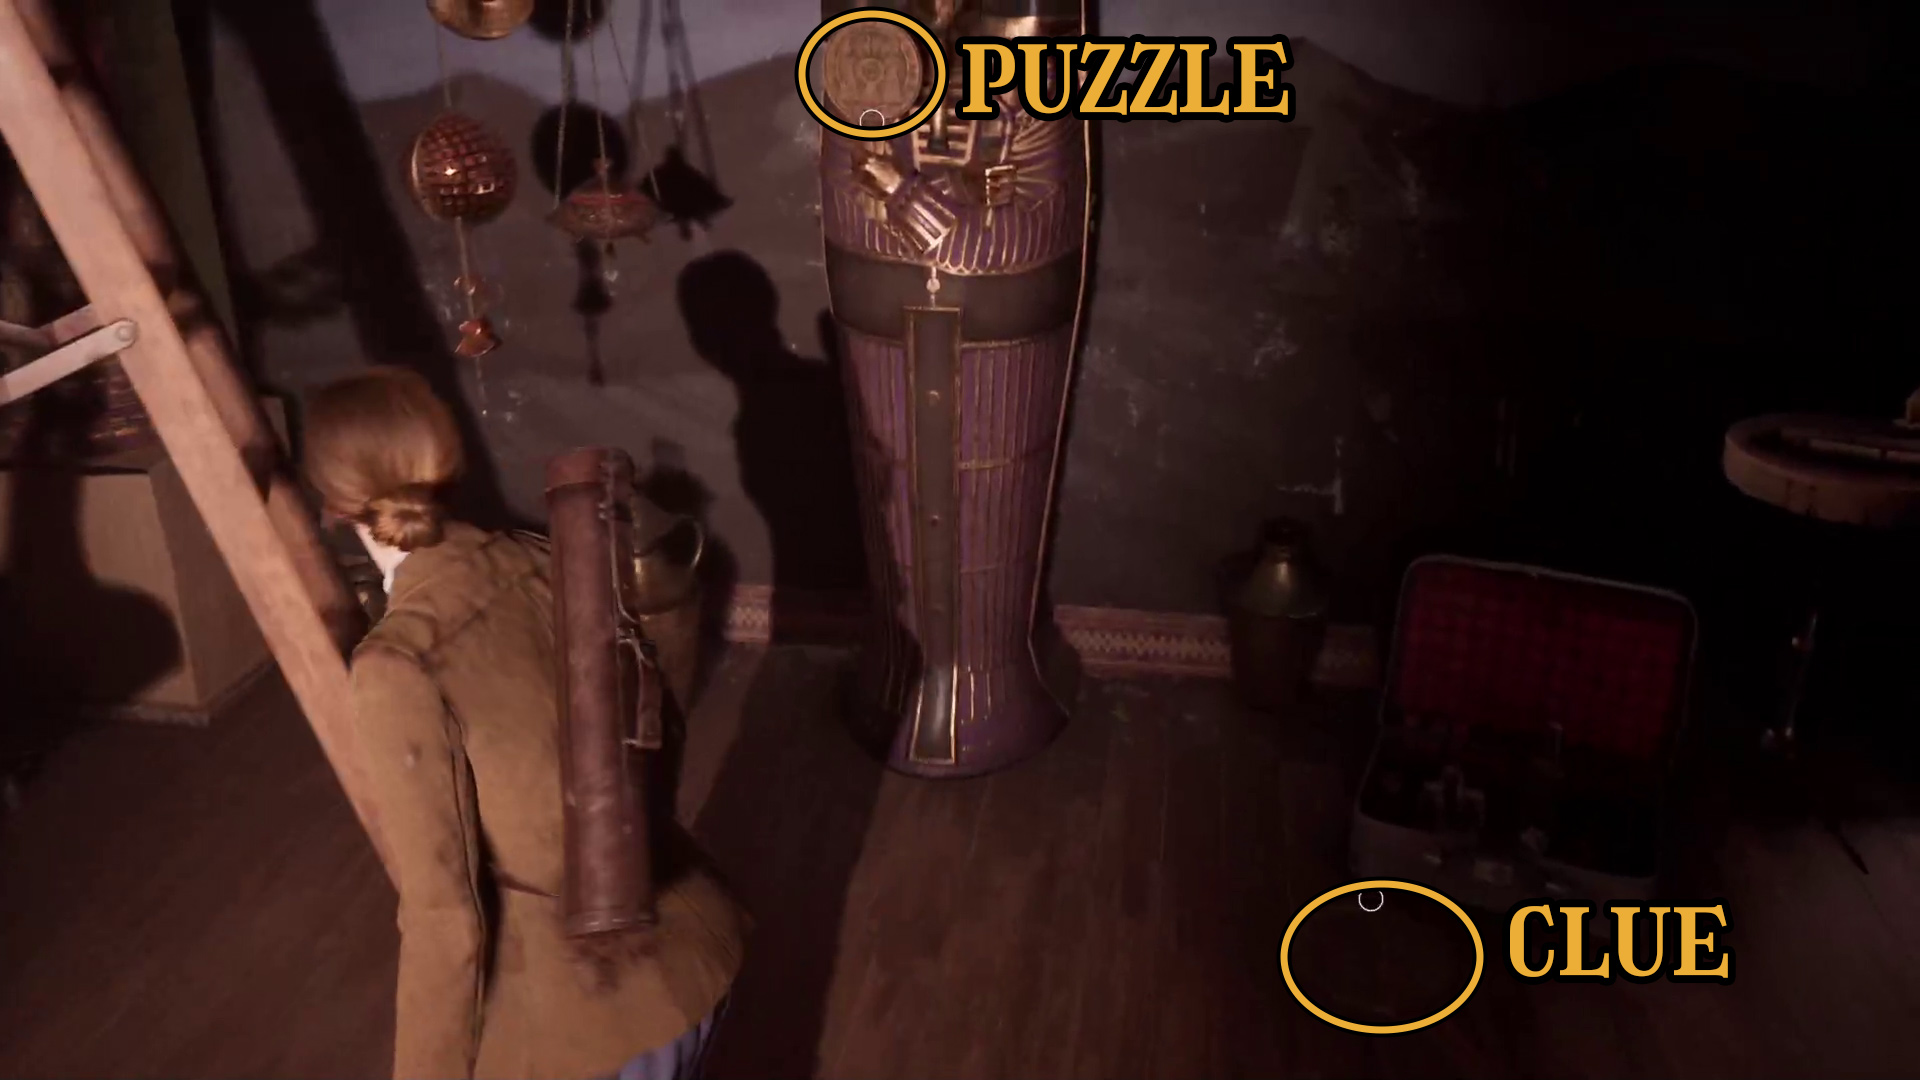
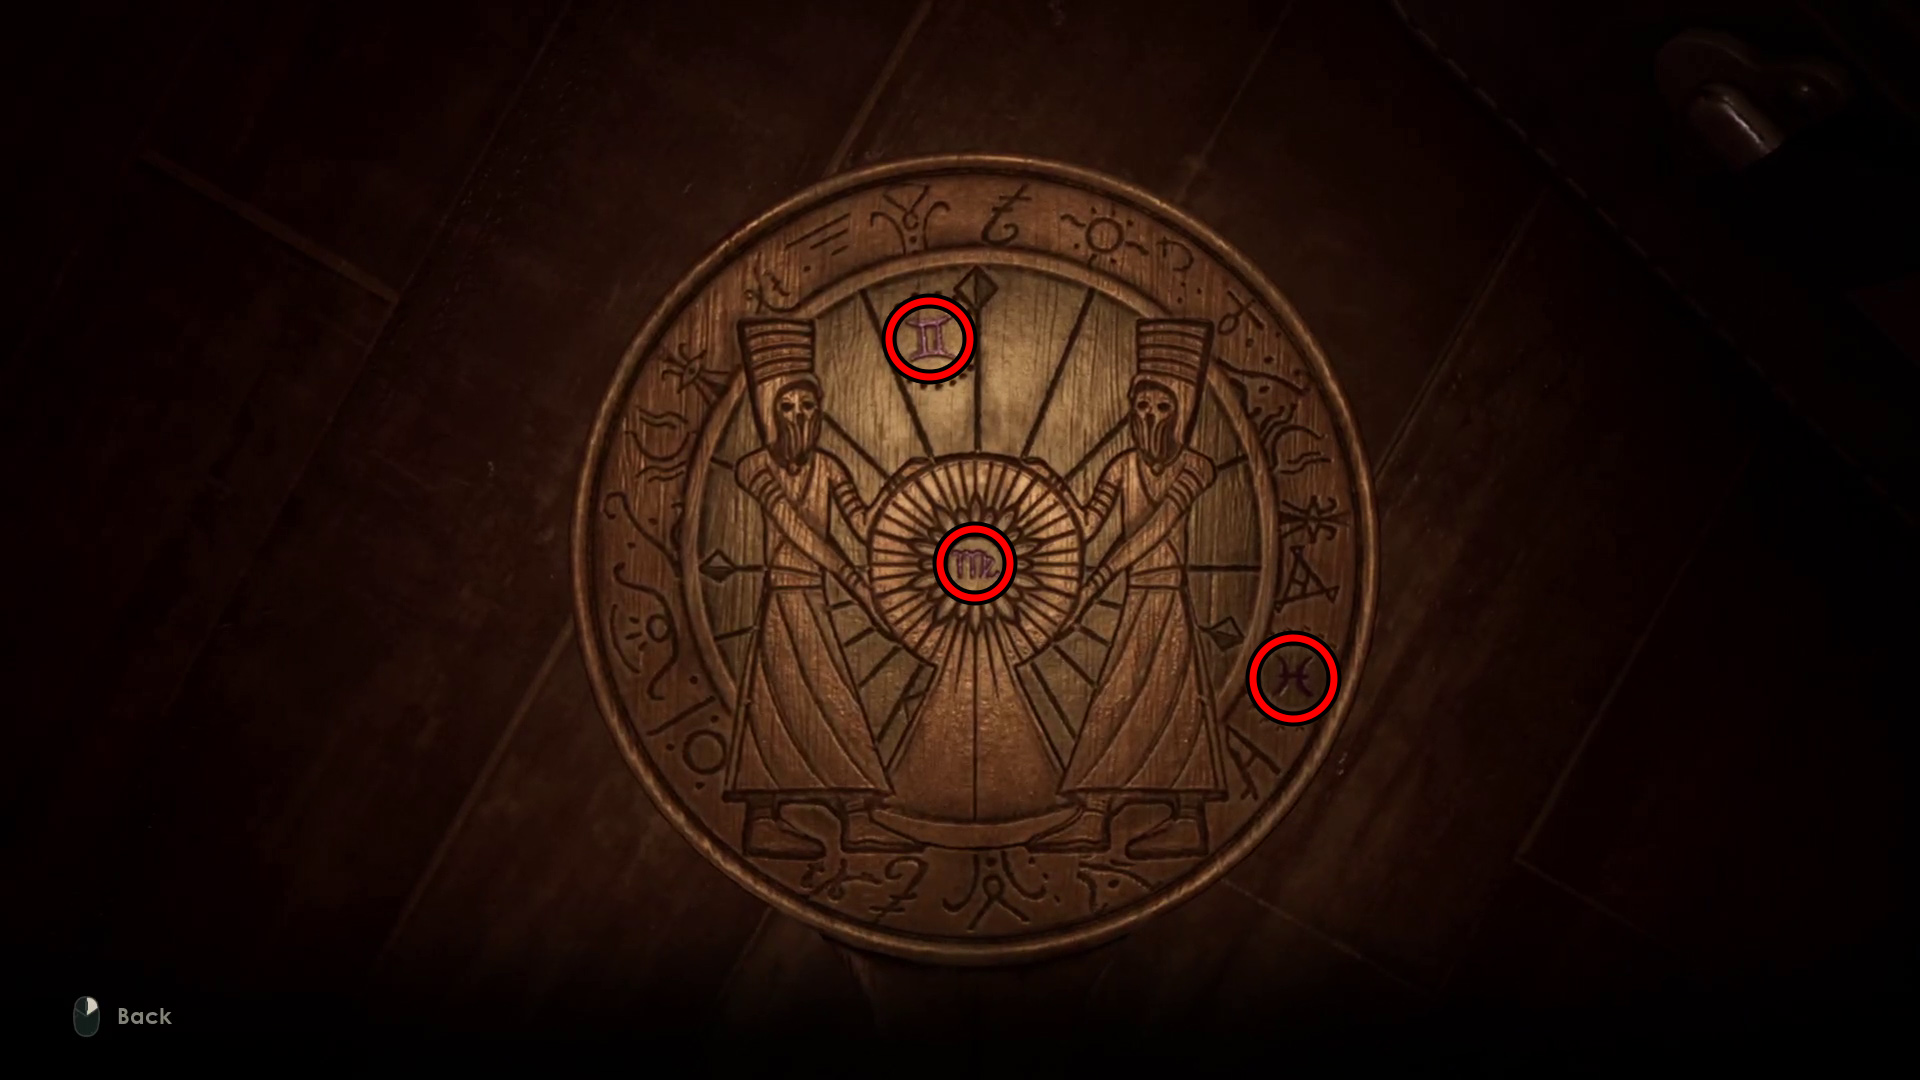
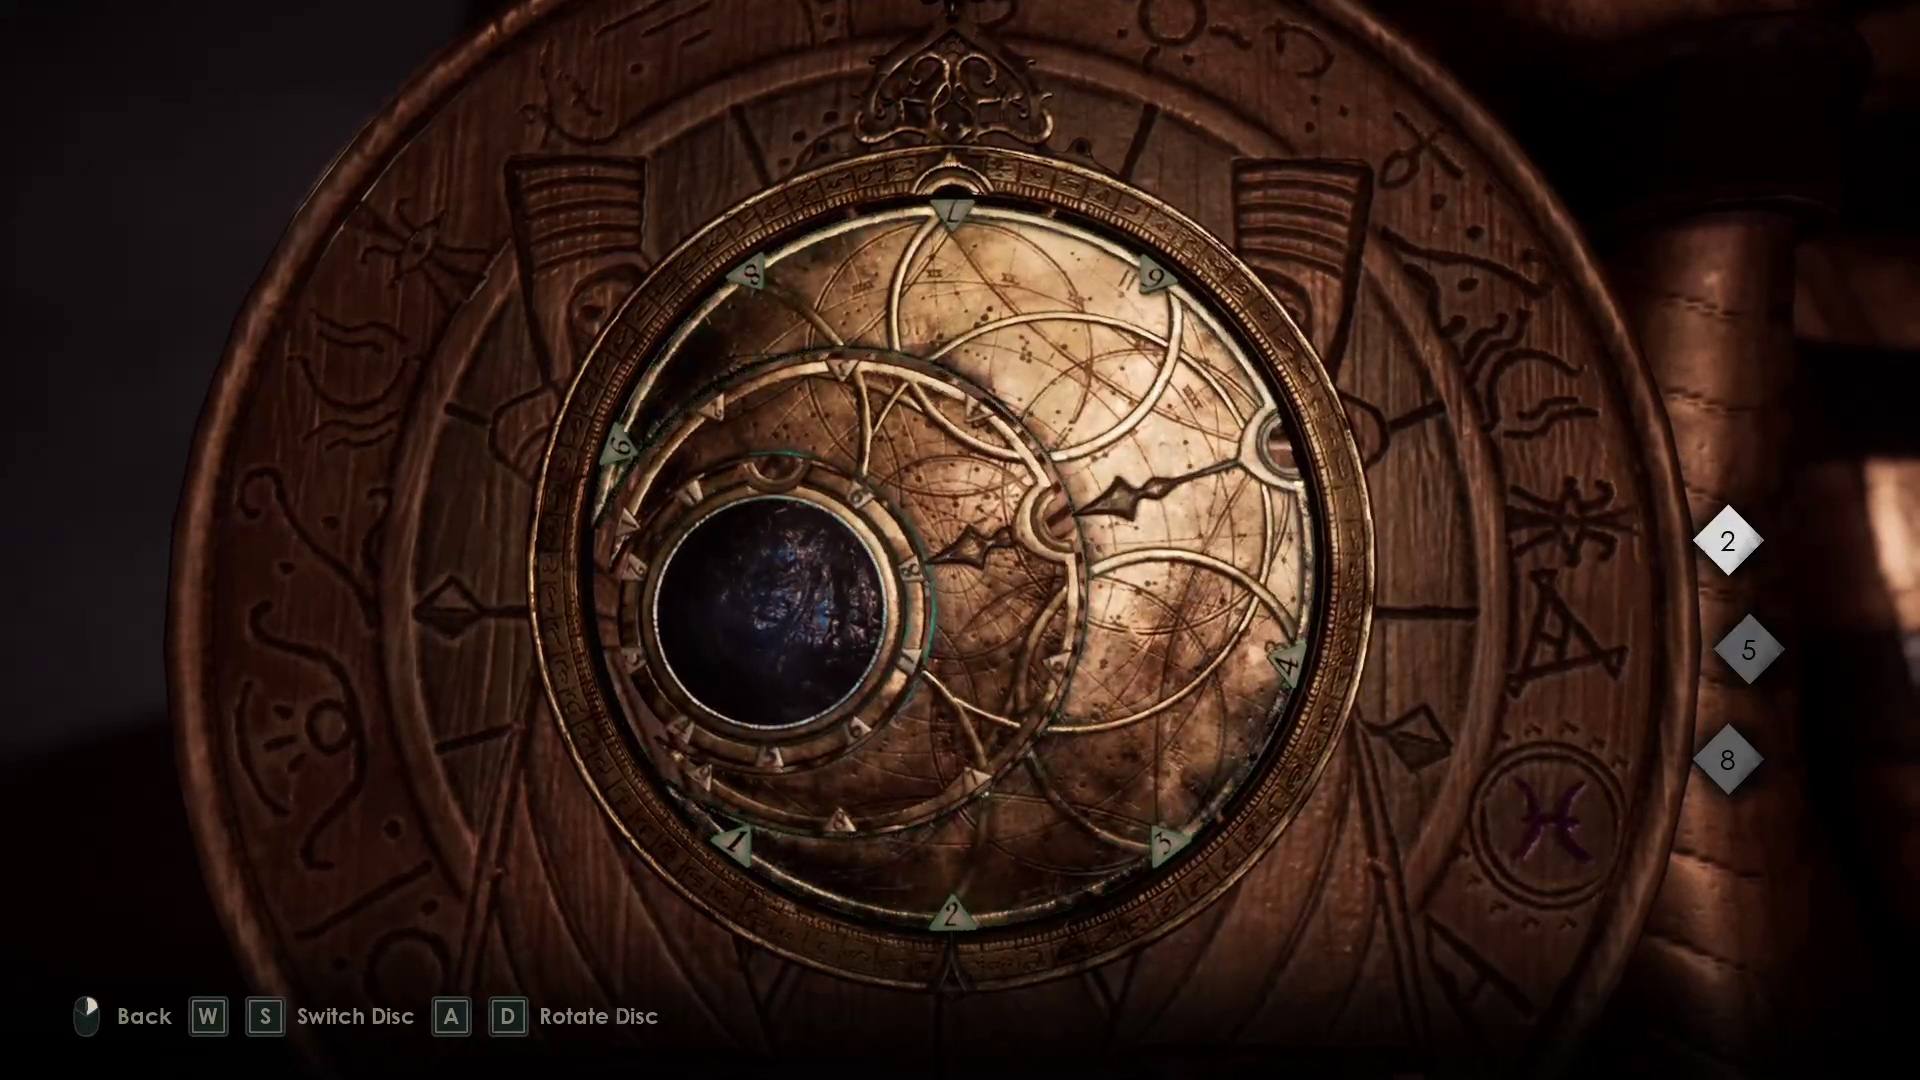
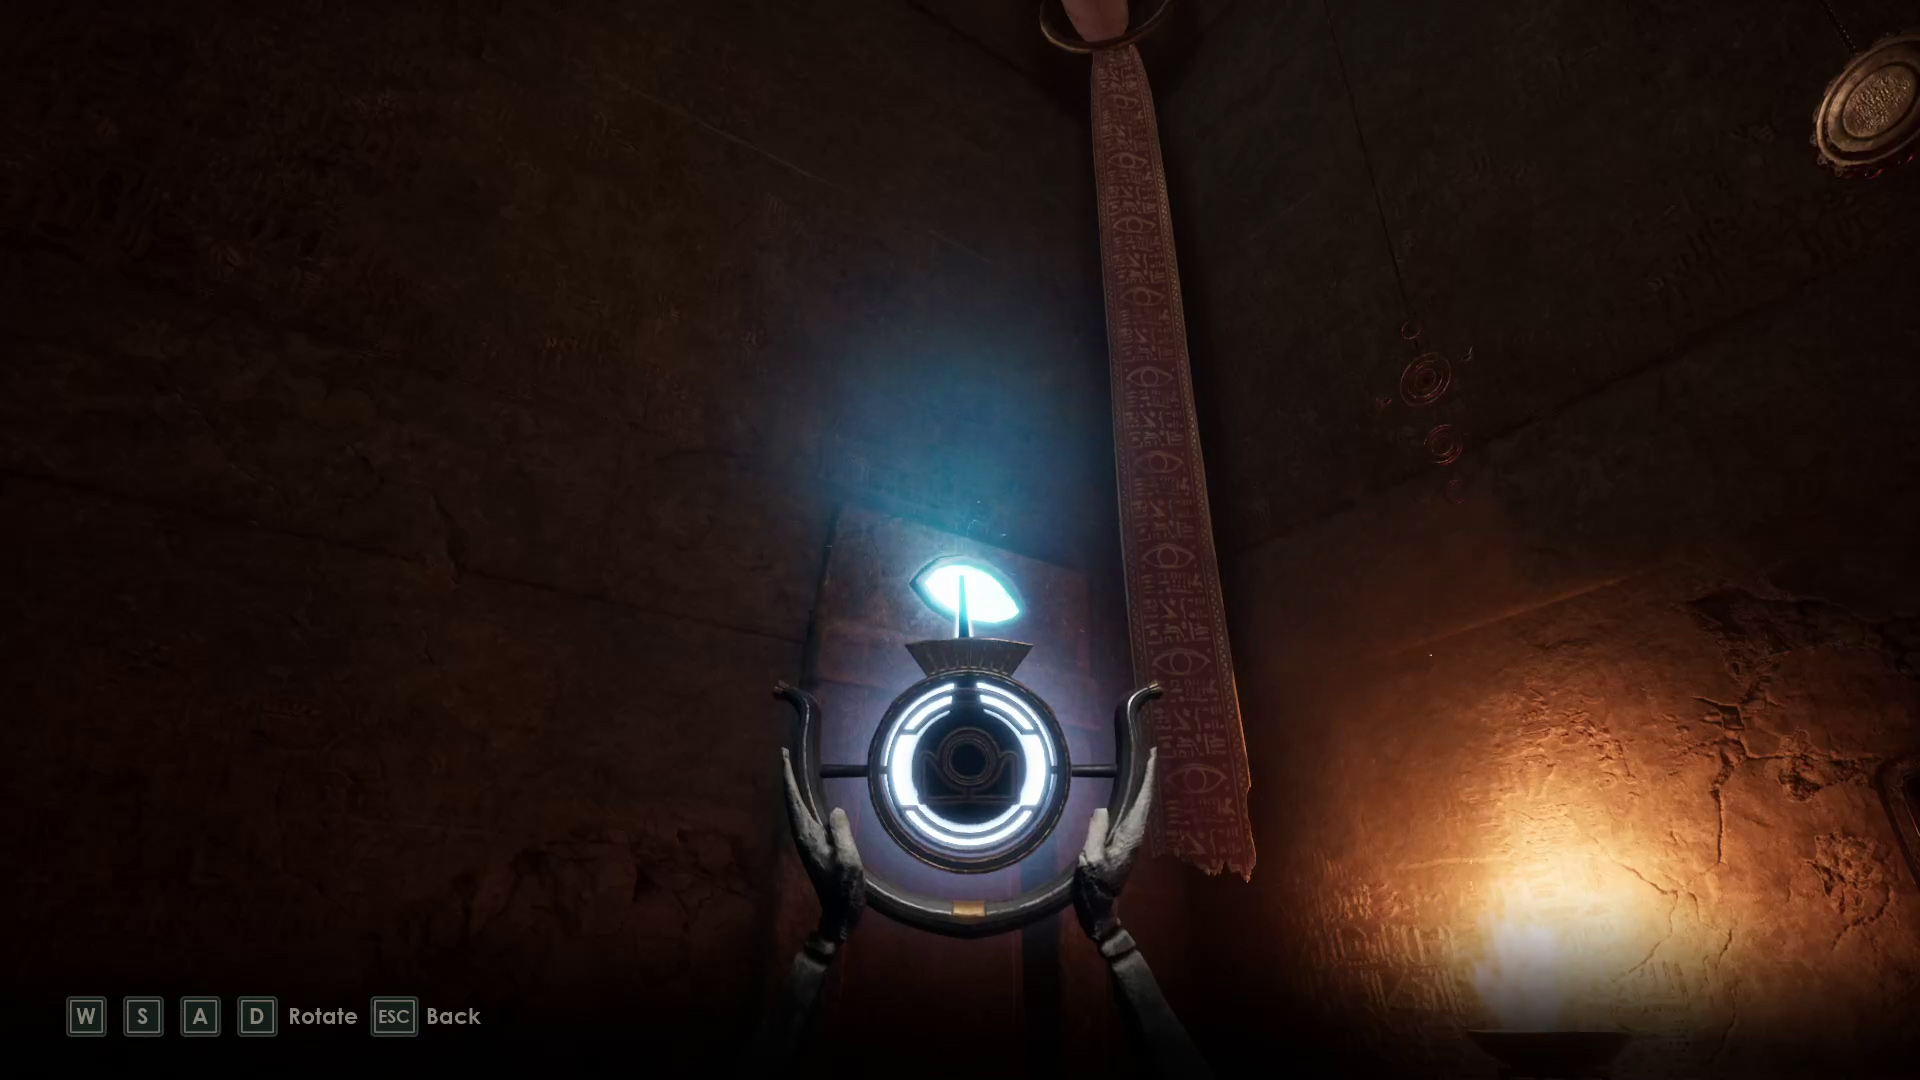
Go up the many flights of stairs and you’ll eventually come to a set of double doors. Go through, and a cutscene will begin. When it ends, you’ll be facing the doors you came through. Turn around, and inspect the puzzle clue on the stage (Image 38) — we’ve included it below (Image 39) to make it easier to refer to when doing the related puzzle (Image 38).
Image 38Image 39
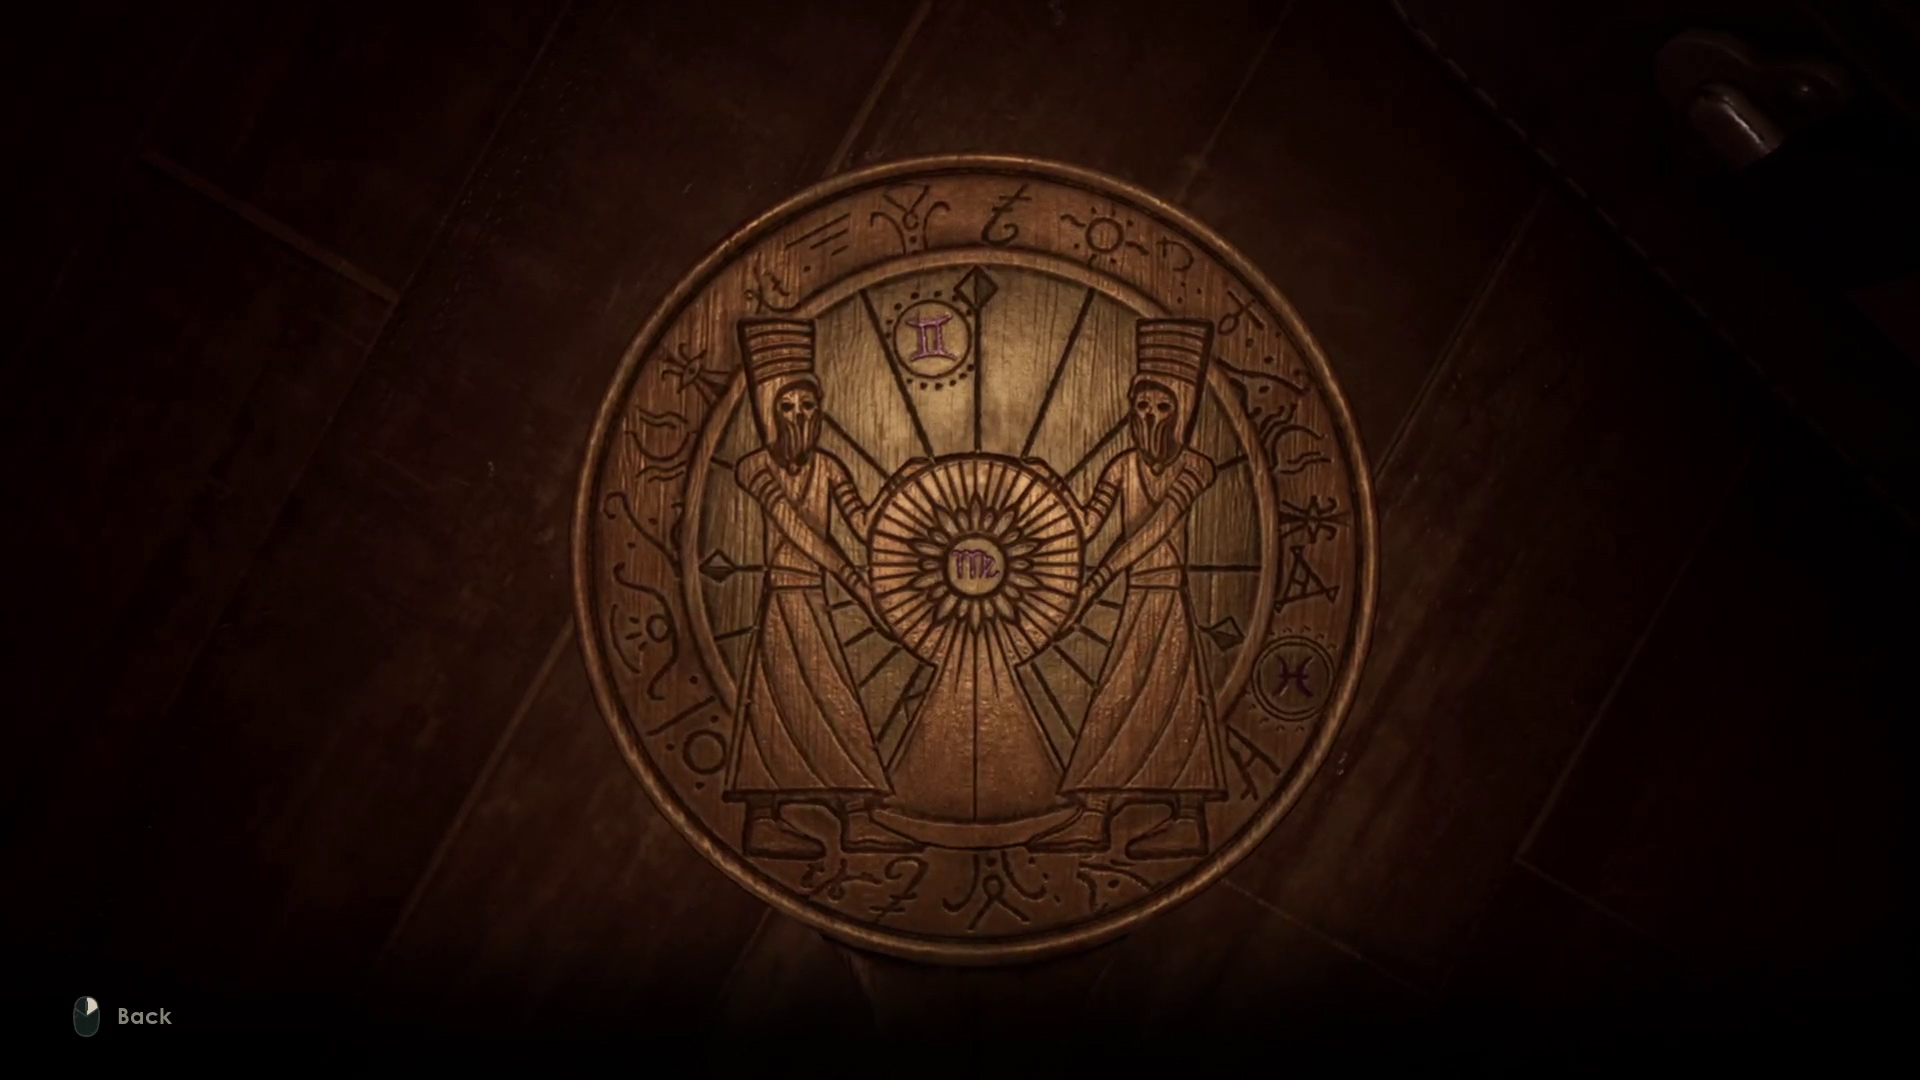
You have an Investigation item in your inventory that is the key to solving this puzzle — look for the symbols from the clue, and pay attention to the placement of each of the symbols on the clue.
The symbols on the clue correspond to 2, 5, 8 — input those numbers in the talisman from outer disc to inner disc as seen below.
Once you complete the puzzle, after a brief delay the sarcophagus will open (you may need to get off the stage for a moment to trigger this). Walk up to the sarcophagus and press the indicated button to squeeze into it. Keep moving forwards through it and then through the tunnel, and you’ll enter a dark desert.
Find a way inside the sunken temple
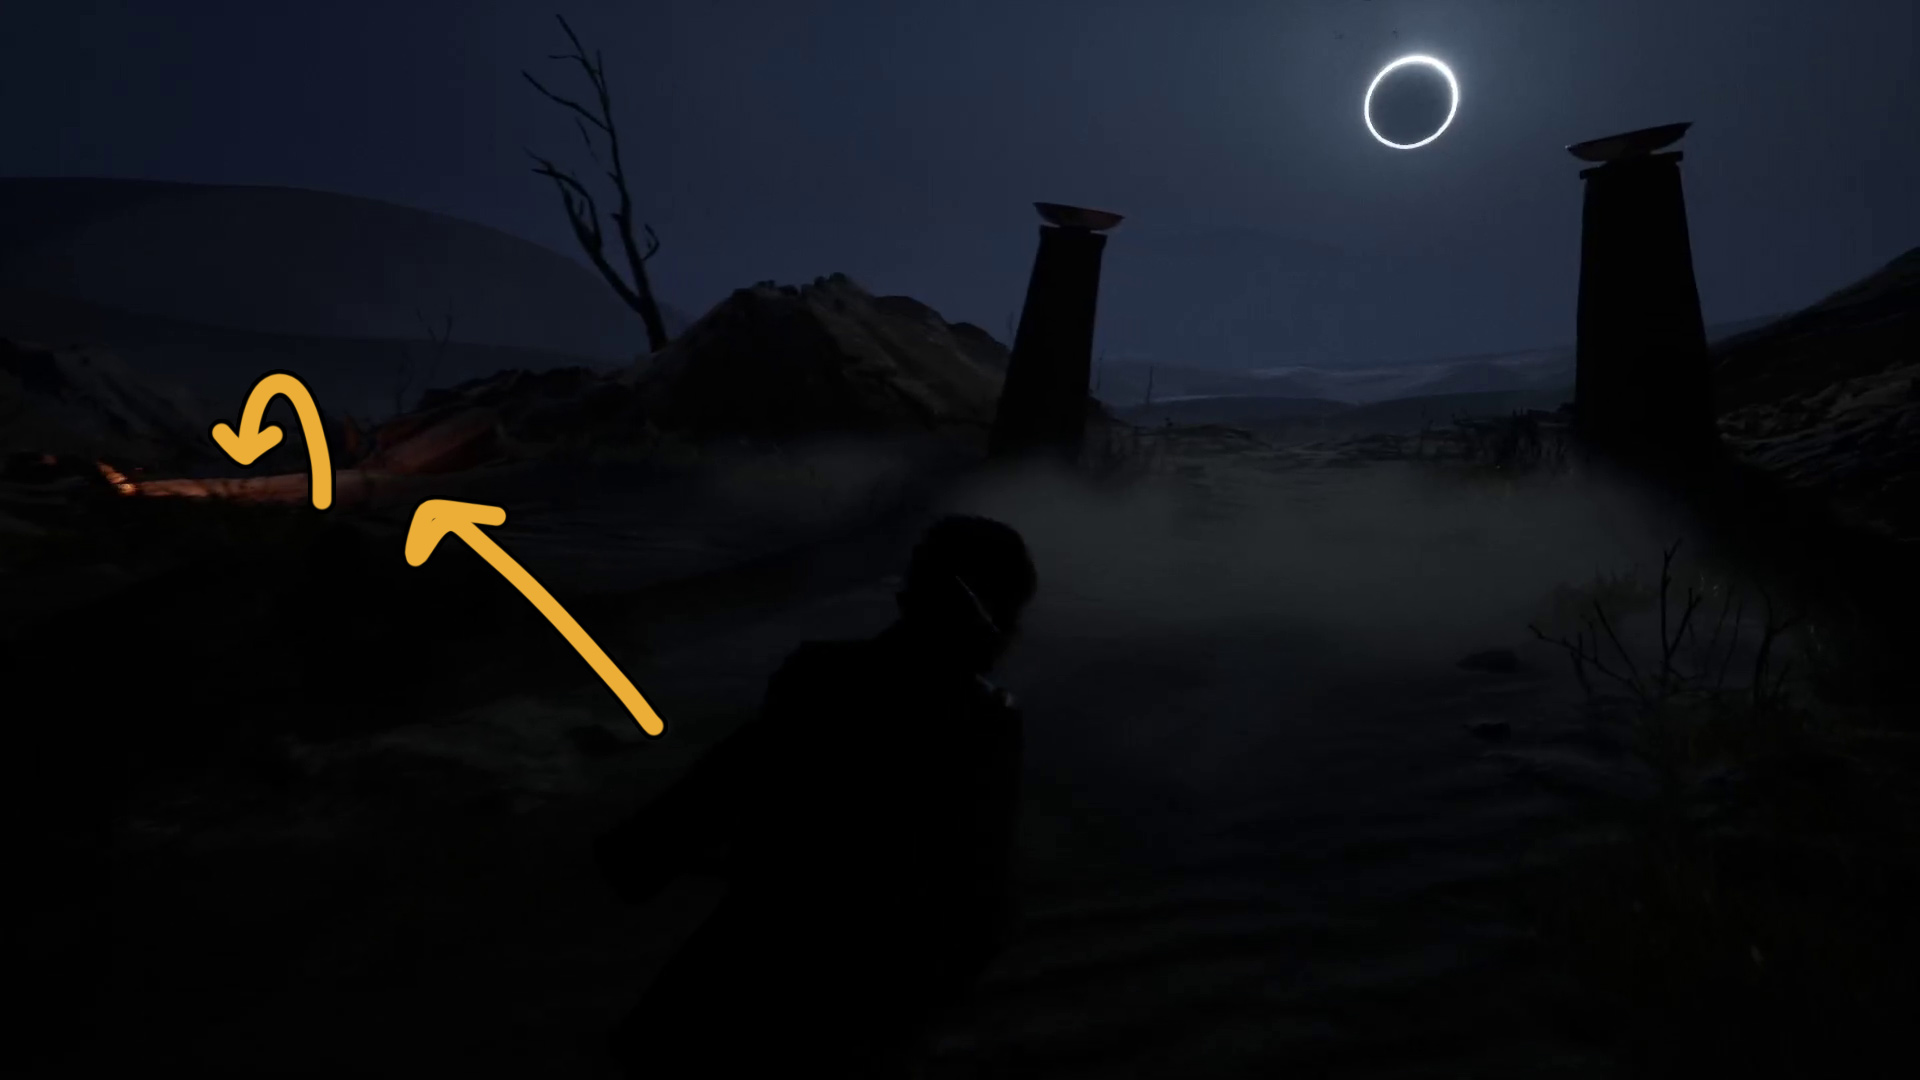
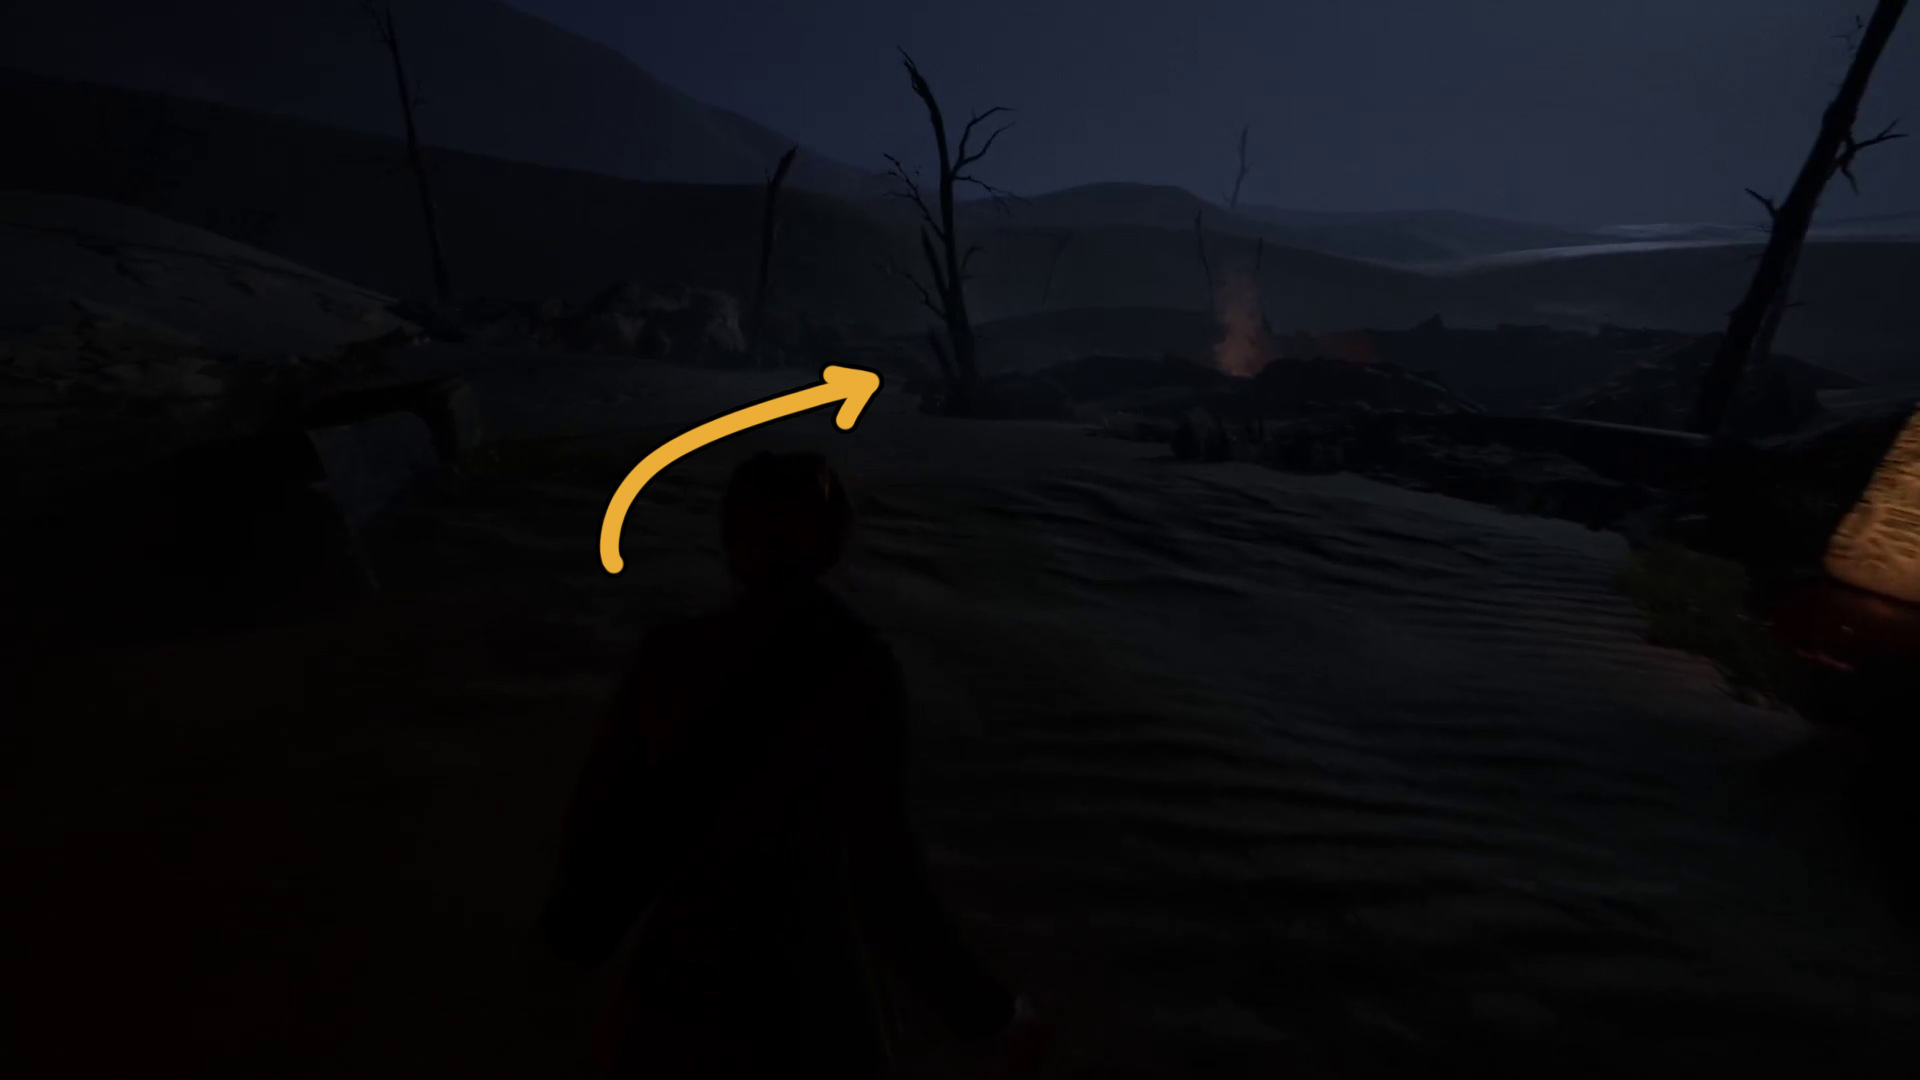
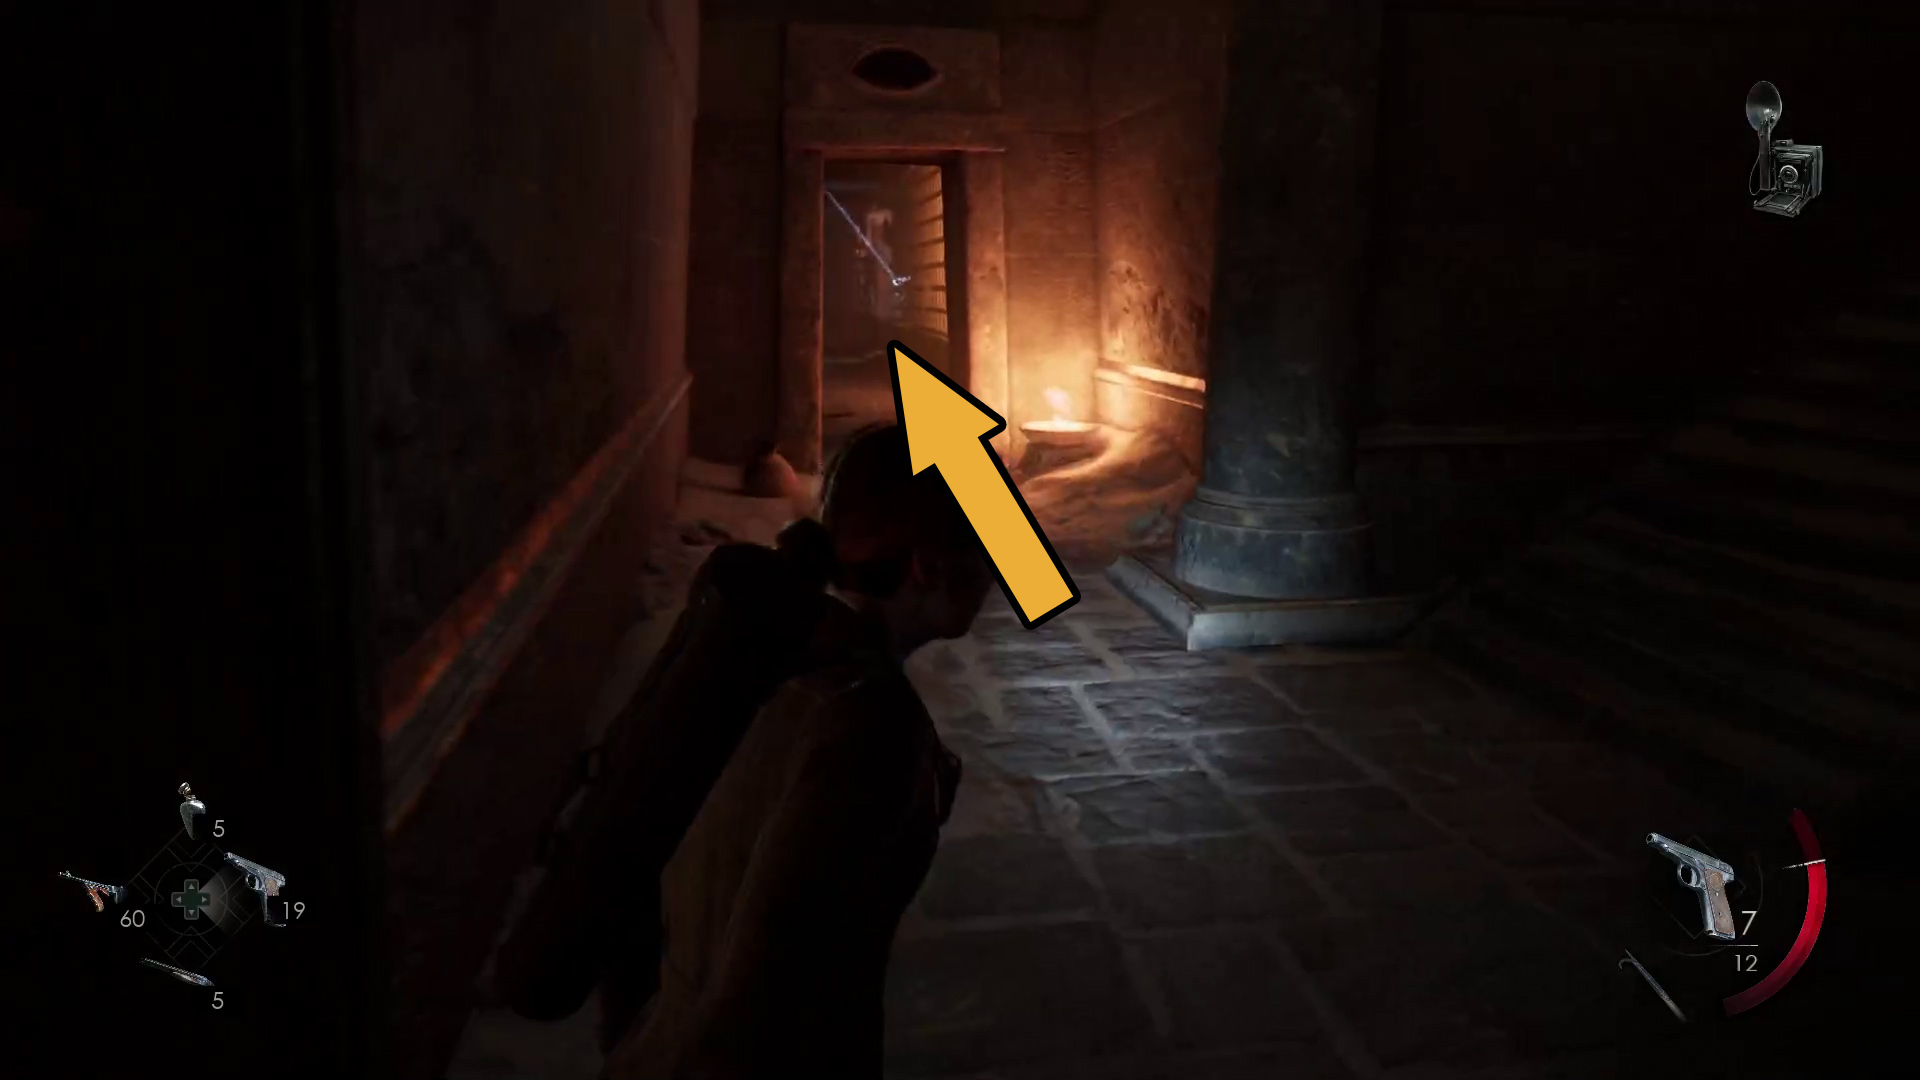
You can enjoy the view of the eclipse from up ahead if you want, as there’s a spot clearly meant for it. When you’re ready, follow the path lit by the lantern (Image 40) — you’ll have to press the indicated button to climb down where the ledge is marked with red paint (or is it blood…). Continue following the path and you’ll come to another lit area with a hole, but you can’t do anything here yet. Instead, continue past the hole downhill to the next lit area (Image 41).
Image 40Image 41
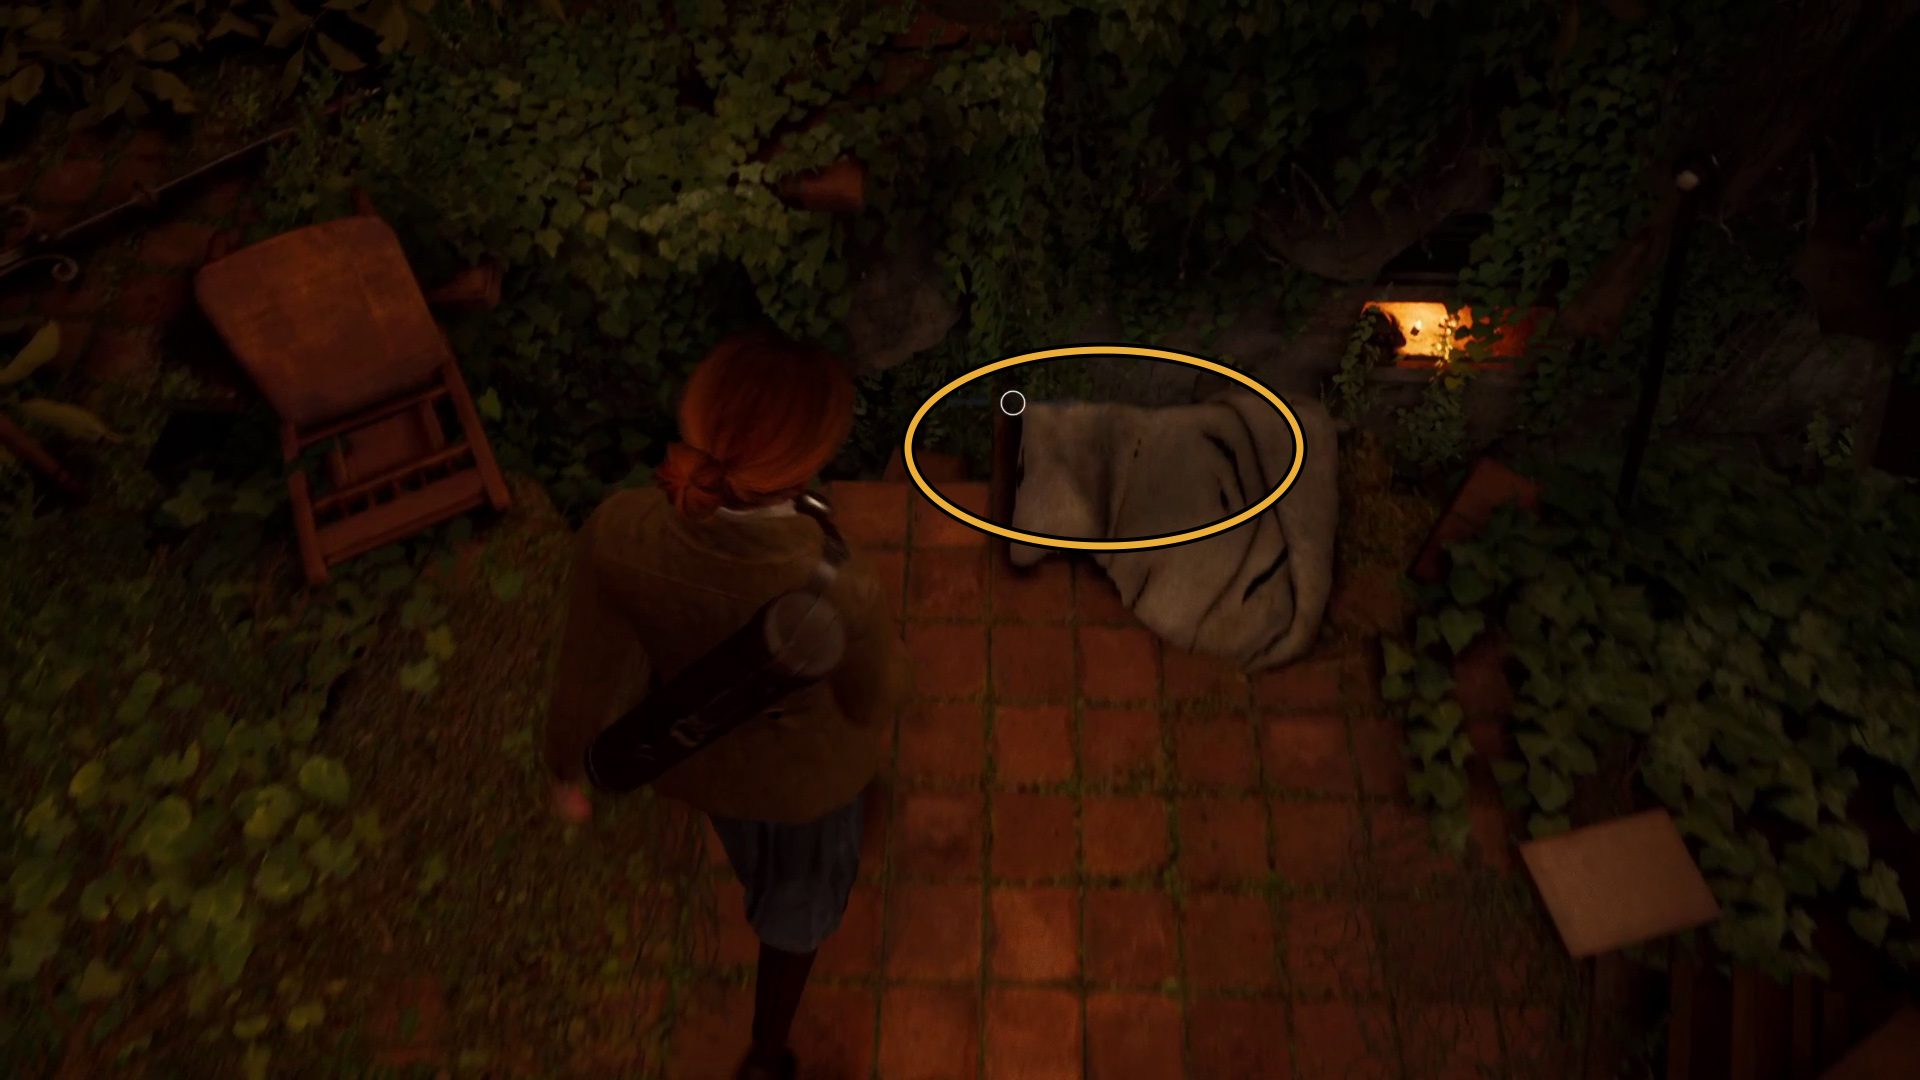
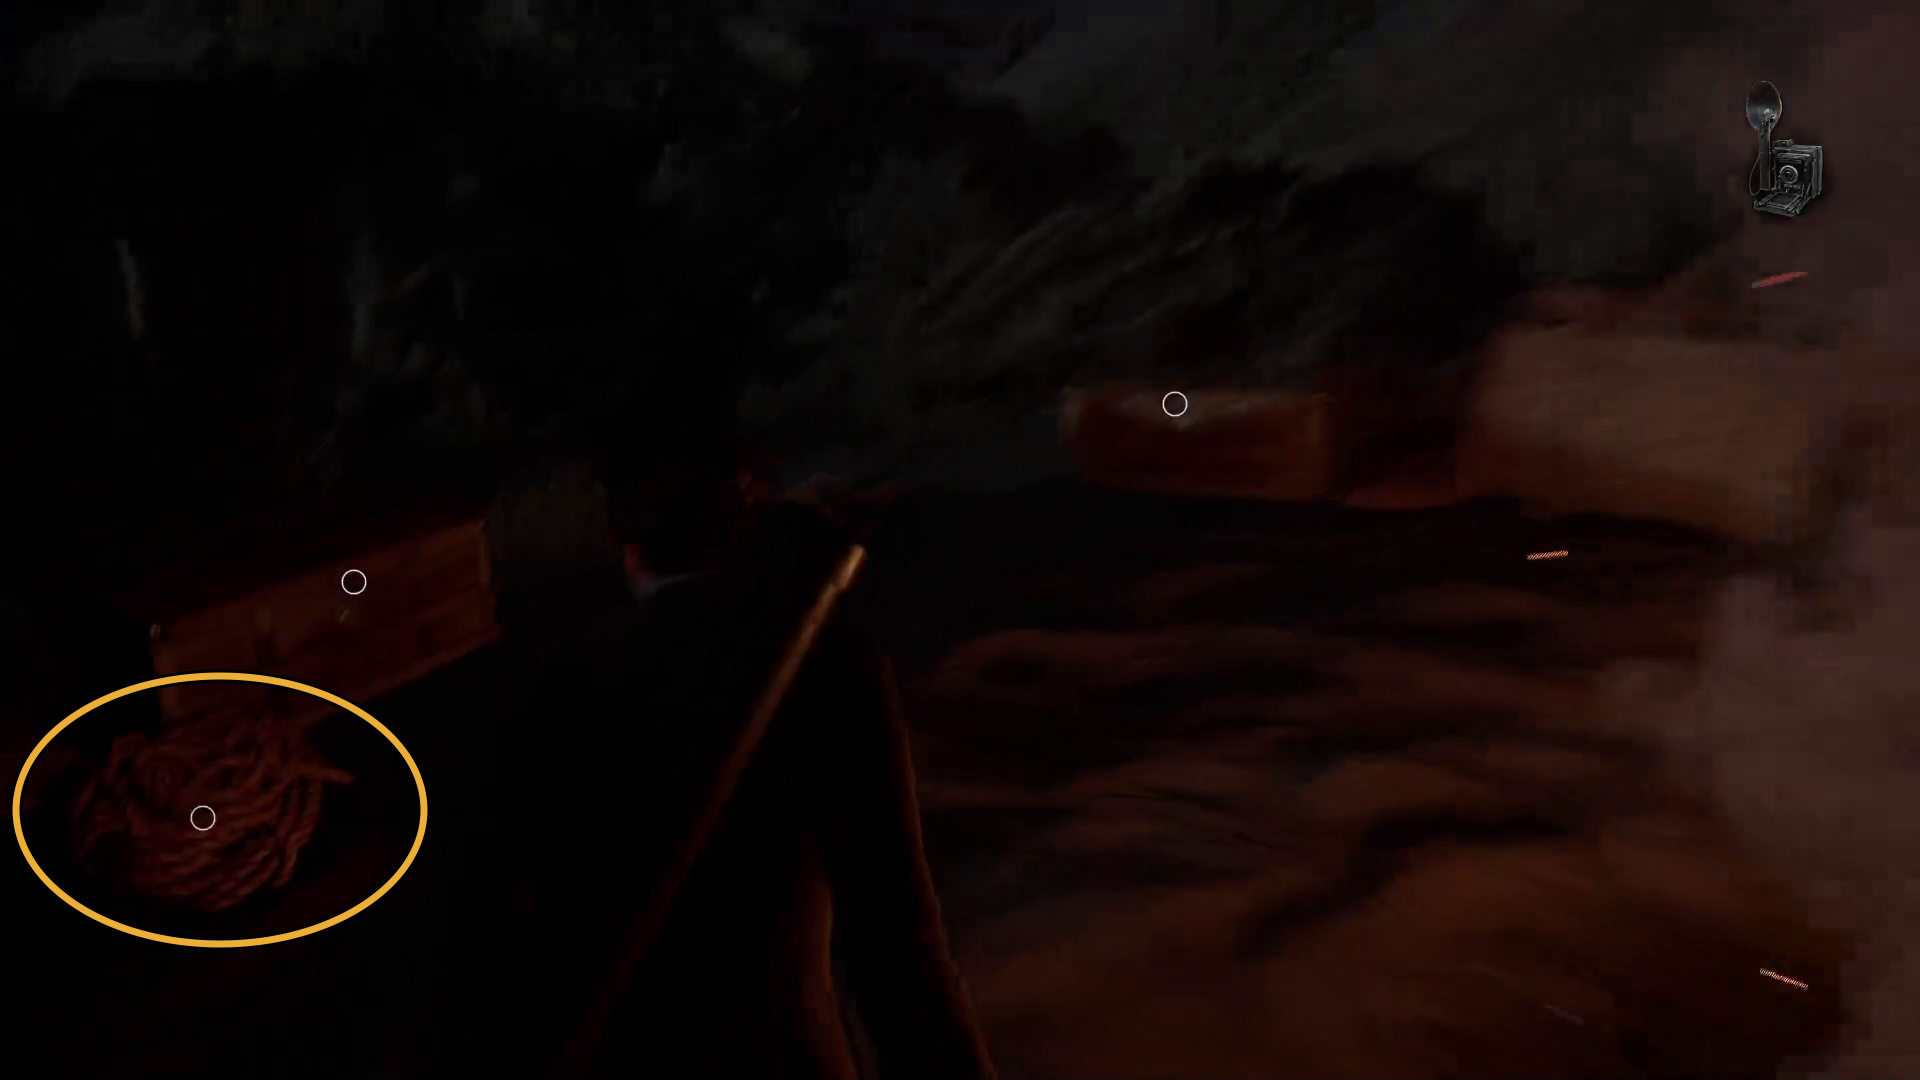
At the far side of the campfire are two chests, and more importantly, some rope (Image 42). Grab the Rope key item and loot the chests — the chest next to the rope has the Beyond the Nile Valley clue. Now you can head back to the hole you passed earlier, and interact with stone column (Image 43). Note that you have to be on the side facing the hole to do so. Once you’ve got the rope attached, walk over to the hole and press the indicated button to climb down into the sunken temple.
Image 42Image 43
Use the old temple mechanisms to reveal the contract
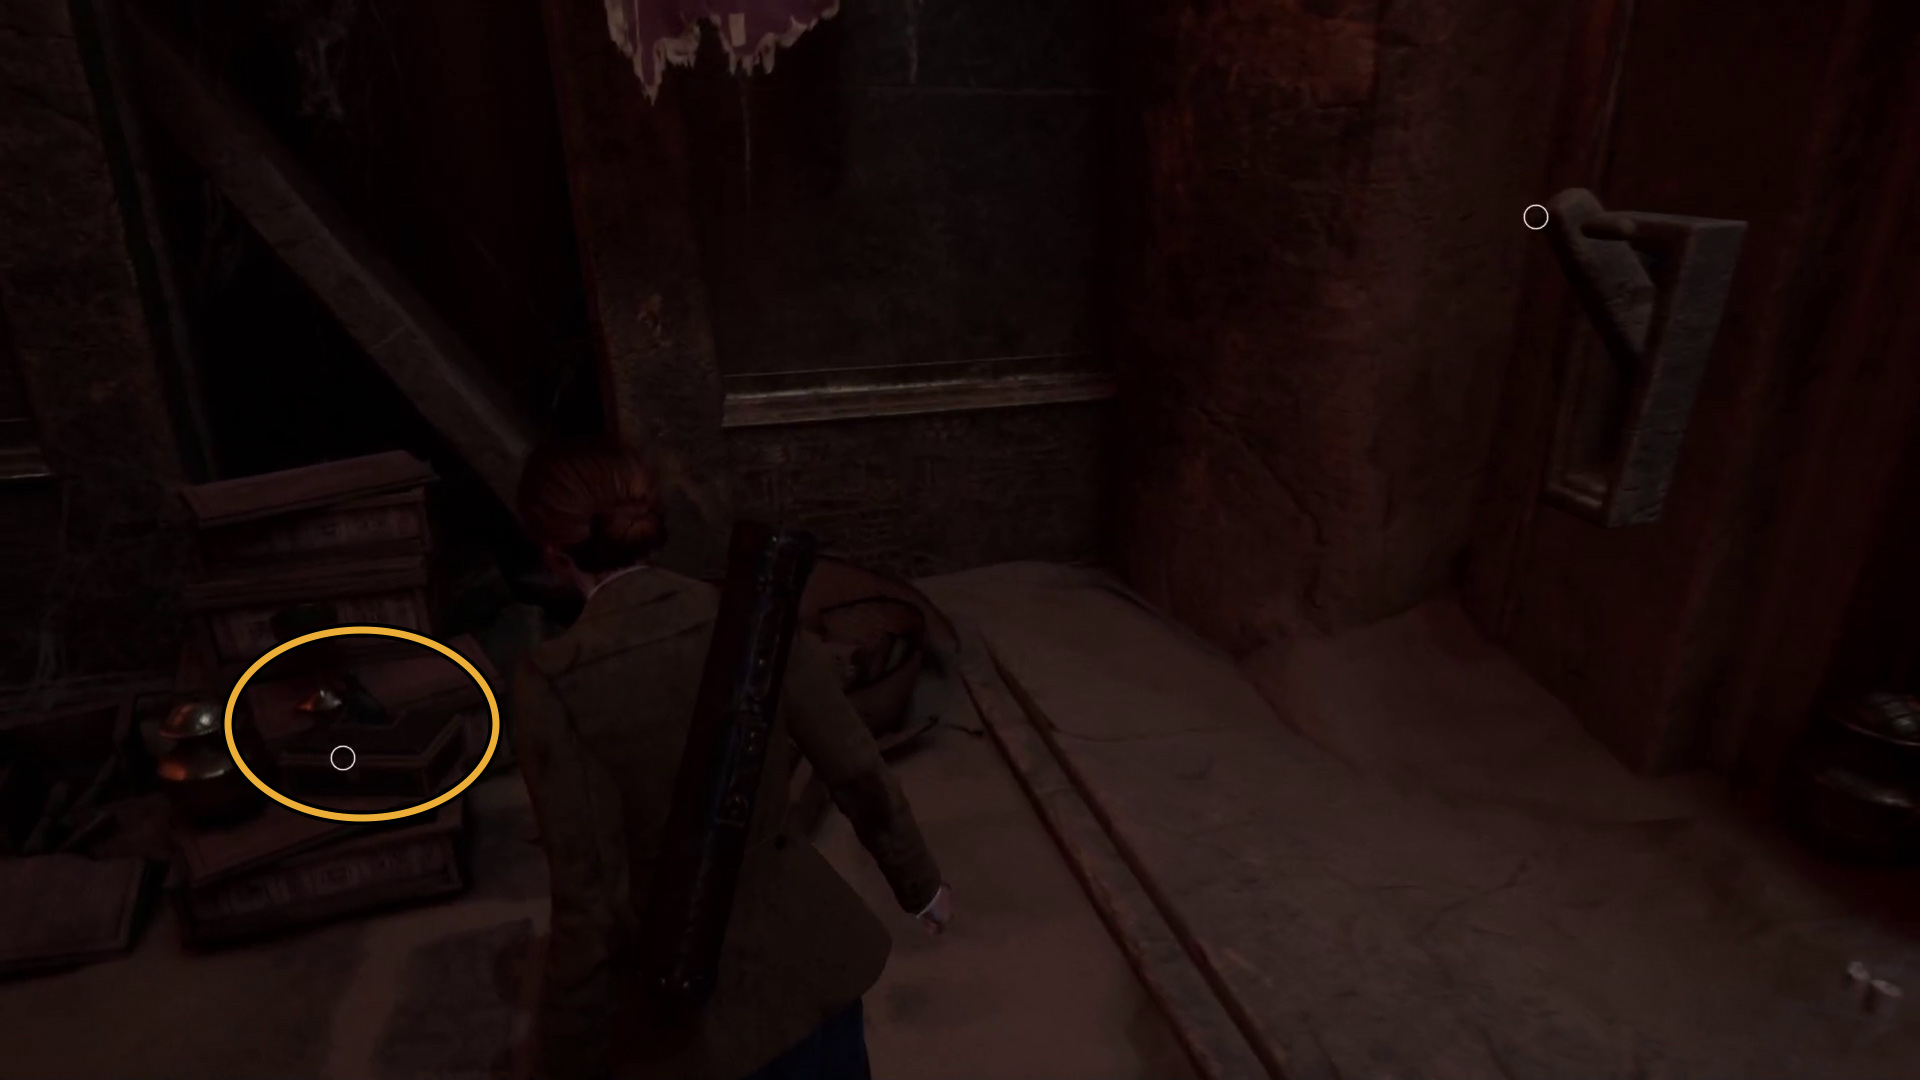
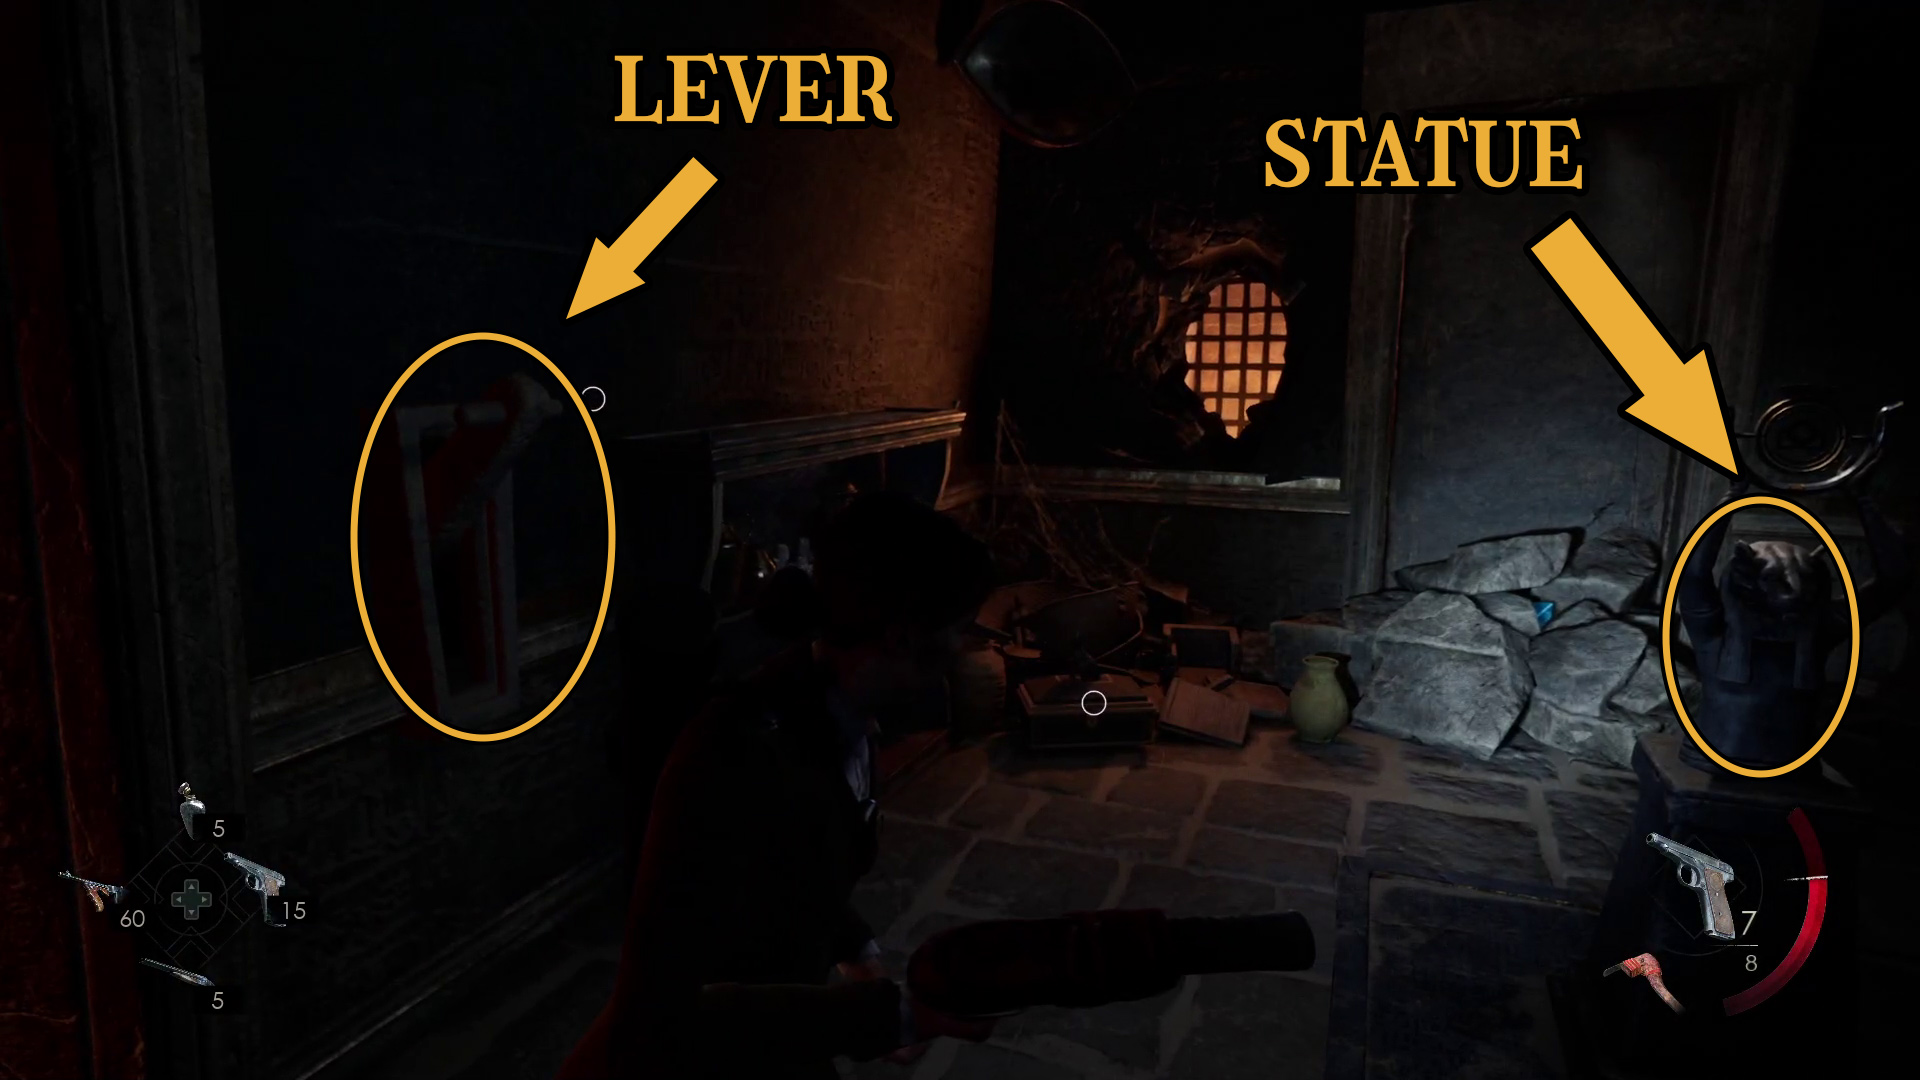
After the climbing cutscene ends, you’ll be in the sunken temple. Explore the edges of the room to loot the black cat boxes (Image 44), and then when you’re ready, grab the Canopic Jar Lagniappe from the base of the big statue, and pull the lever on the left side of said statue (Image 45).
Image 44Image 45
The lever will open the door to your right (Image 46), but be careful — when you get close to the now-open door, a couple of large scarab-ish monsters will fly out and attack you. They die with just one pistol shot, so they aren’t too threatening, but they can latch on to you and force a button-mashing event if you aren’t careful. Go through the door you opened, and you’ll go down some stairs and enter a small room. There’s some loot in here, and then you can walk over to the doorway blocked by the pillar and crawl through (Image 47).
Image 46Image 47
You’ll enter another small room with no way out (yet).
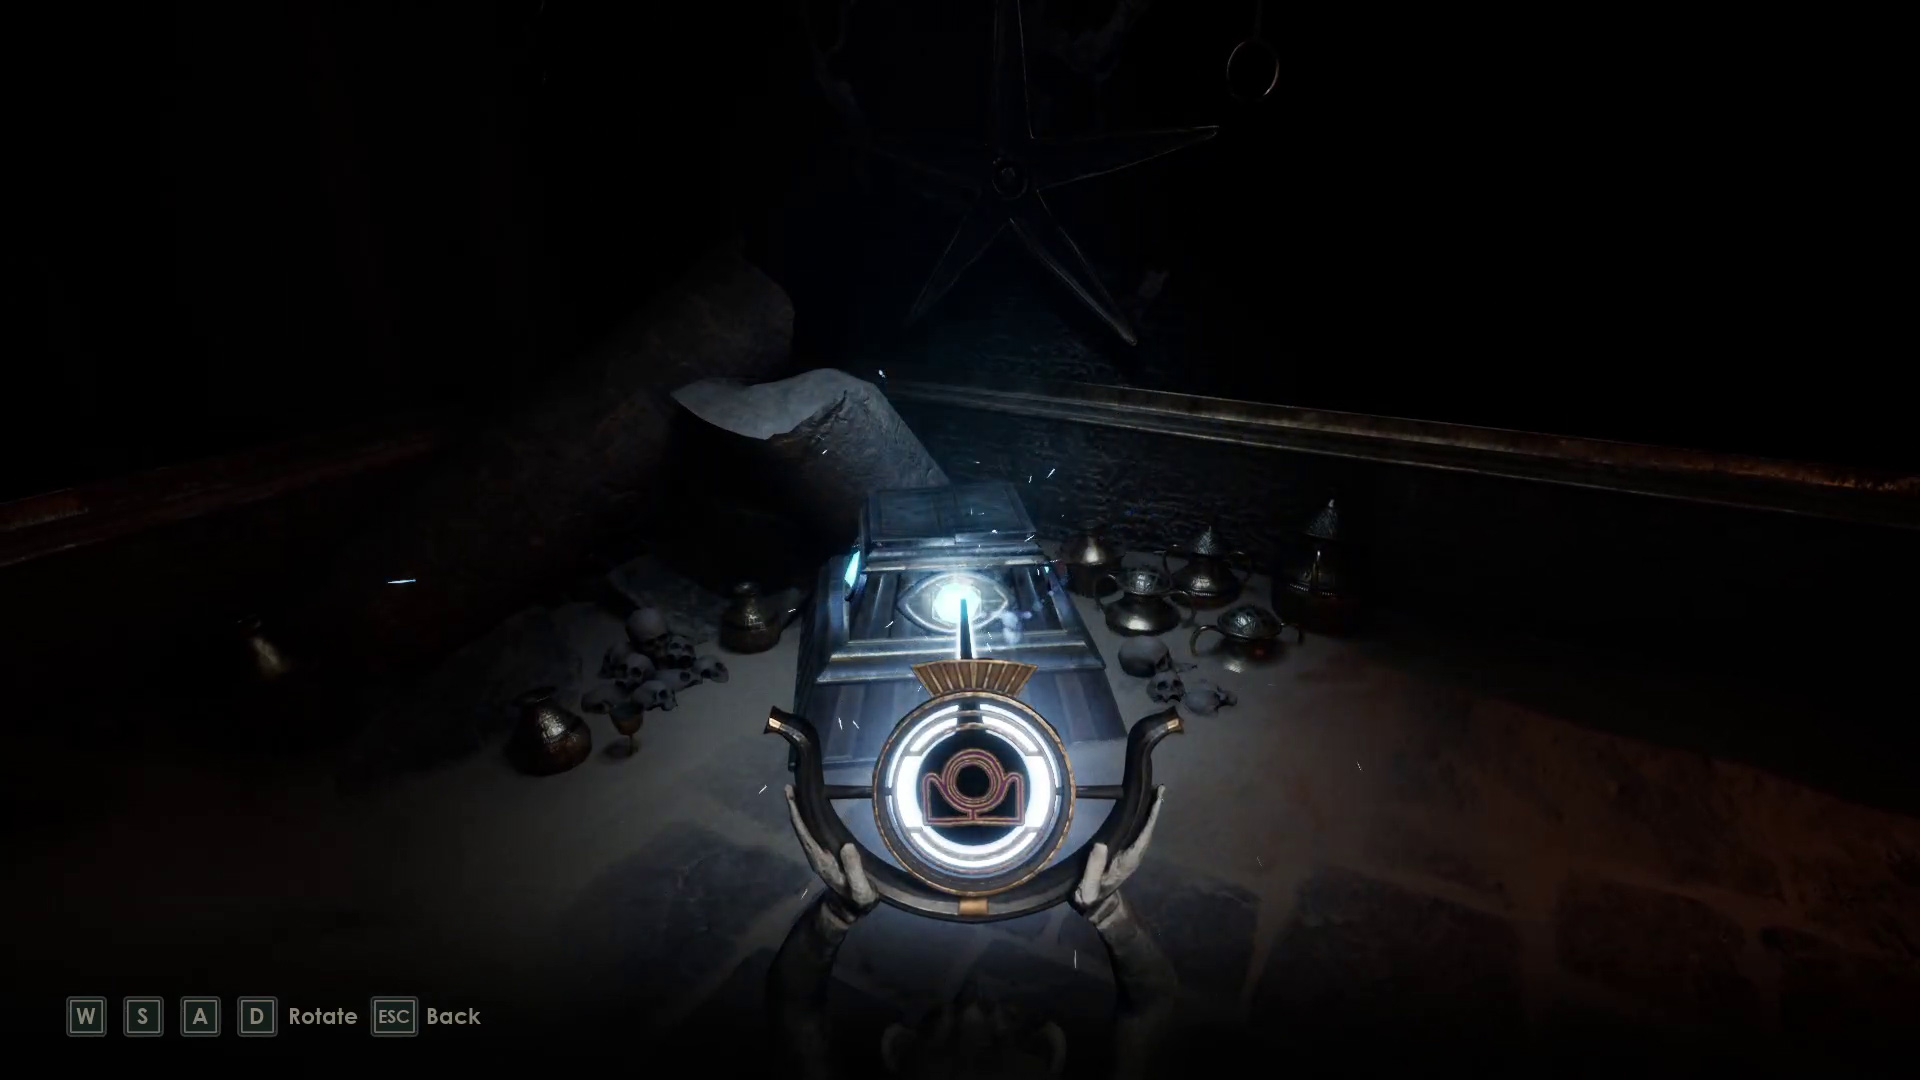
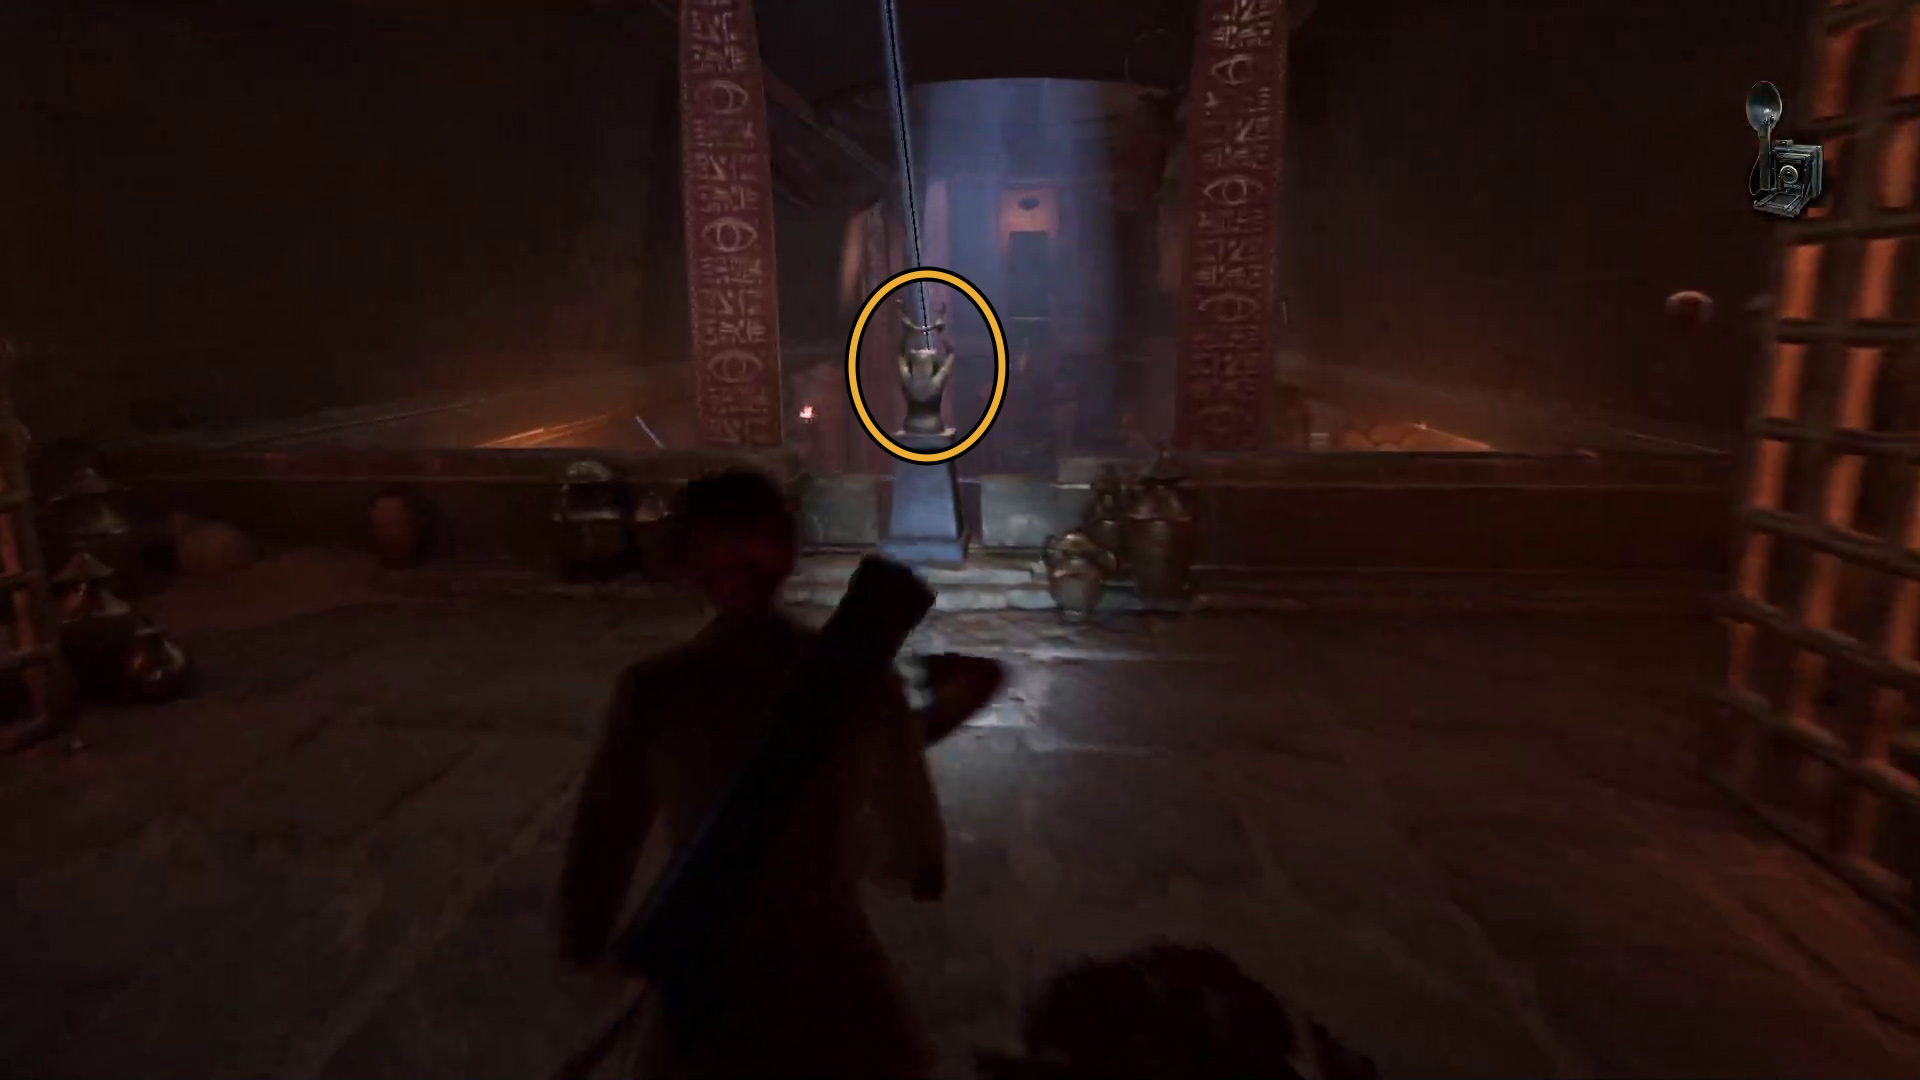
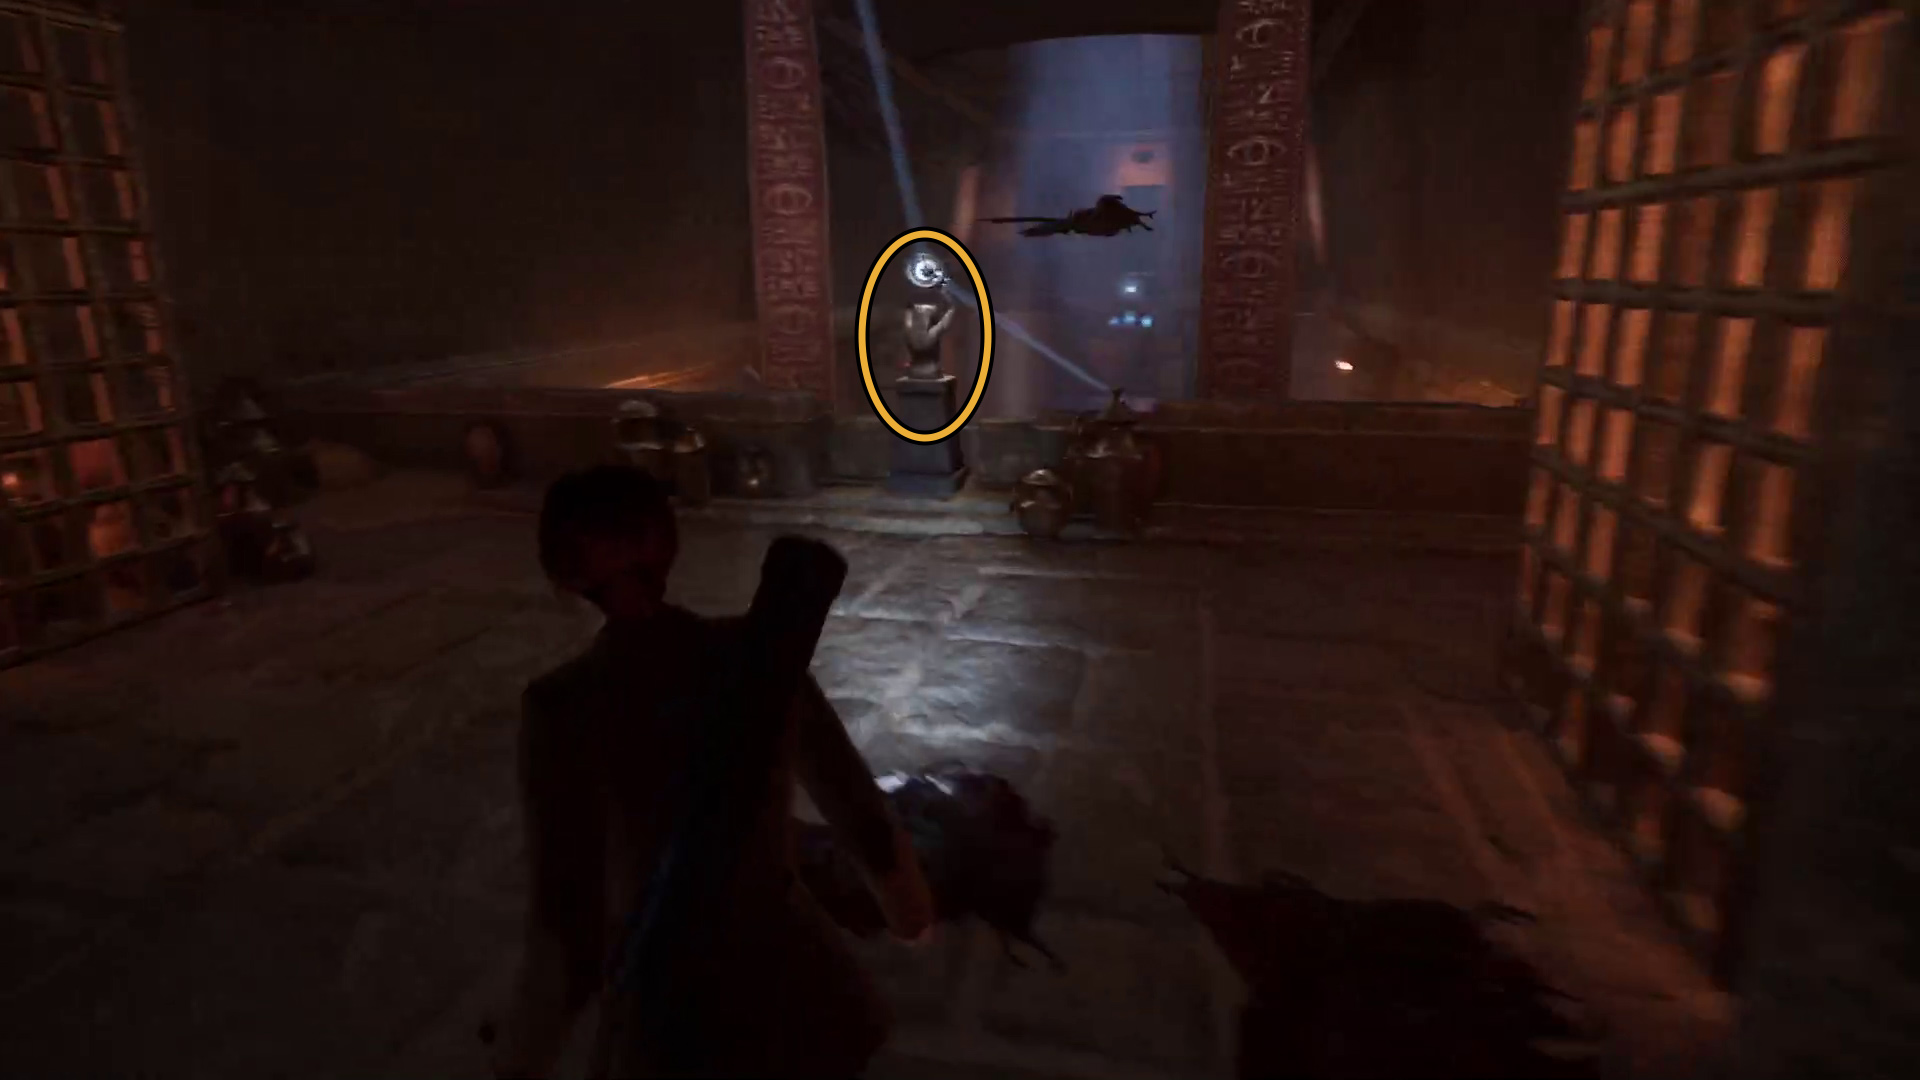
You’ll find something useful in the chest, and it can be used in this room. You’ll have to turn something on, and then adjust it.
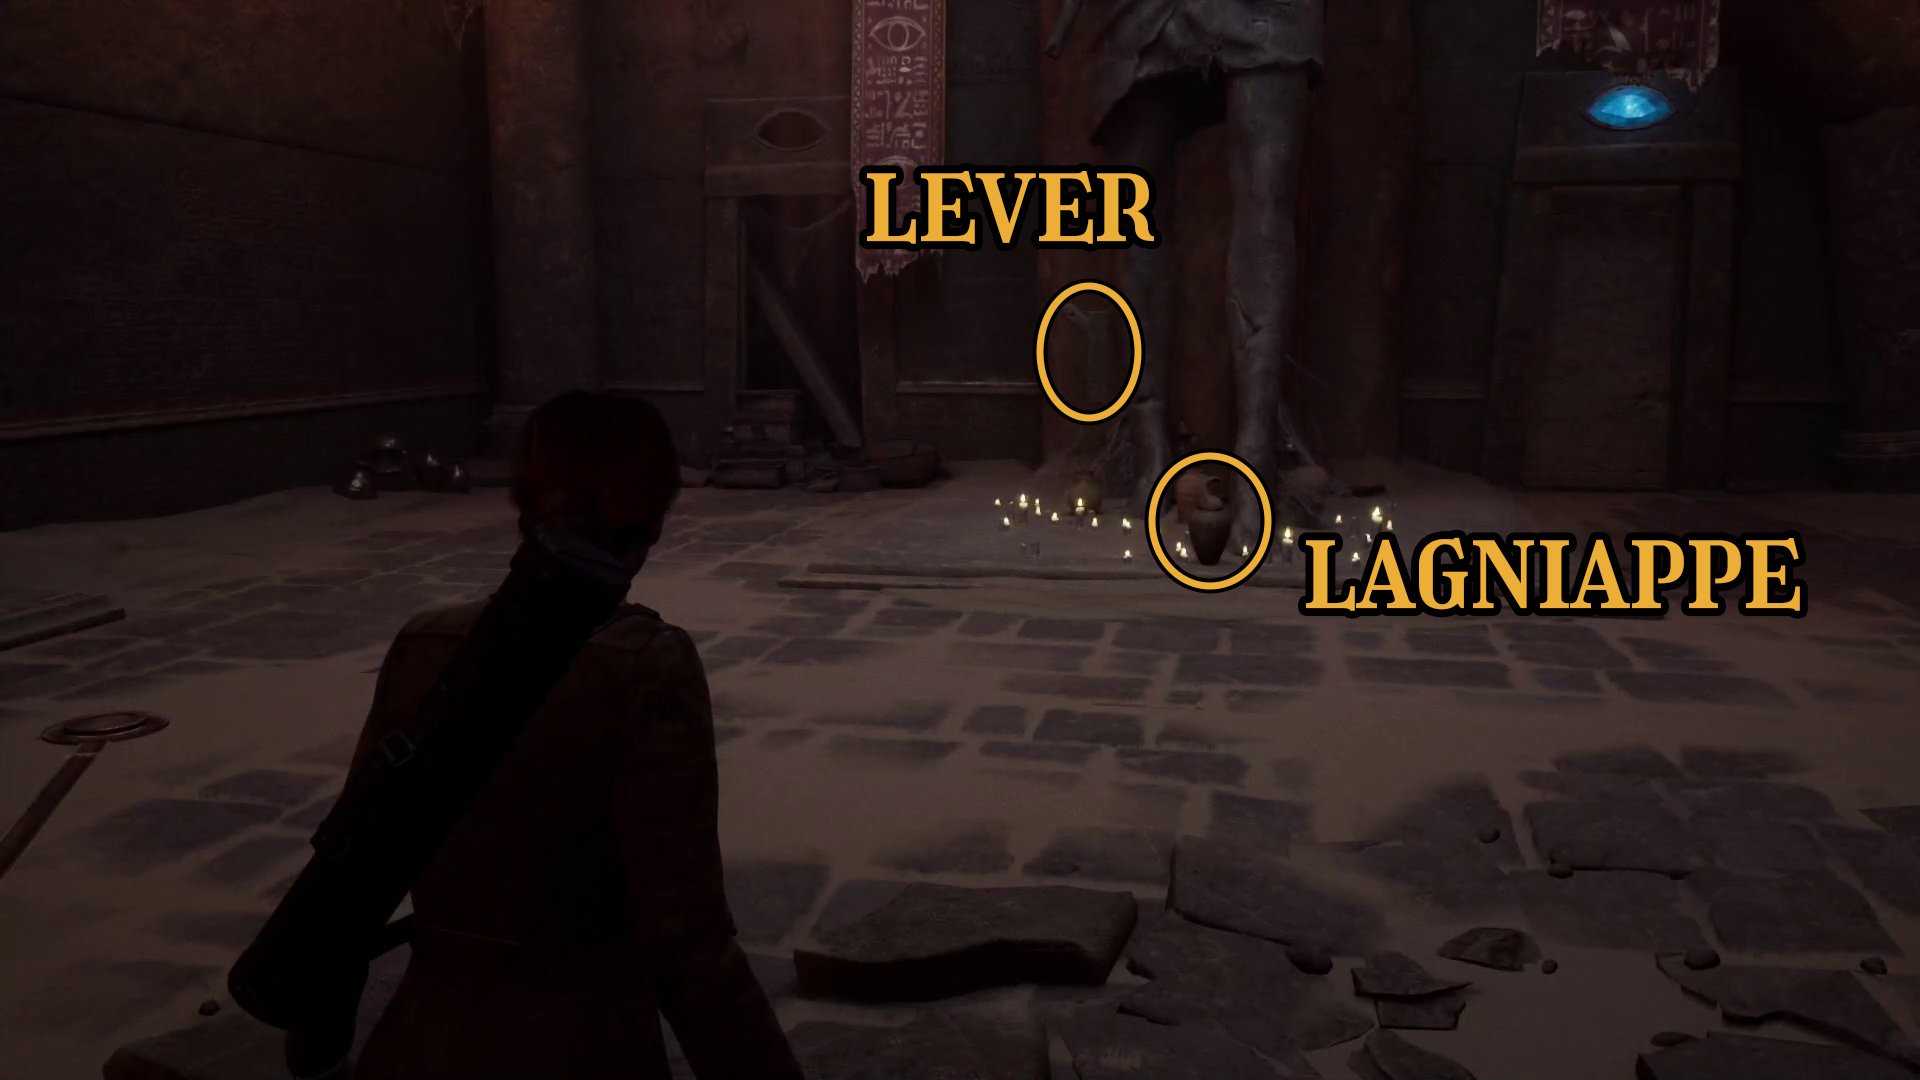
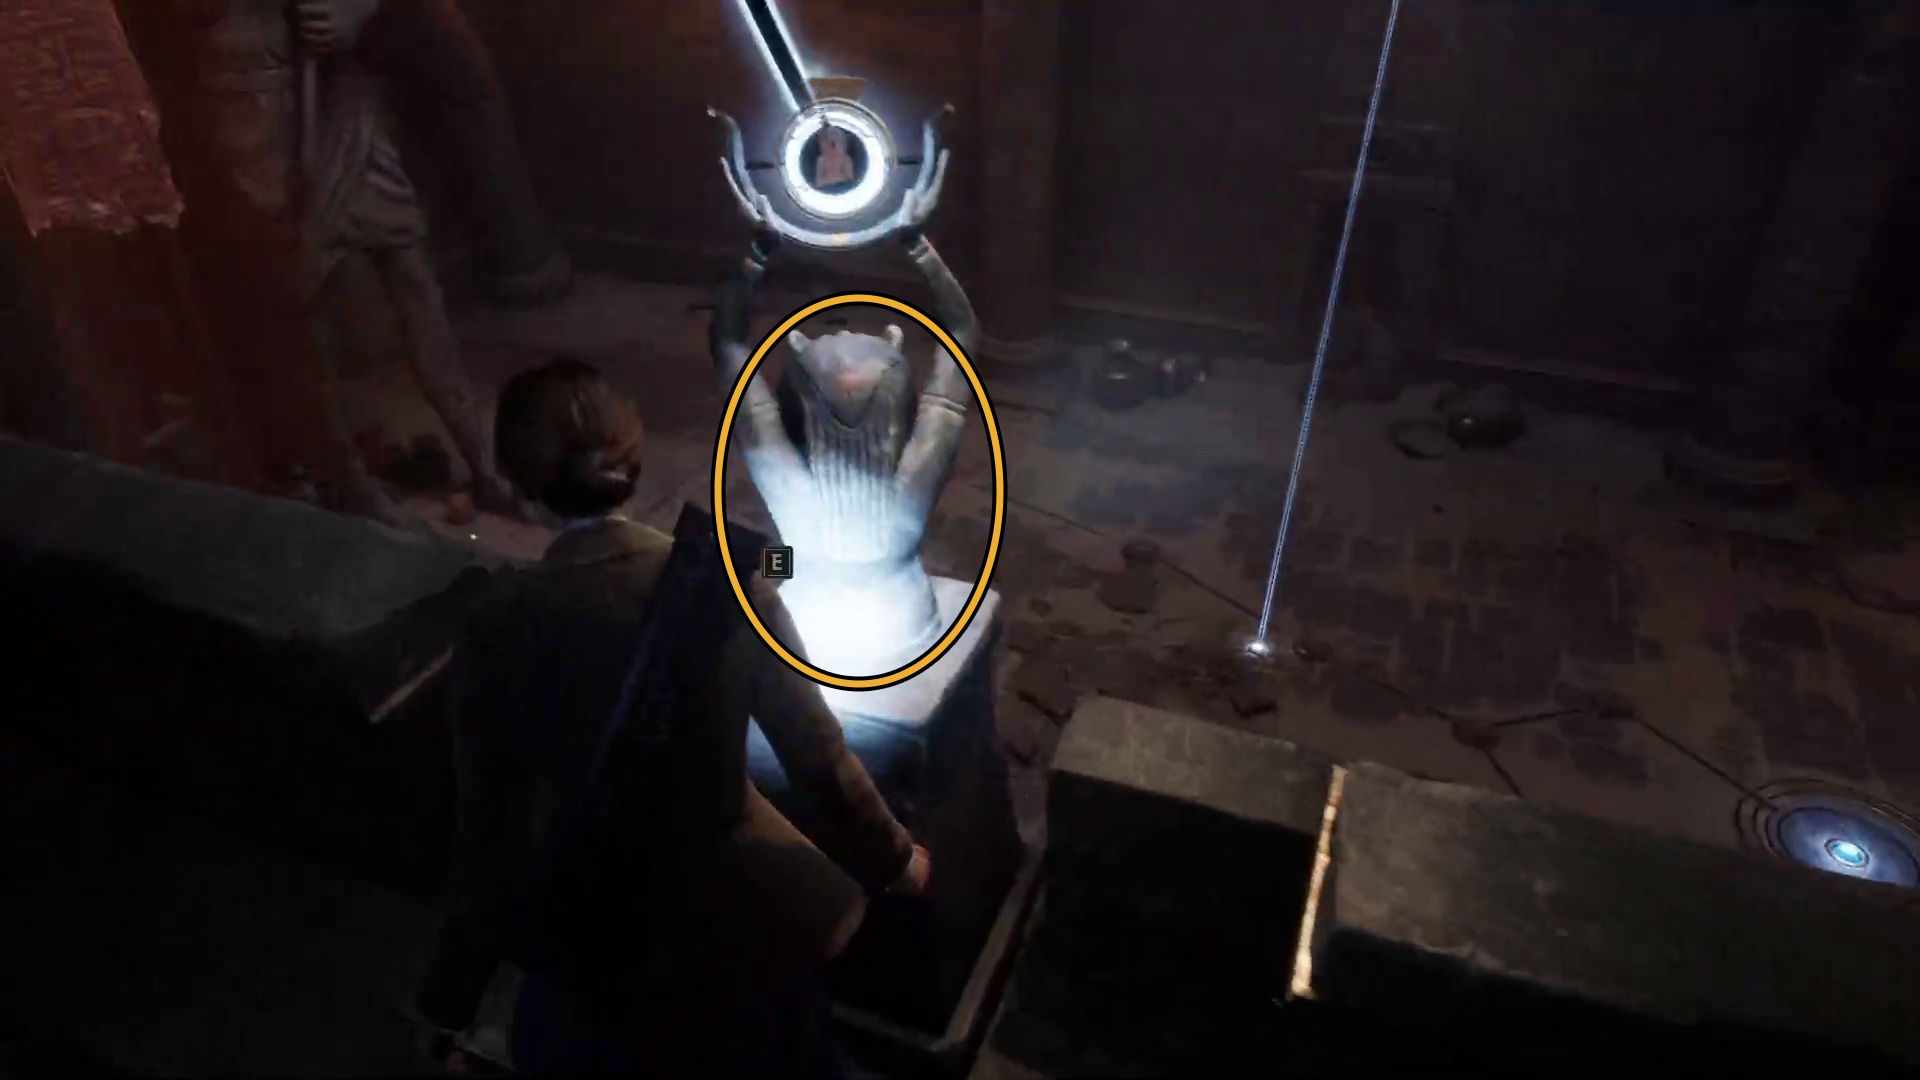
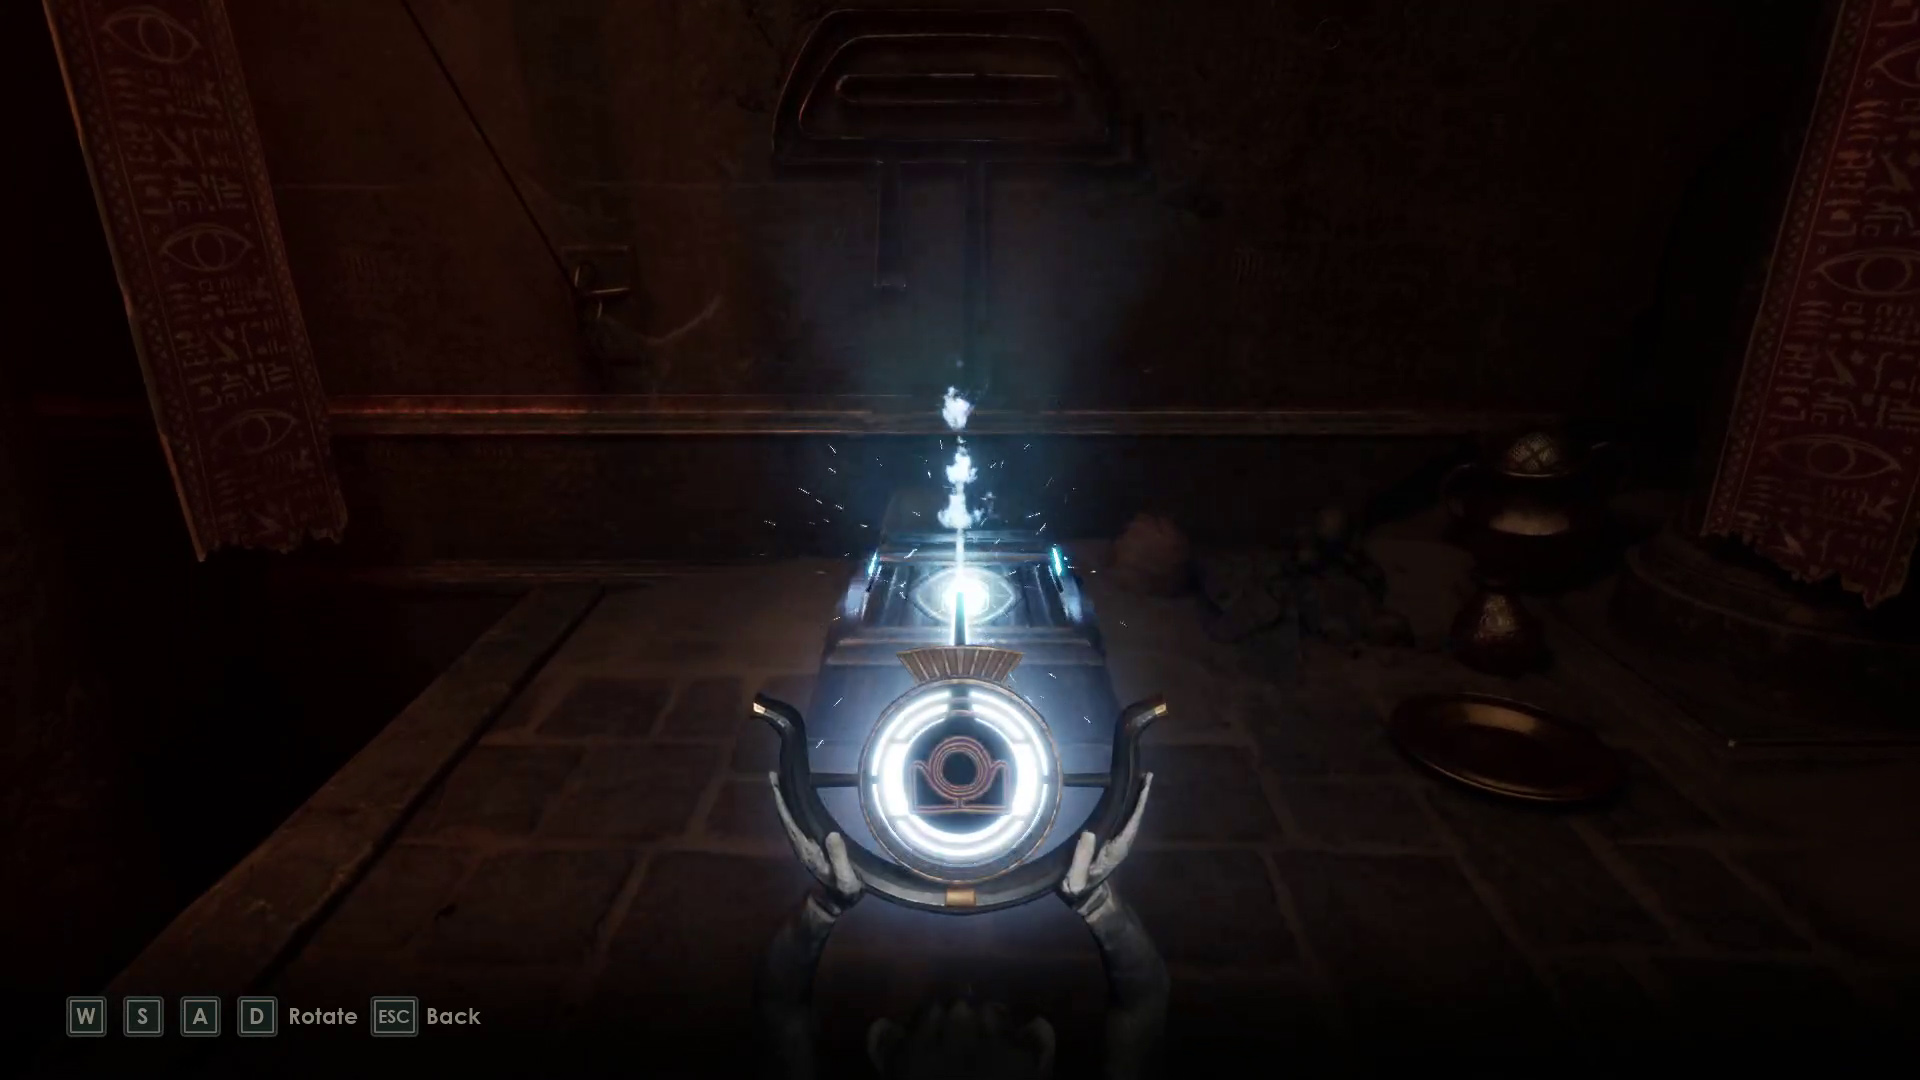
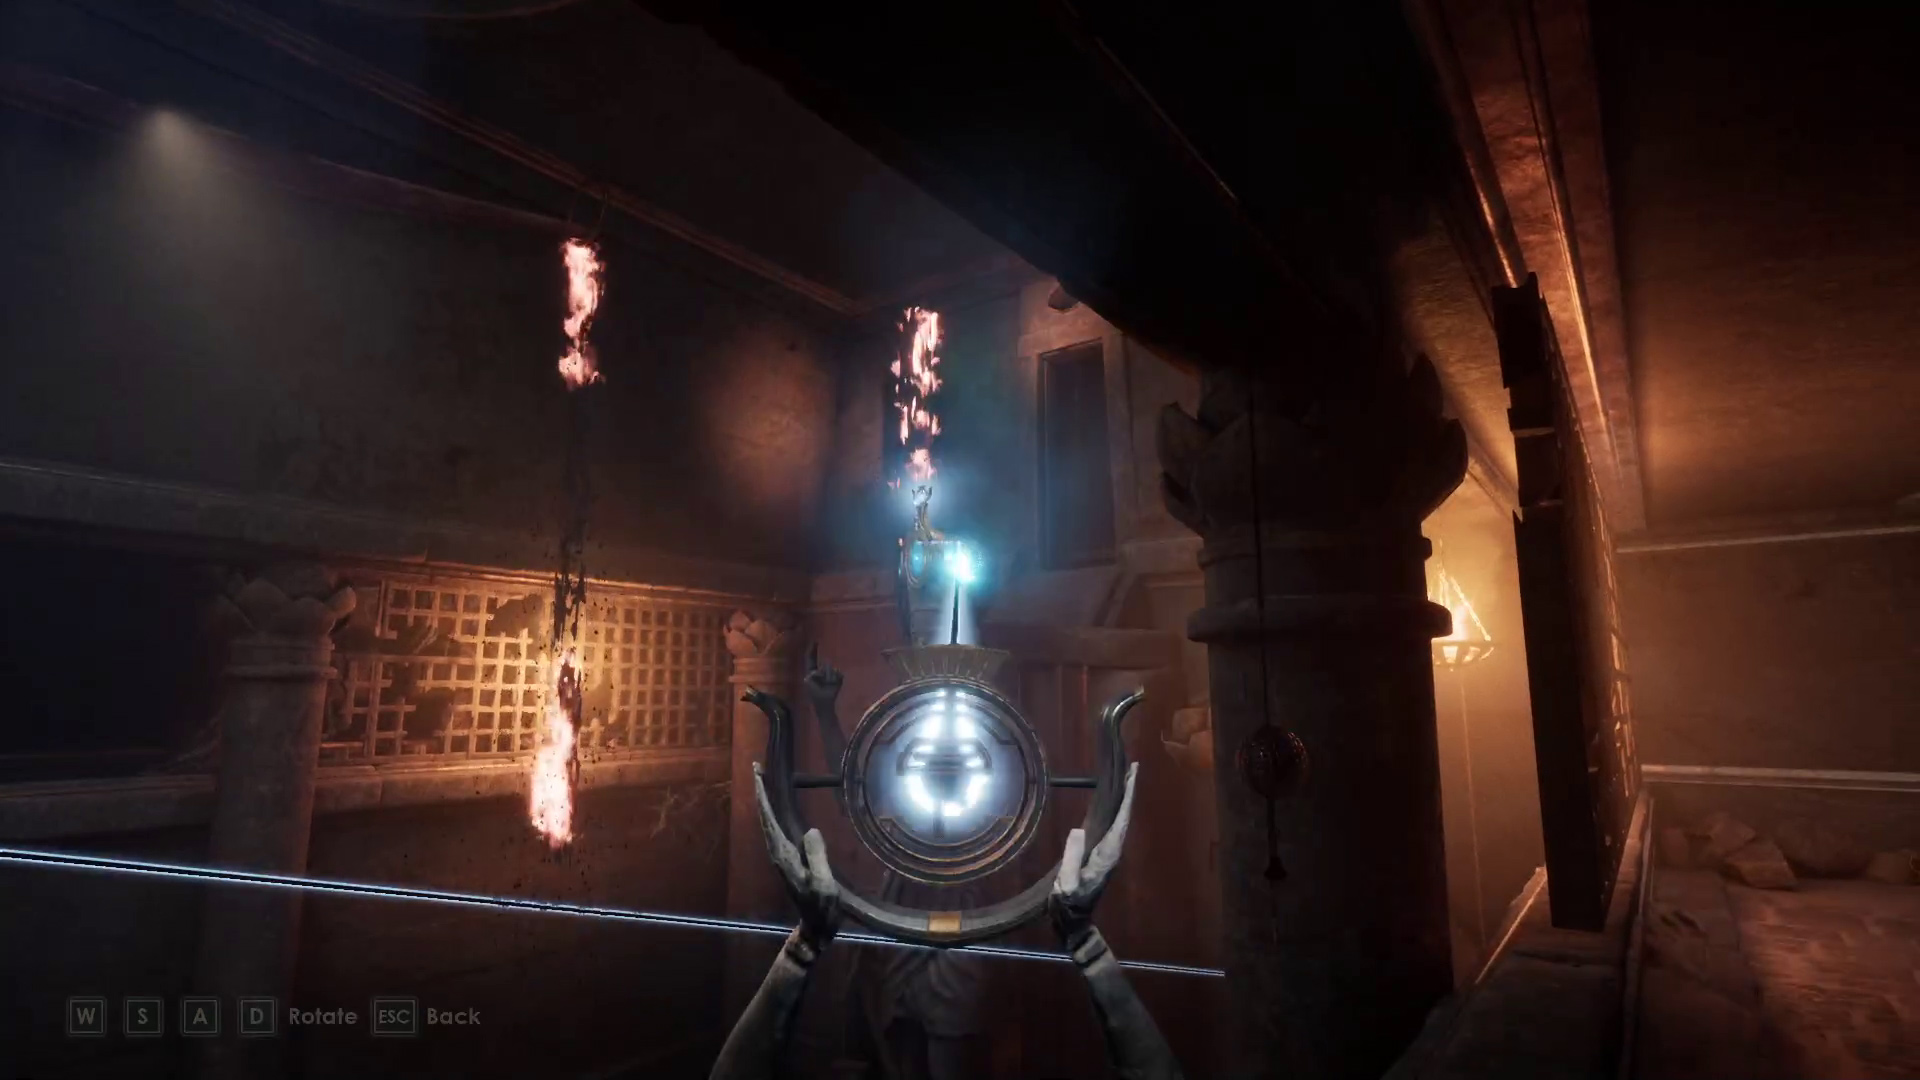
Walk to the chest across the room and pick up the key item The Horizon (Image 1). Then turn around and place The Horizon in the statue in the center of the room, and pull the nearby lever (Image 2).
Image 1Image 2
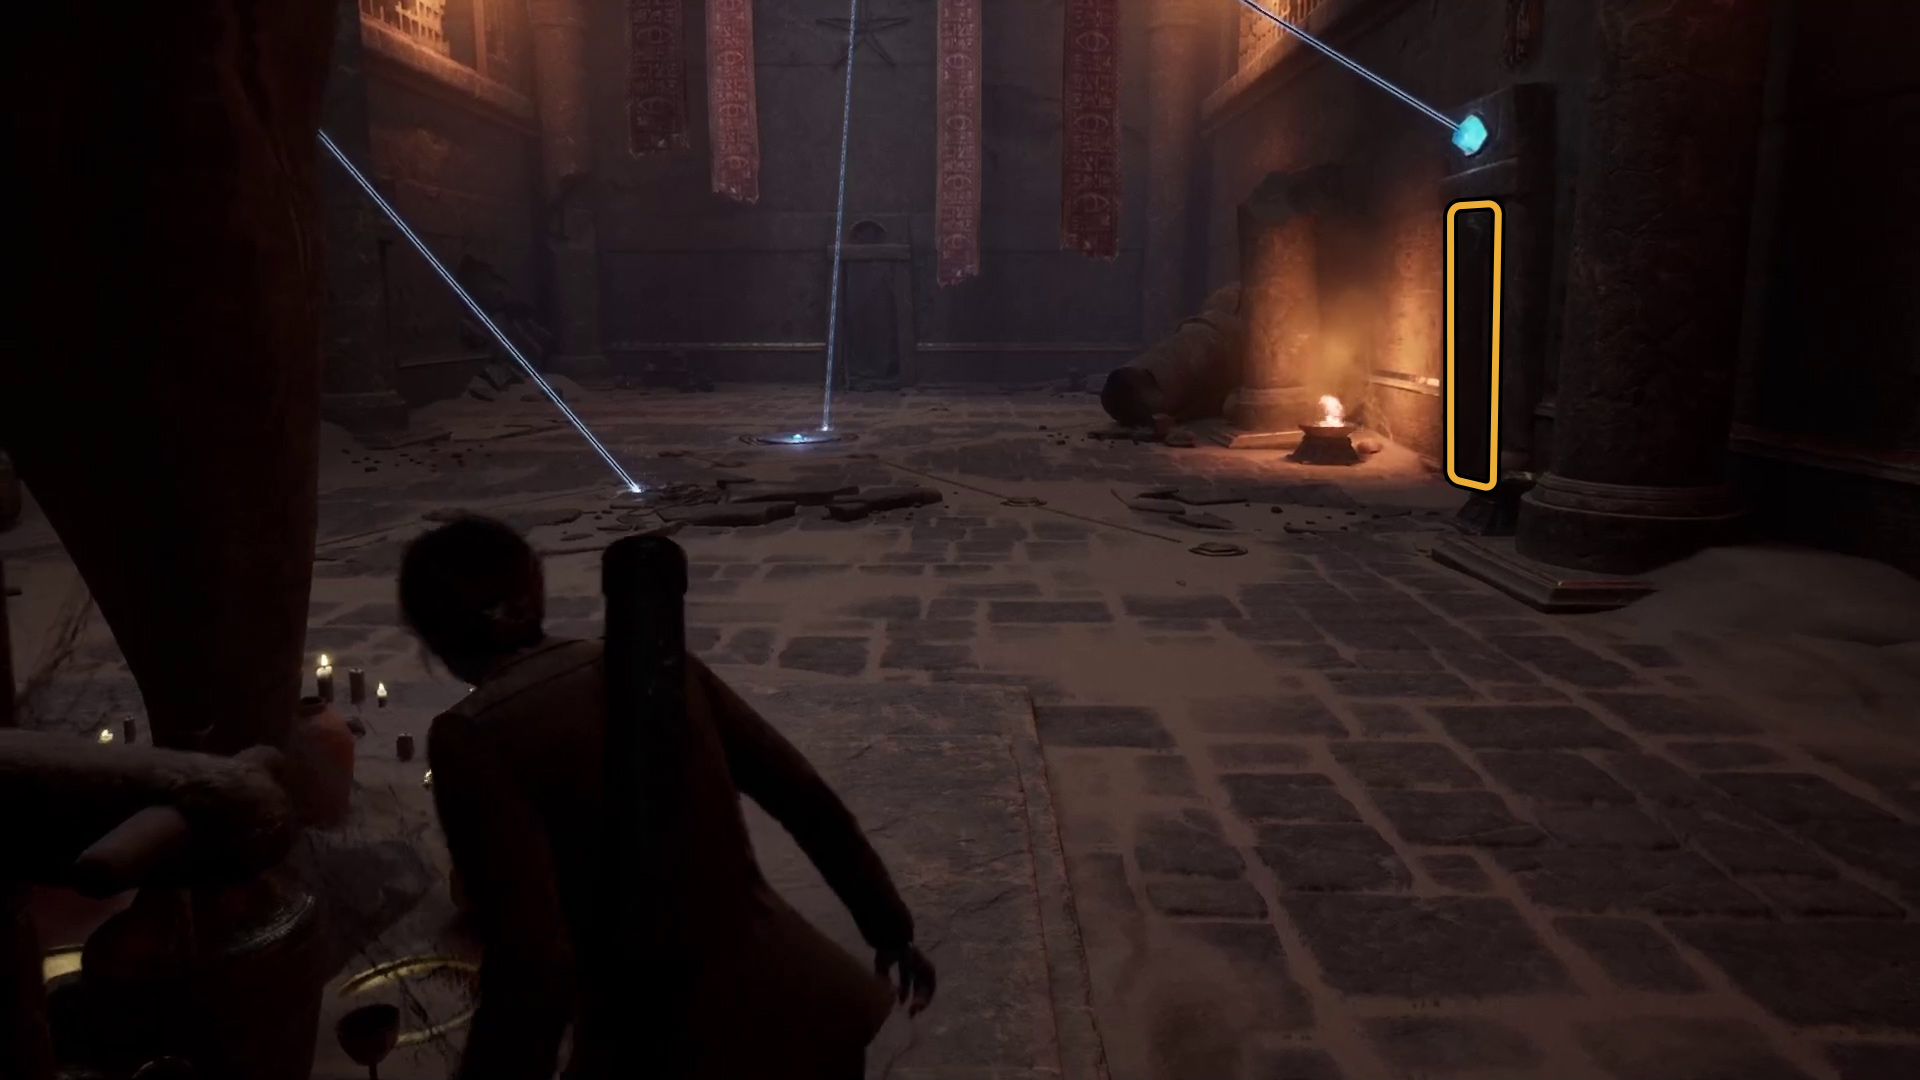
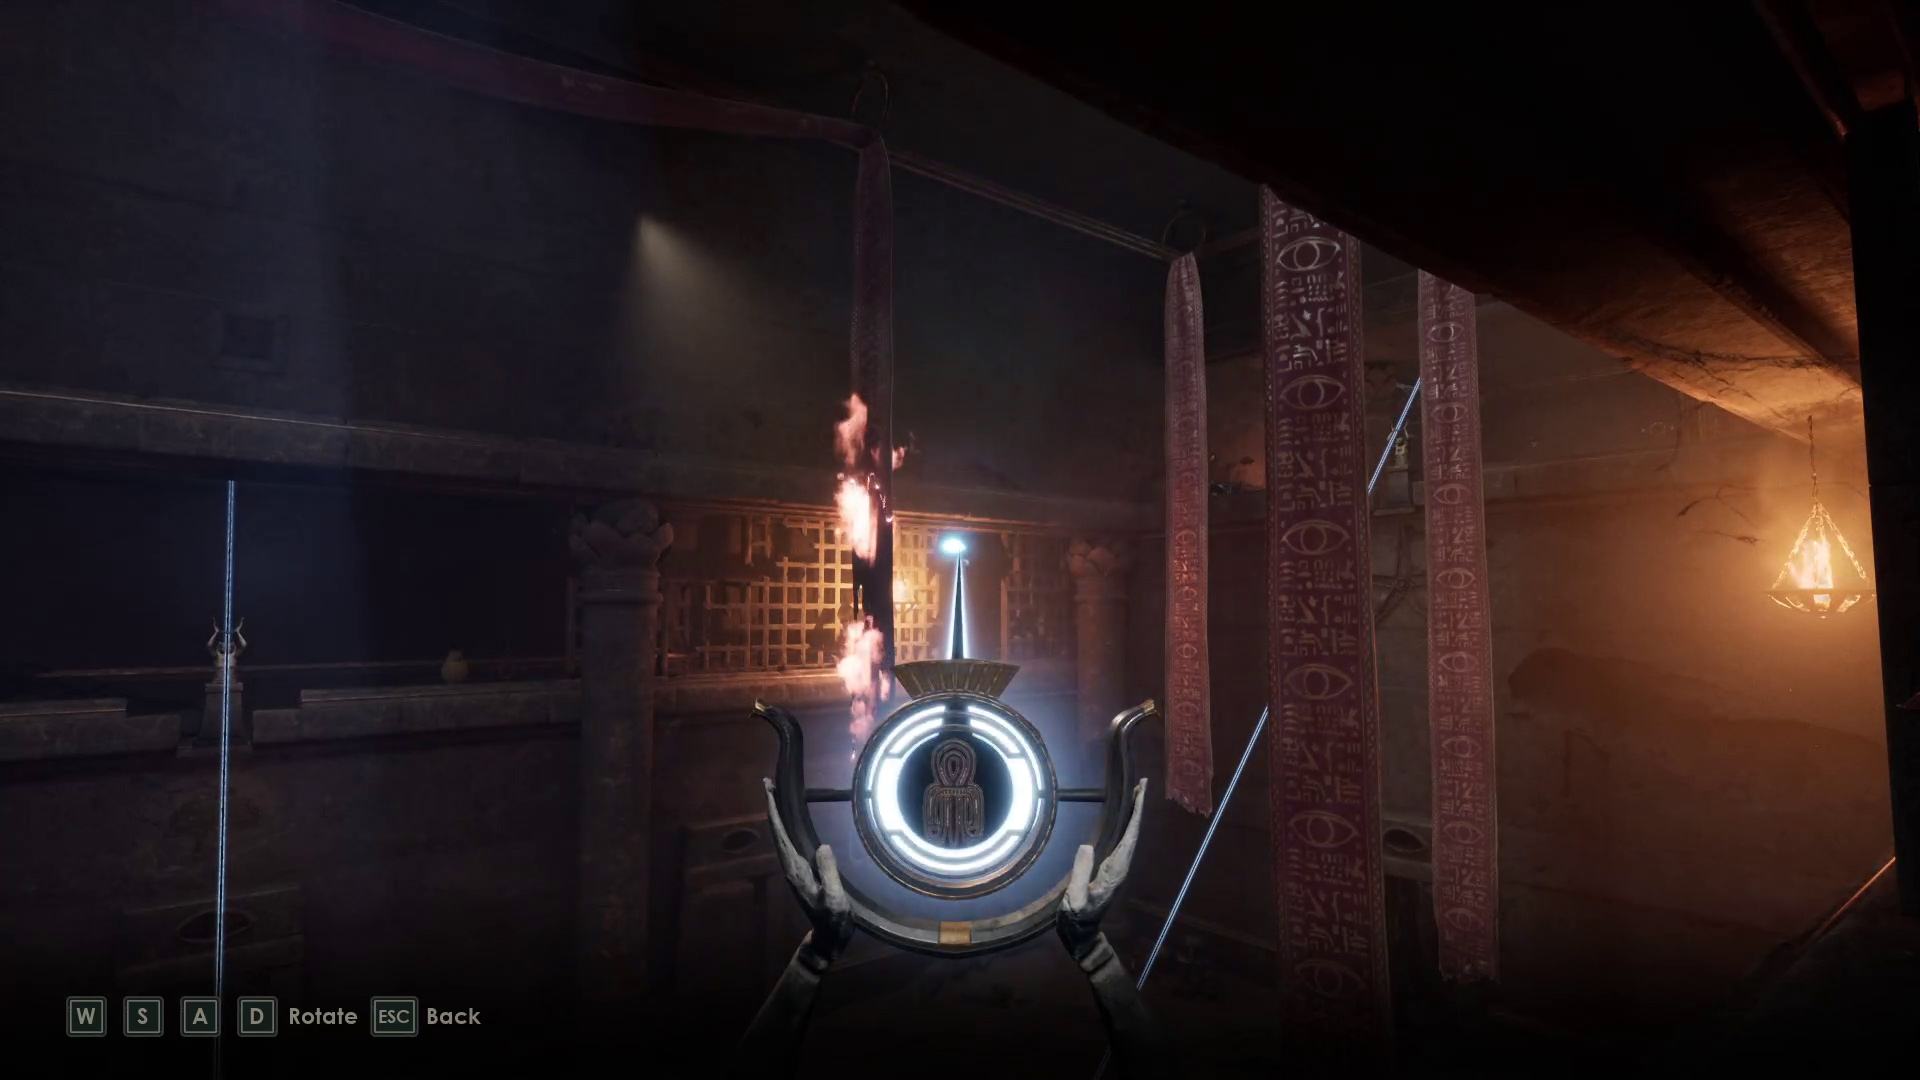
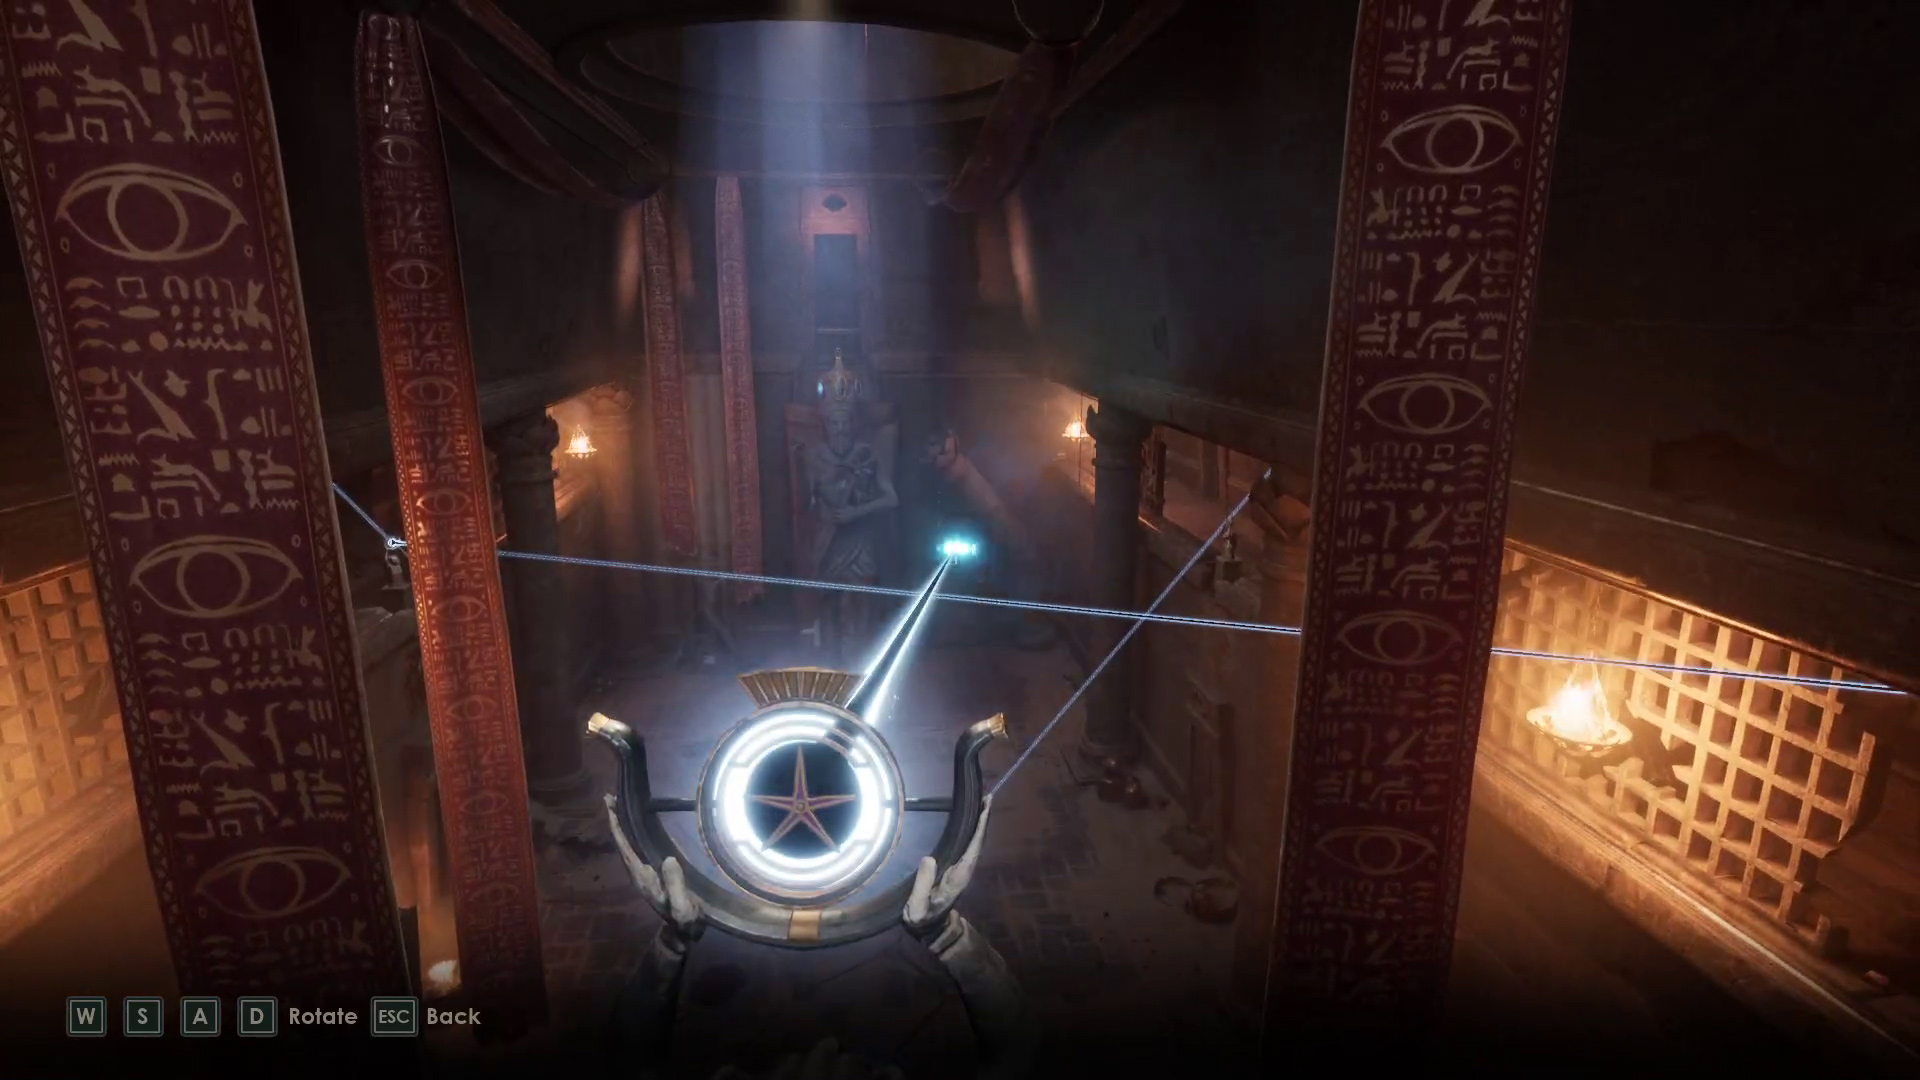
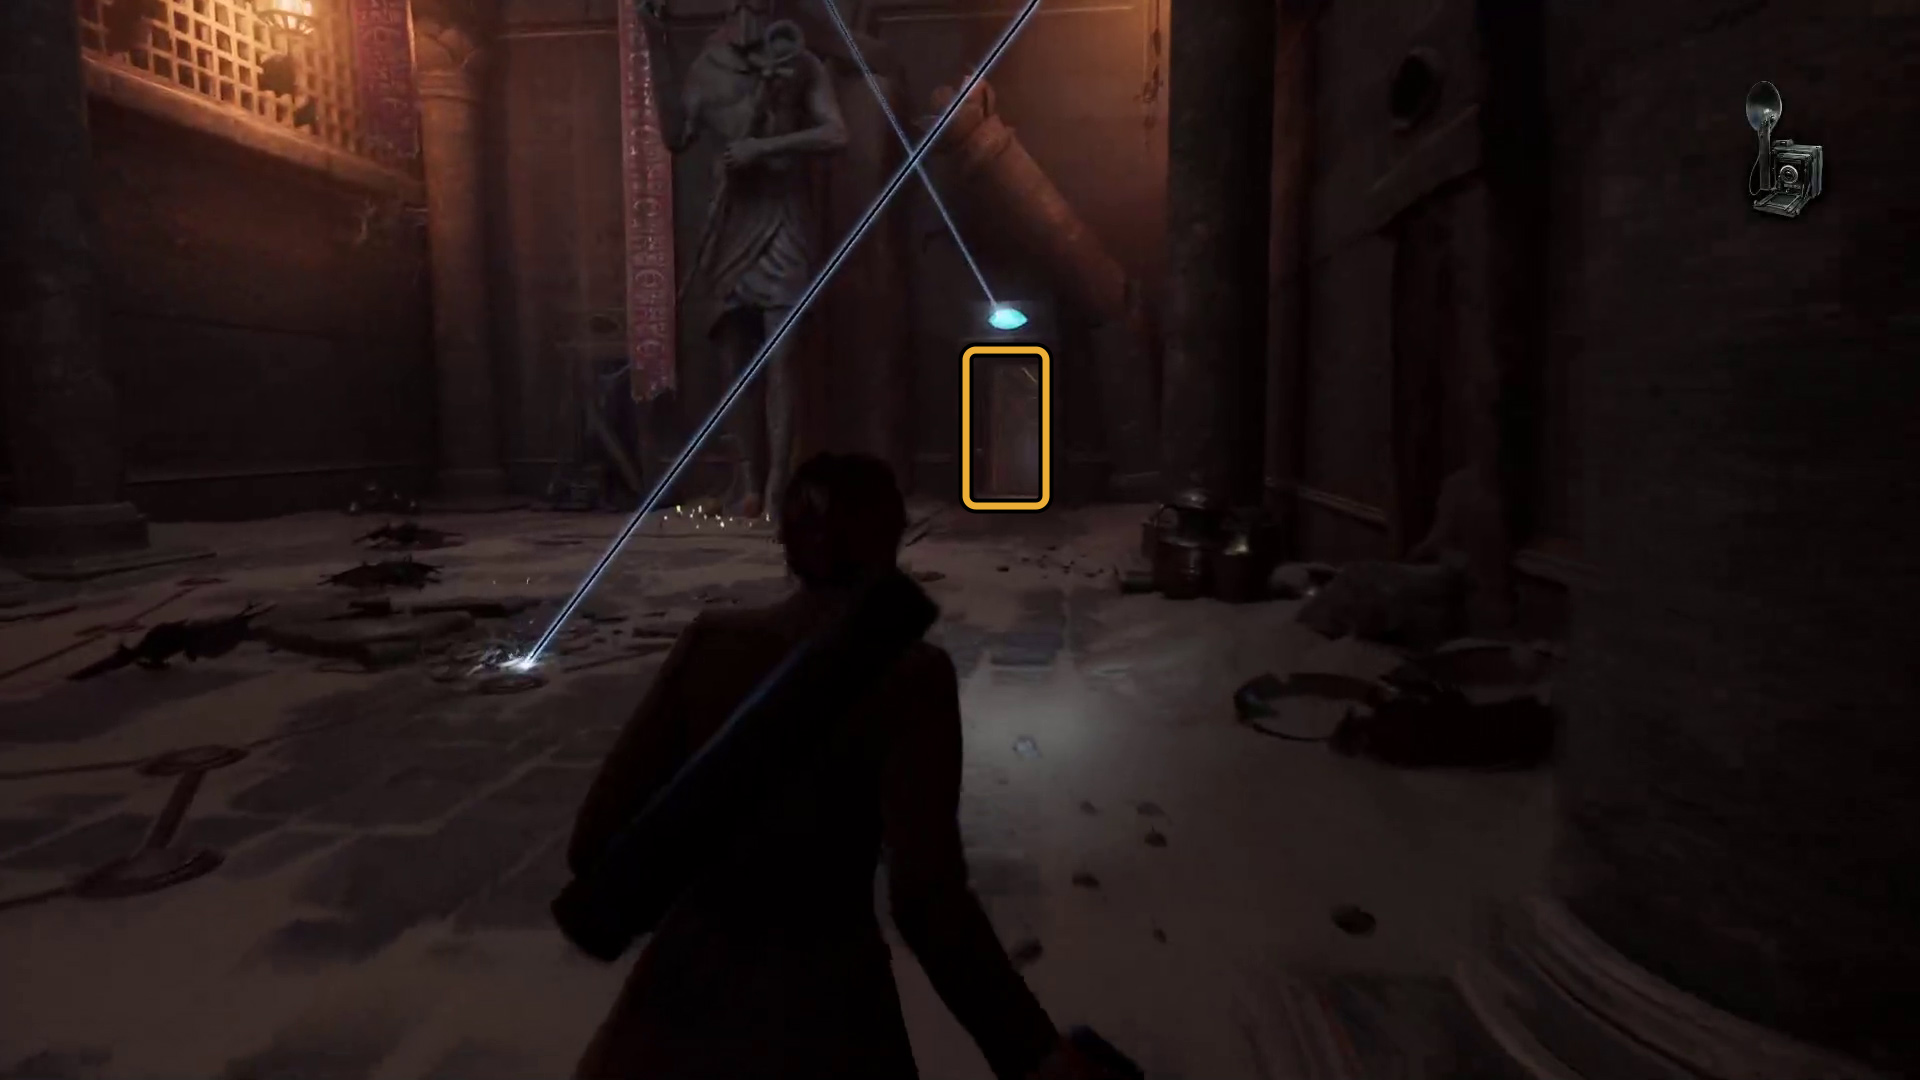
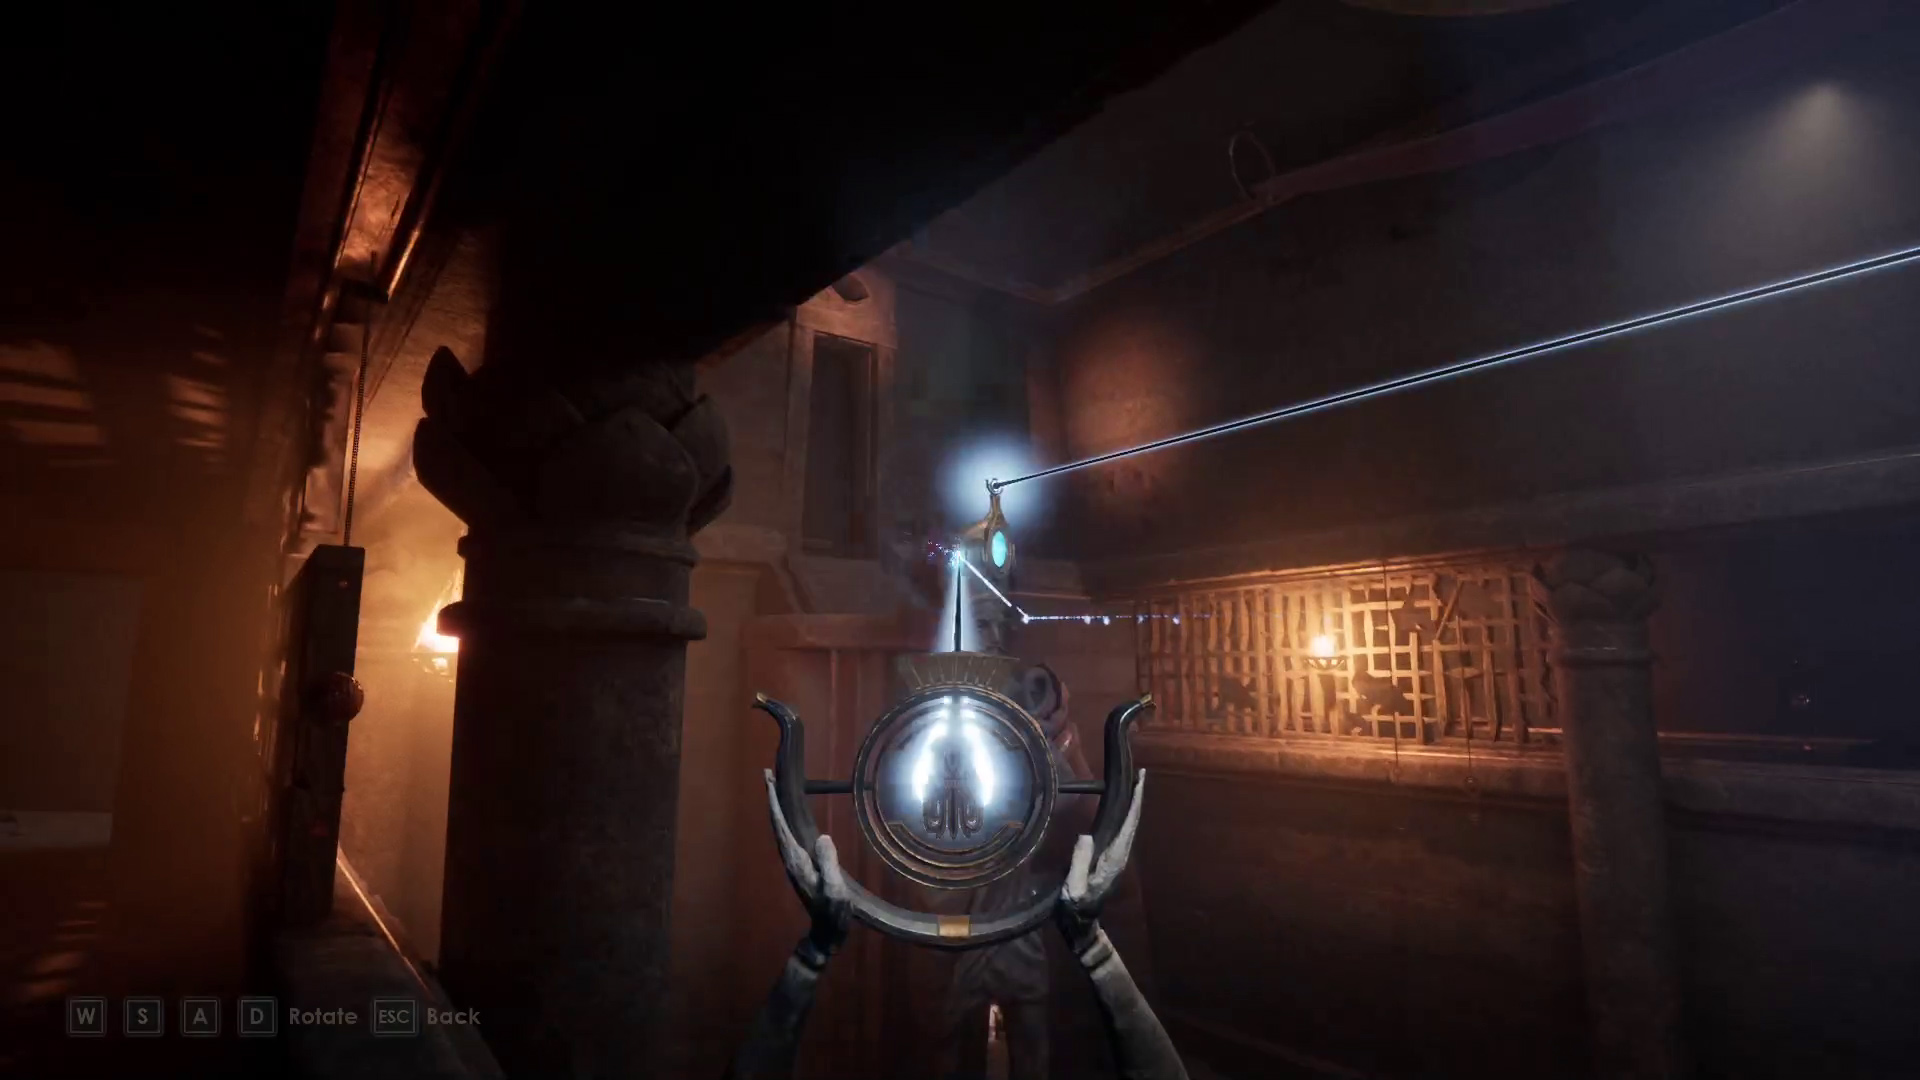
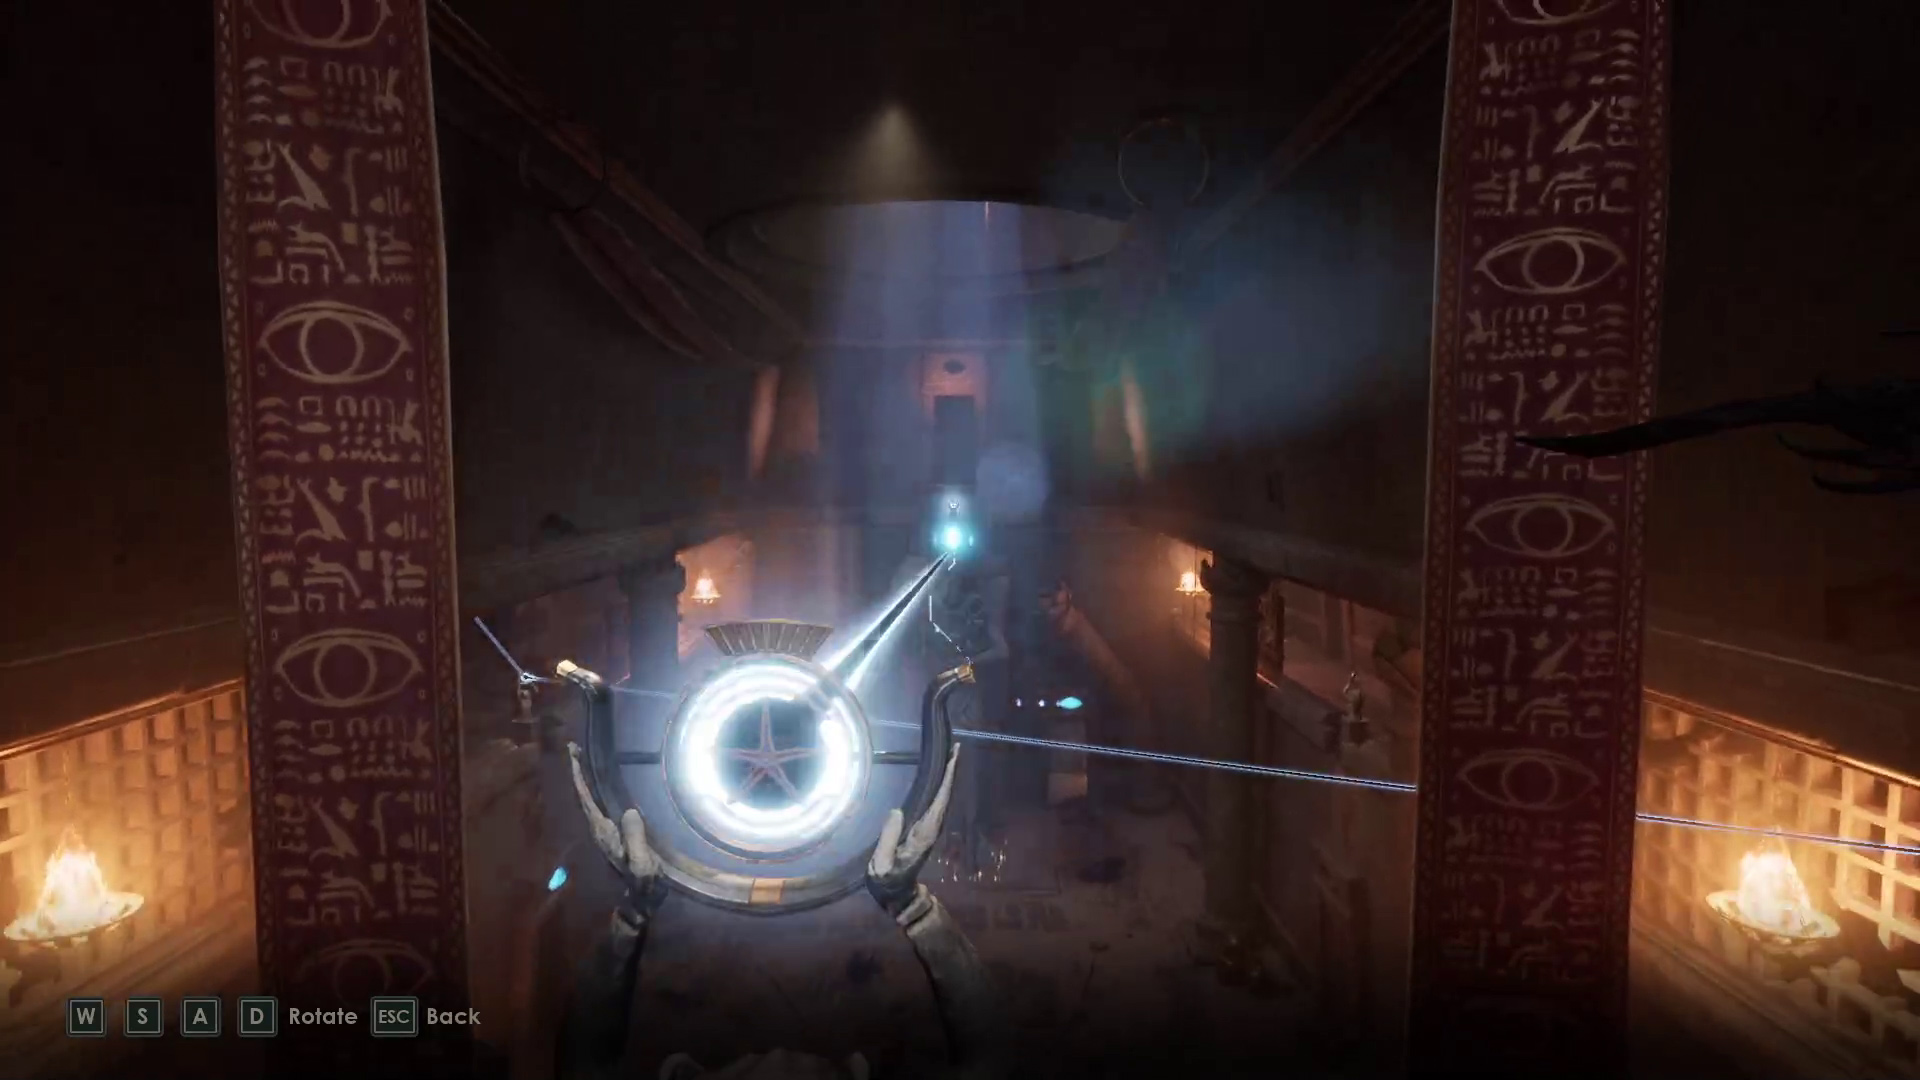
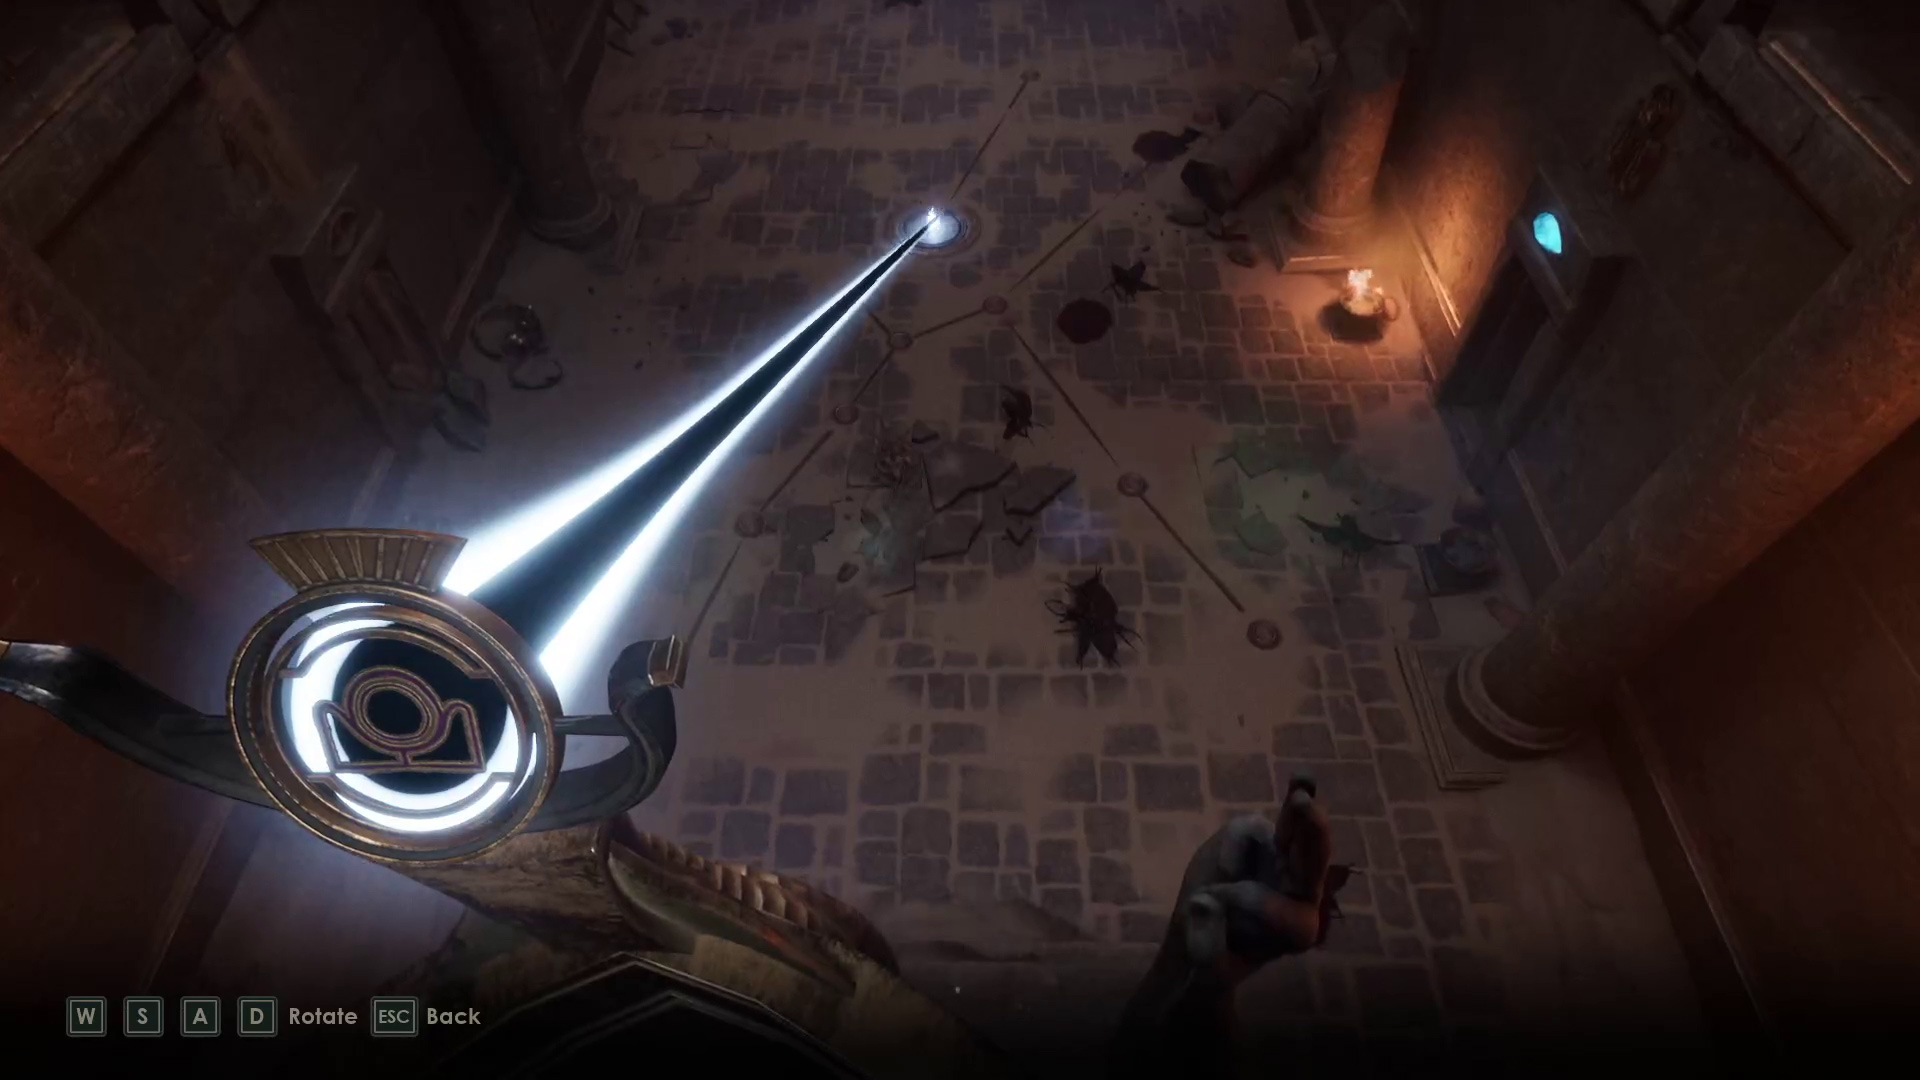
That done, you’ll need to direct the beam of light to the blue crystal above the door. Interact with the back of the statue (Image 3), and then aim it as indicated (image 4) to open the door.
Image 3Image 4
Once you’ve solved the puzzle, you’ll be able to go through the now-open door. There’s just one way forward, up a bunch of stairs, and then you’ll come to a spot where you can go three different directions — left, straight, or up the stairs. You’ll have to solve another mini-puzzle to open the next door here.
You can open the next door the same way you opened the previous one — you don’t even have to find a lens this time!
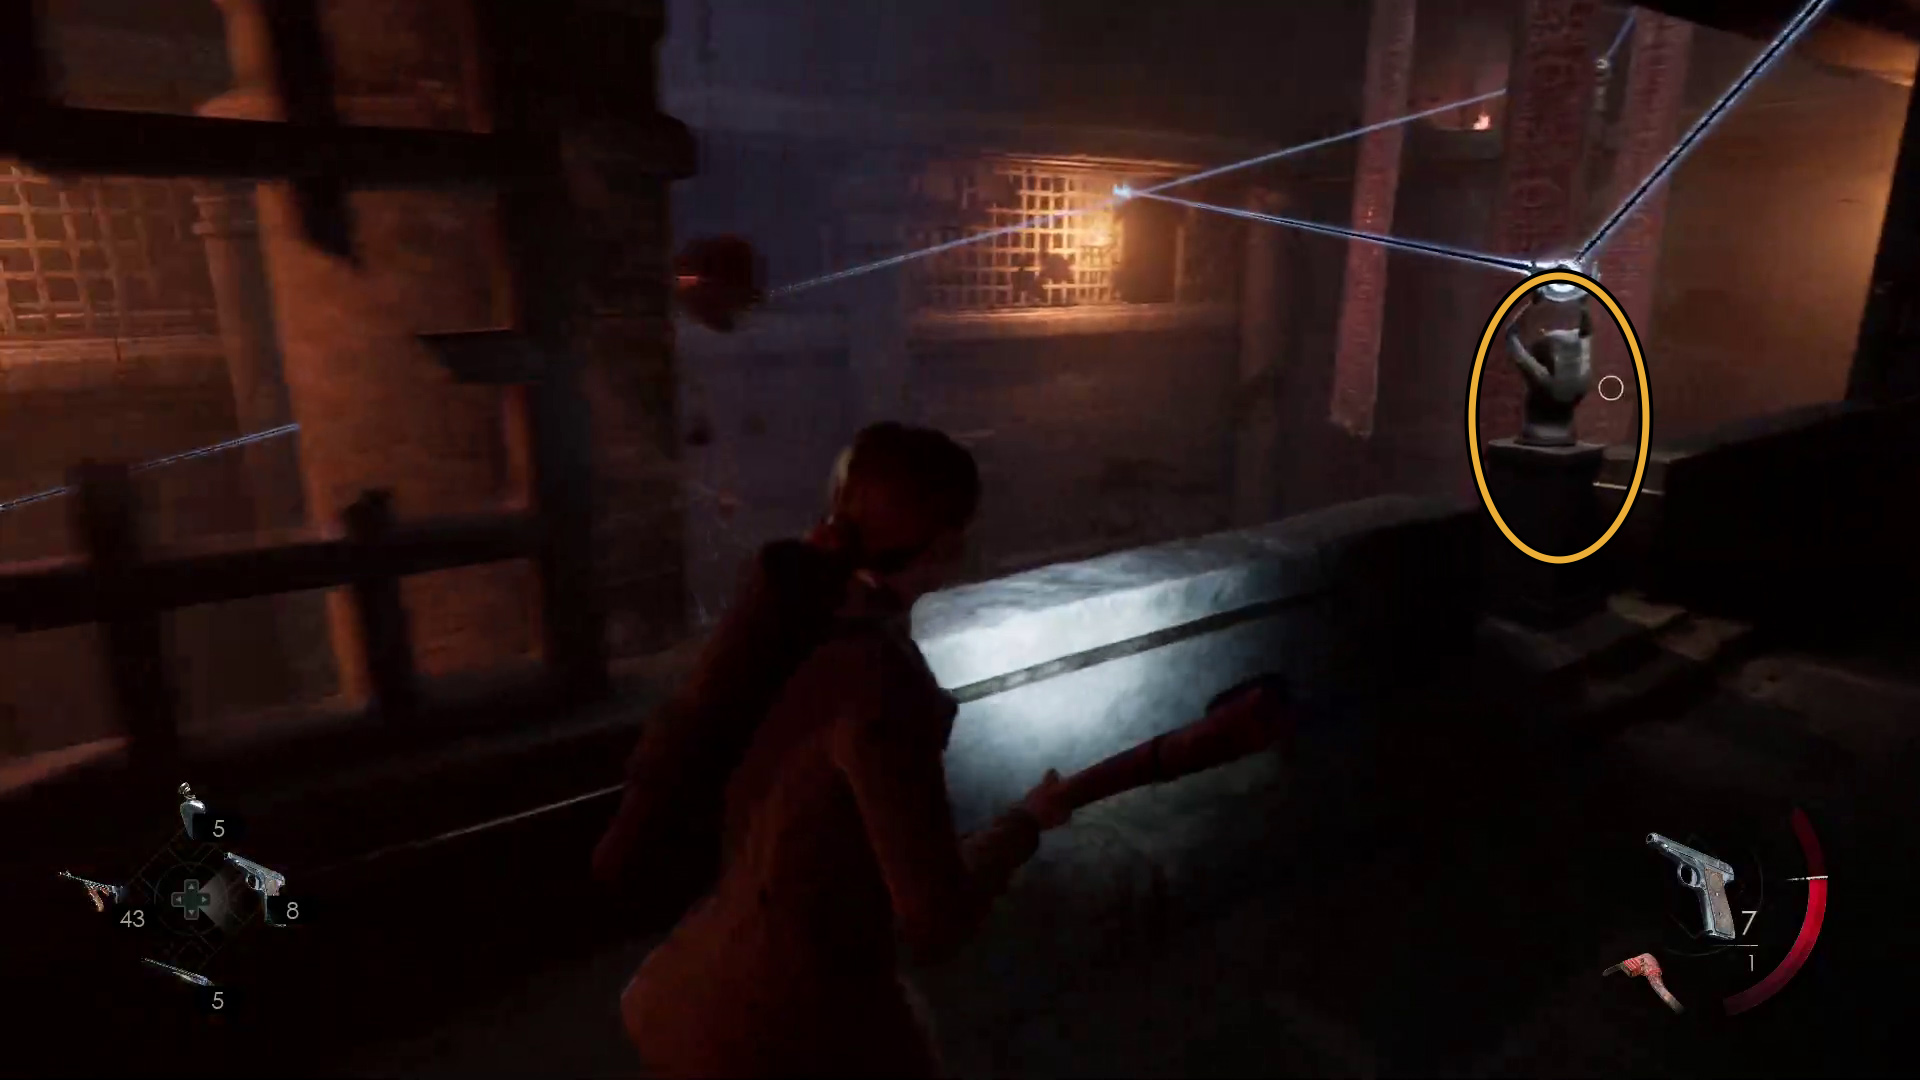
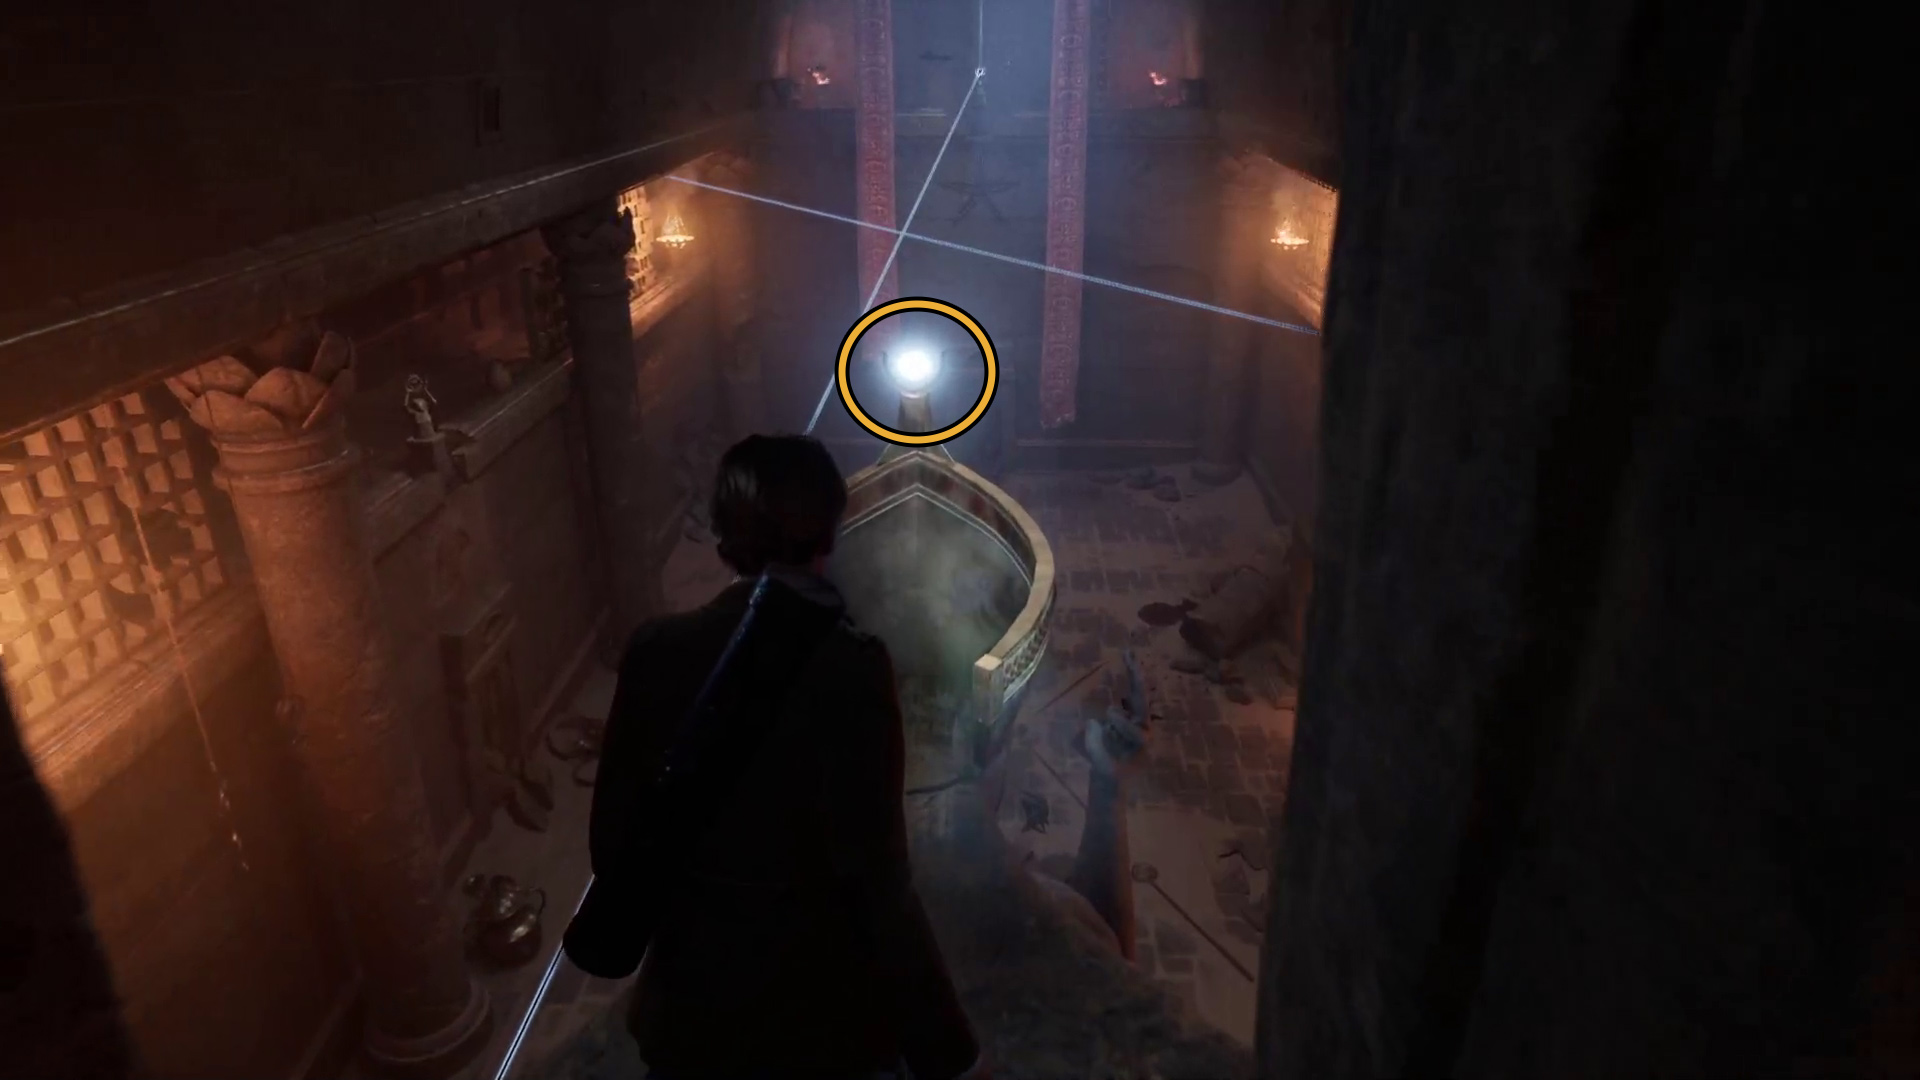
Go left onto the balcony (Image 1). Continue forward until you can interact with the statue that has a light-bending lens (Image 2).
Image 1Image 2
Careful — once you move the statue a bit, more of the flying enemies will show up. You can burn them with the light beam, but it’s difficult, so you may want to press the interact button again to get off the statue and shoot them the regular way. Once you’ve killed the enemies, continue moving the light beam to the right, and aim it at the blue crystal across the room on the opposite balcony (Image 3).
Image 3
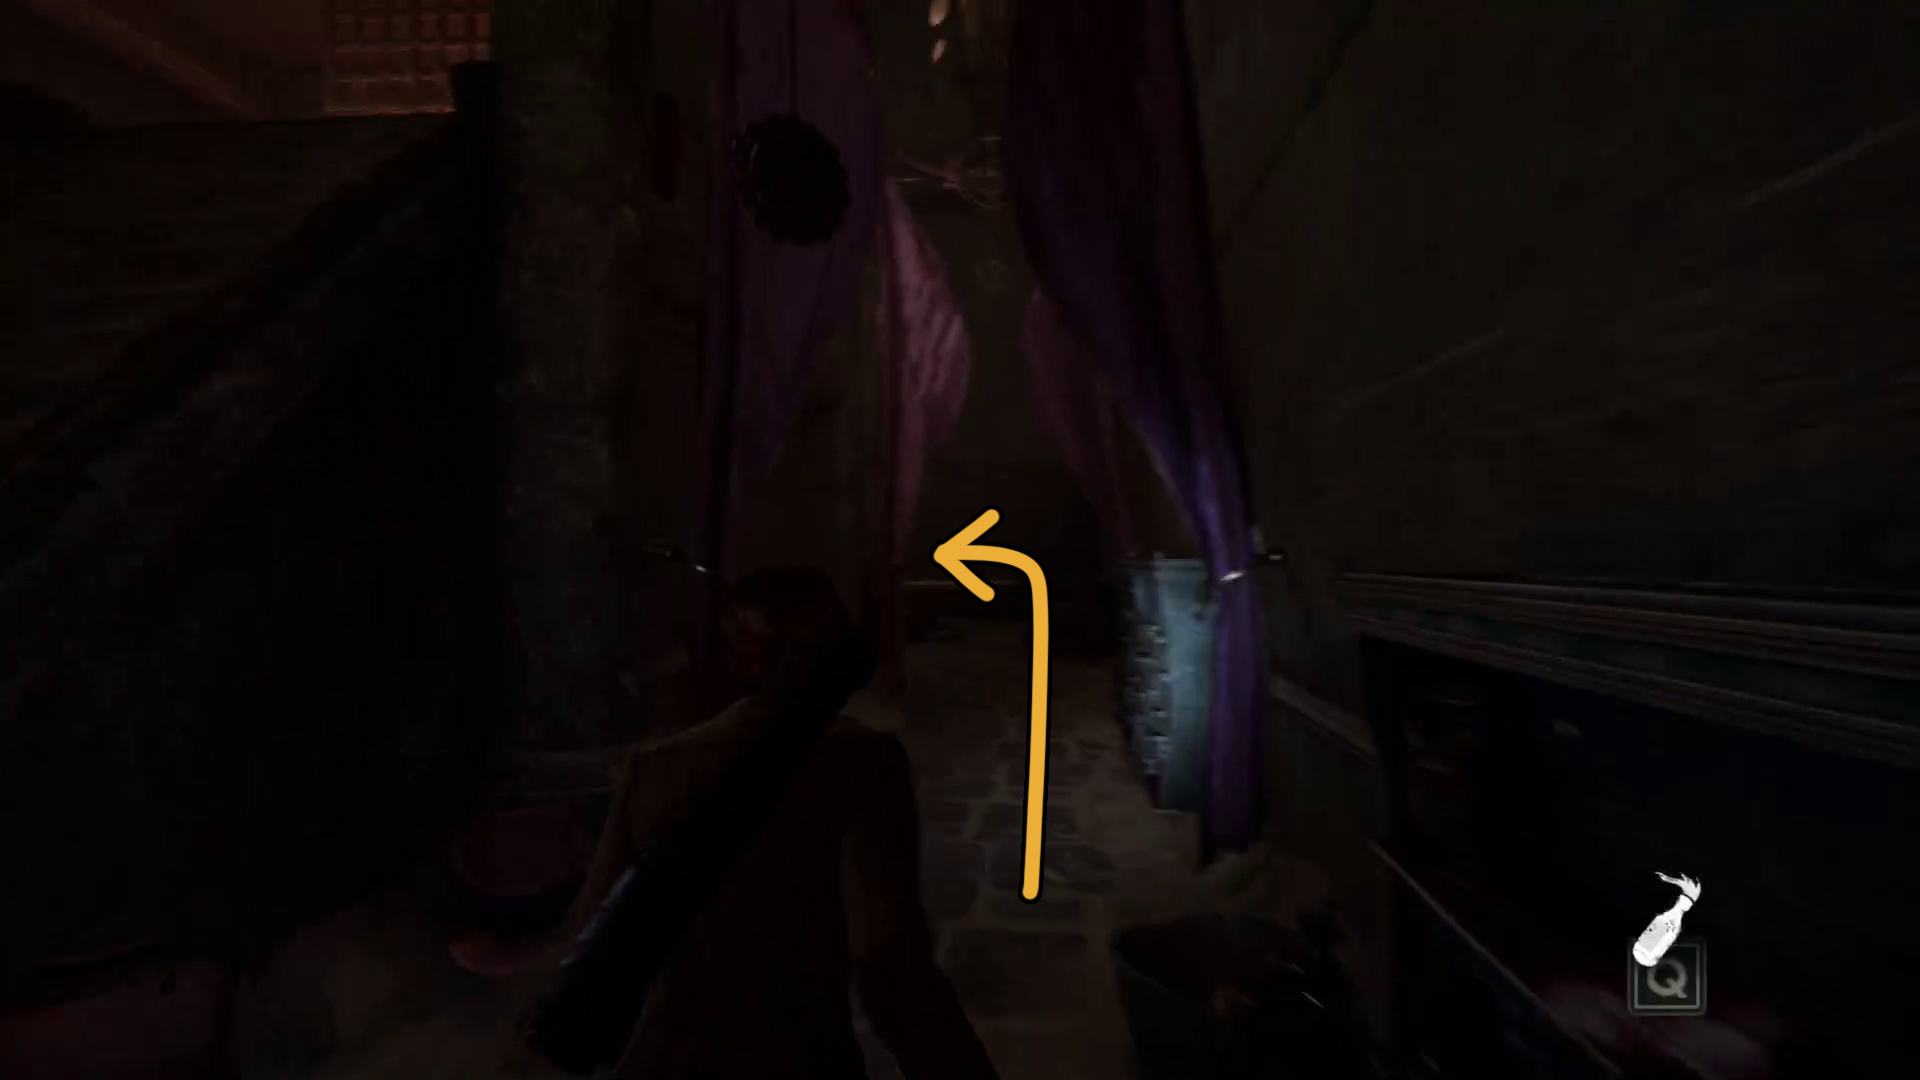
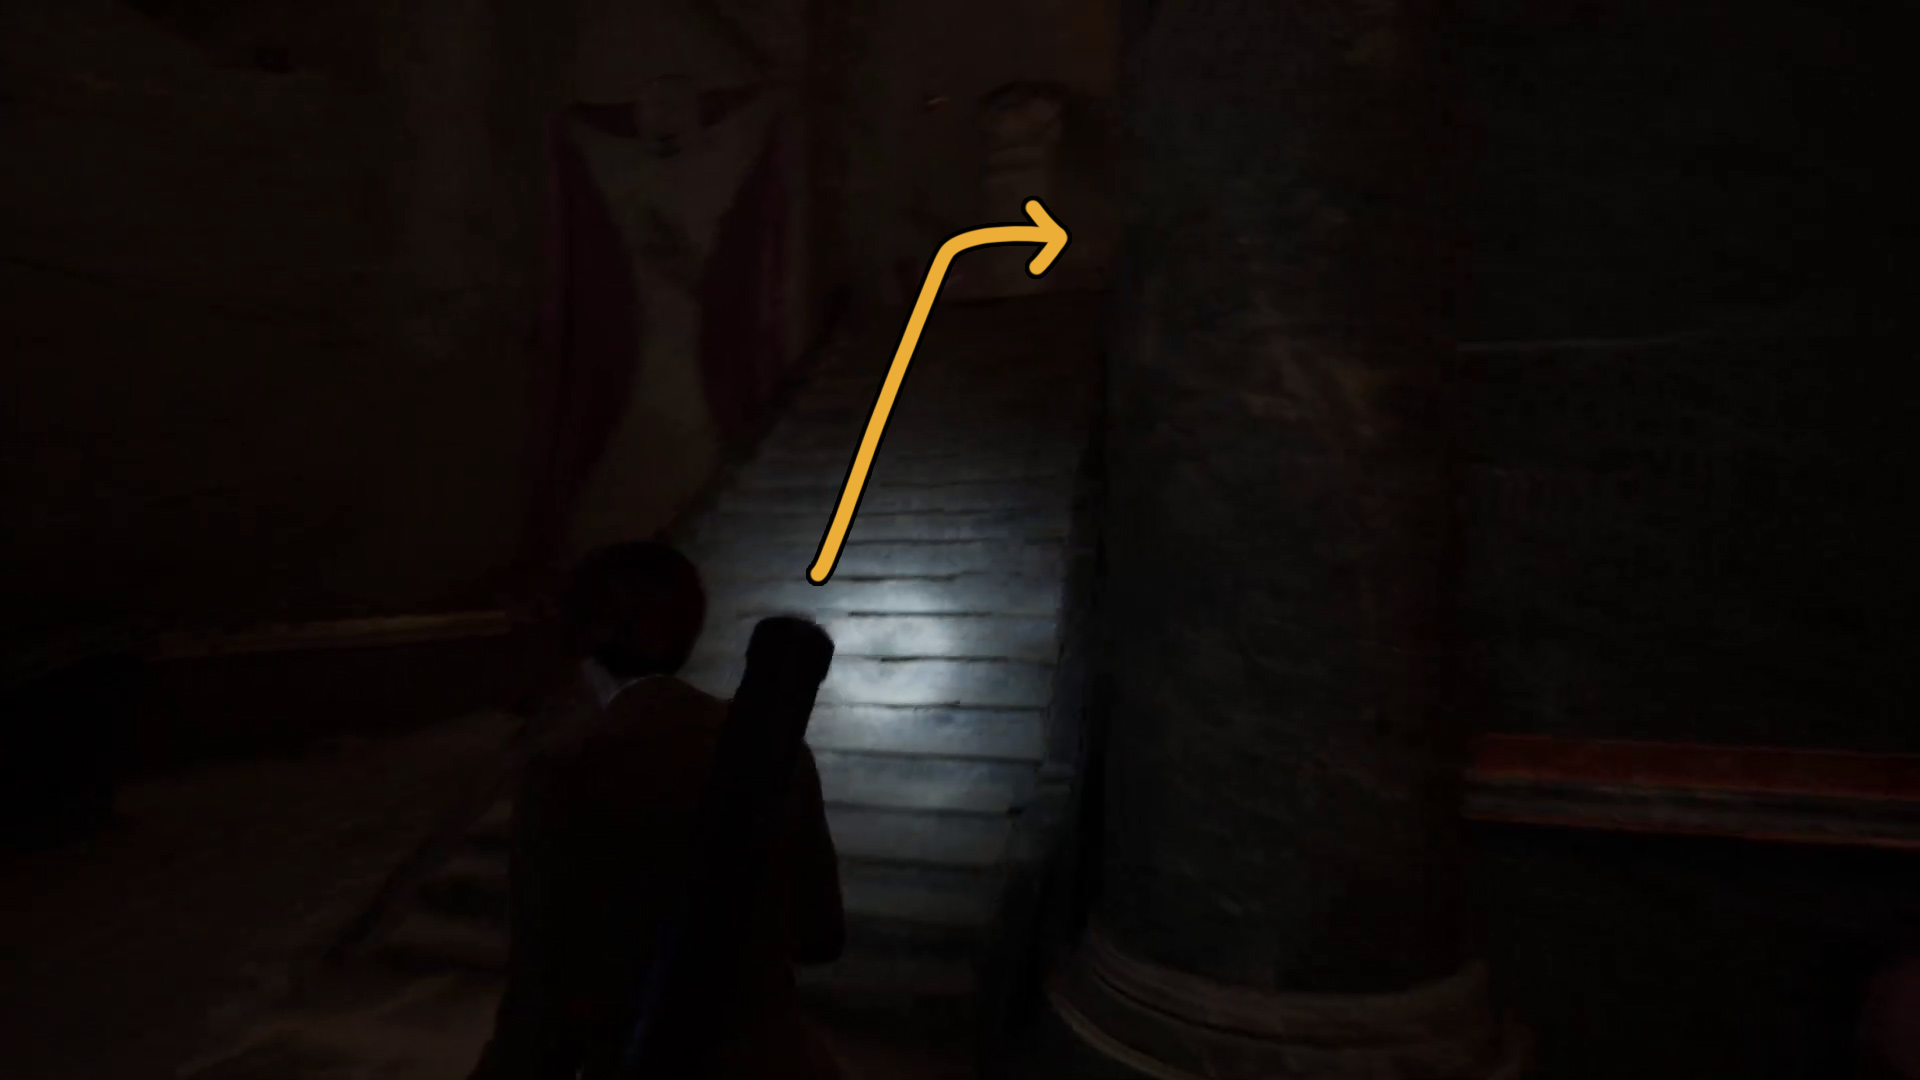
After solving the “puzzle”, you’ll need to get to the now-open door. Go back the way you came, past the stairs, and turn left at the wall (Image 48), then take your first right and go down the stairs (Image 49).
Image 48Image 49
You’ll come to a 4-way intersection. Left and right have barricaded doors, so go straight first into the room across the intersection. You can find a big stack of melee weapons there, plus some loot. Grab a fresh melee weapon, then go back to the intersection and head left. Break down the barricade with melee attacks, and then take a left and enter the small chamber. There’s a bit of loot here, and then you’ll have to solve another simple puzzle.
Once again, you’ll need to pull a lever, and aim a beam of light somewhere specific.
Pull the lever on the wall and then interact with the statue (Image 1). Aim the light at the eye-shaped crystal on the nearby chest (Image 2) to unlock it. Inside the now-open chest, you’ll find the key item The Star, which is another light-bending lens.
Image 1Image 2
Leave the room with the chest and go straight — at the opposite end of the hall is another barricade you can break with a melee attack. The door will open, but don’t go through it yet — we’ll come back here after we open another door. You’ve got another puzle to solve now…
You need to find a use for The Star, the lens you just found.
Turn around from the door you just opened via melee attack, take a right, and go back up the stairs. At the top of the stairs, go left, then take an immediate right up the stairs (Image 1). Head over to the statue (Image 2) and put The Star into it. More enemies will spawn as as you reach the statue, so be ready. You can try to kill them with the light beam, or use your weapons. Then, aim the light beam at the blue gem above the door to the right of the statue (Image 3).
Image 1Image 2Image 3
Remember the door we opened earlier with a melee weapon? Go there, by turning around from the statue, going down the left-hand stairs, then going left and taking your first right down the stairs, then taking a left at the intersection to enter the main chamber. In the main chamber, turn right and go towards the door you opened with the light beam (Image 50). There are two enemies around the corner to the left just inside the doorway.
Image 51
After dealing with both enemies, continue straight down the stairs, and continue forward until you find another barricaded doorway on your right (Image X). Bash your way in (If you don’t have a melee weapon, you can find one in the room down the hall). Then check the place for loot, and figure out what to do next.
This time, you’ve got to send a light beam somewhere besides directly onto a blue crystal.
Pull the lever on your right upon entering the room to engage the light beam. Then aim the statue through the eye-shaped hole and onto the mirror in the next room (Image 1). Then leave this room and go right into the next room, where you’ll find a statue that now has light going through its lens. Interact with the statue and aim the beam of light towards the blue crystal on the chest to open it (Image 2) — inside the chest, you’ll find another key item lens, The Underworld.
Image 1Image 2
Fresh lens in hand, head back the way you came, down the long hallway and up the stairs (Image 52). At the top of the stairs, turn right and continue up yet more stairs, where you’ll be able to bash your way through a barricaded door, opening it. Now you’re back on the balcony where you moved the initial statue (Image 53), and you’ve got to figure out one final puzzle…
Image 52Image 53
You’ll need to use all three light-reflecing statues that ring the balcony to solve this puzzle. Take a look at the large statue and see if anything sticks out… you can also get up into the statue’s crown eventually.
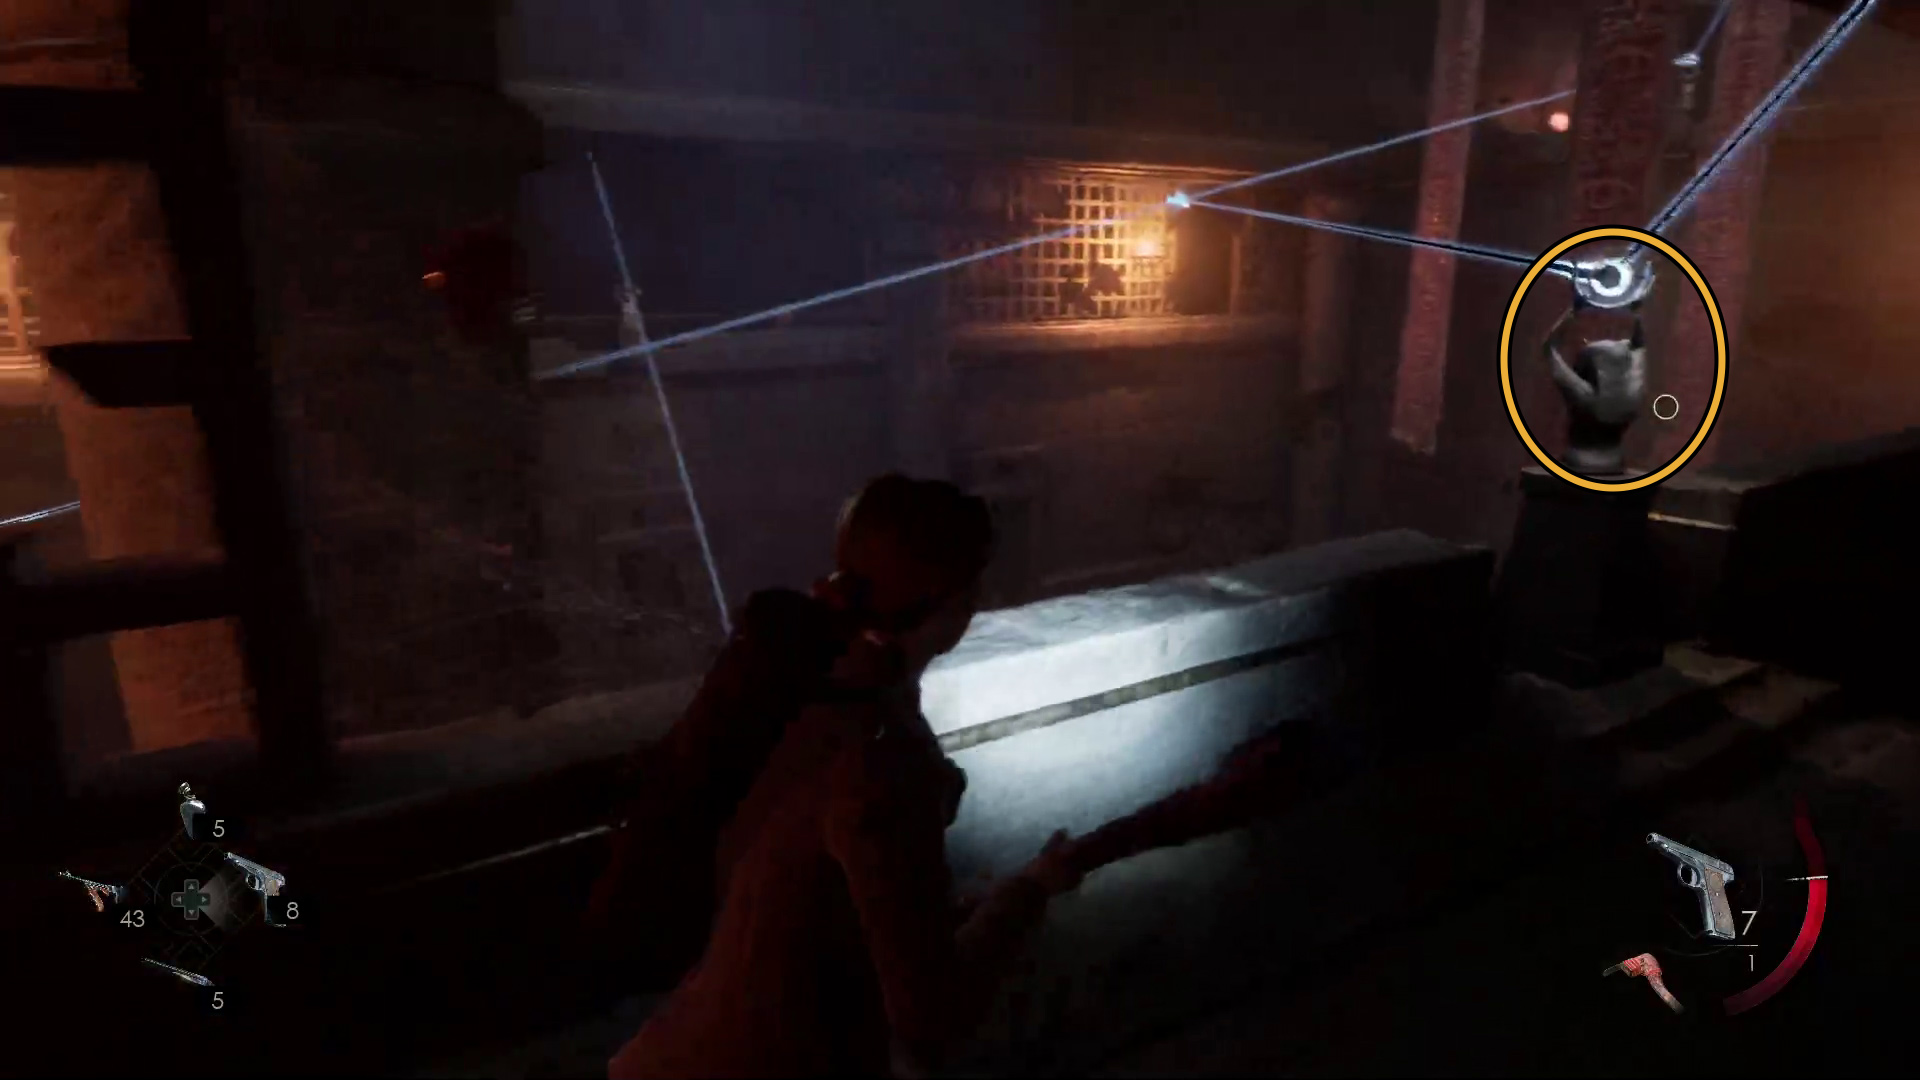
You’re going to need to use all three statues to activate the three blue gems on the crown of the large statue that stands in the main room. If you’ve been following the walkthrough, you’ll already be near the first one. Interact with it (Image 1) and aim the light beam at the left-most gem on the statue’s crown (Image 2).
Image 1Image 2
From the statue, go right and down the hall, then take your first left up the stairs to the platform with th second statue (Image 3). Interact with it and aim the light beam at the center blue gem on the statue’s crown (Image 4).
Image 3Image 4
From the second statue, turn around and go down the stairs to the left, then take another left and continue forward to the third and final statue (Image 5). Interact with it, and place The Underworld lens into the statue. Then interact with it again, and aim the beam of light at the right-most blue gem on the statue’s crown (Image 6).
Image 5Image 6
From this statue, go right, and go through the doorway on the right just ahead. Continue up the stairs and squeeze through the small hole, then take the next left and enter the crown (Image 7). Interact with the crown’s lens, and aim the beam of light at the glowing blue circle on the floor constellation (Image 8).
Image 7Image 8
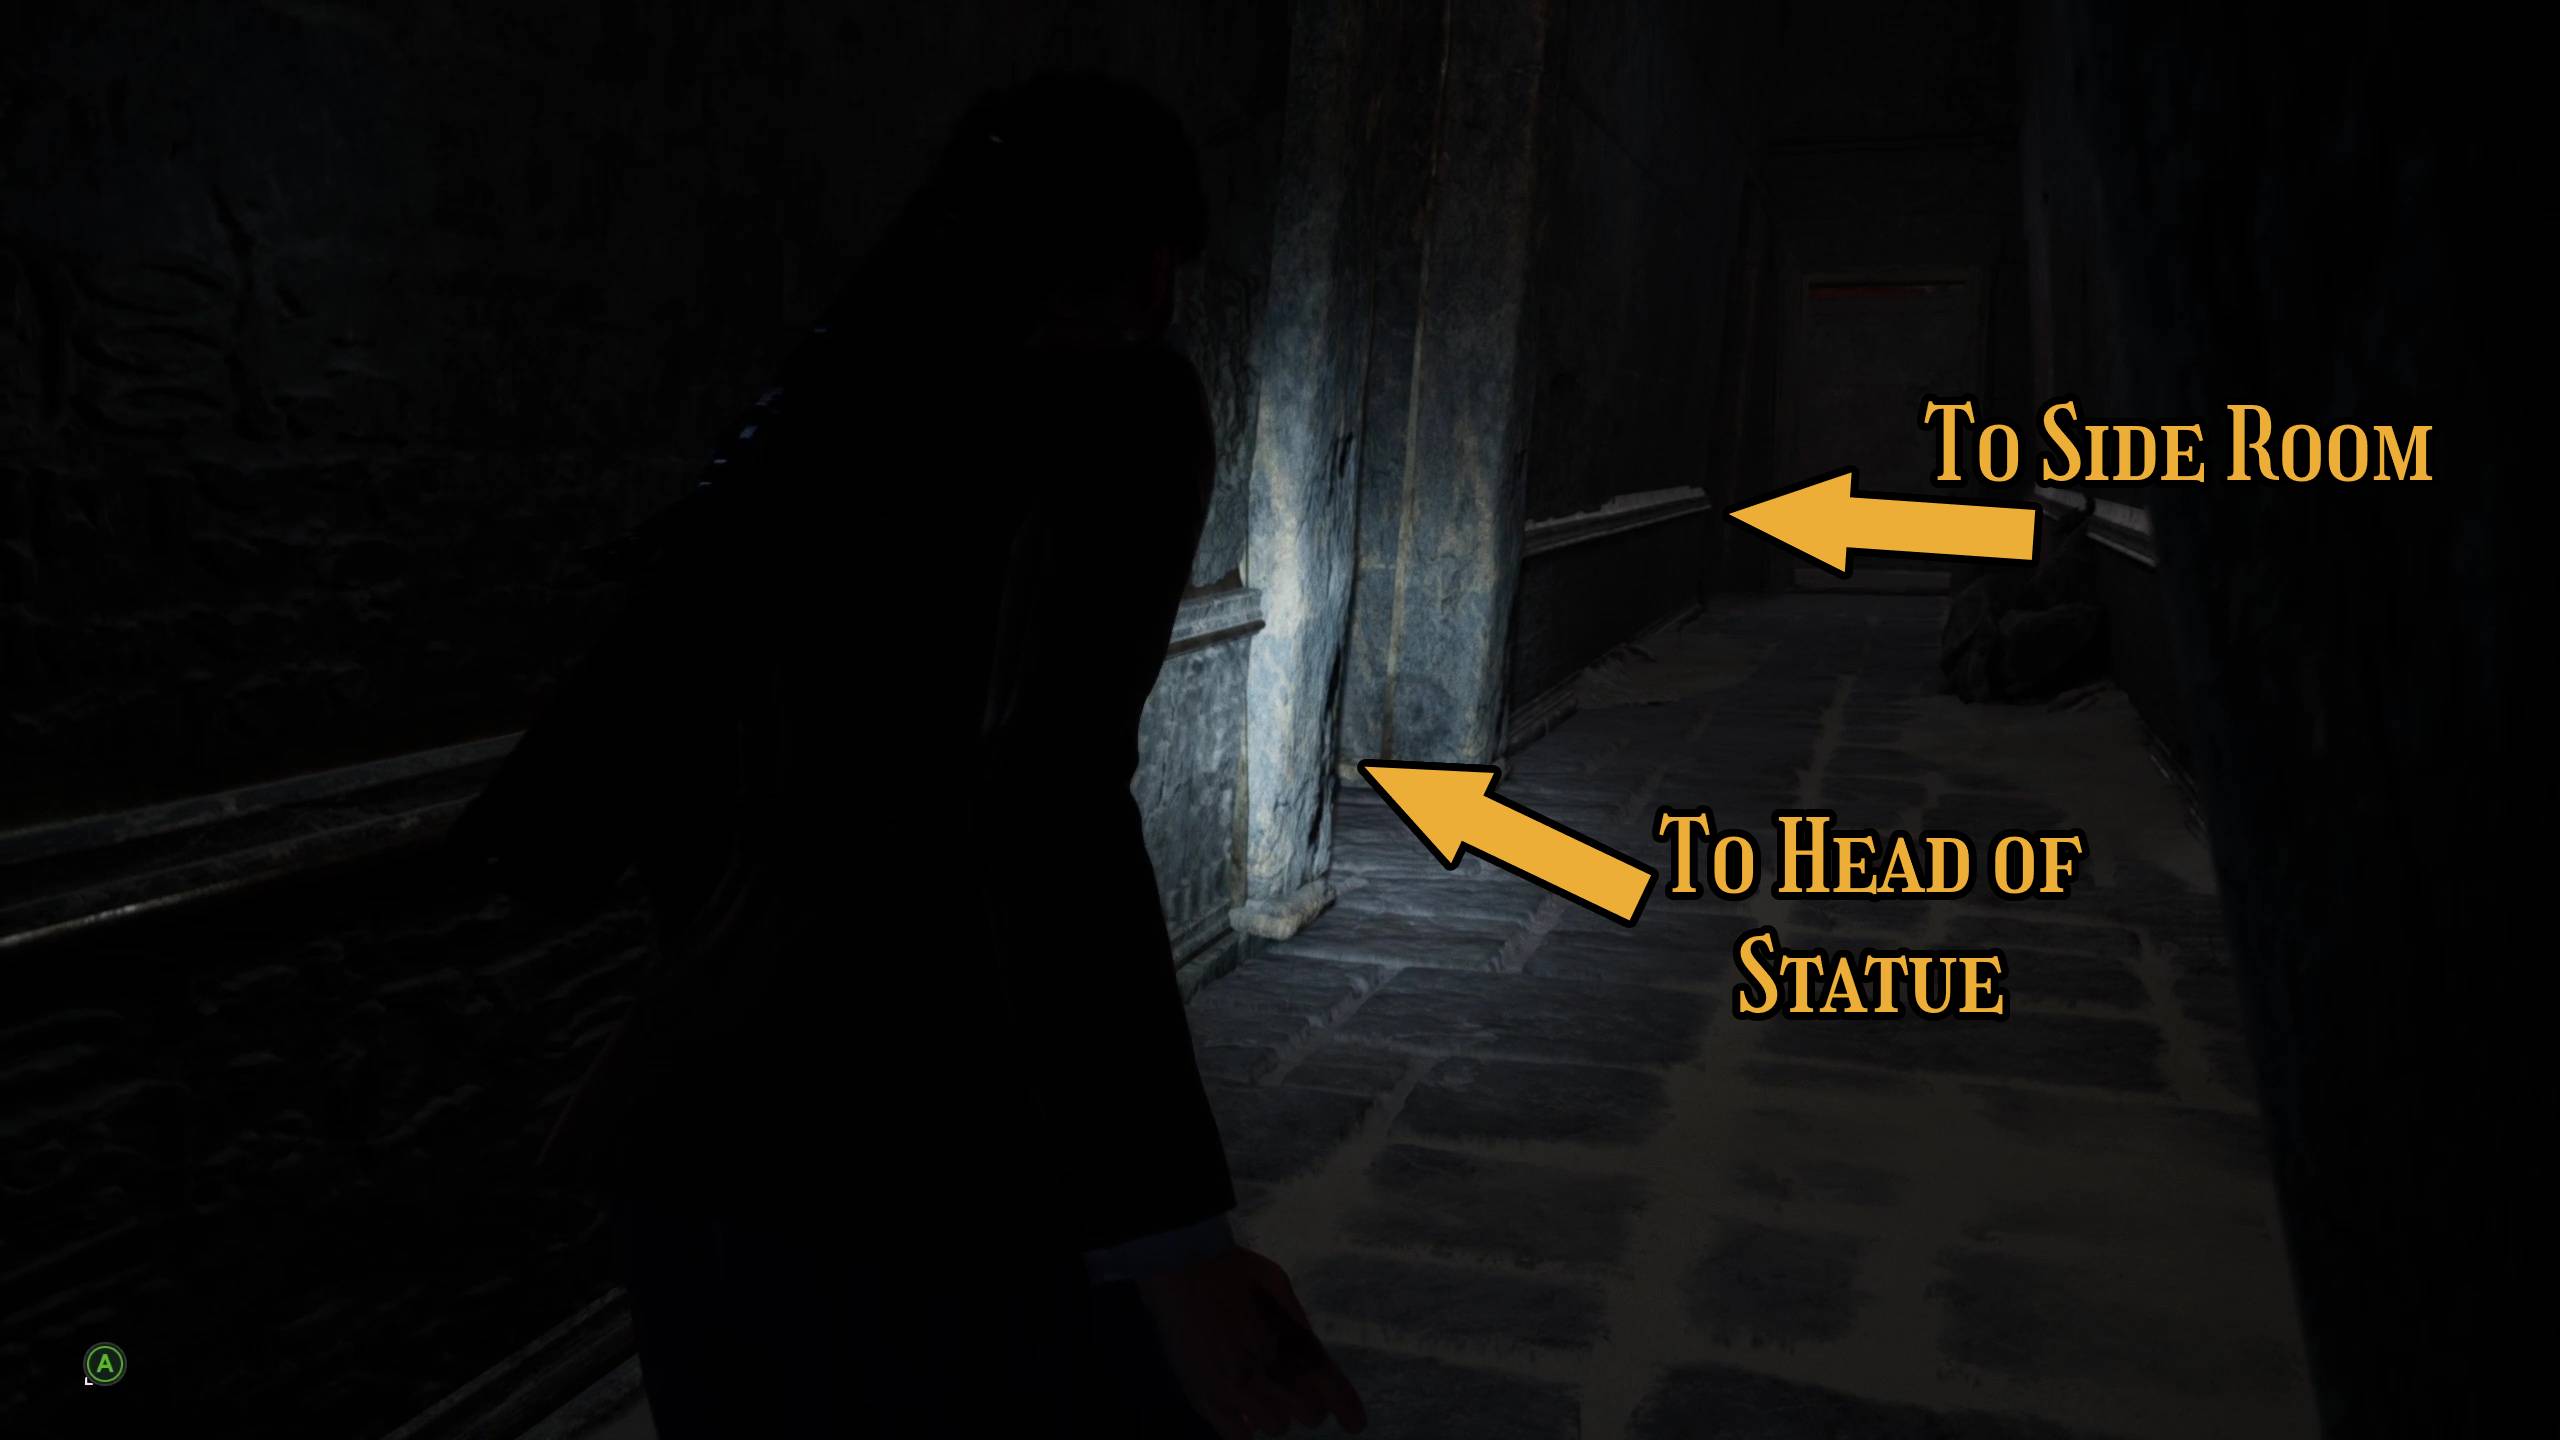
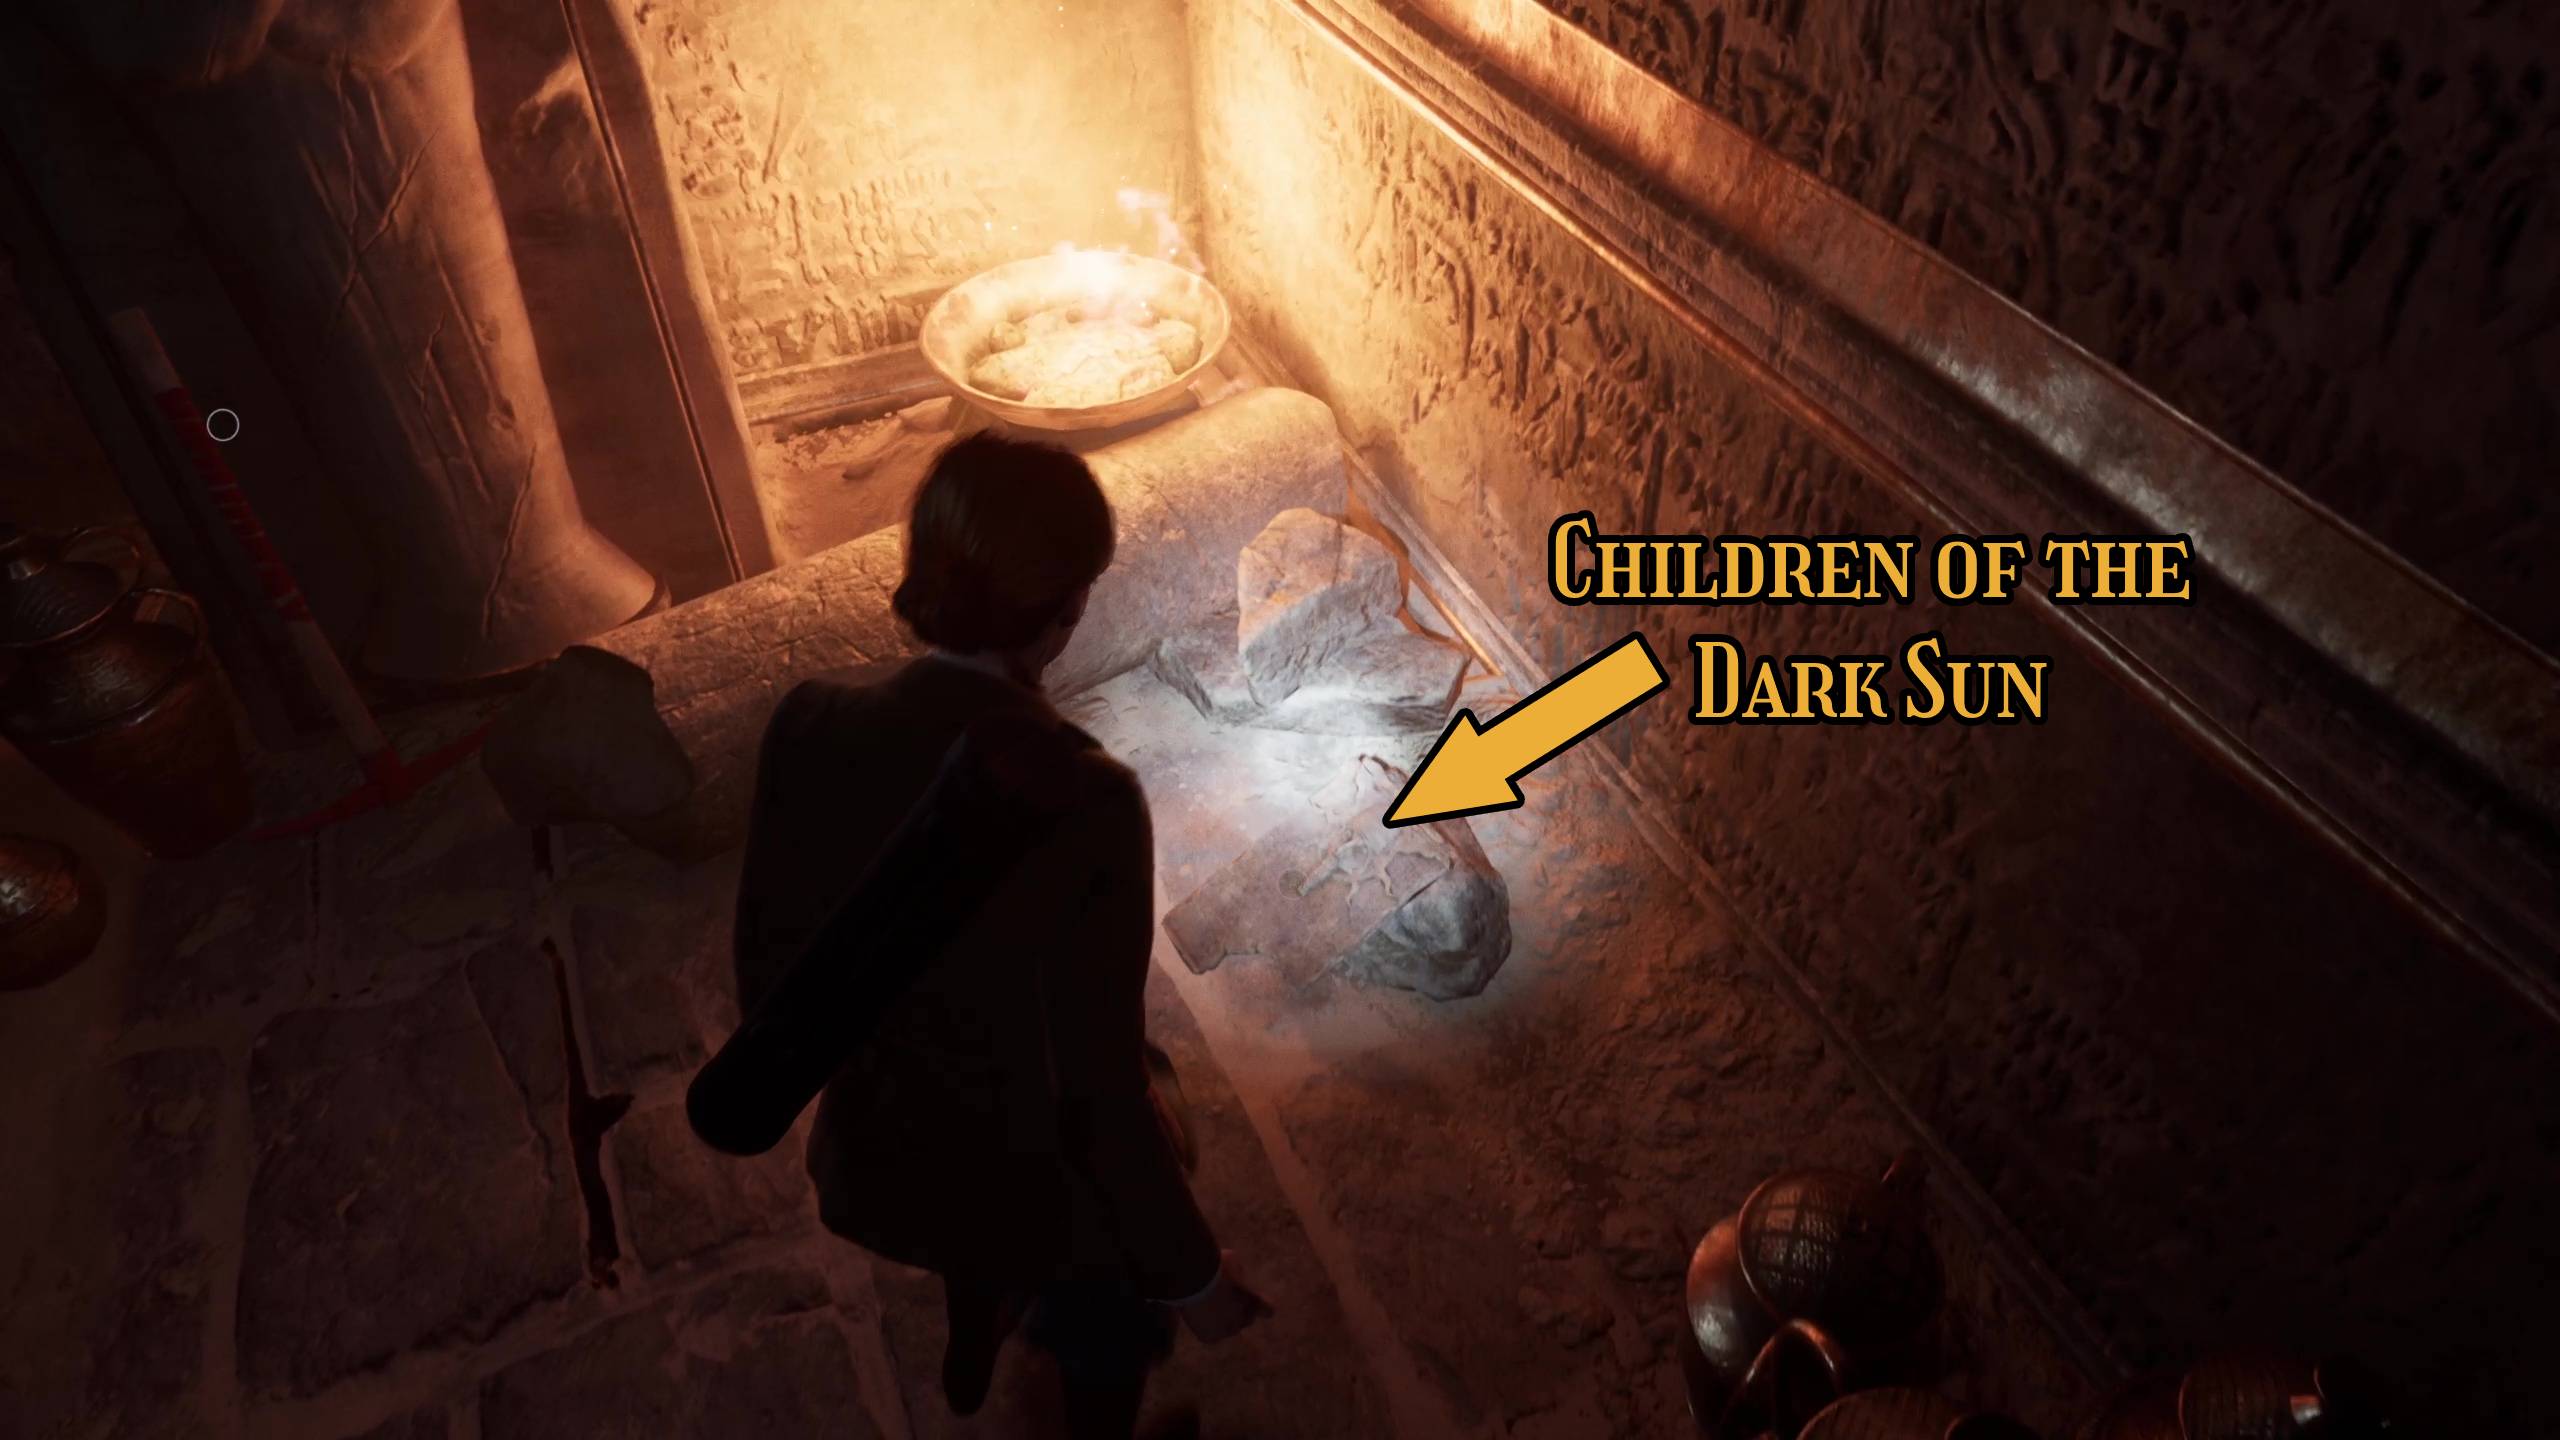
Once you solve the puzzle, the relevant section of the floor in the main room will open, and you’ll need to make your way back down to the ground floor. But before you do that, make sure to leave the statue crown and turn left. The corridor there has an easy-to-miss side room (Image 54) where you’ll find the Children of the Dark Sun Lagniappe (Image 55).
Image 54Image 55
From the statue crown, turn around and then take a right, squeezing through the small hole once again. Go down the stairs, and continue past the small statue. The door on your left will close when you get near, and a few flying enemies will appear. Take ’em out and continue forward, up the stairs on the right, then down the stairs across the platform — there will be an enemy at the bottom, so watch out.
Past the enemy, go through the doorway on the left (Image 56) and keep going down and forward. There is an enemy to the left just beyond the doorway at the end of the next chamber (Image 57), so draw them out, eliminate them, then continue forward and down the next set of stairs.
Image 56Image 57
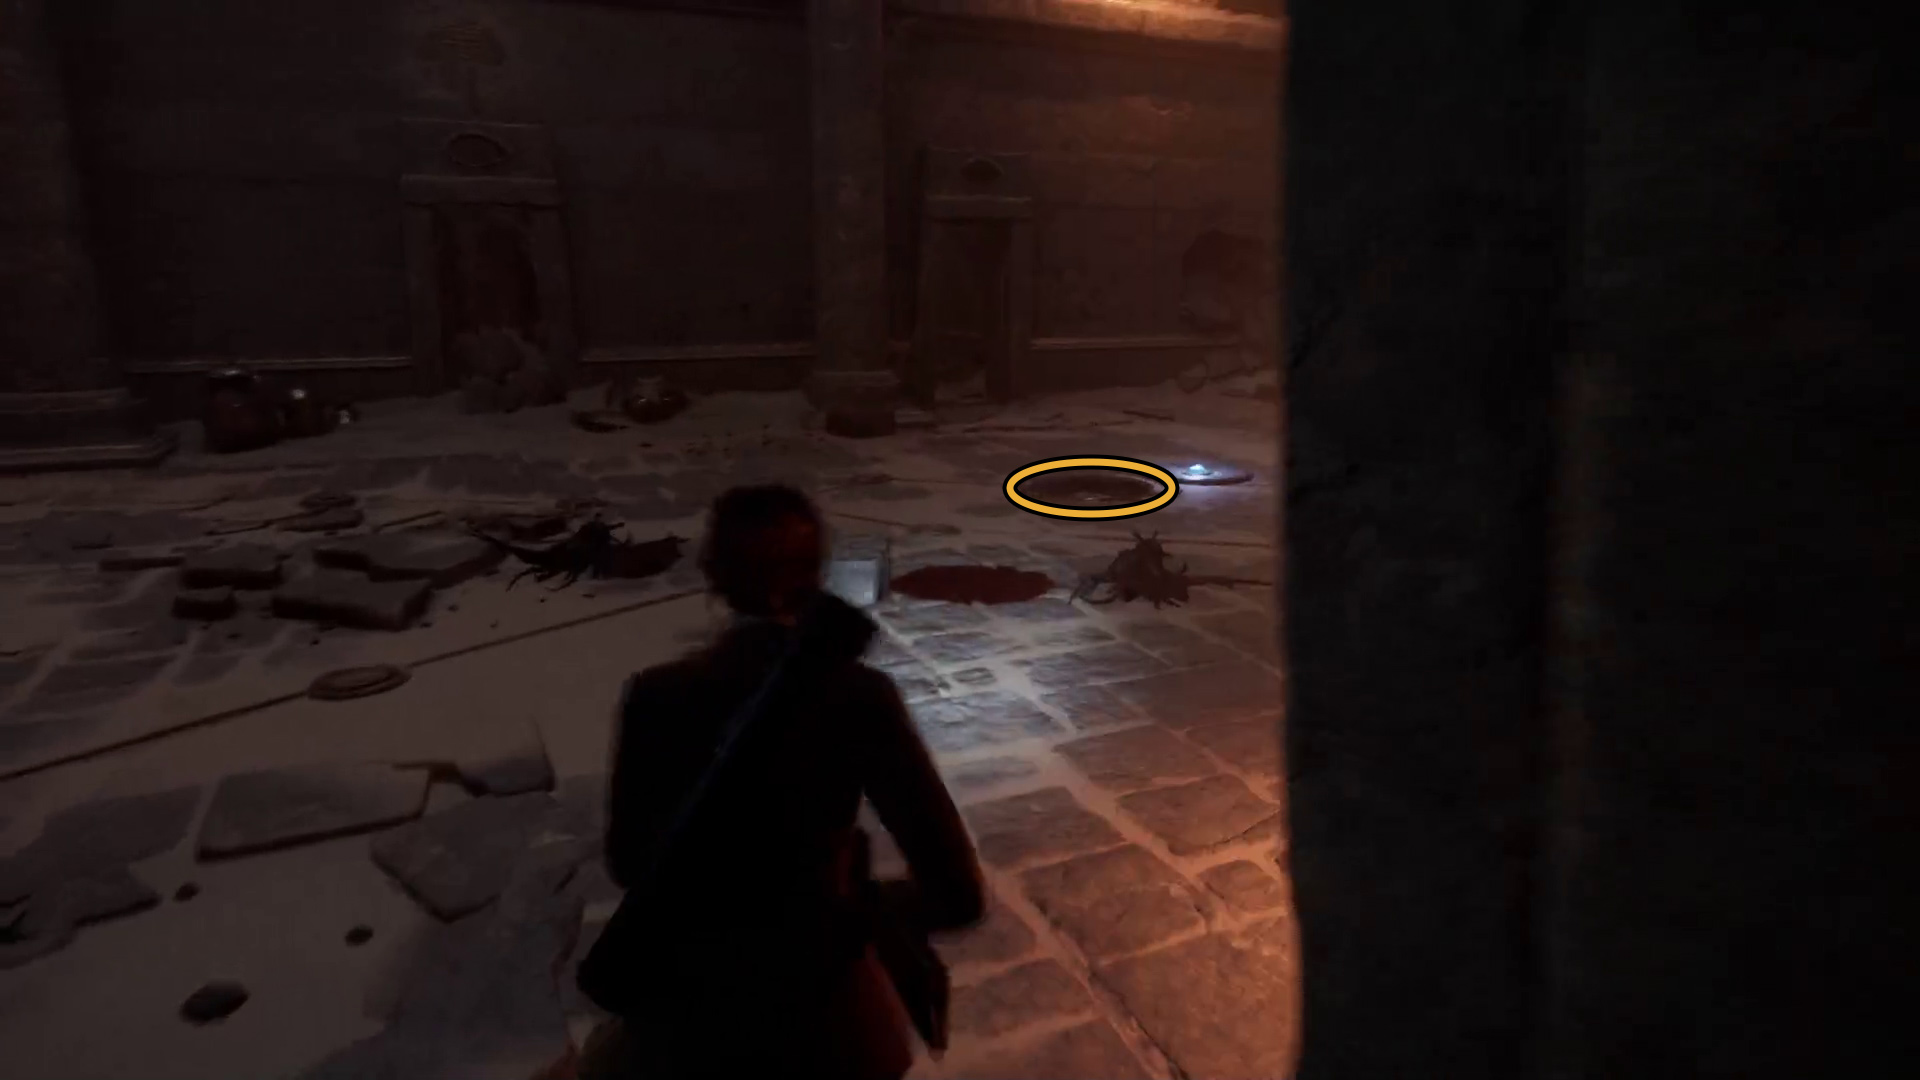
There’s only one way forward, so keep moving forward, past the statue and through the doorway, then through the next room and up the stairs. You’ll soon reach the main room — head to the exposed hole in the floor and interact with the box there to start a cutscene and end the chapter!
Unabashed FromSoftware fanboy still learning to take his time with games (and everything else, really). The time he doesn't spend on games is spent on music, books, or occasionally going outside.