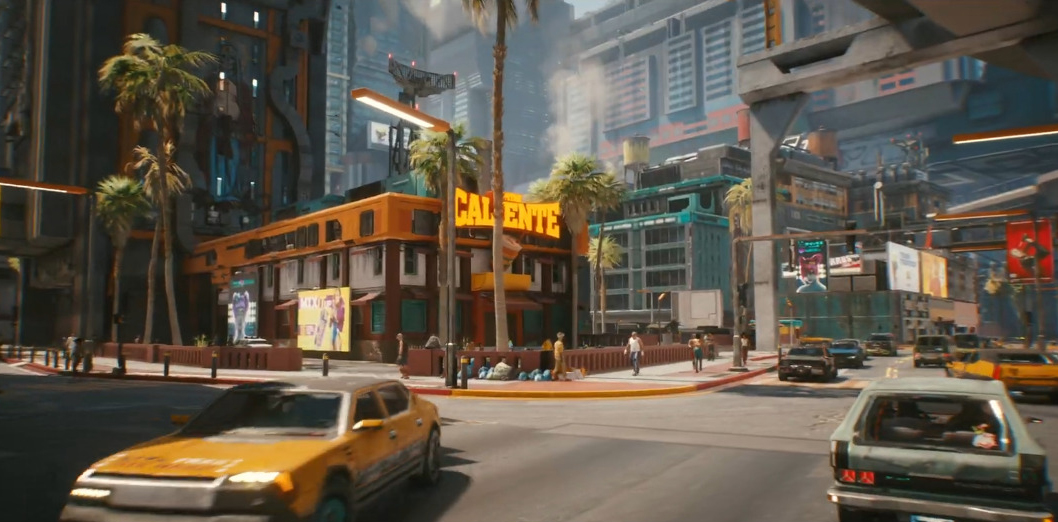
An open-world RPG game or not, Cyberpunk 2077 can certainly be proud of the scale and density of its setting. Night City comes with an impressive map that features anything from unexpected encounters on the streets, to locations with engaging side quests, to many jobs you can do for the police or local “fixers,” to a variety of services and food vendors. Indeed, sometimes it’s more interesting to stroll through a certain part of the city rather than fast travel or drive a car to your destination.
And yet, for the most part, this is the explanation that the game itself leaves us with:
Which isn’t much to work with when your journal, your global map, and your mini-map are all packed with icons, current quests, potential quests, and something you have just stumbled upon and you just really have no idea. What do all of these icons mean? How is The Danger Level determined? What’s the deal with optional non-lethal or stealthy approaches? Well, this is why we prepared this guide for you! Here we will do our best to answer all of these questions and sprinkle a few tips on how to approach all of these different quest types.
The Cyberpunk 2077 map markers are:
Main Job
Side Job
Fixer
Undiscovered
SOS: Merc Needed
Thievery
Agent Saboteur
Gun for Hire
Search And Recover
Special Delivery
Assault in Progress
Reported Crime
Suspected Organized Crime Activity
Tarot Card
Clothing
Ripperdoc
Netrunner
Weapon Shop
Melee Weapon Vendor
Medpoint
Food
Bar
Joytoy
Junk Shop
We will be breaking the guide into four categories: Quests, Services & Venues, and Activities to help you navigate Cyberpunk 2077‘s massive map marker list.
Obviously, if you want to concern yourself with story, action, leveling, Street Cred, and valuable loot, you can look to the first category, Quests, to see all of the large and small quest types offered by the game.
The second category, Services & Venues, is all about weapon and clothing stores, cyberware, consumables, and junk items.
Finally, you will encounter a few niche activities and discoverables within the Night City. While most of them are tracked as Side Jobs, we decided to single them out and discuss them in detail in Activities section.
Let’s take a look at what Night City has to offer!
1. Cyberpunk2077 Quests: Jobs and Gigs
Of course, this section represents the central part of your Cyberpunk 2077 experience. You will spend most of your time with the main questline (Main Jobs) and major side quests (Side Jobs). This is where the game truly shines and offers the best way to immerse yourself in the setting.
This is also where you will be getting your Street Cred, your XP, your eddies (money), and your loot from. The city’s Districts will gradually open to you as you complete Main Jobs and as your character becomes more capable, and in every part of the city you will find more Side Jobs, Gigs (we call them Fixer Gigs in the guide), and NCPD Scanner Hustles.
We will discuss all of these quest types (and many, many quest sub-types) below, including what to expect, how to approach these quests, as well as some additional tips or tricks to help you finish these more efficiently and get higher rewards.
This category of map markers includes:
Main Job
These are your main questline markers. The handcrafted main story with plenty of action sequences and dramatic situations is definitely one of the best aspects of Cyberpunk 2077.
While you can definitely acquire a tunnel vision for the main storyline, your experience can be significantly enhanced by spending some time exploring the Night City, completing some jobs for fixers (see “Fixer Gigs”), jumping in on the action you see around you (see “NCPD Scanner Hustles”), and helping out interesting characters (see “Side Jobs”).
Completing Major Side Jobs could affect some of the scenes you see in your main questline, or even unlock additional ending paths for you to try out.
Regardless, if you are playing Cyberpunk 2077 for the first time, you definitely don’t want to miss out on the main questline and the unique experience it offers.
Little bit of advice: while most of the situations you will encounter will not be heavily affected by the choices you make, there are certainly moments when siding with one character over another, or rescuing someone important amidst the chaos will come with interesting consequences and additional interactions later on.
This category of map markers includes:
Side Job
We will distinguish between Major Side Jobs and other, Minor Side Jobs.
Major Side Jobs
Major Side Jobs feature… well, a Major Character — someone with an involved story, a recurring face, someone you can romance, or even someone who can eventually leave you with an alternative ending path.
Think, for example, how recurring of a character Delamain is — all of the Side Jobs you complete for Delamain will build up to a unique situation where your choice will affect how you interact with this character going forward.
Or, take Panam and her multi-chapter story: completing it successfully will unlock an alternative ending path for your character when the time comes to make that choice. Then, there is the multi-branched Johnny Silverhand Side Job storyline — we discuss it in detail in this guide.
All of these are Major Side Jobs, and after getting involved with them you probably won’t be looking for Side Job icons on your map to access the next chapter, but instead waiting for them to text or call you with your next objective.
Little bit of advice: With many of these Major Side Jobs you want to be paying attention to some of the dialogue lines you pick (do you want to be acting flirty?), additional objectives(if a character asks you to call them with updates — you might want to do that), and decisions you make (should you kill the opponent you confronted?). While some of these decisions will only affect some dialogue lines, others might lock you out of the rest of the story.
Technically, this category also includes mini-game/activity quests, such as racing and bare-knuckle sparring. However, we decided to cover them in more detail in a separate section, “Activities,” later in this guide.
Minor Side Jobs
Then, there are Minor Side Jobs. Don’t underestimate this category — most of these jobs still come with detailed, quirky stories. Usually these quests are much shorter, but they might still come with a follow-up call or a text.
Night City has a lot to offer in terms of interesting people and interesting situations: a man with a flaming crotch, a vintage music stall with an owner who will quiz you, a depressed cop, a vending machine with a sentient AI, a Zen monk who guides you through a meditation, a man selling rigged braindance recordings, and many others.
Unlike Fixer Gigs, which also occasionally come with a deeper story, Minor Side Jobs are independent events in the Night City (or the Badlands, of course), and get you directly in touch with people you will be assisting or completing a job for, sometimes with unexpected consequences.
They definitely come with a unique flavor and are worth looking into, providing a memorable experience for your playthrough.
This category of map markers includes:
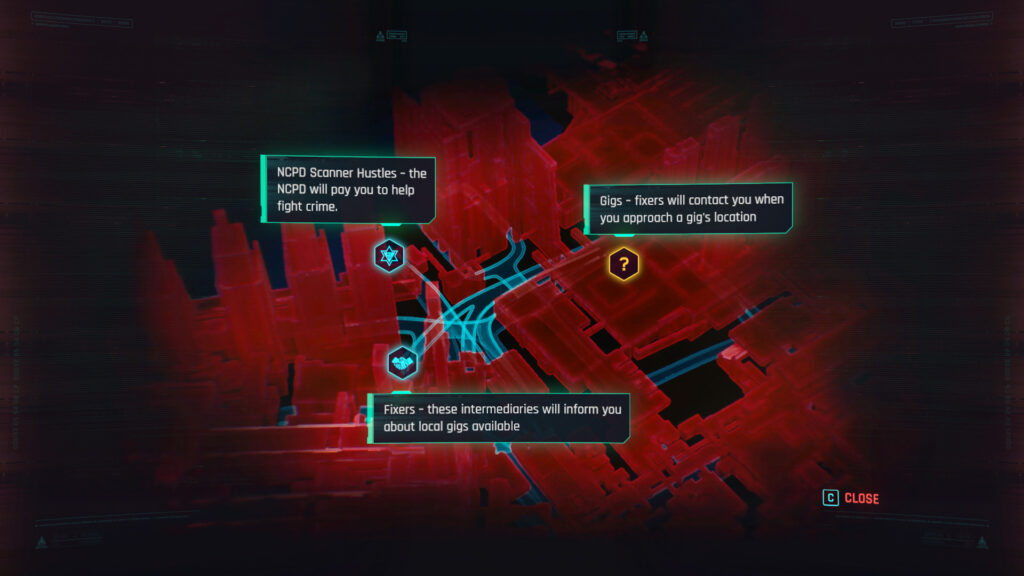
Fixer
CyberPsycho Sighting
Undiscovered
SOS: Merc Needed
Thievery
Agent Saboteur
Search and Recover
Gun for Hire
Special Delivery
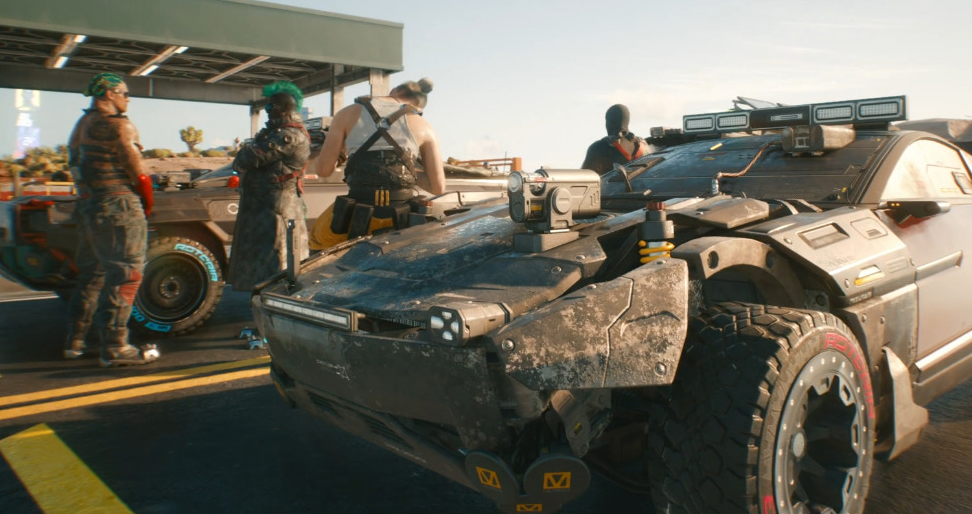
Fixer Gigs are jobs you get from fixers in Night City. In this section you will probably be most familiar with the “Undiscovered” icon (), and that’s because every gig will appear as this icon on your map before you approach the location. When you do, you will receive a call, a text, or both from your local fixer with details of the job, should you decide to pursue it.
Higher-Level Fixer Gigs
Gigs in each district will come in four successive tiers (coming with additional challenges and greater rewards).
In all districts you can immediately gain access to First Tier of Fixer Gigs. To unlock the next three tiers you need to meet a specific Street Cred level requirement, which varies from a district to district. Watson comes with lowest requirements, while Santo Domingo can require up to 50 Street Cred for its Fourth Tier gigs.
Street Cred to unlock higher-tier Fixer Gigs:
Watson – Second Tier: 4, Third Tier: 8, Fourth Tier: 15.
City Center – Second Tier: 9, Third Tier: 18, Fourth Tier: 32.
Westbrook – Second Tier: 10, Third Tier: 20, Fourth Tier: 35.
Pacifica – Second Tier: 12, Third Tier: 32, Fourth Tier: 42.
Heywood – Second Tier: 13, Third Tier: 22, Fourth Tier: 30.
Santo Domingo – Second Tier: 21, Third Tier: 38, Fourth Tier: 50.
(If you are not getting a Gig where you think there should be one, try to approach the location before or after 8 PM, as that’s an important time trigger for some of them.)
Stealthy, Lethal, and Non-Lethal Resolutions
You will notice that in many cases the fixer will be specific about how they want you to complete the gig.
Non-Lethal. Does the target need to be taken down or convinced to do something? Prepare to do a non-lethal approach to claim best rewards. Sometimes this means picking better dialogue options, sometimes it means taking the target down and carry their body to a vehicle. In the last scenario you might need to do some fighting while you transport the body.
Lethal. On the opposite hand, sometimes you will be directly asked to assassinate your target. However, that doesn’t mean that you can’t spare them if there is an option for them to permanently leave Night City.
Stealthy. Sometimes you will be asked to infiltrate an area while staying undetected. This bonus objective will also come with best rewards for completion. One of the quickest ways to complete this kind of a task is simply dart between the unsuspecting guards, complete your objective, and re-trace your steps (or take a shortcut out, if that’s an option). For extra-stealthy builds, this will probably be the easiest job type they can get.
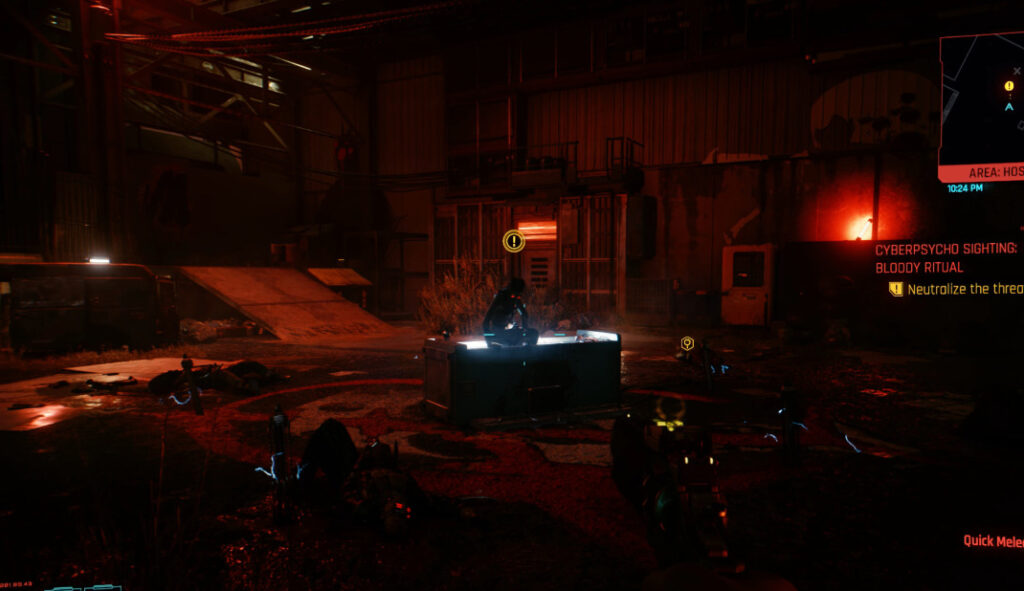
CyberPsycho Sightings
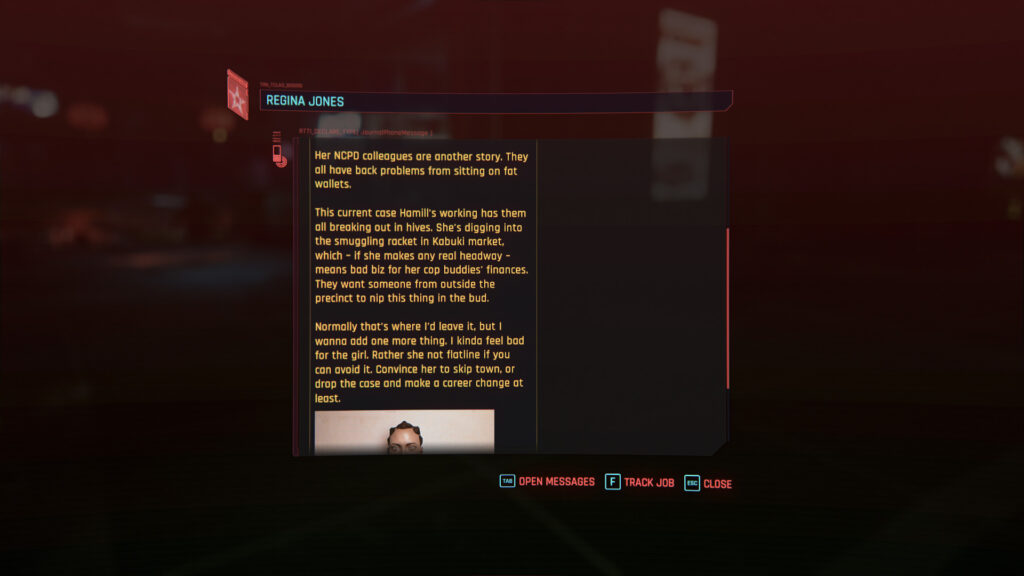
Unlike other Fixer Gigs, CyberPsycho sightings will appear as Side Jobs on your map while inactive. Still, they will be tracked as Gigs in your Journal after being discovered. You will originally be told about CyberPsychos by your first fixer, Regina Jones, who will then become the person you will report to on your progress — that’s the reason we included it in this category.
There are total of 17 CyberPsychos in the NightCity. Completing all of them will unlock “I Am The Law” achievement. Two of your targets will have special requirements (one will need you to complete the main story job, “Transmission,” and the other only spawns after 8 PM), but the rest can be discovered early on in the game.
There are a few things that are common for all CyberPsycho encounters. First of all, CyberPsychos will be tougher enemies with big health bars, but will have some weaknesses you can exploit — quickhacks tend to be helpful, with the exception of the Detonate Grenade (they don’t usually carry any).
Second, you will often be looking for a shard or an email in the area that will clue you in on the events that led to the situation, which you will report to Regina via a text message.
Third, Regina will be happier if you take your targets down non-lethally, and System Reset quickhack could be quite helpful with that. However, it doesn’t seem to affect anything mechanics-wise.
Community Note: as of the time of writing this guide, a few players have been struggling to take down their targets in a non-lethal way, even with blunt weapons equipped. When reporting to Regina, V acts as if they killed the CyberPsycho. Uploading the non-lethal neutralizing Quickhack, System Reset, seems to have solved the issue for some of the players.
This category of map markers includes:
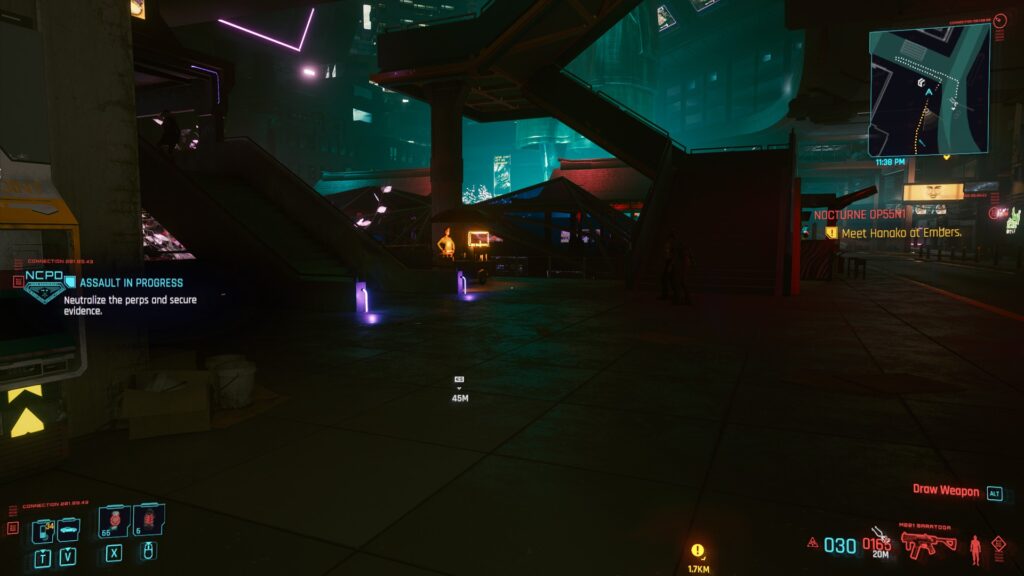
Assault in Progress
Reported Crime
Suspected Organized Crime Activity
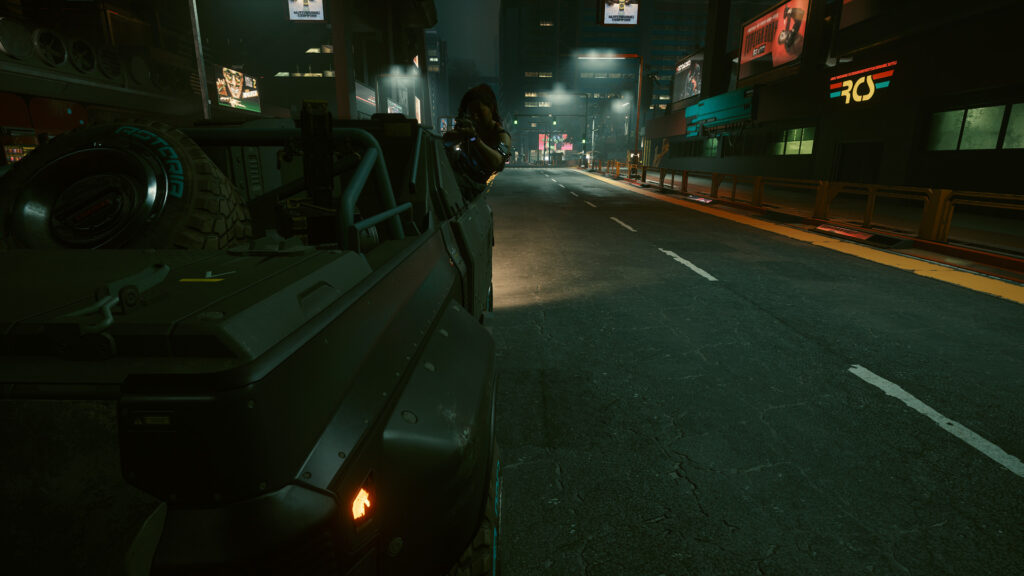
Unlike the Fixer Gigs, these are the very quick clean-up jobs you will be doing for NCPD. While they might feel like they spawn randomly, there is actually a limited number of them, each with a fixed location. Once you complete an event, it will not re-spawn (they count towards your District completion trophies).
If you are going for completion, you might want to pursue these encounters after completing the main story, since all of them will appear on your map when you return for “One more Gig.”
These missions are, essentially, very quick jobs that ask you to neutralize all of the targets in one small location (for example, a parking lot, an alley, or a stretch of a balcony).
Don’t be surprised: sometimes there are multiple NCPD Scanner Hustles spawned in the same spot.
If you care to get a small clue on what happened, you can usually locate a shard, pick up a message, or find an email that will give you some clues (although they usually are short and cryptic). Often picking these up (or some other item) is required to complete the mission.
Occasionally, the item itself might be the sole objective, and enemies do not need to be engaged.
Finally, pay attention to The Danger Level earlier in the game — it’s calculated by comparing you level to the (undisclosed) recommended one for the hustle. Unless you want a challenge or a stealth mission, wait until later before you pursue the more challenging hustles.
Little piece of advice: dropping an EMP or using AoE Quickhacks is often a good idea for speeding up your assault, since with these hustles enemies tend to be bunched together in a smaller location.
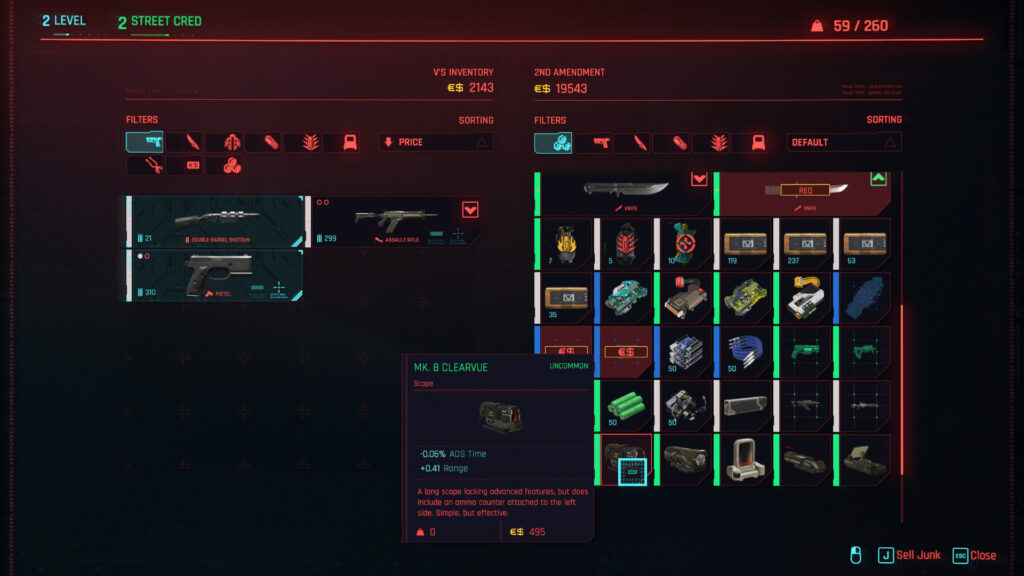
2. Cyberpunk 2077 Services & Venues
In this category we will discuss places you can visit to refill your stock, get your equipment, cyberware, crafting blueprints, quickhacks, or to sell extra things from your inventory and get some eddies.
There is an easy way to distinguish between various Quests (see previous category) and Services on the map: all of service map markers are white. That’s not to say that you can’t occasionally pick up a quest at a diner, of course! Pay attention to activities happening inside some of the venues.
This category of map markers includes:
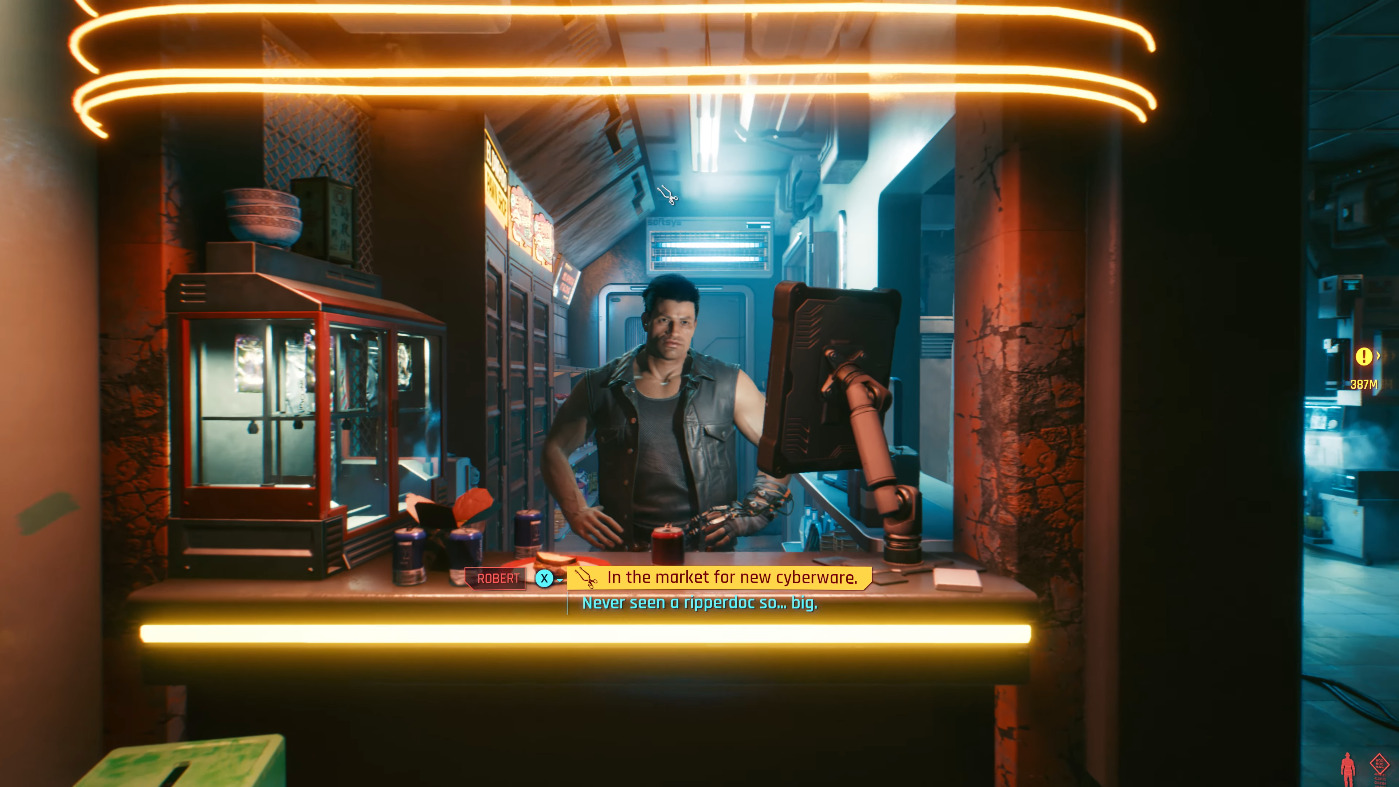
Ripperdoc
These surgeons specialize in selling and installing Cyberware implants. When it comes to Cyberware that comes with mod slots (Ocular System and Arms, for example) you will be able to swap mods yourself, but any installation operations have to happen at a Ripperdoc clinic.
Cyberware is an expensive investment, but its unique bonuses (things like time dilation, full immunity against Status Effects, double jumping) are definitely worth looking into, even if you don’t care about major percentage increases offered by some of the categories.
Each Ripperdoc will have a unique inventory and offer higher ranks in some types of Cyberware over others. You should definitely note the locations of different clinics as you explore the city.
Remember to pay off your debt to Viktor, too, to get access to stuff like the highest-grade Kiroshi Optics!
This category of map markers includes:
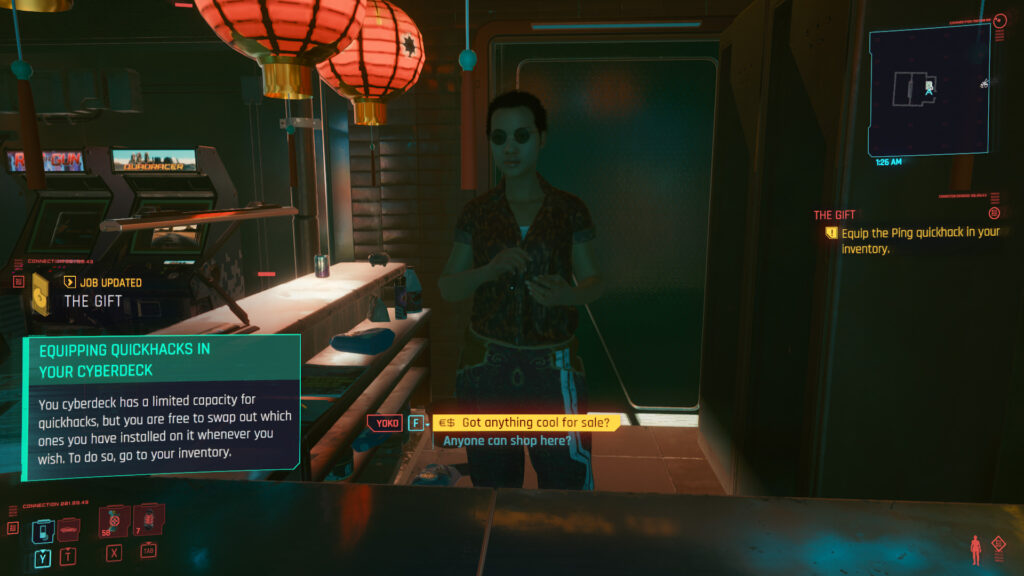
Netrunner
Medpoint
Netrunner vendors will primarily supply quickhacks to equip on your Cyberdecks — you still have to go to Ripperdocs to get Cyberdecks themselves installed in your Operating System Cyberware slot.
Medpoints will sell inhaler consumables (think MaxDoc and Boosters) and crafting specs for such items. They are a good way to restock or, if you craft with your character, a good way to upgrade the kind of items you can produce for yourself.
This category of map markers includes:
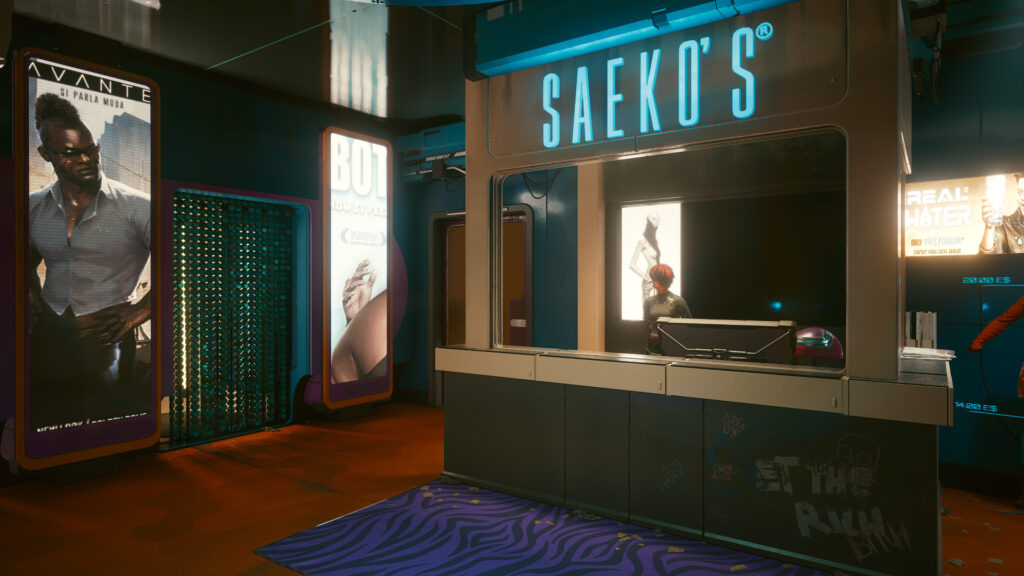
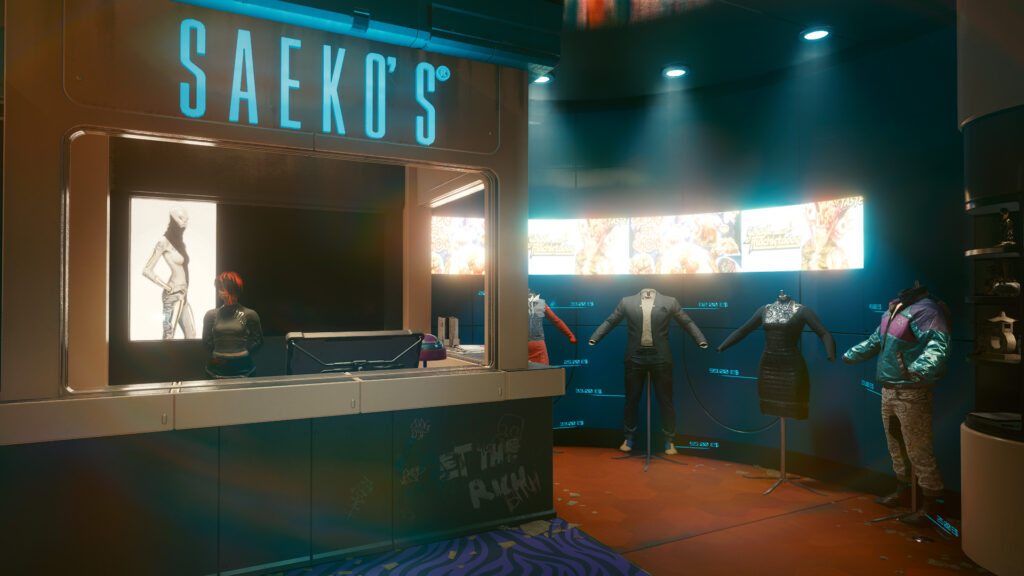
Clothing
Some of these storefronts might look quite stylish, but clothing vendor services go beyond the looks: these stores also sell clothing with good armor ratings, clothing mods, and clothing crafting blueprints. Of course, you can also pick up a unique piece of clothing to enjoy how your character looks in the mirrors and the inventory screen.
Try to use these locations to bring up the Armor score of the clothing categories that are lagging behind on your character (when was the last time you checked your headwear, hmm?) and to get higher-grade mods: Armadillo, for example.
This category of map markers includes:
Weapon Shop
Melee Weapon Vendor
This category is mostly self-explanatory (at least because of the accompanying icons). Keep in mind that while Weapon Shops sell a good variety of guns, explosives, and ranged weapon mods (with an occasional melee weapon in stock), you should visit Melee Weapon Vendors to get a bigger inventory of melee weapons, melee weapon mods, and melee weapon crafting specs.
This category of map markers includes:
Drop Point
Junk Shop
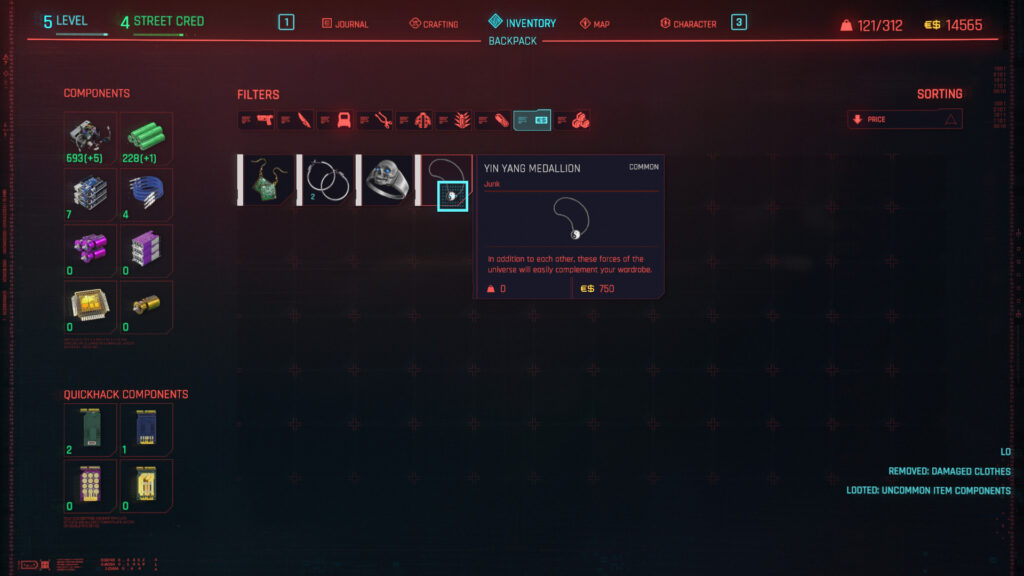
You will be introduced to Drop Points early into the game — they will be the most convenient way for you to sell off items from your inventory. We also suggest that you sell your expensive Junk Items here as well — beware of the Crafting Perk, Scrapper, that disassembles your junk items automatically. They can cost as much as 750 eddies each, but give the same crafting materials as very cheap materials of the same rank!
Junk Shops are often quirky places where junk items are sold. It’s a fair resource of items for dismantling, especially if you need low-grade crafting components.
This category of map markers includes:
Food
Bar
You will have a few important main story encounters in bars, but otherwise you will probably remember them and food vendors for selling food consumables (mildly useful, not as much as inhaler charges) and drinks that produce a wobbly visual effect on the screen and trigger a couple temporary negative effects.
On a somewhat related note: some alcohol items you will see around are worth picking up to sell, however, especially early in the game. You won’t need to go to a bar to do so, of course — just visit a nearest Drop Point.
This category of map markers includes:
Joytoy
We discuss this category in our Romance guide! These come with a few mature cutscenes and provide no gameplay benefits (no quests either) for your character otherwise.
Both prostitute types (cheaper and expensive) can be found in Westbrook, Japantown, with the luxury type requiring a specific quest completion (Kerry’s questline, in particular).
3. Cyberpunk2077 Activities
And here’s our special little category: some interesting activities you can try out in Night City!
How about some racing and drama? Or, want to try your timing skills in some good ol’ bare-knuckle sparring? Learn more about the city’s locations and your main storyline by finding some neat tarot murals? Or, how about some casual or quite intense shooting ranges?
We will summarize all of these activities (as well as where to find them and some strategies) for you below — just open up a tab that interests you!
First, car racing! Thought racing terrain was just the Nomad thing? Not quite! With “The Beast in Me” you will get a chance to race not only in the Badlands, but both in quieter and more busy districts of Night City, with some shooting, sandstorms, and drama to spice things up.
During the questline you will get to know Claire (bartender lady at the Afterlife) and her story, and completing the quest might get one or two unique vehicles, depending on your choices. Also, this questline comes a good amount of Street Cred and eddies!
Wait for Claire to contact you sometime after “Double Life” (when you find out about Voodoo Boys) and offer you to join street racing as her driver. Meet in her garage shop in Arroyo during daytime or in Afterlife at night. Accept her offer to begin.
Here are the four races you will be participating in:
“The Beast in Me: City Center”;
“The Beast in Me: Badlands”;
“The Beast in Me: Santo Domingo”;
“The Beast in Me: The Big Race”;
(Optional) “Follow Sampson”.
And here are some tips from us:
Do not pay attention to combat and let Claire take care of it.
The direction you will need to follow will be marked by a luminous path: make sure to hit each holographic gate in order.
When a sandstorm begins during your Badlands race, slow down. Also take a balanced safety vs. speed approach with the bumps — keep to the dotted line.
When it comes to Sampson, the best outcome is to pursue him during the race — Claire will be much happier and this will affect your relationship with her positively (you will see her at Afterlife again).
During this sequence you can intervene and convince Claire to spare Sampson for the happiest outcome.
If you help Claire, she will give you her vehicle. If you spare Sampson’s life in addition to this (in the way described previously), he will also gift you his.
Winning the race will not get you any of the two vehicles and Claire will be unhappy with you in future encounters.
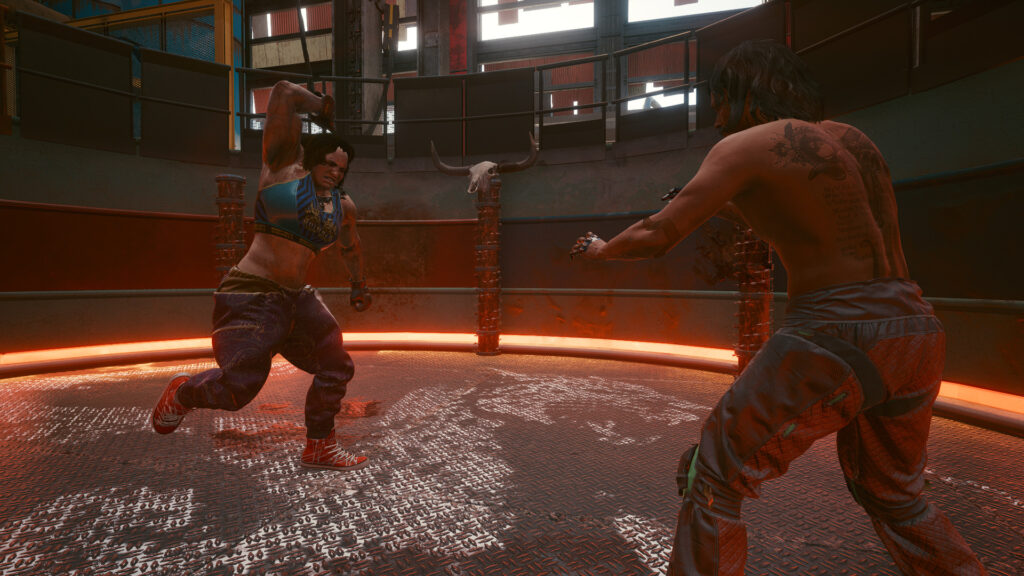
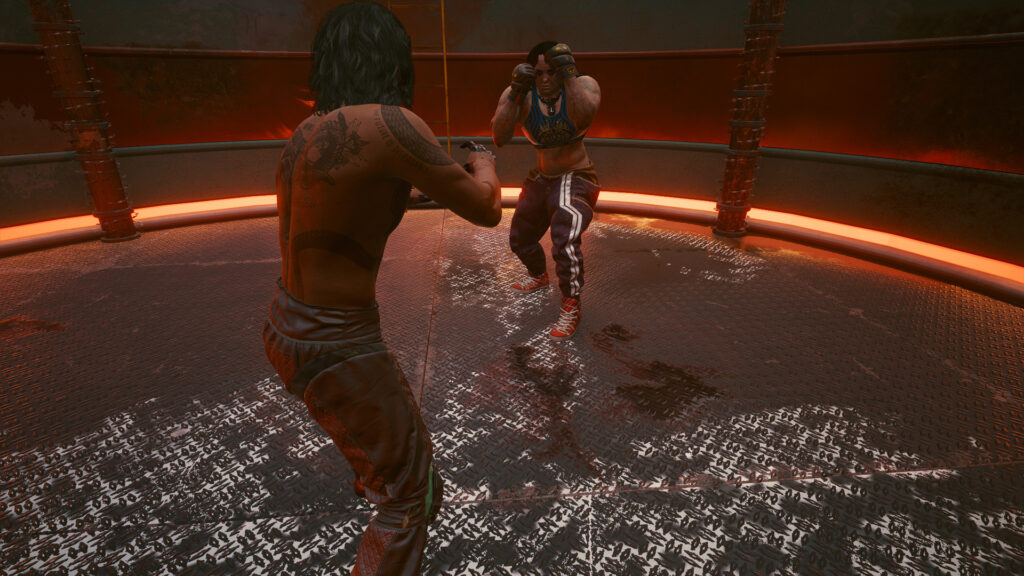
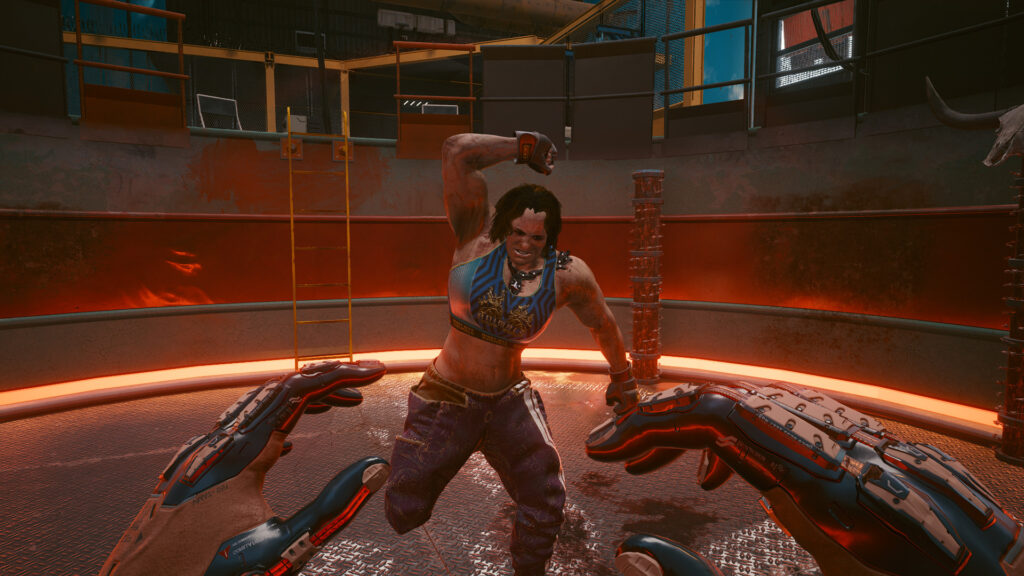
As soon as you rescue Sandra Dorsett from Scavengers with Jackie, right after your Lifepath Prologue, you will get a chance to spar an android opponent after you leave your apartment and explore the complex.
Coach Fred will call out to you, and if you win against the android and chat with Fred, he will offer to introduce you to the sparring community of Night City. This will start the Side Job questline, Beat on the Brat, where you will face opponents in five different stages (with an additional optional one).
These will be:
Champion of Kabuki (level 5);
Champion of Arroyo (level 22);
Champion of the Glen (level 28);
Champion of the Animals (level 30);
(Optional) Ticking Time Bomb (level 28);
Finale (level 35).
Struggling right off the start? You might need to employ extra tactics to gain an advantage: we have a separate guide on Champion of Kabuki. Of course, these tactics won’t work everywhere, so you might want to equip yourself with Gorilla Arms and maybe get a few Perk points in Street Brawler and Athletics.
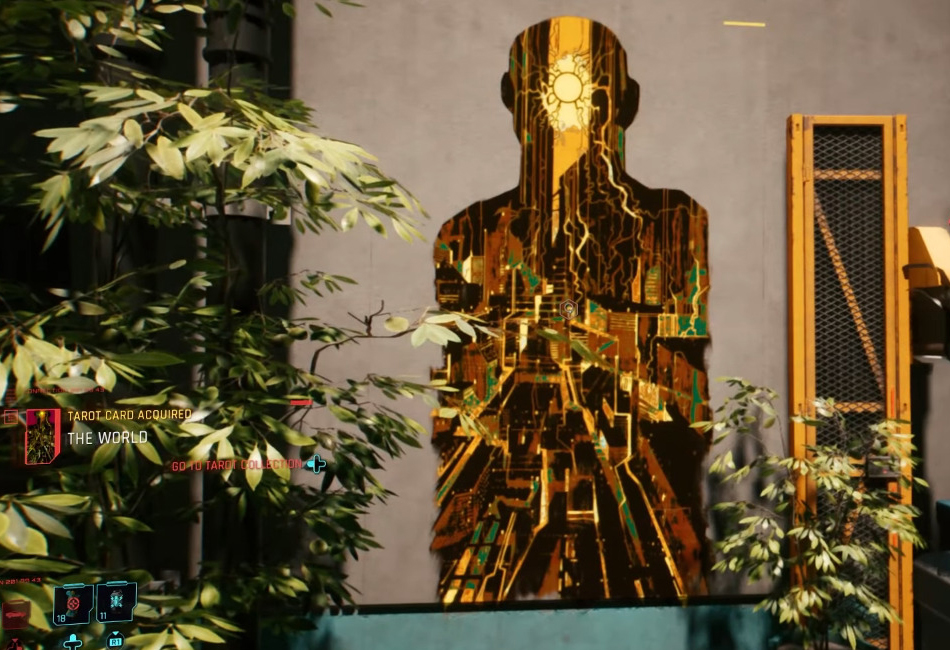
If you are all about Misty’s mysticisms, you will probably enjoy this one quite a bit. So, this questline — “Fool on the Hill” — involves you locating and scanning graffiti murals inside Night City that represent major arcanum tarot cards.
Symbolic Meanings
Thing is, Cyberpunk 2077 is taking this theme seriously, and the tarot murals you find will either relate to the location you discover, an element of the game’s storyline, or both!
Consider finding “The World” on the balcony that’s near Viktor’s clinic and Misty’s “Esoterica”: those of you who got to this point in the game will know what the related situation is. We won’t spoil it for you, but once you find it there — look up the full meaning of the card! (Google will pull it right up for you.)
If you are one of the people who explore the game’s setting through conversations recorded in emails, suicide notes, and personal journals, you can go ahead and look up meanings of some of the cards you find in your playthrough — note the upright and reversed meanings!
There are 22 cards you will be able to find in the game, 2 of which will be secret tarot cards that you will encounter during epilogue (“The Devil”/”Where is My Mind?” ending will have both). After finding all but these two you can visit Misty and listen to her reading of some of the cards you found — she will allude to the meaning behind the game’s various endings, in an abstract, mystical way. Very thematic!
Completion Achievement: “The Wandering Fool”
If you mostly care about the achievement, you only need to concern yourself with 20 of the cards — the secret/ending cards will not contribute towards the count. You will begin the quest as soon as you scan the first card and it is added to your inventory (the player community noticed that it might take a few minutes to get triggered).
After you have scanned all 20 of them, talk to Misty at “Esoterica,” near Viktor’s office (you will be able to track her location in your Journal). After speaking to her you will unlock “The Wandering Fool” achievement.
After the little playful shootout with River and his nephews during “Following the River,” you might be thinking: “man, this is the only time I get to shoot at targets in this game and it has to be an arcadey wild west video game where I am pressured to let some kids best me at it?”
Well, be troubled no more, eager shooter, for there are two opportunities in Cyberpunk 2077 where you can practice your skill at a timed shooting range, with some competition! Of course, depending on your build and level, these two challenges might be way too easy for you. Still, you can get an Epic Pistol, M-10AF Lexington, and an Iconic Smart Assault Rifle, “Divided We Stand,” from completing these — so you might as well have a little fun.
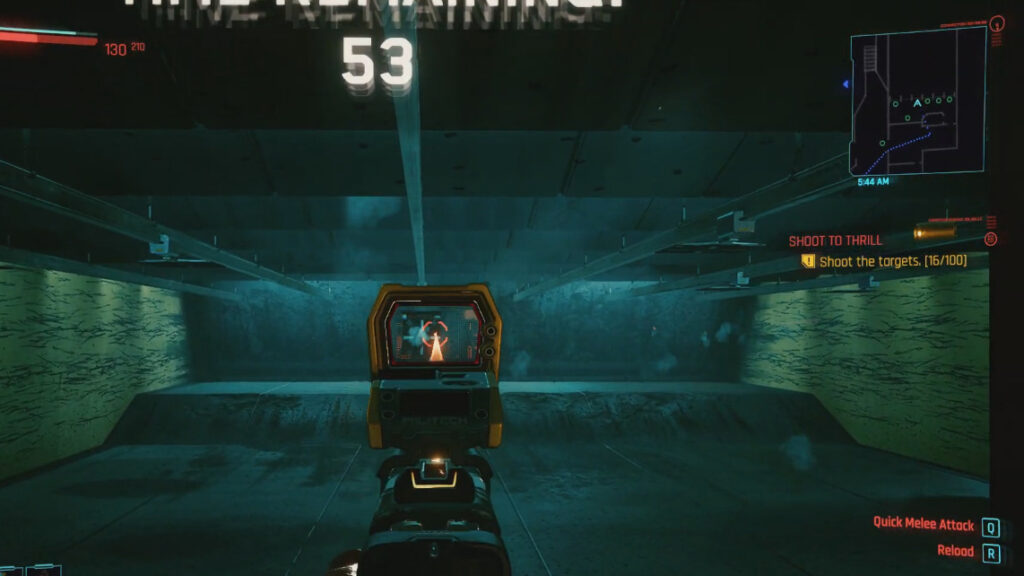
“Shoot to Thrill”: Wilson’s Shooting Range
This is the quest that awards the Epic-rank Pistol, M-10AF Lexington, upon completion.
Do you remember the owner of the “2nd Amendment” gun shop who handed you the custom-made iconic Power Pistol, “Dying Night,” early in the game? That’s the guy who will give you a call sometime after you complete “Playing for Time” and do some quests (sometime into the Act 2 of the game).
He will inform you about hosting a gun competition, and you can head over to his shop to accept this Side Job.
You will need to land at least 41 hits in the allocated 60 seconds to win — otherwise you will be in second place or below. Which, considering that you have 100 targets, should be pretty doable.
Keep in mind that this is handguns-only. You will get to pick your weapon, so go for one with the highest ammo clip and fire rate. Something like Unity or Lexington will work great. Try to time your reloads for when there are no targets in sight.
Multiple hits per target will count towards your score, so start at the bottom and follow the recoil of your gun going up (this will let you hit 2-4 times per target). (Tip Credit: TechRaptor, “Cyberpunk 2077 Shoot To Thrill Gig”).
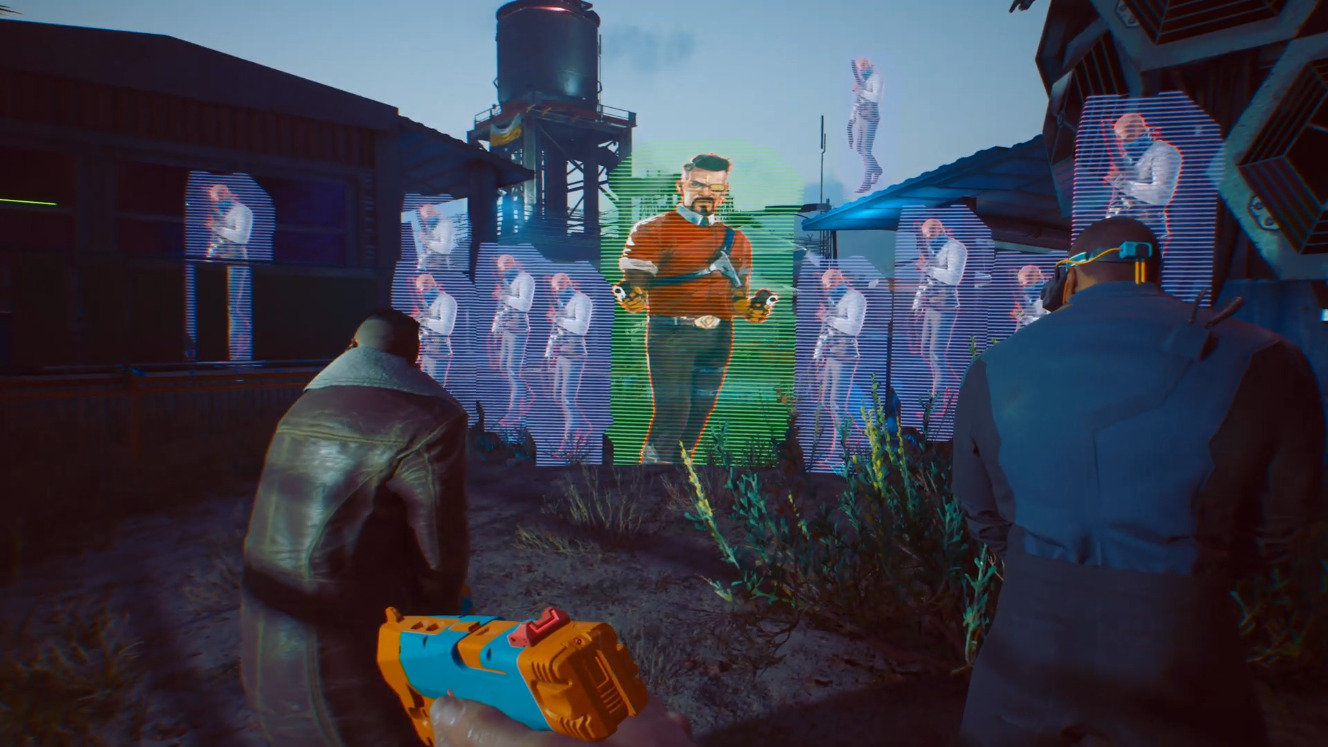
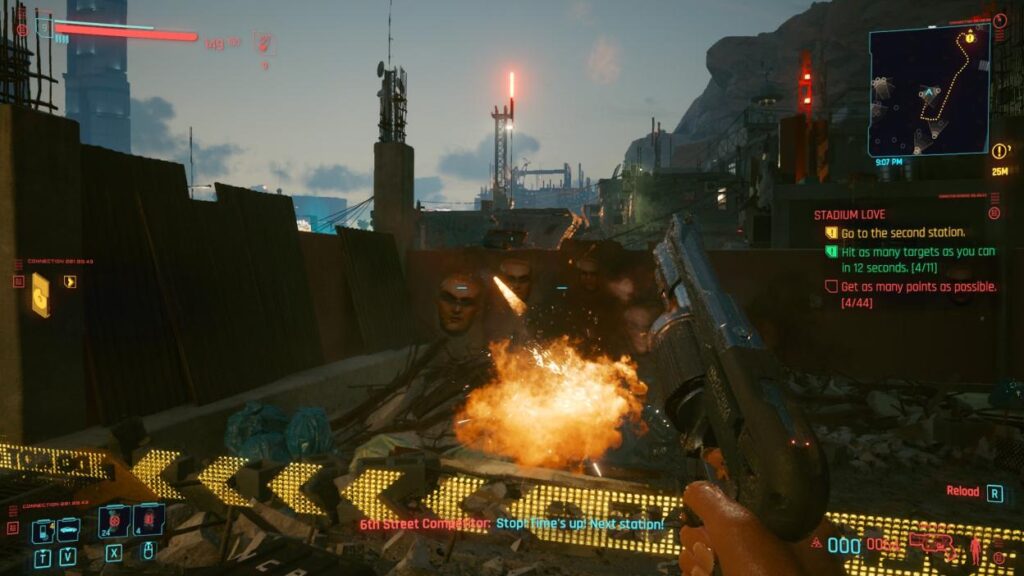
“Stadium Love”: 6th Street’s Challenge and Shots!
This is the quest that awards the Iconic Smart Assault Rifle, “Divided We Stand,” upon completion.
How about a more difficult challenge? (Especially so for players using a controller.) Drunk shoot-out with targets that all have the face of Weldon Holt on them (he’s the one running against Jefferson Peralez), surrounded by 6th Street gangers? Can’t use your own gun, every shot counts? Sounds like your thing? Great.
During 2nd Act of the game (after you complete “Playing for Time”) you can try and crash a little party thrown together by 6th Street gangers. To do so, head over to the most southeastern corner of Rancho Coronado sub-district in Santo Domingo, to the eastern half of the buildings dissected by the elevated highway in that bottom corner.
The party will be happening on the roof of one of the buildings in that sector. If you avoid provoking them, you will be able to participate in the shooting range. Should the shooting challenge prove to be too difficult or you accidentally start combat, you can always loot the iconic gun off of the table after clearing out the area (however, this will likely result in the bounty placed on the player.)
Note: Beware that if you were discovered by the gang during the “Life’s Work” Fixer Gig (when you need to retrieve Jake’s car from an shop controlled by 6th Street gangers) prior to this, the only path in this quest available to you will be the violent one.
Regardless, let’s talk shooting range.
You will need to land 44 hits total, 11 hits at every range within a 12-second limit. So, four stations total. And, yes, to get the gun you need to beat the score of 43 points, so you will need to hit every target.
There are few handicaps you need to be aware of:
First, you will need to use DR5 NOVA Power Revolver to participate. Your own guns aren’t permitted this time. The gun shoots 2 per second, with a clip size of 6. This means that you will spend a second reloading, so make sure every bullet hits the target (you can still make the time with a few misses).
You will have to reload at least once, potentially twice, during every range. With two reloads you are running at a risk of leaving the range incomplete, so be resourceful with your bullets.
Secondly, you will be taking a shot before each station, marking the start of the countdown (so, no, you can’t wait the visual effect out). This will result in the screen swimming a little when you shoot, which makes aiming a little harder.
Finally, make sure to not step past the yellow digital barrier as you maneuver yourself around — not quite as easy as it sounds. This will mishap result in automatic disqualification.
To improve your chances, manually reload before each session. Make sure you have enough ammo — get refills by the drinking glass.
If you are still struggling with the quest, here’s a little cheat for you: using Sandevistan‘s time dilation effect will make the task of landing each bullet significantly easier.
Share this article:
Mila Grish
Dedicated contributor at EIP Gaming and a part-time collector of books she will never have time to actually read. Jumps on the newest releases just as quickly as on the uncovered dusty collections from the basement. For her, shiny graphics can never be an excuse to not have a polished player experience or an immersive story.
Oh, hey! Sorry, you are definitely correct there. Stuff like the Ripperdoc icon, Junk shop icon, and Gigs have changed. Thank you so much for bringing our attention to it. We will update these ASAP.


Outdated. The icons have changed.
Oh, hey! Sorry, you are definitely correct there. Stuff like the Ripperdoc icon, Junk shop icon, and Gigs have changed. Thank you so much for bringing our attention to it. We will update these ASAP.