Sitting above the Lower City of Baldur’s Gate is the Szarr Palace, Astarion‘s old home. And, more pressingly, the home of his old master: Cazador. The Palace sits atop Cazador’s true lair, Cazador’s Dungeon, but in order to confront him (and Astarion’s past), you will first need to work your way through the Palace, discovering its many secrets. This walkthrough will help guide you through both the Szarr Palace and Cazador’s Dungeon, so that you don’t miss anything in this vampiric lair.
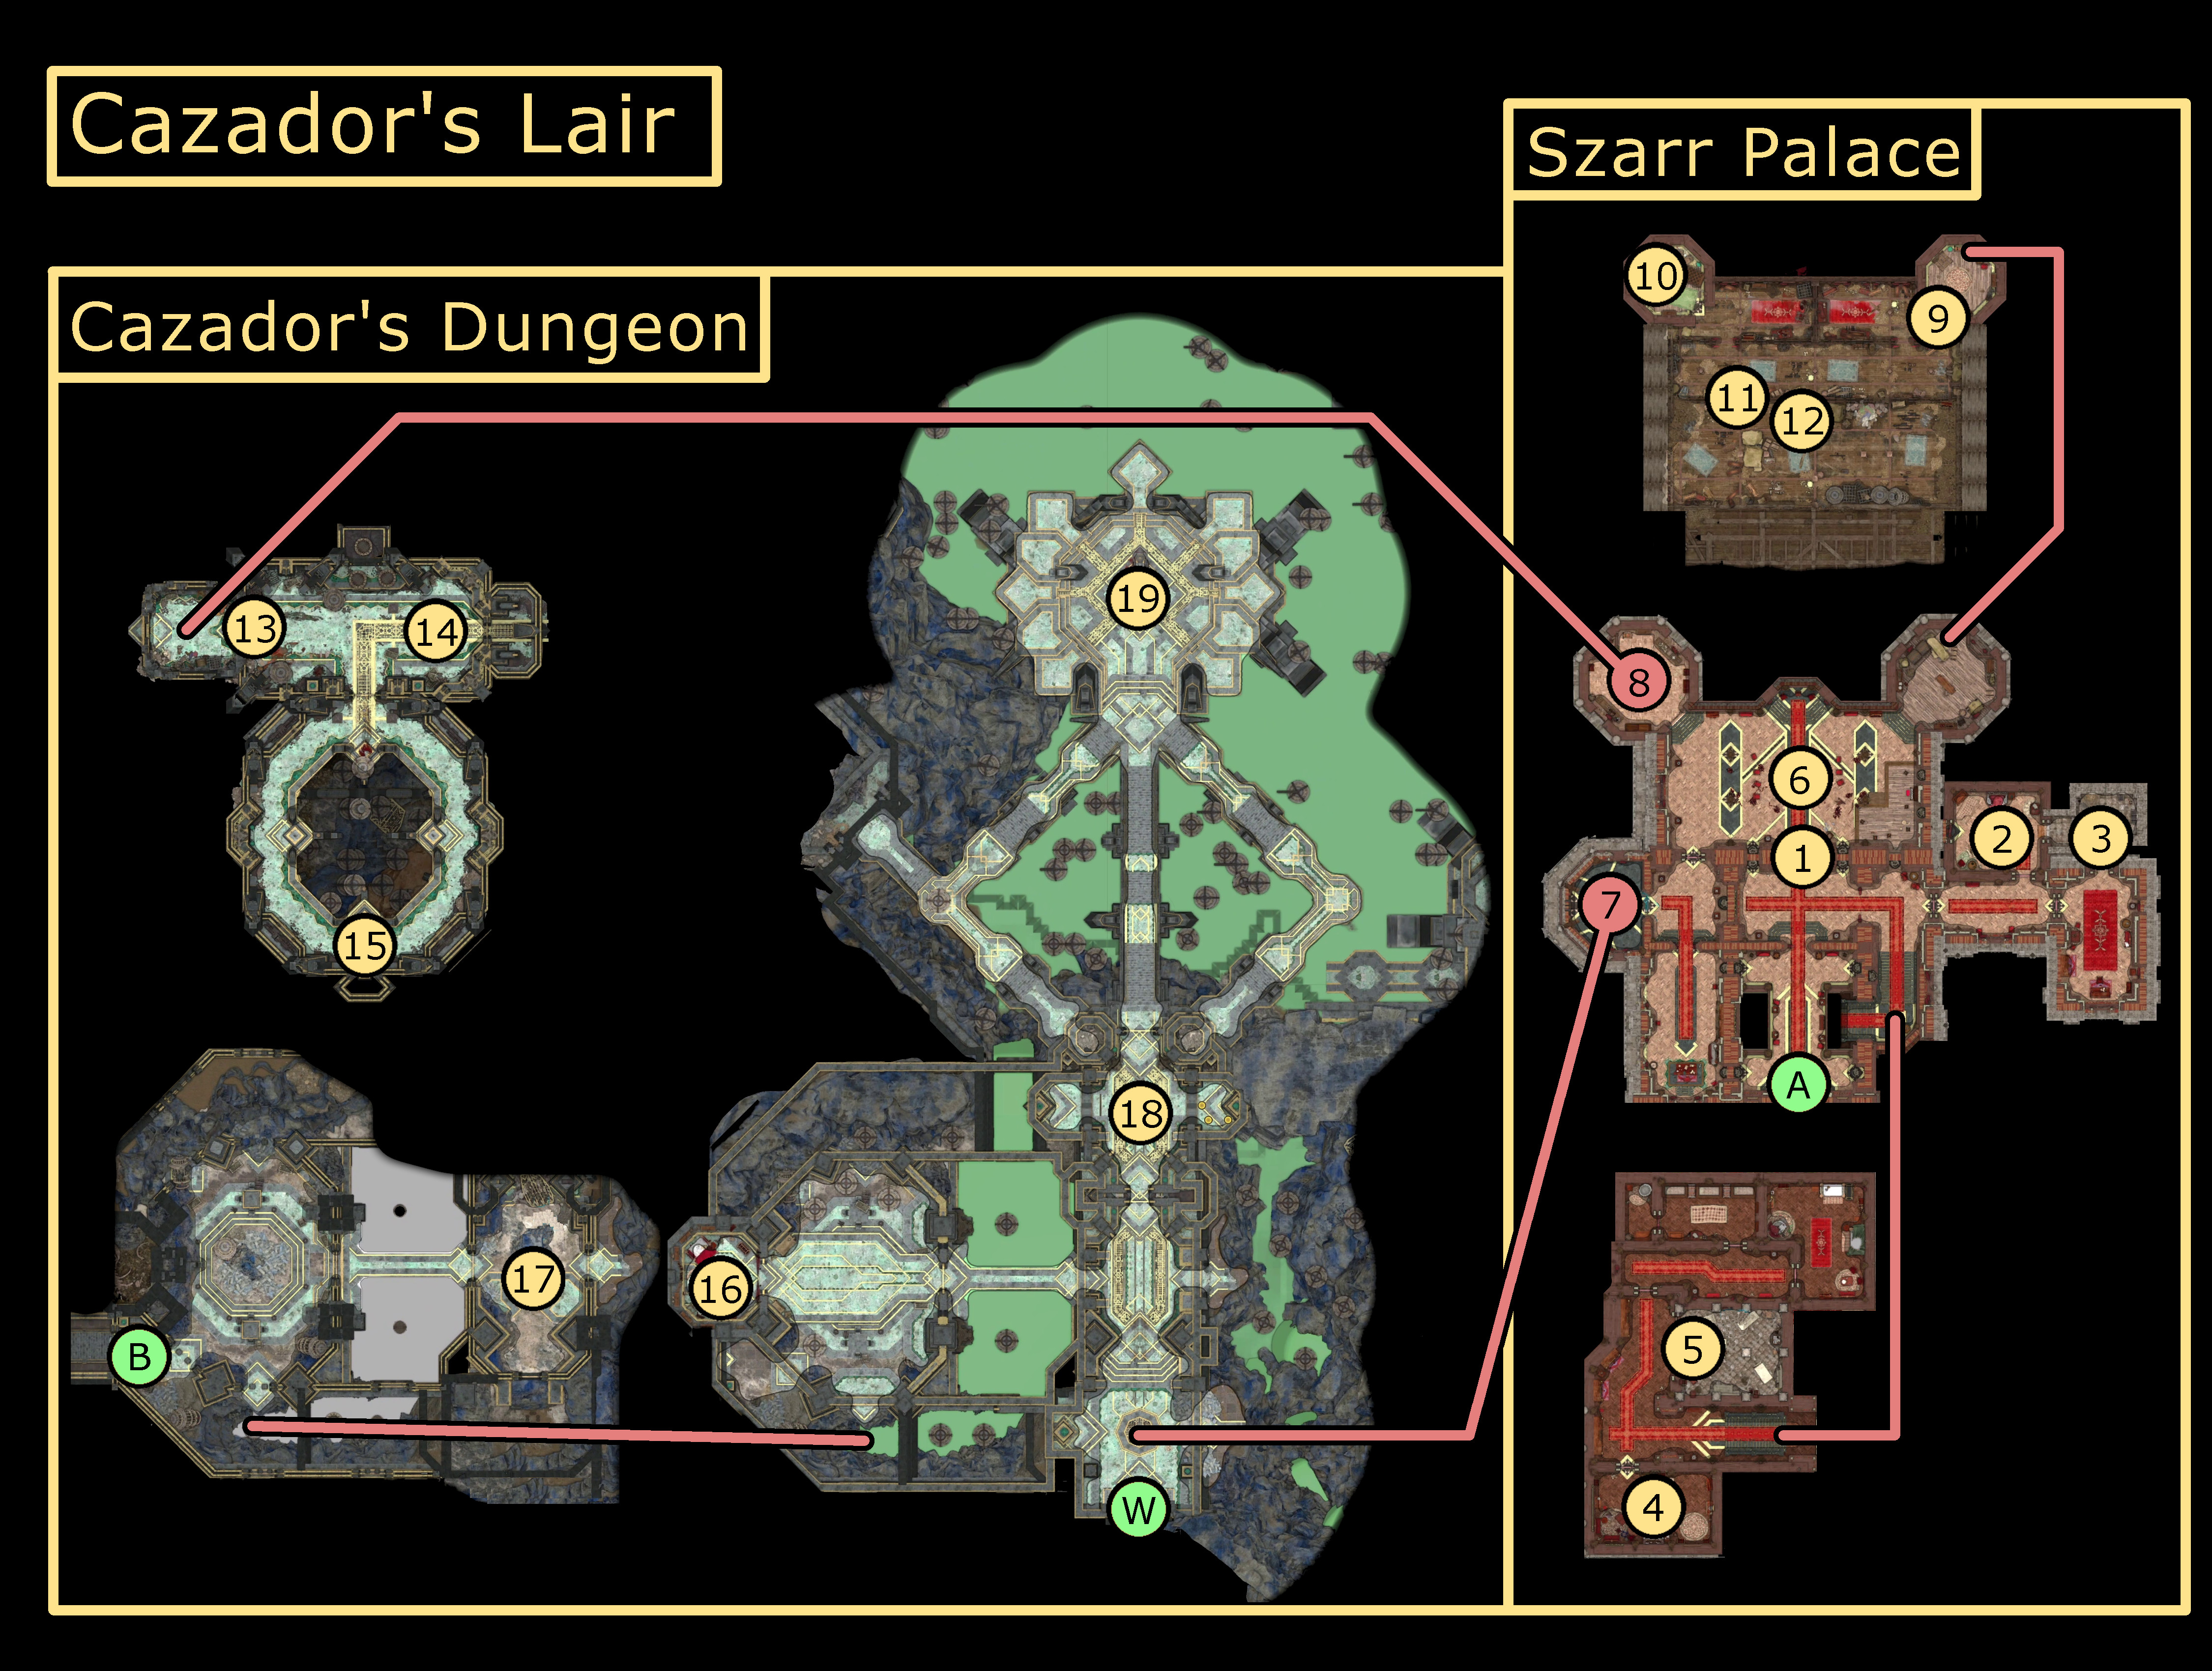
Map
Points of Interest 1 – Chamberlain’s Room 2 – Secret Room 3 – Victoria’s Body 4 – Godey 5 – Sinister Door 6 – Werewolf Party 7 – Elevator 8 – Secret Hatch 9 – Door Button 10 – Treasure Button 11 – Secret Door 12 – Silver Key 13 – Pressure Plate Door 14 – Fireball Plate Puzzle 15 – Fireball Plate Chest 16 – Vellioth 17 – Lower Passage 18 – Sebastian & Prisoners 19 – Cazador
Exits A – Lower City B – City Sewers W – Waypoint
Points of Interest
Sinister Door
The first thing you’ll come across of note after entering Szarr Palace is the Sinister Door. This door is closed and magically locked. You can learn more about it with a DC-25 History check, you can learn that the language written on the door is Kozakuran, which you’ll need a dictionary to translate, and with a DC-15 Investigation check, you can learn that the small hollow in the door would perfectly fit a ring bearing the Szarr family crest.
In order to pass through the Sinister Door, which is required to get further into Szarr Palace and to access Cazador’s Dungeon, you will need to locate the Kozakuran Dictionary and Szarr Family Ring. The Dictionary is in the room with Victoria’s Body (#4), and the Szarr Family Ring is on Godey (#5), who you can either convince or loot. With the dictionary read and the Ring in hand, you’ll be able to open the door, revealing the Werewolf Party (#6).
Chamberlain’s Room
Upon entering Szarr Palace, you will soon come across a Sinister Door (#1), but it will not be possible to open yet. And so, you may as well explore the rest of the floor. To the right of this door, next to the stairs going down, you can enter the Chamberlain’s Suite. To your left is a door to the Chamberlain’s Private Room, which can be lockpicked with a DC-20 Sleight of Hand check, or can be entered via the illusory walls from the Secret Room (#2).
Within the room, you can find a coffin with the body of Chamberlain Dufay in a coffin. Nearby, under the bed, a passive Perception check will reveal Dufay’s Diary, revealing his plot to fake his death. It appears that he consumed the wrong potion, however, resulting in his death.
Secret Room
By going into the Chamberlain’s Office and then walking straight through the stone wall to the north of the room, you can find the Secret Room. This Room contains the body of a werewolf named Lurianna Savauge, the explanation of which you can learn in the Chamberlain’s Room (#2). Her body has the Chamberlain’s Private Room Key (which unlocks the main door to the Chamberlain’s Room (#2)), as well as a note that explains that she sought to join Chamberlain Dufay in death. There are also two chests with minor loot in the Secret Room.
You can then exit the room out of the illusory wall to the west, though you might need to move the Wicker Chest in the way, in order to enter the Chamberlain’s Room (#2).
Victoria’s Body
On the first room you come across on the bottom floor, you can see the door oozing with dark energy. You will need to enter it to find the Kozakuran Dictionary required to open the Sinsiter Door (#1). However, opening the door will spew forth a wave of Vitality Drain, and so you should either break the door down from a distance, or open it with Mage Hand.
Once you open the door, you’ll see that the Vitality Drain is extending from the body of Victoria, in the center of the room. You can cast Remove Curse on Victoria’s body to stop the effect, or can Jump or Fly over the curse to avoid it.
On the opposite side of the room from Victoria’s Body, you can find the Kozakuran Dictionary in the Mahoghany Wardrobe closest to the bed.
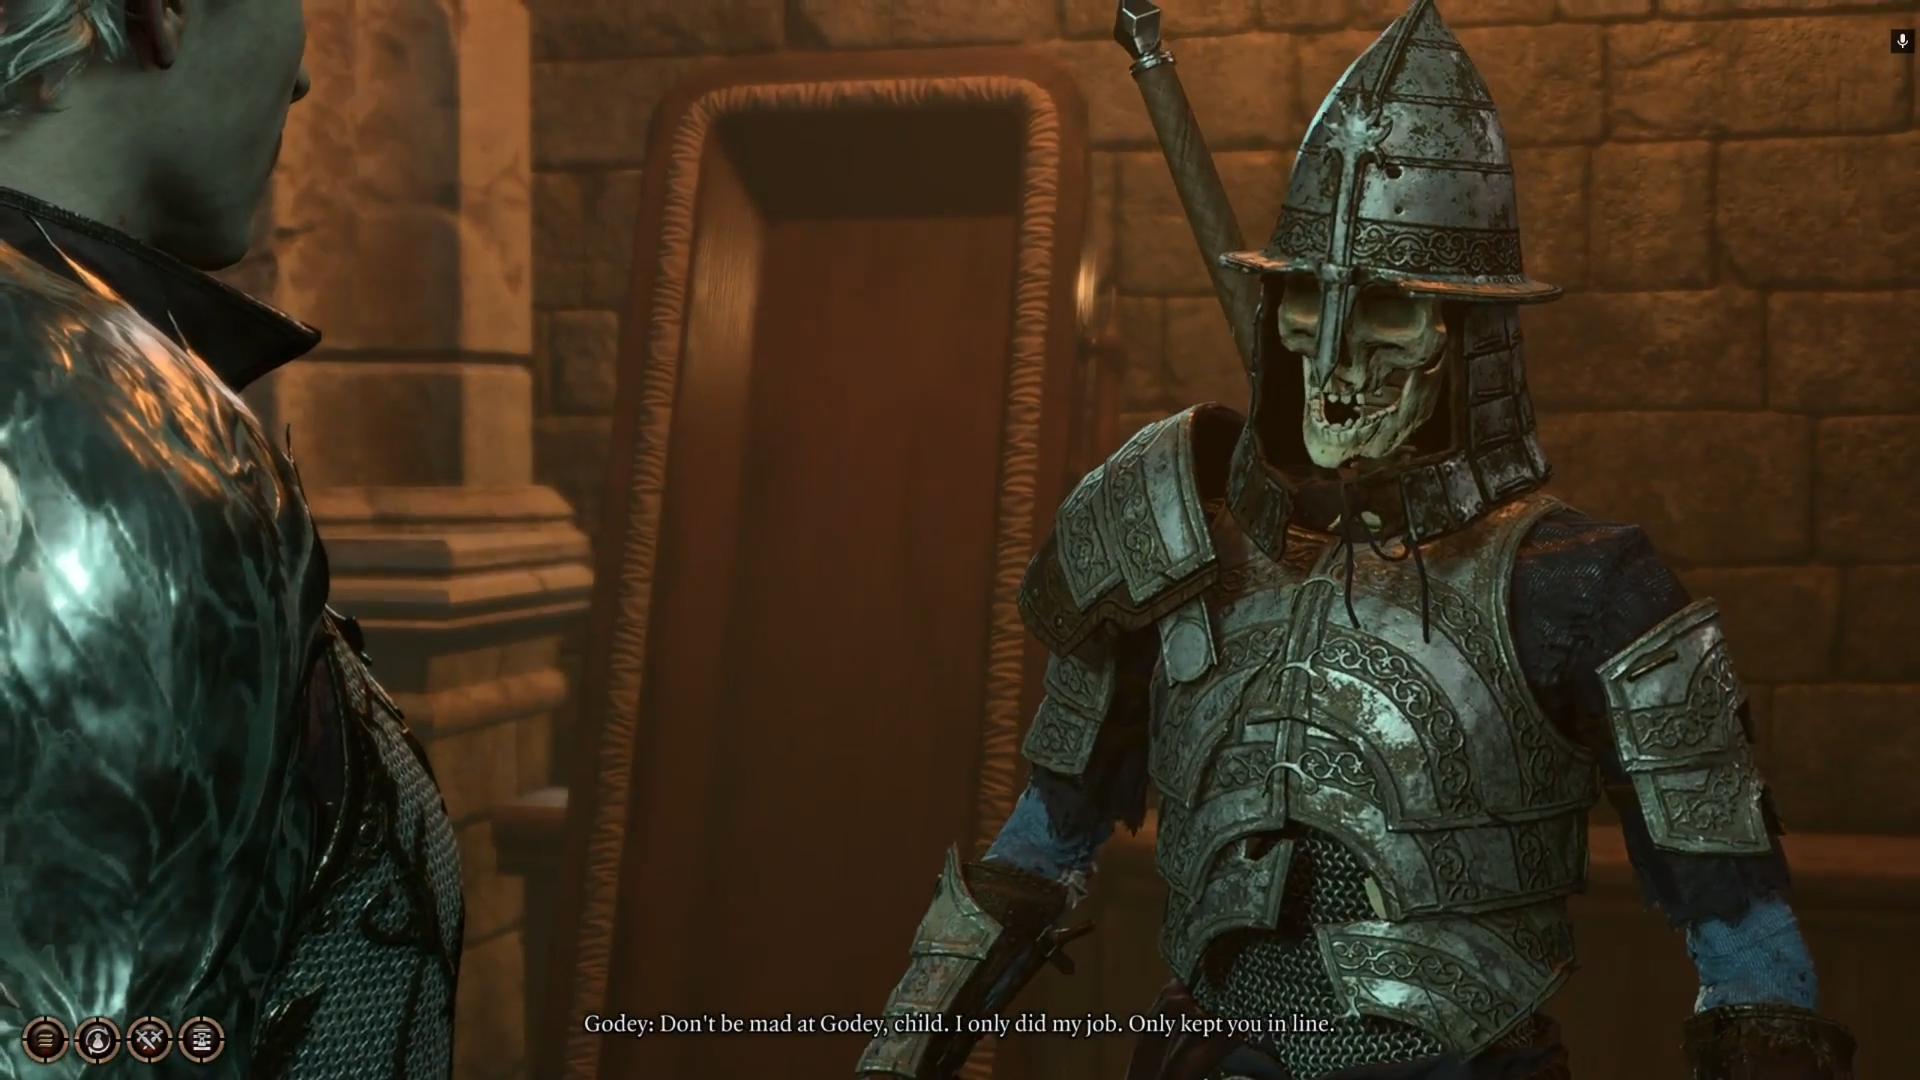
Godey
Along the hallway leading to the bedchambers on the lower floor, you will pass by a walled-in archway without a painting in it. A passive Investigation roll will reveal that this is actually a “Door to the Kennnels”, and a passive Perception check stepping through it will reveal Godey, a skeleton, waiting in ambush.
You should make sure you come through here with Astarion, since without him, Godey will be hostile to anyone who walks through. With Astarion, however, you can persuade him to give you the Szarr Family Ring without a fight, so long as you can pass a DC-15 Deception or Intimidation check, followed by a DC-20 Persuasion, Deception, or Intimidation check.
The Szarr Family Ring that you get from Godey (whether you persuade him, steal it, or loot him for it) is required to pass through the Sinister Door (#1).
Werewolf Party
After passing through the Sinister Door (#1) using the Kozakuran Diction and the Szarr Family Ring, you will be witness to a scene of carnage. A party in the ballroom seems to have gone awry; the room is filled with 3 Werewolves, 2 Wolves, 4 Bats, and 5 Rats, as well as many corpses from their “festivities”. If any of these creatures spot you, they will be hostile, though you can attempt to sneak around instead.
Should you deal with the enemies, you can cast Speak With Dead on the Party Guest in the room to learn what happened, though it won’t come as much surprise.
Elevator
This Elevator, activated with the Szarr Family Ring, leads down to Cazador’s Dungeon. From this point on, it is highly recommended to bring Astarion with, if he is still in the party, as Cazador will be fought here, and Astarion will be presented with several choices relating to his backstory.
Secret Hatch
In order to enter this room, you will need to use Mage Hand or leave a party member in the opposite room (with the ladder leading to the Attic), where they can press a button. That button will close the room they are in, but open this room with the secret hatch
In this room, you will find an Oppulent Chest with the Counting House Safe no.1 Key, and a button that acts the same as the other. However, you can move the Oppulent Chest to uncover a secret hatch. This hatch can be unlocked with a DC-20 Sleight of Hand chest, or using the Silver Key (#12) in the Attic.
Door Buttons
In order to leave the small, octagonal room you find yourself in upon entering the attic, you will need to press the button on the wall. This is an introduction to the concept more than anything.
Treasure Buttons
By pressing either the button outside or within the opposite octagonal room twice, a door will slide open for a few seconds, revealing a treasure in the room. In order to leave after collecting the treasure, however, you will need to press either button again and leave in the few seconds you have.
Secret Door
There is another button hiding behind some crates that are stacked along the south wall of the hallway between the two octagonal rooms (#9 and #10). Pressing this button will open a secret door, leading to a hidden section of the attic.
Silver Key
By climbing a ladder in the hidden section of the attic that you access via the Secret Door (#11), you can find a Wooden Chest containing a Pouch with a Silver Key in it. This Silver Key can be used to open the Secret Hatch (#8) that is hiding on the lower floor, under an Oppulent Chest and in a secret room.
Pressure Plate Door
After going down the Secret Hatch (#8), you will come face-to-face with… a door! This door is locked with a DC-25 Sleight of Hand lock, but it can also be opened by placing enough weight on the two pressure plates next to it. The Metal Crates near the pressure plates are enough to weight them down, so you don’t need to leave anyone behind.
Fireball Plate Puzzle
Next, you will be met with another DC-25 Sleight of Hand locked door, 4 Pressure Plates, and plenty of Metal Crates. As before (#13), compressing all of the Pressure Plates will open the door.
The intended way to solve this puzzle is to place a metal crate in front of each of the Gargoyles and on top of the two Noxious Fumes vents that you can notice with a passive Perception roll, and then to place the remaining Metal Crates on the pressure plates themselves (having nullified the traps). However, you can also try to either lockpick the door or disable the traps, both requiring DC-25 Sleight of Hand checks.
If you don’t disable the traps before putting the Crates (or yourself) on the pressure plates, then the vents will spew Noxious Fumes, which will be detonated by the explosive Fire Bolts that shoot from the gargoyles.
Fireball Plate Chest
In the next, octagonal room, you’ll be met with a similar challenge. As before, the intended solution to unlock the DC-25 Sleight of Hand-locked chest is to place a Metal Crate in front of both of the Gargoyles pointing toward it, and then another on the Vent (you can notice with a passive Perception check) in front of the chest, and then to stand on the two Pressure Plates themselves using two of your party members in order to open the chest. There is some gold and a few powerful arrows and potions in the chest.
Vellioth
Now only a skull siting in Cazador’s room, Cazador’s former master Velioth is still in possession of some awareness. You can interact with the scroll to communicate with it. By passing DC-15 Wisdom checks, you can learn of Cazador’s past from the skull. At the end of the dialogue, you will receive the Black Mass Scroll, giving some information about Cazador’s ritual of ascension.
Lower Passage
You can access the lower level of Cazador’s Dungeon through a variety of means, including flying, jumping, or teleporting down, using the elevator near Cazador’s Room (#16), or carefully jumping via the cages to the east.
In the hallway immediately below where you enter, you can pass a difficult passive Perception check to notice a dirt mound. Digging it up reveals a casket, which is trapped. You can disarm it with a DC-15 Sleight of Hand check. The Casket contains the Pelorsun Blade, a unique Rapier that is especially useful against the undead (for example: Cazador (#19)).
Sebastian & Prisoners
You’ll pass by two cells on your way to Cazador (#19). Astarion has unique dialogue here, so it is good to bring him along. Regardless, each cell will have prisoners of Cazador. To the right, Sebastian will flag the group for dialogue when they enter, and will blame Astarion for luring him years ago into this place. He will tell ask the group for help, but will not be especially optimistic. You can tell him you will kill Cazador and then free him, or not.
In the cages on the other side, you can find the kids kidnapped from the Gur Camp in Rivington. Speaking to them, you can learn that the cages are controlled by Cazador’s Staff, and by obtaining it, you will be able to free them.
If Astarion uses Cazador’s Staff to ascend, then doing so will kill all the prisoners in both cells.
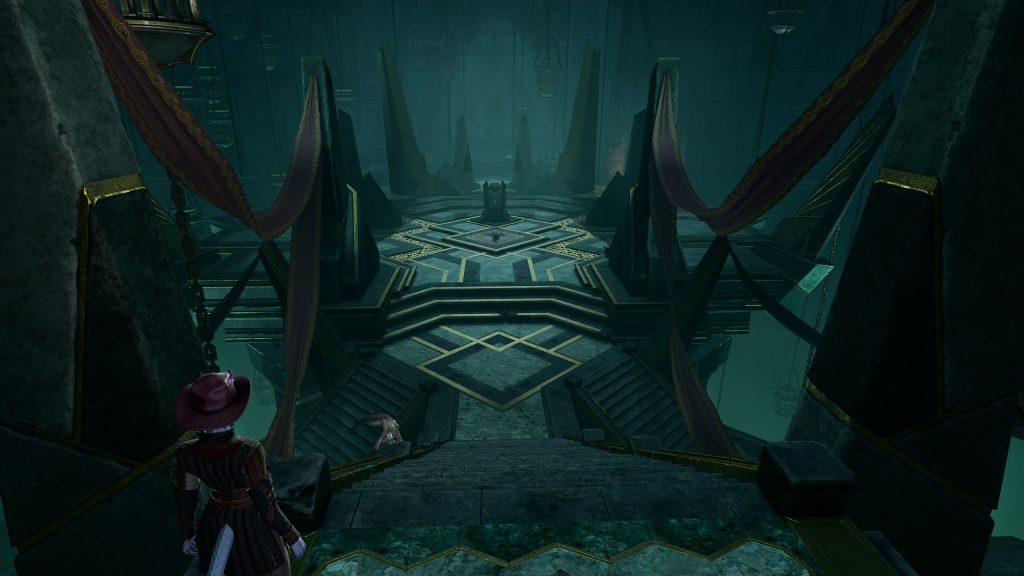
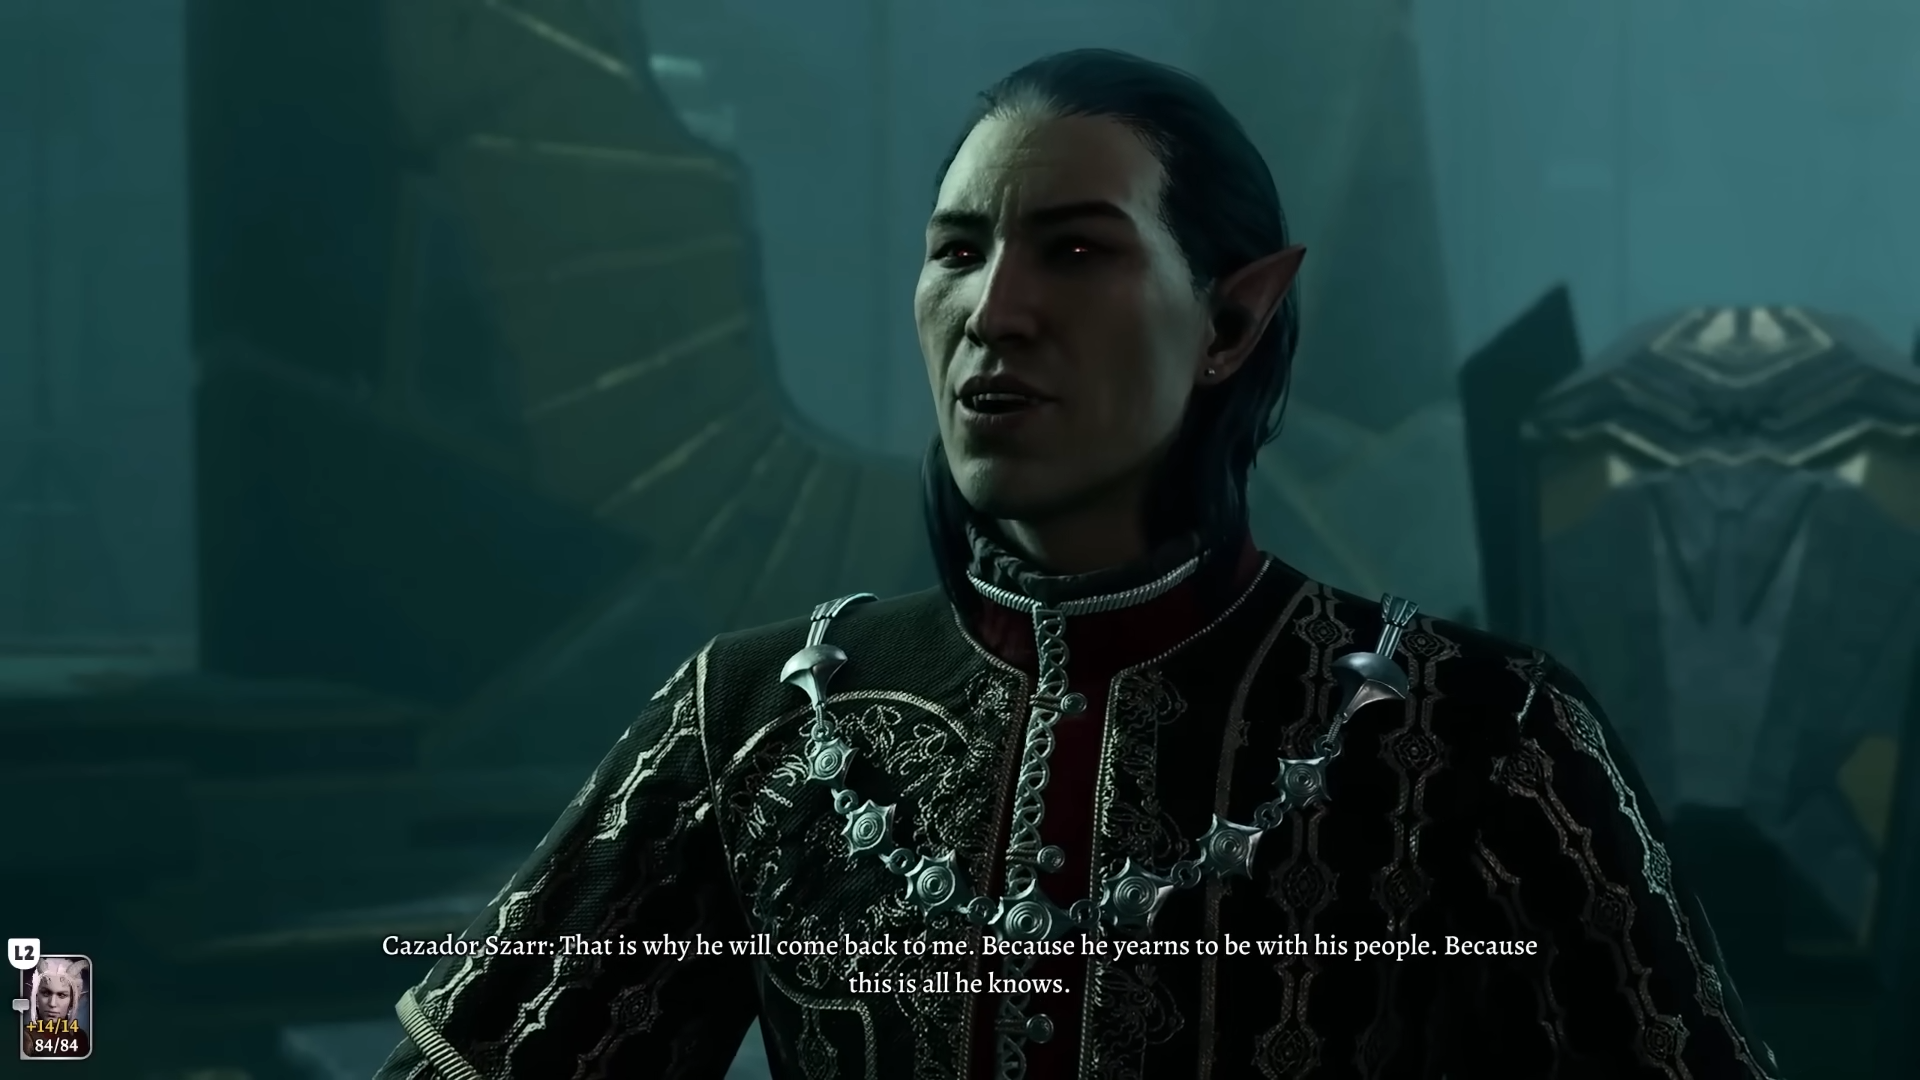
Cazador
As you come into the final chamber of Cazador’s Dungeon, you will soon realize that a ritual is taking place. Cazador will rise and address you. If Astarion is in your party, or if Astarion dies or left the party, then the result will always be that Cazador will end the dialogue with a fight. If Astarion starion is at camp, then Cazador will ask you to bring him if you can pass a DC-15 Persuasion check, though you can fight Cazador instead (depriving him of all the boons he gets from the ritual, but depriving Astarion of choices).
Assuming Astarion is present, either as a companion or as a zombie (if he is dead or left your party), then he will be trapped by runes as soon as the fight begins. Your first priority should be to Help him, which will release him from the binds and prevent the ritual from going through. If he is still bound after 3 turns and all of the Vampire Spawn floating around the arena are alive, then Cazador will complete the ritual, resulting in Astarion‘s permanent death and in Cazador becoming the Vampire Ascendant. However, if you kill any of the Vampire Spawn, then the ritual cannot be completed in Astarion‘s favor.
Because Cazador is given greater movement speed, temporary hit points, and extra Necrotic damage for each Vampire Spawn in the ritual, as well as some other bonuses for specific Spawn, you should prioritize killing or knocking out the Spawn as well, to weaken Cazador.
After you defeat Cazador, if Astarion is in your party, then he will have a choice to make. He can choose one of the following options, which you can influence:
He can choose to leverage the ritual Cazador was attempting in order to Ascend himself. This changes his personality to be more cruel and kills the Prisoners (#18) (and thousands more). He cannot do this if even one of the Vampire Spawn was killed. If Astarion does this, then you and the party will need
He can choose to kill Cazador and end the ritual. If you are not playing as Astarion, you must succeed on a DC-18 Persuasion check (Or a DC-15 Persuasion check if you a DC-20 Insight check first). If one or more Vampire Spawn was killed during the fight, then Astarion will default to this choice, and won’t need to be convinced.
If you fail to convince Astarion above, then refuse to help him with the ritual, then he will destroy the Staff (trapping the prisoners (#18) forever) and leave your party forever.
If you let Astarion start the ritual and then interupt it, Astarion will destroy the staff (trapping the prisoners (#18) forever) and then attack you, forcing you to kill him forever.
In the second choice, where Astarion is convinced or forced to kill Cazador and not perform the ritual, then you will have the choice whether to mercy-kill, free, or trap the Prisoners (#18) forever.
If Astarion ascends, then you will encounter the Gur people on your way out, who want to kill Astarion, and you will have the choice to side with either (though, obviously, siding with the Gur people means killing Astarion permanently). If Astarion is convinced not to ascend, then the Gur people will see him as redeemed and let him leae, regardless of your choice regarding the prisoners.
In Cazador’s Sarcophagus, you can find the High Security Vault no.3 Key (for the Counting House). On his body, you can find the dagger Rhapsody. And if the Staff was not broken after the fight, you can find the staff Woe.
Szarr Palace can be entered from atop the wall that runs down the middle of the Lower City. You will need to get through the Szarr Palace South Tower to access the door to Szarr Palace.
By lockpicking the DC-30 Sleight of Hand-locked door in the lower level of Cazador’s Dungeon, or unlocking it using the Silver Key (#12) in the attic, you can directly access the City Sewers, near Lorna Esthelian. This door cannot be accessed from the City Sewers unless you exit it from Cazador’s Dungeon first.
There is 1 waypoint in Szarr Palace and Cazador’s Dungeon, suitably titled Cazador’s Dungeon.
Share this article:
Graves
Graves is an avid writer, web designer, and gamer, with more ideas than he could hope to achieve in a lifetime. But, armed with a mug of coffee and an overactive imagination, he'll try. When he isn't working on a creative project, he is painting miniatures, reading cheesy sci-fi novels, or making music.