Someone at Larian must really hate  Shadowheart. Otherwise, there’s no way to explain her ability scores, which make her ill-suited to being even a half-decent melee or ranged attacker. Not to mention her haircut. And then her one good offensive Cantrip –
  Fire Bolt – uses Intelligence for its Attack Rolls. Since
  Shadowheart starts with a grand total of 10 Intelligence, this makes it pretty much useless for her.
With her  Trickery Domain, you would expect her to be directed towards some sort of
  Cleric/
 Rogue hybrid. This class combo would theoretically allow her to both support and heal the party with her
  Cleric spells, and also deal with traps and locked doors during exploration. But with her 13 starting Dexterity and no Proficiency with any of the
  Rogue skills, that’s not viable either.
In fact, if you want to see what a real  Cleric can do, you might just want to check out our Light Domain Cleric build and respec
  Shadowheart accordingly. But if you’re someone who likes to stick to the developers’ vision for companions, this build will help you make the most out of a bad situation and turn your
  Shadowheart into a decent tank who will make your entire party sturdier and more accurate.
if you’d rather just check out the full, completed build, then you can see what it looks like in our Baldur’s Gate 3 Build Planner here.
Companion Build Goals
To start things off, here are our general guidelines for companion builds:
Build Summary
Here’s what will make our  Shadowheart tick:
- Subclass
- Feats
- Key Spells
- Important Gear
- The Blood of Lathander
- Hellrider’s Pride
- The Whispering Promise
- Amulet of Restoration
- Dark Justiciar Half-Plate
No matter how poorly rolled, a  Cleric is still a very strong class in Dungeons & Dragons. Divine spells are just that strong. The annoying thing about them in the 5th Edition is that many require Concentration. And since you can only concentrate on a single spell at a time, this limits our options.
With how good  Bless and
  Spirit Guardians are, picking one over the other is pretty much an impossible choice. Luckily, with some specific gear, we won’t have to choose. For any serious fight, our
  Shadowheart will be concentrating on
  Spirit Guardians to deal massive damage to all enemies around her. This way she won’t have to attack her foes – just being near them will be enough. Because
  Spirit Guardians is a Concentration spell, we’ll be getting some Feats and items that make it very hard for
  Shadowheart to lose Concentration.
And thanks to Hellrider’s Pride and The Whispering Promise, a pair of gloves and a ring respectively, whenever she heals her allies they’ll get the benefits of both  Bless and
  Blade Ward for 2 turns. Thanks to spells like
  Mass Healing Word that cost a Bonus Action – forget about Concentration – our
  Shadowheart won’t even be spending an Action to
  Bless her party.
Since  Spirit Guardians will require
  Shadowheart to be near her enemies, we’ll equip her with a shield and some nice armour. This is also where we’ll get some use out of her suboptimal
  Trickery Domain. The
  Mirror Image spell it provides will let our
  Shadowheart avoid hits with the best of them.
Shadowheart Overview
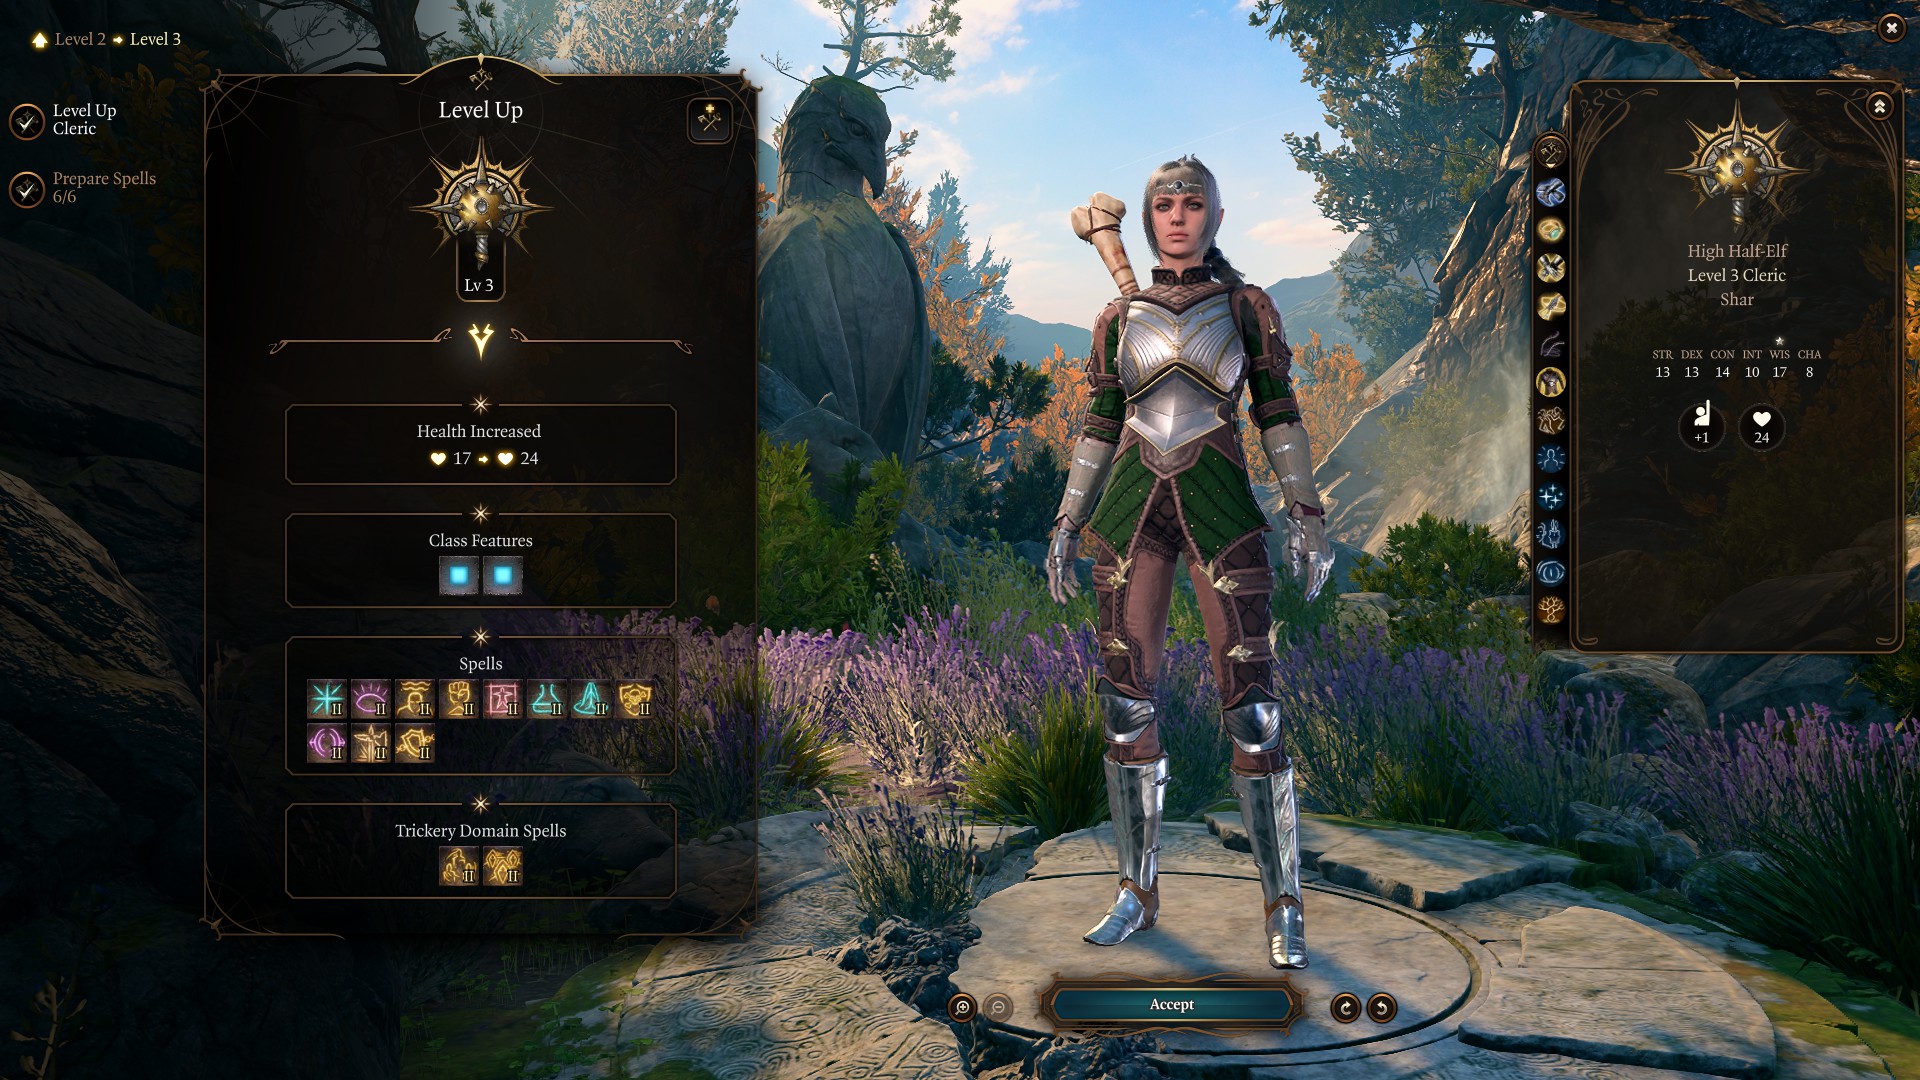
If you’re up for a laugh and a ‘what were they thinking?’ exclamation, this is what you can expect from  Shadowheart when you recruit her as a level 1
  Cleric:
- Race/Subrace –
 High Half-Elf
 - Starting Class –
 Cleric
 - Domain –
 Trickery
 - Abilities
- 13 Strength
- 13 Dexterity
- 14 Constitution
- 10 Intelligence
- 17 Wisdom
- 8 Charisma
- Background –
 Acolyte
 - Skill Proficiencies
- Starting Cantrips
- Starting Spells
Spells and Abilities
This section will highlight all the things we’ll be picking when raising  Shadowheart’s level.
Feats
With that mess of a stat spread,  Shadowheart will need every ability score we can squeeze out of the game. But since she’ll be using a lot of Concentration spells, we’ll also need to make sure she’s not breaking Concentration after every hit she takes. And that means boosting her Constitution Saving Throws. Luckily, we can sort out Constitution Saving Throw Advantage with a piece of gear – thanks to that we won’t need to take
  War Caster. We’ll still need to give her Proficiency with those Saving Throws, as she doesn’t get it as a
  Cleric.
This leads us to the following Feat choices:
 Ability Improvement
- When
 Shadowheart reaches level 4, we’ll raise her Dexterity by 1 to maximize the effectiveness of medium armour on her, and her Wisdom by 1 to make most of her offensive spells harder to avoid.
 Resilient
- At level 8, we’ll be picking up Resilient to put 1 point into Constitution (for a total of 15) to become Proficient at those Saving Throws.
 Ability Improvement
- Finally, upon hitting level 12, we’ll put 1 point into Strength to help
 Shadowheart with her melee attacks, and 1 point into Constitution for a round 16.
As you can see, with how messy  Shadowheart’s stats are, we won’t even reach 20 in her primary spellcasting attribute. And even come endgame, her Strength bonus to Attack and Damage rolls won’t go past +2. What were they thinking, indeed.
Spells
As a  Cleric,
  Shadowheart will get access to the full list of
  Cleric spells, plus two Domain spells for the first 5 of the game’s 6 spell levels. She’ll start the game with access to 1st level spells, unlock the 2nd level upon hitting character level 3, the 3rd at level 5, 4th at level 7, 5th at level 9, and 6th at level 11.
Because in Baldur’s Gate 3 you don’t need to rest to memorize new spells and can instead freely swap them in and out outside of combat, this section will merely list  Shadowheart’s Domain spells along with some of her most universally useful
  Cleric spells. Just do remember that all her other spells have their own situational uses.
- 1st Level
- 2nd Level
- 3rd Level
- 4th Level
- 5th Level
- 6th Level
Equipment
Despite her shortcomings,  Shadowheart will become a decent supporting tank for our party. And because of how the game’s second Act is set up, she’ll help trivialize most of its challenges simply by existing. To achieve these goals, here’s the gear our
  Shadowheart will need:
- Weapon – The Blood of Lathander
- You get this legendary +3 mace near the end of Act 1 when you complete the Find the Blood of Lathander quest in Crèche Y’llek. As it is a mace, it’s not the best fighting weapon, but its +3 enchantment will help offset
 Shadowheart’s poor Attack Bonus. The light it emits will not only illuminate your surroundings, it will blind fiends and undead enemies that get close to
  Shadowheart. With how often you’ll be fighting Shades and other assorted undead in Act 2, this mace almost feels like cheating.
- Shield – Ketheric’s Shield/Viconia’s Walking Fortress
- Ketheric’s Shield you get after defeating Ketheric Thorm in Act 2 will make
 Shadowheart’s spells harder to resist. And since you’ll be using her anyway, once you complete her personal quest in Act 3, you’ll get a chance to loot the legendary Viconia’s Walking Fortress.
- Handwear – Hellrider’s Pride
- A pair of gloves you get from Zevlor in Act 1. Whenever you heal an ally, these will put a
 Blade Ward on them for 2 turns. This otherwise self-cast Cantrip makes its targets resistant (taking only half damage) to physical damage.
- Armour – Dark Justiciar Half-Plate
- There are two versions of this armour in the game, a Rare and a Very Rare one. Which one you get depends on how you approach the Nightsong quest in Act 2. To get the better version, you’ll need to kill Nightsong. If you don’t want to do that, you can find the Rare version around where you find the Spear of Night in the Gauntlet of Shar. Either way, this is the armor you want for
 Shadowheart, as it provides Advantage on her Constitution Saving Throws.
- Headwear – Dark Justiciar Helm/Helmet of Arcane Acuity/Wapira’s Crown
- Dark Justiciar Helm – There are some good helmet options for
 Shadowheart, and this is one. Found inside Grymforge, it gives you a +1 bonus to your Constitution Saving Throws.
 - Helmet of Arcane Acuity – Stashed away in a secret area of the Mason’s Guild basement in Act 2, this helmet will give you bonuses to your spell attack rolls and spell DC whenever you hit a target with a melee weapon. And while
 Shadowheart won’t be very good at it, she’ll be trying to hit enemies with her mace quite often.
 - Wapira’s Crown – After completing Zevlor’s Save the Refugees quest in Act 1, you’ll recieve this item, a helmet that will heal
 Shadowheart whenever she heals a party member. Since our heals will come with a
  Bless and a
  Blade Ward, this helmet is a good way to get a two for the price of one deal on those two buffs.
- Cloak – Vivacious Cloak
- Found inside the Grand Mausoleum in Act 2, this cloak will give
 Shadowheart 8 temporary Hit Points whenever she casts a spell in melee range. A nice little boost to her survivability.
- Footwear – Boots of Striding/Evasive Shoes
- Boots of Striding are great for
 Shadowheart. Whenever she casts a Concentration spell, they’ll give her a movement speed boost. And whenever she’s concentrating, enemies won’t be able to push her or knock her down. To get these, you’ll have to kill Minthara when dealing with the Goblin Camp in Act 1. Since she’s a potential companion, you might not want to do that.
 - In that case, the Evasive Shoes you can get from Mattis when you reach the Last Light Inn in Act 2 will provide a nice AC bonus.
- Amulet – Amulet of Restoration/Amulet of the Devout
- With how useful our heals will be to the party, even without taking into account the actual healing, it’s nice to have some healing options that don’t require expending spell slots. That’s why we’ll be using Amulet of Restoration on
 Shadowheart for most of the game. Get it from Derryth Bonecloak in the Myconid Colony in the Underdark.
 - Once you’re in Act 3 and get a chance to burglarize the Stormshore Tabernacle, Amulet of the Devout will be your late-game option that makes
 Shadowheart’s spells much harder to resist.
- Ring – The Whispering Promise
- Sold by Volo or Grat the Trader in the Goblin Camp in Act 1, this ring is the source of our free
 Bless, and as such a crucial part of the build.
- Ring – Band of the Mystic Scoundrel
- Found in the Jungle you briefly visit after hitting jackpot on Akabi’s wheel in Act 3, this ring lets us cast an Illusion or Enchantment spell as a Bonus Action after landing a melee attack. Since many of
 Shadowheart’s Domain spells, most notably
  Mirror Image, come from these schools, it’s a great option for her.
The Gameplan
The idea behind this build is quite simple. We boost our  Shadowheart’s Constitution Saving Throw as much as we can, upcast an instance of
  Spirit Guardians, and send her into the fray. This will deal a lot of damage to your enemies. And when those enemies are fiends or undead, thanks to
  Shadowheart’s mace, they’ll also get Blinded.
As a full  Cleric she’ll get plenty of heals and supporting spells. And with our gear setup, whenever she heals an ally, they’ll become stronger and more resilient. Just keep in mind that some of your healing spells are cast as Bonus Actions. This means you can buff your entire team with
  Mass Healing Word and do something else on your turn. A
  Cleric’s summoning spells like
  Spiritual Weapon and
  Planar Ally are also quite strong.
In general, be aware of which of your spells require Concentration and which cost Bonus Actions, as this can feel a bit arbitrary at first.  Sanctuary, a level 1 spell, completely prevents your ally from taking damage, and it just takes a Bonus Action and doesn’t need Concentration. Similarly,
  Mirror Image, a strong defensive option for
  Shadowheart, doesn’t require Concentration. The same goes for
  Warding Bond, which can help you make an ally much sturdier.
Conversely, some of the spells you won’t necessarily think require Concentration, do. And when you use them, they’ll break whatever you’re currently concentrating on. A lot of  Shadowheart’s Domain spells that help control the battlefield, like
  Fear and
  Dominate Person, are like that. So keep that in mind when using them.
While  Spirit Guardians will be the bread and butter of this build, don’t just mindlessly use it in every fight. Consider who you’re facing and what the party needs at the moment, then use your precious Concentration slot accordingly. Something like
  Shield of Faith can help her tank a strong foe. And a well-placed
  Silence can shut down enemy spellcasters and outright win you a fight.
All Builds























When you reach Act 3, the Reviving Hands from Vicar Humbletoes in the Stormshore Tabernacle is a direct upgrade to Hellrider’s Pride. Same effect, plus Death Ward when you Revivify, +1 to Strength saves, and a free cast of Revivify.
this build isn’t my style. i always rush to withers to takeaway all my companions unimportant stats. why does shadowheart need 13 strength? get that into dex to get higher AC