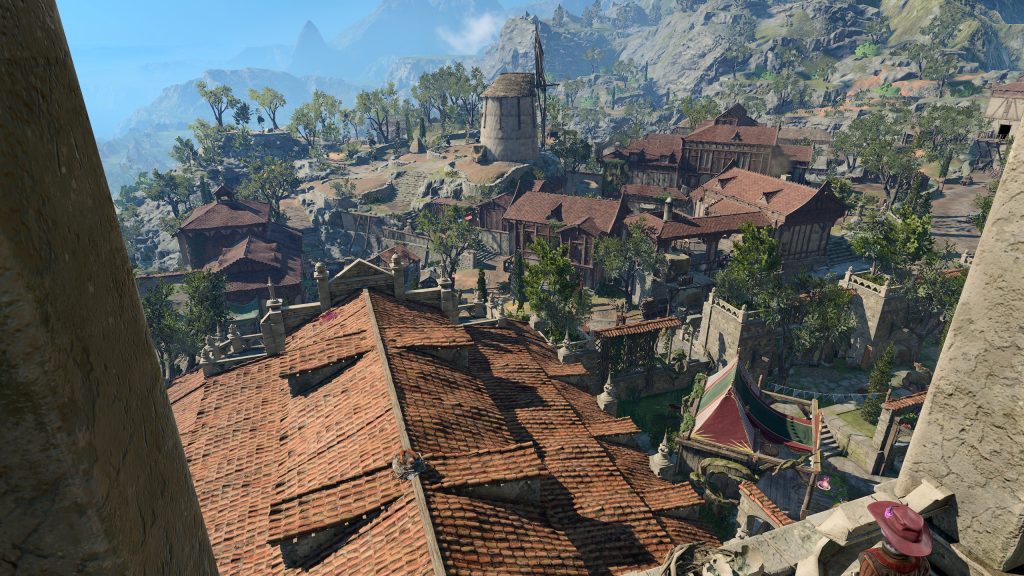
Coming out of the Shadow-Cursed Land should be a relief, but in order to actually reach Baldur’s Gate itself, you’ll first need to traverse Rivington & Wyrm’s Crossing. But this region isn’t just a speed-bump: there are more than a few mysteries to unravel and clues to pick up in these unassuming outskirts.
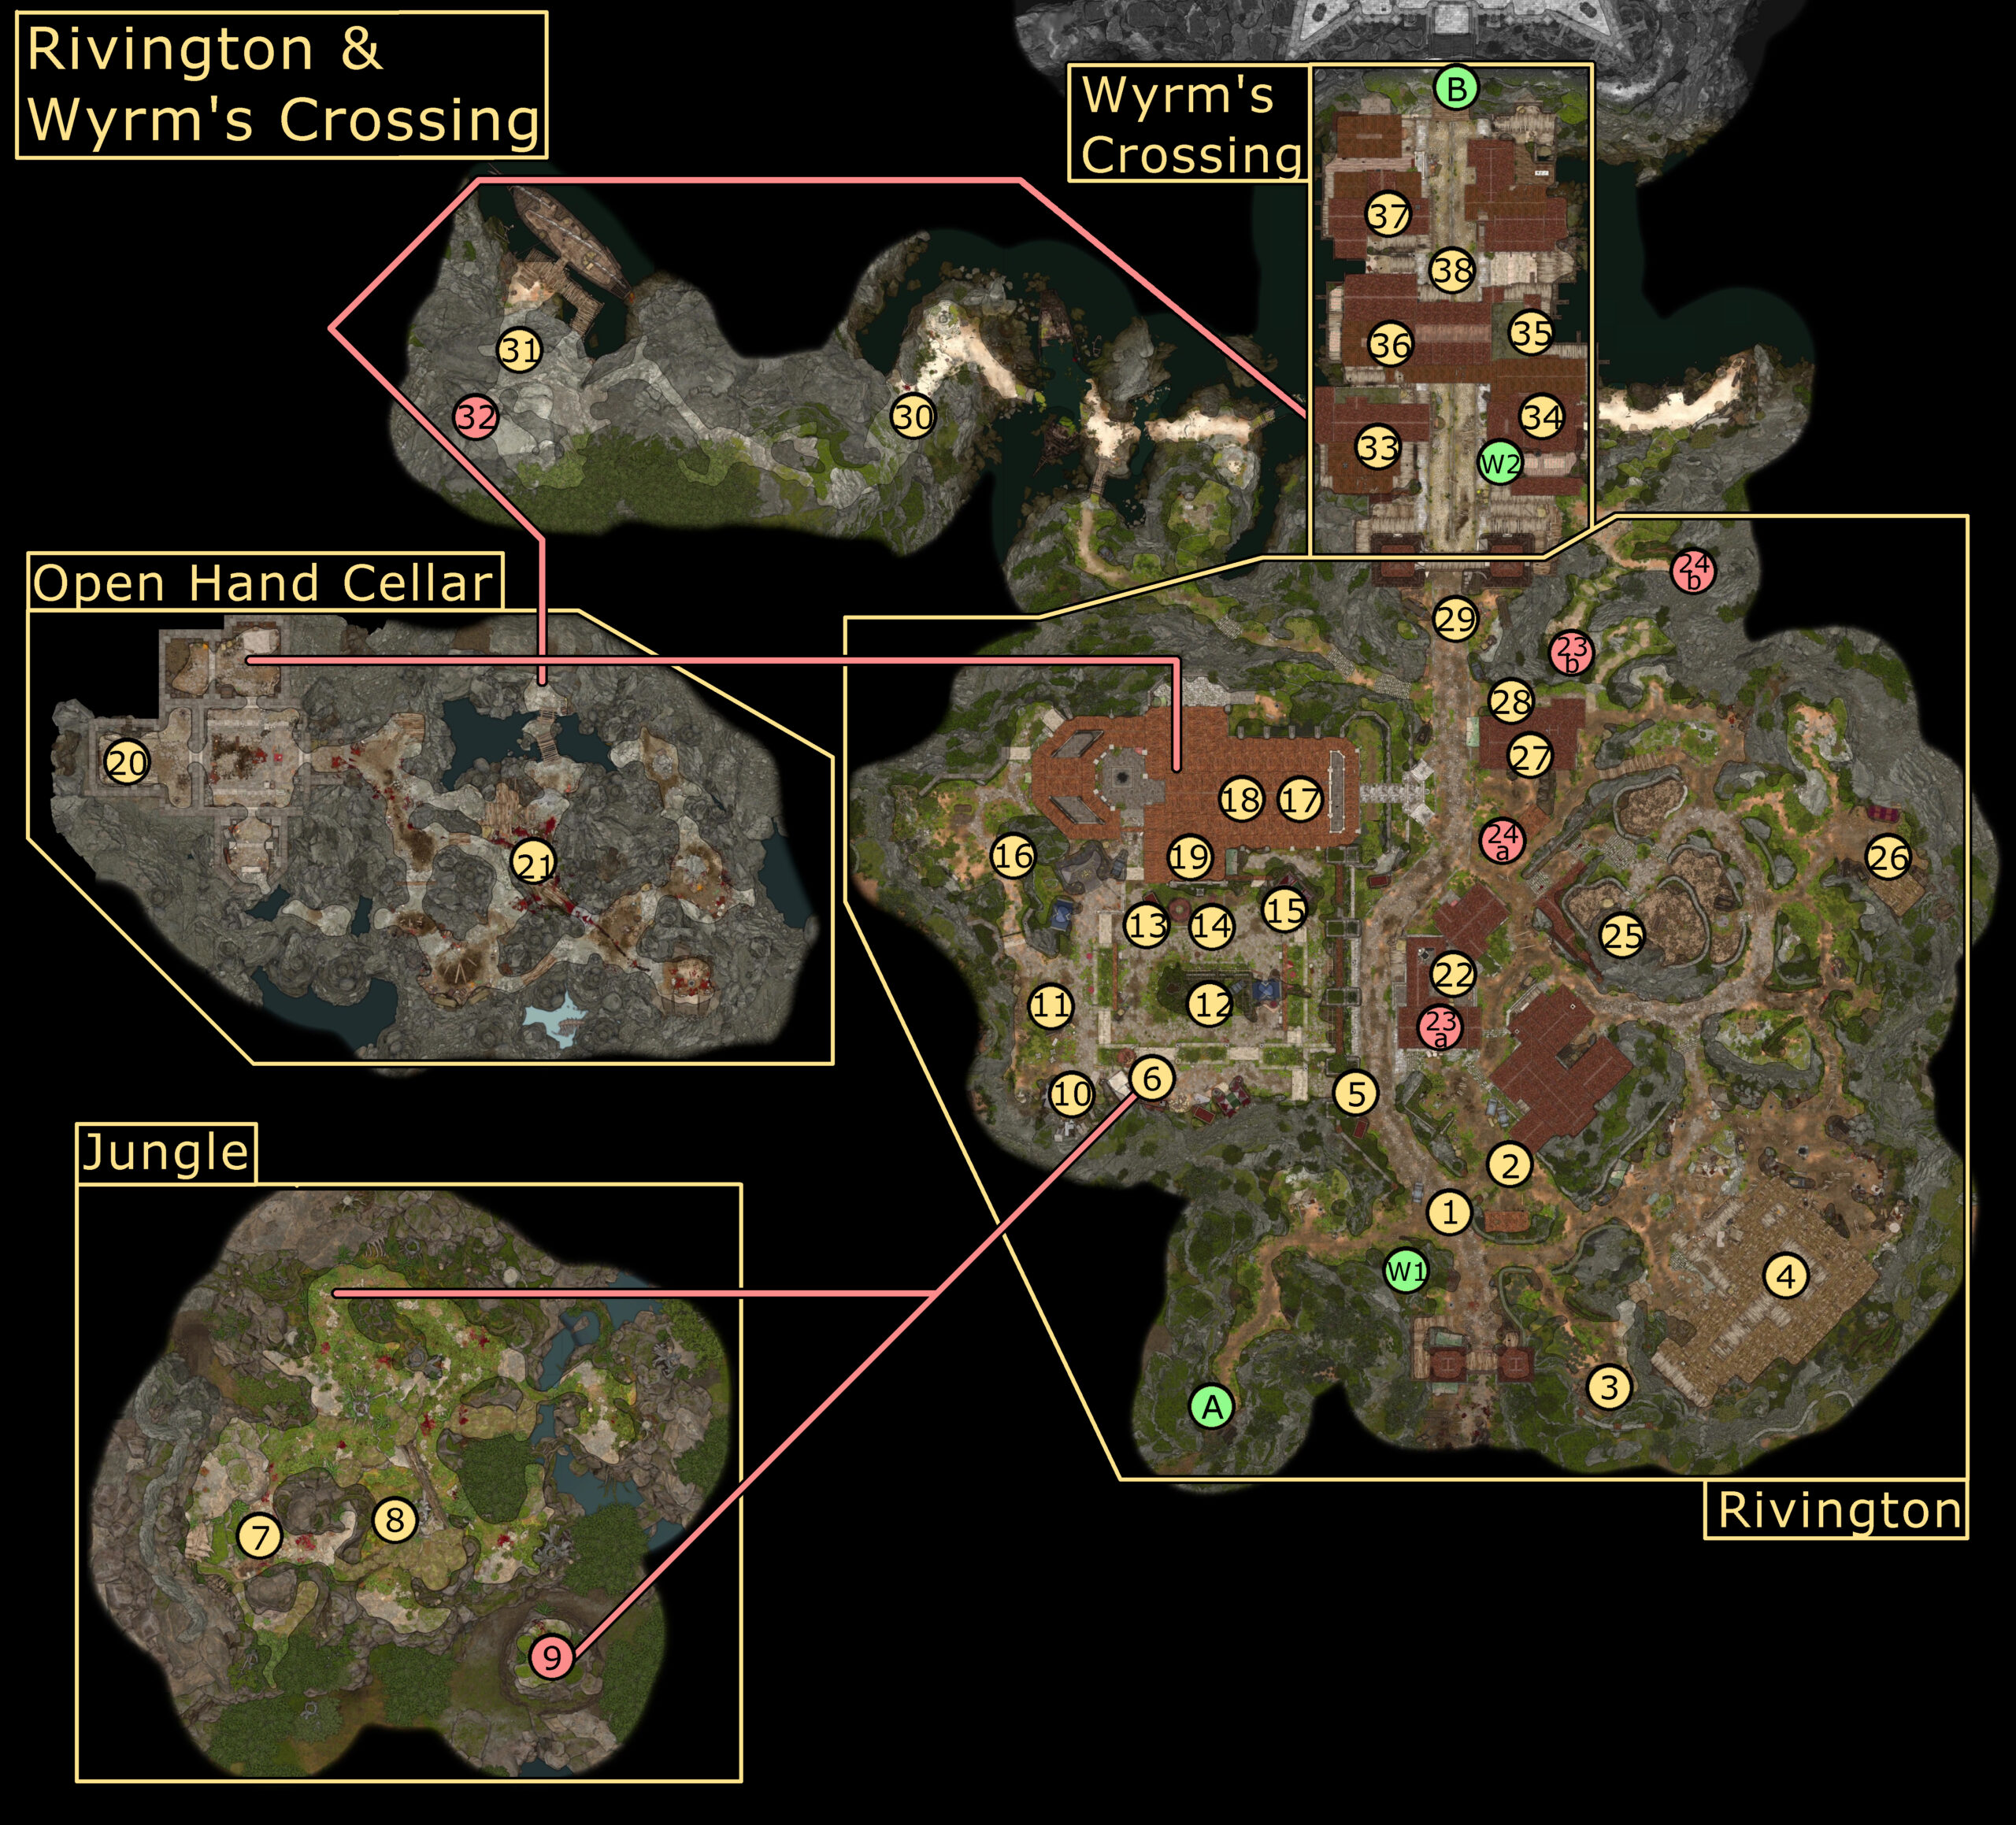
Map
Points of Interest 1 – Yenna 2 – Arfur’s Mansion 3 – Strange Ox 4- Requisitioned Barn 5 – Circus of the Last Days 6 – Akabi 7 – Chult Alioramus Cave 8 – Chult Alioramus Ambush 9 – Portal Back to Circus 10 – Stoney & Boney 11 – Popper 12 – Zethino 13- Lucretious 14 – Shadow-Whiskers and Crimson 15 – “Dribbles the Clown” 16 – Brilgor 17 – Open Hand Temple 18 – Tara the Tessmyn 19 – Father Lorgan 20 – Shirra’s Sarcophagus 21 – Doppelgangers 22 – The Rivington General 23 – Wulbren’s Hideout 24 – Rivington Well 25 – Infant Mind Flayer 26 – Gur Camp 27 – The Sword Coast Couriers 28 – Lens the Journalist 29 – Steel Watch Checkpoint 30 – Trapped Path 31 – Nine-Fingers and Stone Lord Fight 32 – Smuggler’s Passage 33 – Fraygo’s Flophouse 34 – Sharess’ Caress Lobby 35 – Naoise Nallinto & Fist Jara 36 – Kith’rak Voss & Raphael 37 – Danthelon’s Dancing Axe 38 – Shops
Exits A -Entrance to Rivington B – Wyrm’s Rock W – Warps
Points of Interest
NOTE: Orin will disguise herself as the first two of these that the players meet. If you aim at keeping them alive (with the exception of the Stone Lord Thug), then you should make sure to head to Wyrm’s Rock and speak to Gortash there before speaking to any of the below NPCs, who Orin can disguise as:
Dying Stone Lord Thug along the Trapped Path (#30)
If you don’t speak to Gortash first, learning that Orin has infiltrated your camp, then the first two of the above NPCs who you speak to will actually be Orin in disguise. In these cases, she will have either already killed the character, or you will be able to find them dead later. The only exception to this is the Dying Stone Lord Thug, who cannot be saved, and who will be Orin even if you’ve spoken to Gortash first (though not if you’ve spoken to two other NPCs on the list first).
Yenna
The first person you’ll meet in Act 3 is Yenna, a young human (alongside her cat, grub). The conversation will make it clear to you (though perhaps not to Yenna) that the child’s mother won’t be coming back. In light of that, you will be given the option to give Yenna food or gold. Doing so will ensure that Yenna will join your camp later as a companion.
Yenna is one of the people that Orin the Red will kidnap later in Act 3, once you reach the Undercity. However, Orin will instead kidnap Lae’zel, Gale, Halsin, or Minthara (prioritizing your companion with the highest relationship) if they are in camp when you enter the Undercity.
The kidnapping can also occur in your camp at night, and if Lae’zel is the one Orin impersonates, then you will need to talk down Orin (disguised as Lae’zel) with a successful DC-25 Persuasion or Intimidation check. Failing to do so will result in Orin killing Yenna.
Arfur’s Mansion
As you approach the mansion, Arfur Gregario (and his hired help, led by Zenovia Dawg) will be arguing with some refugees that have taken up Arfur’s Mansion as their hideout. You can opt to intervene: if you decide to try to convince Arfur to accept the refugees into his home, you’ll need to pass an Intimidation or Persuasion check, which can vary based on your class, but ranges from DC-18 to DC-25. However, failing it, or siding with Arfur, will lead to Zenovia and her goons knocking out the squatters and removing them.
If you do succeed, Arfur will let the refugees stay, but Zenovia will threaten you. With 500 Gold, a DC-15 Persuasion Check, or a DC-10 Intimidation check, you can convince her to stand down.
You can also use Detect Thoughts to learn that Arfur is afraid of something being discovered in his basement, though telling Arfur that you know that will Arfur to pay Zenovia to immediately attack you.
Regardless of if you learned about the basement, you can find a hatch in a workshop at the back of the house with a successful Perception check. This basement hatch can be picked with a DC-18 Sleight of Hand check with Thieves’ Tools, or can be opened using a Key on a bookshelf in Arfur’s Bedroom (which, itself, can be picked with a DC-10 Sleight of Hand check or using the key located on one of the bottle shelves in the mansion’s kitchen).
In the basement, there are many tripwires and rigged fireworks. These do low damage, but can trigger often, so it is best to send in a party member with high Perception alone. At the back of the room, you’ll find a trapped and locked chest, with a DC-15 Sleight of Hand required to disarm the trap, and DC-20 to unlock the chest. Inside the chest, you’ll find a Blackmail Letter, which will point you to the Requisitioned Barn (#4) to investigate suspicious toys.
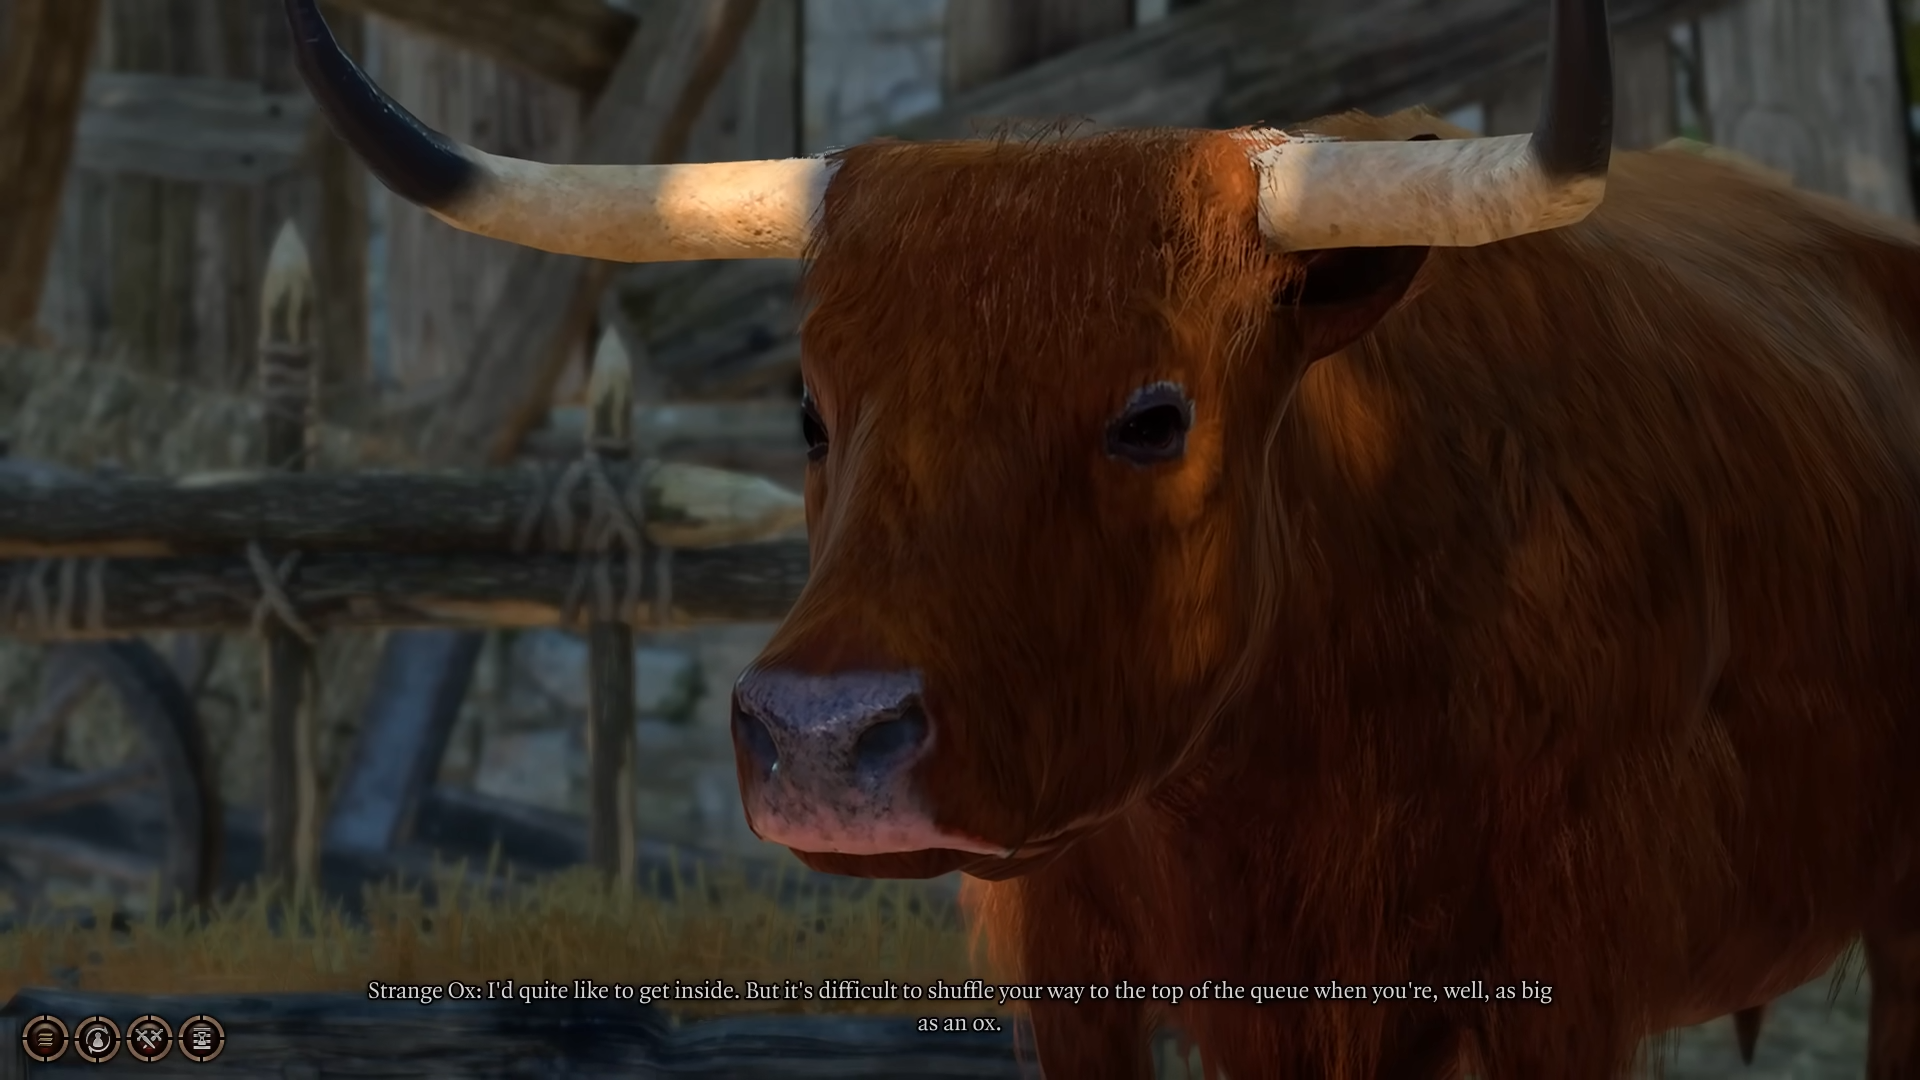
Strange Ox
If the Strange Ox has survived Acts 1 and 2, you’ll find it once more here in Act 3. As you approach, you’ll need to pass an Insight check to confirm that the Ox is the same one. Casting Speak With Animals will allow you to question the Ox, after which he will ask you to help him and turn into an apple. Should you take this apple into the Lower City, the apple will vanish, leaving behind a Shapeshifter’s Boon Ring and a… somewhat gross note. This also allows you to summon him during the final battle of the game.
If you try to eat the apple, the Strange Ox will become an ooze and attack you. That’s just weird.
Requisitioned Barn
As you approach the Requisitioned Barn, you’ll encounter Nestor, a Flaming Fist who is managing the barn and will ask you for donations to aid the refugees in Rivington, which gives inspiration to various character backgrounds. However, if you want access to the Barn, you’ll need to talk your way in. If you’ve been to Arfur’s Mansion’s basement (#2) and read the note found in the trapped, locked check there, then you’ll have access to a DC-10 Persuasion check for Nestor to let you through. Otherwise, you can attempt the same with a DC-18 Deception check or by sneaking your way through.
Once inside, you can find a set of toys in the north corner of the Requistioned Barn. Approaching the toys can cause them to detonate, but whether they do, once you’ve confirmed the existence of these explosive toys, Nestor can take care of it from there. With this evidence, you can speak to Arfur Gregorio at Sharess’ Caress to obtain an admission pass to the Archducal Coronation.
Fist Rowan in this Requisitioned Barn is one of the targets of Orin’s impersonation. Coming into contact with him before speaking to Gortash or talking to two other possible impersonation victims will mean that he is actually Orin. In this case, Fist Rowan’s actual corpse can be found in Bhaal’s Temple later.
Mattis, from the Emerald Grove in Act 1 and the Last Light Inn in Act 2, will be near the Requisitioned Barn, selling some completely useless (but very funny) items.
Circus of the Last Days
At the entrance to the Circus of Last Days, you’ll find Klaus and Benji, who have been tasked with sniffing out suspicious people and denying them entry. And, as luck would have it, you’ll be considered “suspicious”. However, you can talk your way past this with a variety of checks, depending on your chosen class. You will always have access to a DC-18 Persuasion, Intimidation, and Deception check, though any of these checks marked with a Class tag is DC-10 instead. You can also spend 200 Gold, or go through the Open Hand Temple (#17) and open up the back gate with a DC-15 Sleight of Hand check.
Akabi
Akabi is a djinni running a magical wheel at the Circus of Last Days. You can spin the wheel for 500 Gold, but you will always get a consolation prize. There are 16 possible Consolation Prizes, which are universally “joke” items with limited or no utility.
A passed Perception check can reveal that Akabi is cheating. Calling him out on this will cause him to turn players into a Cheese Wheel and refuse to let them play any further (though the other members of the party still can). A Bard can use this information to pass a DC-15 Performance check to distract Akabi and win the “Jackpot”.
If you aren’t a Bard, pickpocketing Akabi’s Djinni Ring with a DC-13 Sleight of Hand check will ensure he can’t rig the game anymore, meaning you’ll win the “Jackpot” on the next spin. After doing so, Akabi will be furious, and will teleport you (alone) to the “Jungle of Chult,” a unique area filled with Alioramus dinosaurs (#7 and #8) and a few pieces of look that can only be accessed via this method. After being teleported, there will be one Alioramus directly in front of you, though you will start in the jungle hiding.
You can escape the jungle through the Portal Back to Circus (#9). If you die in the Jungle, your resurrection orb will appear back in the Circus, giving you another way out.
Chult Alioramus Cave
After being teleported to the Jungle, you can find a cave with a Chult Alioramus Colossa and a regular Chult Alioramus. After dispatching them, you can climb the back of the cave in order to find a skeleton with a backpack containing the Band of the Mystic Scoundrel.
Chult Alioramus Ambush
There are two other Chuld Alioramuses (Aliorami?) patroling the Jungle, who will attack you if they see you. These can easily trigger the Alioramus and Colossa in the cave nearby as well (#7).
Portal Back to Circus
You can jump (or teleport, if you want to avoid damage) down to the Portal back to the Circus of the Last Days. Next to the portal, you’ll find a DC-20 Sleight of Hand locked chest containing the unique Nyrulna trident, a surprisingly powerful weapon. Once you go through the Portal Back to the Circus, you will never be able to return to the Jungle (as Akabi (#6) will not let anyone spin his wheel anymore), so make sure to grab the two unique items before going through.
Stoney & Boney
By talking to Boney (the Mug Mephit in the corner of the Circus of the Last Days (#5)), you are able to purchase a statue of yourself for 5000 gold, which will appear in your camp with the variation of your choice (armed, in camp attire, or nude). This might seem like a steep price, but it doesn’t provide a permanent +1d4 to Attack Rolls and Saving Throws, so it might be worthwhile to the richest (or most vain) characters.
Popper
Popper is a kobold, selling trinkets at the Circus of the Last Days (#5). While Popper’s loot isn’t particualrly interesting, you should plan on stealing The Clown’s Severed Hand item sitting on a silver platter in his tent, which is one of the Clown Body Parts you’ll want to give to Lucretious (#13) when you’ve found them all.
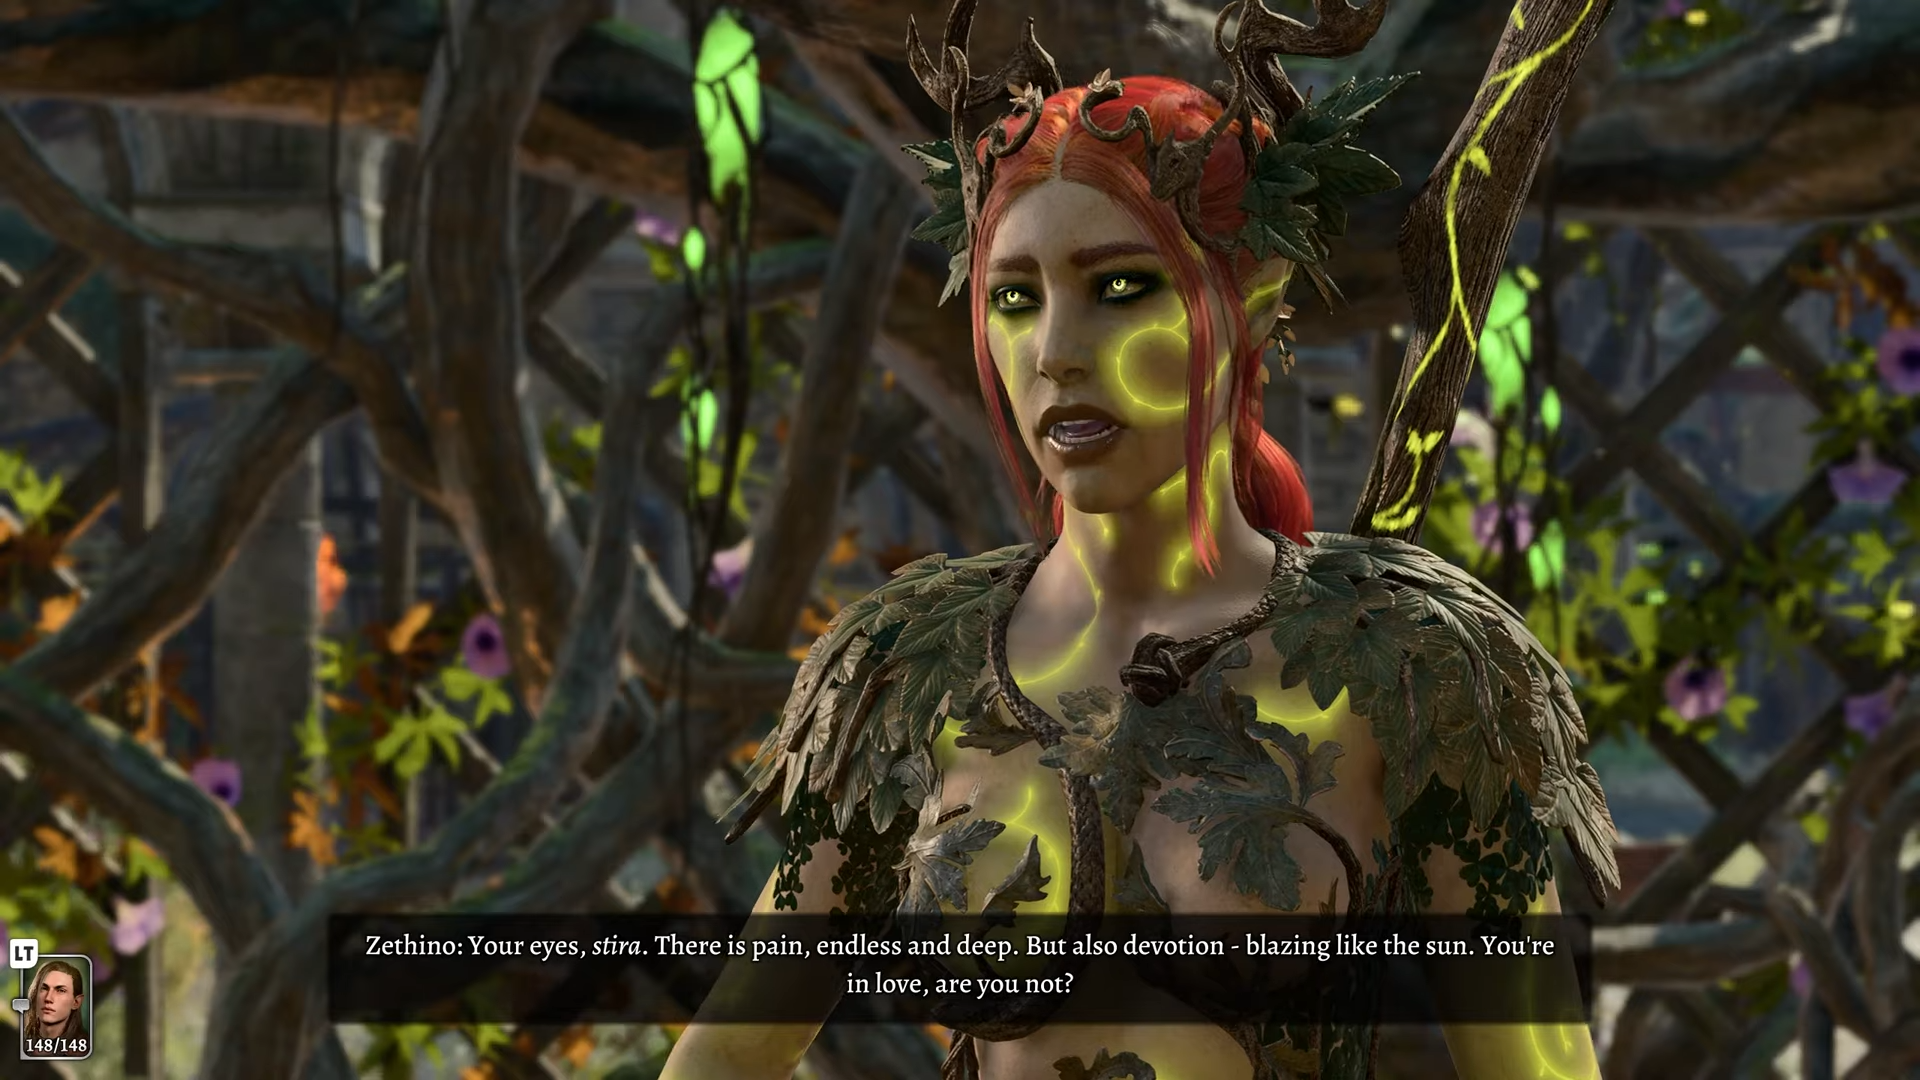
Zethino
Zethino is a Dryad, and also the “Master of Love” at the Circus of the Last Days (#5). By speaking to her, you can engage in a “Test of Love” with a companion of your choice (except for Jaheira or Minsc), for the cost of 100 gold. You should be sure to pick the companion whom you’ve spent the most time with (especially if you are a pursuing a romance with said companion). Once you’ve paid the gold, you’ll be asked a series of 3 questions about the companion. Answering these questions correctly will result in Zethino affirming your relationship with your companion, netting you some additional relationship points with them.
Zethino is one of the targets of Orin’s impersonation. Coming into contact with her before speaking to Gortash or talking to two other possible impersonation victims will mean that he is actually Orin. In this case, Zethino’s actual body can be found in Bhaal’s Temple later.
Lucretious
Lucertious is the ringmistress of the Circus of the Last Days (#5). After meeting with “Dribbles the Clown” (#15), she will task the player with locating all the missing body parts of Dribbles the Clown. There are 7 in total, each found in a different scene of Bhaal’s gory aftermath, as follows:
The Clown’s Severed Hand is at Popper’s tent (#11), sitting on a silver platter, where it can be stolen or talked out of Popper’s possession.
The Clown’s Severed Torso is in the Open Hand Temple’s basement, and can be found in the same place as the Doppelgangs (#21).
The Clown’s Severed Pelvis is in an empty house near the Basilisk Gate Barracks and behind Stormshore Tabernacle.
The Clown’s Severed Arm can be located in a boarded up house called the “Peartree House” in the Lower City, south of Sorcerous Sundries.
The Clown’s Severed Leg can be found in the basement of the groundkeeper of the park in the Lower City. Slightly past the city’s central way and to the west, you can find the entrance.
The Clown’s Severed Foot is in the basement of Rainforest’s Home in the Lower City, near the General Goods and Books shop, near the Blushing Mermaid.
The Clown’s Severed Head is in the Undercity Ruins, to the north of the Temple of Bhaal waypoint.
After you return each of Dribbles’ body parts to Lucertious, she will give you the Spellmight Gloves and let you know to finish up any business you might have with the Circus of the Last Days, as they will be gone after your next long rest.
Shadow-Whiskers and Crimson
Two animals at the north of the Circus of the Last Days (#5) are caged: Crimson, a Dilophosaurus; and Shadow-Whiskers, a Displacer Beast. Both of these animals can be spoken to using Speak With Animals.
Speaking with Crimson, or discerning with a DC-15 Animal Handling check, will reveal that Crimson has been starved recently, and will lash out at anyone. Feeding Crimson some meat will bring him back to his senses, where he can reveal some about himself and Shadow-Whiskers. This will also ensure that he does not get involved in the ensuing conflict with the false Dribbles the Clown (#15).
Speaking with Shadow-Whiskers, you will learn that she is filled with rage at the hunters who killed her mate and cubs, and that she plans to kill everyone here for the sake of vengeance. To prevent this, players can either break the lock on her cage, ensuring it can’t be opened or broken into even with a key, or open the cage without being in or initiating combat, at which point she will run away. Failure to do either of these options will result in Shadow-Whiskers breaking out of the cage during the fight with the false Dribbles the Clown (#15), attacking anybody close to her — including you.
“Dribbles the Clown”
Just past Shadow-Whiskers and Crimson, you’ll come across Dribbles the Clown on stage. He will notice you, and invite you up to the stage. If you are playing as a Great Old One or Arch-Fey Warlock, you will be able to attempt a DC-25 Insight check to see through “Dribbles'” disguise, which will give you an advantage in the ensuing conflict.
No matter what happens, the false Dribbles will eventually attack you, alongside his pet “Bitey Buddy” and two members of the Circus, revealing his true nature as a Doppelganger. Depending on if you fed Crimson and broke Shadow-Whiskers’ cage (#14), they will join the fight as well, attacking anyone in their vicinity.
After defeating Dribbles the Clown, you’ll be able to talk to Lecretious (#13), who won’t be too broken up over the actual Dribbles’ death, and will task you with finding his various scattered bits.
Brilgor
Brilgor’s body can be found here, after digging it up from a dirt mound. As the primary suspect for the murder of Father Lorgan of the Open Hand Temple (#19), you can cast Speak With Dead on Brilgor to get additional information for solving the mystery of the Open Handle Temple Murders. Specifically, he will reveal that both he and Father Lorgar were murdered in a cave beneath the Open Hand Temple (#21). To clear Brilgor’s name with Investigator Valeria, you will need to find a bloodstained note in Fraygo’s Flophouse (#33) and bring it to him in Sharess’ Caress (#34).
Open Hand Temple
In the Open Hand Temple, you can talk to Clements and Bill at the front of the Temple, to help them decide whether to be closed- or open-minded toward the refugees outside. Further in, you can encounter Investigator Valeria, who is investigating the murder of Father Lorgan, and thinks she has a suspect in Brilgor, both of whom are now dead. After spekaing to him. You can cast Speak With Dead on Brilgor (#16) and Father Lorgan (#19), or investigate the Doppelgangers in the secret basement (#21) in order to discover the truth. Once you have, though, you’ll need to bring said information to Valeria in Sharess’ Caress later (#34).
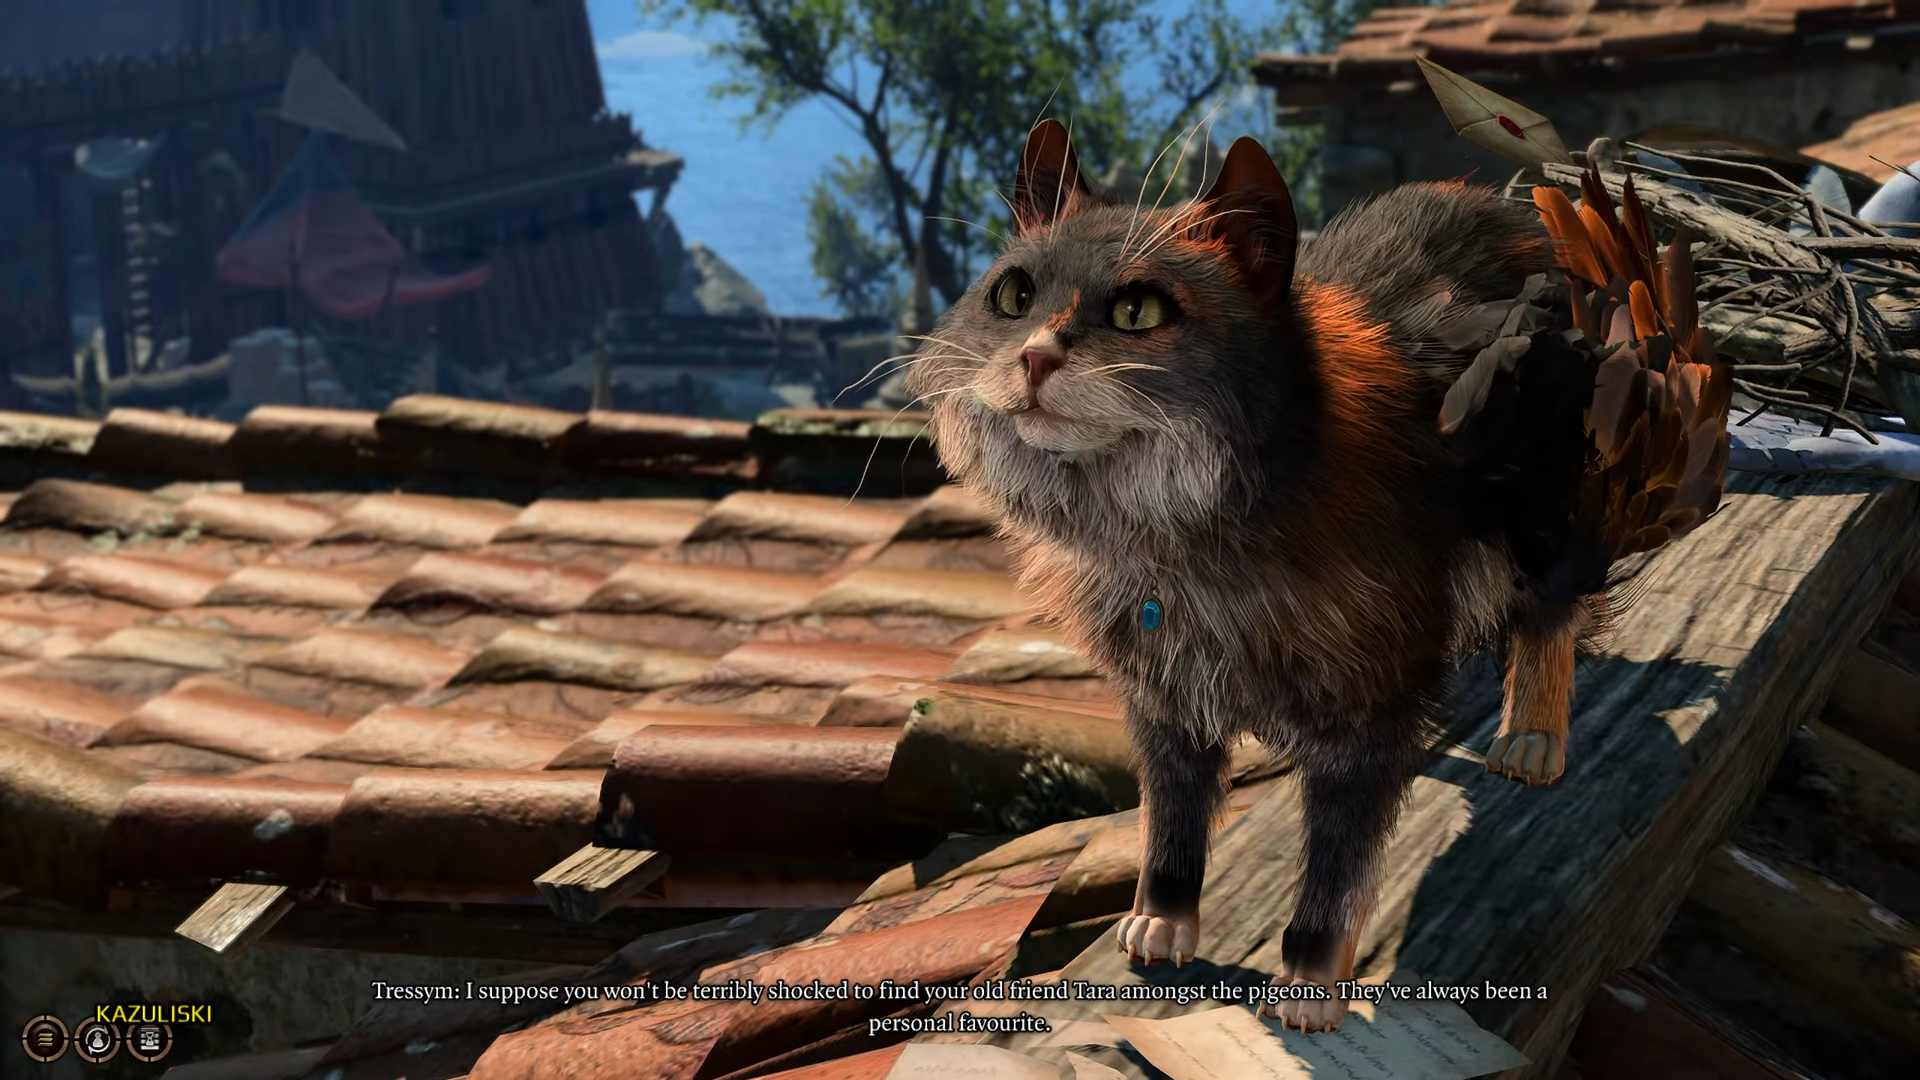
Tara the Tessmyn
On the roof of the Open Hand Temple, you can encounter Tara the Tessmyn. Given that she is connected to Gale’s backstory, it is good to bring him with for this brief interaction.
You can discover that it is her who has been intercepting the Sword Coast Couriers’ carrier pigeons. Gale can convince her to stop with no checks necessary, but if you don’t have Gale with you, then you can convince Tara to stop with two DC-15 Persuasion, Intimidation, or Deception checks after casting Speak With Animals.
Father Lorgan
Father Lorgan will be dead by the time you encounter him, but you can cast Speak With Dead on him to learn that there is more to his death than meets the eye: you can learn of a secret cave beneath the Temple of Open Hand that is likely to be a font of answers.
Shirra’s Sarcophagus
If you have the Sentient Amulet from the Grymforge (#17*), the monk within will possess Shirra’s corpse when you open the Sarcophagus’s lid (it is the sarcophagus in the corner, which you can learn from reading the plaque). Upon learning that Shirra won’t be able to take on his curse, he will ask you to do so, requiring you to endure the curse yourself. You can then attempt a DC-15 Arcana check to learn more about it.
If you refuse, the 4 bodies in the room (including Shirra’s) will become hostile zombies, which will need to be killed.
If you accept, then you will need to pass two DC-15 Wisdom or Constitution Checks (one of which can be replaced with an Illithid DC-2 Wisdom Check), or else suffer a permanent -1 Wisdom point for each failed check. Any character who does this, no matter the Wisdom point loss, will gain the ability to cast Tasha’s Hideous Laughter once per long rest.
Doppelgangers
To reach the cave attached to the Open Hand Temple’s basement, you can go through the side room and behind the shelving to find a broken piece of wall, which you can jump through to progress.
After that, you will soon come across 3 people in the cave. But, while they may look like brigands, they are actually Doppelgangers, who will be immediately hostile when you approach. After killing them, make sure to grab the Clown’s Severed Torso off Penela Lumpensicks’s body for Lucretious’s quest (#13) in the middle of the carnage, as well as the Flowery Key off the body of Zomm (which will lead observant players to Fraygo’s Flophouse (#33).
You can also cast Speak With Dead on Zomm in order to learn some about his murderous companion Dolor (who you can encounter later in the Lower City).
The Rivington General
The Rivington General is a shop run by Gyldro Angleiron, though players can shop for his wares through his assistant Exxvikyap.
Gyldo Angleiron is one of the possible targets of Orin’s Impersonation, so if you talk to him before talking to either Gortash or 2 of the other possible Orin impersonation victims, he will be replaced. Unlike other Orin Impersonation victims, he will still be alive (and will awaken after your interaction with Orin), though he will be killed later after your next Long Rest.
There is a hatch in Angleiron’s portion of the store that connects to Wulbren’s Hideout (#23), if Wulbren is alive in Act 3. In order to use it, players will first have to enter from the cave entrance to the north of Rivington (#23b).
Wulbren’s Hideout
If Wulbren was rescued from the Moonrise Tower Prison (#11*) in Act 2, he will be taking shelter in Angleiron’s Shelter. He will ask the party to destroy the Steel Watch Foundry, the source of Gortash’s Steel Watch, and will give you a Runepowder Bomb to help do so. In order to access Wulbren’s Hideout, you’ll need to enter from the beach-facing cliffs (#23b), since the hatch in Angleiron’s shop (#23a) is closed via lever inside the cave.
If Wulbren is not alive in Act 3, this hideout will be inaccessible.
Rivington Well
By entering either via the well (#24a) or from an entrance near the beach to the north (#24b), you’ll be able to access the Rivington Well. A relatively small area, you’ll find several corpses of murdered refugees. None of them will have anything to say if you cast Speak With Dead.
In order to access much of the Well, you’ll need to either be able to jump a long distance, or else cast spells like Grant Flight or Enhance Jump. In order to exit out of the side facing the cliff, you’ll also need to fire a projectile at the winch to the southwest, moving a rock.
Infant Mind Flayer
In the basement of the windmill in Rivington, you’ll find a sleeping, starving Mind Flayer, who was once the owner of the mill. You can kill the Mind Flayer, or talk to it. With a DC-15 Persuasioncheck, you can convince the Mind Flayer to “go find its own meal”, but otherwise you can agree to help find it food. Any of the corpses around town (including those in the nearby Rivington Well (#24)) will do, rewarding the party with 1 point for the Illithid powers.
If you do feed it, you will encounter it later in the Lower City, where it will kill several citizens.
The Mind Flayer, if killed, will have a Mind Flayer Brain (which can be consumed) and the Ring of Truthfulness.
Gur Camp
The Gur are a group of monster hunters, who have recently become the target of Cazador’s ire. Approaching them will cause their leader, Ulma, to ask the party to rescue the children taken by Cazador, which the player can do by infiltrating Czar’s Palace after going through the Lower City. Bringing Astarion along will provide some unique dialogue, revealing more about his backstory as a thrall of Cazador.
The Sword Coast Couriers
The Sword Coast Couriers are a postal service. You can talk to Danzo at the front counter in order to learn that many letters have been going missing, which might lead you to Tara (#18) on the roof of the Open Hand Temple to convince her to stop killing the carrier pigeons. After doing so, you should return to Danzo for your reward.
Just outside, you can also encounter Scratch’s former owner, Angry Mar’hyah, who has been a terror to Scratch and all the other hounds under her control. If you reveal that you have a dog at your camp, she will ask for Scratch back, and players will need to pass a DC-18 Intimidation or Persuasion check to get her to stand down, and can follow that up with a DC-20 Deception or Intimidation check will make her leave the kennel and free the dogs she has abused.
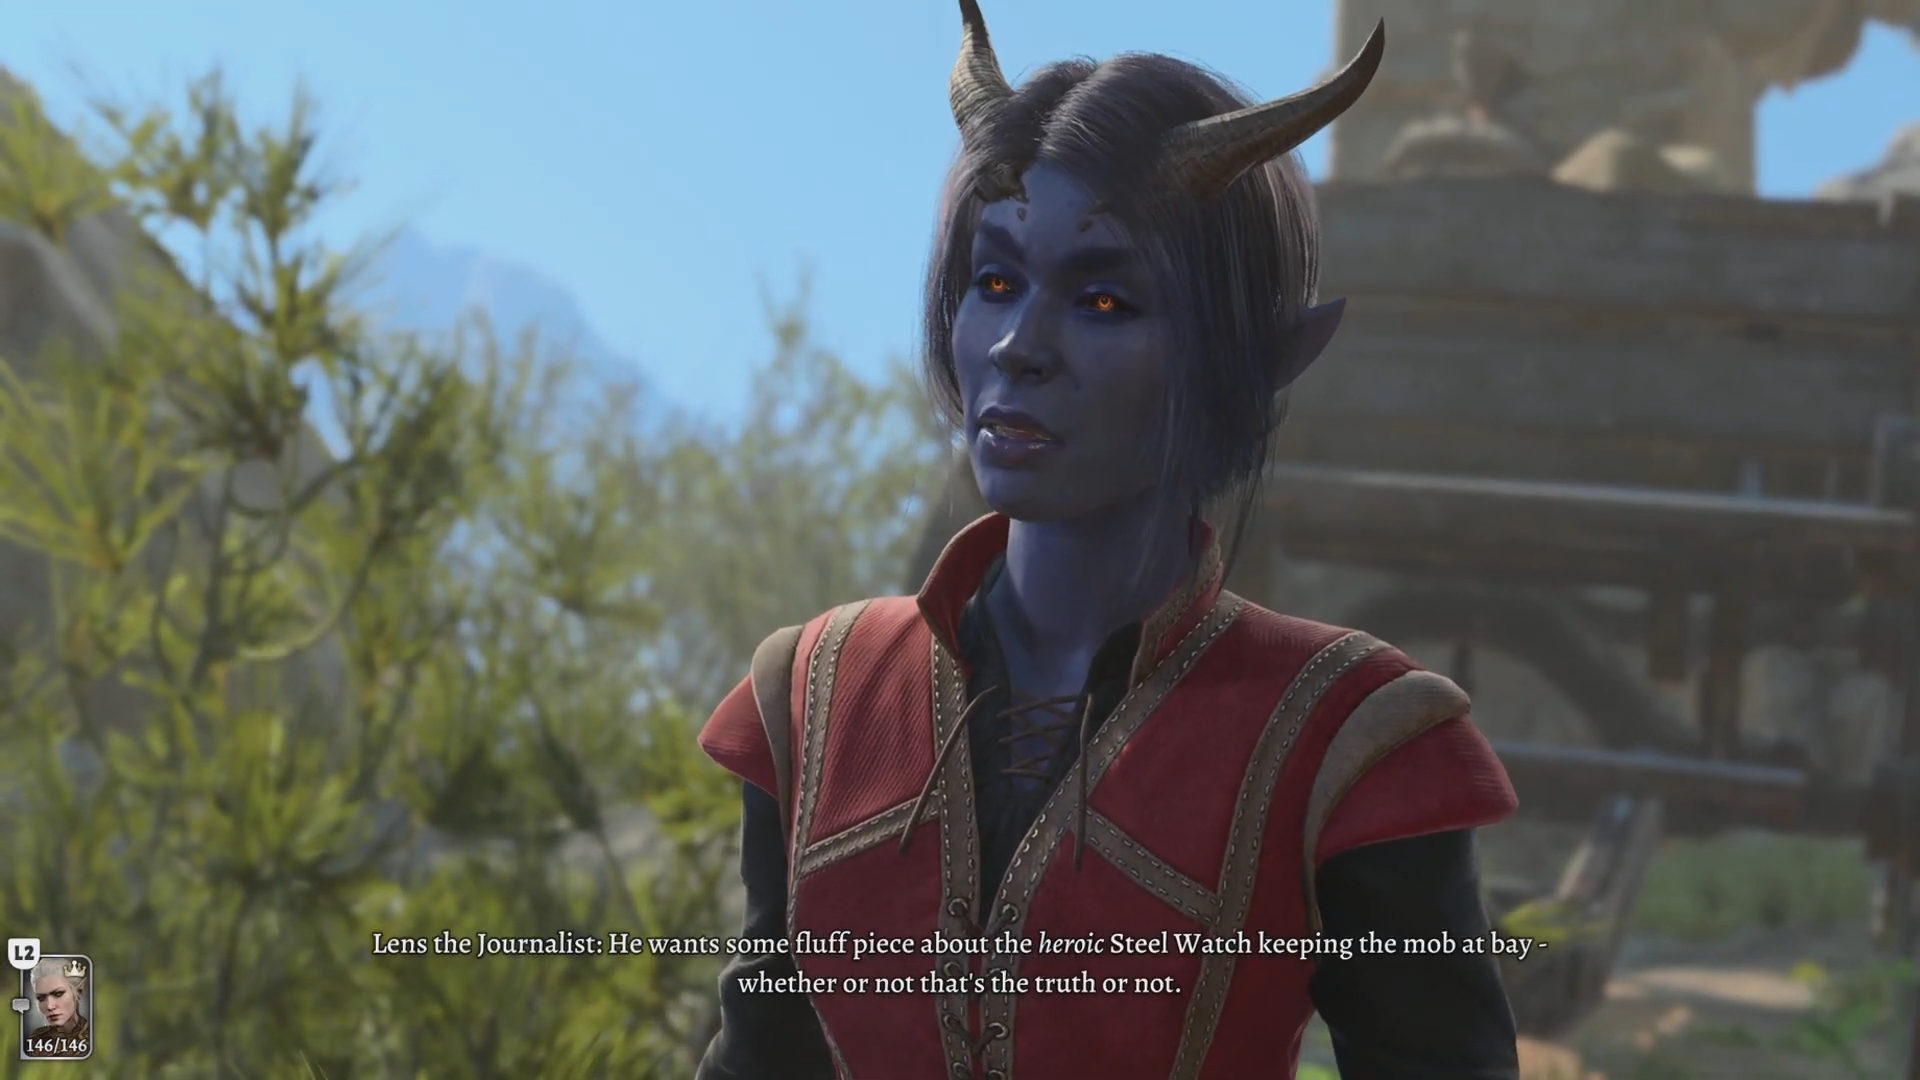
Lens the Journalist
Outside the Sword Coast Couriers, you will find Lens the Journalist, who will want to interview the party about their exploits, which will also point players toward the Baldur’s Mouth Gazette in the Lower City.
Lens is one of the possible targets for Orin’s Impersonation. If you have not spoken to Gortash or two of the other possible impersonation targets, then she will actually be Orin, and Lens’ actual body will be found later in the Temple of Bhaal.
Steel Watch Checkpoint
Nearing Wyrm’s Crossing, you’ll come across a checkpoint of Flaming Fists and a Steel Watcher. As you approach, you will be interrogated by the Gauntlet on duty there. After paying 200 gold (a fine you cannot get passed), the Steel Watcher will scan you. If you helped Wulbren in Moonrise, then they will cause a distraction, allowing you to use it to head into Wyrm’s Crossing without being noticed. Otherwise, bringing Karlach with you will cause the Watcher to malfunction, and you will be directed to report to the Steel Watch Foundry, letting you bypass the checkpoint.
Otherwise, after being scanned, the Gauntlet will try to place you under arrest. You can either consent to this arrest, placing you directly into the Wyrm’s Rock Prison, or fight back. The 5 Flaming Fists are not difficult enemies to take on, but the Steel Watcher can be very tough: your best bet is to keep your party spread out (due to the Steel Watcher’s many AoE attacks) and use lightning damage if you have it.
Trapped Path
To the west, you can follow a path by the beach toward a docked boat. In doing so, however, you will come across an area with 5x Blast Mines. After getting past them, you will then encounter a Dying Stone Lord Thug. This character will be impersonated by Orin unless you’ve spoken to 2 other possible impersonation victims (even if you’ve spoken to Gortash already). The Stone Lord Thug will inevitable die, and then after that you can continue forward, being wary of the two tripwires that will activate traps once you enter a cave.
Nine-Fingers and Stone Lord Fight
At the end of the beach, you will come across thugs from both the Nine-Fingers’ and the Stone Lord’s gangs. When you approach (assuming you don’t just hide and wait for the fight to start), Farlin will ask you to join in and help her on behalf of the Thieves’ Guild. Doing anything else will cause both parties to be hostile to you, but siding with Farlin will give you allies in the fight and will allow Farlin to put in a good word for you when you find the Thieves’ Guild later.
After the battle, regardless of if you sided with the Thieves’ Guild or opt to fight both parties (since you can’t ally with the Stone Lord Thugs), there is also a Mind Flayer Parasite on a barrel near the fight, and 2 more on the boat.
Smuggler’s Passage
To the west of the fight, there is an entrance to the Smuggler’s Passage. There are a couple of notes that can add context, a big pile o’ treasure to loot, and a trapped chest containing some very powerful boots.
Fraygo’s Flophouse
In Fraygo’s Flophouse, you can go to the top floor and interact with a Wardrobe to unlock it with the Flowery Key that you looted off of the Doppelgangers below the Open Handle Temple (#21). Upon doing so, you can discover the body of Ffion Goldgrind, as well as a Bloodstained Parchment that you can use as evidence for Investigator Valeria (either at the Open Hand Temple (#17) or Sharess’ Caress (#34)) to prove Brilgor’s innocence.
On the first floor, if you have Astarion in your party, you can interact with Dalyria and Pale Petras to reveal more about him (so long as you don’t have anything glowing on you when you do).
Sharess’ Caress Lobby
Sharess’ Caress holds a surprising amount of NPCs. Firstly, there is Mamzell Amira, who wants help finding Ffion (whose body can actually be found in Fraygo’s Flophouse (#33)). Doing so can give the player “free time” with Nym & Soth Orlith, two drow sex workers in Sharess’ Caress (who you can also interact with for charge).
You can also find Arfur Gregorio here after interacting with him outside his mansion (#2). This can allow you to point out that you found the toys he rigged with explosives in the Requisitioned Barn (#4), at which point he will reveal that the plan came from Felogyr in the Lower City, and will give you an admission pass to the Archducal Coronation, giving you access to the Lower City as well. After he does, you can then let him go, extort him for gold (which he will give you all of), kill him, or have him turn himself in (which will result in him dying by the time you see him again in Wyrm’s Rock Prison).
Upstairs, on an overlook, you can find Valeria, who will be here after “concluding” her investigation at the Open Hand Temple. Here, you can present her with the Bloodstained Parchment from Fraygo’s Flophouse (#33) (or a few other places), which will get her to give you a pass to enter the Lower City for your help.
Naoise Nallinto & Fist Jara
Upstairs, in a private room, you can encounter Naoise Nallinto about to engage in… entertaining Fist Jara. Before the two can, however, Fist Jara will become a Mind Flayer, which will be immediately hostile. If you kill the new Mind Flayer, Naoise will be impressed (and aroused by the mind flayer’s beauty). With a successful passive Insight check, you can further inquire on that, which will enable you to engage Naoise yourself to acquire the temporary “Rapture” buff.
Kith’rak Voss & Raphael
In the “Devil’s Den” (subtle), you will encounter Kith’rak Voss & Raphael discussing a deal. Voss has learned that Raphael has the Orphic Hammer — a tool that can free Orpheus — and is trying to convince Raphael to give it to him, but Raphael is uninterested. However, Raphael will be willing to deal with you, offering you the Hammer in exchange for the Crown of Karsus.
If you decline, you will be able to obtain the Orphic Hammer anyway, by infiltrating the House of Hope in the Lower City. And you won’t need to agree to give the devil a super-powered, mind-controlling crown.
If you accept, he will go through with the deal, though (as expected), you should expect to deal with some aftermath at the end of the game, unless you go to the House of Hope and — instead of stealing the Orphic Hammer — destroy the contract you signed to get the Hammer.
Danthelon’s Dancing Axe
Dantheolon’s Dancing Axe, in addition to being a storefront, is also a Harper hideout. After letting the shopkeep know that “Jaheira sent you,” you can head to the basement, where you’ll encounter Geraldus. A successful Insight check can reveal that he is terrified of something. If Jaheira is in your party, she will then make a statement that will cause your enemies to be surprised.
Speaking of enemies: the other Harpers her are actually not Harpers at all, but instead are Doppelgangers that will attack you at the end of the conversation. Afterward, Jaheira will reveal that she is looking for Minsc, who she believes will be helpful in their coming fights.
Above Danthelon’s Dancing Axe, you will also find the Velveteen Elixir, a potion shop, as well as an area of rooftop close enough to teleport or fly to Wyrm’s Rock, in case you didn’t secure any passes.
Shops
There are a variety of shops in Wyrm’s Crossing. As follows:
Hoots Hooligan: In Sharess’ Caress. Sells supplies and food.
Traveller Griska: Fraygo’s Flophouse. Sells potions and alchemy supplies.
Thodric Shedeever: Streetside. Sells fish.
Roberon Slit: Streetside. Sells dyes.
Velson Oakes: Streetside. Sells supplies.
Glyunda Oltower: Streetside. Sells tools and explosives.
Enthari Danthelon: Danthelon’s Dancing Axe. Sells weapons and armor.
Stylin’ Horst: The Velveteen Elixir. Sells potions and alchemy supplies.
Carmen Pennygood: At Carm’s Garms. Sells clothing and attire.
Exits
Entrance
After dealing with the Intermezzo, in which the party will interact with the Emperor and learn about Orpheus, they will enter Act 3 proper here, at the cusp of Rivington.
In order to enter Wyrm’s Rock, you’ll need to accomplish some kind of feat. The easiest way is to sleep in using Grant Flight or Misty Step in order to bypass the Wyrm’s Rock gate.
Alternatively, you can also help Investigator Valeria (usually found at Sharess’ Caress (#34)) solve the Open Hand Murders or discover Arfur Gregorio’s sabotaged toys (#2 for his mansion, #4 for the toys, and #34 to find him after) and bring it to his attention, both of which will give you a pass that will let you through Wyrm’s Gate.
Lastly, you can try to talk or bribe your way through, requiring an incredibly hard DC-30 Persuasion or Deception check or a DC-25 Persuasion check followed by paying 20,000 gold.
Warps
There are 2 Warp Points in Rivington & Wyrm’s Crossing:
W1: Rivington
W2: South Span of Wyrm’s Crossing
Where To Go Next
After clearing out everything in the city’s outskirts, you ought to make your way to Baldur’s Gate. Before you can, though, you’ll need to get through Wyrm’s Rock (which is your only path forward), where you might as well investigate the Wyrmway it was built upon as well.
Share this article:
Graves
Graves is an avid writer, web designer, and gamer, with more ideas than he could hope to achieve in a lifetime. But, armed with a mug of coffee and an overactive imagination, he'll try. When he isn't working on a creative project, he is painting miniatures, reading cheesy sci-fi novels, or making music.