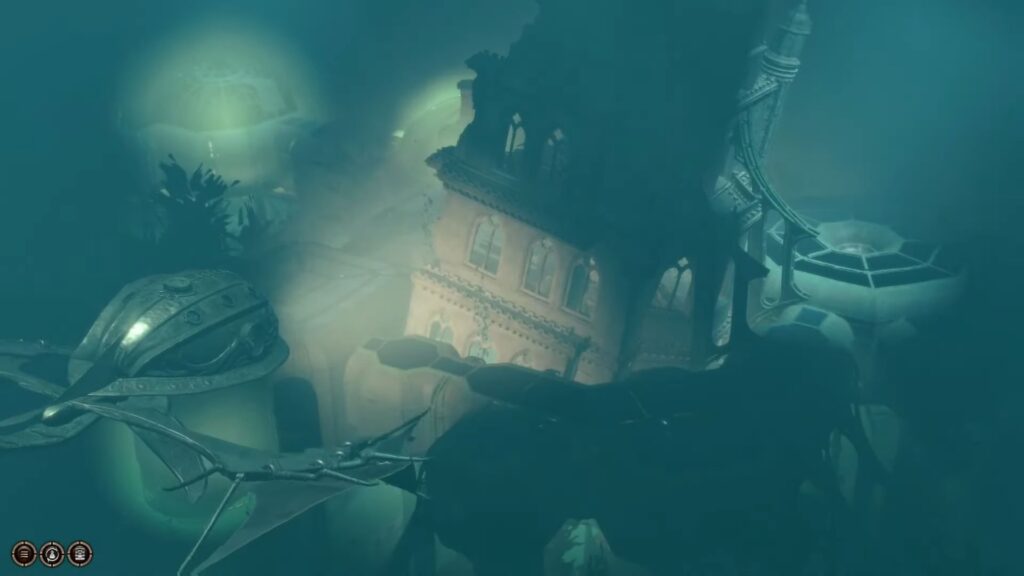
Reachable only by a submersible found below Flymm Cargo, the Iron Throne is an underwater prison. Primarily a means to control the Gondians working in the Steel Watch Foundry, the Iron Throne can also contain Duke Ravenguard and Omeluum. But, upon reaching it, you will be on a tight time limit before the entire place explodes, and so will need to rescue who you need to rescue quickly. Thankfully, this walkthrough can guide you through getting everyone out alive from the Iron Throne.
It should be noted that it is advisable to always complete the Iron Throne before disabling the Steel Watch Foundry, as doing it in the reverse order results in the destruction of the Iron Throne and the death of everyone within.
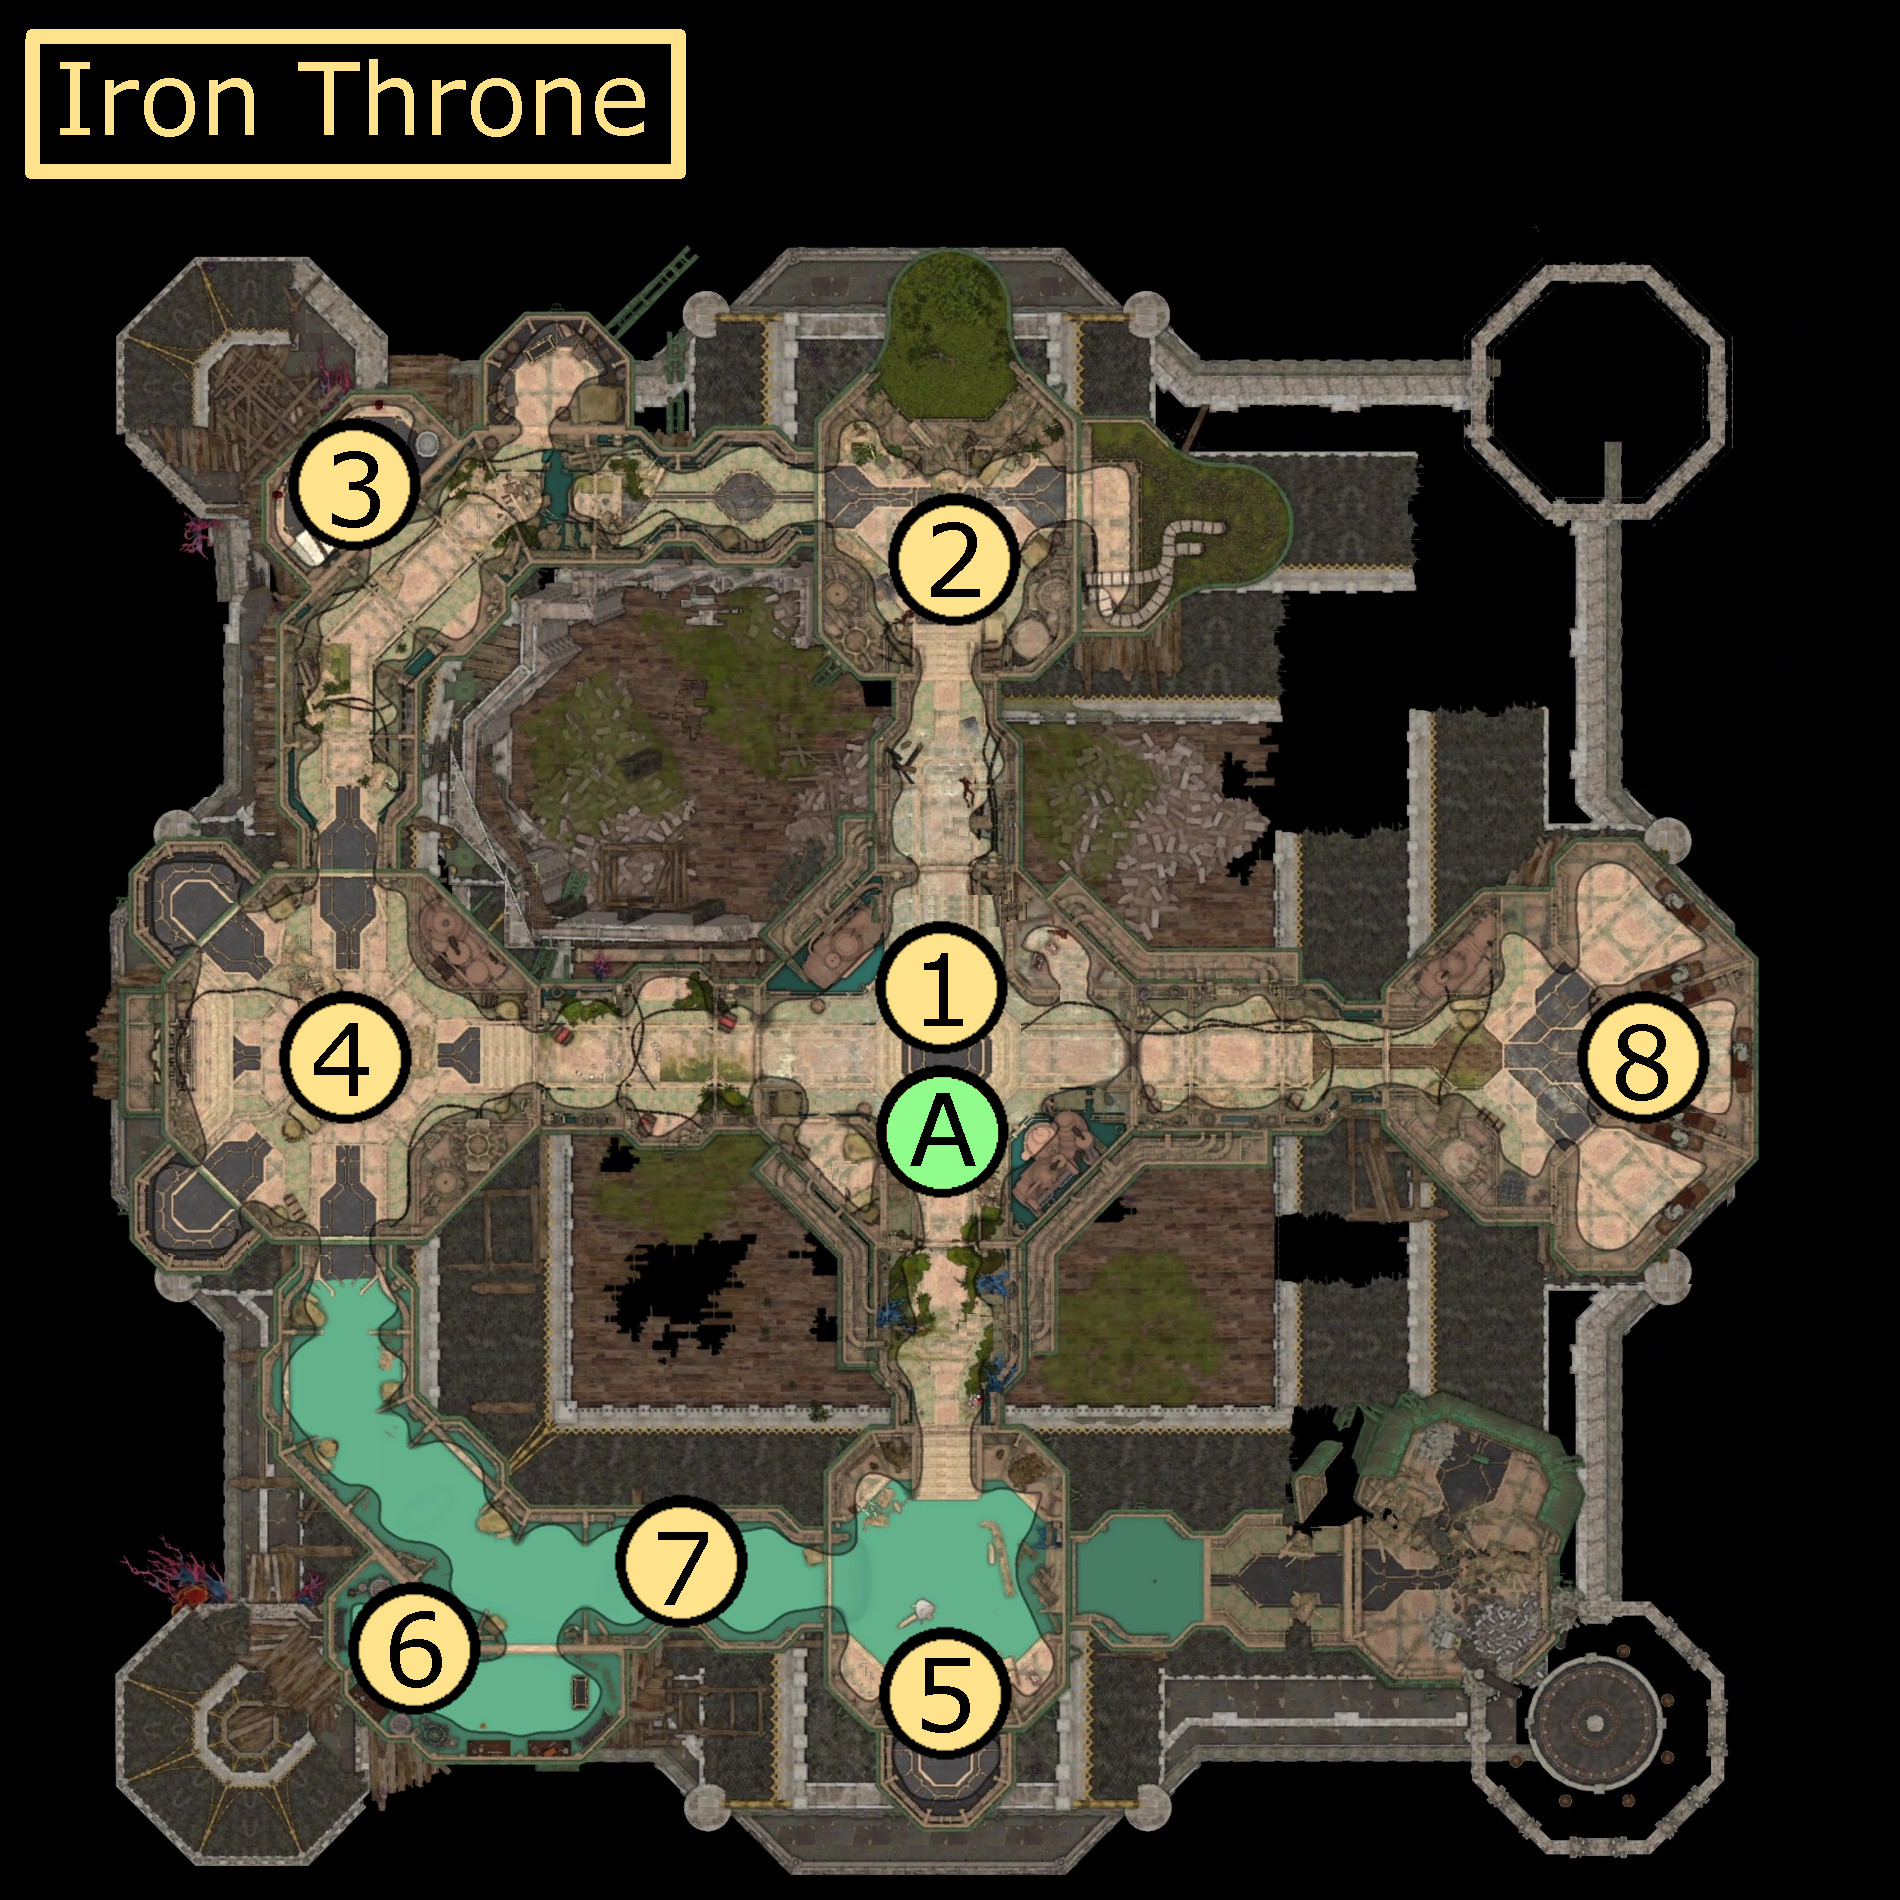
Map
Points of Interest
NOTE: Once you enter the Iron Throne, you will have only a few turns before the entire location explodes. The timer will begin as soon as you exit the Submersible.
If you want to save everyone, you will need to do so before the time limit, which ranged from 5 to 6 turns depending on your difficulty. If any NPC or party members are outside the Submersible (A) at the end of the time limit, they will die (though party members can be revived). Once freed, the Gondians will always dash toward the Submersible. Omeluum (#6) and Duke Ravenguard (#7), however, will become temporary party members, letting you control their actions.
As such, it is best to split your party, with different members going in each of the 4 direcctions, and then to use everything at your disposal to speed up the process. That means that spells like  Haste,
  Misty Step,
  Dimension Door, Grant Flight (some of which can be applied in the Submersible (A) before entering) and more can all be of great use. Also, keep in mind that all levers (which unlock cells) can be switches with ranged attacks, letting you open cells from a distance. Characters with multiple attacks can also open multiple doors in a turn this way.
Entrance
At the entrance of the Iron Throne, there are 2 cells, each containing 1 Gondian each, which can be opened by pulling their lever or by lockpicking their DC-21  Sleight of Hand locks. There is also 1 Gondian in this area already free, and a Sahaugin ready to attack. In general, these are weak enemies, though they can pose a threat to the fleeing hostages.
Notably, all new Sahaugin that spawn after the first turn will enter from the southern hallway, so closing the door in that direction after the Hostages to the south (#5) have passed through the doorway can seal off the Sahaugin that spawn in from continuing their attack. Since Omeluum (#6) can teleport himself and someone else straight to the submersible, you do not need to wait for him to make it through the entryway, should you opt to seal the door.
Sahuagin Ambush
To the North, there are 3 Sahaugin total, ready to attack should you go this direction. It is the fastest way to reach the Chests & Key (#3). It is possible to, after sending a party member North, use the levers to close the doors leading to the Entrance (#1), effectively trapping the Sahaugin, which you may be able to run past.
Chests & Key
There are two rooms that can be opened via lever next to each other in the northwest part of the Iron Throne, each with an Opulent Chest. The smaller room to the east has lesser loot (though it does contain the mundane Sahaugin Singing Bundle, hinting at why the Sahaugin might be at the Iron Throne). The larger room, however, has a chest containing the High Security Vault no.6 Key, to be using in the Counting House.
Hostages
To the west, there are two cells, with 3 Gondians each. As well, there are 2 Sahaugin Hunters outside the cell, posing a significant threat to the fleeing Hostages.
Hostages
To the south, there is a cell with a hostage, as well as another hostage tied to a chair next to the cell in question. These hostages are very close to two of the “Bubbling Emergences” from which more Sahaugin Spawn (#7), so these Hostages should be safeguarded closely.
Omeluum
Further along the southern hallway, passing by all of the Sahaugin Spawn locations (#7), you can find Omeluum the Mind Flayer, provided he survived the Myconid Colony in Act 1 and provided you did not give Lady Esther the Githyanki Egg back in the Mountain Pass. Despite Omeluum’s telepathy upon entering the Iron Throne encouraging you not to save him, you can save him and all of the Gondians (#1, #4, #5) and Duke Ravenguard (#8).
When you go to rescue Omeluum, you will find him on a surgical bed, and can Help him up. Importantly, he will have the ability Teleport to Submersible which, like it sounds, like instantly rescue him and one other character. This ability is usually best to use immediately, since Omeluum is so far from the Submersible that he is unlikely to be able to reach it any other way. However, with very good planning, you can use this ability on Duke Ravenguard (#8) or a lagging Gondian.
Sahaugin Spawn
Every turn, 3 Bubbling Emergences will appear along the southern hallway, near the Hostages (#5) and Omeluum’s (#6) cell. After 2 turns, a Sahaugin will emergy from these Bubbling Emergences. This can make rescuing those hostages difficult, so you should make sure that a combat-ready companion heads south to take them on. After the Hostages to the south (#5) have gotten beyond the threshold heading toward the Entrance (#1), you can safetly seal the door, locking the Sahaugin in the southern hall.
After being rescued, Omeluum (#6) can Teleport to Submersible, so if you seal the hall both him and the companion sent to rescue him can still be easily saved.
Duke Ravenguard
Duke Ravenguard will only be here if you witnessed Gortash’s Coronation at Wyrm’s Rock. After doing so, speaking to  Wyll will ensure that Mizora appears at camp that night. Mizora will give Wyll an option to save his father, at the expense of returning to his contract, or to let his father die, but in either case, Ravenguard will still be in the Iron Throne and can be saved, though the circumstances differ.
When you come upon Duke Ravenguard in the middle cell, you can free him. If Wyll agreed to sign Mizora’s contract, then there will be no obstacles in his rescue. However, if Wyll did not sign the contract, Mizora will appear, furious that Wyll would try to rescue his father after Mizora took away that option.
In the latter case, Mizora will give Duke Ravenguard “Fiendish Obeisance: Kneel”, making him unable to move for one turn, and also summon several “Combustion Belly Spiders”, which explode on their turn, very likely killing Duke Ravenguard. Healing him, using potions or spells that protect from fire, or using spells like Dimension Door can prevent this fate.
Whatever the case, once Duke Ravenguard has been freed, you will take control of him as a temporary party member.
If you plan correctly, you can also use Omeluum’s (#6) Teleport to Submersible action to save them both, though this does require you reaching Omeluum and getting him to the Duke quite rapidly.
In the cell south of Duke Ravenguard, there is another cell with 2 Gondian hostages, who can be rescued by pulling the lever to their cell. The Gondians are similarly susceptible to Mizora’s Combustion Spiders as Duke Ravenguard.
Exits
Upon entering the Iron Throne via the Submersible found in Flymm Cargo’s Basement in the Lower City (whether you do so with Redhammer‘s help or not), you will be given a single warning that the Iron Throne will explode, “killing everyone in it.” This is false, as you can save the hostages here, but it does give you chance to turn around once, should you wish.
Once you are docked with the Iron Throne, then you can leave at any time by interacting with the Control Panel at the front of it. Doing so leaves anyone still in the Iron Throne to their fate, so you should attempt to rescue as many people as possible before.