In VOYAGER, a mystery faction wants you to head to a crash site and do what their other operators have been unable to do: recover their missing equipment, and find out what caused the deaths of their other crew members. In this guide we will list the relevant details of the mission, followed by a step-by-step walkthrough.
Prospect Details
Approximate time to complete: 6 hours or more — depending on how lucky/unlucky you get with ore spawns, this mission can require venturing into a significant number of caves.
Difficulty:
Recommended Level:30 — You must be (or reach) level 30 during this mission in order to complete it.
Place the Thrusters and Guidance System into the Ship
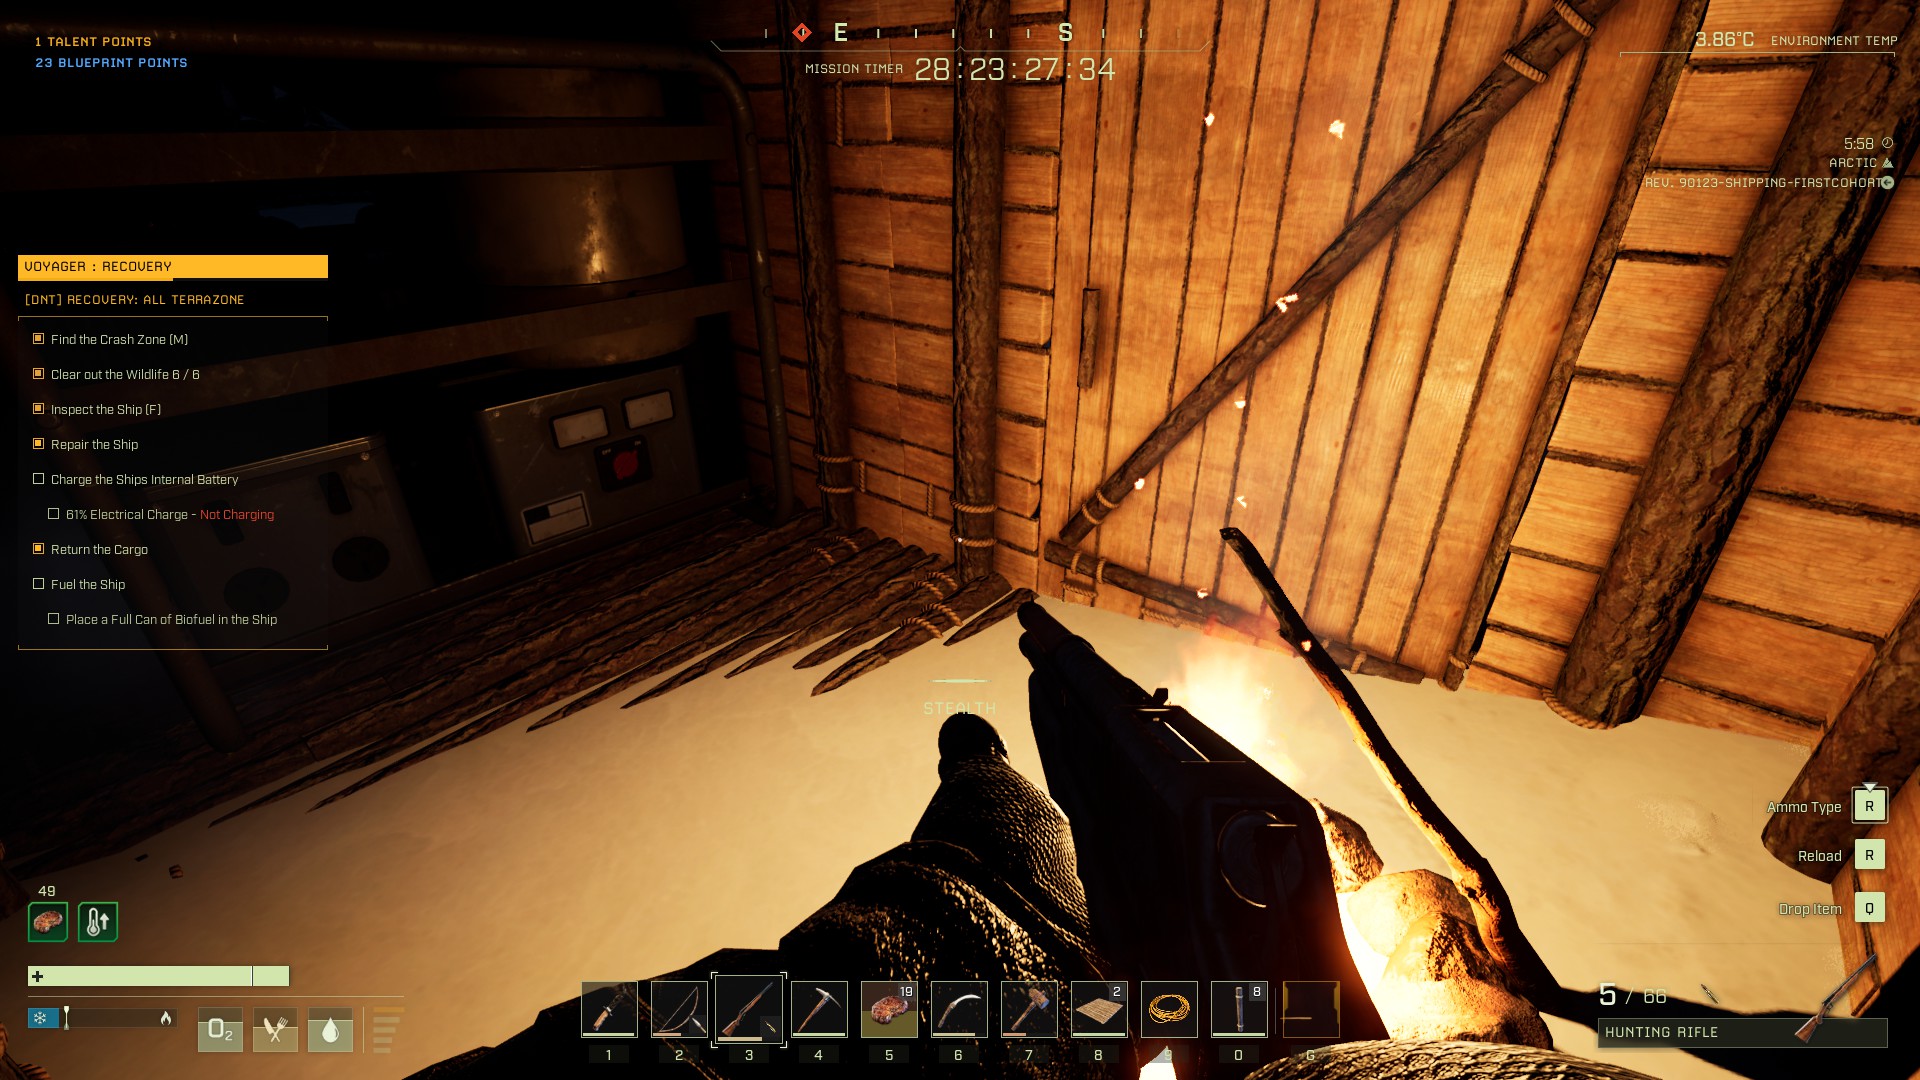
Charge the Ships Internal Battery
Return the Cargo
Track the Creature that took the Cargo
Kill the Creature Guarding the Corpses
Collect the Cargo from Corpses
Return Cargo to Ship
Fuel the Ship
Place Full Can of Biofuel in the Ship
Rewards
650
200
Variants Modifiers
Creature melee damage: -50%
Creature health: -50%
Creature movement speed: -10%
Bear spawn rate: -50%
Lion spawn rate: -10%
Polar bear spawn rate: -50%
Wolf spawn rate: -10%
Aggressive creatures perception: -50%
Neutral creatures perception: -50%
Passive creatures perception: -50%
Experience gain: -25%
Creature melee damage: +20%
Creature health: +30%
Creature movement speed: +10%
Aggressive creatures perception: +30%
Neutral creatures perception: +30%
Passive creatures perception: +30%
Scorpion spawn rate: +30%
Lion spawn rate: +30%
Wolf spawn rate: +30%
Experience gain: +25%
Player respawn count: 3
Prospect Notes
To complete the objectives, you’ll need to tech all the way up to Planetary Tech Tier 4 in order to craft a Biofuel Generator and Electricity Tool. This mission can be time-consuming: the materials required to tech up to Tier 4 and craft the equipment you need will take a long time to collect.
Avoiding danger is the name of the game in VOYAGER
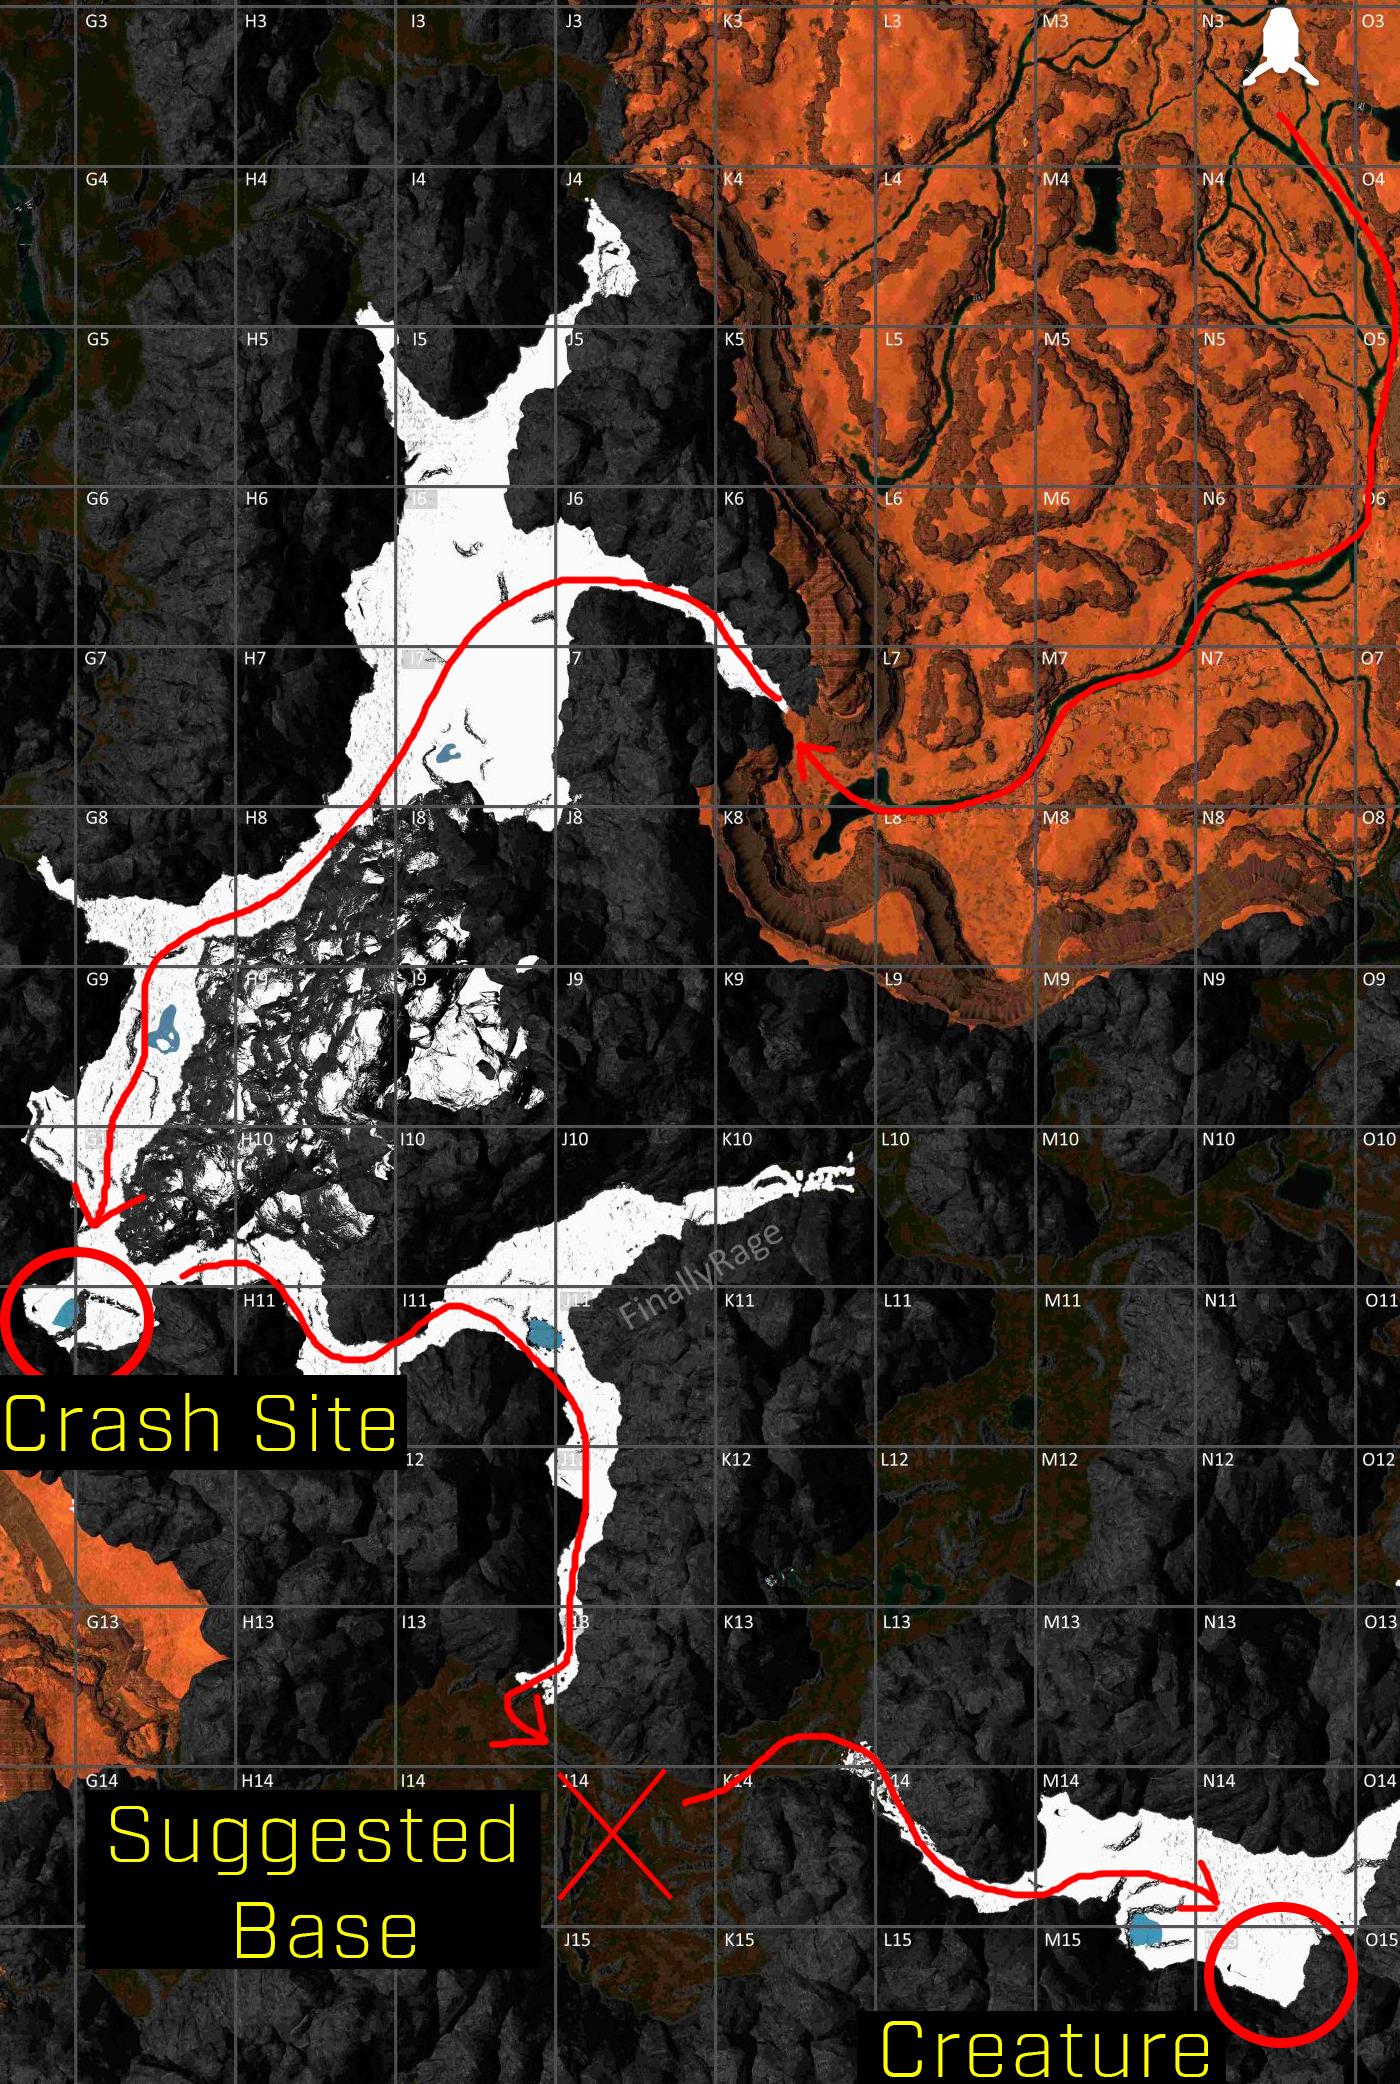
We follow the river through the desert so that we can kite predators through water if necessary — if you want to save time, feel free to take the more direct route. The reason we enter the Arctic from the Desert instead of cutting through the forest at M-10/L-10 is because there are frequently bears in that area of the Forest; the Arctic wolves are much easier to deal with.he cold.
If you want a map to help you locate caves for mining, Icarus Intel is a fantastic resource. (A big thank you to Finally Rage and everyone who contributed to Icarus Intel!)
Preparing for VOYAGER
There are a number of Workshop items you should consider bringing:
Shengong ‘Hulu’ Canteen – If you don’t bring a canteen with you from Orbit, you’ll need to craft a waterskin before you go from the Desert to the Arctic at the start of the mission.
Shengong ‘Dong’ Pickaxe – This (or any other) steel-level pickaxe will dramatically increase the speed at which you can start teching up.
Xigo ‘Hark’ S5 Envirosuit – The -5% percieved threat on this envirosuit helps a great deal with the first trip through the Arctic.
This prospect necessitates reaching Tier 4. Therefore, there are a significant number of blueprints you’ll need to have or unlock during this mission, in addition to the usual survival tools.:
These guys can be a piece of cake, or a serious pain, depending on how you handle them.The trick is to move slowly into a cave so that only one or two pop up at a time. When they do, if they’re close, simply sprint up to them and knife them in the mouth. If they’re far away, quickly shoot two arrows at their mouth. If you’re fast, you can kill them before they get a chance to attack.
You don’t need a light source to see the cave worms, since their mouths glow in the dark
If you don’t notice them pop up and either hear them spit, or start taking damage, run back the way you came, then slowly move back towards them to find them. You can dodge the poison if you’re very fast and move perpendicular, but this is hard to do in a cave. It’s a good idea to have a stack of Cooked Meat when you enter caves, just in case you screw up and need to heal.
Mission Walkthrough
Step 1: Reaching the Crash Site
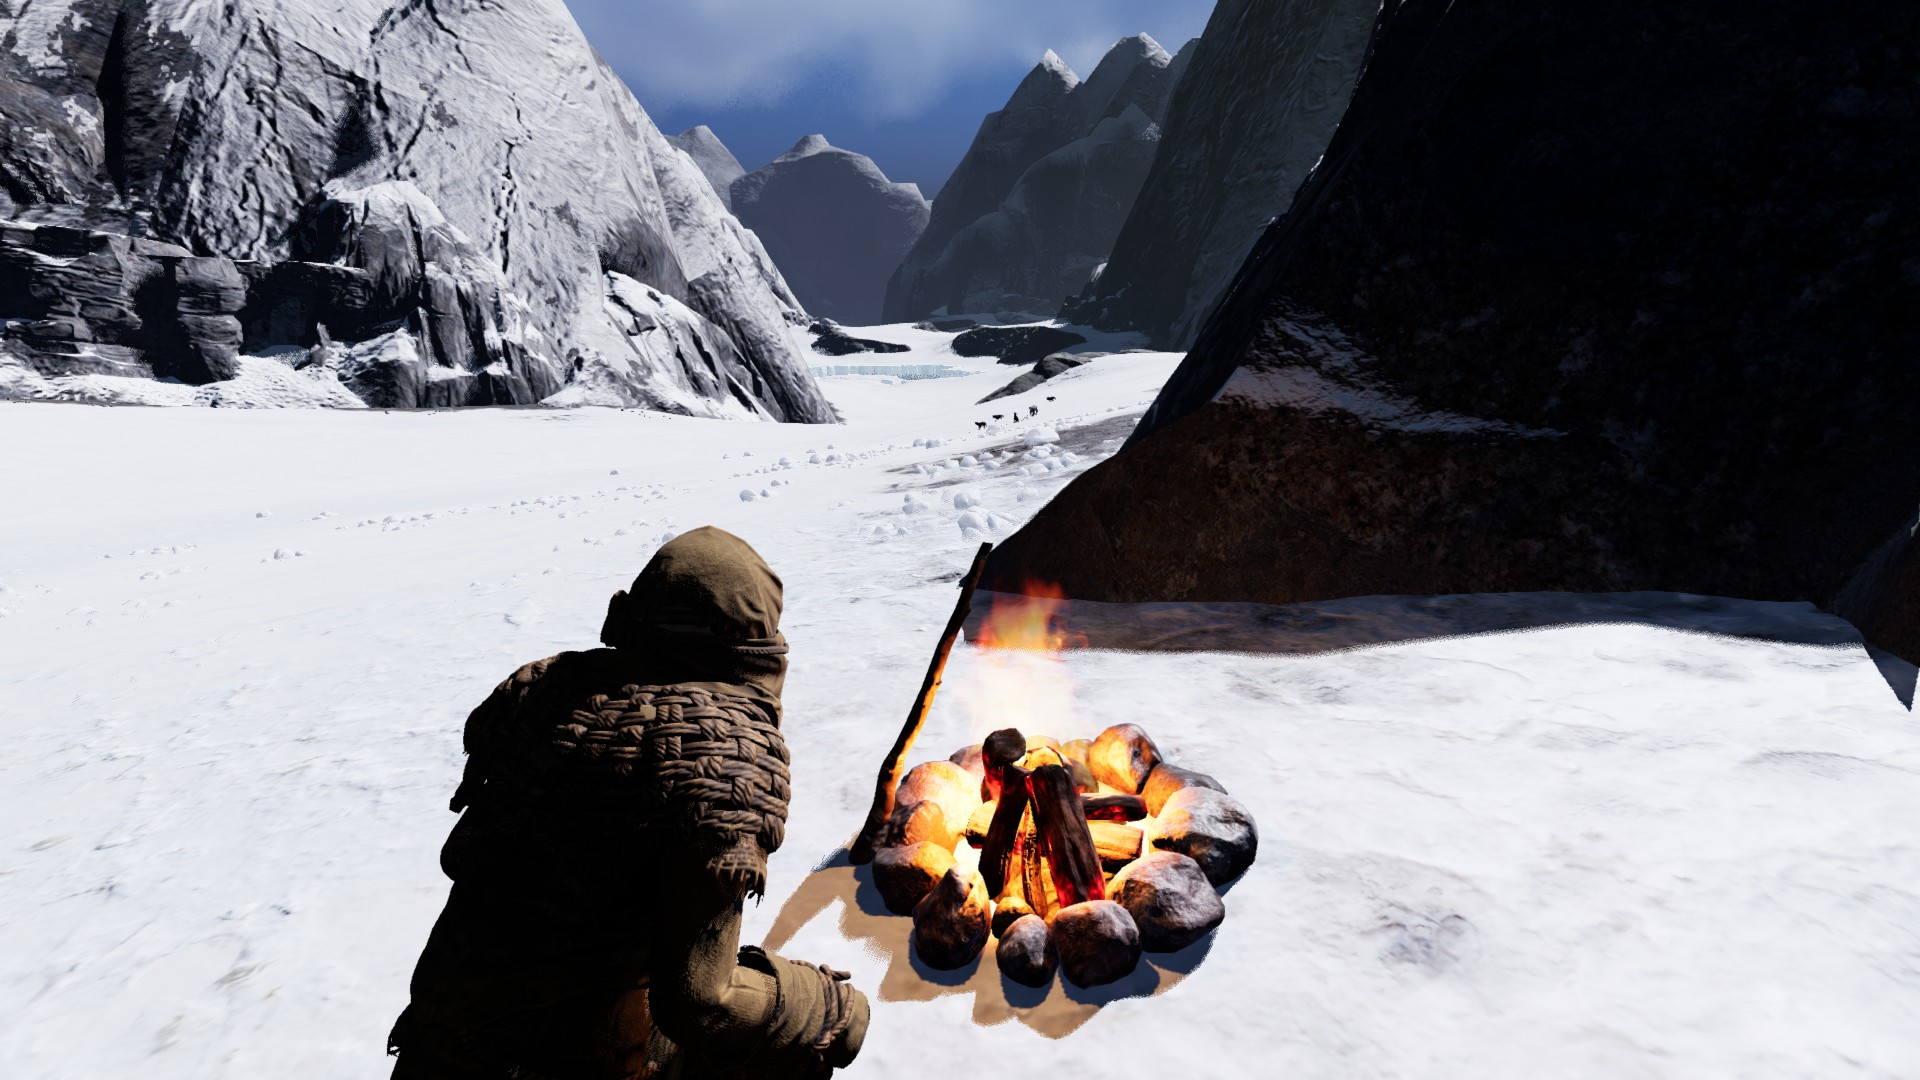
You’ll land in the northeast corner of the Desert biome; do the usual mission prep and get yourself a bow, arrows, and a knife if you didn’t bring one from Orbit. Next, craft an axe and a pickaxe, cut down trees for fuel and a portable shelter + Repair Hammer, and tech up to the Waterskin if you didn’t bring the canteen from Orbit. Follow the path indicated on the map above, using the water to kite any predators that you aggro. You’ll want to craft at least ~50 Bone Arrows and 20 Cooked Meat before you venture into the Arctic, so don’t be shy about hunting as you cross the desert. Also collect a decent amount of fuel, since it’s relatively scarce in the snow.
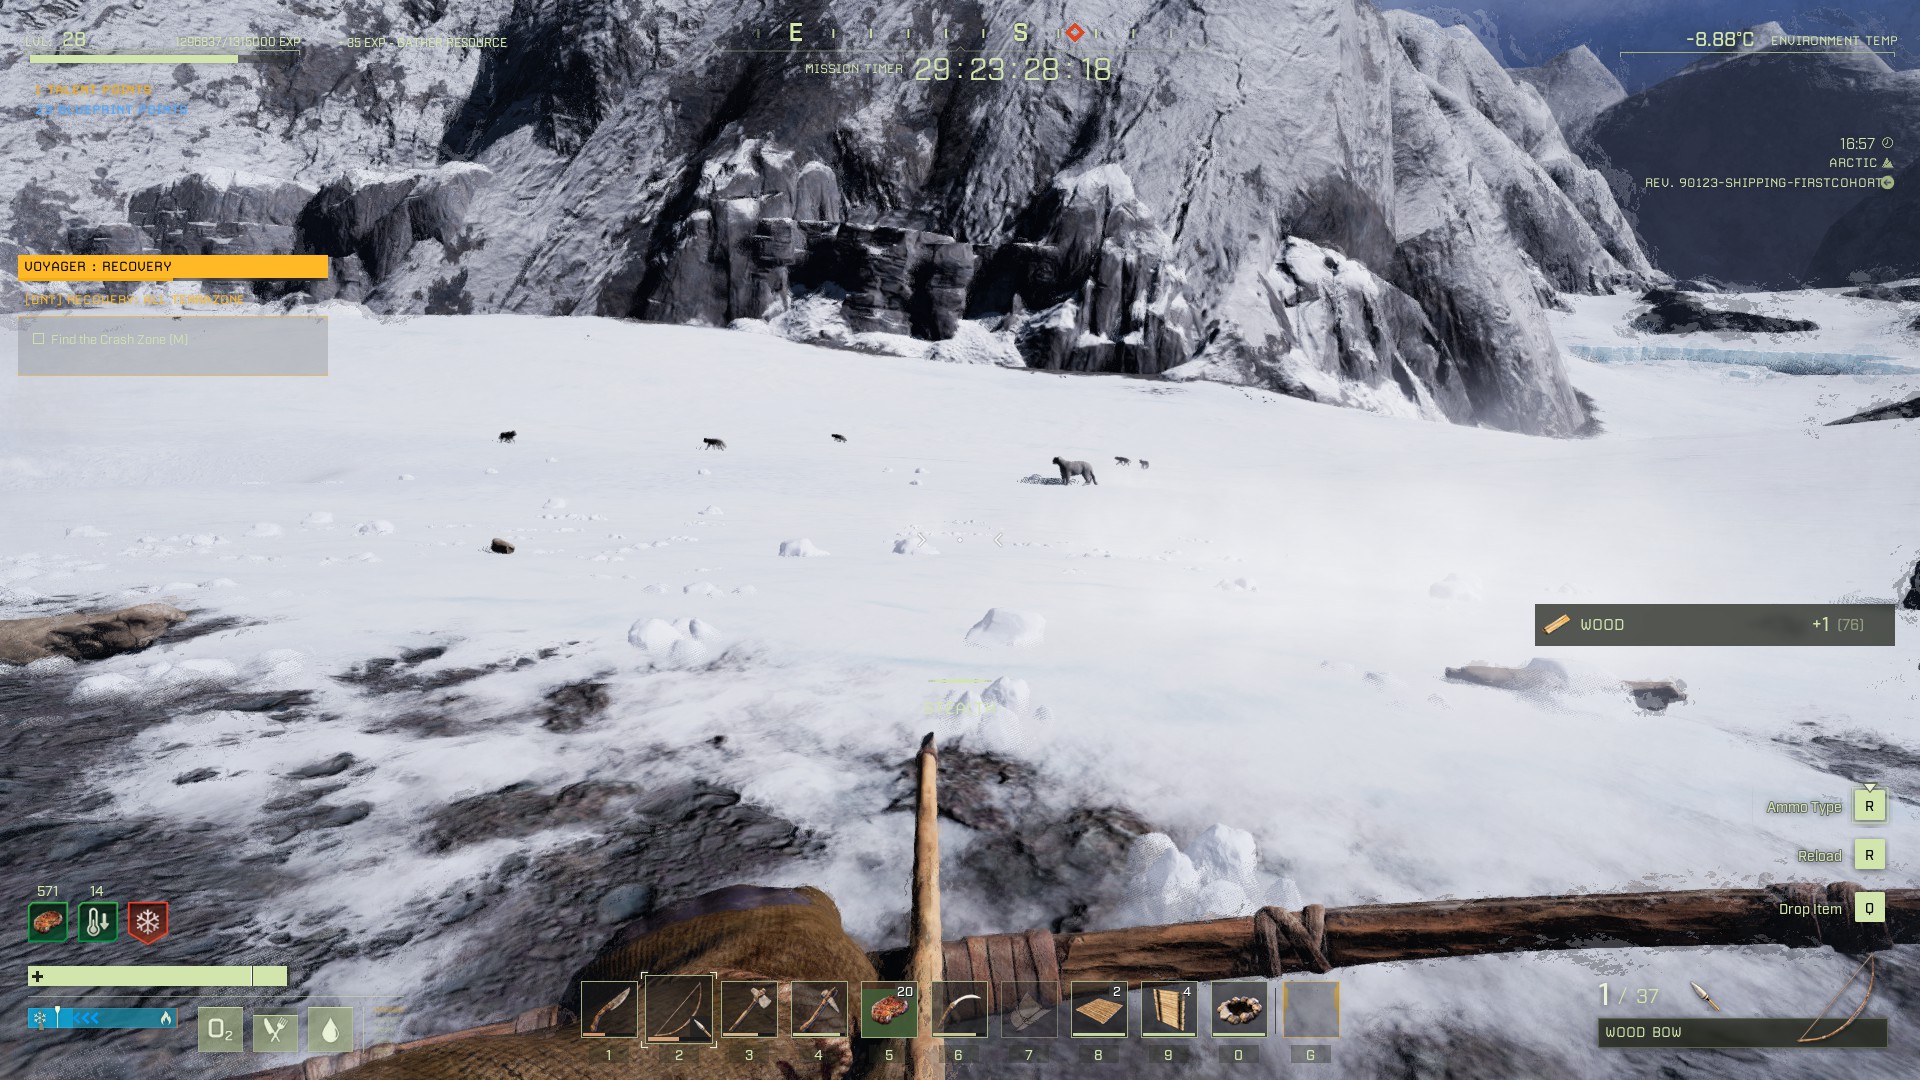
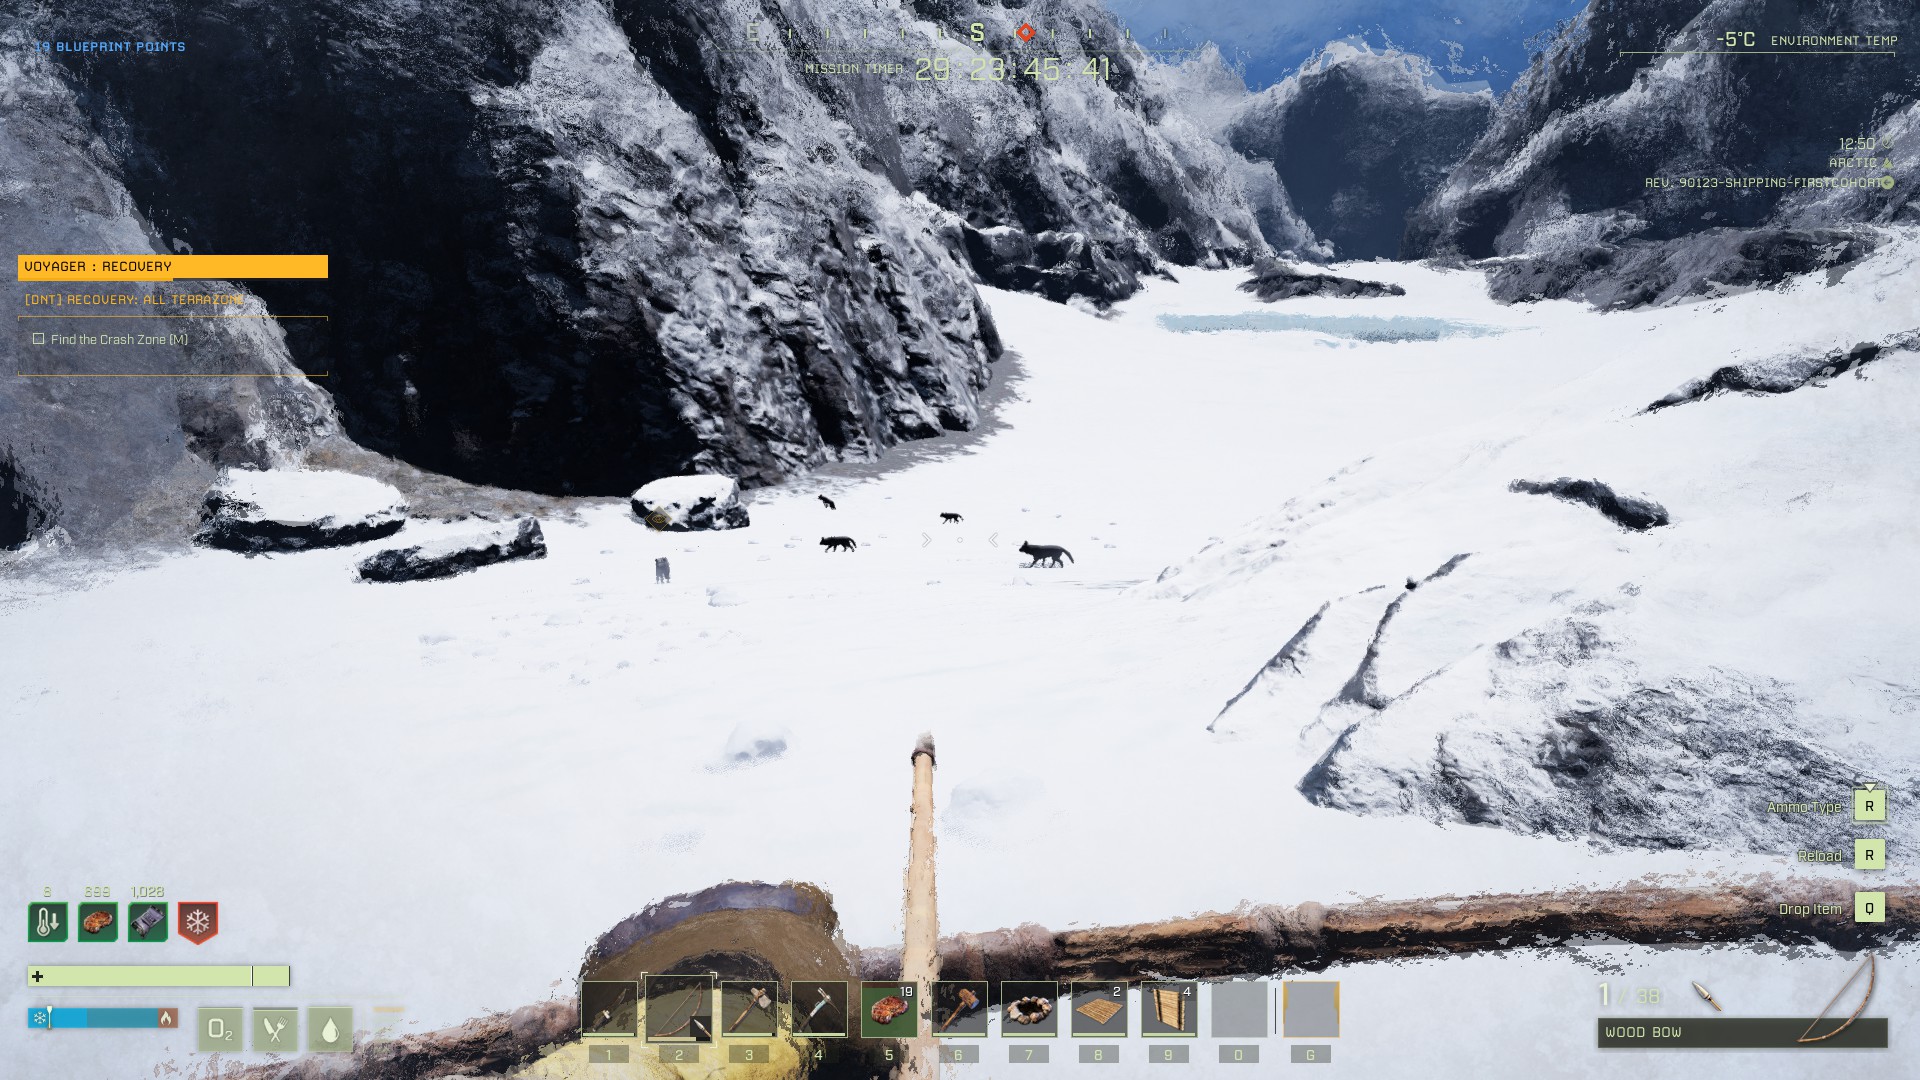
Once you enter the Arctic via the pass in K-7, you’ll start running into wolves — a lot of wolves. If there are just one or two in your path, take them out with your bow and harvest their materials, but if there’s a big pack, try your best to sneak past. Make your way to the objective marker in F-11, taking cover in caves or your portable shelter if a storm comes. Note that snow will accumulate on a flat roof, so keep an eye on your roof piece. If it starts to crack, press [Y] to remove it — you can then replace it. Don’t forget that you’ll need to repair building pieces before you can pick them up with [Y]. It’s also a good idea to drop your Campfire and warm yourself up every 5 minutes or so, even if no storm is coming. This is also a good time to fill your water container by melting Ice at your fire.
As long as you brought some kind of water container and fuel for your fire, there’s no rush to get through the Arctic — it’s better to go slow and not die to the huge wolf packs
You’ll see a dropship as you approach F-11 — once you get close enough, 6 low-level wolves will spawn and attack you. They should be easy to handle as they spawn one after the other, but if you aren’t confident in your aim, do the following before you approach the dropship: Place your portable shelter with window-hole variants, leave 1 wall missing, and put your final wall in your hotbar. Then go trigger the wolves’ spawn, run back to your shelter, and place the final wall behind you, then shoot them from relative safety.
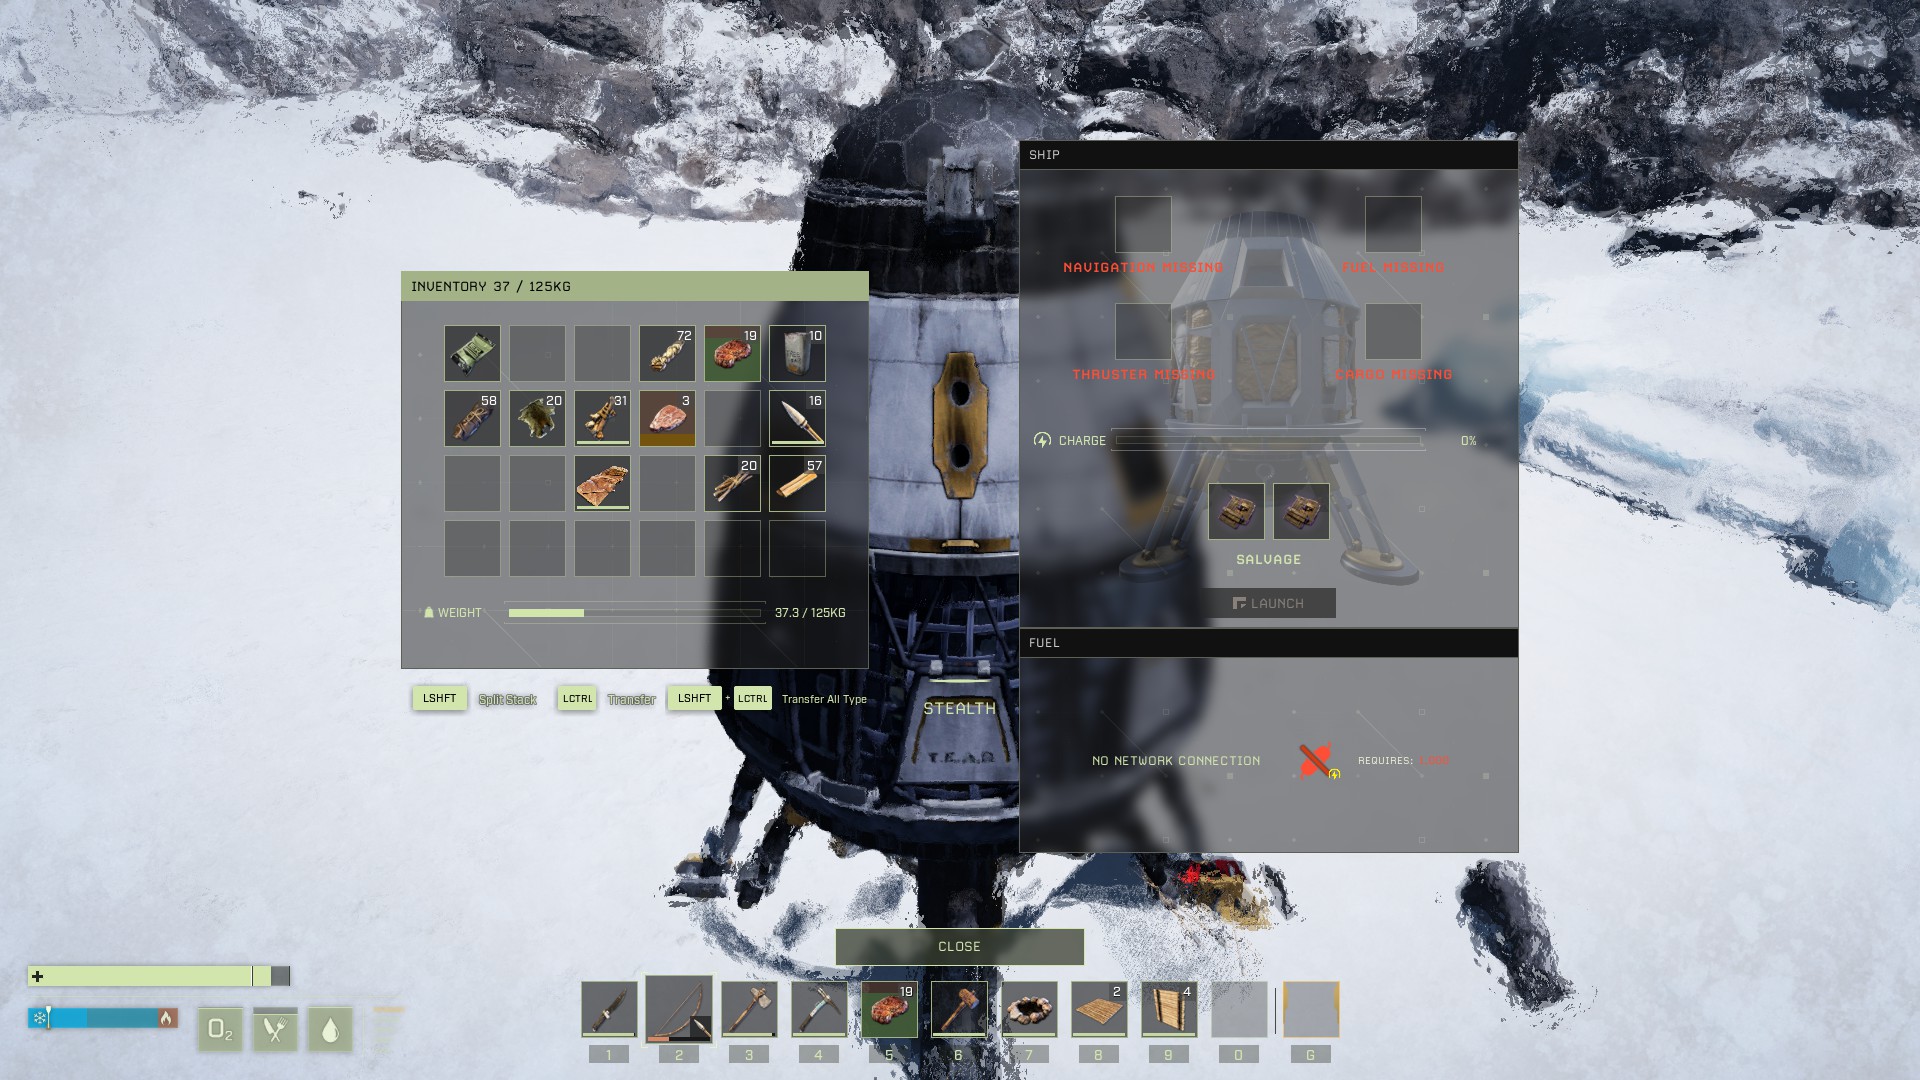
Once you’ve cleared the wolves, go and inspect the dropship with [F]. You’ll find two damaged components in its inventory — take those with you and then leave the Arctic via the pass in J-13.
Make sure to grab both damaged components before you leave the Arctic
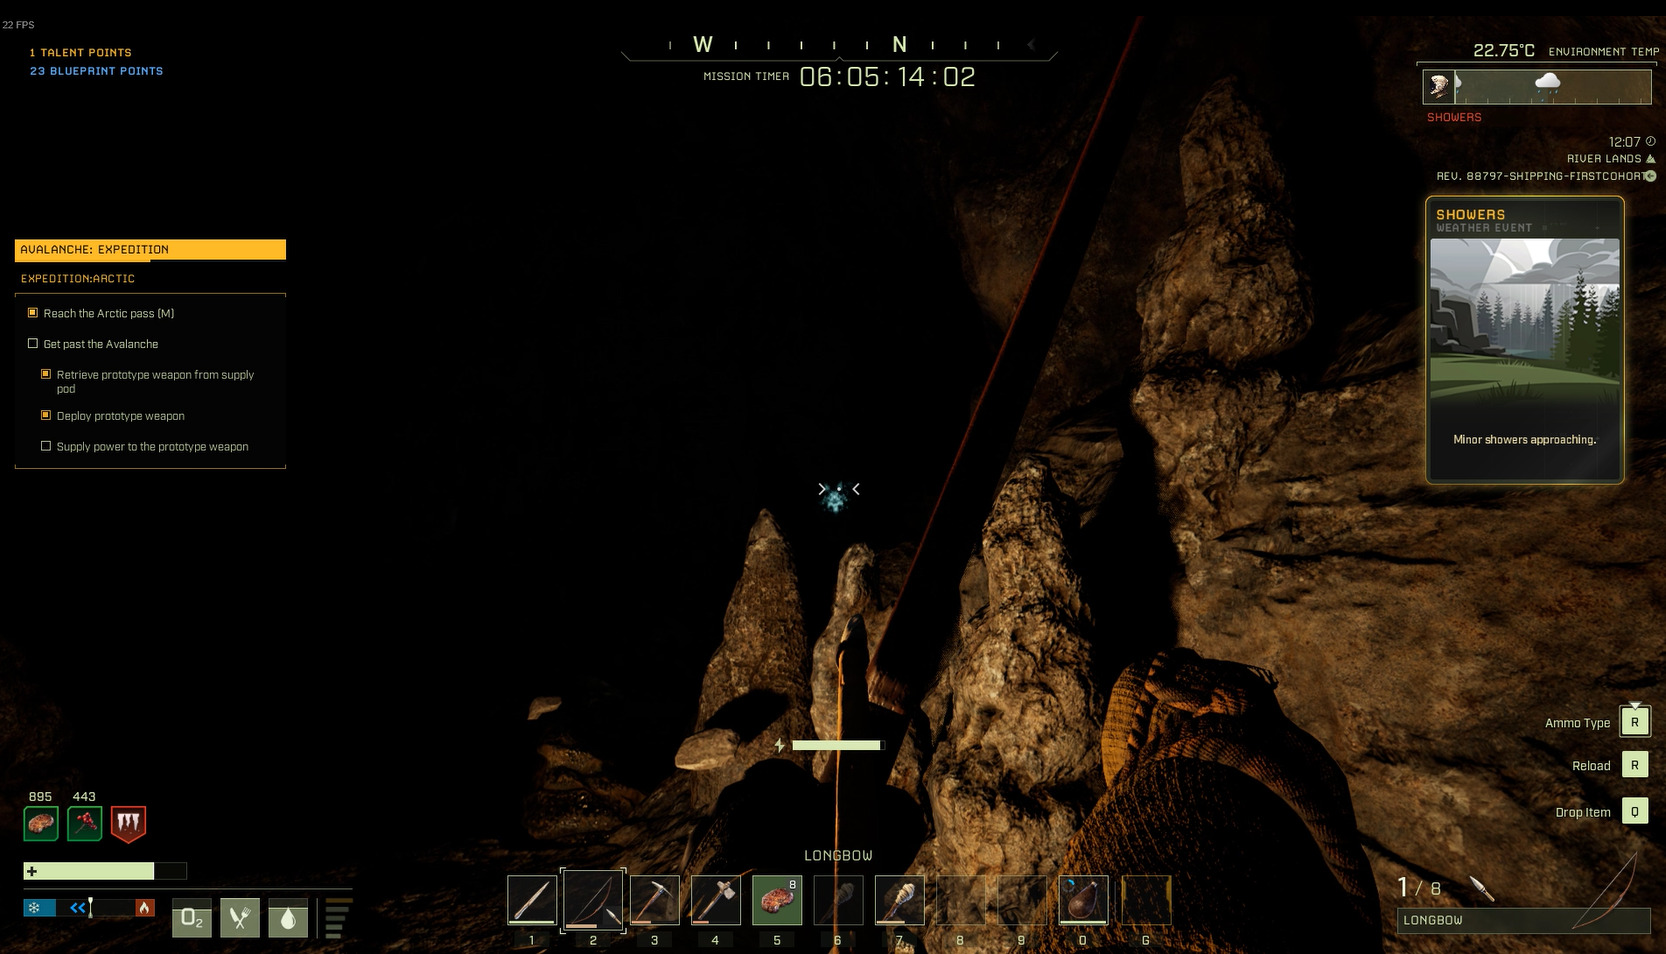
Step 2: Teching to Tier 4
We won’t be giving step-by-step directions for this part of the mission, since it boils down to this: collect a ton of resources and mine every cave you can until you’ve got what you need. There are too many resources required to list them all here, so instead here’s an ordered list of all the workbenches and other deployables you need to craft, and what they’re used for:
It’s also a good idea to craft the Cooking Station, and then the Kitchen Bench + Biofuel Stove, and create/consume the best meals you can; You’ll want as much Maximum Health and Stamina as possible throughout the mission, since one death can end it all.
Step 3: Taking Down the Creature
For this step, the safest strategy is to tech all the way up to the Hunting Rifle, but theoretically you can do this part with just a bow and a large quantity of arrows. Considering that the Hunting Rifle’s main ingredient is Titanium, which you don’t need for anything else in this mission besides the 10 Ingots for the Thruster, it should be easy to mine the necessary 80 Titanium Ore while collecting other materials.
Once you’ve got the following items, it’s time to head into the Arctic in search of the missing cargo via the pass in M-14:
The following strategy is quick and dirty, so if you don’t mind taking a bit more time preparing, there is another, more predictable method that simply requires even more crafting: Build a Masonry Bench, and use it to craft 4 1×1 stone box near the polar bear’s spawn. You can hide inside it or place a ladder that allows you to climb to the top of it. Trigger the boss spawn, run to your little fort, then engage the boss.
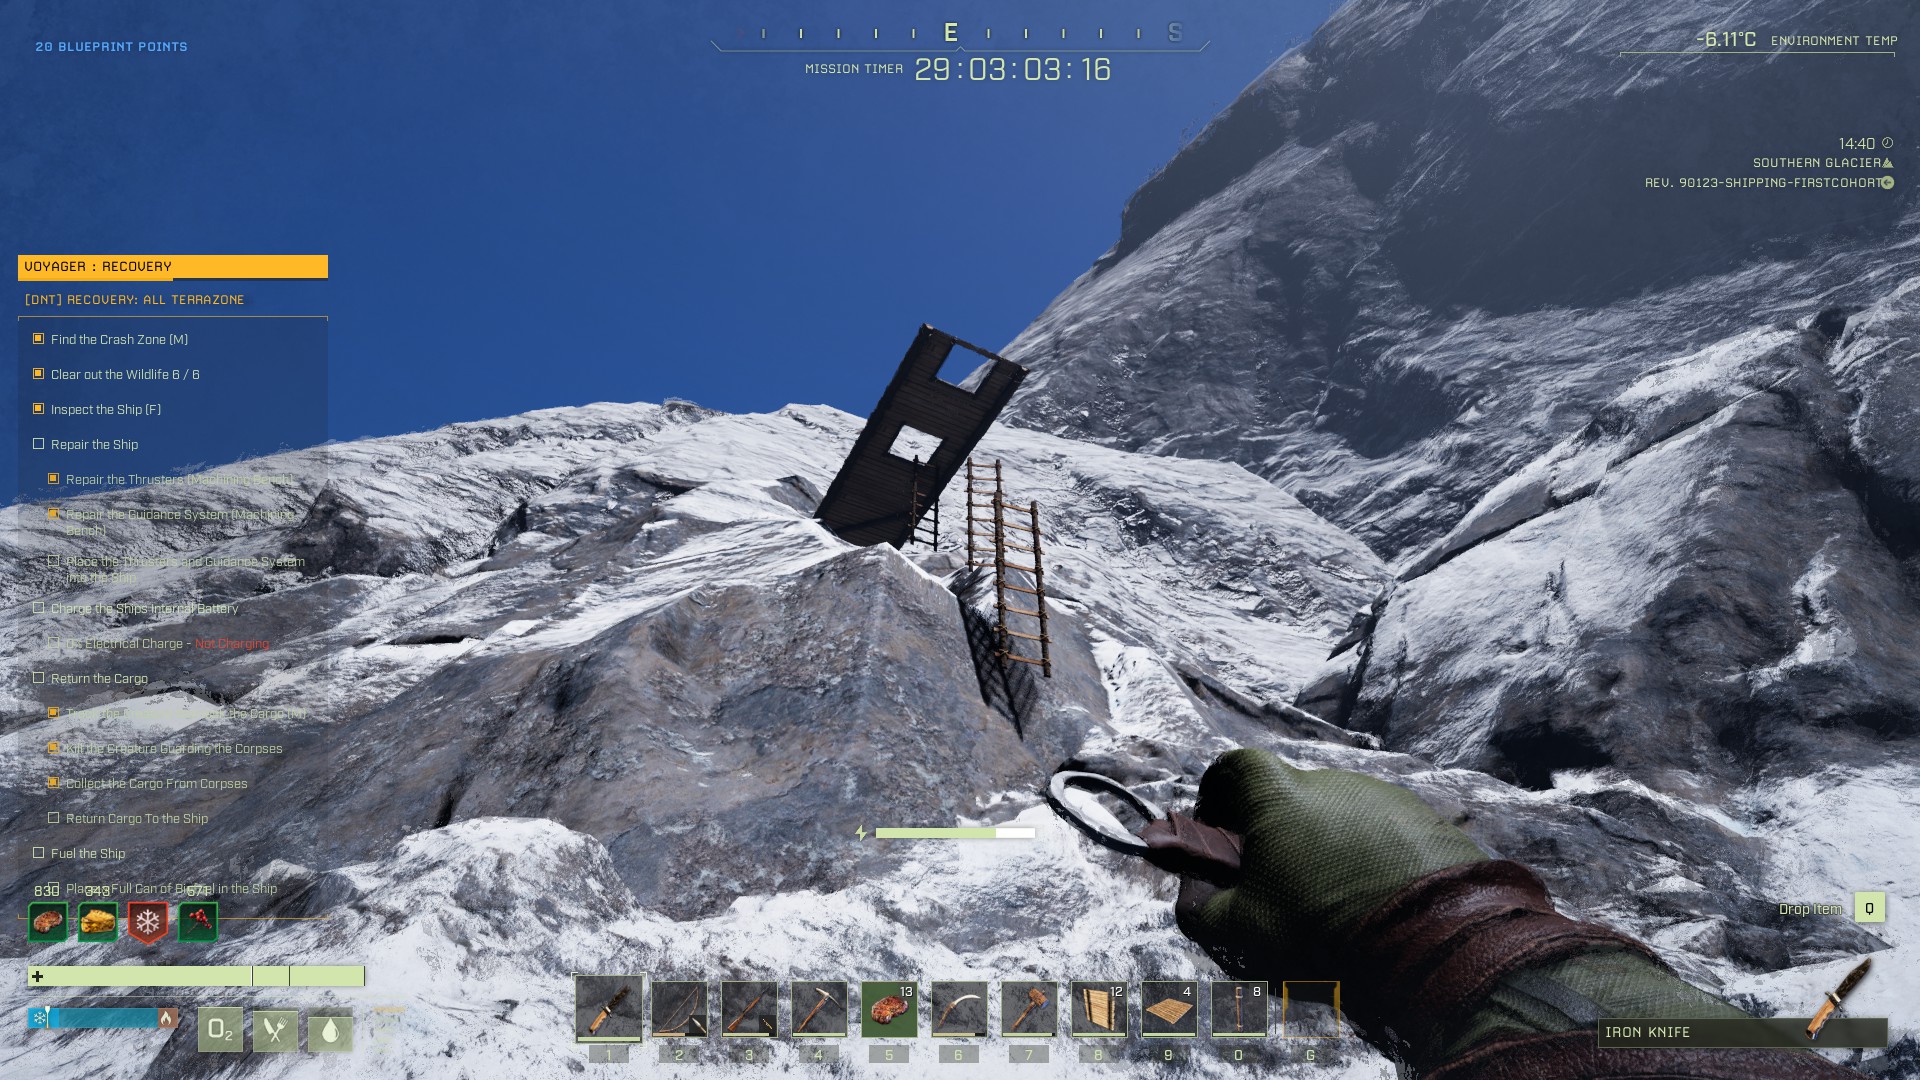
Head to the bottom of M-14, but don’t approach the cave or the remains just yet. Instead, head to the cliff face in the eastern edge of the yellow circle on the map, and build a series of ladders up the cliff face. Then build a platform with trapdoor holes at least 3 pieces out from the cliff.
Ugly, but effective
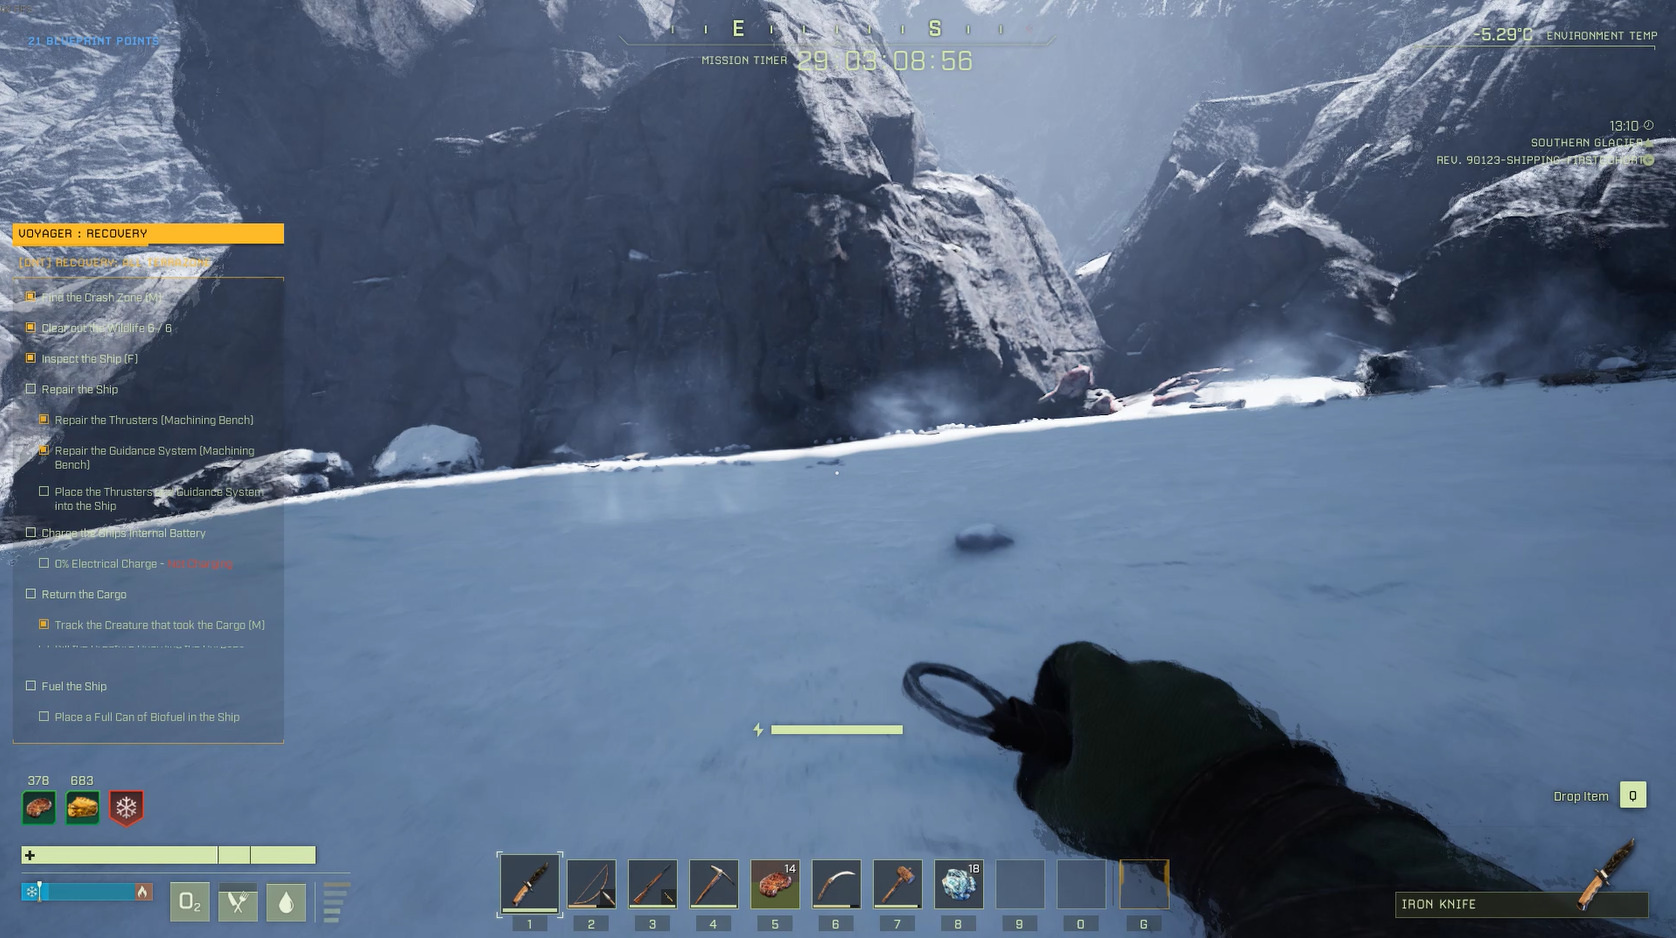
Once this is finished, approach the area pictured below, and be ready to sprint to your ladders. Go very slow, and keep an eye on the “Track the Creature that took the Cargo” objective on the left hand side of your HUD. The moment you see that check-box fill in, sprint away and back to your ladders. If you’re lucky/fast enough, you won’t even aggro the boss that spawns. If it doesn’t chase you, wait for it to roam far enough away from its spawn that it runs back to it — attacking it after this occurs seems to prevent it from aggroing. You can then take it down from the safety of your platform.
The polar bear boss will spawn once you’re this distance from the pile of bonesStart shooting only once it has reached the edge of its roaming range and ran back to its spawn at least once
These style platforms seem to prevent predators from reaching you as long as you don’t stand on the floor piece that is touching the cliff face, and so should be effective even if the bear does end up chasing you (note that this has yet to be tested, since the boss did not aggro on the run this guide is based on).
Once the boss is taken care of, head down to where it spawned and inspect the pile of corpses. Inside, you’ll find the missing cargo, a “Strange Device”. Take it with you and leave the Arctic.
Step 4: Repairing the Ship
You need the following components before you can repair the ship:
Strange Device – The thing you found in the corpse pile in Step 3
2 Full Biofuel Cans – Make 100% certain they’re full; you can do this by placing more than enough ingredients in the composter — if it stops creating fuel despite the presence of required ingredients, the Biofuel Can is ready to go.
You should also only venture into the Arctic once you have enough building pieces for a 2×1 shelter, a decent supply of food and fuel, and plenty of ammunition + the weapon of your choice. You’ll be spending a long time hanging out and protecting your Biofuel Generator, and then you’ll need to make the trek back to your dropship. When you’re ready, take any Orbital gear you brought with you, plus all the aforementioned stuff, and head to the crash site in F-11.
As before, you’re going to run into a lot of wolves, so take your time and be careful. Once you get to the crash site, it seems like extra wolves spawn, so be ready for that as well.Once you reach the dropship, set up your 2×1 shelter, place the Biofuel Generator inside, put a can in it, and connect it to the dropship using the Electricity Tool. Then activate the Biofuel Generator and wait — it should take 60 minutes to fully charge the dropship. Note that you may have a UI bug where the mission objectives indicate the dropship is not charging, but as long as the number next to % charged goes up, you’ll be fine.
Stay warm and find something to do on your phone or your 2nd monitor while the dropship charges(or go old-school and read a book)
Since storms and wolves can both mess up your shelter, you’ll need to hang out at your computer while the dropship charges. Don’t forget to remove/replace your roof if it starts to crack during a snow storm. Once it’s charged, place your 2nd Biofuel Can in the “Fuel” slot of the dropship, replace the two repaired components, and you should be able to launch it.
Once you’ve launched the repaired dropship, you just need to make it back to your own dropship (I guess there wasn’t room in the one you repaired). It would be a shame to die after so much work, so make sure you’re ready — food, water, and ammunition — and then head north and into the desertvia the pass in K-7. Follow the river for safety and reach your dropship to leave the planet.
We hope this guide on the VOYAGER mission was helpful! Since this mission is so long and complex, we’d love any alternative strategies or suggestions you may have — use the comments below to drop us a line. Specifically, we’d love to know how the strategy for dealing with the polar bear boss worked for you. Questions and general whinging are of course also welcome.
Share this article:
DanielD
Unabashed FromSoftware fanboy still learning to take his time with games (and everything else, really). The time he doesn't spend on games is spent on music, books, or occasionally going outside.
On it now..two rifles, a stack of ammo and going to get the bear. Not a bad mission although the animal spawns still need more work. Gold and copper were easy enough, titanium was the biggest runs we had to do. Nice guide 🙂
At the boss now, just made some ladders up and three floors out. We tested the floors out on some bears earlier and it worked so… confident. We’ve logged for the night to come back and finish it tomorrow. Ship is all charged as well, just need to go back and put the the can of biofuel in and launch. Will update tomorrow 🙂
Well, that was far easier than expected. Bear boss dropped in 6 or 7 shots. I don’t think we even would have need the wall cheese, but, better safe than sorry when you have no respawn in hardcore mode.
Sorry to hear that Joe, that’s really strange… I haven’t experienced this bug myself so I can’t really speak to a possible solution, honestly. Have you seen if you can simply place the thrusters and guidance systems in the dropship? Or are they displaying as broken in the inventory still?
Zander
2 years ago
Really enjoyed this mission. Initially geared up with a 2 story 3×3 stone base in the center of M4 at the south of the lake and pulled most of what was needed from the super cave to the south. Part of the team then went and his the first extractor site in M8.
I went south and built another 2 story 3×3 stone base at the double caves on the line between J14 and K14. Made a ton of wine, pumpkin bread, and pickled carrots (current max for stamina and stam regen) along with fur armor. Went to crash site and grabbed initial pieces. Came back to second base, repaired and geared up for winter. Built a 1 story 1×3 base in front of extractor site in center of M14. Went to N15, crouch cut away and entrance into the cave there, then walked over to the inspection site which spawned Blanco the super polar bear. Evaded him and ran to cave entrance – he couldn’t get in so safely shot him down with about 6-7 rifle shots.
From there we ran the extractors at M14. Gotta take down the polar bears anywhere nearby, they will target your extractors and you’ll have to rebuild. Then took a 1×3 stone base, repaired shuttle pieces, biofuel generator, wire, biofuel stove, two full biofuel cans, bedrolls, and firepit back to the crash site. That bad boy only charges 1% per minute, so took 100 minutes, but generator uses only about half a biofuel can in the full charge. Fortunately, got to explore that super massive cave just west of crash site – definitely going back there on other missions, that thing easily has twice the ore of the two caves we tackled..
Ran back from there and took off.
Key takeaways:
I solo’d most of the builds for our group so I leveled from 46-56 on this mission.
Pulled 341 exotics from extractor sites – so 650 | 541 payout on this mission, one of the highest we’ve seen yet
Hunting rifle is key on this mission, so save all that titanium
Highly advise playing with a group, hardcore mission so if you’re downed you have to be revived.
Desert is pretty gnarly, cougars aggro easily and will attack your base – had multiple waves attacking desert a few times
Super fun if you like building and gearing up a lot. All in all prob 10-12 hour round
Thanks for sharing your experience Zander! I think it’ll be really helpful for other players deciding whether or not they want to attempt this mission.
RoelT
2 years ago
In stead of braving the artic straight away, I take the long way through the desert to L 9 then on to J 14. There I level up my base and take the biofuel generator, 2 cans of biofuel and the machining bench plus repair mats to the ship. Two items repaired, and the generator set up for loading, I then head back to base. For the polar bear I found that two wood beans set diagonally on the ground suffices. I did however have the bear respawn after killing it and grabbing the cargo.
BlackEye
1 year ago
Charging time of the drop ship was exactly 60 minutes for me.


On it now..two rifles, a stack of ammo and going to get the bear. Not a bad mission although the animal spawns still need more work. Gold and copper were easy enough, titanium was the biggest runs we had to do. Nice guide 🙂
Glad the guide was helpful! Did you end up using either of the suggested strategies when dealing with the polar bear boss?
At the boss now, just made some ladders up and three floors out. We tested the floors out on some bears earlier and it worked so… confident. We’ve logged for the night to come back and finish it tomorrow. Ship is all charged as well, just need to go back and put the the can of biofuel in and launch. Will update tomorrow 🙂
Well, that was far easier than expected. Bear boss dropped in 6 or 7 shots. I don’t think we even would have need the wall cheese, but, better safe than sorry when you have no respawn in hardcore mode.
Thanks for letting me know how it went (even if it ended up being too easy 😀 )!
I’m stuck in this mission. I don’t know how to repair these parts…only option i get when i click on them is drop…
Are you attempting to repair them at the Machining Bench?
I am having the same problem. I can not figure out how to repair the thrusters and guidance system while at the machining bench?
Any thoughts?
Sorry to hear that Joe, that’s really strange… I haven’t experienced this bug myself so I can’t really speak to a possible solution, honestly. Have you seen if you can simply place the thrusters and guidance systems in the dropship? Or are they displaying as broken in the inventory still?
Really enjoyed this mission. Initially geared up with a 2 story 3×3 stone base in the center of M4 at the south of the lake and pulled most of what was needed from the super cave to the south. Part of the team then went and his the first extractor site in M8.
I went south and built another 2 story 3×3 stone base at the double caves on the line between J14 and K14. Made a ton of wine, pumpkin bread, and pickled carrots (current max for stamina and stam regen) along with fur armor. Went to crash site and grabbed initial pieces. Came back to second base, repaired and geared up for winter. Built a 1 story 1×3 base in front of extractor site in center of M14. Went to N15, crouch cut away and entrance into the cave there, then walked over to the inspection site which spawned Blanco the super polar bear. Evaded him and ran to cave entrance – he couldn’t get in so safely shot him down with about 6-7 rifle shots.
From there we ran the extractors at M14. Gotta take down the polar bears anywhere nearby, they will target your extractors and you’ll have to rebuild. Then took a 1×3 stone base, repaired shuttle pieces, biofuel generator, wire, biofuel stove, two full biofuel cans, bedrolls, and firepit back to the crash site. That bad boy only charges 1% per minute, so took 100 minutes, but generator uses only about half a biofuel can in the full charge. Fortunately, got to explore that super massive cave just west of crash site – definitely going back there on other missions, that thing easily has twice the ore of the two caves we tackled..
Ran back from there and took off.
Key takeaways:
Thanks for sharing your experience Zander! I think it’ll be really helpful for other players deciding whether or not they want to attempt this mission.
In stead of braving the artic straight away, I take the long way through the desert to L 9 then on to J 14. There I level up my base and take the biofuel generator, 2 cans of biofuel and the machining bench plus repair mats to the ship. Two items repaired, and the generator set up for loading, I then head back to base.
For the polar bear I found that two wood beans set diagonally on the ground suffices. I did however have the bear respawn after killing it and grabbing the cargo.
Charging time of the drop ship was exactly 60 minutes for me.
Thanks for the info BlackEye, I’ll update the guide!