Cold and quiet. ICARUS’s snow biome is a deceptively calm place. First-time visitors, mesmerized by the otherworldly sights, are enticed to keep pressing in: they do not anticipate just how many things can go wrong quickly — very quickly. At some point, a line of no return has been crossed. The body of an unfortunate prospector will be lost to the freezing desert, perhaps forever.
Mastering ICARUS’s Arctic Biome will take more than a few tips and a couple of visits, but you still made the right choice in opening this guide.
Below you will find sections that walk you through the essential preparation you will need to do before venturing into this biome, as well as arm you with many tips and strategies that will help prevent unnecessary deaths. We will guide you through a list of items you want to bring with you, a way of securing a safe path into the biome, threats to watch out for, and some strategies for developing a self-sustained outpost inside the region.
Some of the tips you will see below came from our discussions with the kind members of the official ICARUS Discord server: special thanks to @Cav3dust, @NfiniT, @sta7ic, and @Dionaea for their observations and tips.
Preparing for the Arctic Biome
You will need to do extensive preparations before venturing into the Arctic. There are not many ways to over-prepare for this region, even for a high-level character: aggressive wolf packs, massive polar bears, resource scarcity, and unforgiving blizzards will not make your stay in the biome easy.
Minimum Character Level:17.
We recommend that you thoroughly develop your Tech Tier 2 before you venture into this biome for the first time.
Here are the central challenges you will need to plan for:
Freezing temperaturesand blizzards: Immediately, you will be affected by the extremely cold climate of the region, with temperatures dropping dangerously low during weather events and at night.
You can’t sleep through the coldest periods of the day without a source of heat.
The cold will make you consume more food at best, and lead to persistent damage and nasty debuffs like the Frostbite if left unchecked.
Wolf packs and polar bears: Prepare to deal with more dangerous counterparts of forest carnivores. We will discuss them later in this guide.
Scarcity of resources and water:Provided you survive your first night in the Arctic, shortage of basic crafting resources and water might become highly pressing, unless you plan ahead of time.
In the two sections below we will discuss essential tools and equipment you should bring with you to account for these challenges and make your stay in the biome much more comfortable.
Essential Tools
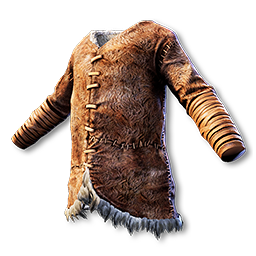
1. Fur Armor Set Requirements: Tier 2, Lvl 20, Textiles Bench Materials required (for the full set): Leather (30), Fur (74), Rope (22)
Fur Armor is much more expensive to make than Cloth Armor, but this set will help you endure most of the ambient temperatures in the Arctic without acquiring Frostbite. If you don’t plan to run into the biome just to gather a bucket of ice, Fur or Polar Bear armor sets are a must.
Incomplete Sets: Full Fur Armor Set awards a 5% cold resistance buff — for best performance it’s not advised to mix-and-match your set with Cloth, Carbon, or even Polar Bear pieces. Aim for a full Fur Armor or Polar Bear Armor set.
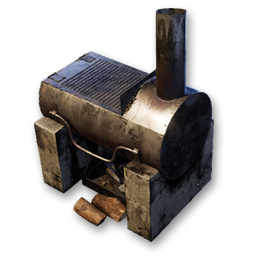
Fur can keep you comfy during a sunny day in the Arctic. Once the night hits, or the winds pick up, you need to be inside and you need to be warm. You will also use your heat source to process meat for food, and to melt ice for your canteen. A Campfire or a Fireplace will prevent you from freezing, but the Potbelly Stove provides enough heat for you to navigate around your hideout and for multiple teammates to sleep comfortably through the night.
Downgrading: In most circumstances, a campfire will work just fine for all of the basic functions, but it needs to be placed very close nearby. Be very careful not to catch aflame.
Animals of the Arctic Biome are vicious, and so you should be as well. You will need to deal very high damage at a distance for your polar bear encounters, while wolf pack assaults will require a lot of high-end ammo. Get a high-tier weapon to match your weapon Talents.
Downgrading: If you are confident in your stealth and headshots, and have some talent points invested into bow damage, you can get by with a Longbow. Try to avoid polar bears unless you can build traps.
4. Bandage Set (Basic Bandage, Suture Kit) Requirements: Tier 1, Level 5 Materials required: Fiber (40) for Bandage; Fiber (10), Bone (5), Leather (2) for Suture Kit
You can only dodge so much until you get hit. Wolves leave a Minor Wound while polar bears can inflict a Major Wound condition on your character. Pack some Bandages for the former and some Suture Kits for the latter. Do not let your wounds fester.
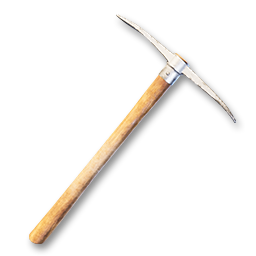
The Arctic Biome’s reward for completing its challenges is ore. Plenty of precious, highly useful ore. Higher tiers of your tools increase the speed and the yield, so bring only your best pickaxe(s) with you and prepare a plan for transporting your heavy booty.
What to Bring with You
We discussed the essential tools for basic survival in the Arctic in the previous section, but if you want to increase your chances for survival, are planning on conducting a mining operation, or even setting up an outpost, there are several more items you should consider.
– Berries (or Berry Jam), Flatbread (or Bread), and Meat (or Prime Meat) are a good trio to bring with you into the Arctic, increasing your stamina and health substantially when their timers are maintained. These will help with your survival and crafting projects alike. (Bring extra meat or plan on crafting and/or deploying an Ice Box.)
– A Waterskin and an Oxygen Bladderwill most definitely help keep you alive, but you will feel a tremendous difference if you use a Canteen. A Shovel will ensure an infinite supply of ice. An Oxygen Tank can supply you with oxygen for several days, but is not required (especially if you plan on building an Oxite Dissolver).
– Bring enough beds for all of your team members: it’s better to sleep through the cold night. If playing solo or in low numbers, think carefully before you set a respawn point in the Arctic (more on that later).
– A Stone Furnace will significantly reduce the weight of your Iron and Copper ores, allowing you to carry a lot more than you would be able to otherwise. (If you unlock the independent blueprint for crafting Sticks or bring a Carpentry Bench with you, you can easily build a Stone Furnace in the Arctic.)
– Heat Bandages are recommended for Frostbite and to boost your heat in case of emergency, but are generally not crucial to survival.
– Recovering health points in the game is not easy. Better food will help you with that, but to ensure that you can recover from a bad fight, bringing some Health Regeneration Paste is a good idea.
– If you do not have a habit of “resetting the pneumonia timer” and plan on spending some time mining, carry some Antibiotic Tonics.
– You might not have raw Fiber to build yourself a torch once yours breaks: try to bring a Lantern.
– If you plan on using torches and campfires, you might want to bring your Fire Whacker.
– Emergency Sticks and Fiber are a good idea, but if you decide to set up a base, it’s highly recommended to unlock alternative ways to craft Sticks and Rope.
Sticks are a very scarce material in the Arctic. Unlock the talent and the blueprint that will allow you to make them yourself unless you plan on building a Carpentry Bench (note: requires Rope).
A lot of Tier 2 benches can be built in the Arctic if you bring a massive amount of Fiber, or simply unlock the ability to make Rope out of Leather. Keep in mind that Polar Bears do not drop normal Fur or Leather.
If you are serious about conquering the Arctic — keep on reading! We will discuss some ways you can venture deep and even set up a base that can be supported with mining and hunting within the biome itself.
What to Do in the Arctic
Once you are fully set up in the Forest and are ready to take on more challenges, the Arctic can become your gateway to high-tier crafting. This biome is also a great destination for leveling through mining and hunting alike.
Let’s talk about a process of securing a safe travel path through the hostile region, with three different stages to support increasing distances of travel further into the biome while protecting yourself from its deadly elements.
Setting up a transition zone outpost with a respawn bed is a good idea for your first venture into the area. Set up your structure near the transition area or go a little further and build on top of a grassy patch, surrounded by snow. As long as it’s within the forest climate, it can be as basic as you want it to be (it’s still a good idea to make it out of stone or otherwise maintain it regularly).
Additional advantages: Even if there is no source of water nearby, you can easily melt the ice inside your campfire with a waterskin set in one of the slots. Use a shovel to collect more ice if you plan on spending a lot of time in your outpost. Use your transition zone outpost to test your equipment against the snow wolves and dip your toes into the cold of the Arctic.
Do not rush to build yourself an Arctic house — you will find that there are a lot of elements you will need to master inside the biome, assessing issues and resources you still need to address. Your first goal is to locate a couple of caves to wait out storms and cold nights (preferably, by sleeping). Otherwise, try to come back to your transition zone outpost every now and then, and try not to give yourself a difficult rescue mission by dying deep within the Arctic.
After you secure some caves as nooks you can hop into for safety, design and carry a very basic portable stone shelter with you, enough to fit in a bed and a campfire/potbelly stove. Work out a path with several safe stops and locations for your “tent”.
Risk management: It might be tempting to set a respawn point inside one of these temporary setups. However, try to imagine what happens if you die and respawn at such a location: with low health, low basic needs, and no equipment to keep you warm, much less to allow you to fight. Unless your lootable body is very close nearby, you are guaranteed to be stuck in a death loop.
If you do decide to set a temporary camp in the Arctic as your respawn, always prepare for the worst. Leave a full Fur Armor set and a bow inside a chest, and have fuel and food in your campfire.
The Arctic Biome has plenty of caves, so you can get by with some quick outposts, venturing back as soon as you start approaching your weight limit. If you have some plans for massive crafting and construction projects, however, it will make sense to set up a more permanent base of operations.
Your weapons and tools will last for only so long without repairs. Even the best oxygen tank will need to be replenished after several days of use. Even if you set up a smelter to reduce the weight of your collected ore, eventually you will not be able to carry all of it back out of the area in one trip. So, why not craft on the spot?
It’s easier to start a more permanent setup by developing a cave shelter. Be aware that an Antibiotic Tonic requires Yeast, so plan on ways of dealing with pneumonia. Once you are able to craft stone structures, a proper shelter can be set outside. However, pay attention to what animals spawn nearby. You do not want to be set on a collision course with respawning polar bears.
If you can craft Rope from Leather, it will not be hard to prepare a spare set of Fur Armor, thus securing your outpost as a safe respawn point.
Threat Management
The Arctic is a relatively quiet place: whistling winds and wandering wolves. However, the dangers that are present in the area carry a very deadly edge. They require both extensive preparation and thinking on your feet.
Dangerous Wildlife
Polar Bears
These vicious beasts blend into their surroundings and quietly survey the area. Before you can equip yourself to fight back confidently both in gear and Talent points, these beasts will likely tear you to shreds with little to no effort, leaving your body and your equipment in the middle of a snow desert.
Before you are ready to venture into the Polar Bear territory, you want to feel confident avoiding or defeating an average Forest Bear. Start with our guide for dealing with bears and develop a strategy that works for you.
It’s important to remember that Polar Bears have even more health than regular bears and can easily break through the majority of barriers you build to hold them back. Try to kill them quickly — try using guns.
Do not venture far into the snow desert until you are either absolutely confident in your equipment or skills, or are prepared to lose.
Arctic Wolves
Arctic Wolves are similar to their Forest counterparts, but there is a catch: in most cases they travel and attack in packs. The entire pack might not always be visible due to shadows, slopes, and rocks, but its members average around three — they can go up to five and above.
Avoiding wolves means avoiding every single member of the pack: work on your stealth Talents and learn to survey your surroundings efficiently.
Taking this animal down often means defeating each pack member of their in one or two shots before they reach you: work on your stealth attacks, weapon Talents (bows, spears, or firearms), and practice headshots. Always carry a knife for close combat.
Snow Leopards
Snow Leopards are similar in their behavior to Lionesses of the Desert: their whitened fur, quiet movement, and fast leaping allows them to easily ambush their prey. It’s a good idea to be prepared to face leopards in close combat. However, unlike wolves, they tends to travel alone.
It’s a good idea to spot and stealthily dispatch of Snow Leopards before they see you. Still, you might find yourself attacked first by them more than a few times. Have a knife handy, as well as some methods of healing: some Cooked Meat or a Health Restoration Paste, for example.
Biggest danger brought by the Snow Leopards is initiating battle with other predators nearby. Within a close distance, more animals can join in and easily overwhelm you.
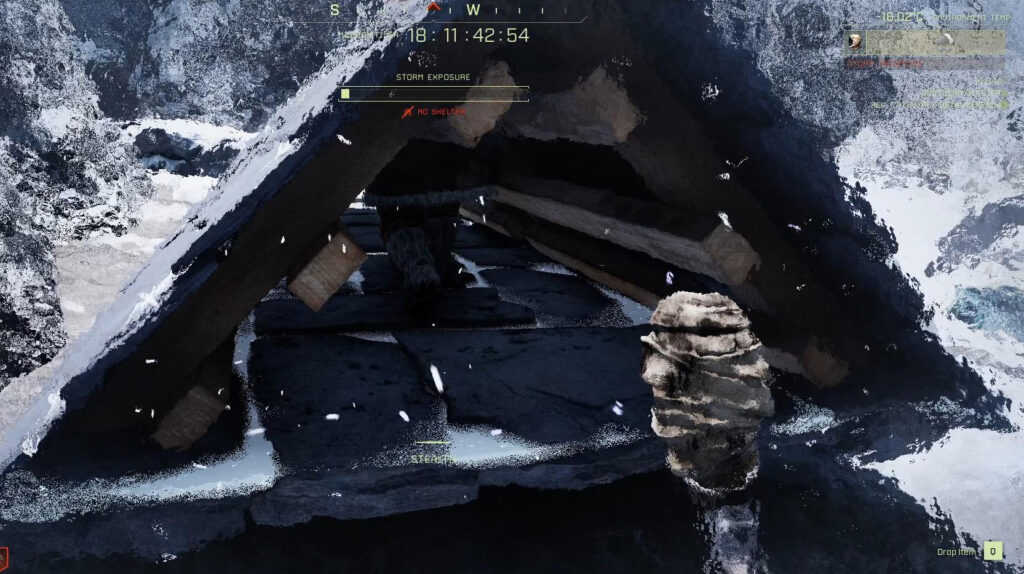
If you could continue hanging out and chopping trees during a mild storm in the Forest, you cannot do so in the Arctic. Extreme cold will penetrate through your Fur Armor and snow storm exposure can quickly kill you if left unchecked.
Cold Nights
Arctic nights are too cold to stay outdoors. Earlier in the guide we discussed the importance of warm shelter with a bed: prepare ahead and try to sleep through the night when possible. Keep in mind that temperatures are deadly unless you are inside a sheltered area — campfire alone will not be enough to protect you.
Arctic Storms
Severe storms in this biome require you to be aware of your closest secured shelter even during the day. Never risk being too far from one: the storm will slow you down to a crawl, and before you know it you will be taking too much damage to survive.
Establishing a cave network will definitely help before you establish a more permanent base. However, you may want to consider carrying a small pack of stone construction materials on you, enough for a tiny shelter and a campfire in cases of emergency.
Survival in the Arctic centers around creative use of space. Inventory and otherwise.
Available Resources
The Arctic is one of the two biomes scarce in basic resources. Yet, should you take up the challenge, it will generously reward you with massive caves populated with plenty of mining nodes. This snow desert will be bereft of plant life aside from mushrooms in the caves, but a few pieces of driftwood can be collected as wood.
Ice in the Arctic biome is abundant in the transition areas as well as deep within (should you have a shovel), and it can be melted to fill up your drinking containers. Note that, despite the ore abundance, you will still want to locate caves if you want to get your hands on ore nodes aside from Oxite, Sulfur, and Silica.
Wolves can provide for most Tier 2 crafting when combined with ore, helping you dabble with some of the more ambitious Tier 3 projects as well. Keep in mind that while Polar Bears provide Polar Bear Pelt, they do not drop regular Leather or Fur.
We hope this guide on the ICARUS’s Arctic biome was helpful! Please leave us any questions or suggestions you have in the comments below.
Share this article:
Mila Grish
Dedicated contributor at EIP Gaming and a part-time collector of books she will never have time to actually read. Jumps on the newest releases just as quickly as on the uncovered dusty collections from the basement. For her, shiny graphics can never be an excuse to not have a polished player experience or an immersive story.