In the ICESTORM mission, you’ll be helping the Lagos faction recover and set up a device that may disrupt the permanent storms over an Arctic region of Icarus. This guide will first list the relevant details of the mission, and then provide a step-by-step walkthrough.
Deploy and Activate the Disruptor above ground and under shelter in the Glacier Arctic
Rewards
125
Variants Modifiers
Creature melee damage: -50%
Creature health: -50%
Creature movement speed: -10%
Bear spawn rate: -50%
Lion spawn rate: -10%
Polar bear spawn rate: -50%
Wolf spawn rate: -10%
Aggressive creatures perception: -50%
Neutral creatures perception: -50%
Passive creatures perception: -50%
Experience gain: -25%
Creature melee damage: +20%
Creature health: +30%
Creature movement speed: +10%
Aggressive creatures perception: +30%
Neutral creatures perception: +30%
Passive creatures perception: +30%
Scorpion spawn rate: +30%
Lion spawn rate: +30%
Wolf spawn rate: +30%
Experience gain: +25%
Player respawn count: 3
Prospect Notes
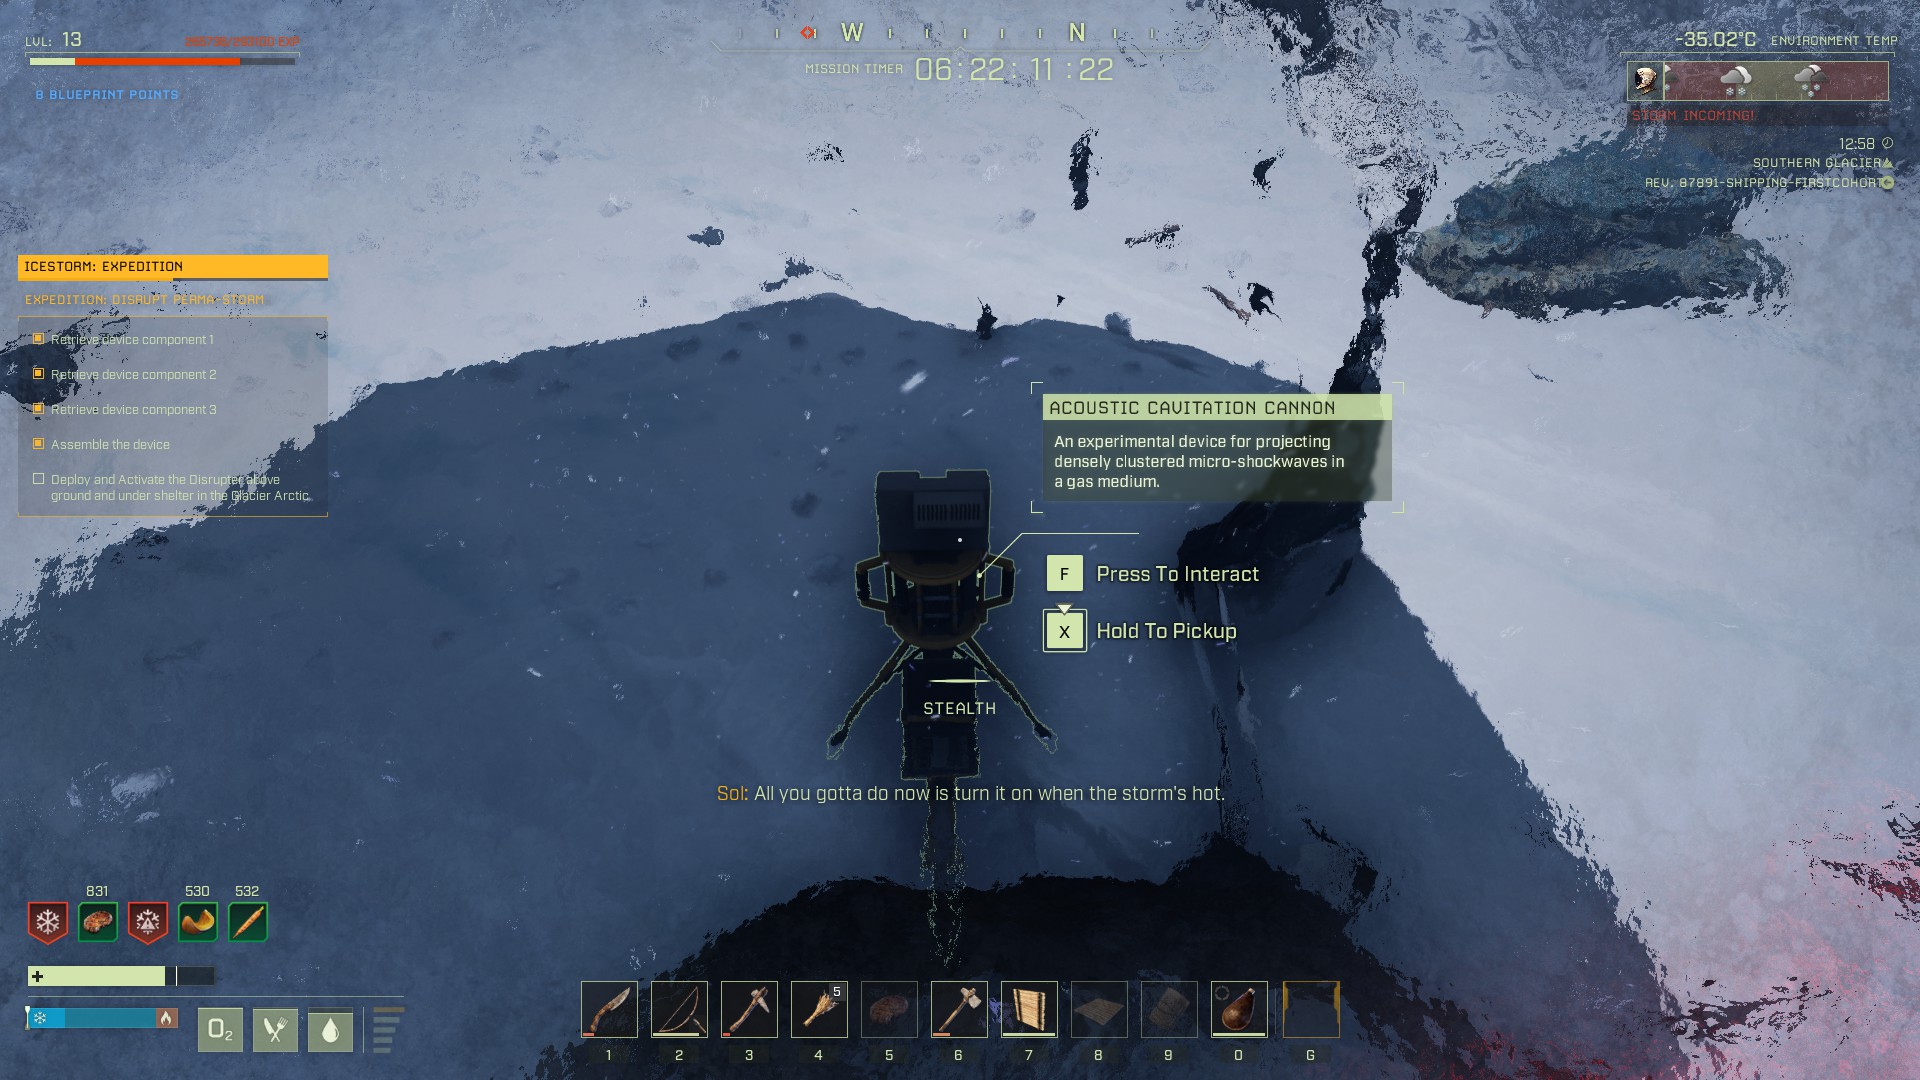
To complete the objectives, you’ll need to collect three device components, and then use them to craft a device (this can be done at your Character). This device needs to then be placed in shelter in the Arctic; it will run for a while, and then your missions objectives will be completed.
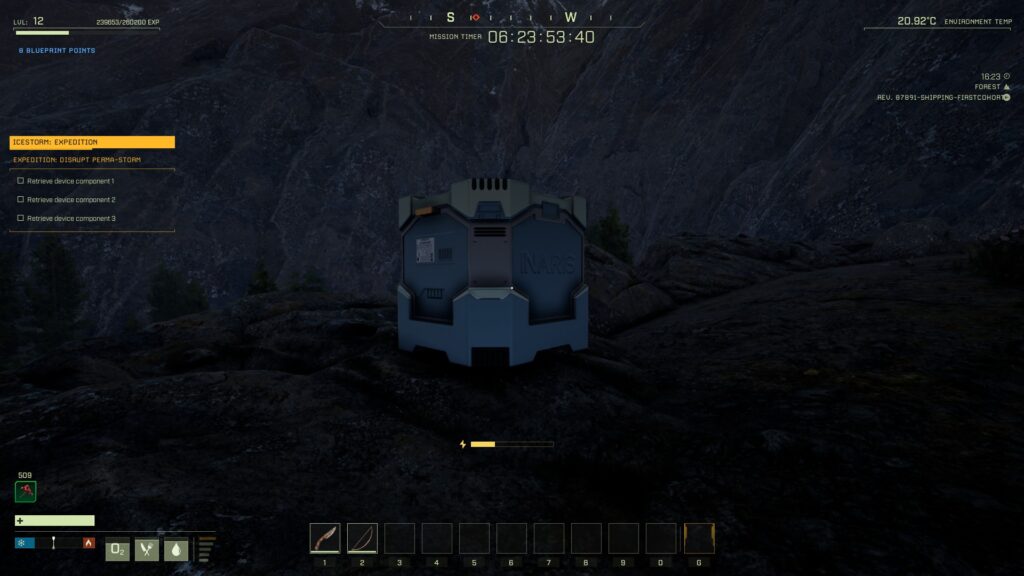
Device Components are all in supply crates like this one
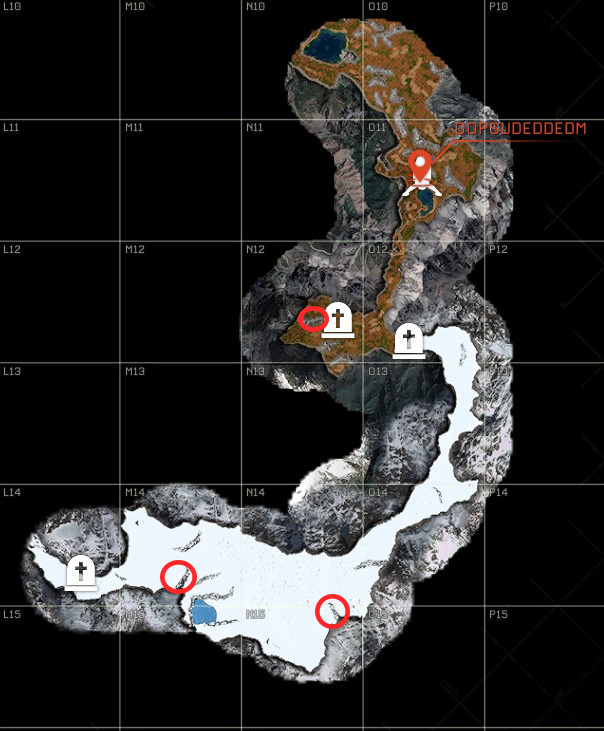
The red circles indicate the objective locations — you can ignore all the tombstones
Preparing for ICESTORM
This prospect requires venturing into the Arctic, and then placing a device in shelter there. While you can get lucky with rock spawns, it’s better to go in prepared. Here’s what you should create, at a minimum, to complete your objectives:
Portable Shelter — bring extra floor (as roof) tiles as snow will likely collapse them
Bedroll — this is optional; if you want, you can place one in a thatch shelter near the entrance to the Arctic to make potential respawns and runbacks faster.
The following talents will dramatically increase your chances of survival. They are from the Solo tree, but if you’re not alone this mission isn’t so difficult and therefore these aren’t so important.
Fleet Footed [Solo – Solo]: 2 points
+10/15% to movement speed. We’ll be running through the Arctic as fast as we can, so this is important.
‘Tis But a Scratch [Solo – Solo]: 2 point
-10/15% resistance to physical damage. Dying sucks, and surviving an animal attack means your mission finishing potentially 10+ minutes faster.
Very, Very Quiet [Solo – Solo]: 1 point
-15% perceived threat while in stealth. You’ll have to pick up some other talents — feel free to choose whatever you like, but this talent is essential for not becoming polar bear breakfast.
Mission Walkthrough
Step 1: The First Component
Once you land, open your map and find the small blue circle southwest of where you dropped in. Double-click the blue circle in N-12 to set a waypoint, and start heading south through the valley. Gather sticks and rocks to craft your knife and bow while doing so.
Once you’ve collected a few different types of food and have slain at least an animal or two, craft a Campfire and cook your food — the bonus stamina and health makes the rest of the mission faster and safer. Chop down nearby trees for XP while you wait for your food to cook, and craft 4 Wood Floors and 4 Wood Walls, plus a Wood Door.
Make particular care to collect as many berries as you can while venturing south, as if you don’t collect at least a stack or so, you’ll need to craft a Waterskin in order to go into the Arctic hydrated (and that means creating a Crafting Bench and having to melt ice, which both will cost you time).
There’s a bear that hangs out near the first component, so be on the lookout and sneak if you aren’t full of food and ready for a fight. Once you’ve got the first component, head to the bottom of O-12 and prepare yourself for heading into the Arctic.
Step 2: The Second & Third Component
If you haven’t recently leveled up, you risk losing a lot of XP in the Arctic if you die. It’s a good idea to attempt to level up while prepping for the Arctic — if you have everything you need and still haven’t leveled up, fell trees until you’ve leveled up, then continue with the walkthrough.
Before you go into the Arctic, you should make sure you have at least 10 Cooked Meat, and at least 2 or 3 of two other types of cooked foods, such as Grilled Pumpkin and Roast Squash. Bring a Campfire, two full stacks of wood, and a full stack of fiber with you as well. You’ll also need a stone pickaxe, and you should make sure you’ve got a full set of Cloth Armor — the movement speed bonus will be essential to staying alive in the Arctic. If you’re level 15+, you could create better armor like Leather, but it’s unlikely you’ll be that high level at this point in the mission tree.
If you have enough extra resources, it’s not a bad idea to create another wooden box shelter and set it near the entrance to the Arctic, then place a Bedroll in it. This will save you time if you end up needing to respawn.
Once you’re ready to go, double click the blue circle in the upper right of N-15 to give yourself a waypoint, and then stick to the right-hand (western) wall while making your way into the Arctic. While you’re entering the Arctic, you’ll almost certainly have to sneak past multiple Polar Bears. If you can’t see around a corner or rock, you should sneak until you have better vision. Polar Bears tend to wander back and forth, so be patient and crouch-move past them once they’re out of your way.
If a serious storm starts up, go slow to avoid predators, and then build your shelter once you start taking damage from Exposure. Snow may collapse your roof — replace it only once, as you’ll need extra roof tiles to protect your objective later. Once your waypoint is due south of you, get off the wall and head towards it. You’ll find it at the top of a small slope.
There are far fewer animal spawns this deep into the Arctic, so you can set your new waypoint on the final blue objective marker to the west in M-14, and the head straight there. Bear a bit right (north) as you’ll have to make your way up another slope, and grab the final component. On your way, you should still keep an eye out for predators, but try to move quickly to avoid dying to the cold.
At this point, you may be taking damage from the cold, so feel free to set up your shelter and your fire to warm up.
Step 3: Deploying and Activating the Disruptor
Now comes the tricky part. You have two choices: you can try and place the Disruptor in your portable shelter and activate it, or you can search for a mineable stone deposit to place it in. The latter option is safer if you can find a decent rock spawn — if you can’t find one after heading west for a few minutes it’s better to place your device in your portable shelter and then attempt to escape the Arctic.
First, you’ll need to go into the Crafting menu and create the disruptor (it’s the last item on your list of craftable items). Once it’s crafted, you can deploy it like any other buildable (right-click it in your inventory and select “Deploy”), then press F to activate it. It takes a long time to run, but you don’t need to be near it for it to finish. Once it’s on and under shelter, you can attempt to escape the Arctic — but note that if you’ve placed it in a Wooden shelter, you’ll need to stay there to repair and maintain your shelter, since the device won’t function if it isn’t sheltered.
For this reason, finding a rock outcropping and hollowing out a space for the Disruptor is usually the better option. However, if you followed the directions and brought a full stack of wood and fiber, you can craft new structure pieces to replace any sections that the storms damage. Therefore, be ready to be flexible and use either a stone outcropping or a shelter to protect the Disruptor while it runs.
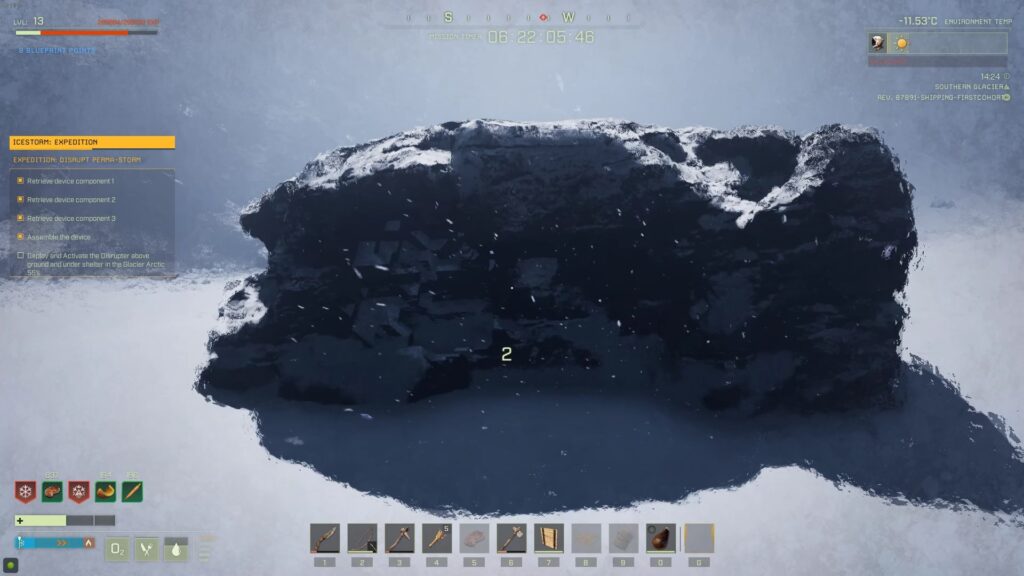
You can’t tell from out here, but the device AND a campfire are in that rock somewhere
Once the Disruptor is finished running (or is safely ensconced in stone), you can die or attempt to escape the Arctic — the fastest way out of the Arctic is through a pass to the west (in L-14), but you’ll then have to loop all the way around to the north to return to the drop site. If you followed the advice at the start of Part 2 and leveled up before you got here, you’ll be able to happily relax in the snow and let the cold take you, then respawn near your drop site and head back into space!
We hope this ICESTORM walkthrough was helpful! Let us know if you have any questions or suggestions via the comments box below.
Share this article:
DanielD
Unabashed FromSoftware fanboy still learning to take his time with games (and everything else, really). The time he doesn't spend on games is spent on music, books, or occasionally going outside.
Animals do not spawn to attack it like in some of the other missions, but I was not able to test whether or not animals that pass nearby will attack it — the area of the Arctic where you find the final component seems bereft of life.
Were you able to locate your body? I imagine finding the overflow bag your corpse leaves behind is difficult in the artic. You might be able to open the map and double-click the exact center of the tombstone where you died to help you locate it.
That being said, restarting the mission may be your best bet.
Boom
2 years ago
This guide is great, but if you’re above level twenty, you can skip quite a few steps.
You could just make a stone hut and let the generator run in there, for example. 🤷”♂ï¸
GrizzJam
2 years ago
I think this walkthrough does a good job of describing the mission, some pitfalls, and bringing a firepit and bedroll is very good advice. It looks like you completed this at a relatively low level, which is applaudable. I took my time going through the initial missions and was around level 30 when I took this mission. I think the walkthrough would be improved tremendously if you talked more about the biggest problem that someone might face on this mission.. Polar Bears and how to avoid them. The biggest challenge for new Icarus players are Bears. In fact their first taste of death and the stress inducing corpse run is because of a run in with a Grizzly bear. Then there are Polar Bears, a mob that has 3x the health of a forest bear and will one shot those are caught off guard by them. Polar Bears will equally one-shot low level players that engage a Polar Bear thinking they have the same attributes/health as a Grizzly bear. You will hear loud roars when you enter the vicinity of a Grizzly bear. When you hear that roar, you know that you need to be more cautious and your priority will be to make sure you see the bear before he sees you so you can get that first critical surprise shot. You do not hear a roar when you enter the vicinity of a Polar bear. One particular streamer, CrypticFox, was ambushed by a roaming Polar bear on the forest side portion of the entrance to the the arctic, and then that same bear killed him two more time on his corpse run (Bears stick around the area near your corpse). Very entertaining for viewers, not so entertaining for the player when several deaths adds 2-3 hours to complete the mission.
The point I’m making is that when entering the Arctic, you need to be extra careful, be stealthed, and travel cautiously. The best thing a low level player (lower than level 25) can do to increase survival is to avoid them at all costs. A Polar bear has over 4000 hp, and that surprise head shot with your bone arrow does 300-400 hp damage. You need to shot 10+ more at it and have them crit each time to drop it before it reaches you. A bone knife won’t be very effective when it closes the gap. On multiple occasions I’ve headshot a Polar bear for 3000 hp (hunting rifle) stealthed, and it didn’t die. In fact, one polar bear took several more rifle shots as it barreled towards me before it dropped.
My advice, to reduce the number of corpse runs, unlock the bolt-action rifle at level 25, have a full set of leather armor, and upgrade your tools to iron before you do the final objectives.
Thanks for the feedback, and for sharing your tips! We’ve got someone working on a guide for handling polar bears, so we’ll certainly be linking that here once it’s finished. I’ve also updated the guide with some specific tips on avoiding polar bears.
I dug me a hole straight down the center of a large wide rock and was able to fire off enough shots with my bow to drop a polar bear before he busted through the rock.
Munish
2 years ago
My disrupter does not get to 100% during one storm and then it resets once a 2nd storm starts”¦ what am I doing wrong?
This sounds like a bug to me; the disruptor should run continuously once you turn it on… At least, that’s the behavior I got during my runs of the mission. Hard to say what behavior is intended without further data, however.
Laza
2 years ago
hello, I can’t build a device anywhere, I can’t advise me anywhere in the house or what I’m doing wrong I still have 3 things in mind
Nebula
1 year ago
I also don’t have a 2nd component spawned, which is kinda sad if I’d have to restart haha x)


Do you have to protect it from animals while it’s running?
Animals do not spawn to attack it like in some of the other missions, but I was not able to test whether or not animals that pass nearby will attack it — the area of the Arctic where you find the final component seems bereft of life.
My first device component is gone/didn’t spawn ?
I retrieved the other two. Tried relogging and nothing :/
Yes, I have the same problem. First component never spawned. I’m stuck now.
I lost a component after I died the first component now I can’t find it anywhere so I couldn’t get finished this one
Were you able to locate your body? I imagine finding the overflow bag your corpse leaves behind is difficult in the artic. You might be able to open the map and double-click the exact center of the tombstone where you died to help you locate it.
That being said, restarting the mission may be your best bet.
This guide is great, but if you’re above level twenty, you can skip quite a few steps.
You could just make a stone hut and let the generator run in there, for example. 🤷”♂ï¸
I think this walkthrough does a good job of describing the mission, some pitfalls, and bringing a firepit and bedroll is very good advice. It looks like you completed this at a relatively low level, which is applaudable. I took my time going through the initial missions and was around level 30 when I took this mission. I think the walkthrough would be improved tremendously if you talked more about the biggest problem that someone might face on this mission.. Polar Bears and how to avoid them. The biggest challenge for new Icarus players are Bears. In fact their first taste of death and the stress inducing corpse run is because of a run in with a Grizzly bear. Then there are Polar Bears, a mob that has 3x the health of a forest bear and will one shot those are caught off guard by them. Polar Bears will equally one-shot low level players that engage a Polar Bear thinking they have the same attributes/health as a Grizzly bear. You will hear loud roars when you enter the vicinity of a Grizzly bear. When you hear that roar, you know that you need to be more cautious and your priority will be to make sure you see the bear before he sees you so you can get that first critical surprise shot. You do not hear a roar when you enter the vicinity of a Polar bear. One particular streamer, CrypticFox, was ambushed by a roaming Polar bear on the forest side portion of the entrance to the the arctic, and then that same bear killed him two more time on his corpse run (Bears stick around the area near your corpse). Very entertaining for viewers, not so entertaining for the player when several deaths adds 2-3 hours to complete the mission.
The point I’m making is that when entering the Arctic, you need to be extra careful, be stealthed, and travel cautiously. The best thing a low level player (lower than level 25) can do to increase survival is to avoid them at all costs. A Polar bear has over 4000 hp, and that surprise head shot with your bone arrow does 300-400 hp damage. You need to shot 10+ more at it and have them crit each time to drop it before it reaches you. A bone knife won’t be very effective when it closes the gap. On multiple occasions I’ve headshot a Polar bear for 3000 hp (hunting rifle) stealthed, and it didn’t die. In fact, one polar bear took several more rifle shots as it barreled towards me before it dropped.
My advice, to reduce the number of corpse runs, unlock the bolt-action rifle at level 25, have a full set of leather armor, and upgrade your tools to iron before you do the final objectives.
Thanks for the feedback, and for sharing your tips! We’ve got someone working on a guide for handling polar bears, so we’ll certainly be linking that here once it’s finished. I’ve also updated the guide with some specific tips on avoiding polar bears.
I dug me a hole straight down the center of a large wide rock and was able to fire off enough shots with my bow to drop a polar bear before he busted through the rock.
My disrupter does not get to 100% during one storm and then it resets once a 2nd storm starts”¦ what am I doing wrong?
This sounds like a bug to me; the disruptor should run continuously once you turn it on… At least, that’s the behavior I got during my runs of the mission. Hard to say what behavior is intended without further data, however.
hello, I can’t build a device anywhere, I can’t advise me anywhere in the house or what I’m doing wrong I still have 3 things in mind
I also don’t have a 2nd component spawned, which is kinda sad if I’d have to restart haha x)