In the SEARCHLIGHT mission, you’ll be surveying the Arctic for the Lagos faction, who naturally are hoping to find exotics. This guide will first list the relevant details of the mission, and then provide a step-by-step walkthrough.
Prospect Details
Approximate time to complete: 1 hour — not including the runback to the drop pod, which adds at least another ~20 minutes.
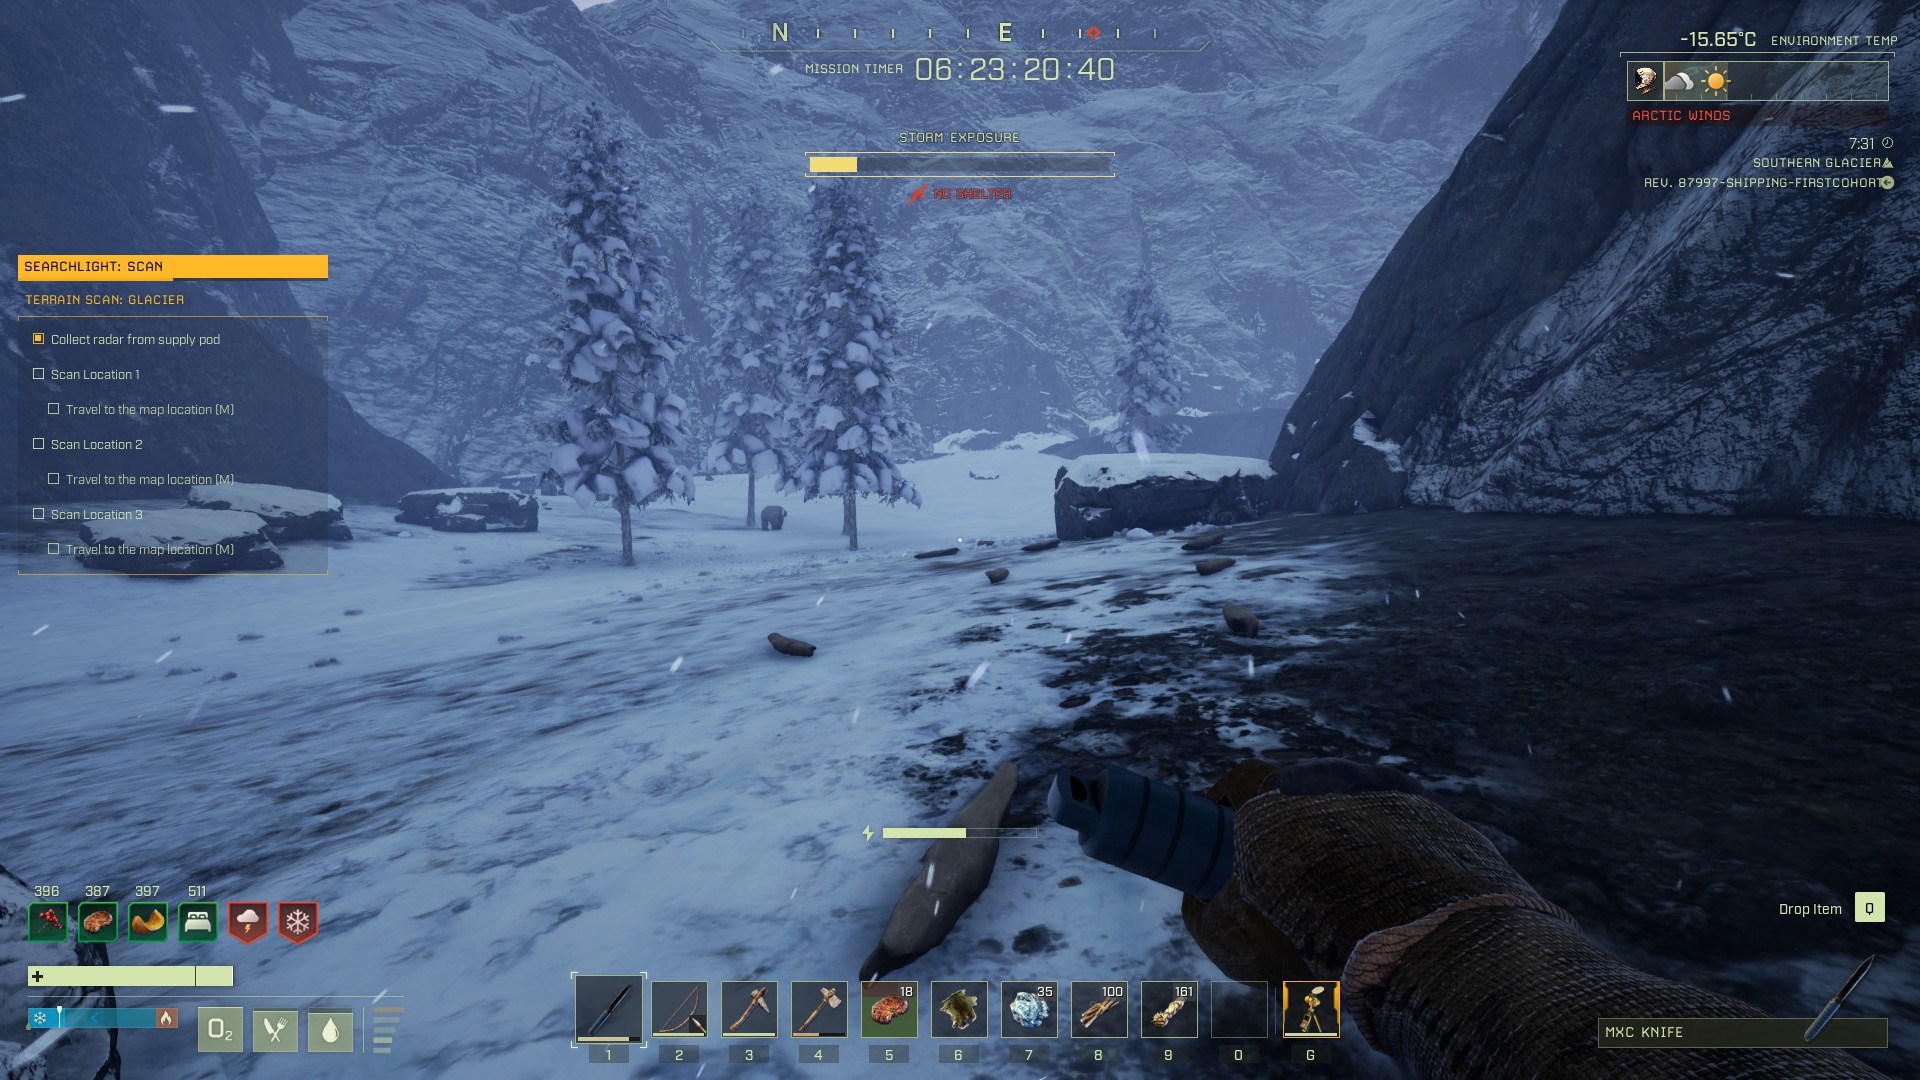
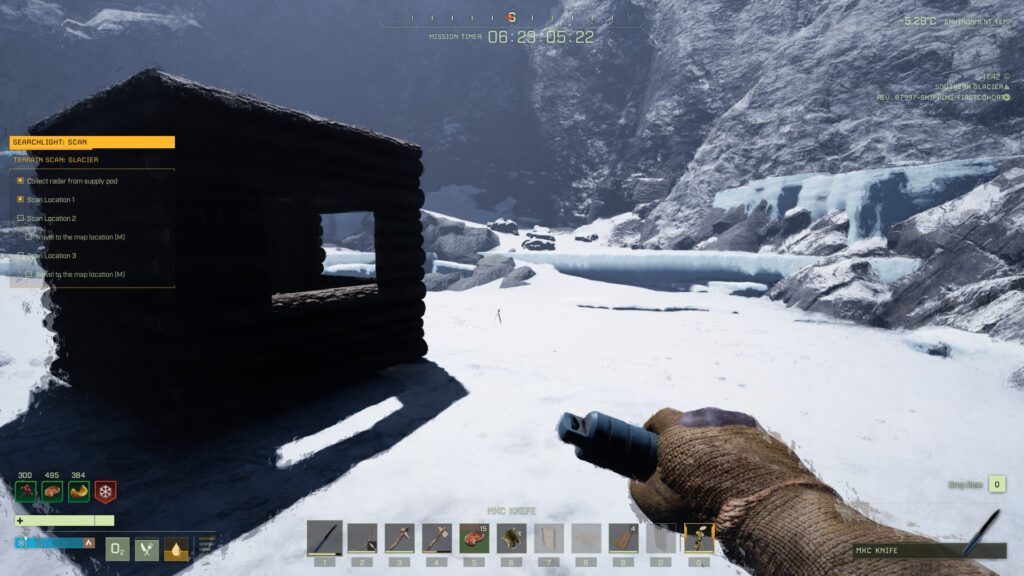
To complete the objectives, you’ll need to collect the radar from the supply crate, and then bring it to three locations and activate it. At each location, the radar will be attacked — you can usually hide from the predators that spawn, and sneak back to activate the radar, but it is possible that you’ll have to fight them.
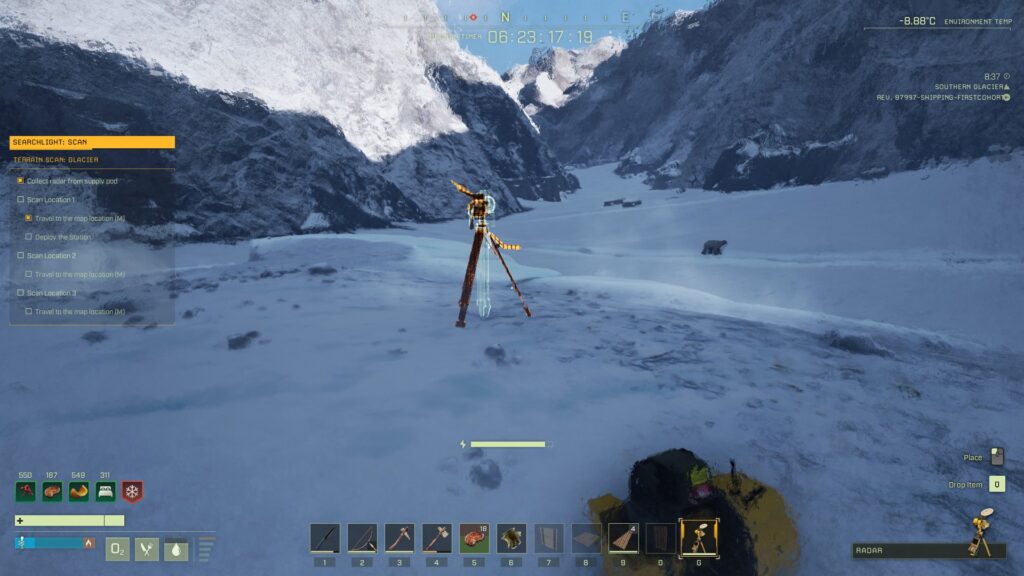
Deploying the radar (note the furry friend in the background)
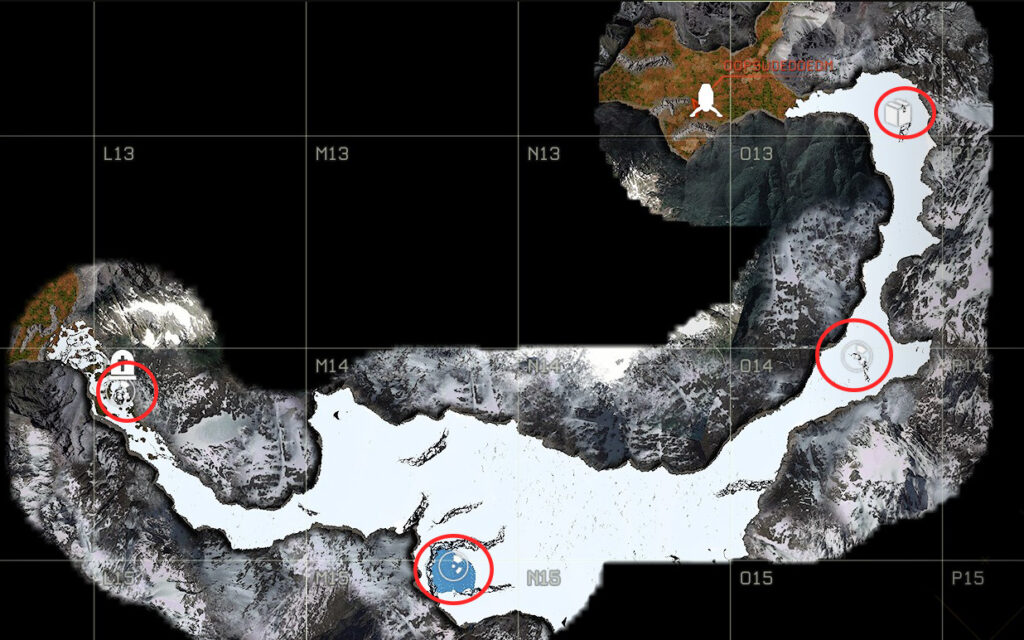
The red circles indicate the objective locations
Preparing for SEARCHLIGHT
This prospect requires venturing into the Arctic, and then placing and activating a device there. Here’s what you should have unlocked, at a minimum, to complete your objectives:
Thatch or Wood Ladder — This is 100% required, so make sure you have this unlocked before you begin part 2 of this walkthrough
The following talents will dramatically increase your chances of survival. They are from the Solo tree, but if you’re not alone this mission isn’t so difficult and therefore these aren’t so important.
Fleet Footed [Solo – Solo]: 2 points
+10/15% to movement speed. We’ll be running through the Arctic as fast as we can, so this is important.
‘Tis But a Scratch [Solo – Solo]: 2 point
-10/15% resistance to physical damage. Dying sucks, and surviving an animal attack means your mission finishing potentially 10+ minutes faster.
Very, Very Quiet [Solo – Solo]: 1 point
-15% perceived threat while in stealth. You’ll have to pick up some other talents to reach this — feel free to choose whatever you like — but this talent is essential for not becoming polar bear breakfast.
Running With Knives [Combat – Blades]: 3 points
+2/5/10% to movement speed with a knife equipped. We’ll be avoiding death-by-frostbite purely by moving quickly, so this makes it even safer.
Mission Walkthrough
Note: Like many missions, this one ends once the final objective is completed; you don’t have to get anything back to the drop pod. If you make sure you’ve got an empty XP bar before you begin Step 2, you can let your character die once you’ve completed the mission, and therefore get back to the Drop Pod much quicker. If you do this, make sure you don’t have a spawn point set at a Bedroll.
Step 1: Prep & Grabbing the Radar
This mission lands you very close to your first objective — but it’s in the Arctic, so we aren’t heading there yet. Instead, we’ll prep in the forest, then venture into the cold once we’re good and ready. Here’s what you should have, at a minimum, before moving on to the next step:
Cloth Armor (Full set) – The 5% move speed bonus the full set gives you is invaluable.
A full stack (100) of Berries, and 100% Water – Alternatively, you could bring a canteen from the Workshop, or craft a Waterskin, but it really isn’t necessary if you go fast and bring a full stack of berries with you.
A full stack (50) of Oxite in your Oxygen slot, and 100% 02 – You can get Oxite in the Arctic, but we won’t have time to stop and mine.
A full stack (20) of Cooked Meat – This is mainly for emergency heals, though naturally you’ll want to eat while you’re in the Arctic as well.
1 Wood Repair Hammer – If your shelter gets damaged, you can’t pick it up until it’s repaired
Optionally (but highly recommended), bring extra food. Ideally, bring at least 5 of each of two types of cooked vegetables for the extra stamina; this will make sprinting through the Arctic easier.
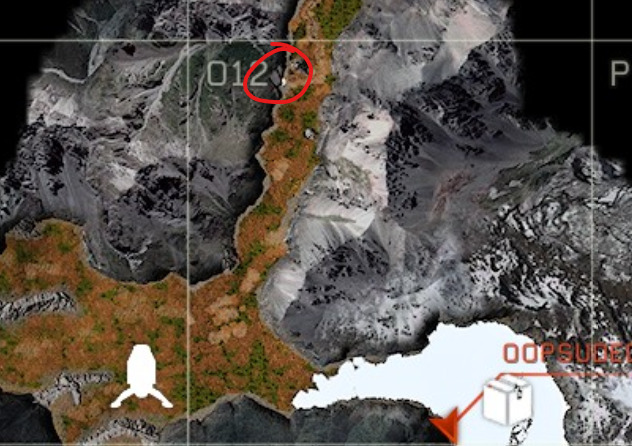
This should take you about an in-game day to prep, so partway through the day, craft a Bedroll and set it up under shelter somewhere near your Drop Pod — you’ll want to sleep through the night, then set out fresh in the morning with the Well Rested buff. To get 100% water before you set out (do this right before sleeping at the end of the day), head to the waterfall just east of the actual text “O12” on the map:
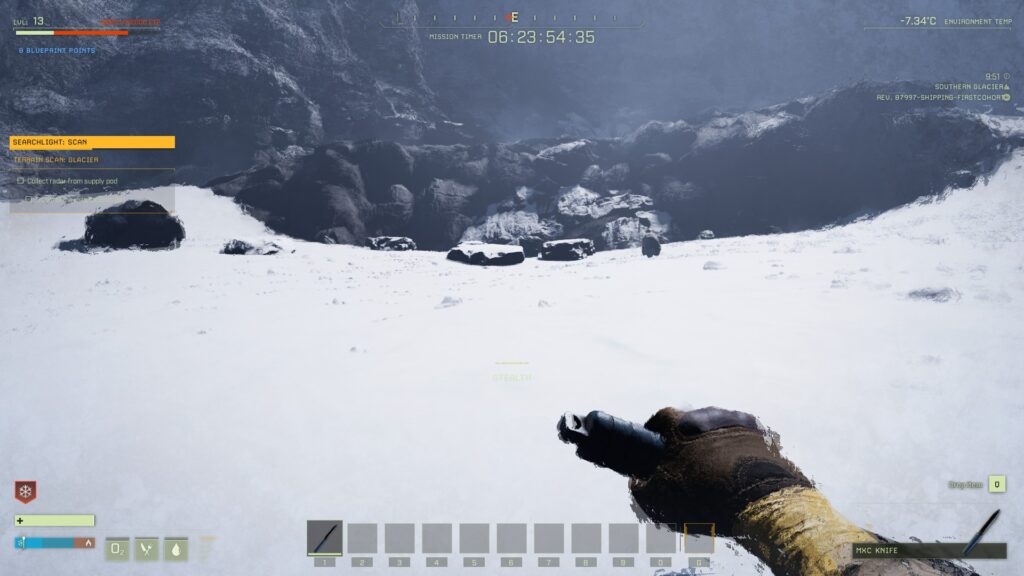
Once you’ve got all your gear and you wake up in the morning, open your map and double click the supply crate icon to give yourself a waypoint. Pull out your knife if you’ve got the Running with Knives talent, and start sprinting towards your waypoint. There will probably be a Polar Bear near the Supply Crate, so approach with caution and sneak around blind corners/rocks. Don’t engage the bear, just wait for him to get out of your way if you need to, then grab the radar from the supply crate.
Can you spot the Polar Bear and the Supply Crate?
Step 2: Scanning Locations 1 & 2
Once you’ve got the radar, open your map and double-click the objective marker to the south in O-14 and then start heading that way. Stick to the western (right) side of the valley as you continue south. Don’t forget to eat a berry, a veggie, or meat from each stack every so often so they don’t spoil. There don’t seem to be many animals out here, so you can generally sprint, but continue to sneak around blind corners or if there’s a big rock you can’t see past.
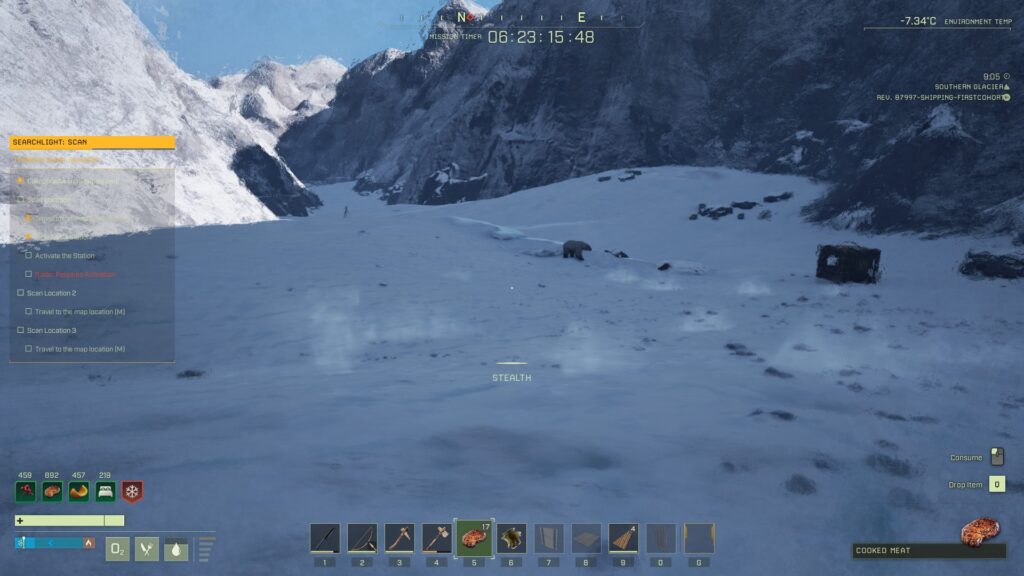
There should be a polar bear between you and the small incline the first Scanning Location is on, so keep an eye out. Once you find the scanning location, build your portable shelter a good distance away, and place your Bedroll in it and set it as your spawn point. Then go set up the radar, activate it, then sprint in the opposite direction of your shelter and crouch (stealth). A polar bear will spawn and attack the radar, but after a bit it will wander off. Sneak around it (if you have to) and reactivate the radar, then wait for it to finish.
This guy sniffed at my shelter for a while and cost me some time
Once it’s done scanning, pick it up, and then go deconstruct your portable shelter with [Y] —but remember to pick up the door and bedroll first by holding [X] on them, or you could lose them while packing up your shelter. Open your map and set your next waypoint on the objective marker in M-15. You should be able to head straight that way in the open — as always, keep an eye out for predators and check your food for spoilage as you go.
Once you’re at the next site, set up your shelter on the higher ground north of the radar placement area. Thistime,you’re going to need to hide in your shelter, since the wolves that spawn are much better at finding you even if you’re decently far away. You should still place your Bedroll and set it as your spawn before you activate the radar. Activate the radar and sprint to your shelter;pull out your bow and equip your bone arrows (hold [R] to select ammo) and dispatch the wolves as they approach your cover. Reactivate the radar and then pick it up once it’s done scanning, then leave your shelter intact, with your bedroll inside and your spawn point set. Make sure the roof is on it before you go. Note: If you plan on killing your character to avoid the runback, don’t do this, as a set spawn point will prevent you from respawning back near your pod.
The view from the ridge north of the 2nd Scan Location — place your shelter here before you activate the radar
Part 3: Scan Location 3
Open your map and set your final waypoint for the objective marker in L14. This is the most dangerous part of the mission, since we have to pass through a narrow valley that probably has a polar bear — which is why we left our shelter set up with a spawn point. You’re almost out of the Arctic, so don’t panic if you start taking damage from the cold; eat meat to heal (you can drag it to your hotbar to make it easier) and keep moving carefully.
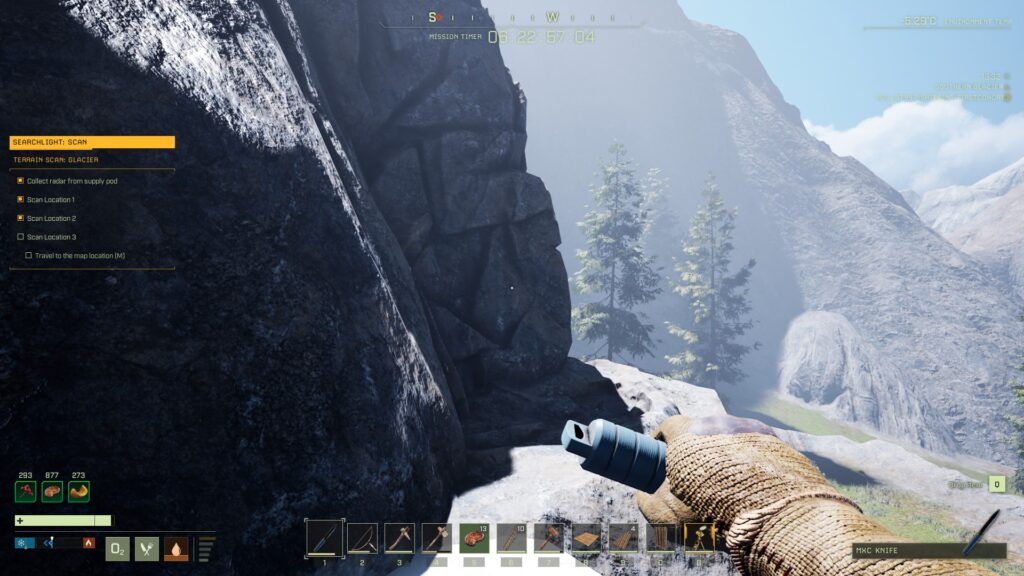
Go past your final objective and get into the forest to warm up and collect some fiber and sticks — there is sometimes another polar bear here, so again, be careful. Once you’re warm, craft at least 6 Ladders and 3 Floors of any type. Then head back into the Arctic to where your waypoint is. You should see a tall rock directly where your waypoint marker is — circle around it to its northern side, where you’ll find a ledge that overlooks the forest.
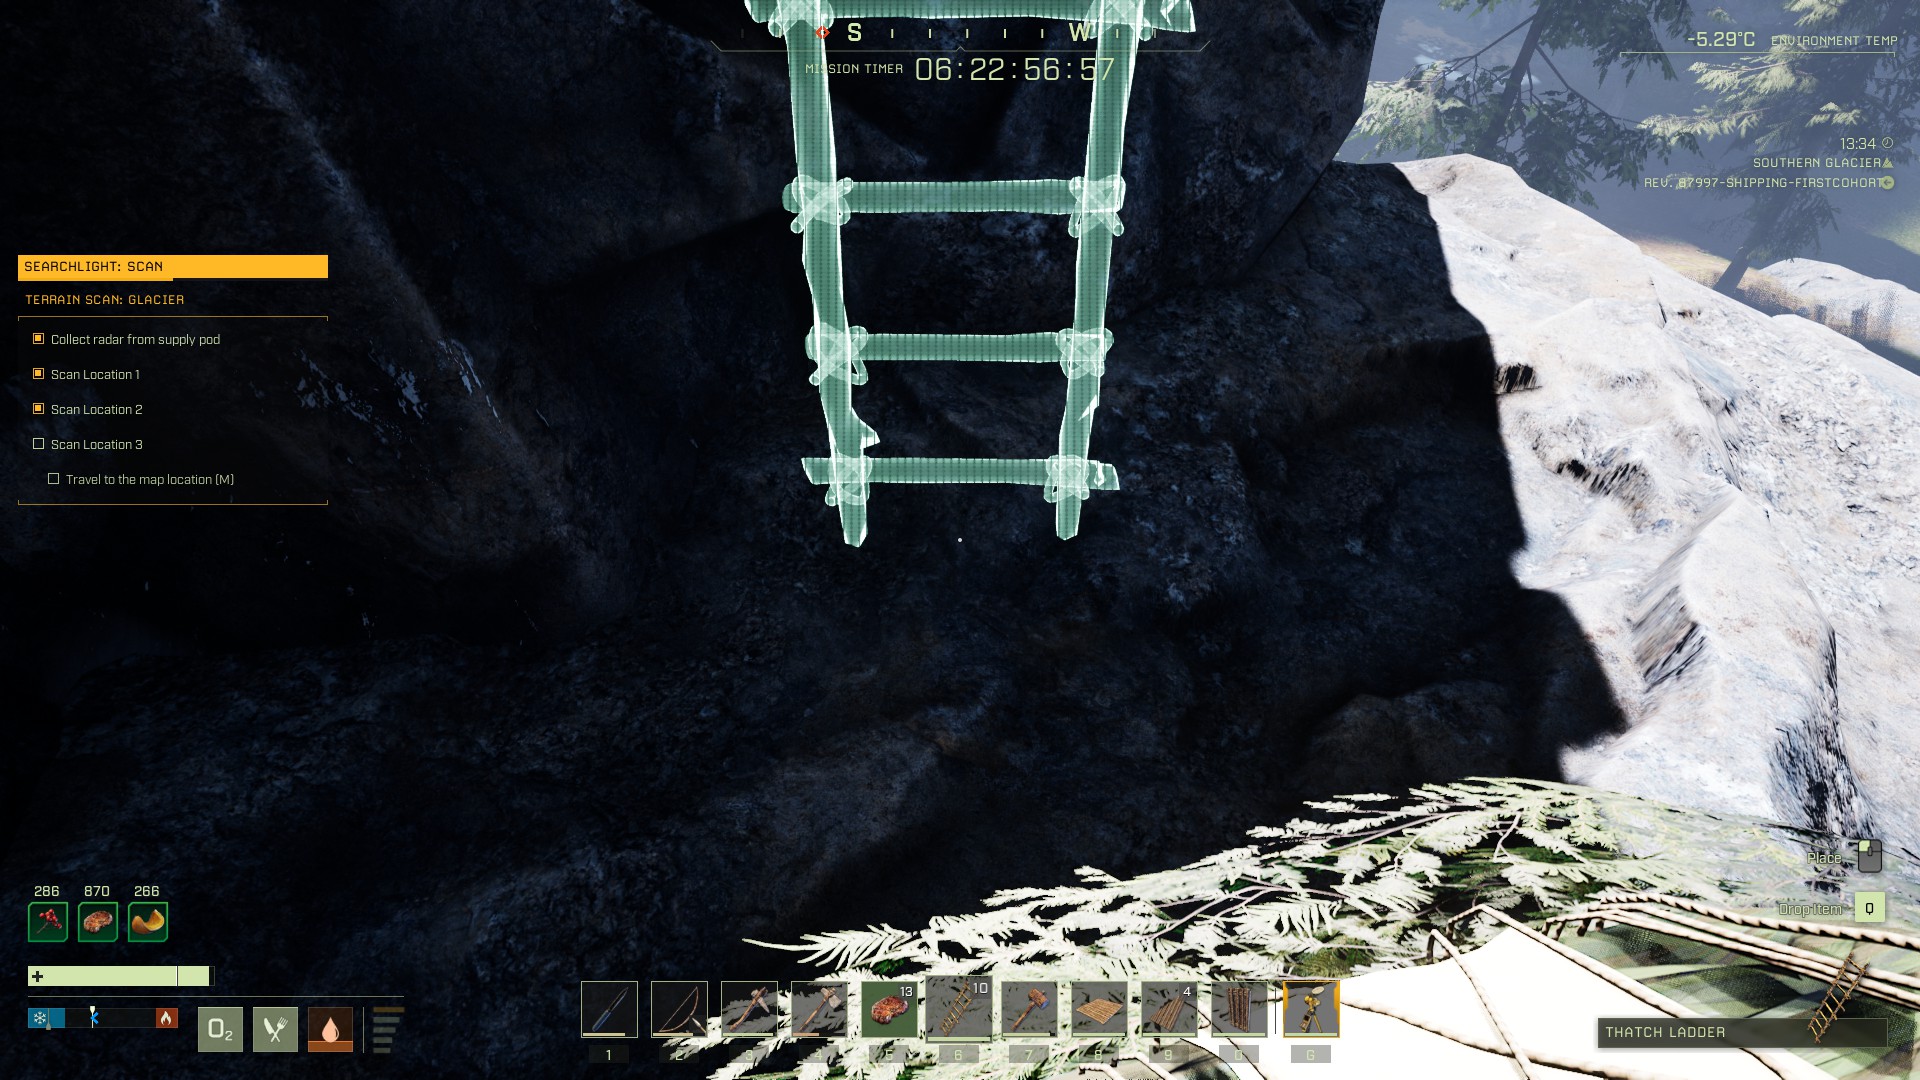
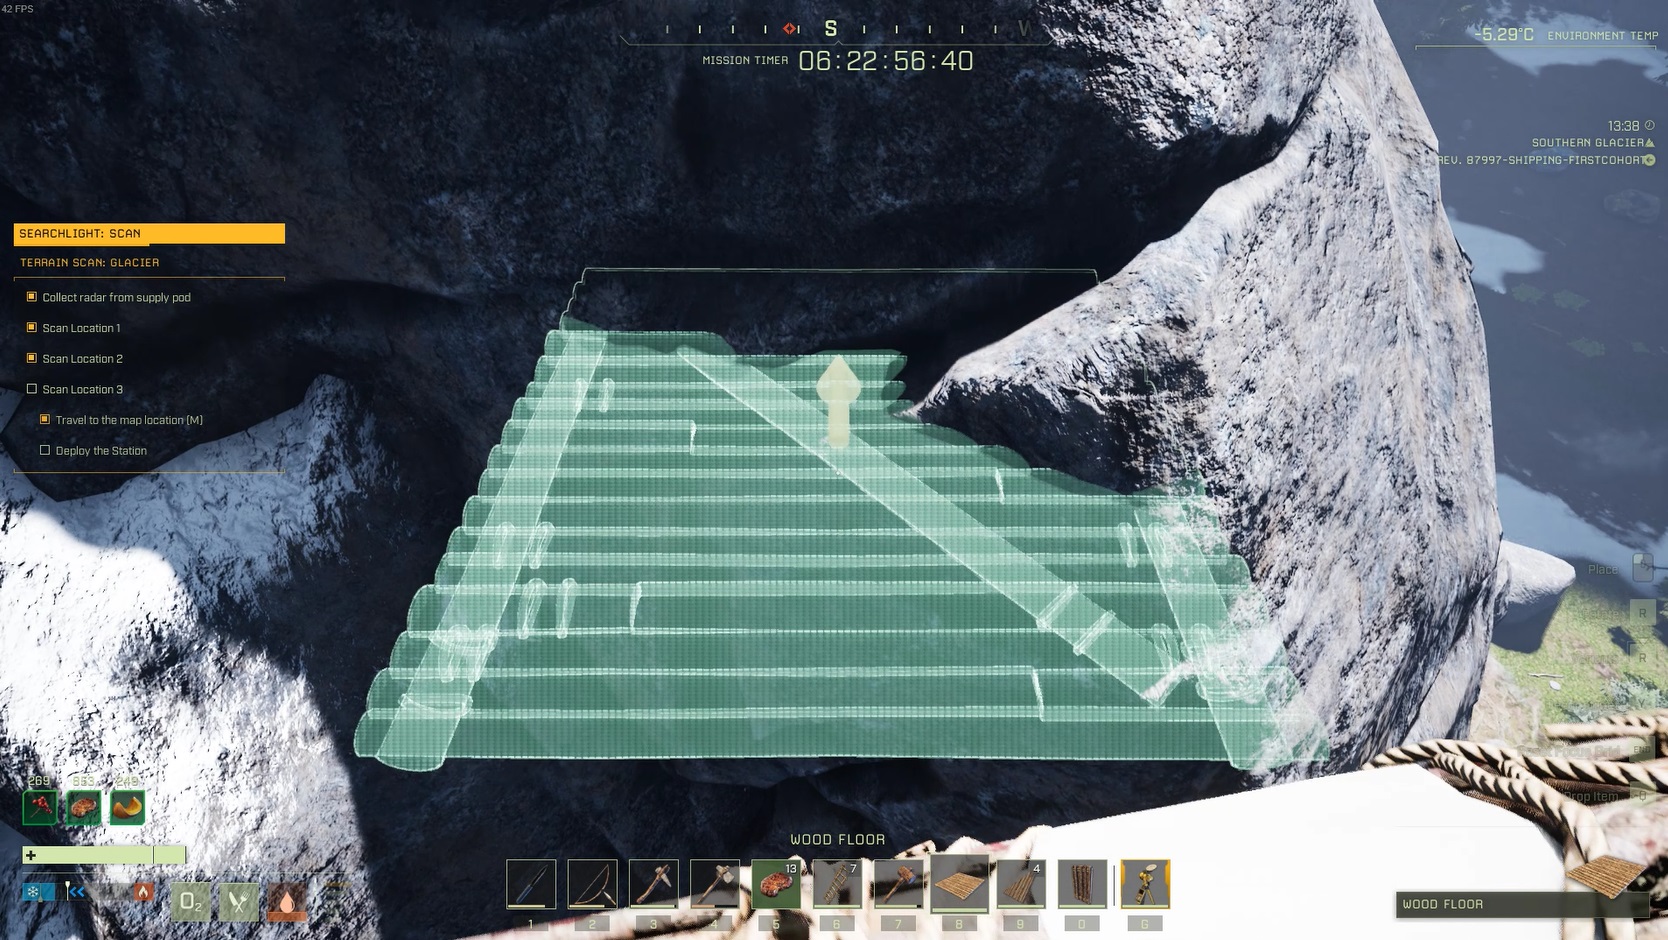
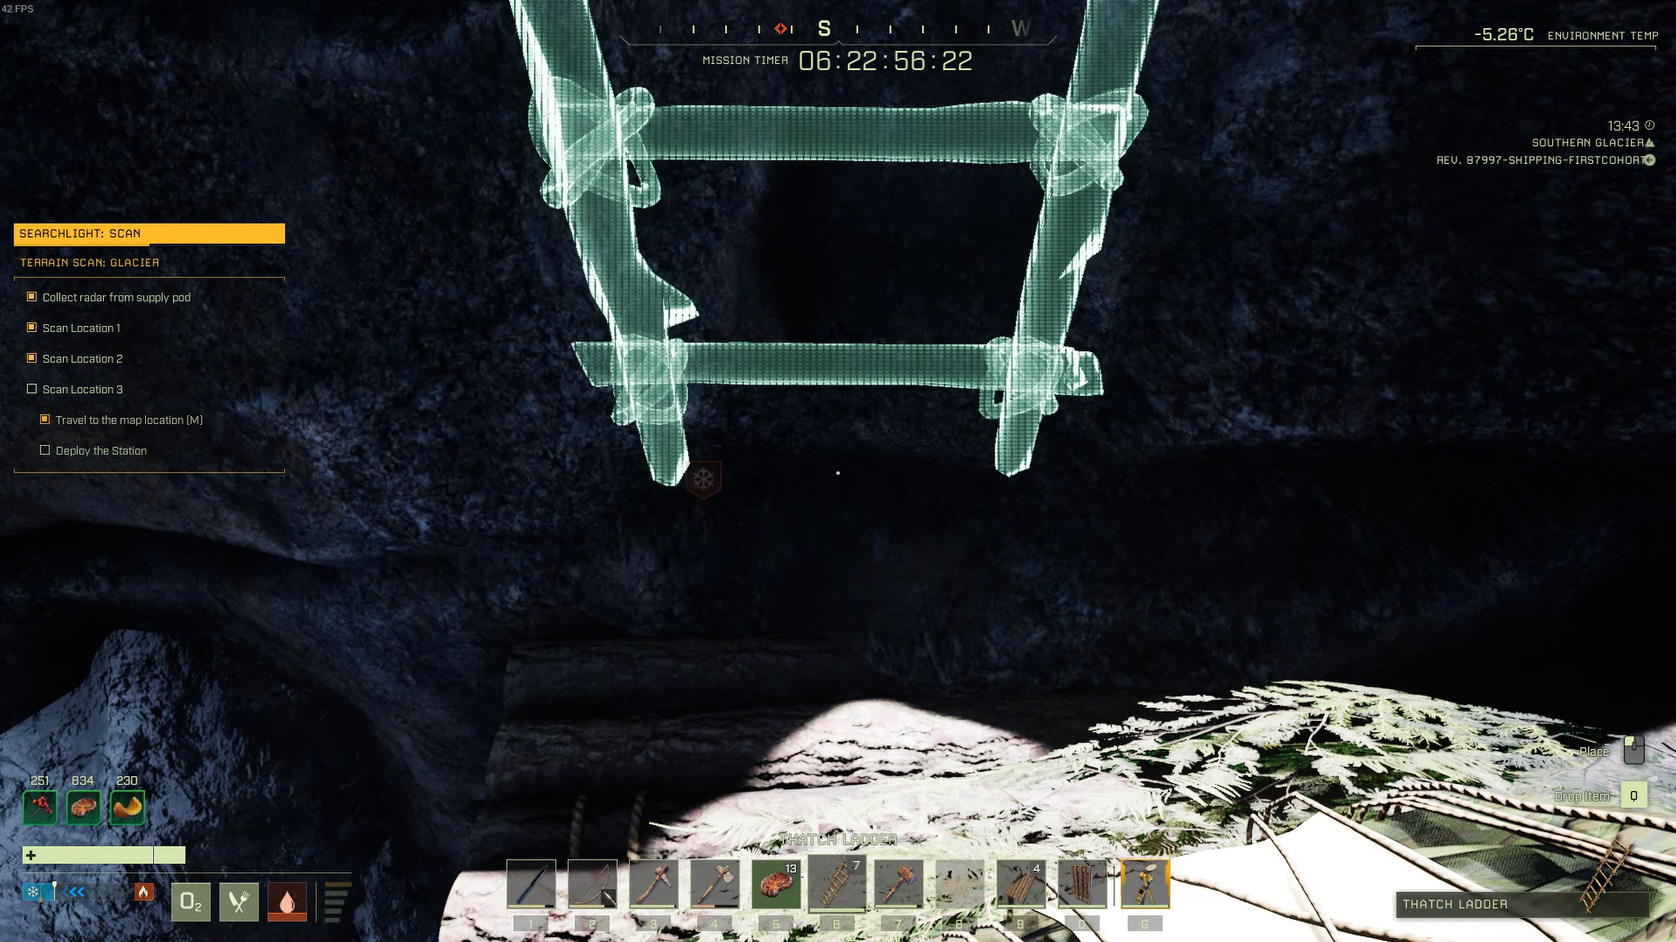
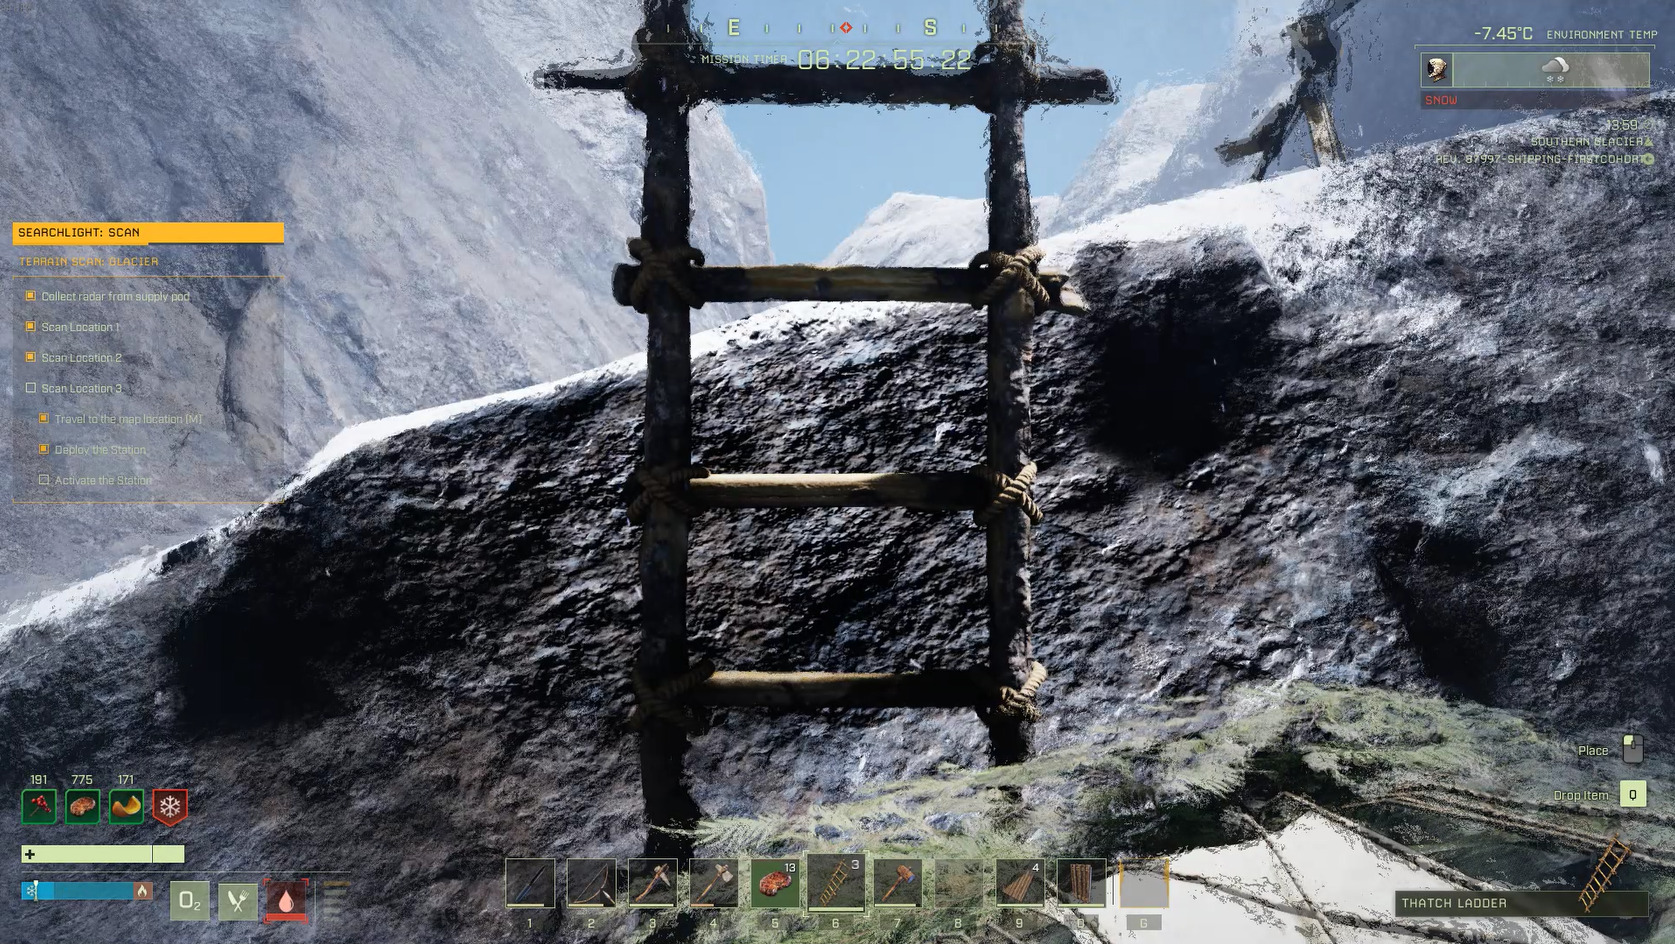
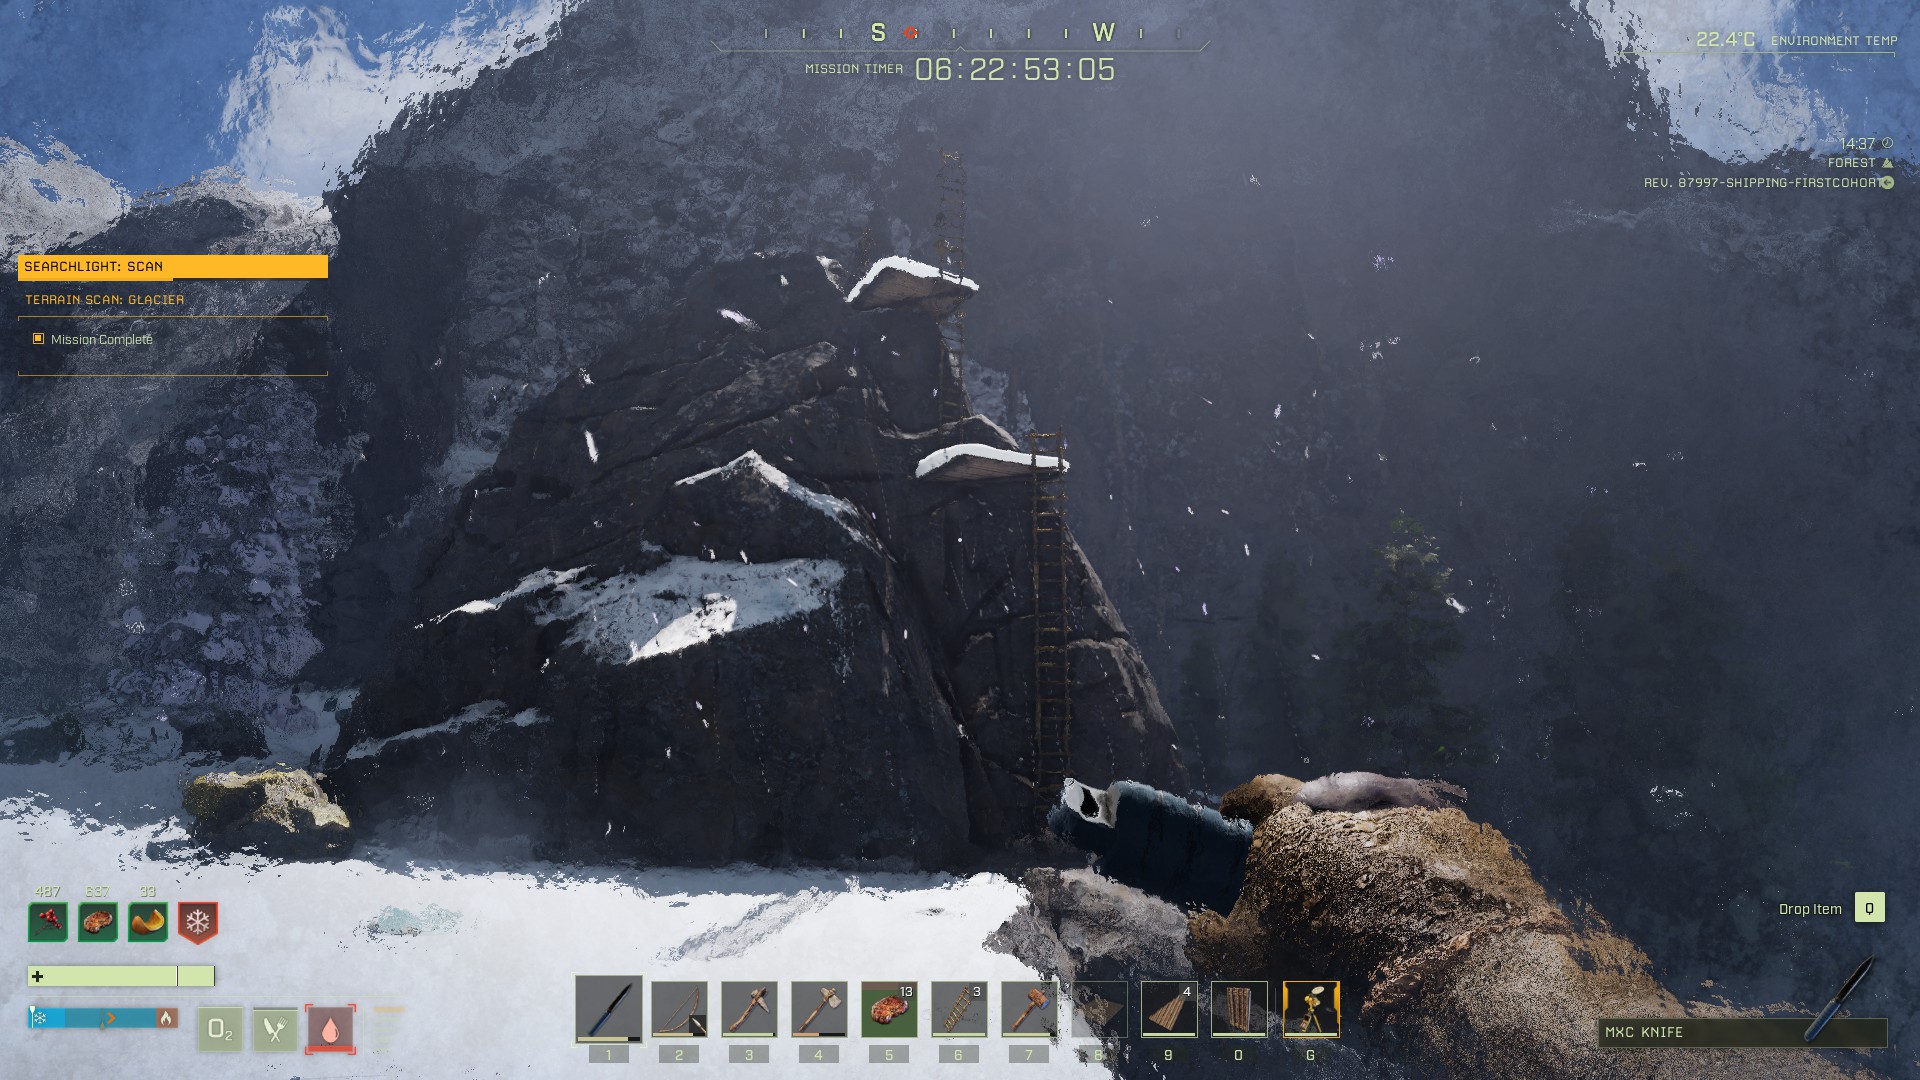
You’ll need to build a series of ladders and platforms to climb to the top of the rock formation.
First, build 3 ladders [1], then climb to the top and stand on top of the final ladder (you can accomplish this by not pressing any movement keys once you’re ascending the final rungs.
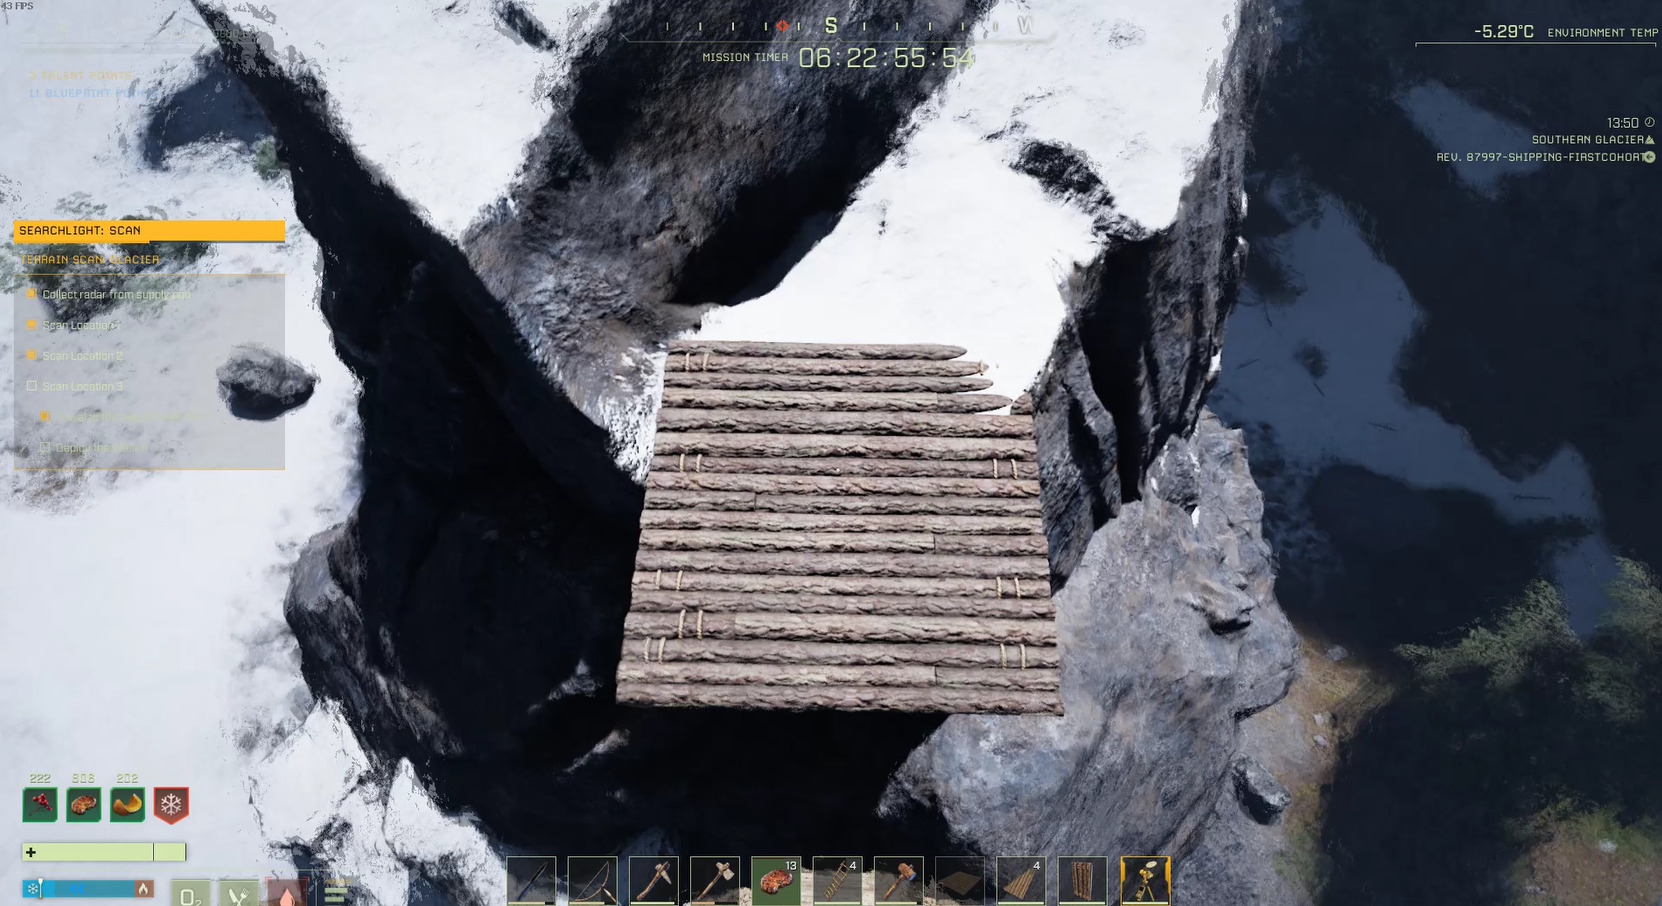
Then place a floor piece directly in front of you on the rock face [2].
Jump to the floor piece, then place another 2 ladders on the platform, as close to the rock as you can [3].
Climb up, and place another platform while standing at the top of the ladders [4]. Jump down, and place one more ladder in front of you to reach the radar’s placement location [5].
Take a look at the finished product [6] if you’re confused about the placement of the ladders and platforms.
[1] Start your first stack of 3 ladders here[2][3][4][5]
Then, just activate the radar and wait! Theoretically, an animal is supposed to attack the radar (and the radar does need to be reactivated at one point), but it seems to spawn far below the rock and isn’t a concern.
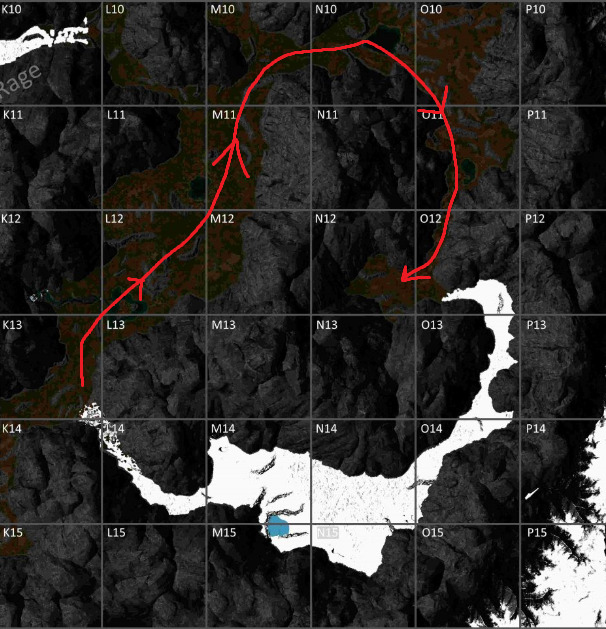
You have to pick up the radar for the mission objectives to be fully completed, but once you’ve done so, you can climb down your ladders (carefully) and head back to the drop pod! See the route you’ll need to take back below — you could theoretically head back through the Arctic, but it’s much riskier and unlikely to be significantly quicker.
The route back (base map thanks to Finally Rage, who is awesome, and uploads tons of images for the community)
We hope this SEARCHLIGHT walkthrough was helpful! Questions and suggestions are both welcome in the comments box below.
Share this article:
DanielD
Unabashed FromSoftware fanboy still learning to take his time with games (and everything else, really). The time he doesn't spend on games is spent on music, books, or occasionally going outside.