In the RESURGENCE mission, you’ll be helping the Sinotai faction collect valuable bio-samples. This guide will first list the relevant details of the mission, and then provide a step-by-step walkthrough.
Prospect Details
Approximate time to complete: 1 hour
Difficulty: Normal
Recommended Level:10
Location(s):Forest Biome, Arctic Biome
Objectives:
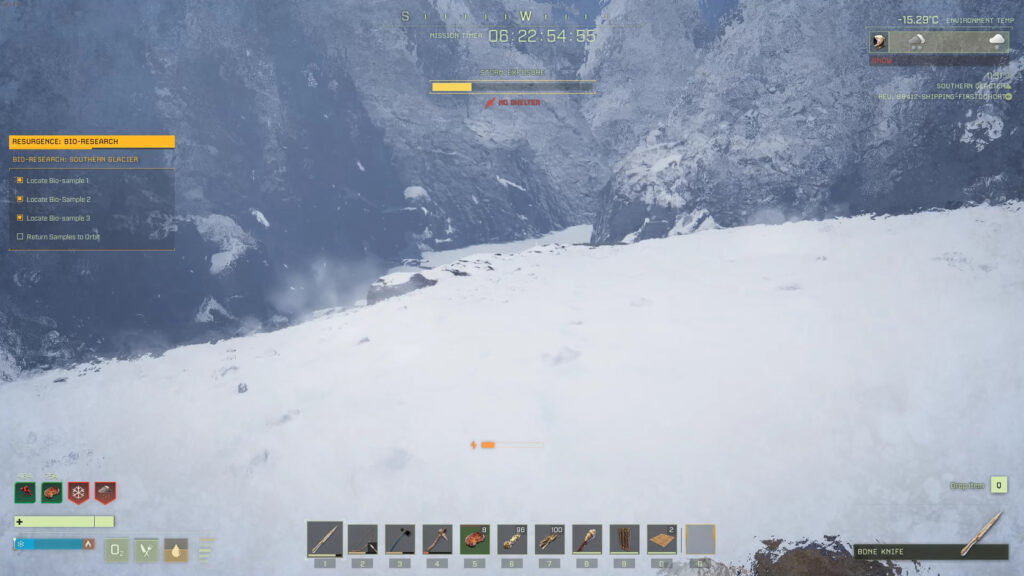
Locate Bio-sample 1
Locate Bio-sample 2
Locate Bio-sample 3
Return Samples to Orbit
Rewards
150
Variants Modifiers
Creature melee damage: -50%
Creature health: -50%
Creature movement speed: -10%
Bear spawn rate: -50%
Lion spawn rate: -10%
Polar bear spawn rate: -50%
Wolf spawn rate: -10%
Aggressive creatures perception: -50%
Neutral creatures perception: -50%
Passive creatures perception: -50%
Experience gain: -25%
Creature melee damage: +20%
Creature health: +30%
Creature movement speed: +10%
Aggressive creatures perception: +30%
Neutral creatures perception: +30%
Passive creatures perception: +30%
Scorpion spawn rate: +30%
Lion spawn rate: +30%
Wolf spawn rate: +30%
Experience gain: +25%
Player respawn count: 3
Prospect Notes
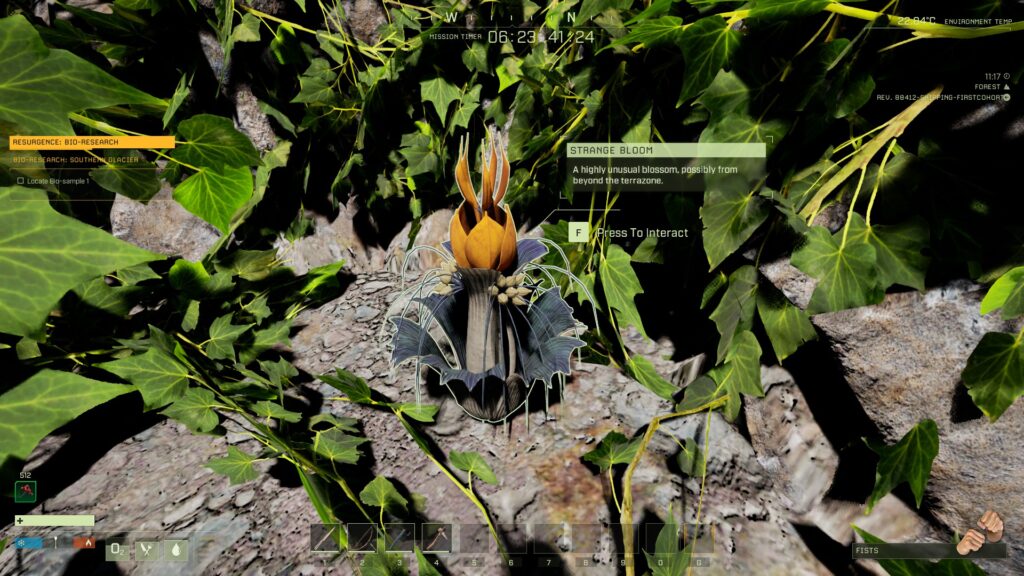
To complete the objectives, you’ll need to locate each Bio-sample within the search zone, and then press [F] to interact with it. The first two are easy to reach, but the final Bio-sample in the Arctic can be a bit tricky to get to without becoming Polar Bear food.
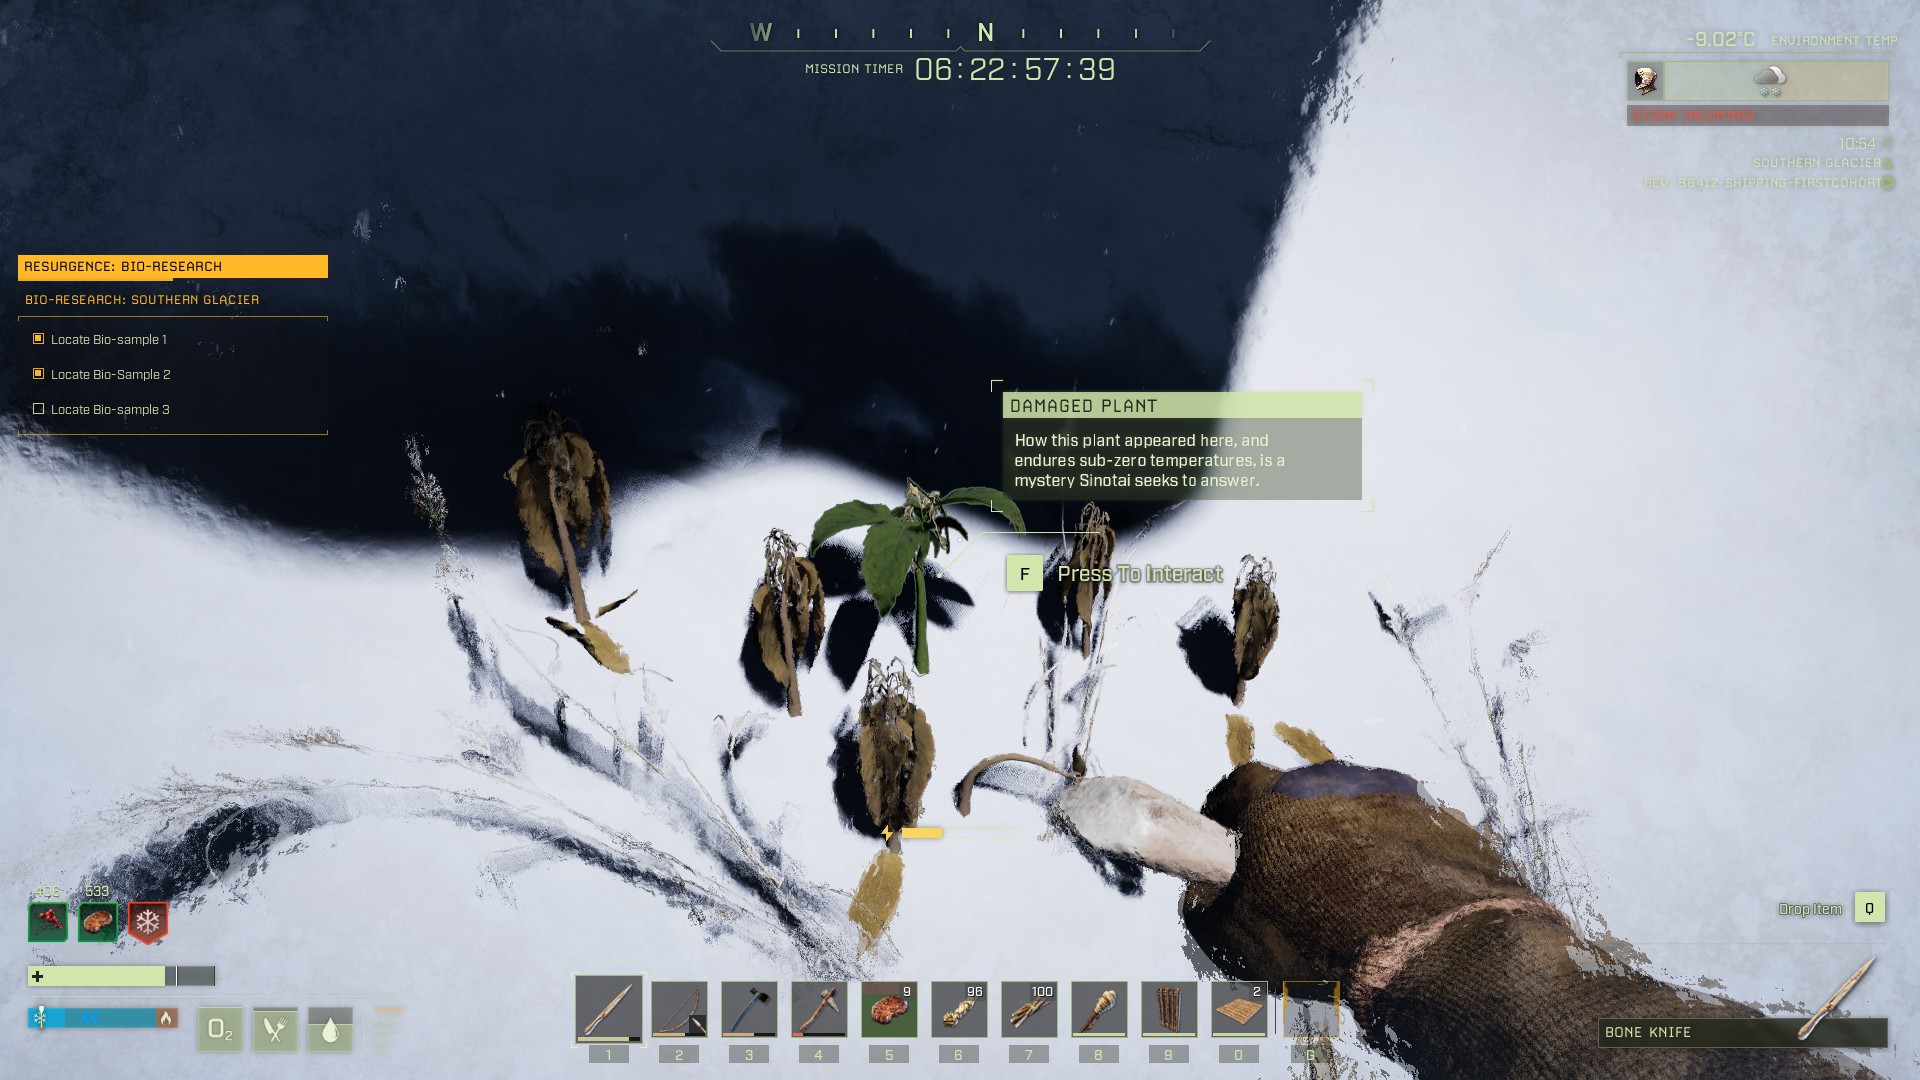
One of the plants you’re looking for
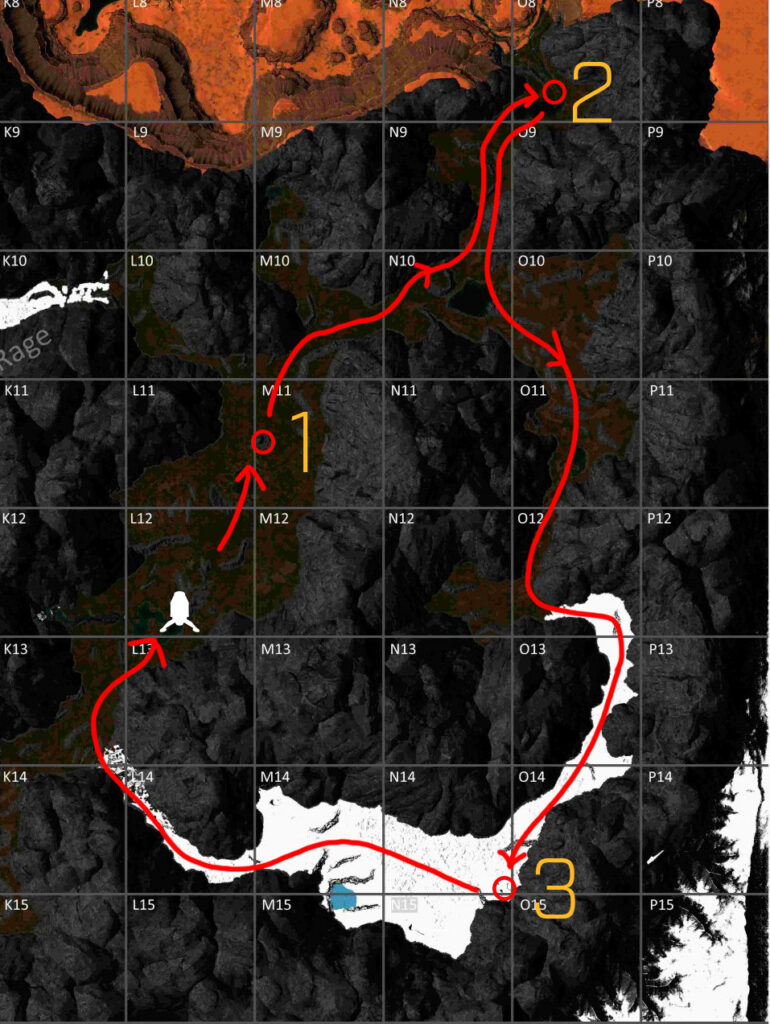
Red circles indicate objective locations — note that these must be done in order
Preparing for RESURGENCE
While it’s definitely possible to complete this prospect with little to no equipment, you will probably run into wolves while searching for the first few samples, and you’ll need to eat eventually. At a minimum, bring the following:
If you’re very risk-averse, you can also create a portable shelter to help you fight predators.
The following talents will make the hard part of the mission (sneaking past Polar Bears) much easier.
Fleet Footed [Solo – Solo]: 2 points
+10/15% to movement speed
Very, Very Quiet [Solo – Solo]: 1 point
-15% perceived threat while in stealth
Without a Sound [Survival – Hunting]: 1 point-5/10/15% perceived threat while stealthed
Mission Walkthrough
Step 1: Bio-Samples 1 & 2
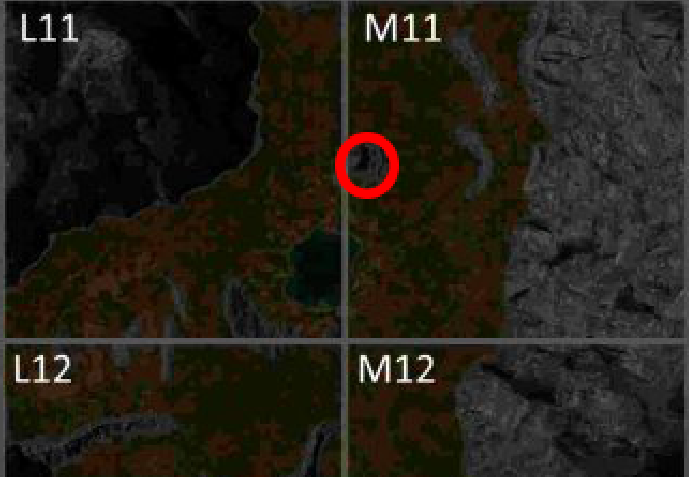
Once you land, open your map and find the yellow circle in the northeast that indicates the first search zone. Double-click the middle of the line where L11 and M11 touch to set a waypoint, since that’s where the first objective is. Start running northeast, and gather sticks and rocks to craft your knife and bow while doing so. Sometimes it can be worth creating a stone pickaxe to collect stone faster for arrows, but your knife and a half-dozen arrows should be plenty.
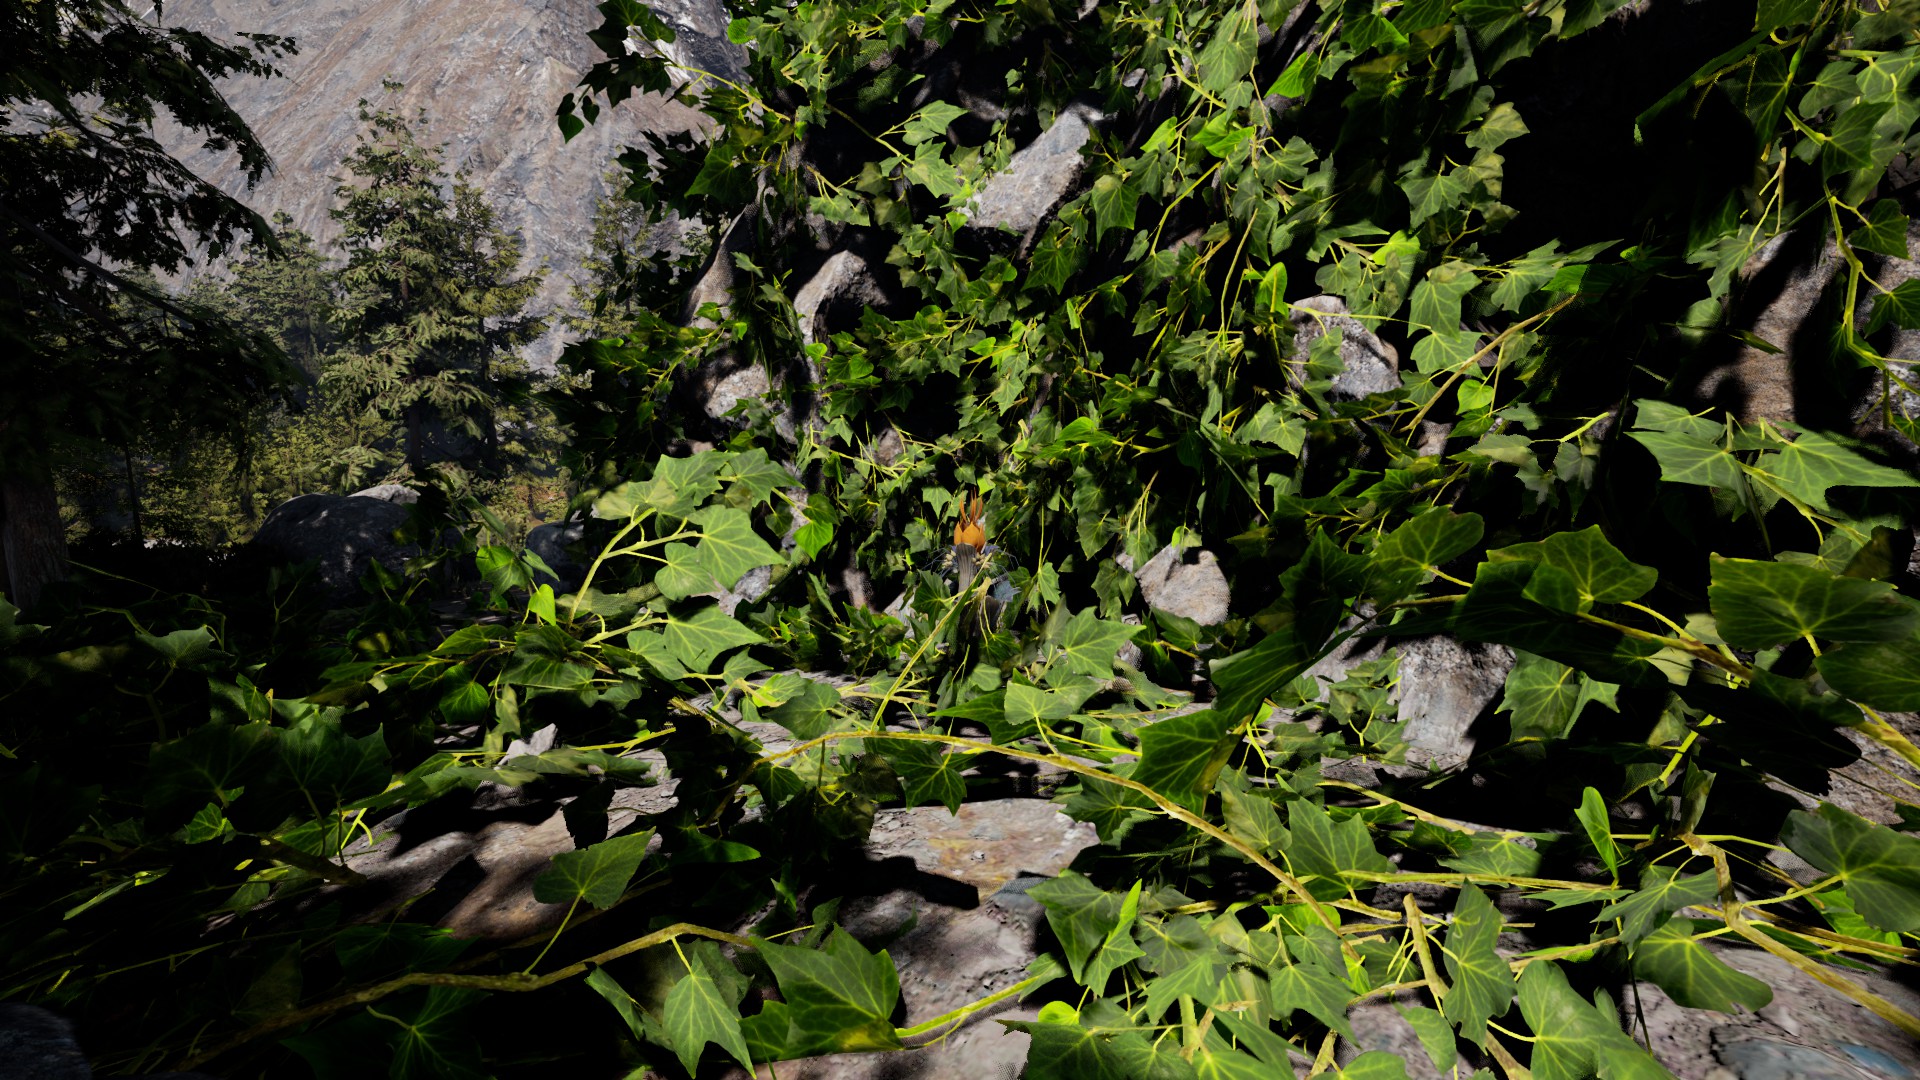
Once you’ve collected a few different types of food and have slain at least an animal or two, craft a Campfire and cook your food — the bonus stamina and health makes the rest of the mission faster and safer. Chop down nearby trees while you wait; you’ll need the wood later to create a small shelter. Once you get close to your waypoint, look for a large rock just north of the lake you passed. On the southeastern side of the rock is your first objective: get close enough to interact with it (press [F]) to collect your first sample.
Map Location for Bio-Sample 1Look for the bright green ivy — the sample is on the ground in the middle of it
Your next search area is even further to the northeast through the mountain pass at N-9, so mark the middle of N-10 with a waypoint and start heading that way. Once you reach your waypoint, set a new one in the bottom of O-8 (use the map at the start of this guide if you want a reference) and keep on truckin’. It’s only low-level wolves around here, so feel free to move quickly. Make sure you’re picking up Berries, and eating one every so often to prevent them from spoiling.
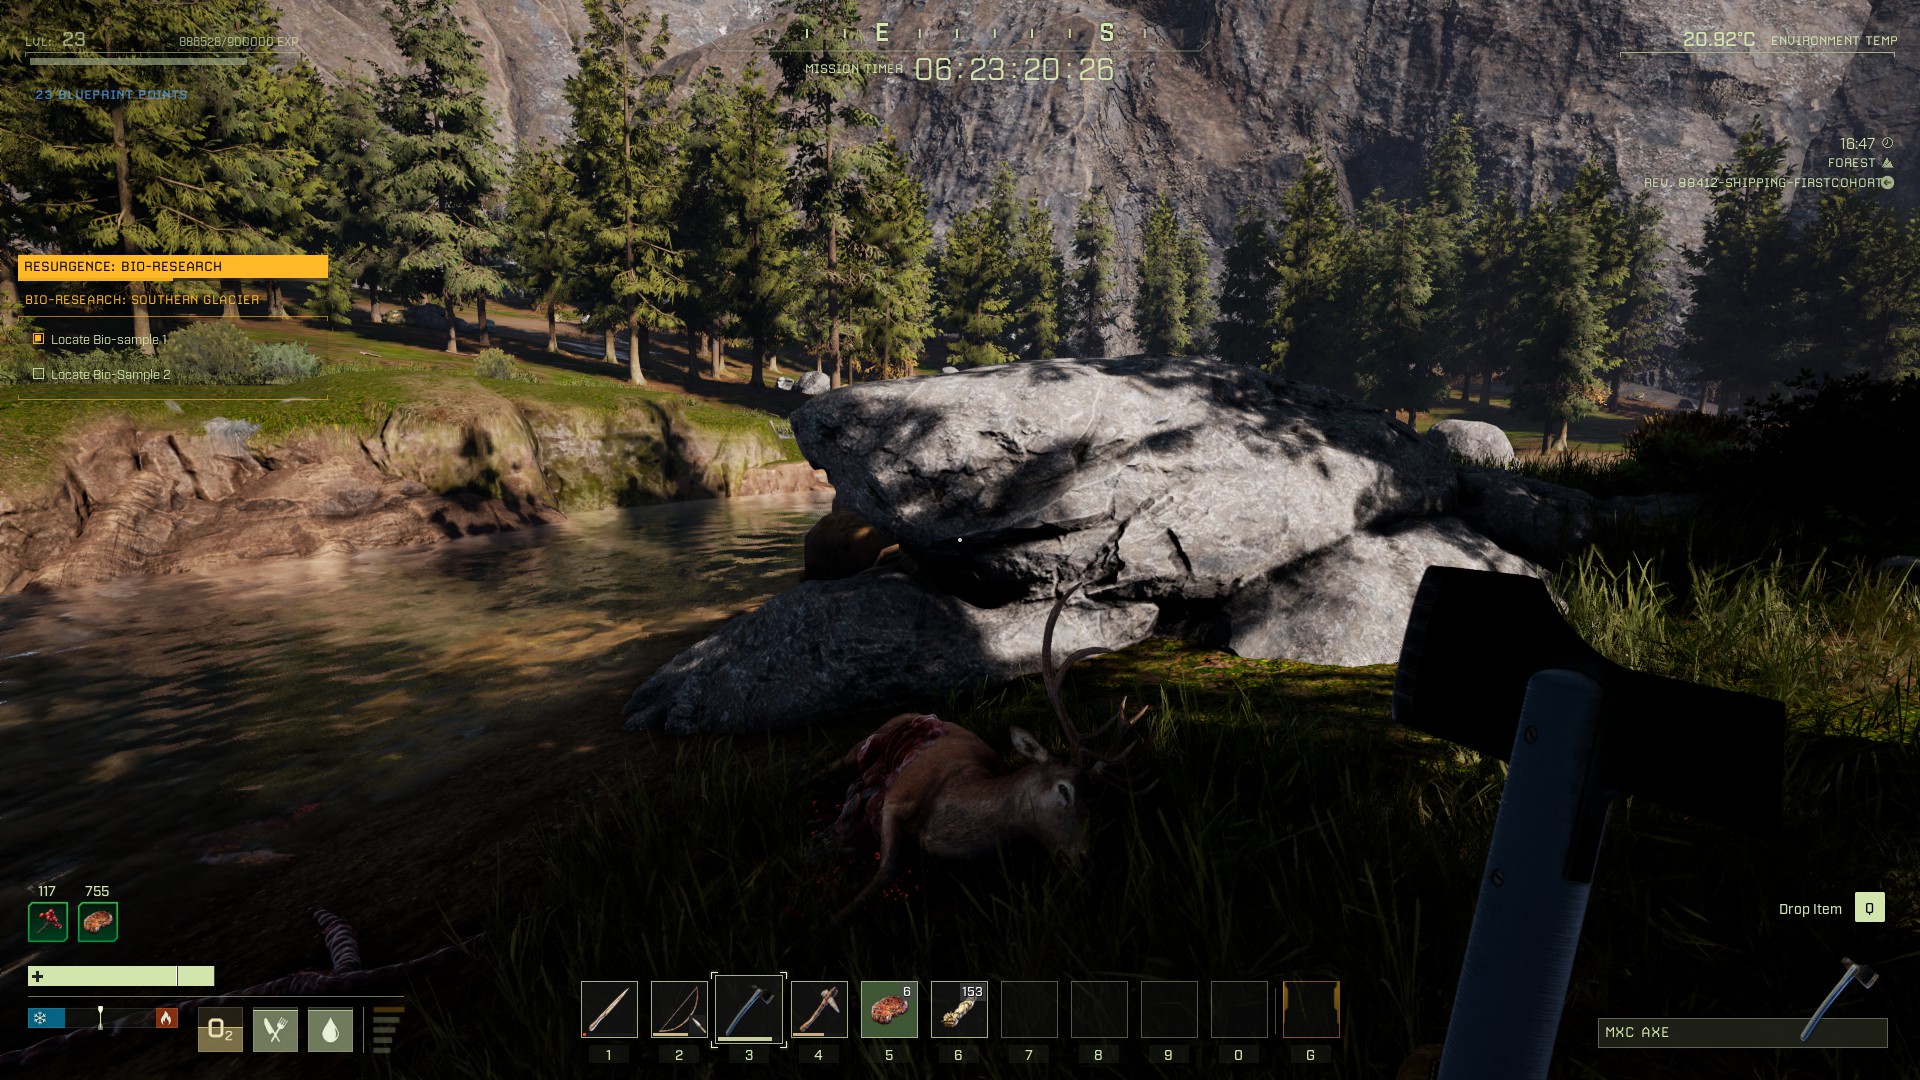
This next bio-sample is a little harder to find, since it’s pretty flat. To reach it, go to where the lake in O-8 becomes a river, and follow the western bank of the river north. You’ll go around a moderately sized boulder, and then you’ll see weird tendrils going into the river. Behind the rock is a deer corpse that you can interact with to collect your second Bio-Sample.
Map Location for Bio-Sample 2The sample is in this deer
Step 2: Bio-Sample 3
Now you’ve got quite the hike ahead of you. Set a new waypoint on your map, this one for the middle-left side of O-12. Predators will be scarce until you enter the pass at the bottom of O-11, at which point you’ll need to keep an eye out for a bear that patrols this section. Once you get close to the transition to the Arctic, it’s a good idea to set up a camp. Build a shelter, place a Bedroll in it, and get at least 10 Cooked Meat. If you haven’t crafted a full set of Cloth Armor, do so while you’re waiting for your meat to cook.
It’s also a good time to top off your Oxygen, and get a few extra Oxite in your inventory. You shouldn’t need any water container, since by now you should have a full stack of Berries — but if you do lack Berries, make sure you replenish your water at the stream north of your base before you depart.
If you’re close to leveling up, do so before you enter the Arctic. This is the part of the mission where you’re most likely to die, and the death penalty’s XP debt is a bummer.
It will be close to dark at this point, so sleep through the night. In the morning, set a waypoint for the bottom-right corner of N-14 and head into the Arctic. Be careful and patient as you move around blind corners or ridges — there are a number of polar bears that spawn in O-12/O-13. Always stealth (crouch) if you don’t have full visibility. Once you’ve gotten a decent way in, there should be no more predators, and you’ll be able to move more quickly.
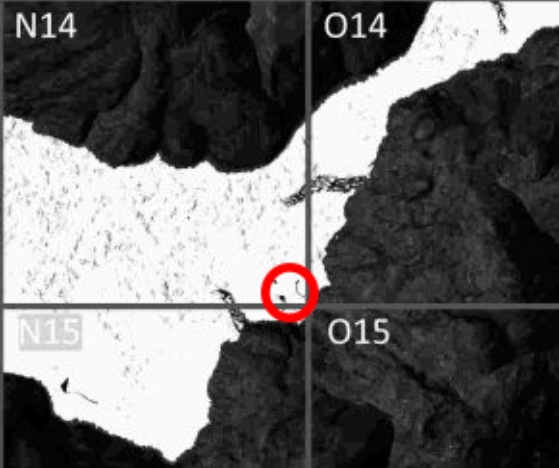
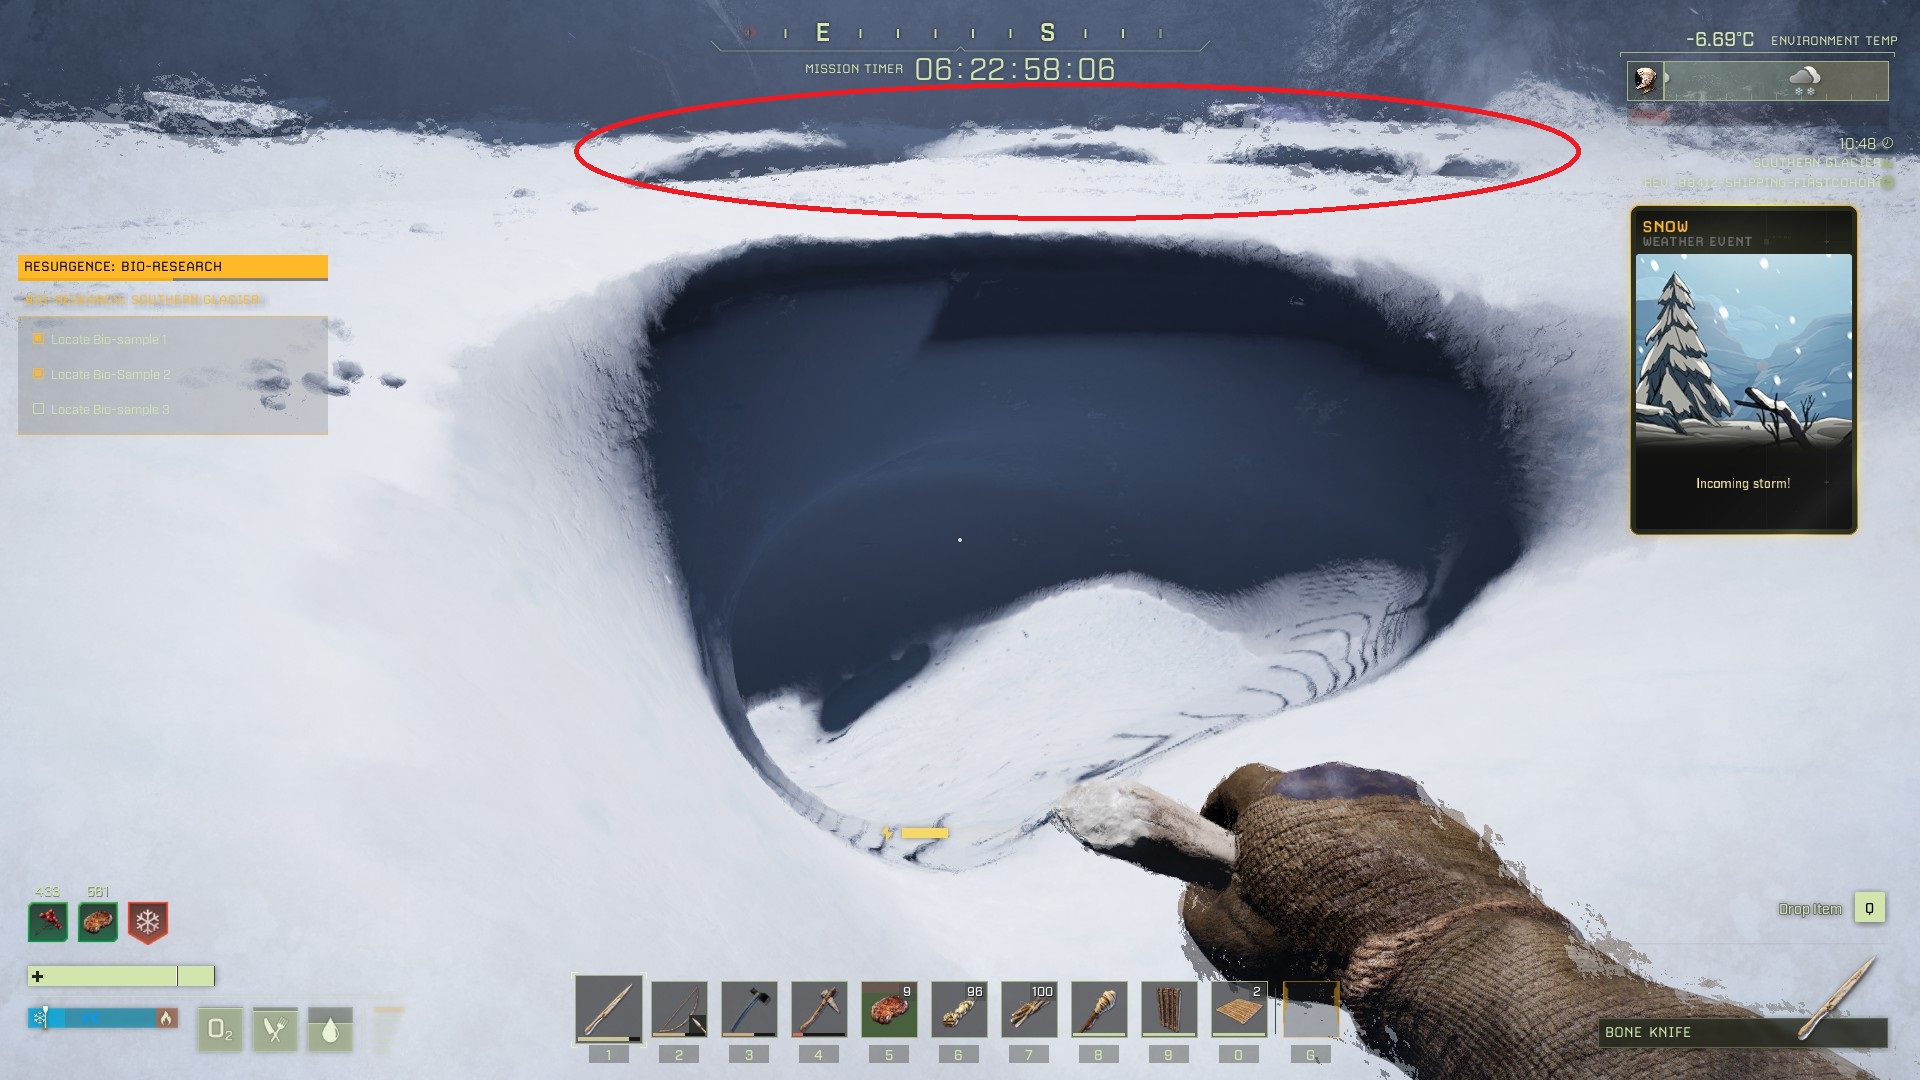
You’ll find the final sample in the bottom right corner of N-14, in a pit in the snow. Be careful, as you can easily fall and hurt yourself badly if you don’t approach this area carefully. There are a number of holes here; the one you want is the wider one behind the more circular one.
Map Location of Bio-Sample 3The sample is not in the first pit, but the one further southThe sample is small, but stands out against the snow well enough to spot easily
Despite what the mission objectives say, you don’t actually have to get anything back to the dropship, because you don’t actually have anything in your inventory. If you’ve got no XP in your bar, and no Workshop items to save, you can kill yourself by jumping into the pit a few times. Otherwise, you’ll want to head out of the Arctic heading west — set a waypoint in the middle of L-14 to guide you and start heading that way. (Don’t worry about resetting the waypoint once you pass it, just keep moving west through the pass).
There’s a polar bear that spawns right near the border of M-14 and L-14. He can sometimes be hiding on the other side of the cliff that’s right where the area narrows, so be careful at this point. There can be more than one predator in this area, so be very cautious all the way back to the Forest.
Going back to the dropship through this area is probably the most dangerous pat of the mission
Once you’re out of the Arctic, open your map and set a new waypoint on your dropship, get there, and leave the surface.
We hope this walkthrough for the RESURGENCE mission was helpful! Please leave any questions or suggestions in the comments below.
Share this article:
DanielD
Unabashed FromSoftware fanboy still learning to take his time with games (and everything else, really). The time he doesn't spend on games is spent on music, books, or occasionally going outside.
Thanks for the write up Daniel. Helped knowing the exact locations. I personally like to gear up more for each mission doing it all solo, so always wear fur in the artic and have a camp fire and usually a good bow and a shotgun.
Glad it was helpful! Finding that deer sure is a pain, huh?
Good call about the fur in the Arctic, it’s always better to be safe than sorry when you’re solo.
Mightymama
1 year ago
Would not have done it without you. My map had nothing to show where to go so thank you
Paul
1 year ago
Im doing the mission for the second time, I have all 3 samples again and it says to get them to the dropship so the first time I went to the ship and left and it said failed. I cant get it to say mission completed so I can leave. I looked in the ship for something to return the samples but nothing there I think its a bug maybe
Hey there Paul. When this guide was written, I believe the samples weren’t actually “collected” as items in your inventory. It’s possible that this has changed, in which case you’d need to make sure that you’re moving the samples from your inventory to the dropship’s inventory.
The most likely explanation is that it’s simply a bug, unfortunately.
Anton
1 year ago
To be honest, this yellow circle is the only real difficulty in the mission. Its thiness is quite absurd. I had to look for it foar a couple of minutes to notice it. Once done, this mission is a piece of cake.


Thanks for the write up Daniel. Helped knowing the exact locations. I personally like to gear up more for each mission doing it all solo, so always wear fur in the artic and have a camp fire and usually a good bow and a shotgun.
Glad it was helpful! Finding that deer sure is a pain, huh?
Good call about the fur in the Arctic, it’s always better to be safe than sorry when you’re solo.
Would not have done it without you. My map had nothing to show where to go so thank you
Im doing the mission for the second time, I have all 3 samples again and it says to get them to the dropship so the first time I went to the ship and left and it said failed. I cant get it to say mission completed so I can leave. I looked in the ship for something to return the samples but nothing there I think its a bug maybe
Sorry it says return samples to orbit not to the dropship… Im just lost I even tried the new radio thing to all in a dropship
Hey there Paul. When this guide was written, I believe the samples weren’t actually “collected” as items in your inventory. It’s possible that this has changed, in which case you’d need to make sure that you’re moving the samples from your inventory to the dropship’s inventory.
The most likely explanation is that it’s simply a bug, unfortunately.
To be honest, this yellow circle is the only real difficulty in the mission. Its thiness is quite absurd. I had to look for it foar a couple of minutes to notice it. Once done, this mission is a piece of cake.