Frequently dropping to the surface of Icarus with only an envirosuit, prospectors have to be able to craft their own equipment from local resources. The UDA would like help staying ahead of the game by analyzing the remains of caveworms as a potential resource. If you are successful, you can use the research findings to develop a whole new tier of weaponry that your prospector can craft on any mission hereafter!
This walkthrough will take you across the map and show you how to set up a powered diagnostics lab, as well as the inevitable retaliation by Icarus. Follow along to uncover what lies beneath the surface.
Construct a base to supply it with water and power
Acquire 50 x Caveworm Scales and 15 x Poison Sacks
Start the Analyzer and defend it during operation
Test out new caveworm equipment blueprints
Rewards
600
200
Variants Modifiers
Creature melee damage: -50%
Creature health: -50%
Creature movement speed: -10%
Bear spawn rate: -50%
Lion spawn rate: -10%
Polar bear spawn rate: -50%
Wolf spawn rate: -10%
Aggressive creatures perception: -50%
Neutral creatures perception: -50%
Passive creatures perception: -50%
Experience gain: -25%
Creature melee damage: +20%
Creature health: +30%
Creature movement speed: +10%
Aggressive creatures perception: +30%
Neutral creatures perception: +30%
Passive creatures perception: +30%
Scorpion spawn rate: +30%
Lion spawn rate: +30%
Wolf spawn rate: +30%
Experience gain: +25%
Player respawn count: 3
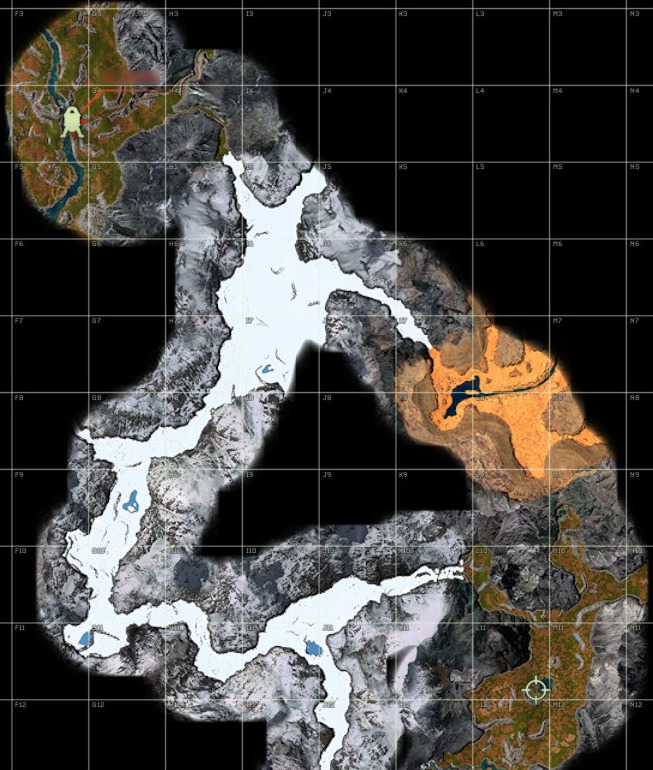
Map of Key Locations
The Dropsite is in the Riverlands (F4), while the analyzer is in the Forest (L11). Which biomes do you want to travel through?
Boss Details
Caveworm Attack
Health: 300 (approximately)
Duration: 40 caveworms in 5 minutes
Location: L11
Weak point(s): Mouth
Drops: Caveworm Scale (2-5), Poison Sack (1-2)
Attacks: Bite (melee), poison spit (ranged)
Behavior: New worm rises from ground nearby
Notes: Anticipate caveworm arrivals by looking for the boreholes the worms create prior to rising from ground. Each Poison debuff lasts 15 seconds and the health drain can stack infinitely. Caveworm Scales and Poison Sacks are heavy (1 kilogram each).
Preparing for UNEARTHED
The Sample Analyzer is on the other side of the arctic, so it is necessary to craft some fur armor for the trip. A good bow and arrow set and melee weapon will help dispatch any bears and Arctic fauna you cannot avoid.
This convenient cave for a starter base is concealed on a hillside terrace just east of your Dropship. (Click on the image for a map location.)
Remember that in the arctic storm shelter roofs need to be supported by beams from the ground. Otherwise, it will eventually collapse and you will need to redeploy the roof.
Once you arrive, you will need to craft Tier 4 workstations to provide water and power to the Analyzer. Stone shelters or better are recommended here due to the harsh weather conditions.
The key success of any voyage is preparation. The path to your first objective is at least 7-10 kilometers depending on the path you take, so prepare well. There is a hidden cave nearby in F4/G4 with natural barriers from most predators. Harvest, mine, and craft until you get your gear sorted to your liking. Then, set off on your chosen path to the objective in L11.
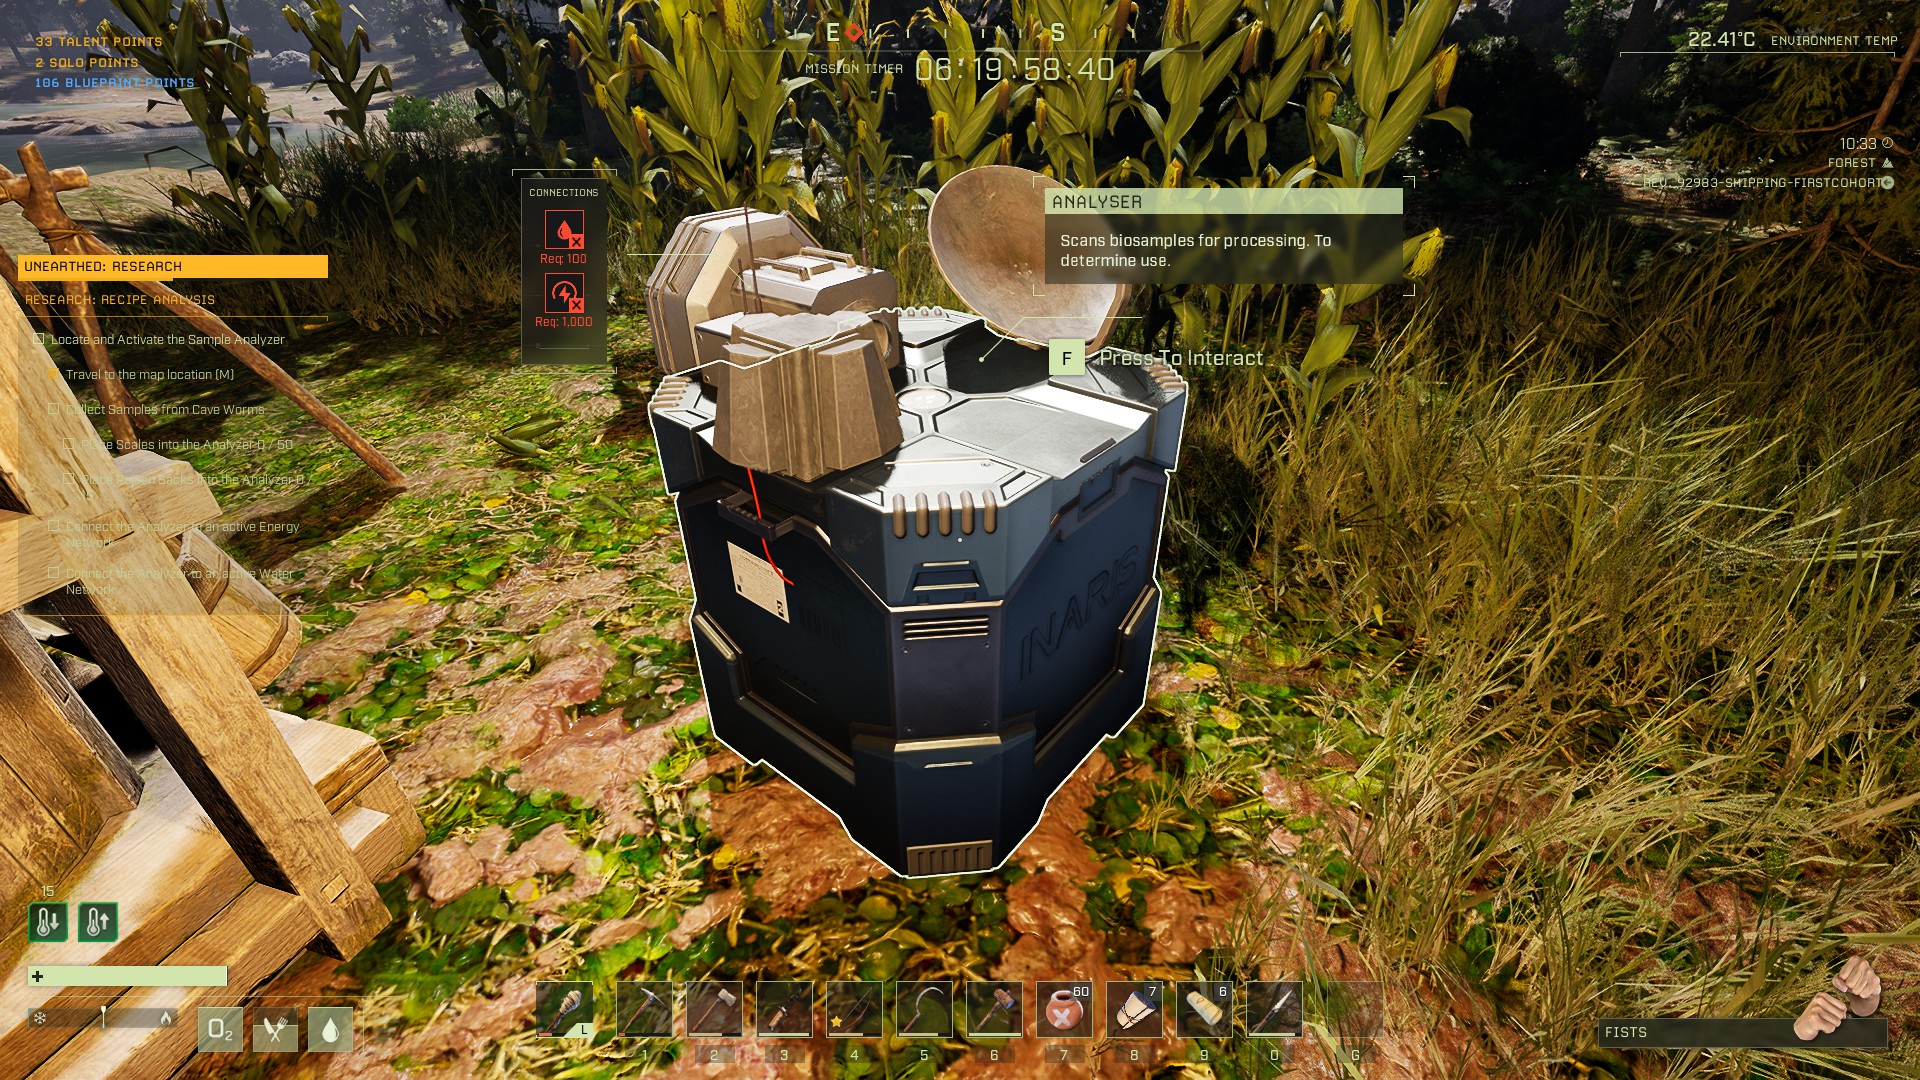
Step 1: Locating the Sample Analyzer
Such a needy tool, the Sample Analyzer requires both pumped water and electrical power
The Sample Analyzer is an already-deployed workstation on the southwestern shore of the lake in L11. It cannot be picked up, and it will be the center of a large Caveworm battle ahead. Consider clearing out all the plants around it.
It may be best to set up your base at least 10 meters (5 tiles) away so it doesn’t block your vision or attacks. A 2×3 base is sufficient, or you can use the cave a short distance to the southwest. Stone or better is recommended as you will be assaulted regularly by Heavy Rain.
On the way to L11, you will pass several caves. Saving any scales and poison sacks you loot from caveworms will reduce the hunting you have to do once you find the Analyzer.
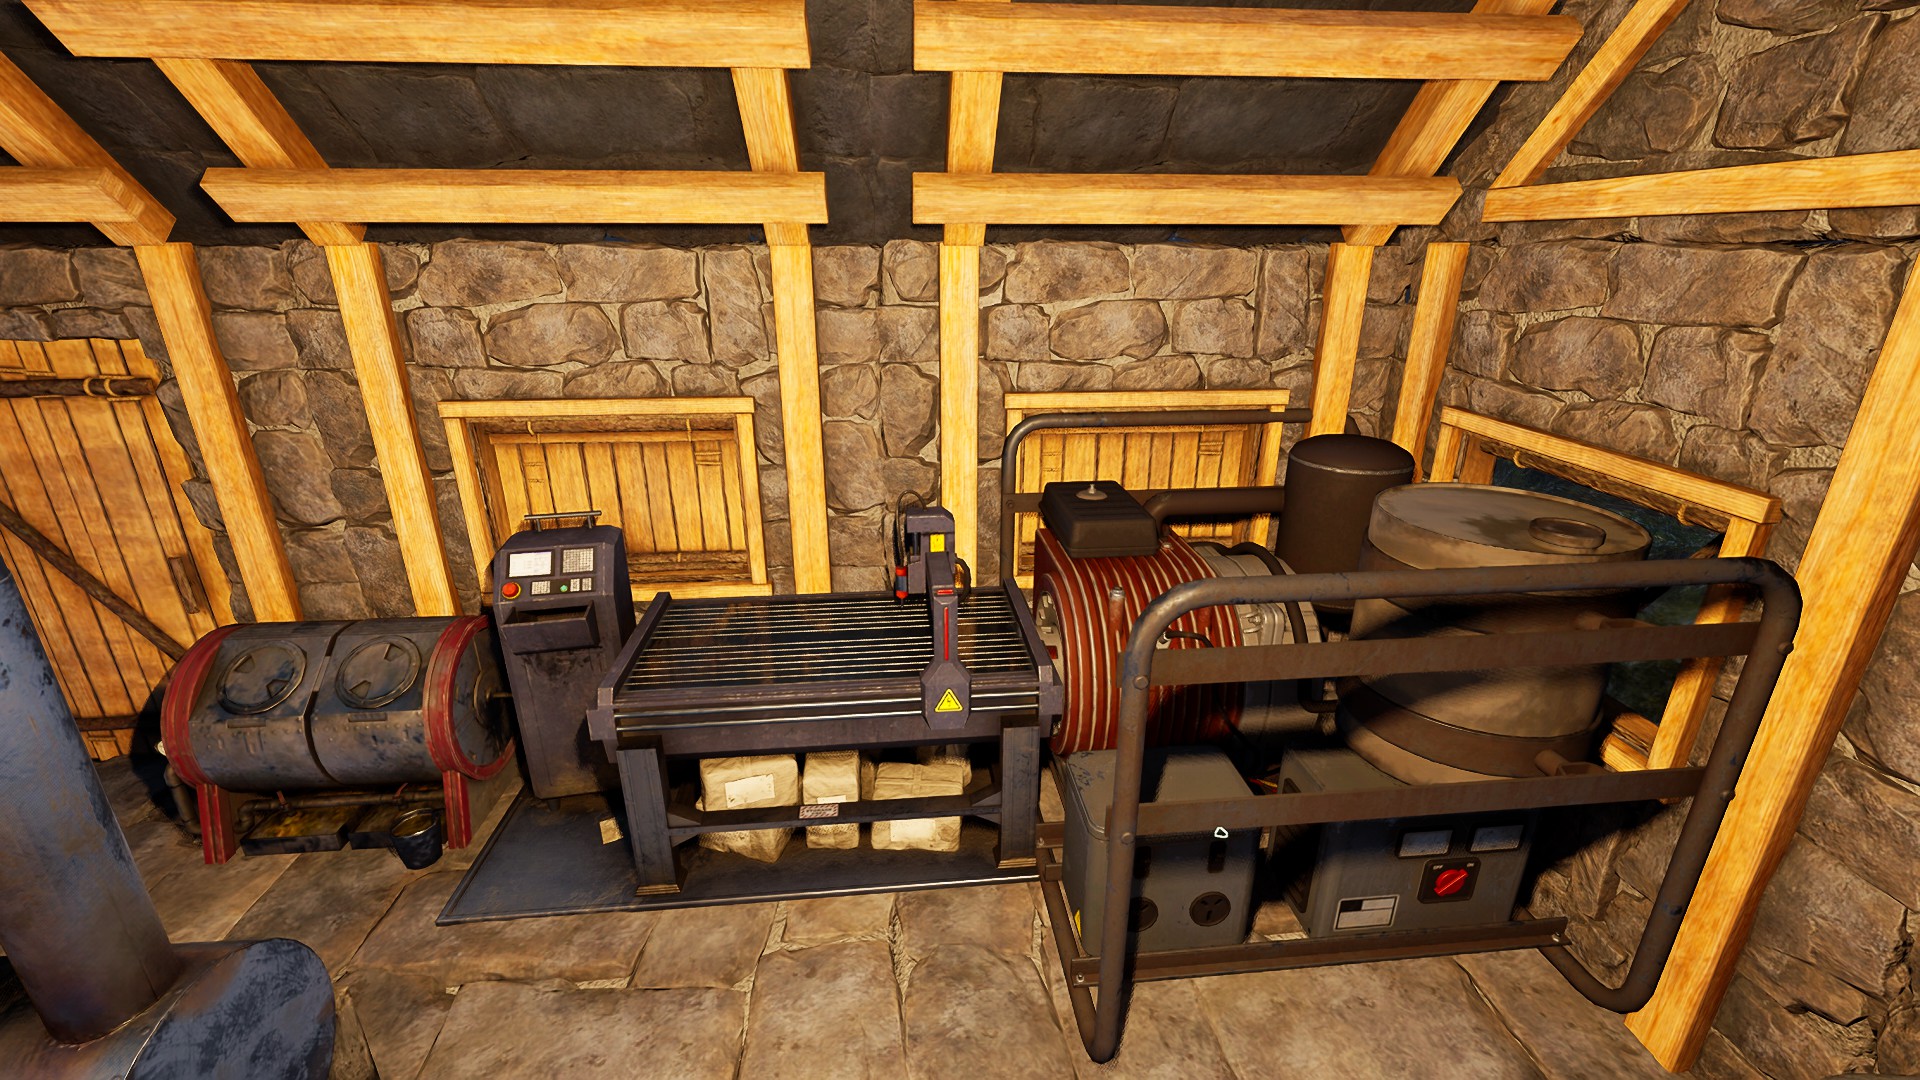
Step 2: Supply Water and Power
The Sample Analyzer requires power and pumped water, and the water pump also requires power. This means you will need to craft a Fabricator to get access to the Biofuel Generator and Water Pump.
Also, you will need the Biofuel Composter to fill a Fuel Can to run the generator. Sticks are the fastest source of biofuel, so stock up or invest in the Wood Breakdown Talent skill.
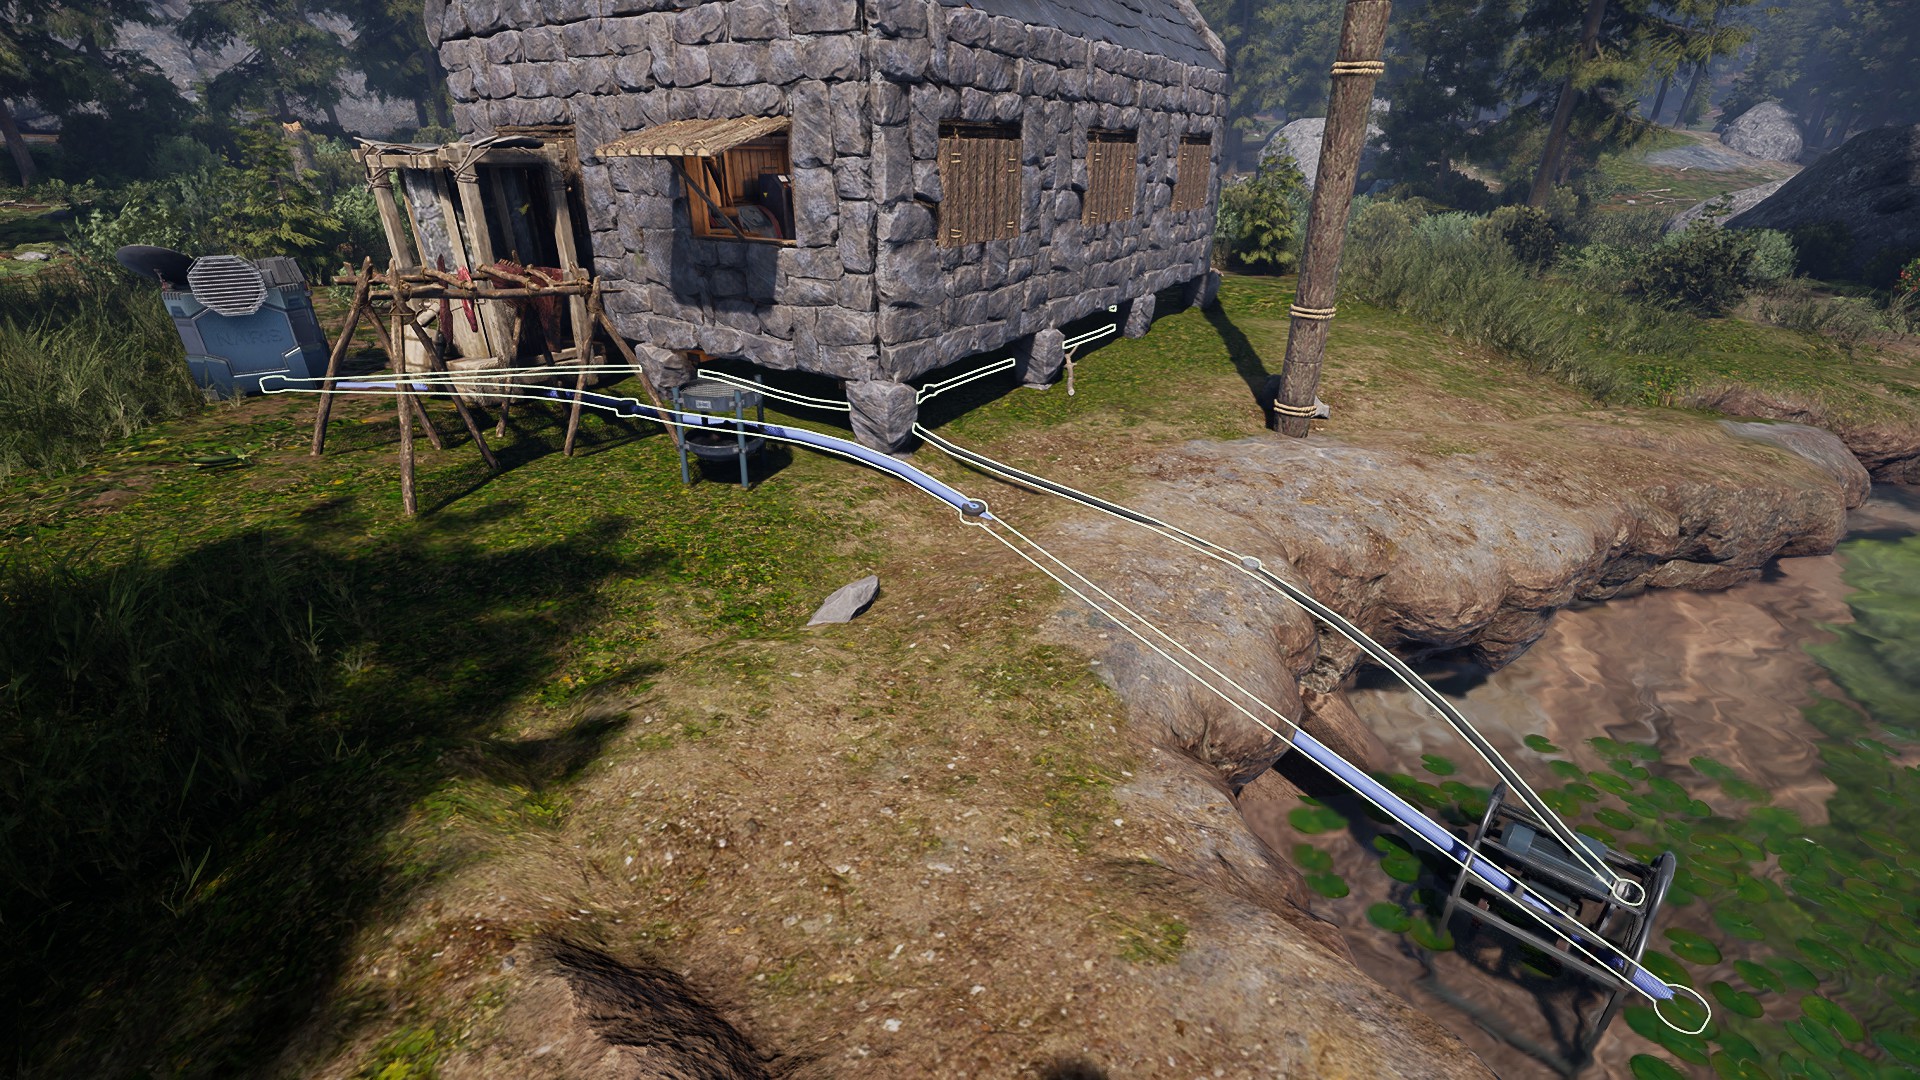
You will need Tier 4 workstations like the biofuel generator and water pumpCraft a pipe tool and an electricity tool to create water and power networks
Unlike the HYDROPONICS: Stockpile level, you will have to craft your own pipe and electricity tools. The mechanics for laying both pipe and wire are pretty similar. Check out our Electricity Guide for an illustration of how to set up an electrical network.
First, place the Water Pump in the lake.
You will need to wire the Biofuel Generator to both the Water Pump and the Sample Analyzer. (Use the Electricity Tool.)
Then, run pipe from the Water Pump to the Sample Analyzer. (Use the Pipe Tool.)
Add a can of biofuel to the generator and turn it on.
The pump will start automatically, the mission objective will complete, and Sol will tell you the Sample Analyzer is ready.
Step 3: Find Caveworm Scales and Poison Sacks
The next step is to get something to analyze. You will need to reap 50 Caveworm Scales and 15 Poison Sacks from caveworms and place them in the Sample Analyzer inventory.
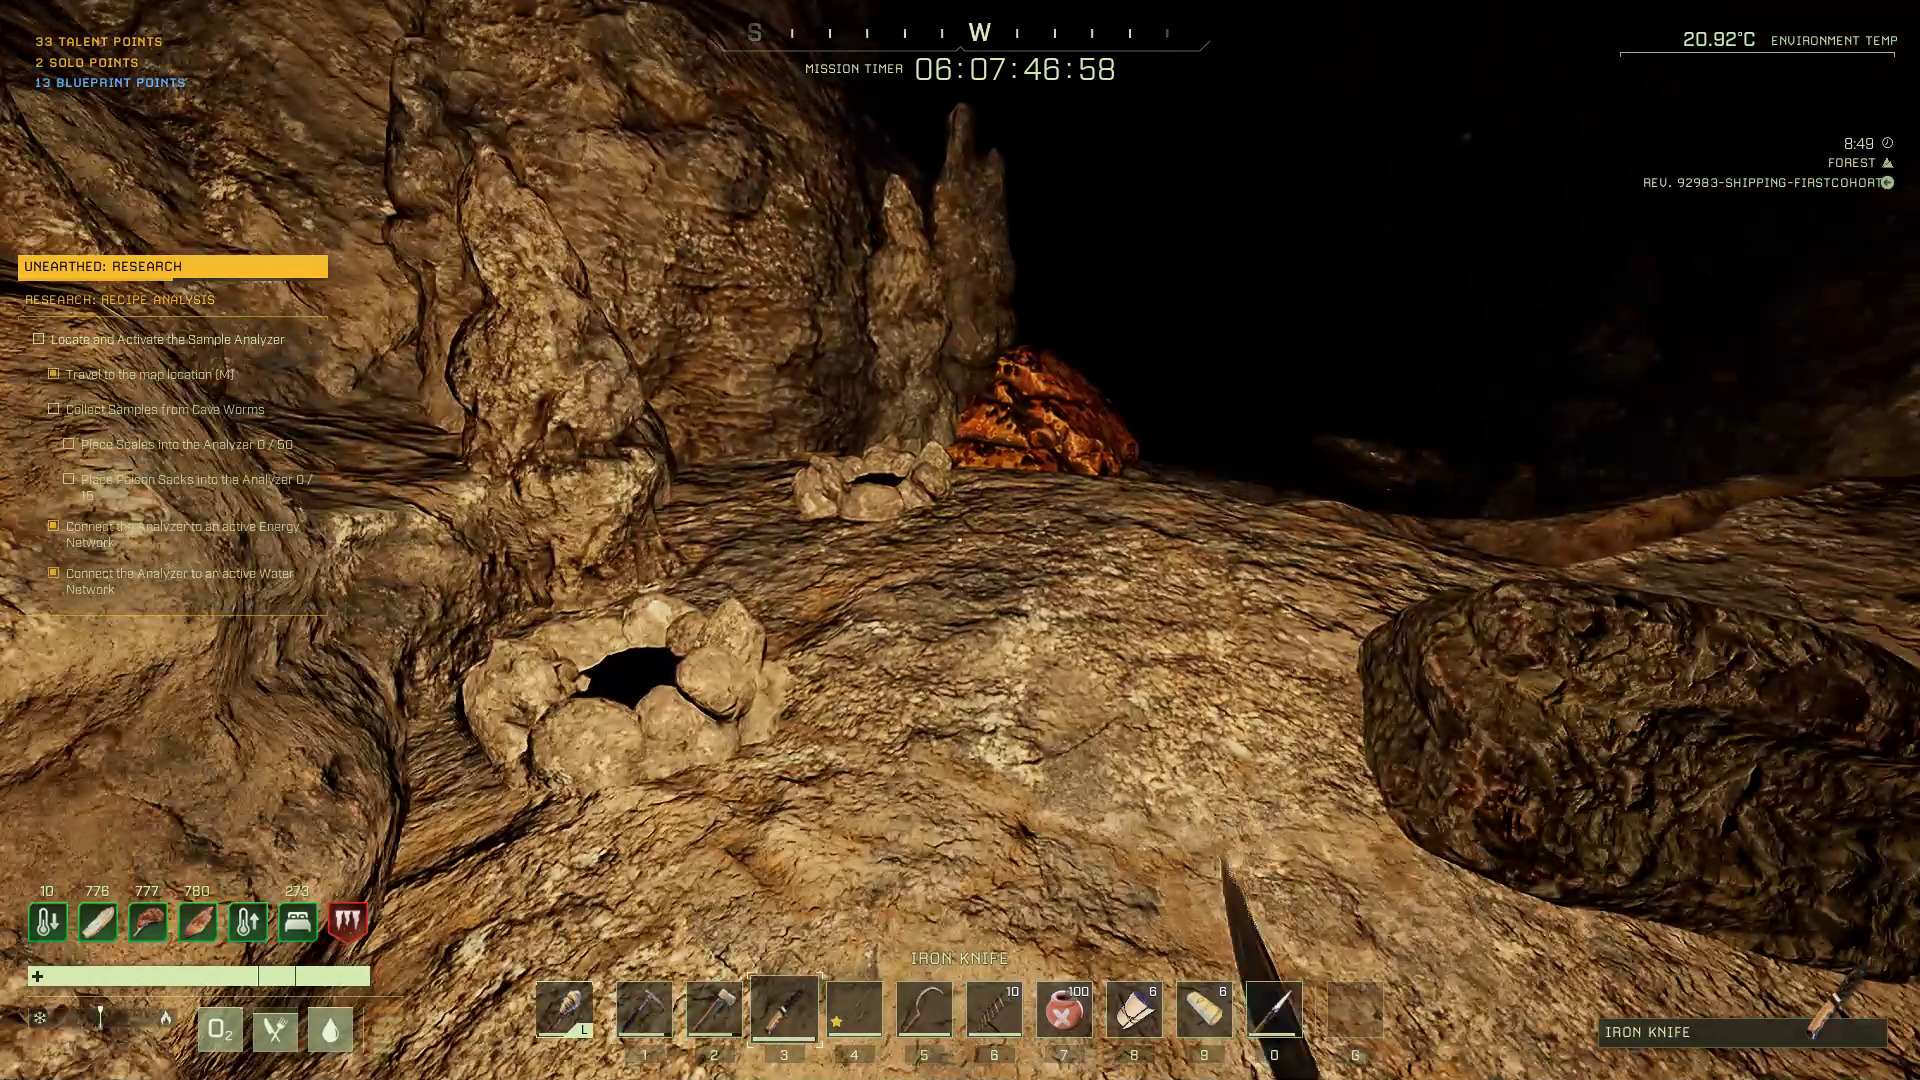
Look out for the telltale signs of a hostile caveworm, a small campfire-like hole in the rock
You can find at least one caveworm in every small cave, and larger caves frequently house 6 or more. Watch out for how their Poison debuffs stack, and leave a cave, if necessary (to heal). Bows and knifes are effective against caveworms: aim arrows at the top of their mouths to crit even during a spitting animation.
Step 4: Defend Against the Caveworm Attack
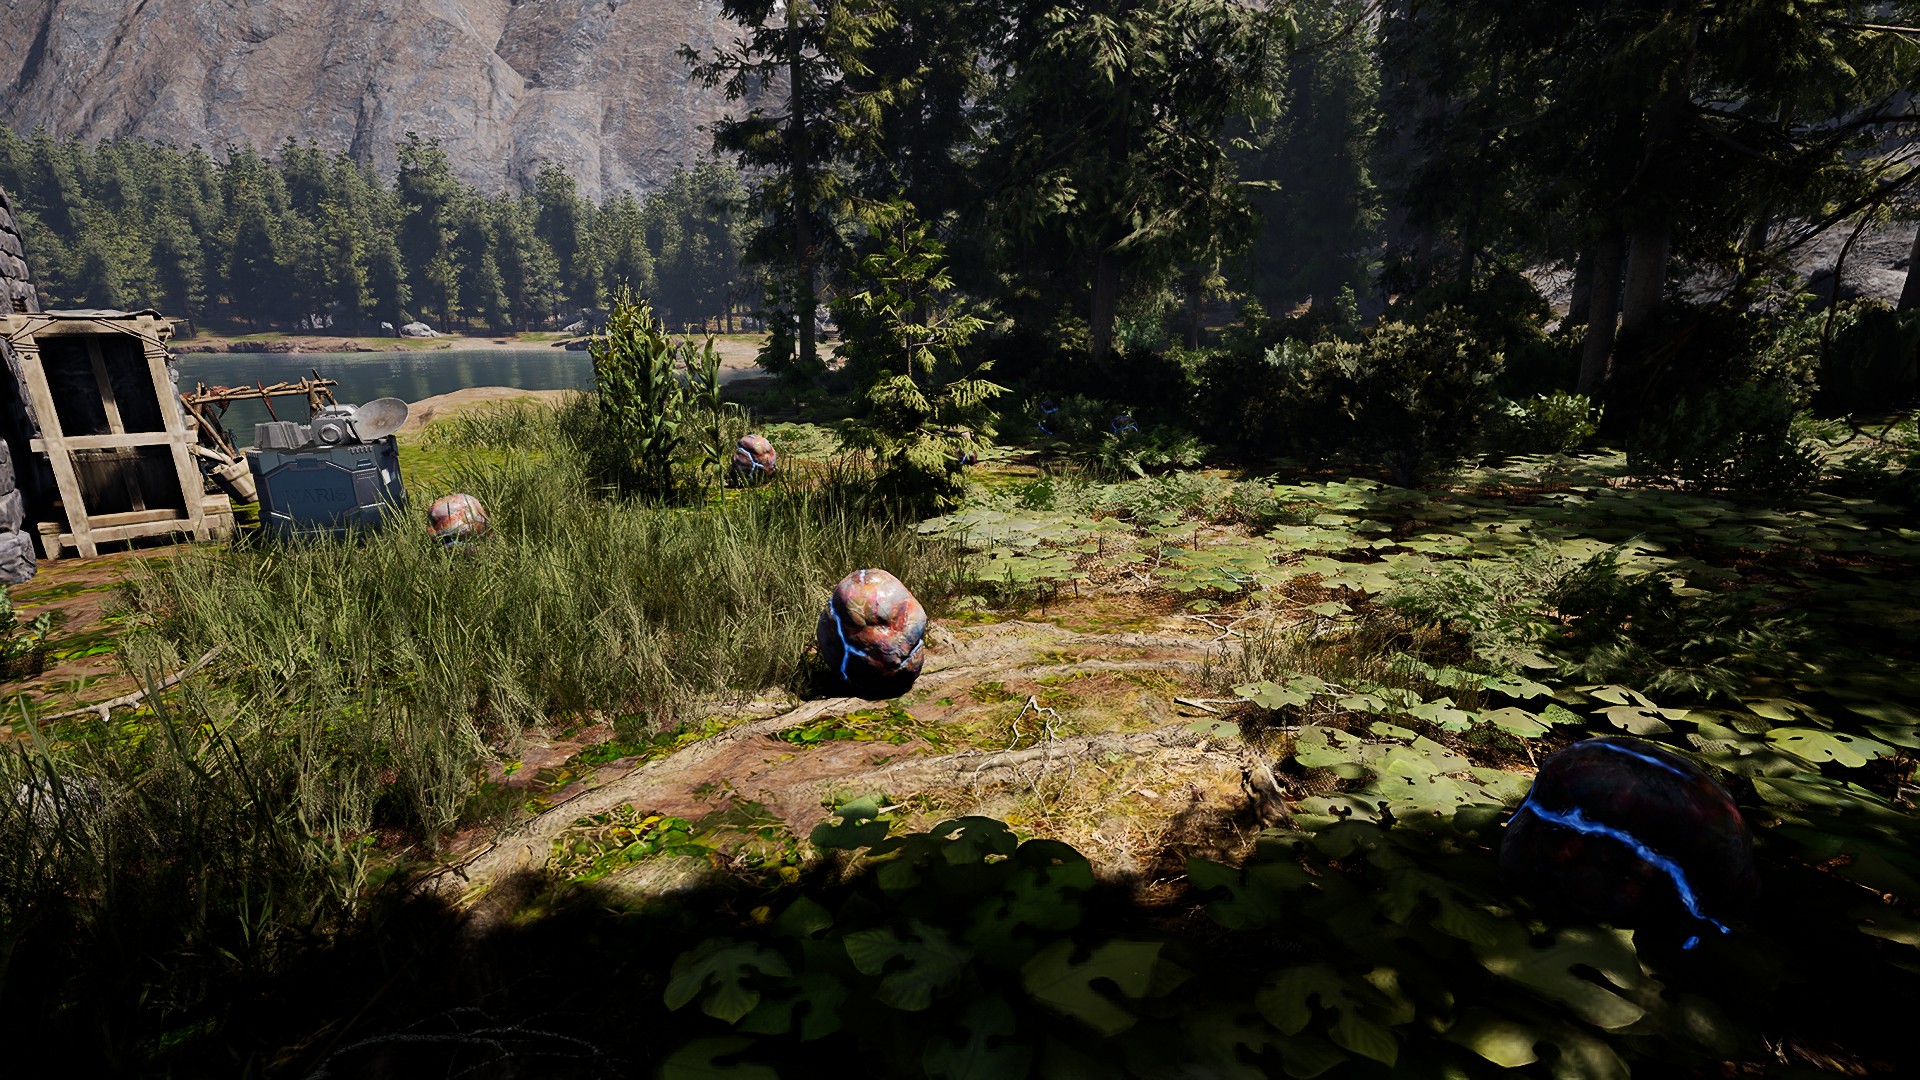
Dispatch caveworms quickly before their numbers growLeave the loot for the end so you do not become encumbered
As soon as you put enough materials into the Sample Analyzer, it will begin working and attracting the attention of caveworms. They appear in several different locations in about a 10-meter radius around the machine.
Dispatch the caveworms quickly, as they will continue to appear and grow their numbers. About 40 of them will attack in total over a 5-minute period.Resist the urge to loot the flesh balls they drop immediately. The scales and poison sacks weigh 1 kilogram each, and you can quickly become encumbered.
Step 5: Craft Caveworm Scale Weapons
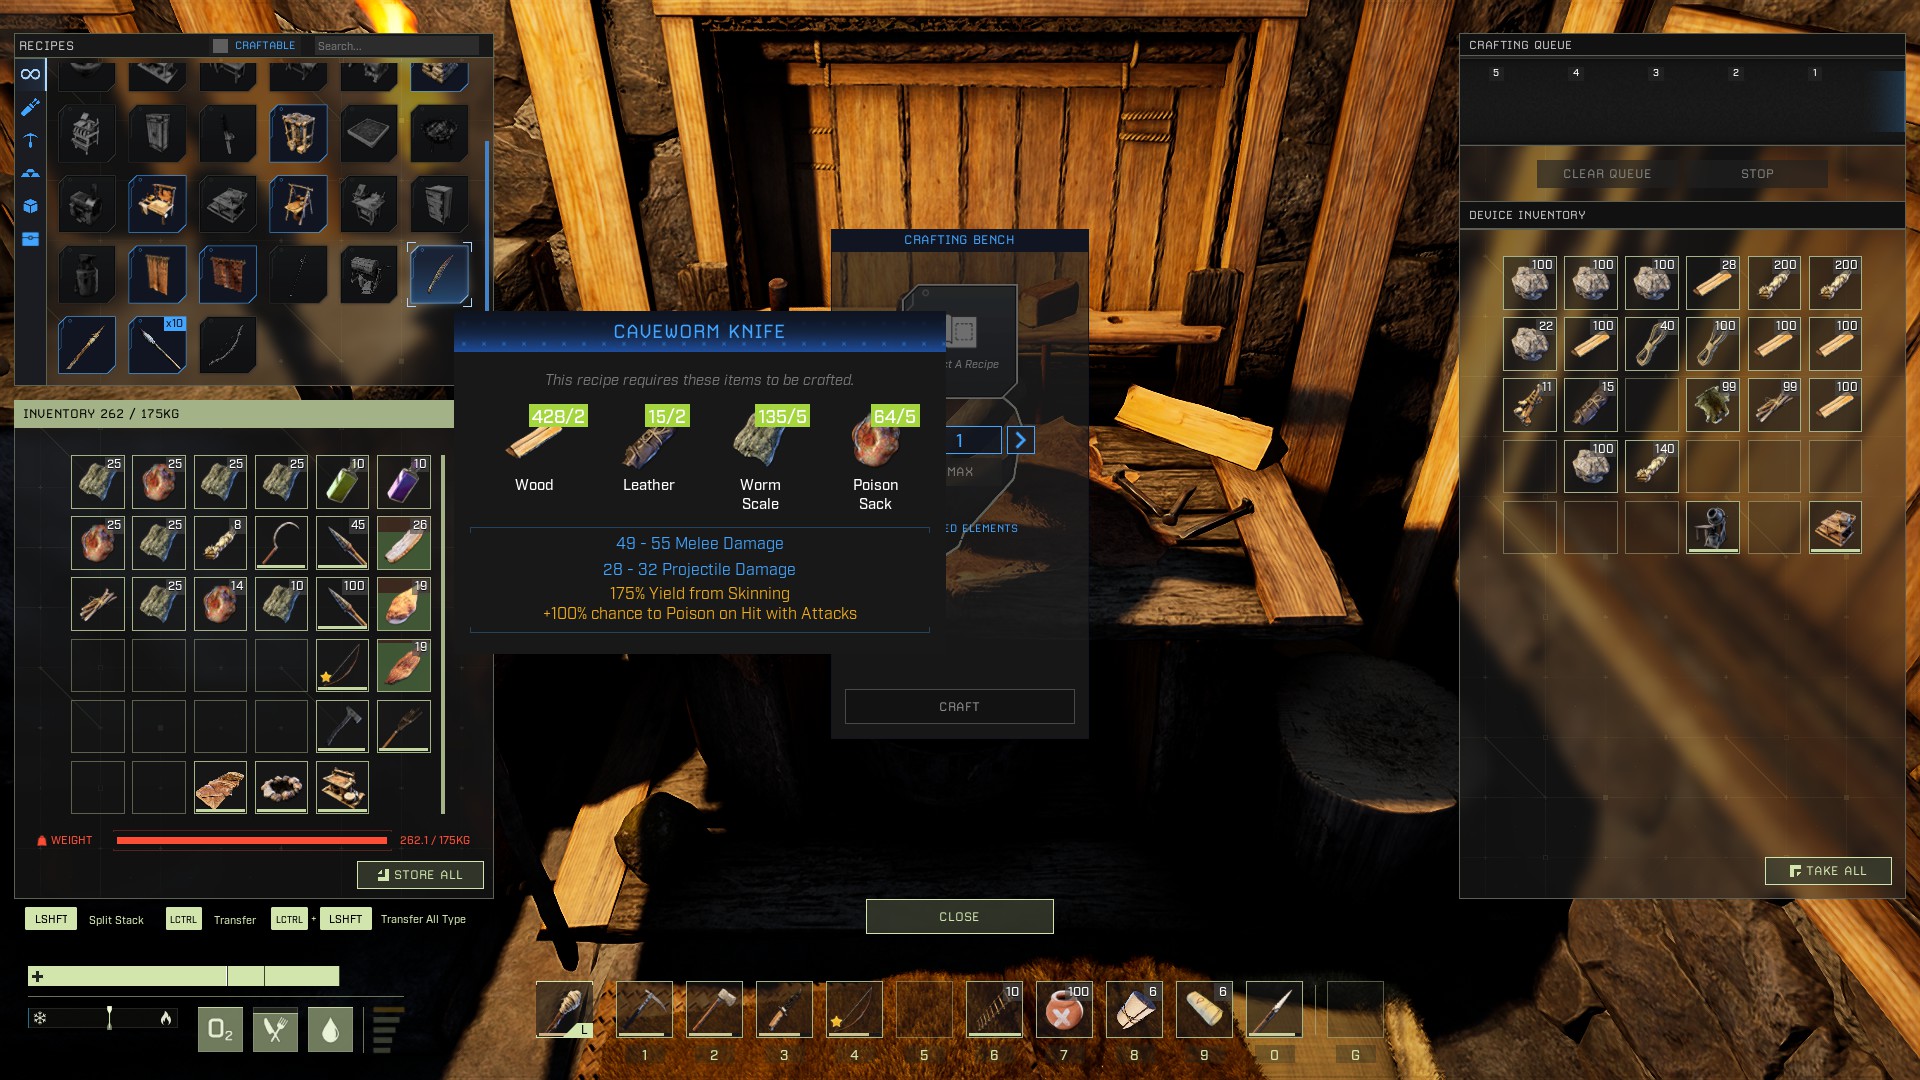
All the caveworm gear blueprints can be found at the Crafting Bench once you finish analyzing the samples to learn them
After the attack, your prospector will learn and needs to craft the blueprints of three new Caveworm weapons: a bow and arrow set, a spear, and a knife. The Bow is identical to the aluminum variant, the spear is similar to the bone spear, and the knife is between the bone and iron types. The arrow, spear, and knife all poison targets with 100% effectiveness.
Each caveworm armament requires scales and poison sacks to craft, as well as some wood and leather. You only have to craft one of each. The loot from the Caveworm Attack should be more than enough to craft all the new equipment.
1x Caveworm knife, 1x Caveworm bow, 1x Caveworm arrow (x10), and 1x Caveworm spear in total require:
Once you craft the four new pieces of gear, the mission is complete. It was a long trip from the Dropship to the Sample Analyzer. If you have brought workshop gear, you have to head back the long way. Although, this is a good chance to test out the new Caveworm gear as you go.
If you did not bring any gear, maybe now is the time to see how high a poison stack you get before you die and respawn back near the Dropship. If the Unstuck glitch still works, that too is an option (climb very high and use the option in the menu).
Thanks for checking out this walkthrough. Hopefully it was helpful and entertaining! Feel free to post any comments, questions, or tips in the comment box below. Then, get back to taking revenge on those caveworms using their own grimy scales against them!
Share this article:
SurvivalSherpa
SurvivalSherpa is an avid gamer spending most of his time at the nexus of the survival, crafting, building, and role playing genres on any platform, especially to test indie titles in EA. AFK, life is about work and education in STEM fields, reading fantasy, and sipping great coffee in the Pacific Northwest.


Simpler solution: Craft waterwheel instead of generator. Requires no fuel, and supplies just enough power for pump and analyzer
the lake near is not considered flowing and cannot be placed
Your guide has one slight inaccuracy re: shelters in the arctic. Sloped roofs (a ramp variant) do not require supports.
When using workshop gear: Bring the Dropship grenade or craft one as you tech up in this mission anyway. Saves the long trek back.