The VOYAGER-like mission, CRYOGENIC takes prospectors all across the northern part of the map to complete a series of multi-part objectives. Sinotai loves to push the limits with exotic mutations, and they believe there is valuable biological data to be scavenged from preserved arctic specimens. The question is: how are you supposed to get a sample out of something that is frozen solid?
CRYOGENIC weaves construction, extermination, recovery, and “king-of-the-hill” elements into a giant slalom of a mission. Read on to get advance intelligence of key objectives, optional loot, as well as boss mechanics and strategies to make it back before your prospector becomes yet another preserved arctic specimen.
Prospect Details
Difficulty: ()
Recommended Level: 25
Location: Arctic and Desert Canyons
Weather: Moderate-to-severe
Mission timer: 7 days
Approximate time to complete: 4-6 hours
Objectives:
Investigate the Mammoth Graveyard
Retrieve 5 DNA samples from the carcasses
Investigate the Ice Structure
Approach the Ice Wall
Travel to the equipment drop-zone in the Desert Canyons
Assemble the Prototype Weapon
Recover the three components from the Desert Canyons
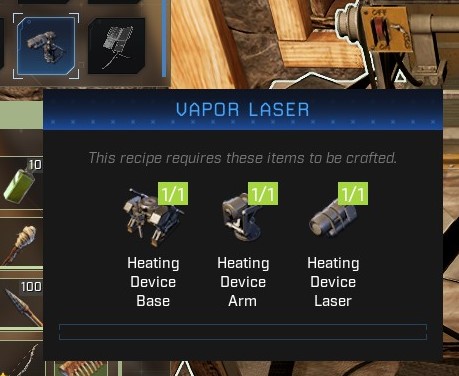
Reconstruct the Vapor Laser in a Machining Bench
(Optional) Recover and repair a power source
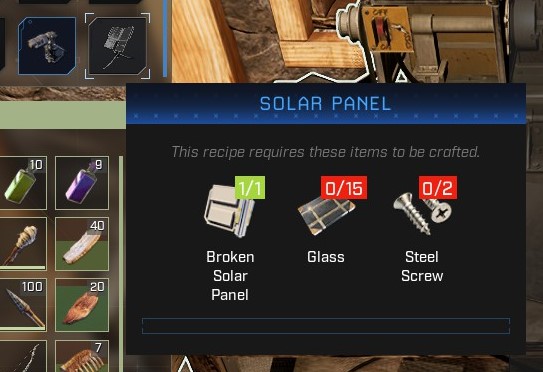
Recover a broken Solar Panel and Electricity Tool from the Desert Canyons
Repair the Solar Panel in a Machining Bench
(Optional) Recover survival supplies from the Desert Canyons
Defeat the Bear boss guarding the supplies
Salvage the Shotgun, Polar Bear Armor (3 pieces), and Hot Cocoa (with Thermos)
Melt the Ice Wall
Deploy Vapor Laser in front of the Frozen Wall
Power the Vapor Laser and activate it
Defrost the Frozen Mammoth and recover a sample
Remain in the cave until the specimen is thawed (30-60 minutes)
(optional) Deploy and fuel heat sources around the specimen to accelerate melting
(optional) Defeat the Exotics-enhanced Mammoth
Recover a sample from the specimen
Return with the samples to the Dropship
Rewards
650
200
Variants Modifiers
Creature melee damage: -50%
Creature health: -50%
Creature movement speed: -10%
Bear spawn rate: -50%
Lion spawn rate: -10%
Polar bear spawn rate: -50%
Wolf spawn rate: -10%
Aggressive creatures perception: -50%
Neutral creatures perception: -50%
Passive creatures perception: -50%
Experience gain: -25%
Creature melee damage: +20%
Creature health: +30%
Creature movement speed: +10%
Aggressive creatures perception: +30%
Neutral creatures perception: +30%
Passive creatures perception: +30%
Scorpion spawn rate: +30%
Lion spawn rate: +30%
Wolf spawn rate: +30%
Experience gain: +25%
Player respawn count: 3
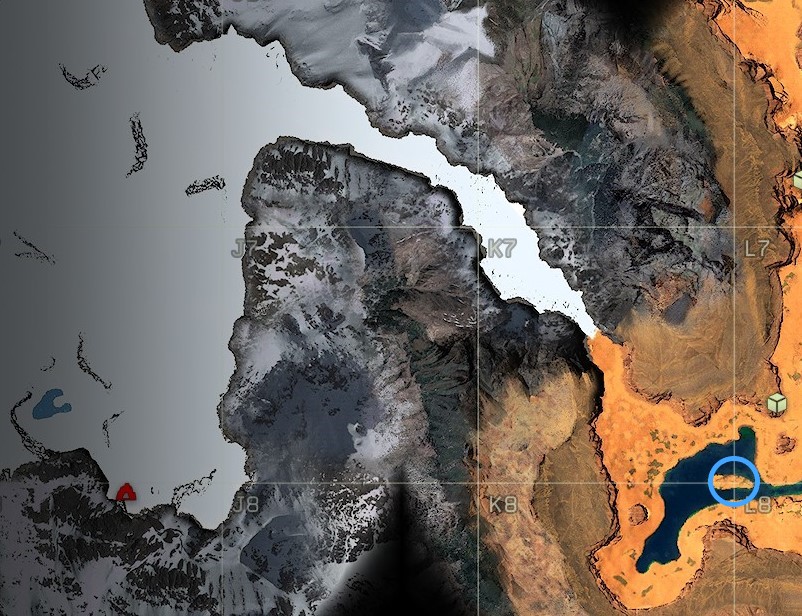
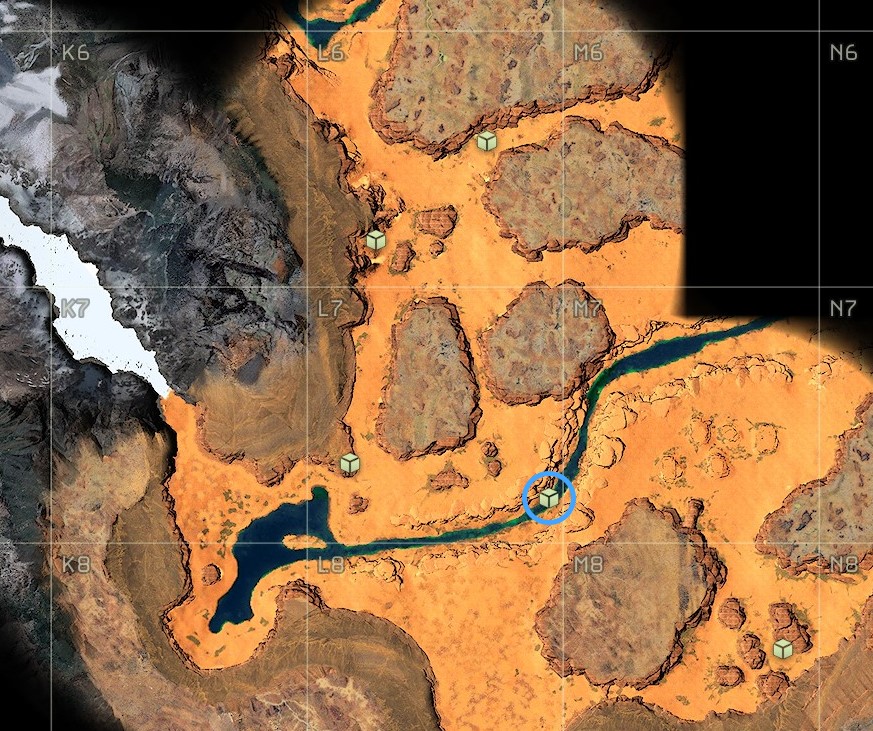
Map of Key Locations
From the Dropship in the Riverlands, the path of least resistance might be the short pass through H4
Boss Details
Bear (optional, various names)
Health: 3000 (approximately)
Location: M8
Critical points: Head
Drops: Fur, leather, bone, raw meat, T-bone steak (rare)
Attacks: Swipe (melee)
Behavior: Will charge at a prospector if nearby, or if the prospector attacks it. Gives chase until killed, or if the prospector creates enough distance.
Notes: Similar to a Level 70 Bear. Guarding survival gear crate (optional mission objective)
Exotics-enhanced Mammoth (optional, various names)(
Health: 22000 (approximately)
Location: ð™¸5
Critical points: Front of the head, between the eyes
Behavior: The Mammoth will charge at a prospector if nearby, or if the prospector attacks it. It gives chase until killed, or if the prospector creates enough distance. The Mammoth has a tight turning radius and will track the prospector closely with every change in direction.
Notes: Similar to the boss for the mission CLEAN UP. It will begin to heal if it disengages from the fight to return to its starting location. The Mammoth also seems to resist weapon talent debuffs like Slow, Bleed, and Immobilize. (Killing it is optional and not a mission objective.)
Preparing for CRYOGENIC
This mission takes you through both the hottest and coldest biomes for significant periods of time. Naneo Armor will provide both physical and thermal protection in both cases. There are up to 10 non-stackable items that must be scavenged from supply drops. Craft the Leather Backpack or the Gatherer’s Backpack and the Patcher II Module to increase storage.
You will need access to a Machining Bench to assemble the Vapor Laser, and to make Steel Screws and repair the Solar Panel, unless you plan to craft an alternate Tier 4 power source. A Concrete Furnace also will be required to make Glass to repair the Solar Panel. This is a good opportunity to upgrade to iron tools or better.
The Frozen Mammoth takes up to an hour to defrost, and the process halts if you leave the cave. Consider bringing the materials or components for a portable shelter to sleep, wait out storms, or retreat from predators.
The party in the cave of the Frozen Mammoth can get a little busy, so it pays to bring enough favors (ammo) to take care of everyone
While there are raw materials to make campfires in the cave, there is very little fuel — so, this one must be carried in. The Gatherer’s Backpack will help with this. As the Frozen Mammoth melts, it will attract all sorts of predators. If your primary weapon requires ammo or frequent repairs, consider bringing extras.
You also have an opportunity to kill an Exotics-infused Mammoth, like in the mission CLEAN UP: Extermination. This fight can be avoided, and your choice may influence the weaponry you craft, or the level of technology you build.
For CRYOGENIC, you will need workstations like the Machining Bench for objectives that take place far from the Dropship. But first, get your basics (equipment, armor, shelter, food, weaponry, and restoration items) sorted.
A forest base will provide easier food and resourcesAn arctic base keeps you closer to the mission objectives
Then, decide whether you want to craft the repair workstations and materials first and carry them in, or set up a forward base in the Arctic or Desert and craft the materials on-site. Also, consider what weapons and armor you will need to get through the bear-infested Riverlands-Arctic transition zone.
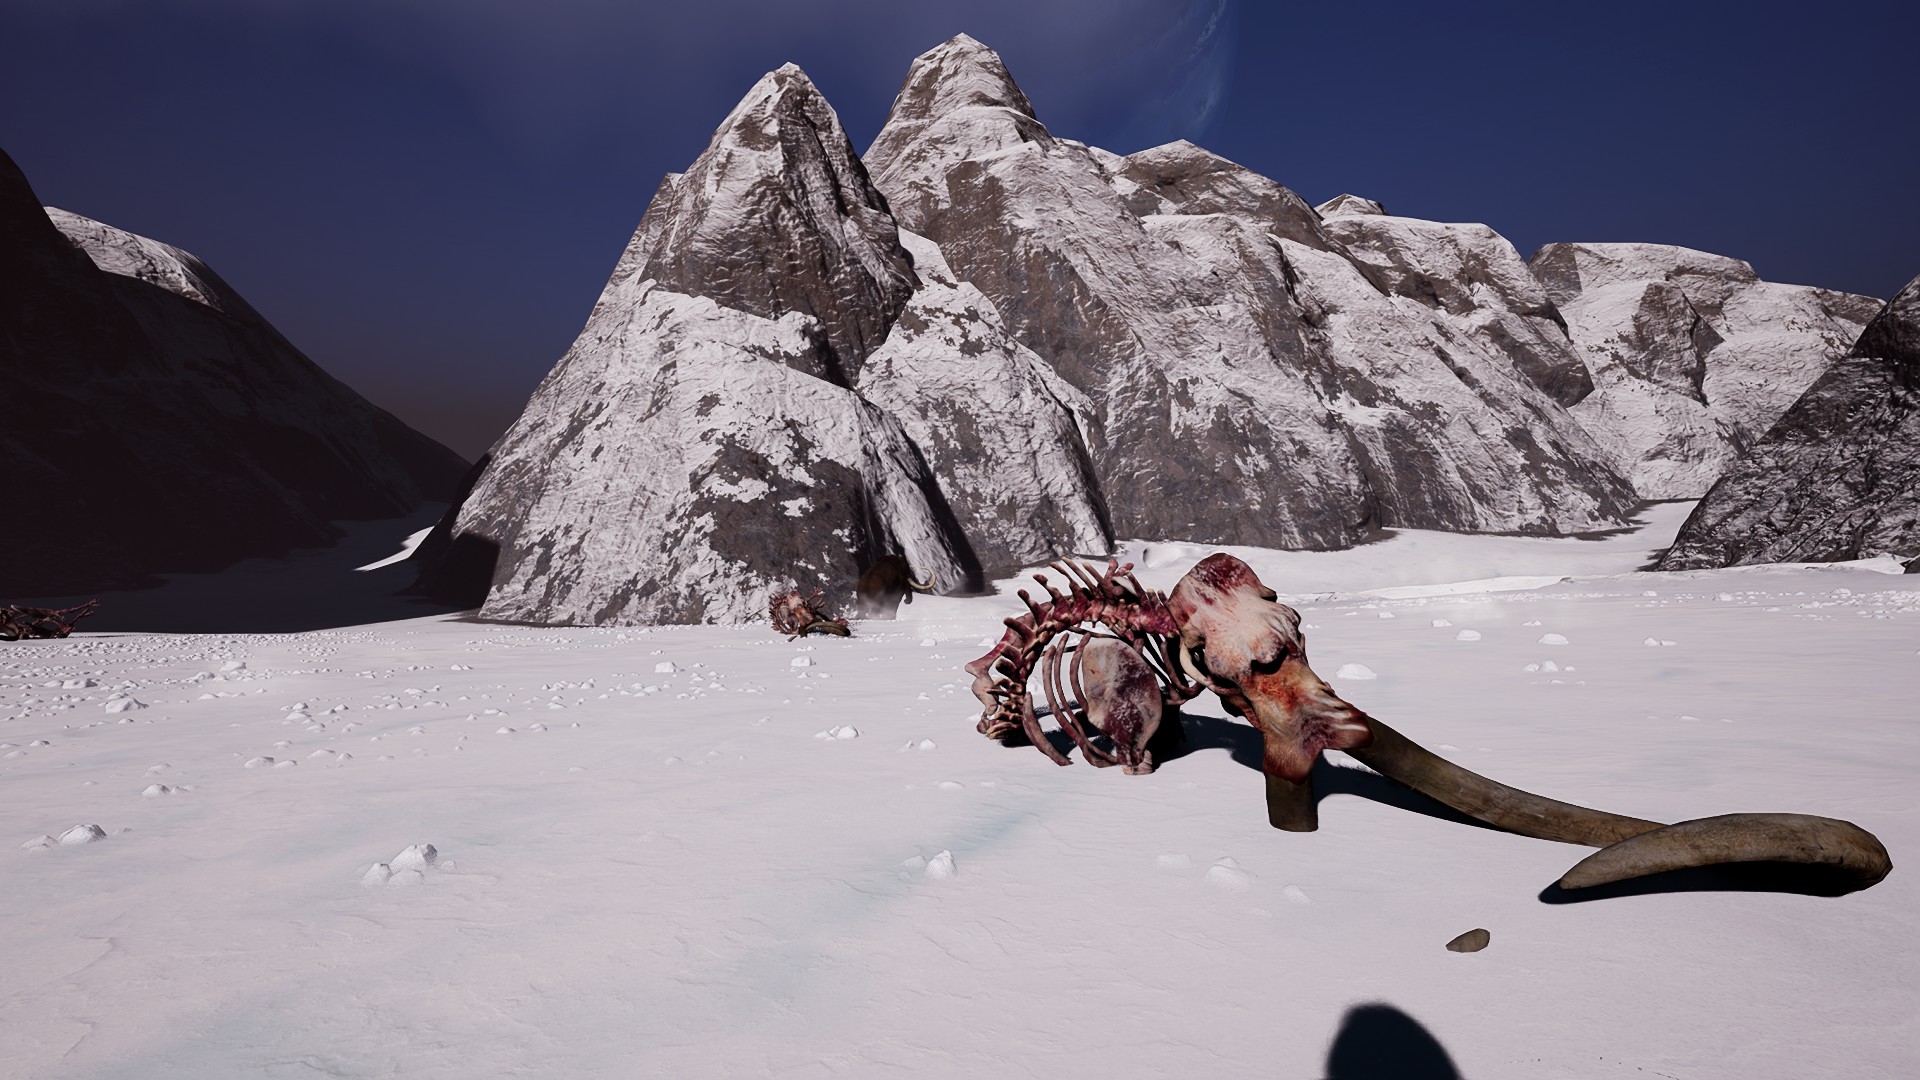
Investigate the Mammoth Graveyard
It is not necessary to kill the lonely mammoth guarding these skeletonsEach Mammoth skeleton contains one sample. Thankfully, they stack
Your first task in the arctic is to raid a Mammoth Graveyard for some opportunistic sample collection (grave robbing). Head to ð™¸6, and when you see several mammoth skeletons in a wide circle, go to each one and collect a Mammoth Sample.
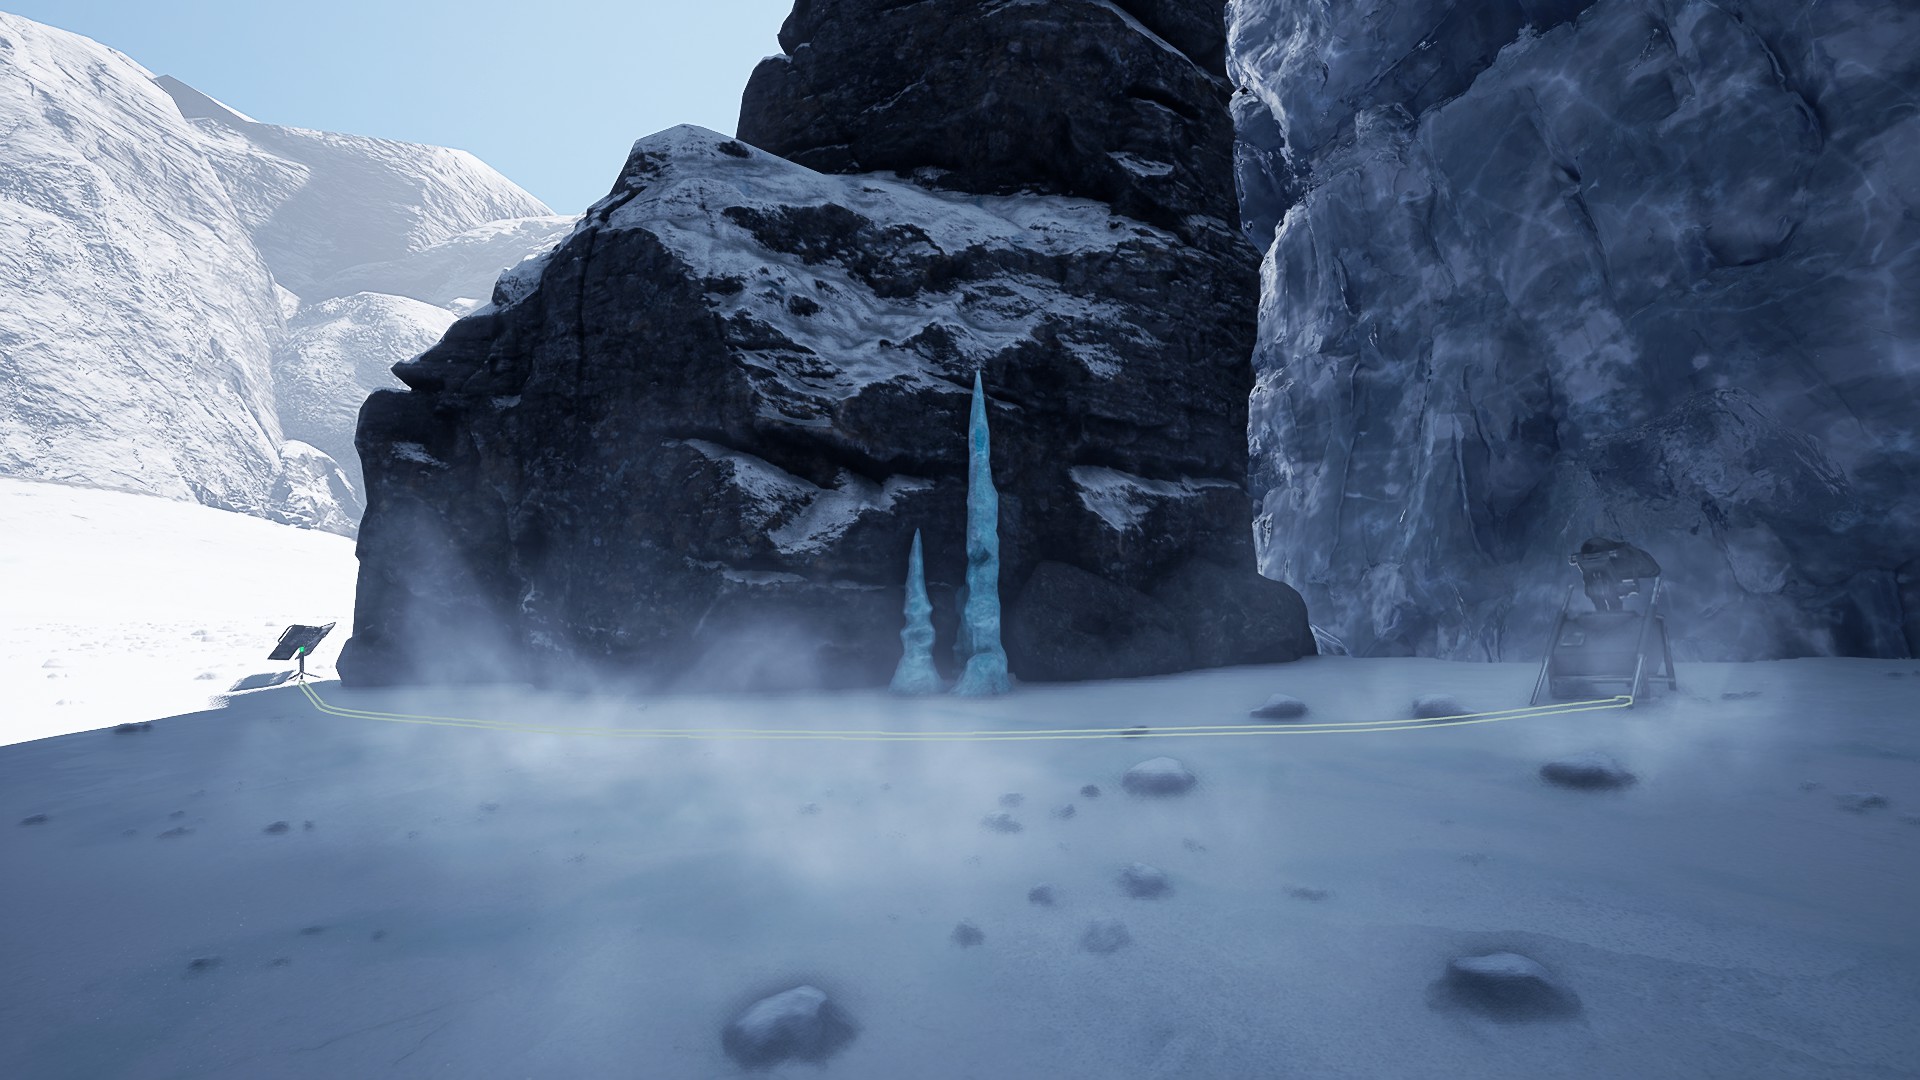
The Ice Wall is the clear-colored wall on the right, even though the glacier-blue ice sticks out much more
Once you recover the last sample, turn South and look for a rock formation in ð™¸7/ð™¸8 that sticks out from the mountain. This “Ice Structure” is where the second half of the objectives will take place. For now, you only need to approach the Ice Wall.
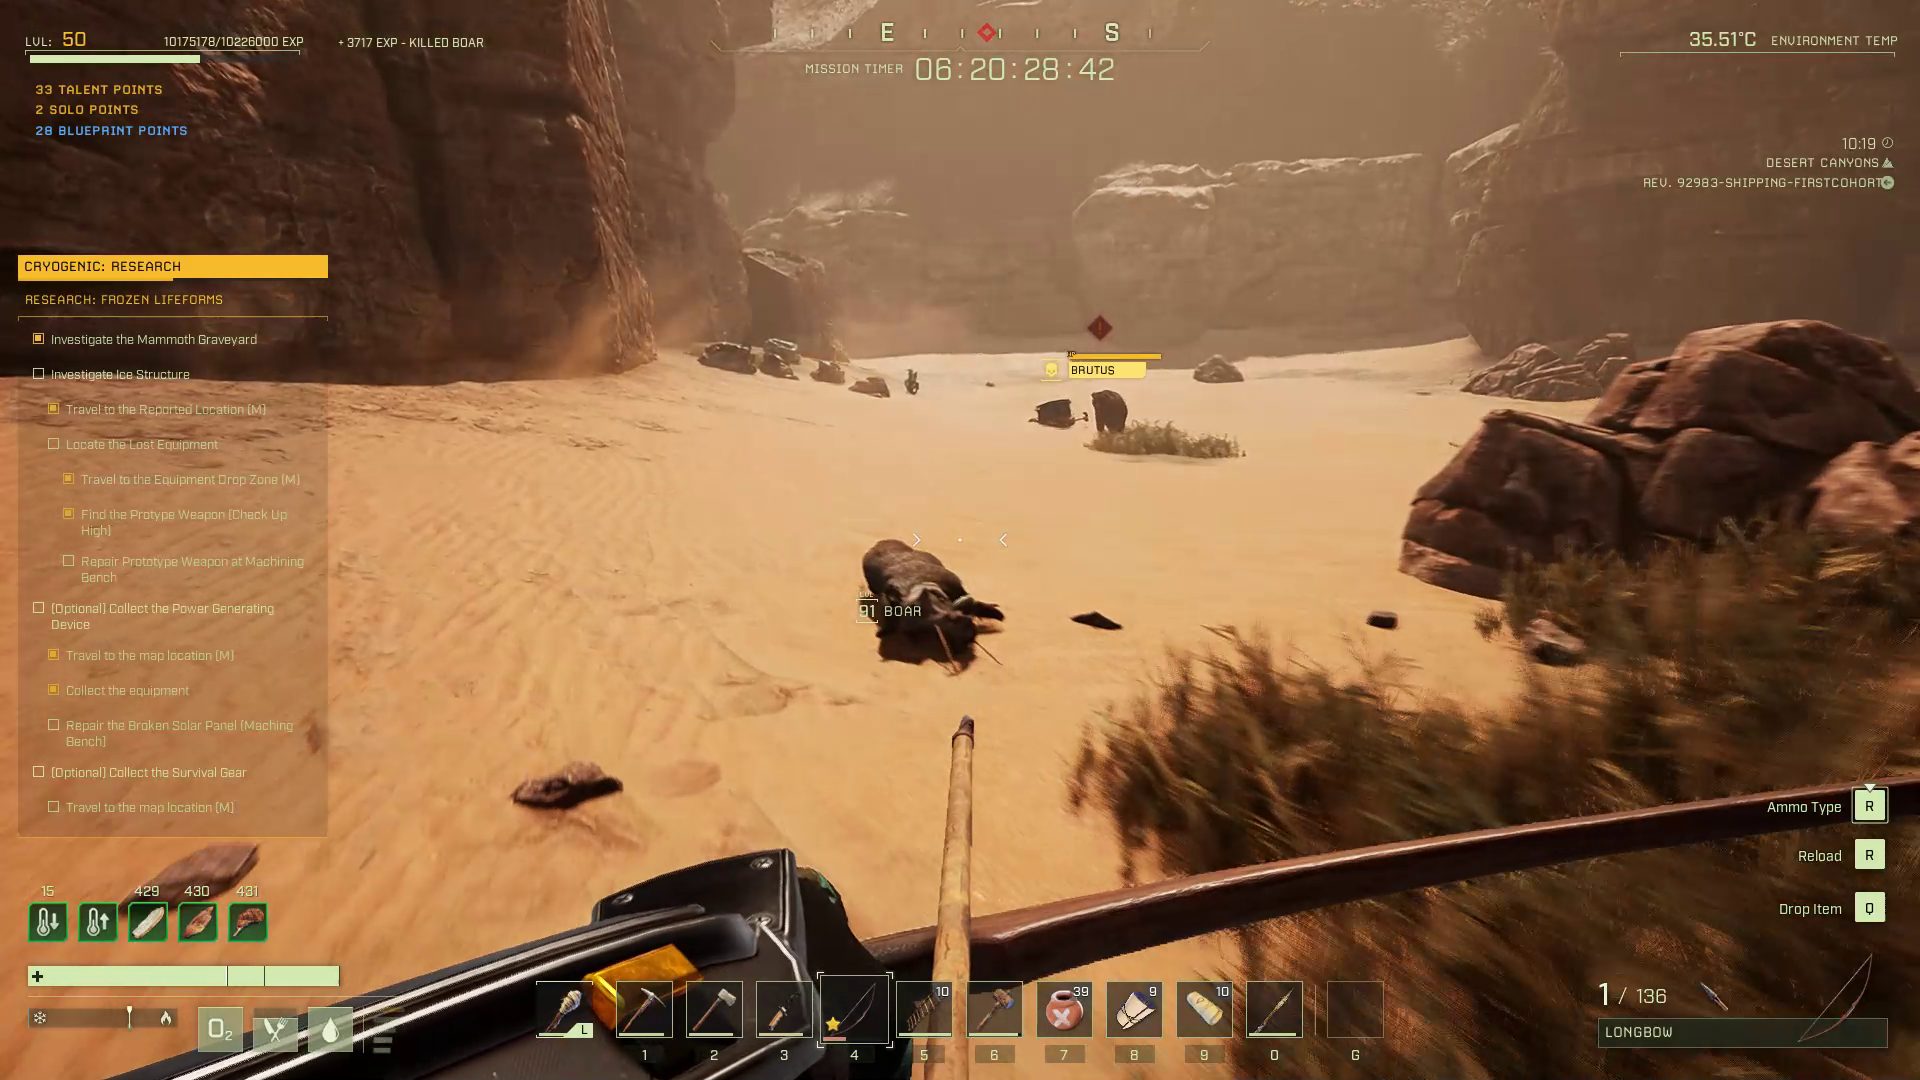
Sol will tell you there is more to do, but he doesn’t know what or why. You will get the location of an equipment drop-zone: it is on the island in the lake in K7/K8 of the Desert Canyons. Once you arrive, you will get the locations of several dropped crates in the area and finally find out what you are asked to assemble.
Assemble the Vapor Laser
You are asked to assemble a prototype weapon that amounts to a laser drill to cut through the Ice Wall (similar to AVALANCHE: Expedition). This equipment, along with a broken power source and some survival gear, have been dropped to the planet in five separate crates strewn across the Desert Canyons.
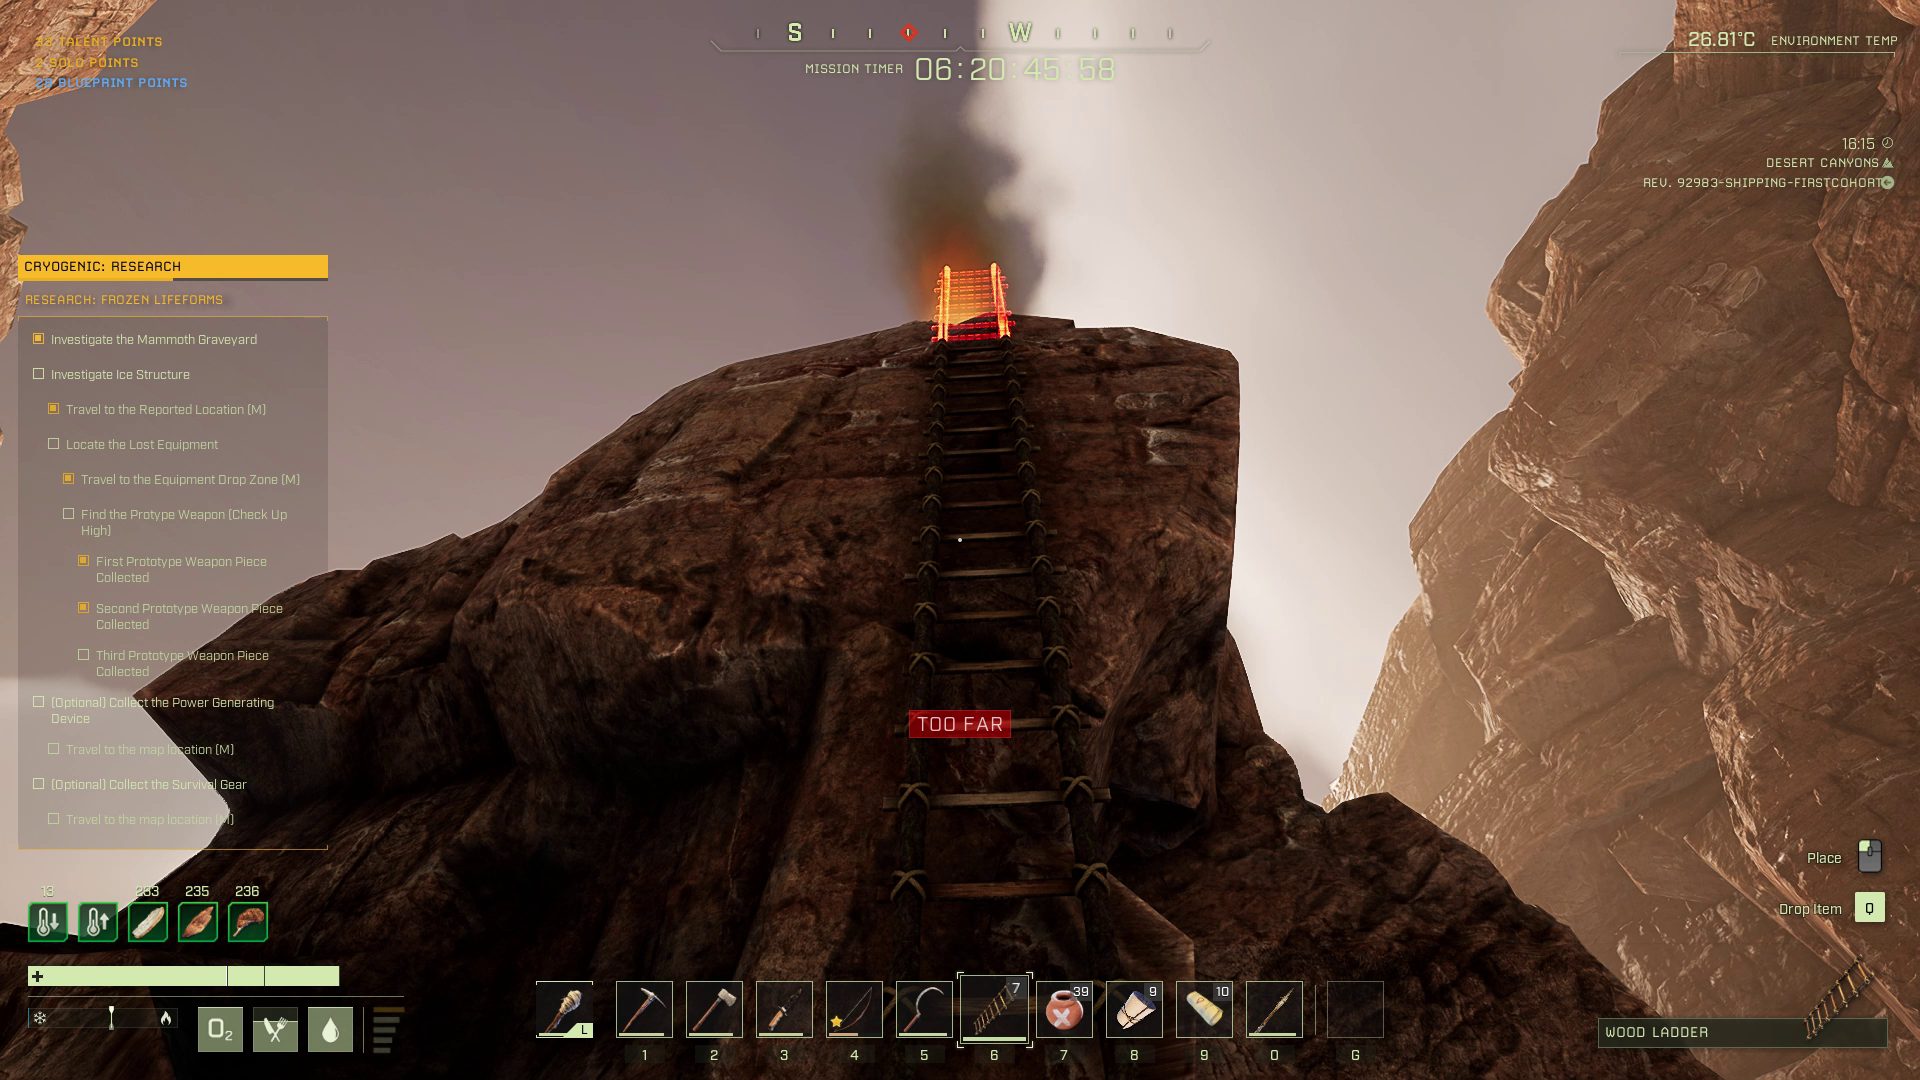
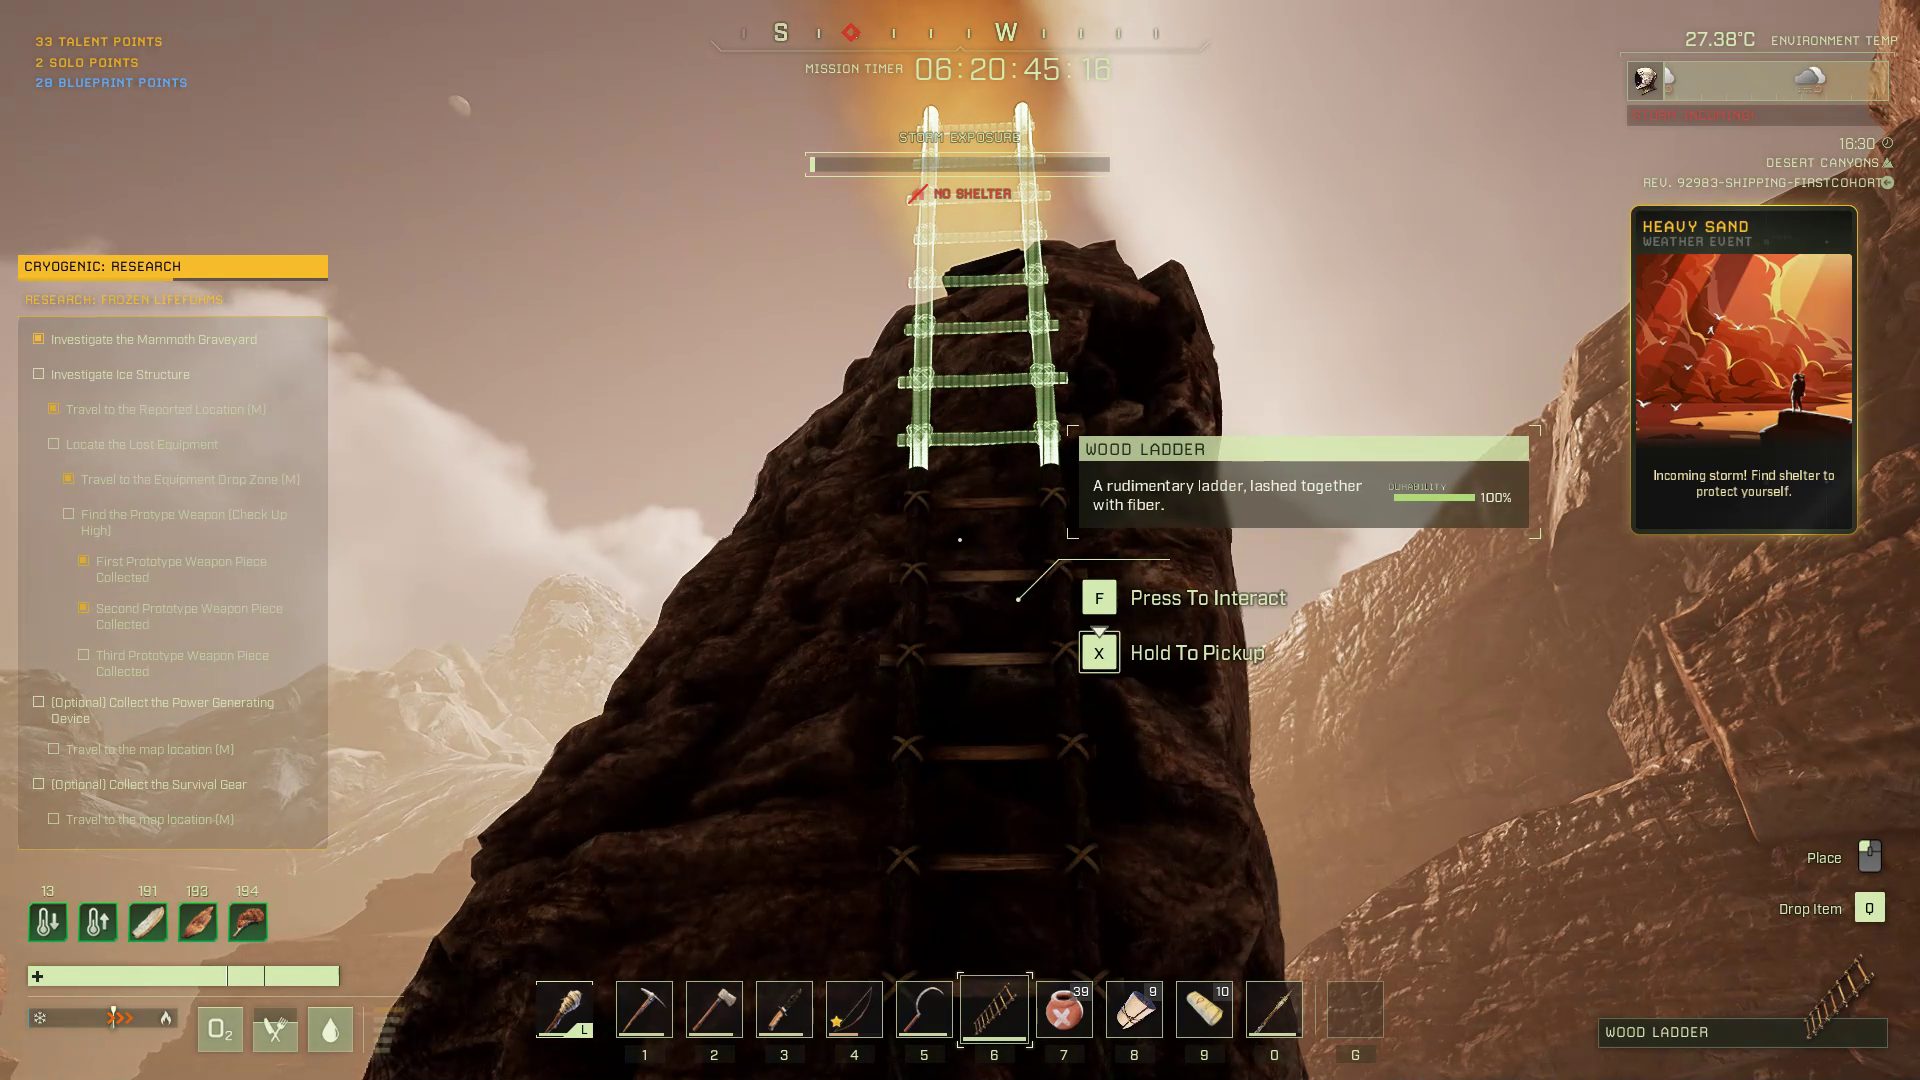
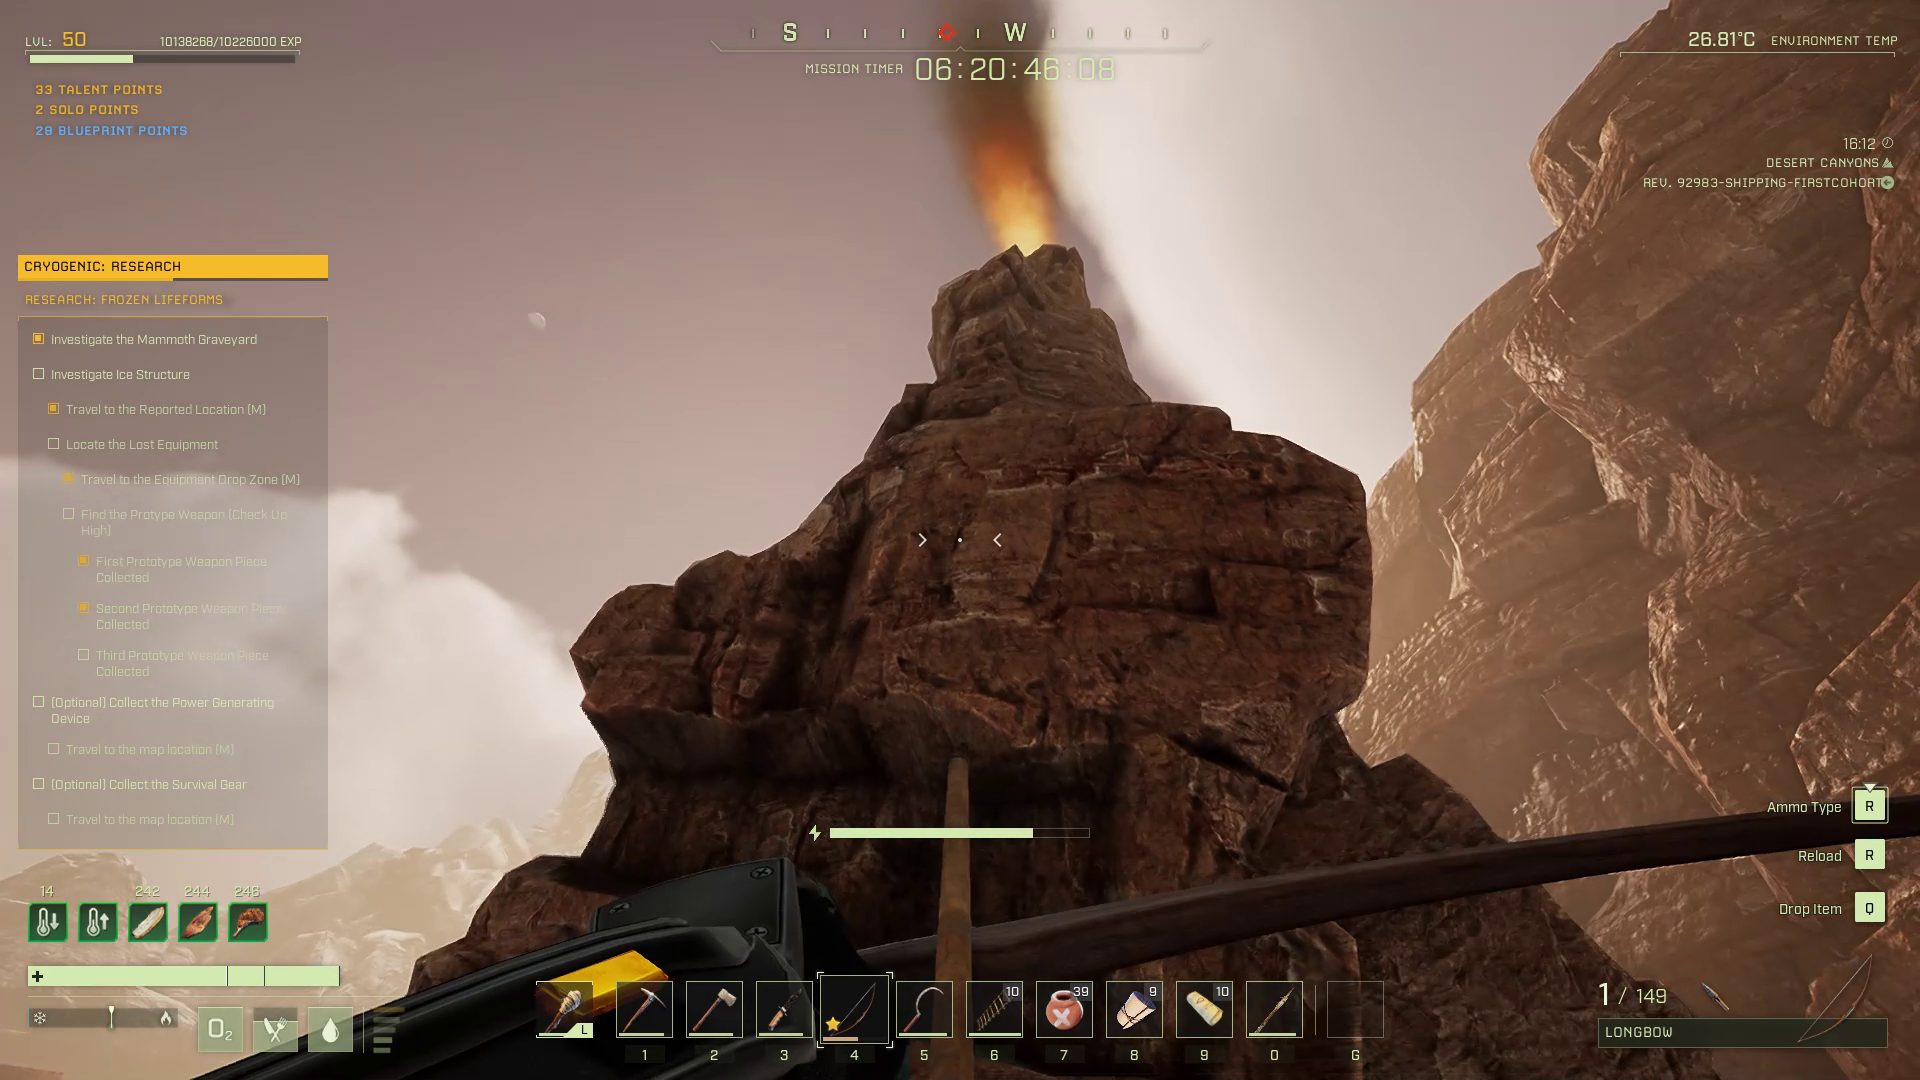
Use the lakeside resources to craft a stack of 10-15 ladders to more easily access the laser component crate drops north of the lake
The only required crates to be salvaged contain the laser components, and these lie along a path north of the lake. The mission objectives correctly warn that they are difficult to reach. Bring ladders or structures to help you get to high places. Watch out for cougars or scorpions; if they detect you, they will attack your structures and may leave you stranded on a pillar.
Step 1: Base to Ledge 1Step 2: Ledge 1 to Ledge 2Step 3: Ledge 2 to PeakThe furthest prototype part is in a crate atop a pillar. If falling is a concern, the north side has two convenient ledges to break up the climb
Assembling the Prototype Weapon (Vapor Drill)
This requires the Machining Bench. You will need to deploy the workstation in a sheltered location, or return to the base with the “prototype weapon” components. Place them in the bench, find and select the Vapor Laser recipe, and craft. There are no extra resources required, so you can assemble the drill in the field and carry it on your back to free up three inventory slots.
Assemble a Power Source (Optional)
While technically an optional objective, recovering the broken Solar Panel is a low-risk task that shaves a lot of time off the mission. If you are planning to hunt for exotic veins during CRYOGENIC, repairing the Solar Panel is a good option because it puts out the same amount of power as the Biofuel Generator. In any case, the Electricity Tool in the crate is not broken and is definitely worth salvaging.
The crate is submerged in the river running east from the lakeOne or two cougars may be camping the crate. They become easy targets in the water
Repairing the Solar Panel
Luckily, only the Machining Bench is required to repair the solar panel, even though a Fabricator is required to make one. However, the Glass and the Steel for the Screws have to be made in a Concrete Furnace. If you craft this 40-kilogram workstation at a forest base, it might be easiest to leave it there and bring the materials to the Arctic.
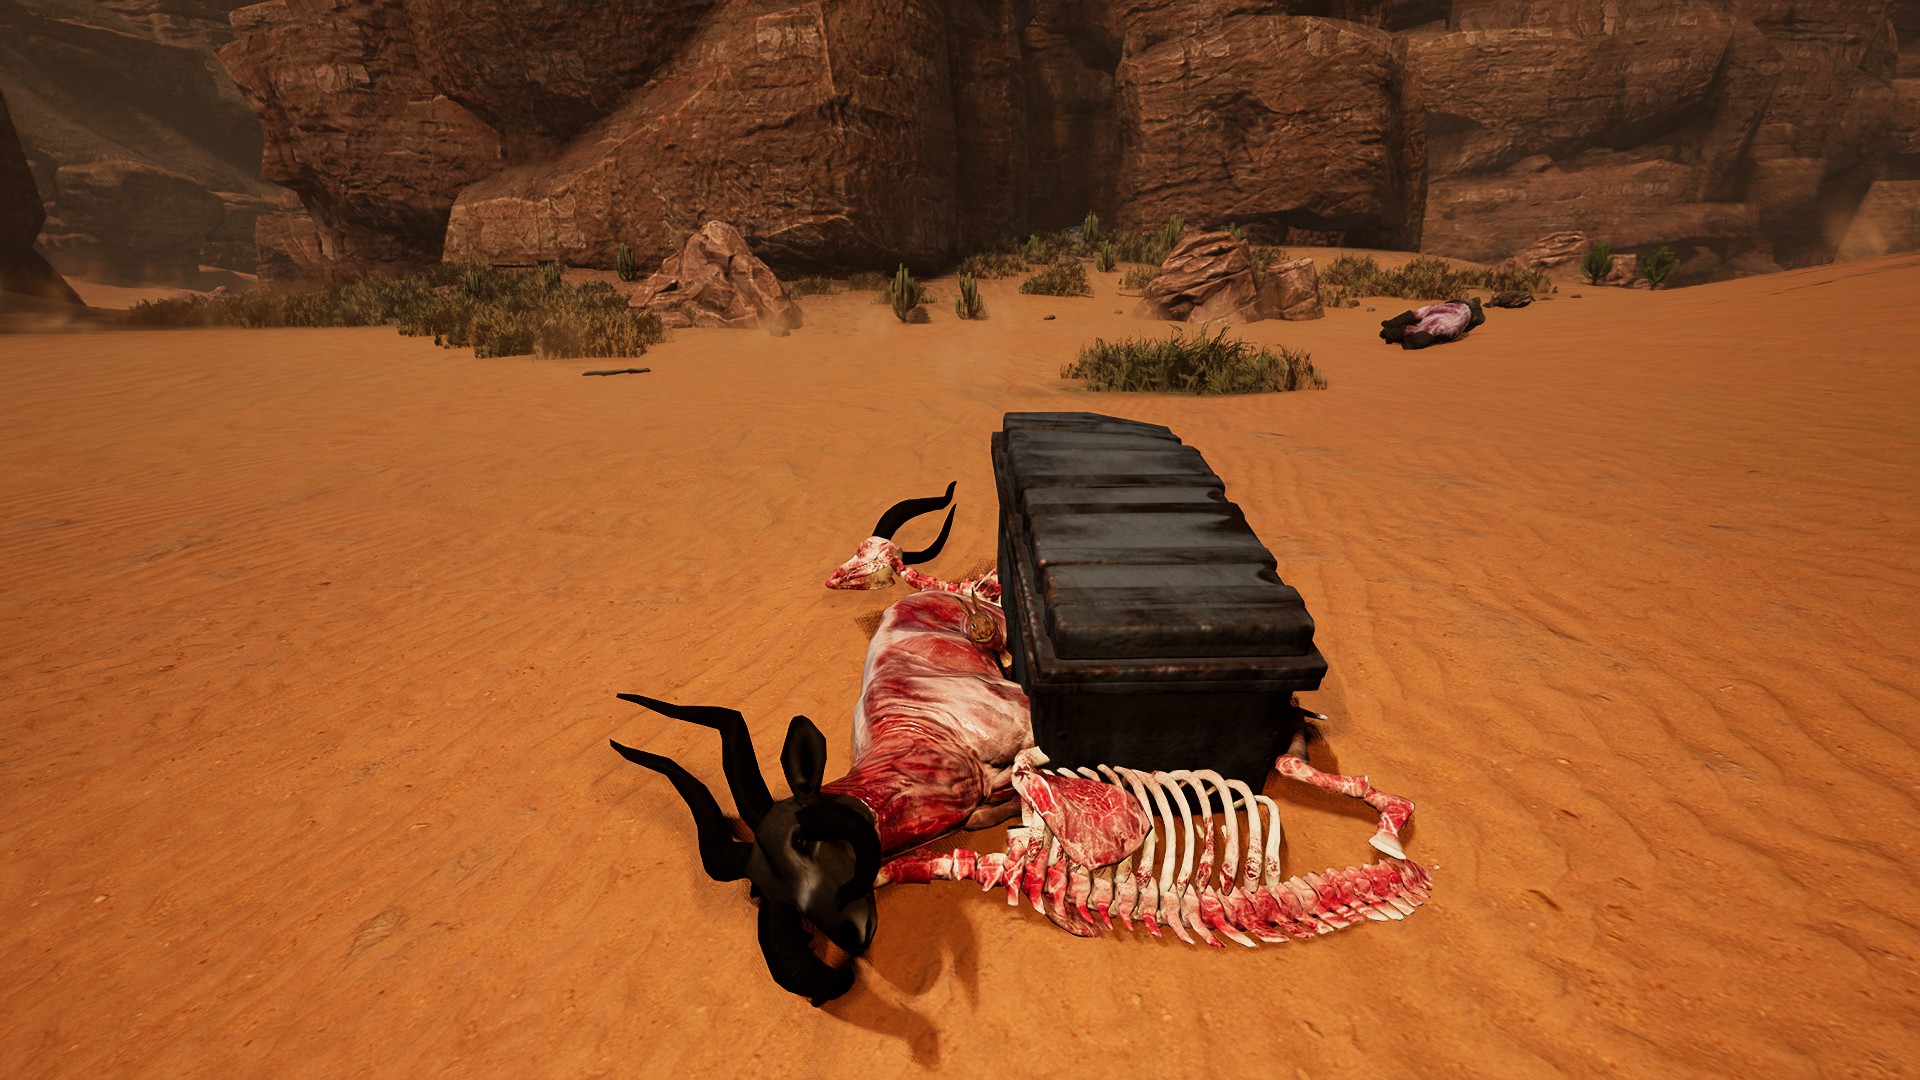
Recover Survival Supplies (Optional)
The last crate contains an assortment of Arctic survival tools and armor. In order to get to this crate, you will have to defeat a bear mini-boss located surprisingly deep in the desert. Check out the Bear Survival guide for ideas on how to deal with this displaced creature. This named mini-boss has the stats of a bear of about Level 70.
The survival crate is in a tight, congested areaTake care of the higher-level predators before the bear
Your reward for dispatching the bear is three pieces of polar bear armor, a shotgun, and a thermos of hot cocoa. There is no ammo for the shotgun, so you will have to craft your shells in the Machining Bench.
What did that poor bunny ever do to deserve this?!?
Like the other crates, you cannot complete the objective until you move all the equipment into your inventory. Afterward, the equipment you don’t want to keep can be dropped. Also remember that if you consume the hot cocoa, you can keep the thermos and move it into your envirosuit’s water slot.
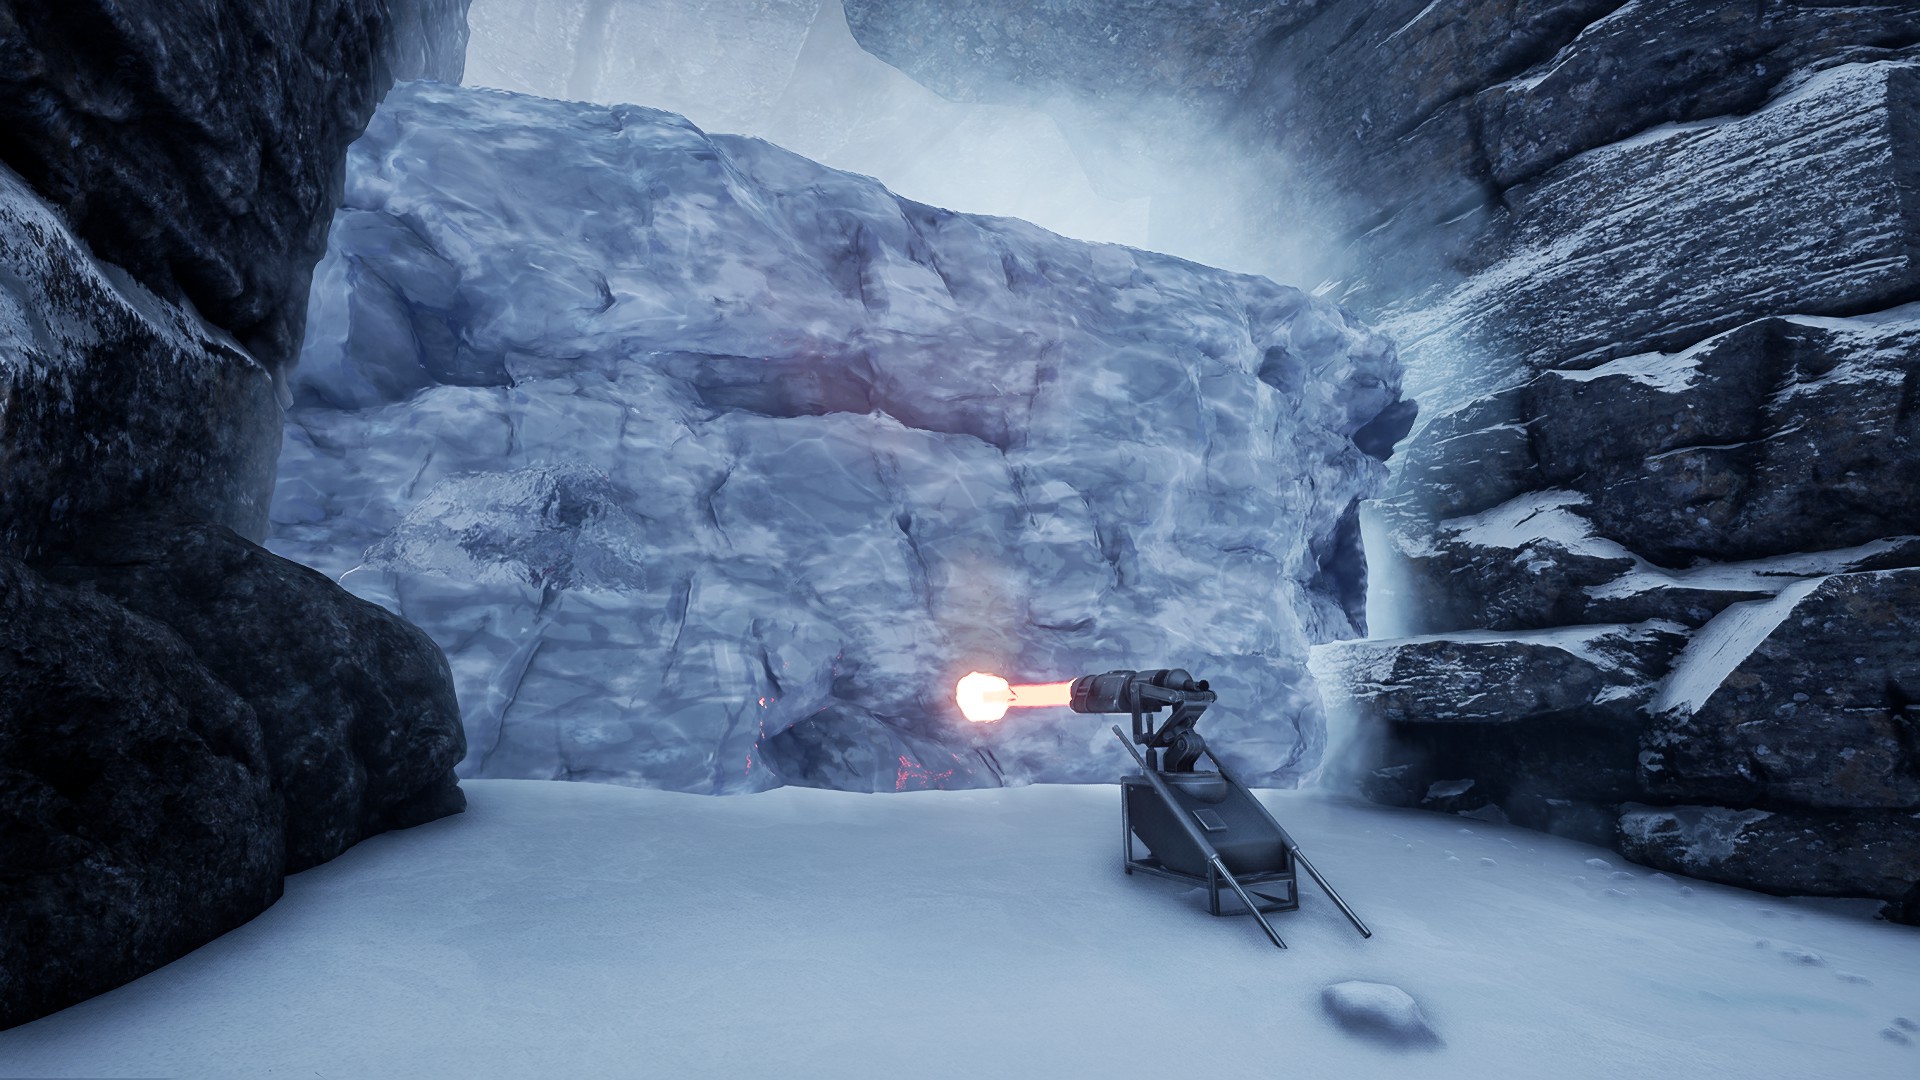
Melt the Frozen Wall
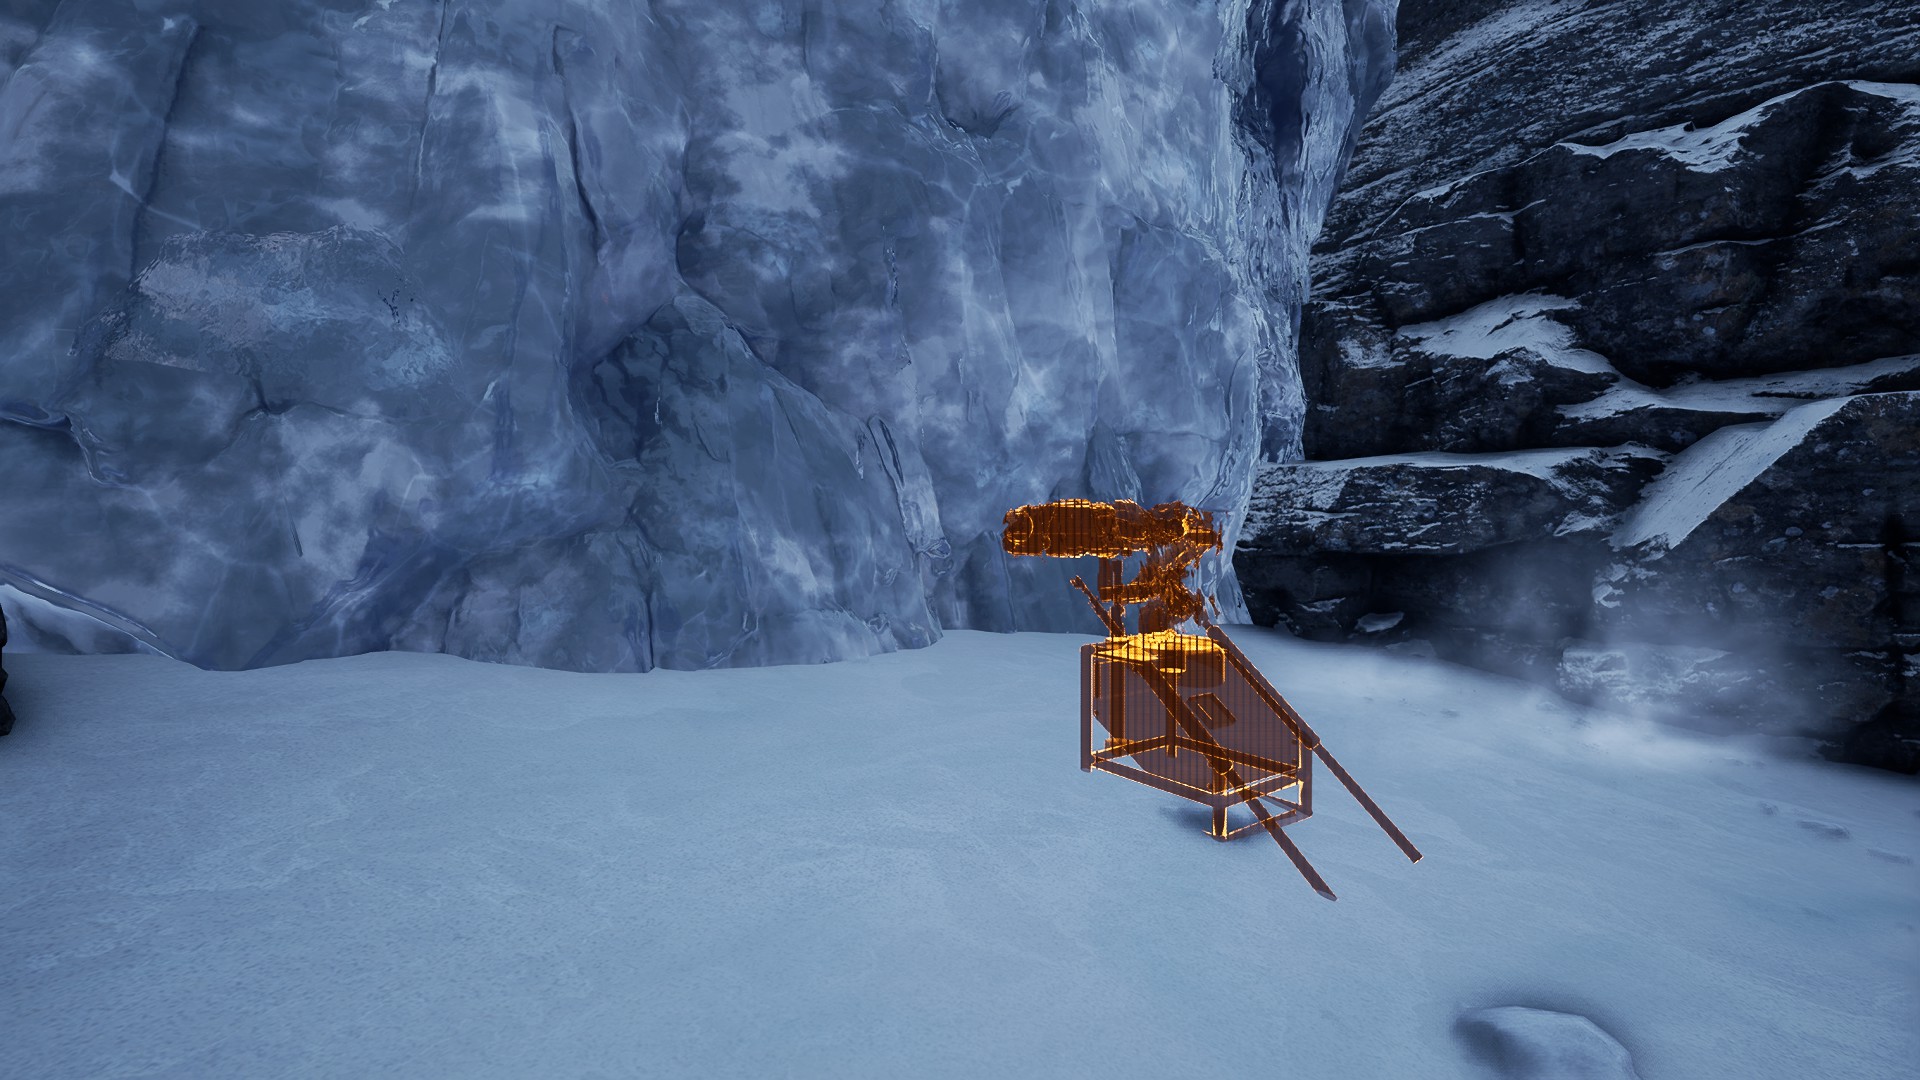
If you crafted a Biofuel Generator, set it up in a sheltered place near the Ice Wall and fuel it. If you did repair the Solar Panel, set it down in a sunny spot. A good choice is in front of the cave wall to the left of the Ice Wall. The Vapor Laser must be deployed at the hologram in front of the Ice Wall.
Vapor Laser hologram.Solar Panel and wire.Connected Vapor Laser.Activate the Vapor Laser and watch the Ice Wall melt into a puddle
Use the Electricity Tool to connect the Power Source to the Vapor Laser. (See the Electricity Guide for wiring guidance.) Once the two are connected, go up to the Vapor Laser and activate it. As soon as the Ice Wall melts, the final encounter at the Frozen Mammoth starts, so enter the cave as soon as possible.
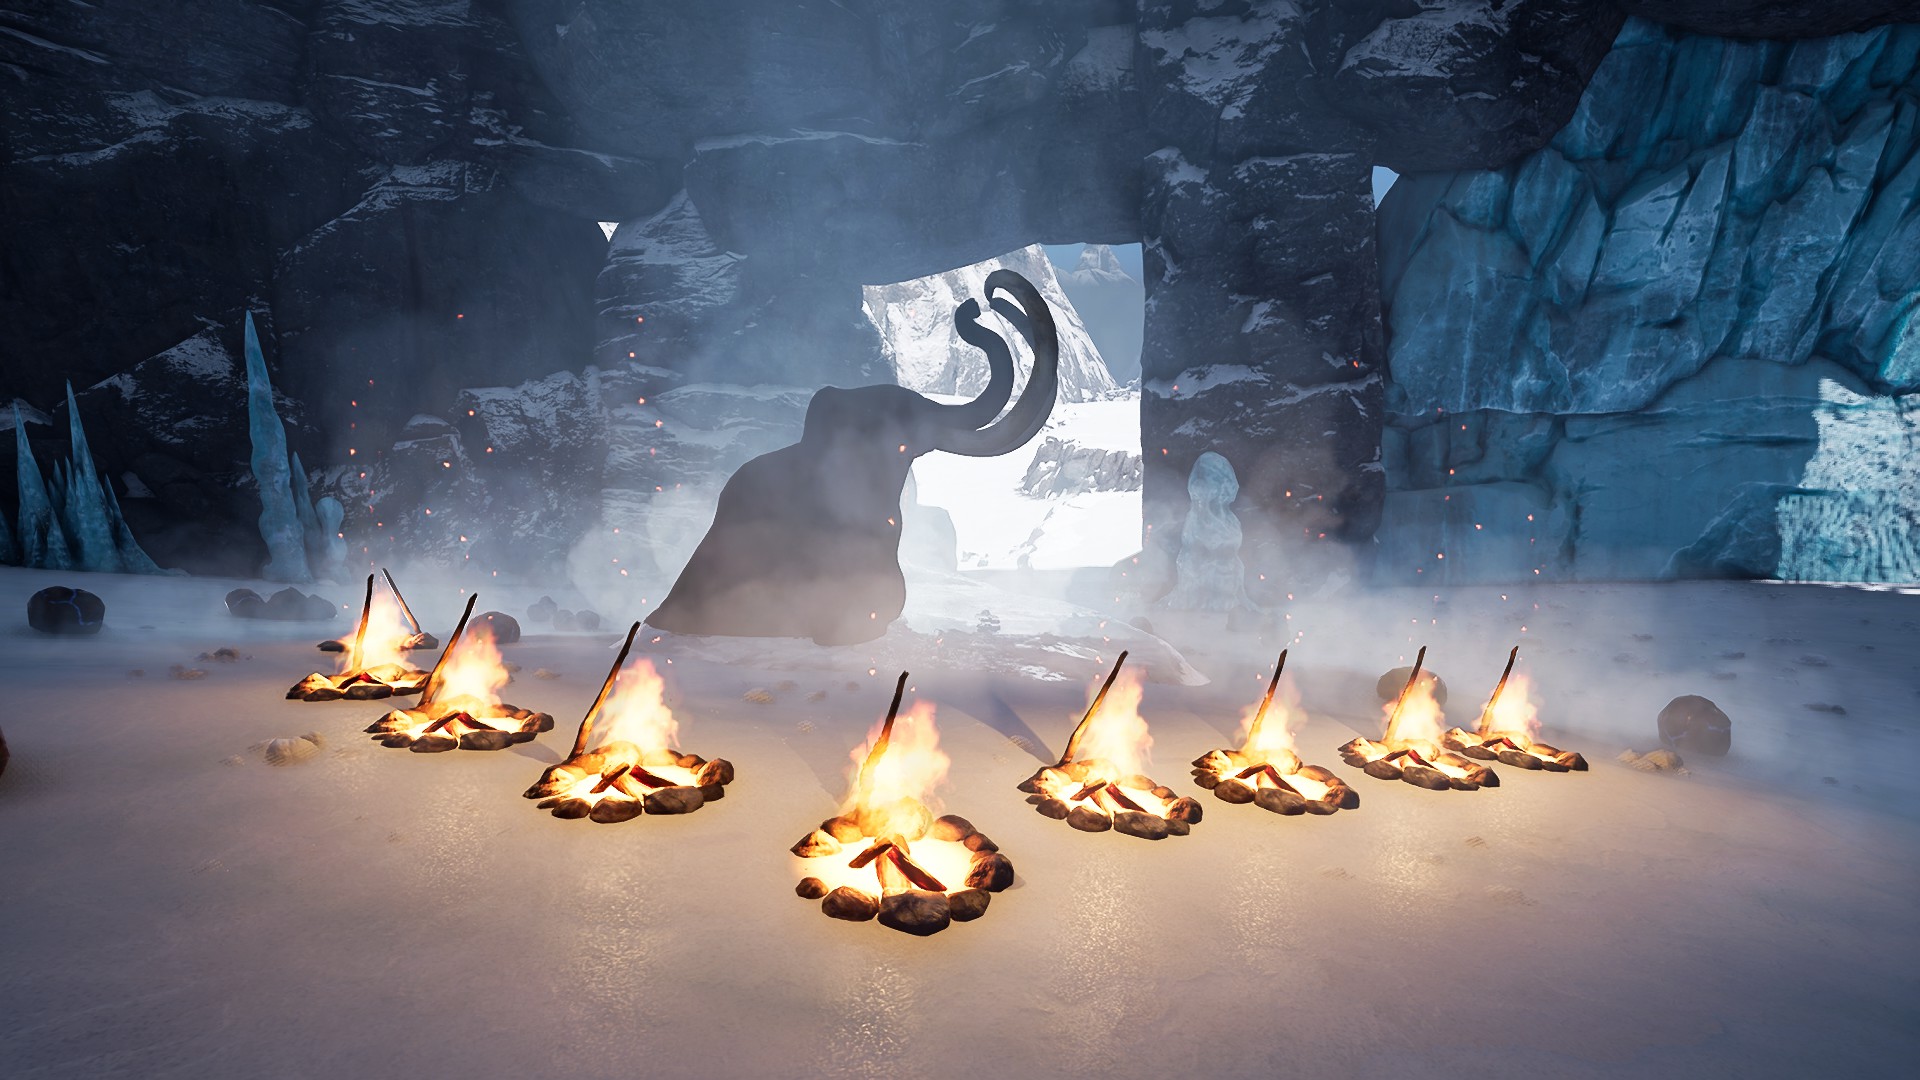
Defrost the Frozen Mammoth
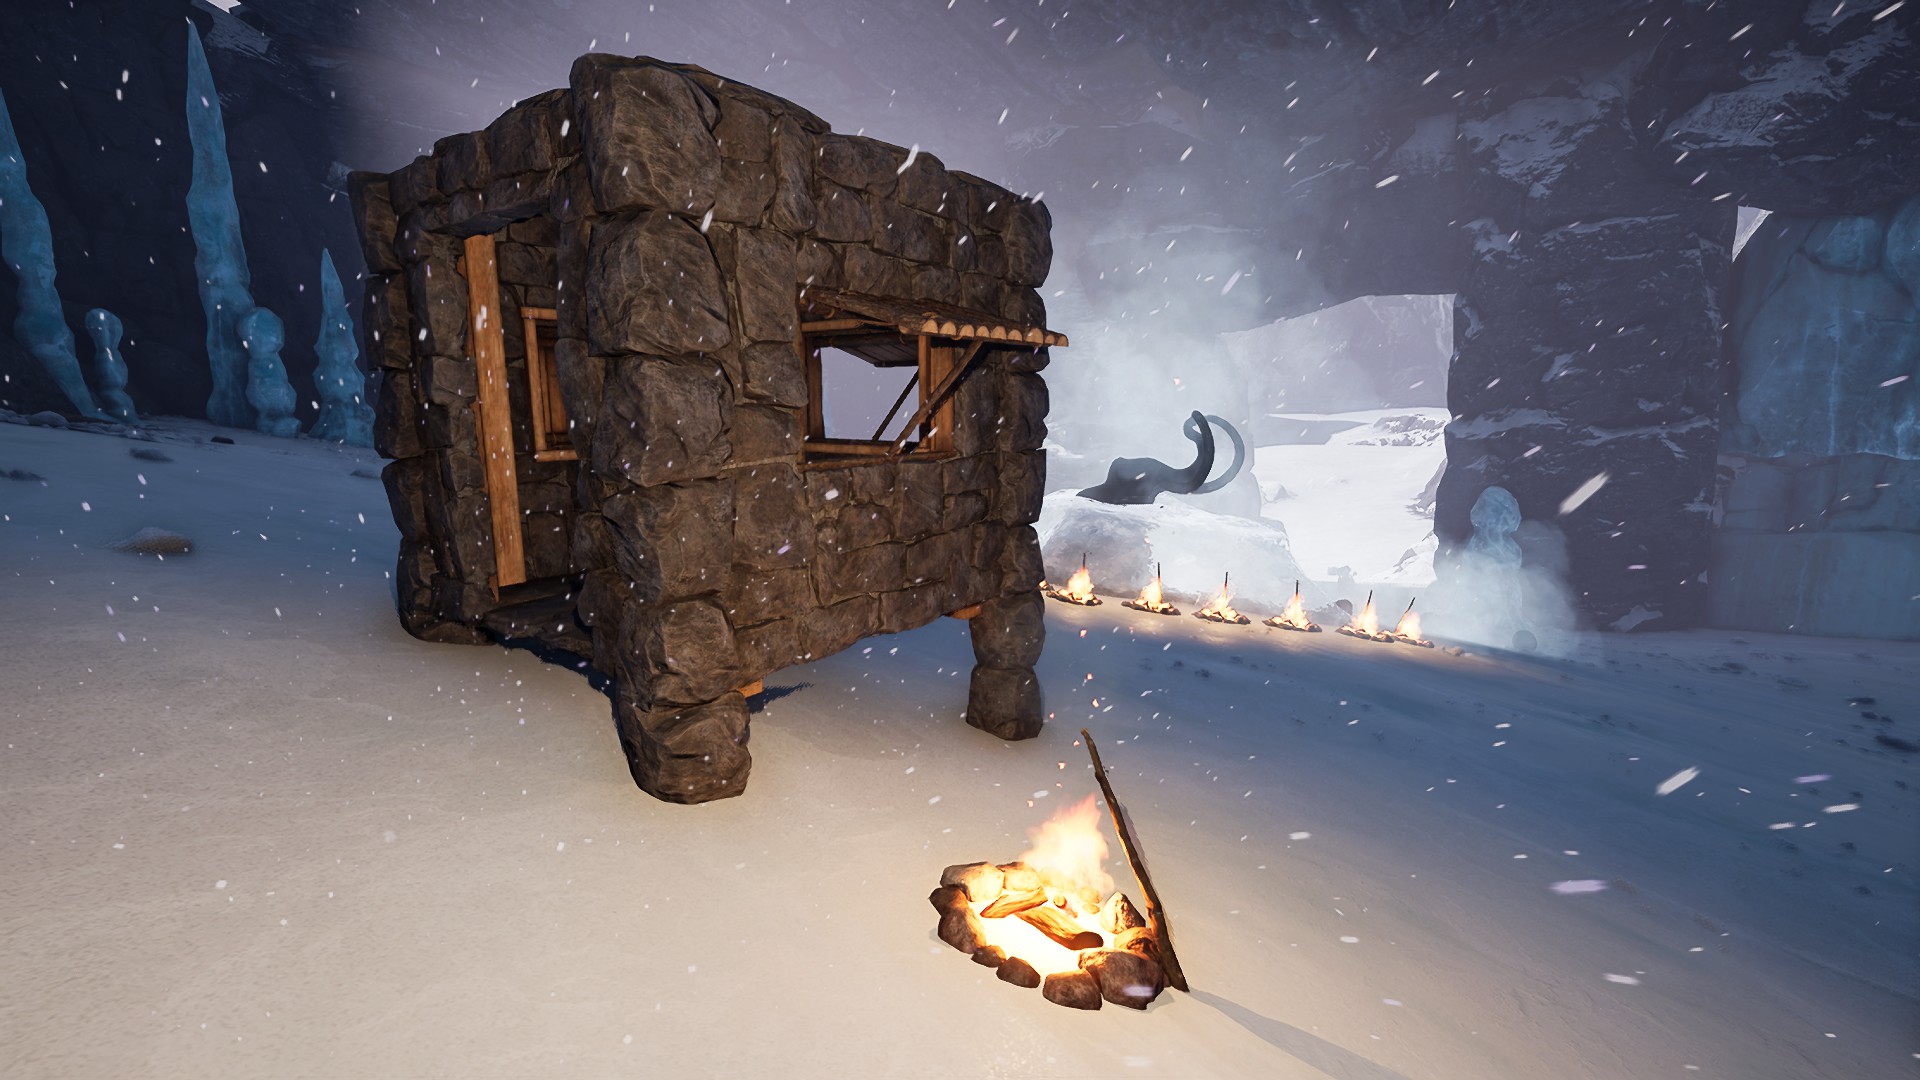
The mechanics for the Frozen Mammoth encounter are of the king-of-the-mountain variety you experienced during research missions like UNEARTHED and CARAPACE. As long as you remain in the cave with all the dangers, the mammoth will defrost. You will experience the full effect of storms while inside the cave, so consider bringing a portable shelter, as well as a campfire and bedroll to sleep through the night.
The fire at the far right marks the furthest a heat source can be placed and still accelerate melting
It takes approximately 60 minutes to melt completely, and this can be reduced to 30 minutes by placing and fueling heat sources like campfires in the vicinity of the specimen. Each heat source will increase the melting bonus by 10%, or, in other words, reduce the melting timer by 3 minutes. A maximum of 10 sources can contribute to the bonus.
The ice will continue to melt even during a storm, but more slowly. Restart the fires once it passes
To keep you company, there are about 10 Caveworm spawn points around the Frozen Mammoth. If you are in range of any of them, a Caveworm will emerge and attack. Even if you kill one, the cooldown on their respawn timer is just a few seconds, so it may reappear if you reenter its detection range. As an added bonus, Arctic predators will be drawn to the cave and detect you rapidly once they enter the mouth.
The ideal place to construct your shelter is on the other side of the Frozen Mammoth from the cave entrance. It is about 8 meters (4 squares) up the hill, but close enough that your shelter campfire can be one of the 10 helping melt the specimen. Here, there is a gap in the placement of Caveworm spawns, and most predators will leave the cave before they detect you if you are in stealth.
Stay down. As the ice melts, it provides less cover
After the Frozen Mammoth has melted approximately 10%, an Exotics-enhanced Mammoth will spawn just outside the cave and come in to attack. Remaining in the cave for this fight is not advised as your shelter and campfires might get destroyed, so kite the angry beast outside as soon as possible.
This fight can be avoided. But, if you choose to kill it, check out our walkthrough for the extermination mission CLEAN UP for tips to take down this type of a boss. If not, lead the Mammoth far enough away, so that when you double-back to restart the melting process you will lose its aggro.
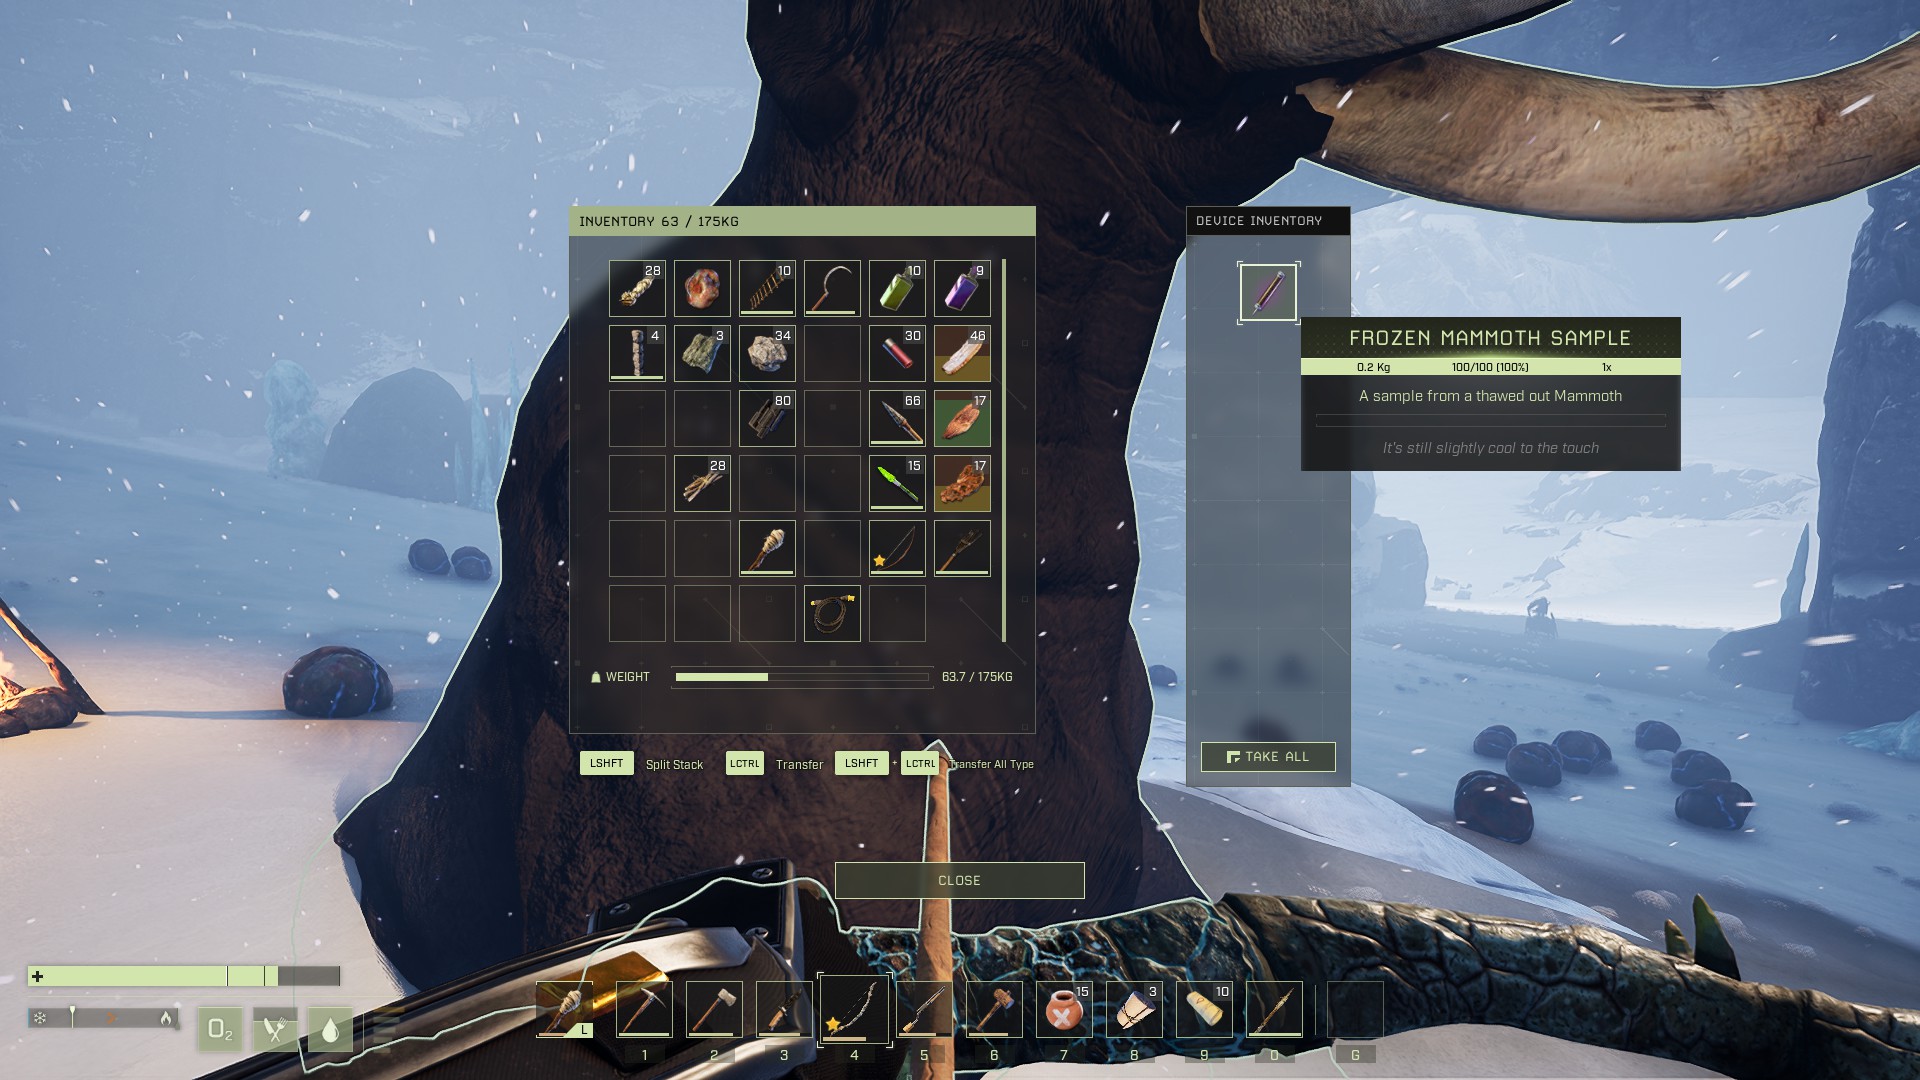
Finishing the Mission
At last! The ice gives up its charge. Take it back to the dropship and claim the reward
Once the ice has melted, run down to the Mammoth carcass and check its inventory. The (no longer) Frozen Mammoth Sample will be there to remove. Once you take the sample, pick up the other 5 Mammoth Samples if you stashed them in your base and return to your Dropship to return to the station. Sol doesn’t have much confidence that you are going to return alive, but if you made it this far, then the trip back is a victory lap. Just don’t push too fast through the Arctic-Forest transition zone, as meandering predators tend to congregate there.
Hope you enjoyed this walkthrough and the mission! Let us know how you liked it and, if you have any question or corrections, share them in the comment box below. Then, go spend those well-earned mission rewards and get back to prospecting!
Share this article:
SurvivalSherpa
SurvivalSherpa is an avid gamer spending most of his time at the nexus of the survival, crafting, building, and role playing genres on any platform, especially to test indie titles in EA. AFK, life is about work and education in STEM fields, reading fantasy, and sipping great coffee in the Pacific Northwest.