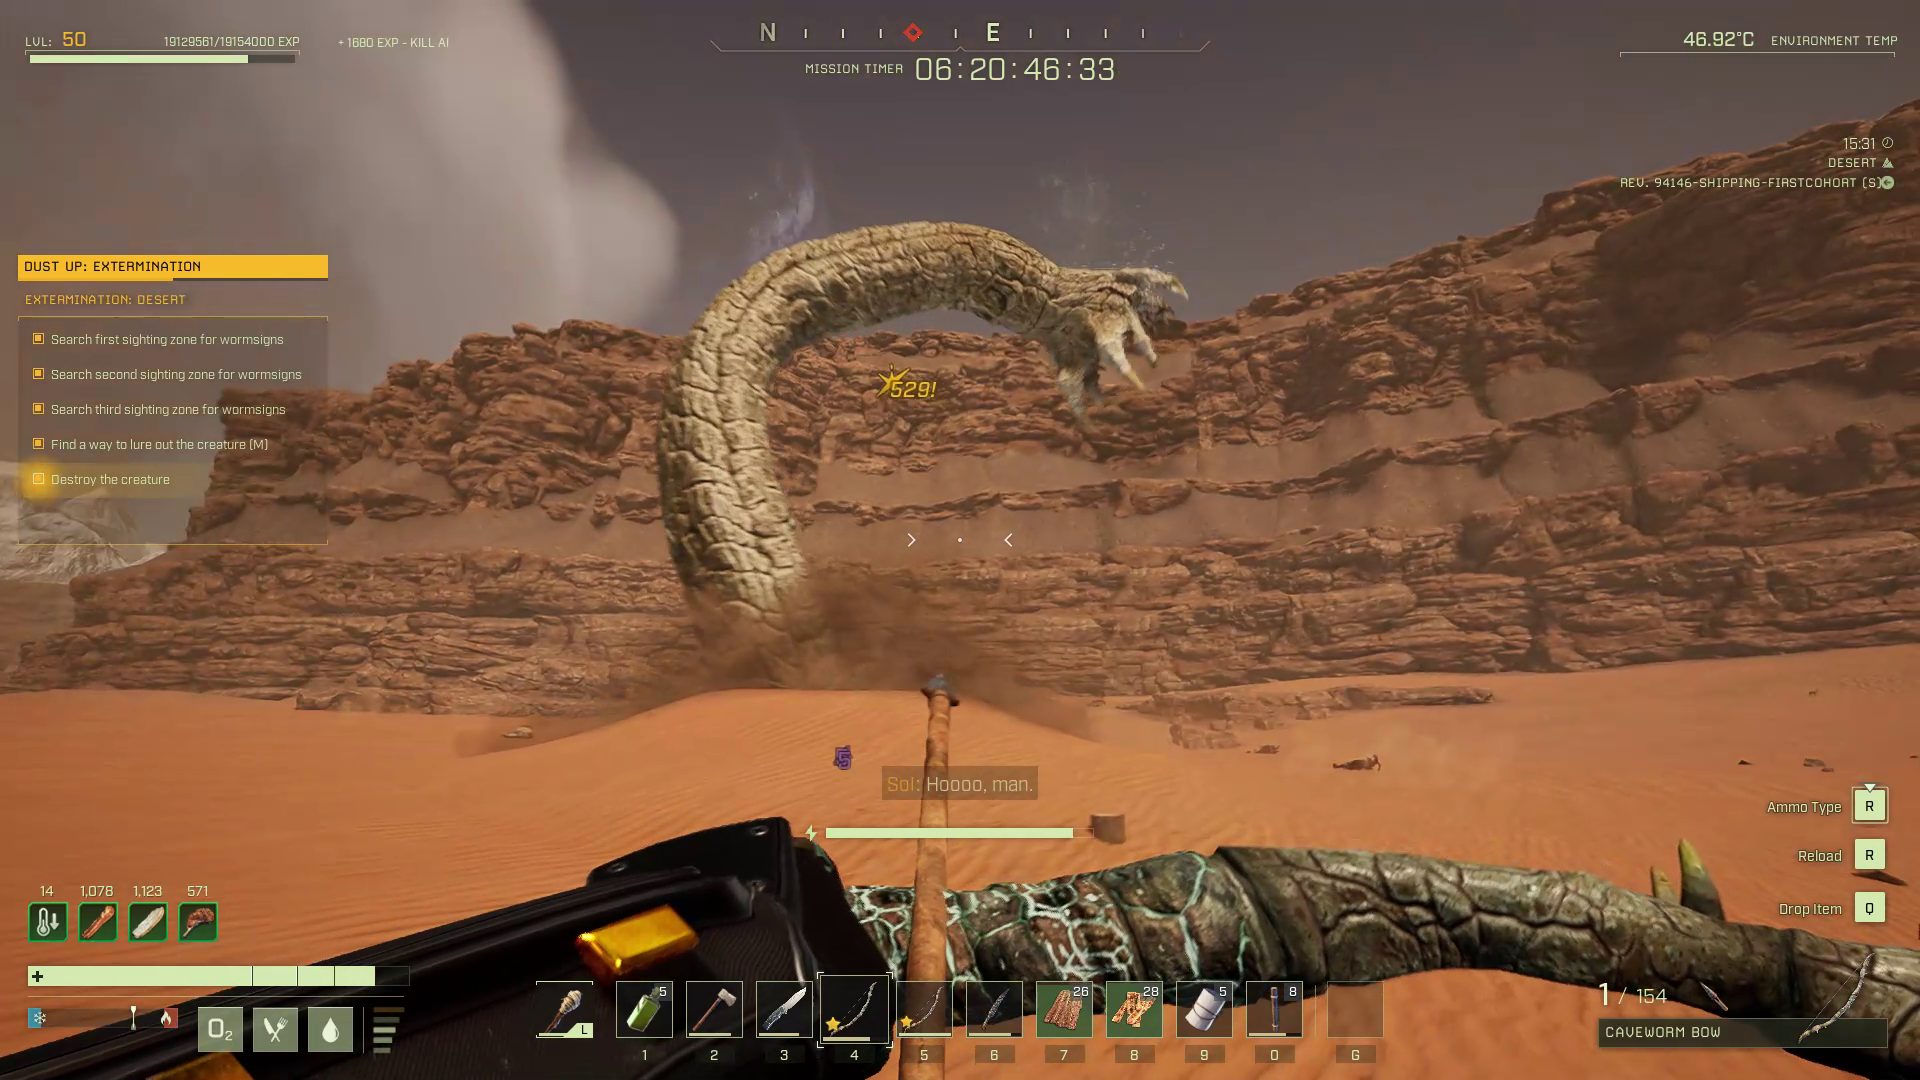
It is finally time to track down the Sandworm that you encountered while opening up the Desert region in the mission EL CAMINO: Expedition. In DUST UP, you will follow the destruction left by the Sandworm until you stumble upon its position beneath the sand. Slay this overgrown poison sprinkler and you can make some quick Ren when you return to orbit!
The battle with the Sandworm can be finished fairly quickly if you make the right preparations and know how it moves and attacks. Check out the mission intelligence and battle tips in this walkthrough so you can find what lies beneath the sand before it finds you.
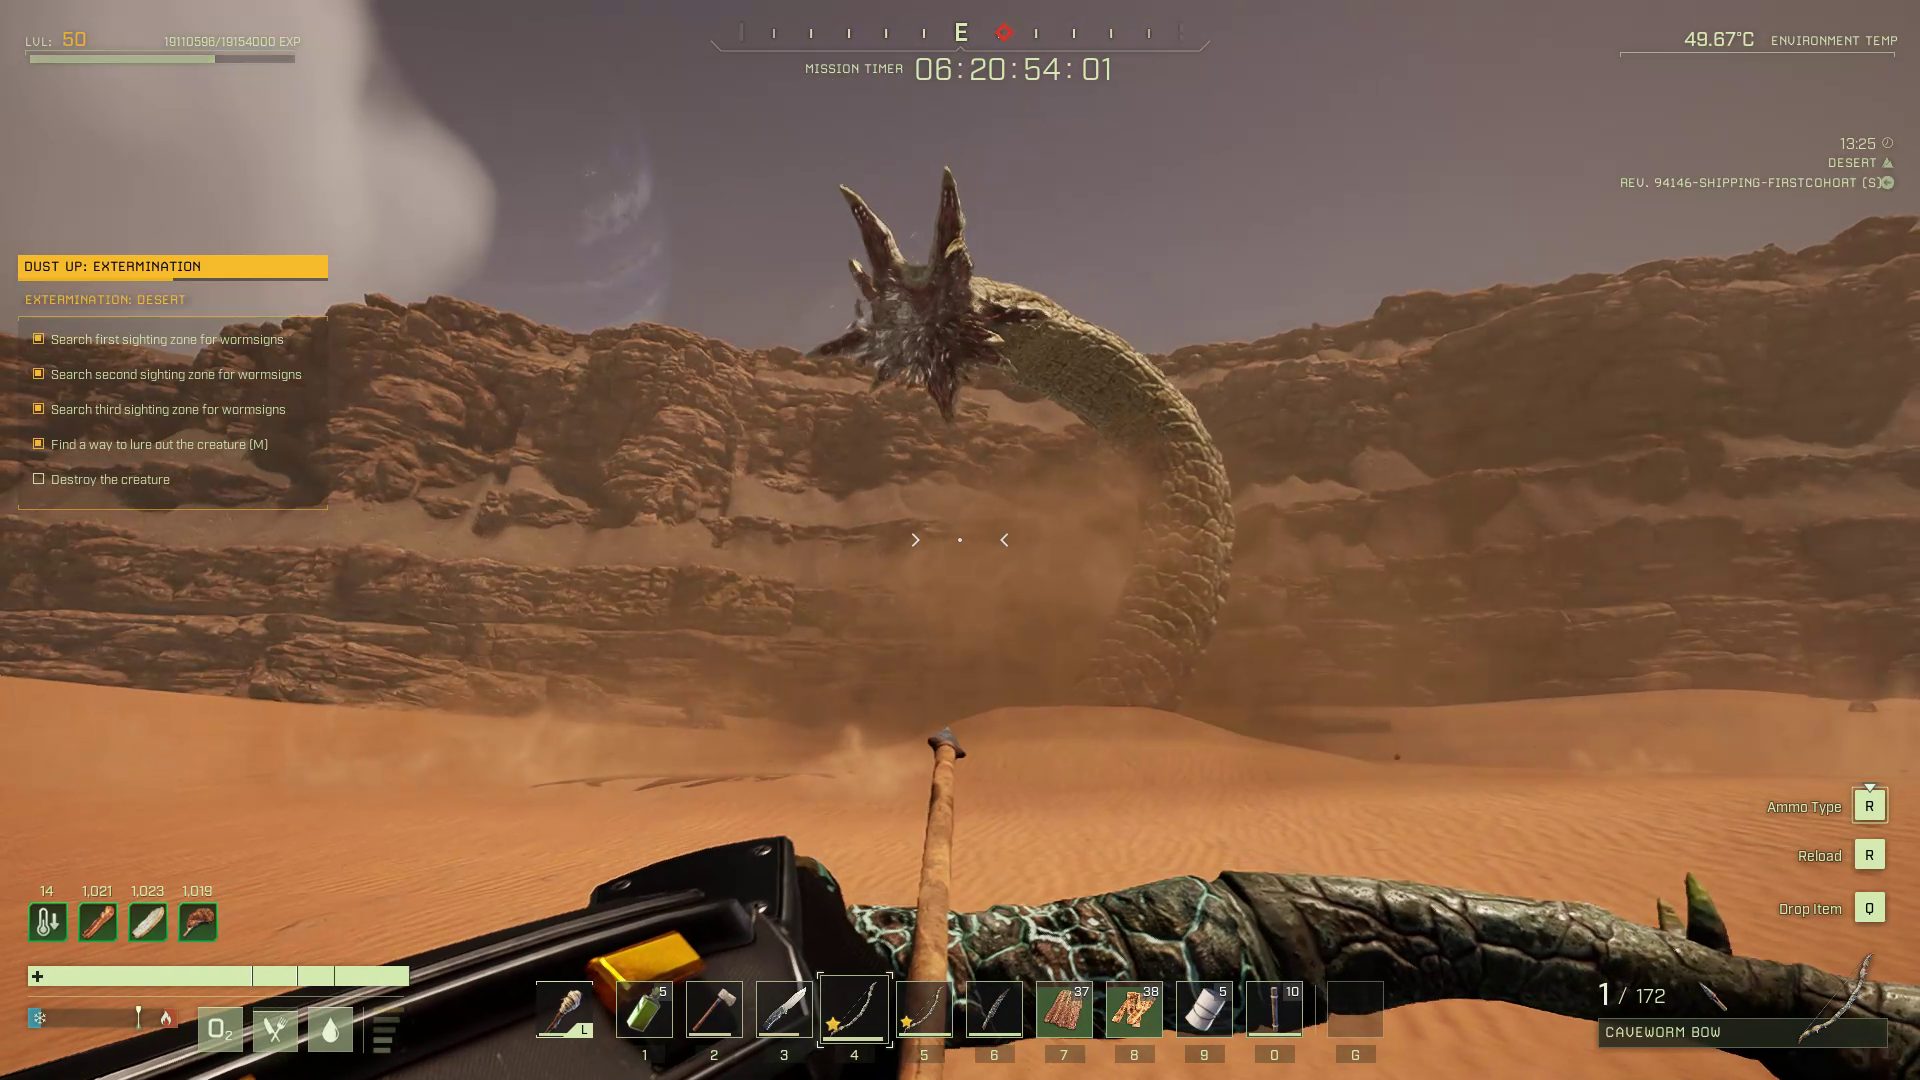
Behavior: It will spontaneously disappear and reemerge in a random nearby location. If a target prospector is within melee range, it will prefer melee attacks. Otherwise, it will use ranged poison attacks. Typically, three melee attacks will be followed by an Enraged Bite: a scream/roar followed by a bite and a rest period during which the mouth is open and vulnerable to melee attacks.
Notes:
After being baited, if all prospectors leave the area, the Sandworm will submerge and then reemerge when a prospector returns — until the Sandworm is killed.
The Sandworm carcass cannot be damaged, skinned, or mounted. (Sadness.)
During an Enraged Bite, prospectors can leave the melee range and the Sandworm will still commit to the bite, followed by the vulnerable rest period.
The trunk and mouth (when closed) can be attacked at any time, but for less damage.
The Poison attacks do base damage and impart a weak, single stack of poison.
The Bite attacks are lunges and can cause multiple hits on the same prospector (enough for a one-shot kill in the worst cases).
All Bite attacks commit to a target location at the start of the animation: they don’t track the target prospector after the animation starts.
The Sandworm can deal massive damage with multiple simultaneous hitsConcentric rings in the sand show you were the Sandworm will reemerge
Preparing for DUST UP
The preparations for DUST UP are similar to how you would prepare for any Desert Biome mission, just to a greater degree. The Sandworm has strong melee attacks, and the battlefield is in the open, where at least a few predators are likely to enter the fray. Instead of Cloth Armor, consider Naneo or better.
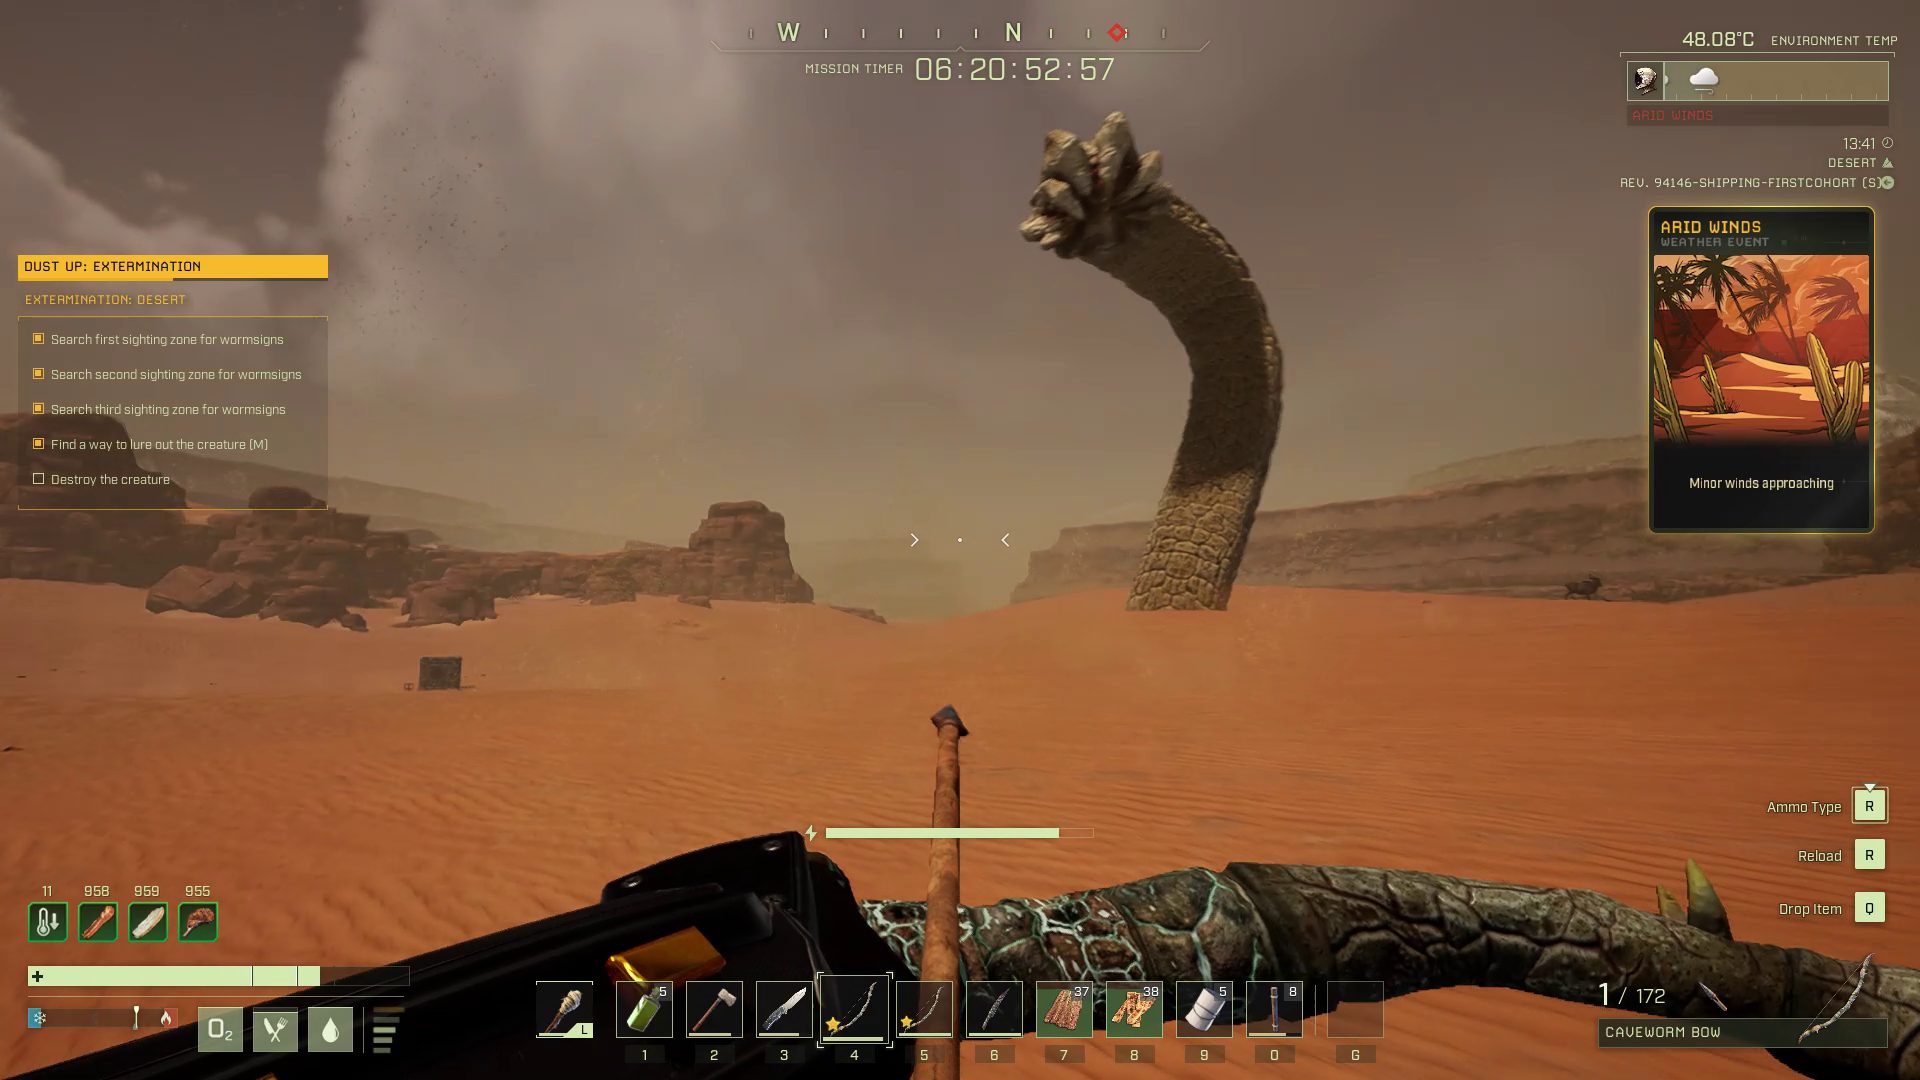
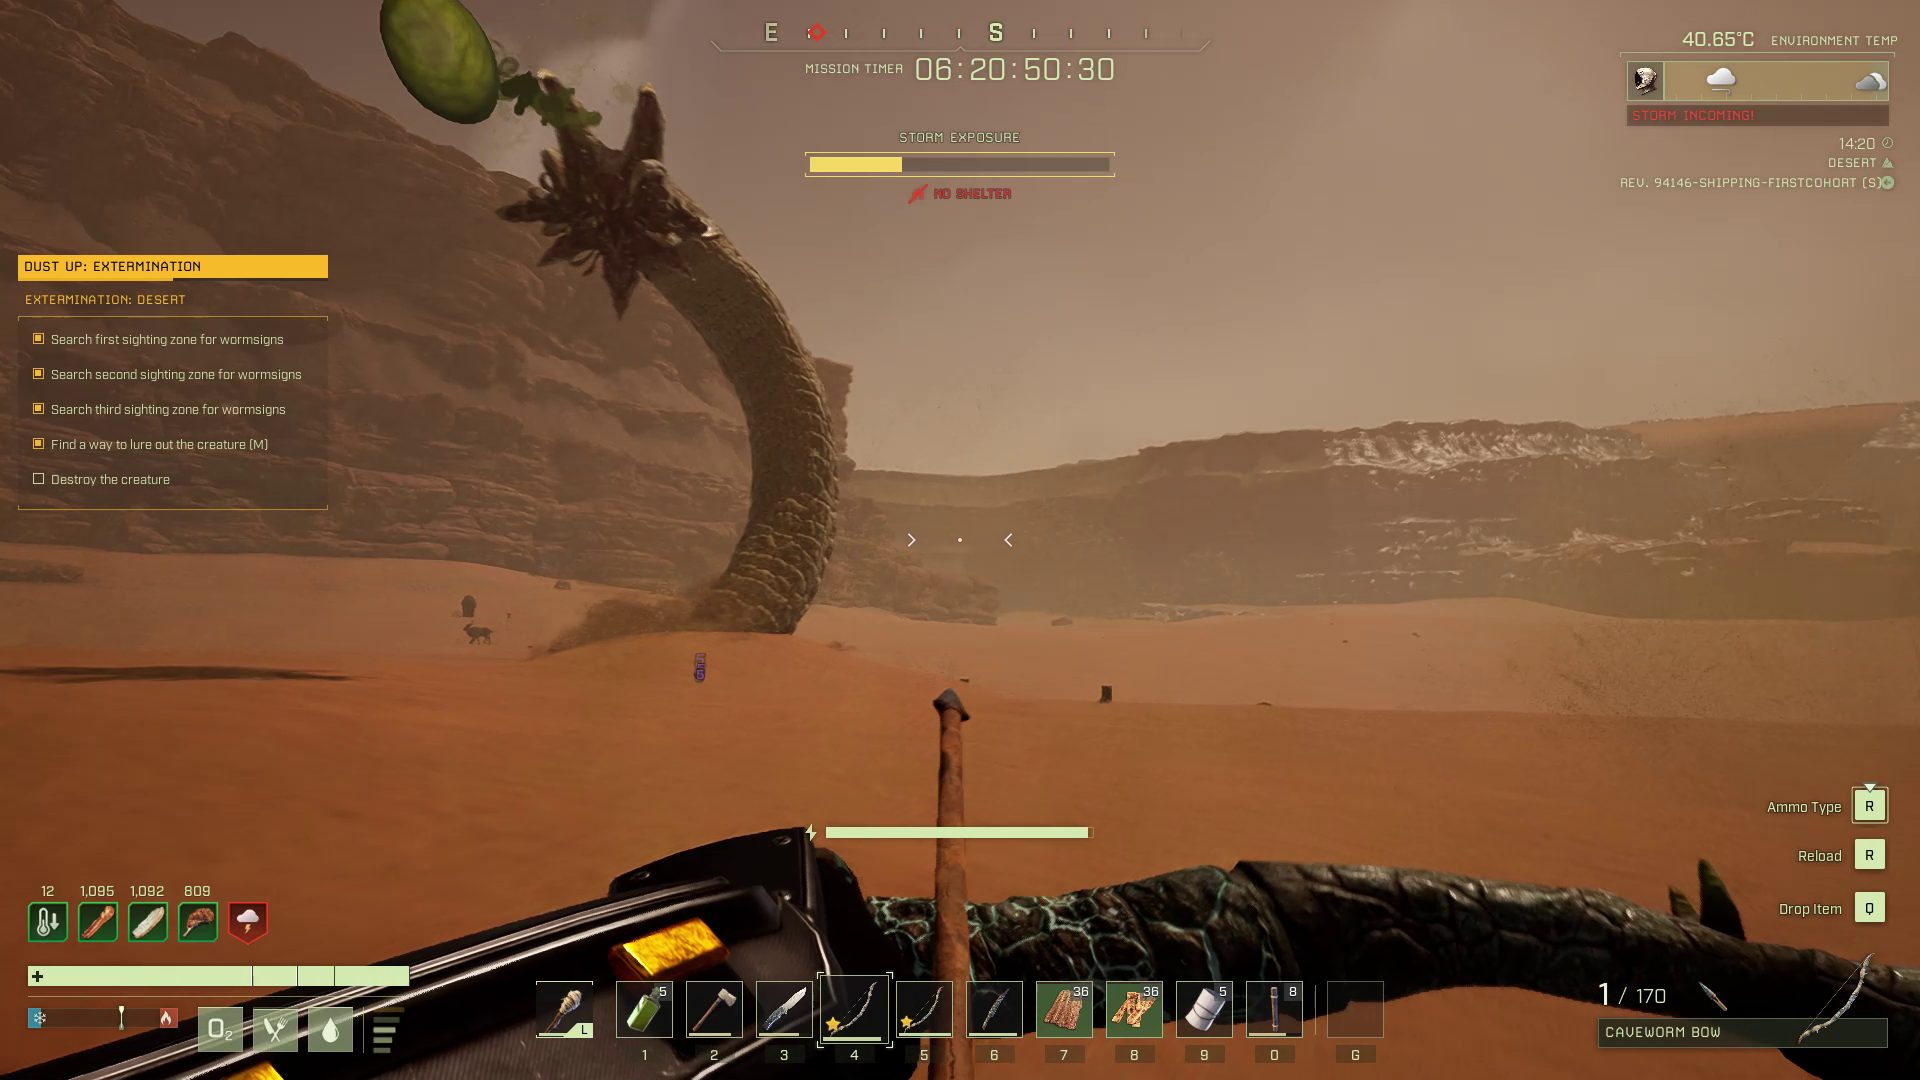
The Sandworm encounter takes place far from any shelter. If the fight drags on, you likely will encounter desert storms. Consider bringing a portable shelter in case you need to take cover, sleep, or respawn.
Keep the shelter far enough from the action that the Sandworm will submerge when you run for cover
Compared to scorpions, the Sandworm’s poison is mild. If you stay within its melee range, you won’t have to worry much about it. However, if you plan on staying out of the melee range of the Sandworm, you likely will get hit with poison several times. Anti-Poison Paste or Anti-Poison Pills will help, as well as the Detoxifier Module, which increases poison resistance.
While you should keep moving during the fight, you don’t need a lot of stamina as the Sandworm is most often rooted to one point. On the other hand, its Bites are potentially catastrophic, so food that increases health might be best.
Any weapon can take down the Sandworm, but you still have to travel through the Riverlands, Desert, and the Transition Zone. You can defeat the Sandworm readily with just a knife if you are bold enough to stay within its melee range and proc its Enraged Bite. A spear will also work, but the DPS might be lower. Regardless of where you fight from, there are frequent opportunities for regular and critical ranged attacks, so any ranged weapon would do as well. Backup weapons and ammo are a good idea in any case.
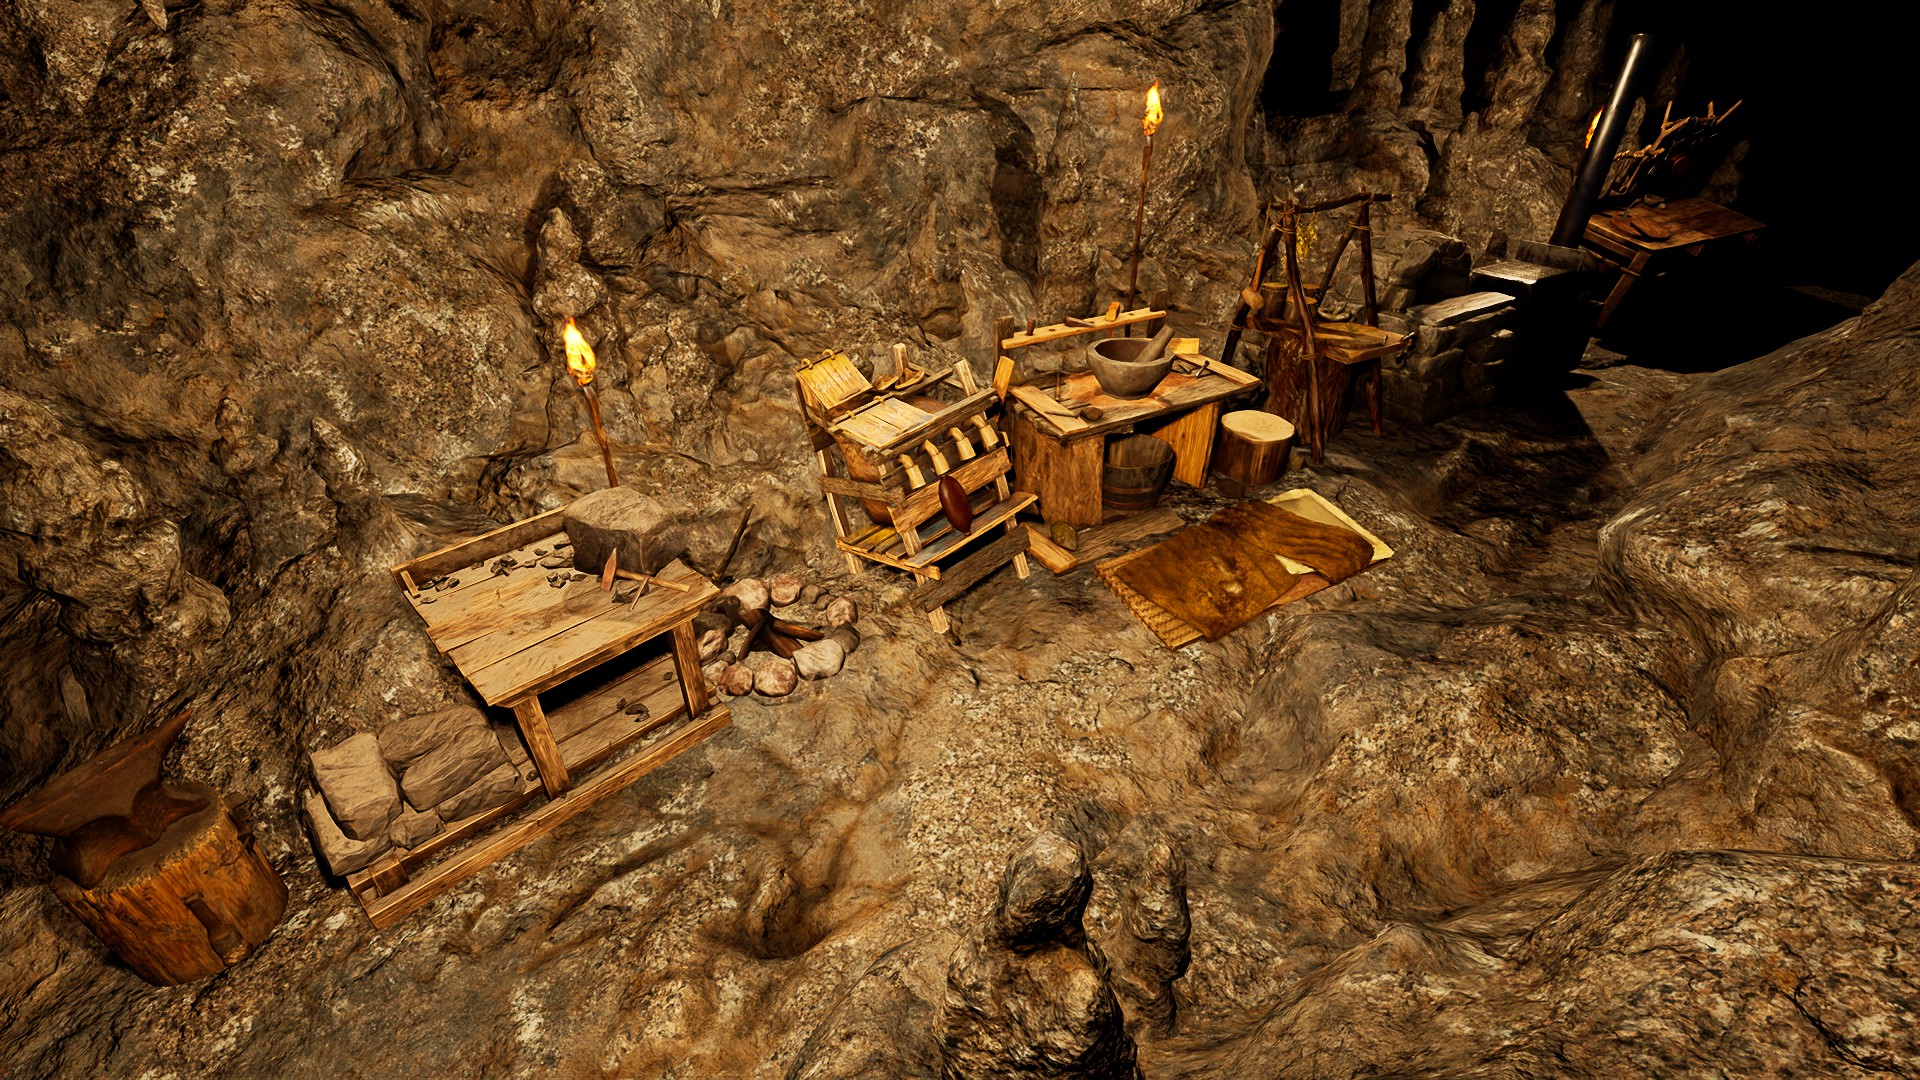
The Dropsite is near a large cave in the southern Riverlands, so there is no shortage of resources, ore, and game to put together a sufficient loadout before entering the desert. If you stick to cooked meats for healing, you can enter the Desert sooner, especially if you bring workshop equipment to get through the Transition Zone.
This cave below the ridge may provide all the ore you will needTier 2 tech is sufficient for equipment and supplies, but you can always go further
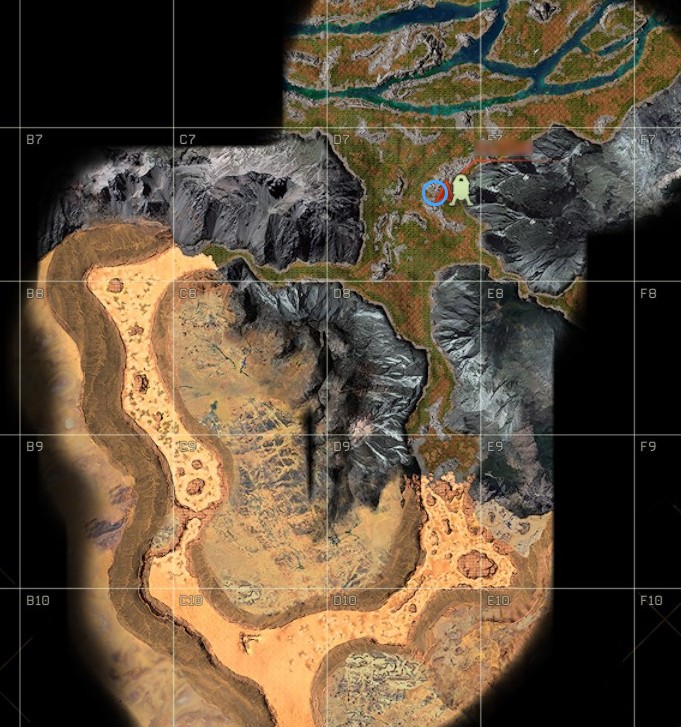
Once you have your loadout settled, head through the west Transition Zone toward B8 to find the start of the Sandworm’s trail.
Tracking the Sandworm
Evidence of the Sandworm’s passage had been left in three places throughout the Desert region. The first stop is a massive dark gouge the beast left in the sand. This is followed by a boulder the Sandworm spit a poison-laced hole through. The final site is a gruesome decaying elephant carcass on the northeast side of an oasis.
Site 1: The GougeSite 2: The BoulderSite 3: The ElephantThe map at the beginning of this guide shows locations of these three sites
At each location, you need to approach the object to get the mission to tell you to investigate. Then, you have to interact with the object to get the mission to advance to the next site. After the third site, you will be given the location of the Sandworm’s final location in D13.
Before you leave, the oasis in D12 is a great place to resupply. If you did not bring a portable shelter, the cave on the south side of the pond is a decent spot to deploy your bedroll and campfire and set your respawn point.
Baiting the Sandworm
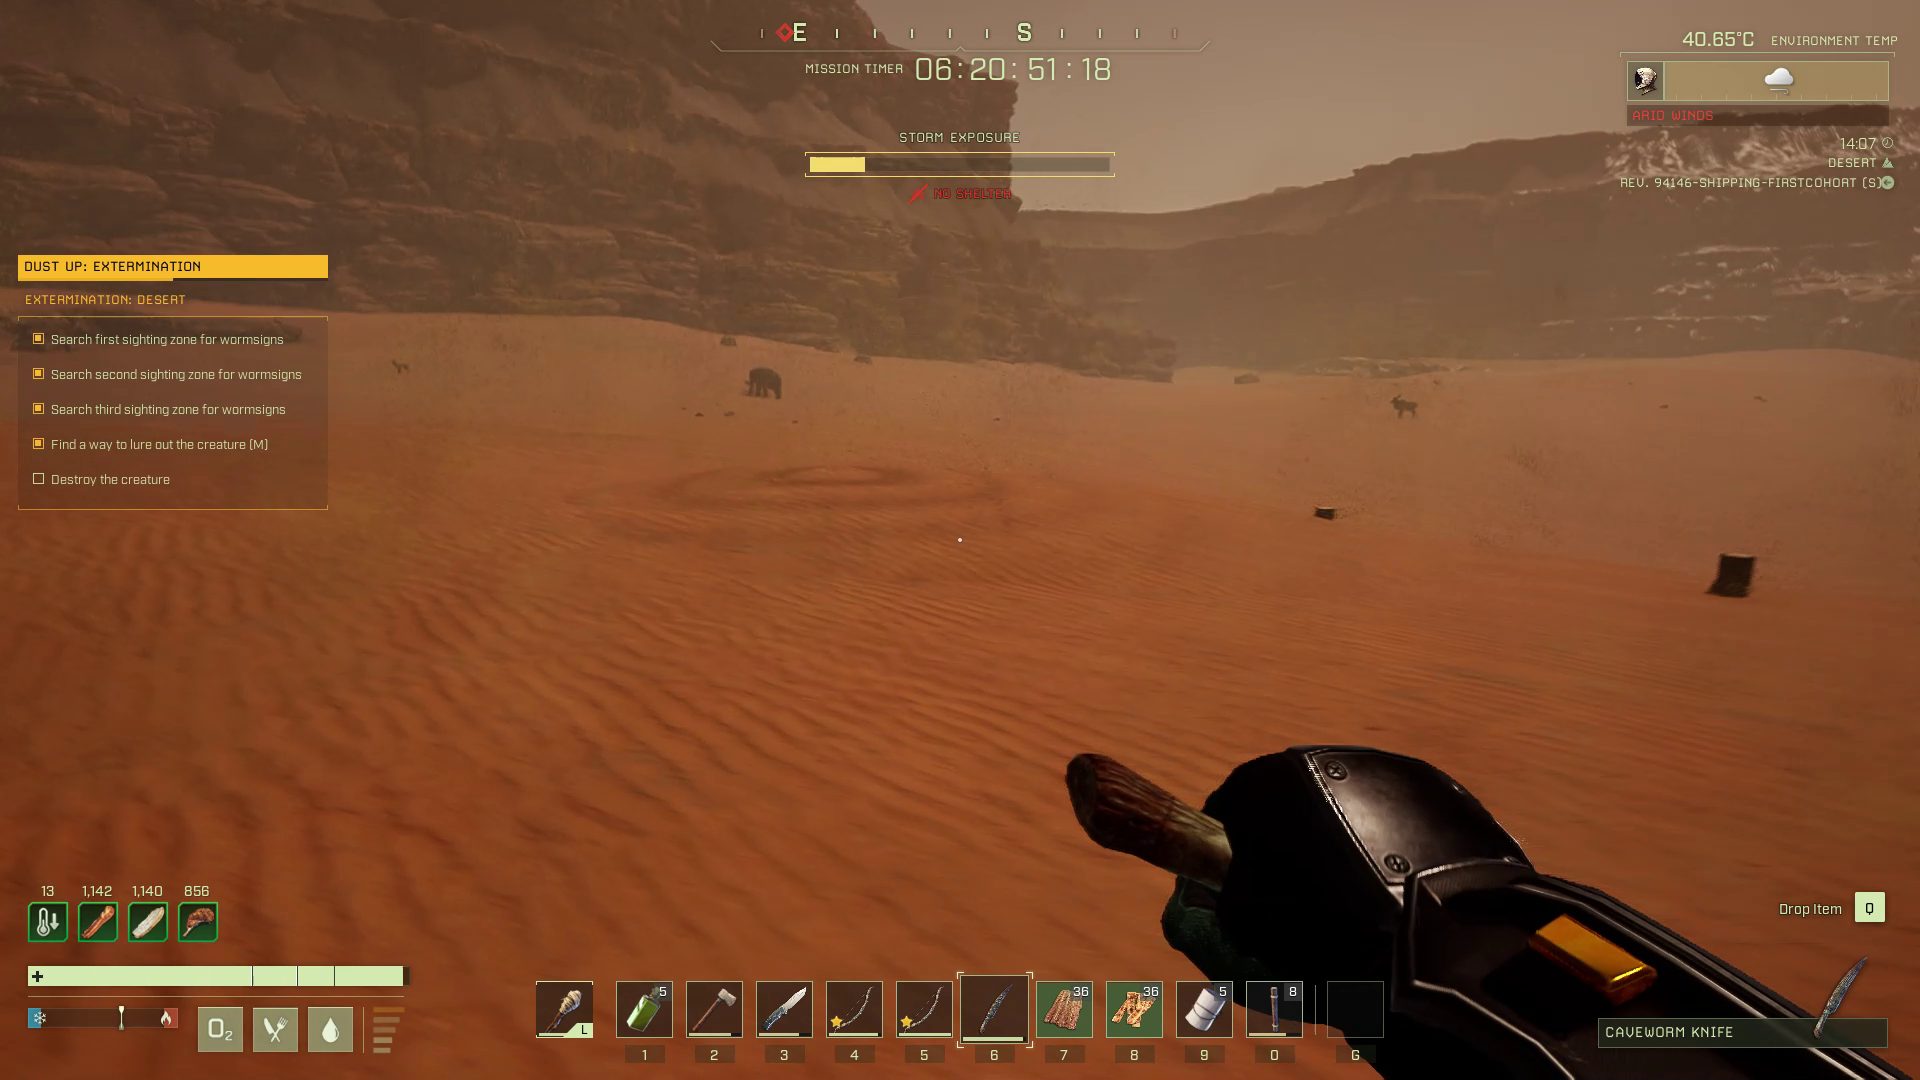
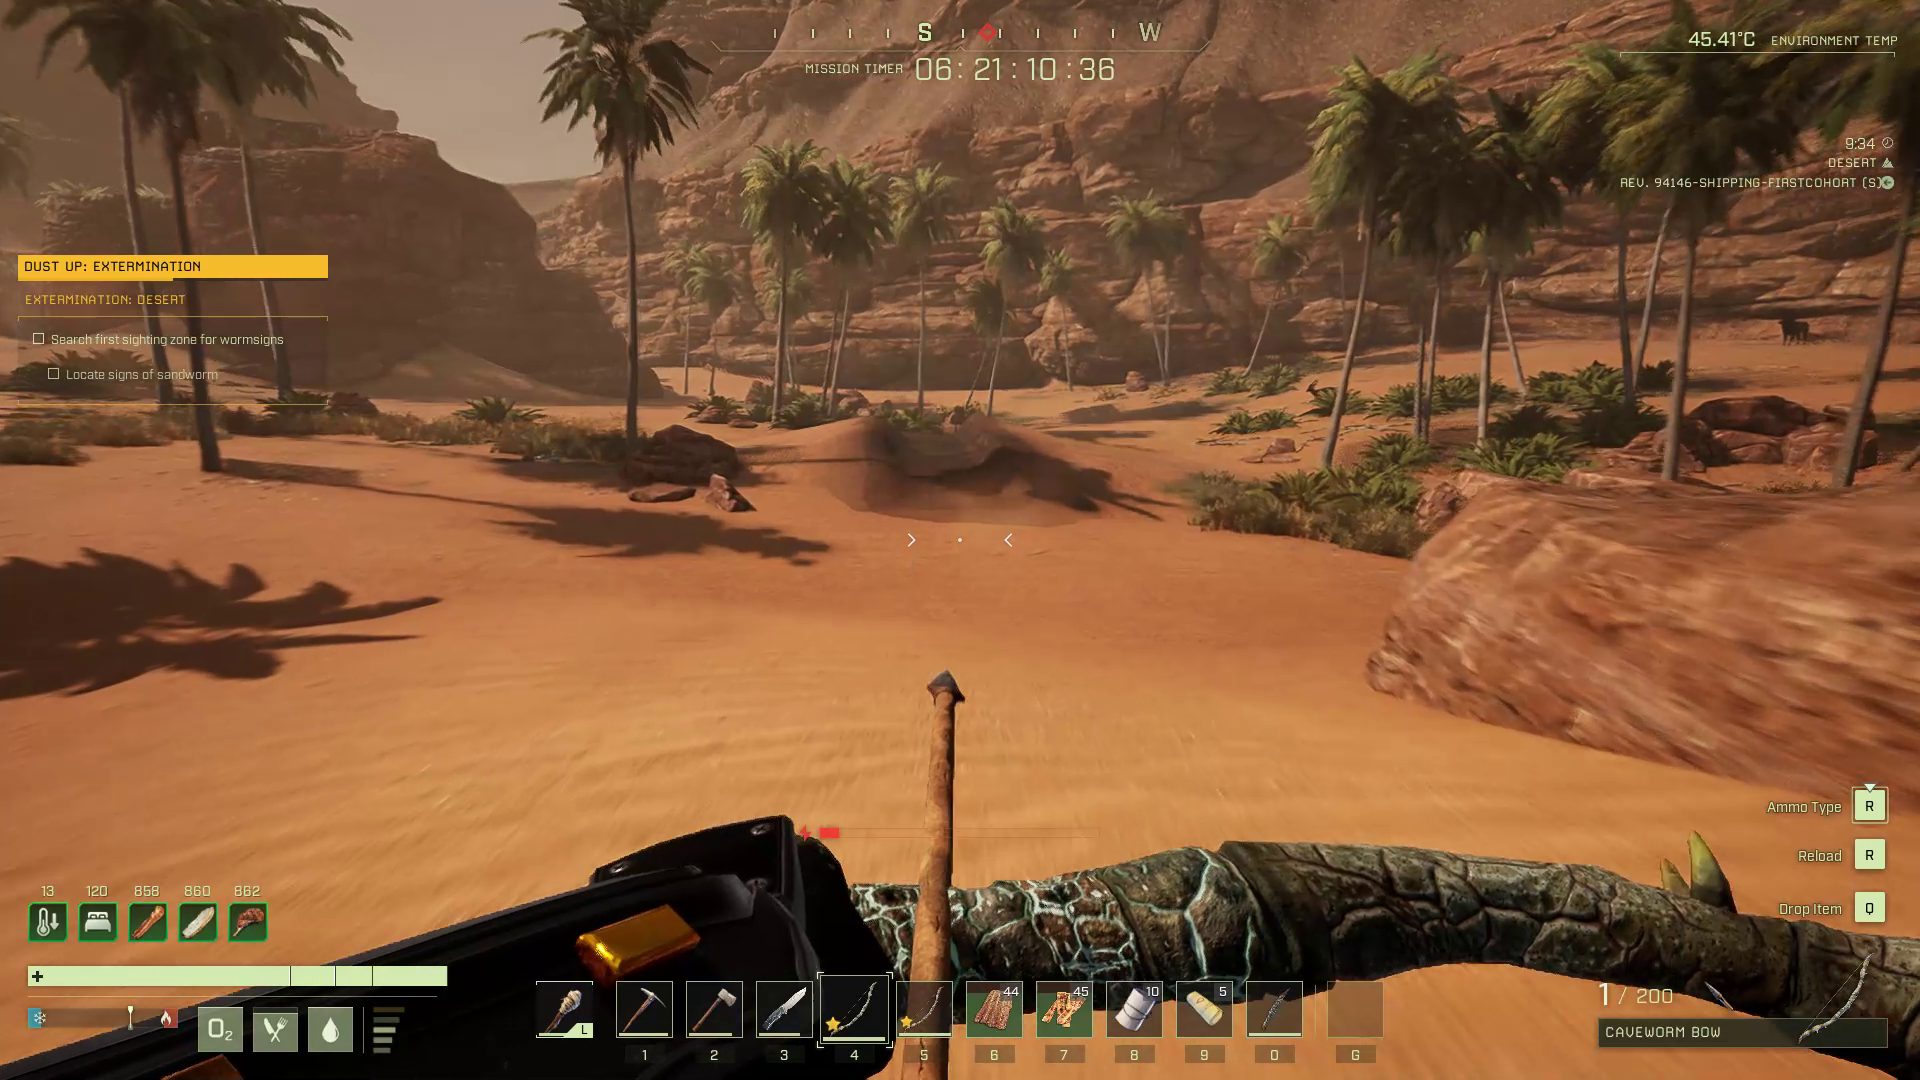
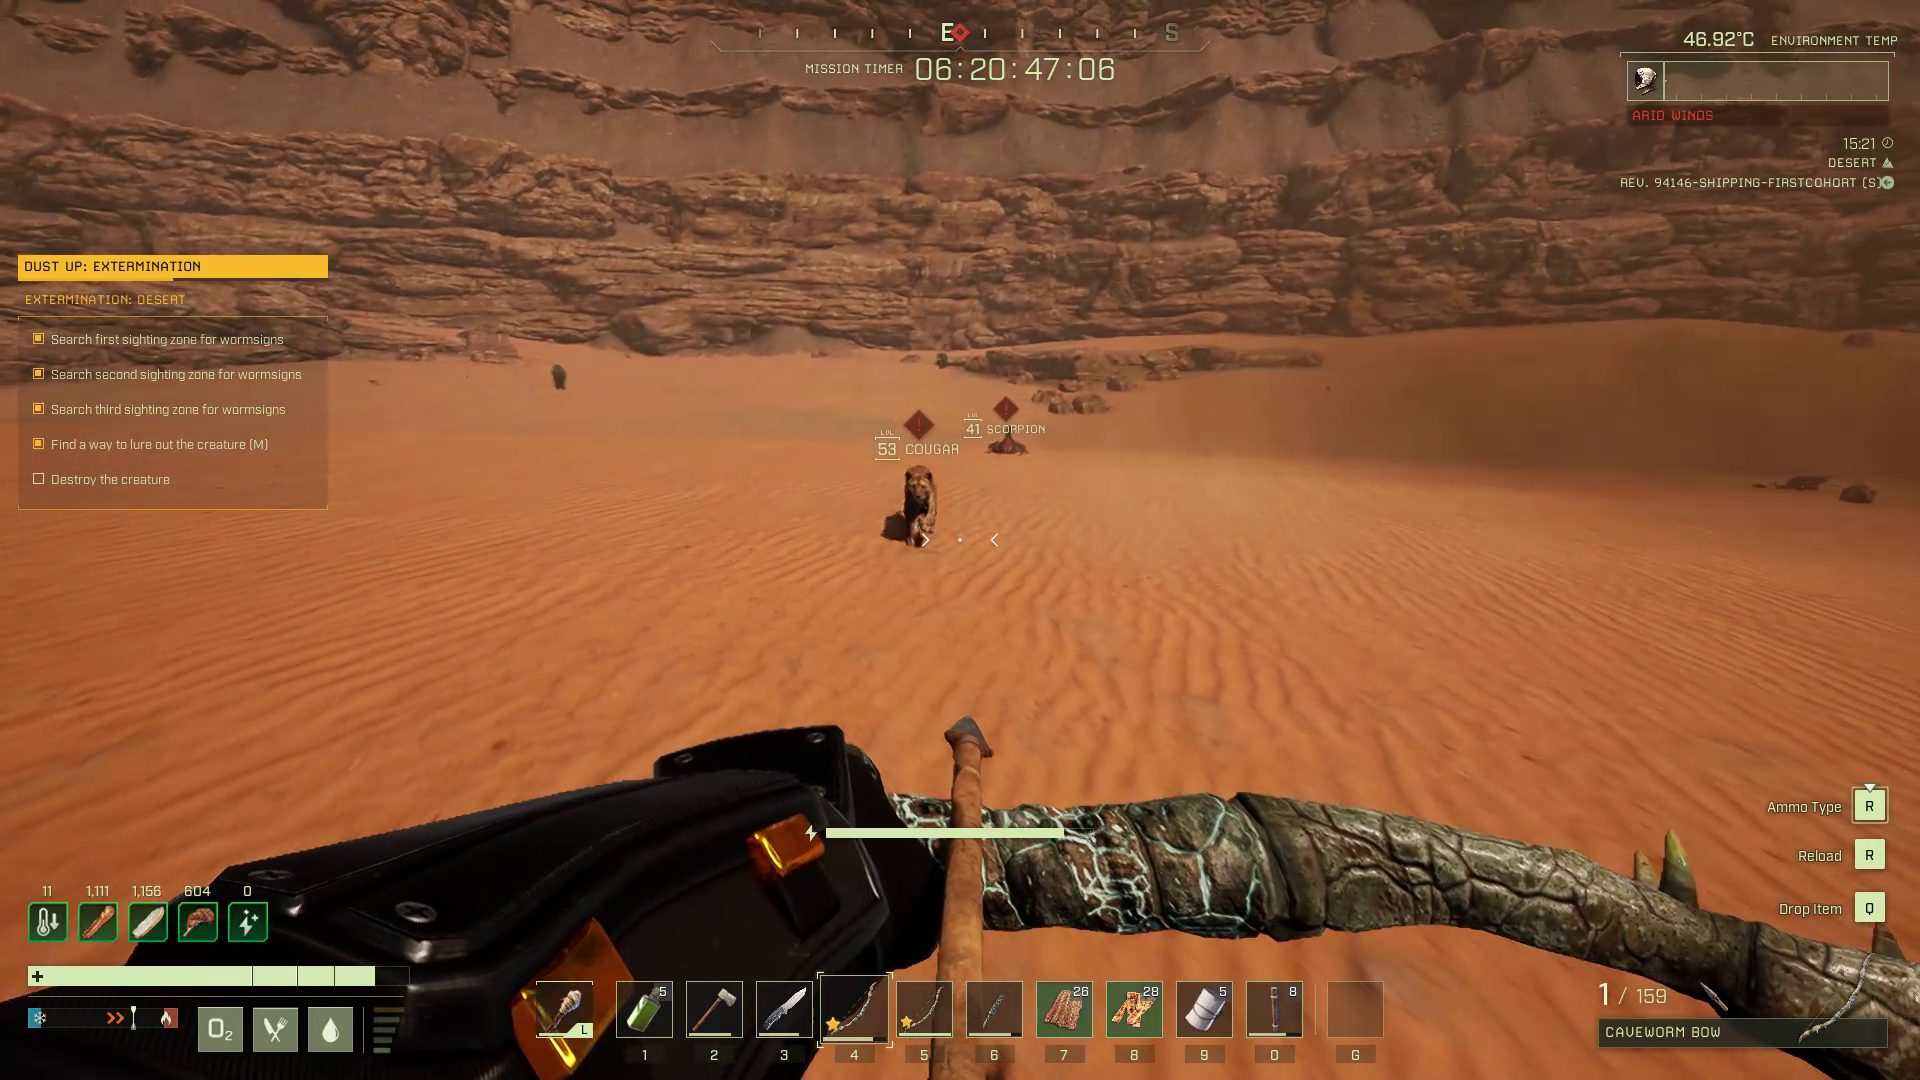
Once you arrive at the Sandworm’s location marked on your map, you will see a dusty, undulating circle of sand. Apparently, the Sandworm is lying in wait for some animal prey.
Beneath the dusty, undulating sand the giant Sandworm awaits the offering of an animal carcass
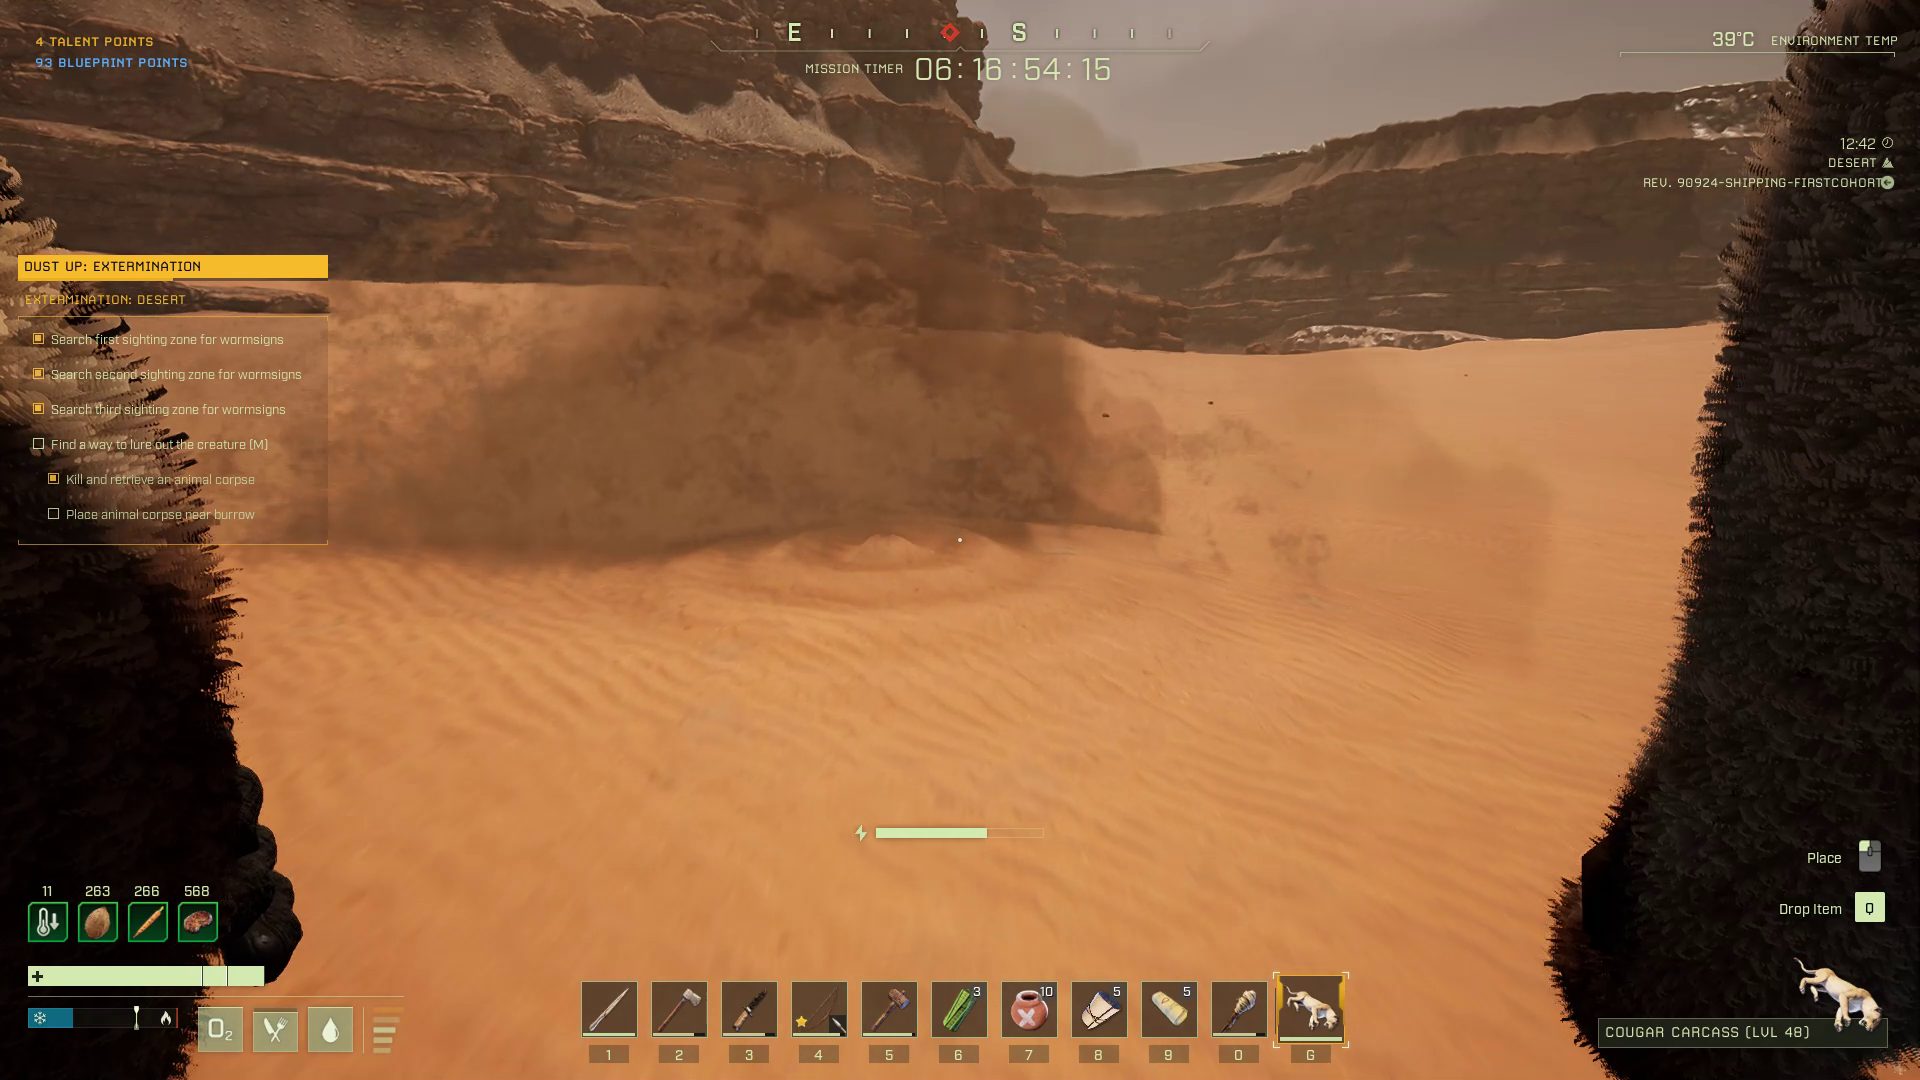
Kill a nearby animal (even a scorpion will work) and drop is body near the circular rings of sand. You will know it worked because the carcass will quickly disappear. Then, get out of the way: the Sandworm is coming out to play!
Defeating the Sandworm
The fight with the Sandworm can either be short or long depending on how well you exploit its weaknesses. (You can find useful intelligence in the boss summary near the top of this walkthrough.)
Any weapon can be used against the Sandworm effectively, so there are two main strategies to drop the scaly serpent:
Long Range Method (Ranged weapons only)
Close Range Method (Melee and/or Ranged weapons)
For both methods, keep in mind that the battlefield is wide open to attacks by any passing predator. Watch out for Cougars and Scorpions, in particular, as their detection radius is very long. If detected, leave the Sandworm’s melee range immediately and then aggressively deal with the predator. The shorter this distraction is, the less poison damage you will take from the Sandworm in the process.
The Sandworm won’t regain health, so don’t worry about leaving the area to deal with the locals
Long Range Method
This is the simplest of the methods because it locks you and the Sandworm into a small number of possible actions. First, leave the melee range of the Sandworm. You will know you are sufficiently far away when the Sandworm stops lunging for you with Bite attacks.
Now, the Sandworm will focus on its ranged attacks: Poison Spit and Poison Spray. For both of these attacks there is a wind-up when it arches back, and a release when it thrusts forward, opens its Mouth, and shoots its poison.
Keep moving around the Sandworm, just outside of melee range, to stay ahead of the Poison attacks
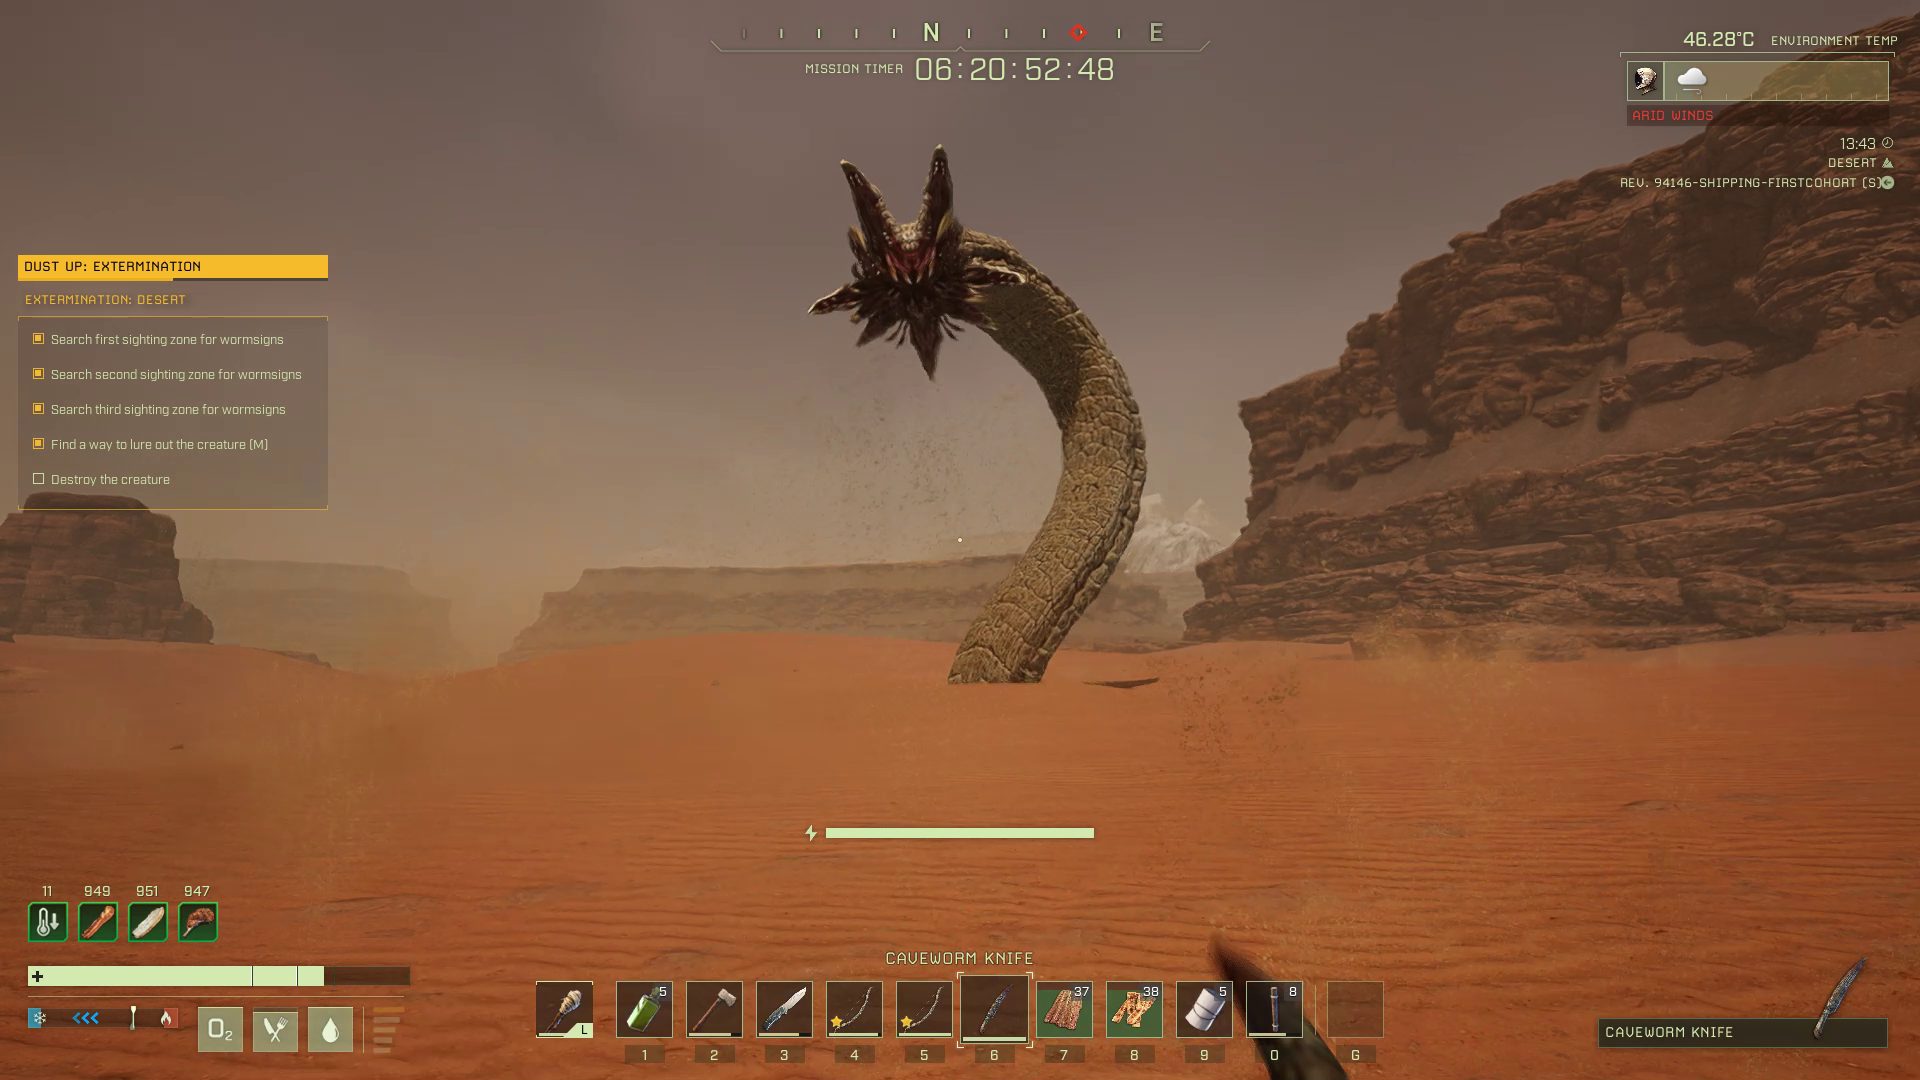
During the wind-up and while the Sandworm’s Mouth is open, the Mouth is vulnerable to critical attacks. Use this opportunity to shoot the Mouth with a ranged weapon and then try to evade the poison attack. Your weapon choice will affect the particular moment you would want to shoot during the Poison Attack. Try different timings.
You may get hit a few times, so place restorative items in your hotbar. Use envirosuit modules like the Detoxifier Module and consumables like Anti-Poison Pastes and Pills to mitigate the poison damage.
Short Range Method
This method is more complex and relies on dodging and understanding the behavior patterns of the Sandworm. First, enter the melee range of the Sandworm. Keep moving either clockwise or counterclockwise around its base to make dodging easier.
The Sandworm usually will attempt 3 regular Bite attacks, followed by an Enraged Bite attack. Dodge in the direction you have been moving each time the Sandworm winds up for another attack. When the Sandworm roars before its Enraged Bite, leave the melee range and wait for the lunge.
An open-mouth roar always precedes an Enraged BiteMoving just outside melee range leaves you poised for a massive counter attack
After the lunge, the Sandworm will have to rest on the ground for several seconds with its Mouth open. This is your opportunity to get in several melee critical hits on the open Mouth. Once the Sandworm returns to its upright position, reenter its Melee range so the pattern can continue.
You will occasionally have to deal with Rapid Bites and poison attacks that break this pattern. Dodge the Rapid Bites and heal after the poison attacks. As long as you remain in the Melee range, the poison attacks will be rare.
A poison stack from a Caveworm Knife will continue to damage the Sandworm between its Enraged Bites
While you are waiting for the Enraged Bite, you can continue to shoot ranged weapons at the trunk and the closed mouth of the Sandworm. The damage will not be as great, but if you remain aggressive, this damage could amount to 25% or more of the total damage you do.
If you become very good with your shoot-then-dodge timing, you can also get a critical hit on the Sandworm’s Mouth every time it winds up for a Bite attack. This easily can amount to another 25% or more of the damage you do to the Sandworm. This is a risky maneuver, as any of these attacks could end up being a Rapid Bite. With a little bit of practice, it is possible to escape any melee damage from the Sandworm for the entire battle.
Aim low and to the right to be lined up for a critical hit before each Bite
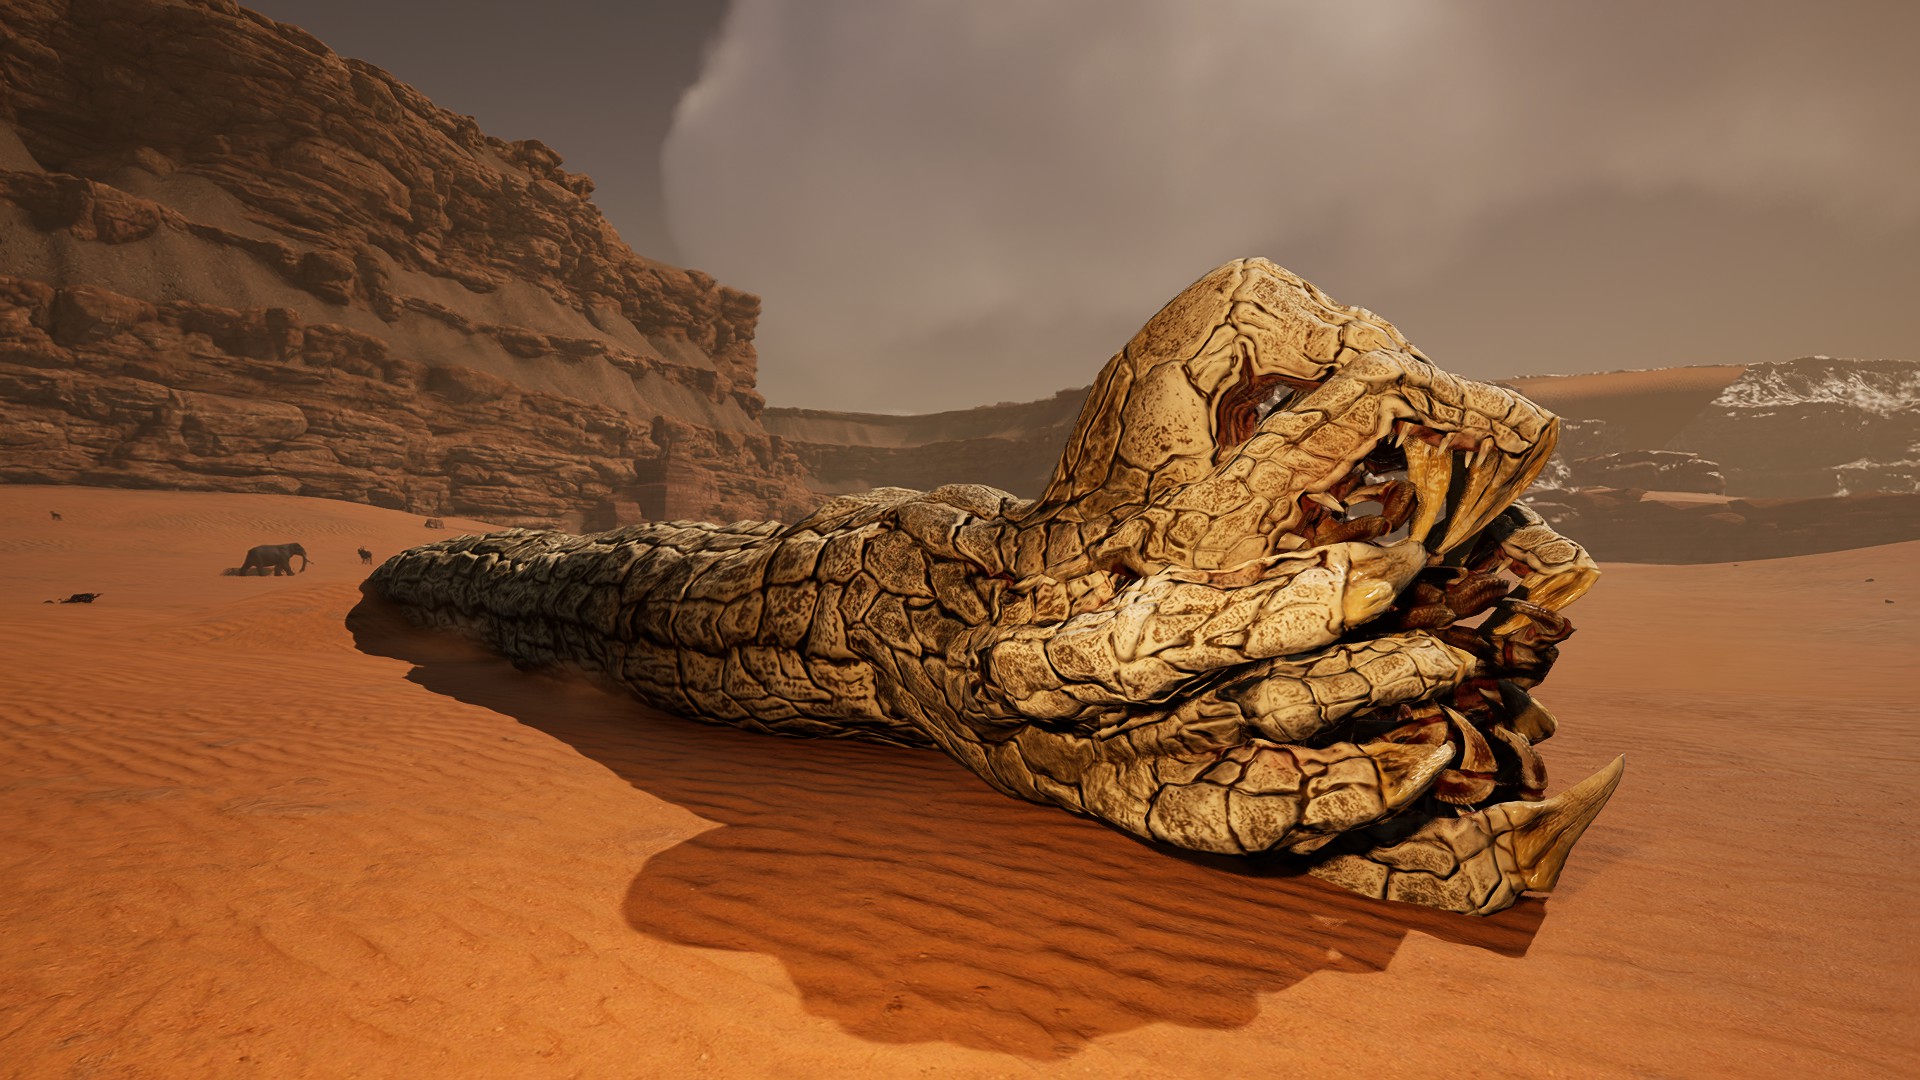
It’s Over When It’s Over
The final shot sends the Sandworm reeling and screaming before it flops dead on the sand
Without the Animal Healthbar talent or module, you won’t know when the Sandworm is weakening; it does not go through clear stages as it loses health. At Medium difficulty, the Sandworm has about 17K health points. However, you will know when it is over: the Sandworm will recoil, scream out its death knell, and then flop full-length on the ground for you to admire the sheer magnitude of your defeated foe. Then, the mission will be complete.
Finishing the Mission
Congratulations! You bagged a big one this time. Sadly, you cannot skin it. During the Beta tests, the Sandworm would drop scales from which you could craft armaments similar to the Caveworm gear, but this feature has been removed. Take a few selfies (although, you’ll have to build a structure to actually “ride” the bested beast), and then decide how you want to get back to the Dropship.
The desert loses its largest denizen, and it’s back to business as usual for the other animals
If you did not bring any workshop gear, the open Desert provides ample predators to throw yourself at, if you want a “shortcut” to the Dropship. You can also test if the cave or the ladder Unstuck exploits still work to teleport yourself back. However, the travel distance really is not that long for this mission, so why not enjoy the victory lap?
Thanks for checking out this walkthrough. We hope you found it accurate and useful, or at least entertaining. Leave a comment, question, or correction in the comment box below, and then pick your next Extermination target on Icarus!
Share this article:
SurvivalSherpa
SurvivalSherpa is an avid gamer spending most of his time at the nexus of the survival, crafting, building, and role playing genres on any platform, especially to test indie titles in EA. AFK, life is about work and education in STEM fields, reading fantasy, and sipping great coffee in the Pacific Northwest.