Uniao, a rather controversial faction, is looking for someone willing to conduct a survey of a forest valley for them. Animals tend to respond aggressively to the equipment required for this job, but don’t worry: if you figured out the defense in LIVEWIRE, you will probably find HEADSTONE to be even easier — this mission benefits from a very similar strategy with just one small change. Our guide will first list the relevant details of the mission, and then provide a step-by-step walkthrough.
Prospect Details
Approximate time to complete: 40 minutes – 1 hour (not including the runback to the dropship could take ~10 minutes).
For this mission you will need to travel to a valley surrounded by 3 tactical points. Each point comes with a Supply Crate containing a Geo-Station next to an outline where that Geo-Station needs to be deployed. These 3 points will be located at higher terrain, but using shortcuts to scale the cliffs will save you a few minutes.
Next, you will need to return to the lake to deploy the Uplink Transmitter. Soon after, 4-5 small waves of predators will emerge and run towards you, if they see you, or they will directly attack the Transmitter (which does have durability). However, we will show you an easy way to prepare for this event and defend the Uplink Transmitter with relative ease.
Supply Crates in this mission will not be defended, nobody will attack you when you launch the Geo-Stations, and the local predator population will be pretty slim until you start up the Uplink
Map with the 3 Supply Crates, the Uplink location, and the travel path we will cover below. (Click on the map to enlarge it.)
Preparing for HEADSTONE
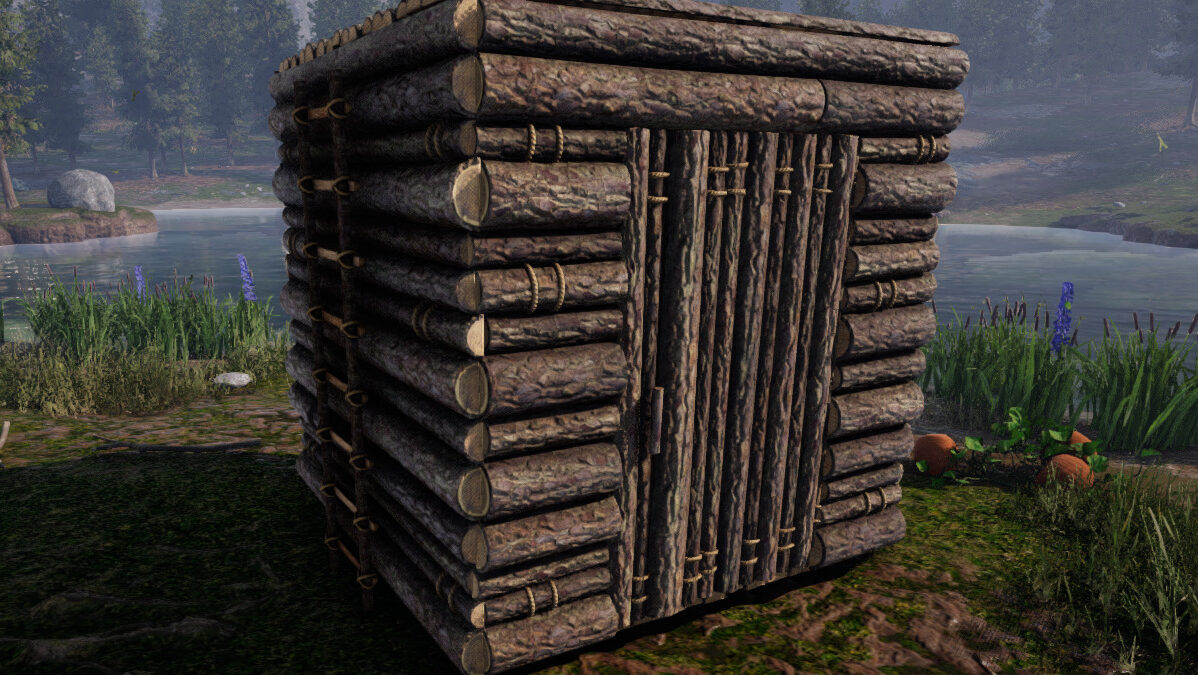
If you follow our suggestion for the defense of the Uplink Transmitter, you will only need basic weapons for this mission. However, this does mean that you will need to build a barricade or a portable shelter. (A portable shelter can also be used for rest with a campfire and a bedroll, but it’s possible to complete the mission before the first nightfall.)
Portable Shelter – Thatch can work, but you will have a much easier time using Wood.
Mission Walkthrough
Step 1: Heading Out
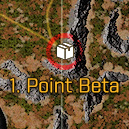
If you open the map right after you land, you will see 3 Supply Crate locations marked on your map. That’s the 3 points where we can pick up and deploy Geo-Stations. Double-click on the one in the bottom-left corner, the Point Beta in the labeled map we had for you in the previous section. This will set a custom waypoint to help you track it.
The colored (or white) diamond indicates your waypoint — center it on your compass (use the up-arrow to assist you) to head in that direction
Grab some Oxite nearby and let’s get going — we will gather some berries on our way to the valley and we can drink at the lake as soon as we deploy Geo-Station Beta. Weather is likely to be pretty mild throughout the mission, so feel free to skip building a portable shelter until Step 3.
As you travel, stick to the mountain walls if you want to avoid getting ambushed. It can be a good idea to kill a couple of wolves to get yourself a little bit of meat to cook later, as well as ingredients for a bedroll, should you need it.
Step 2: Obtaining and Deploying Three Geo-Stations
Click on the tabs below to get exact locations and step-by-step instructions. First one is already open for you. Our path and our shortcuts are just one way to navigate and complete the mission and you can easily do this part of the mission your own way. Scroll down to the next section when you are ready.
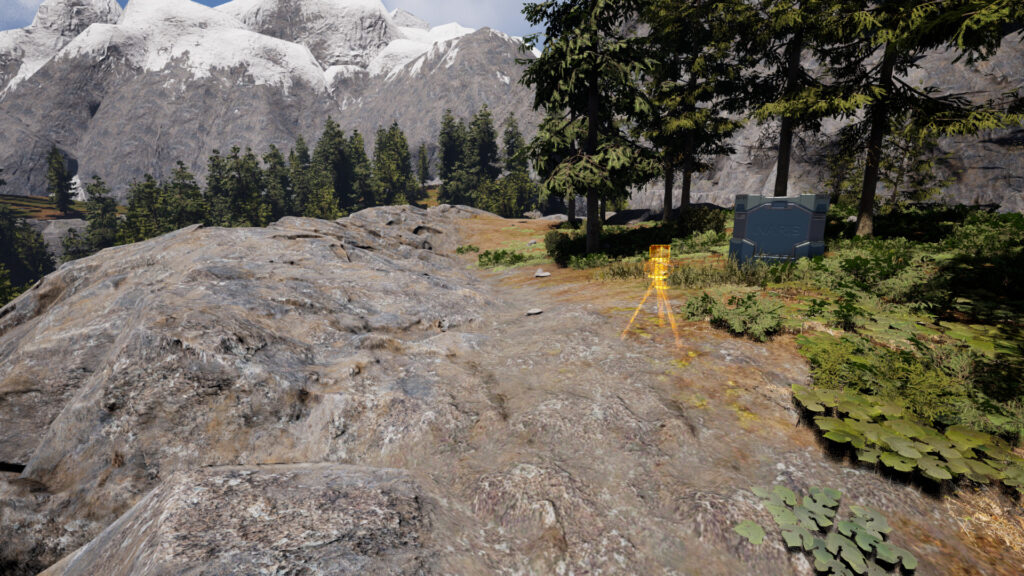
Beta Geo-Station is an easy first step: it will be directly to our right when our path into the valley is cut off by a sharp cliff. You will know when you are close to your destination when you can’t travel further east without falling to your death.
Most of the cliffs in ICARUS are scaleable if you find the correct path, but this one might not be the one you want to practice on
If you followed our directions, you are already tracking your destination on the compass. However, you can also just take a right turn at the cliff and walk up to this setup on the edge of the ridge.
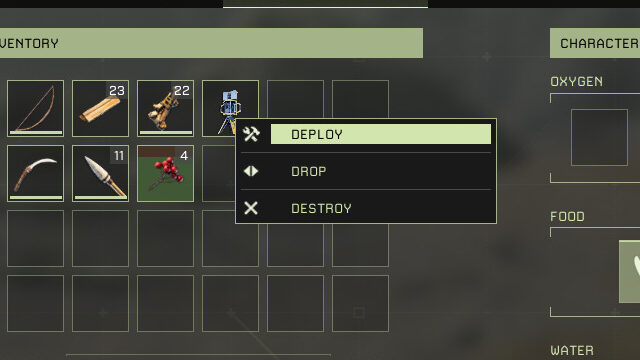
How do I set up the Geo-Station?
Open up the crate and take the Geo-Station into your inventory.
In your inventory, click [RMB] on the Geo-Station and select, “Deploy.”
Align the green outline with the yellow outline and click [LMB] to deploy the Geo-Station.
You have probably done this many times by now
You do not need to interact with the Geo-Station after you place it. Sol will notify you that everything is set up and complete. Move on to the next point.
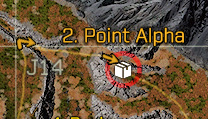
We are headed to Point Alpha next. If you use our shortcuts, getting up to it will be quick and easy (or you can run to the lake for a drink in between and take an expected route back up, if needed.) Double-click the crate on your map to set a custom waypoint.
Once the Geo-Station is set up travel North from the Point Beta until you stop at a narrow, shallow valley. There are many ways to descend from here quickly, but you can also try and follow our shortcut below for a safe slope down.
Travel just a little bit to the west, along the drop, and study the rock formations on the cliff: you should spot a little natural ramp that connects to the wall a bit ahead of you. It will feel almost like it has been placed there on purpose.
At this point, you can choose to follow this path into the valley (south, then east): you will see a lake you can take a drink from and set up a campfire if you would like to leave some meat (or fish) to cook while you set up Geo-Stations. If you do that, you can come to Point Alpha from the north of the lake.
If you would rather take a break after, we have a second shortcut for you. Keep north as you travel directly east from the mini-valley, until you are separated from the Alpha Supply Crate by a rock wall on your right.
This one might be a little harder to spot. It’s a spotty ramp which will take you up very smoothly, but to a certain point. You will need to make a couple of small hops to clear the remaining two rocks (just hug the wall to your right and you shouldn’t fall).
At that point, you will quickly come upon the Alpha Supply Crate. Check the previous section if you don’t know how to deploy it, but it should be an easy task for you at this point.
As soon as the Geo-Station is deployed and starts communicating with the point Beta, you are ready to move on to the next point.
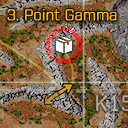
Last destination is the Point Gamma on a high terrain southeast. Traveling around the ridges can slow you down, but we have a useful shortcut for you to bypass that (it’s a little riskier than others, so it’s totally fine if you would rather take your time and be safe).
Double-click the Gamma crate. Once you descend into the valley, it’s a good time to take a drink and set up a campfire if you haven’t done so earlier. If you are running a little behind and it’s 16:00 on the clock, you may want to collect materials and build yourself a portable shelter to rest for the night.
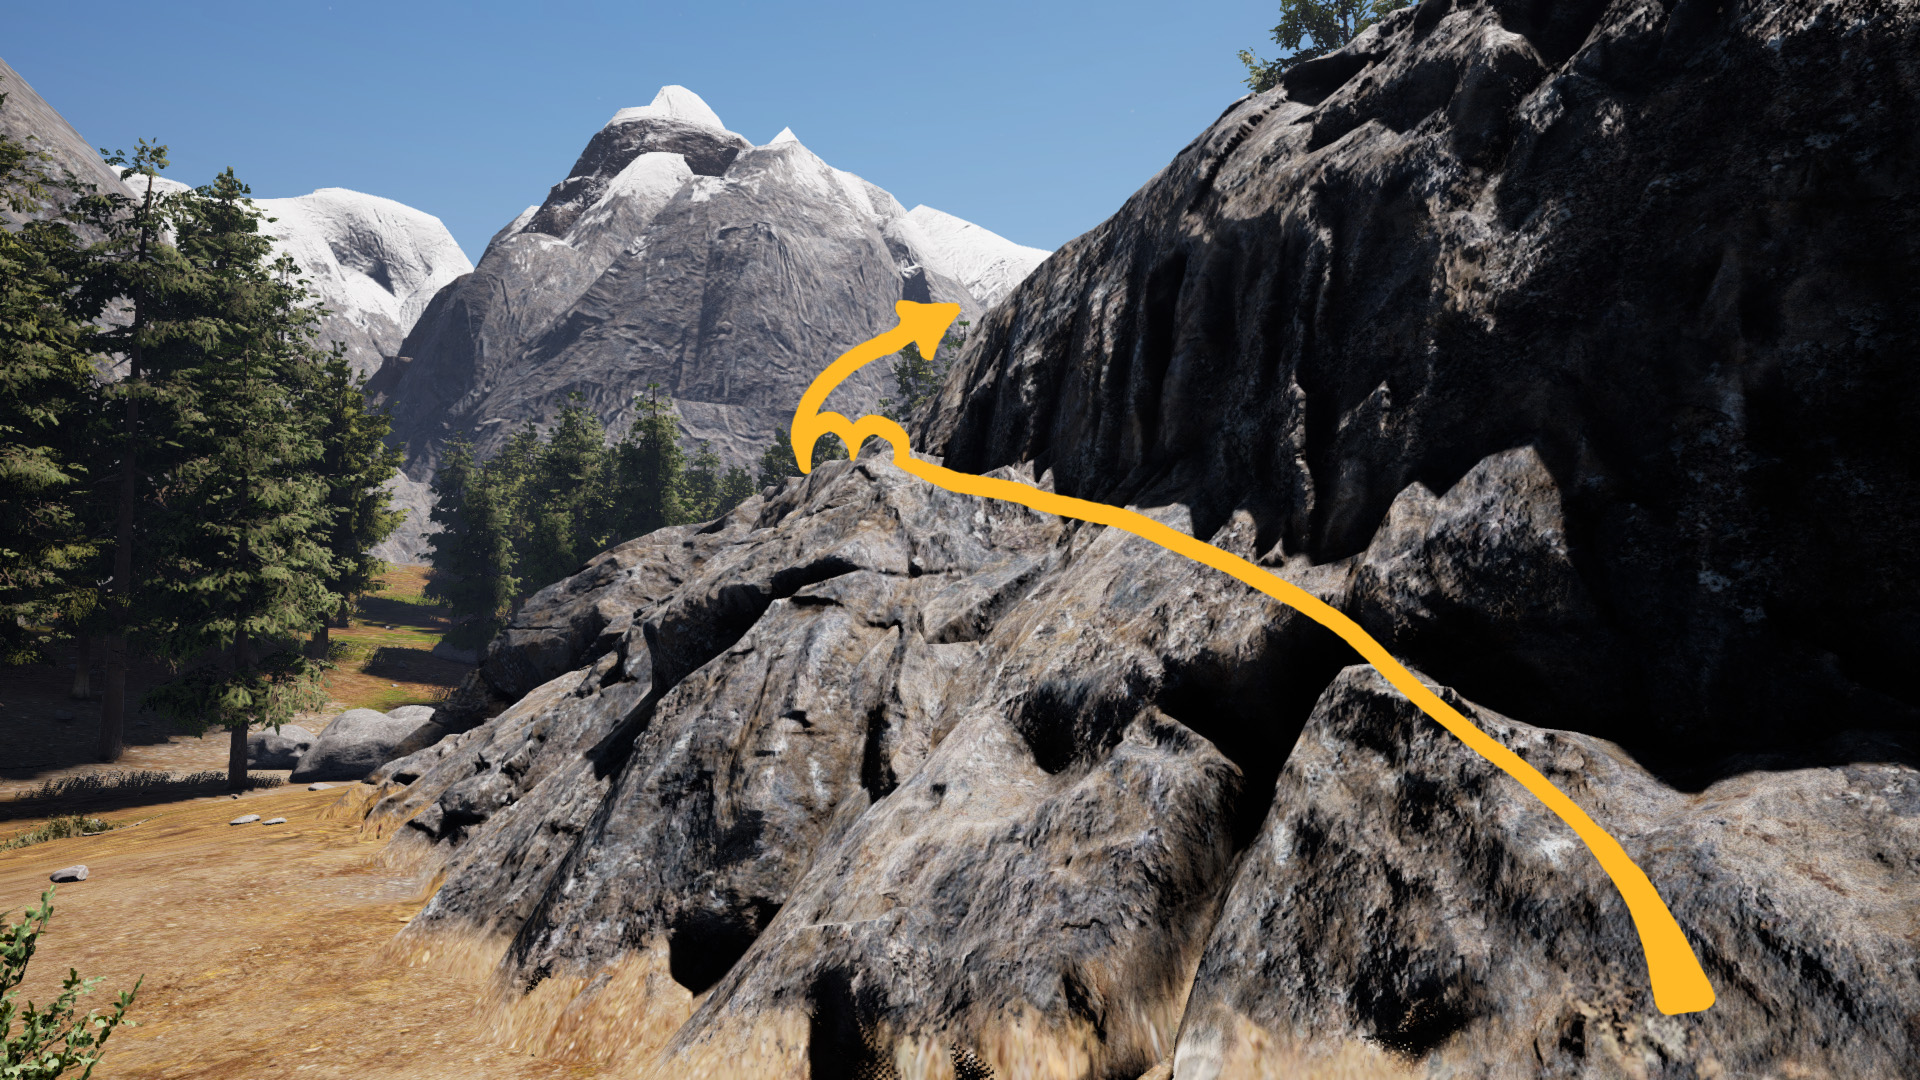
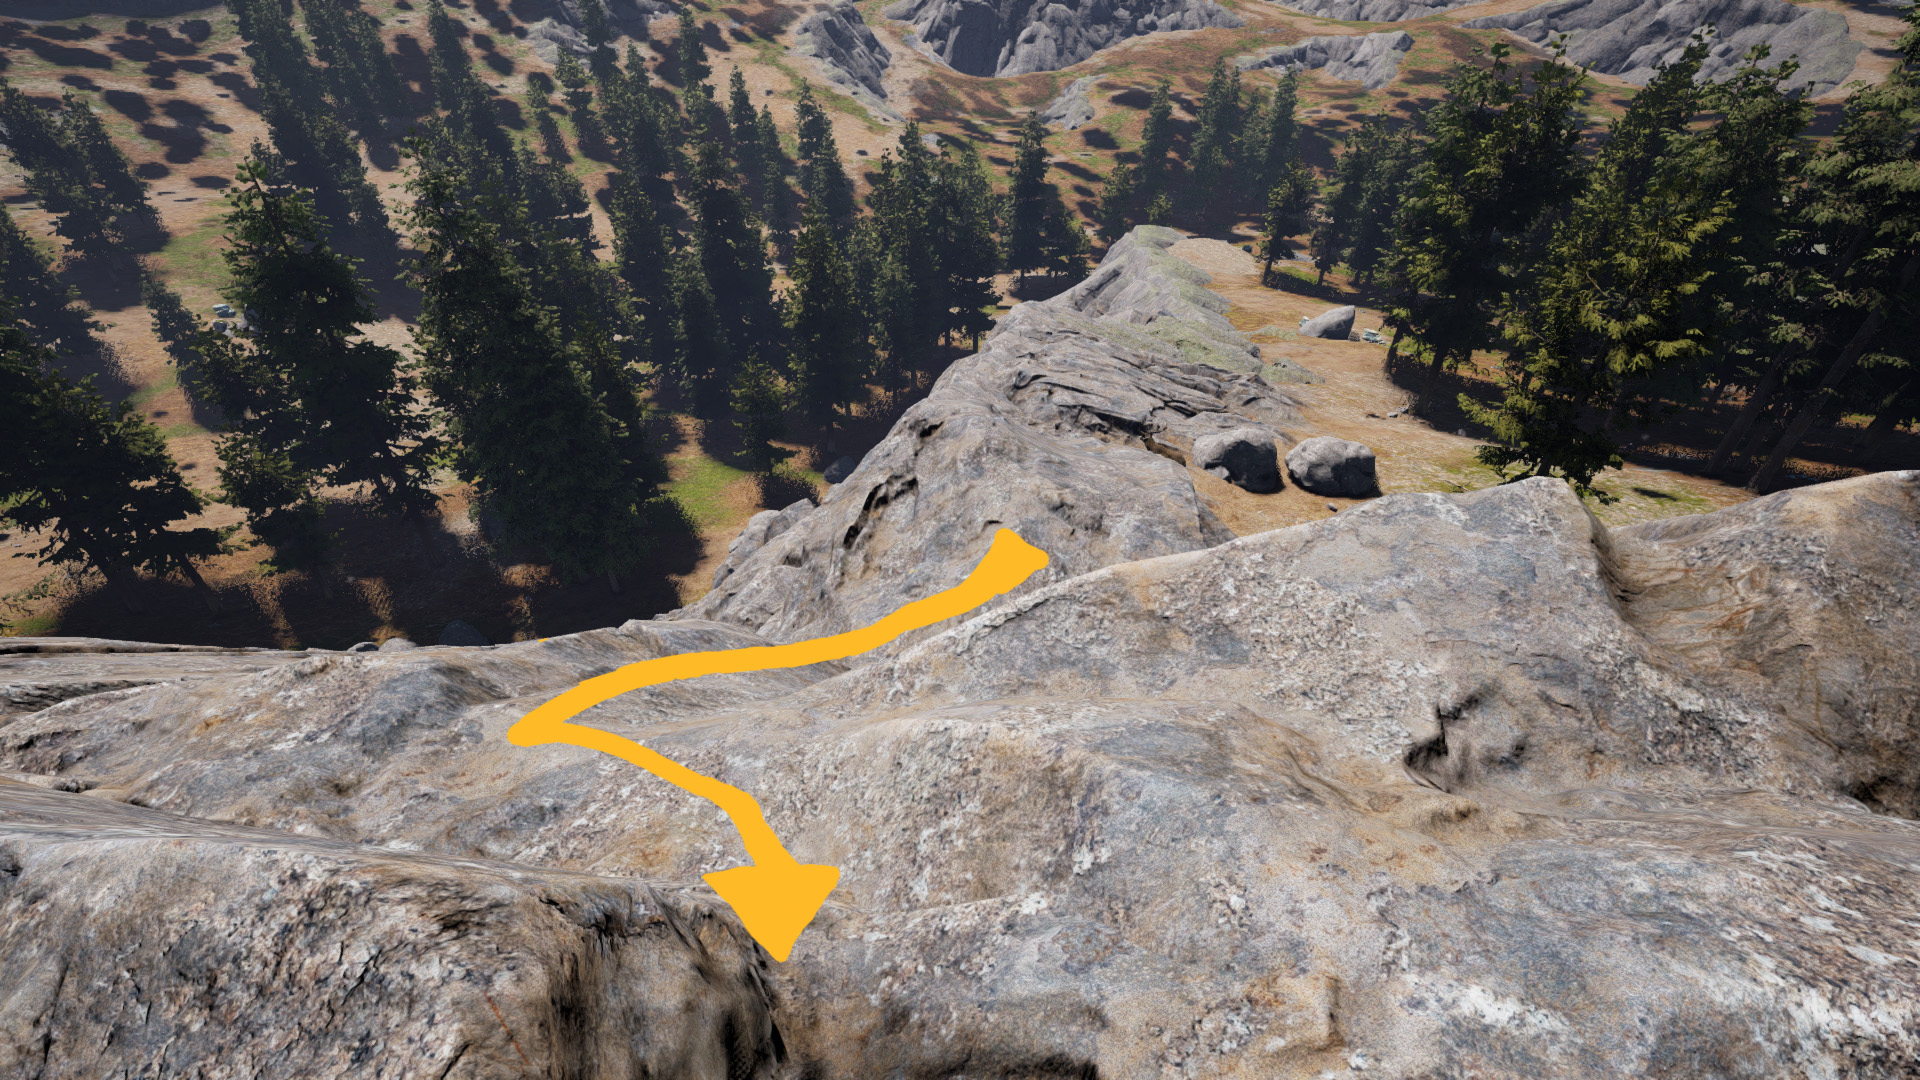
When you are ready, look at the icon above (click on it if you need to enlarge it) and find the double-sided arrow. We marked an invisible ramp for you that we discovered when completing the mission in the past. You can come to it from a higher location, but the drop will still look rather steep. You will need to get into the middle of that slope and climb it up. If you felt confident climbing rocks so far, here is the shortcut:
If you follow the yellow path we put on the map, you will come up to a cliff falling below and a wall to your left. That wall is connected to an invisible ramp that you might notice yourself if you look ahead of you and below, and then trace the path up. Try to follow the path we have on the image to your right.
Be very, very careful. If you move around too much and lose the grip, the fall could kill you. Try a couple small jumps, see if you start moving up the wall when you walk forward. If you don’t feel like you can figure it out after a couple of attempts and are playing solo, don’t risk it. Walk down into the valley, travel east until you get onto the slope.
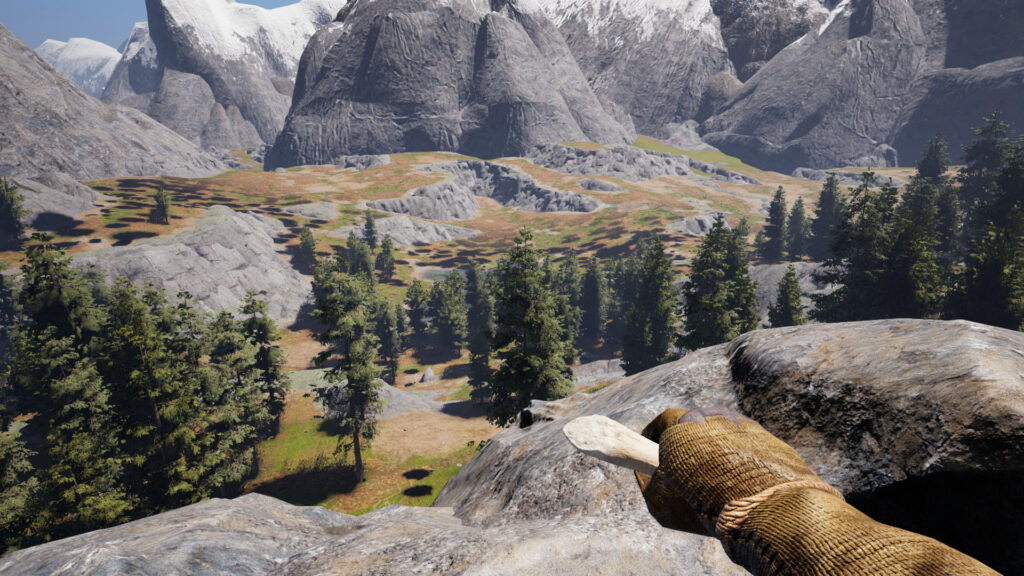
However you will reach the Gamma crate, the view onto the valley will be very pleasant from up here. Interact with the crate, as with the other two locations, and deploy the station.
Once you deploy Geo-Station Gamma, all three stations will connect to each other in a triangle: you may observe one of its corners from where you are. When you are ready, return to the lake for the final stage of the mission. (If you used our shortcut to get here, it should be easier to use for climbing back down — but be very careful!)
Step 3: Preparations and Deploying the Uplink Transmitter
Portable Shelter for Rest and Next Objective
Now that we are back at the valley lake, it’s time to take down some trees to put together a simple wood shelter. A simple box made out of x4 Wood Wall, x2 Wood Floor, and a Wood Door will work perfectly both for resting and for the next part of the mission. Place the campfire right next to the box outdoors, and the bedroll inside.
Have a Hammer and a Whacker prepared just in case. (You can use the Repair Hammer later.) Thatch box is an acceptable alternative, but you might want to make a few more walls as barricades when we are working with the Uplink Transmitter in the next step.
Whatever you have to work with, gather the needed resources. You can build the shelter right away if it’s 17:00 or later and rest at 18:00 until morning.
Setting Up the Uplink Transmitter and the Defenses
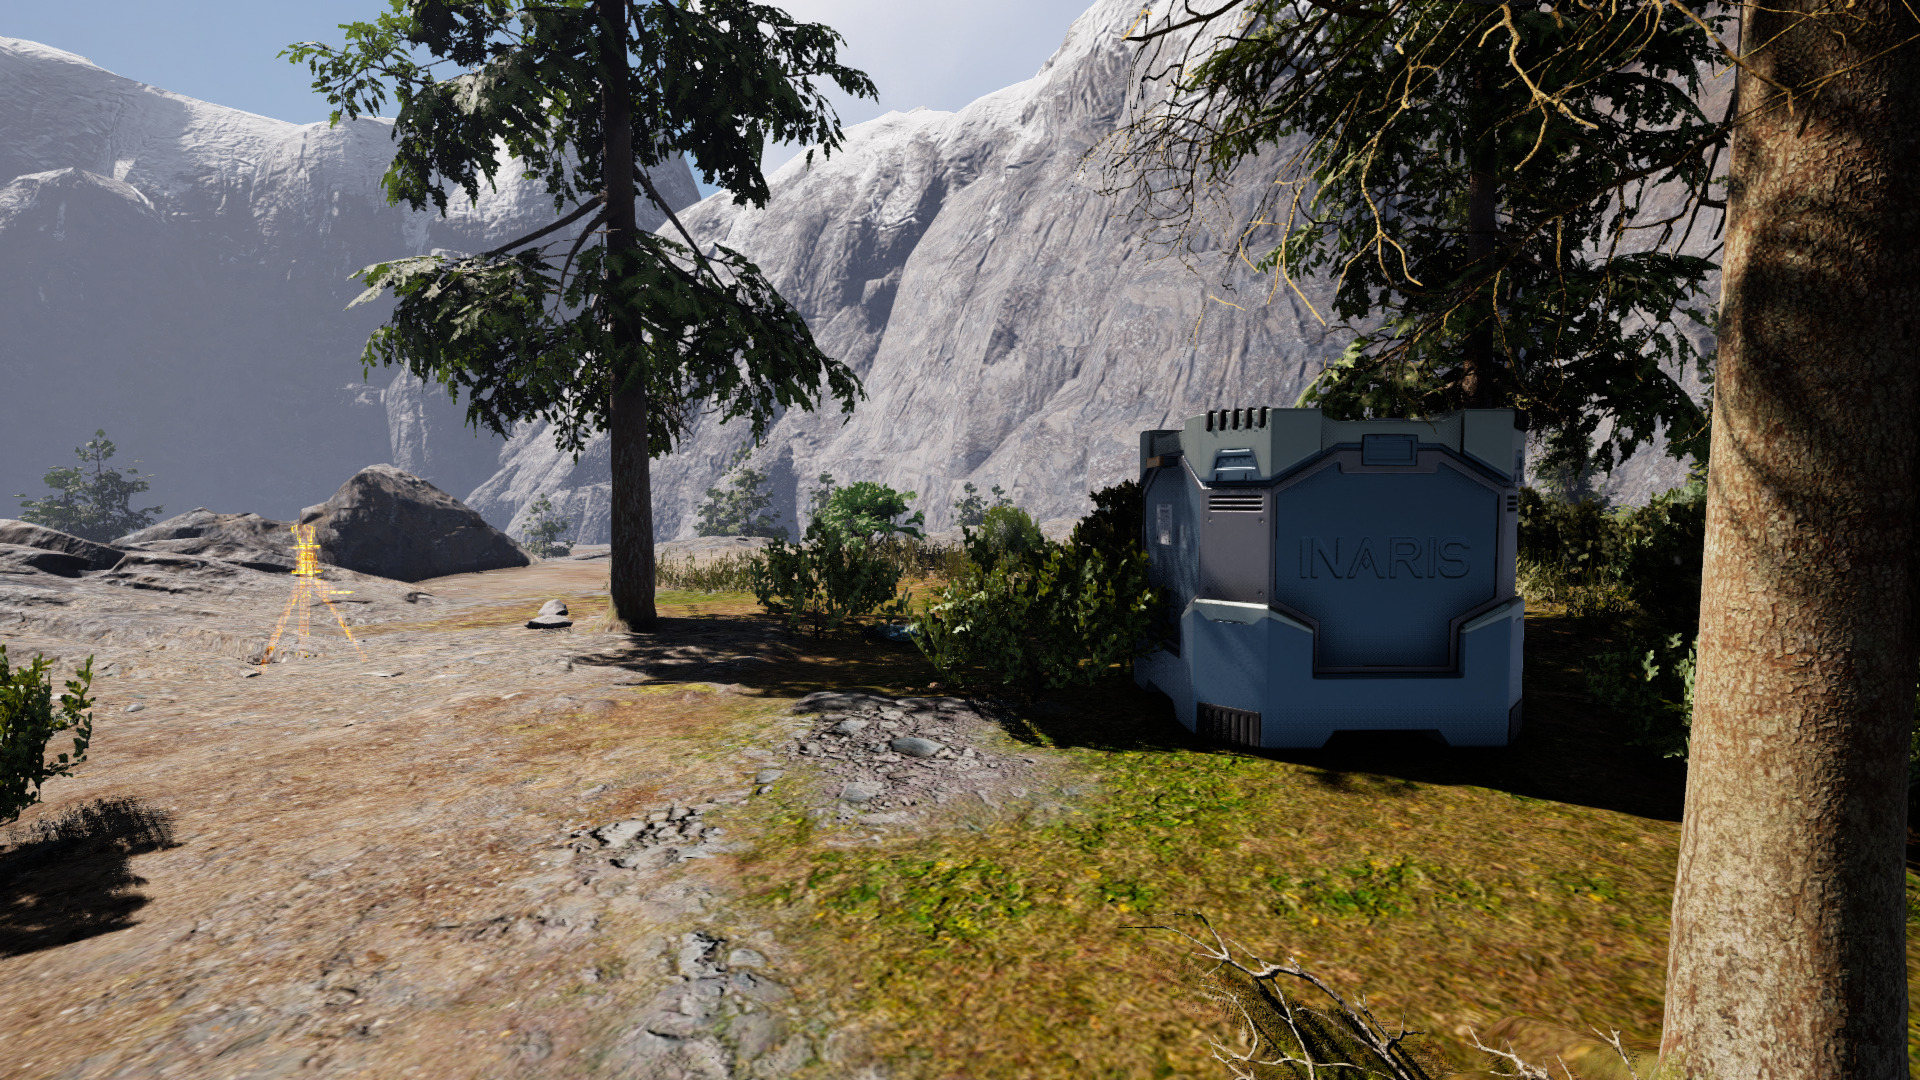
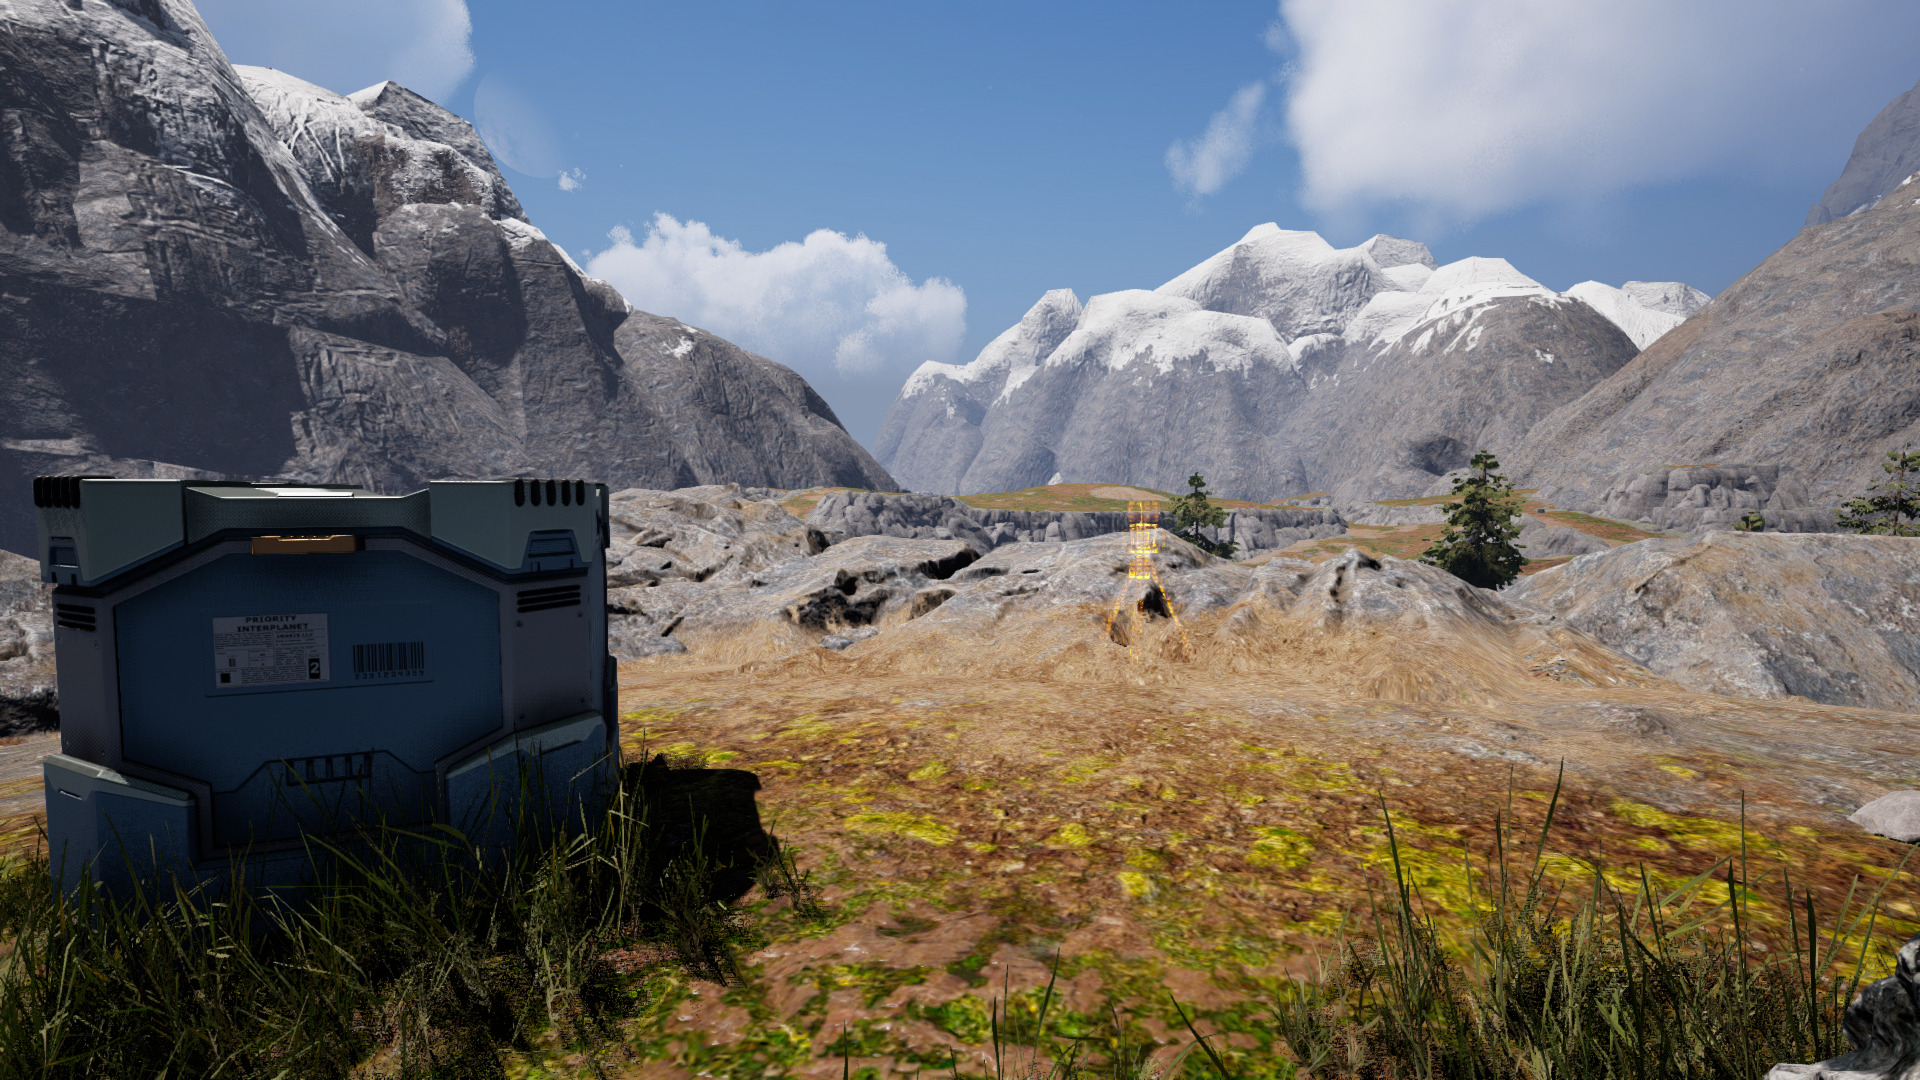
You probably already saw it, but the final supply crate, Delta, is located on the northern shore of the lake. Inside this crate is our Uplink Transmitter that we can place into the designated outline. Nobody will attack you when you place it (do not activate it yet), so go ahead and deploy it.
With the beautiful view of the lake, the scene is deceptively peaceful. Things will change quickly once the Uplink Transmitter is activatedNo, no, no! Bad wolfie, bad! Stop it! Ah!
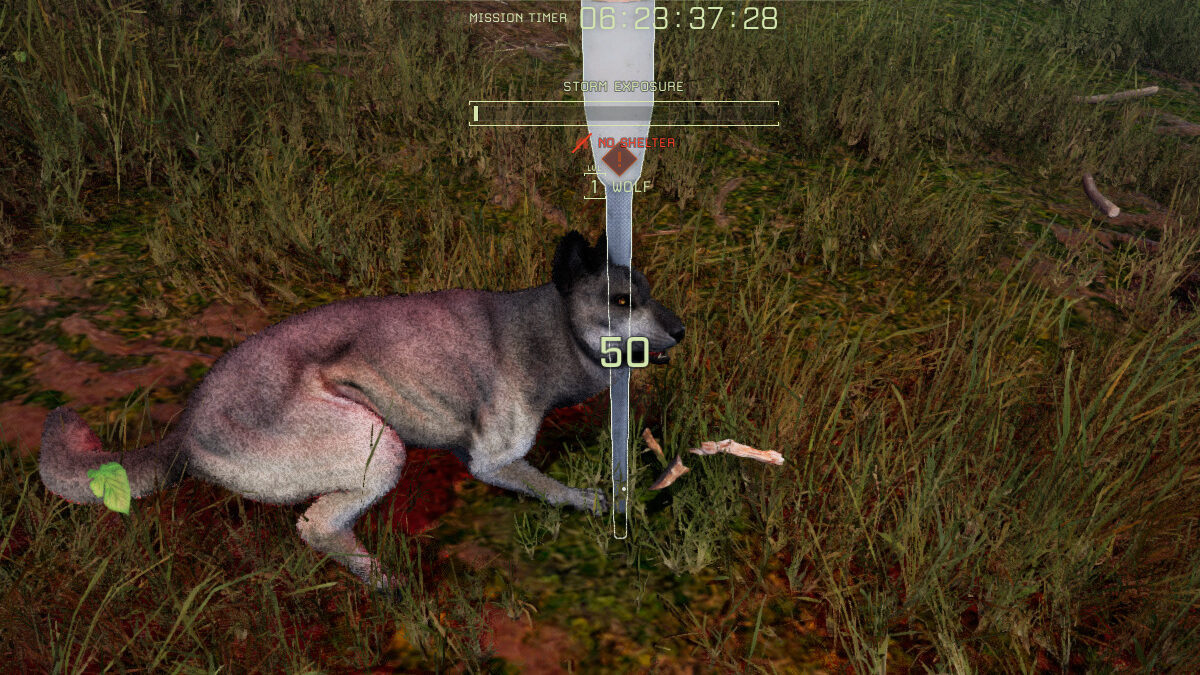
Just like with LIVEWIRE, the reason for setting up the defenses first is simple: several animals will come to fight you once the Transmitter is activated. If you saw the cover image for this guide, you know why it’s a bad idea. Running off and hiding will not be a sufficient solution: if the animals can’t attack you, they will attack the Transmitter, and this time the device actually has durability points.
So, instead, once the Transmitter is all set up, we will encase it in our wooden shelter. (Your buildables will not register any collision, so make sure the Transmitter is fully encased.) There are multiple options for the design:
Design Option #1: Box with Windows
(Click on the image to make it larger.)
Don’t mind the wide building. This is just something I chose to play around with the first time I did it. A 1×1 box with window holes in the walls will be perfect for the task.
Shoot at the incoming animals with a bow and repair walls with a Hammer.
Design Option #2: Box and a Ladder
(Click on the image to make it larger.)
If you can craft a Wood Ladder, build a box without any windows (a door is needed for activating the Uplink) and climb on top. Shoot at the animals with your bow, aim for the head.
Repair any damages with a Hammer: be quick if you climb down between the waves.
(Layers of Thatch Walls or a pile of Wood Railings can also work for this task, but the shelter design usually works out better in cases like these.)
Both methods have a chance for confusing the animals. If you can successfully stealth inside the wooden box, they might start wandering around instead of attacking you or the shelter. You can later quietly crawl out and leave for the dropship.
Activate the Uplink Transmitter and get ready to defend it. There will be about 4-5 waves of wolf packs and at least one bear. Try to not get hit (stand further away from the walls if you are inside), eat food repeatedly to restore health, repair the walls before they crumble.
It will take a couple of minutes (you can check the percentage in your objectives), and after the Uplink transmission is finished, your mission objectives will be complete.
Step 4: Return Trip
Note: If you’re really close to leveling up, or if you’ve just leveled and have very little XP towards the next level, you can choose to die, as it will save you time running back to your dropship. If you do want to use this tactic, you need to level up if you are close to your next level, or don’t gain more XP if you’ve recently leveled. This way the XP debt penalty after your death will be minimal (you can’t go down a level).
You don’t need to get anything back to your dropship. So, unless you want to die and respawn close to it (see the note about XP loss above), open your map, set a waypoint on the dropship icon , and make your way back. Press [F] once you’re at the dropship and it will open up the menu that allows you to leave the planet. Another job well done, prospector!
We hope this mission guide for HEADSTONE was helpful! Let us know if you have any questions or suggestions by using the comments box below.
Share this article:
Mila Grish
Dedicated contributor at EIP Gaming and a part-time collector of books she will never have time to actually read. Jumps on the newest releases just as quickly as on the uncovered dusty collections from the basement. For her, shiny graphics can never be an excuse to not have a polished player experience or an immersive story.
I build a cabin for the transmitter, then a cabin around it, then multiples layers of ramps further and further from the cabins, clearing the area of trees and buhses, and guess what? The safe area was so vast there was no attack at all. 4 hours 30mn left..
DaRobbi
2 years ago
i placed 5 camp fires around the uplink and placed a stoneplate into the lake. No animals showed up, maybe its ab bug, because they cant reach me or the uplink?
i played HC: left time 1 hrs
Last edited 2 years ago by DaRobbi
Michaelangel007
2 years ago
You can speedrun this entire mission in 15 minutes. You don’t need to bother with creating shelter for the uplink transmitter.
1. When you land collect 24 stones, 8 fiber, and and 8 sticks. Build a campfire but don’t place it.
2. Run to I14, collect and place the beacon. Walk down the cliff and head to the bottom of J14.
3. There are two paths you can run up to get the second beacon at the bottom of J14. One is from the north side, the other is from the south-west side. It will take a little trial and error to discover them but they aren’t too difficult to climb once you know how.
4. Again walk down the cliff to the north, walk 50 feet, walk down another cliff, and head up north to the 3rd beacon at the top of J14.
5. Head south east, and then walk down the cliff on the left side of the “pointy” cliff marker making a beeline to the last create.
6. The trick is to place a campfire literally as close as you can on the 4th location, light it, place the uplink, activate it, then run south and jump into the lake! There is a shallow rock in the middle you can stealth on. Wait till the uplink status is around 10% to make sure no mobs spawn and then keep heading south and then west back to your drop ship.
Until you learn the terrain it is handy to open your map, double click on each of the crates to place a waypoint marker. This will make it easier to learn the navigation path.
Once you are familiar with the terrain this is an easy mission to run in hardcore for some quick Ren and a slow trickle of Exotics. Every so often the game likes to throw a bear in your way but they can easily be dodged. i.e. Back up when they charge and then dodge at the last second and keep running.


I build a cabin for the transmitter, then a cabin around it, then multiples layers of ramps further and further from the cabins, clearing the area of trees and buhses, and guess what? The safe area was so vast there was no attack at all. 4 hours 30mn left..
i placed 5 camp fires around the uplink and placed a stoneplate into the lake. No animals showed up, maybe its ab bug, because they cant reach me or the uplink?
i played HC: left time 1 hrs
You can speedrun this entire mission in 15 minutes. You don’t need to bother with creating shelter for the uplink transmitter.
1. When you land collect 24 stones, 8 fiber, and and 8 sticks. Build a campfire but don’t place it.
2. Run to I14, collect and place the beacon. Walk down the cliff and head to the bottom of J14.
3. There are two paths you can run up to get the second beacon at the bottom of J14. One is from the north side, the other is from the south-west side. It will take a little trial and error to discover them but they aren’t too difficult to climb once you know how.
4. Again walk down the cliff to the north, walk 50 feet, walk down another cliff, and head up north to the 3rd beacon at the top of J14.
5. Head south east, and then walk down the cliff on the left side of the “pointy” cliff marker making a beeline to the last create.
6. The trick is to place a campfire literally as close as you can on the 4th location, light it, place the uplink, activate it, then run south and jump into the lake! There is a shallow rock in the middle you can stealth on. Wait till the uplink status is around 10% to make sure no mobs spawn and then keep heading south and then west back to your drop ship.
Until you learn the terrain it is handy to open your map, double click on each of the crates to place a waypoint marker. This will make it easier to learn the navigation path.
Once you are familiar with the terrain this is an easy mission to run in hardcore for some quick Ren and a slow trickle of Exotics. Every so often the game likes to throw a bear in your way but they can easily be dodged. i.e. Back up when they charge and then dodge at the last second and keep running.