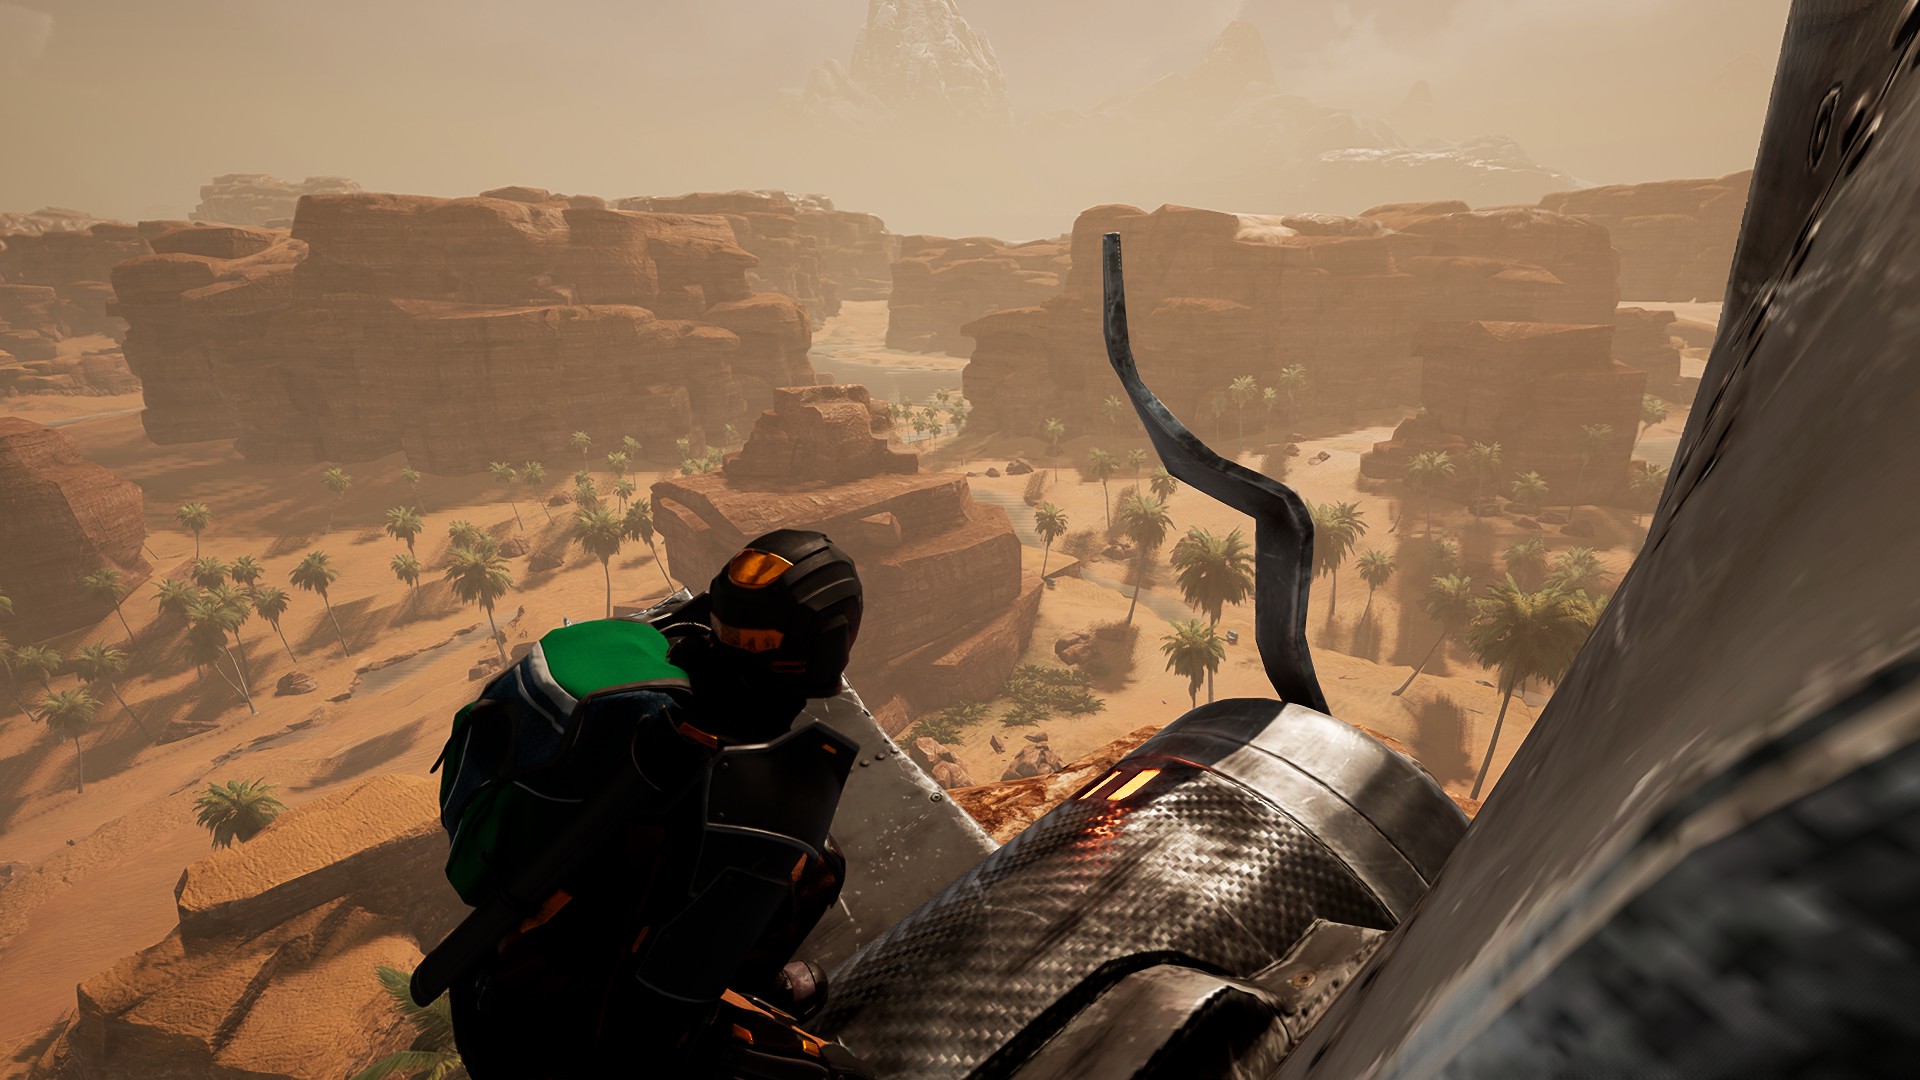
The FIELD TEST prospect is very similar to one of the missions from the Beta test weekends. The goal is straightforward: run through a large swath of the Desert Canyons region and recover three pieces of a Device from a downed satellite, with wreckage strewn across the sandscape. This is one of the missions that demonstrates the vertical dimension of the Desert Canyons in a way that distinguishes it from the others. (Sol hints that this is important in his introduction once you reach the planet surface.)
Follow along with this walkthrough and we will show you everything you need to know to find the tech and finish the mission faster than a cougar can take down an antelope!
There are plenty of resources around the Dropsite and the lake in M4 to get set up before you investigate the southern crash sites
Note: Ladder Teleporting
Instead of jumping from ladder to ledge, you can place another ladder and grab it to instantly pull you over
A helpful technique to master is ladder “teleporting”: after you place a ladder (e.g., Wood Ladder), climb to the top — if you don’t move once you climb past the last rung, you will just stand on top of the ladder. From there, press F to grab onto another ladder, without jumping. You can also grab a ladder in this manner from a ledge, even if there is a little bit of distance between you and that ladder.
It can be a risky technique (especially when descending with a backpack) but is often useful to move quickly around steep or rough terrain without placing platforms. Practice on some lower rocks before trying this on the high-flying desert cliffs. It makes short work of the vertical elements of the Desert Canyons.
(We have also discussed a variation of this technique in our WATERFALL: Expedition mission, if you happened to use our guide to complete that mission.)
Preparing for FIELD TEST
You start deep in the Desert Canyons and will have to build up any tech here that you do not bring with you from the workshop. The Wood-From-Sticks Talent and unlocked Bone Sickle will make it easy to craft what you need. Basic equipment and weaponry are enough to see you safely through the mission. It is also helpful to remember that Sponges can be found in the large Desert Canyons lake and used as a Waterskin (with 25% of the capacity).
You will likely encounter conflict recovering one of the pieces of the broken Device, or take damage in a fall. Cooked Meat is the only healing consumable available to you in this mission and can be a lifesaver in a pinch. A Survival Backpack and Kickfall Module will help reduce fall damage and provide extra space for the Device pieces. Check out our Desert Survival guide for more tips.
As soon as you touch down, gather your resources and craft your equipment and a portable shelter, if desired. Then set off to investigate the Crash Sites and recover the Device components.
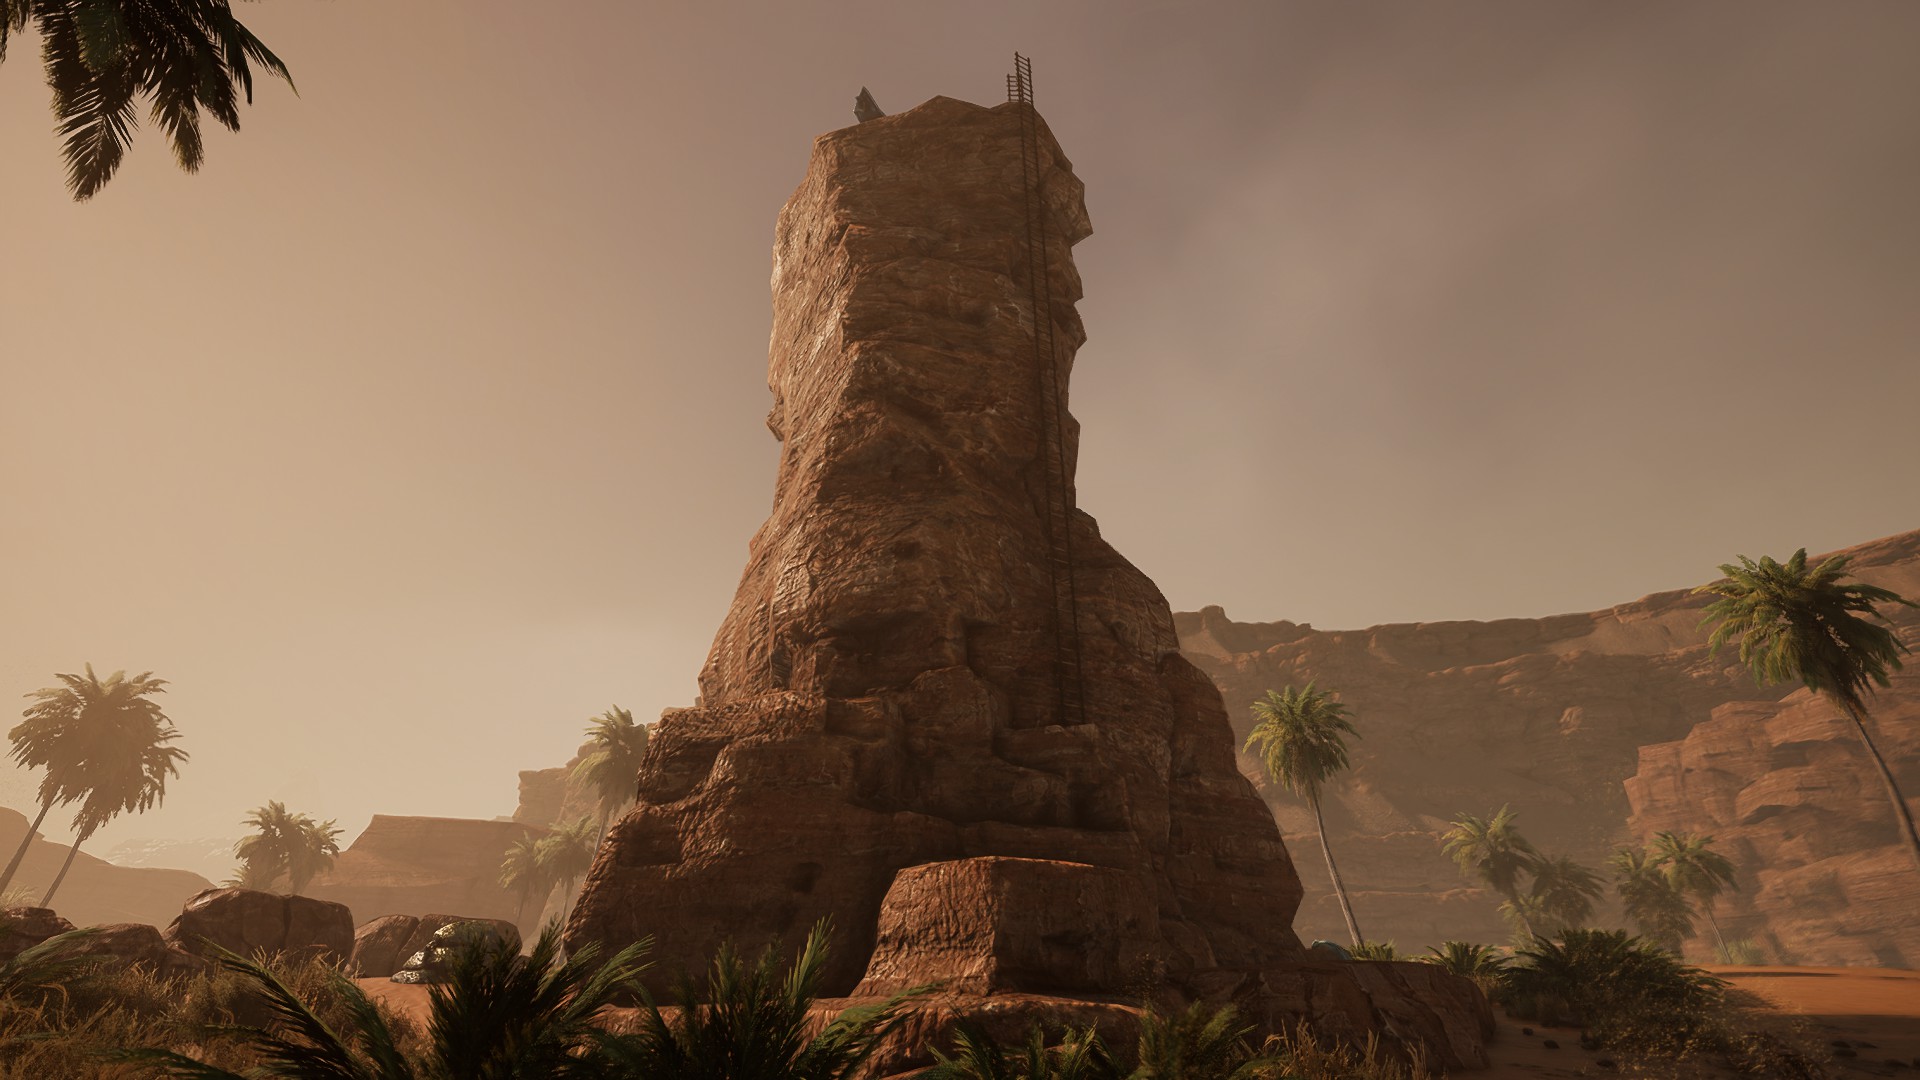
Crash Site Alpha: Top of the Spire
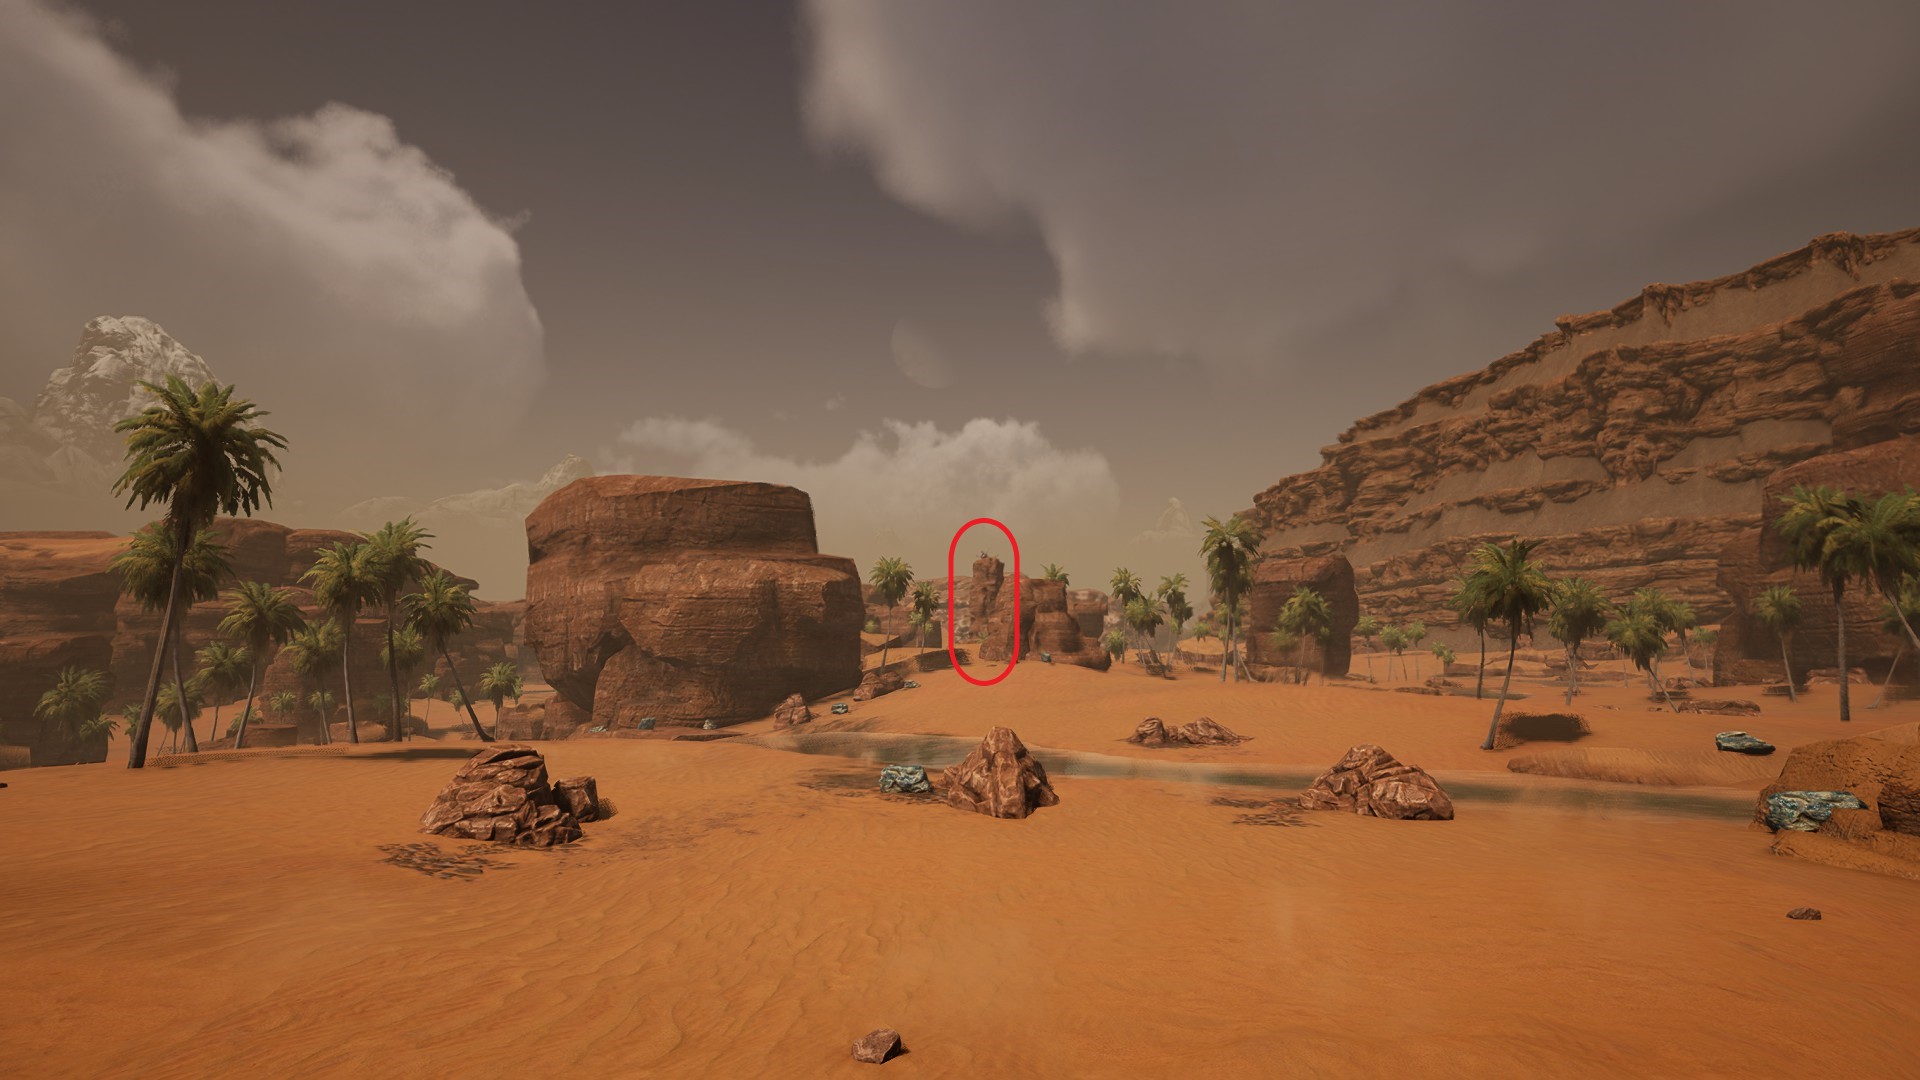
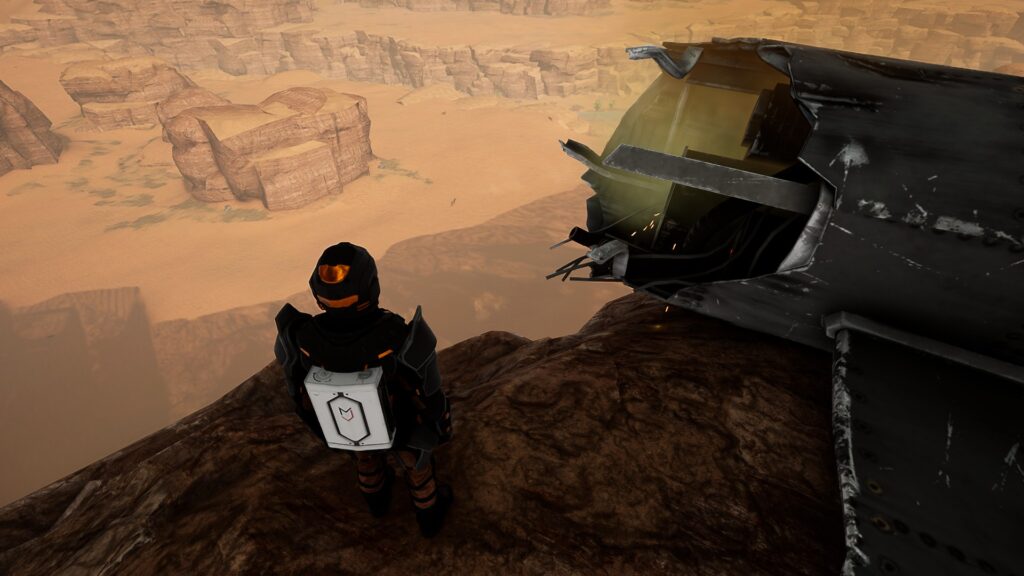
The exact position of each objective is not provided, only a large search area. Sol’s message that some Crash Sites may be in hard-to-reach areas should be heeded. From the Dropsite, look west and you should be able to see a smoke plume rising above a tall stone pillar. That is your first Crash Site.
Hop onto a high rock near the Dropsite and you can spot a Crash Site atop a distant stone column
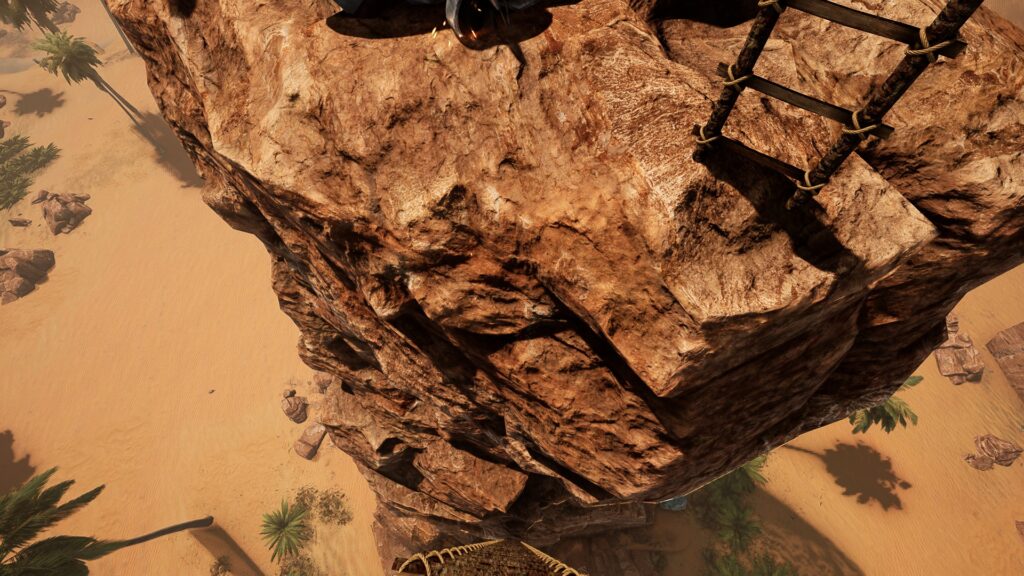
Once you reach the pillar, jump onto the wider base to get close to the center spire, and then place the first two Wood Ladders in what will become a tall stack running up its side. Hop onto the ladder and place each new ladder piece as you climb: at some point you will get too far from the spire — continue to climb the current ladder section until the camera view moves you onto the top; do not move as it happens. At this point, you can place a Wood Floor to step onto and then restart the ladder closer to the spire. Alternatively, you can find a place against the wall to deploy a second ladder and “Ladder Teleport” onto it to continue your ascent. (We discussed this method at the beginning of the guide.)
A stacked ladder near the base of the stone column will bring you within jumping distance of the wreck at Crash Site Alpha
Once you reach the top, recover the tech from the wreckage and start on your way down.You can pick up the ladders as you move down, but be careful not to pick up the ladder you are on. It is very easy to do, but keep your finger on the ladder interact key (F) to grab on in case you start to fall.
Crash Site Bravo: Canyon Ambush
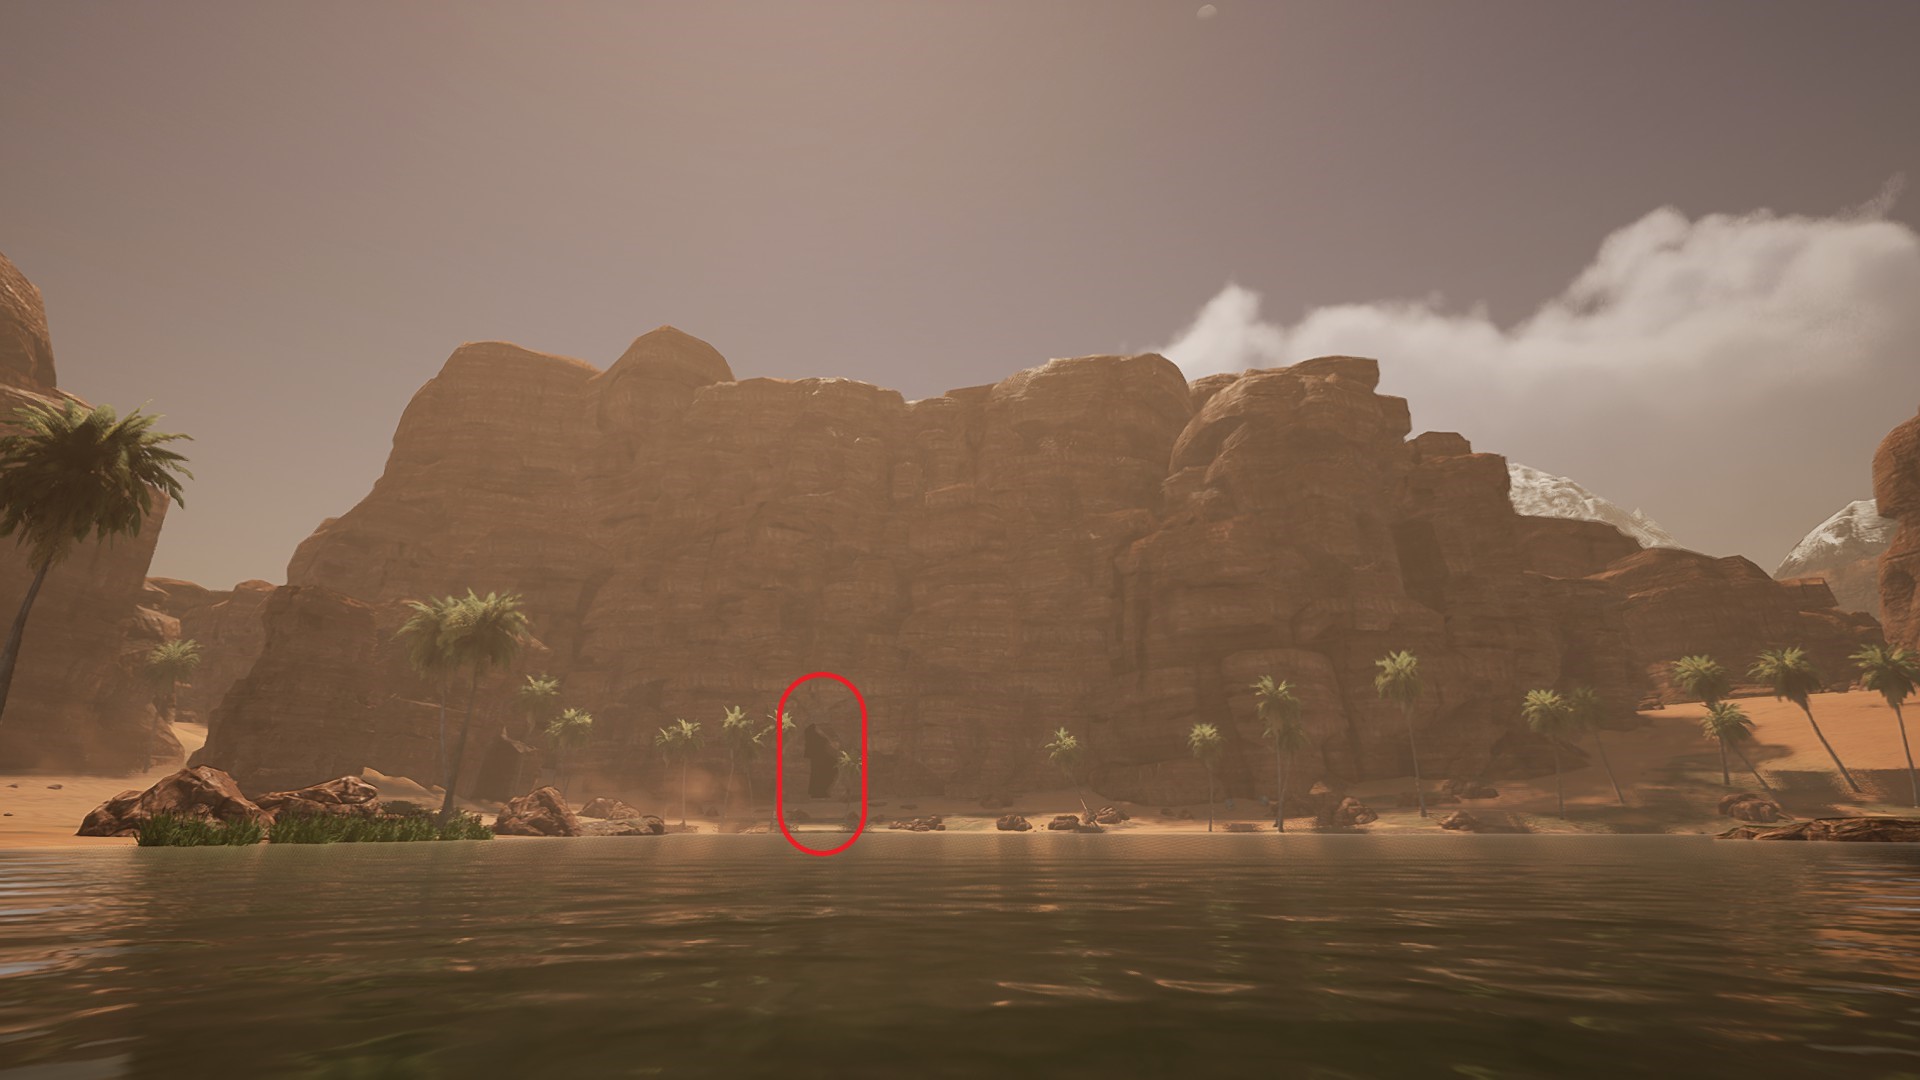
Once back on firmer ground, you will see the zone for the second objective. Head south from the spire along the river until you arrive at a large lake. (This is where you can also pick up a Sponge which can be used as a water container to slightly extend your water supply.) You will see a cave on the south side of the lake which runs through a mesa.
A massive cave entrance on the southern shore of the big lake in M4 will take you straight to Crash Site Bravo
You will find the next objective at the other end of the cave. Otherwise, you can move along the east or west side of the mesa to reach it.It should be safer to just use the cave in this instance: there are no cave worms in this cave (though, make sure you already have or can make a Wood Rag Torch). In contrast, if you take either of the canyon routes along the sides, you may encounter increased resistance from predators in tight quarters. As a bonus, you can take a few moments to mine some Iron inside the cave and deploy a Crafting Bench, so you can craft a Longbow and Flint Arrows.
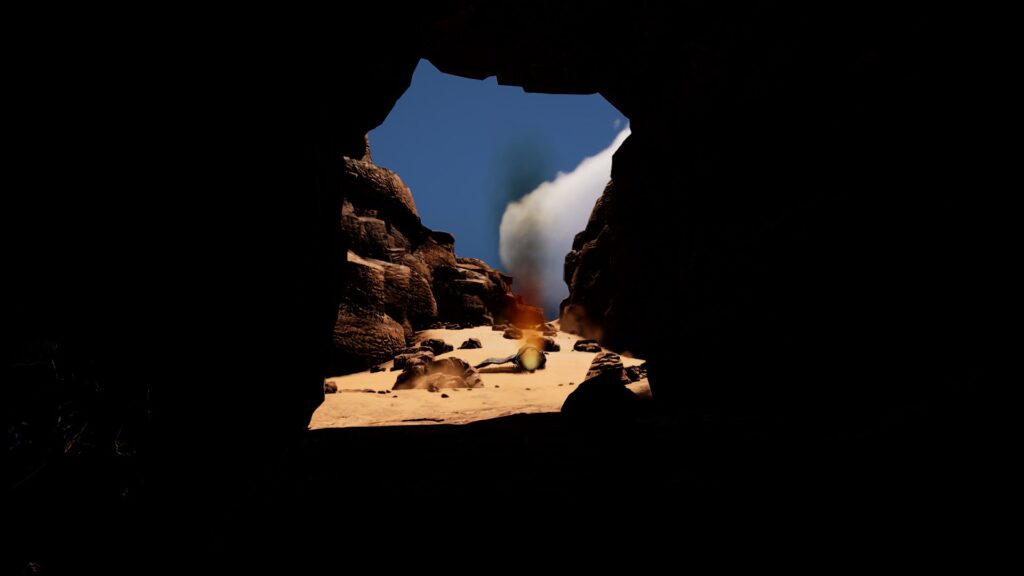
Look out for ambushing cougars as you emerge from the cave to search the second wreckage
As soon as you arrive at the Crash Site, you may be confronted by several cougars. They have a very large detection radius and there is no cover. Try to take the cougars down in one hit, or you will likely aggro many other predators in the area.Retreat through the cave if you need to — there are two lakes inside which can slow down your pursuers. When you get a chance, grab the Device component from the wreckage and continue south as fast as possible.
Crash Site Delta: Hidden Cliff Ledge
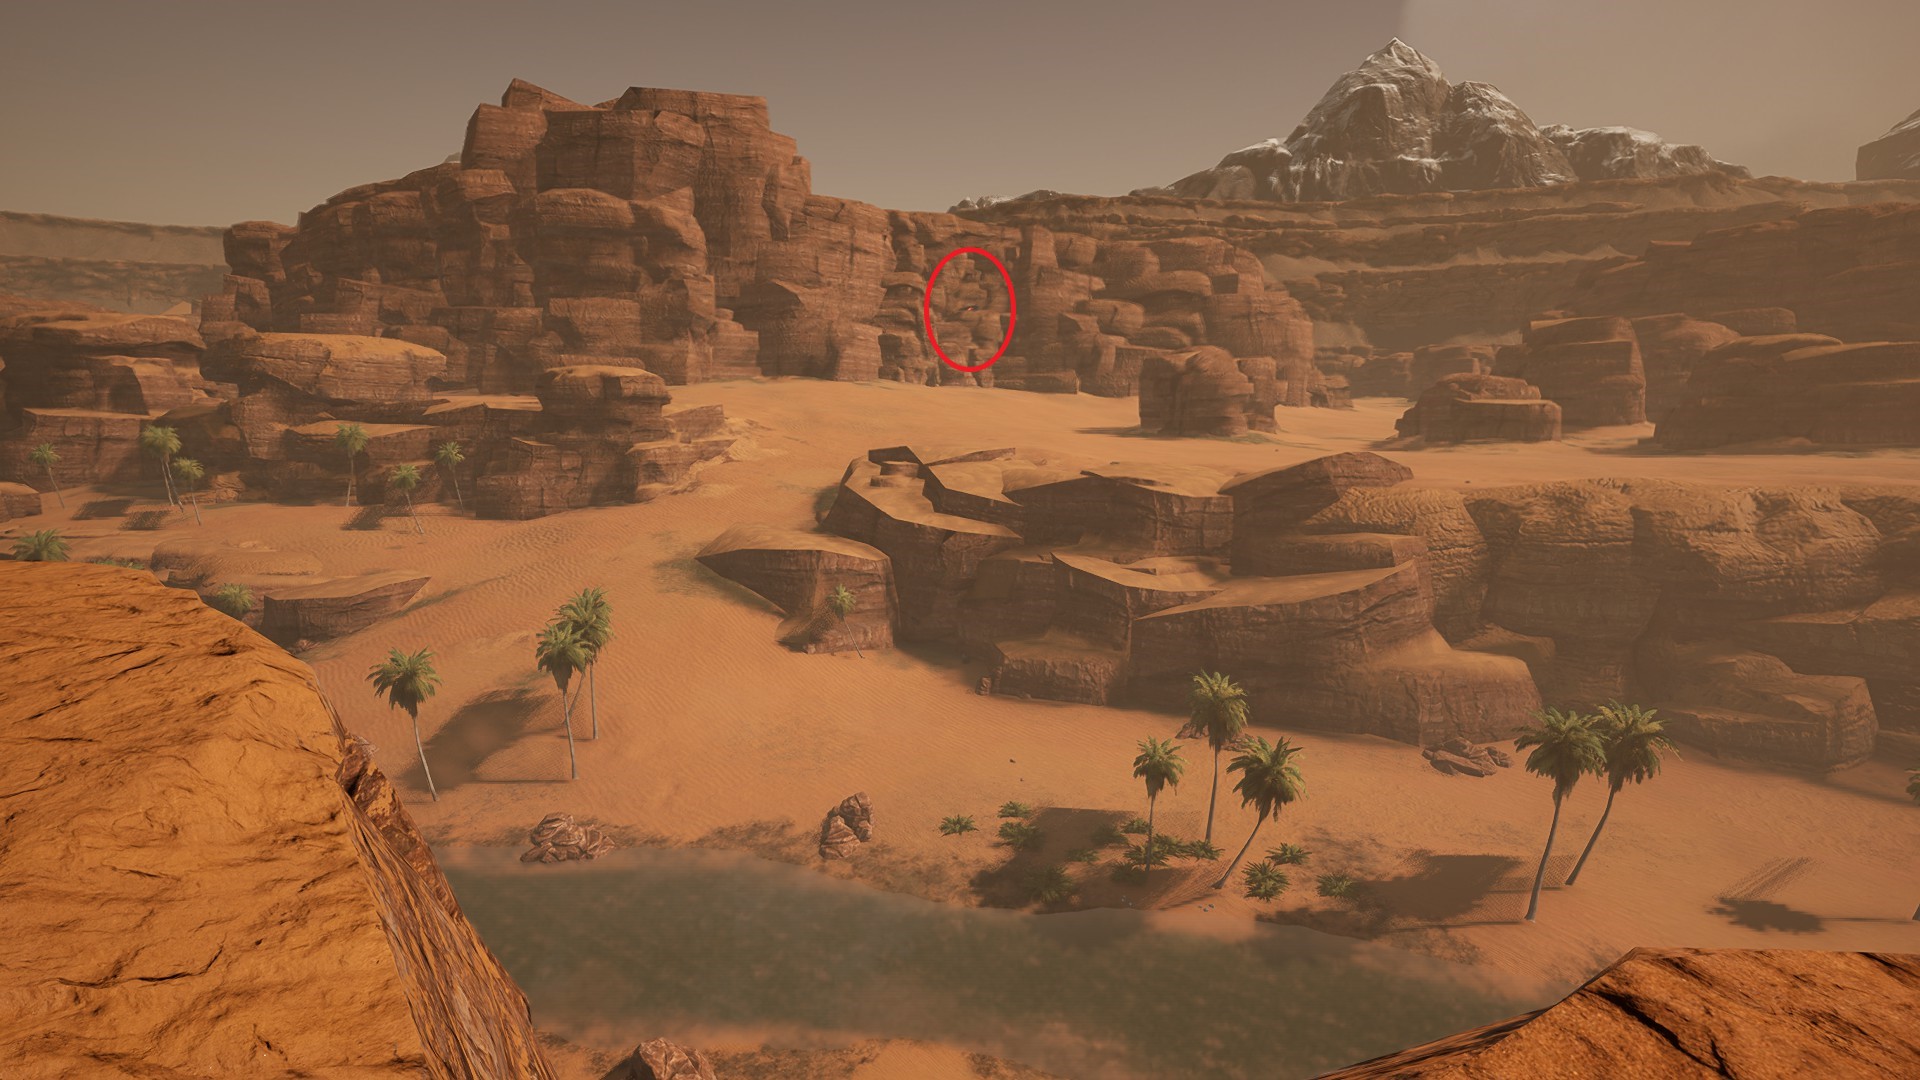
You will soon find yourself on a steep cliff face. You will need to find a safe sequence of ledges to break your fall as you descend, or you will break your leg (or worse) in the fall. Alternatively, you can follow the cliff edge toward the east or west until you come to a gentler path down — you will probably be returning along the east path after you retrieve the last component of the device anyway.
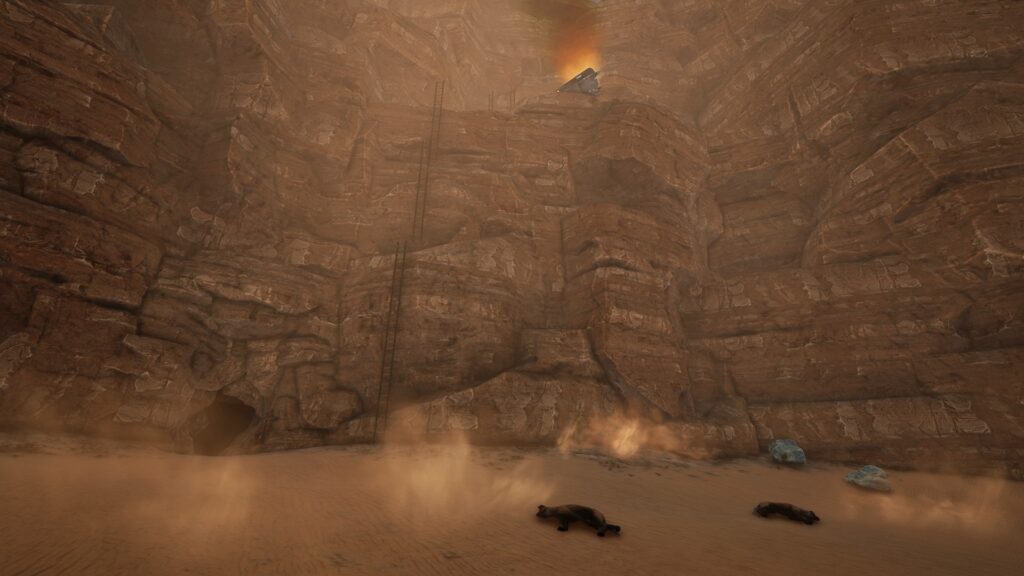
From here, you can spot the faint glow of the wreckage at Crash Site Delta halfway up the distant cliff face
The final Crash Site is past the cliff, across a river, and across an open desert. As you approach, you will see a faint light and some smoke from burning wreckage high up the side of another cliff face. You will need 15-20 Wood Ladders, and possibly a couple Wood Floors to scale it and reach the ledge where the wreckage sits. You can gather the wood and fiber you need from the riverside before you head south.
You may need to “Ladder Teleport” or place Wood Floor pieces into the side of the cliff as you climb in order to follow the face close enough to jump onto the ledge with the wreck.
Use the ledges to break up the ladder stacks so you have something to break your fall if you stumble on the way down
Once at the top, retrieve the last component of the device, and Sol will give you your last objective — to construct and test the experimental Device. A recipe to reassemble the Device will appear in your crafting menu.
Assemble it to find out what happens, and you will have completed all mission objectives.
Whatever Sol says, this prototype does not make you the Ironman. Resist the urge to jump!
Finishing the Mission
Now is the time to decide how to return. If you haven’t brought any workshop items you care about losing, you can leap off the ledge and hopefully die from the fall damage.
Alternatively, you can test whether the unstuck exploit still works. For this you will need to build a Wood Ladder stack tall enough to ensure that the game cannot find a safe and valid place to send you, and instead will teleport you back to your Dropship.
If you want to explore and take the scenic route, you can descend your scaffolding, run back to the river, and follow it toward the north east until it takes you almost directly to your Dropship.
Either way, as Sol would say, “you’re done here”, and you can blast off back to the orbital station.
Hope you enjoyed this mission and found the walkthrough helpful. Feel free to leave your comments and suggestions below. Then, check out one of our other guides or walkthroughs, and take us with as you drop down to Icarus for another mission. Enjoy!
Share this article:
SurvivalSherpa
SurvivalSherpa is an avid gamer spending most of his time at the nexus of the survival, crafting, building, and role playing genres on any platform, especially to test indie titles in EA. AFK, life is about work and education in STEM fields, reading fantasy, and sipping great coffee in the Pacific Northwest.