BEACHHEAD is ICARUS’s tutorial mission, designed to walk you through the basic survival skills before letting you take on further missions. This guide will give you a quick and basic step-by-step walkthrough of this tutorial. (As of December 2021, there is a way to skip this mission altogether.)
If you would like to skip the tutorial, return to and interact with your Dropship. We recommend that you briefly leave the menu and check that the objectives got completed. Then, return to the orbit.
If you would like to complete the objectives, we will walk you through the basics: we will quickly level, unlock basic tools, hunt, and unlock the bedroll blueprint. Then, we will either build a proper shelter, assemble one out of material stacks, or locate a nearby cave. Once we have a shelter, we will set up the bedroll and rest, if needed. Then, we will continue gaining experience until level 5 to complete the mission.
Skipping the tutorial is as easy as: Hop out of the ship, turn around, interact with it with [F], click Return to Station.
BEACHHEAD requires minimal travel — you can do everything you need for the objectives without leaving the lake
Mission Walkthrough
Remember that, if you would like, you can skip the mission altogether by interacting with your Dropship (Press [F]). Check that the mission objectives have completed by briefly closing down the menu, and then click “Return to Station”.
That being said, if you would like to use BEACHHEAD as an opportunity to learn some quick basics without headache involved, let’s continue!
Basics: What Do I Do?
One consideration you should always keep in mind when playing ICARUS is that there is no pause button. If you have your character hanging out on the surface as you are reading this guide, their Oxygen, Hunger, and Water meters will be going down.
So, if you need to start with the very basics, we highly recommend that you exit to the Character Select and read about how to take care of your basic needs first. You can select “Resume Prospect” after selecting your character and return to your mission exactly as you left it.
Here are the basics you need to know before we proceed:
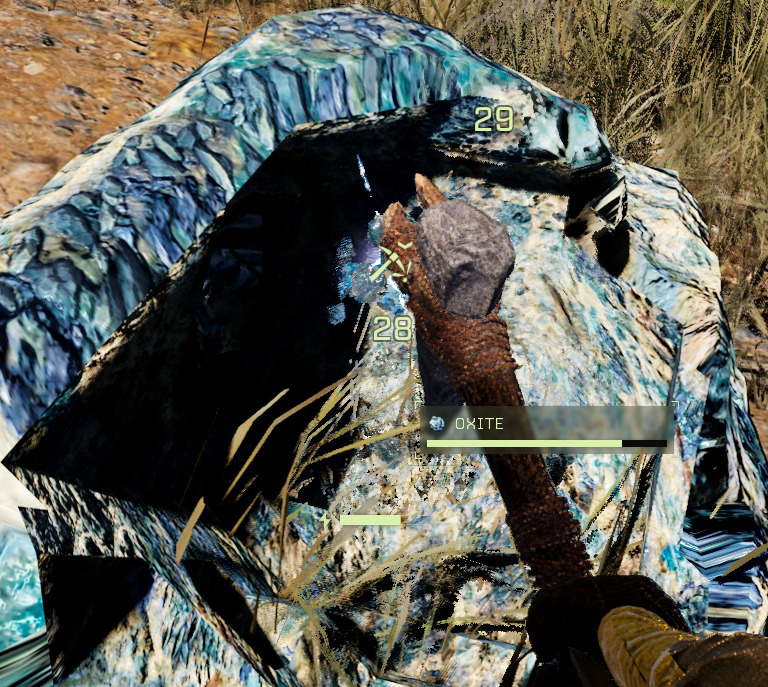
Oxite Ore is used to restore your Oxygen meter. Pick up blue rocks from the ground or mine blue nodes with a Stone Pickaxe to acquire it. Right-click and Consume it to restore your oxygen. Place it into your oxygen slot inside the inventory screen to consume it automatically.
You can drink from the nearby lake to replenish your Water. Hold [F]. Eating Berries will help a little bit, but is not a substitute for drinking.
Collect Berries, Pumpkins, Watermelons, and Carrots for food. For a more effective food source, cook your Pumpkins and Carrots inside a Campfire (requires a blueprint).
You can also collect Fish by killing them inside the lake. However, eating fish meat before cooking it in a Campfire is likely to result in food poisoning.
We already have a dedicated Beginner’s Guide to ICARUS, so if you need a detailed breakdown of the basics, head over there.
Now you are ready to hop into the game and level up!
Step 1: Gaining the First Levels
Right After Landing
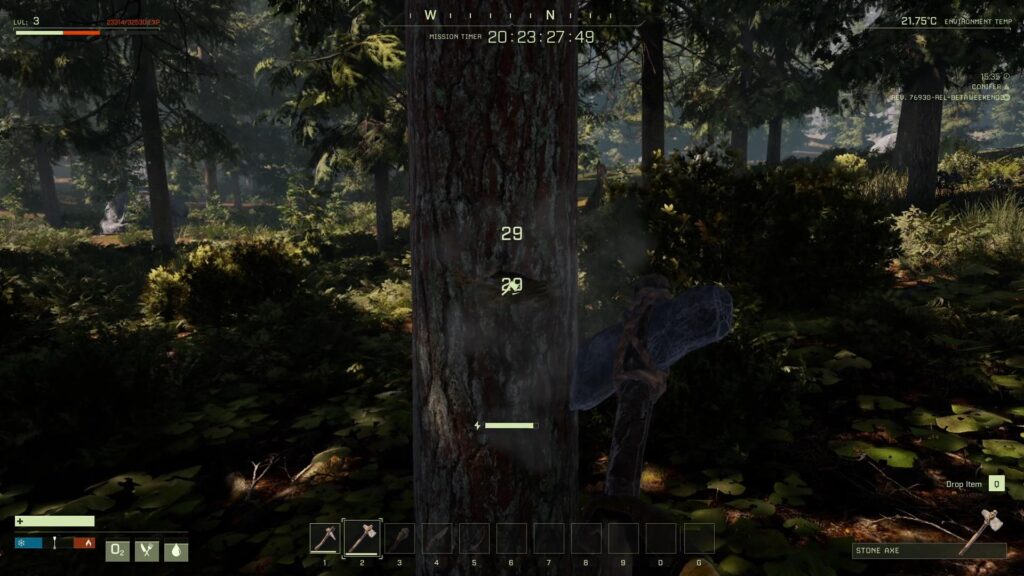
As soon as you land and exit the pod, start gathering Sticks and Stone from the ground, and picking from the ferns and bushes for more Sticks and Fiber. We need enough to craft a Stone Pickaxe, which you should have access to starting with level 1. Mine some stone and craft a Stone Axe.
Use the Axe to start chopping down trees: unless you have a reason to focus on mining for your character, chopping trees will give you the most experience on lower levels. (You can read about this in our dedicated guide on fast leveling.)
Idea behind this approach is to ditch the tree as soon as it starts falling and move on to the next one
At some point, you should find an Oxite node and mine it with your pickaxe. You will use a lot of Oxite when you consume it raw, so don’t hesitate to finish the node (you will hear a satisfying “crack” and get some bonus oxite and experience).
Unlocking Essential Blueprints
Gain your first 2 levels in this manner as quickly as you can and unlock the following Blueprints as you level (in the order of importance):
(Grab whichever talents you think will suit your future build. Extra stamina is always useful, so feel free to pick up Chase ‘Em Down. You can pick up some Bows talents to assist with hunting.)
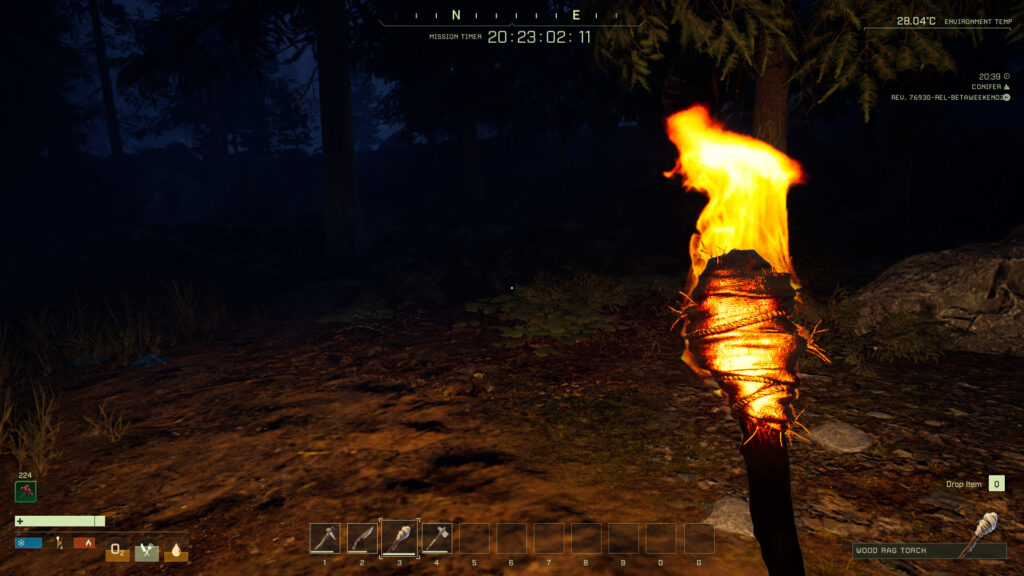
You will need the Stone Knife to defend yourself should a sneaky wolf descend upon you. You will also need it to skin the animals you kill to get resources. A Wood Rag Torch will allow you to see once the sun sets (or inside caves), while the Campfire will allow you to cook raw food and sleep in a Bedroll to skip the night time.
If you do have a fight with a wolf, there is a chance it will inflict a Wound debuff. You will need to treat it with a Basic Bandage to avoid it turning into a Festering Wound.
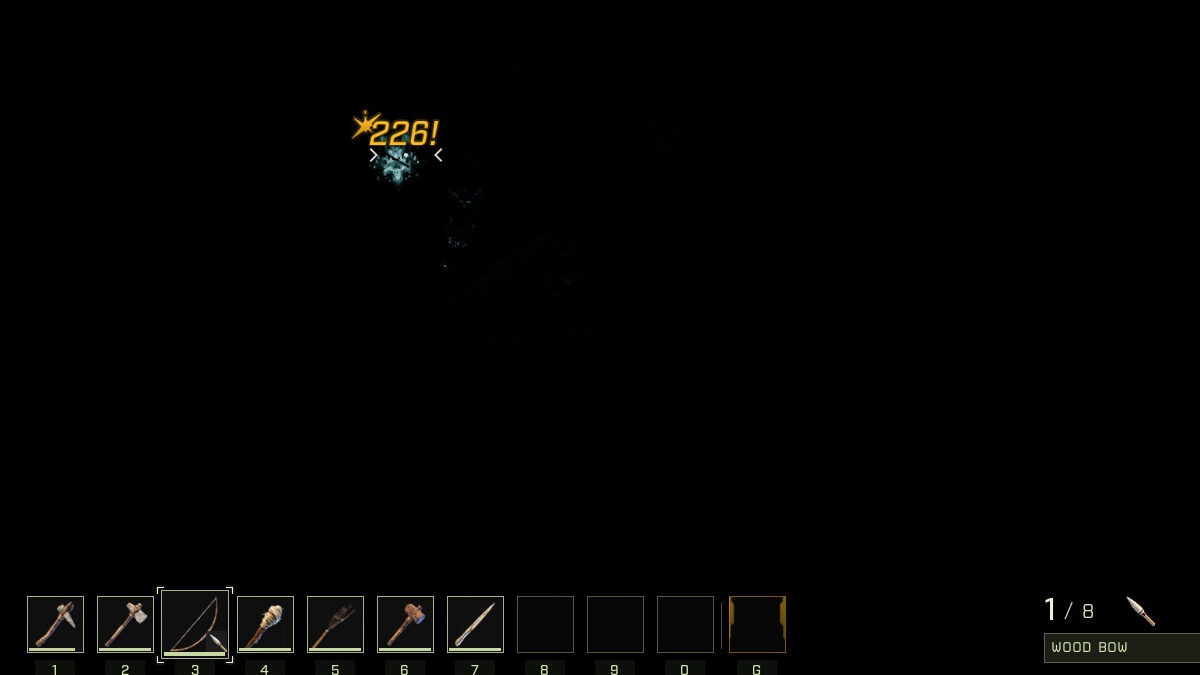
Wood Bow and Stone Arrow will make the next step, Hunting, a little easier for you. You can learn a very useful and easy trick for killing your targets very quickly if you have those handy.
Step 2: Hunting
We will need to get the Fur and Leather for our Bedroll before the sun sets.
Fur will be harder to collect, so we will start with attacking wolves and baby deer and then put together some Bone Arrows to make hunting other animals a little bit easier.
At first, you can use a knife, but be careful: eat some Berries to increase your maximum health. If you still have some time before sunset, Right-click and Deploy a Campfire, throw some Wood into it, and cook some vegetables and fish. Eat up to three unique foods to boost your stamina and health.
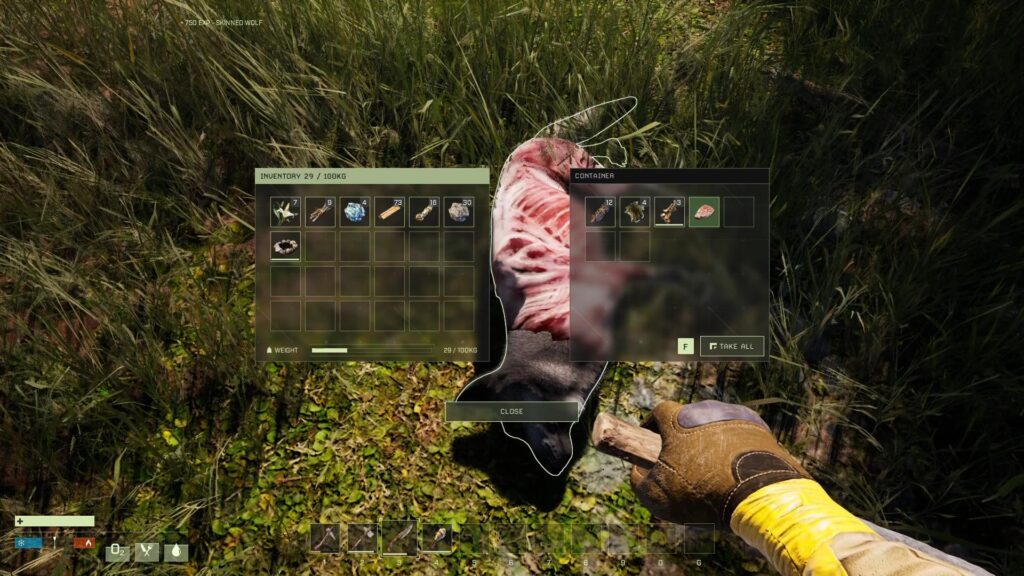
With your knife, defeat a wolf or two to collect some Leather and Bone (attack the leftover carcass to collect more bone). Once you can craft a bow and some arrows, learn how to land Critical Shotsfrom our dedicated guide (summary: stealth, aim, shoot in the vicinity of the head). With this knowledge you can kill most of the animals around the lake, and with Bone Arrows you can go after the large deer as well.
Fallen animals attract more wolves — skin the bodies to avoid that, or pick up Leather and Fur and leave the half-skinned carcass lying around to use this to your advantage
As soon as you collect 20 Fur, craft yourself a Bedroll. If you are co-oping with a friend, each of you will need a separate bed (or the other player will need to briefly leave the game as you sleep).
Next step: figuring out a shelter. We recommend that you either use our cave suggestion or a shortcut method we will describe below.
However, if you are an over-achiever with level 5 and extra blueprint points, you can absolutely construct a little wooden house — read about how to do so in our dedicated guide on building a shelter. (You can unlock thatch construction, but we personally consider it a waste of blueprint points.)
Otherwise, it’s likely that it’s starting to get a little dark, so let’s pick a quicker method for securing a shelter before the sun sets down. Let’s put together four Stone Piles or Wood Piles as a makeshift shelteror take on a bit of a challenge and locate a cave.
Pick your approach below and let’s get started!
Thank you to @Dionaea for the idea and the pictures!
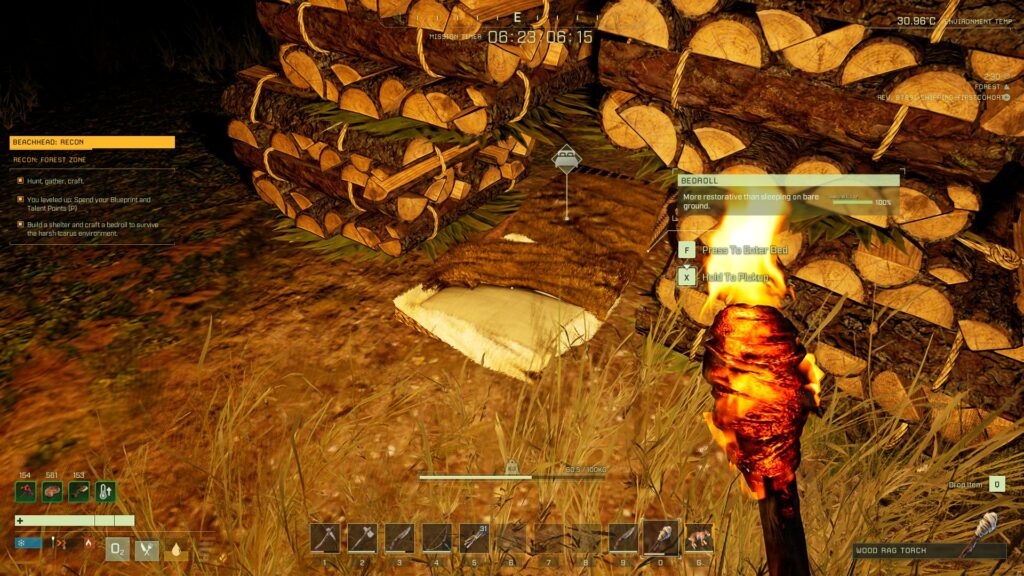
Quick and simple: a “roof” made out 4x Wood Piles or Stone Piles, arranged to cover a Bedroll underneath, with a Campfire set up in front. (You need an active campfire to be able to sleep, but you don’t need it to complete the objective).
So, all those trees we have fallen for quick leveling earlier… it’s probably time we went and chopped them up! Each tree yields quite a bit of Wood, so it shouldn’t take you much longer than a couple of minutes to have 400 ready for exactly four piles (and a tiny extra for the Campfire). Of course, if you were unlocking mining Talents so far, you can make your piles out of Stone.
Craft and deploy each pile, and arrange them with a Bedroll underneath to look something like this:
Check that the bed underneath is considered properly sheltered (you will see a warning otherwise). Pick up and move the piles around until you have the bedroll properly covered
If you want to actually rest, set up the active Campfire at the front. If not, the objective will complete as soon as you put down a sheltered bed.
An alternative method could be using the community’s traditional “natural” shelter method — hiding inside a gigantic mineable boulder. If you find something that can fit a bed inside, you could have fun carving out a tiny cave that can fit you and set the campfire at the front. However, this method is more reliable for emergency weather shelter than for setting up a bedroll.
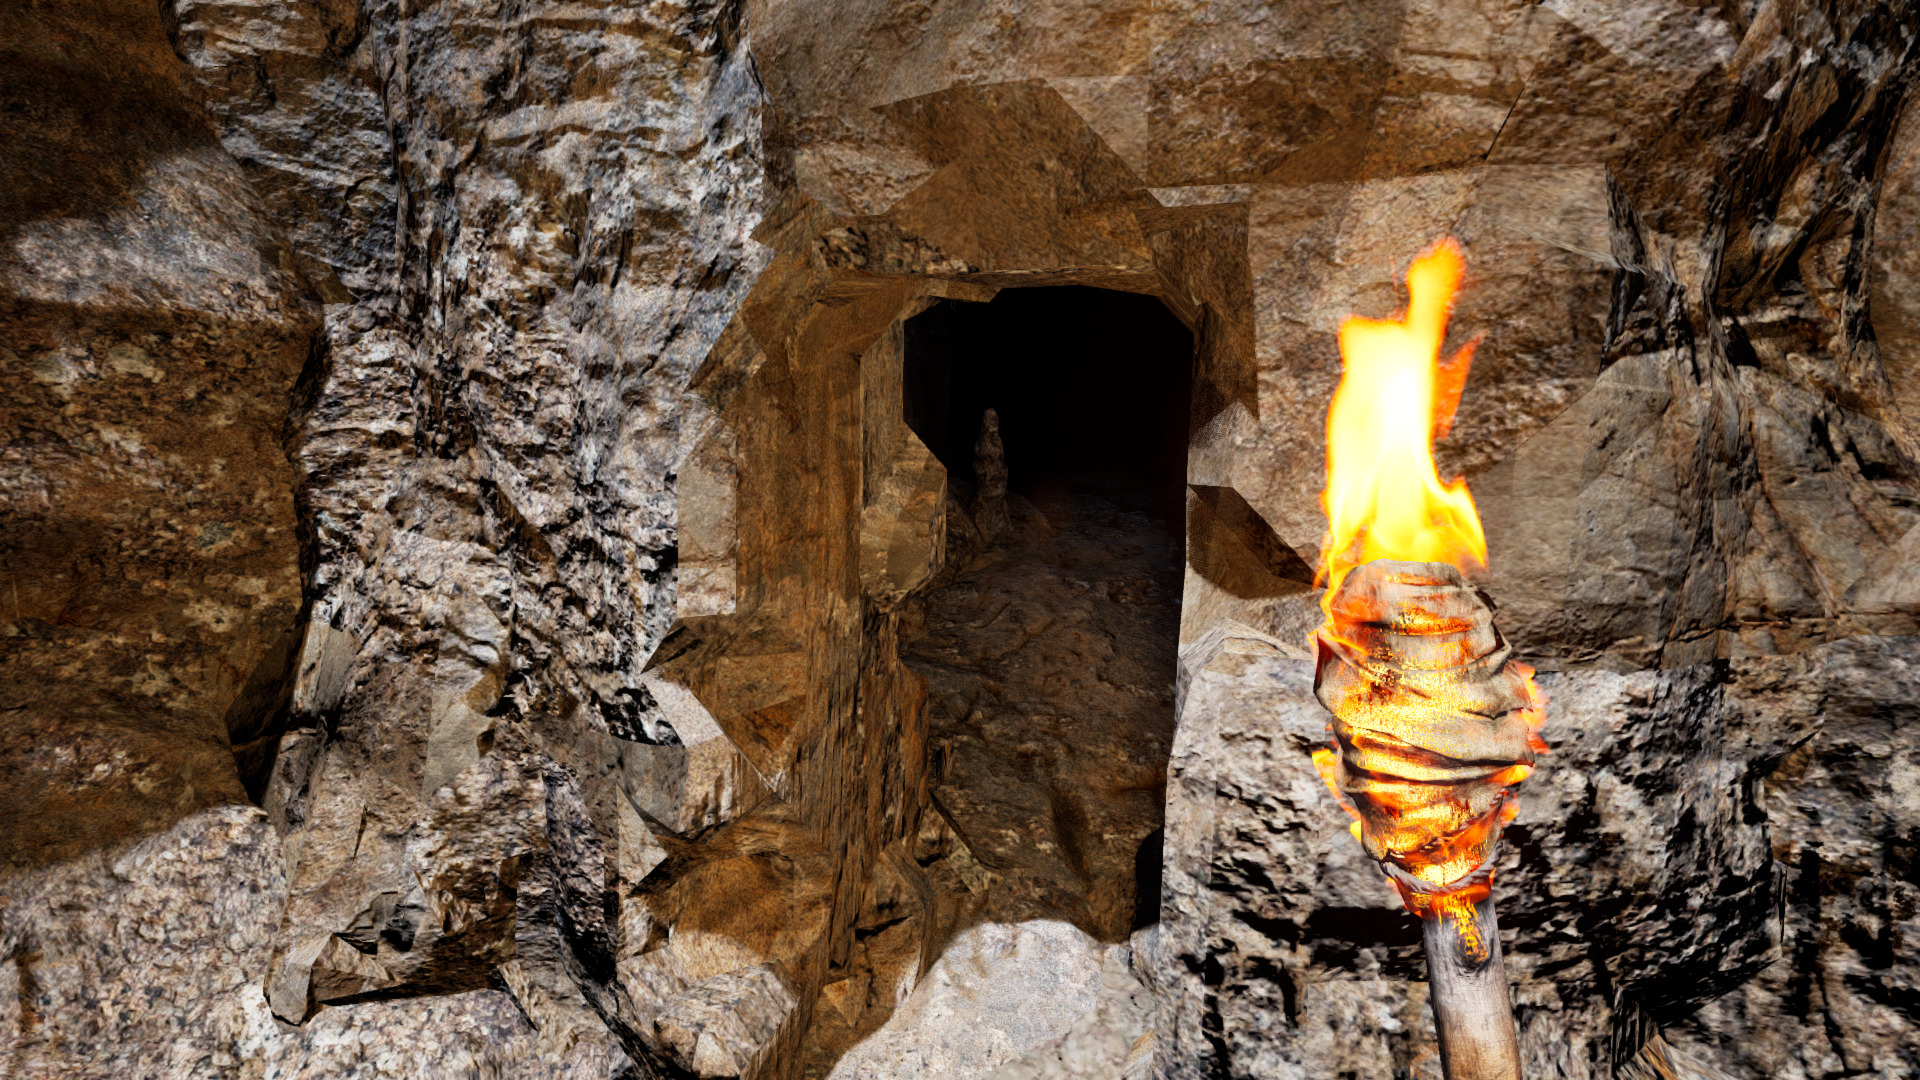
If you want to do something a little more cool, you can go on a little adventure to explore a nearby cave. Bring your bow: you will need to kill a small cave worm once you get inside. The cave we will help you find will be among the smallest in ICARUS, but more than large enough for a bedroll and a campfire. (You can use caves like these in the future to quickly create camps with a few benches and storage crates.)
Caves in the forest also come with a small pool of water inside to help you keep your water meter at full, as long as you don’t mind contracting Dysentery (the debuff is not as bad as it sounds.)
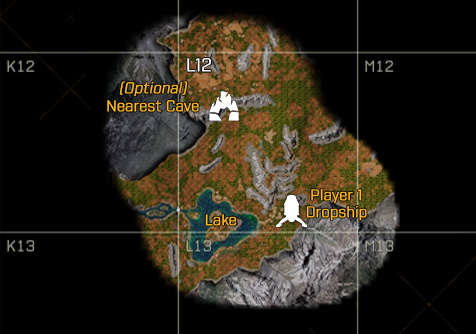
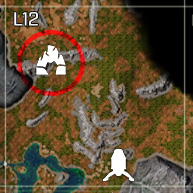
Open your map and double-click inside square L12, in its northwest corner, around where the cave icon is (in the left image) to set a custom waypoint, and let’s head out. (Click on the image if you need to see it in full size.)
The cave we are after is of a hidden kind. This means that its entrance will be hidden by a layer of rock.
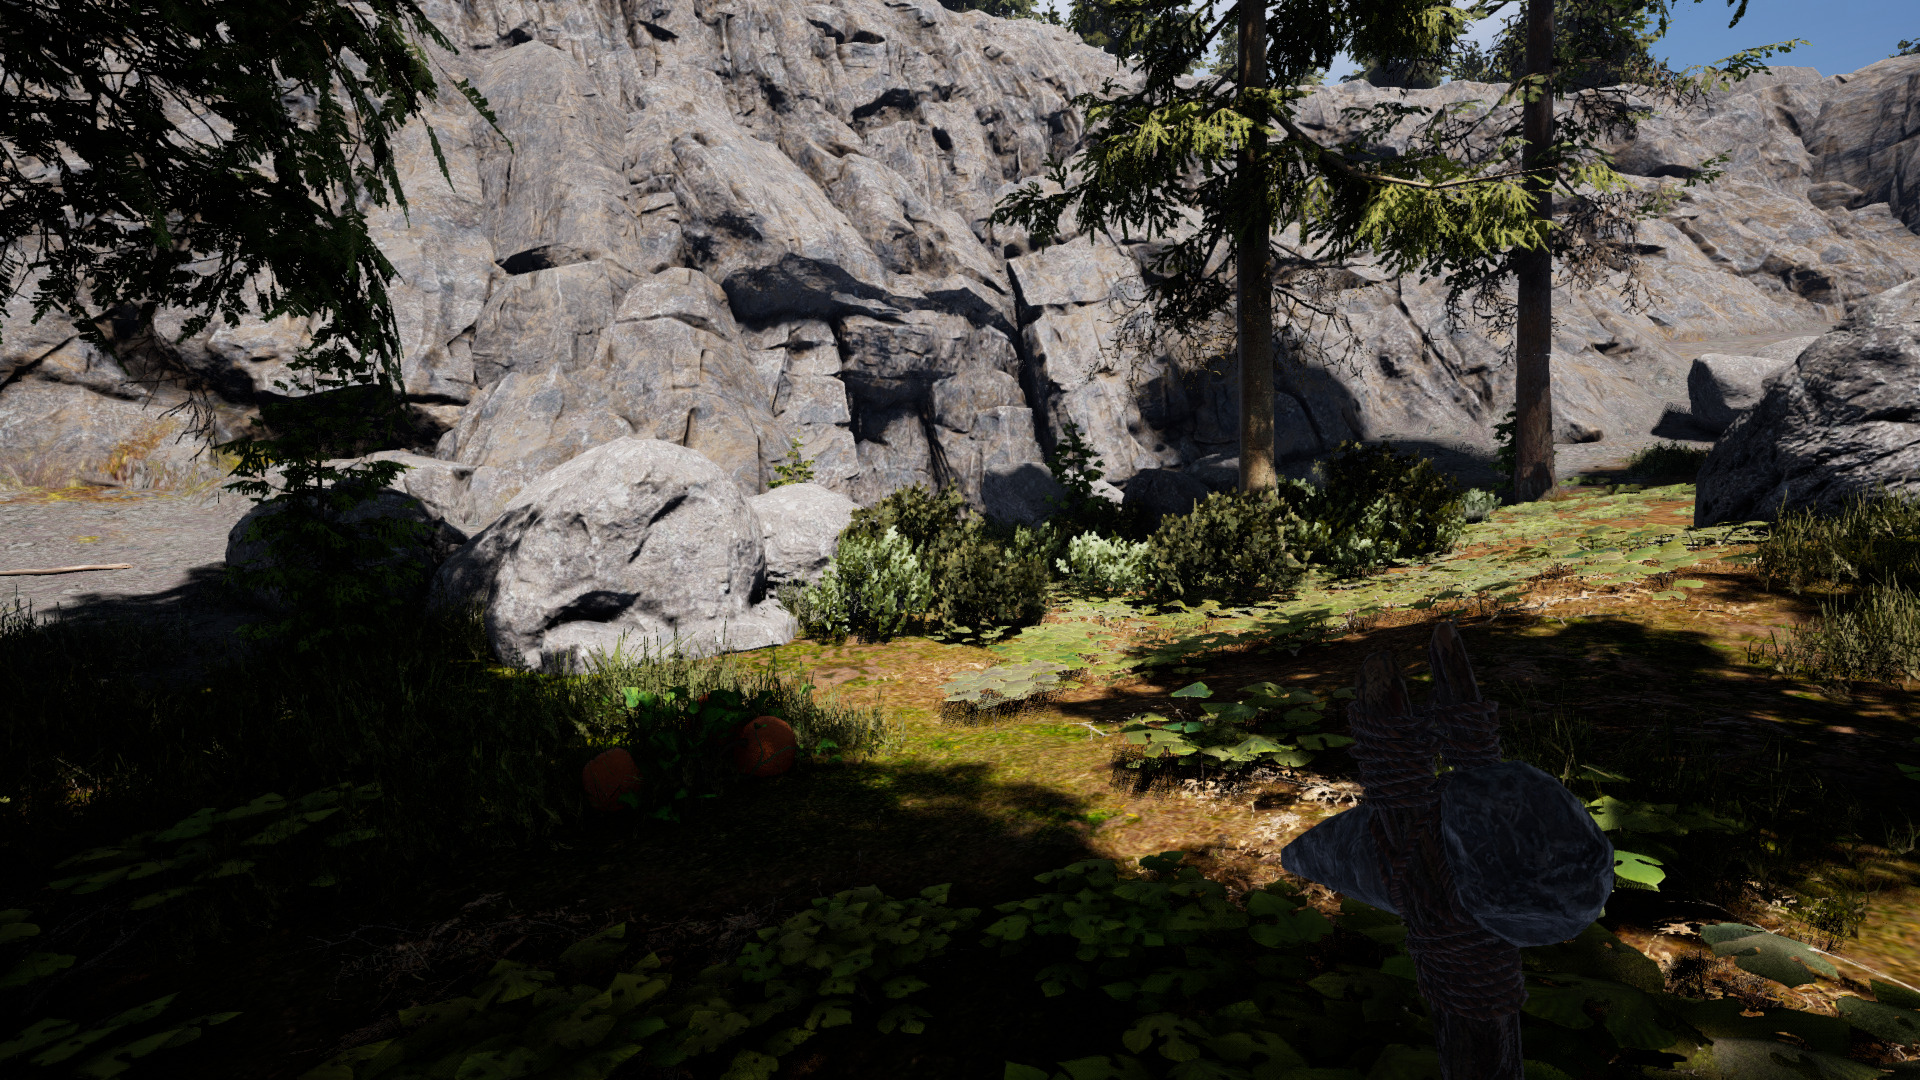
After you approach the ridge in the northwest corner, try to look for this arch with a rectangular depression in it. Approach it with your pickaxe and see if you get the option to mine it. (Click on the image if you need to see it in full size.)
Mine it until you make a hole that can fit you: don’t venture too far in without your weapons at the ready, however! That will be our next step.
Swap your torch for a bow. Make sure you have at least a couple of arrows. Eat a unique food or two, if you can. Once you venture in, a cave worm will pop out with a screech — you will not need a torch to see it (it will be bio-luminescent).
You have one goal: once the cave worm emerges, shoot at its head and take it down before it can inflict more than one stack of poison on you (its ranged attack).
You will likely get at least one stack of poison, but do your best to kill it as quickly as possible to avoid accumulating more
You won’t be able to skin or loot its body (sadly). If you need to heal, you can eat some cooked food. We are about to set up a Campfire, so you can cook some meat and vegetables if you need to.
Now, deploy the Bedroll. One thing with placing any deployables in the cave is”¦ you can’t see anything while placing. A useful approach is to locate a good spot, and go into the deploy mode without moving your character around too much.
You might need to shift around a little to get the outline to turn green, but you should be able to place the bed close to the entrance without much issue.
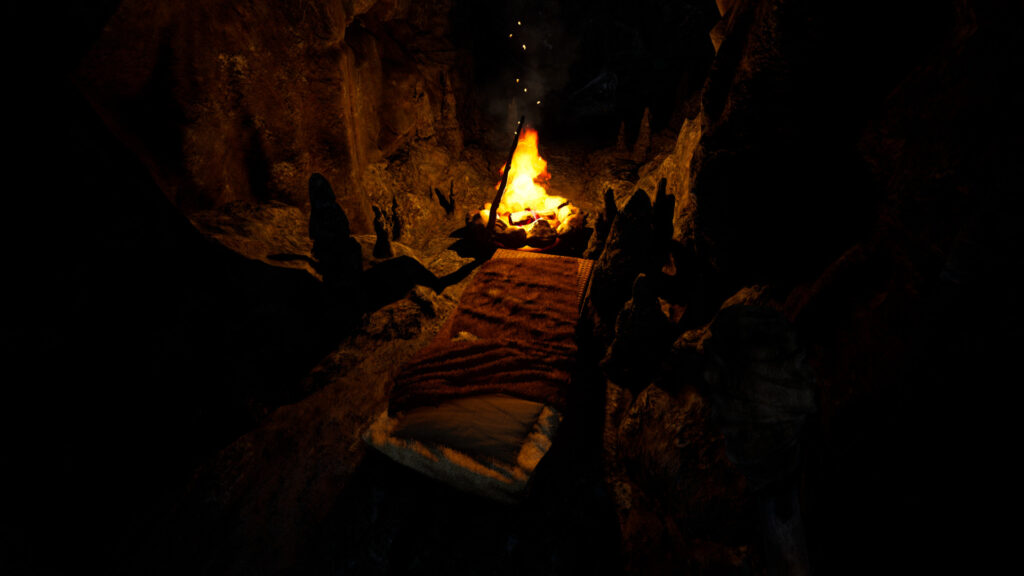
Once you place the bed down, the objective will complete. If you would like to actually rest (it has to be after 18:00), you can set up a Campfire. As a bonus, you can cook some food and then drink from deeper within the cave (you are likely to get Dysentery debuff, so eat your food first!).
If you were wondering why you went through all this trouble just to set up a bed, you might just get it once you light up that campfire and take a look around
What to Do If It’s Dark?
All in all, however, do not be too afraid to move around during night time. If you don’t get enough materials to craft a Bedroll before nightfall, focus on maintaining your needs for a few in-game hours until the sun comes back up (around 7 am).
The biggest change you will have to deal with at night is extremely low visibility: it will be harder to find oxite and food, you likely won’t be able to land any stealth attacks without hunting talents that give you animal outlines, avoiding being attacked by multiple wolves could become an issue, and finding specific locations can be awkward.
Night time in ICARUS: complete with creepy ambient sound and perpetually startled animals
As soon as possible, set up a Campfire site, open your map, and double-click to mark the location should you need to return to it. We recommend setting it up by the lake to allow you to drink and potentially fish, if needed (it’s a little brighter under water).
If you want to be proactive, you can try doing some stone mining to gain a little bit more experience as you wait. Don’t worry too much about the weather — it will not be very severe during this mission and will mostly just slow you down. Just try not to hold your torch against bushes or trees for too long to avoid setting the forest on fire.
Step 4: Reaching Level 5
Good morning! Hope you managed to catch some Zzz’s last night.
Well, good news is, you have completed the most difficult parts of the mission and your next goal is simple: level up! Go fell more trees and land some impressive headshots. You need to reach level 5 to complete the last objective on the list, so have a little bit of fun!
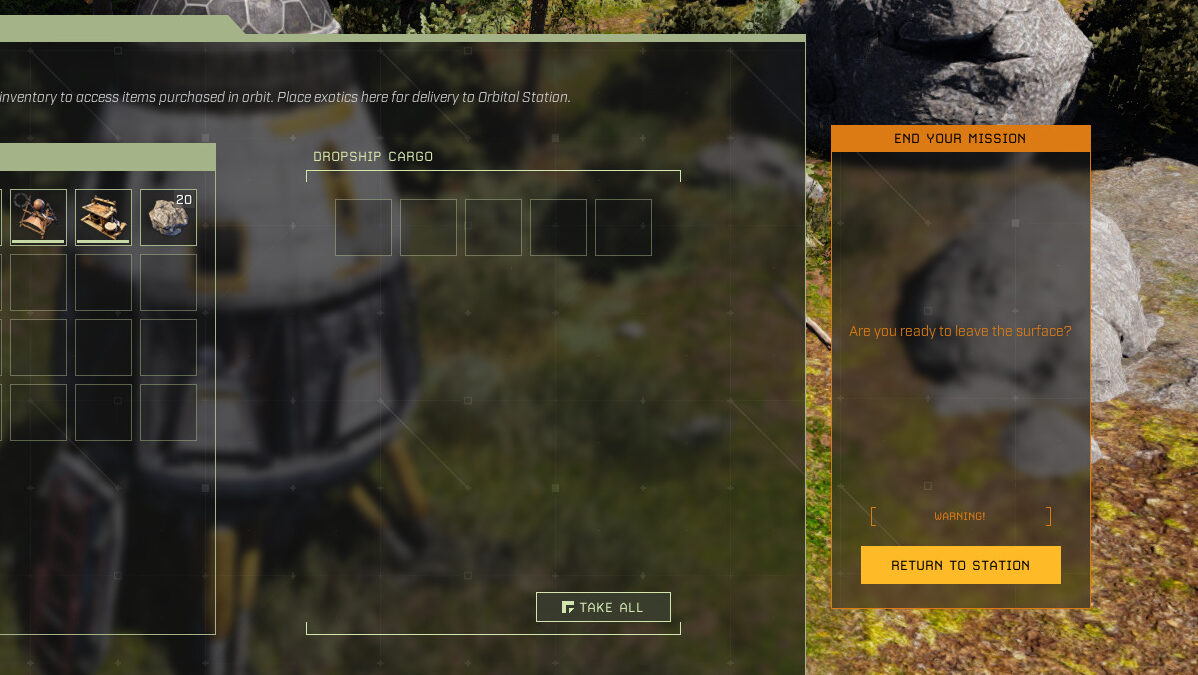
When all of the objectives are completed, return to your original Dropship and press [F]. This will bring up the ship’s inventory and offer the option to extract yourself. You won’t be able to bring any items you put together on the surface back with you, so simply click “Return to Station” to complete the mission.
We hope this mission guide for BEACHHEAD was helpful! Let us know if you have any questions or suggestions by using the comments box below.
Share this article:
Mila Grish
Dedicated contributor at EIP Gaming and a part-time collector of books she will never have time to actually read. Jumps on the newest releases just as quickly as on the uncovered dusty collections from the basement. For her, shiny graphics can never be an excuse to not have a polished player experience or an immersive story.
Orale I can not explain how stupid I am. I have been on this mission for the total 11 hours that I have in this game. These objectives have been checked off for the past couple of hours now but I thought I had to do something else. I didn’t realize that I just had to do these basic things and then leave. My ass already has a decent sized base and I’ve done a good amount of work. Time to extract  😲 


Orale I can not explain how stupid I am. I have been on this mission for the total 11 hours that I have in this game. These objectives have been checked off for the past couple of hours now but I thought I had to do something else. I didn’t realize that I just had to do these basic things and then leave. My ass already has a decent sized base and I’ve done a good amount of work. Time to extract  😲