MAELSTROM is a Scan and Expedition mission with strong-to-heavy storms. Each fight defending your scanner is long and intense. However, the ultimate goal of this mission is to blow open a permanent shortcut on the Styx map.
Objectives and Tips
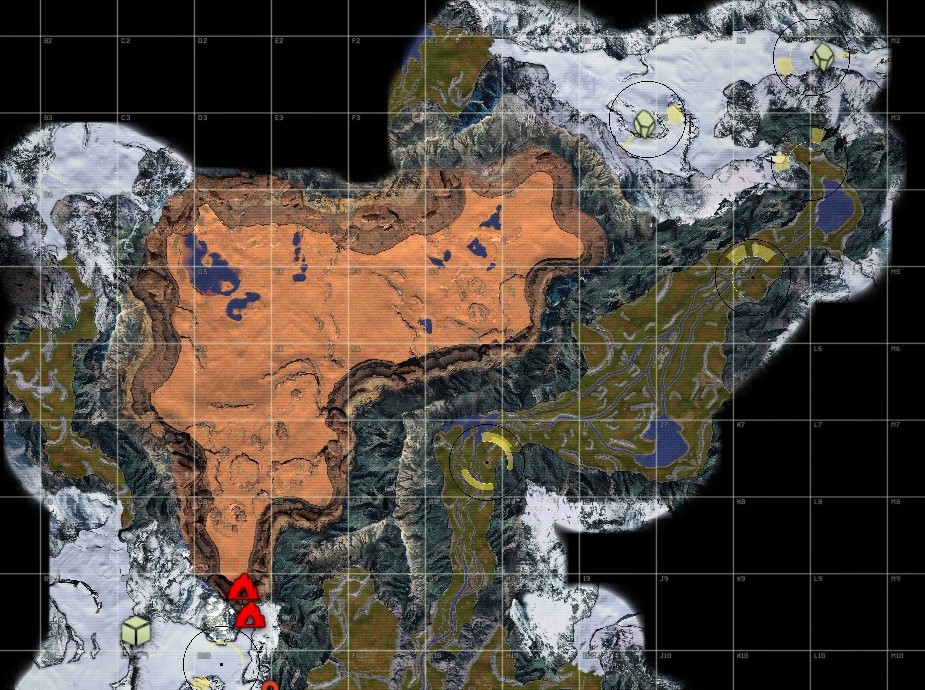
Set up a base somewhere between your Dropship and the entrance to the Arctic region (The Wall) to the north. Both arctic regions to the west and east of your Dropship have polar bears to cull for their fur to make a good set of armor.
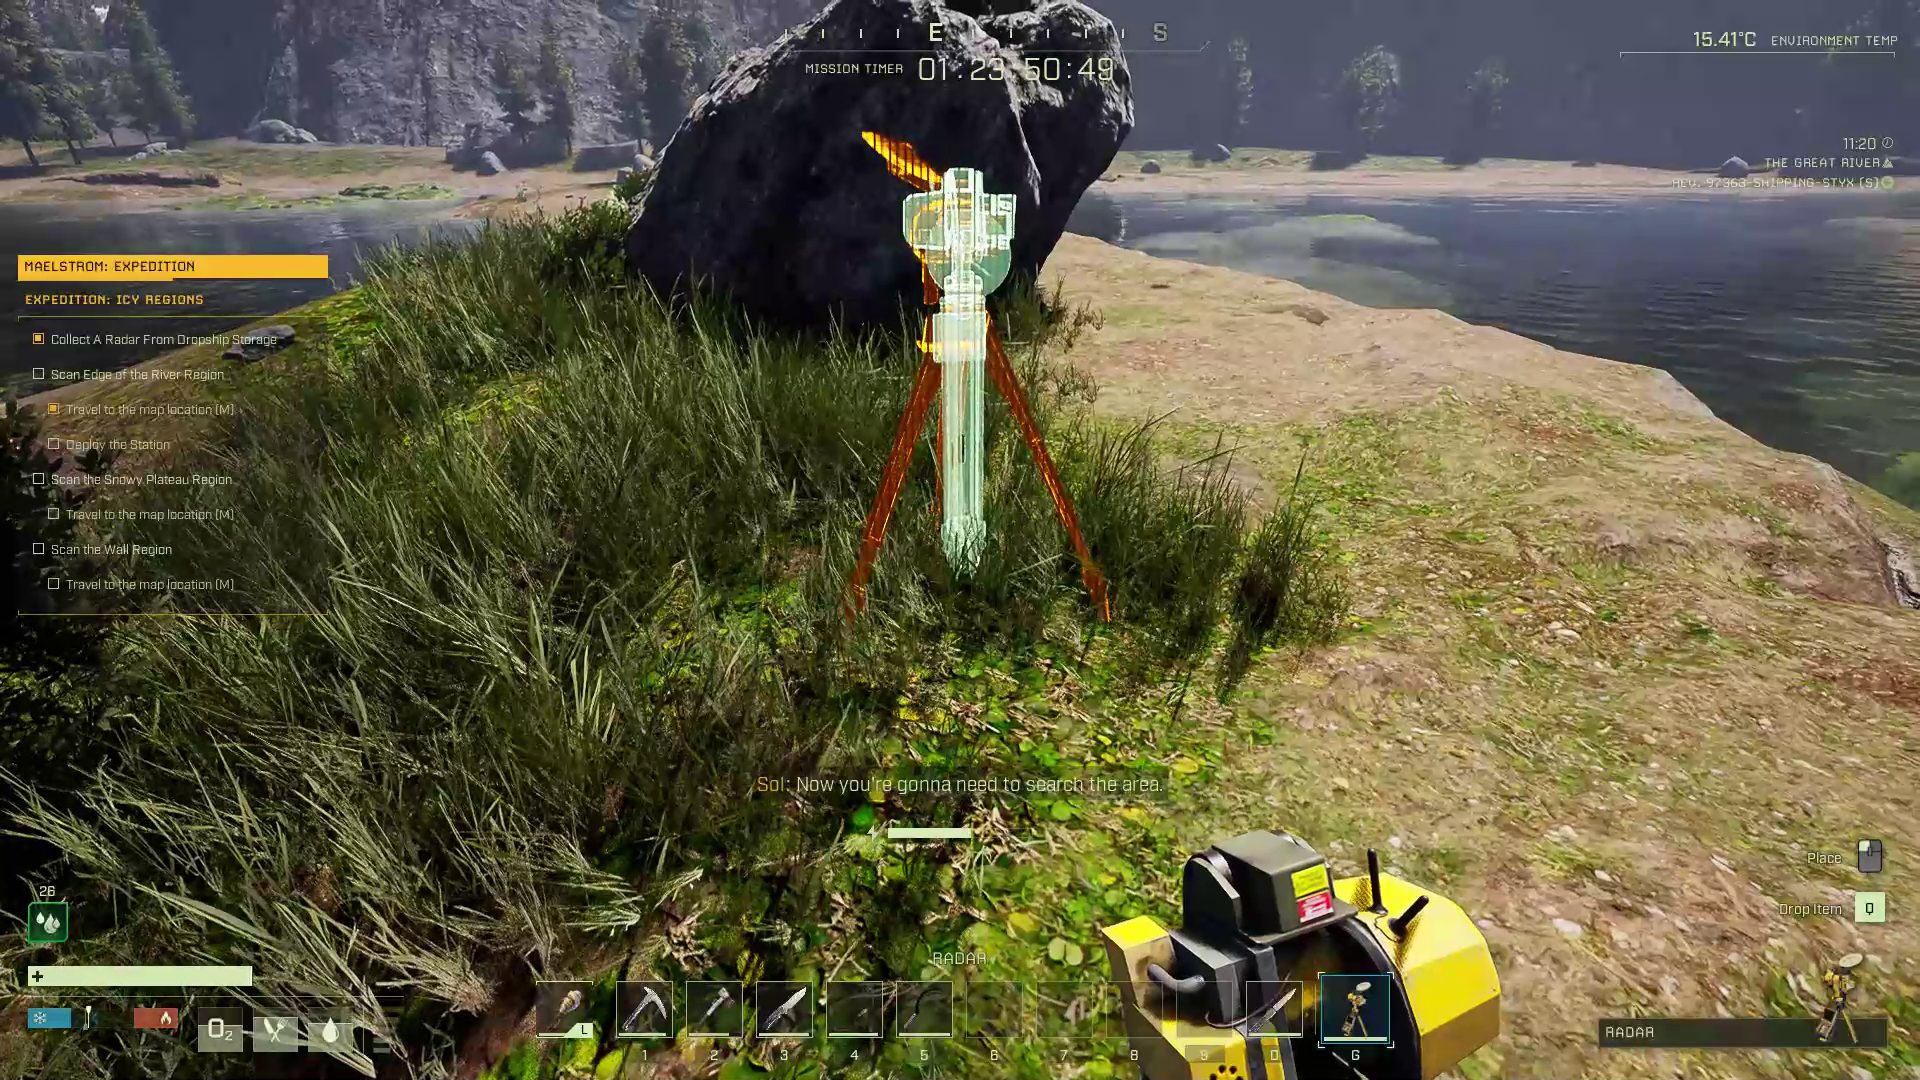
Once you are satisfied with your loadout, pick up a radar from the Dropship and head to an island in the southwest of E14 for your first scan. Each scan lasts 4 minutes, and the timer pauses if there are no conscious prospectors nearby.
It is best to keep your spawn point set at your base and not at a temporary shelter near the scan locations. If you become unconscious, the enemies will destroy your scanner and camp on that location. You can always pick up a new scanner from the Mission Equipment in the Dropship.
Scan Edge of the River Region
This fight is in close quarters and lively. Your scanner will technically only be targeted by wolves and bears for several minutes. However, this lake is also a hunting ground for many crocodiles. A strong firearm (or the Larkwell Martinez bow and arrows) will help drop them before they can take the island. The waters are also infested with piranhas.
Look for the hologram on an island in the lake to know where to place the radar.
You need to remain close to the radar for the timer to advance. Don’t be afraid to let the radar take a hit or two, and bring a Repair Hammer to keep its durability up.
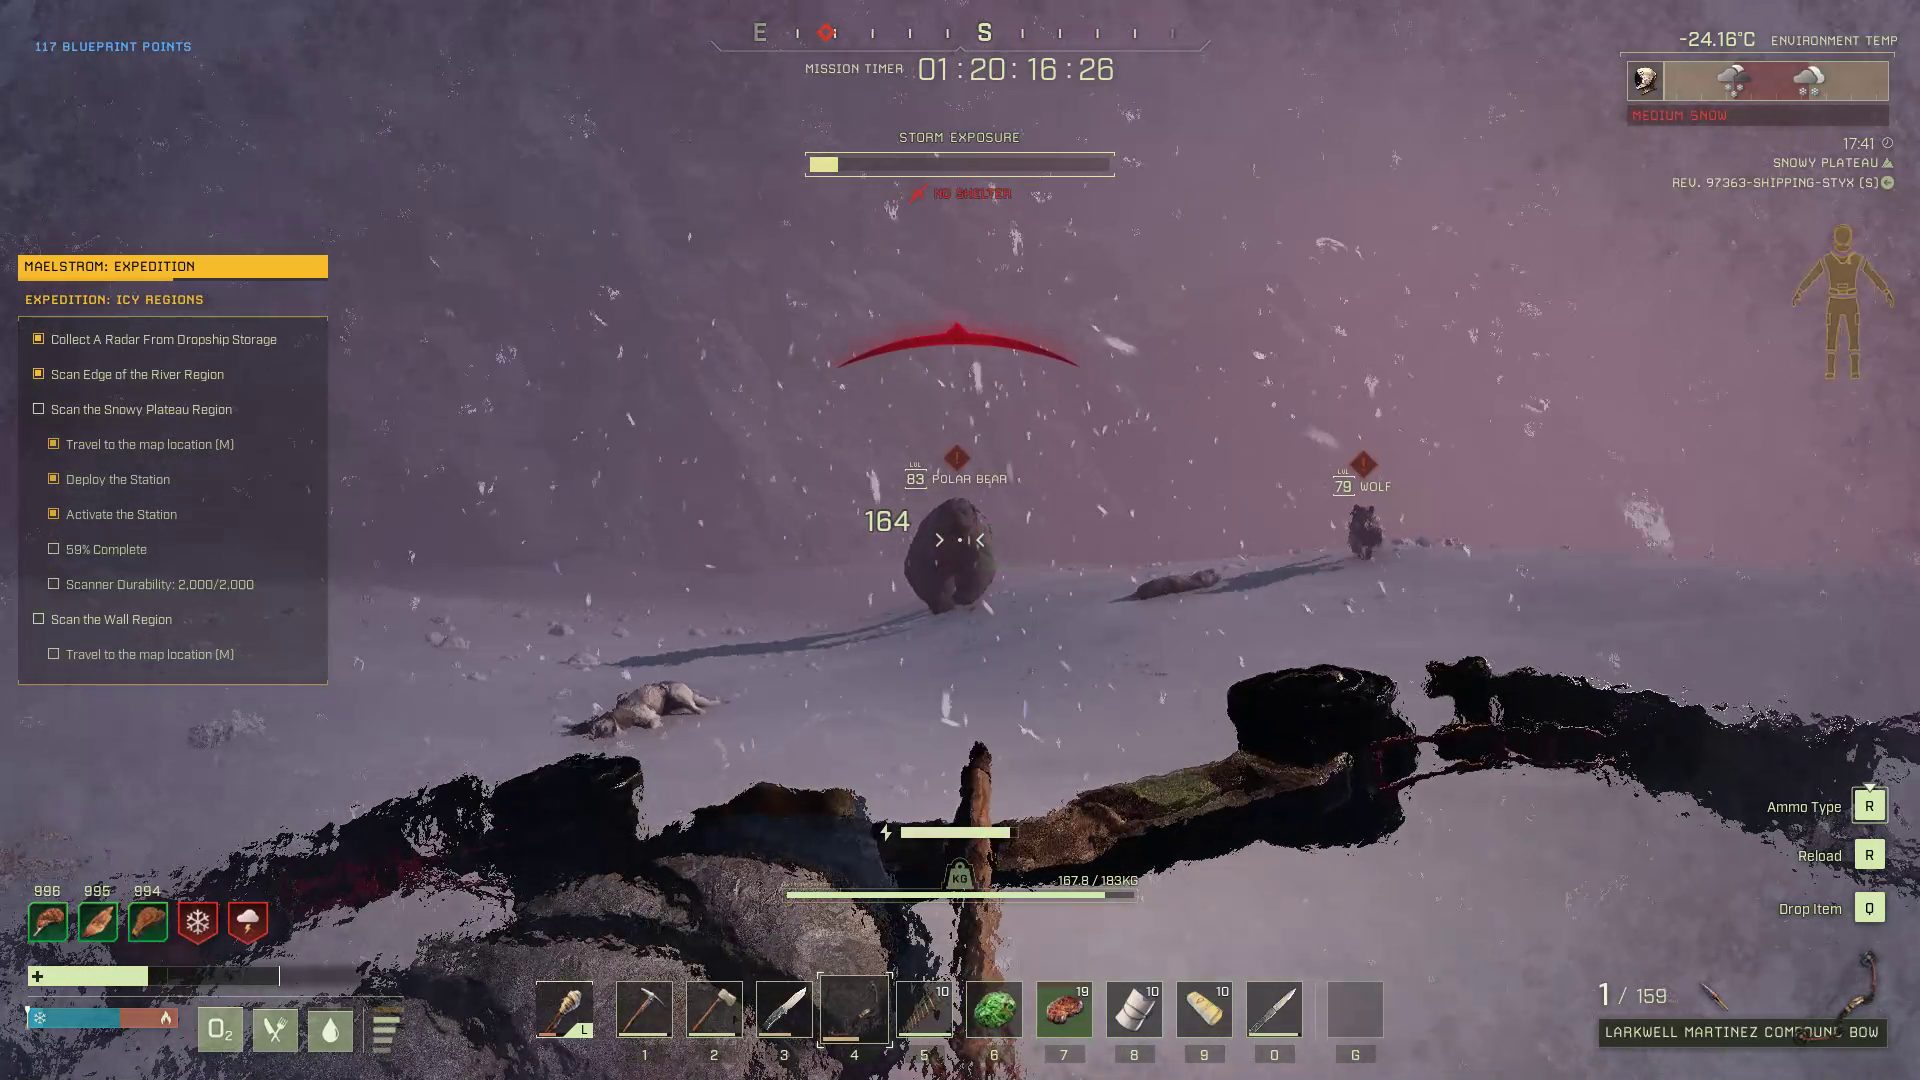
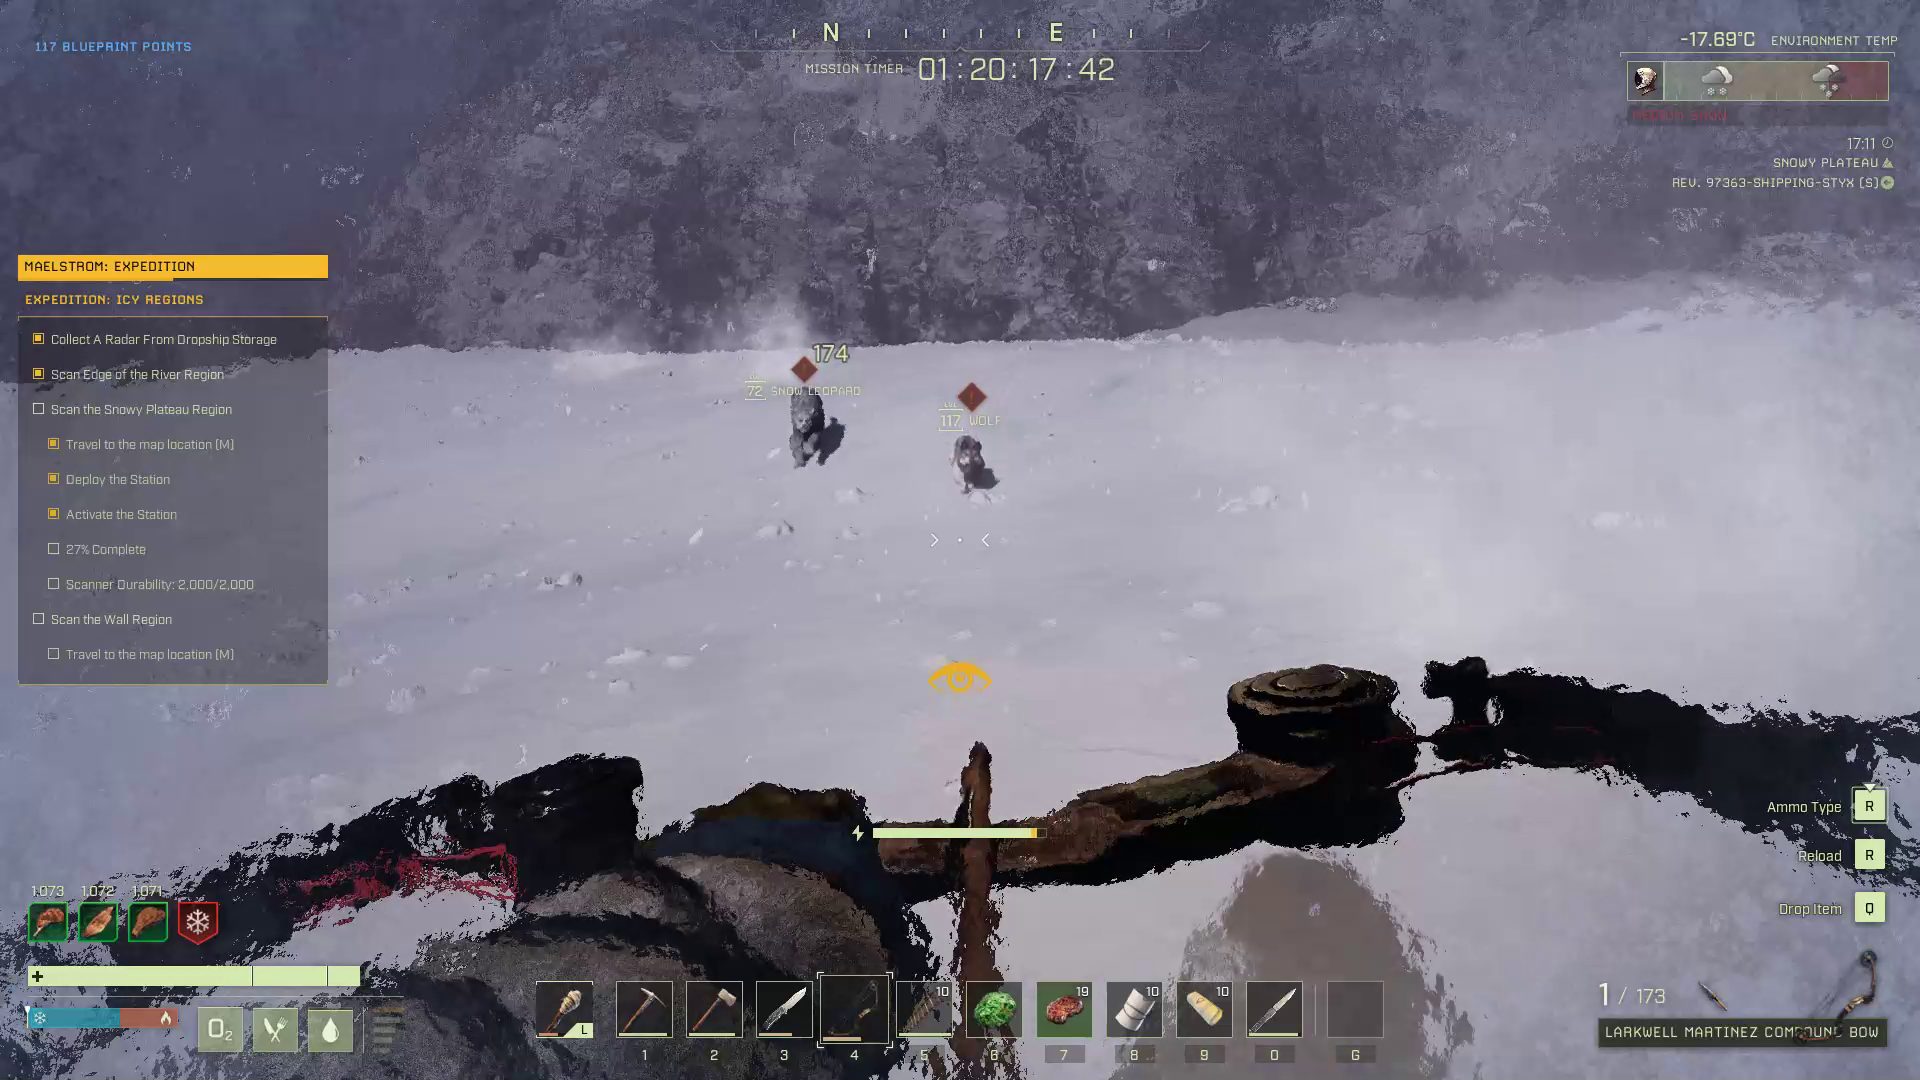
Scan the Snowy Plateau Region
The second scanning location is in the Arctic region to the east of your Dropship. Cross the valley and scramble up the Plateau on the east side of it.
Keep an eye out for the occasional snow leopard joining the wolves for an attack.
The fight will bring waves of wolves and snow leopards to attack you. Each snow leopard always attacks with another wolf or two. Keep an eye out for the polar bear patrolling the plateau; if it gets close enough, it will engage and distract you or attack the scanner. Again, a Hunting Rifle works well to quell this uprising before it becomes a problem.
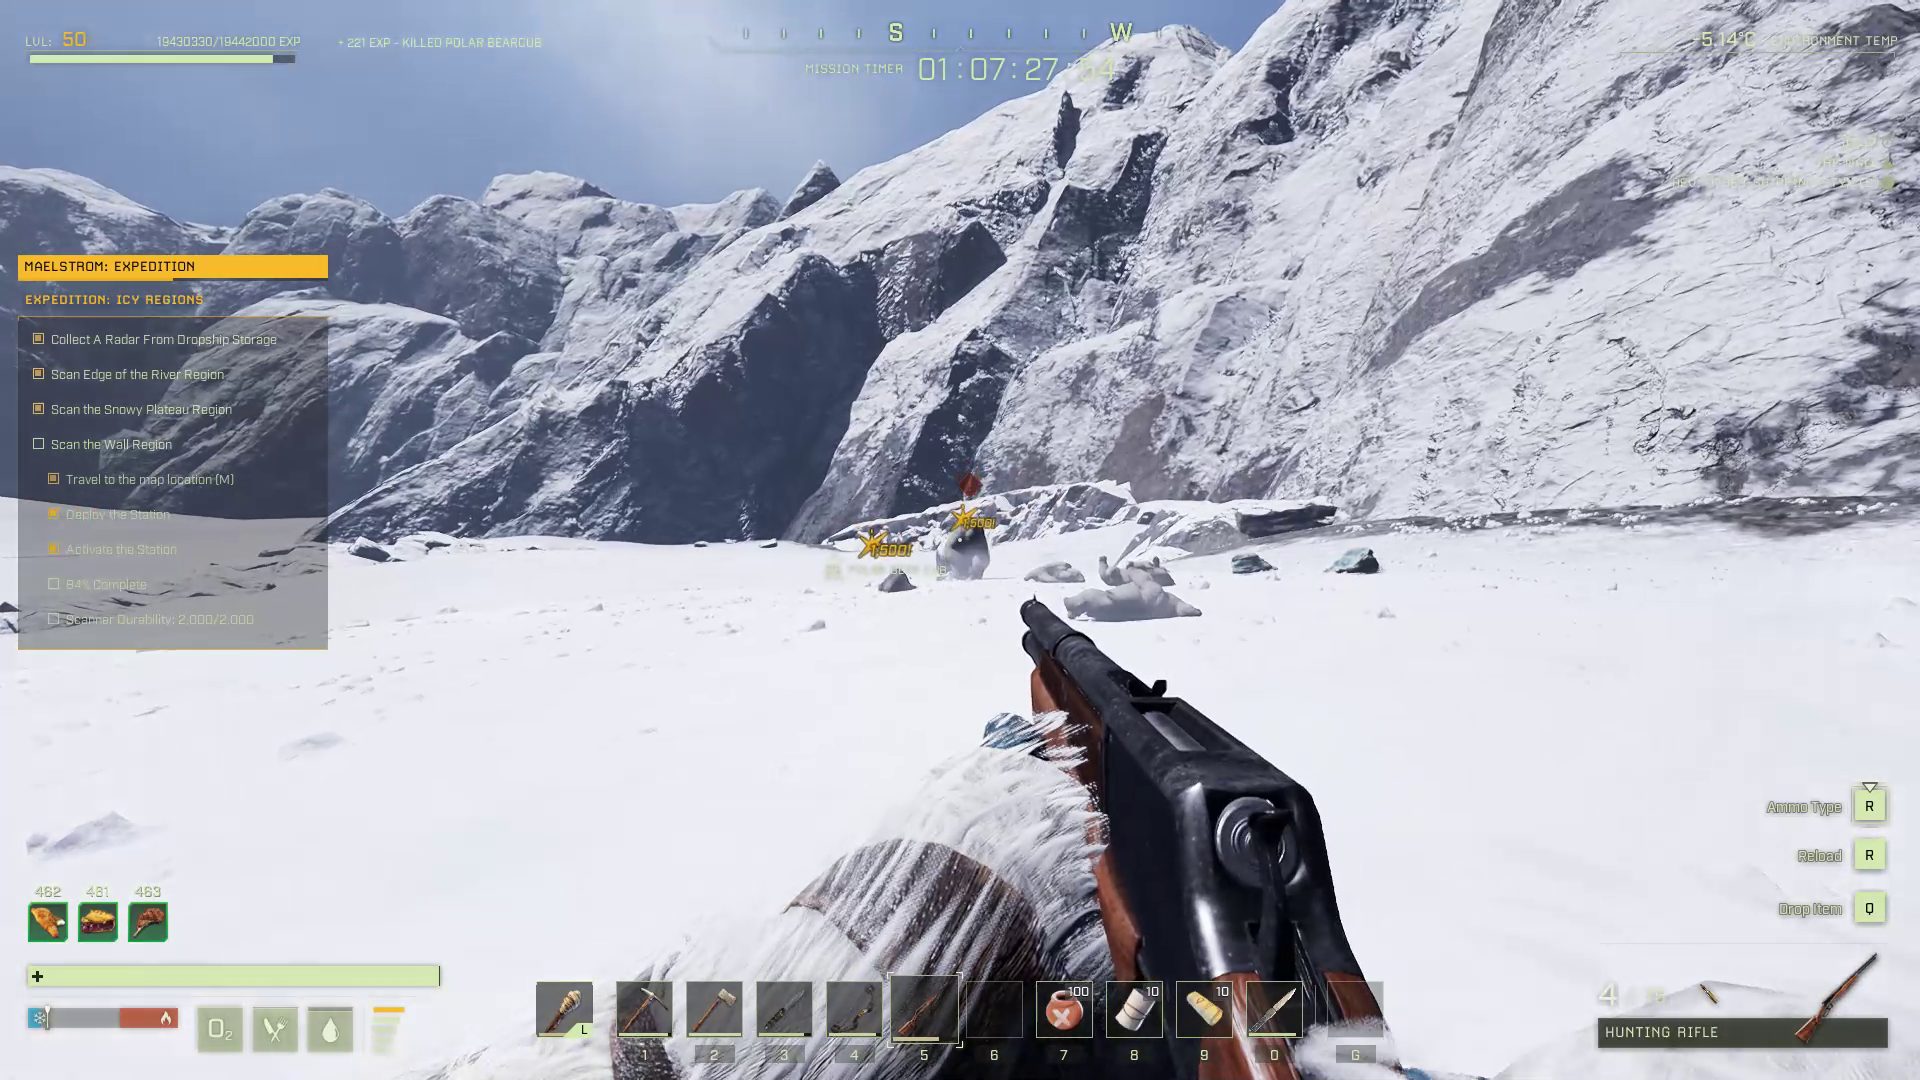
Scan the Wall Region
The last scanning fight is the harshest. Strong armor and the hunting rifle are practically required to defend the scanner. Confronting you will be none other than Baby Polar Bears. For every 3rd wave, an adult polar bear will join, as well.
These are fully aggroed, high-level polar bears. Each Baby Polar Bear can be taken down by a critical hit from the Hunting Rifle, while the adult will take 3-5 critical hits. Once the scan is complete, you can pick up the radar.
You have about 5 seconds to get over your reservations about killing baby polar bears before you become the family dinner.
However, this radar will not be required for the rest of the mission, so you might swap it for the IC-001 Radar if you brought one. You will be doing a lot of running to complete the mission, and there is no reason why you can’t search for exotics veins in the process.
NOTE: You may be able to cheese each of the scanner defense fights by building a ramp a few meters away and extending a platform over the scanner. Draw the enemies’ aggro as they approach and you can take them down with just a bow.
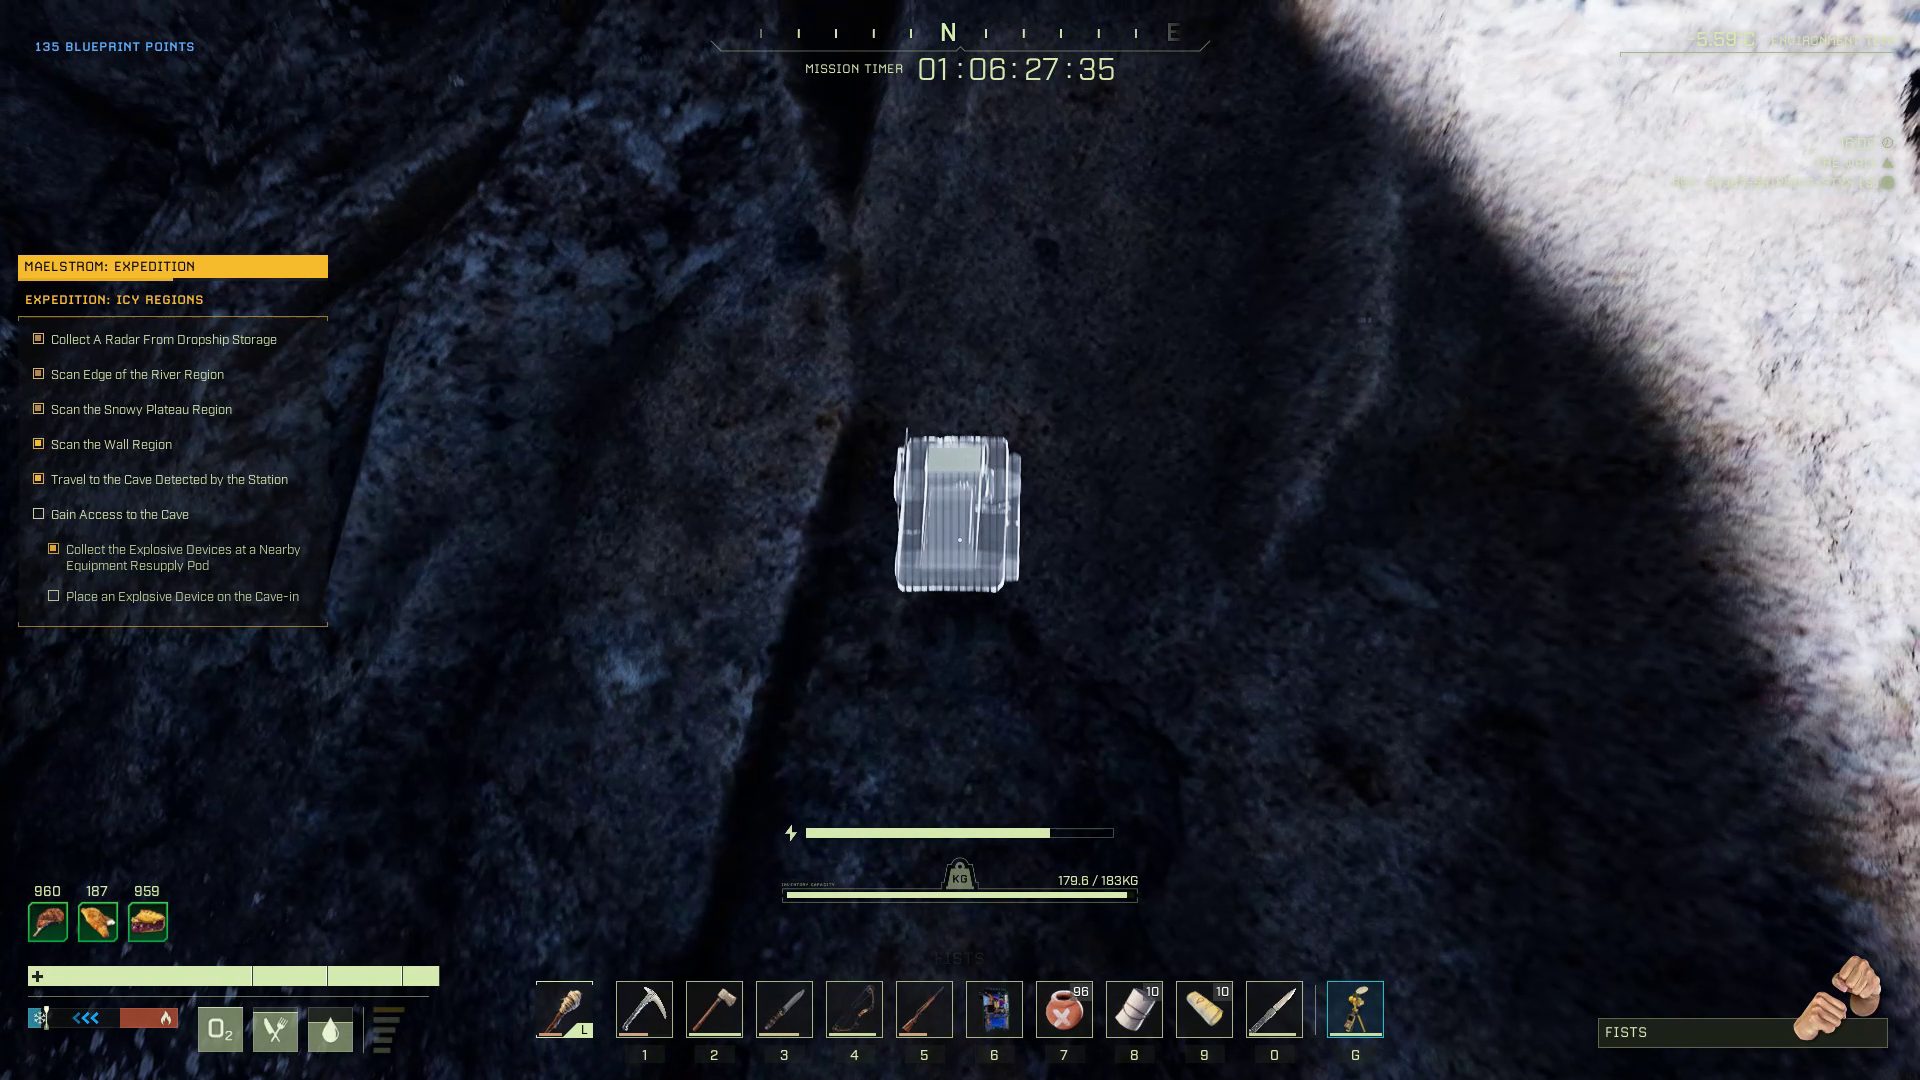
Open the Passage to the Desert
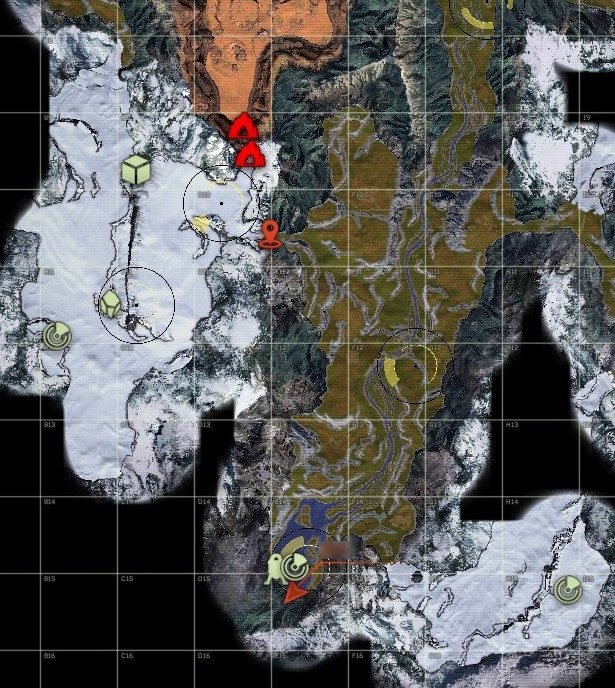
The scans triangulate the location of a cave-in in D9, where you can blow open a passage to a new desert biome. First, go up to the side of the cave-in marked on the map. You will be told to go and recover explosives at a supply crate dropped at the base of The Wall. The location in C9 will be marked on your map.
The hologram for one of the detonators will only show up once you have recovered them from the supply crate.
Recover the two explosives, and then run back and plant one on the south side of the cave-in you first examined. Now comes the hard part: you must find your way to the north side of the cave-in to plant the second explosive.
Here are the two possible routes:
Go back to the drop crate where you picked up the explosives, continue north through the Verdant Stair and into the Ice Flats region. There is a transition cave in C4 where you can enter the Desert region and proceed SE to the cave-in.
Go back into The Great River (Styx) region and follow it NE until it terminates in a large lake. Head west and cross the Alpine Valley region to enter the Grove and find a transition cave in the northern edge of G3. This takes you into the Desert region where you can proceed SW to the cave-in.
With both explosives planted, they will detonate and open a passage through the cave-in, back to The Wall region. Return to The Great River (Styx) and follow it SW to your dropship to leave, unless you want to hang around and search for the two exotics veins on this map.
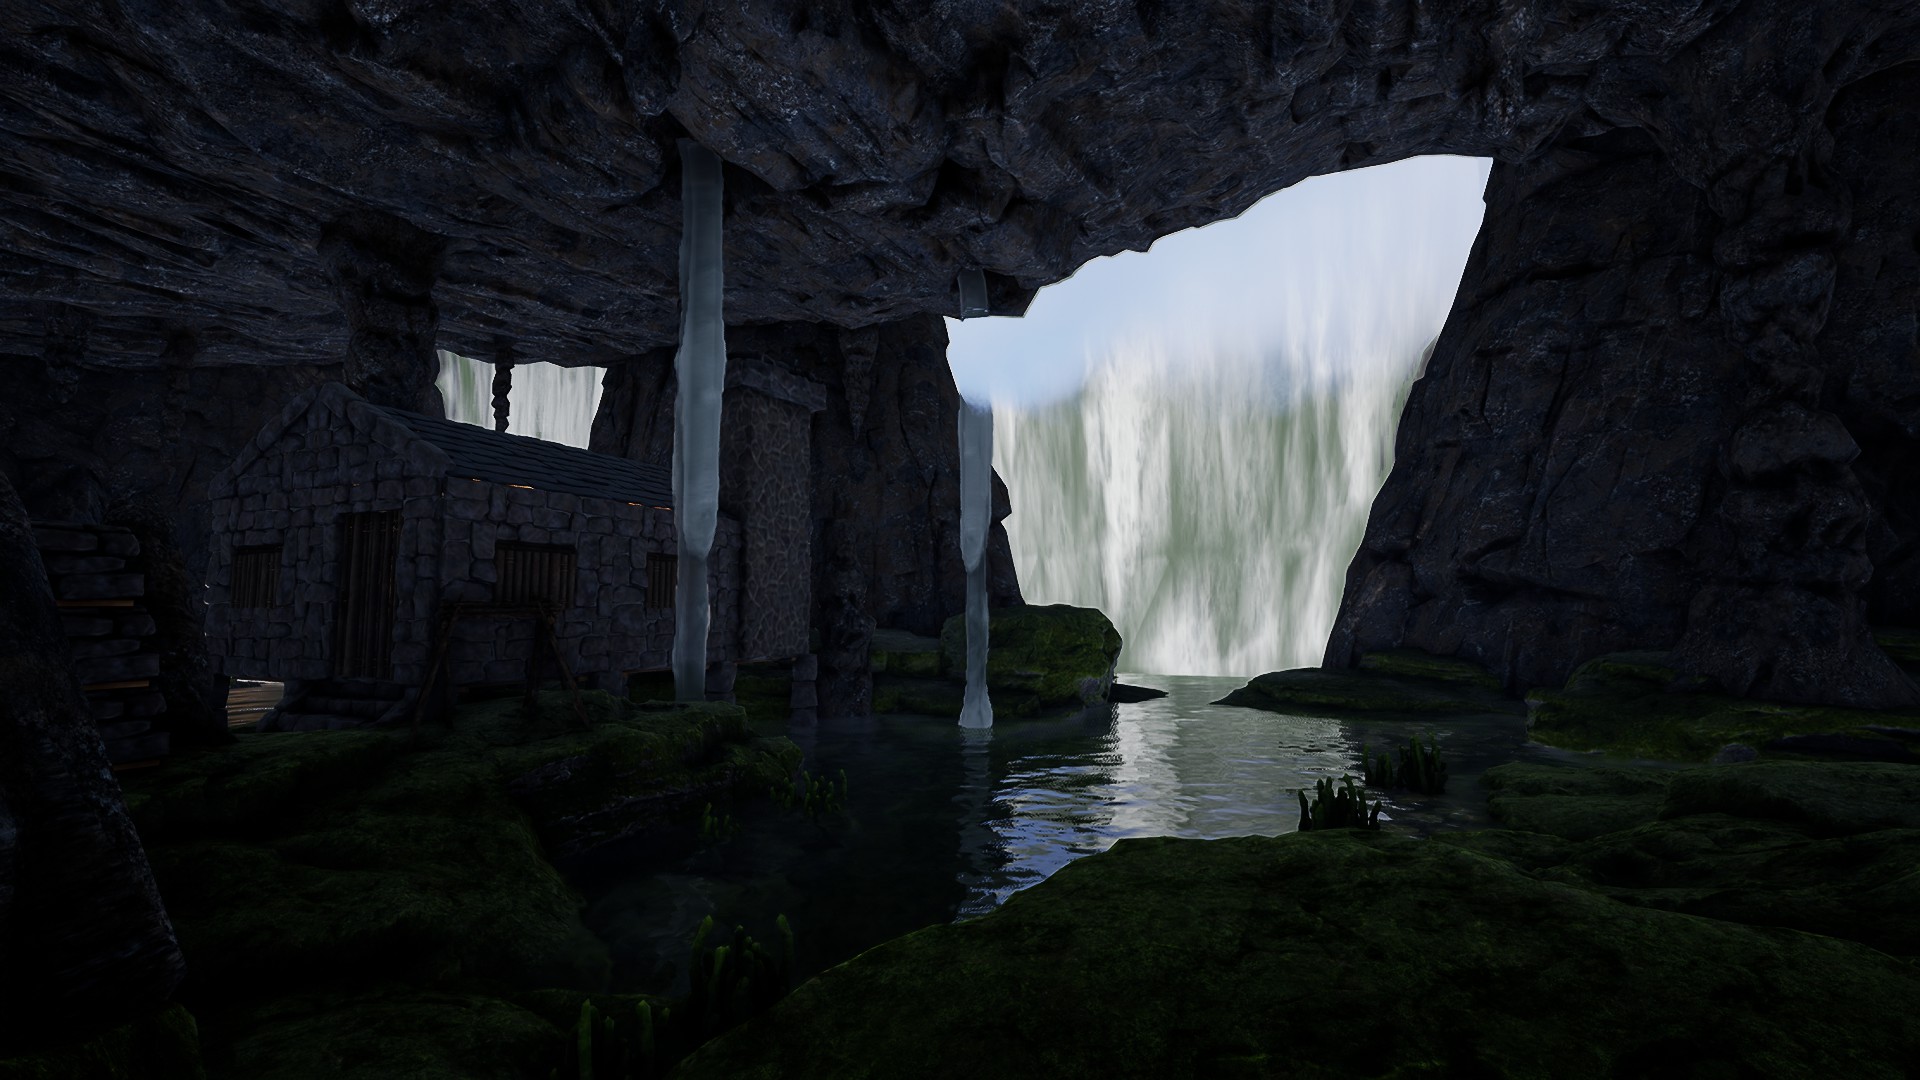
Just south of the Dropship is a cave located behind the waterfall, with an antechamber big enough for a substantial base. The antechamber is also littered with ore!
We hope you found this walkthrough helpful, and managed to find a path through the MAELSTROM. NOTE: This is a brief mission walkthrough, a new format we are testing. It lets us cut to the chase with tips and tricks, and allows us to cover the many ICARUS missions and updates as they come out. Let us know what you think about it in the comments below.
Share this article:
SurvivalSherpa
SurvivalSherpa is an avid gamer spending most of his time at the nexus of the survival, crafting, building, and role playing genres on any platform, especially to test indie titles in EA. AFK, life is about work and education in STEM fields, reading fantasy, and sipping great coffee in the Pacific Northwest.
Thanks for noticing this! You are correct, this is another way to enter the Dusty Barrens desert biome region. However, one has to open this route be completing the VERTIGO: Expedition mission beforehand in order to open up this tunnel. The Verdant stair path might still be the most direct route if coming from The Wall region.
We’ll be sure to add your suggestion as a 3rd path, and note that it requires VERTIGO: Expedition be completed first.


bottom right of H5 there is a tunnel to the desert so instead of going to North of G3 you can just go H5
Hi Lumplen,
Thanks for noticing this! You are correct, this is another way to enter the Dusty Barrens desert biome region. However, one has to open this route be completing the VERTIGO: Expedition mission beforehand in order to open up this tunnel. The Verdant stair path might still be the most direct route if coming from The Wall region.
We’ll be sure to add your suggestion as a 3rd path, and note that it requires VERTIGO: Expedition be completed first.