Lagos Group has been unable to chart an Arctic region thanks to a major avalanche, so naturally they’ve asked the most experienced Prospector in orbit for help — you. In this guide we will list the relevant details of the mission, followed by a step-by-step walkthrough.
Prospect Details
Approximate time to complete: 2-4 hours, maybe more — depending on how lucky/unlucky you get with Gold spawns, this mission can require venturing into a significant number of caves.
Difficulty: Hard
Recommended Level:30 — You must be (or reach) level 30 during this mission in order to complete it.
To complete the objectives, you’ll need to tech all the way up to Planetary Tech Tier 4 in order to supply a laser with electricity. You’ll then need to retrieve the laser from its supply crate, use it to clear the Avalanche, and then scout a decent distance into the Arctic. This mission can be time-consuming, and there are numerous high-level bears, as well as large wolf packs, in the area you’ll be completing your mission objectives.
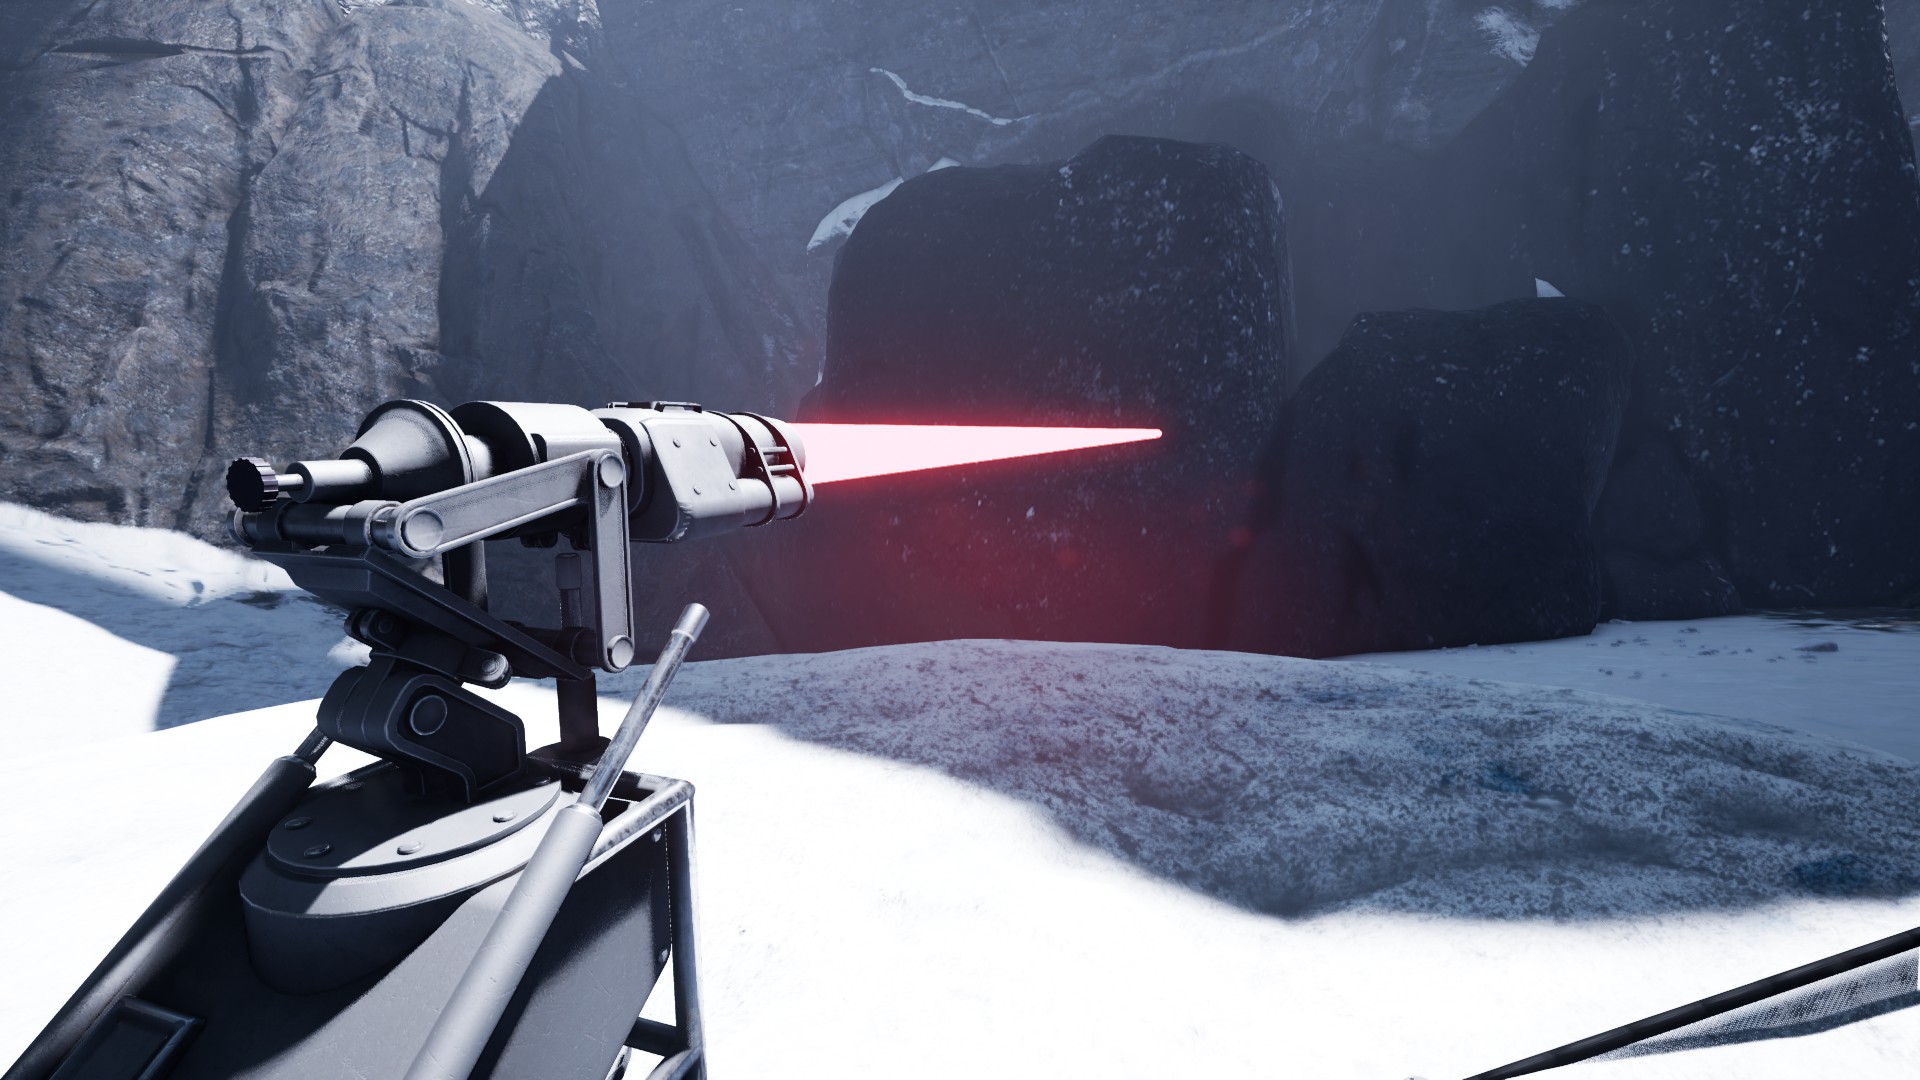
Powering this drill is the primary challenge of the mission
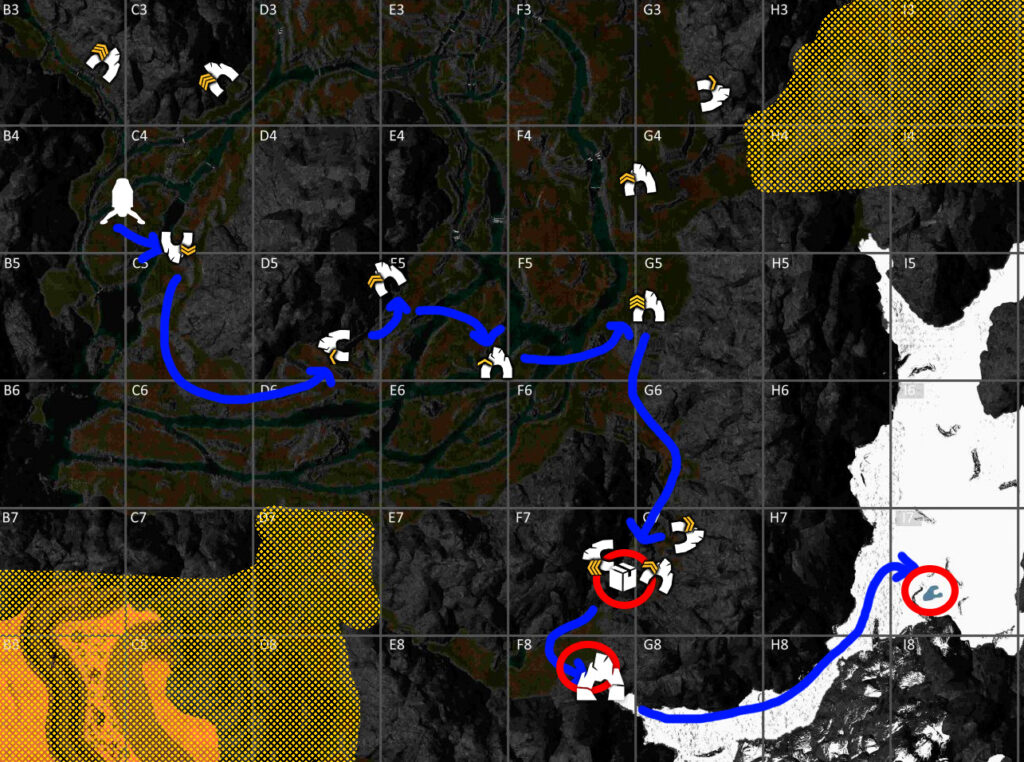
The red circles indicate locations of the objectives; blue line is the recommended route; yellow areas have been confirmed to be “out of bounds” for this mission.
It’s possible — depending on your luck with ore spawns — that you won’t need to visit all the caves on the route. The only resource you probably won’t be able to get all you need of from the 3 caves near the supply crate is Gold. Depending on your willingness to risk having to back-track, you can choose to skip some or all of the caves as you make your way to F-7.
If you want a map you can zoom in on to help you locate caves, Icarus Intel is a fantastic resource. (Huge thank you to Finally Rage and everyone who contributed!)
Preparing for AVALANCHE
It’s a good idea to bring one of the advanced Pickaxes (not the one that unlocks the rest) from the Workshop, as this will save you a significant amount of time and make it easier to collect the gold you need.
This prospect requires dealing with some high-level predators, and also necessitates reaching Tier 4. Therefore, there are a significant number of blueprints you’ll need to have or unlock during this mission, in addition to the usual survival tools.:
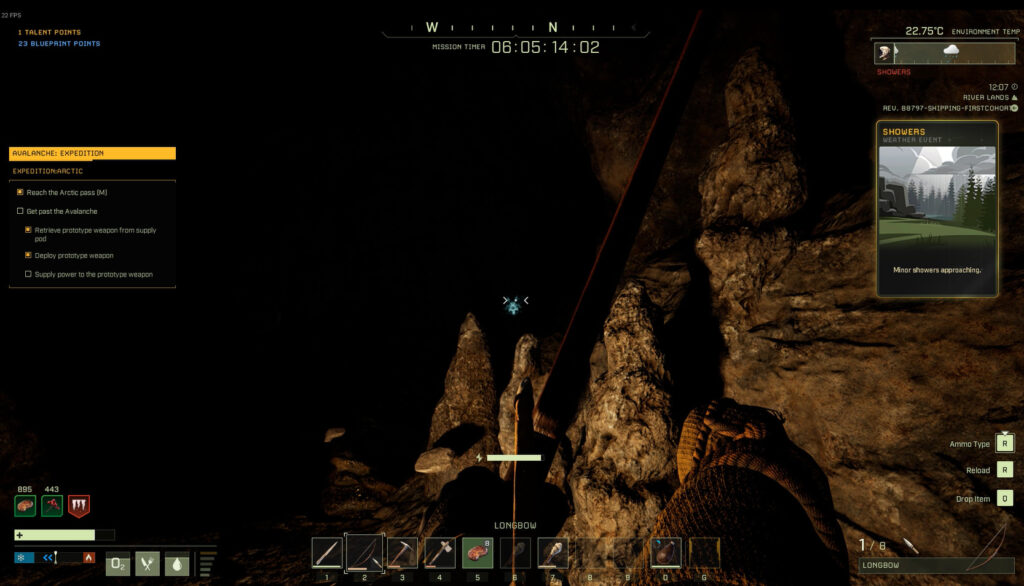
These guys can be a piece of cake, or a serious pain, depending on how you handle them.The trick is to move slowly into a cave so that only one or two pop up at a time. When they do, if they’re close, simply sprint up to them and knife them in the mouth. If they’re far away, quickly shoot two arrows at their mouth. If you’re fast, you can kill them before they get a chance to attack.
You don’t need a light source to see the cave worms, since their mouths glow in the dark
If you don’t notice them pop up and either hear them spit, or start taking damage, run back the way you came, then slowly move back towards them to find them. You can dodge the poison if you’re very fast and move perpendicular, but this is hard to do in a cave. It’s a good idea to have a stack of Cooked Meat when you enter caves, just in case you screw up and need to heal.
Mission Walkthrough
Like many missions, this one ends once the final objective is completed; you don’t have to get anything back to the drop pod. At the end of the mission, if you aren’t worried about losing some XP or very recently gained a level, you can let your character die with minimum penalty and get back to the Drop Pod much quicker. (Do not do this if you brought Orbital items you would like to keep.)
Step 1: Hunting for Gold, Leaving the Riverlands
You’ll land in the Riverlands, in an area that has high-level wolves and bears, so be cautious from the moment you exit your dropship. Move southeast as you collect sticks and stones to craft a knife, bow, and pickaxe. As always, hunt animals until you’ve collected enough resources to craft a bedroll, and start making Bone Arrows instead of stone as soon as you can.
You’ve got a choice to make early on in this mission (unless you brought a Pickaxe from Orbit, in which case just choose the second option):
Set up a temporary base in the Riverlands and mine the caves there — F-5 is a good central location for this first base. While here, you can tech to Tier 2, start smelting a small amount of Copper and Iron, and create an Iron Pickaxe. Then, mine the caves in the area for gold. Once you’ve collected all the gold you can find in the Riverlands caves that are convenient to reach, you can move on to F-7. OR
Check caves for gold, grab what you find, and continue to F-7 and set up your base there. This will be faster than option 1, but it is possible that you’ll have to backtrack to the Riverlands to get the last few bits of ore you need to tech up. It can be a good idea to grab a little bit of copper ore (whatever you can carry in addition to your gold) before heading out of the Riverlands.
Whatever choice you make, it isn’t a bad idea to create a temporary shelter partway through the Riverlands to respawn at in case you die en-route to F-7.
Step 2: Teching to Tier 4
Once you’ve collected the gold you can from the Riverlands caves indicated on the path above, head south through the pass at G-6. The border of F-7 and G-7, in between the 3 caves in the area, is a good place to set up a base. Make it at least 2×3, as you’ll need a lot of space for all the equipment you need to set up. Wood should be fine, but craft a Fire Whacker and have it in your hotbar in case lightning strikes.
If you’re playing solo, put on a podcast or your favorite show, ’cause you’ll be doing some serious resource grinding now. There’s too many resources required to list them all here, so instead here’s an ordered list of all the workbenches and other deployables you need to craft, and what they’re used for:
Assuming you were able to find at least a few gold deposits in the Riverlands, you should be able to get the rest of the resources you need from the area immediately surrounding your base in F-7. If you aren’t level 30 already, make sure that you’re killing and skinning every animal you encounter (use the extra resources to craft random stuff for extra XP) — you can’t craft the Fabricator until you’re level 30. Note that there are some bears that roam this area, so either be careful when moving between caves and base, or else learn to fight them. If you need water, there’s plenty in the caves.
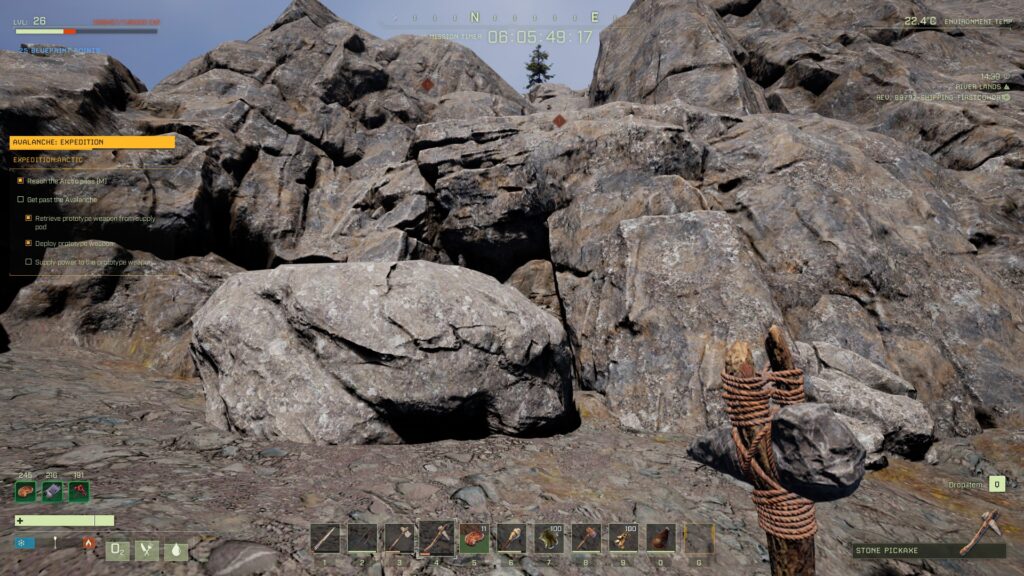
The southern cave in G-7 is hidden, so here’s what to look for:
The cave’s entrance is behind the rock; it’s pretty easy to spot since it looks like a doorway. You’ll need to mine your way in.
How to Make Biofuel
You’ll need to craft a full can of Biofuel in order to power your generator. To do so, place a Biofuel Can and any combination of recipe ingredients in the Biofuel Composter. You can see the possible combinations in the upper-left of the screen when you open the Biofuel Composter.
Part 3: Getting the Laser and Turning It On
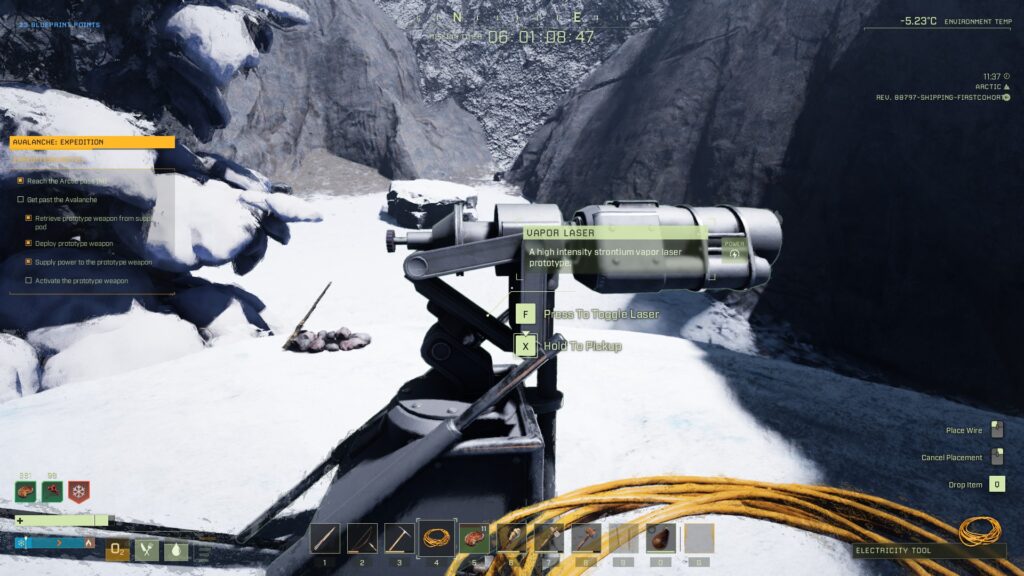
Once you’ve crafted the Biofuel Generator, Electricity Tool, and have a full can of Biofuel, you’re finally done crafting!Leave it all in your base for now, and head to the yellow cave marker on your map in F-8. If you don’t have at least 50 arrows, ideally bone or flint, craft them before you leave your base.
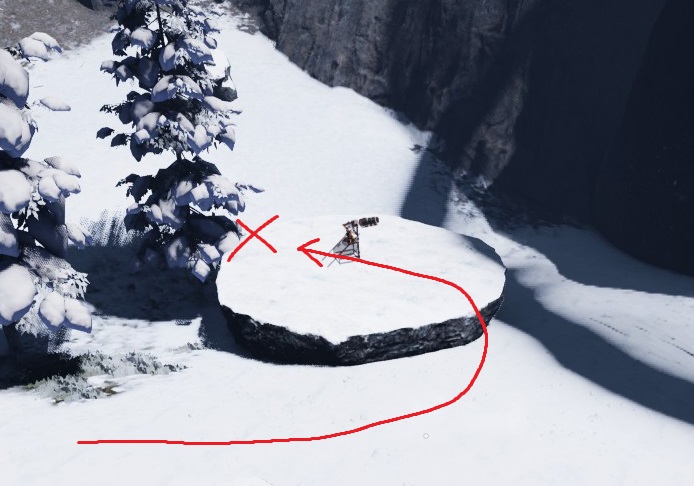
Once you see the spot that the laser goes, sprint to the rock it’s on and stand on its highest point (the northern side). A large number of wolves will spawn and move towards you once you get close to the rock with the laser placement site, but they should get stuck below you, against the rock. It’s still a good idea to pick as many off as you can before they reach you, since sometimes they do sneak up the side.
You can jump up using the route shown, then stand on the X to fight the wolves
We’re just here to get the supply crate to drop — it doesn’t spawn until you approach the drill site for the first time. Open your map and you should now see a small yellow supply crate icon in F-7. Set a waypoint on it and head that way, and while you do so collect the materials you need to build either Thatch or Wood ladders or ramps. Once you round the corner of the mountain near the Supply Crate, you should be able to see it smoking on the ridge. You can’t walk up to it; you’ll have to craft your way up.
You can construct a series of ladders or ramps to reach it, but be careful — there’s a bear that spawns up there. Don’t forget that you can place a ladder, climb to the top of it, then place another one and press F to teleport yourself to that ladder. Ramps are simpler to use but may take a little longer to place. However you choose to do it, make your way up to the supply crate and grab the equipment that’s inside.
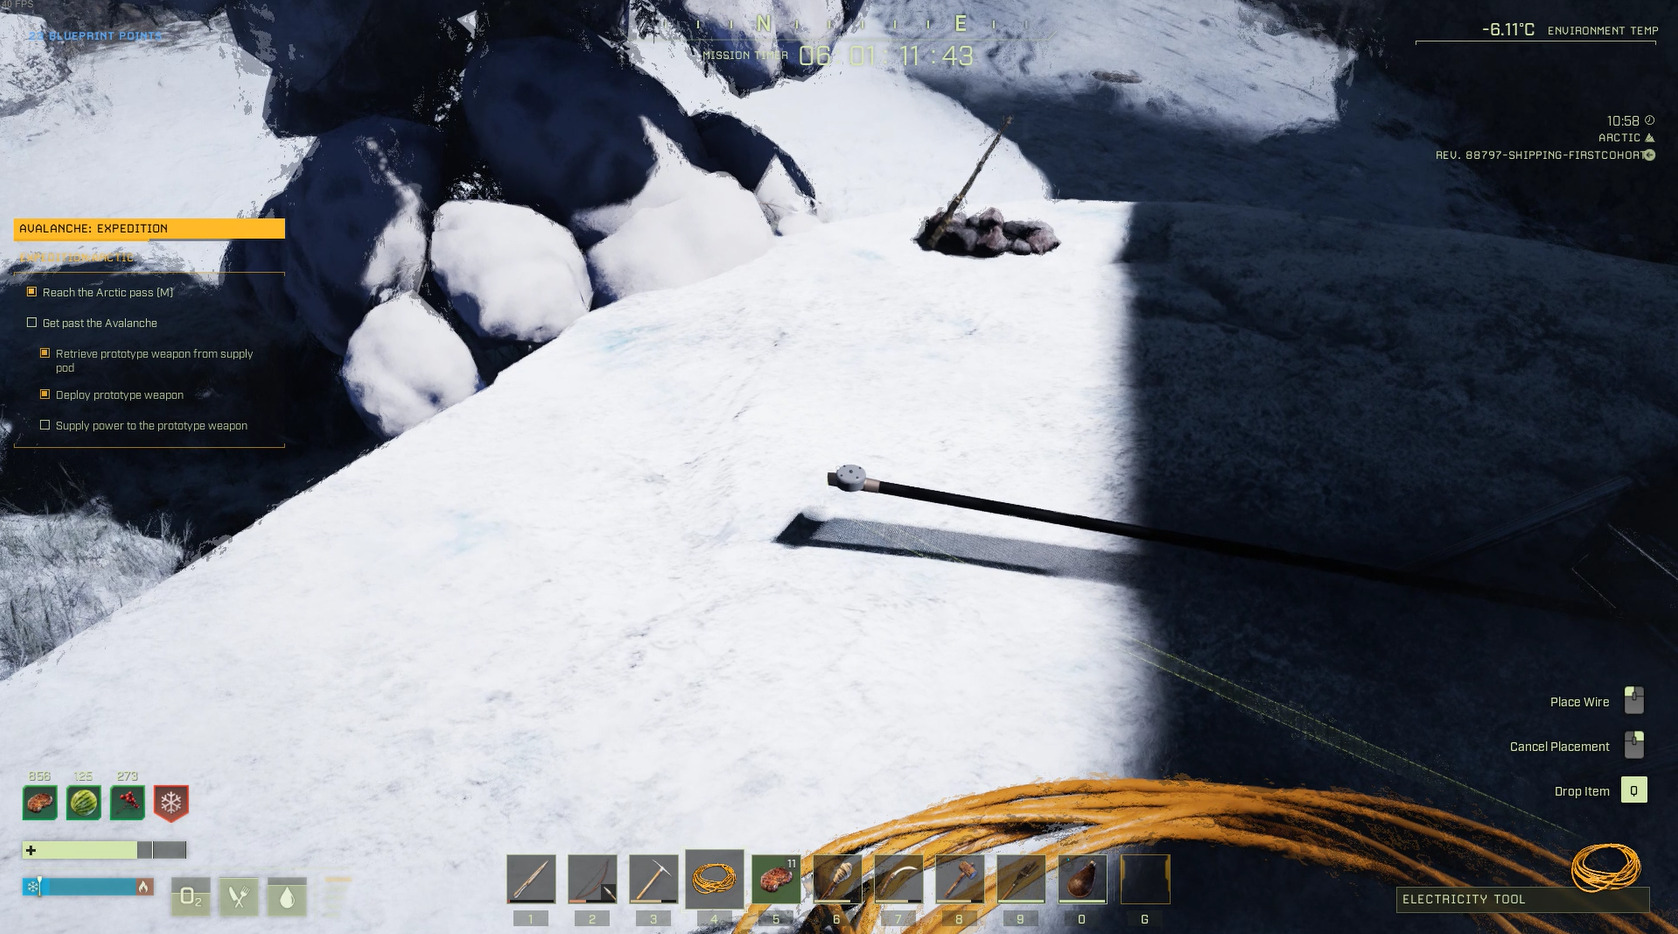
Now go back to your base and get the Biofuel Generator, Electricity Tool, and a full can of Biofuel. You’ll also need to build a 1×1 shelter, so grab any extra wood/fiber/sticks you have now. If you don’t want to come back to your base, after you use the laser, bring anything you want to take into the Arctic with you as well. Take all your equipment back to the laser site in F-8, and place the laser. Be ready for another swarm of wolves — you can use the same strategy as last time to deal with them.
You can now set up your Biofuel Generator and connect it to the laser. While it doesn’t need to be sheltered to run, any weather that shows up will damage the generator, so it’s usually a good idea to put it in your portable shelter. Whatever you decide, get the generator placed, and then put your Electricity Tool in your hotbar and pull it out. If you misplace wires, you can right-click them with the Electricity Tool equipped to delete them.
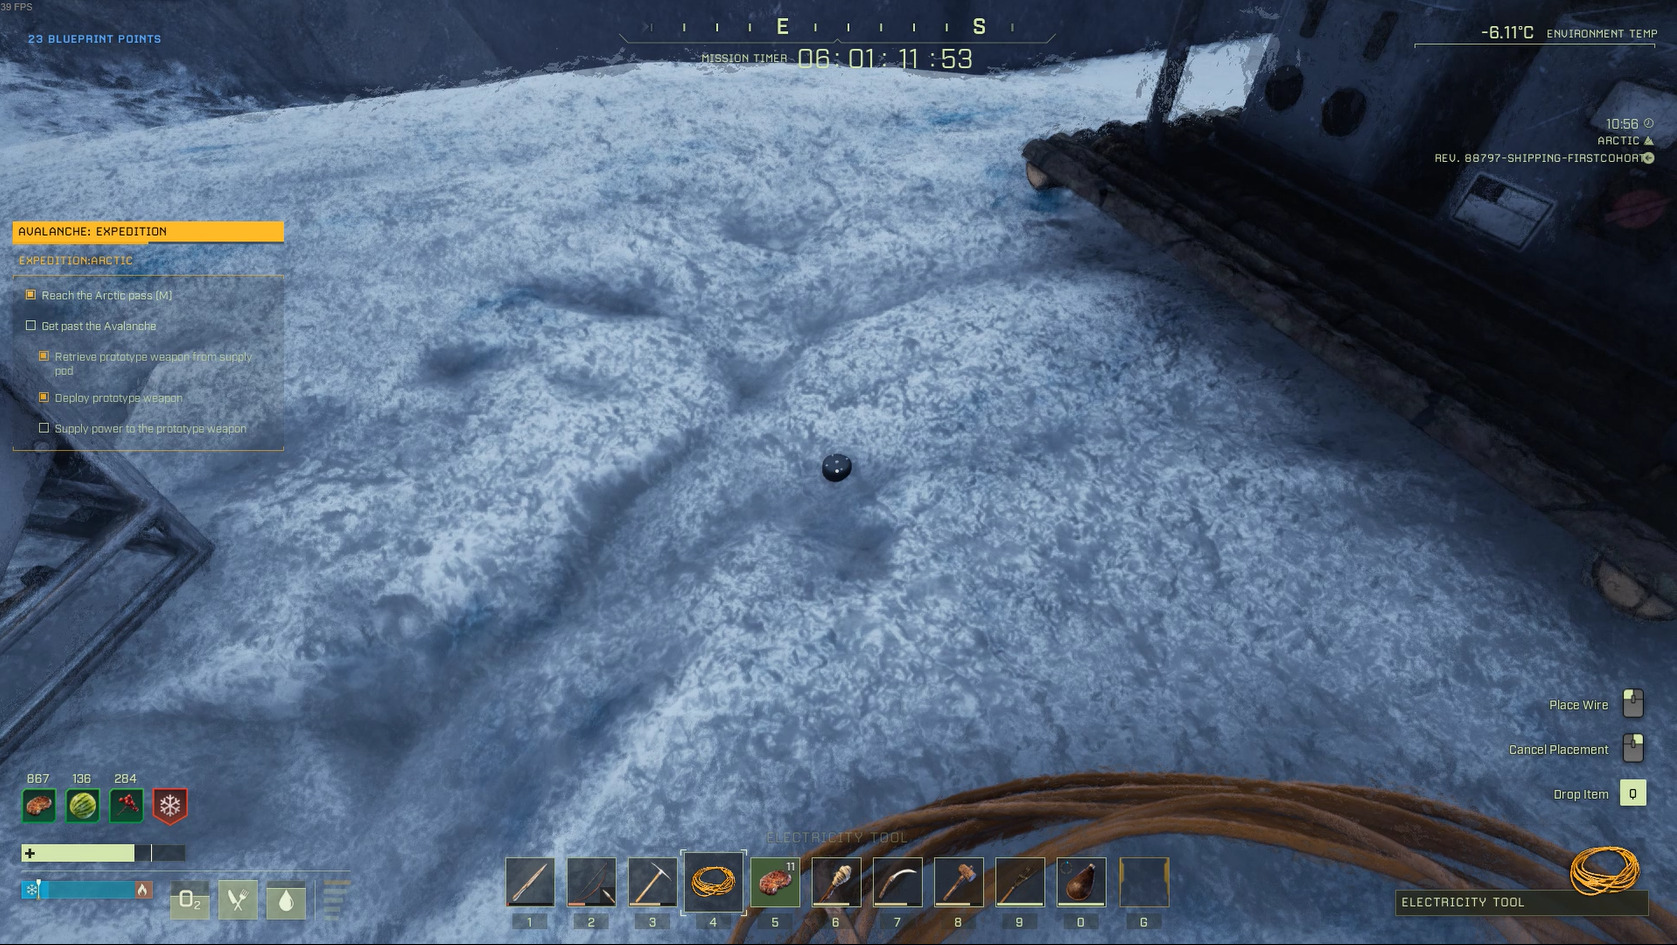
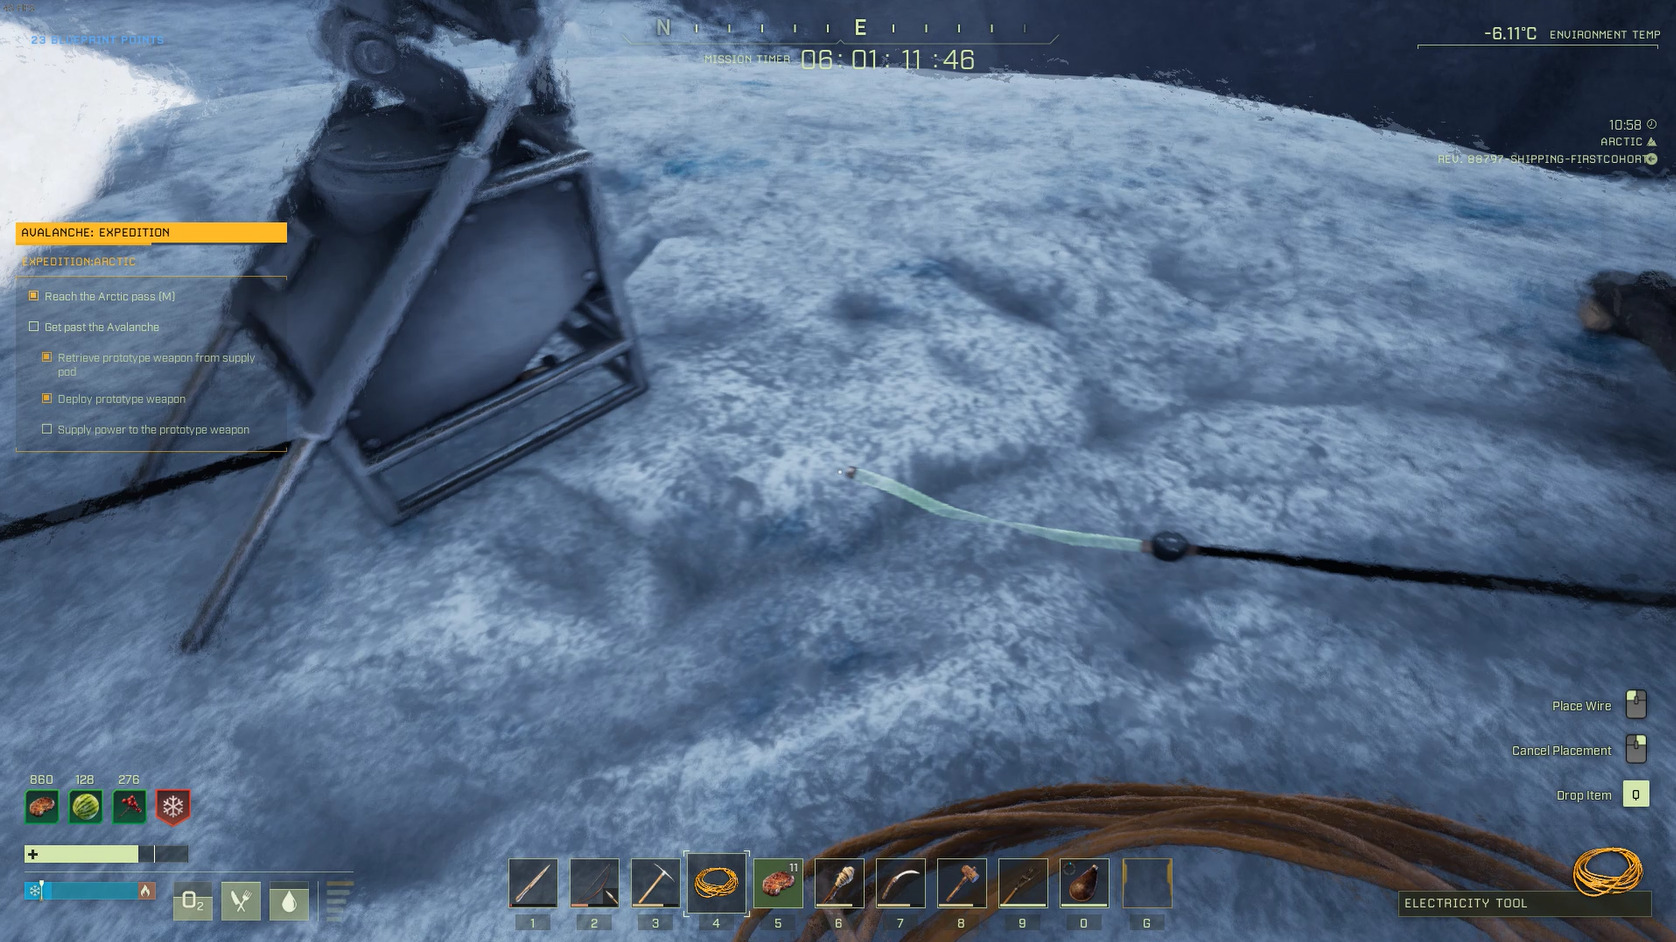
Here’s how you run power from the generator to the laser:
With the Electricity Tool equipped, aim at a spot on the ground in between your generator and the laser, and left-click. This will create a wire node, and you should now see the green “ghost” the wire you’re currently placing if you move your mouse around.
Aim at the generator — when the cable “snaps” onto the generator, left-click again. This should attach the generator to the initial wire node.
Still with the Electricity Tool equipped, aim at the initial wire node you created and left-click. If done correctly, you should now see a green ghost of a new wire.
Aim at the end of the wire coming out of the back of the laser, and when the wire “snaps” to the laser’s connection point, left click to connect the wires.
1234
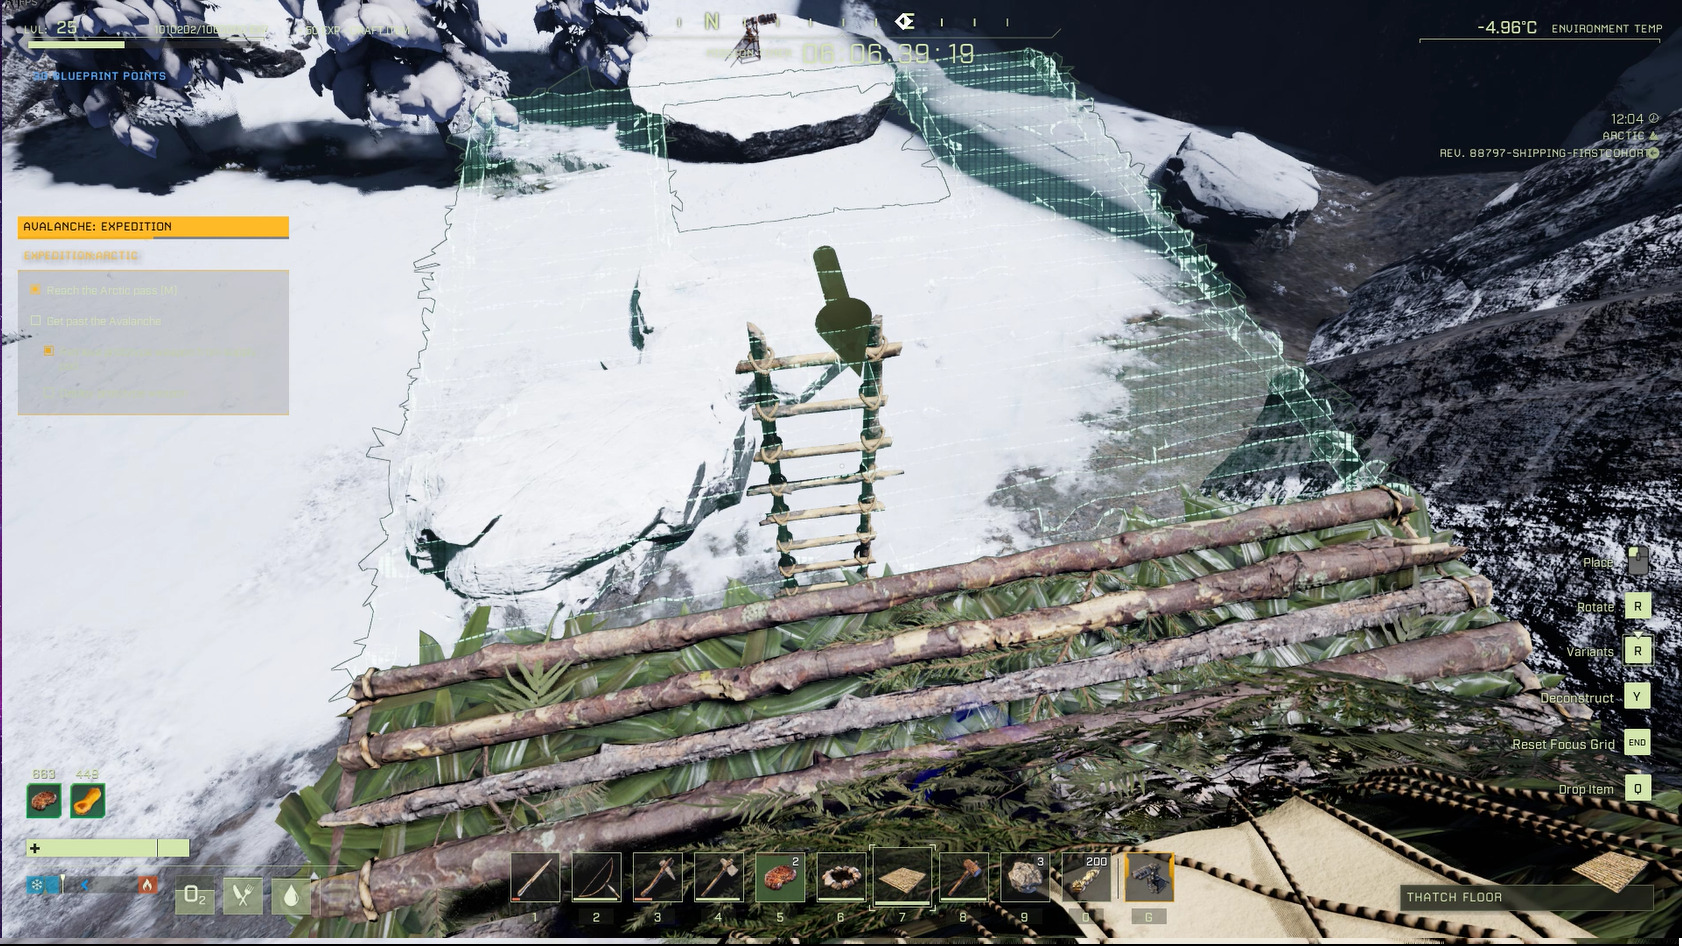
Don’t turn on the generator yet — we’ve got one more thing to build: A sniper’s nest, and more ammo if you don’t have at least 50 arrows (or more if they’re all stone) for your bow. Build 3 ladders and 2 floor pieces, and unlock the floor trapdoor variant of your floor type as well. You’ll want to craft one tall ladder out of your 3 ladder pieces, and then build 2 floor pieces sticking out of the cliff face at the top of the ladder. The darker rock outcropping southwest of the laser site works well for this. Make the outer floor piece a trapdoor piece so you can easily reach your ladder (and shoot through the hole later if necessary).
The outcroppingPlacing the final piece
Now you can go back down your ladder and activate the generator (remember it needs the Biofuel Can in order to run), and then the laser. Run back to your sniper’s nest and climb up; you’re going to have company. The mammoths give decent XP, so it’s good to take them out, but they might wander off if you wait long enough, and then you can sneak past them, through the hole the laser made.
Part 4: Surveying the Arctic
The mission ends in the arctic, so if you’re close to leveling up and don’t need to save anything from the Workshop, finish leveling up now so you can feed your Prospector to wolves and get back to the dropship quicker.
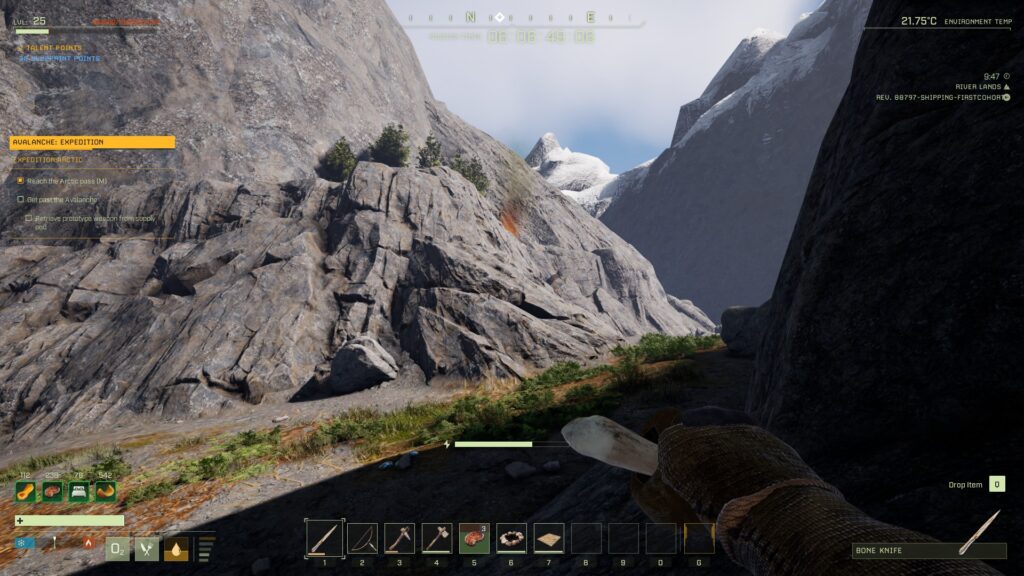
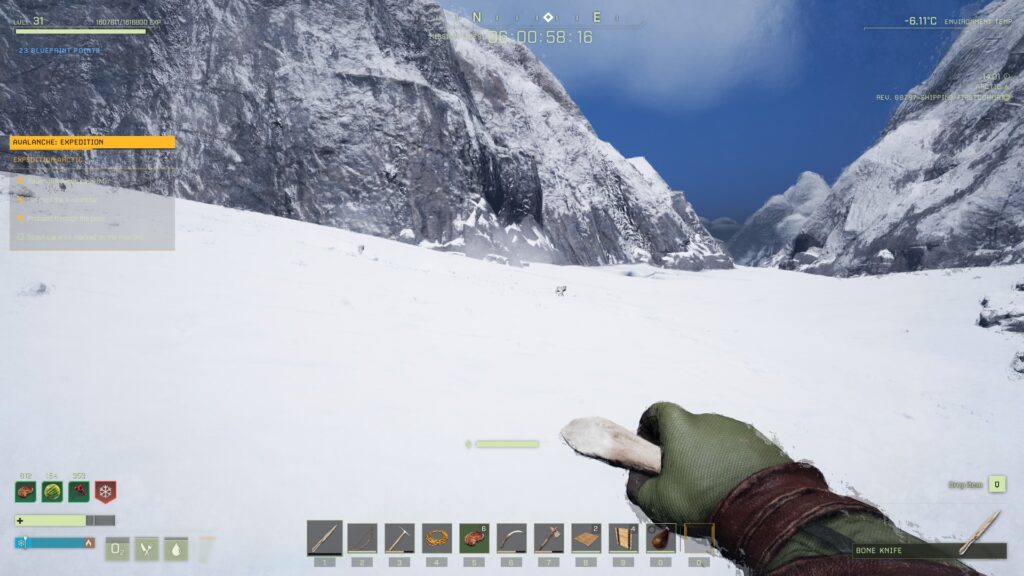
Now all you have to do is make it to the marked point on the map, which is in I-7. Set a waypoint, and when you’re ready, start heading that way. There are a lot of small predators (wolves and leopards), so make sure you’ve got a few arrows and some meat for healing. You should also replenish your water before you go if you don’t have any berries.
There may be blizzards or snowstorms, so you should also deconstruct the shelter around your generator and take it with you (unless it’s thatch — in that case, you’ll need to craft a wooden portable shelter and bring it with you). Also bring a campfire and some fuel so you can heat yourself up if you get too cold.
The predators here can be hard to spot — don’t go slow, but keep your eyes peeled
Once you make it to the marked area, you’ll get the word from Sol and you’ll see your HUD’s objectives reading Mission Complete. You can head back to the drop pod, or kill off your prospector (you’ll probably have to respawn at your base, pick up that Bedroll, and then find another predator or long drop).
We hope this walkthrough for AVALANCHE was helpful! Feel free to ask questions or leave suggestions in the comments below.
Share this article:
DanielD
Unabashed FromSoftware fanboy still learning to take his time with games (and everything else, really). The time he doesn't spend on games is spent on music, books, or occasionally going outside.
Hey guys, I saw all over the forums it’s a known bug that came up in the last patch. We abandoned mission as not sure when it’ll be fixed and didn’t want to lose a toon when the timer ran out!  😢  Good luck!
Hi Lukas! Sorry to hear you’ve run into trouble with this mission. Honestly, the game was released in a fairly buggy state, and I’ve heard many reports of people having issues with various mission elements. If you can’t interact with the supply crate, that’s an issue with the game, not anything you did wrong.
Gilrean
2 years ago
Just FYI, you can totally delete the electrical cords. You just right click on the cord you laid.
Thanks Gilrean! They updated how the Electricity Tool works at some point and I never updated this guide, so I appreciate the heads up.
Shadowdragon
2 years ago
was someone able to find vein on this mission? scanner doesnt work in my game. it scans and after its finished the map wont show anything. (payday extraction finished and playing solo)
I just tried and there is no deposit in Riverland for this mission. No deposit either in the mission where you have to check a flower and a node There is a deposit (160+) in the mission where you have to scan three locations, from up north to two in the south.
Last edited 2 years ago by samyala
samyala
2 years ago
Two hours to build a Fabricator et al., then doing the mission, I think you’re seriously bragging, sir.
samyala
2 years ago
Yes, the biofuel generator works without shelter, but it decay.
Please note there is now an exotic vein at the place you need to search in the Arctic. Considering you have to build a Fabricator and nothing else requiring electronics, it’s a pretty good opportunity to mine some exotics.


Is anyone having issues picking up the supply crate? It has spawned, but we can’t open it to get the laser out.
We have the same problem.. Do you know how to fix it?
We have the same problem
Hey guys, I saw all over the forums it’s a known bug that came up in the last patch. We abandoned mission as not sure when it’ll be fixed and didn’t want to lose a toon when the timer ran out!  😢  Good luck!
Latest patch (this week) fixed this issue apparently!
need the anvil to make nails for the machining bench
Nice catch, thank you!
Hi Daniel, We cant open the supply crate. Do you know what could be the problem? we cant find out, what we did wrong.
Hi Lukas! Sorry to hear you’ve run into trouble with this mission. Honestly, the game was released in a fairly buggy state, and I’ve heard many reports of people having issues with various mission elements. If you can’t interact with the supply crate, that’s an issue with the game, not anything you did wrong.
Just FYI, you can totally delete the electrical cords. You just right click on the cord you laid.
Thanks Gilrean! They updated how the Electricity Tool works at some point and I never updated this guide, so I appreciate the heads up.
was someone able to find vein on this mission? scanner doesnt work in my game. it scans and after its finished the map wont show anything. (payday extraction finished and playing solo)
I just tried and there is no deposit in Riverland for this mission. No deposit either in the mission where you have to check a flower and a node There is a deposit (160+) in the mission where you have to scan three locations, from up north to two in the south.
Two hours to build a Fabricator et al., then doing the mission, I think you’re seriously bragging, sir.
Yes, the biofuel generator works without shelter, but it decay.
Thank you samyala, you’re absolutely right! I’ll edit the guide accordingly.
Please note there is now an exotic vein at the place you need to search in the Arctic. Considering you have to build a Fabricator and nothing else requiring electronics, it’s a pretty good opportunity to mine some exotics.