When you gain control, Tidus will be alone. Swim to the left side of the lake to find a chest with 4 Remedies, then go to the next area. The first battle that you will encounter will be against a Zu, and during it Auron and Lulu will rejoin the party.
After the battle, head north towards the tent and you will find Wakka. Open the chest next to the tent to obtain 8 Al Bhed Potions. If you didn’t pick up the Al Bhed Primer Vol. I and III earlier in the game, you can find them here now, nearby. Afterwards, head to the next area.
Head east and you will find Kimahri. You will also see the Al Bhed Primer Vol. V nearby, if you missed it earlier in the game. Now, head back to the fork and go north, and down the path you will get Rikku.
You’re not going to have Yuna in your party for a while, but Rikku can help fill the vacuum created by not having your main healer, for the time being.
She can use Al Bhed Potions, which will heal your entire party for 1000 HP, as well as get rid of some negative status effects. You’re going to find plenty of these during this part of the game, so take advantage of them when you need healing.
Next to Rikku will be a chest containing 2 Ethers. The next battle you get into will tell you about Rikku’s advantage against machina enemies. If you use her Steal ability on them, she will dismantle the machina, killing it instantly.
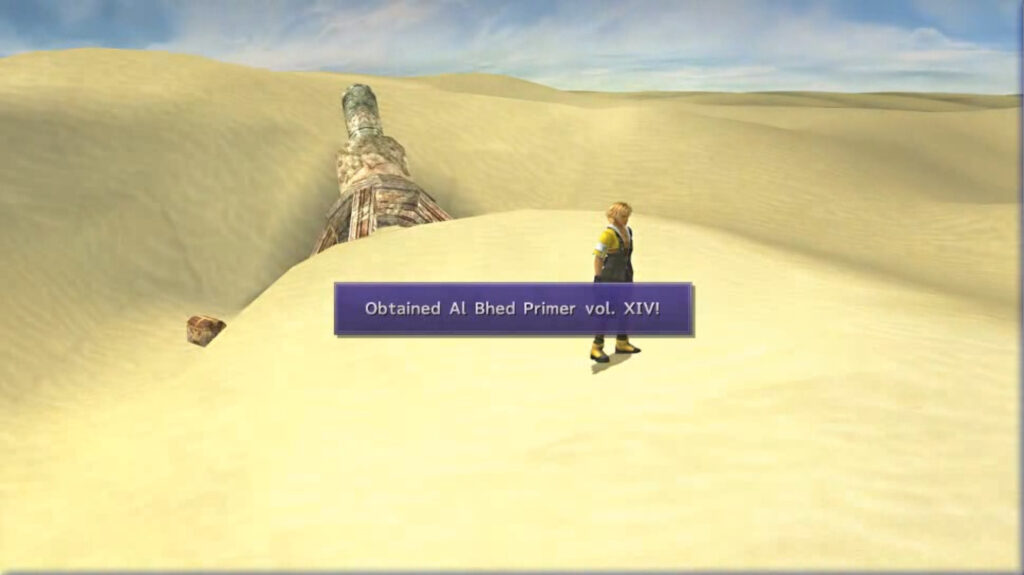
Continue down the path until you see an area to the left, where you can find a chest with 4 Hi-Potions. You can also find the Al Bhed Primer Vol. XIV here, if you missed it earlier in the game. Then, continue through the path until you reach the next area.
Head north, staying in the center, and you will find a chest containing 4 Hi-Potions. Go a little southwest until you see a rock formation, and you will find a chest with 2 X-Potions. Then, head all the way to the west to grab 2 Mega-Potions. Head north to the Save Sphere, then go through the opening on the west side.
Within this small area, head south to find a chest with an Elixir. North of here you will find a building with two chests that contain a Lv. 2 Key Sphere and 10,000 gil. Just a little further north you will find the Al Bhed Primer Vol. XVII. When you have everything, head back to the Save Sphere. Head north from here until you see a sign post, and under it you will find the Al Bhed Primer Vol. XVIII. Continue north to go to the next area.
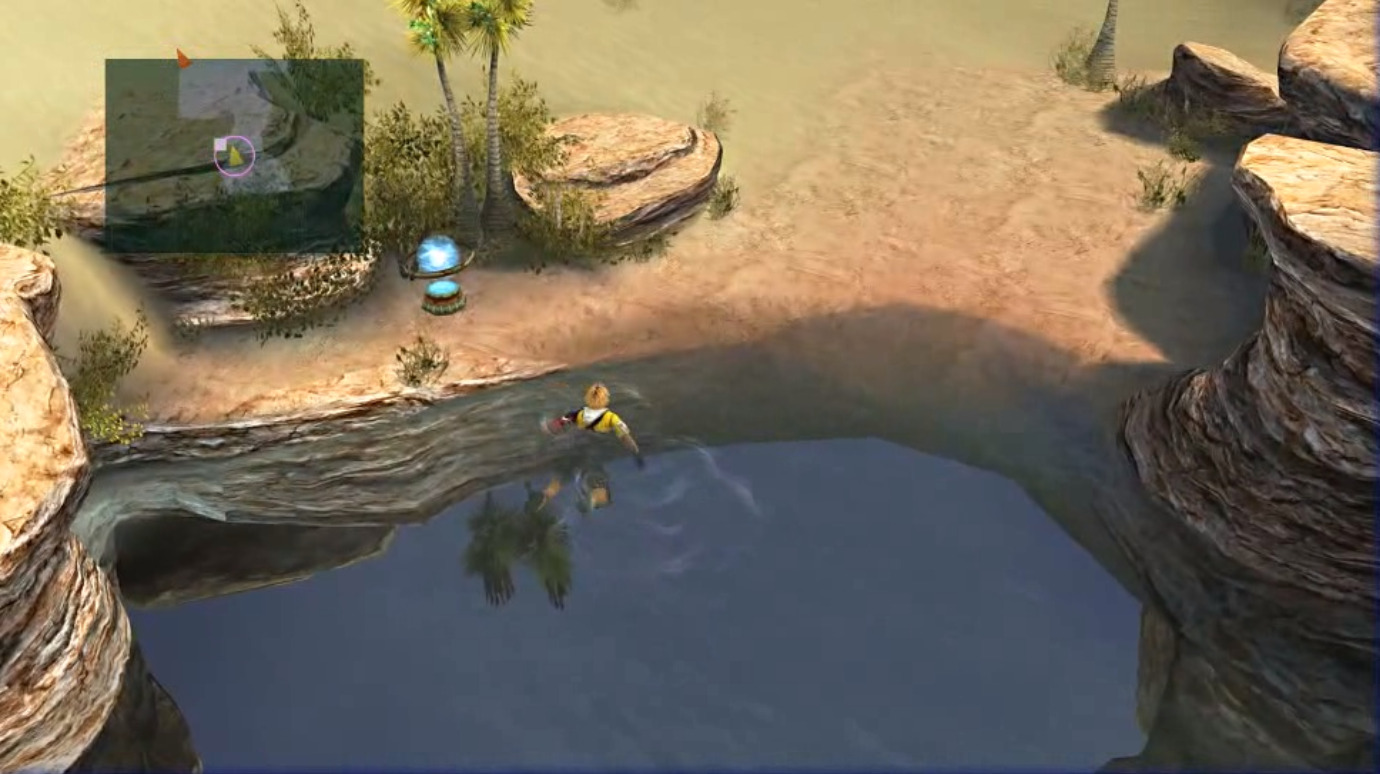
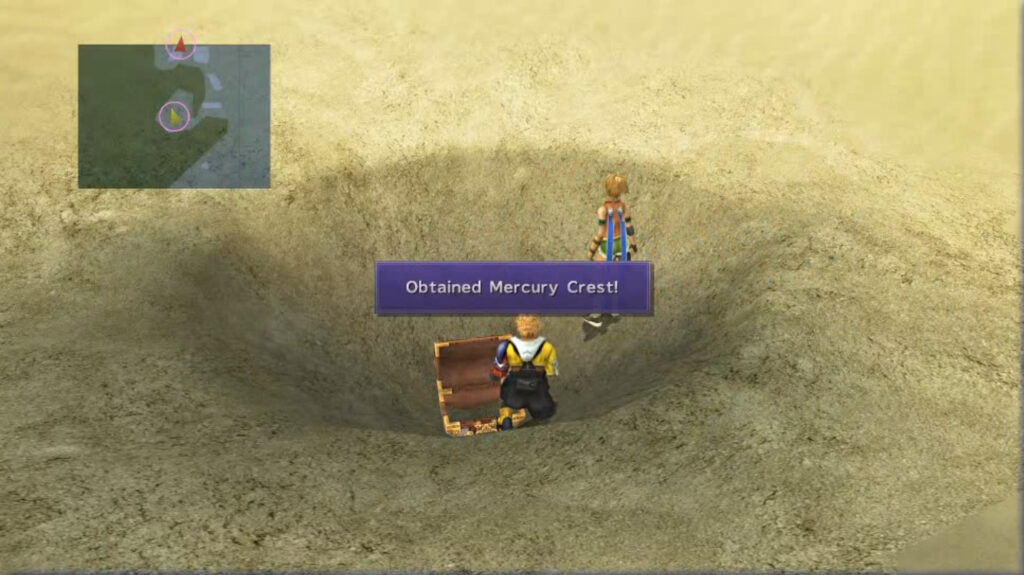
From here, head north until you see a small area to the east, and enter it to find a chest containing 8 Hi-Potions. Further west from this chest, go into the sand whirlpool to find another chest with the Mercury Crest (which will be useful later if you want to get Rikku‘s Celestial Weapon).
Now head northeast, and you will find two more chests inside sand whirlpools.
However, these two will be guarded by Sangragora.
The main thing to worry about with this fiend is that it will frequently try to inflict Confusion on a party member. So, equipping armor with ‘Confuse Ward’ or ‘Confuseproof’ will help make these battles much easier.
The chests guarded by the Sangragoras contain 3 Megalixirs and 2 Teleport Spheres. Head a little bit northwest from these chests to find yet another chest containing 2 X-Potions. Now, just head north to head to the next area. You will have to fight one more Sangragora before being able to move onward.
Al Bhed Home
In this section of the game, there will be three Al Bhed Primers you can pick up: XIX, XX, and XXI.
You NEED to get these now if you want to complete the collection.
You will not be able to come back to this area later. These primers will not appear anywhere else in the game if you miss them here.
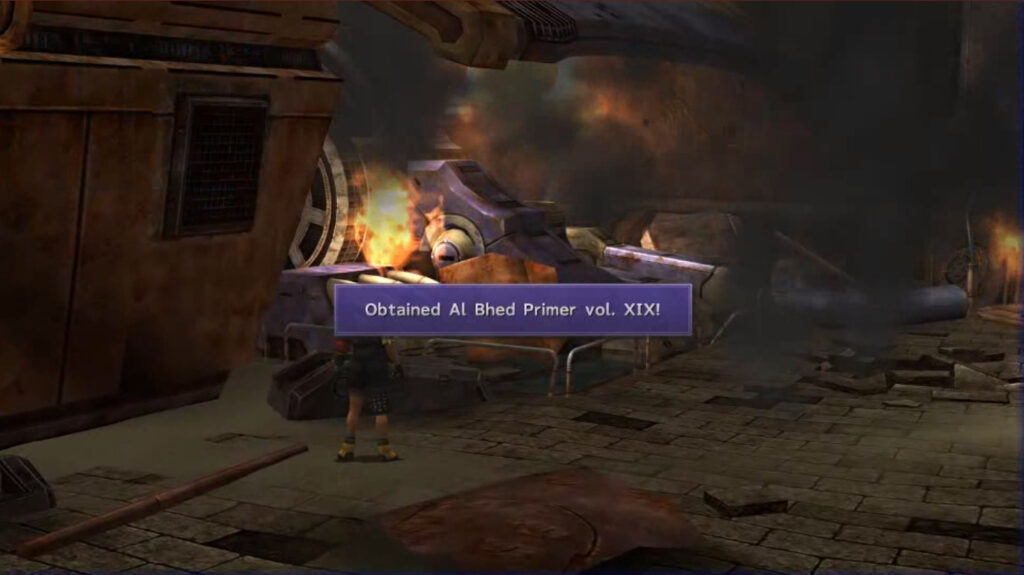
When you regain control, head to the left side of the area to find the Al Bhed Primer Vol. XIX.
First of the three missable primers
Then, you can examine the body of one of the Al Bhed soldiers to find 2 Hi-Potions. Head through the doorway when you’re ready. Once you’re inside, follow the path. Now, go into the only door you can go through after getting ambushed.
Home — Main Corridor
When you enter, you will be thrown into another battle. Afterwards, run down the stairs and run back up (this will make it easier to see where you’re going). Now, go into the first room you see on the left side. Once you get inside, you will be put into another battle.
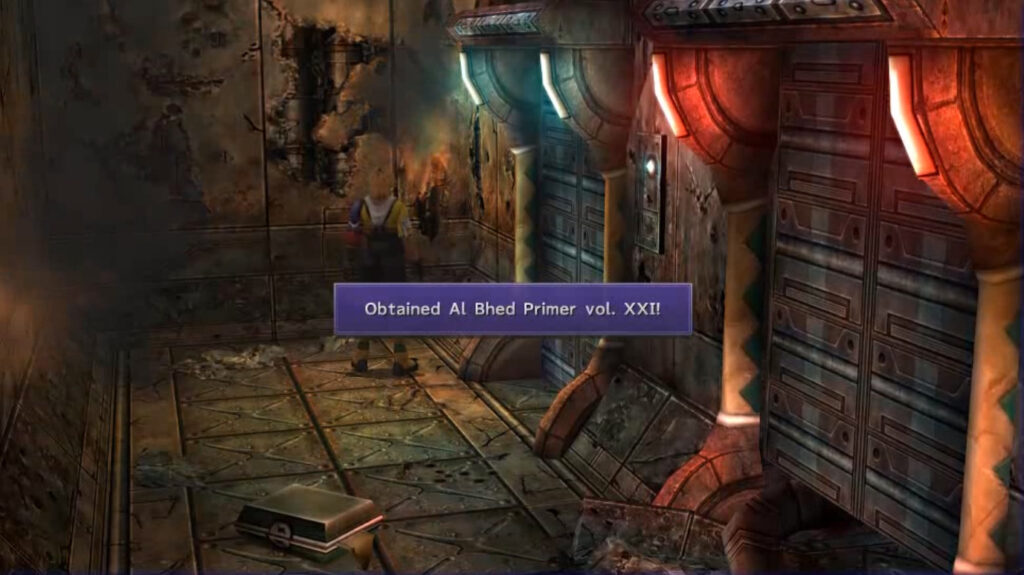
After the battle, you will find the Al Bhed Primer Vol. XX, along with two special chests.
Throughout the Al Bhed Home, you will find chests like these — they will give you choices or riddles to solve, but all of the text will be in the Al Bhed language. Deciphering these chests will be easier the more Al Bhed Primers you pick up throughout the game.
You can see the Al Bhed Primer Vol. XX on the bed
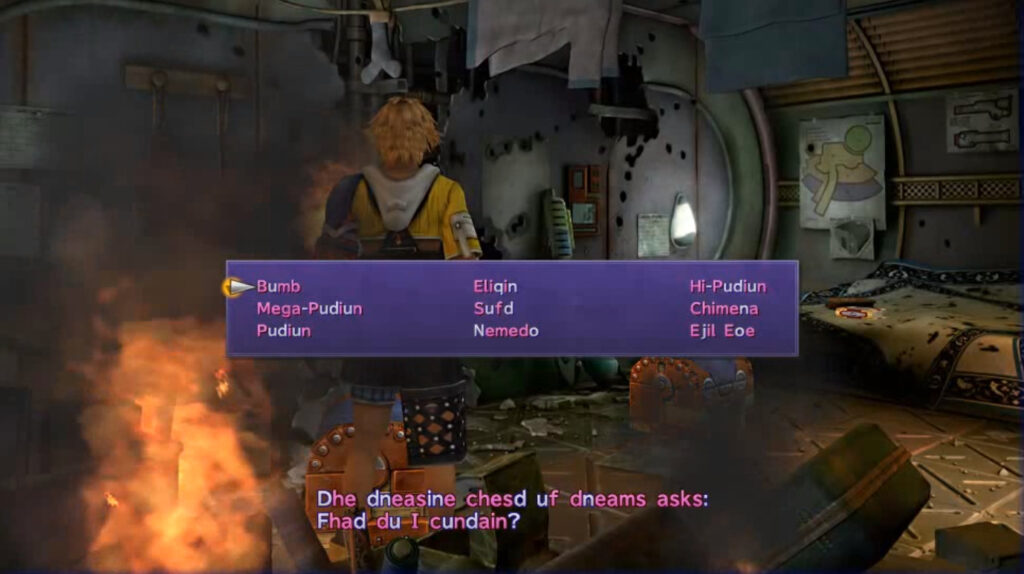
First Al Bhed Home Chest
The chest closest to the door will ask you, “What do I contain?” It will give you a table with the following choices:
Bomb
Elixir
Hi-Potion
Mega-Potion
Soft
Chimera
Potion
Remedy
Evil Eye
Whatever you pick will be what you get from the chest. Picking Bomb, Chimera or Evil Eye will put you in a battle with the fiend. Pick whichever item you want (Elixir or Mega-Potion would be best), and go on to the next chest.
Second Al Bhed Home Chest
This next chest will give you a word, and you will have to pick the same word in Al Bhed.
The first word (“Sorry”) will be the middle option on the bottom row.
The second word (“Wait”) will be the right option on the middle row.
The third word (“Pardon”) will be the middle option on the middle row.
If you give all of the right answers, you will obtain a Friend Sphere. Then, you can head out of the room.
Head down the stairs and go to the right on the three-way split. Before entering the room, pick up the Al Bhed Primer Vol. XXI at the end of the hallway.
Last of the three missable primers
Once inside, you will be put into another battle, then you will see two more Al Bhed chests.
Third Al Bhed Home Chest
The chest in the back of the room will ask you for a numerical password. It gives you a clue for each number in Al Bhed:
The first digit is 4 plus 1.
The second digit is 7 minus 1.
The third digit is 3 times 1.
The fourth digit is 2 plus 1.
The code is 5633. This one will get you a Special Sphere.
Fourth Al Bhed Home Chest
The second chest in the room will ask you four questions to answer. Both the questions and answers will be in Al Bhed, and you will have four options to pick from.
Are you Al Bhed? Yes (third answer down).
Name the son of the Al Bhed leader. Brother (fourth answer down).
On what island do the Al Bhed live? Bikanel Island (second answer down).
What is Al Bhed in Al Bhed? Al Bhed (first answer down).
Answering all of the questions correctly will get you a Skill Sphere.
Once you got through everything, you can leave the room. Head up the middle path on the three-way split to find a chest with 6 Al Bhed Potions. Then, go to the left path and into the next area.
Walk up to the party to start a cutscene. Then, you will get put into a battle. Afterwards, head down the stairs. At the bottom there will be a chest with a Lv. 2 Key Sphere. On the other side of the room you will find another chest, containing a Lv. 4 Key Sphere. Now, enter the next room.
When you regain control, open the chest on the left side of the room for 10,000 gil. After this, you can leave. Simply follow the path at this point, and you will begin a cutscene and enter the airship.
Airship
When you regain control, speak to Cid. Then, leave the bridge and re-enter to continue the story. You can now explore the airship if you want.
When you leave the bridge, you can speak to Isaaru to hear his thoughts on the pilgrimage. Go south to the next area, where you can find Rin, who will sell you items and equipment if you need to buy any.
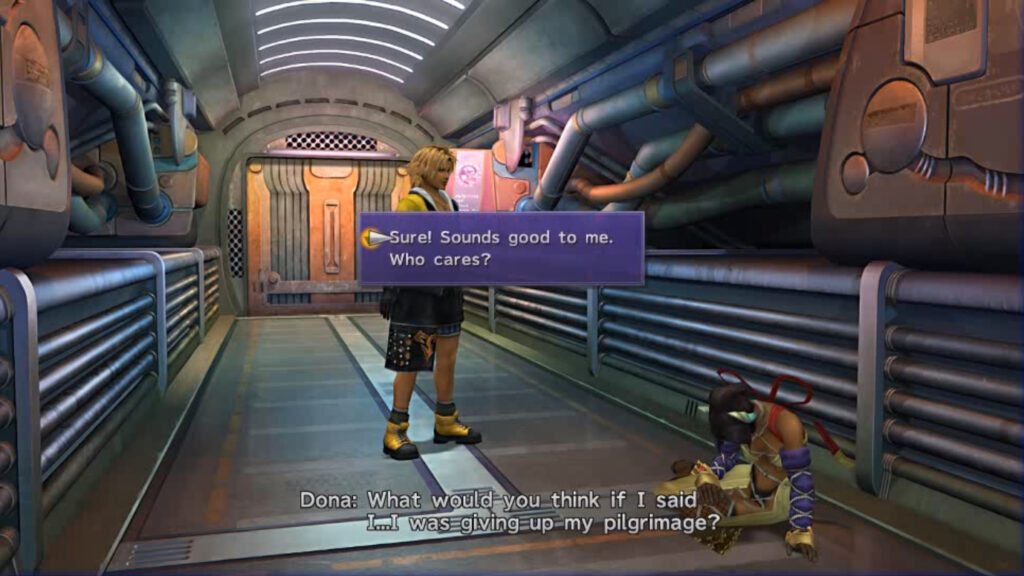
Continue going south, and in the next area take the door west to find Dona. She will ask you about quitting her pilgrimage.
If you choose “Sure! Sounds good to me,” she will quit her pilgrimage. You will be able to find her outside of Djose Temple after this part of the story.
If you choose “Who cares?” she will not quit her pilgrimage, and you will find her in Zanarkand instead.
Your choice doesn’t have any other impact, so pick whichever one you want.
Now, when you’re ready, head back to the bridge and talk to Brother (the pilot of the ship).
Fiends will now spawn on the airship, meaning you can get into random battles.
Leave the bridge and walk down the hallway until you get to the last room with a Save Sphere.
If you have any armor with ‘Stone Ward’/’Stoneproof’ and/or ‘Poison Ward’/’Poisonproof’, they will be useful for the upcoming fight. You can use this opportunity to customize any open slots in your armor for the Ward passives as well — ‘Stone Ward’ and ‘Poison Ward’ only require 30 Softs and Antidotes respectively, which you can buy from Rin.
Speak to the man on the left side of the room to receive 4 Al Bhed Potions, then proceed to the lift at the end of the room to initiate a boss fight.
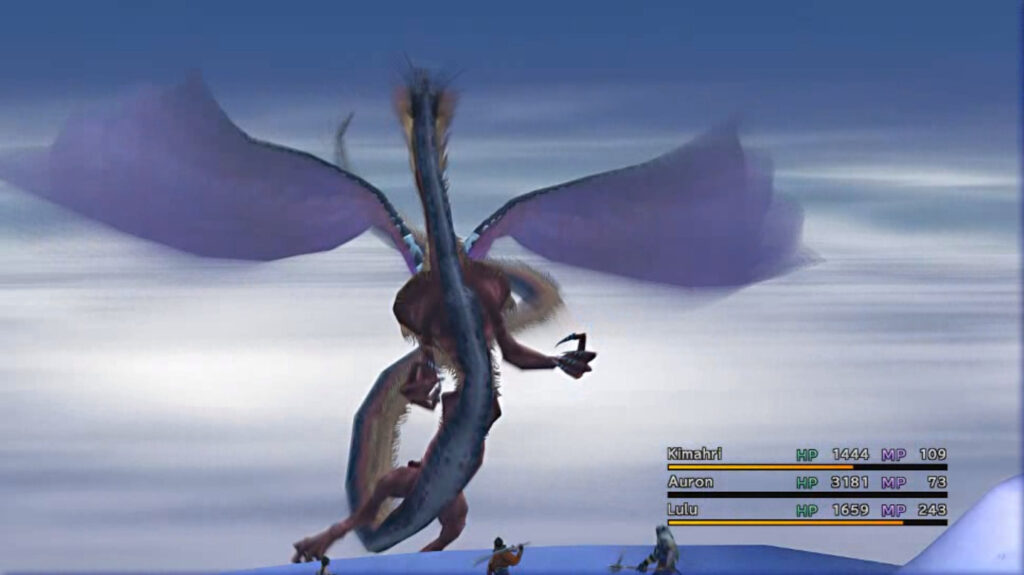
Evrae
During this fight, Tidus and Rikku will be able to command Cid to move the airship away from and towards Evrae, via a Trigger Command. Once the command is given, Cid will move the airship on his next turn (you will see a picture of him in the turn order to indicate when this will happen). While the airship is away from Evrae, Cid will be able to use Guided Missles (Salvos) on his turn, up to three times. However, the boss will be able to attack at range as well.
When close to the ship, the boss will be able to use Stone Gaze, which will Petrify a party member. Also, when you see Evrae roar, that means it is going to use Poison Breath on its next turn. This will hit the entire party and inflict Poison. Rikku’s Al Bhed Potions will work great for this fight, since they will heal the entire party and cure anyone afflicted with either Petrify or Poison.
The general strategy is to attack Evrae with your best attacks, adjusting your team as needed when you move the airship. Once its HP gets low enough, the boss will begin using Haste on itself. At this point, any attempts to Slow it again will just make it recast Haste immediately. At this point, just keep attacking it and it will go down.
After the battle you will see a cutscene. Then, you will be taken to a new area.
Share this article:
KainHighwind27
I'm a huge gamer who especially loves the Final Fantasy series. I will play just about any game, especially if it has anything resembling a Dragoon.