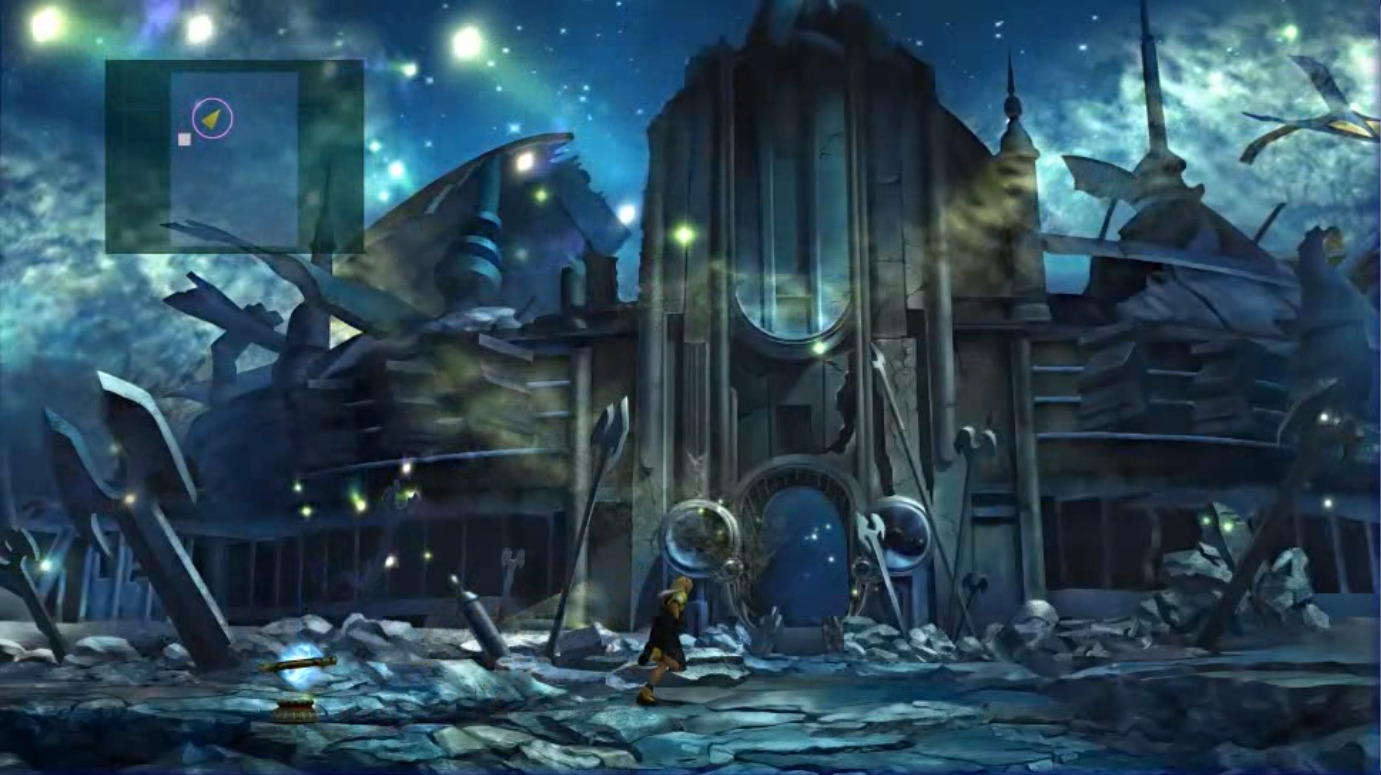
Go down the path, and along the way you will find a chest containing a Fortune Sphere. Further down you will see a small platform on the left with a Spiritual Targe for Rikku. Afterwards, continue to the next area. There’s only a Save Sphere here, so use it and continue on to the next area.
Dome — Interior
Go down the path until you pass through a tunnel. Once you reach the other side, turn around and then go up the path on the right side to find a chest containing 10,000 gil. Continue down that path until you reach a split, and take the path east to find a chest with a Friend Sphere. Then, continue on the path northwest. When you cross a small bridge, turn around and go down the one right next to it to find a chest containing a Lv. 3 Key Sphere. Continue down the path until you get to the next area.
Once you’re inside, you will see a chest on the right side containing a Luck Sphere. Now just go up the stairs and enter to begin your final Cloister of Trials.
Zanarkand Cloister of Trials
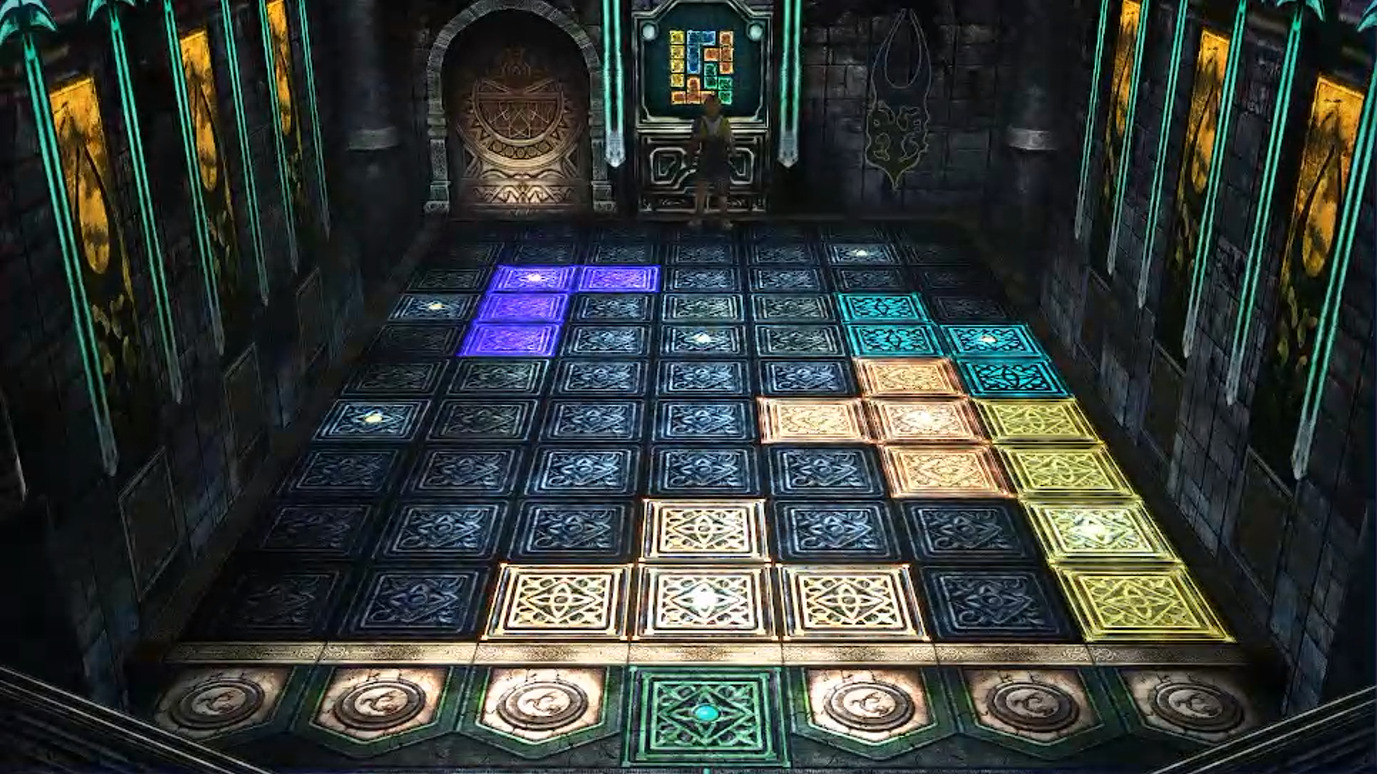
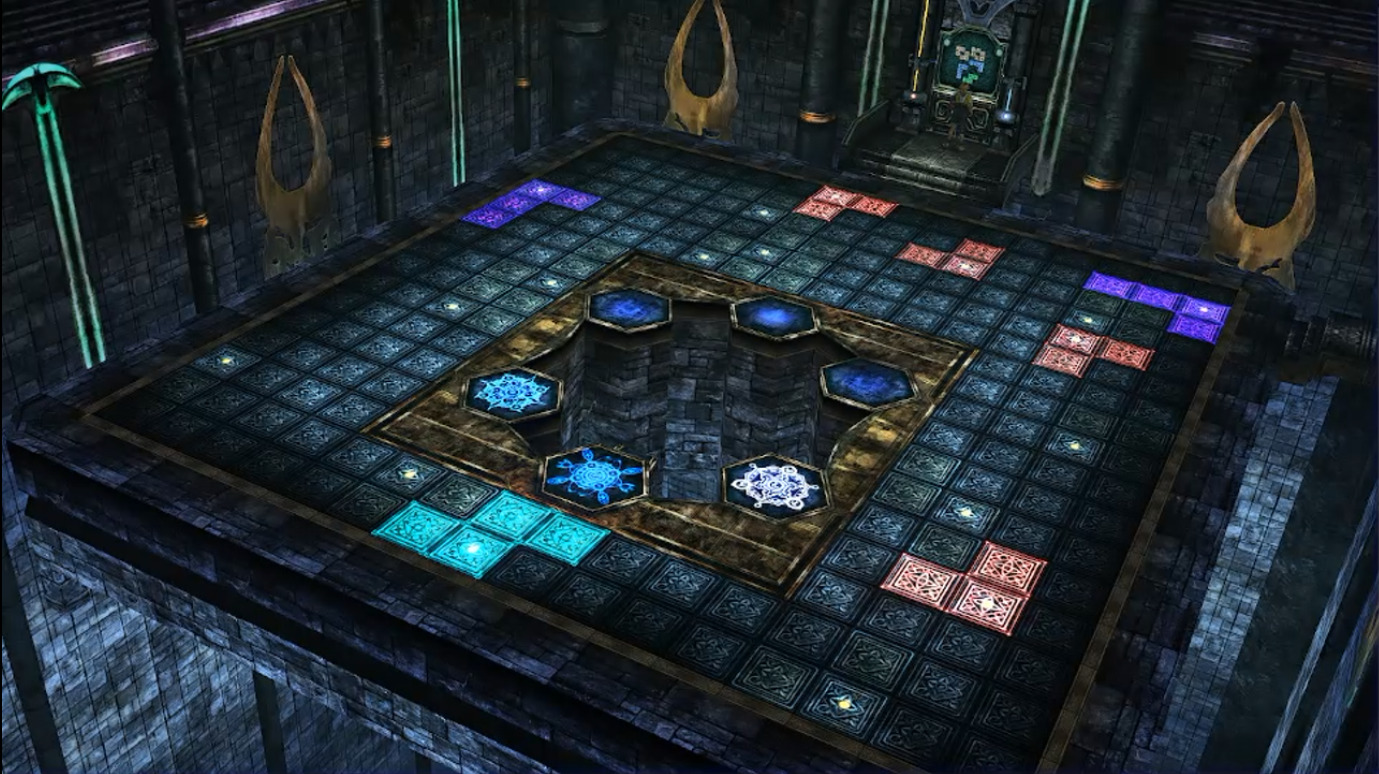
To begin the puzzle, step up to the switch in front of you. You will see Tetris shapes on the screen, at the end of the room. In this Cloister, you will see various combinations of shapes appear on the screen — you will have to light up the floor with the same shapes using the shining platforms spread across the floor. If you step on the wrong shape, the floor will reset and you will have to start that combination over. You can interact with the screen by pressing : it will quickly show you all of the tiles that you need to light up.
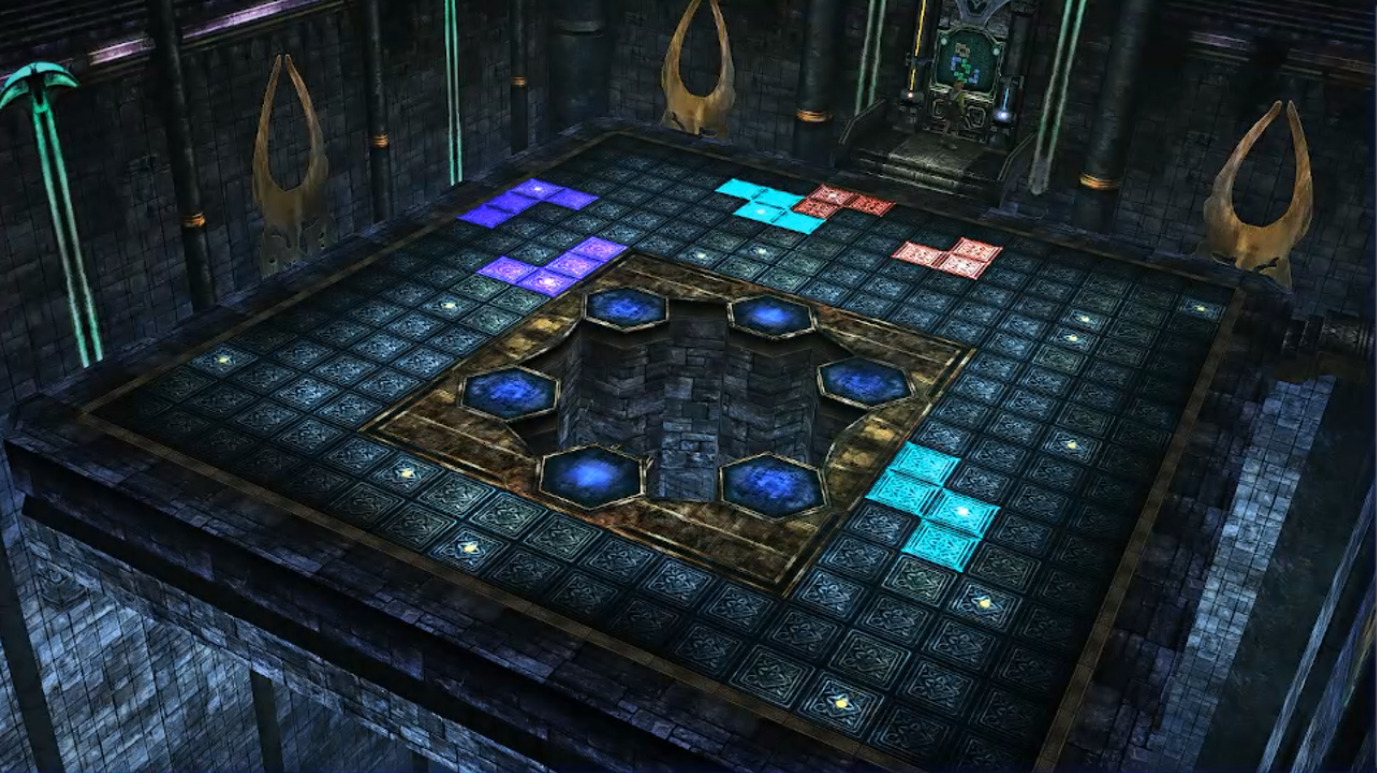
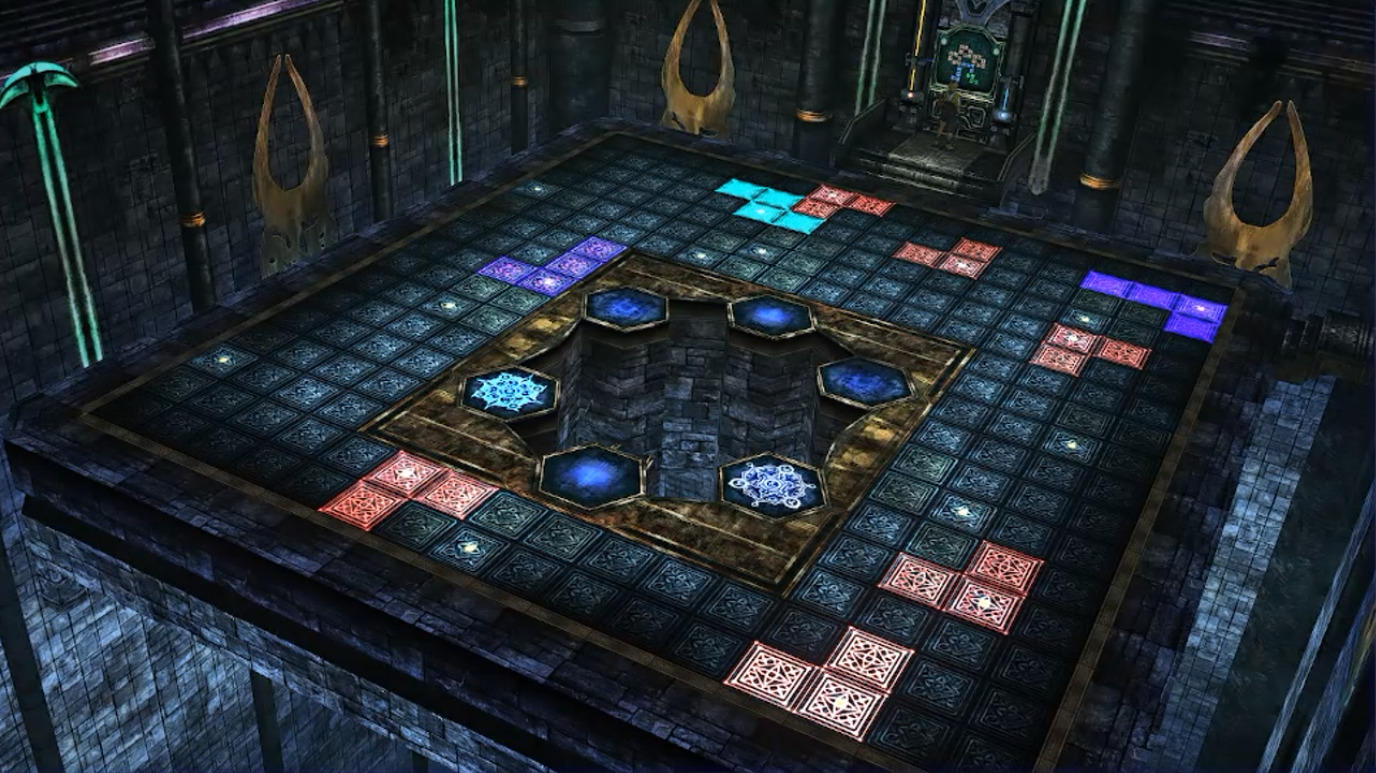
Once you solve the first puzzle (see solution on the image below), 6 pedestals will appear and a door to the next room will open. You will have to push the pillars in the four corners to activate and then solve a puzzle for each one (this can be done in any order).
Zanarkand Cloister of Trials — Solutions
First room solutionUpper left pedestal solutionLower left pedestal solutionUpper right pedestal solutionLower right pedestal solution
Once you’ve solved the four puzzles, take the Kilika Sphere and Besaid Sphere that are located next to the screen in the second room. Then, place them on the pedestals on the center left and center right, respectively. You cannot get the Destruction Sphere treasure on your first visit in this Cloister, so don’t worry about that right now.
After pushing all of the pedestals back, the six glyphs in the center of the second room will light up. Save your game with the Save Sphere that appears in the first room, and make your way to the glyphs to go into a boss fight. Any armor you have with ‘Berserk Ward’ or ‘Berserkproof’ will be usefull for this battle.
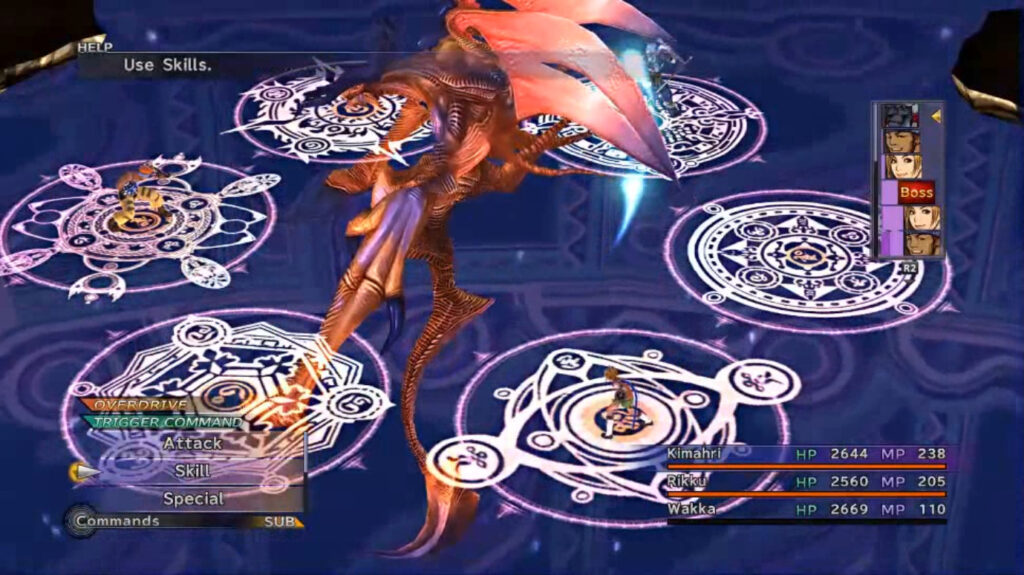
Spectral Keeper
This is the only battle in the game where you can move your position around the boss, and this position will matter for the battle. There will be six glyph platforms that surround the boss where your characters stand. Your characters will have a Trigger Command throughout the fight to move to a different tile.
Spectral Keeper will counter attacks with a physical attack, hitting the three glyphs in front of it. It will also occasionally use Glyph Mine, making a purple mine appear on top of two of the glyphs. If a character is standing on one when it goes off (you can see when this will happen in the turn order as ‘Boss’ with a number), they will die instantly.
The only other attack the boss will use is Berserk Tail. This will hit one party member, and have a chance to inflict Berserk on them. This can be dangerous during this fight, as the automatic attacks could trigger a counter you weren’t ready to take, and you will not be able to move the character out of a Glyph Mine if they’re on top of one.
Try to keep your party spread out throughout the fight, so that the counter attack would hit as few people as possible, and keep Protect up to help survive the attacks. If you’re able to keep Tidus alive, you can use Provoke with him to control where the Spectral Keeper is facing — by having it focus its attacks on Tidus.
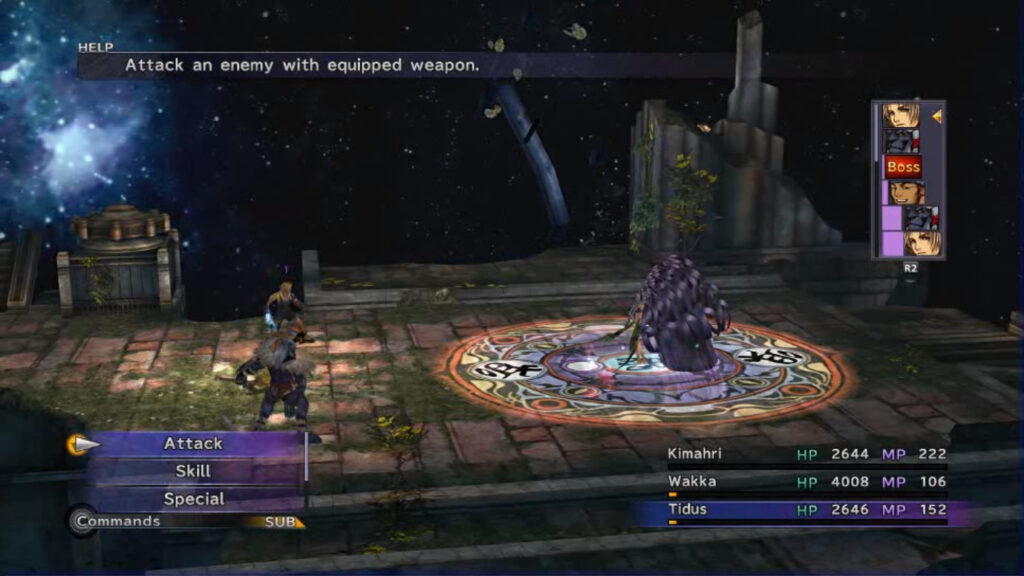
After the battle, make sure you save your game at the Save Sphere before moving on. If you have any armor that resists Silence, Darkness, Sleep, or Confuse, you should equip them now. Once you’re ready, just keep going forward, and after some cutscenes you will be put in another boss fight.
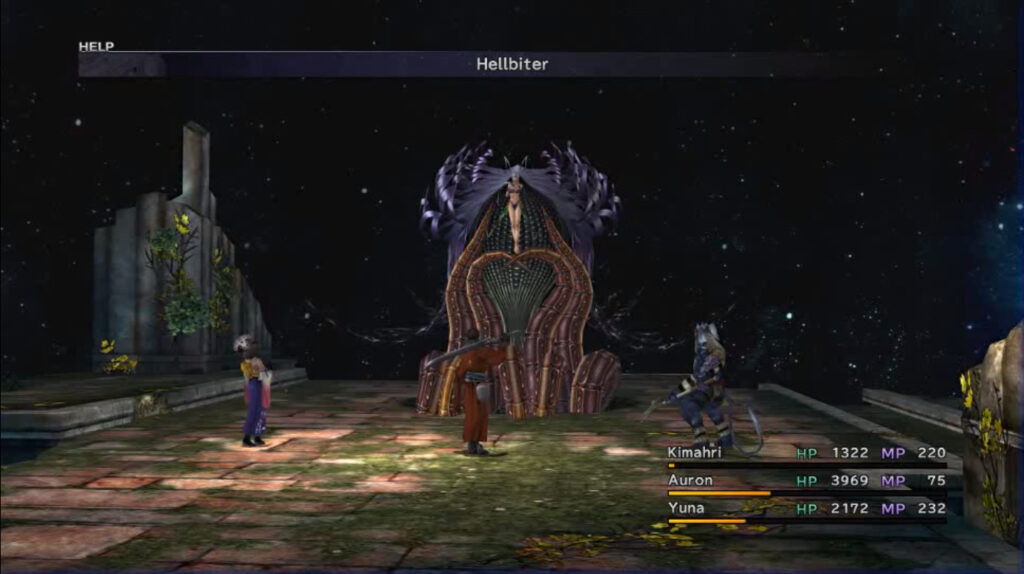
Yunalesca
The battle consists of three phases. Whenever you complete a phase, Yunalesca will transform, restoring her HP and coming back with more max HP than before. She will also change her attack patterns after the transformation. If Yuna learned Holy, it can be used to inflict great damage on this boss.
Phase 1
The boss will counter all attacks during this phase — the attack will depend on what she was hit with. If hit with a physical attack, she will use Blind. If attacked with a magic attack, she will use Silence. If hit by other attacks (like Lancet), she will counter with Sleep.
On top of the counters, Yunalesca can attack with a physical attack that will Dispel most positive status effects from one character. She can also Absorb, which will drain half of a character’s max HP. You can help prevent her counters by casting Reflect on your party (which won’t get Dispelled from her physical attacks), but keep in mind that you don’t want to keep the effect up past this phase.
Phase 2
Yunalesca will immediately begin the phase by using Hellbiter, which is a physical attack that inflicts Zombie on your entire party. She will then attack your party with Cura and Regen (which will damage anyone who’s a Zombie), as well sometimes countering attacks with her physical attack from Phase 1 (but she will no longer use the other counters here).
If you gave your party members Reflect during the first phase, you will want to Dispel it now — otherwise the boss will constantly heal herself. The boss will periodically use Hellbiter throughout this phase, having a higher chance to use it the less people there are inflicted with Zombie. While she stops using it regularly, she will still use Absorb while an Aeon is out for the rest of the fight.
It is very important that you keep at least one party member with the Zombie effect before finishing this phase — any of your party members that do not have it will be killed as soon as the next phase starts.
Phase 3
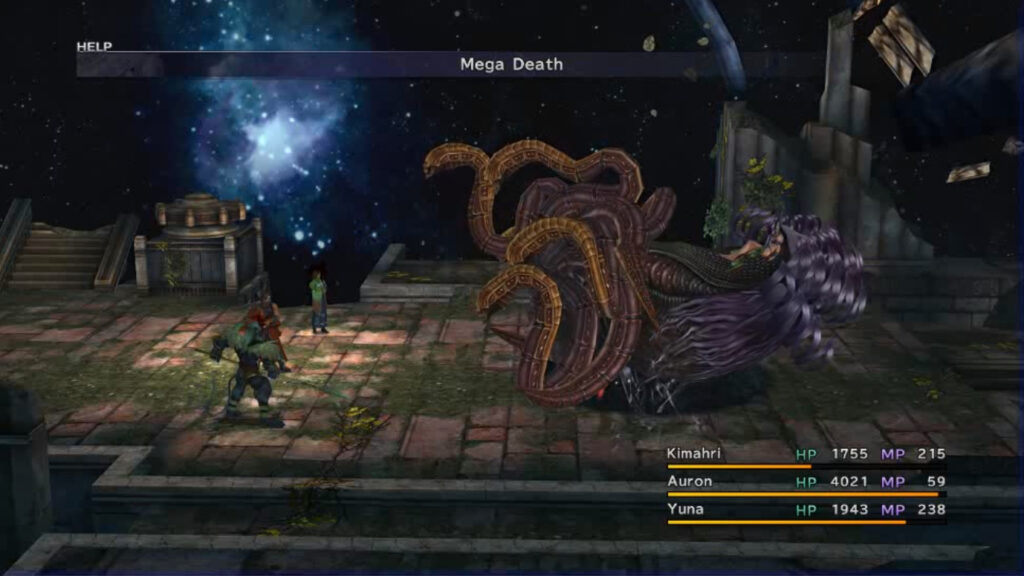
As soon as this phase starts, Yunalesca will use Mega Death, which will instantly kill every character in your party unless they have Zombie. This phase is mostly the same as phase two, except she will now use Curaga instead of Cura; she will also periodically use Mega Death and Mind Blast, which will hit your party and can inflict Confuse on them (it inflicts Curse if used on an Aeon instead). She will also use Osmose against Aeons now, on top of her other abilities.
The main thing to worry about in this fight is managing your status effects (especially so in Phase 3), and making sure that you don’t get wiped from Mega Death.
After the battle there is one more thing to do before you leave the room. Go to either of the stairs present in the room — this will teleport you to another part of the room, but now you will see a chest containing the Sun Crest (which is used for Tidus‘s Celestial Weapon). If you don’t do this now and try to come back later, this area will be guarded by a superboss.
Begin making your way back, and you will trigger a cutscene. After that you will be back on the airship.
Airship
When you regain control, head to the back of the airship (the area with the lift to the top), and talk to Yuna twice. Then head back to the bridge, and after a cutscene you will gain the ability to fly to various locations across Spira. To do this, talk to Cid — a list of locations that you can fly to will appear.
Fly to Highbridge, and make your way through the path. After a series of cutscenes, you will be back on the airship. Now, talk to Cid and Sin will be added to the top of the list of available locations.
From this point on you are free to travel to previous locations in the game and pick up anything you missed, complete side quests, and fight the game’s superbosses. If you only wish to continue the story, skip the next part of the walkthrough and go straight to the final part of the game.
Share this article:
KainHighwind27
I'm a huge gamer who especially loves the Final Fantasy series. I will play just about any game, especially if it has anything resembling a Dragoon.