Final Fantasy X does not have a traditional leveling system that most RPGs do. Instead, it uses the Sphere Grid system, which allows you to increase each character’s stats and learn new abilities. There are two types of Grids you can choose from when starting a new game: Standard and Expert.
How the Sphere Grid Works
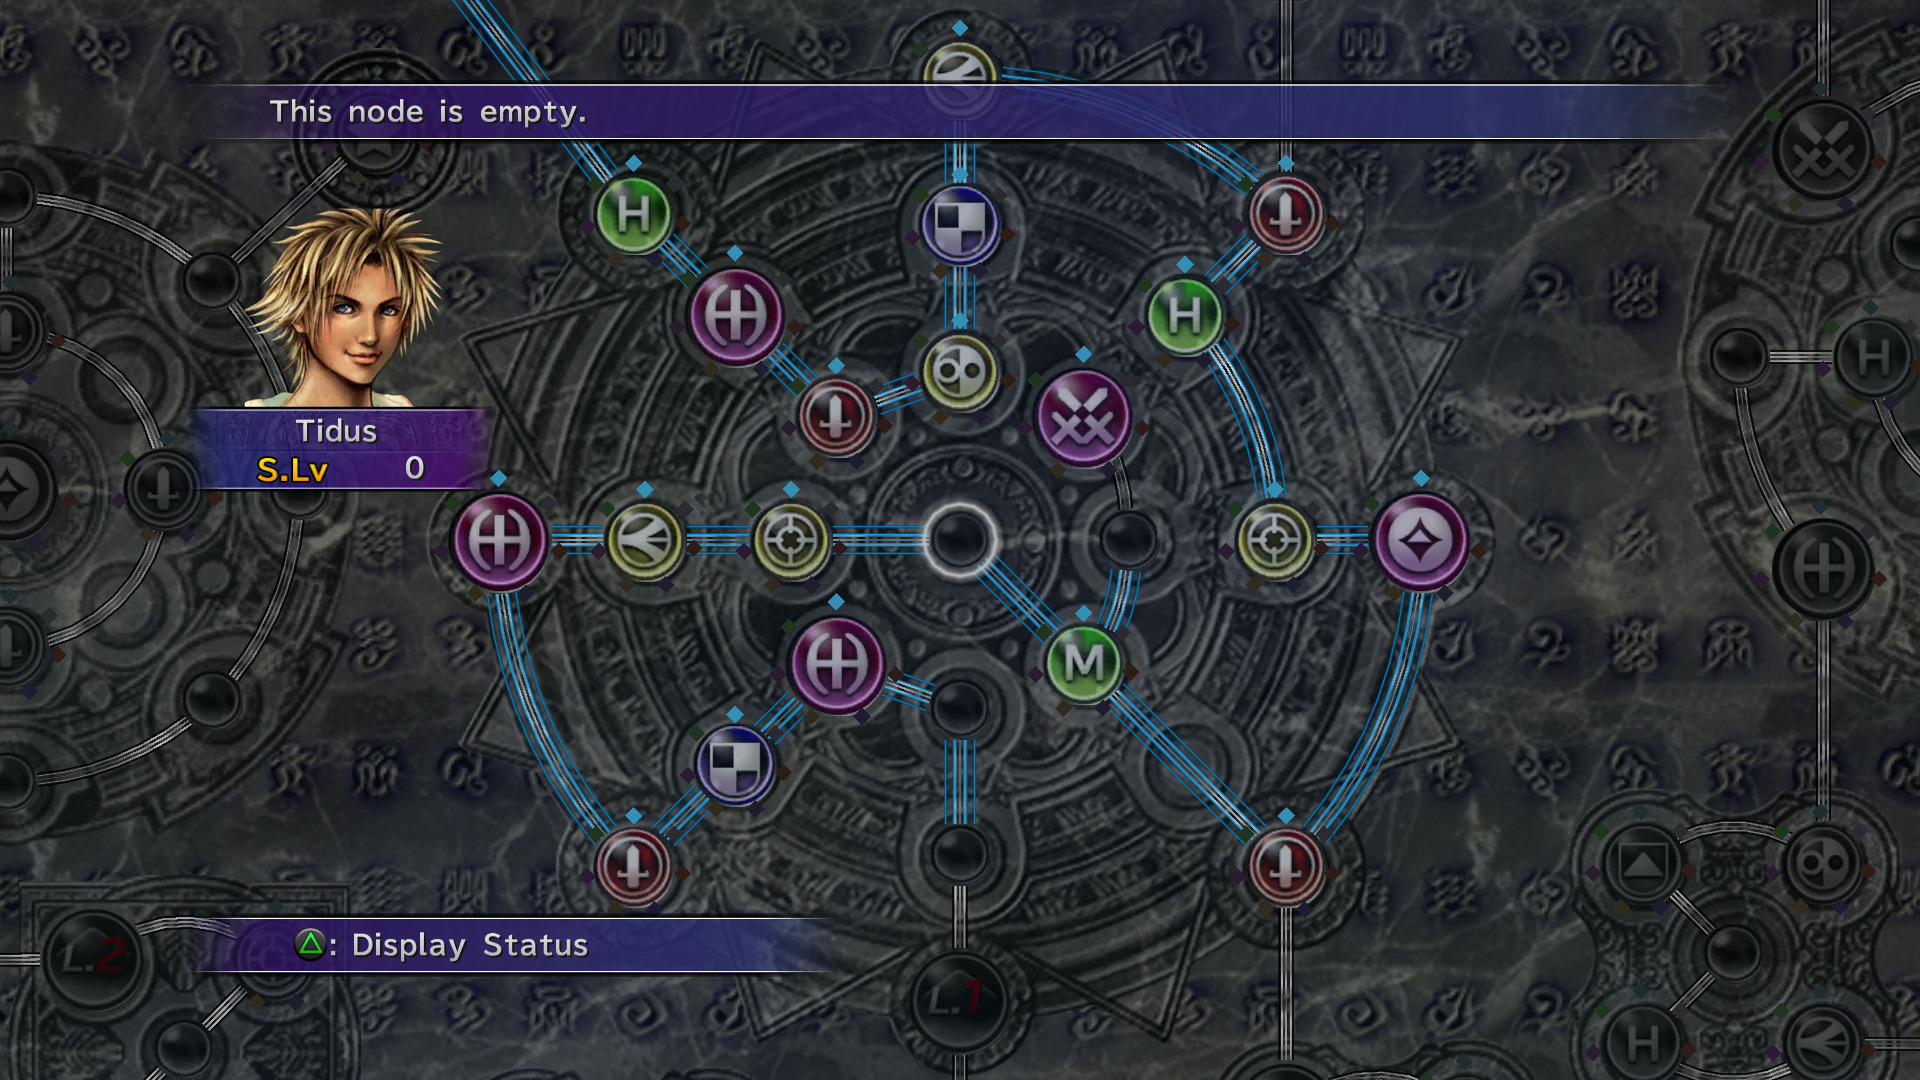
In battle you will gain AP for each character that participated in the fight. Once the character gets enough AP, they will gain a Sphere Level (S. Lv). S. Lvs are used to move across the Sphere Grid, costing 1 level to move forward on your chosen path by one space, or move up to four spaces backwards on the path you’ve already created.
A character’s path across the Sphere Grid will be highlighted as you move through it. Most nodes will be associated with either a stat (for example, a node can add +1 STR) or new ability.
There are also empty nodes and locked nodes present on the grid. The empty nodes you will be able to fill with a stat as you progress in the game, while the locked nodes prevent you from going down a certain path. To activate a node, you will need a sphere that associates with the stat or ability.
Characters will start in different sections of the Sphere Grid. While it is possible for characters to cross over into each other’s sections, most of the paths are initially blocked by locked nodes. These you will not be able to unlock until later in the game (it’s worth noting that it’s easier to go into other sections in the Expert Sphere Grid). Every character is eventually able to activate every node in the grid.
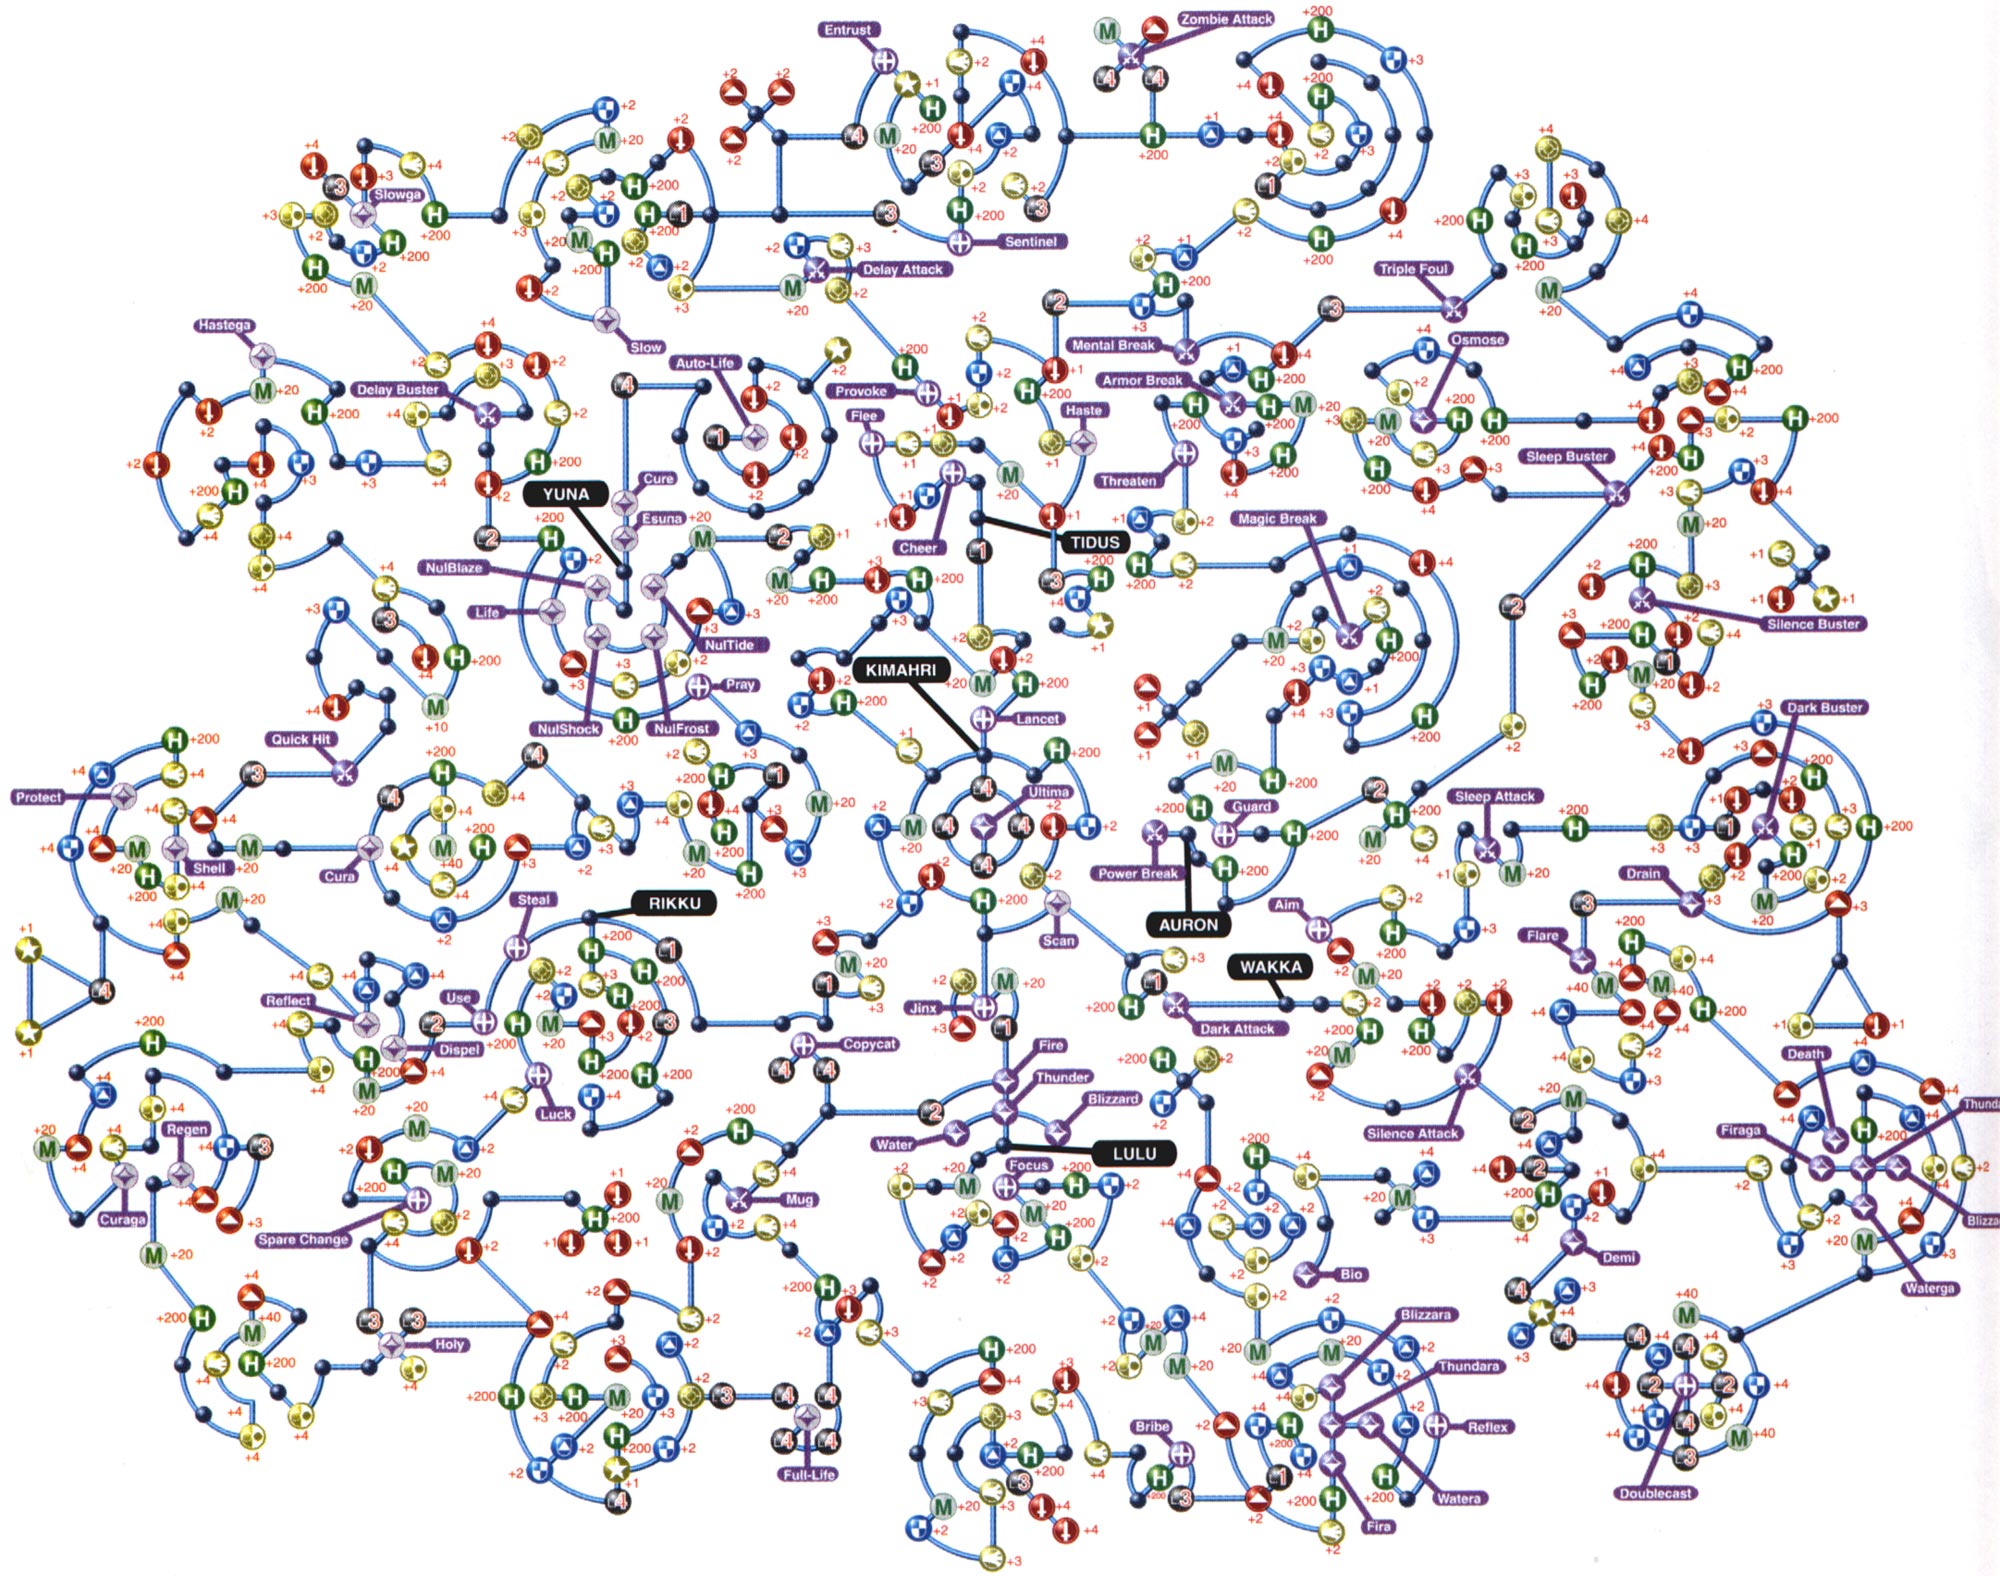
Full chart of the Standard Sphere Grid
Spheres
In order to activate nodes on the Sphere Grid, you will need spheres that correspond with the node. There are also spheres that will help you move across the Grid, doing things like unlocking locked nodes to, even, teleporting to another spot. There are a total of six types of spheres.
Red Sphere
Red Spheres are the most common type of sphere, and are used to activate nodes that increase stats.
Purple Spheres fill in an empty node and turns it into a stat node (which then will need to be activated with a Red Sphere).
There is a Purple Sphere to match each of the basic stats in the game: Strength, Defense, HP, Magic, Magic Resistance, MP, Agility, Accuracy, Evasion, and Luck. It’s worth noting that stat nodes converted by a Purple Sphere will be better than the standard nodes in the Grid (a STR node will give +4 as opposed to the normal +1-3).
Key Sphere
Key Spheres unlock locked nodes. There are four levels of locks, and you need the sphere of the corresponding level to unlock it (for example, a Lv. 3 Key Sphere is needed to unlock Lv. 3 locked nodes). Once one of these nodes is unlocked, it unlocks in every other characters’ Sphere Grid as well, and converts into an empty node.
Yellow Sphere
Yellow Spheres will allow you to activate a node from anywhere on the Sphere Grid. The only requirement with using these spheres is that the node must’ve been activated by another character.
Sphere
Use
Attribute Sphere
Activates any stat node.
Special Sphere
Activates any Special node.
Skill Sphere
Activates any Skill node.
White Magic Sphere
Activates any White Magic node.
Black Magic Sphere
Activates any Black Magic node.
Master Sphere
Activates any node.
Light Blue Sphere
Light Blue Spheres let you teleport throughout the Sphere Grid in various ways.
Sphere
Use
Return Sphere
Warp to any node previously activated by the character.
Friend Sphere
Warp to an ally’s spot on the Grid.
Teleport Sphere
Warp to any activated node on the Grid.
Warp Sphere
Warp to any spot on the Grid.
Clear Sphere
Clear Spheres will clear out any stat node and convert it into an empty node. This is a useful tool for maxing out each characters’ stats for superbosses.
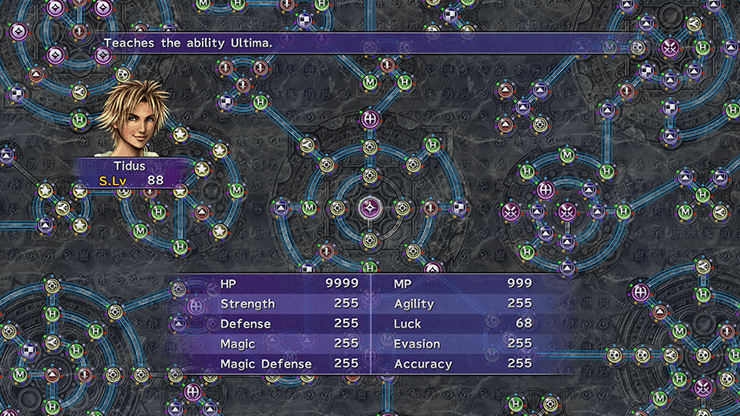
Tidus with a full Sphere Grid and mostly maxed out stats
Standard Vs. Expert Sphere Grid
There are two types of Sphere Grids you can choose from at the beginning of the game; Standard and Expert. The Standard Grid is the one that was in the original Final Fantasy X (with some added Extract abilities to get Red Spheres easier). Characters will start in their own section of the Grid, and their paths will be mostly linear for most of the game. This is the recommended Grid to use for new players.
The Expert Sphere Grid mixes characters’ paths a lot more. All characters will start roughly in the middle of the Grid (with Kimahri‘s Lancet being the center node), and are free to go down any path that they want. It’s also a lot easier to go into other character’s paths, allowing you to mix abilities much earlier in the game (for example, you can learn Black Magic spells while going down Yuna‘s path). This Grid is recommended for players more familiar with the Sphere Grid in general, as the freedom it provides can make new player get lost if they’re not careful. It’s also worth noting that the Expert Sphere Grid has less total nodes than the Standard Grid.
When you get near the end of the game, there are ways where you can easily farm AP and Spheres in order to fill the Sphere Grid quickly, which you will want to do to take on the game’s superbosses.
Completely filling a characters’ Sphere Grid will earn you the achievement ‘Sphere Master,’ while completing it for every character will give you the ‘Perfect Sphere Master’ achievement.
Share this article:
KainHighwind27
I'm a huge gamer who especially loves the Final Fantasy series. I will play just about any game, especially if it has anything resembling a Dragoon.