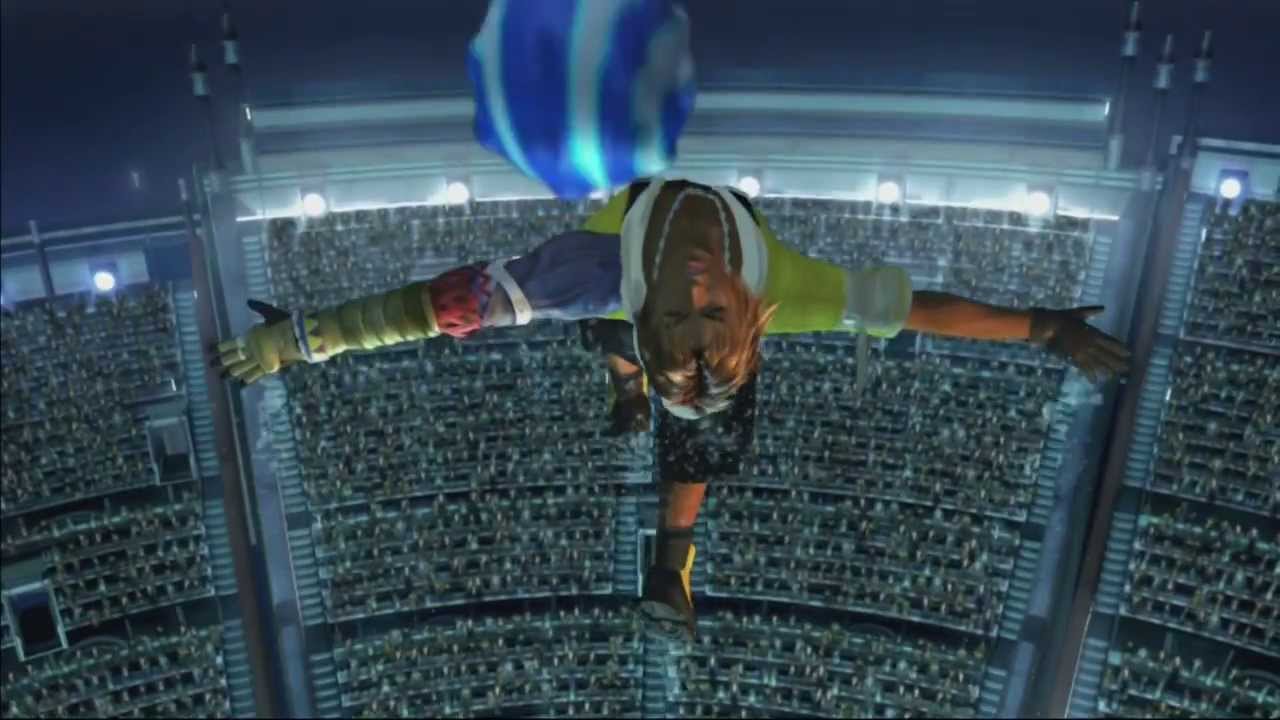
Blitzball is the most popular sport in the world of Spira, and acts as a minigame for Final Fantasy X. It can be accessed at any save point once the party leaves Luca.
In Blitzball, you control The Besaid Aurochs’ team as they go against other teams, and you must score more points than the opponent before time runs out. You will only have to play Blitzball once in the story, but you will need to play it for both Wakka‘s Overdrives and his Celestial Weapon.
The Basics
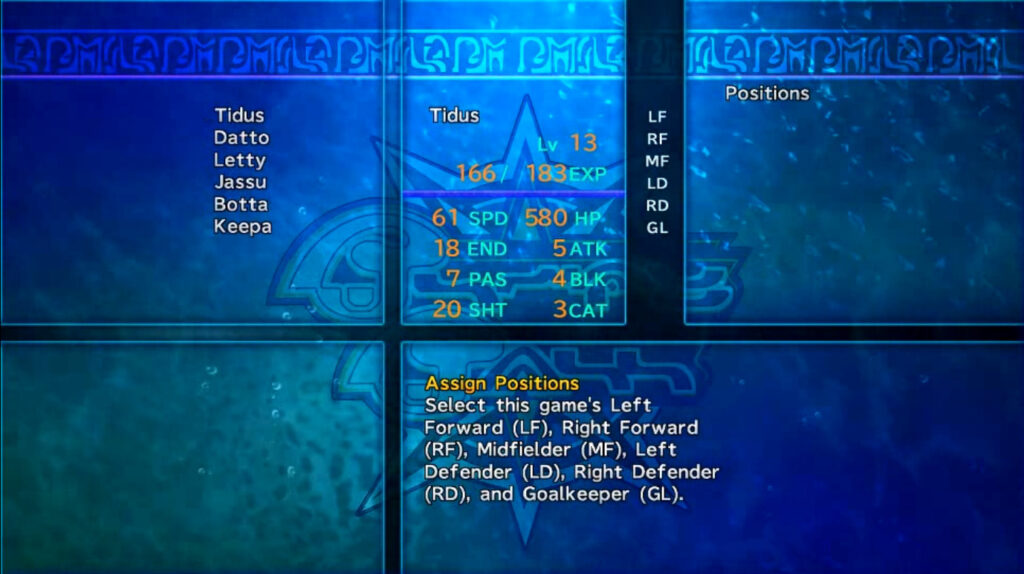
At the start of every game, you will be able to assign a player to each position on the field, and you can equip them with Techniques. You can also have each teammate mark an opponent to learn one of their Techniques (see ‘Techniques’ below). After the halfway point in the game (5 minutes of in game time), your players will gain EXP, and you will be able to reassign their positions, equip them with techniques, and mark your opponents again.
In Blitzball matches, you only control the player on your team that currently has the ball. There are three moving modes you can choose for who you control. Auto makes the player move automatically. Manual A gives you control, where your direction inputs correspond with the minimap, while Manual B is relative to the sphere pool.
While dribbling the ball, if an opponent gets close enough to you or you press the action button, the game’s timer will stop, and you will be put in a menu. The first part of this menu will allow you to choose if you want to attempt to break through an enemy. If you successfully break through the opponent(s), they will not block you while shooting or passing. However, if the break doesn’t work, the player on the enemy team will steal the ball.
You will then be given the choice to pass, shoot, or continuing to dribble the ball. If picking pass or shoot, you will also be able to choose any available Techniques to enhance them. When passing or shooting, all opponents that were not broken through will attempt to block the ball. If the ball gets through the defense, it will go towards its destination, otherwise the opponent will again steal the ball.
While the opponent has the ball, if your teammates confronting them have any tackle or block techniques, you will be able to use them before the opponent makes their move.
Technique Status Effects
There are also a few status effects that can be inflicted by using Techniques:
Poison makes the player’s HP drop rapidly, and regenerate much more slowly when not holding the ball. It will wear off after a few minutes, or at the end of the half.
Wither halves one or more of a player’s stat. The stat lowered depends on how Wither is applied (whether it’s from a shot, pass or tackle). It will wear off after a few minute, or at the end of the half.
Sleep makes the player completely immobile, meaning they will not move, participate in encounters, or catch the ball. You can wake the player up by throwing a pass at them or scoring a goal.
Game Modes
There are three different modes for Blitzball.
Exhibition is just a training match, where neither team earns EXP, however you can still learn Techniques.
League Mode is a series of 10 matches, where you will gain points if you win or tie, and the team with the most points at the end of the League wins. Leagues do not have to played all at once, so you can play a few matches in one sitting, and come back to finish it later.
Tournament Mode consists of up to three Blitzball games, where the losing team gets eliminated, and the last team wins. Tournaments must be played from start to finish at once.
Stats
Every player has a set of stats that determine how they will play in a match. They gain experience by playing in matches and from using Techniques, which will increase their stats.
Stat
Description
HP
Determines the stamina of the player. HP gets lower as a player swims with the ball, and is spent when passing, shooting, or using techniques. If HP gets too low, their stats are halved. HP regenerates slowly while not carrying the ball.
SP
Determines how fast the player swims through the field.
EN
Determines how much damage the player can take when attacked by opponents before losing the ball.
AT
Determines how much damage the player will deal when tackling an opponent. The higher the AT, the higher the chance they can steal the ball.
PA
Determines how far a player can pass the ball to another player. PA gradually decreases during a pass, and if it hits 0, the pass will miss.
SH
Determines how well a player can shoot at the goal. SH gradually decreases as it reaches the goal, and if it is lower than the goalkeeper’s CA when it gets there, they will catch or deflect the ball.
BL
Determines a player’s ability to block passes and shots. The higher their BL, the more PA or SH they will reduce when blocking an opponent.
CA
Determines the goalkeeper’s ability to block an opponent’s shot.
Techniques
All players have a set of techniques that they initially know. However, they can learn more. This is done by using Techcopy.
Before each half of the match starts, you can have each player in your team mark an opponent to learn their Technique. During the match, when the marked opponent uses a learnable Technique, you will see the word ‘Techcopy’ appear very briefly on the top left corner of your screen, and you must press the confirm button immediately to learn it.
Most Techniques can be learned this way, with notable exceptions being Jecht Shot/Jecht Shot 2, Anti-Drain, and Hi-Risk.
Learning Jecht Shot and Jecht Shot 2
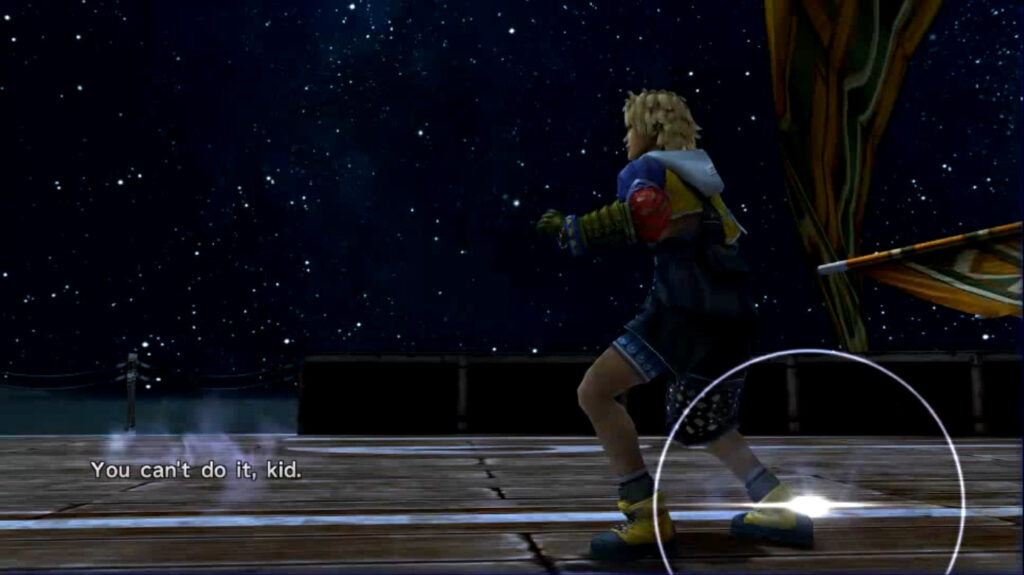
You can first learn Jecht Shot during the story on your way to Luca for the first time. After a cutscene, you will be given a small minigame where Tidus attempts to learn the move. You must press buttons that are prompted by text showing up in various areas of your screen during the game. If you hit enough of the prompts in time, Tidus will learn Jecht Shot. If not, you can attempt to learn it again later any time you sail from Kilika to Luca.
Jecht Shot 2 can be earned as a random prize from a Blitzball tournament, but Tidus must have learned his key abilities (Venom Tackle, Drain Tackle 2, and Anti-Venom 2).
Tidus attempting to learn Jecht Shot
Note on Anti-Drain and Hi-Risk: Anti-Drain cannot be Techcopied. Only Durren can learn the Technique by releasing him and letting the AI teach it to him. Hi-Risk will rarely appear as the 2nd place prize for a Blitzball League.
Technique
HP Cost
Description
Jecht Shot
120
SH+5, eliminates two defenders.
Jecht Shot 2
999
SH+10, eliminates three defenders, and has the Invisible Shot effect.
Sphere Shot
90
SH+3, and boosts SH by a random amount. It will add 0-10 if the player is level 1-19, 0-15 at level 20-39, and 0-20 at level 40+.
Invisible Shot
220
SH+3, and 60% chance of the ball turning invisible. If SH isn’t 0 when the ball reaches the goal, the player has 2 seconds to steer the ball.
Venom Shot
20
SH+3, and if the goalkeeper touches the ball, 40% chance of inflicting Poison.
Venom Shot 2
35
SH+5, and if the goalkeeper touches the ball, 70% chance of inflicting Poison.
Venom Shot 3
100
SH+7, and if the goalkeeper touches the ball, gets inflicted with Poison.
Nap Shot
45
SH+3, and if the goalkeeper touches the ball, 30% chance of inflicting Sleep.
Nap Shot 2
80
SH+5, and if the goalkeeper touches the ball, 70% chance of inflicting Sleep.
Nap Shot 3
350
SH+7, and if the goalkeeper touches the ball, gets inflicted with Sleep.
Wither Shot
30
SH+3, and if the goalkeeper touches the ball, 40% chance of halving BL or CA.
Wither Shot 2
180
SH+5, and if the goalkeeper touches the ball, 70% chance of halving BL or CA.
Wither Shot 3
390
SH+7, and if the goalkeeper touches the ball, BL or CA is halved.
Venom Pass
40
PA+3, and 30% chance to inflict Poison on any opponents who touch the ball.
Venom Pass 2
120
PA+5, and 60% chance to inflict Poison on any opponents who touch the ball.
Venom Pass 3
350
PA+7, and inflicts Poison on any opponents who touch the ball.
Nap Pass
40
PA+3, and 30% chance to inflict Sleep on any opponents who touch the ball.
Nap Pass 2
200
PA+5, and 60% chance to inflict Sleep on any opponents who touch the ball.
Nap Pass 3
510
PA+7, and inflicts Sleep on any opponents who touch the ball.
Wither Pass
40
PA+3, and 30% chance of halving EN, AT or BL on any opponents who touch the ball.
Wither Pass 2
180
PA+5, and 60% chance of halving EN, AT or BL on any opponents who touch the ball.
Wither Pass 3
400
PA+7, and halves EN, AT or BL on any opponents who touch the ball.
Volley Shot
10
50% chance of picking up a dropped ball and shooting straight for the goal.
Volley Shot 2
40
75% chance of picking up a dropped ball and shooting straight for the goal.
Volley Shot 3
250
picks up a dropped ball and shooting straight for the goal.
Venom Tackle
30
AT+3, and 40% chance of inflicting Poison.
Venom Tackle 2
70
AT+5, and 70% chance of inflicting Poison.
Venom Tackle 3
160
AT+7, and inflicts Poison.
Nap Tackle
40
AT+3, and 40% chance of inflicting Sleep.
Nap Tackle 2
90
AT+5, and 70% chance of inflicting Sleep.
Nap Tackle 3
180
AT+7, and inflicts Sleep.
Wither Tackle
8
AT+3, and 40% chance of halving EN, PA or SH.
Wither Tackle 2
80
AT+5, and 70% chance of halving EN, PA or SH.
Wither Tackle 3
250
AT+7, and halves EN, PA or SH.
Drain Tackle
0
40% chance of absorbing 30 HP from the target. Always works if the user or target have Poison.
Drain Tackle 2
0
70% chance of absorbing 150 HP from the target. Always works if the user or target have Poison.
Drain Tackle 3
0
Absorbs 500 HP from the target.
Tackle Slip
40
40% chance of evading tackles without losing EN, though play may become disoriented. If disoriented, further tackles cause temporary loss of a random technique (lasts until the current half is over).
Tackle Slip 2
170
80% chance of evading tackles without losing EN, though play may become disoriented. If disoriented, further tackles cause temporary loss of a random technique (lasts until the current half is over).
Anti-Venom
5
50% chance of preventing Poison.
Anti-Venom 2
50
Prevents Poison.
Anti-Nap
40
50% chance of preventing Sleep.
Anti-Nap 2
210
Prevents Sleep,
Anti-Wither
30
50% chance of preventing Wither.
Anti-Wither 2
200
Prevents Wither.
Anti-Drain
10
50% chance of preventing Drain.
Anti-Drain 2
50
Prevents Drain.
Spin Ball
30
If the goalkeeper blocks the shot, the chance of the ball dropping increases to 70%.
Grip Gloves
30
If the goalkeeper blocks a shot, the chances of the ball dropping drops to 10%.
Elite Defense
5
The player’s field of vision is increased by 30%, allowing them to chance opponents from further away.
Brawler
10
60% chance the player will become involved in encounters from further away.
Pile Venom
30
Inflict Poison up to five times cumulatively.
Pile Wither
70
Inflict Wither up to five times cumulatively.
Regen
50
4x HP recovery when not in possession of the ball.
Good Morning!
80
50% chance of powering up stats to 99 when recovering from Sleep. If woken by a Venom technique, PA and CA. If woken by a Nap technique, AT and PA. If woken by a Wither technique, CA and SH. Otherwise, any stat other than HP or SPD.
Hi-Risk
300
All stats except HP and SPD are halved, but EXP gain is doubled.
Golden Arm
30
SH and PA loss from water resistance is halved.
Gamble
300
50% chance of randomizing all stats except HP and SPD when recovering from Sleep.
Super Goalie
30+
60% chance of adding a random amount from 0-10 to CA. The HP cost is increased by the amount added to the CA.
Aurochs Spirit
600
SH+10, and the SH of original Aurochs is totaled for SH Bonus. If Datto, Botta, Letty, Jassu and/or Keepa are on the team, their SH figures are totaled and used for the SH bonus. If the goalkeeper touches the ball, 30% of inflicting Sleep.
Blitzball Agents and Contracts
You can recruit people to join the Besaid Aurochs all throughout Spira. You can make a contract with an available player, allowing them to join your team for the chosen amount of games.
Note that if a player is already part of a team, you cannot recruit them until their contract is up. After games, if a player’s contract is up, you will get a notification. If one of your teammate’s contracts run out, you will have a chance to immediately renew it.
The only Blitzball game you will have to play in the story is the one in the Luca Tournament. While it is pretty hard to win this game, it is possible.
It will be best if you can teach Tidus Jecht Shot on your first trip to Luca. Keep in mind he cannot use it in the first half of the game.
During the game, do your best not to let more than one opponent get close to you.
In the first half of the game, stick to the south side of the arena, and try to keep the ball away from the Luca Goers by passing. Use Tidus for dribbling and shots as much as you can so he can gain EXP.
Once it hits half time, Tidus should gain a level and be able to equip Jecht Shot. Make sure he has it while setting your party up for the second half.
During the second half of the game, continue staying near or on the south side, and get the ball to Tidus.
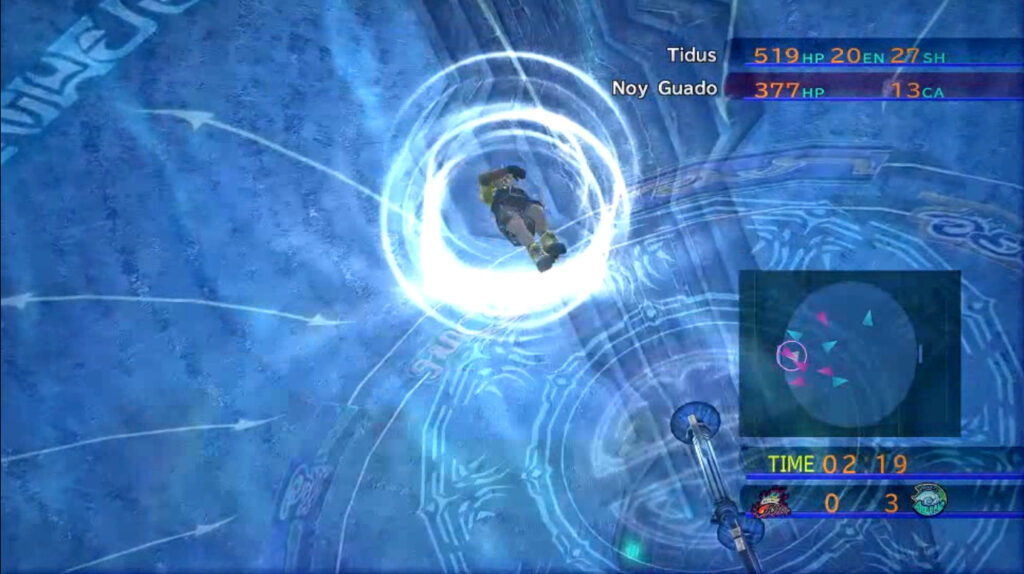
Get Tidus as close to the goal as you can, and use Jecht Shot (remember that this will automatically take out two defenders while he’s shooting it).
Keep repeating this until the cutscene triggers where Wakka replaces Tidus.
Now repeat the same process as before, only make sure Wakka has the ball, and have him use Venom Shot.
Note that due to the nature of Blitzball, there will still be some luck involved, but if all goes well, the Besaid Aurochs should win the match. Remember that you do NOT have to win this match to proceed with the game, but if you do, you will win a Strength Sphere, and will see a different cutscene immediately after the match.
Tidus using Jecht Shot
Tips for Winning Leagues and Tournaments
While Blitzball is completely optional after the Luca Tournament, you will have to play a lot of games if you want to get everything for Wakka. There are some ways to make this easier, making the Besaid Aurochs near impossible to beat.
Just like with the Luca Tournament, teaching Tidus Jecht Shot will make it much easier to score.
You can recruit free agents to replace just about every player in your team (except Tidus). All of the following players are available immediately, as they start off as free agents.
Tidus will always be in your party. His high shooting stat and access to Jecht Shot make him a great RF or LF.
Zev Ronso is the fastest Ronso in the game, and has good passing, attack, endurance, and blocking. He makes a great LD or RD.
Brother has some of the best overall stats at low levels, and is one of the fastest swimmers. He makes for a great MF.
Wakka has good endurance, speed and shooting stat. These stats allow him to be a good RF or LF.
Wedge has great stats overall, and he is able to play in any position well.
Jumal has a high CA stat, and is able to learn the Super Goalie technique. He is the best GL that starts off as a free agent, and one of the best GLs overall.
Some other good recruits you can get are Nedus (for any forward position), Kiyuri (low starting stats, but her endurance, attack and passing become very high), and Ropp (his high passing, attack and block make him a great LD or RD).
Once you’ve recruited the team you want, get into the games, and the general strategies you can use for the Luca Tournament will work in these matches as well. It’ll work much better than it did in the story, as the teams are more evenly matched.
In game, try to keep the ball holder away from large groups of opponents by passing, and try to get any of your forwards close to the goal and score. Just repeat the process as much as you can throughout the match, and you should be able to win just about every game.
Reset Data
In the Blitzball menu, you will have the option to Reset Data. This will reset all players’ levels and abilities (Tidus will still know Jecht Shot however). This will also reset all contracts, so if you recruited new teammates before, you will have to find and hire them again. The main incentive of resetting data is that it almost guarantees the appearance of Wakka’s Overdrives and the Jupiter Sigil as prizes once they become available.
Winning a Blitzball match and tournament earns the achievements ‘Teamwork!’ and ‘Show Off!’ respectively.
Share this article:
KainHighwind27
I'm a huge gamer who especially loves the Final Fantasy series. I will play just about any game, especially if it has anything resembling a Dragoon.