Walk down the path until you see Shelinda, and on the right side there will be a chest containing 3 Lv. 1 Key Spheres. Continue down the path until you see Yenke and Biran, and there will be another chest on the left with an X-Potion. Further down the road, you will run into Belgemine and be able to challenge her again. You can get Yuna, Ifrit and Valefor’s Overdrives charged to make the fight easier, otherwise talk to her to initiate the second fight with her. Just like before, she will heal your Aeons before the fight begins.
Ixion
This fight is much easier than the first, as you have access to both Ifrit and Valefor this time. Belgemine’s Ixion will rotate between using a physical attack and Aerospark, and he will eventually cast Haste on himself, giving him more turns. Summon Ifrit first (or Grand Summon if you have it ready), and use Hellfire for massive damage when it’s available. He should go down quickly, and Ifrit can heal himself with Fire if needed. If your Ifrit does get defeated, summon Valefor to finish off Ixion.
If you win the fight, you will receive 2 Dragon Scales, and 6 Smoke Bombs if you lose. Either way, you will receive the Summoner’s Soul item, unlocking the ability to teach Aeons new abilities in the menu (there will be a tutorial on how to do this).
After you’re done with the battle, there will be a path to the left a little past Belgemine with a chest containing a Magic Def Sphere, then proceed to the next area. There are no treasures to find here, so simply go through the path until you get to the next area.
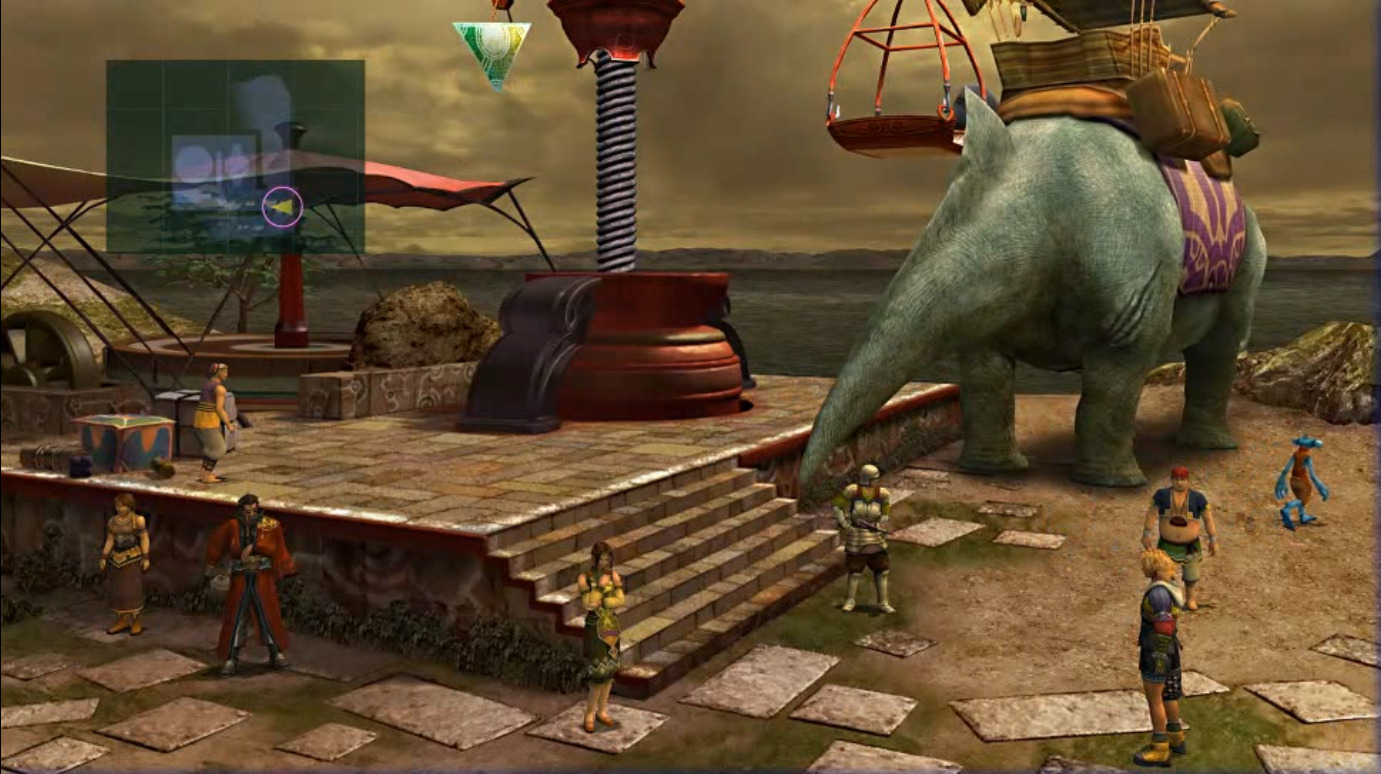
South Warf
Grab the chest here for 2 Phoenix Downs, and you will see O’aka here if you want to stock up on any items (it will be a good idea to buy Potions and Hi-Potions here if you’re low). Head west to go to the next area. Continue west past Auron to meet up with the Crusaders, and find a chest containing 5000 gil, along with a Save Sphere. You can talk to Maechen here if you want to learn about the Shoopufs, otherwise go back to the docking station.
If you have any weapons with Lightningstrike for Tidus or Wakka, equip them now. Either way, talk to the Shoopuf driver to make your way to the next area, and you will be put into a boss fight.
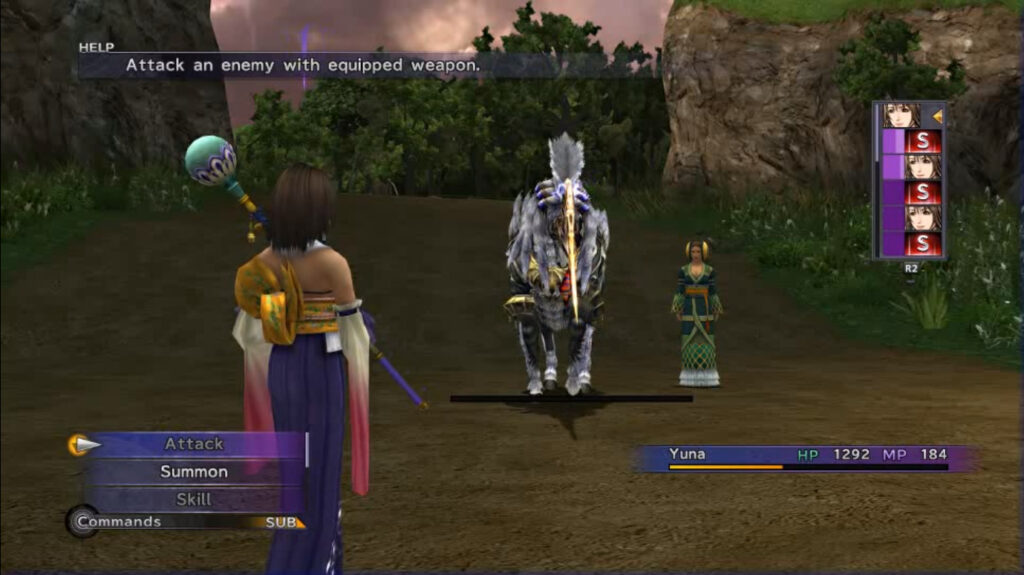
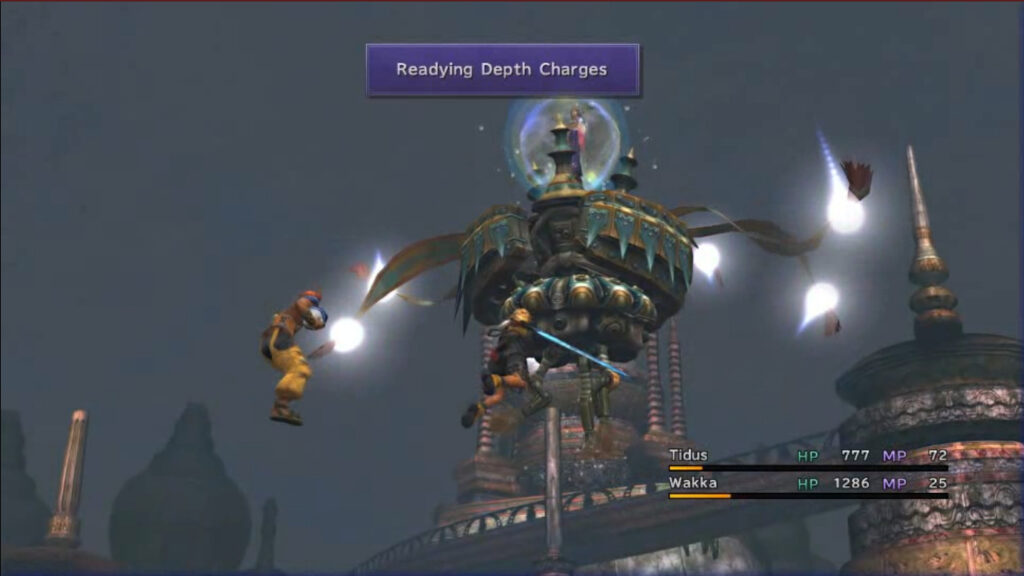
Extractor
As this fight is underwater, you will only be able to use Tidus and Wakka here. Using Haste and Cheer will help make the fight go easier. When the boss swims up, it is getting ready to use its Depth Charge, but can be interrupted if you hit it enough, make it swim back down. Just keep attacking the boss, and use Potions and Hi-Potions as needed, and the Extractor will go down.
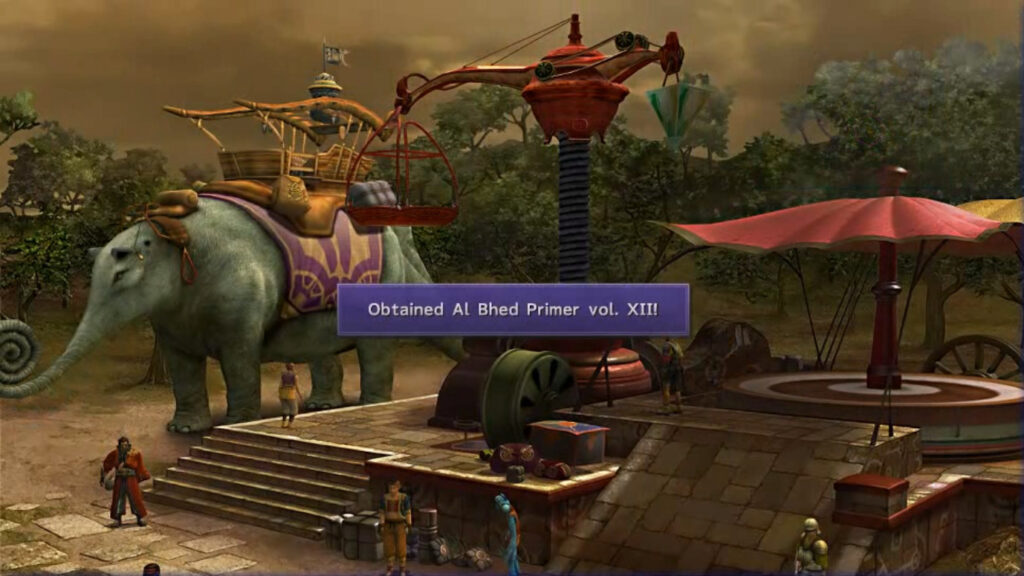
North Warf
Once you arrive, go west to the next area, and go up the ramp to grab the Al Bhed Primer Vol. XII, then continue west to the next section. Grab the chest to get an Ether and continue to the next path. Continue down the road, and after a cutscene, Rikku will join your party.
The next battle you run into will be a tutorial on using Rikku. She brings a lot of utility to the party, being able to steal items from enemies, and having access to items that can only be utilized with the Use command. She can also use these items in her Mix Overdrive, combining two items to create a large variety of effects.
This battle also introduces the chance of chests appearing in random battles. Have Rikku use Steal on them before defeating all other enemies to open it, and get an extra item.
Down the path you will find a chest with 4 Antidotes, otherwise continue down the path to the next area. Here you will find a chest containing a Mega-Potion, then continue north to enter Guadosalam.
Share this article:
KainHighwind27
I'm a huge gamer who especially loves the Final Fantasy series. I will play just about any game, especially if it has anything resembling a Dragoon.