The weather on Icarus is not your friend, and wind and rain will make quick work of anything useful you leave out in the open. If you want shelter from the storm for you and your stuff, you’ll need to build it yourself. In this guide, we’ll go over exactly how to create a decent-sized shelter that should be perfect for a new player’s purposes.
While this guide is geared towards beginners, we won’t be going over all of the key stuff you need to do in order to survive early levels on Icarus — for detailed info on keeping yourself alive, head over to our Beginner Guide!
Tools & the Tech Tree
In order to build a shelter that will last, you’ll need to be able to harvest wood from trees, so you’ll want to craft a Stone Axe if you haven’t already done so. You’ll need Fiber (2), Sticks (4), and Stone (8) — harvest bushes and pick up rocks from the ground with [F] to collect your Axe ingredients, then open your menu [TAB] or [I] and use the Crafting tab to create your Stone Axe.
You’ll also need to spend Blueprint points on the Tech Tree tab of the menu in order to unlock structure blueprints. (Blueprint points are currently earned at a rate of 3 per level.) Thankfully, to get everything you need, you just need the Building Base Set (contains Beam, Floor, Wall, Roof/Ramp, and Door) of your chosen material type. We recommend hunting animals and collecting wood until you’re level 5, and then unlocking the Wood Beam — this will allow you to unlock the Wood Building Base Set pieces you need. However, there is another option, which we’ll discuss in the following section.
Thatch vs. Wood
Before we get into the details of how to create shelter, we need to discuss Thatch structures. In the game’s current state, creating Thatch structures isn’t a particularly appealing choice. While they are slightly easier to build materials-wise, they require constant maintenance and get ravaged by storms. While the difference in storm resistance is just 2 Tiers, you will get enough of the Tier 0 and 1 storms in the starting area to feel that difference.
The only advantage to Thatch is that you don’t have to be level 5 to start creating Thatch structures.
Long story short, if you’re desperate to start building a home, you can certainly spend Blueprint points to unlock Thatch structures. However, you might regret doing so once you reach the Wood tier — there will be little reason to use Thatch from then on, making it a bit of an obsolete tech that likely only served you for a couple levels.
The following instructions for creating your first shelter will work whether you make it from Thatch or Wood, so you can still follow along regardless of if you decide to build with Thatch or not — the only difference will be in some of the material costs.
Creating Your Shelter
Before we start, it’s important to note that if you don’t care about finishing touches (like a closeable Window, or a complex Roof trim), you can save yourself some blueprint points by sticking to the Base Set.
Required Materials
There’s nothing worse than getting halfway done with a construction project only to realize you need more materials. With that in mind, here’s all the stuff you’ll need to create a small (3×2) wooden house:
You can easily create a smaller cabin to fit bare basics, but you will probably get quickly frustrated with the tight space, especially since anything that overlaps with the floor tile that has the door on it will take damage during a storm if you open the door.
You can construct a Wood Pile with 100 wood in the crafting menu, so you don’t have to lug it all around. Place them near your planned construction site for easy access.
Building Process
Try to find a flat spot not too far from where you landed — this should be a safe area and likely has a nearby source of water. You don’t need too much space, and you can see how big your structure will be by right-clicking one of your floor pieces from your inventory and selecting “Deploy”. If the perfect spot is blocked by a tree or a stone deposit, use your axe or a pickaxe to get it out of the way — you can even remove stumps with your axe (trees don’t regrow).
Once you’ve got your spot picked out, just follow the steps below!
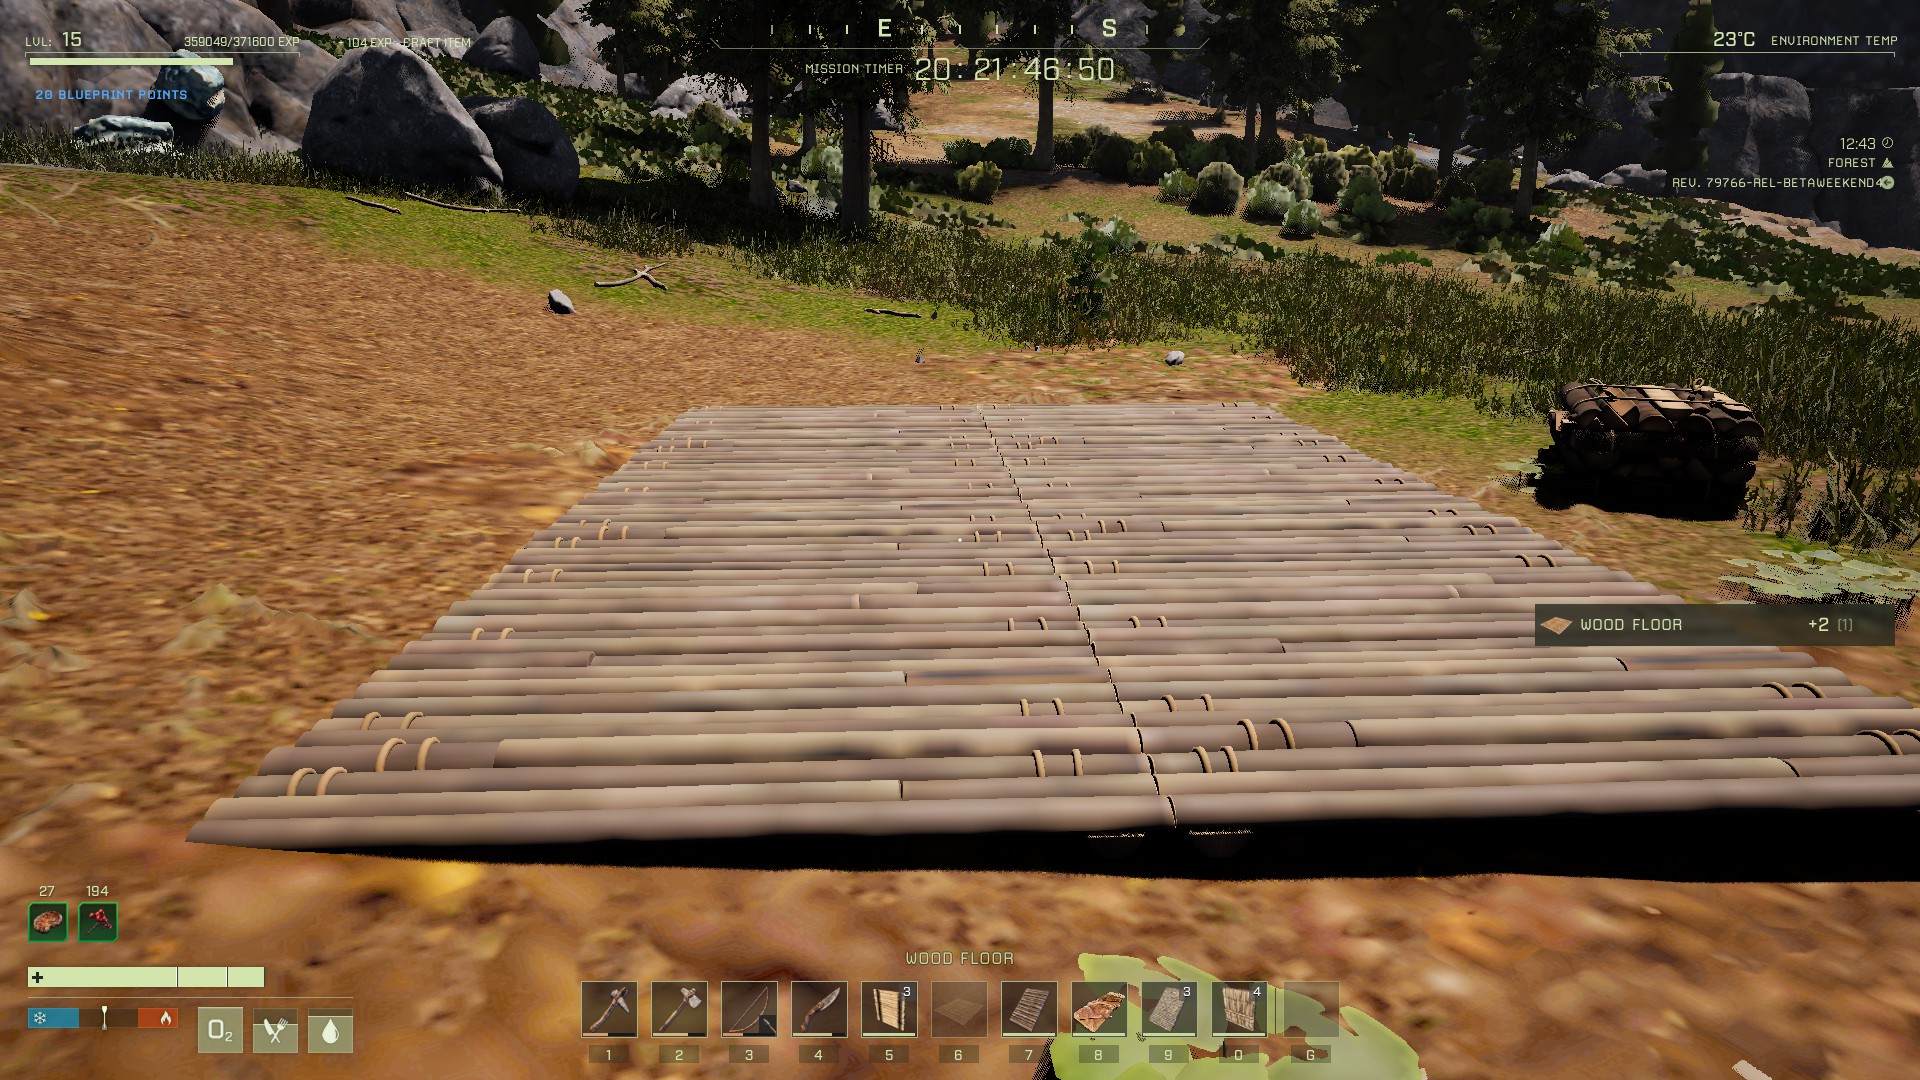
Place your six floor tiles in a 3×2 rectangle.
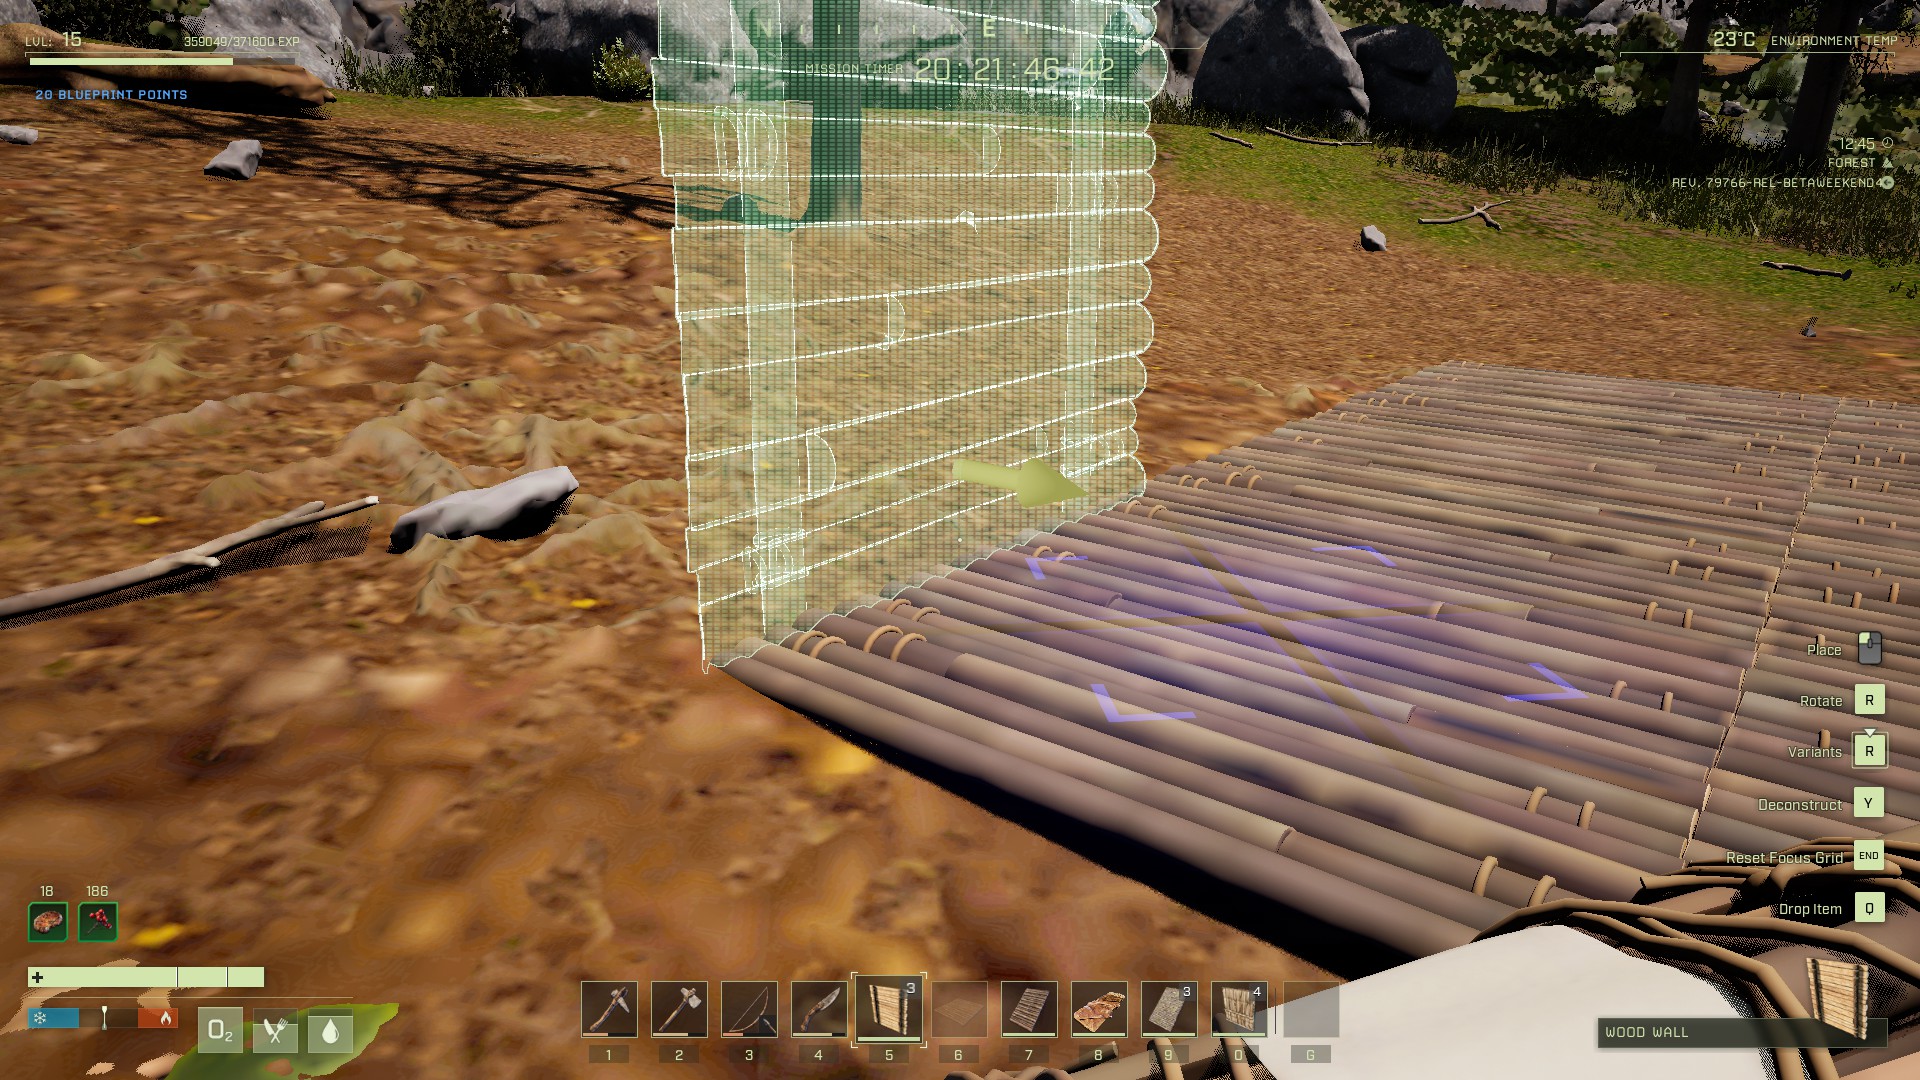
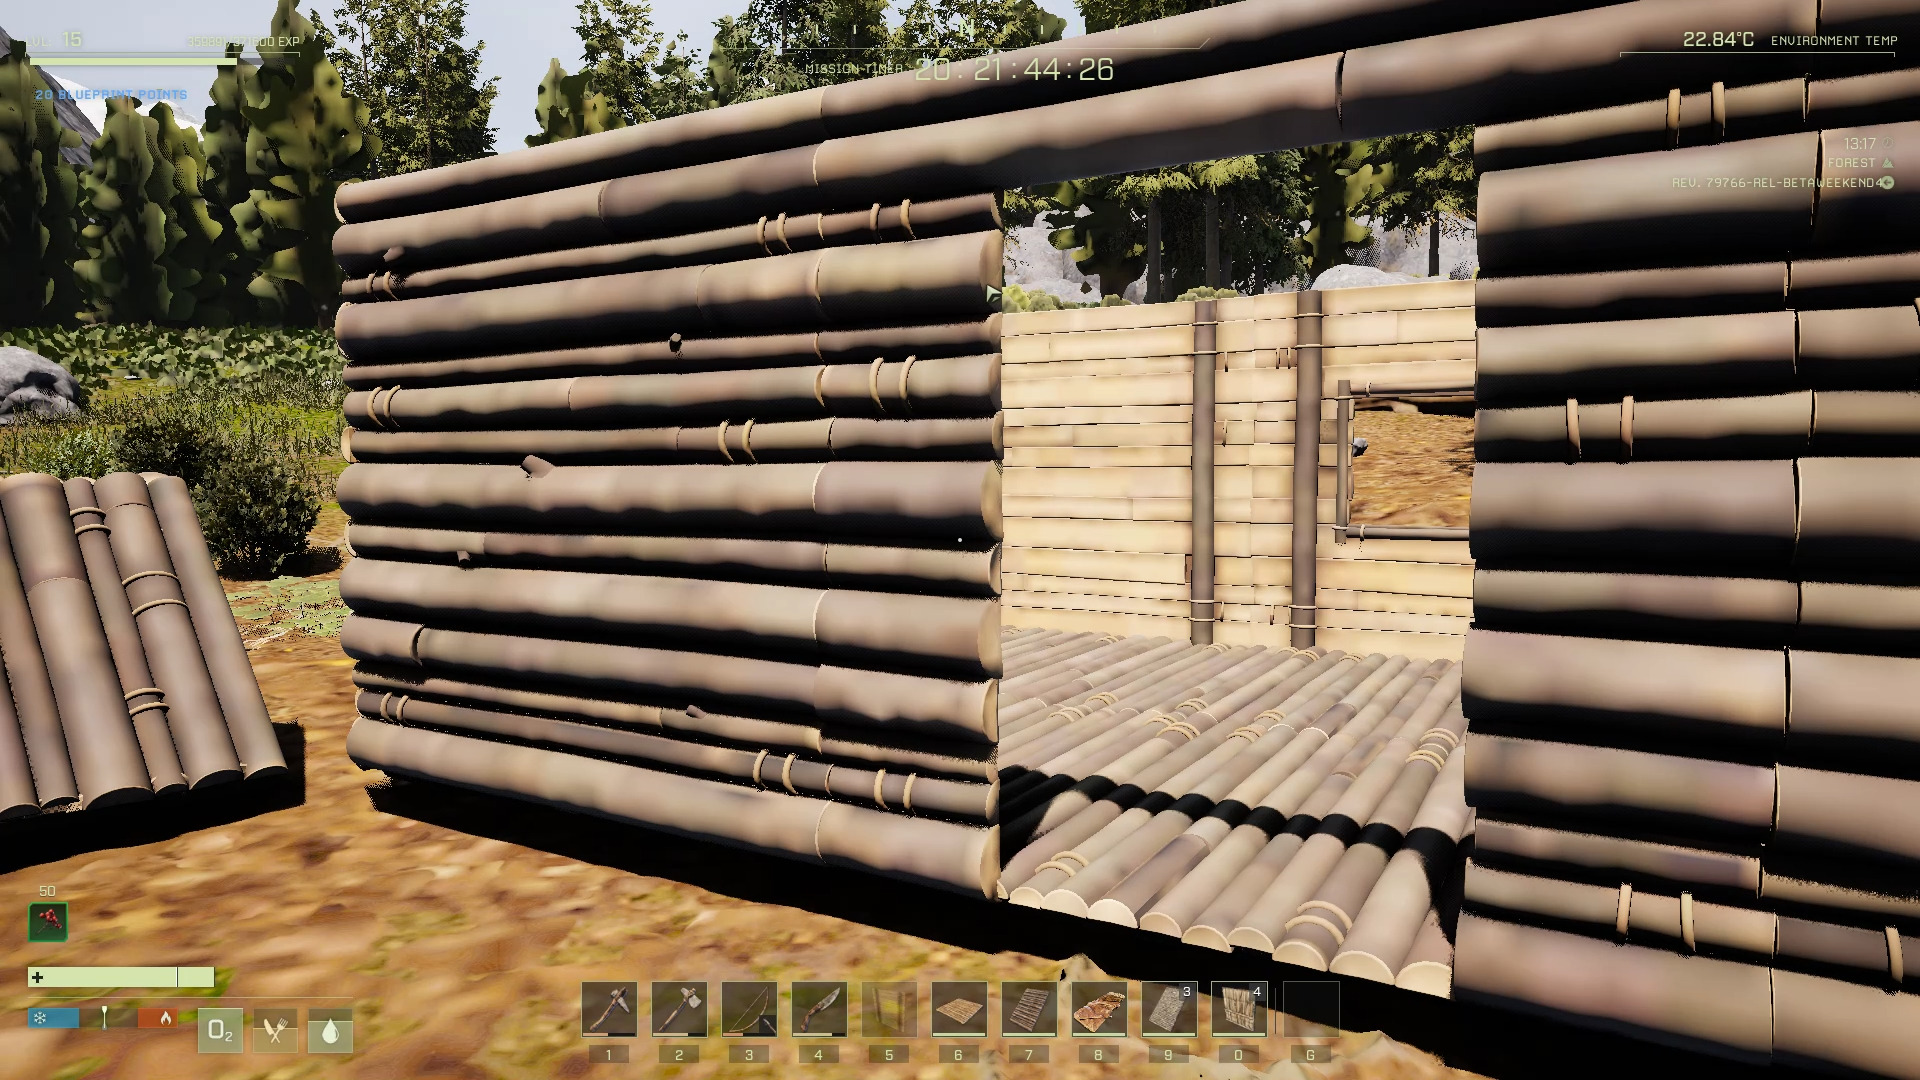
Put walls around the edges of your floor. One wall will need to contain your door — hold [R] while placing the wall and select the Door Frame variant. It’s also a good idea to create a few walls with the Window Variant to let the light in. (If you want the option to close them you can unlock the Trim Set with the Wood Window.)
Place your Wood Door in the wall with the door frame.
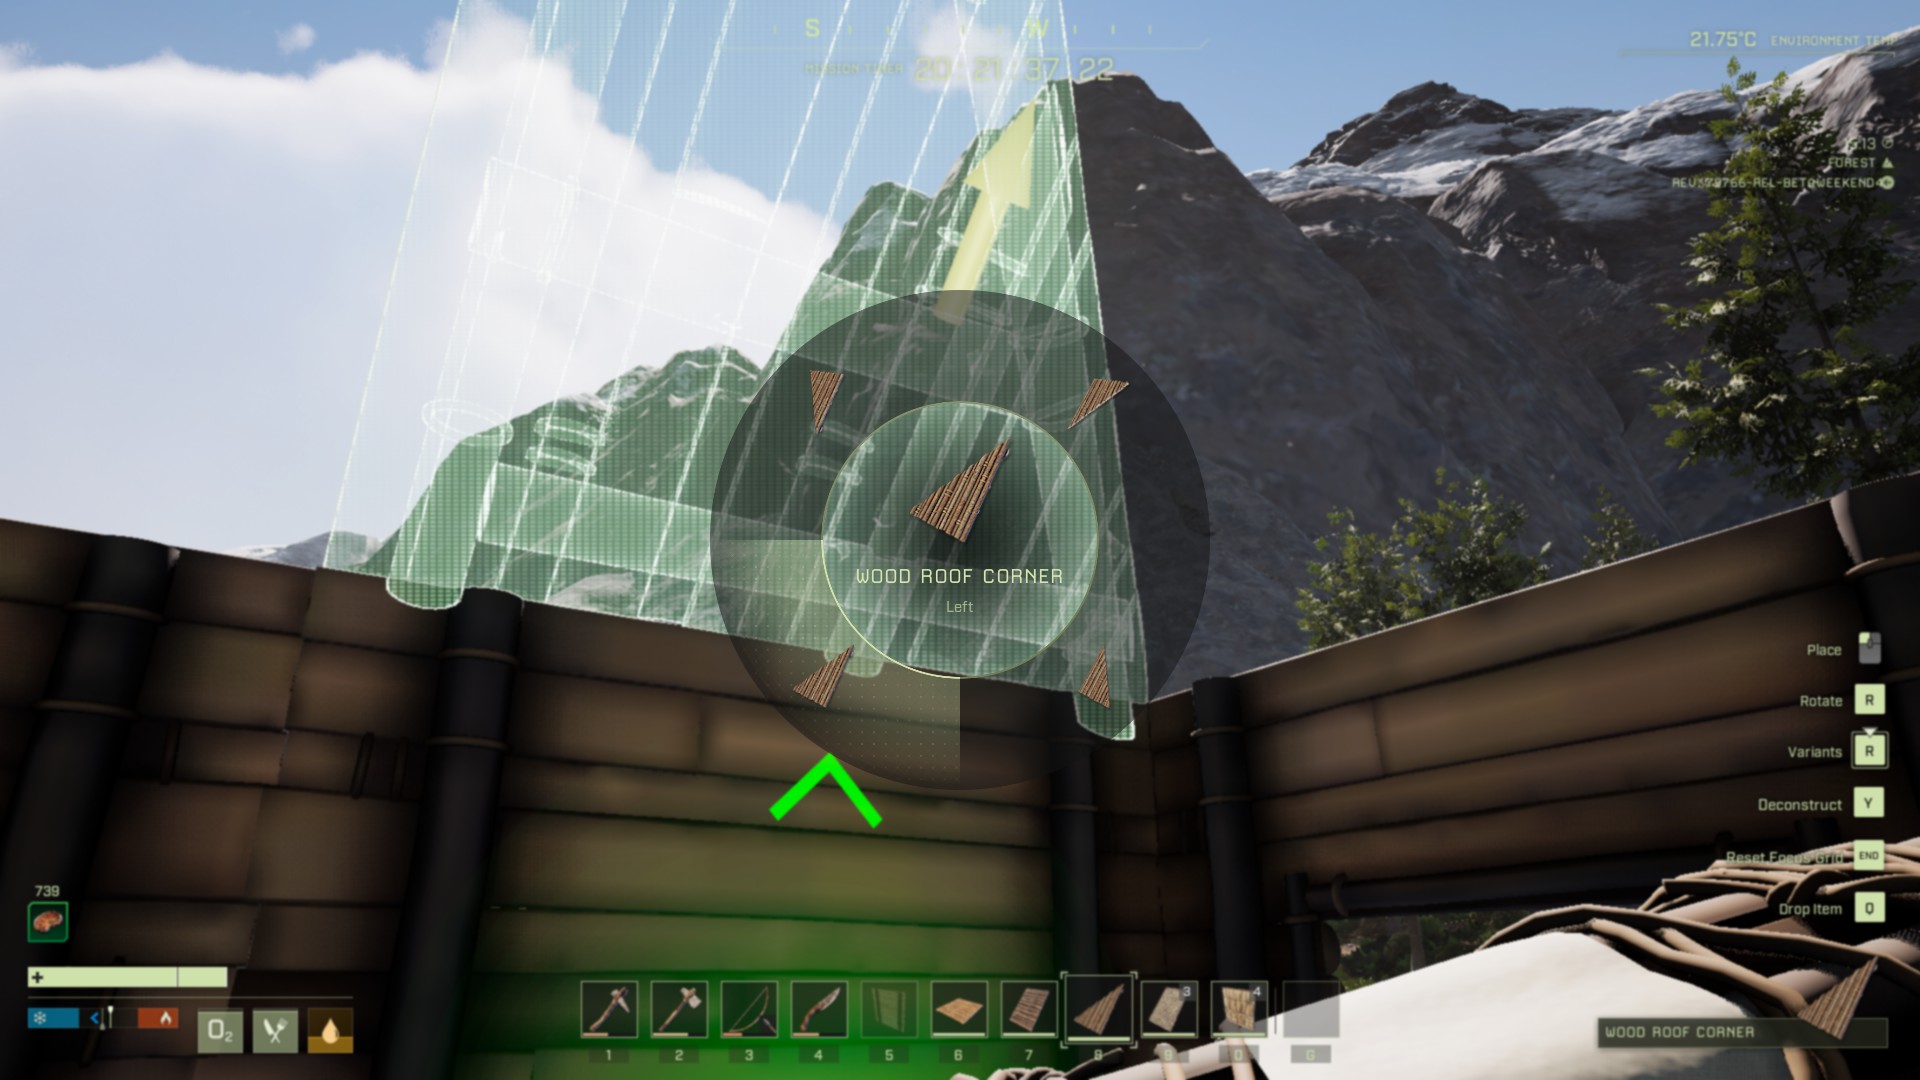
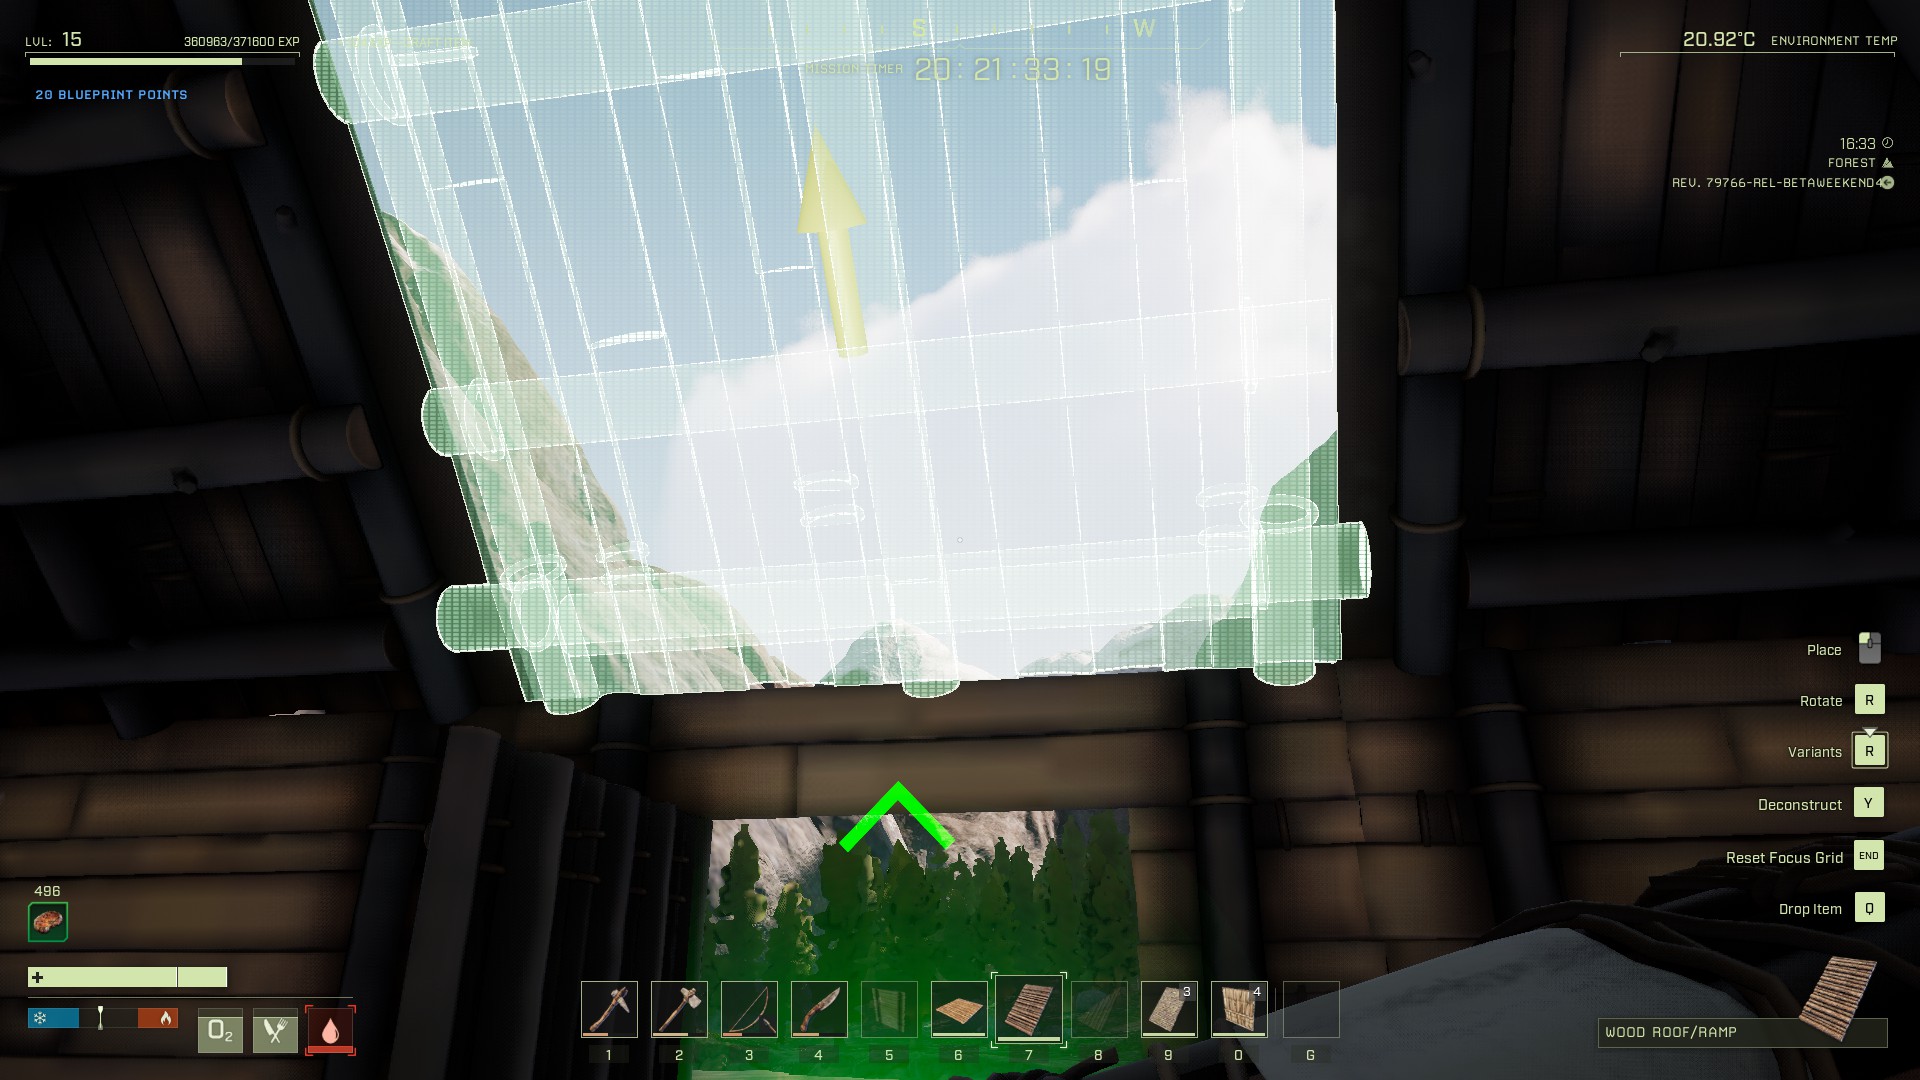
Place Corner Roof pieces on top of your walls, where the long sides of the structure meet the short sides. You’ll need to hold [R] while placing the Roof Corner, then select either “Left” or “Right”, depending on which side of the corner you’re placing the current piece.
Add the regular Roof pieces to the two spots the corners don’t cover.
Put your stuff inside your new shelter!
If you misplace something, no worries! Press Y while your camera is centered on a construction piece, and you’ll deconstruct it (the item will be placed in your inventory).
123456
You might wonder what all those green and yellow arrows mean when you hover over a wall with your next building piece equipped. Those are actually here to guide you: the green arrows on a wall piece are snapping points to show you where to hover your mouse cursor when you are working with more complex building pieces, like Angled Walls. Note that if you press [R] (instead of holding it), your will rotate a building piece, and then the yellow arrow will tell you which way is facing out.
Storm Damage
Remember how storms are a thing that happens? You’ve likely already experienced one while constructing your shelter, and now you get to see how they affect your buildings.
No worries: if you followed our advice and picked Wood as your construction material, you are already one tier up on the scale of the Three Little Pigs. Thatch buildings take at least some damage from all storm types. Still, once those “yellow” storms start rolling in (check the tracker in your upper-right), you will be in a bit of a pickle if you don’t do maintenance repairs.
Thatch vs. Wood Storm Damage
None = This storm tier will not damage your structure
Moderate = This storm tier can deal minor damage to your structure
High = This storm tier is likely to deal damage to your structure
There are lightning strikes about, you just heard a creak, and hovering over a wall shows that it just took some damage. You can ignore this damage, but for how long…?
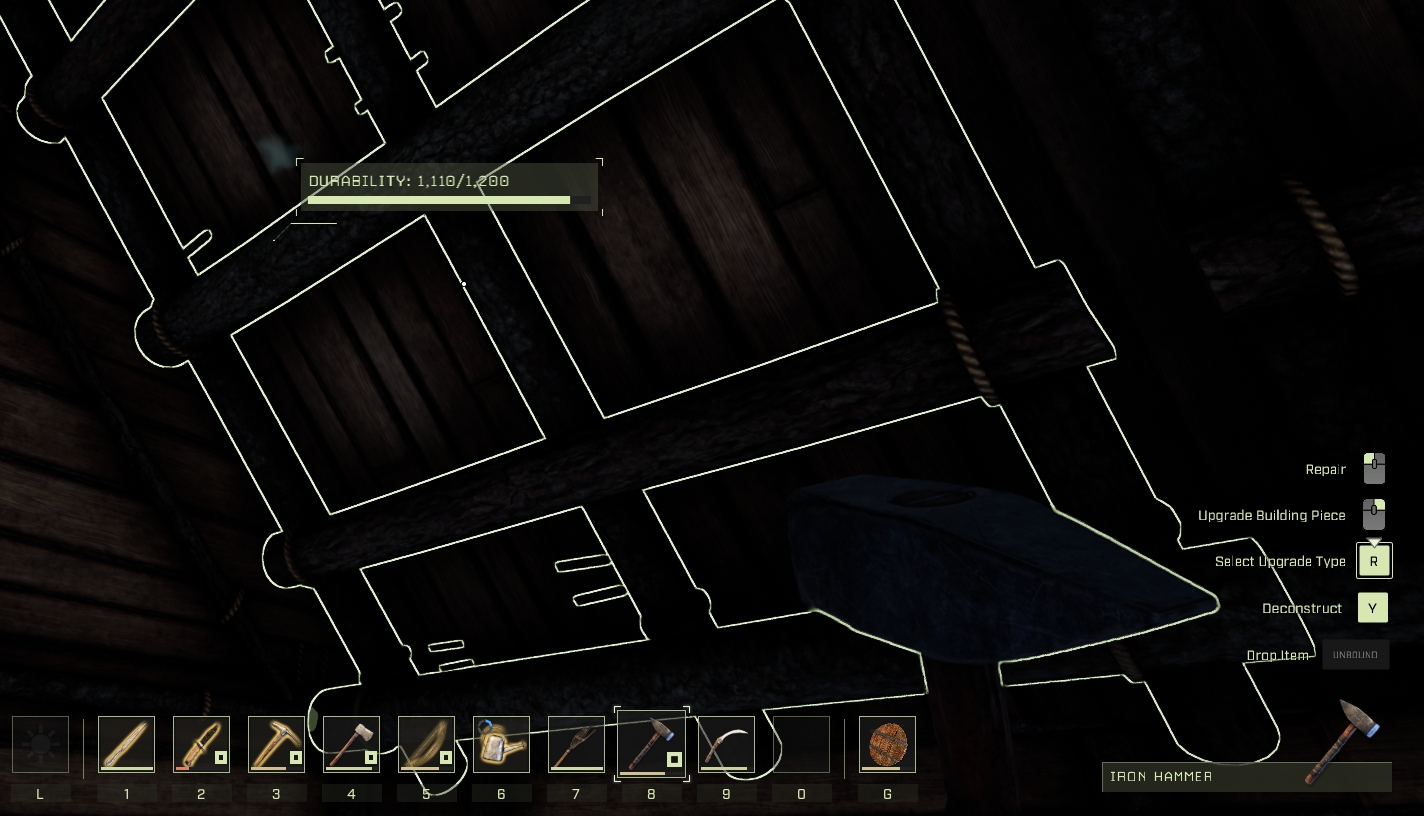
Well, thankfully, the repairing process is easy, and it only takes a single tool — the Repair Hammer.
Hover over a damaged building piece (likely a wall or a roof) and hold [LMB] until the green circle fills up and the repair is complete.
That’s it! Note that your hammer has taken a bit of a durability damage and will need to be repaired at some point.
A good addition to your hammer tool is a Fire Whacker — it takes just one unlucky lightning strike to burn most of your house down. However, don’t worry about this risk in a starting area on Normal difficulty, since the storm tiers here tend to be pretty low.
Setting a Spawn Point
A shelter isn’t a home without a place to lay your head, and it’s nice to be able to sleep through the night instead of fumbling through the darkness. It’s also great to know where you’ll respawn when you inevitably die to a bear. To set a spawn point, you’ll need to unlock the Bedroll on the Tech Tree, and then craft one. This requires a decent amount of animal byproducts, so make sure you’re killing and skinning any prey animals you come across.
Once you’ve got a Bedroll crafted, you can place it in your shelter and then set it as your spawn point by pressing and holding [F]. When night comes, you can use your bedroll by tapping [F]. You’ll need a nearby source of heat, like a Campfire, in order to sleep in your Bedroll. You can place the campfire right outside your shelter — a classic method is to place it near one of your window walls (not having the actual window won’t cause interior storm damage.) This way you can always peek out to grab a cooked snack.
Make sure there are no plants or bushes in the immediate vicinity to catch on fire and set your building aflame. Woops. Just in case… maybe unlock that Fire Whacker after all.
Note that you can pick up your Bedroll and move it to another location whenever you like — don’t forget to reset your spawn point if you do so.
We hope this guide on creating a shelter in ICARUS was helpful! Please feel free to leave any questions or suggestions you have in the comments below.
Share this article:
DanielD
Unabashed FromSoftware fanboy still learning to take his time with games (and everything else, really). The time he doesn't spend on games is spent on music, books, or occasionally going outside.
Thanks for this, I tried to follow this but I think I accidentally built 2×2, so the roof corners never looked right. I end up just using 4 roof on top of my 2×2, they connected like an upside down V with two sides open. That is still considered a shelter. In hindsight I didn’t need to spend a skill point on roof corner.
I was actually just considering updating the guide to point out that people who don’t care about aesthetics should just use the Wood Floor as roof. Thanks for your comment Optimus!
Yes, indeed! The only worry later on is the collapsing roof in the Arctic (due to the snow buildup on the flat roof), so the ramp roof is in order, but you are likely to be using Stone by then anyway! 🙂