Icarus is a harsh and unforgiving place, a product of a failed terraforming project. Surviving here will require more than just a stone axe — but, in order to craft these you’ll need to level up.
Most activities in ICARUS give you experience points, but the process can be very slow, and you might not want to start off willing to risk death at the hands of a wolf pack. If your goal is to level up as quickly as possible, we will walk you though the options you have — avoiding the sharp teeth early on, and keeping things efficient and simple as you progress through the levels.
Before we start, a couple of general things to keep in mind:
We are assuming you are dipping your toes in on an Open World or BEACHHEAD: Recon mission first. We will mention other Missions later in the guide.
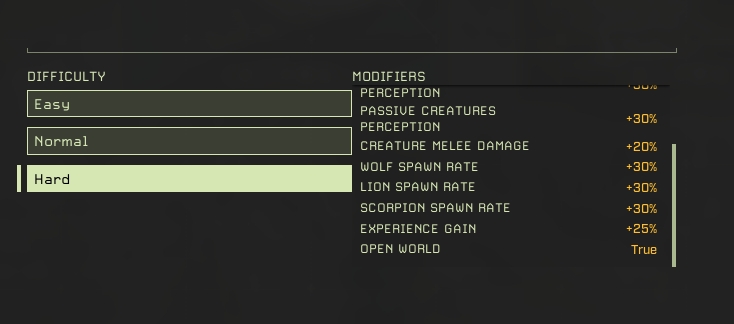
The difficulty of your game will affect the XP gain. There is no relevant downside to playing your Open World game on Peaceful difficulty, but if you are willing to try out the Hard setting, you will benefit from increased XP gain rate. Hardcore mode is not recommended for beginners.
A little note for characters under level 10: if early leveling is really becoming a chore for you, there is currently an option to boost one character right to level 10 when selecting Styx map for Missions.
Quick Start: Lumberjacking
Even after several patches, chopping down trees continues to be the best non-violent method of gaining XP prior to mass-crafting. As soon as you land, pick up some sticks, plants, and rocks, craft yourself a stone axe, and start chopping!
Required: All you’ll need for this method is a stone axe, an area with trees, and food in your stomach. Ideally, get stamina-increasing foods — veggies like Pumpkin and Corn are perfect and plentiful in the starting area.
The process:
Chop down a tree.
As soon as that tree starts to fall, run to the closest tree and start chopping that one down.
Collect plants while you regenerate stamina.
That’s it! If you focus exclusively on felling trees, and don’t bother splitting the logs that fall, you’ll get XP much quicker than if you stopped to collect the fruits of your labors.
Note: Follow this method until you hit level 3-5. We will build on this process in the sections below.
It is worth collecting nearby plants while you wait for stamina to regenerate — you can benefit from all the fiber you collect in the next step. Of course, remember to drink from the lake (eat first), and replenish your oxygen (consume oxite ore).
If you are worried about wolves roaming about, get yourself a stone knife and check out our Keeping Yourself Safe section, a bit lower in the guide.
Useful Talents for Lumberjacking
Speed Chopper (Construction – Tools):+5/10/20% Attack Speed with Axes — Naturally, the faster you can chop, the quicker you’ll level up.
Chase ‘Em Down (Survival – Hunting): +10/25/40 Base Stamina / Marathon Runner(Solo):+20/50 Base Stamina — Increasing your base stamina can help you chop more trees before you have to catch your breath, and also allows you to chase prey/run from predators longer.
Adding On: Lumberjacking & Crafting
Felling trees will start to taper off once you hit level 3-5 and, besides, you probably should prepare a shelter at some point and give your teeth a break from all that raw corn munching (cooked veggies will give you better bonuses).
Required: All you’ll need for this method is an unlocked Wood Building Base Set in your tech tree (or Basic Bandage prior to level 5), a stone axe, and an area with trees and bushes.
You can unlock and use Thatch, but it results in annoyingly fragile buildings, if you don’t want to waste those blueprint points. Meanwhile, if a storm rolls in, mining out a large rock and hiding inside will protect you from the elements.
Now, back to the process:
Chop down trees, chop the fallen trunks and remaining stumps until they turn into wood, then pick all of it up.
Once you run out of stamina, open the crafting menu and select the Wood Wall (or Basic Bandage). Click the “Max” button and thencraft as many as you can.
Your stamina probably still isn’t back yet, so walk around harvesting bushes for sticks and fiber as the crafting process completes. (You can hold [F]).
Once your stamina is full, go back to step 1 and repeat! Little addition, though: when you get to step 2, before you craft the walls,right click the stack of walls/bandages/arrows in your inventory and destroy them to get some of the materials back.
Get used to this view
Couple of Tips:
If you have excess of wood in the inventory, start stacking up some Wood Piles nearby. They can come in handy later.
If you enjoy adding all this crafting to your rotation, fend off some wolves, skin them, mine their carcasses, and craft yourself a Bone Sickle. Use it to gather plants instead — this will give you increased Fiber for your Basic Bandage.
The reason we picked the bandage is because it gives a hefty amount of XP, is very easy to craft, and can come handy if a wolf leaves you with a Wound debuff.
You can also upgrade to a Bone Knife for better protection.
No-Look Method: Mining
If you’d like to watch TV while you grind XP, this method requires the least attention to your screen and still works nicely for lower levels.
Required: All you’ll need for this method is a stone pickaxe, and an area with rocks.
Hit rocks with your pickaxe.
It isn’t as fast as the other methods, but requires basically zero attention. You may have to occasionally reset your position, but once you find a rhythm you can just slowly move left or right with [A] and [D] as you hold down [LMB].
For a good crafting combo, pair with Campfire and Stone Arrow. Destroy and craft again.
Useful Talents for Mining
Speedy Mining (Construction – Tools):+5/10/20% Attack Speed with Pickaxes — As with the Speed Chopper talent, the faster you mine, the more xp you’ll earn.
Level 10 and On: The Hunt Begins
While it’s riskier than simply chopping down trees (not that trees haven’t been known to fall on careless prospectors), you won’t find a better way to gain XP in the Open World game than Hunting. Of course, you gotta be ready for it first:
Required:Once your shelter is in place and you feel good about keeping up with your basic needs, unlock a Wood Bow and Stone Arrows, if you haven’t already. Also get yourself a Stone Knife.
Crouch, look for a chamois, a rabbit, or a wolf, and use your Wood Bow to aim for the head.
Go for lower-level animals, take your time aiming. If the wolf rushes at you, finish it off with Stone Knife hits to the head.
We discuss the importance of aiming for the head in our dedicated guide on Easy Headshots and Critical Hits. You know you got it right when you trigger the kill camera with your shot (you can disable it in the settings once you had enough of it.)
If you are feeling confident, try attacking when you see multiple wolves nearby — once one is attacked, the others get alerted. Then, leave the carcasses around to attract more wolves. On the other hand, if you are struggling with this step a bit, give yourself a little assistance by checking out some of our creative methods in the Keeping Yourself Safe section below.
Practice your kills, then proceed onwards: either exploring more of the map in your Open World game, or by hopping into a mission!
Note: “SMPL3” Missions are an option for your Open World map, if you would rather not leave, but the difficulty settings are limited and not all of them are available this way. Leaving does not undo your progress; you can always come back to your Open World later.
Useful Talents for Hunting
Combat Talents in general, but likely the BowsTree(Combat), for the supreme effectiveness of headshots.
Chase ‘Em Down (Survival – Hunting):+10/25 Base Stamina — With more max stamina, you’ll be able to chase down prey (or escape predators) more easily.
Health Bars(Survival – Hunting): See animal health bars — The ever-supreme Talent pick later into the Hunting Tree that will make nearby animals much more visible to you. An extreme improvement to the experience, and can be further combined with Sense Small Animals/Sense Medium Animals.
An Aside: Keeping Yourself Safe
If you do decide to explore some more of your Open World map, you might need to learn to be crafty. Let’s touch on some examples.
Prospector Pen
It’s pretty easy for a bear or a pack of wolves to sneak up on you while you’ve got a face full of tree and bush. Luckily, there’s an easy way to keep yourself safe: fences!
Unlock Thatch Building Trim Set for the Railing (or Wood Building Trim Set if you’re level 5+) and create a small pen near the area you’re going to be leveling in. Make sure you have a bow and some arrows crafted, along with a knife (when things get a little too close).
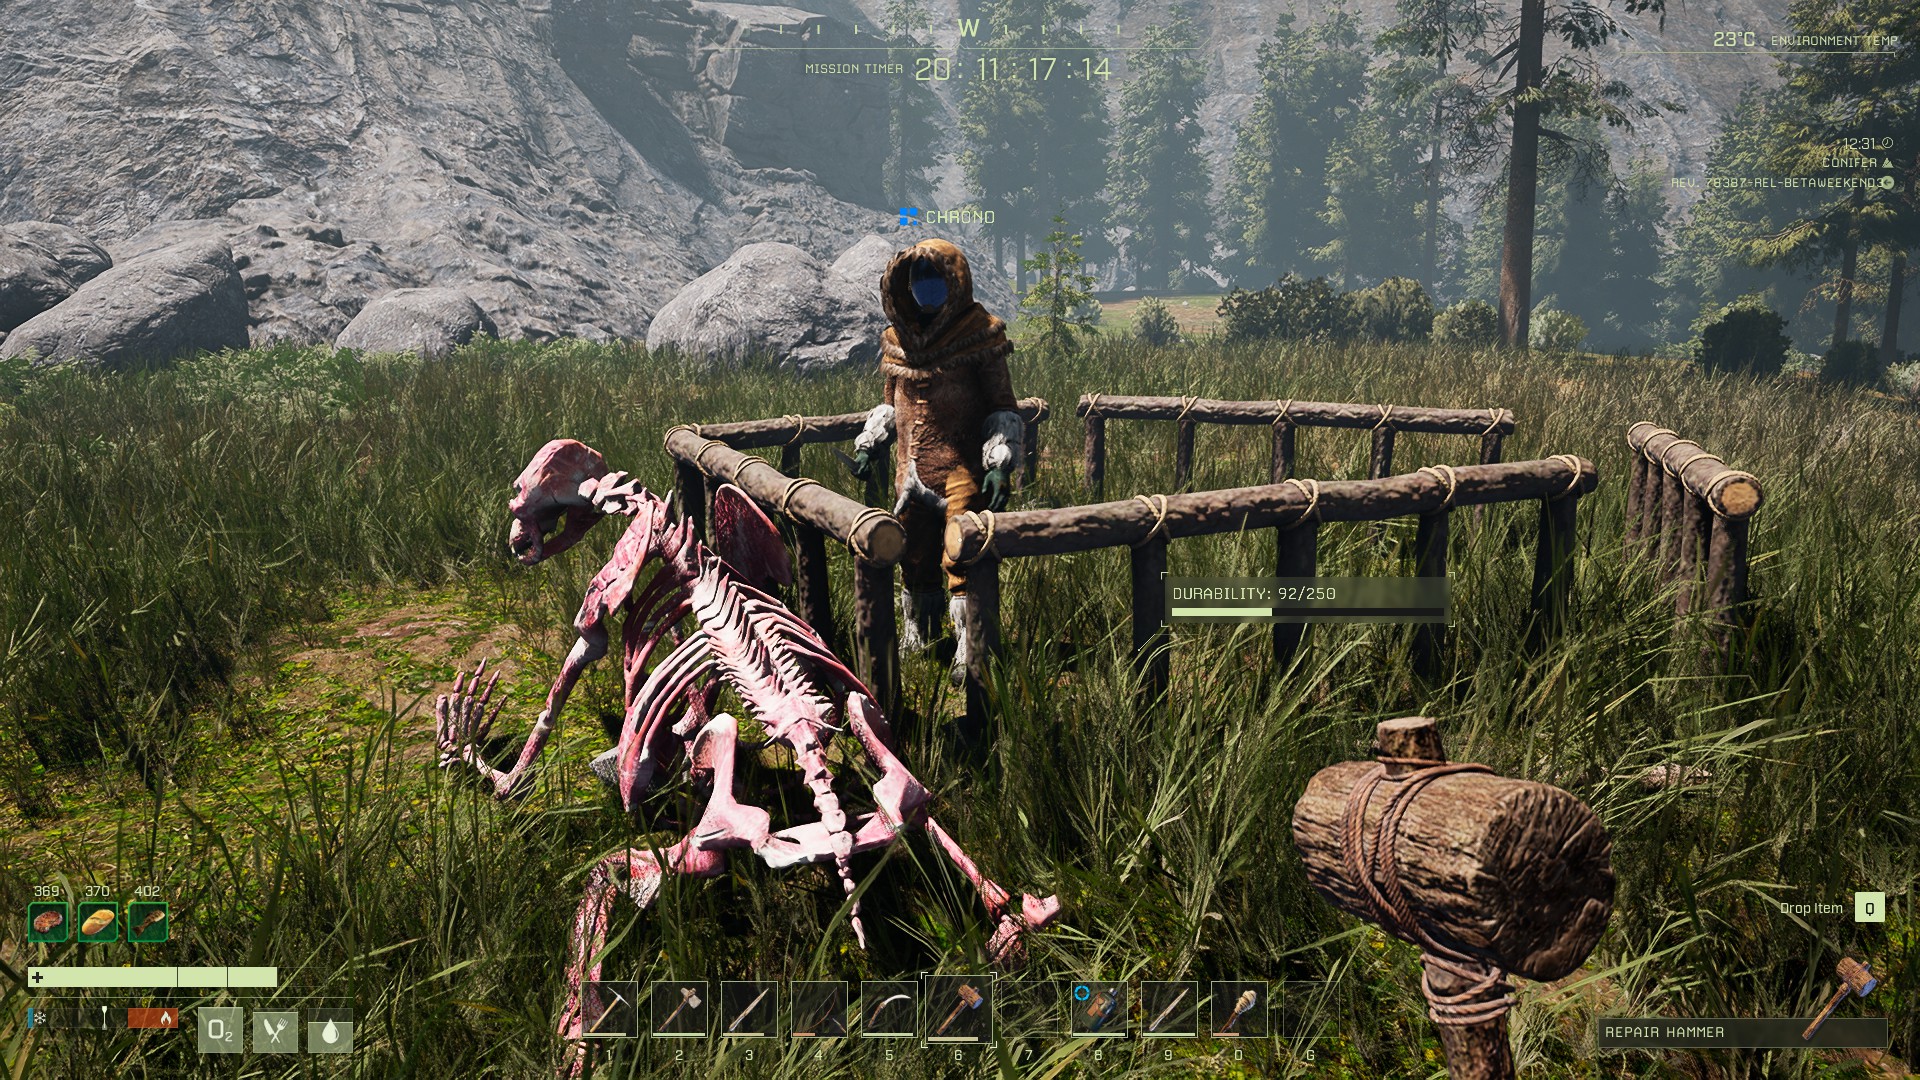
If predators attack you, simply sprint to your pen and jump inside. You can then use your bow and knife to fight back; it will have to destroy the railing before it can attack you, and if it does manage to break through you should have done enough damage to it that you can win the fight. Alternatively, jump out and run, leaving the railing behind as a barrier — we discuss this strategy in more detail in our Surviving Bears guide!
Thanks to Dionaea and chrono539 from the ICARUS Discord for this tip and image.
Pictured: Chrono539 and one foolish bear
Alternate Method
Blueprint Points are precious. If you don’t want to spend them on unlocking the Trim Set, there’s another way to deal with predators, though it’s riskier and harder to pull off:
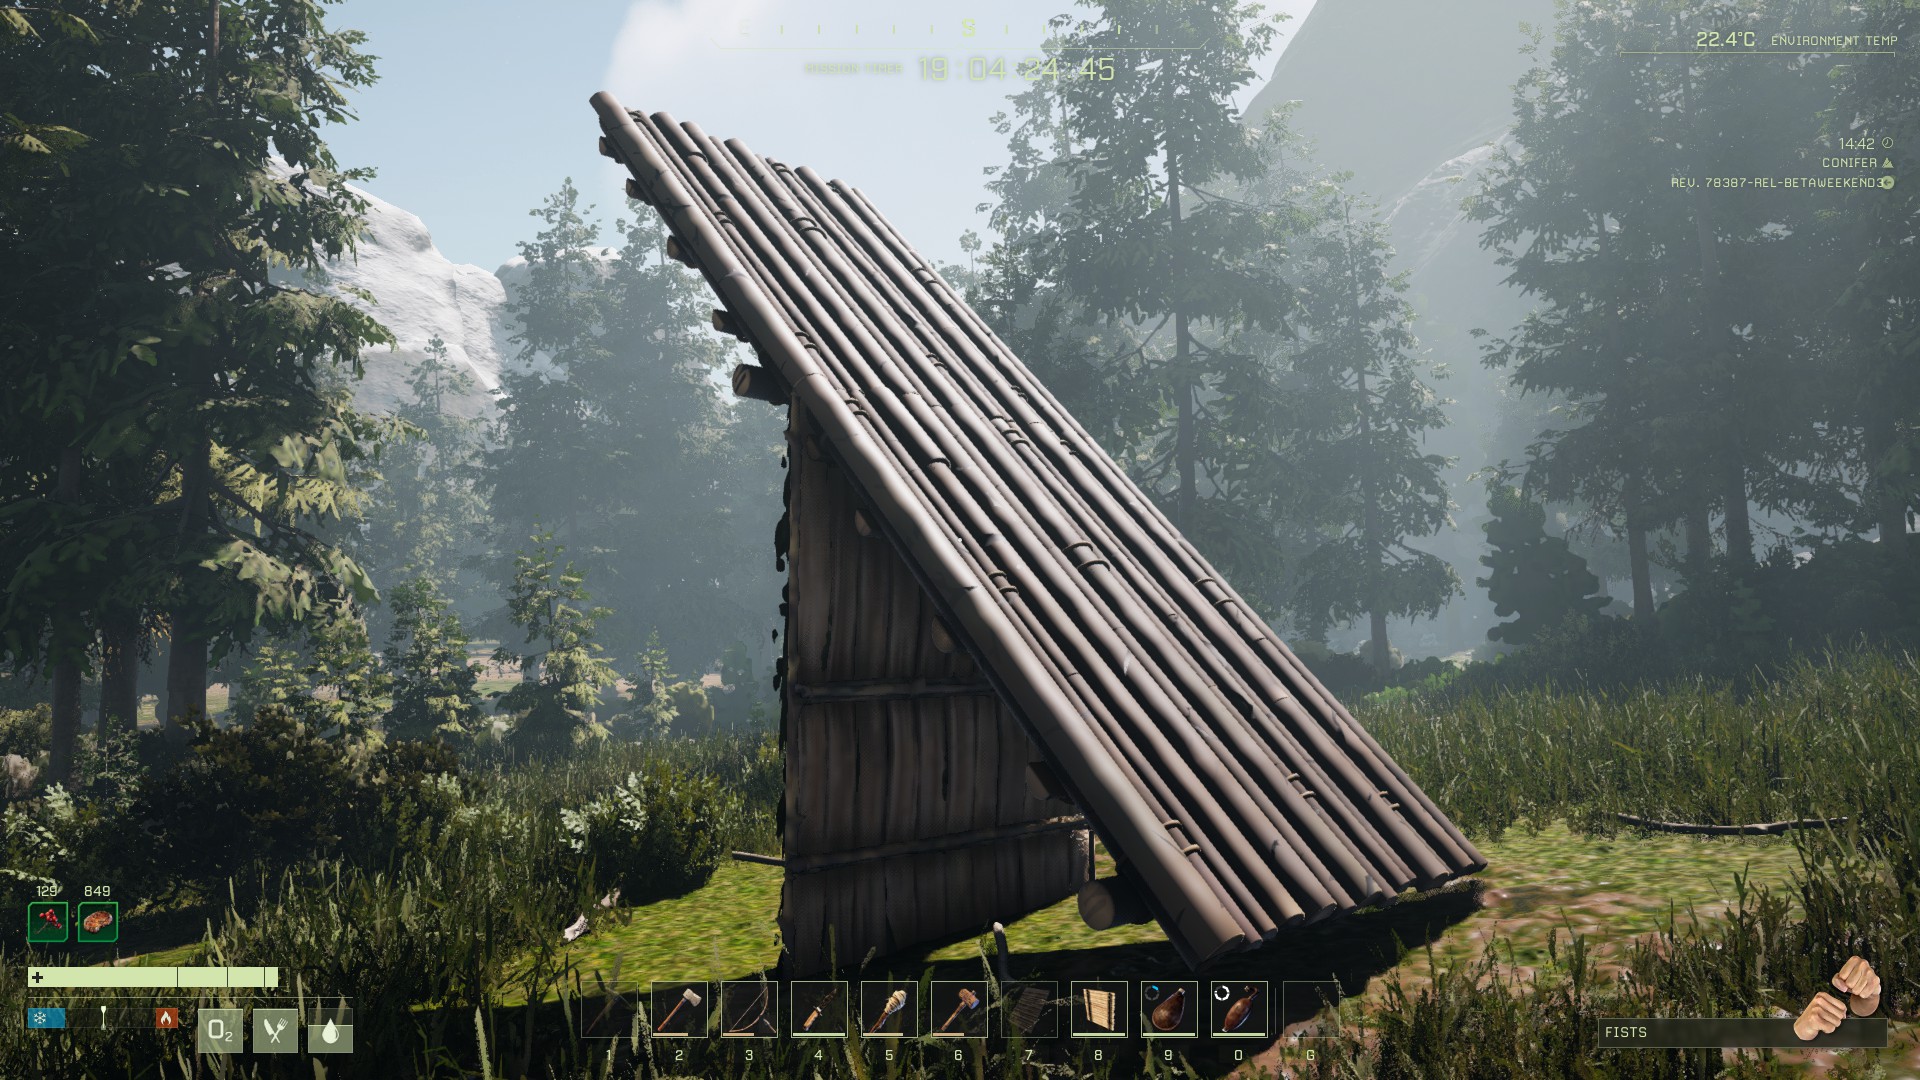
Craft 2 wood wall and 2 wood ramps/roof (or Thatch, before level 5) — all you need is the Base Set.
Place the wall on the ground. Build one ramp from ground to the top of the wall, and one from the top of the wall upwards (see the image below).
If the first wall sinks pretty far into the ground, you’ll need to put another one on top. However, if you have to place two walls like this, you will no longer have a second wall in your hotbar for deconstruction (you will see why that matters below). So, just build yourself a 3rd one.
Put your remaining wall in your hotbar, ideally into one of the first few number keys — this way you can easily press it while running.
Your finished product should look like this
If you’re attacked by a predator, run to your contraption and sprint up the ramp to the top. Use your hotkey to select the wall in your inventory, then turn around and aim at the lower ramp section and press [Y] to deconstruct it. You’ll then be able to get a few arrows into the wolf or bear while they attempt to destroy the wall you’re standing on.
Upping the Ante: Transition Zones
Under normal circumstances, predators and high-level animals tend to be less abundant in the forests. So,if you are confident in your combat skills and want to use this strategy as an efficient method, you should head to transition zones between biomes. Animals here spawn in larger numbers and re-spawn quickly once you leave and come back.
While the Arctic transition zone is close by on the Open World map, Desert transition zones with the Forest tend to be a better option for a lower-level character, since these animals tend to have lower HP. Learn how to land those stealth kills in the Forest before you commit to this method as a reliable way to level — remember that there is an XP penalty to respawning.
Consume unique foods to fill up your three stomach slots and keep your HP and Stamina high. Check out our Hunting Guide if you need more starter and advanced tips.
EIP.gg takes no responsibility for prospectors maimed or killed as a result of this tip.
Leveling As Intended: ICARUS Missions
Okay, so, we did say that hunting is the best… for the Open World. Completing Missions in ICARUS is the intended way to experience the full game (and, in fact, was the only game mode at the start), so that’s your next best bet, especially you wanted to experience the wonderful offerings of the Orbital Workshop (which we highly recommend).
When you feel comfortable with the basics on your Open World, (or, on your BEACHHEAD mission, if you started off with that), start making your way through ICARUS’s Mission tree at your own pace — the challenge will go up with your assumed level, so you might even forget to pay attention to that number as you move along.
You can always return to your Open World map later and enjoy your new blueprints and orbital toys!
Animal Spawning and Milestone Missions
If you still definitely are paying attention to your level gain, missions with beacons that spawn waves of animals can be a bit of a gold mine for XP. Some of them are still a bit bugged to this day and spawn animals repeatedly.
For example, make note of OMPHALOS: Expedition mission on the Styx Map — when you head to the mission marker at I7, infinite waves of Komodo Dragons will come at you, and then keep coming at you in waves. This goes without saying, but taking advantage of an infinite pool of animals to kill is a great way to rack up your XP.
But even without this bug in place, Extermination missions (basically, boss missions) and Exotics-related missions are a big XP boon, so focusing on these major milestones will get you more rewards. For easier missions in between, remember that harder difficulty will get you more XP.
A Note on Hard Missions
Remember that Hard setting on Missions grants increased XP, so if you’re looking to speed-level your way through, trying easier missions on Hard can be a good idea — and you can start that right away with BEACHHEAD, the tutorial mission!
Reference the skull icons to gauge the initial difficulty of various missions. Another one to consider for the Hard setting is HOMESTEAD: Construction, and AGRICULTURE: Supply Stockpile, since you will be doing a lot of XP-related activities that don’t involve as much conflict.
The important thing is to just keep an eye on the mission timer and decide for yourself whether it’s worth finishing the mission this way or to cut your losses and make it out with your current progress — returning to the dropship and leaving the planet is always an option!
We hope this guide on leveling in ICARUS was helpful! If you’ve found other methods for leveling up quickly, please feel free to share them in the comments below. Other suggestions or questions are, of course, always welcome.
Share this article:
DanielD
Unabashed FromSoftware fanboy still learning to take his time with games (and everything else, really). The time he doesn't spend on games is spent on music, books, or occasionally going outside.
When you finish a prospect and are about to leave all of your gathered materials behind in your outpost, take a few minutes to craft everything you can with the materials, break em down and repeat till you are out. (Iron to nails, nails to make stone structures if you can do so and so on with similar elements) take all that extra wood and make wooden walls till you cant anymore, etc.
I had just hit lvl 16 when i finished my second prospect and when i did this before leaving, i was lvl 17 and 1/4 of the way to lvl 18. Granted i stock up on materials quite a bit so this will obviously vary.
Jim
3 years ago
Get an iron sickle, farm all of the ferns (fibre)
Then craft bandages (blueprint) and rope (crafting bench)
You will get 2XP for every unit of fibre used in crafting.
(So 80XP for bandage, 24 for rope)
Deconstruct, farm more and repeat.


When you finish a prospect and are about to leave all of your gathered materials behind in your outpost, take a few minutes to craft everything you can with the materials, break em down and repeat till you are out. (Iron to nails, nails to make stone structures if you can do so and so on with similar elements) take all that extra wood and make wooden walls till you cant anymore, etc.
I had just hit lvl 16 when i finished my second prospect and when i did this before leaving, i was lvl 17 and 1/4 of the way to lvl 18. Granted i stock up on materials quite a bit so this will obviously vary.
Get an iron sickle, farm all of the ferns (fibre)
Then craft bandages (blueprint) and rope (crafting bench)
You will get 2XP for every unit of fibre used in crafting.
(So 80XP for bandage, 24 for rope)
Deconstruct, farm more and repeat.
3 workbenches and craft ropes XD