Because of the length of this level, this guide is divided into sections — use the contents button to navigate to the various sections.
Downtown – Pt. 1
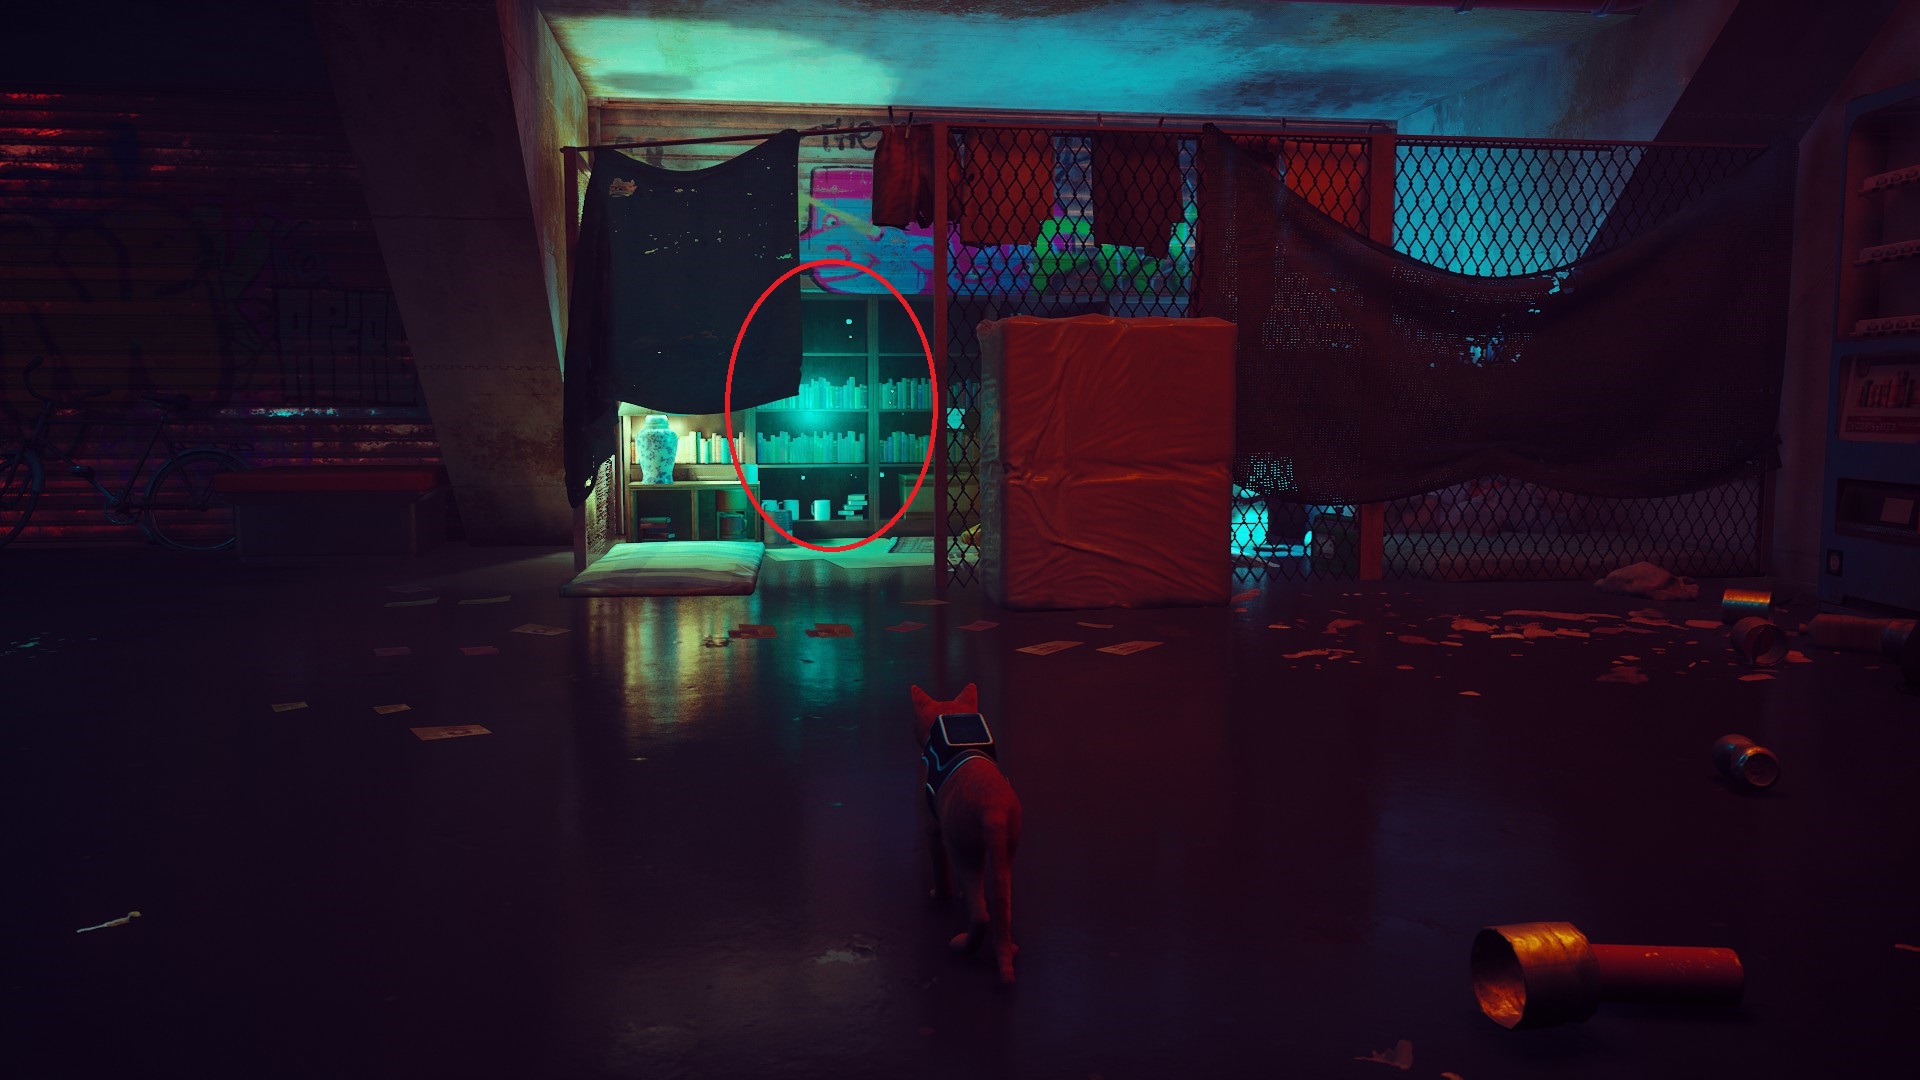
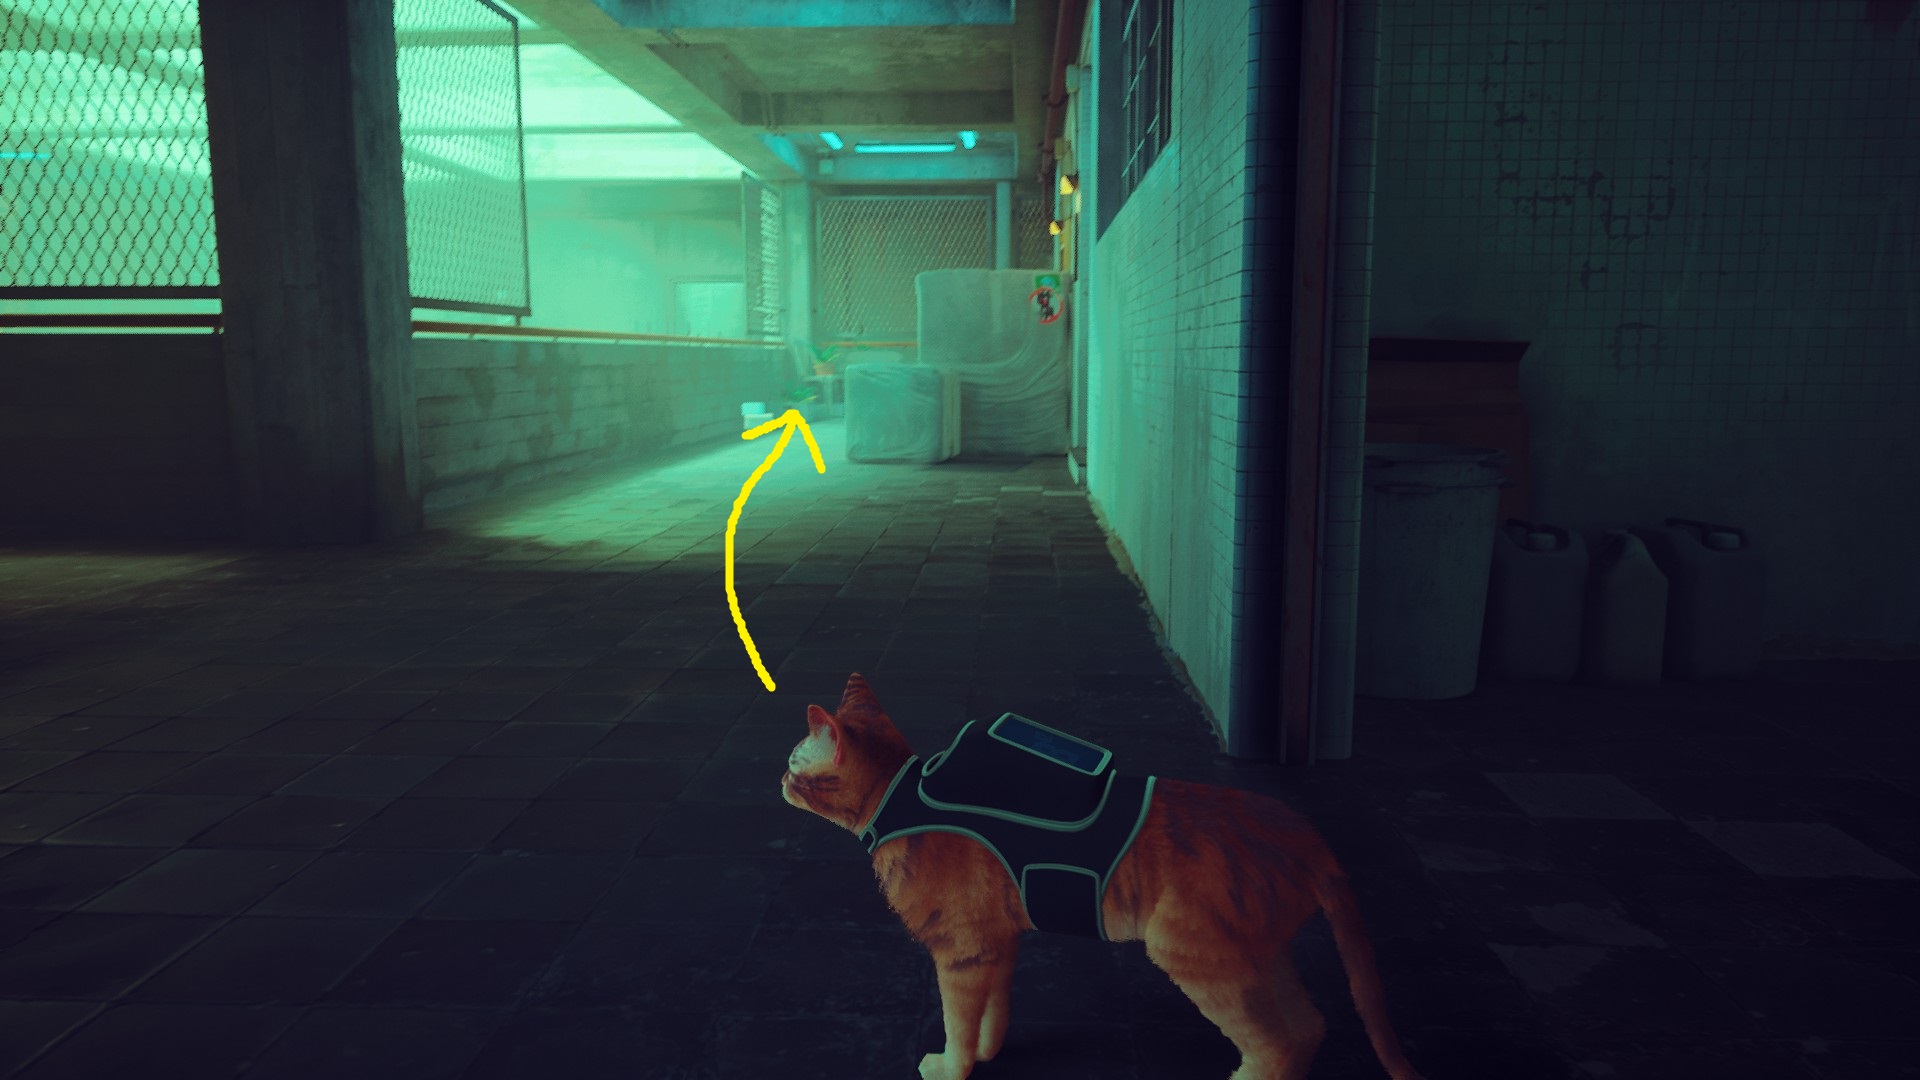
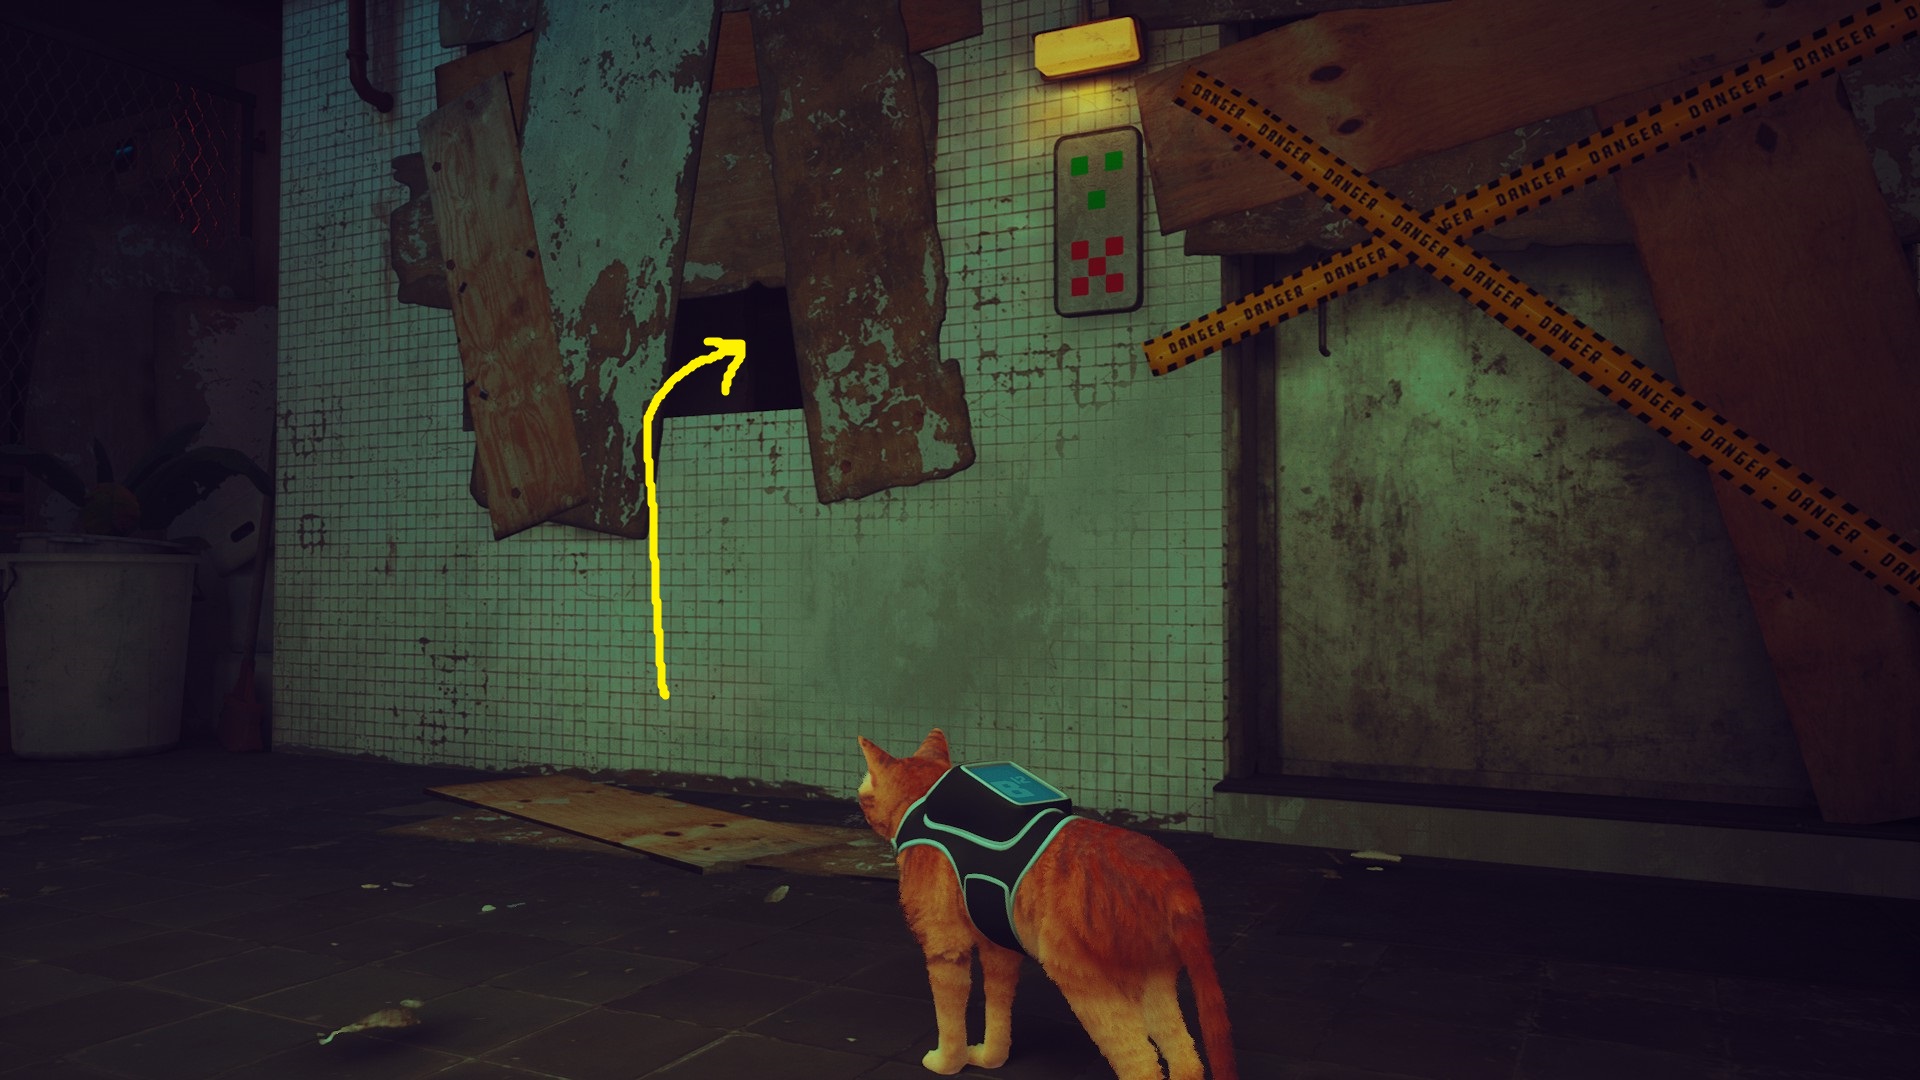
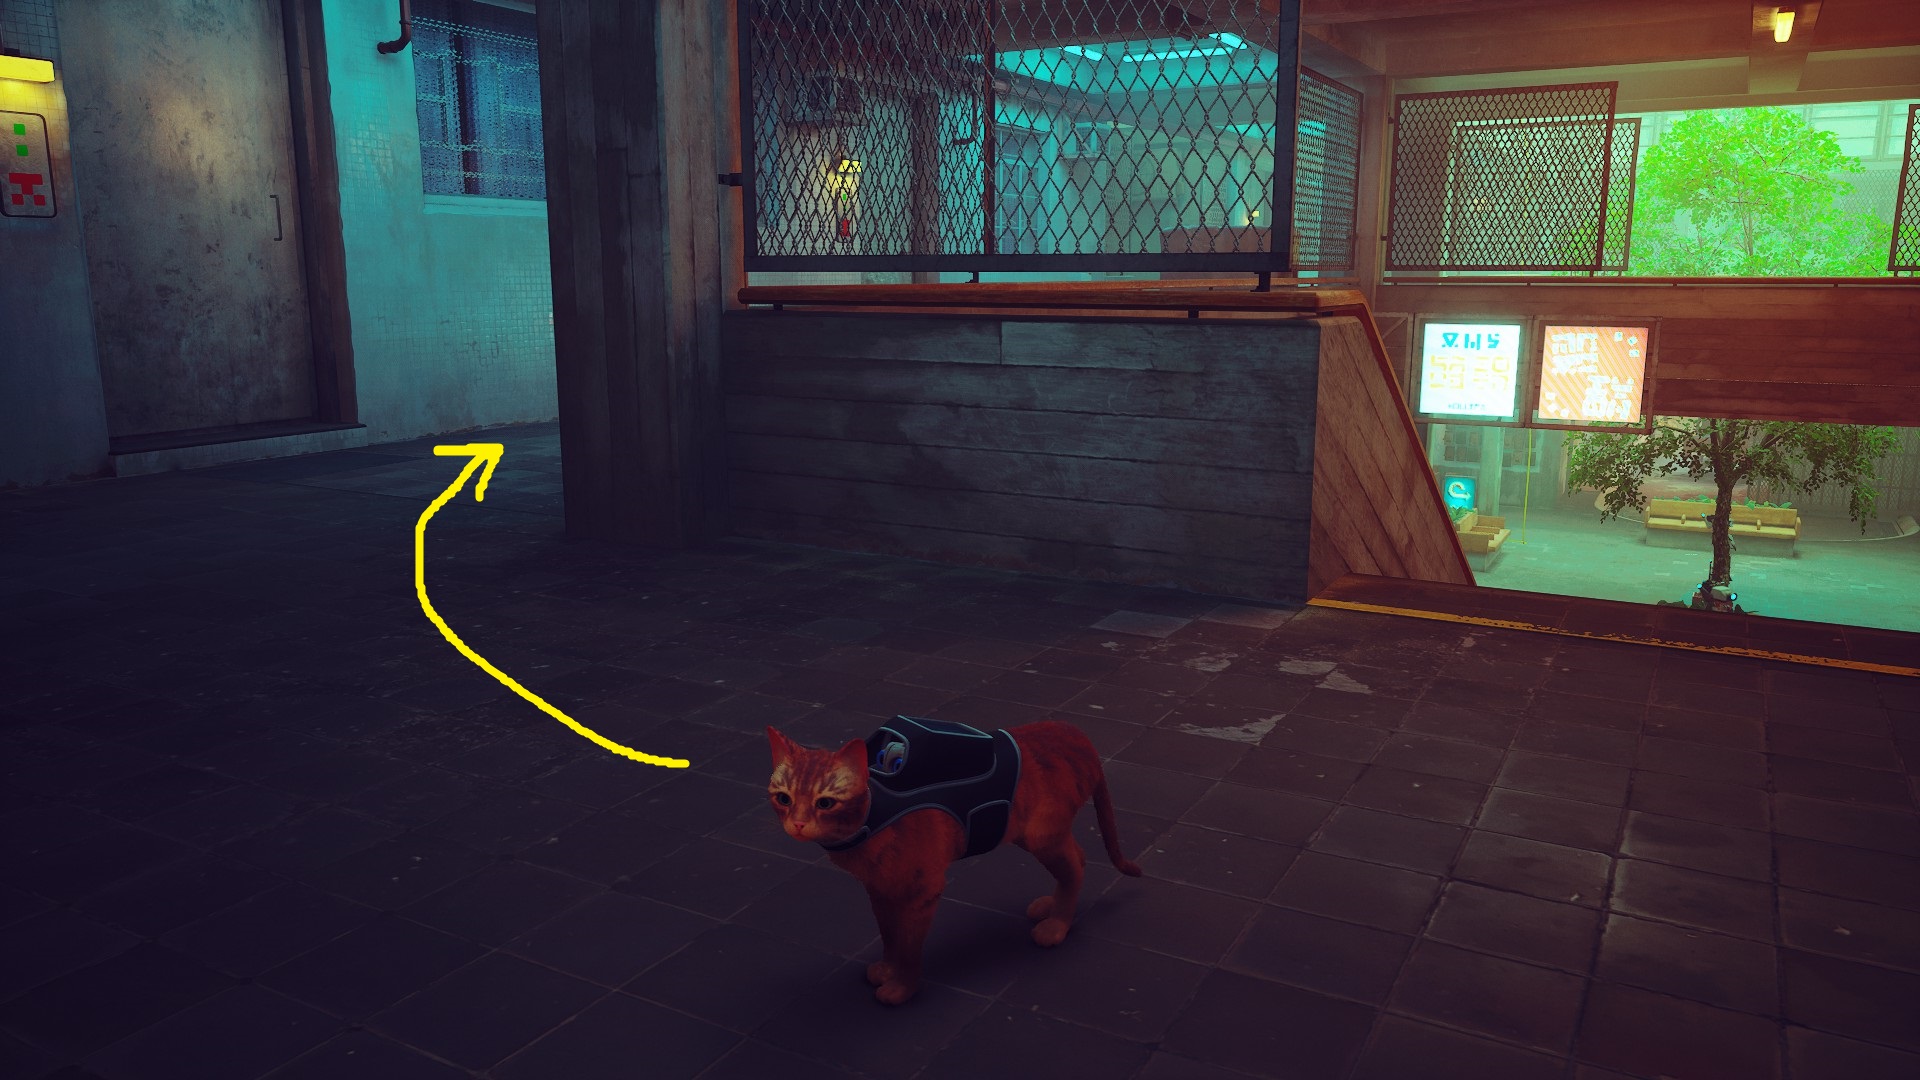
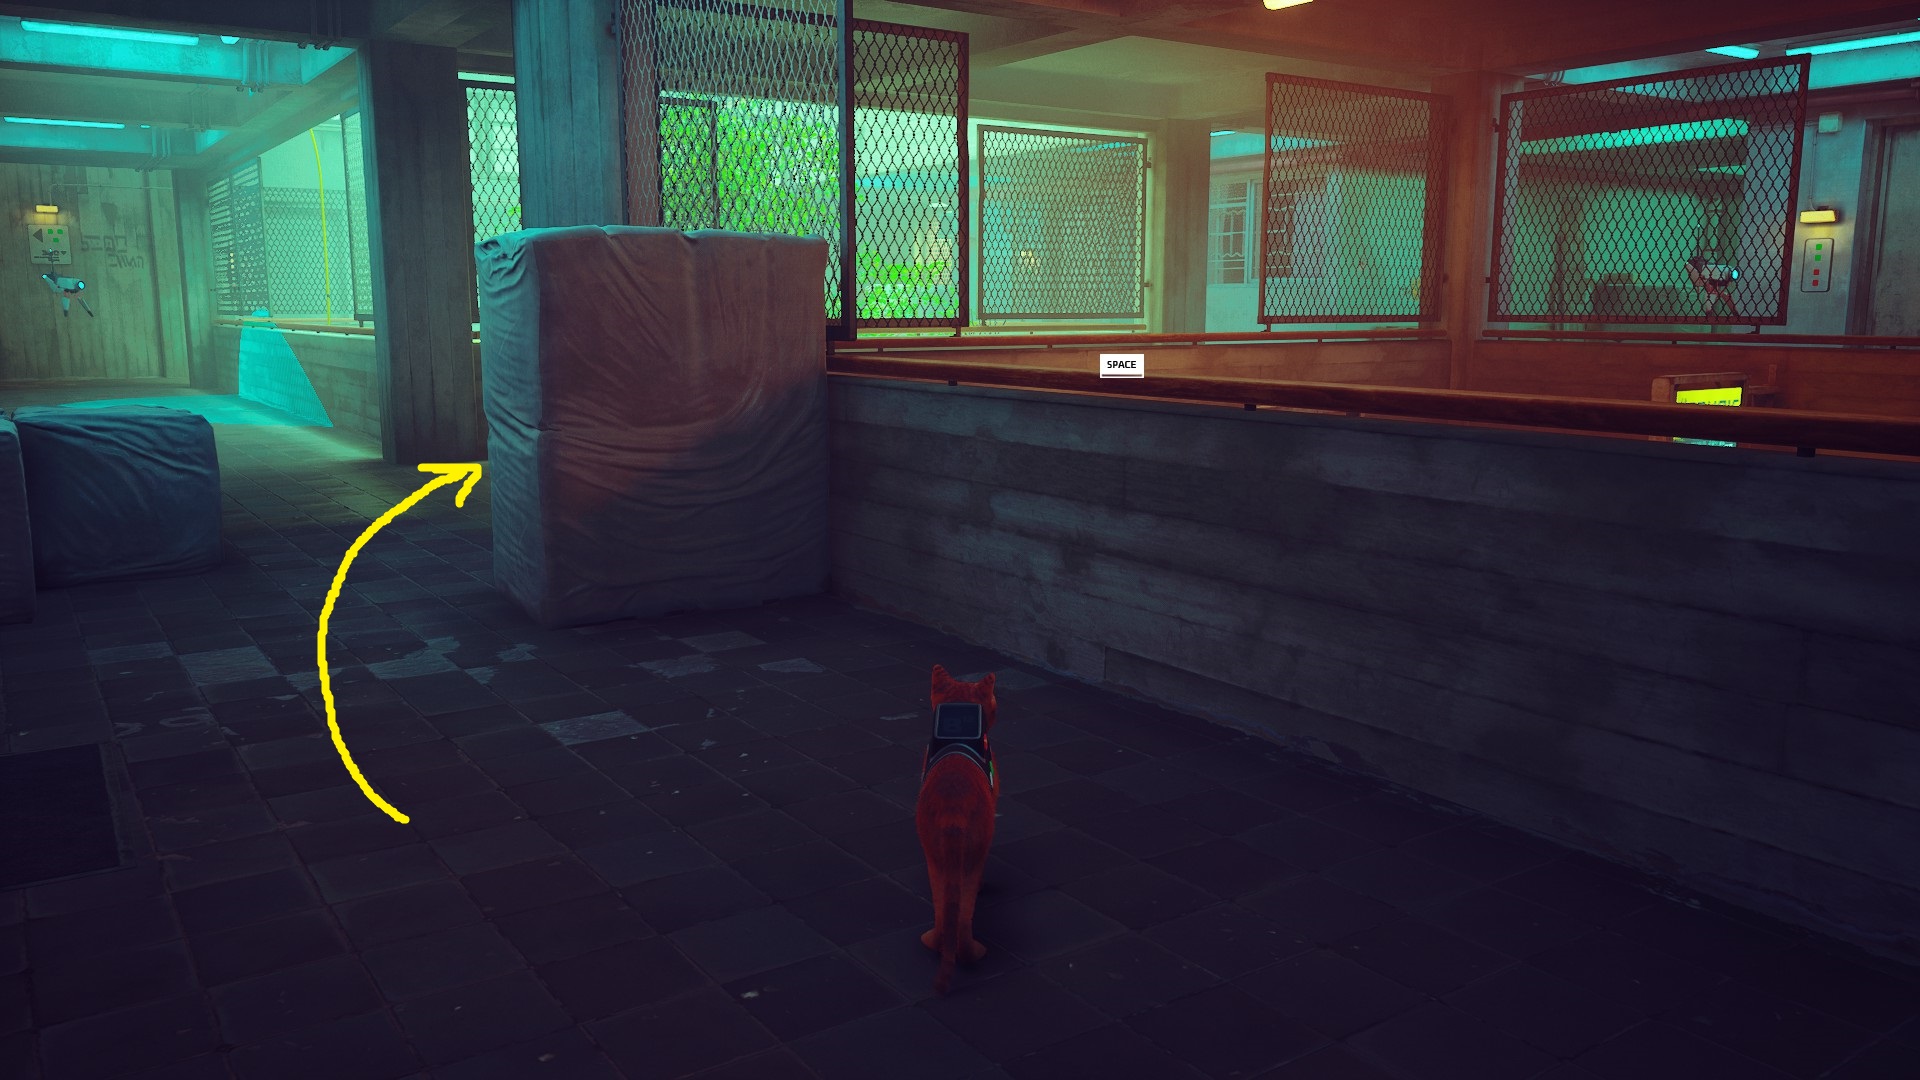
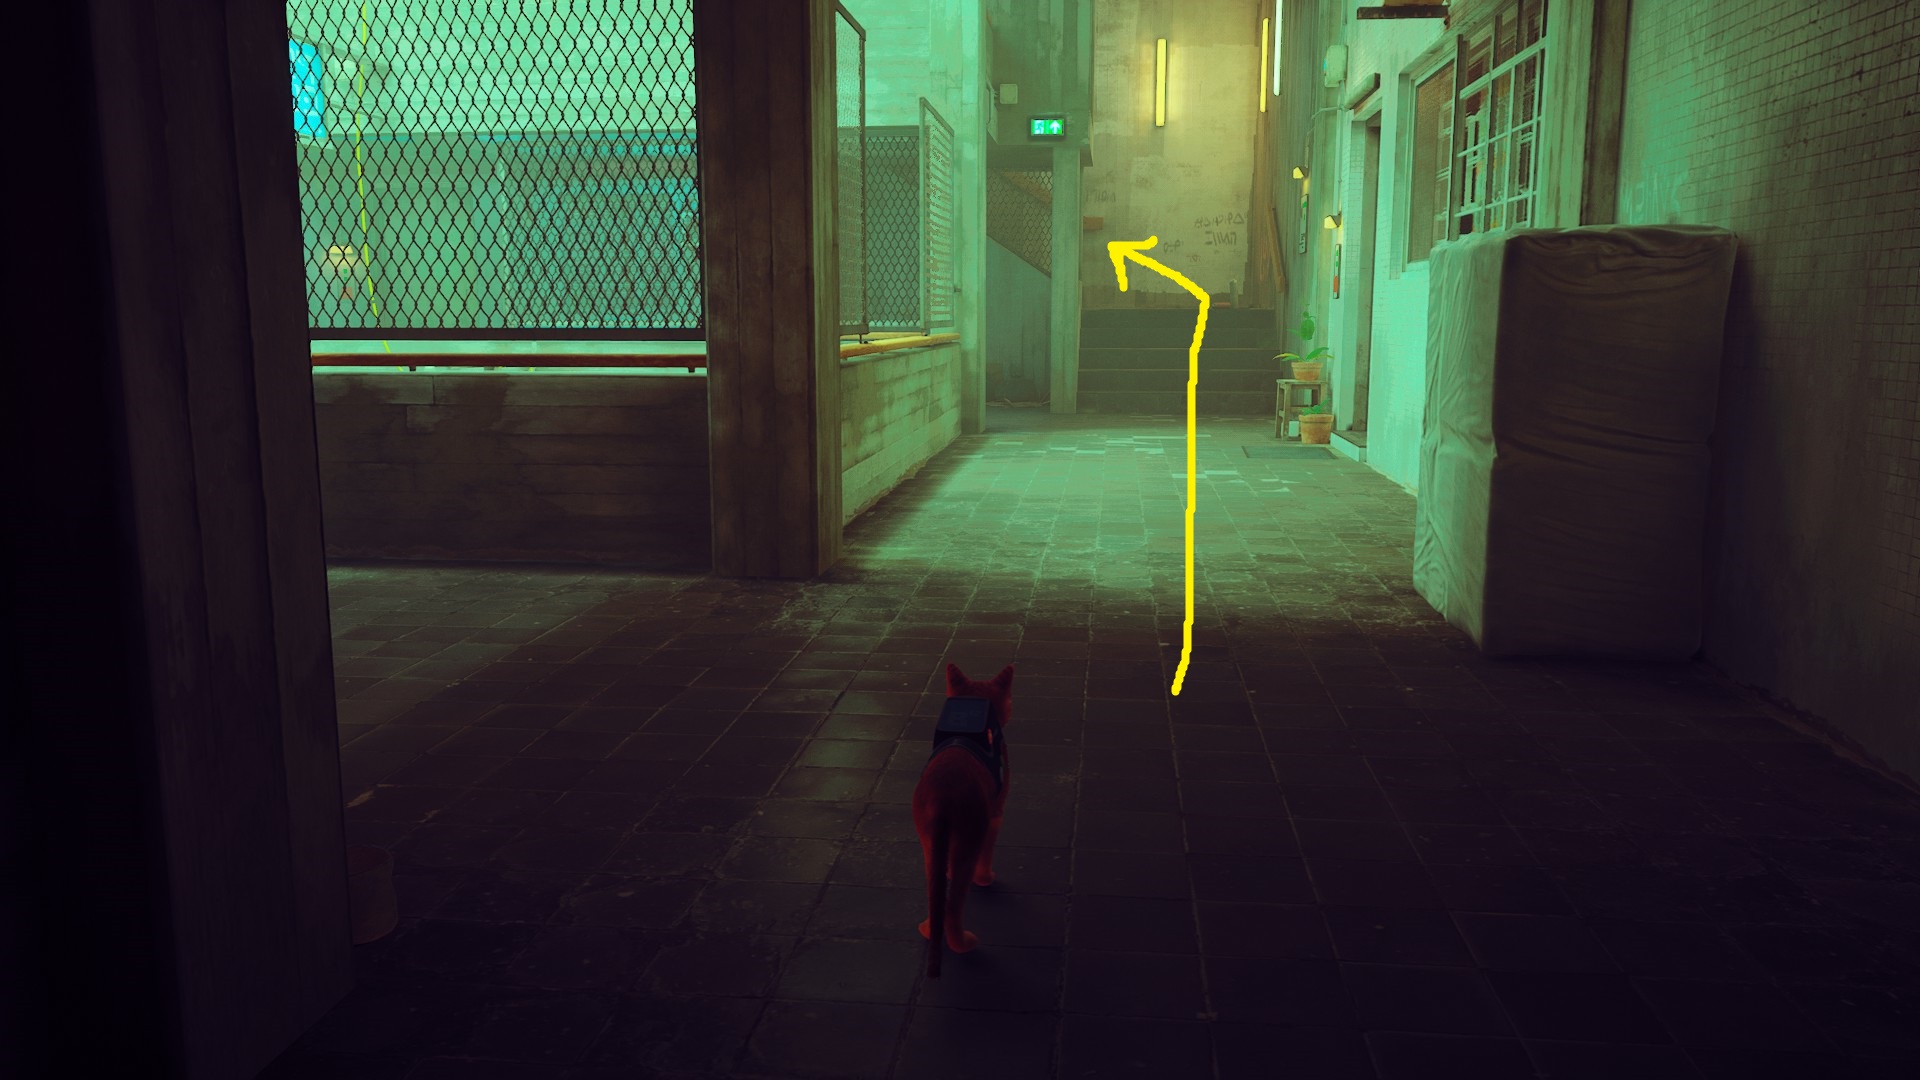
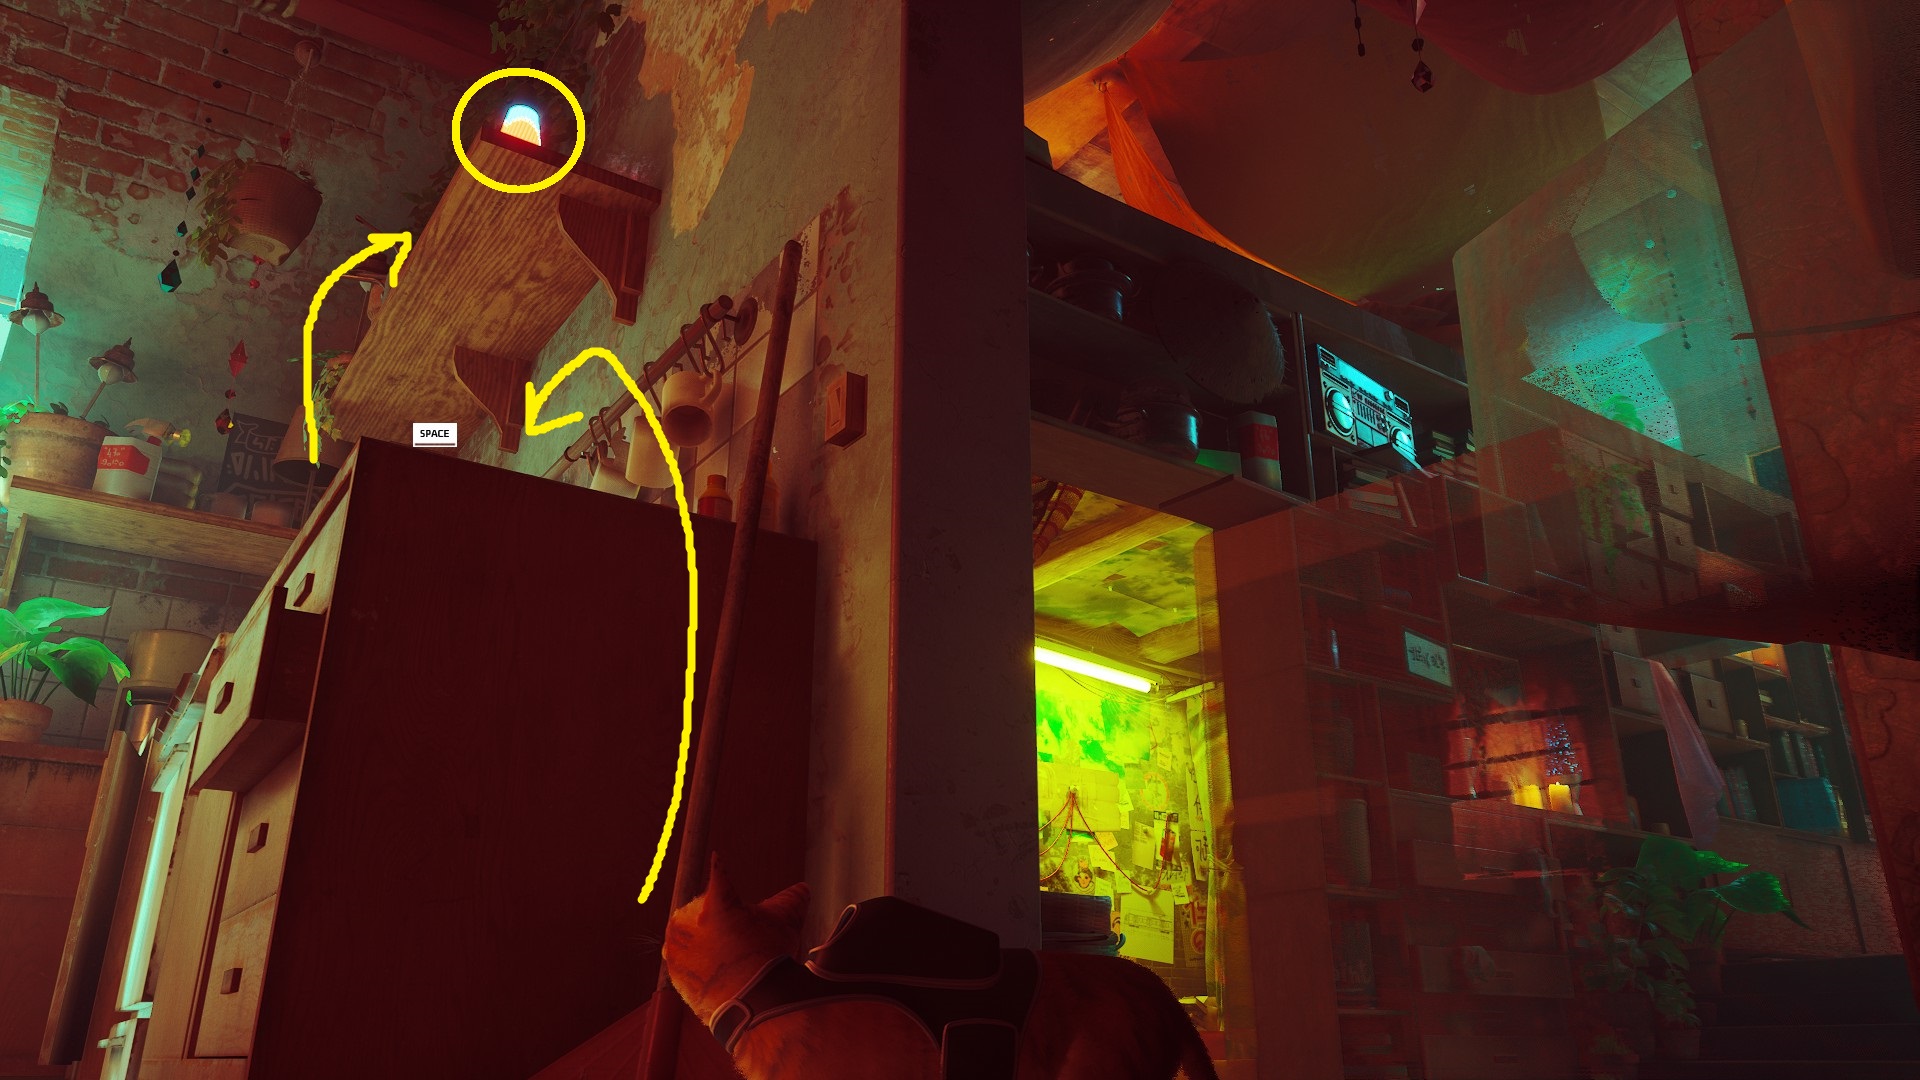
After leaving Antvillage, you’ll find yourself in a dark hallway. There’s only one path forward, so just keep going until you find the subway station. There, a cutscene will play, B-12 will talk to you for a bit, and then you can head across the tracks (or through the subway car) to the other side of the platform, and then continue up the stairs. At the top of the stairs, slip through the hole in the corner of the fence, then turn right and head towards the small living space to find a Memory on the bookcase.
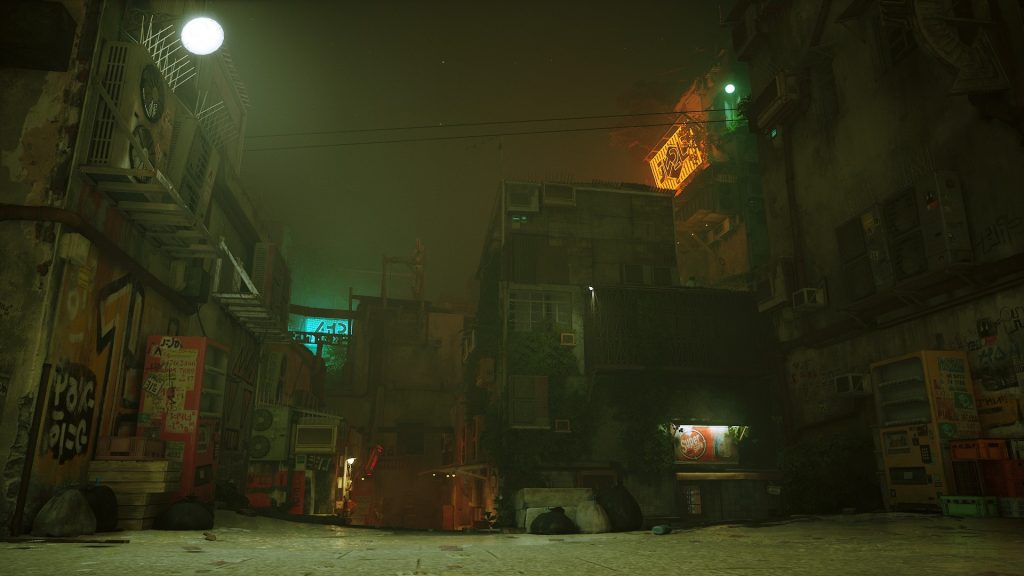
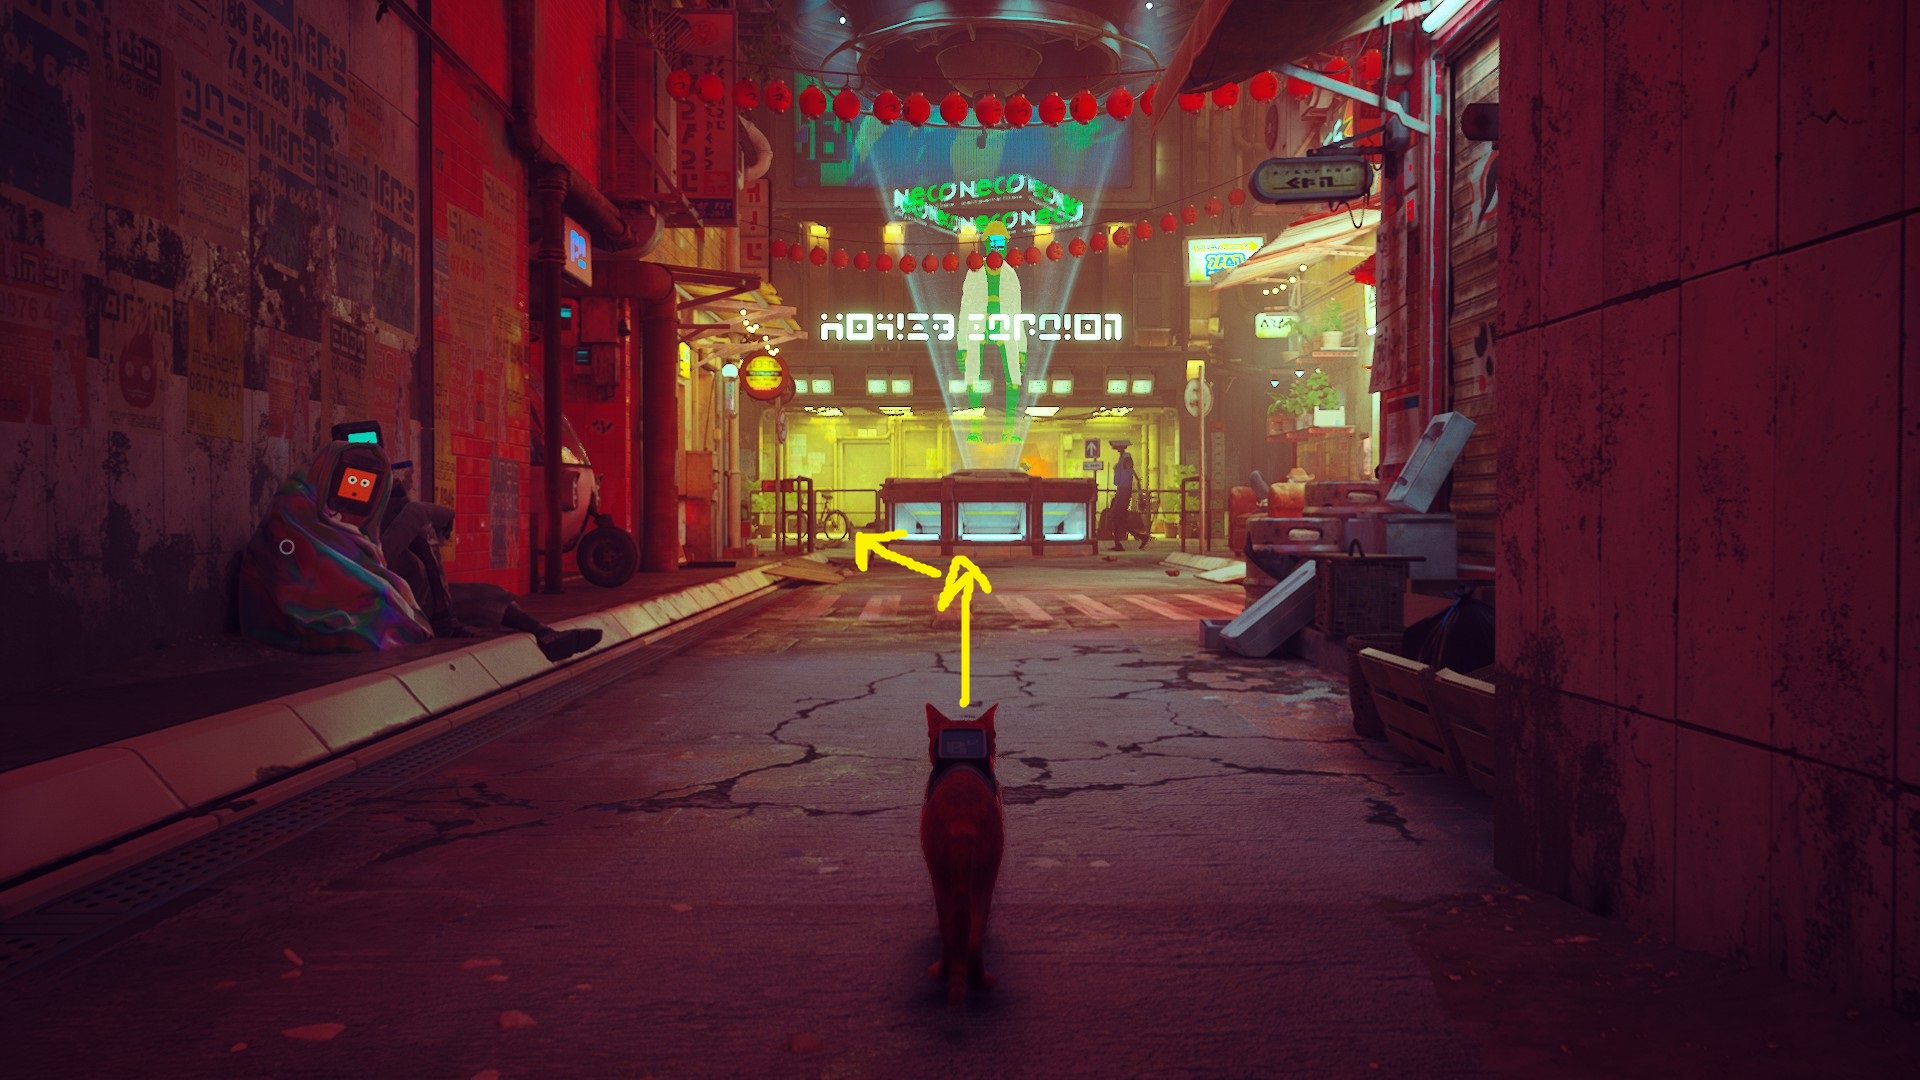
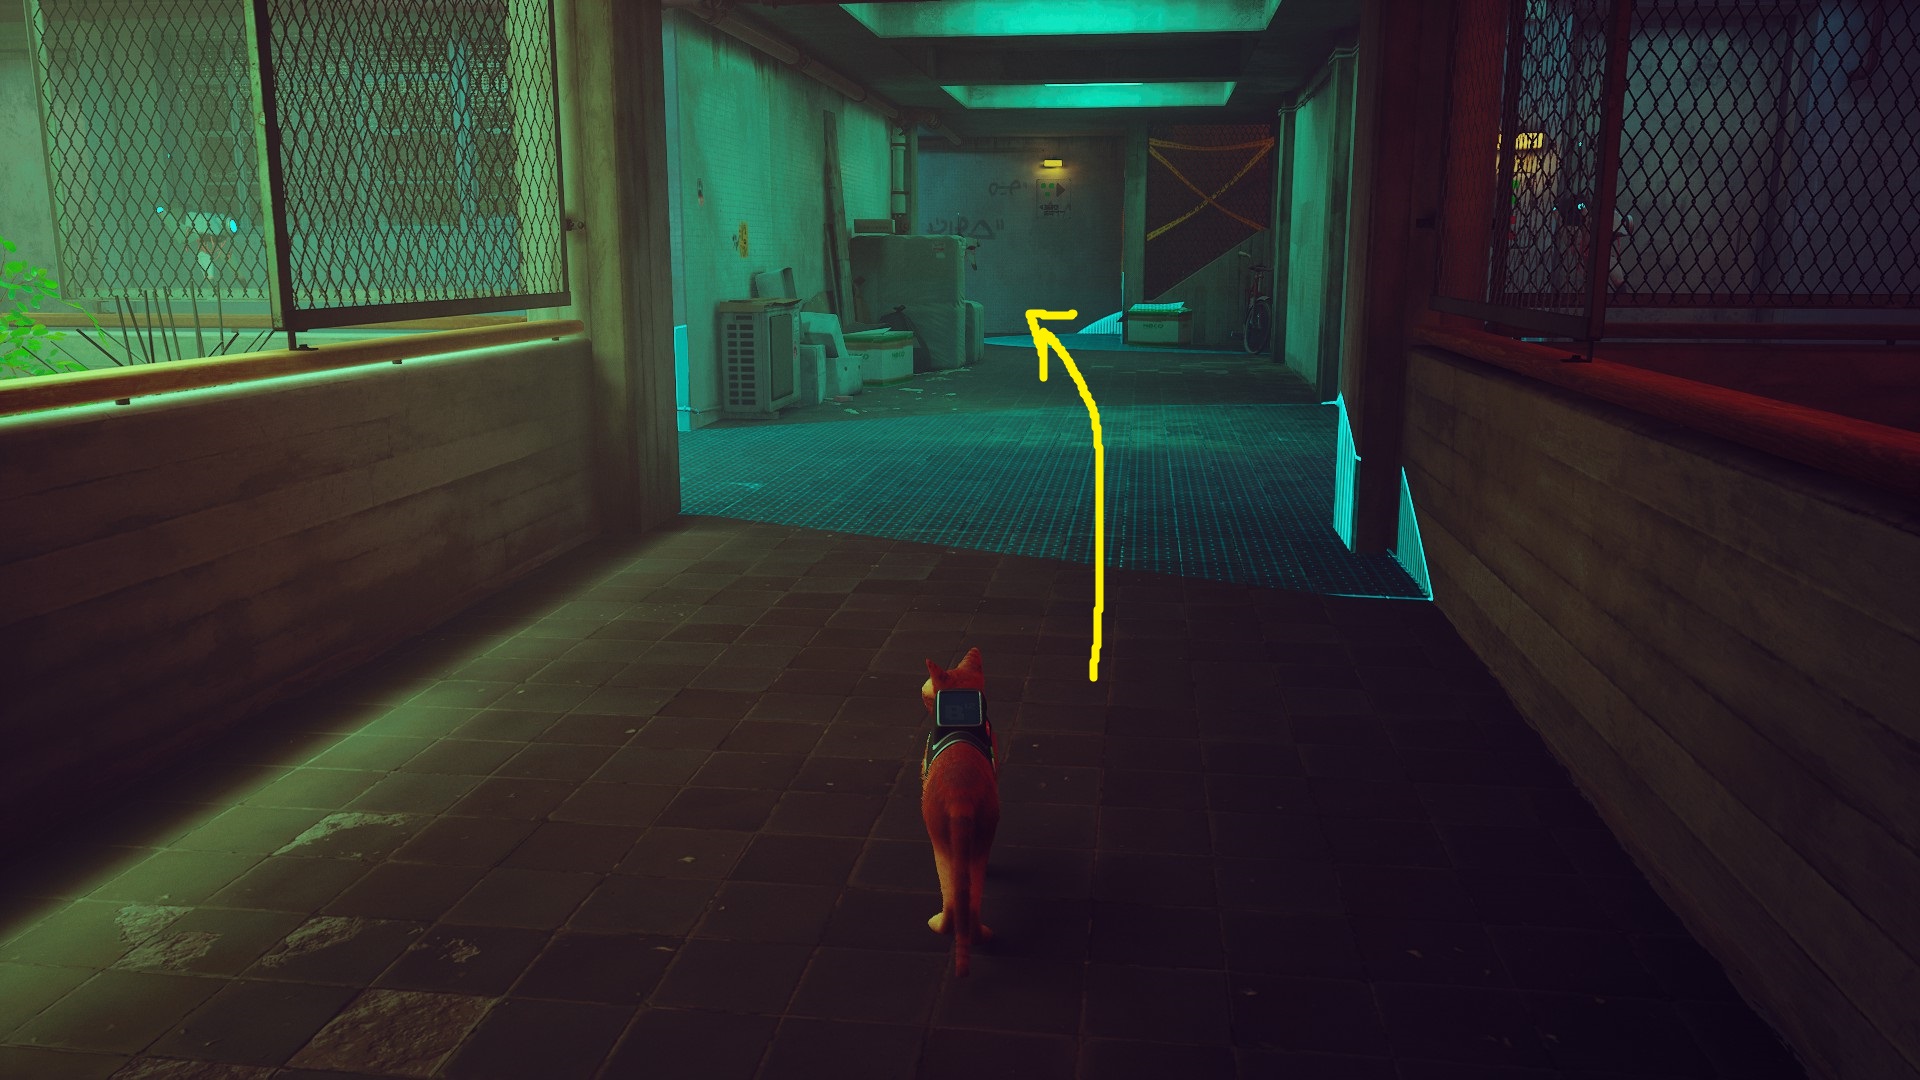
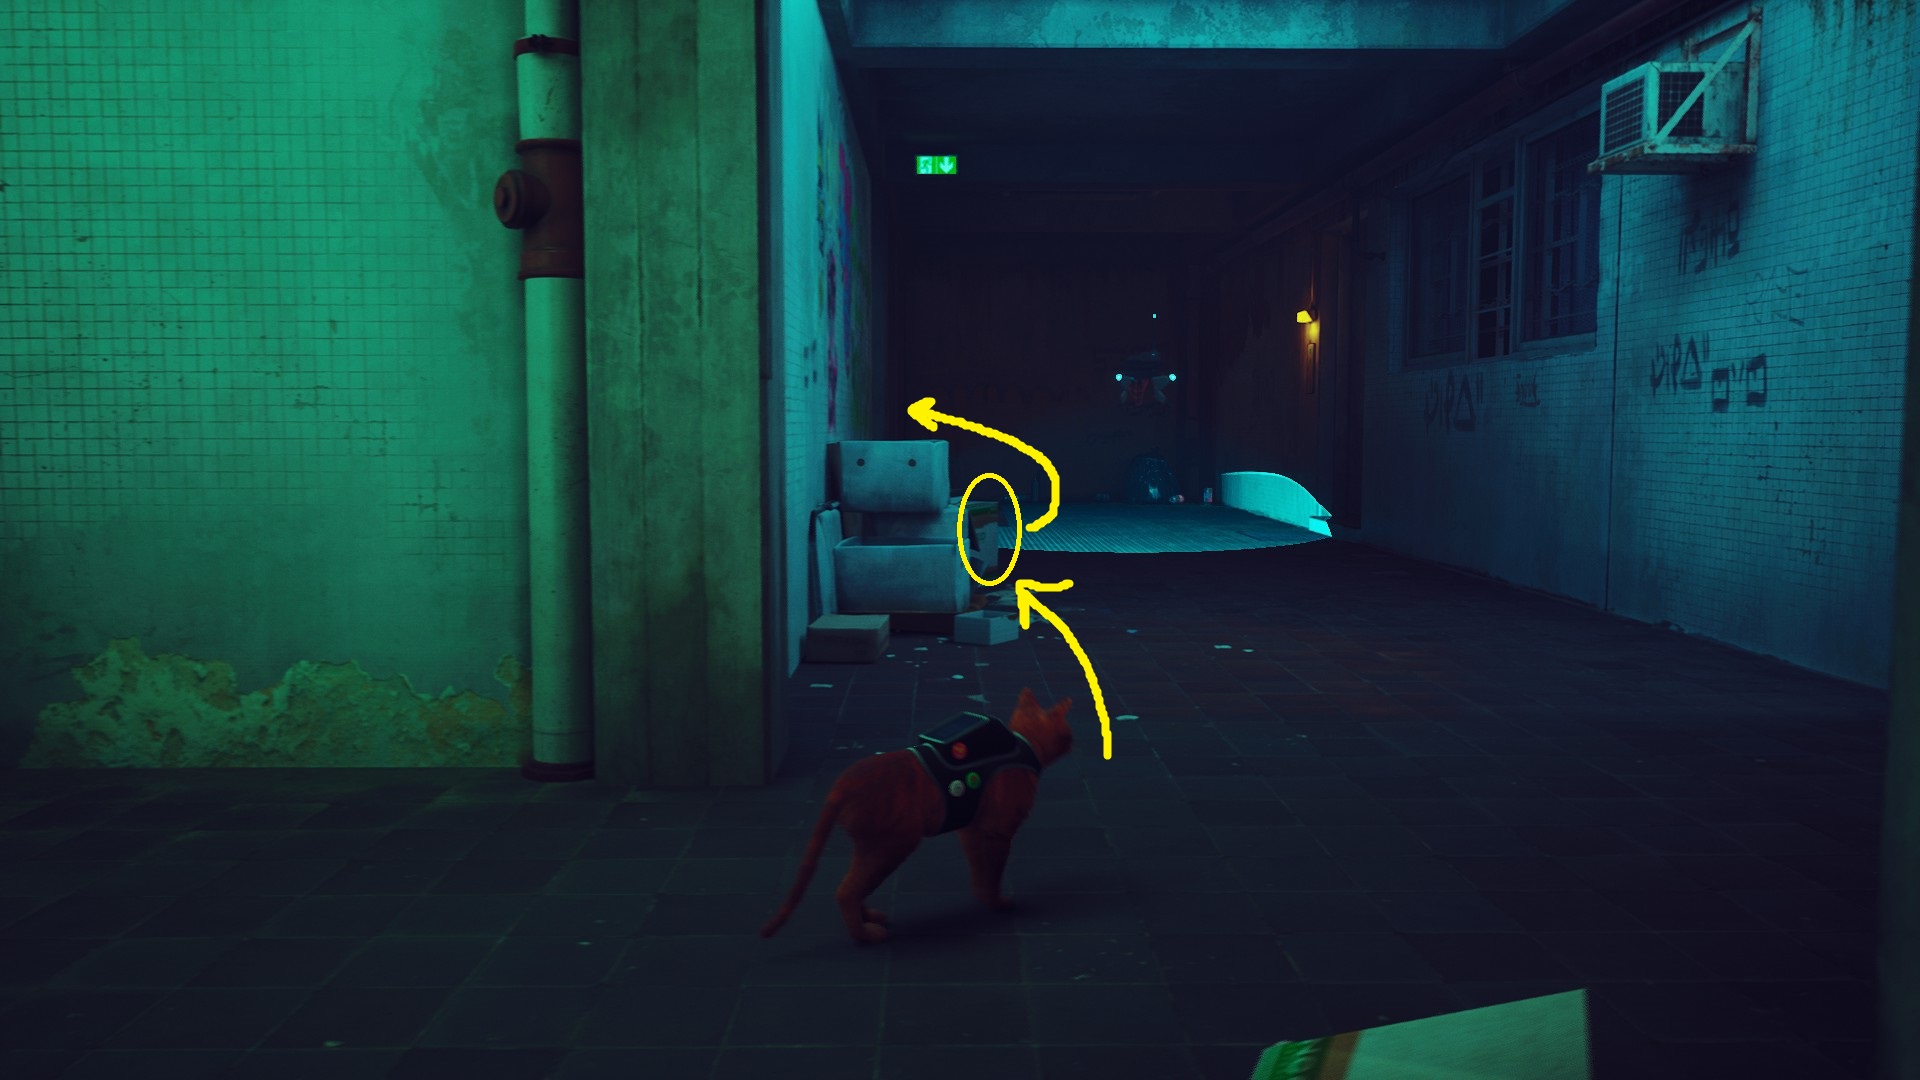
After inspecting the books, head under the caution tape on the far side of the room, then turn right and go up the stairs. Take your next right and you’ll enter Midtown. Continue heading down the main street, and you’ll soon make your way up a ramp and find the roundabout. From here, you can reach Clementine — since you’ve been given a hint in-game on where she is, finding her could be considered a puzzle of sorts…
Inspect Clementine’s Picture in your inventory, and don’t forget you can rotate it!
On the back of Clementine’s Picture, you can find her address. From the roundabout with the hologram in the center, you can see Clementine’s apartment building down the street. Head inside, then turn left to find the stairs to the 2nd floor. At the top of the stairs, turn right and you’ll see the stairs to the 3rd floor. Take them up, then turn right and head down the hallway — the apartment at the end is Clementine’s, and you can jump through the hole in the wall to enter.
Once inside Clementine’s apartment, head into the next room. A cutscene will play, and then you’ll speak with Clementine. Show her Clementine’s Picture, and she’ll tell you to follow her. Do so, and when she stops at her note-covered wall, talk with her. She’ll tell you her plan to use the Subway, and then ask you to meet her contact — a robot with a gold chain and a bomber jacket — and give you a Contact Message to show to this robot. Now you can leave Clementine’s apartment the way you came in (via the hole in the kitchen).
At this point, you’ll need to find the contact, and then you’ll have a couple of puzzles to solve in order to acquire the items you need. Directions to the contact and hints/solutions for the puzzles can be found below.
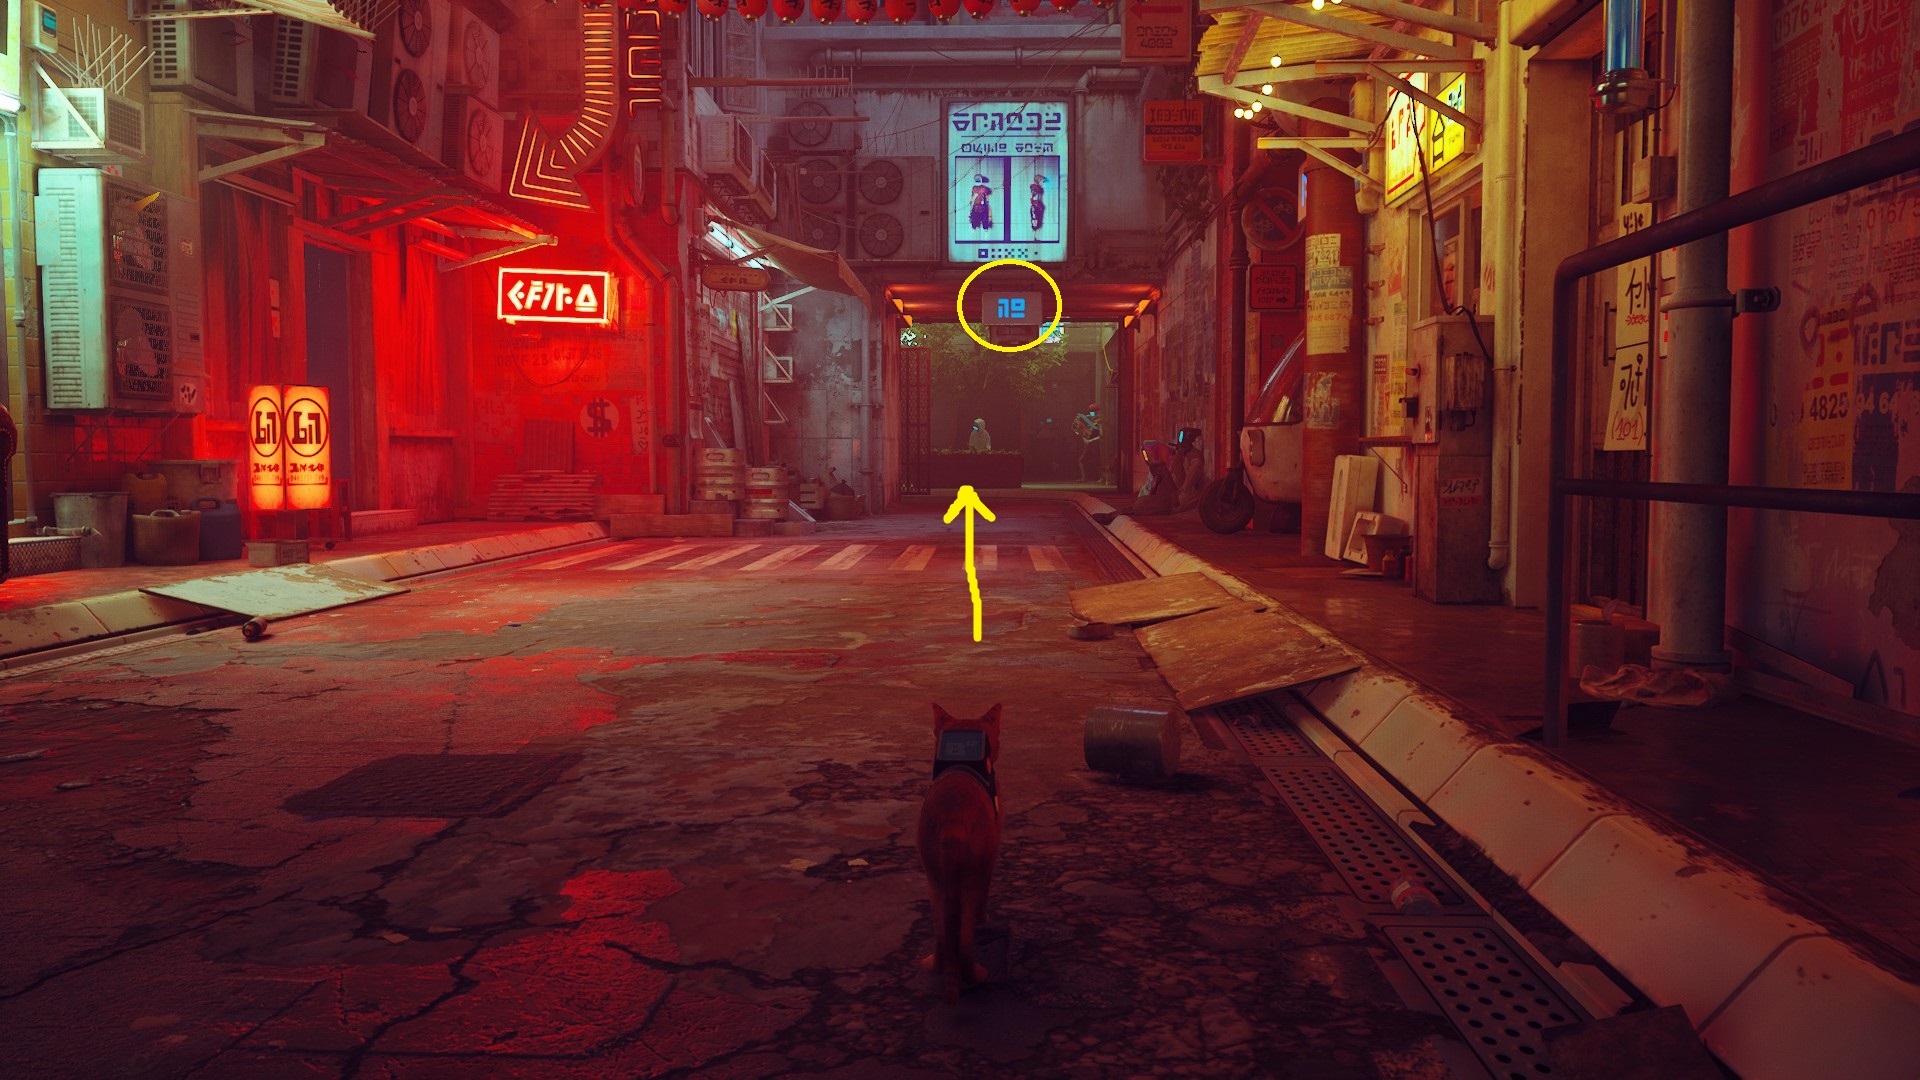
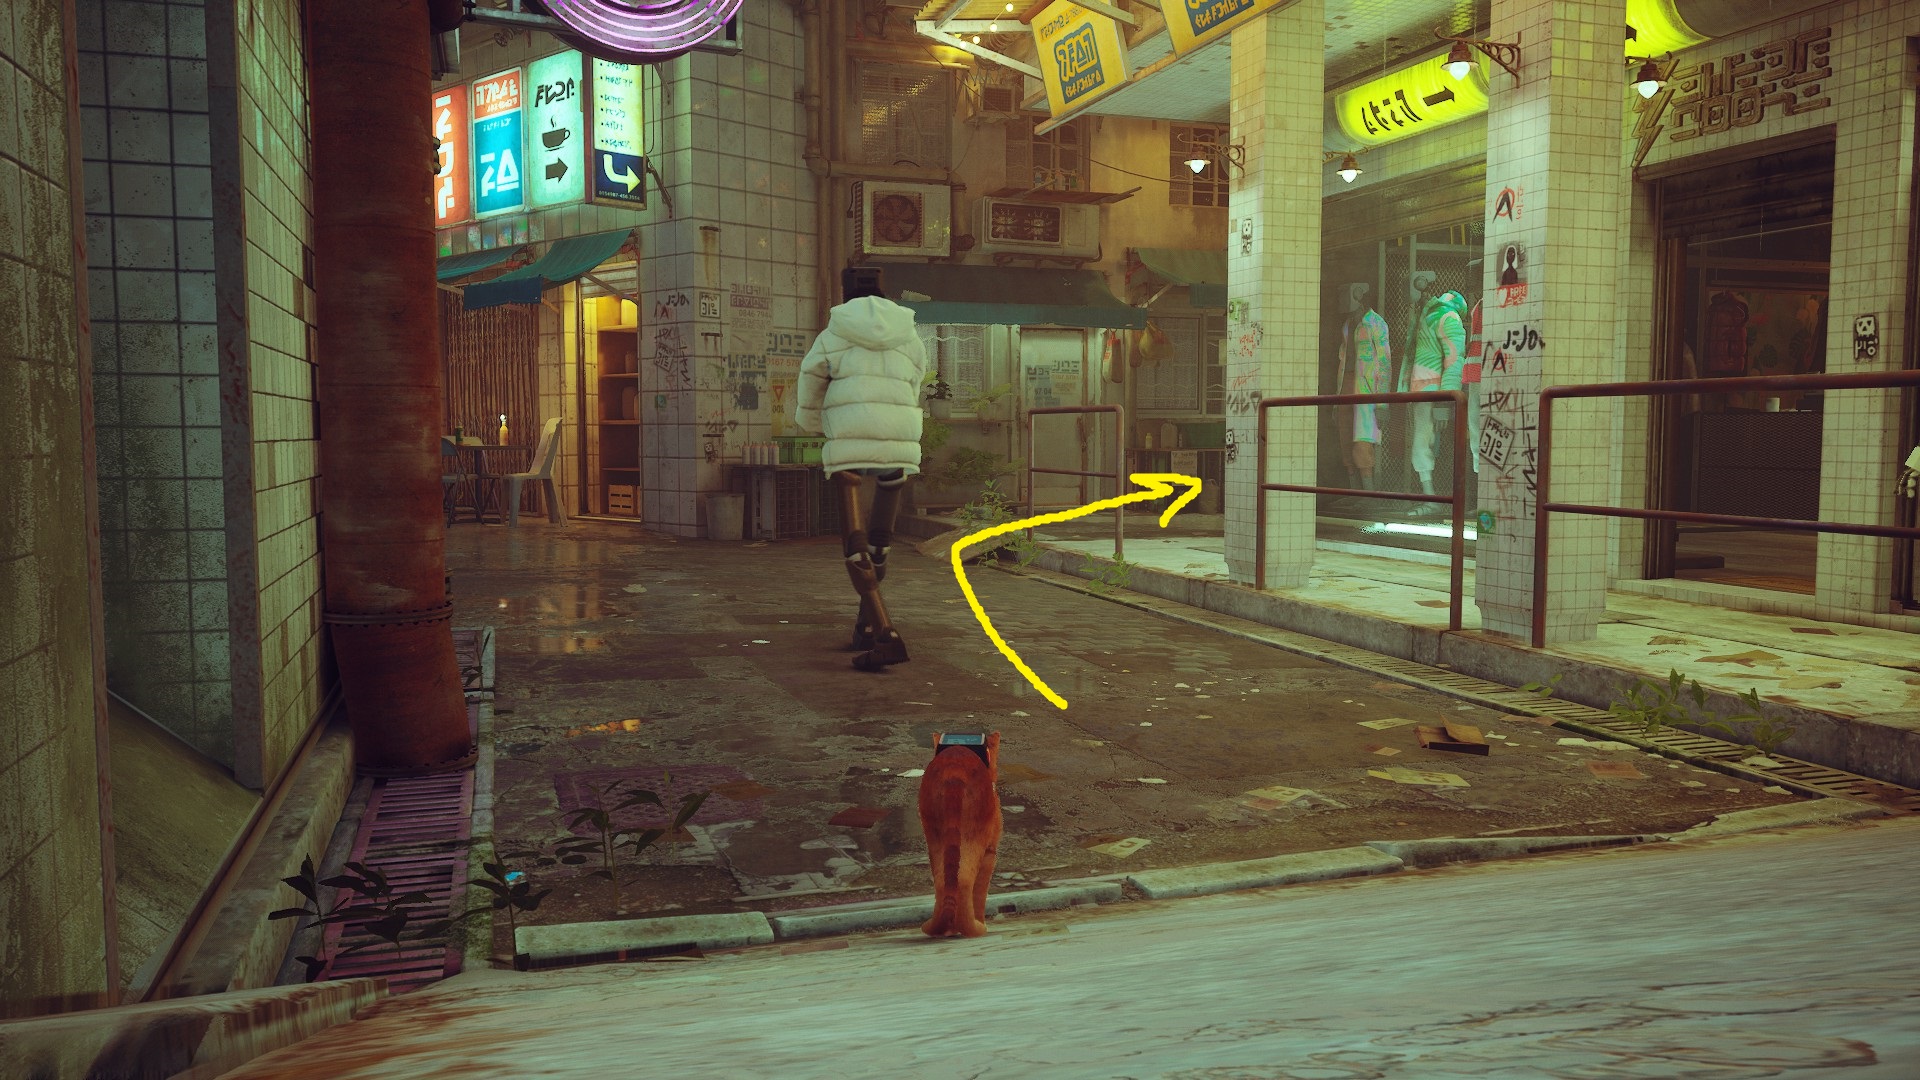
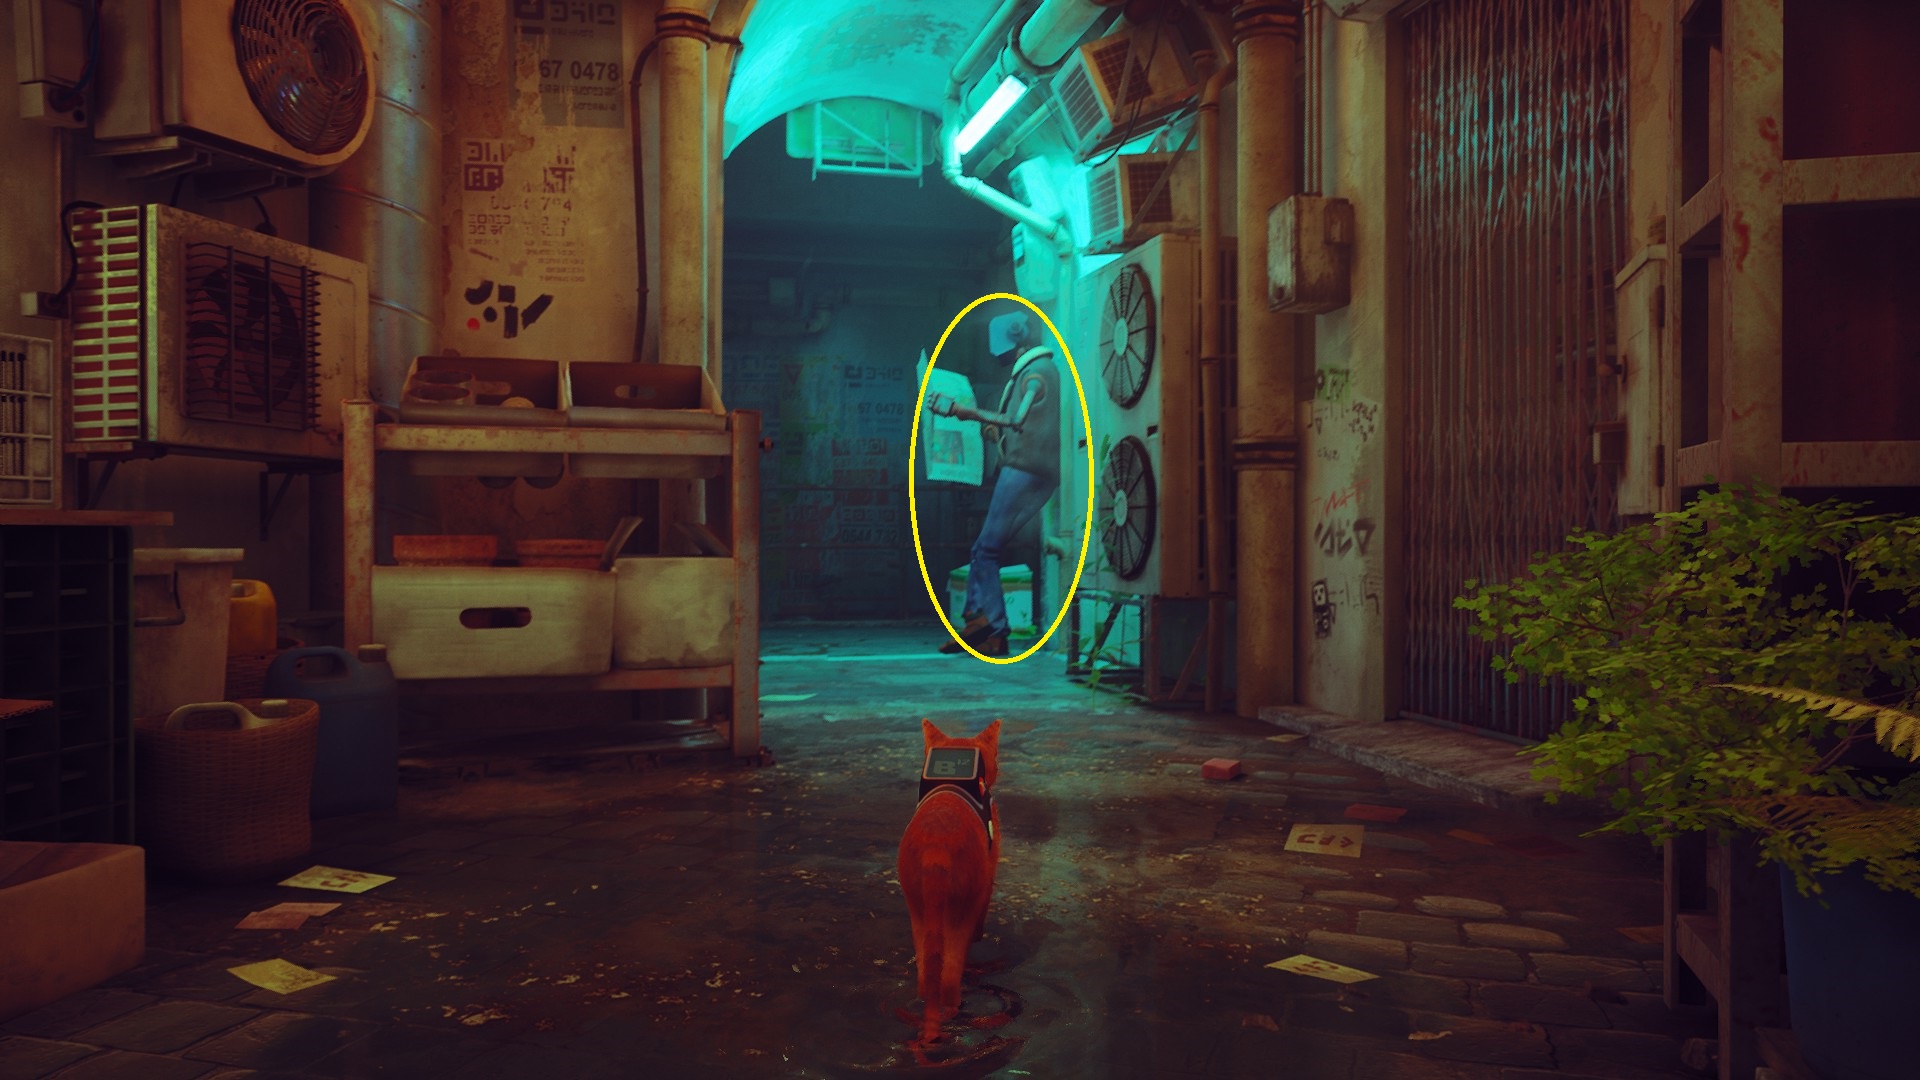
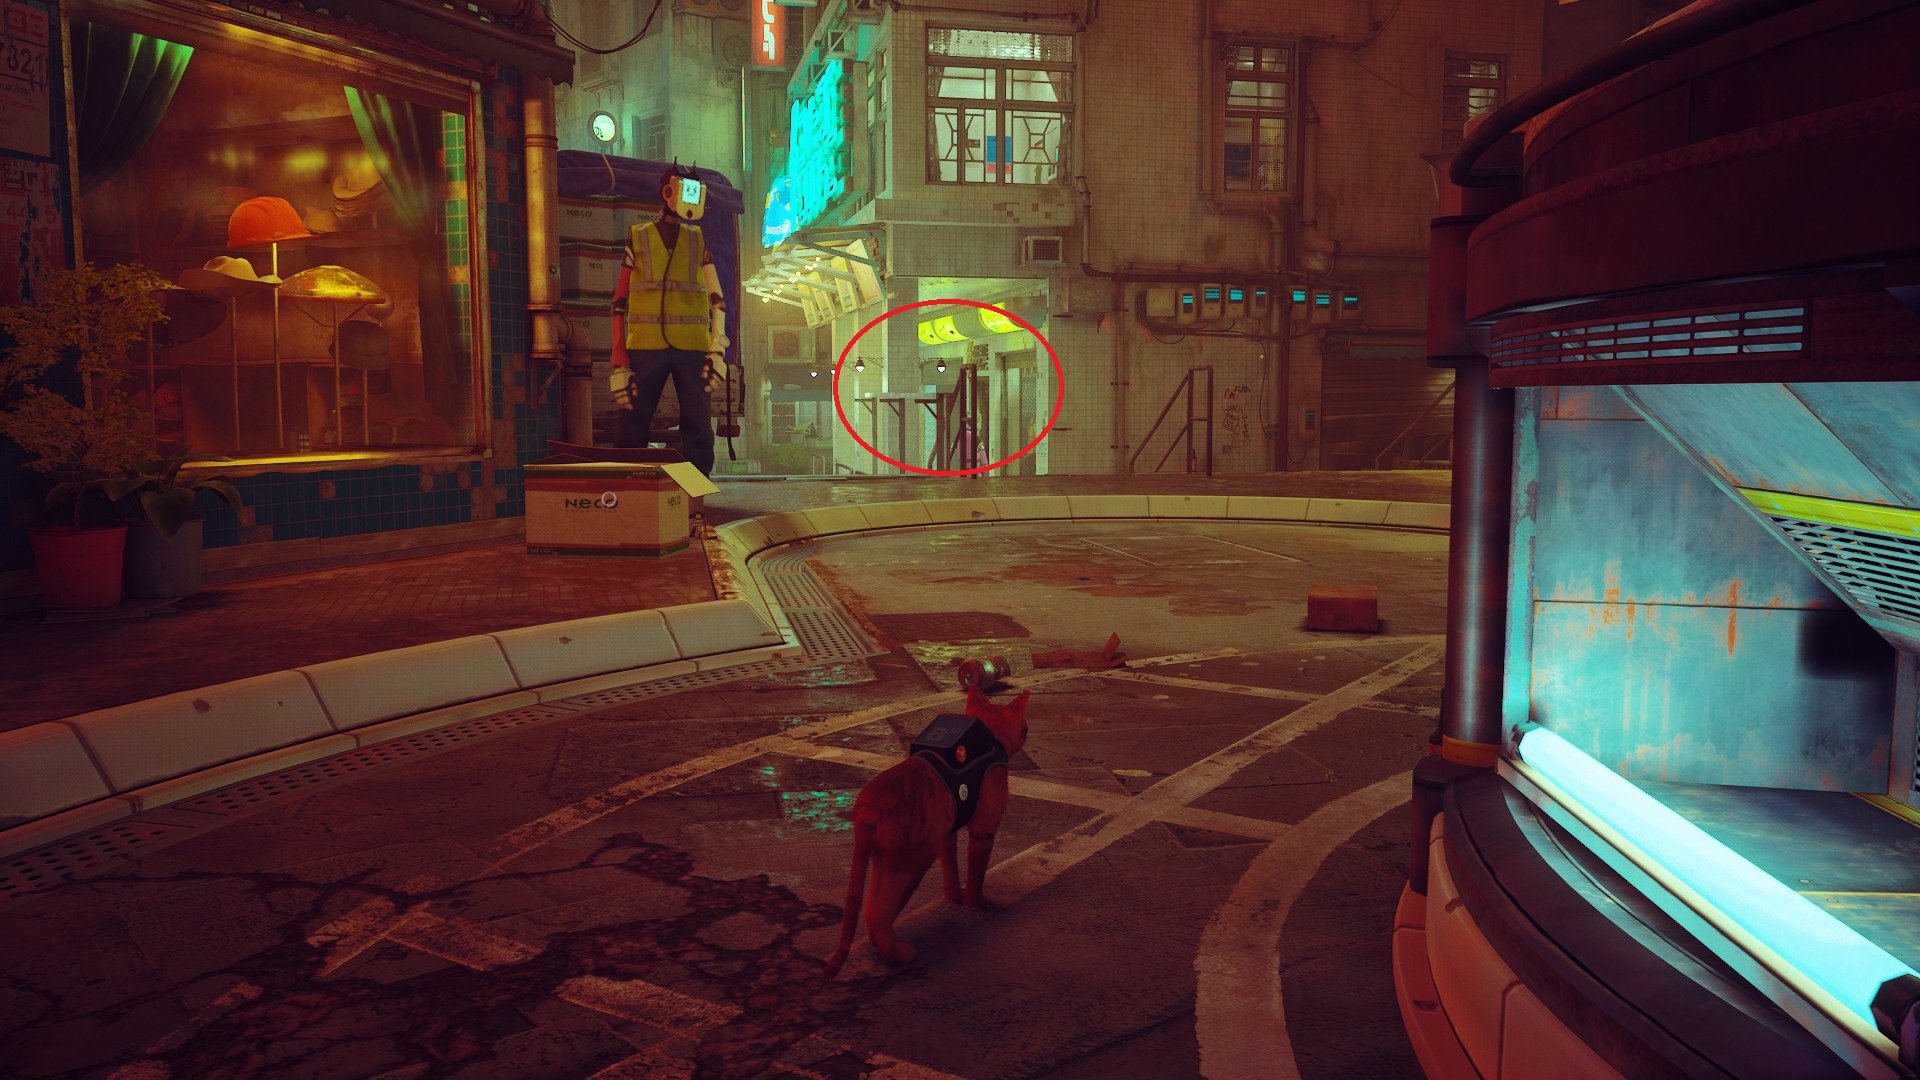
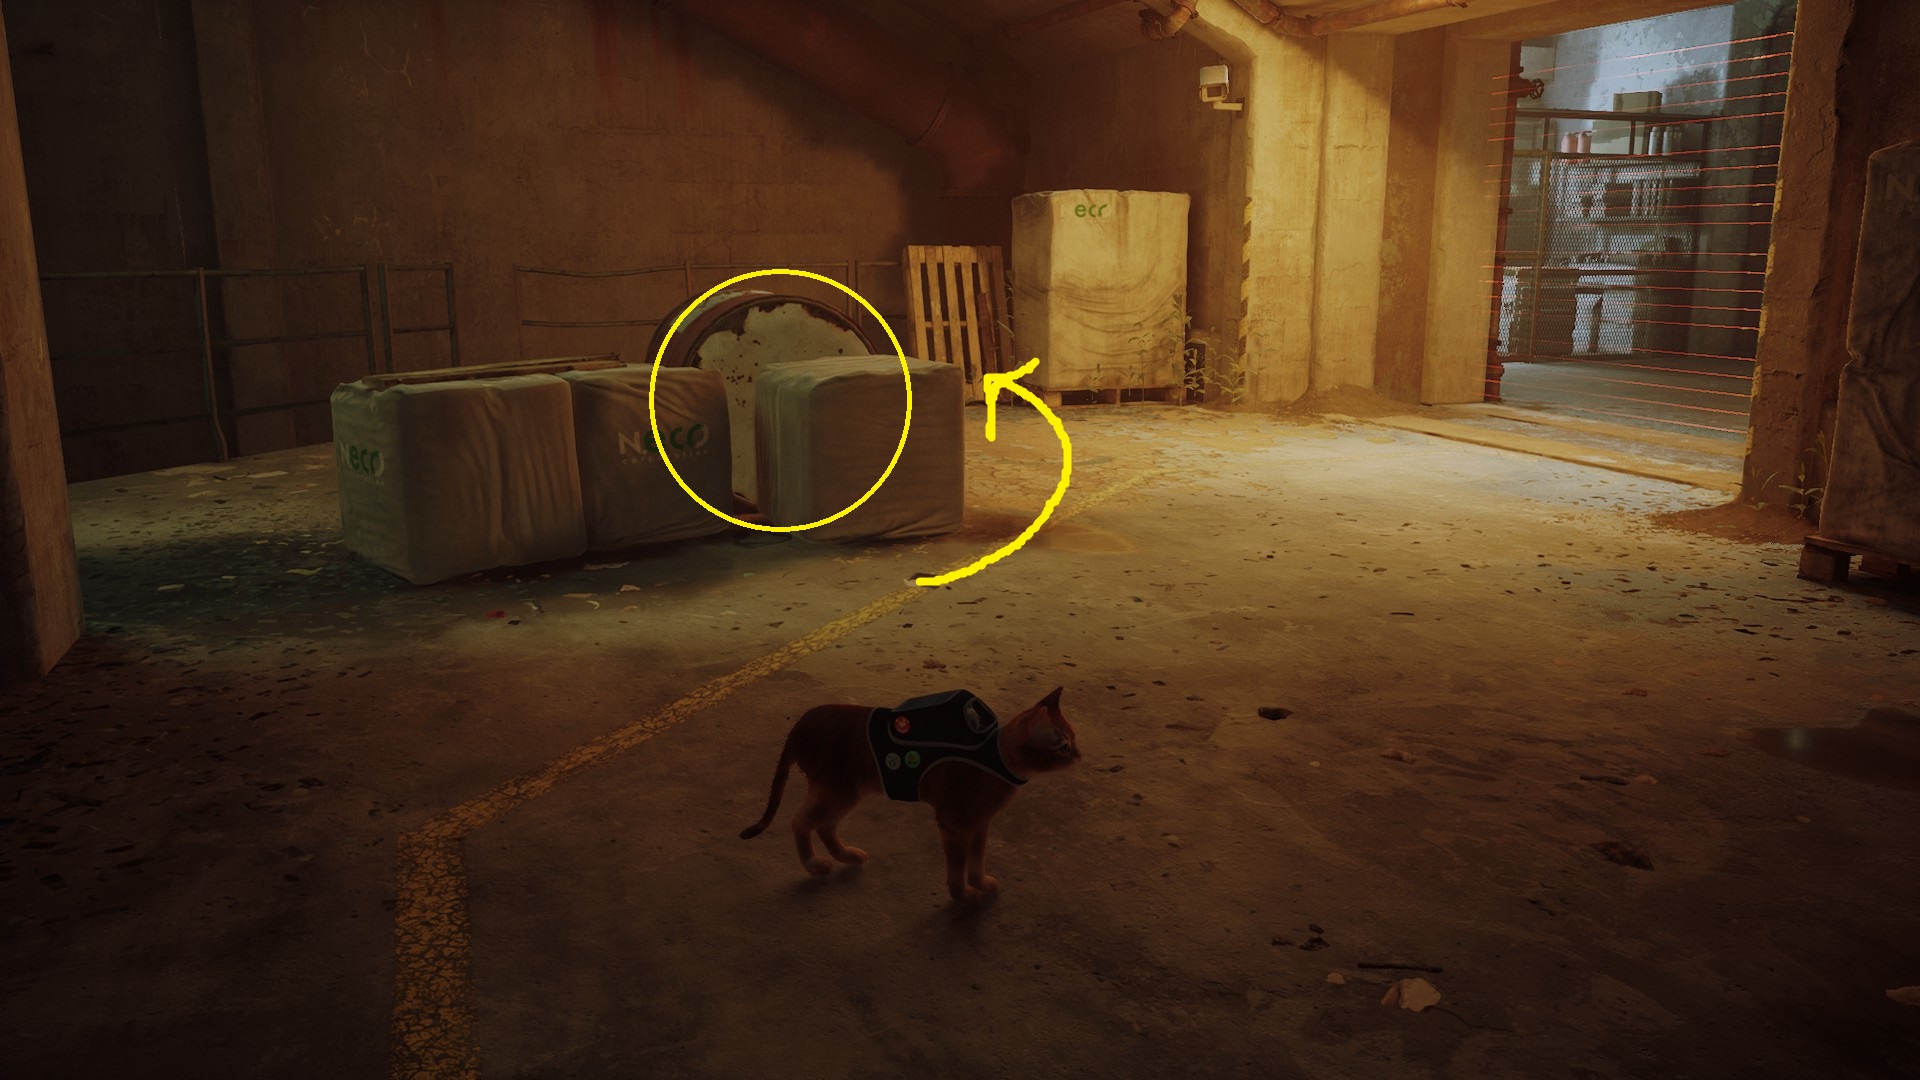
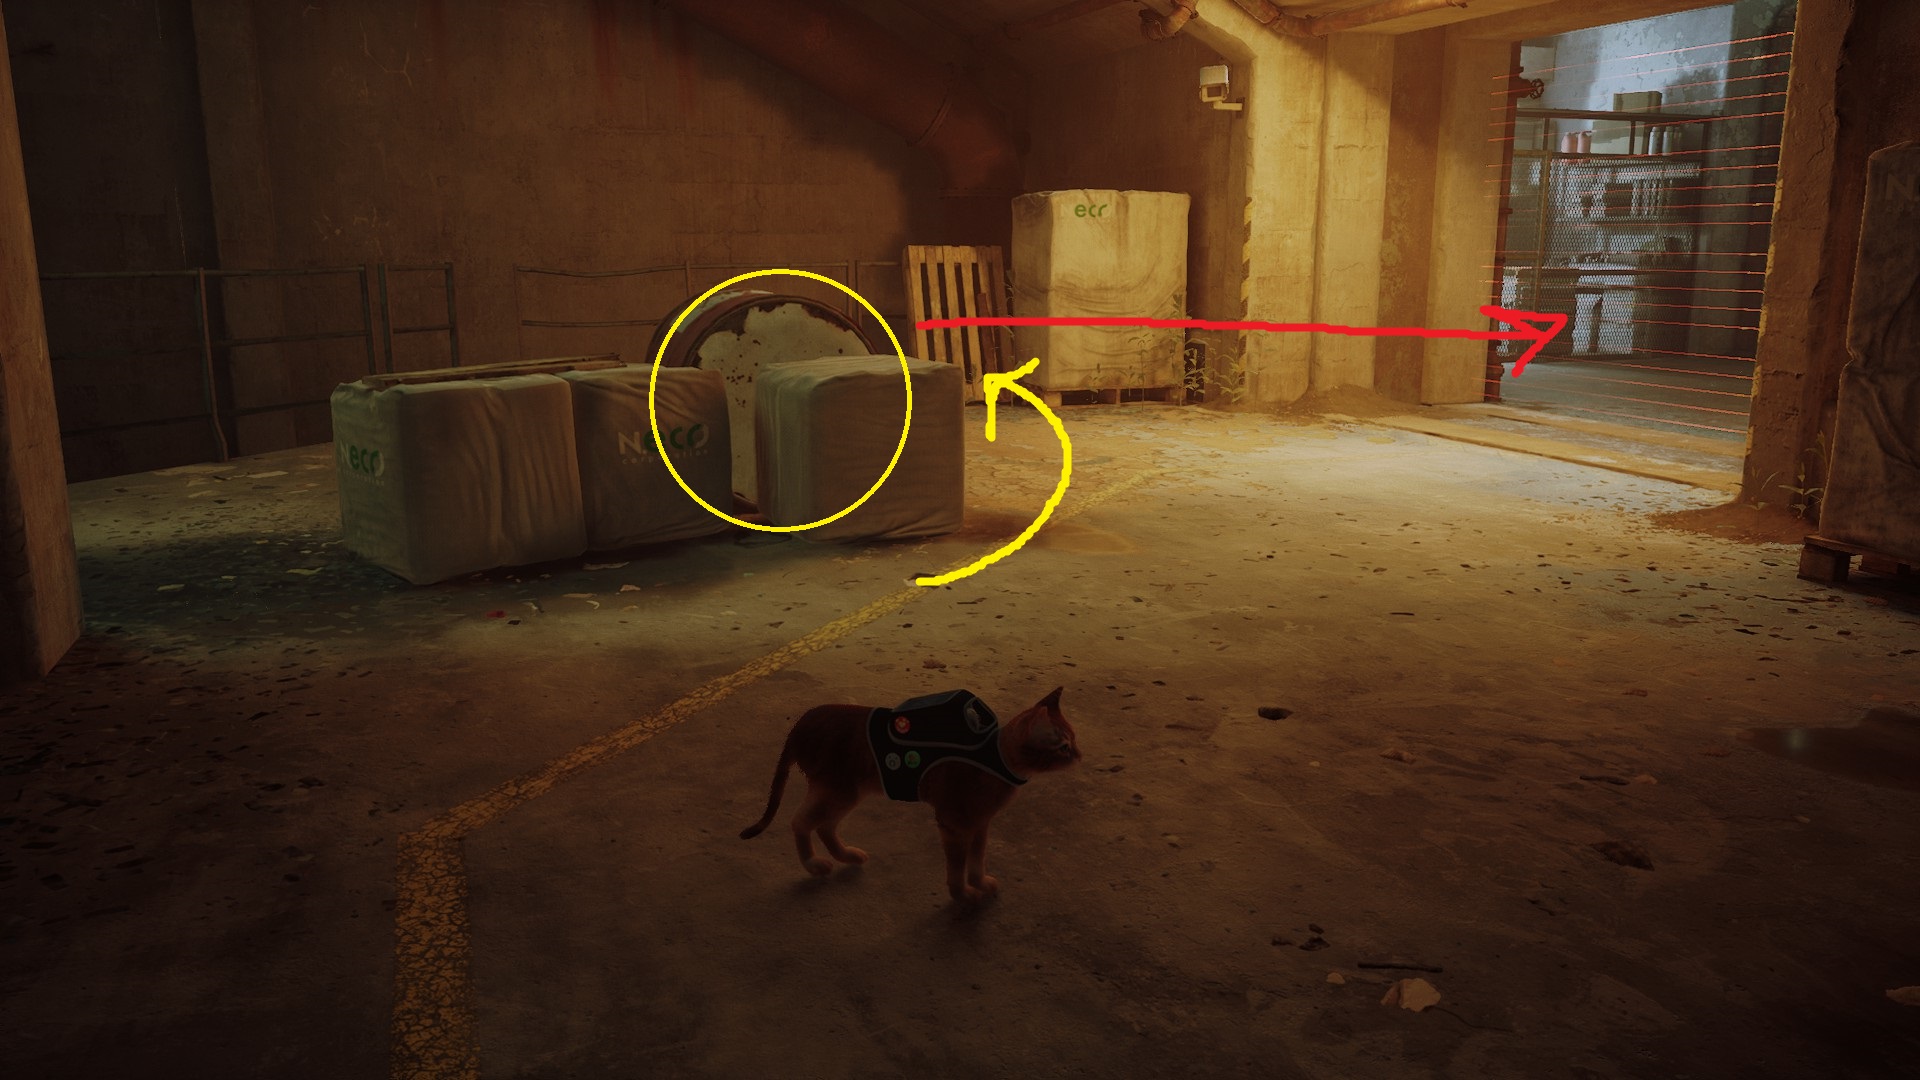
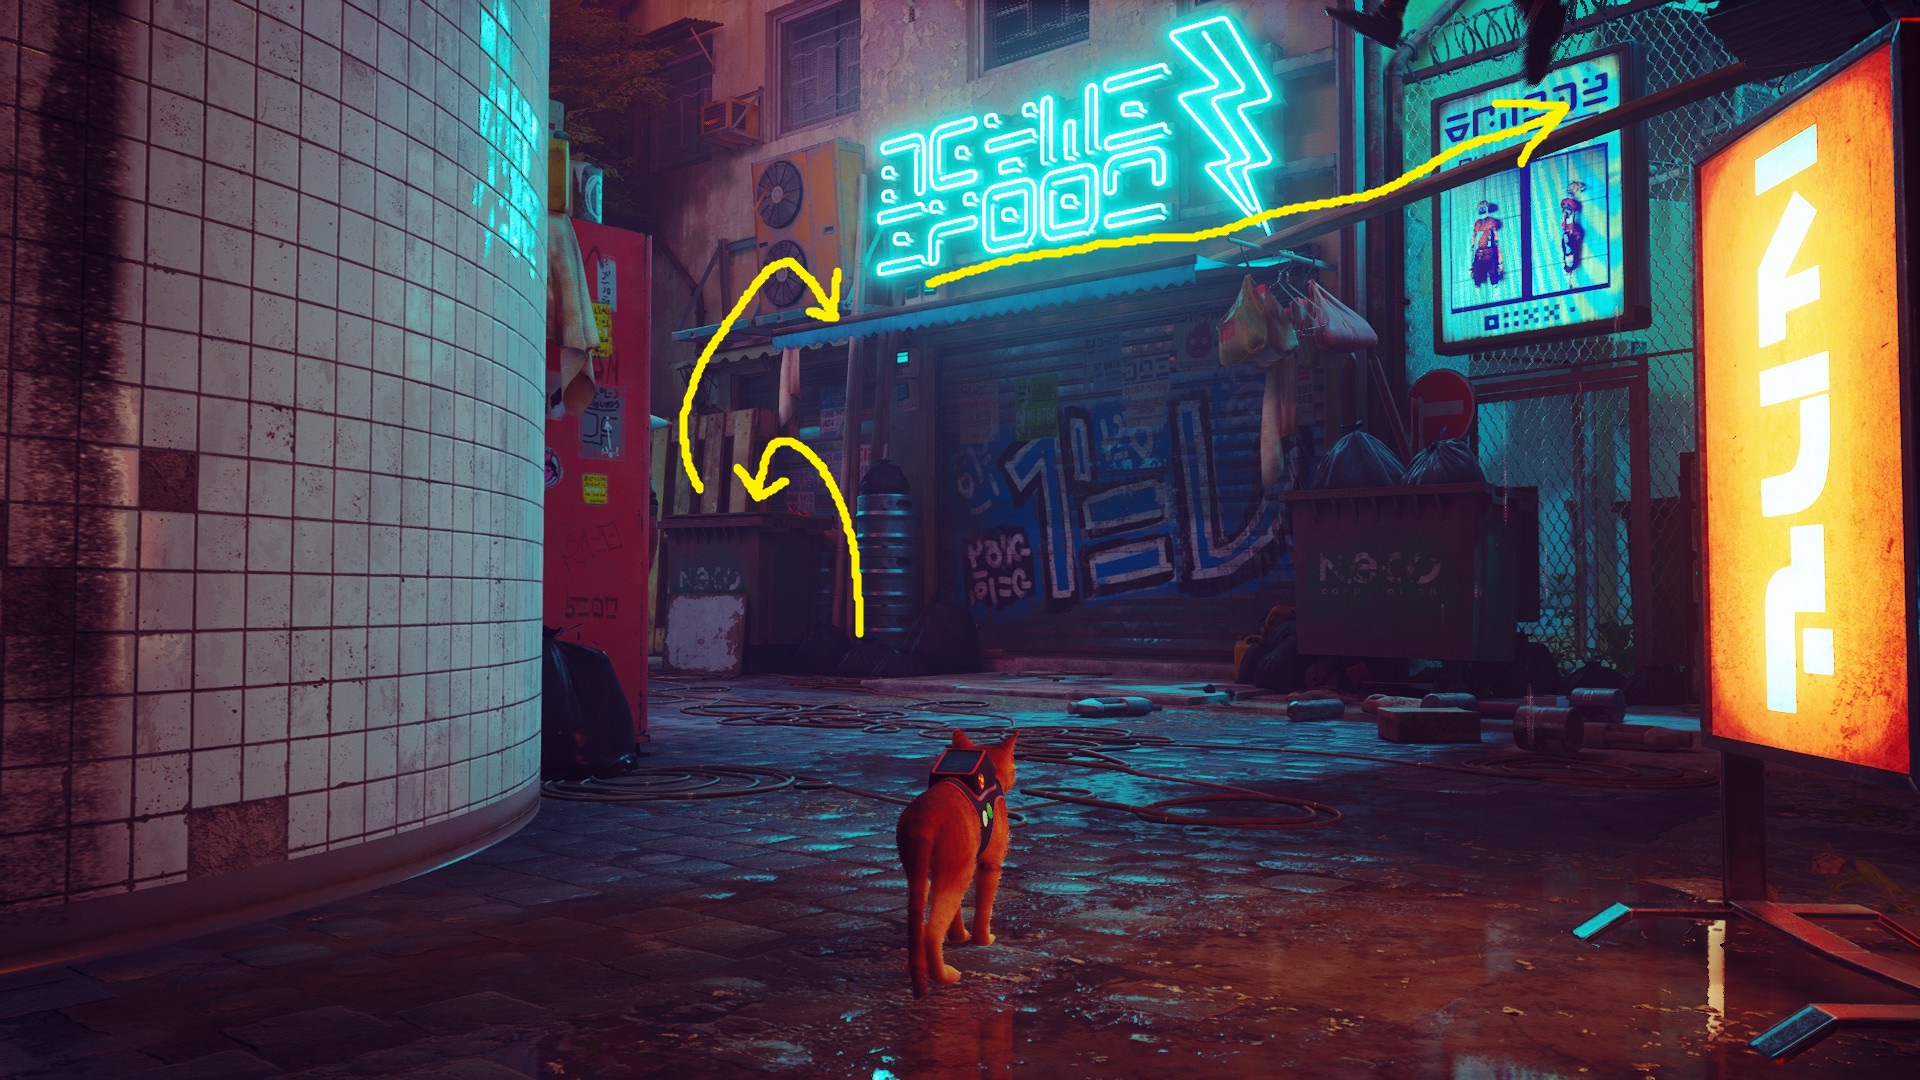
From Clementine’s apartment, head down to the 1st floor of the complex, then go back to the roundabout with the hologram in the center (1). At the roundabout, go left and down the ramp (2), then turn right once you pass the clothing store (3) — Blazer (the Contact) is just down the alleyway (4). Show him the Contact Message, and he’ll tell you he needs a Worker Jacket and a Worker Hat in order to sneak into the place with the Battery Clementine needs.
1234
To get the clothing store shopkeeper out of the way so you can snag the jacket, you’ll need to use something in his store as a distraction. In order to do that, you’ll need a specific item that can be found by looking for another robot with the ‘something’ that you need to use — one of his friends has the item you need.
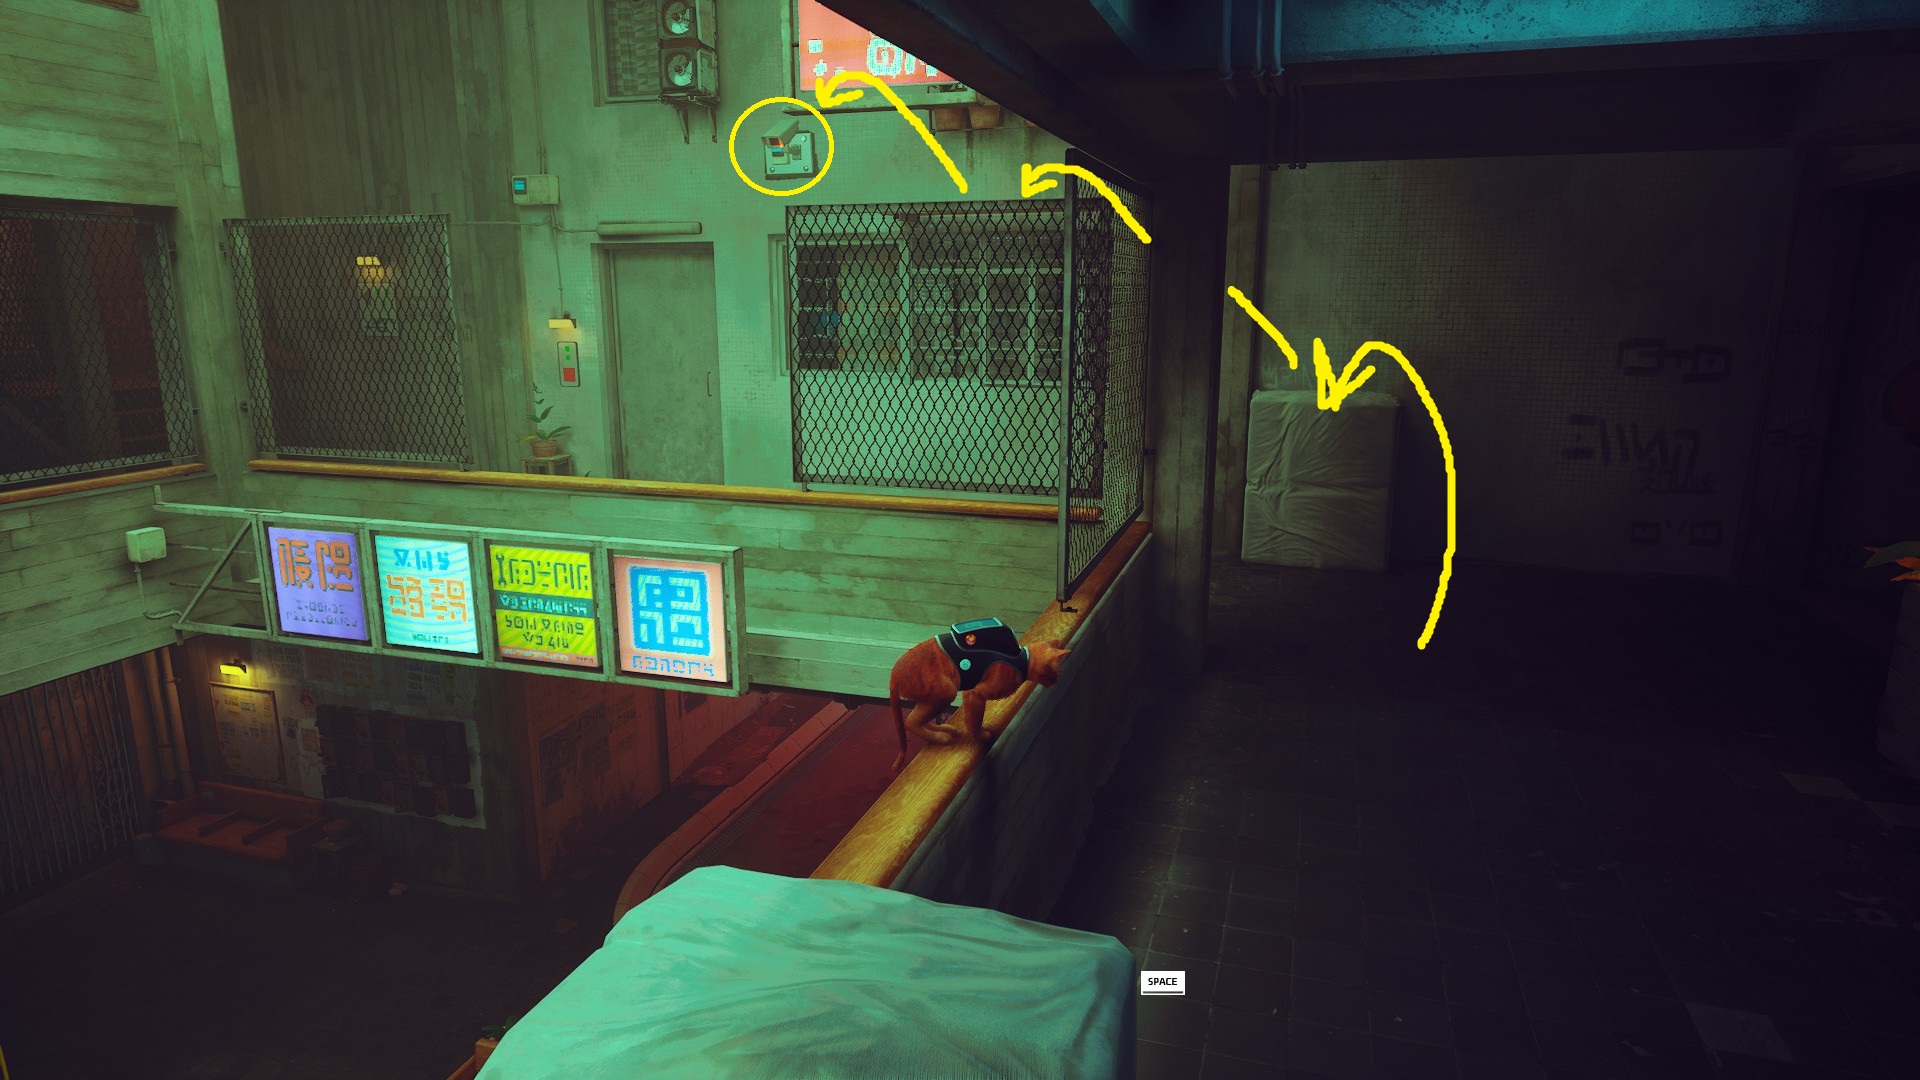
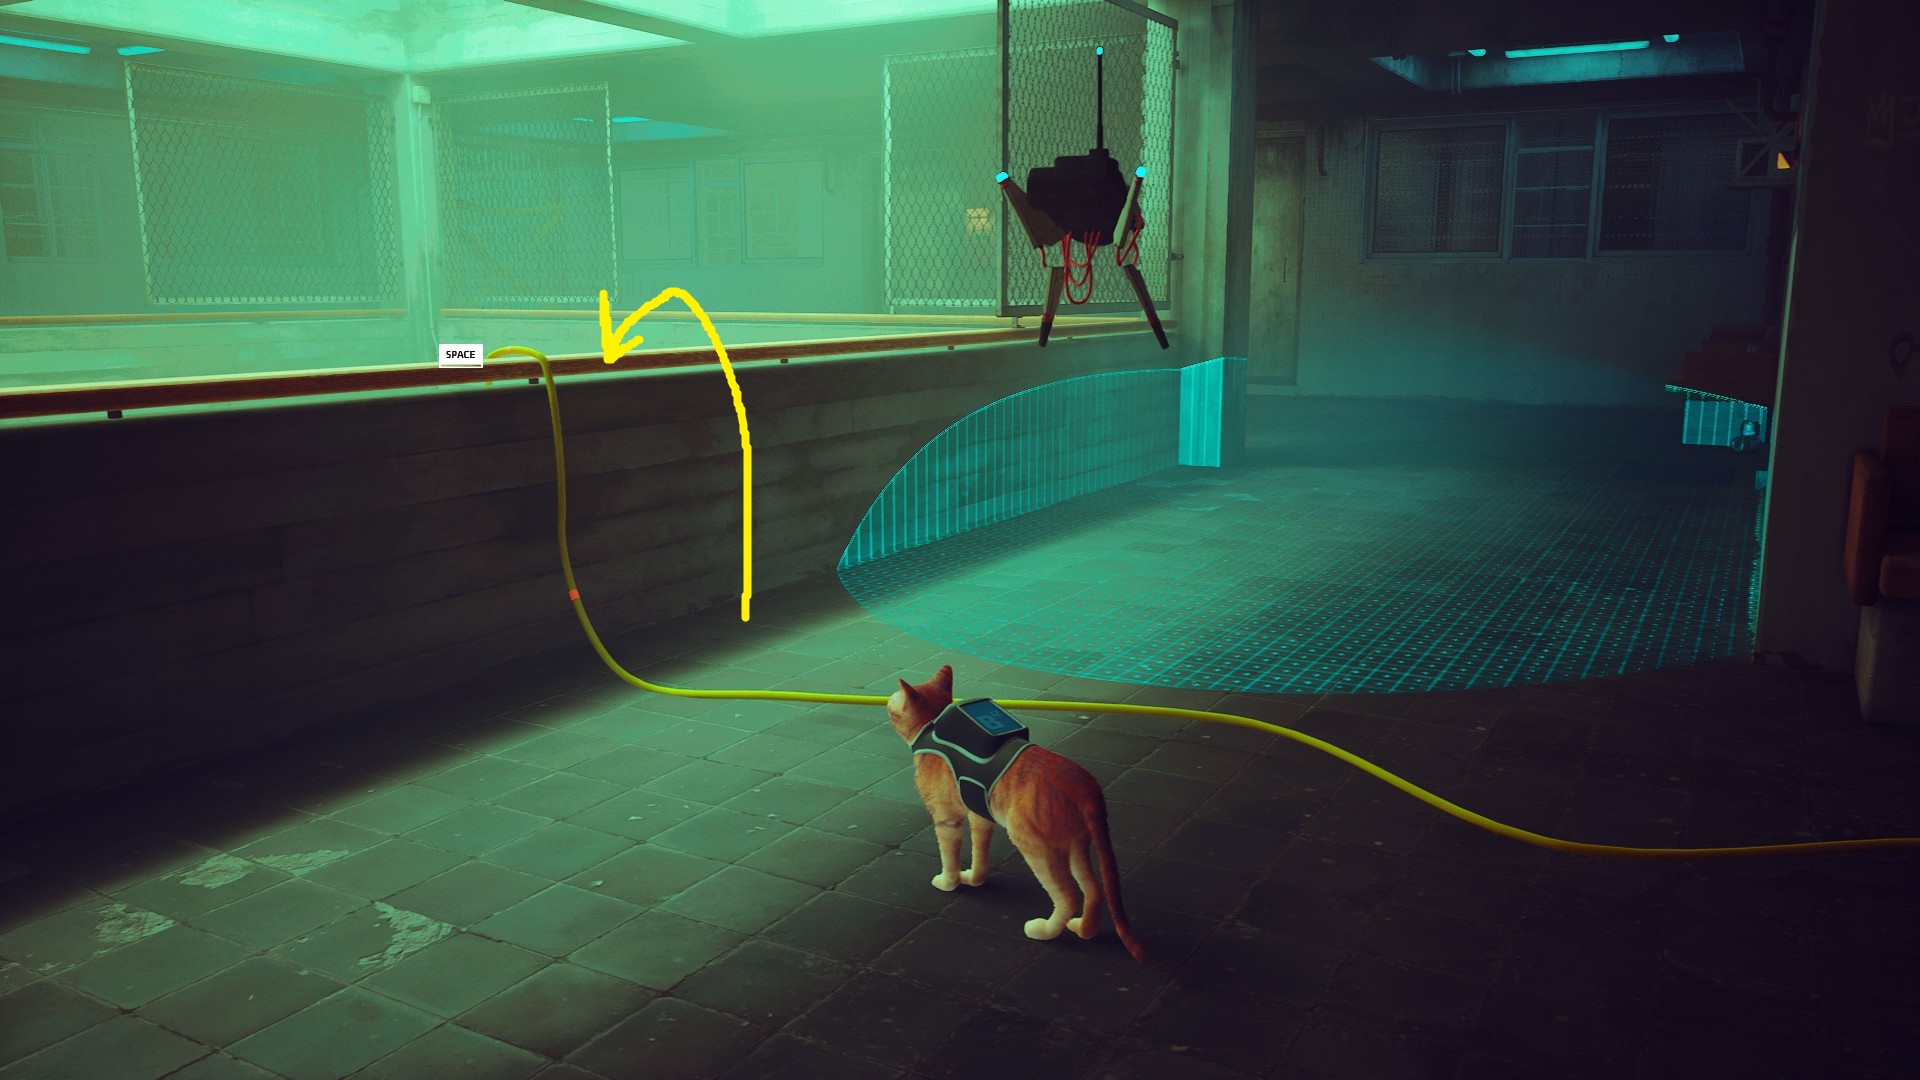
First, you’ll need to get the Cassette Tape from the robots hanging out in the courtyard of Clementine’s apartment. They won’t give it to you until you destroy the three cameras that point down into the courtyard, so turn left from the entrance of the complex and head up the stairs to the second floor (1).
At the top of the stairs, turn left twice to head back towards the courtyard (2), then hop up onto the railing (3). From there, you can jump onto the camera (4) — jump back to the railing and the camera will break. From the railing, you can see the second camera you need to jump on and off (5). From that camera, you can see the third and final camera you need to jump on (6).
123456
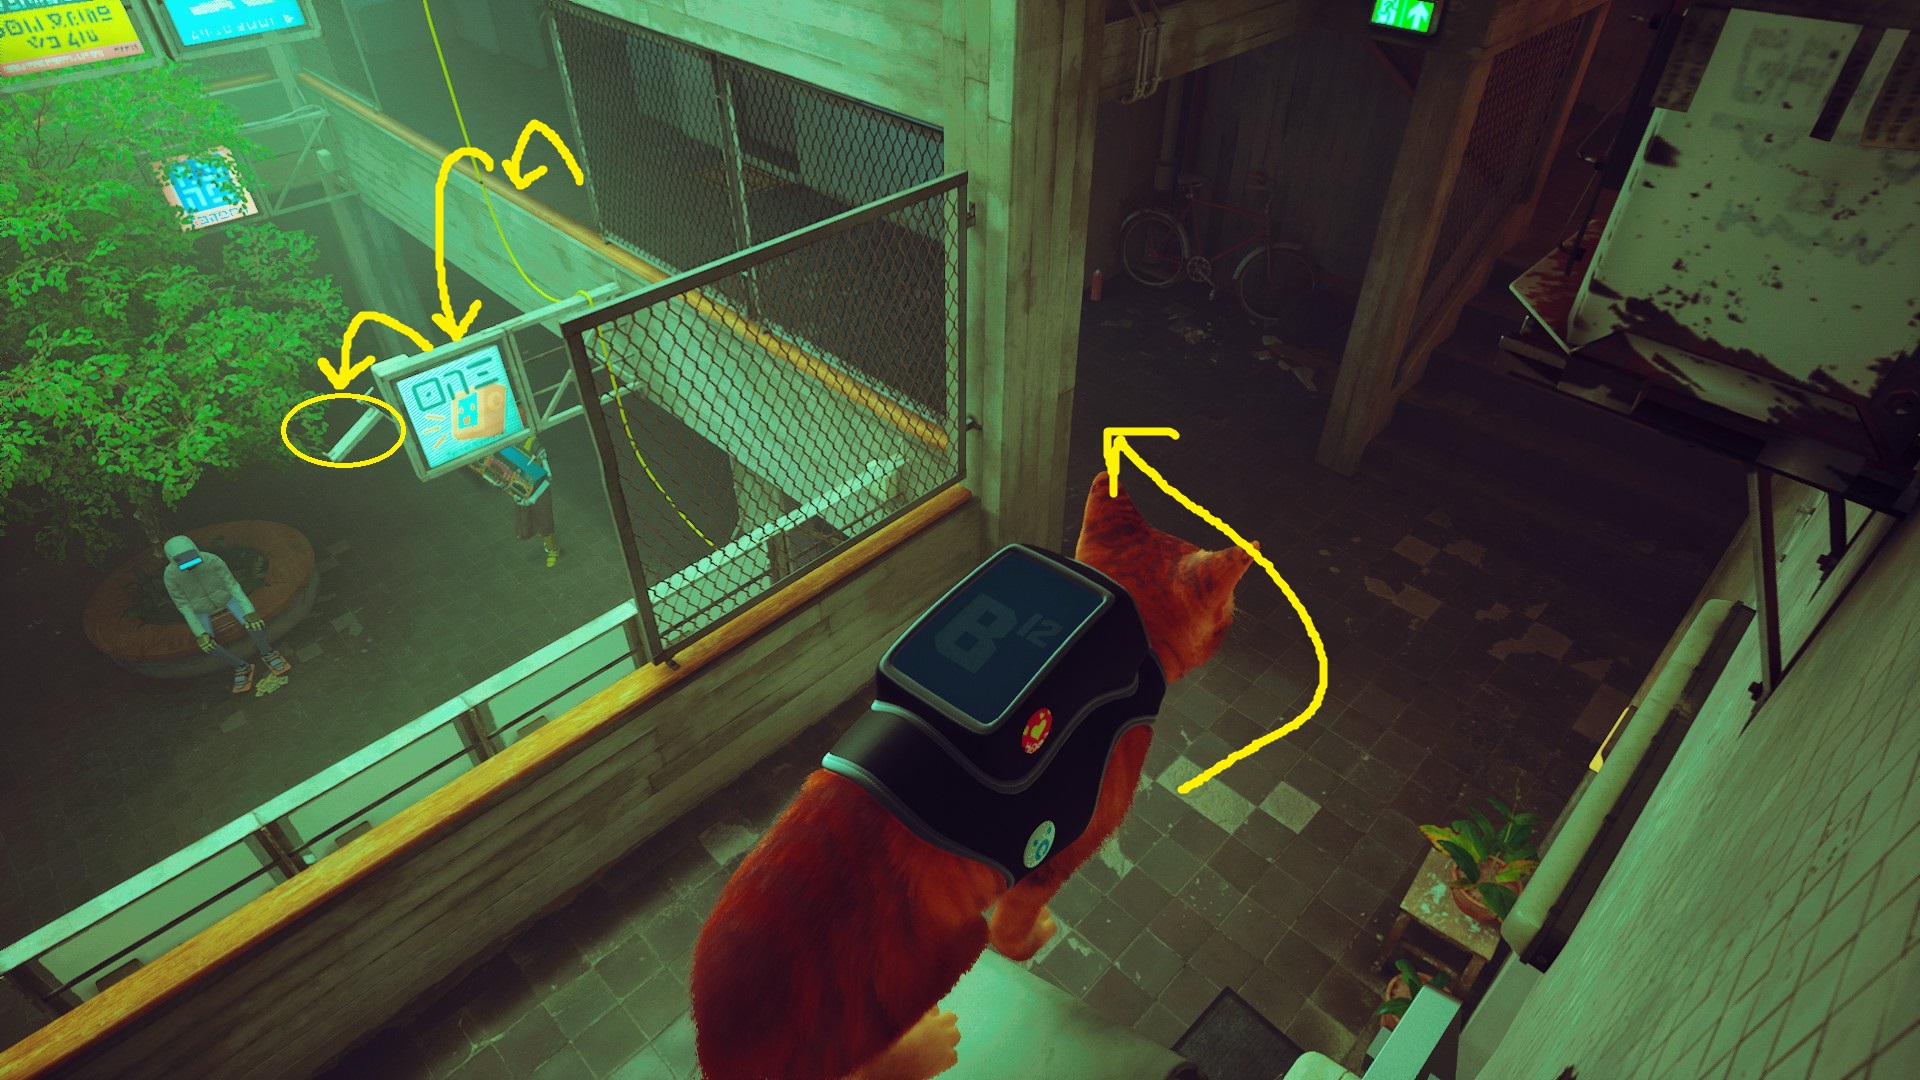
Once you’ve jumped on and off all three cameras, you can go back down the stairs to the first floor and pick up one of the cassettes from the feet of the robot sitting in the courtyard (1). Now that you have the Cassette Tape, head out of the apartment building and back to the roundabout. At the roundabout, you can see the clothing store on your left.
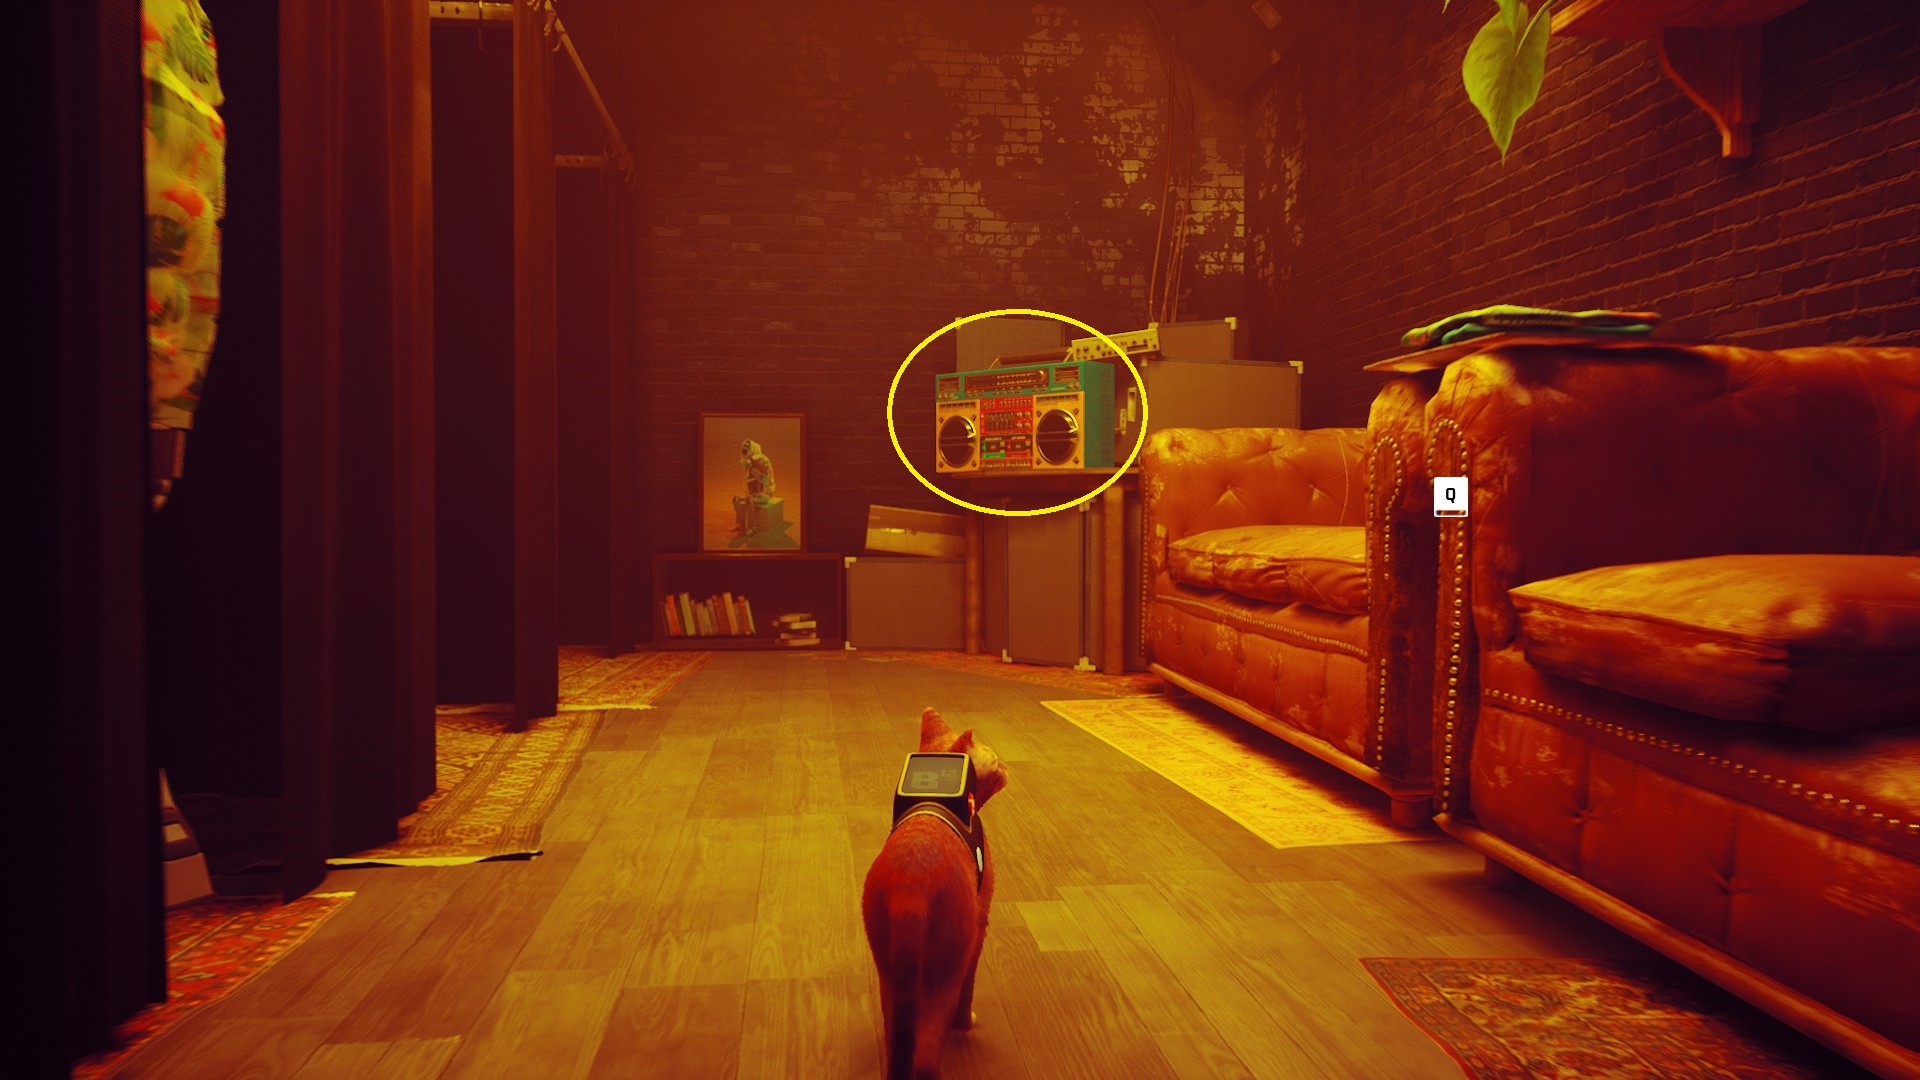
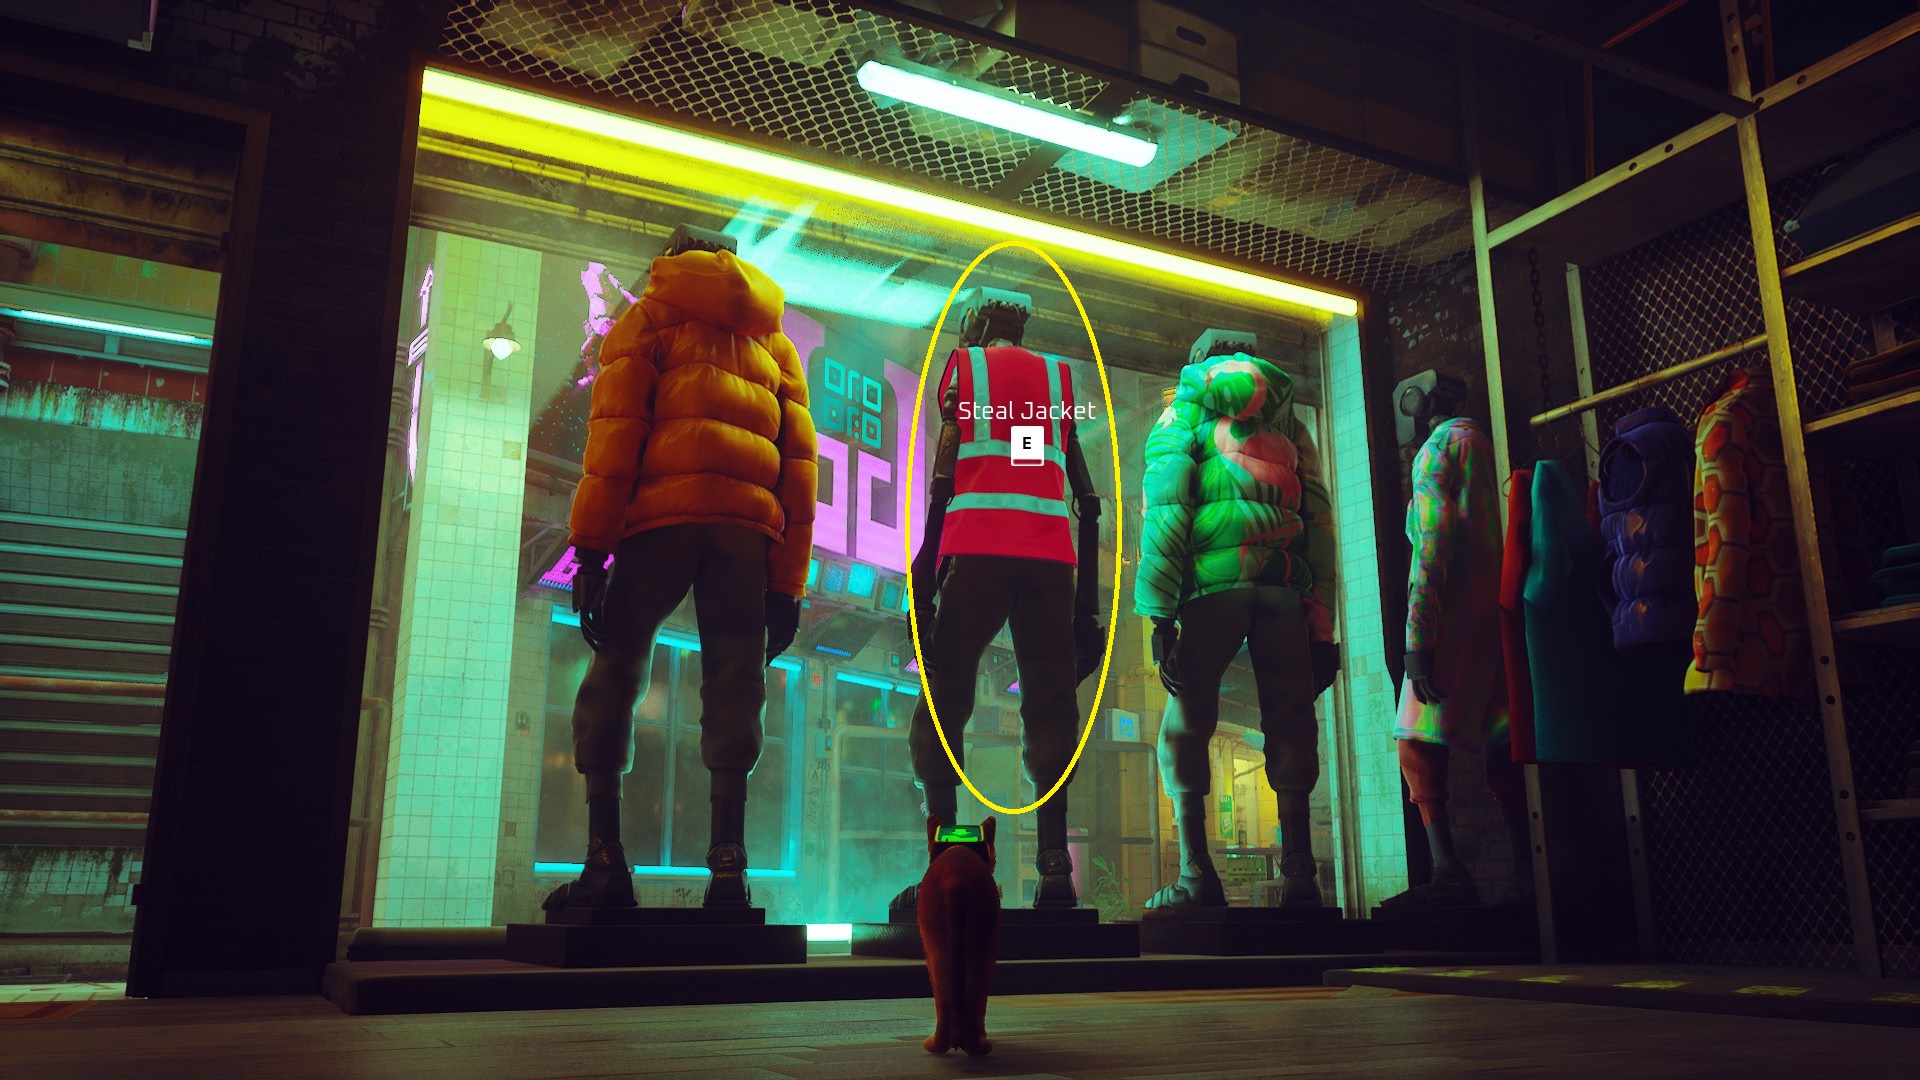
Head inside and make your way to the changing room in the back of the store, and interact with the stereo there (3). Use the Cassette Tape in the stereo, and then go back to the front of the store. The shopkeeper will go to turn off the stereo, and you can steal the Worker Jacket from the display window (4).
12
Once you have the Worker Jacket, you can head to the “Solution for getting the Worker Hat” section of this guide.
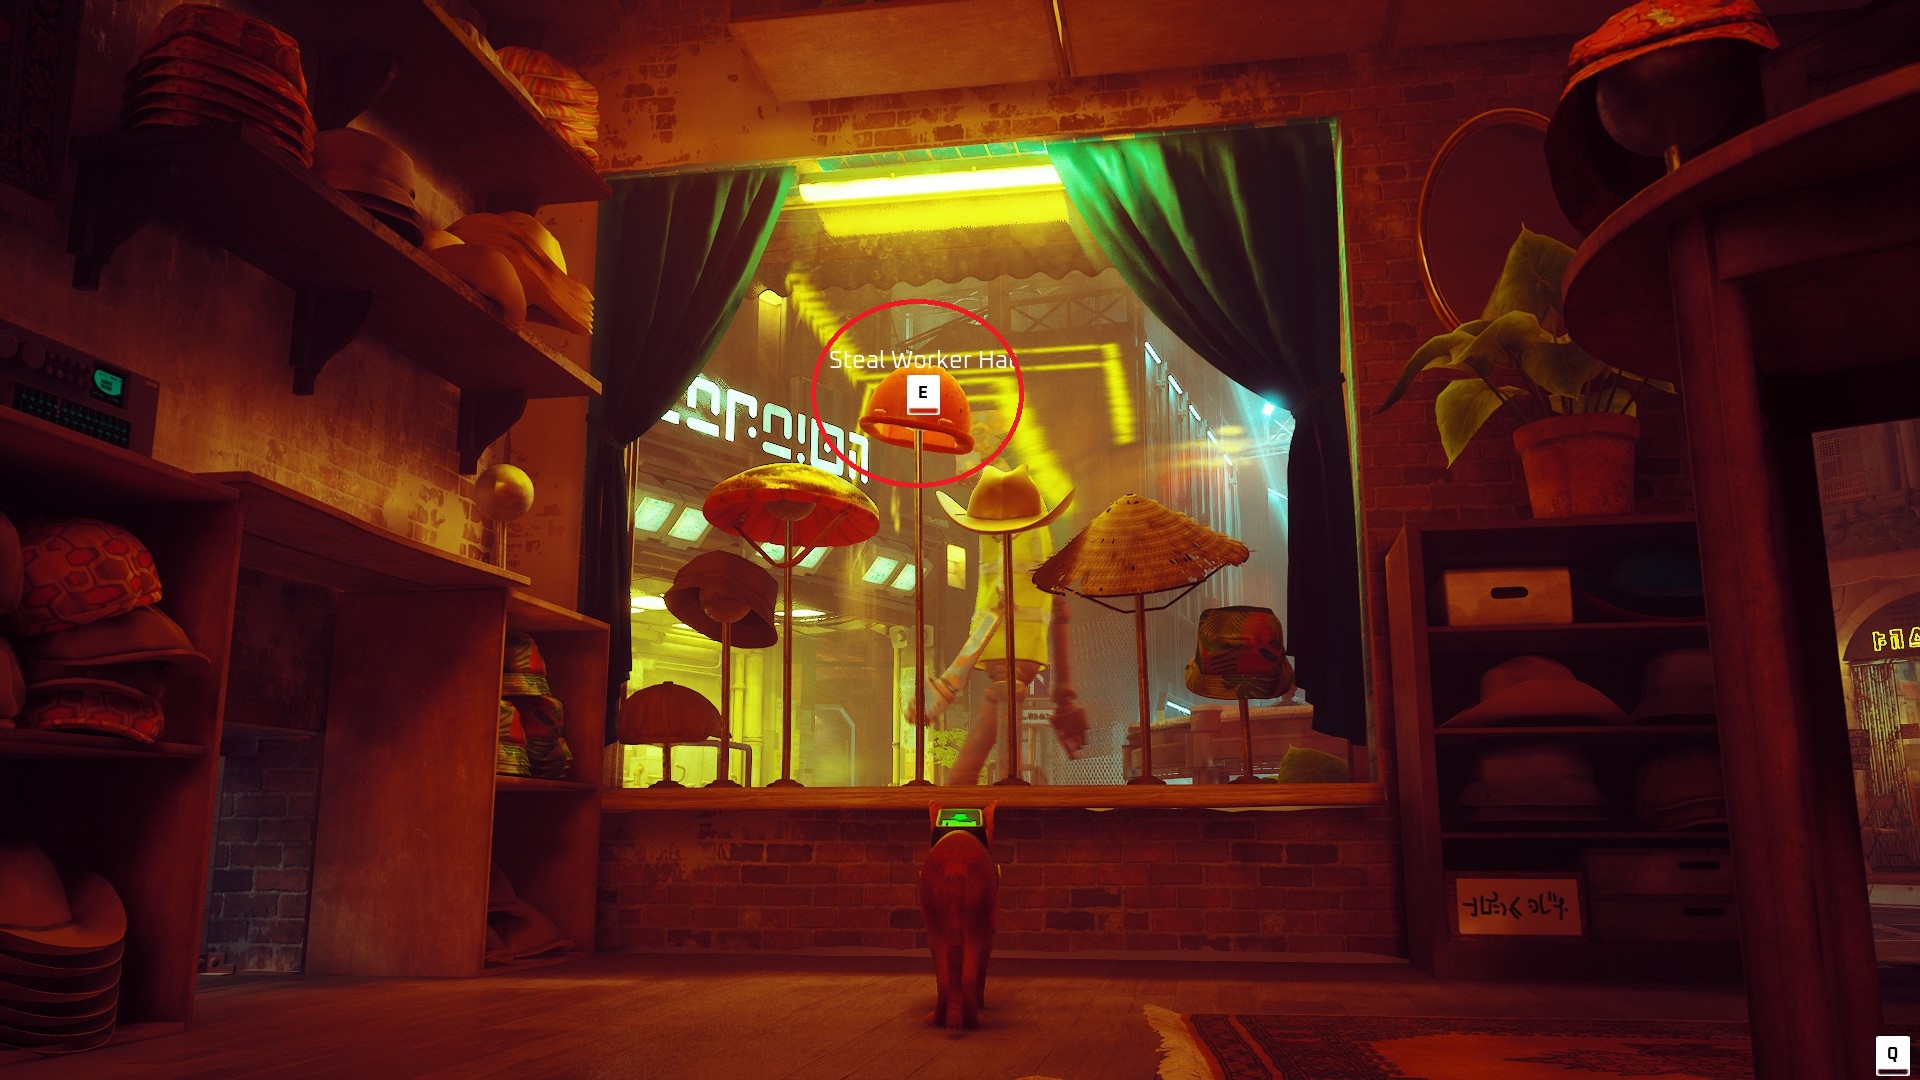
Find the hat shop, and talk to the worker waiting by the truck — he’ll give you a hint as to what you need to do next. Once you’ve solved that part of the puzzle, you’ll be able to find a way inside the shop by doing something cats love to do.
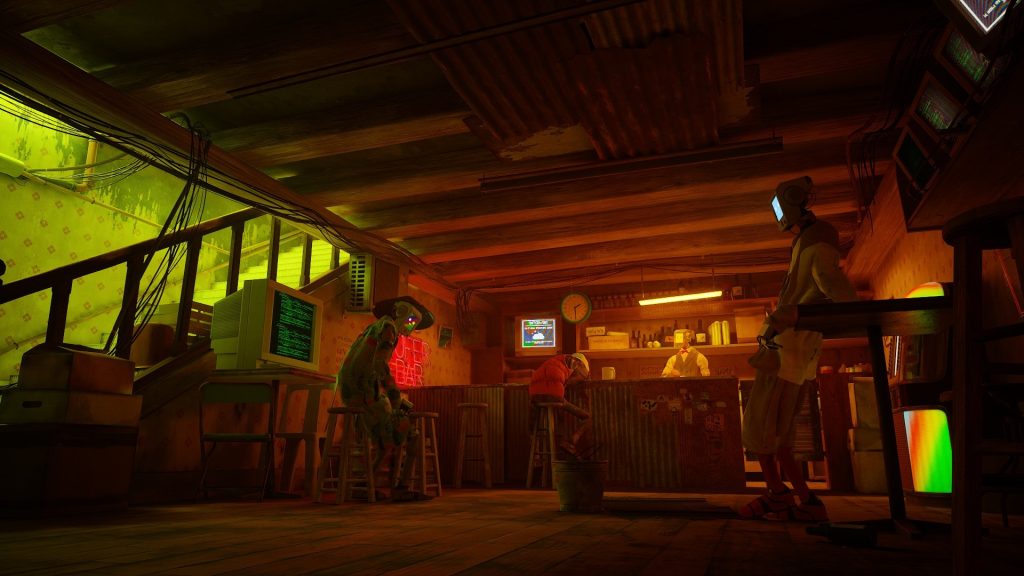
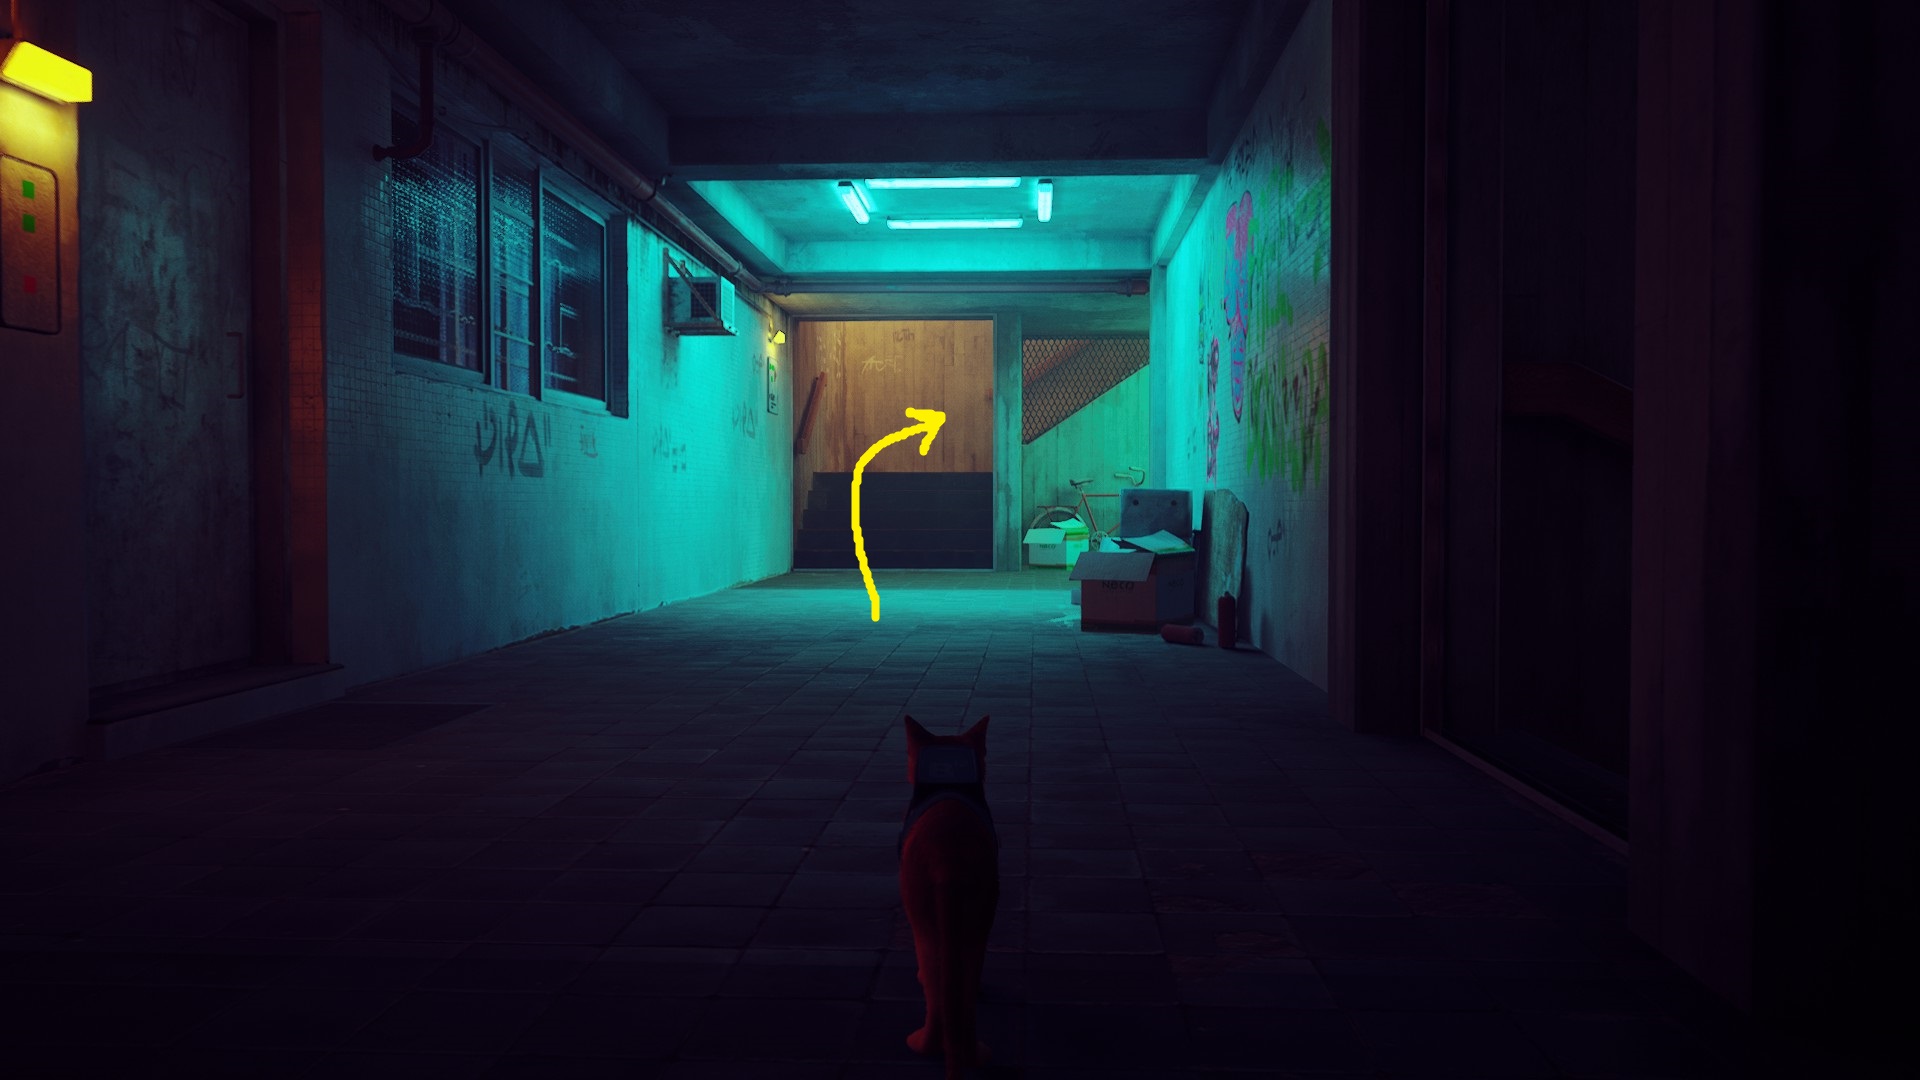
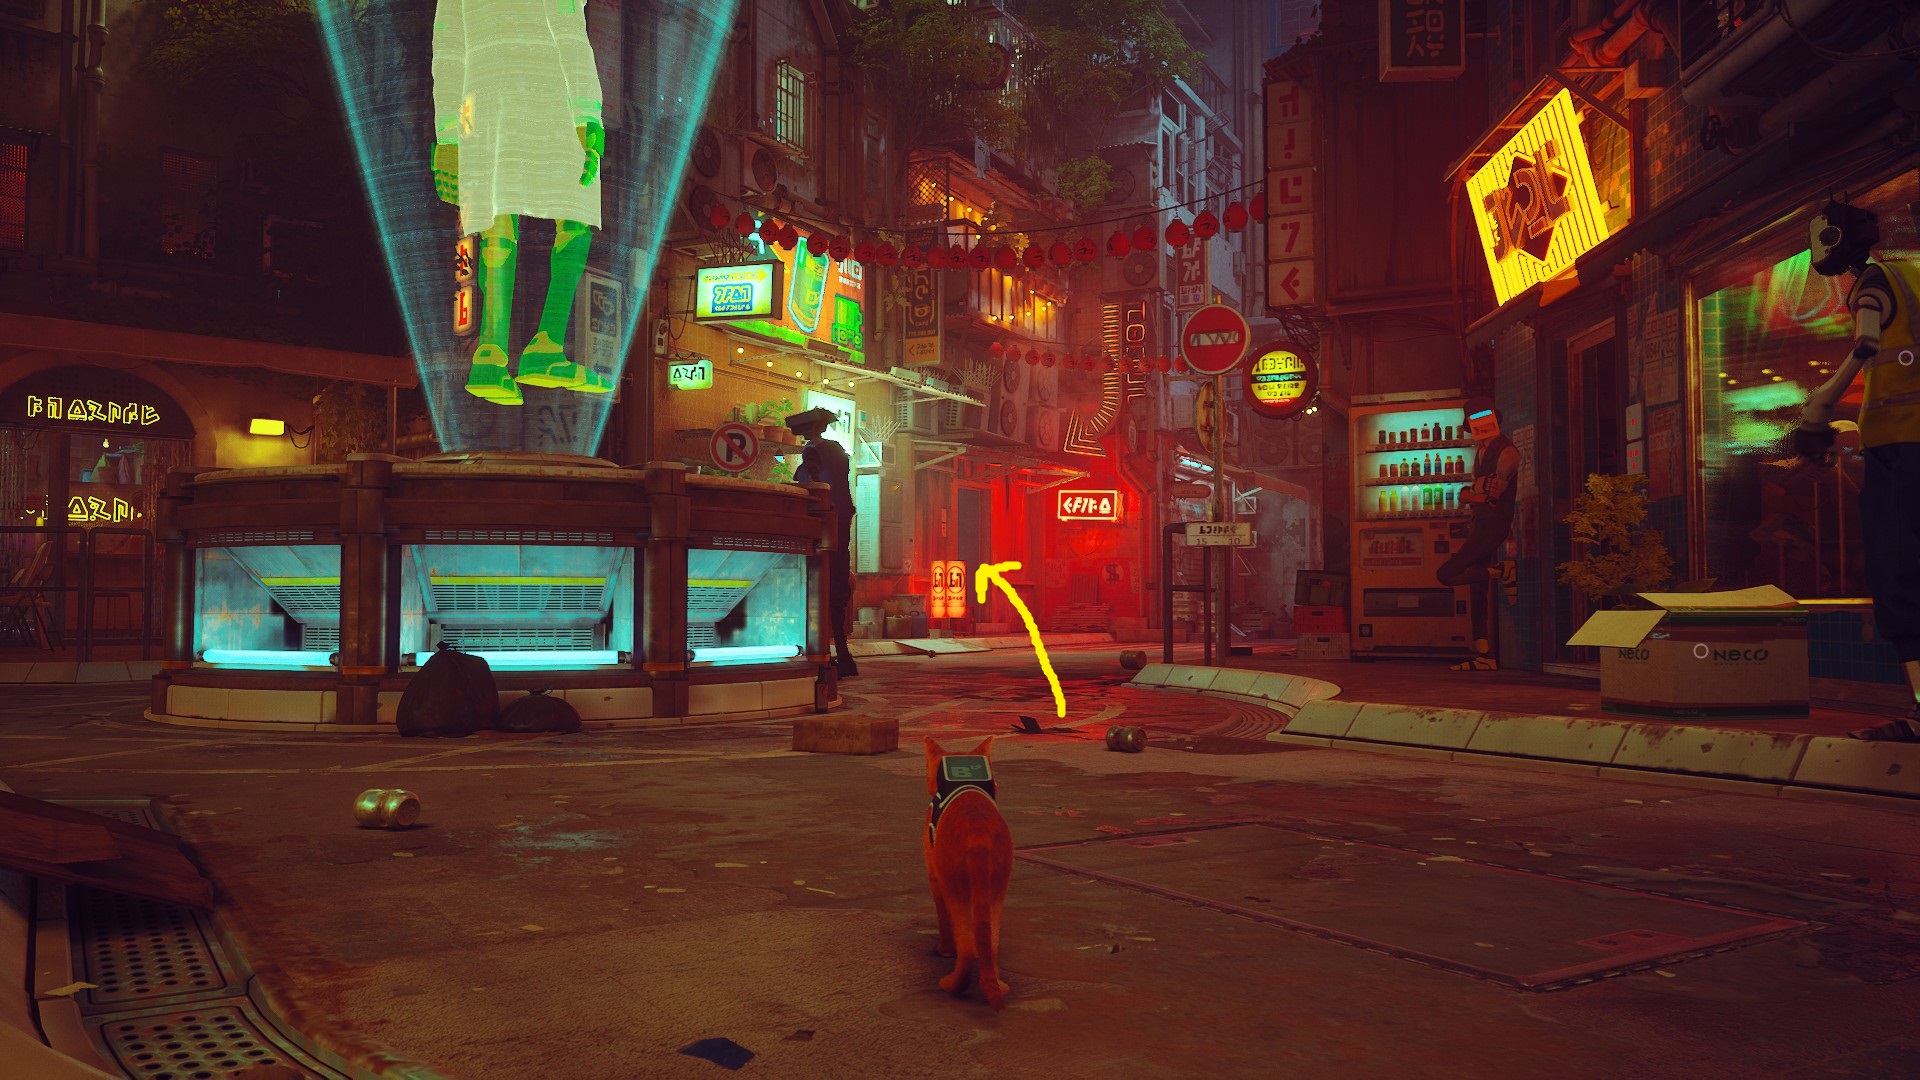
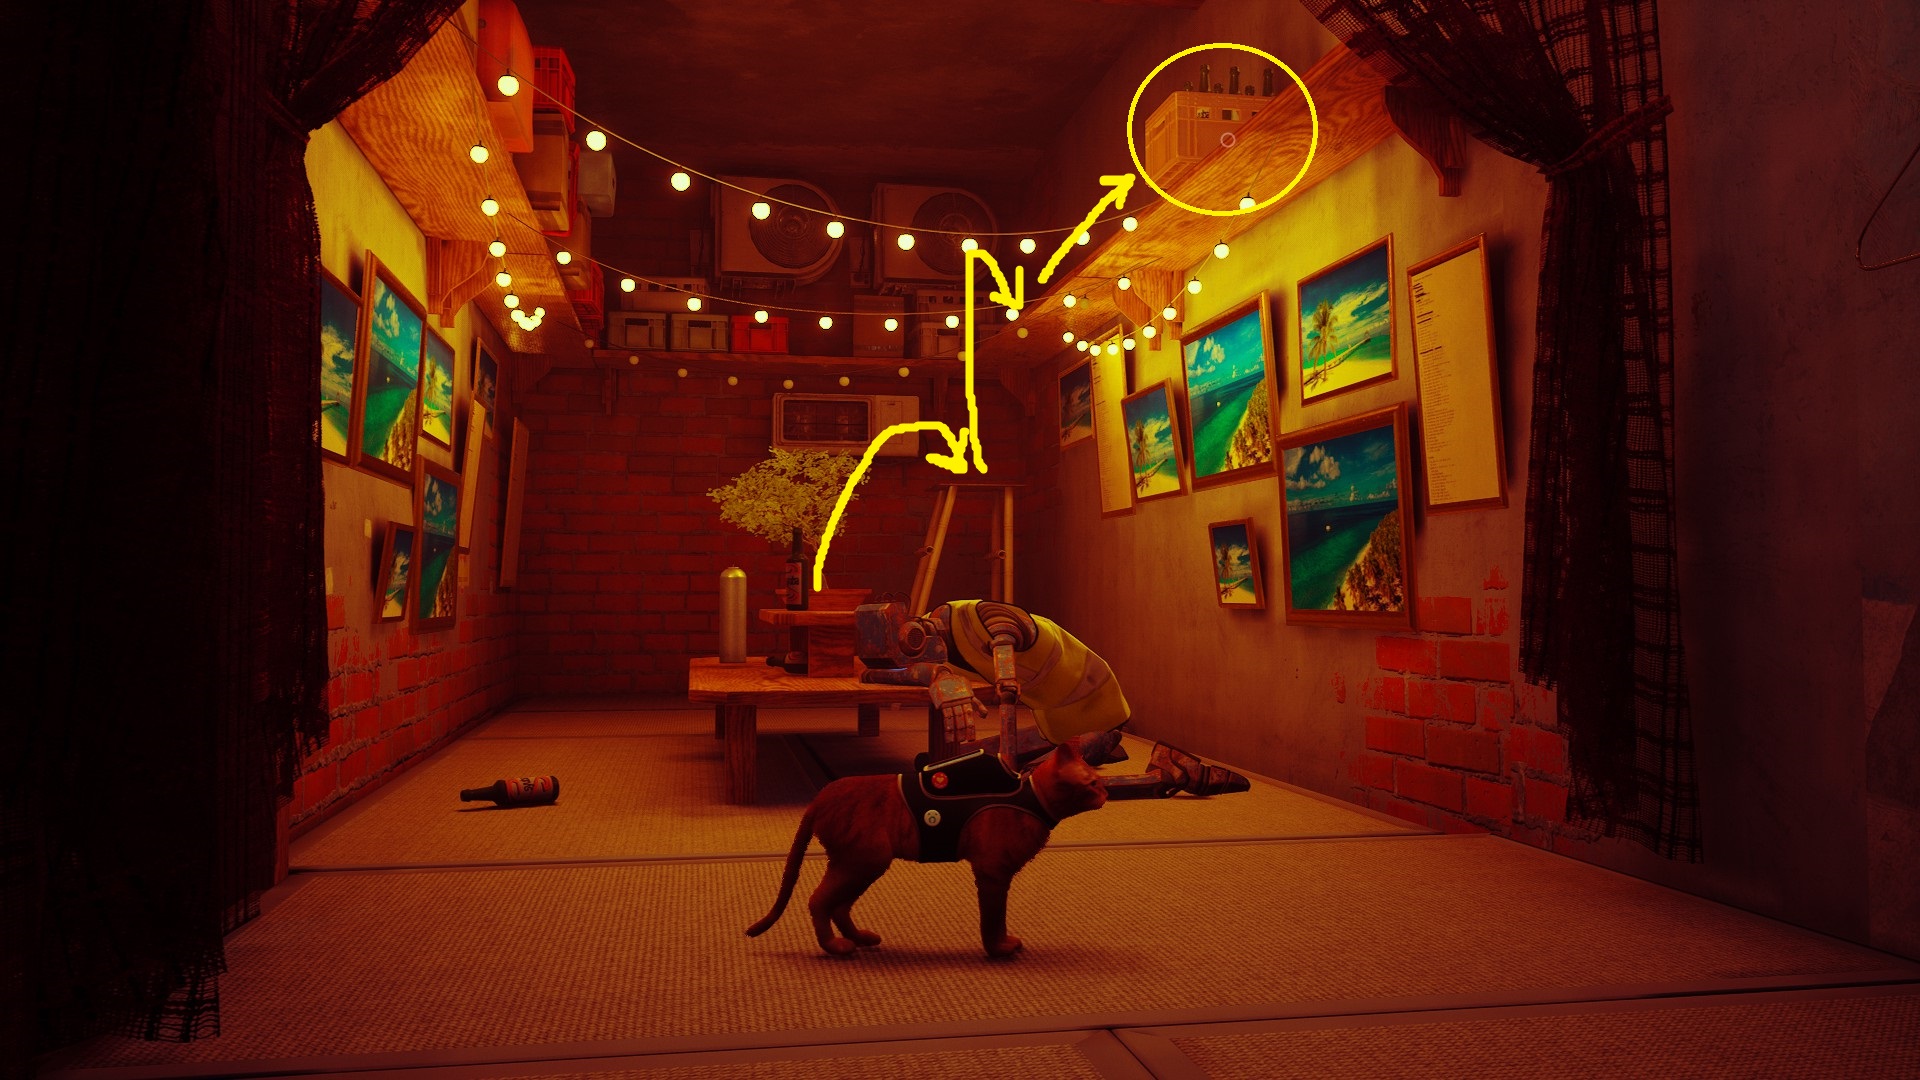
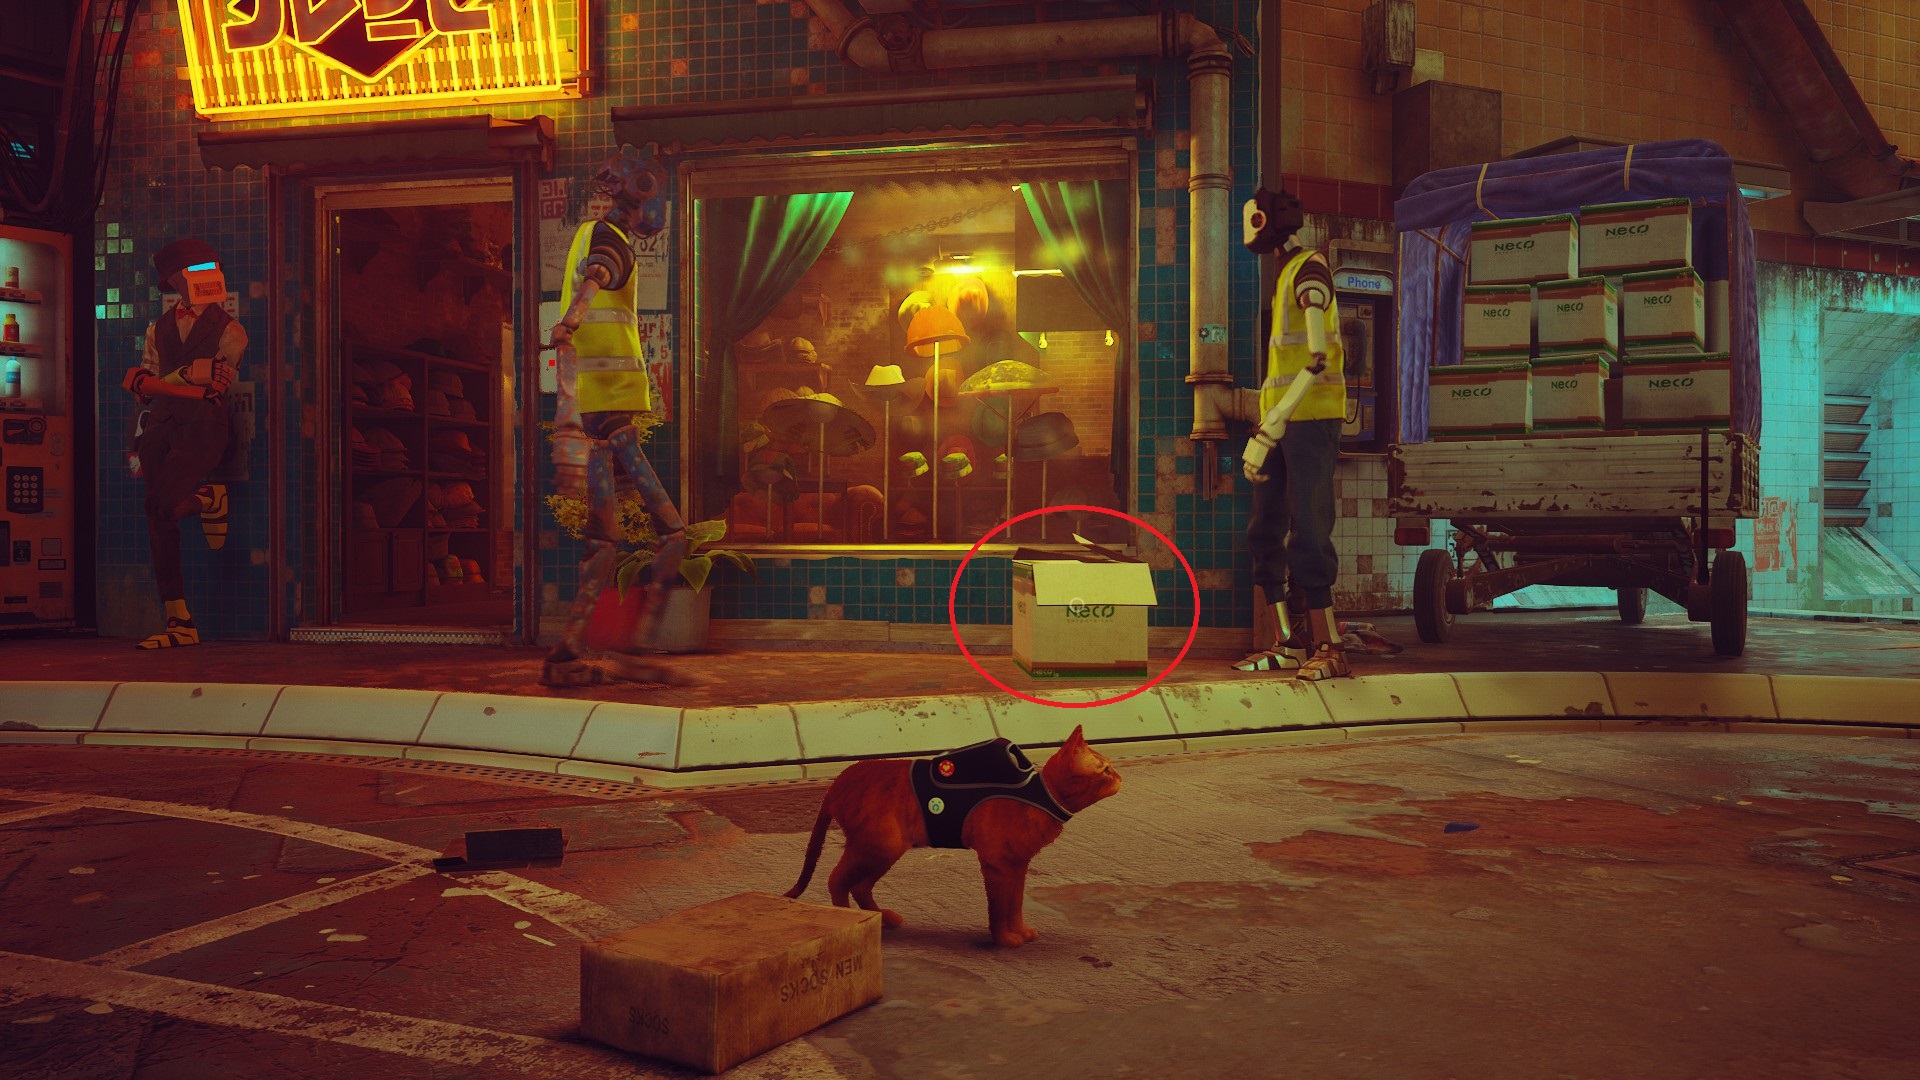
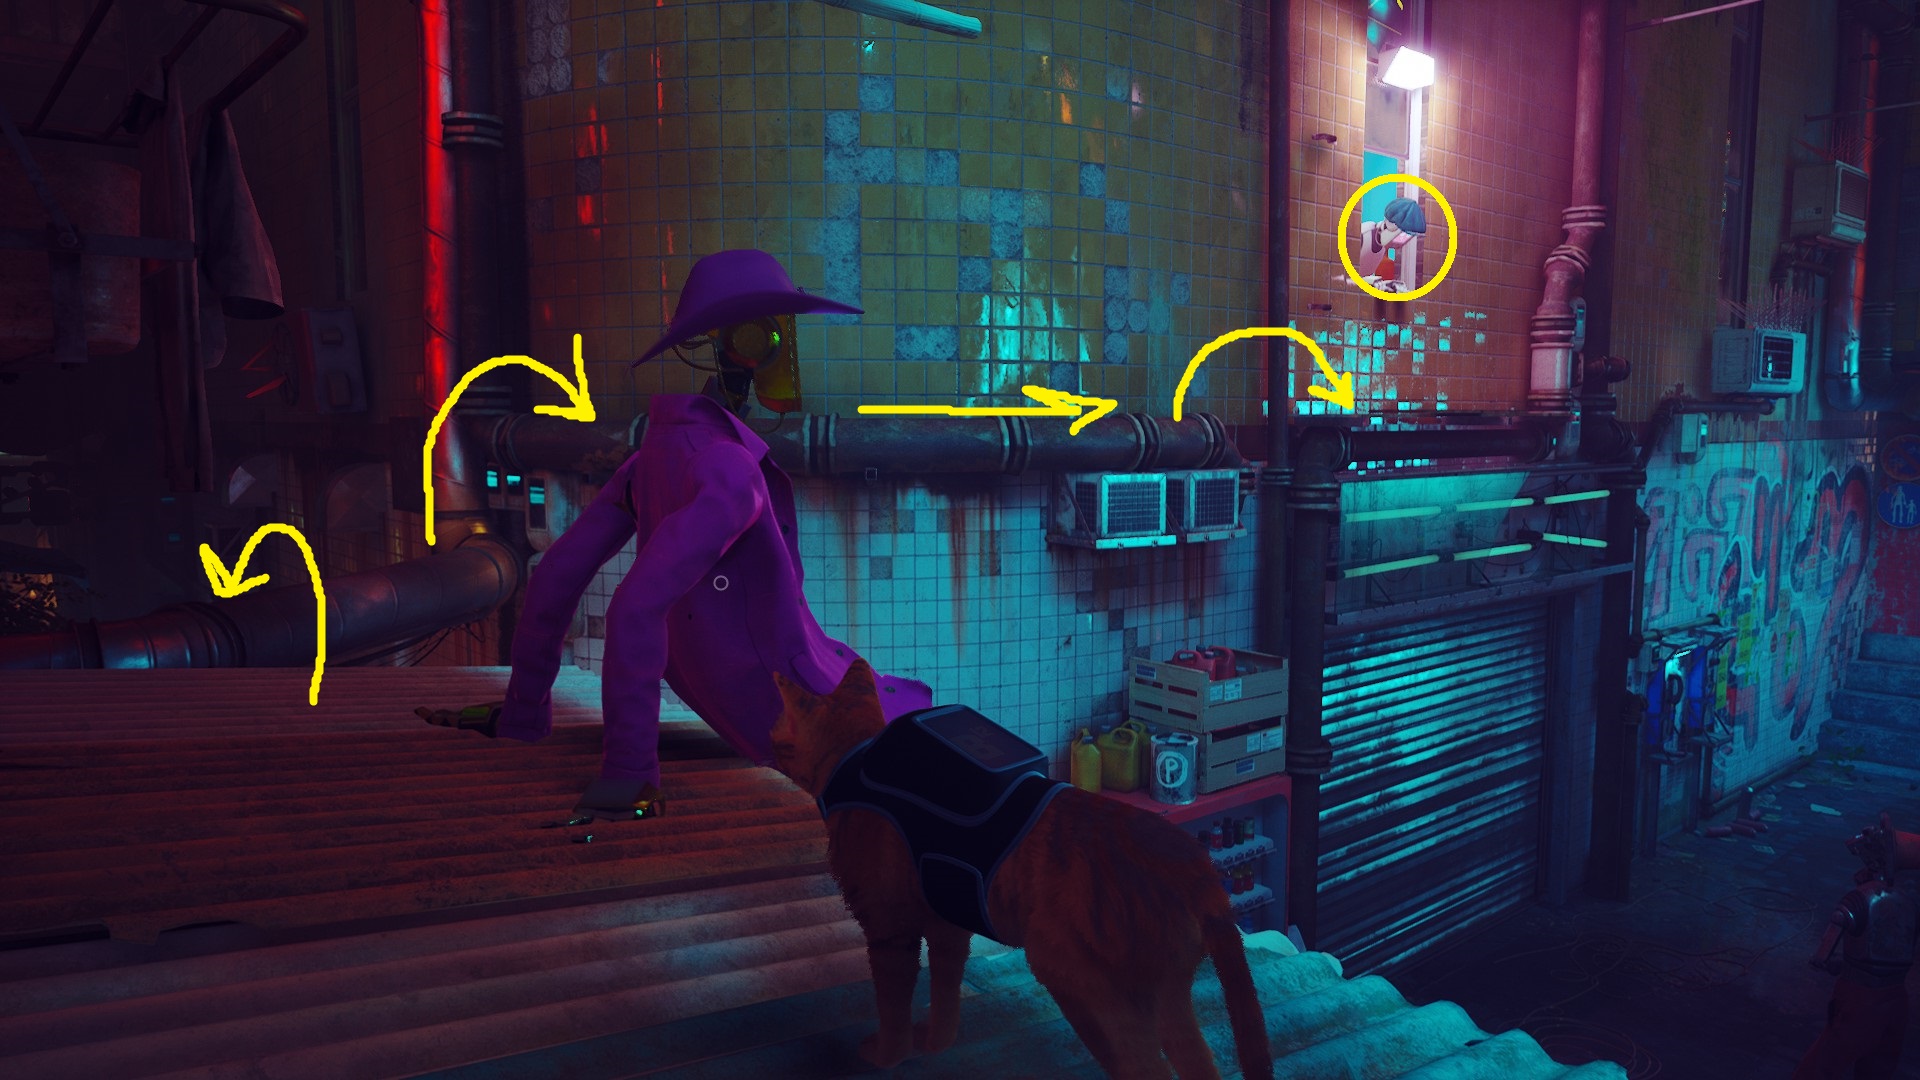
From the roundabout, look down the street that leads to Clementine’s apartment, and you’ll see an orangered neon sign that points to a bar (1). Head inside and make your way to the back room, where a worker is passed out. Use the stool to reach the shelf, and then knock the crate of bottles off the shelf (2). This will wake up the sleeping robot — follow it to the hat store, and then jump in the box sitting on the ground by the back of the truck (3). If you don’t jump in fast enough, don’t worry, they’ll carry in a bunch of boxes. Once you’re in a box and get carried inside the shop, hop out and grab the Worker Hat from the window display.
1234
The Neco Plant
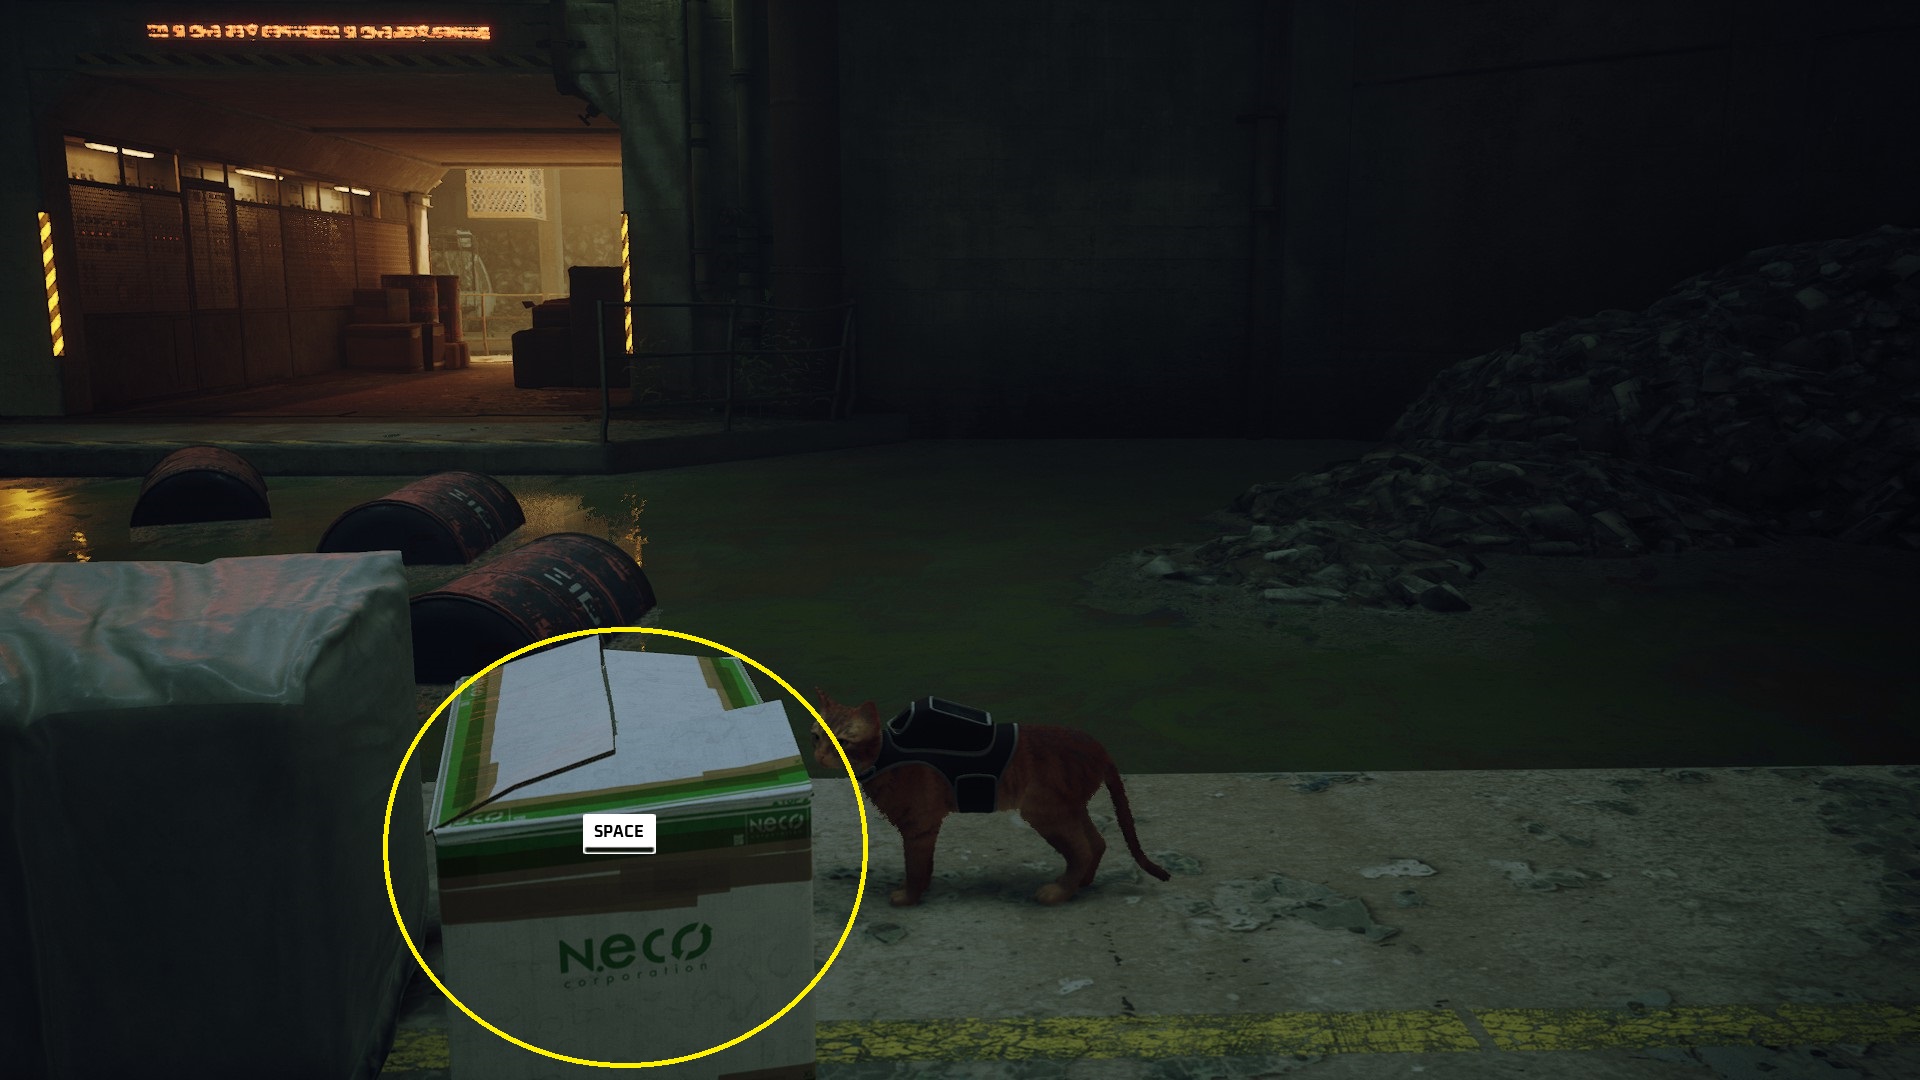
Once you have both the Worker Hat and Worker Jacket, return to Blazer and give him both items. After the cutscene finishes, jump into the box and Blazer will carry you across the checkpoint. He’ll set the box down — jump out and head onto the nearby bridge. This next section includes a bunch of stealth puzzles — while they’re more straightforward than the game’s other puzzles, the solutions will be hidden for players who want to try them first on their own.
Pay attention to the location of the boxes throughout this section. If you get spotted by a drone, run to the nearest box and hop inside, and the drone will eventually forget about you.
A drone is patrolling the area ahead on the other side of the bridge, and its detection range is clearly indicated by the blue light it emits.
Wait for the drone to move to the left side of the bridge, run past it to the right, then turn left to go around the corner.
In the next room, you’ll have to avoid two drones to continue through the doorway on the far side.
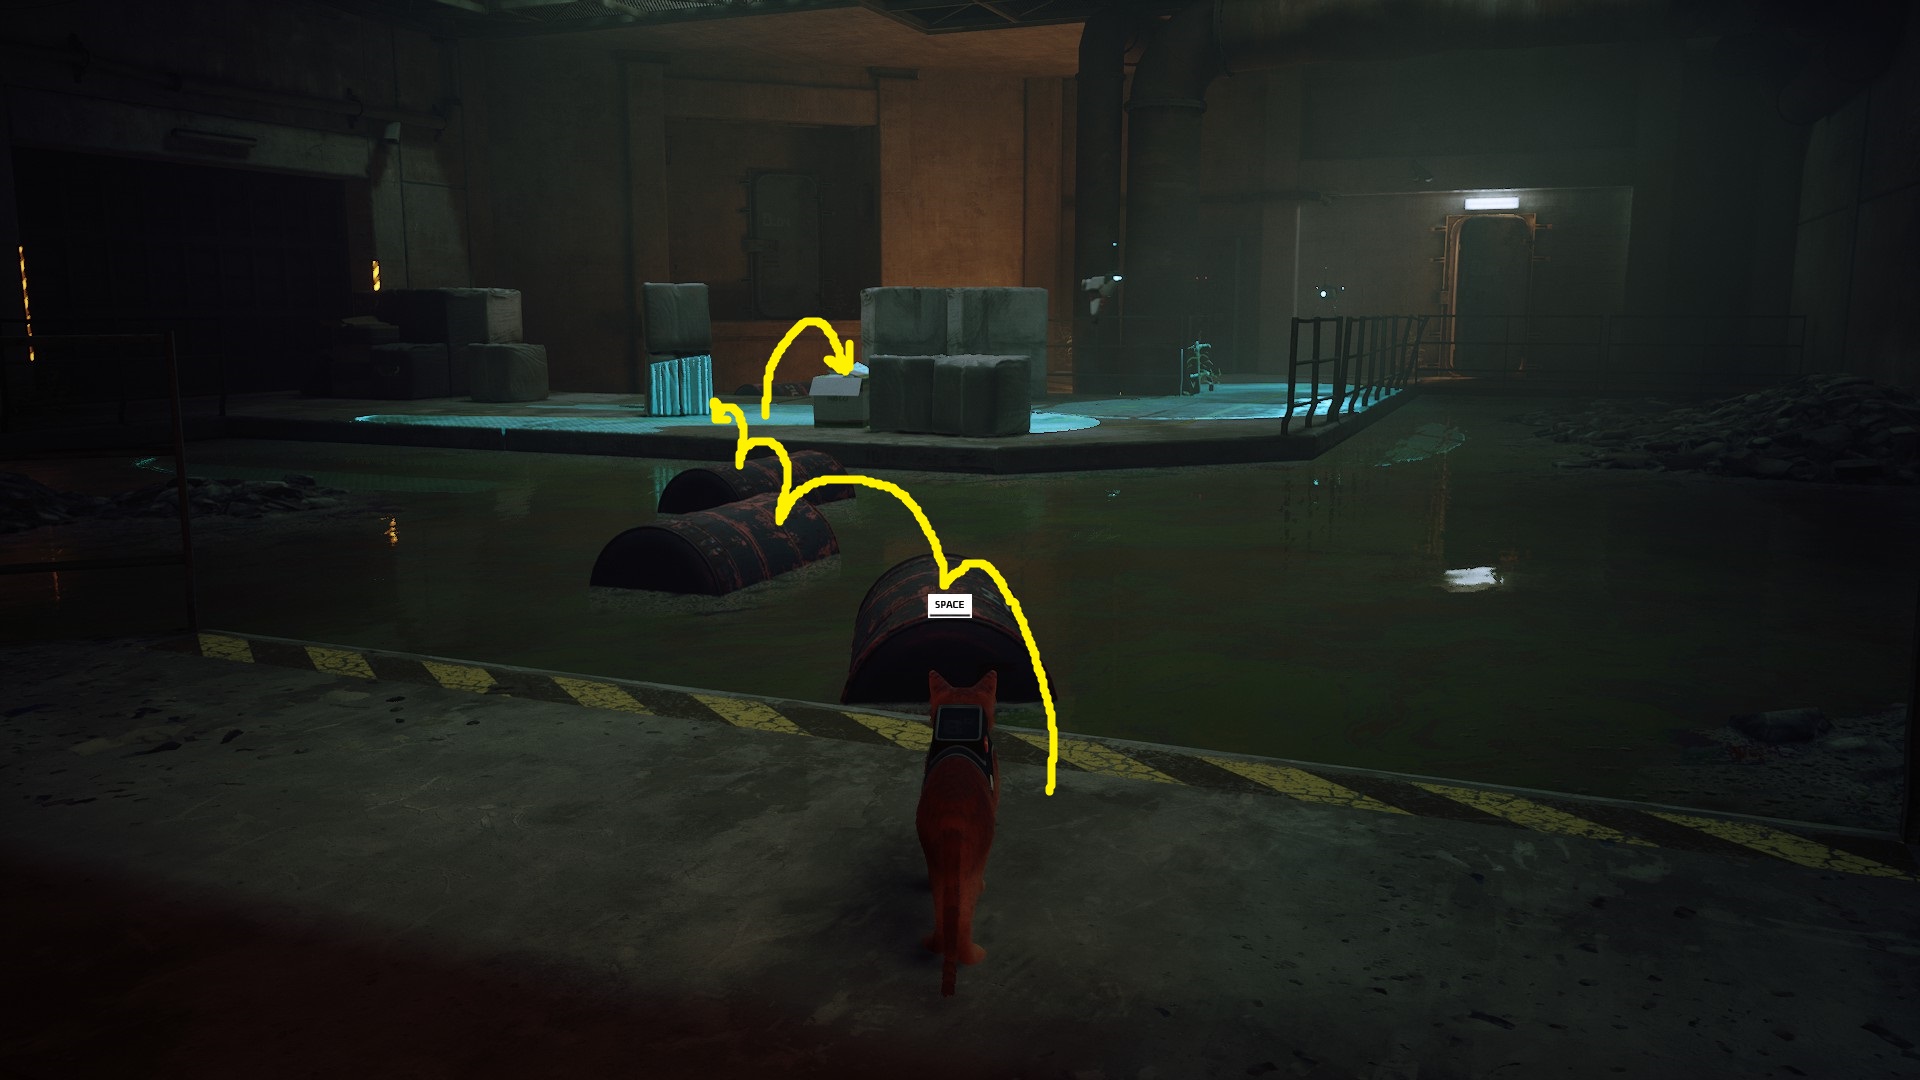
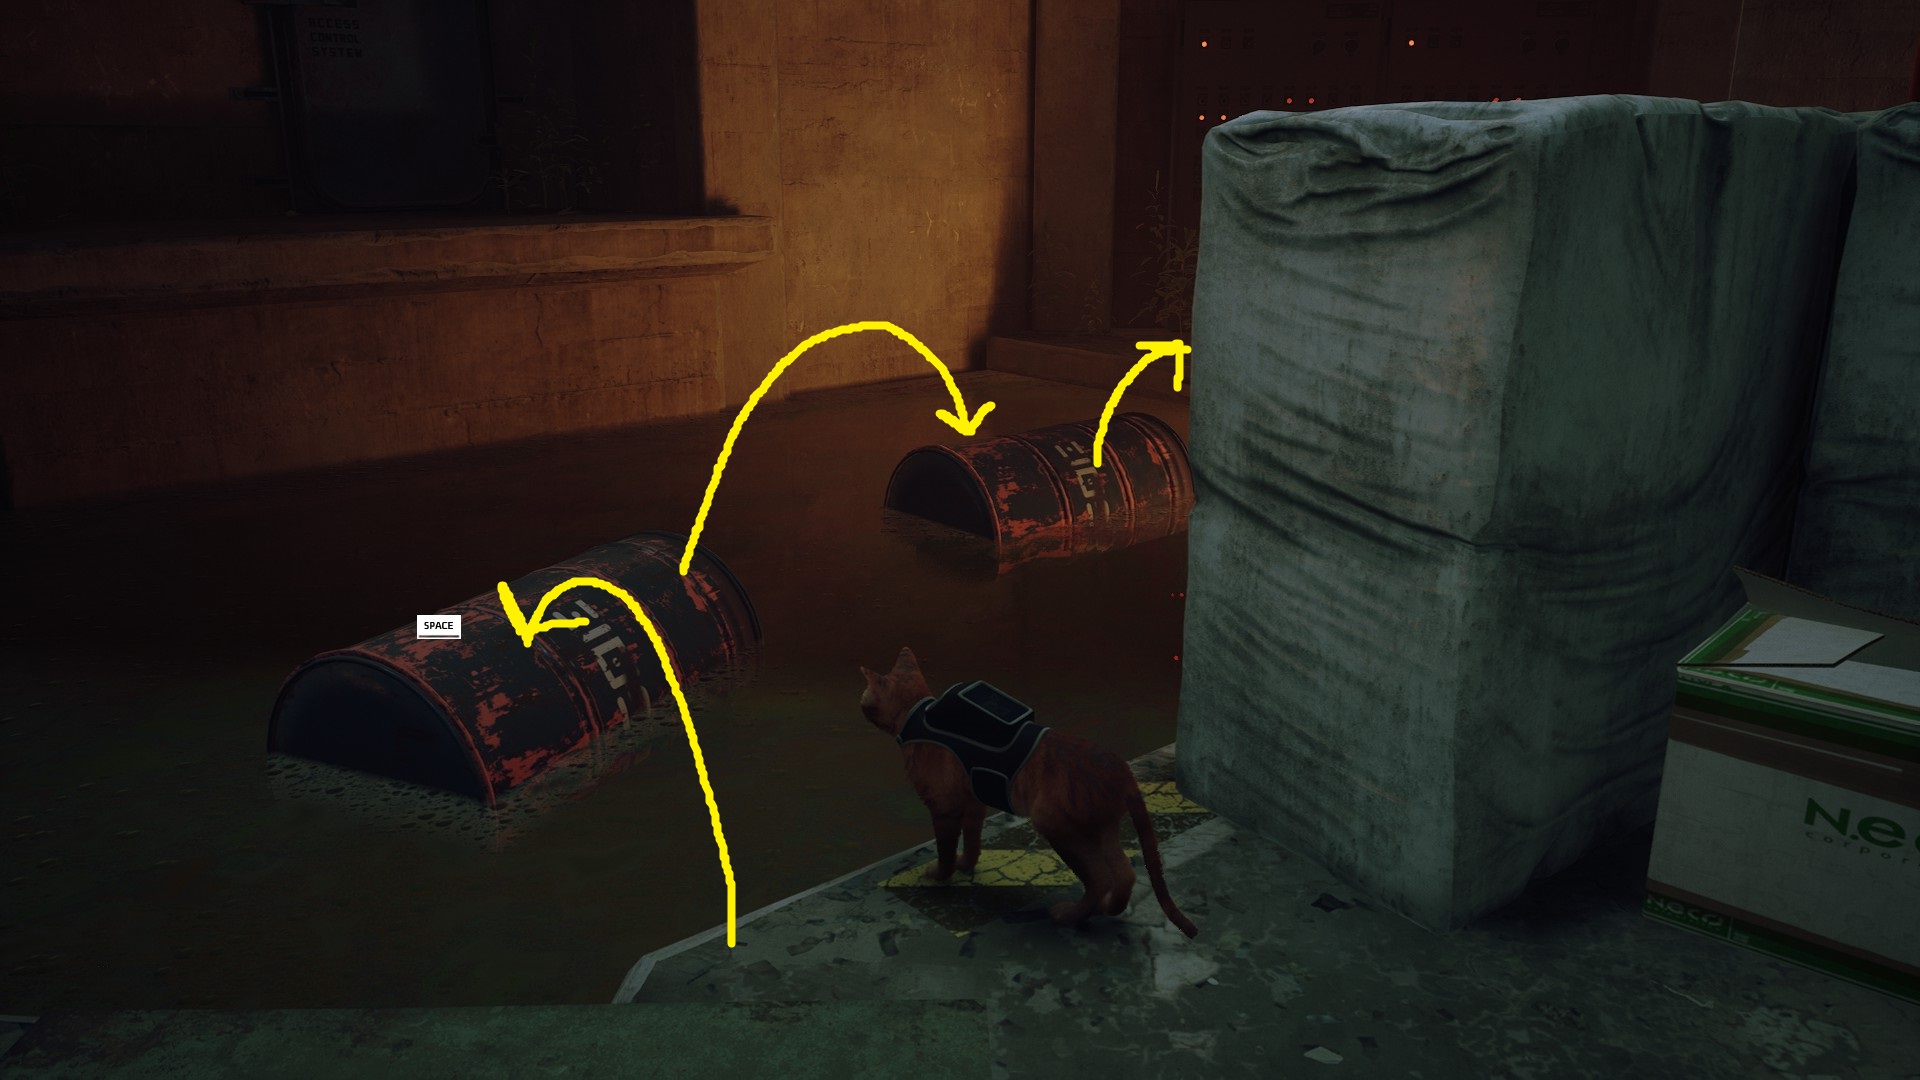
Wait for the patrolling drone to move from the right side of the platform to the left side — once it begins moving left, start hopping across the barrels, and jump into the box on the other side. Once the drone passes the box moving right, jump out of the box and cross the platform to the barrels in the water — use these to get behind the drone guarding the door, and head through.
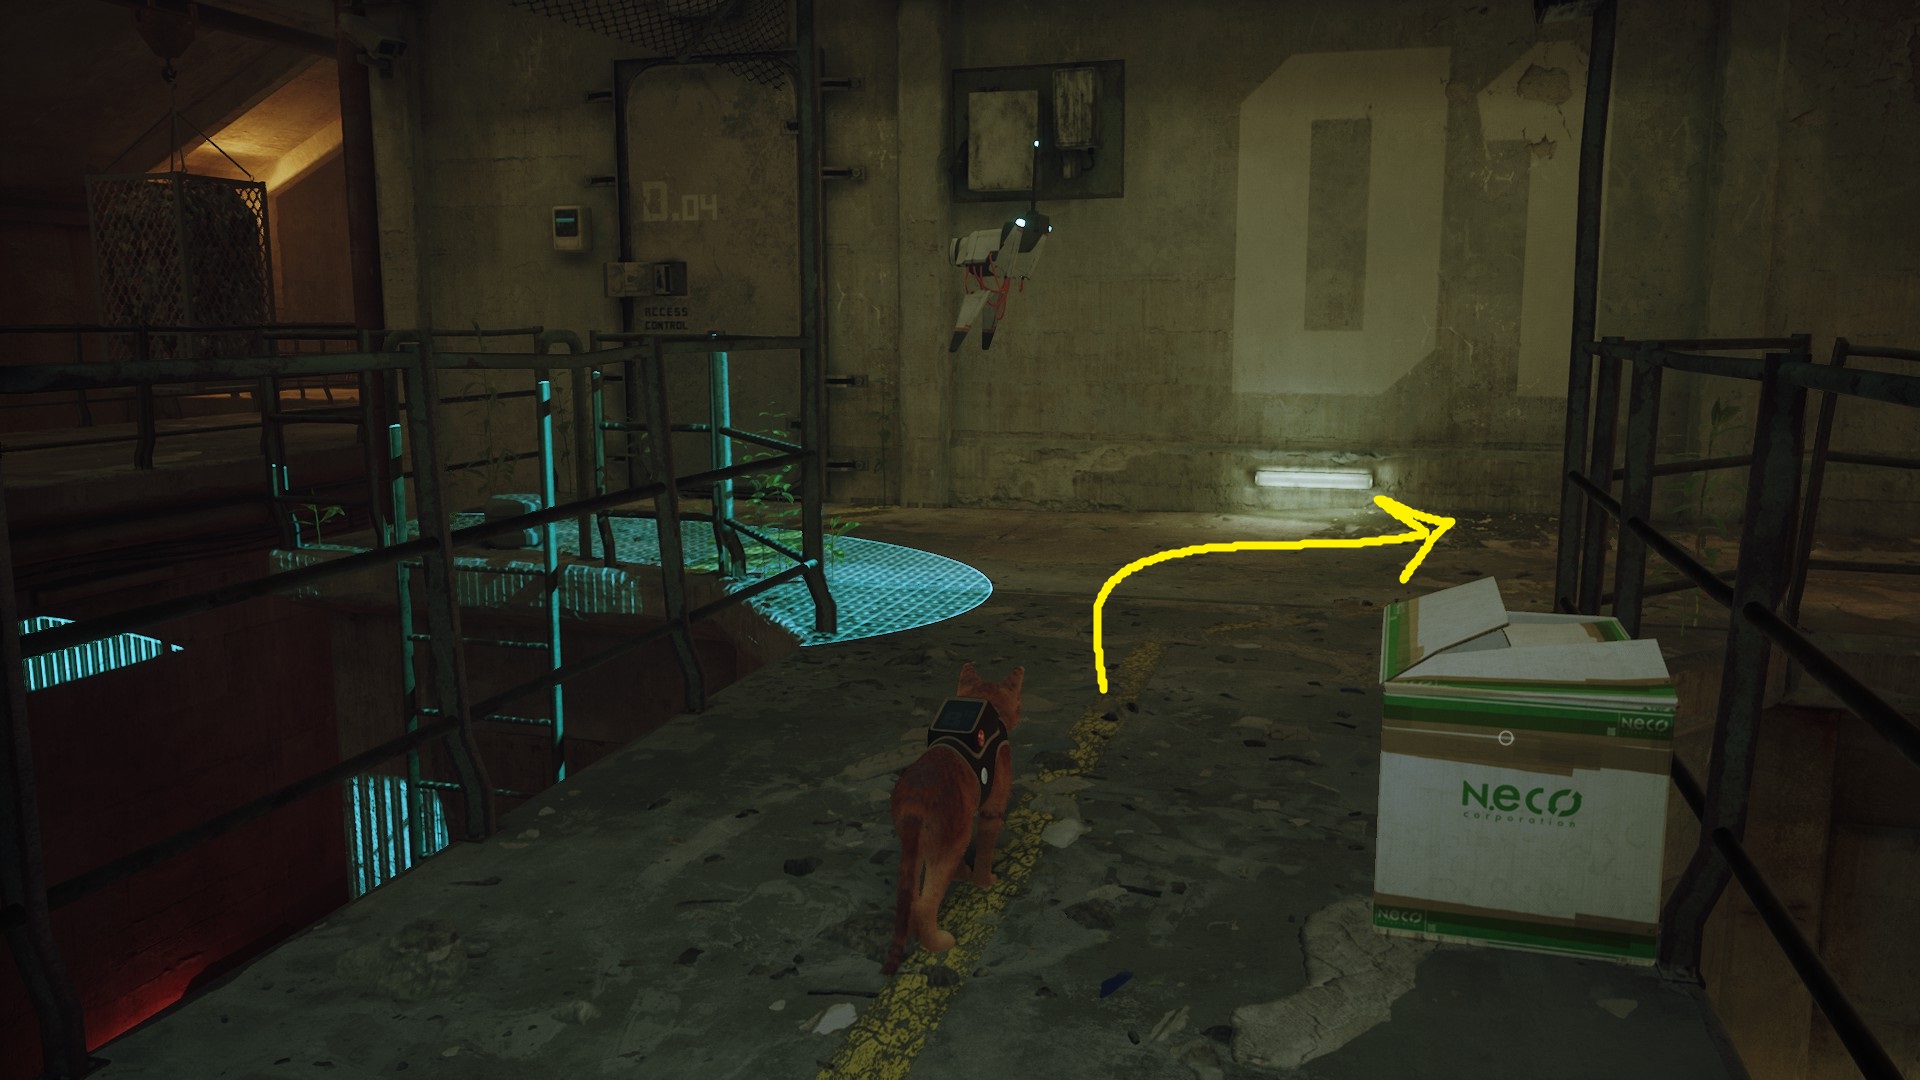
In the next area, you’ll be able to meet a worker who’s looking for their keys, which you can find later on in this area and then return to him for a badge. You’ll then need to find a way to get the door on the left side of the room open in order to proceed.
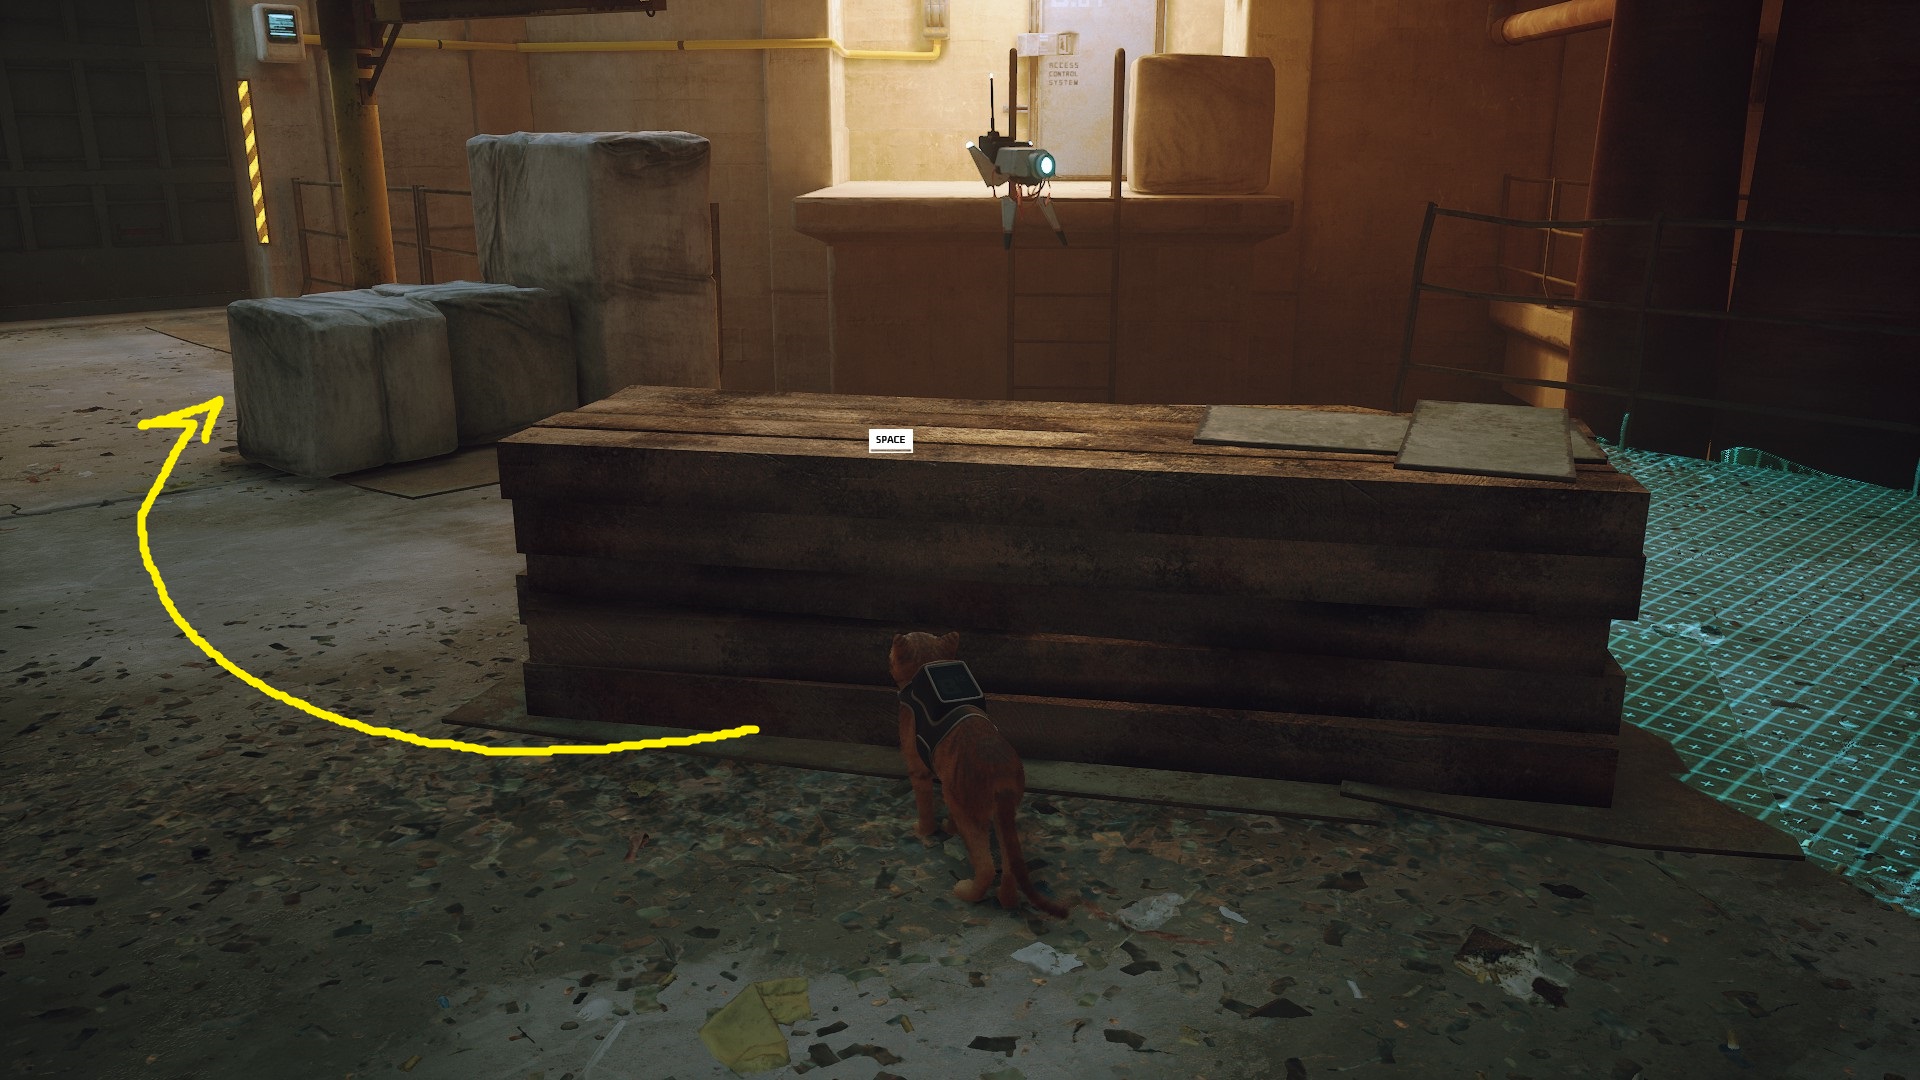
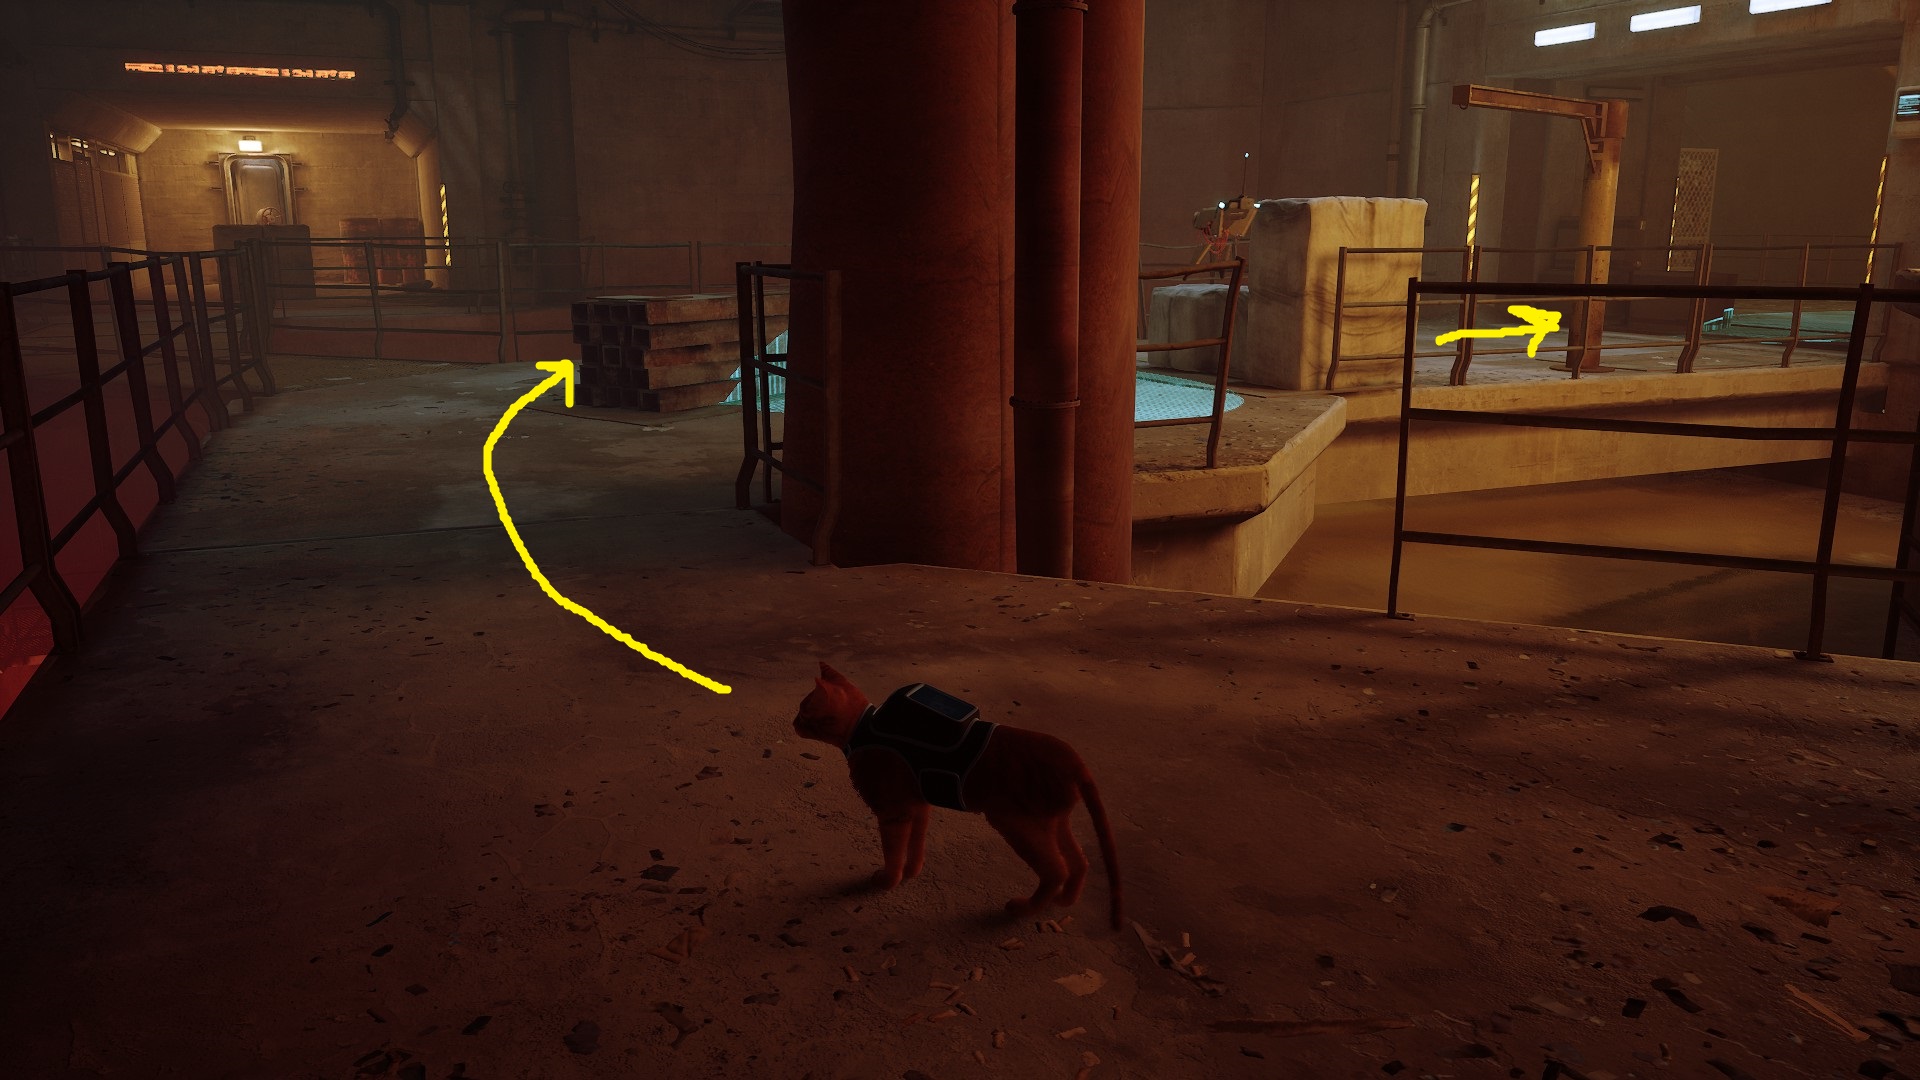
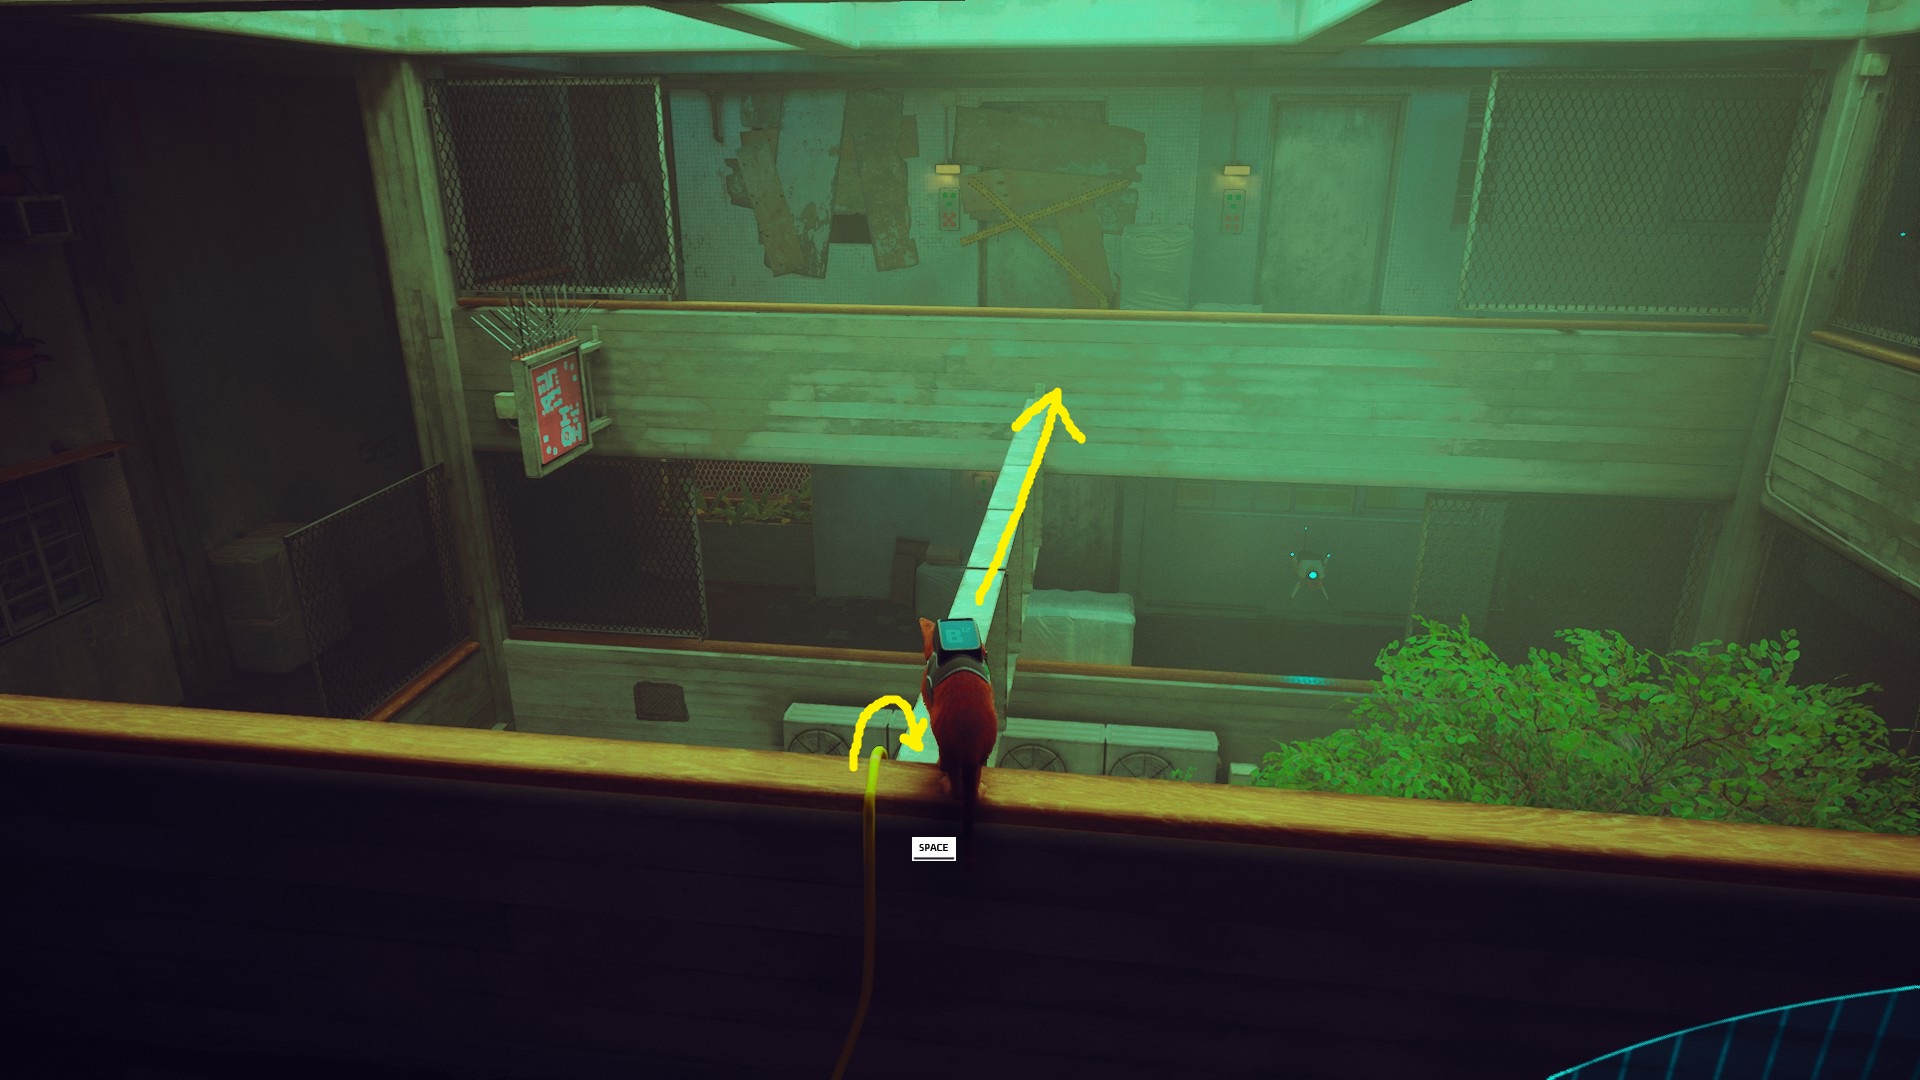
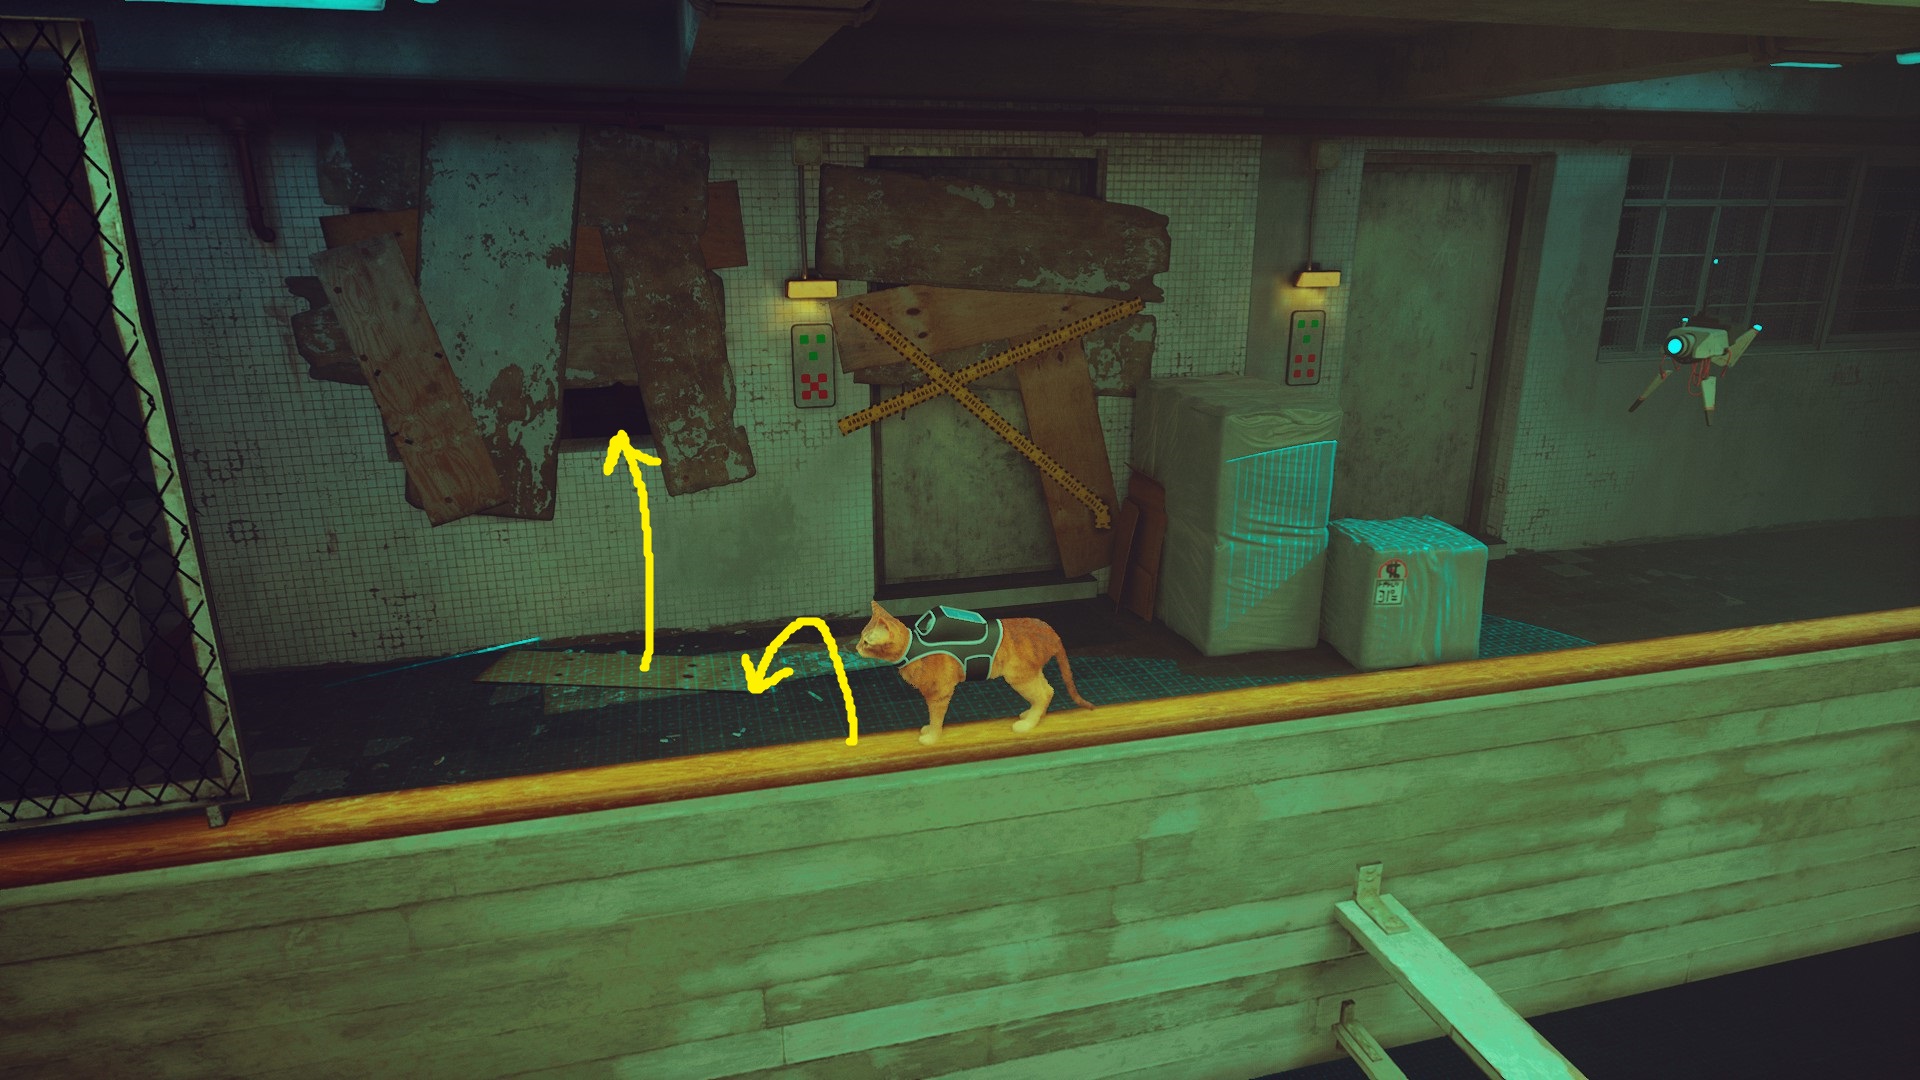
In this room, you can approach the initial bit of cover safely. Then, wait for the drone to look right, and run behind the boxes to the left. The drone can’t see up onto the boxes, so just hop up to the top box and from there to the girder. The girder will swing towards the platform with the lever, so jump to it and pull the lever (2). That done, you can use the box on the platform to reach the pipe, and from there jump back to the main platform (3). Then, wait for the drone to be looking off to the other side of the room, and run behind the initial bit of cover. Wait once more for it to look the other way, and run towards the now open door (4).
1234
After going through the freshly-opened doorway, don’t rush into the next room! You can also find the worker’s keys in this section, so keep an eye out.
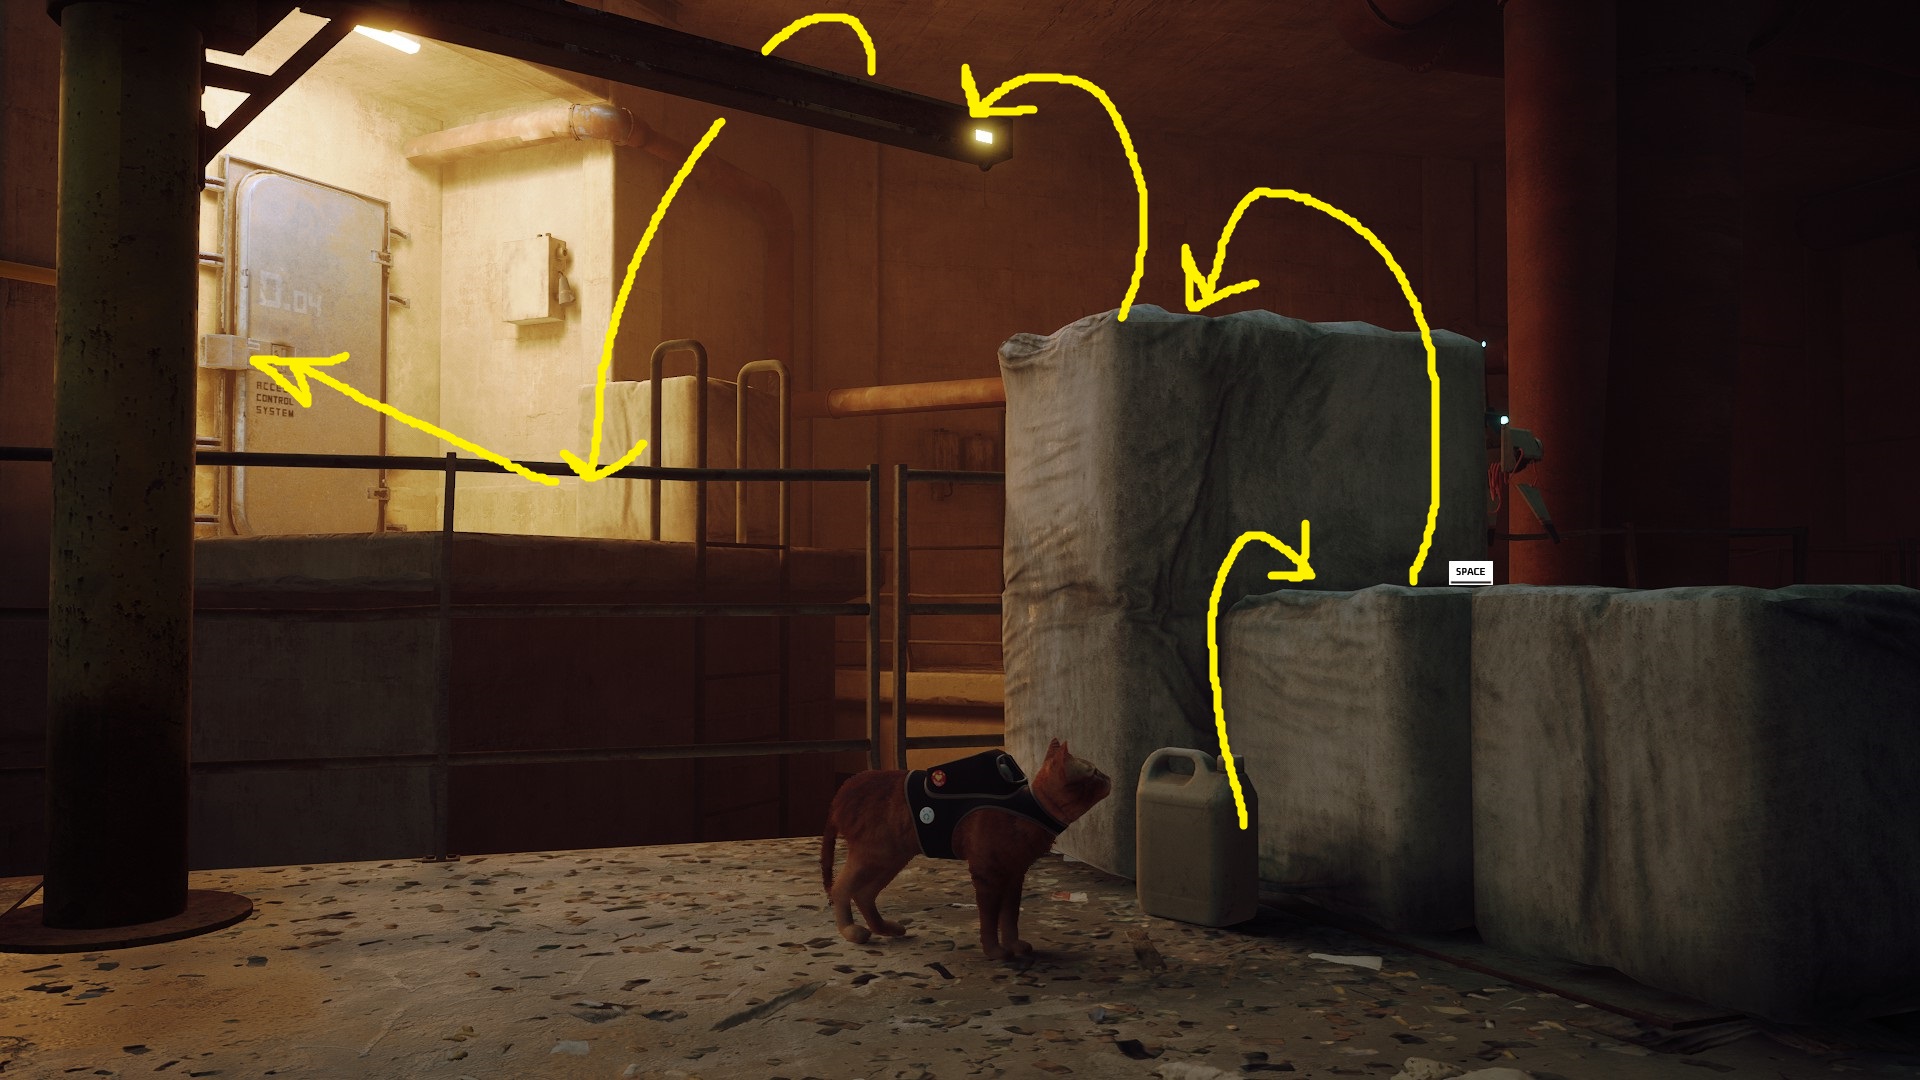
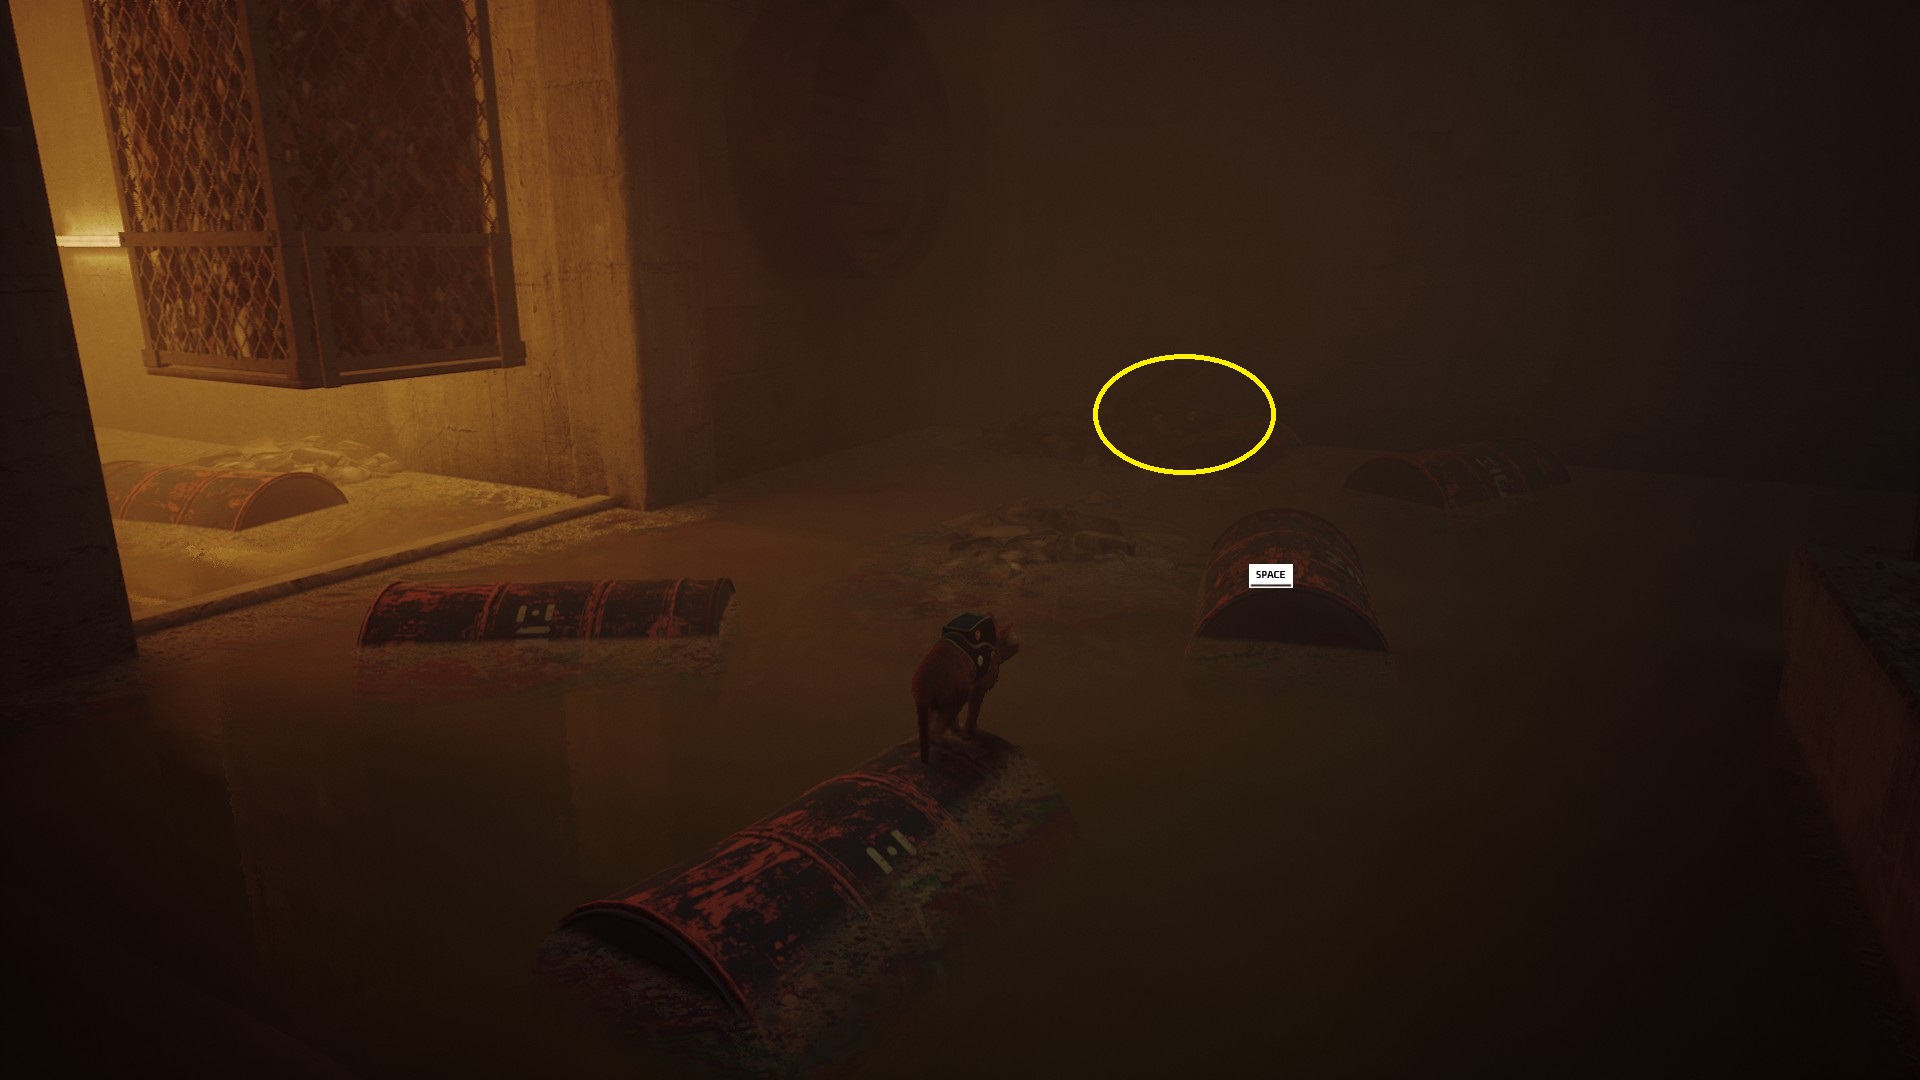
In this section, you’ll need to use the shadow of the trash cages to hide from the drone’s sensors. There are two drones to sneak past in this fashion, and then you’ll be able to jump to some floating barrels. To the right in the water you’ll find the Worker’s Keys — use the barrels to reach them, and then you can proceed forward (following the trash cages).
Once you’ve made it through the narrow, watery passageway, you’ll be confronted with a couple of paths — you can go straight to continue with the mission, but you can also take a detour to return the keys you found to the worker. To return the keys, you’ll need to pull the lever on the left side of the room as you enter; this will open up a gate that takes you back to the second puzzle section of this area (the one where you jumped on barrels to get behind the drone guarding the door). Sneak back to the worker and return the keys — earning yourself the Neco Badge — and then head back to the room pictured below.
Next, you’ll need to slip past a few more drones.
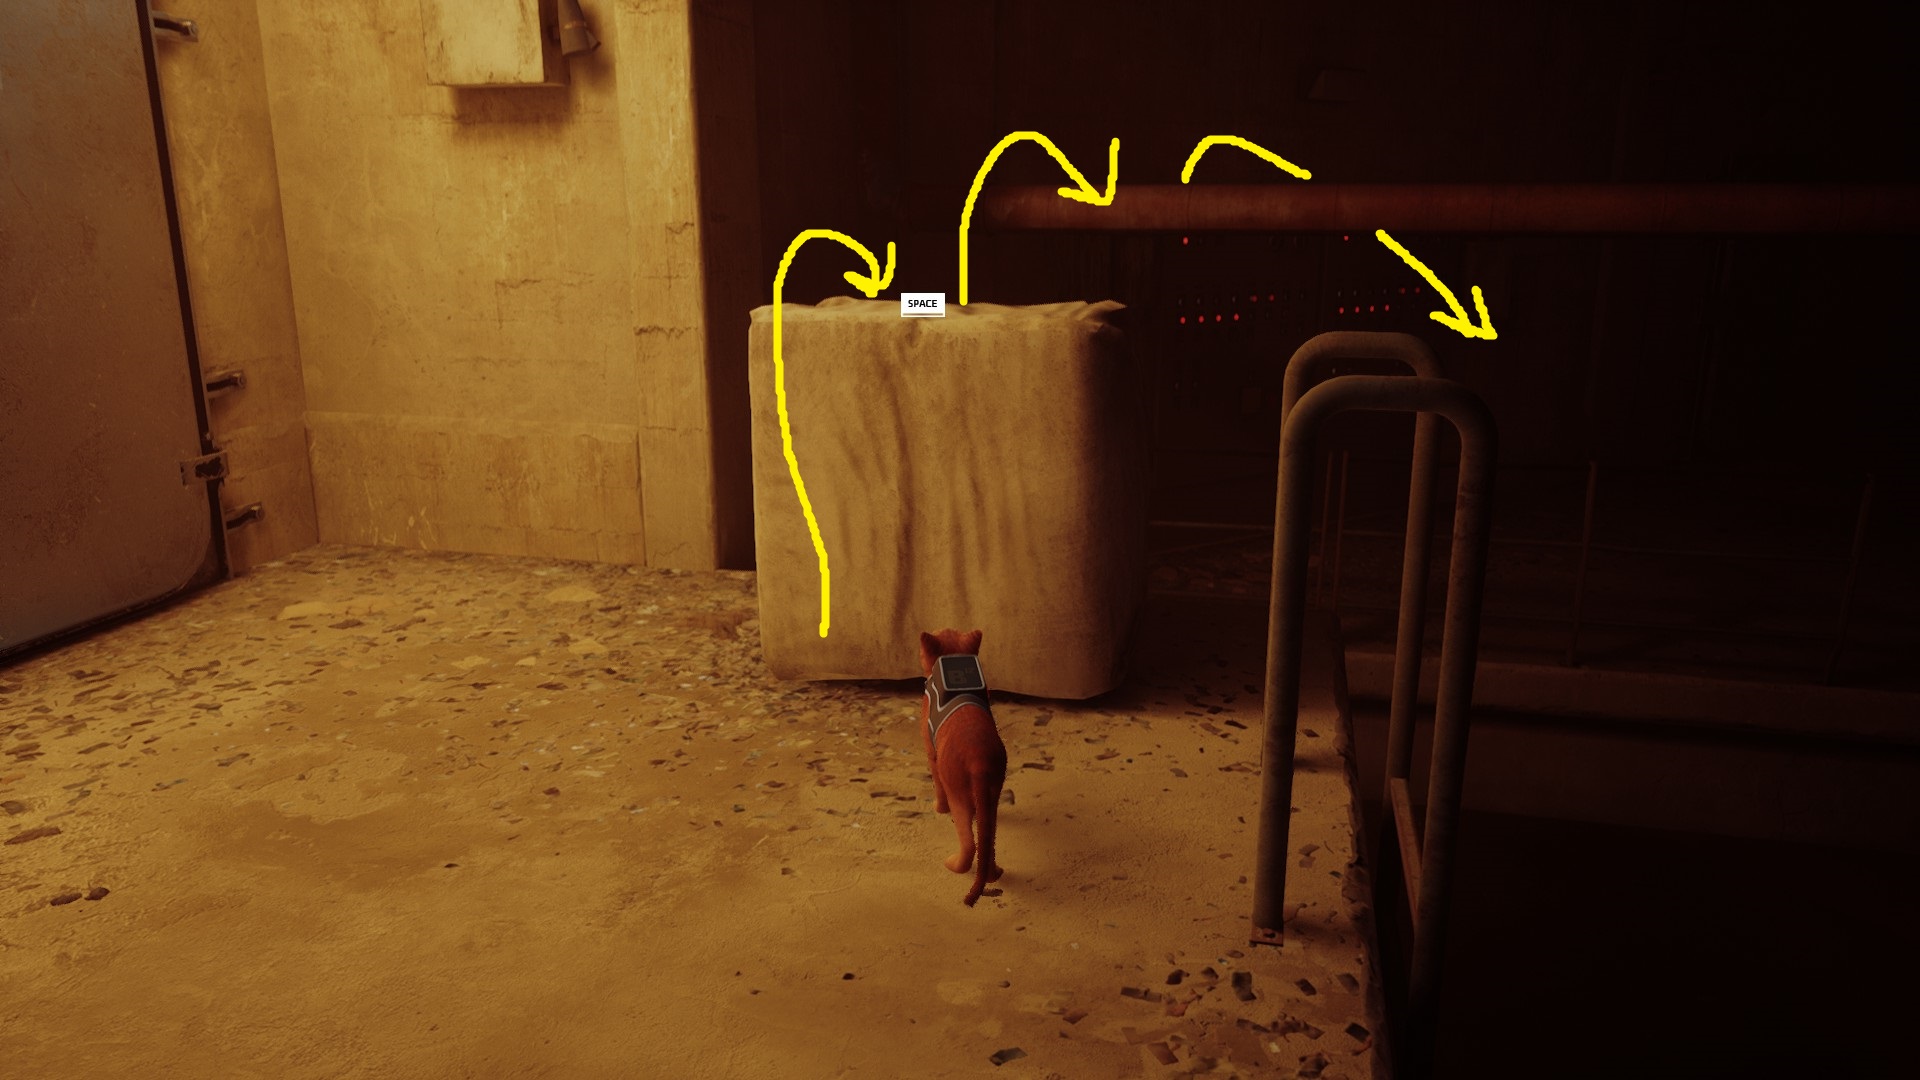
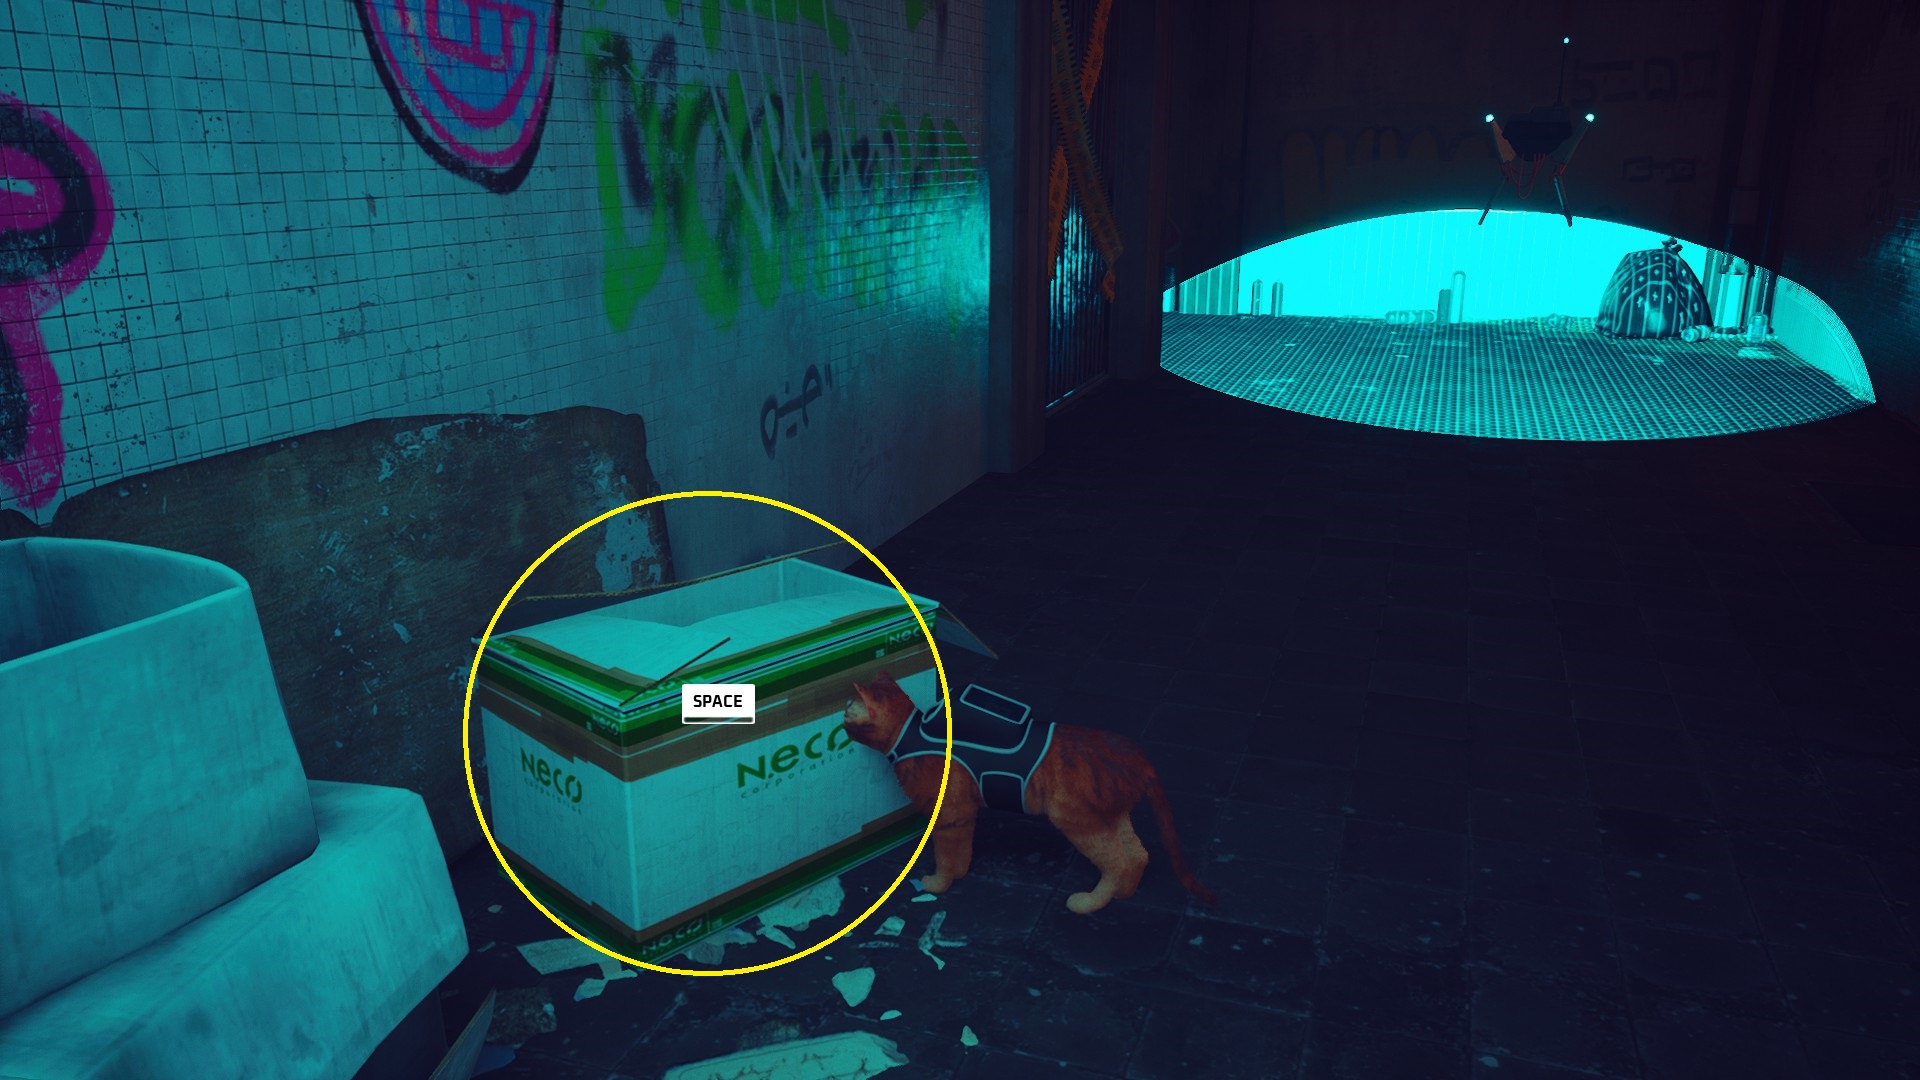
Again, you’ll have to use the shadow of the trash cages to hide from the drone’s sensors — there are once again two drones to sneak past in this fashion. You’ll need to hide on the right side cage to slip past the first drone, and then quickly get to the other side of the cage to hide from the second drone. The margin for error is smaller in this section, but fortunately if you screw up you can just keep running and then hide in the barrel that’s a part of the next puzzle.
After making it past the drones, you’ll find yourself confronted by a doorway blocked by lasers.
To cross through the lasers, get into the nearby barrel and then roll it through the doorway.
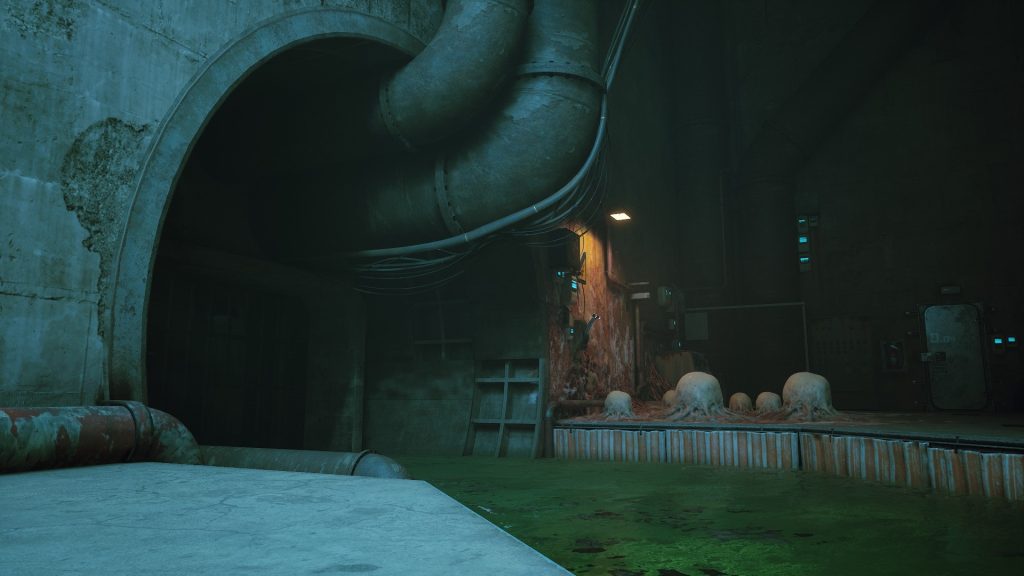
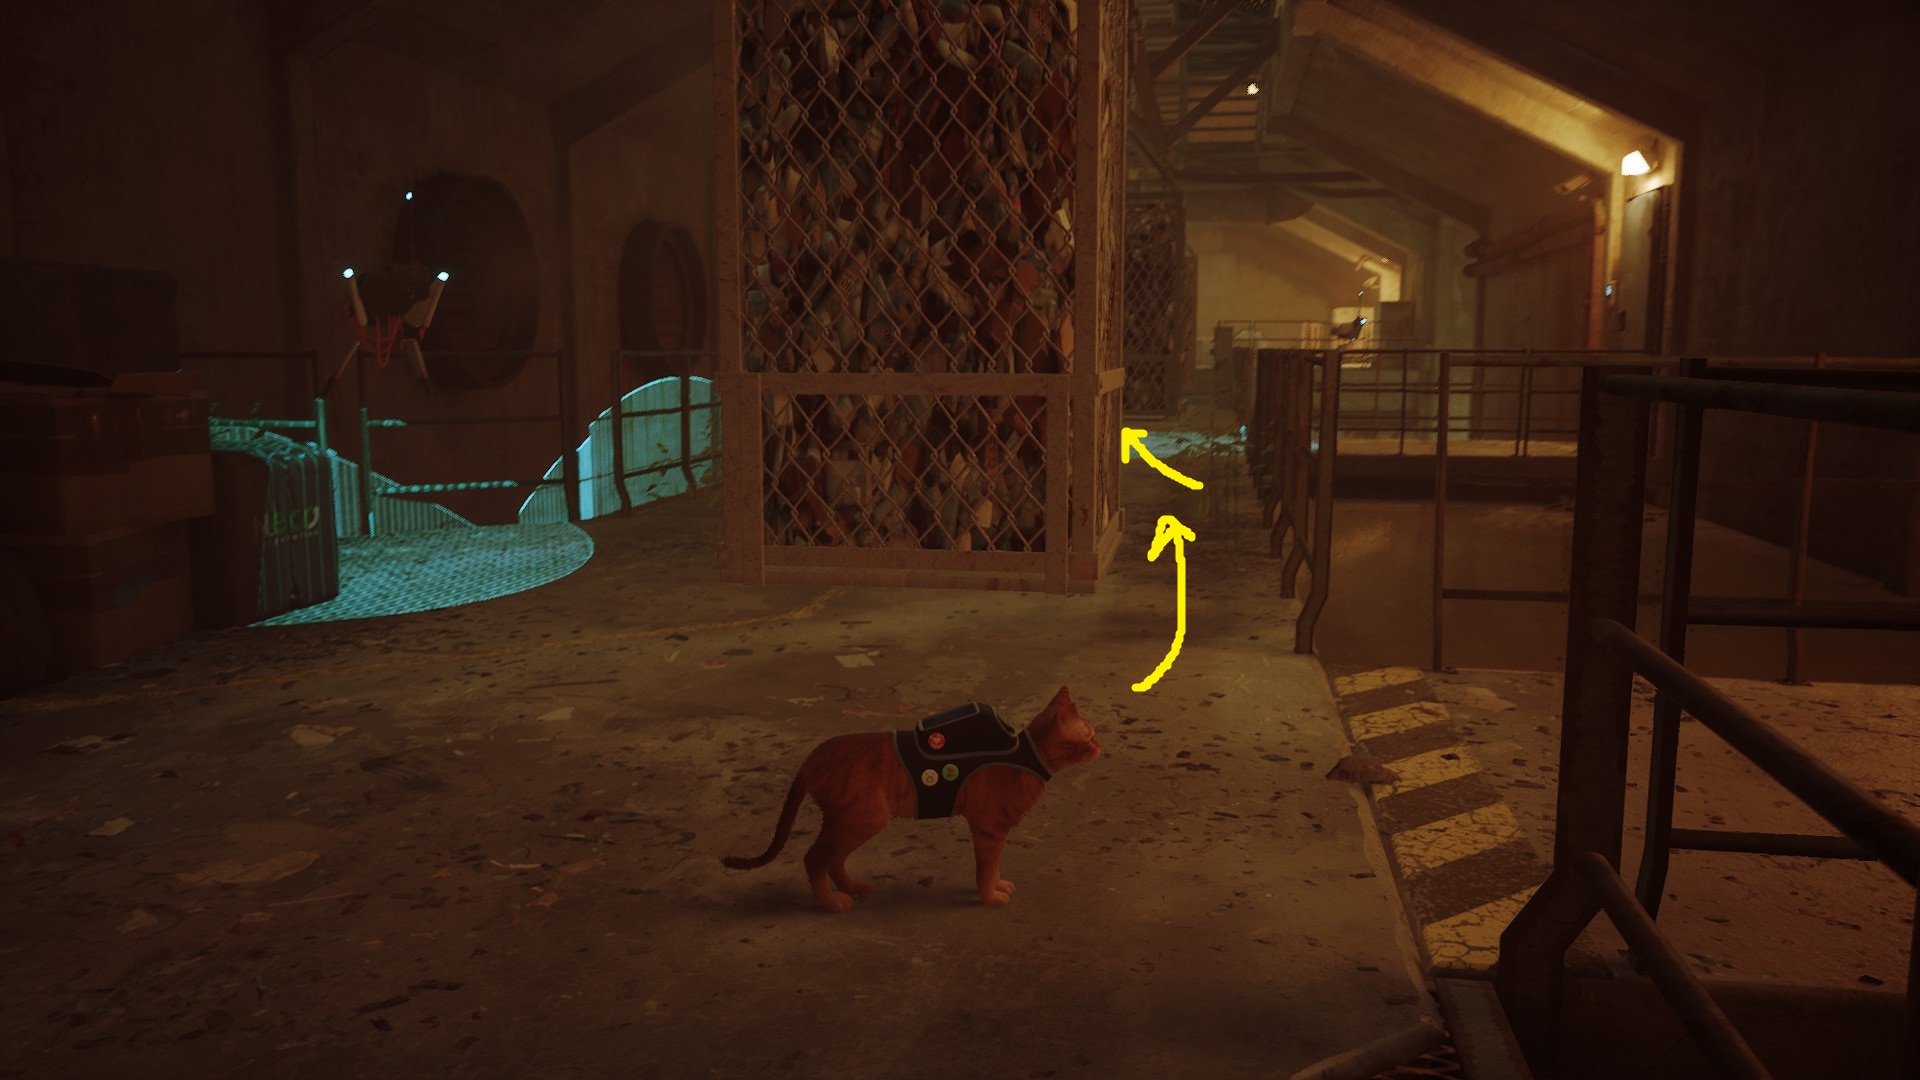
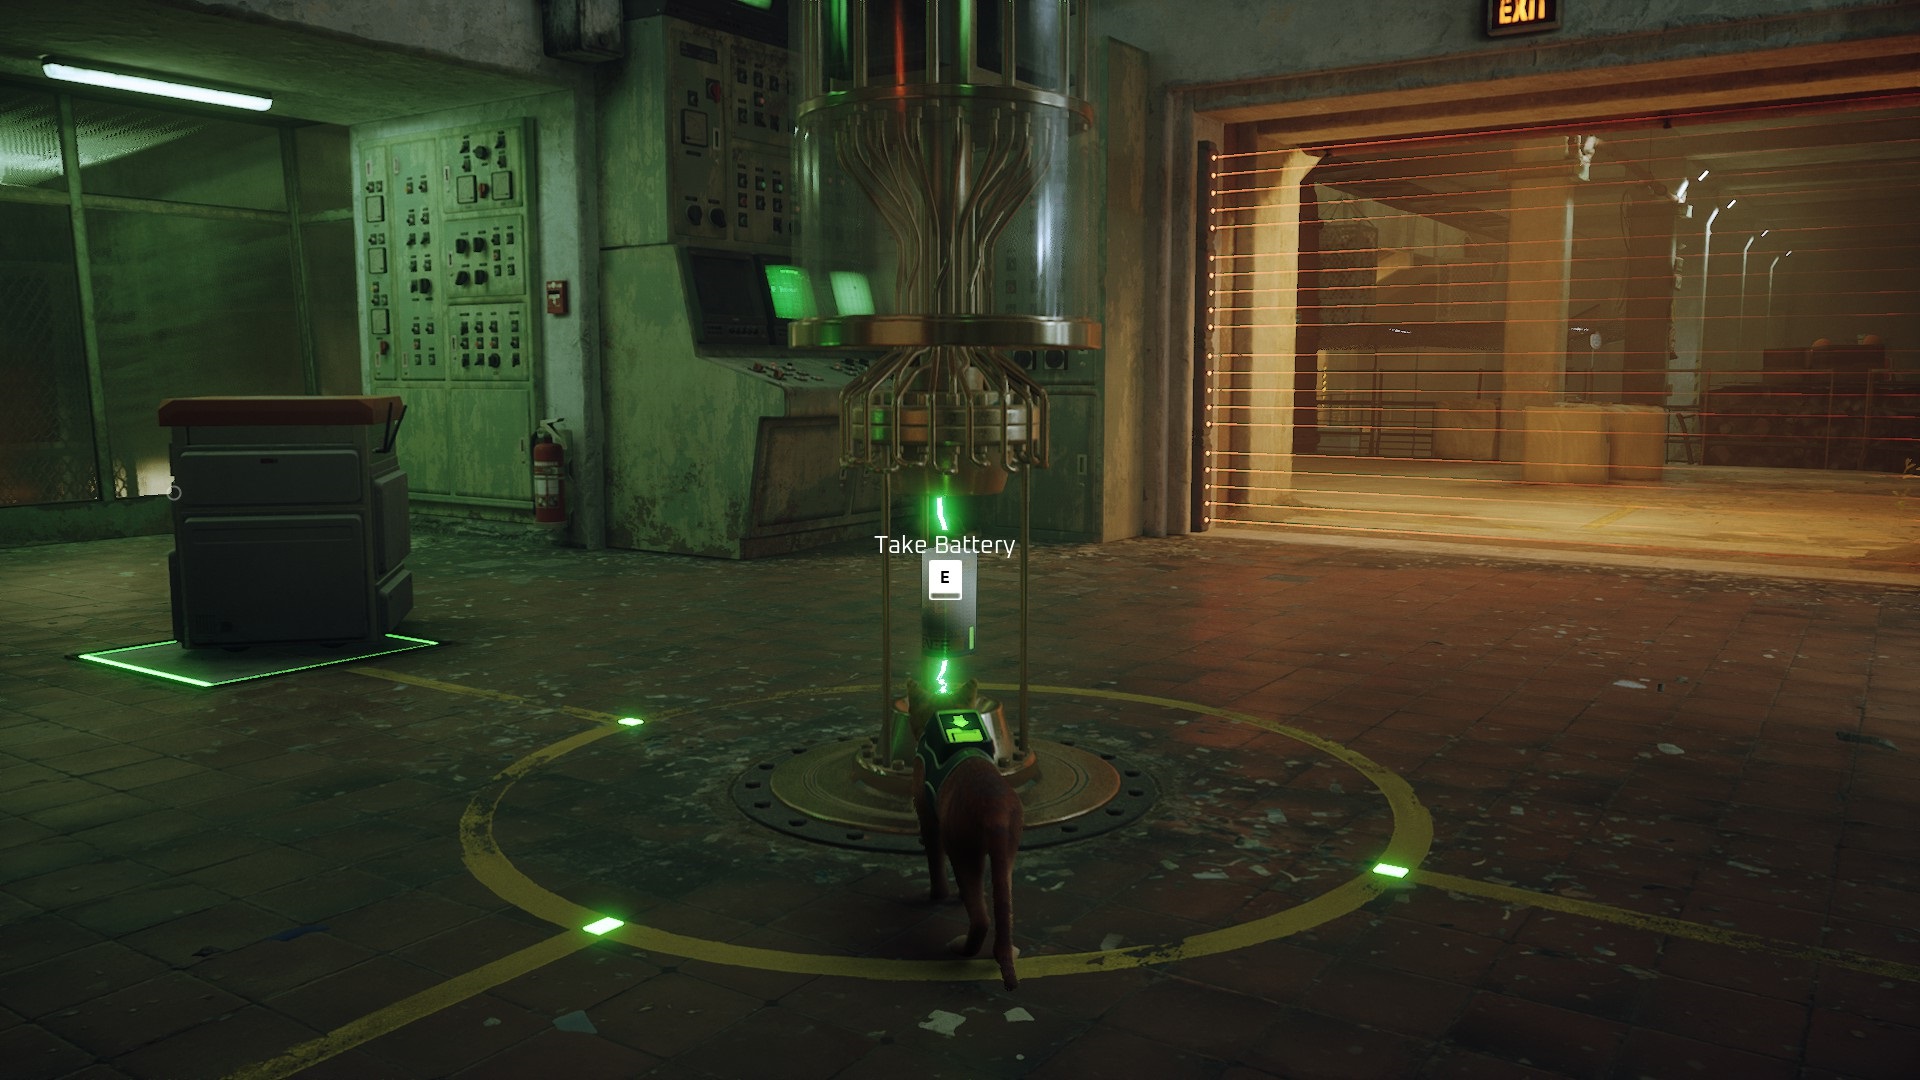
In the next room you’ll find the battery you’ve been searching for, but you’ll need to gain access to it before you can complete the heist.
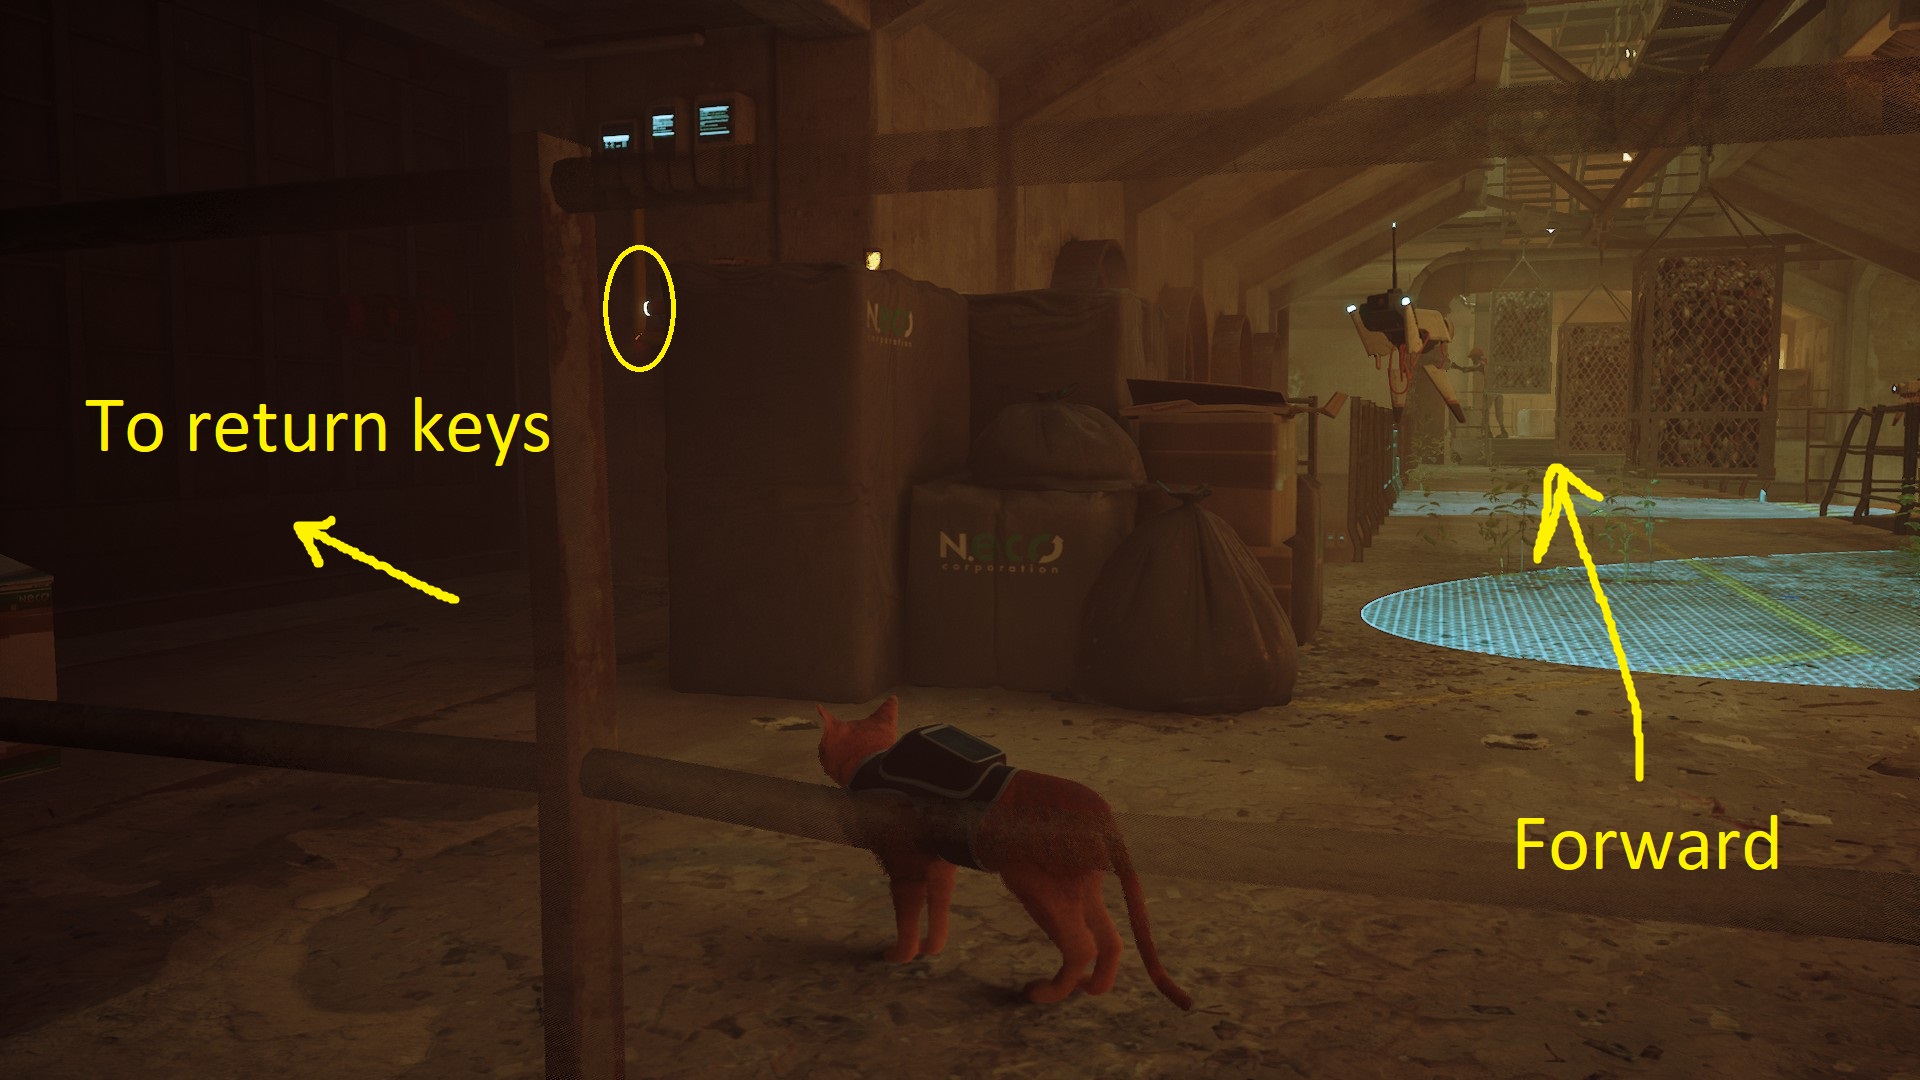
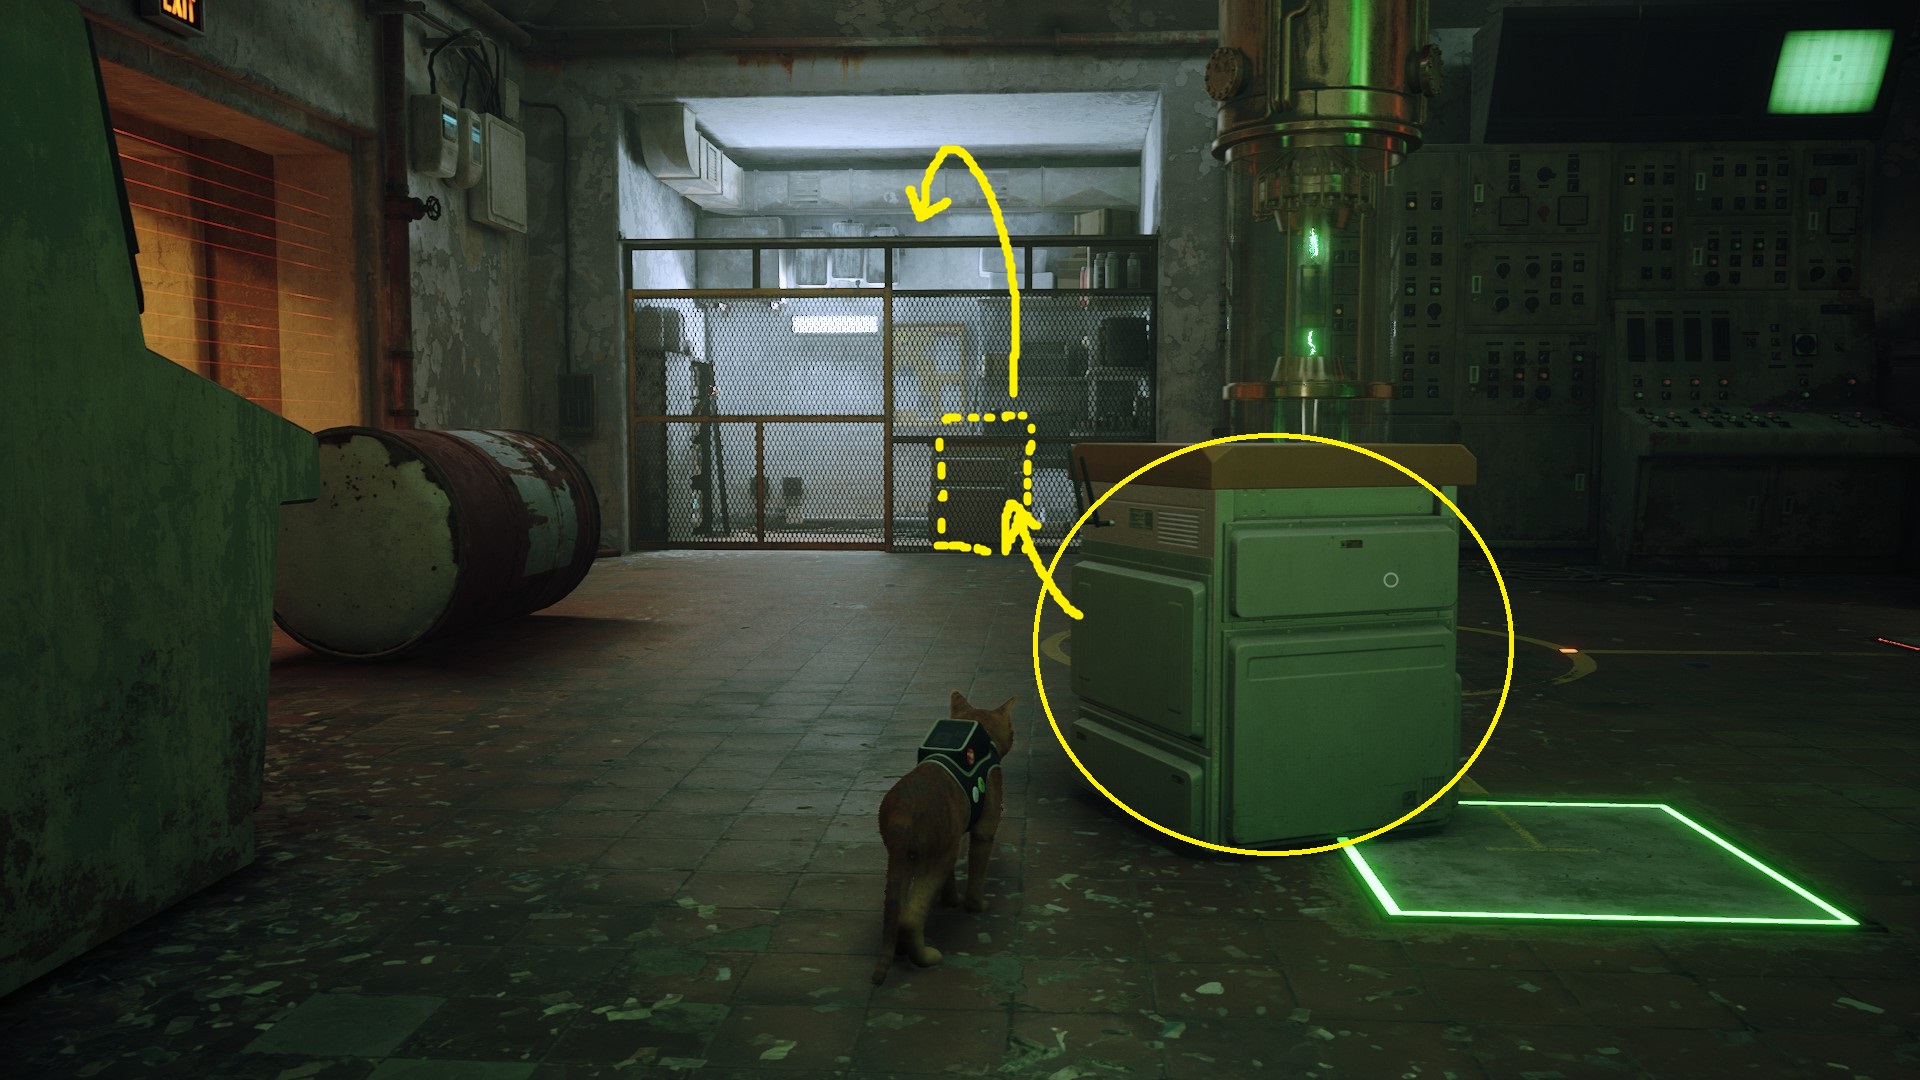
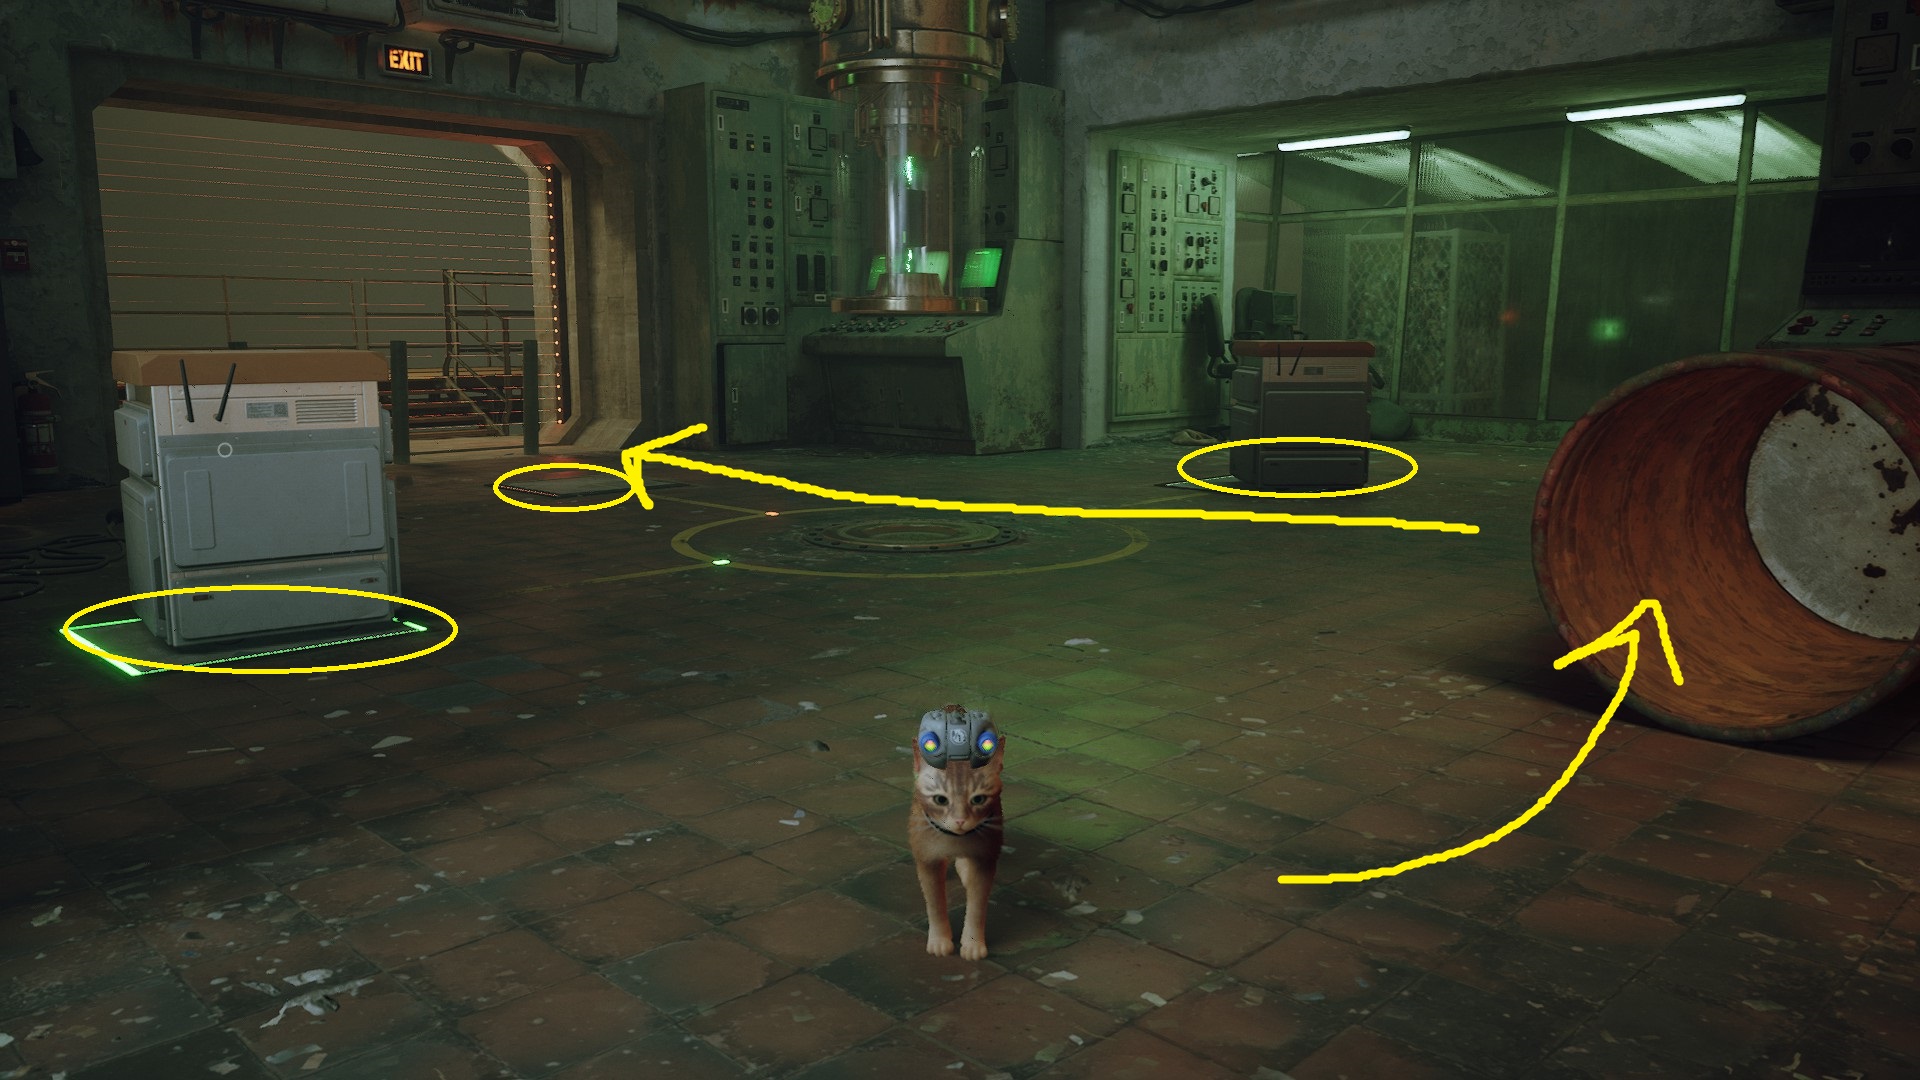
There is a cubical robot in the room that you can move around by activating it (it will then follow you until you deactivate it). You can use this first robot to reach a second… Also, pay attention to what happens when you (or another object) moves on and off one of the three square floor panels that surround the battery.
First, walk over to the cubical robot and activate it, then lead it to the fenced-off section of the room. Jump up on the robot and from the robot leap to the top of the fence, then hop down and pull the lever. This will open the fence’s gate, and you’ll now be able to lead both robots to one of the square floor panels on either side of the battery — leave the panel across from the barrel open. Then get in the barrel and roll it to the final panel, and you’ll be able to grab the battery.
Once you’ve got the Battery, a short cutscene will play, the way you came in will close, and a new door will open. Head outside and turn left, then hop in the bucket — it will take you back to the entrance of Midtown.
Downtown – Pt. 2
Make your way back through town to the roundabout, then turn right to head back to Clementine’s apartment, which has been cordoned off by the local police force. You’ll be able to slip under the barricade easily enough, but getting past the drones won’t be quite so simple…
Just like in the previous area, you can use Neco boxes to avoid detection, and you can run and hide in them if you do get found.
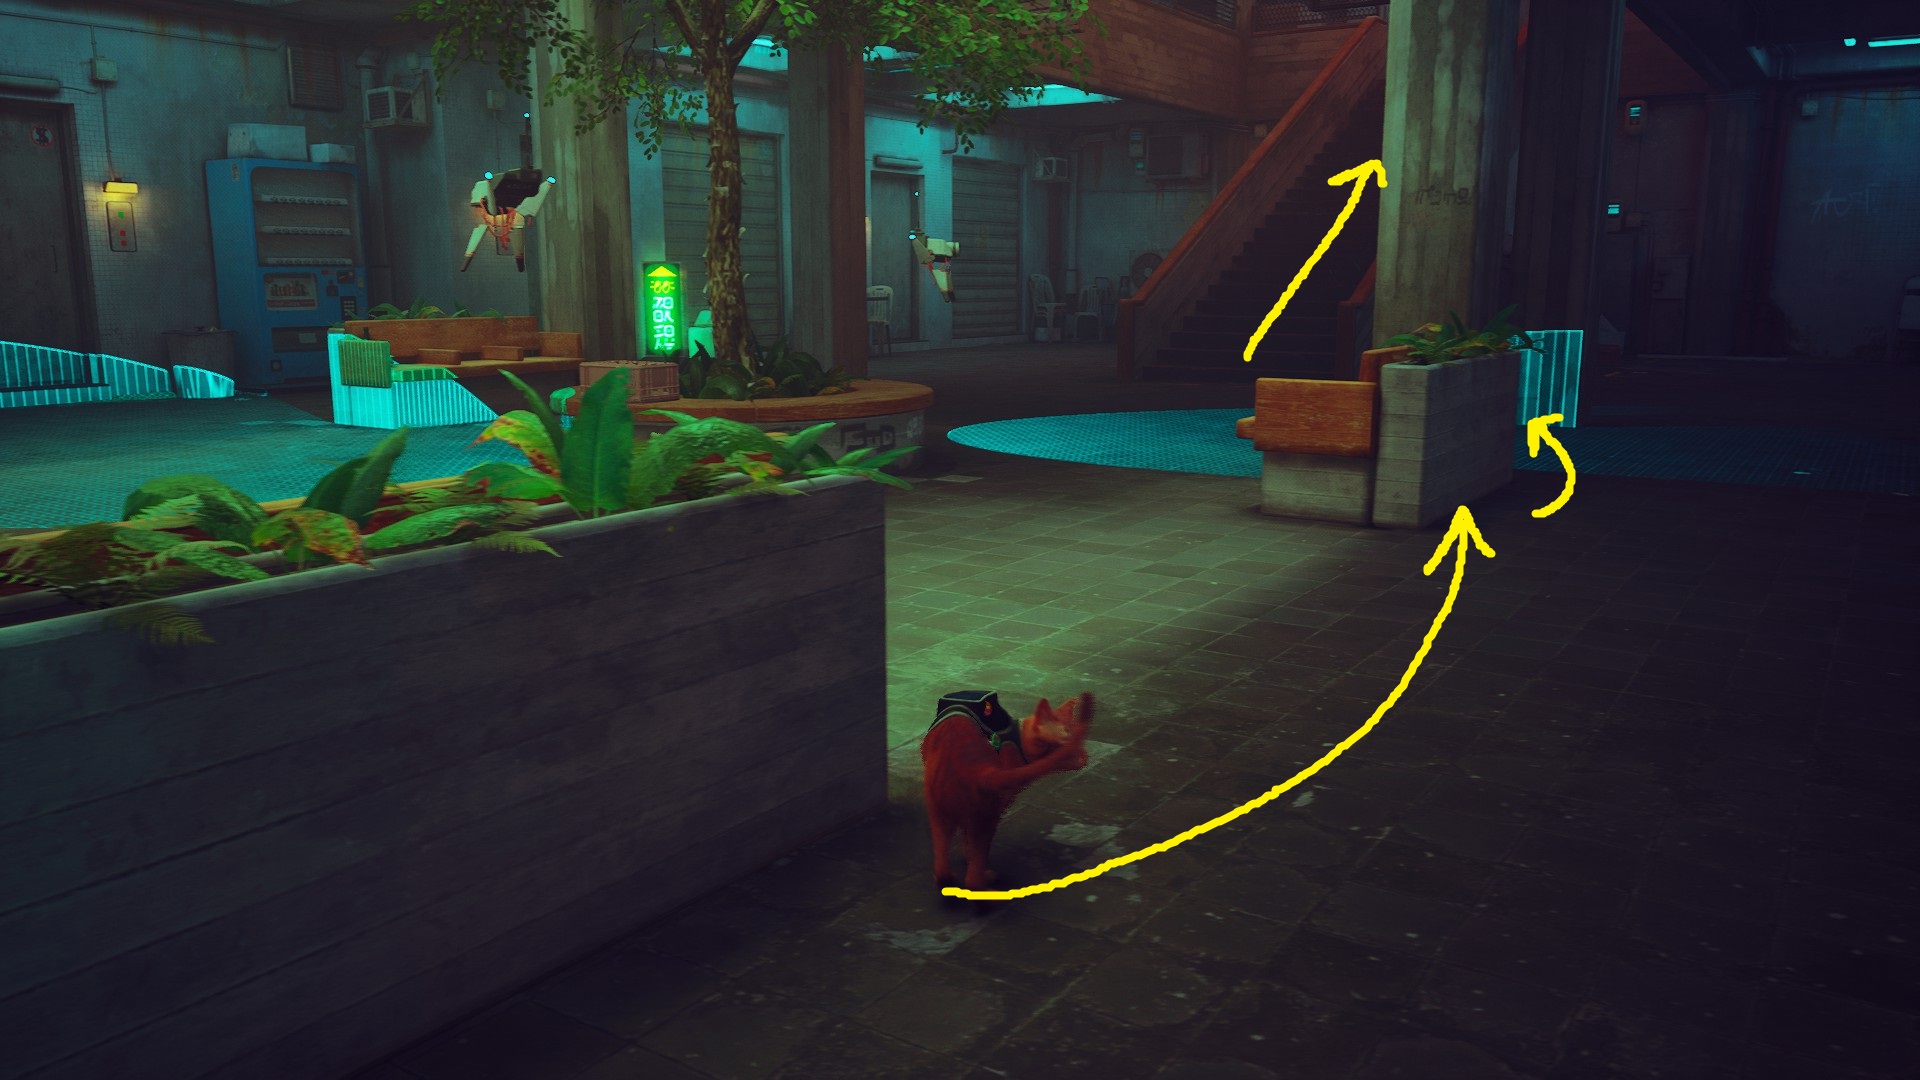
Use the benches on the right side of the courtyard for cover, and make your way to and then up the stairs on the far side. As always, don’t cross until the drones are looking the other way!
At the top of the stairs, you’ll need to figure out a safe route forward.
At the top of the stairs, turn right and then right again and head down the hallway (1). Take the next right (2) and walk out onto the bridge, and then when the drone that gaurds this section is looking the other way, sprint further down the hall (3). Wait for the drone around the corner here to be facing away from you, and then run and hop into the box on the left side of the hallway, then continue around the corner once it passes your box (4).
1234
Just a few more drones to avoid…
First, note the box in the hallway you’re in — you can use it if you get caught. Then, make sure the drone that patrols the hallway ahead is facing the other way, then run to the stairs. Careful, as there’s a drone that sometimes comes down these stairs. Upstairs, jump up onto the guardrail, then make your way down and across the sign. On the other side of the courtyard, hop up on the guardrail there, jump down into the hallway, and then up into the hole that leads into Clementine’s apartment.
1234
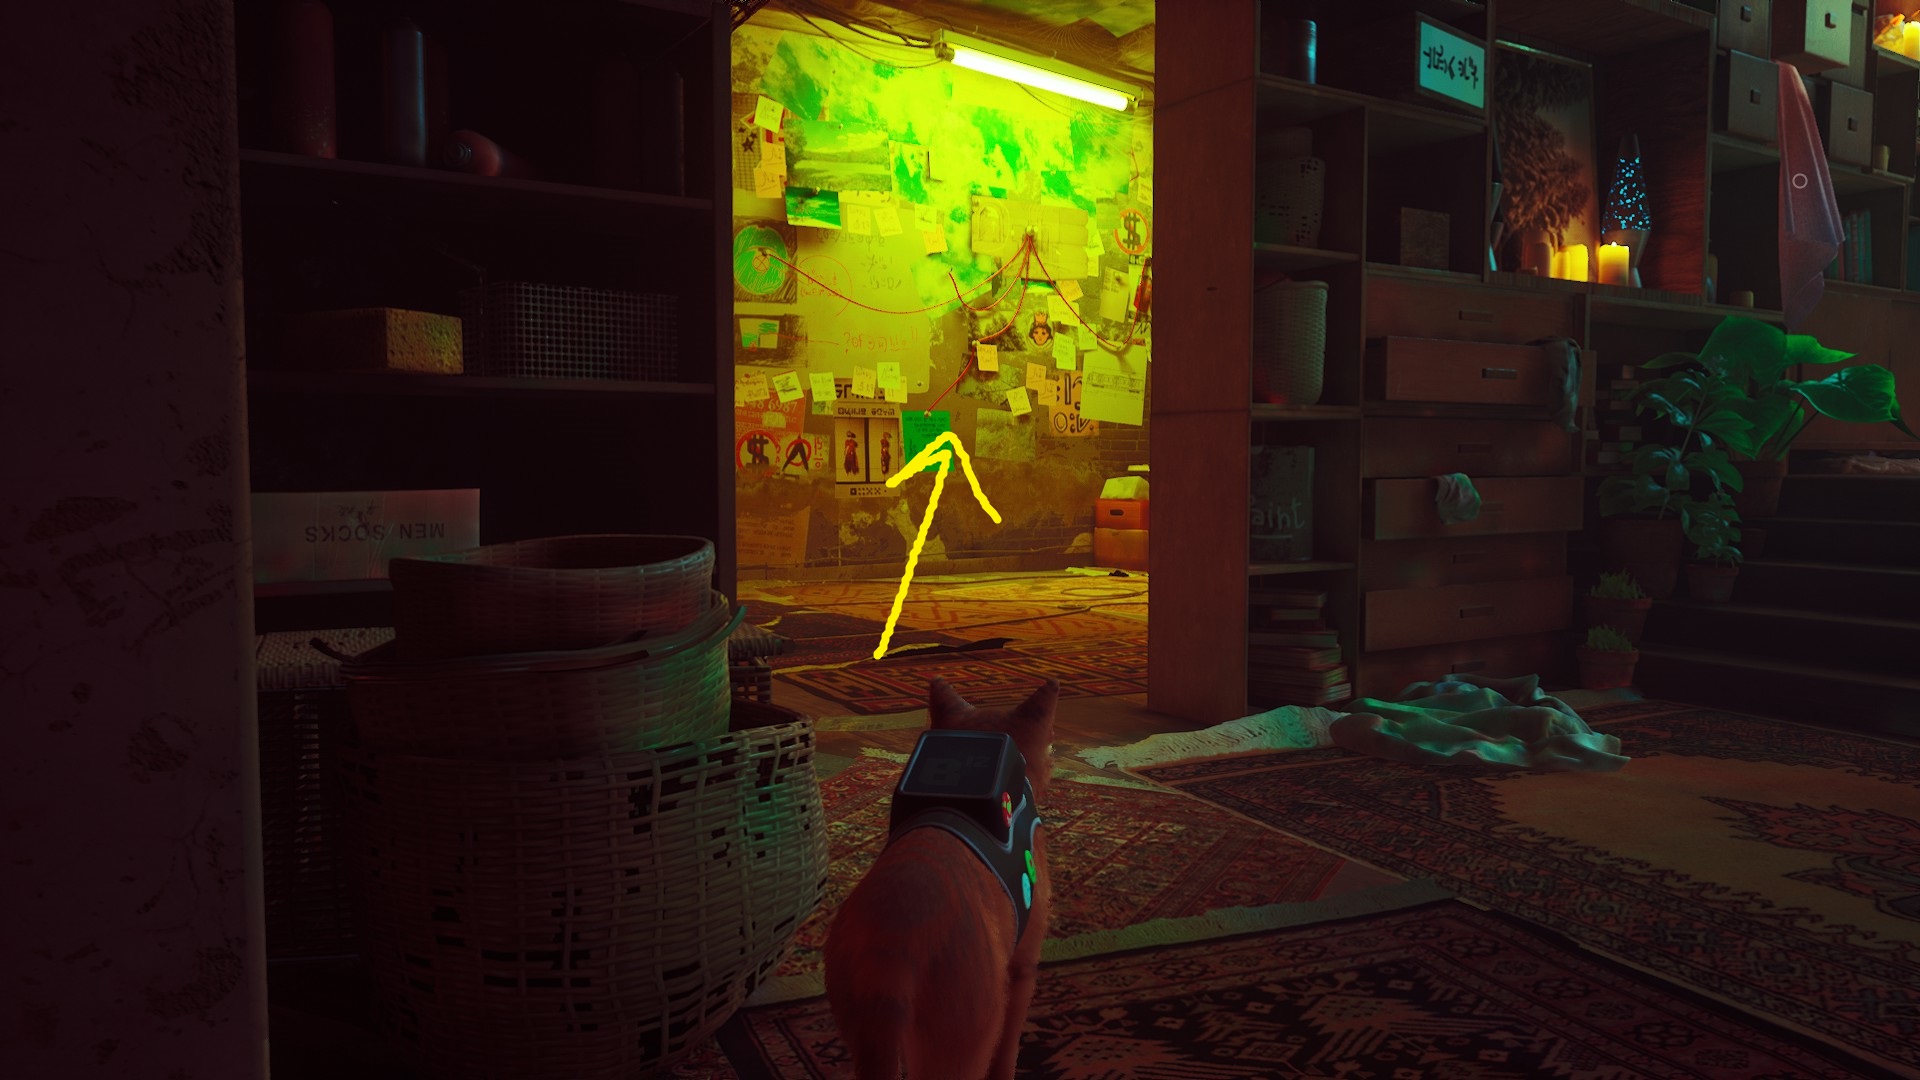
Once inside, head into the room with the Clue Board and inspect it, and after B-12 chatters a bit, you’ll receive the Mysterious Message. This item serves as a clue for what to do next — if you want to figure it out for yourself, don’t read ahead yet, as the following sections will contain spoilers for this puzzle.
The Mysterious Message seems to have drawings of objects someone might have in their apartment…
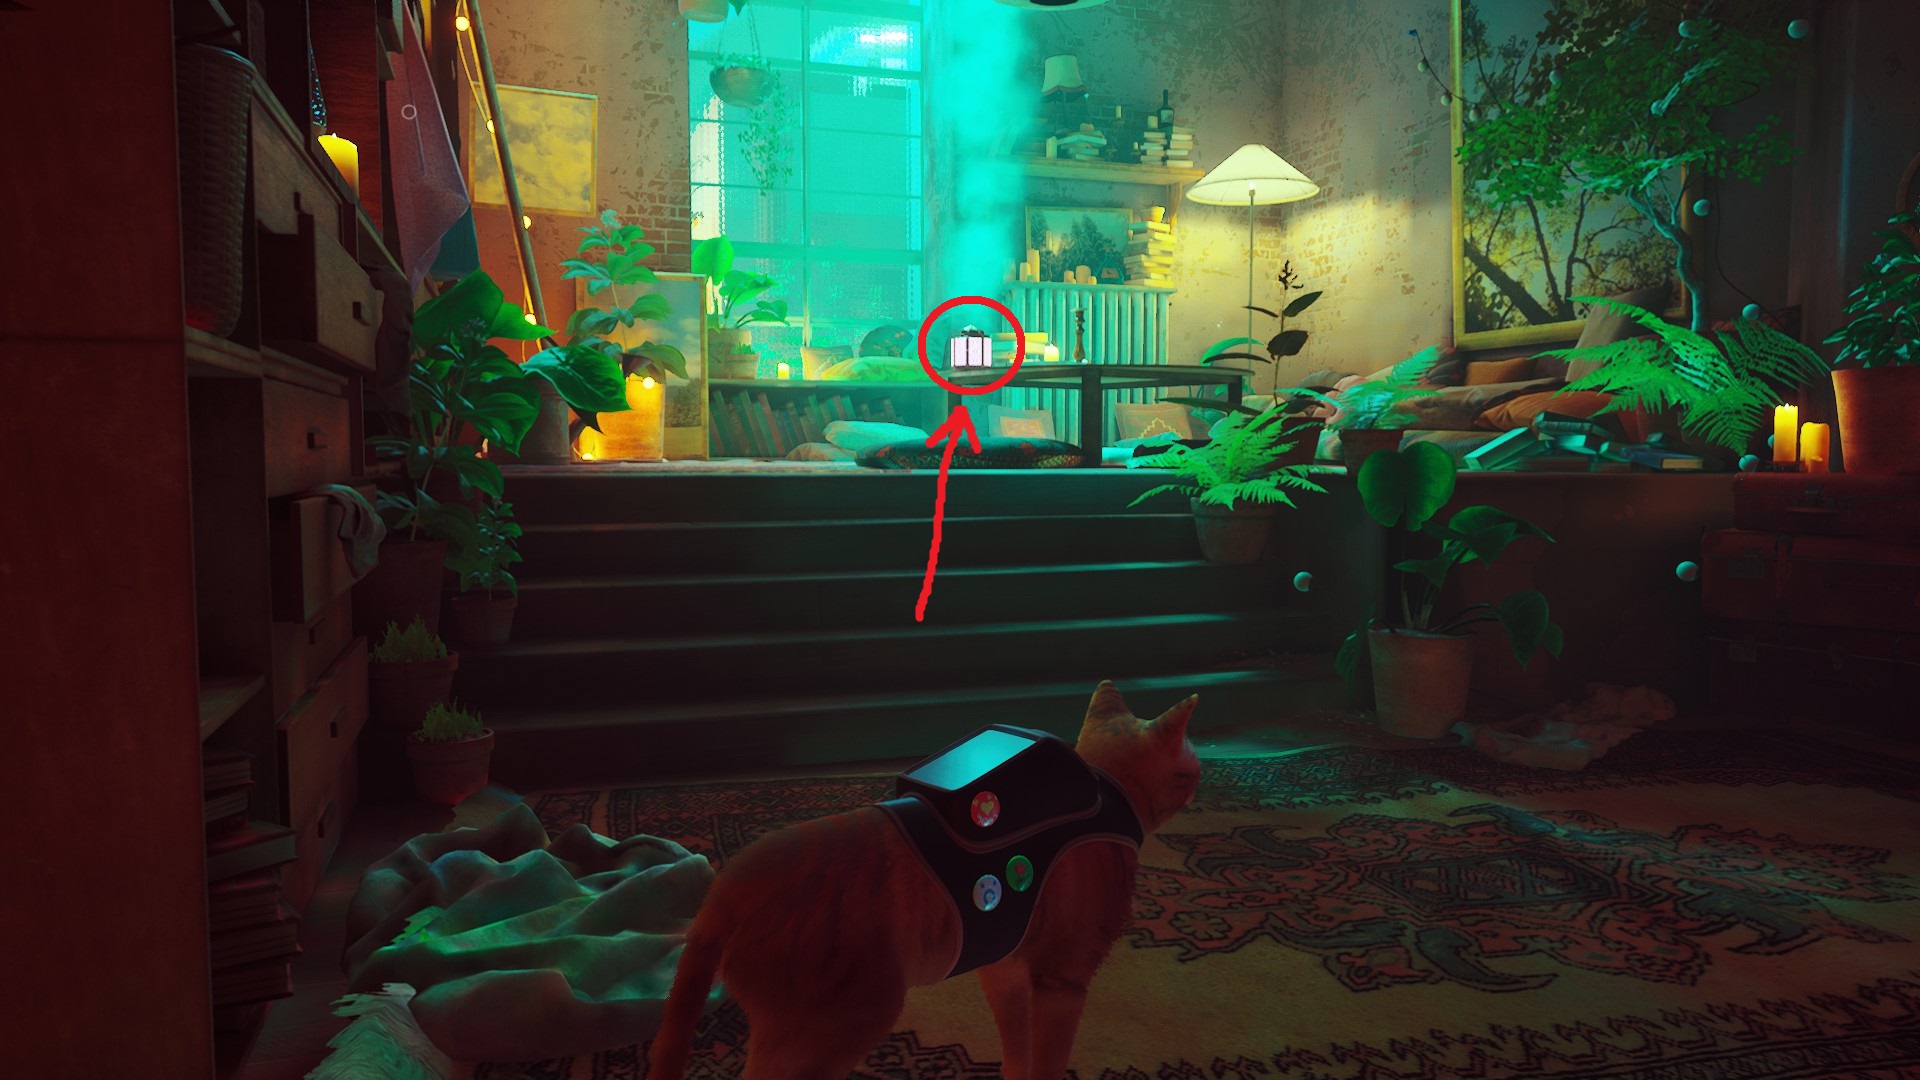
You have to find the four items displayed on the Mysterious Message. First, leave the room with the Clue Board and turn left — on the table up the stairs is an air-purifier that you can inspect (1) to find the first part of Clem’s message. Then, turn around and interact with the cloth hanging from the drawer (2) — scratch at it until the drawer opens, and then you can jump up onto the drawer, and from there up onto the loft.
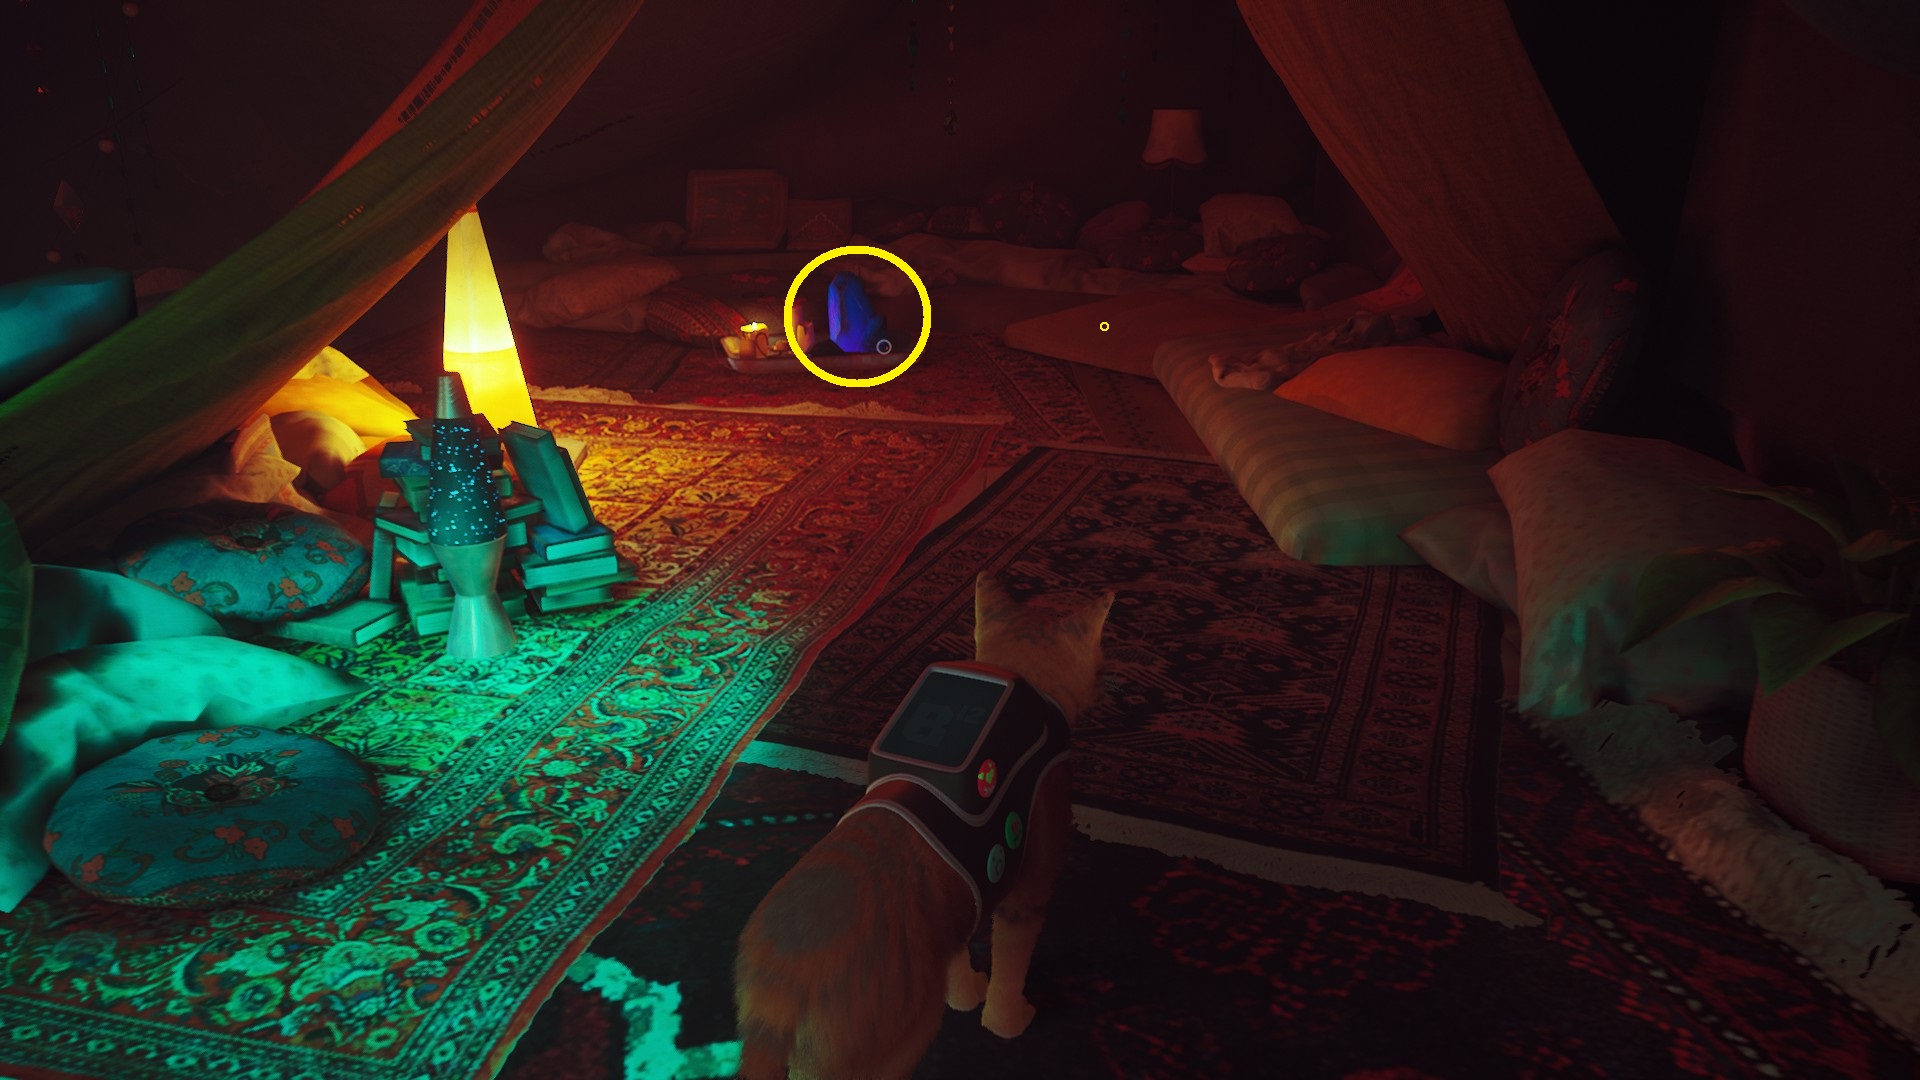
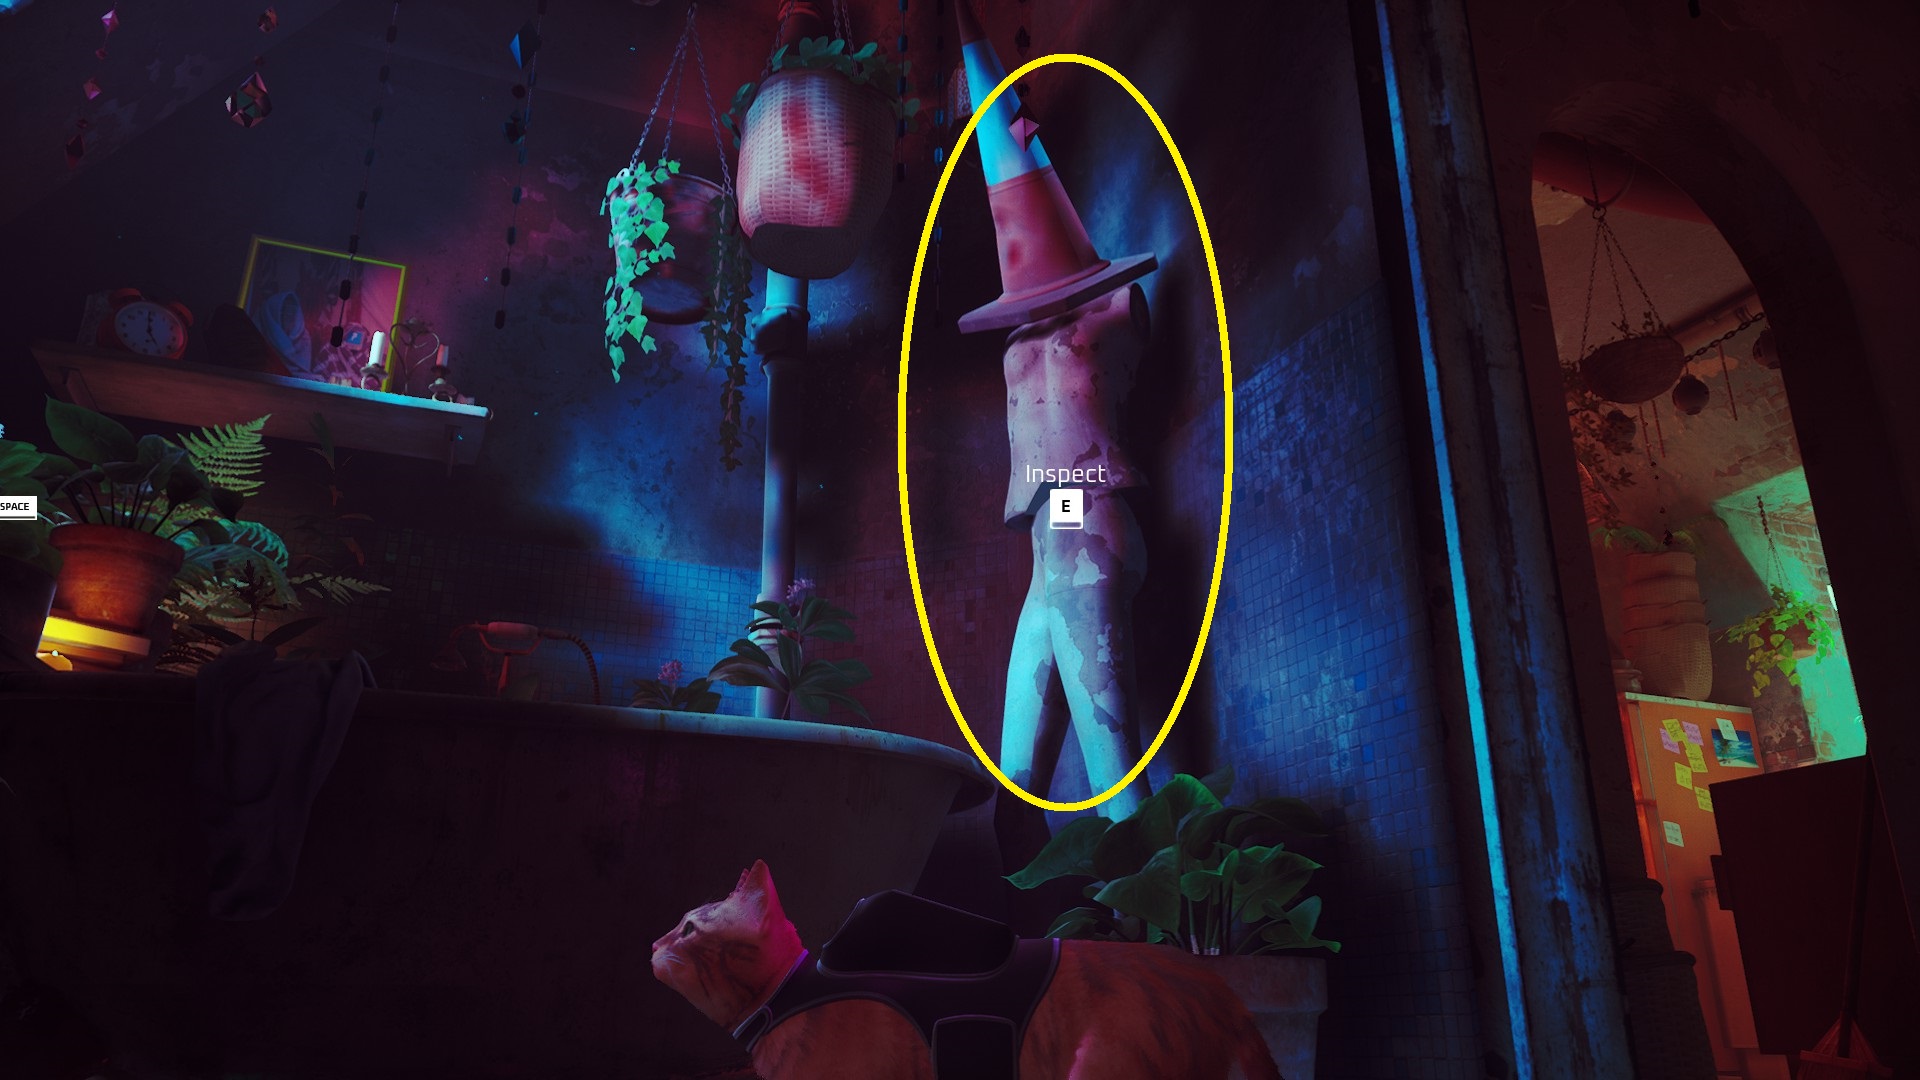
Turn left and go check out the crystal (3) to find the second part of the message. You can jump back down to the ground from here, and then head into the nearby bathroom (4) and inspect the mannequin (5) to find the third message segment. Then go into the kitchen (the room you first entered when you entered the apartment) and inspect the lava lamp on the shelf (6).
123456
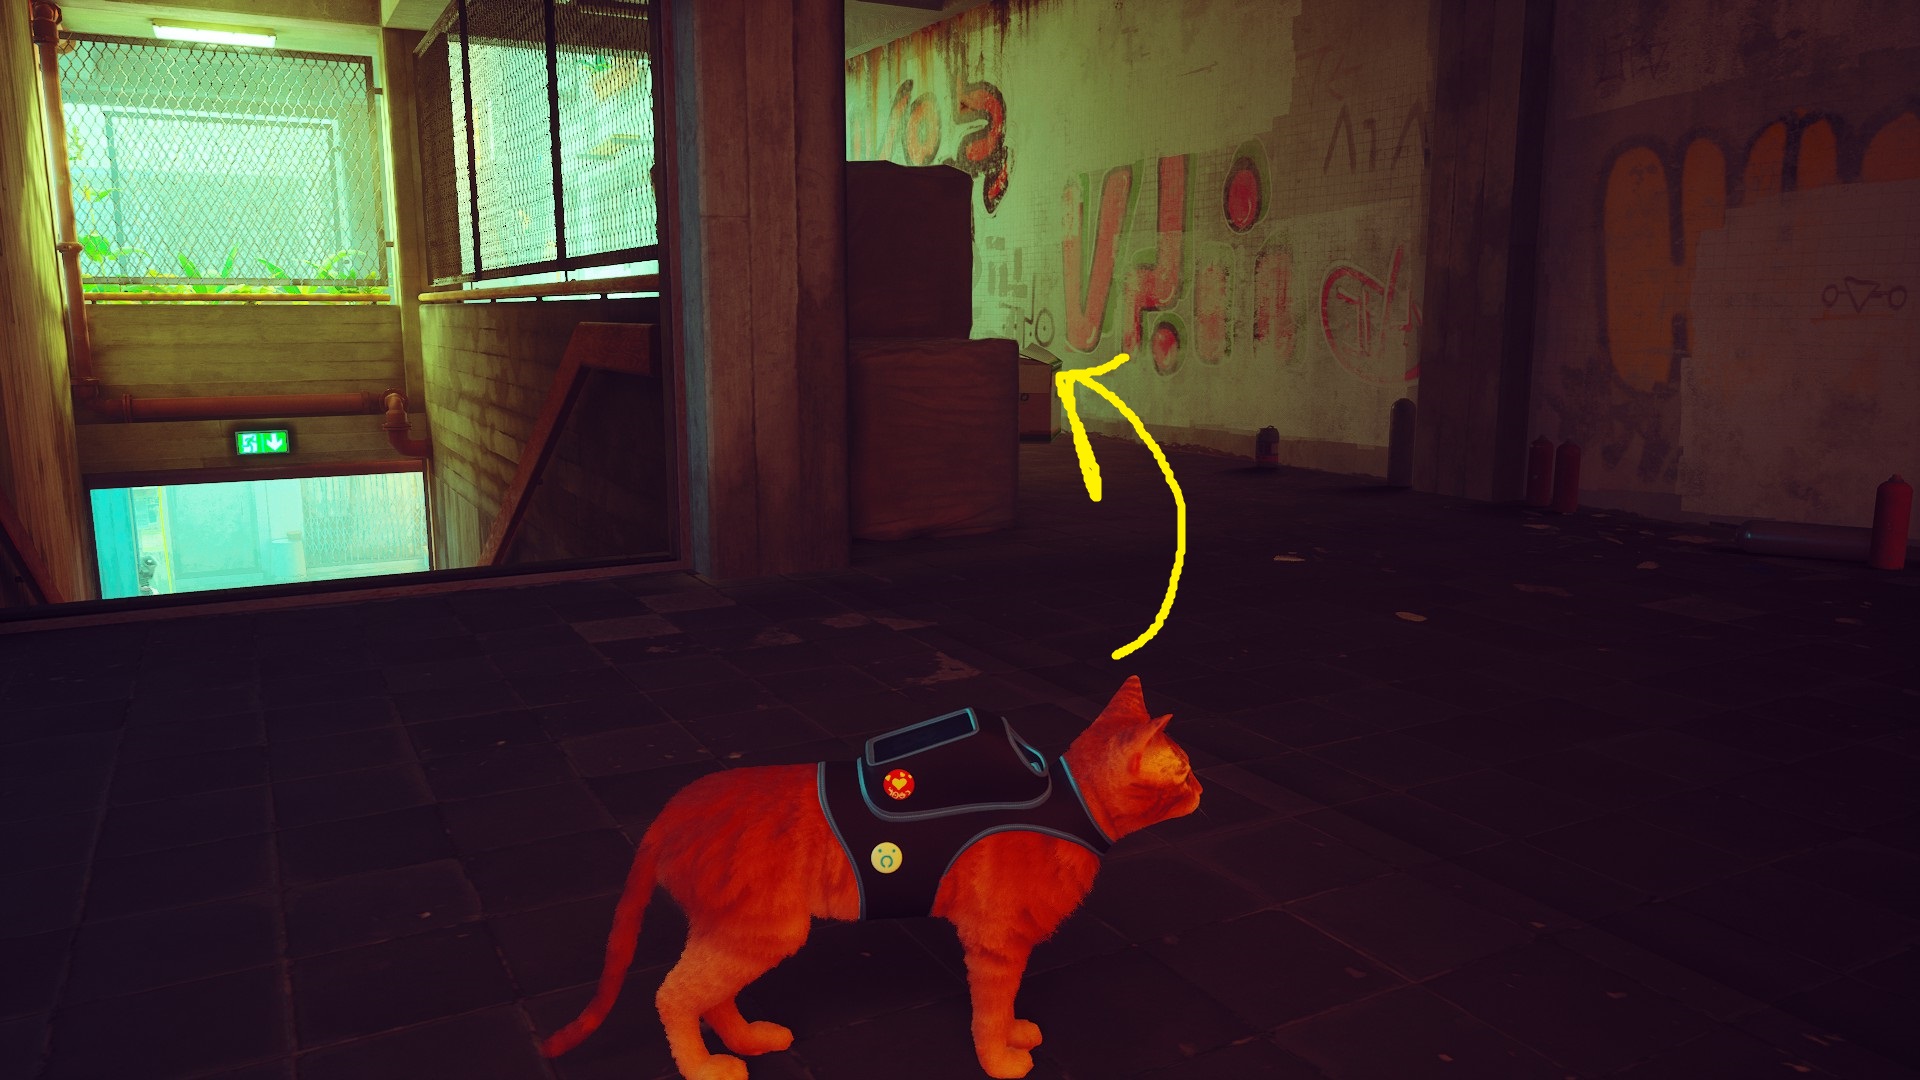
Once you’ve found all four pieces of the message, you’ll know you need to go to the Club. To get there, you’ll first need to get out of the apartment building without being blasted by drones — fortunately, there’s an easy path down to the courtyard.
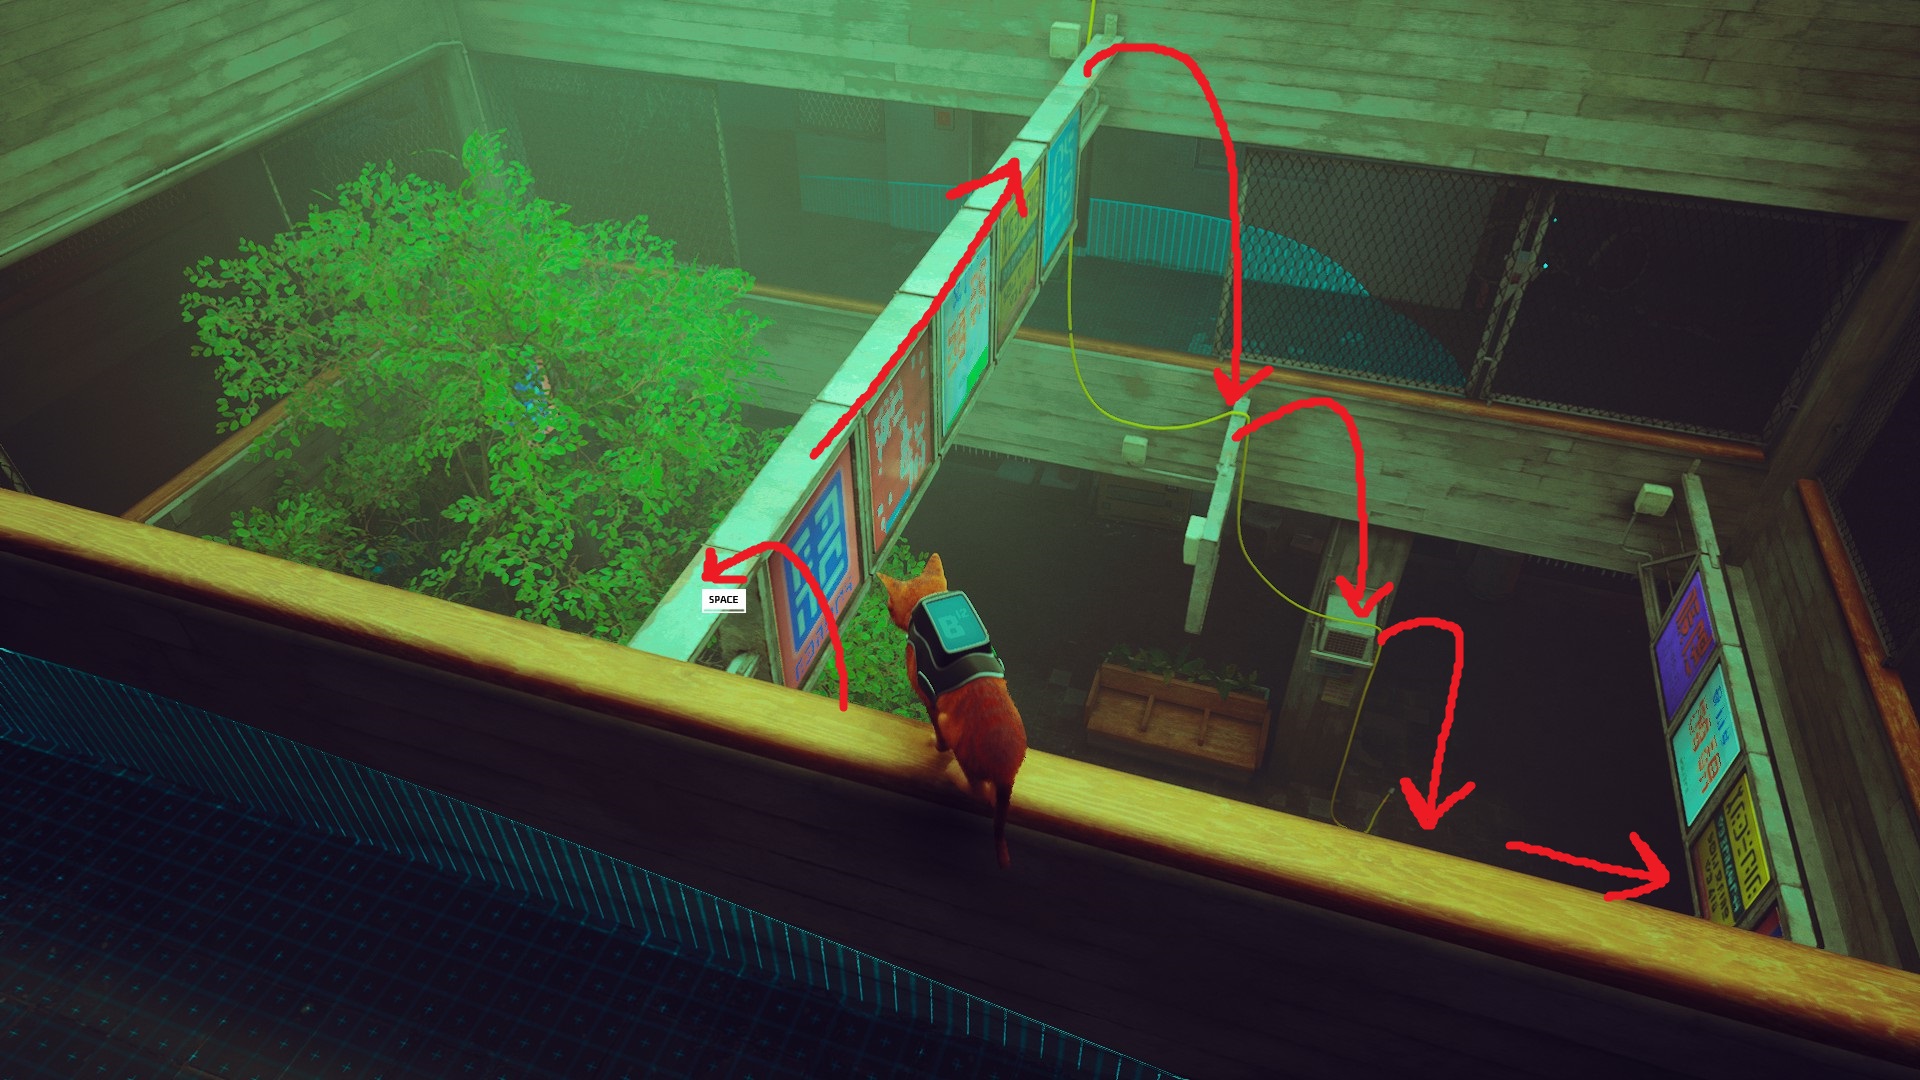
Exit Clementine’s apartment via the hole in the kitchen, and then (once the drone is looking the other way) jump down from the hole and up onto the guardrail. From there, you can follow the path indicated below to reach the courtyard, and then sprint out of the complex, heading back towards the roundabout (the drones won’t chase you very far, so don’t worry about getting spotted).
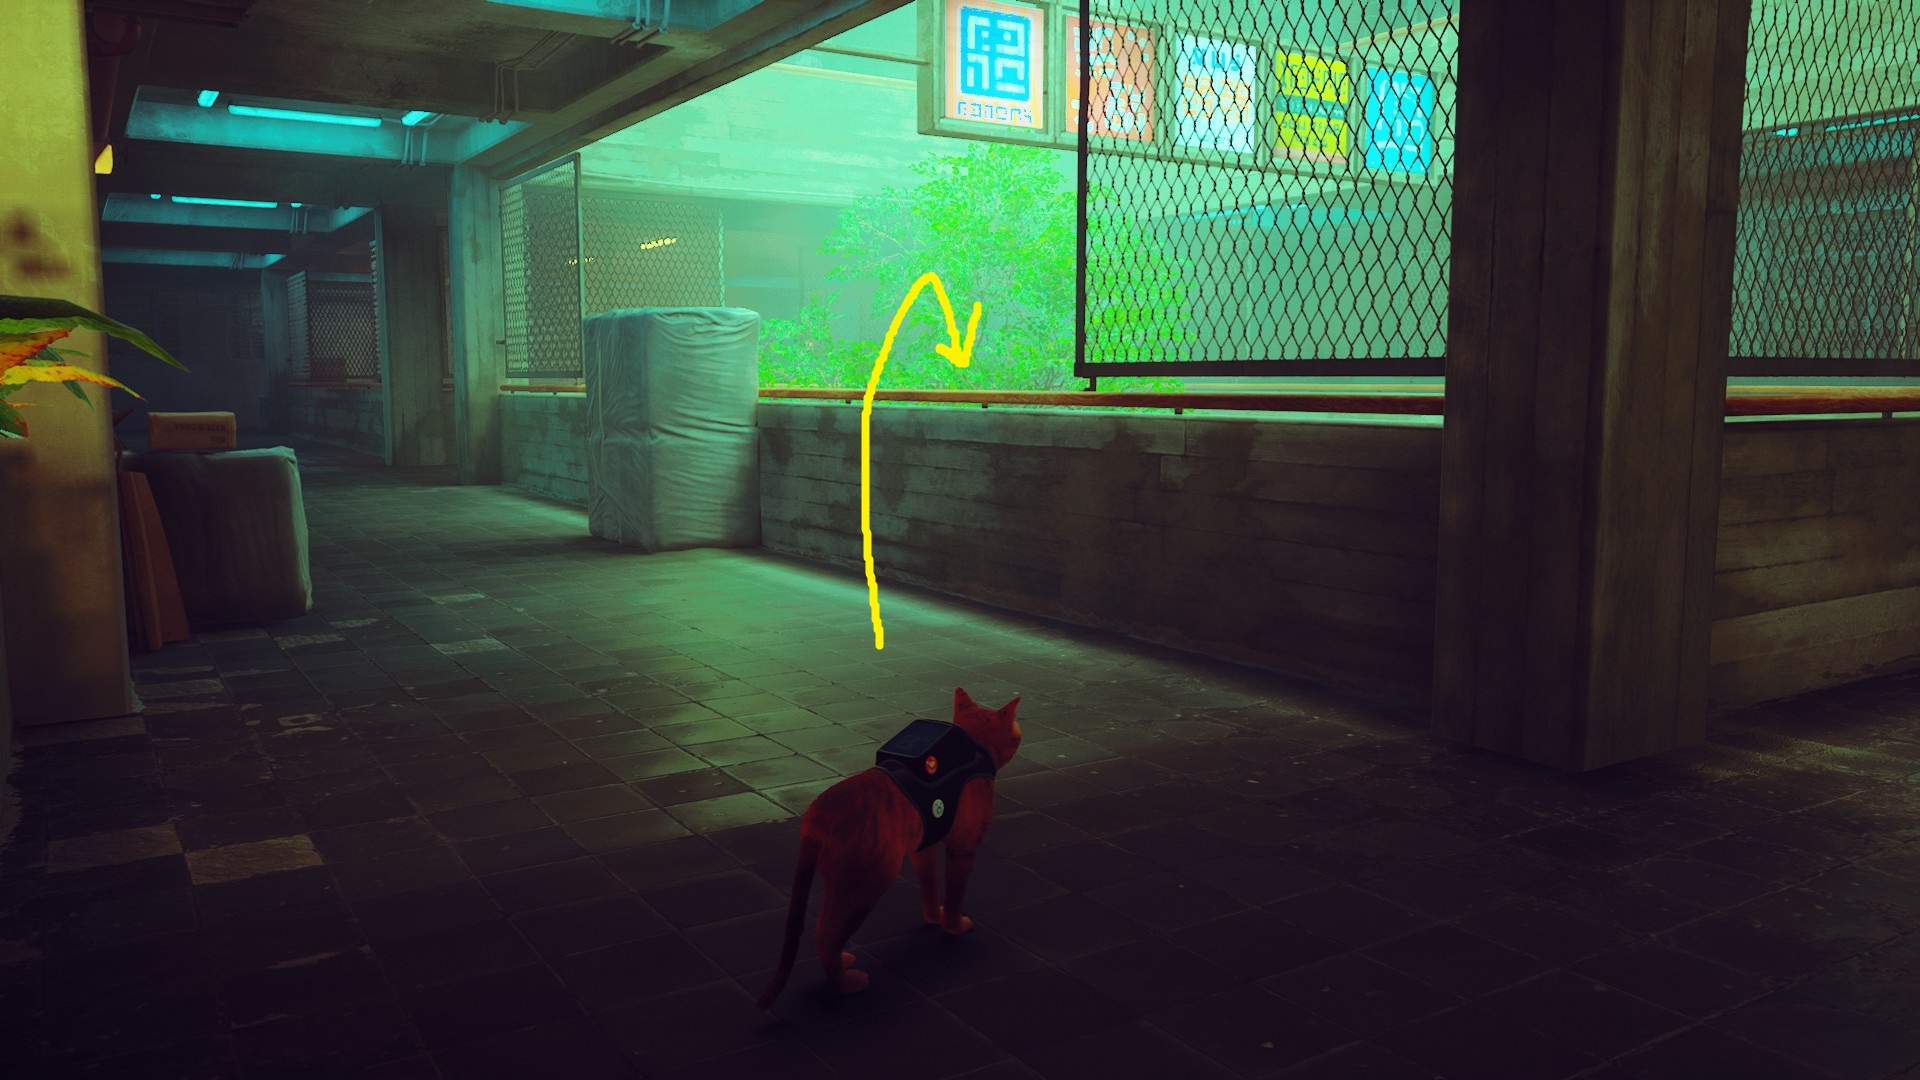
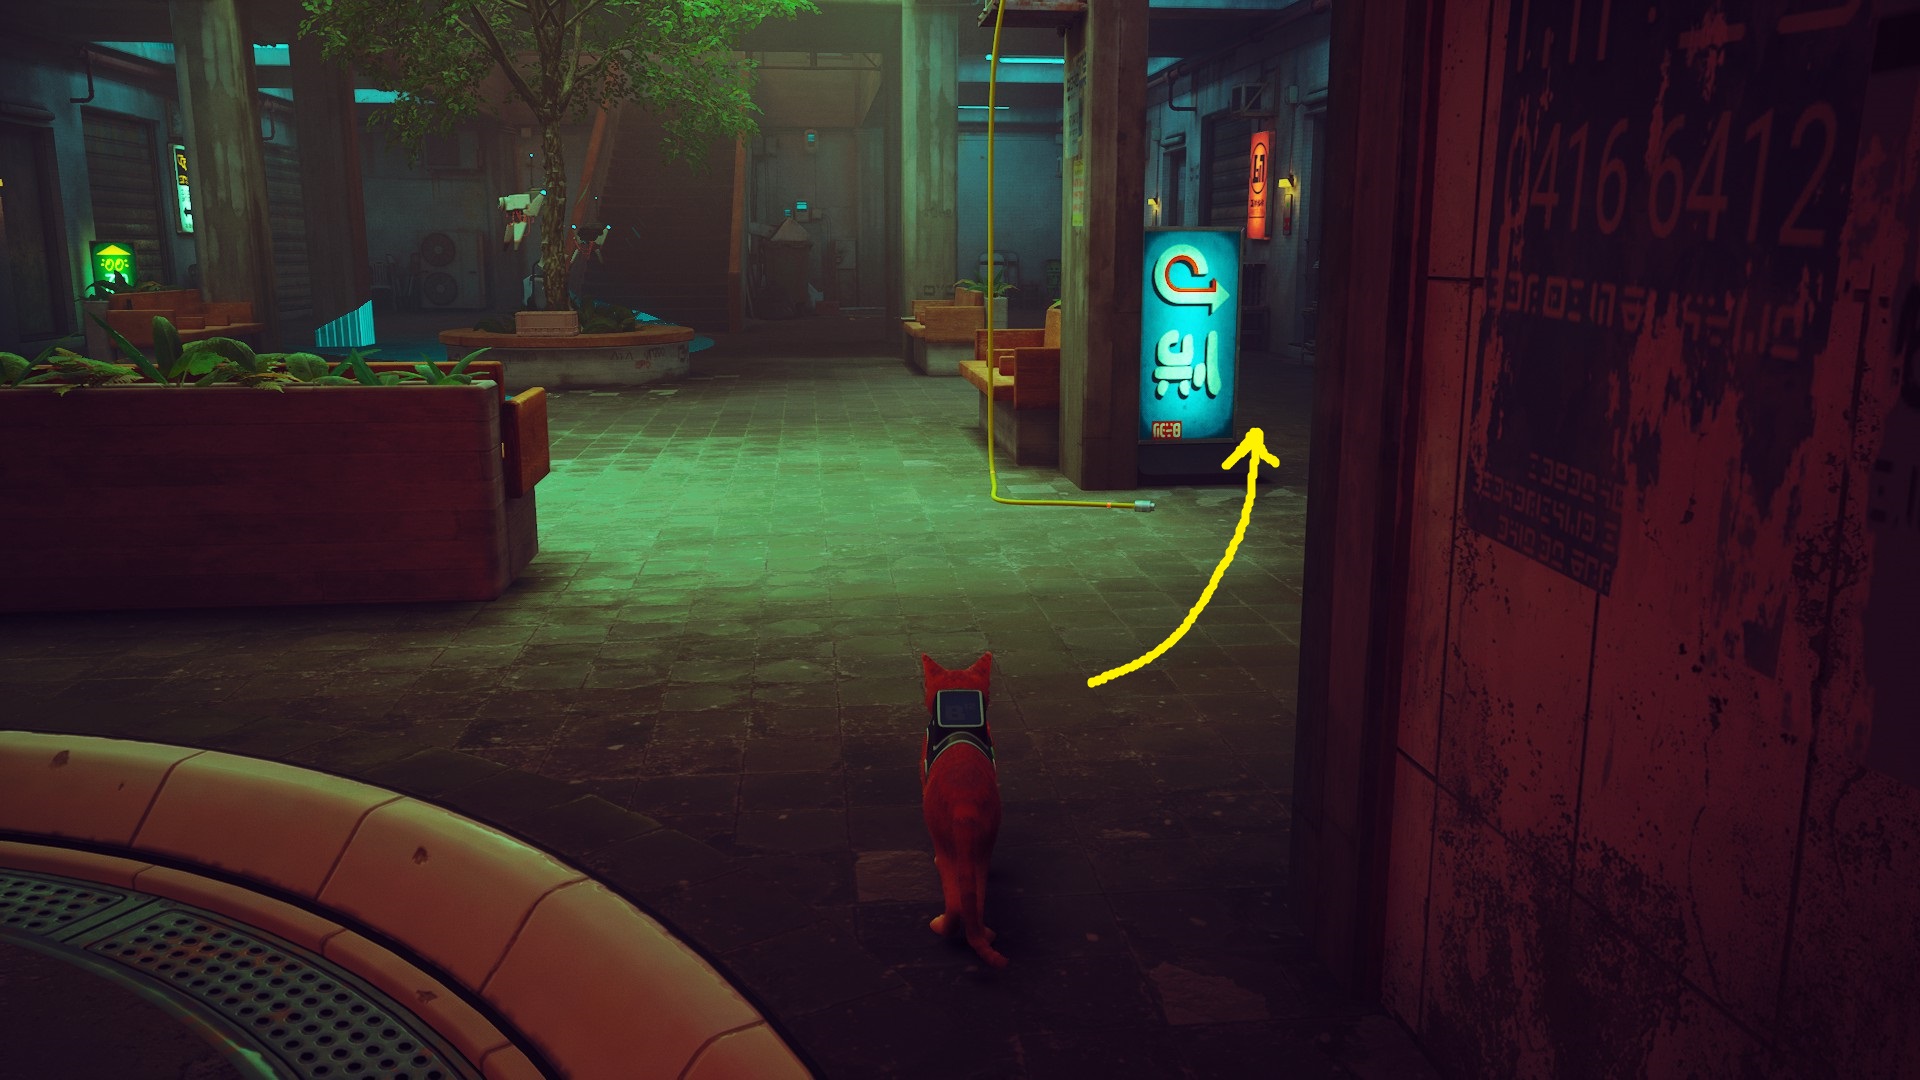
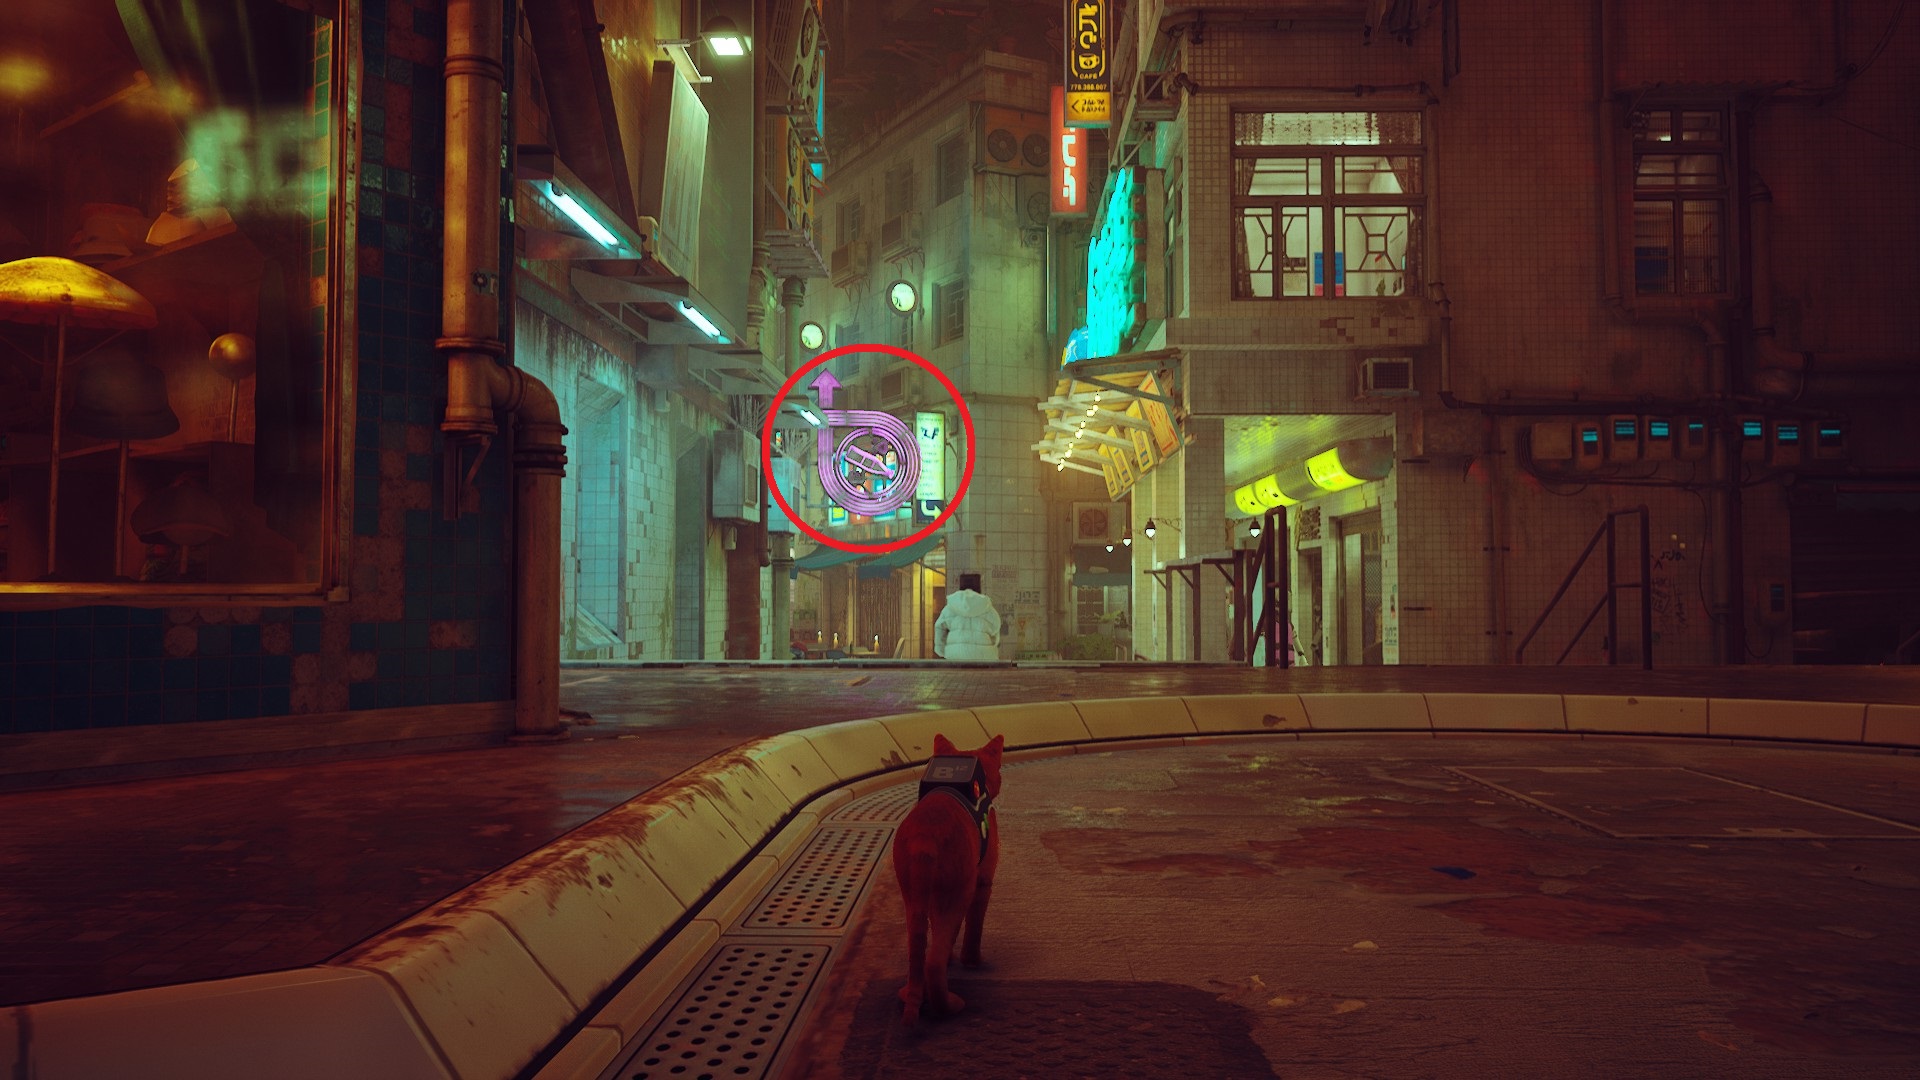
At the roundabout, turn left and you’ll see the pink/purple sign for the club — head over there and you’ll discover the bouncer doesn’t let cats in.
Try talking to the other people in line, and you’ll get a hint about how you can enter the club.
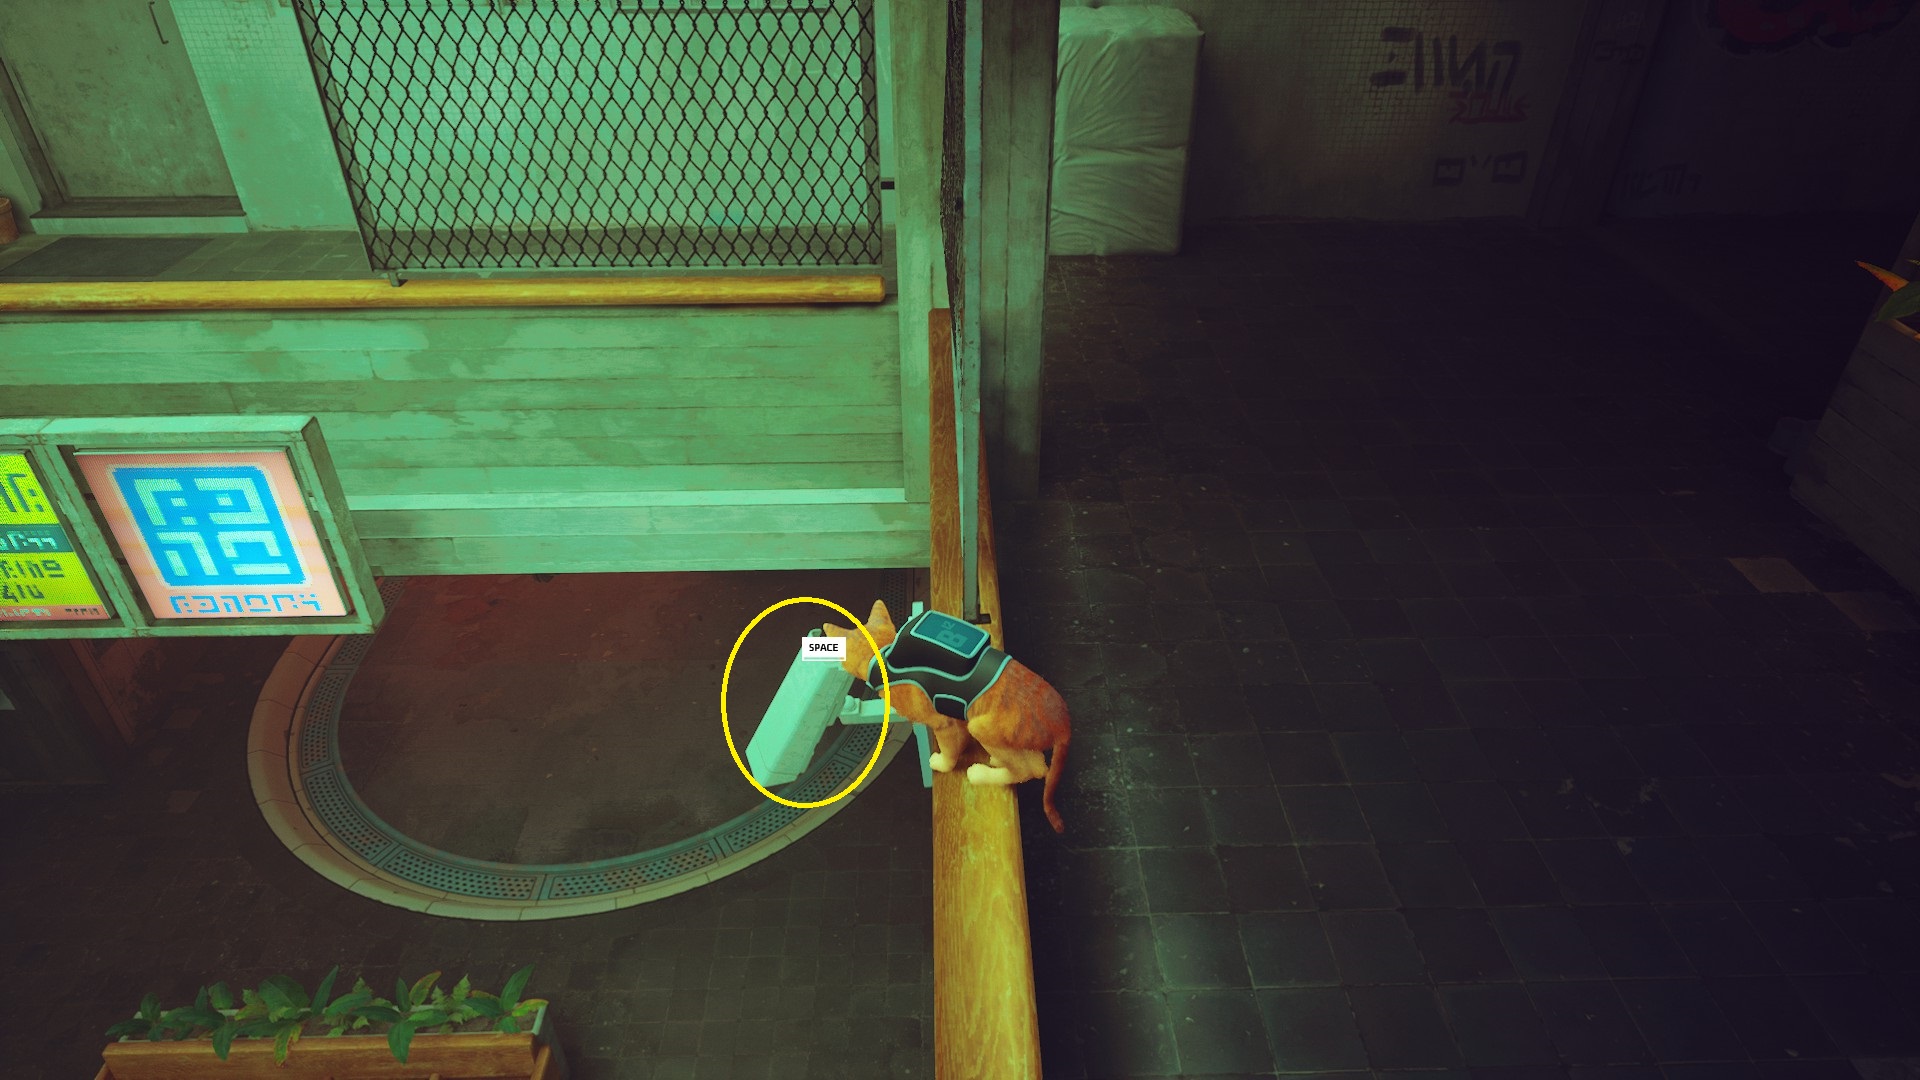
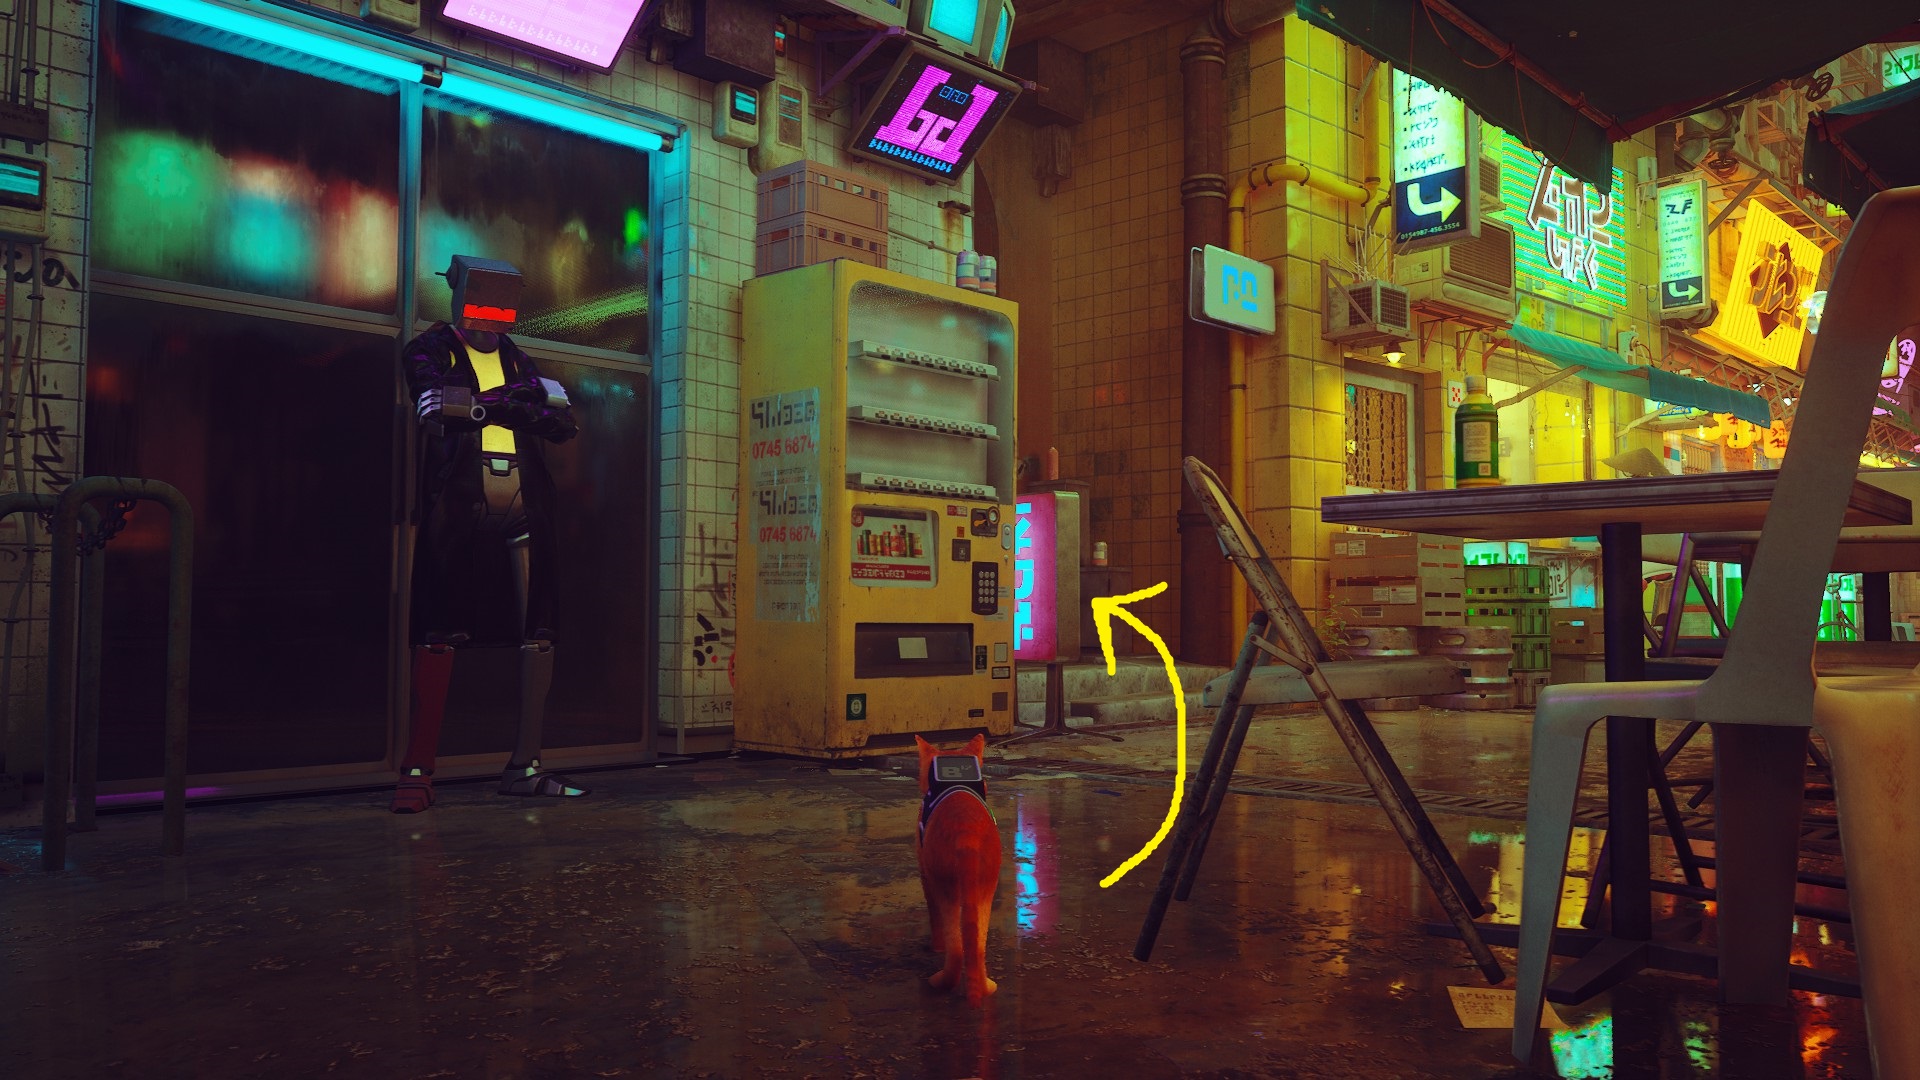
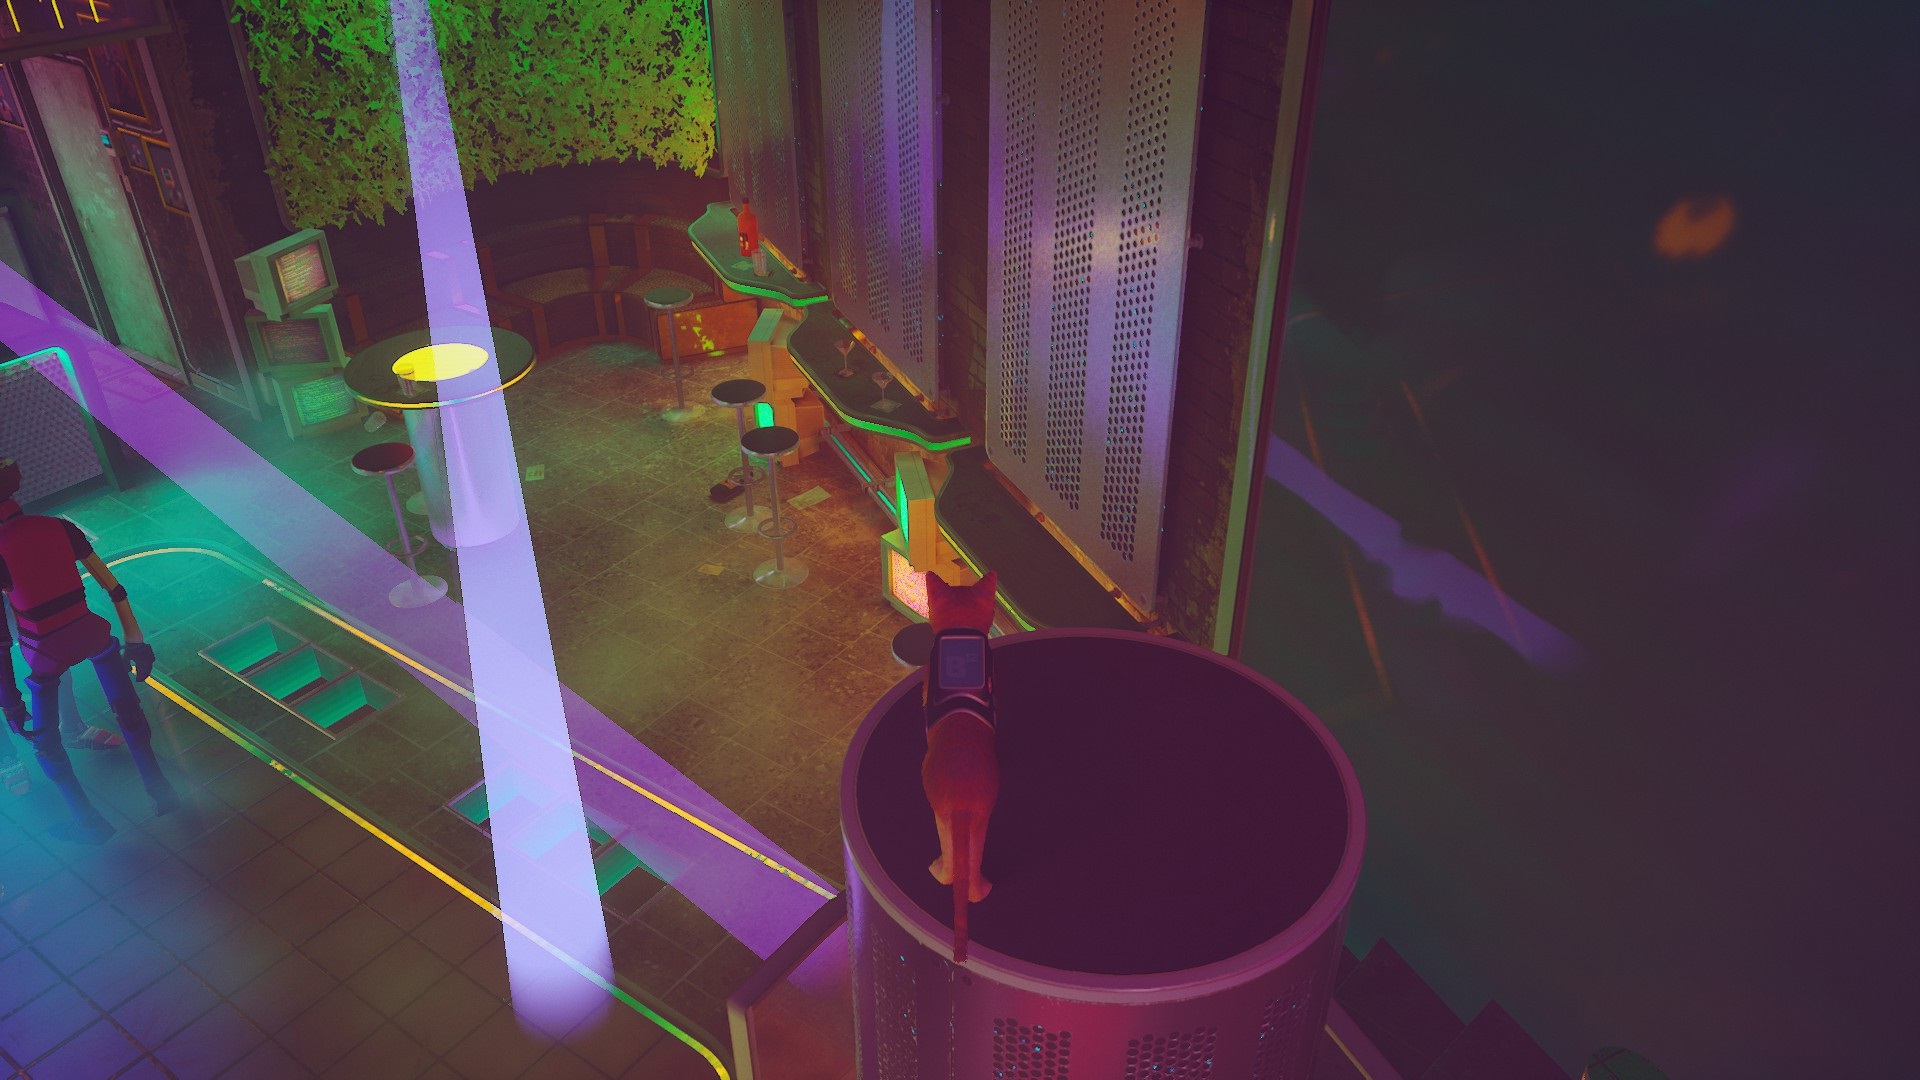
Head into the alley just to the right of the bouncer (1), and continue to the back of the club. You’ll see a cyan neon sign — beneath it, you can jump on the garbage can, and from there onto the awning (2). Continue onto the wooden board (heading towards the purple-wearing robot), and then a series of jumps will take you to just below the Club’s window (3). Speak with the robot leaning out the window, and it will get out of the way, allowing you to jump up into the club.
123
Once inside the club, you’ll first need to figure out how to get to the upper level.
This is a multi-step puzzle — first, explore the stage and see if there’s a way to get higher. Then, see if something is missing from the stage. You may need to run an errand to get the missing something… When in doubt, speak with the robots in the club to get more hints.
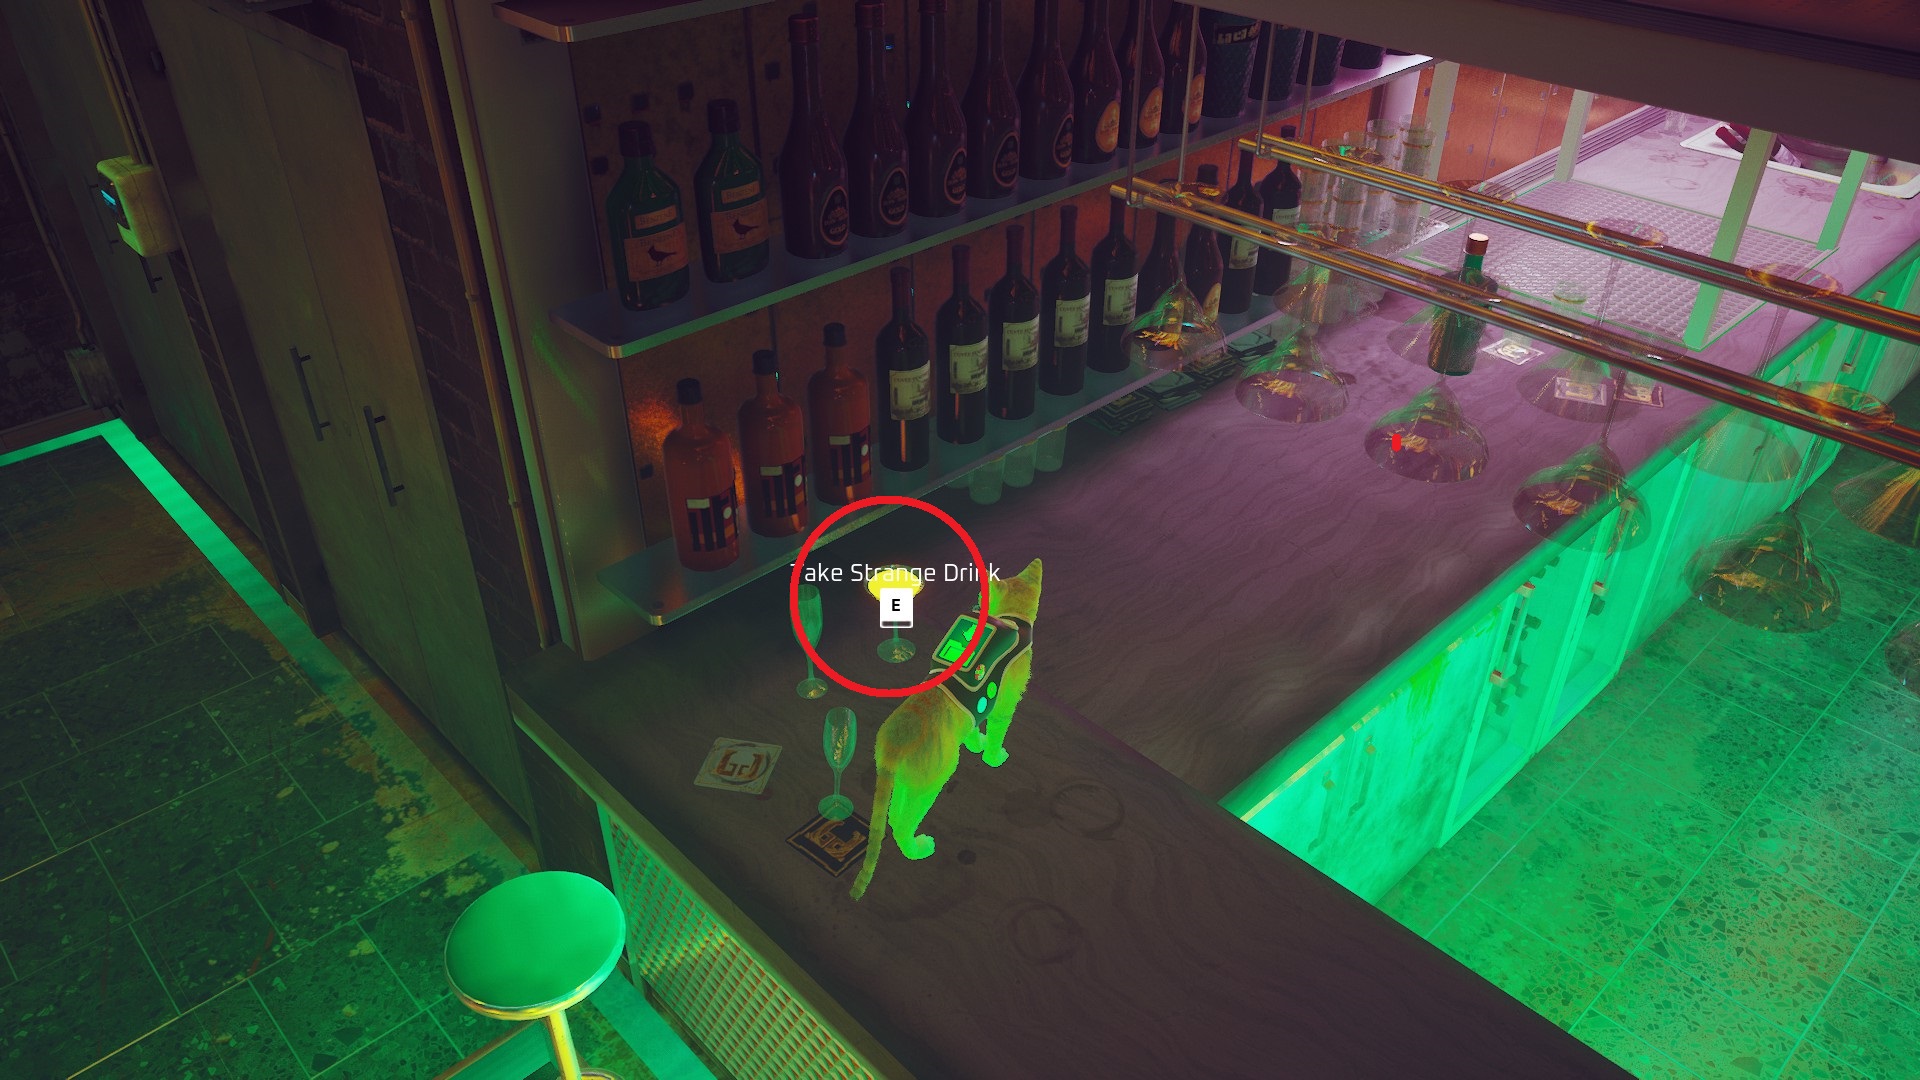
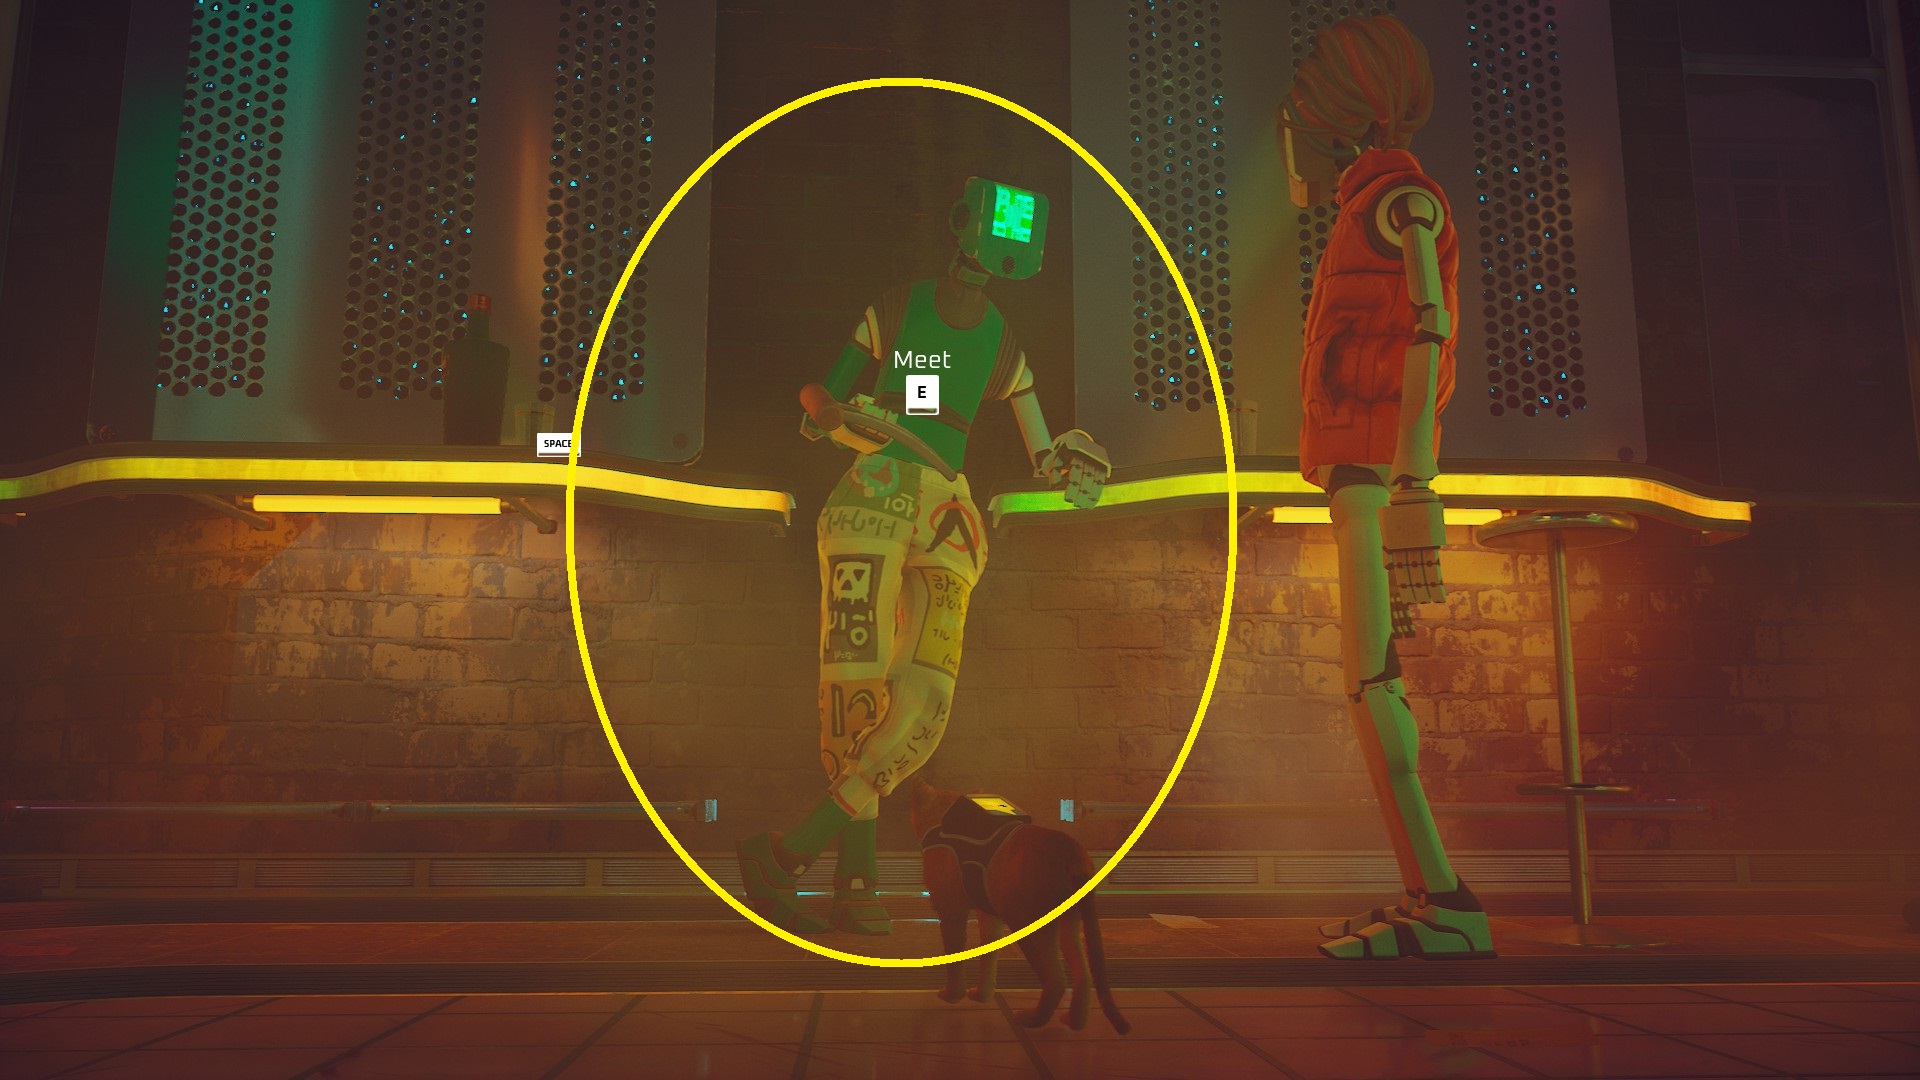
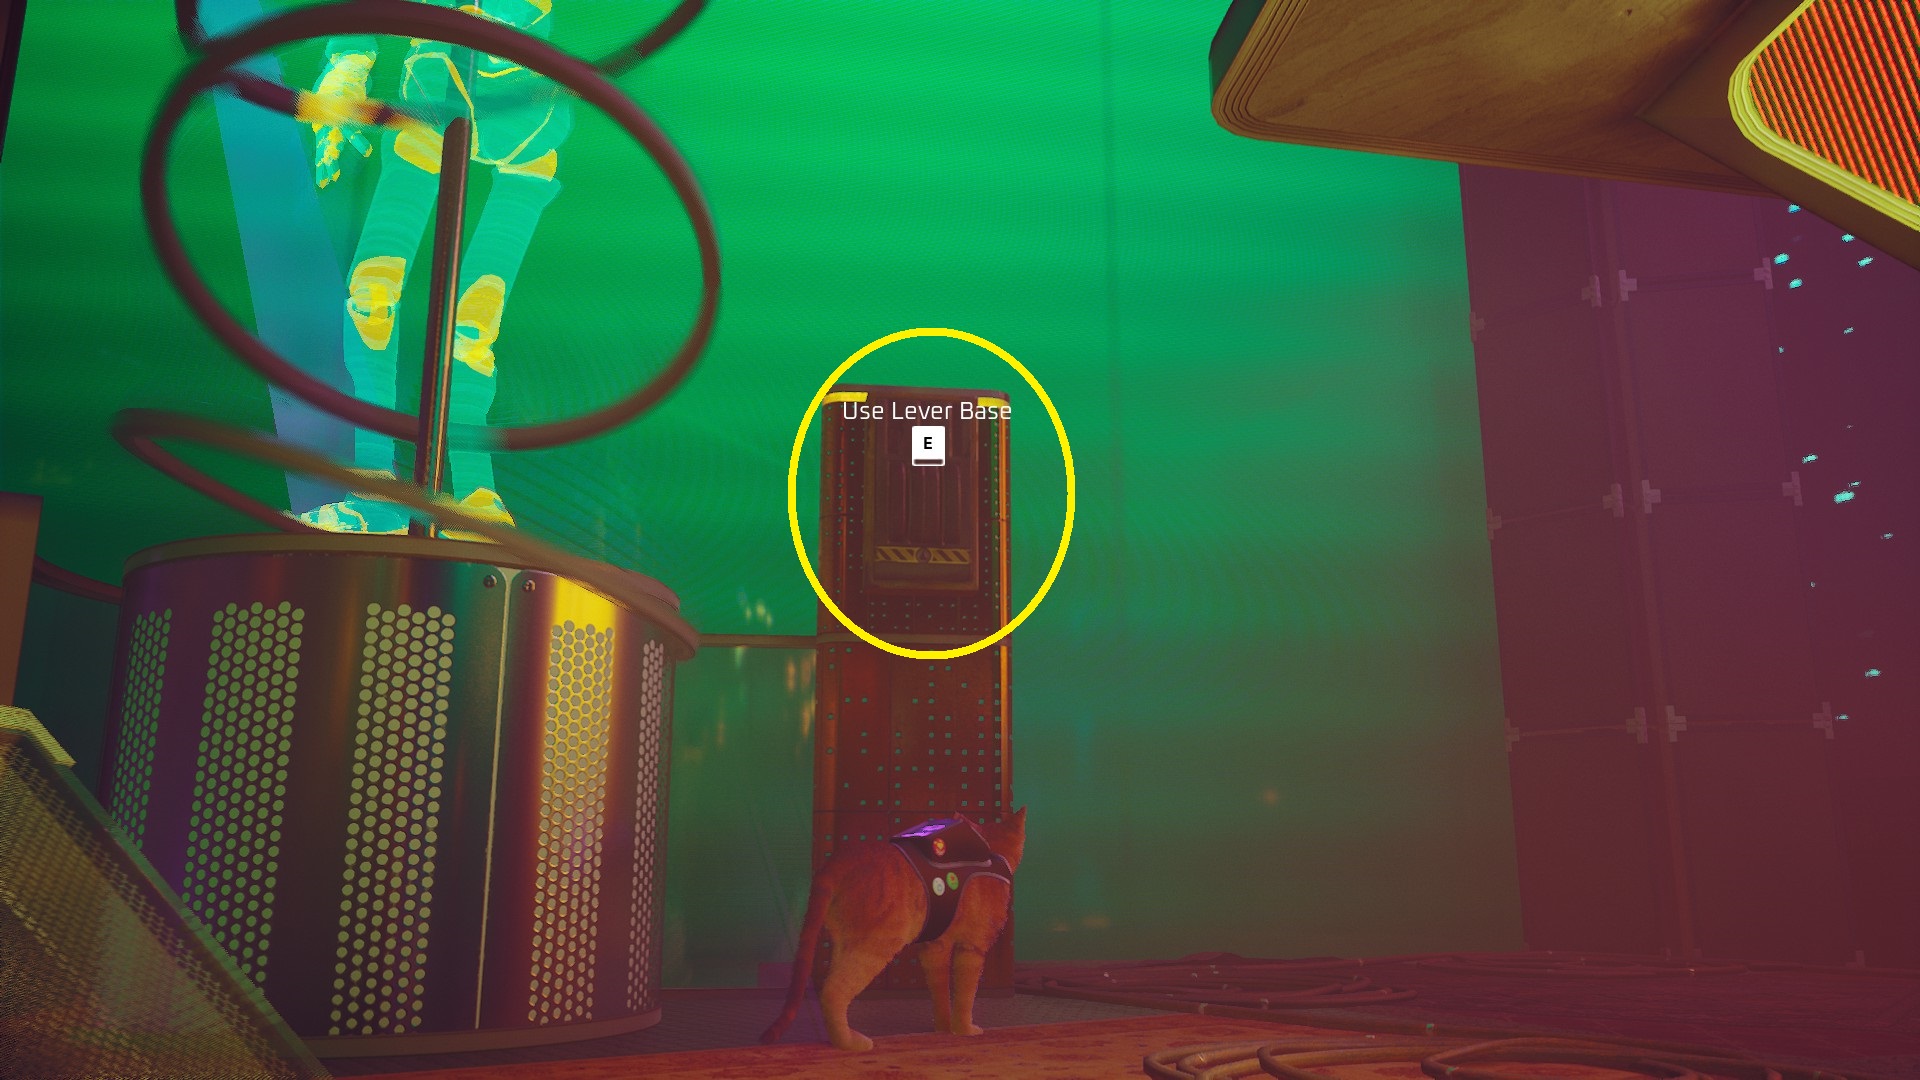
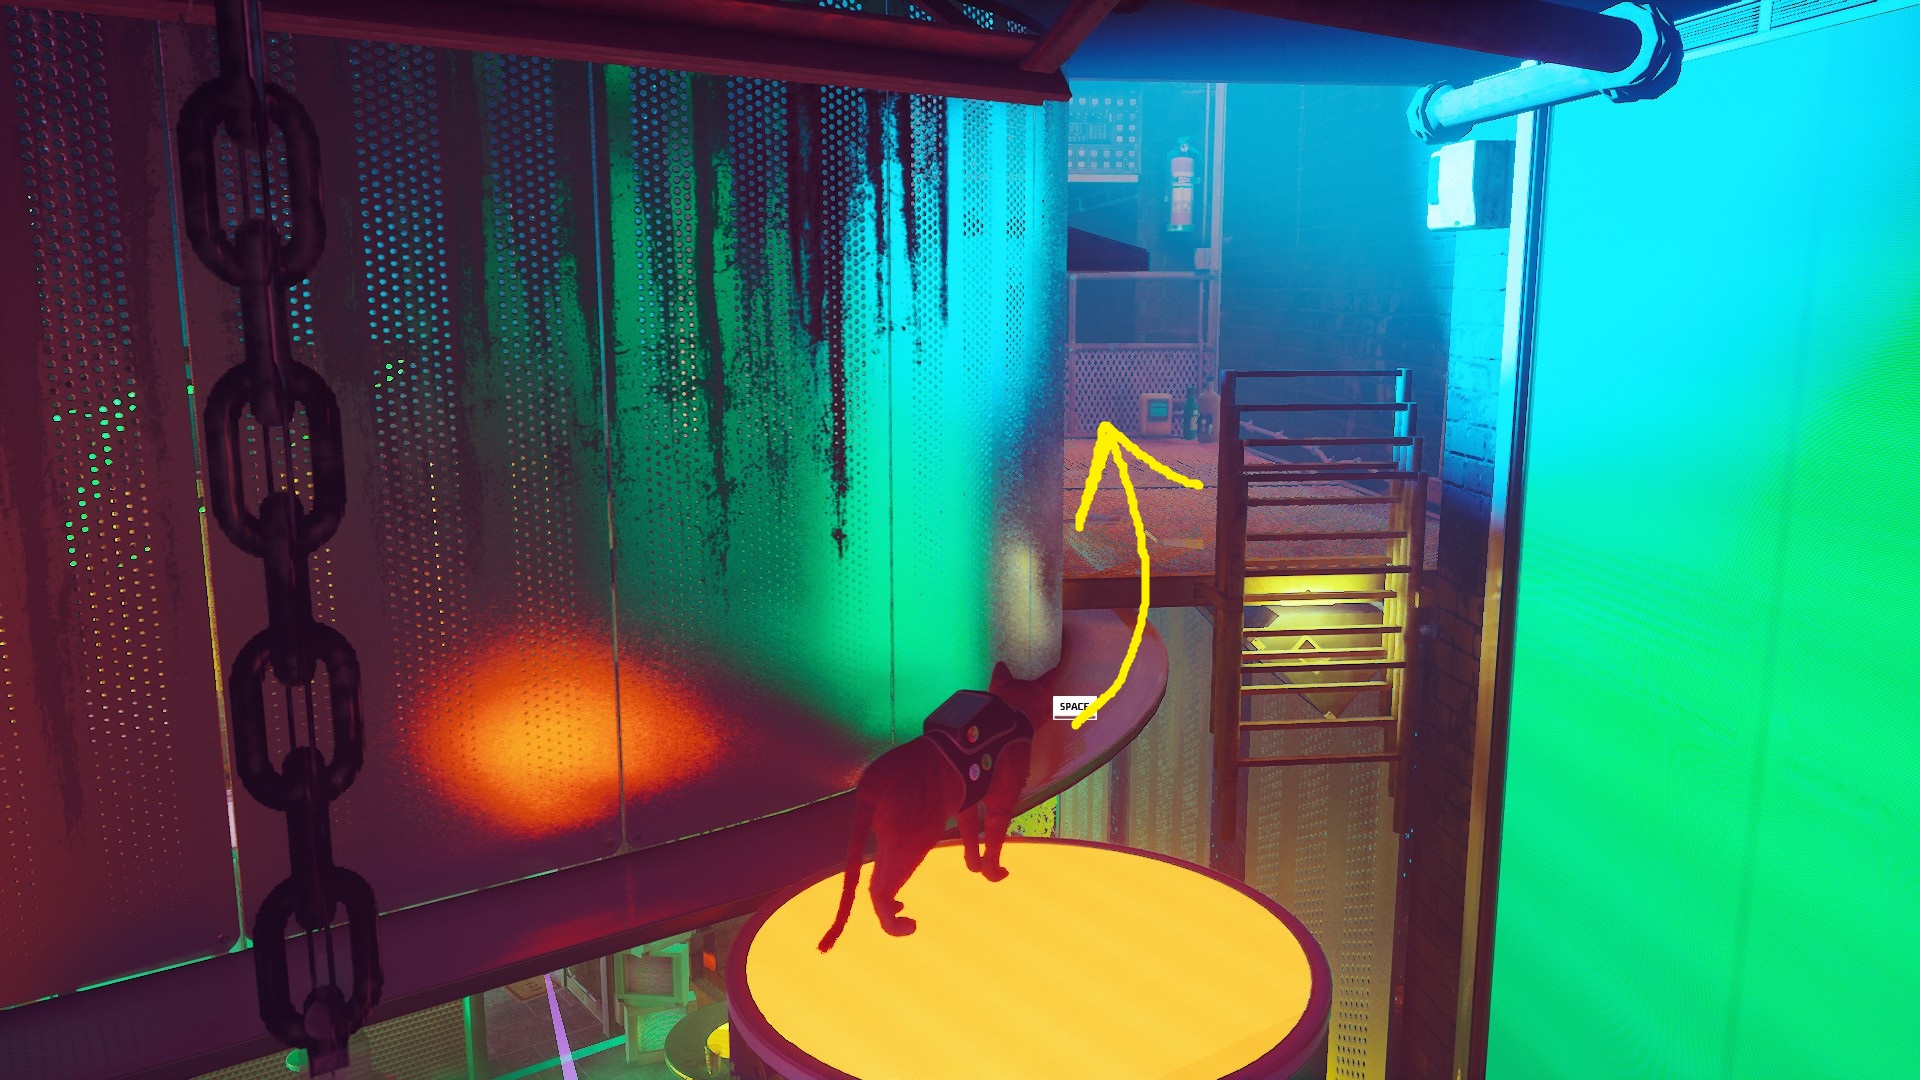
After entering the club, jump up on the bar and pick up the Strange Drink. Then turn around and find the robot with the lever hanging out on the far right side of the room. Give the robot the Strange Drink, and it will give you the Lever. Jump up on the stage and head to stage right (left if you’re facing the stage), interact with the Lever Base, and use the Lever on it. This will replace the lever — use the lever, and the column to the left with the holographic dancer will lower. Jump up on top of the column, and one of the DJs will come over and raise the column again. Once it rises, walk forwards into the control booth.
12345
In the control booth, you’ve got another puzzle to solve!
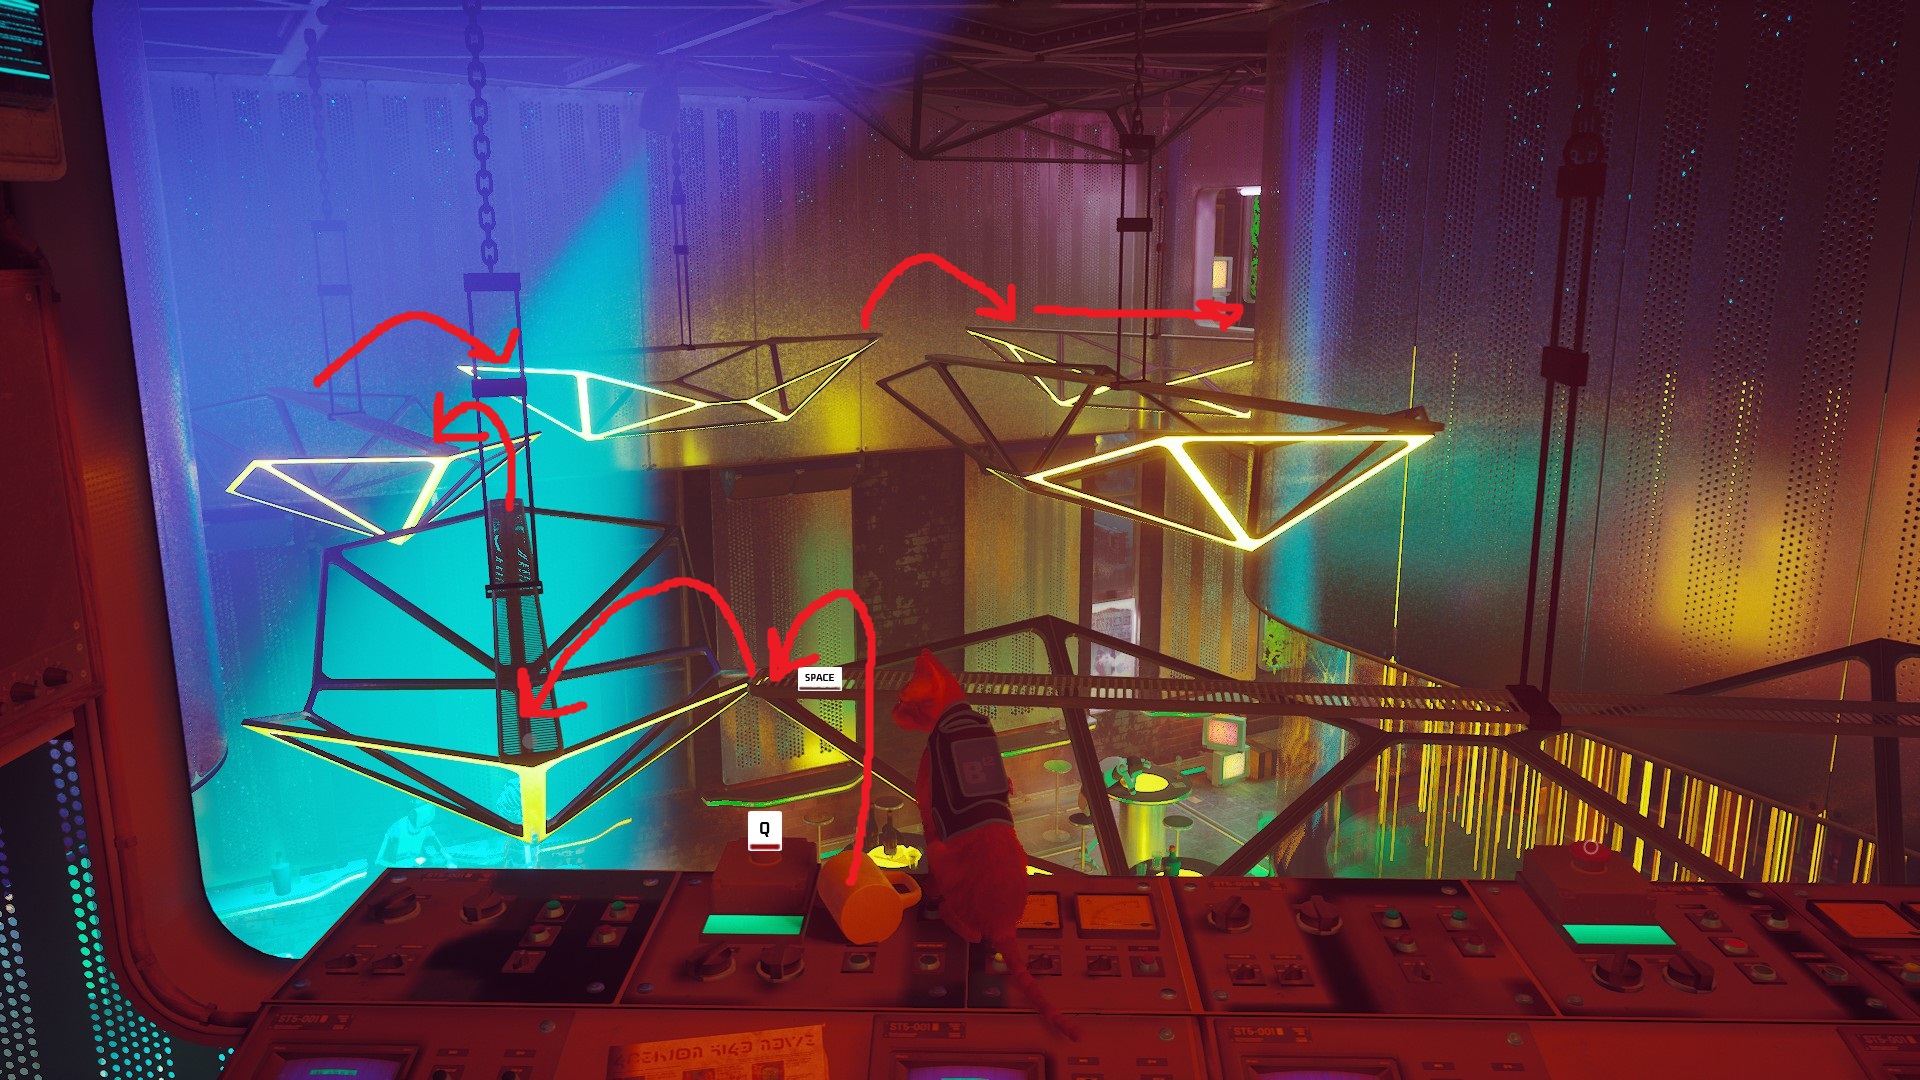
Pay attention to what happens when you press each button on the control panel, and see if you can make a path forward.
Press the buttons on the control panel in the following sequence: Middle, right, left, middle. After doing so, you’ll be able to use the light fixtures to reach the VIP lounge. If you messed up the order, you can reload a checkpoint or just try to get the fixtures looking like they do in the image below.
After crossing the light fixtures and reaching the balcony, turn right and go up the stairs, and a cutscene will play. Congratulations, you’re in Jail!
Unabashed FromSoftware fanboy still learning to take his time with games (and everything else, really). The time he doesn't spend on games is spent on music, books, or occasionally going outside.