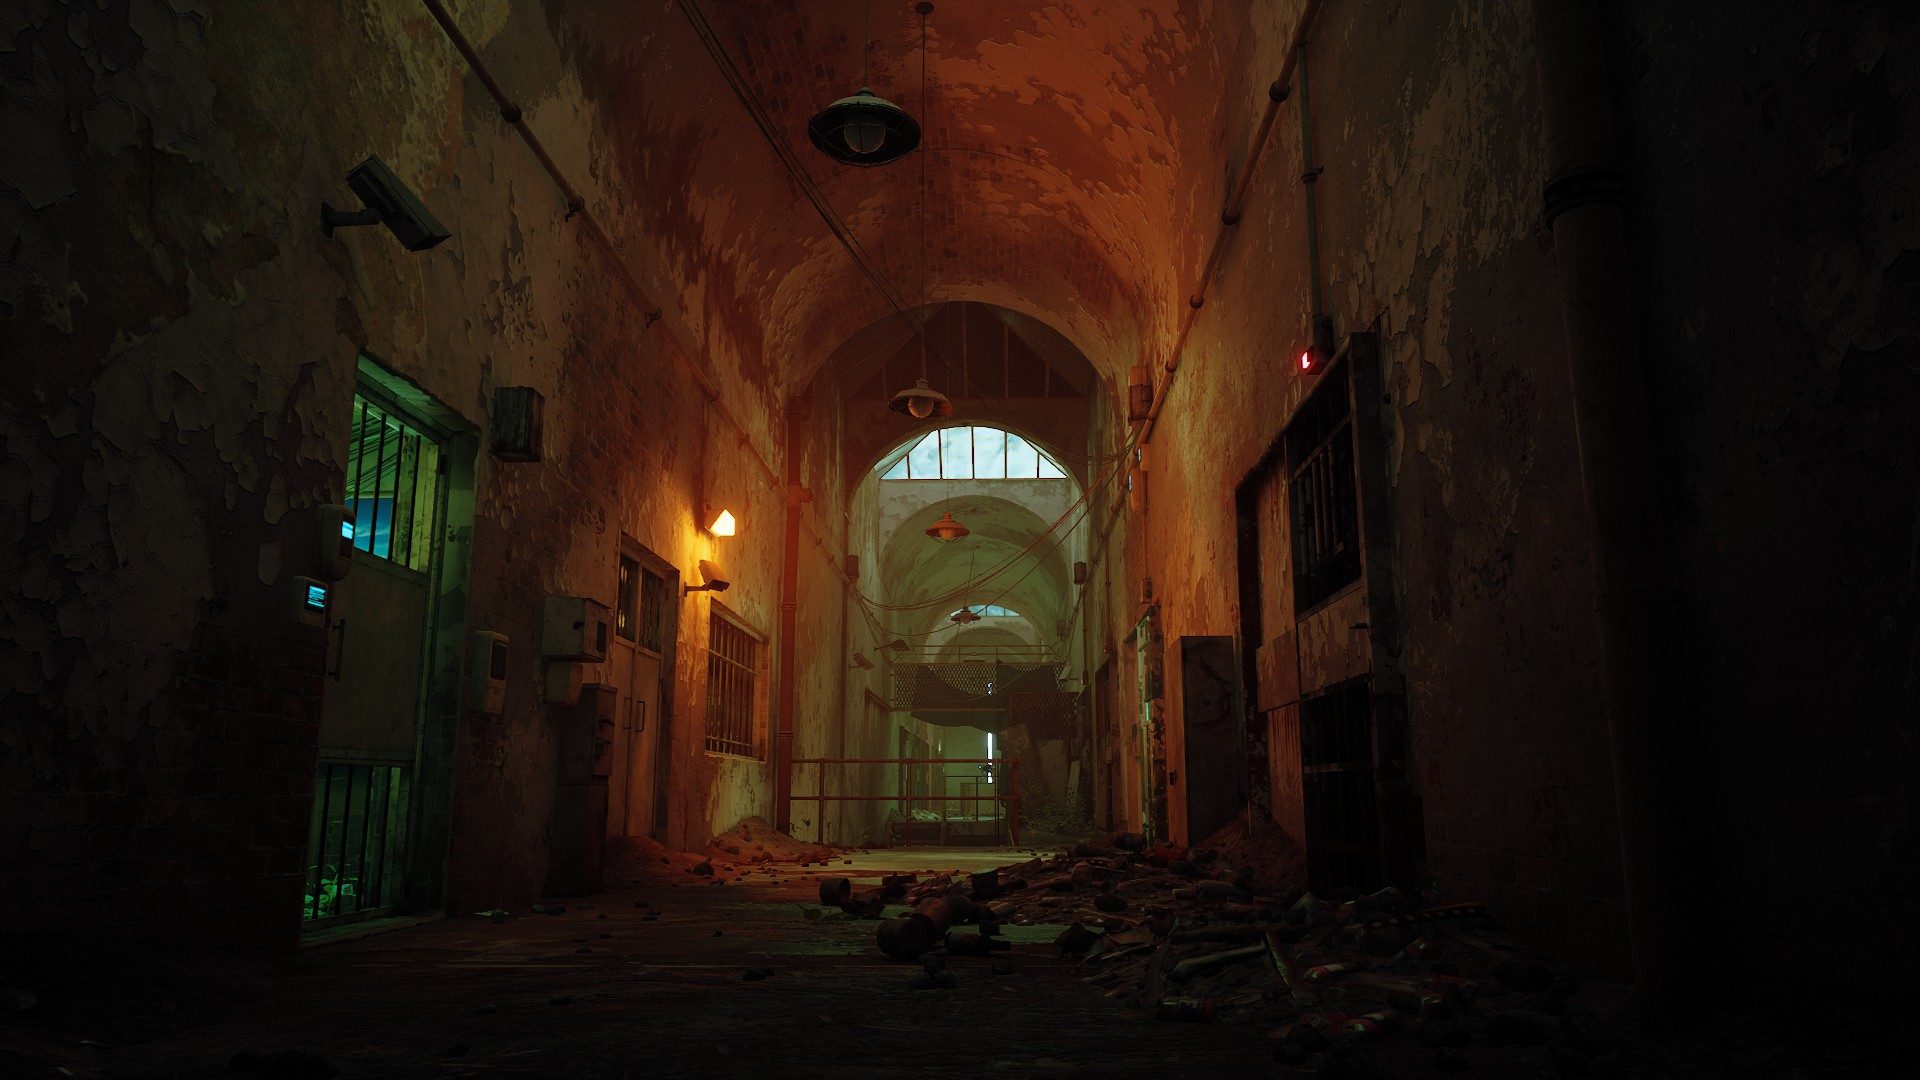
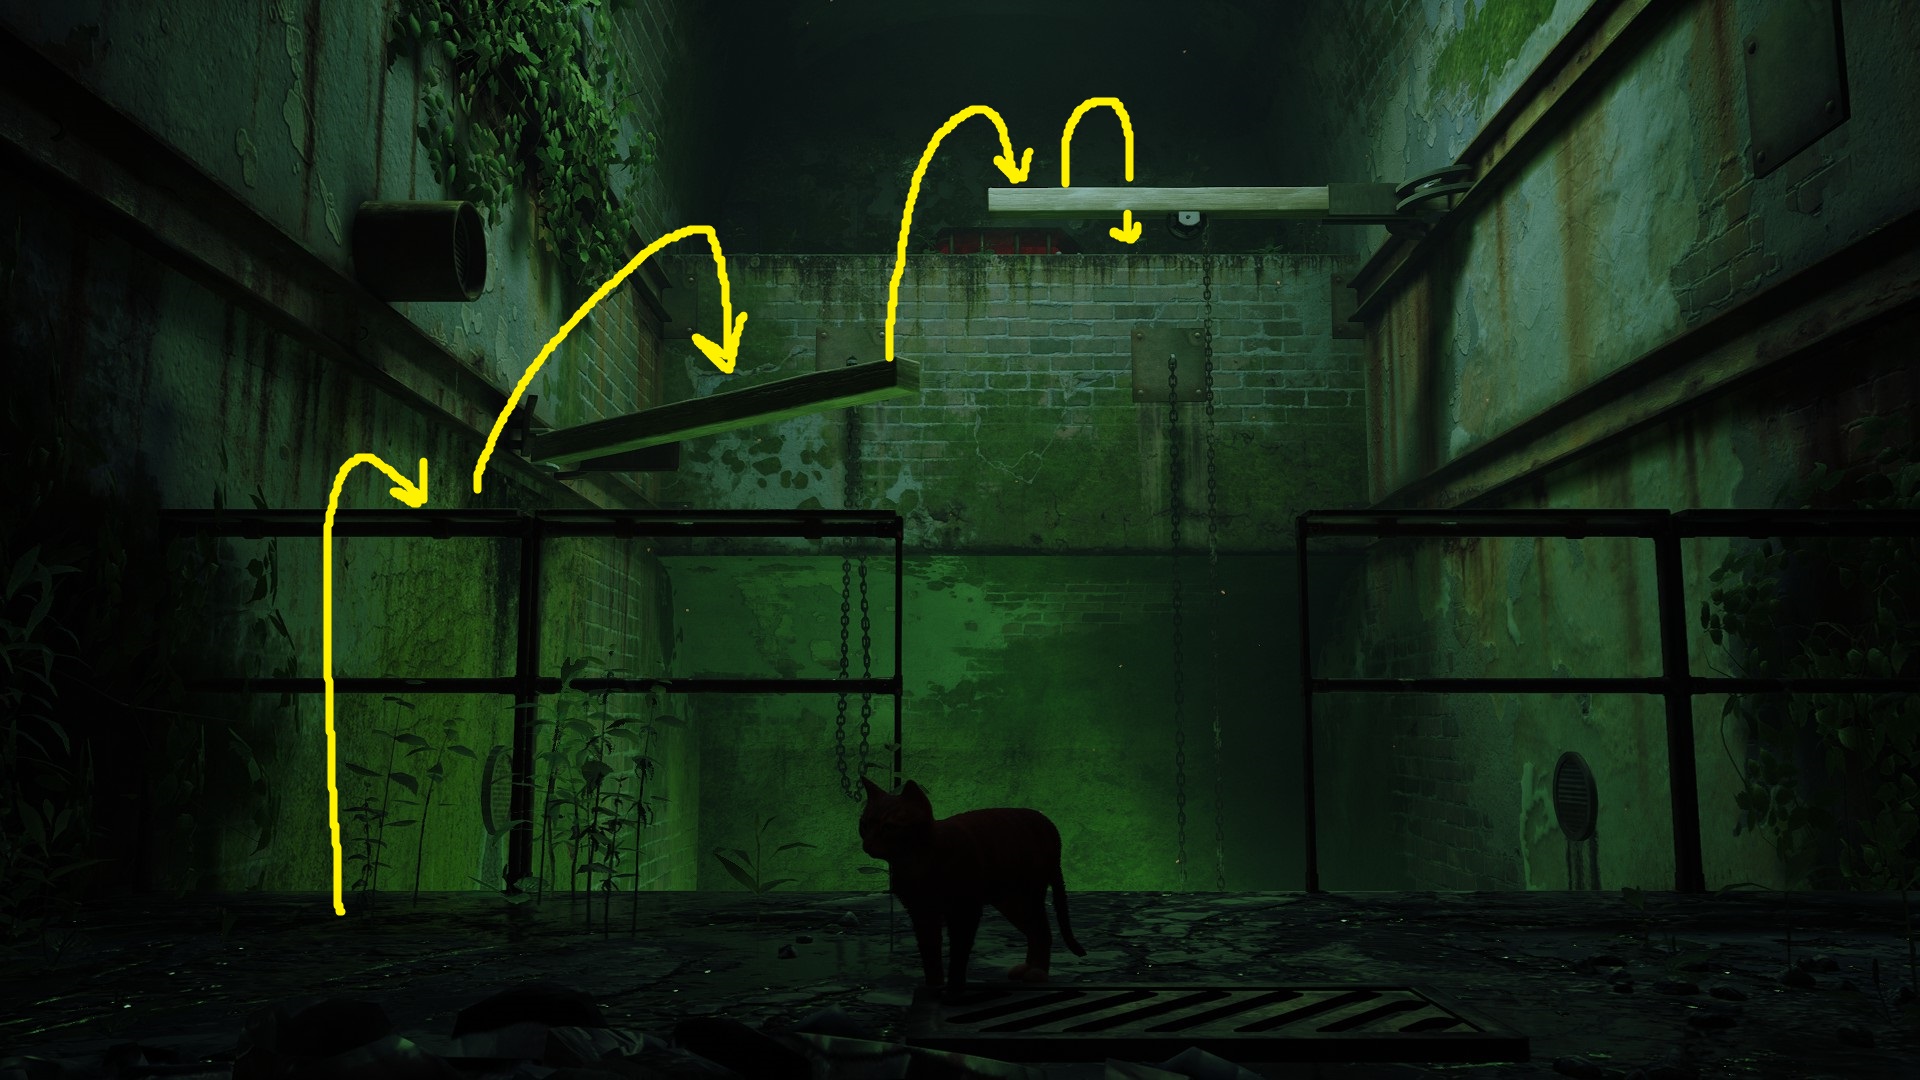
When the Jail chapter begins, you’ll find yourself in a cage suspended from the ceiling. Naturally, you’ll need to escape your cell if you want to continue.
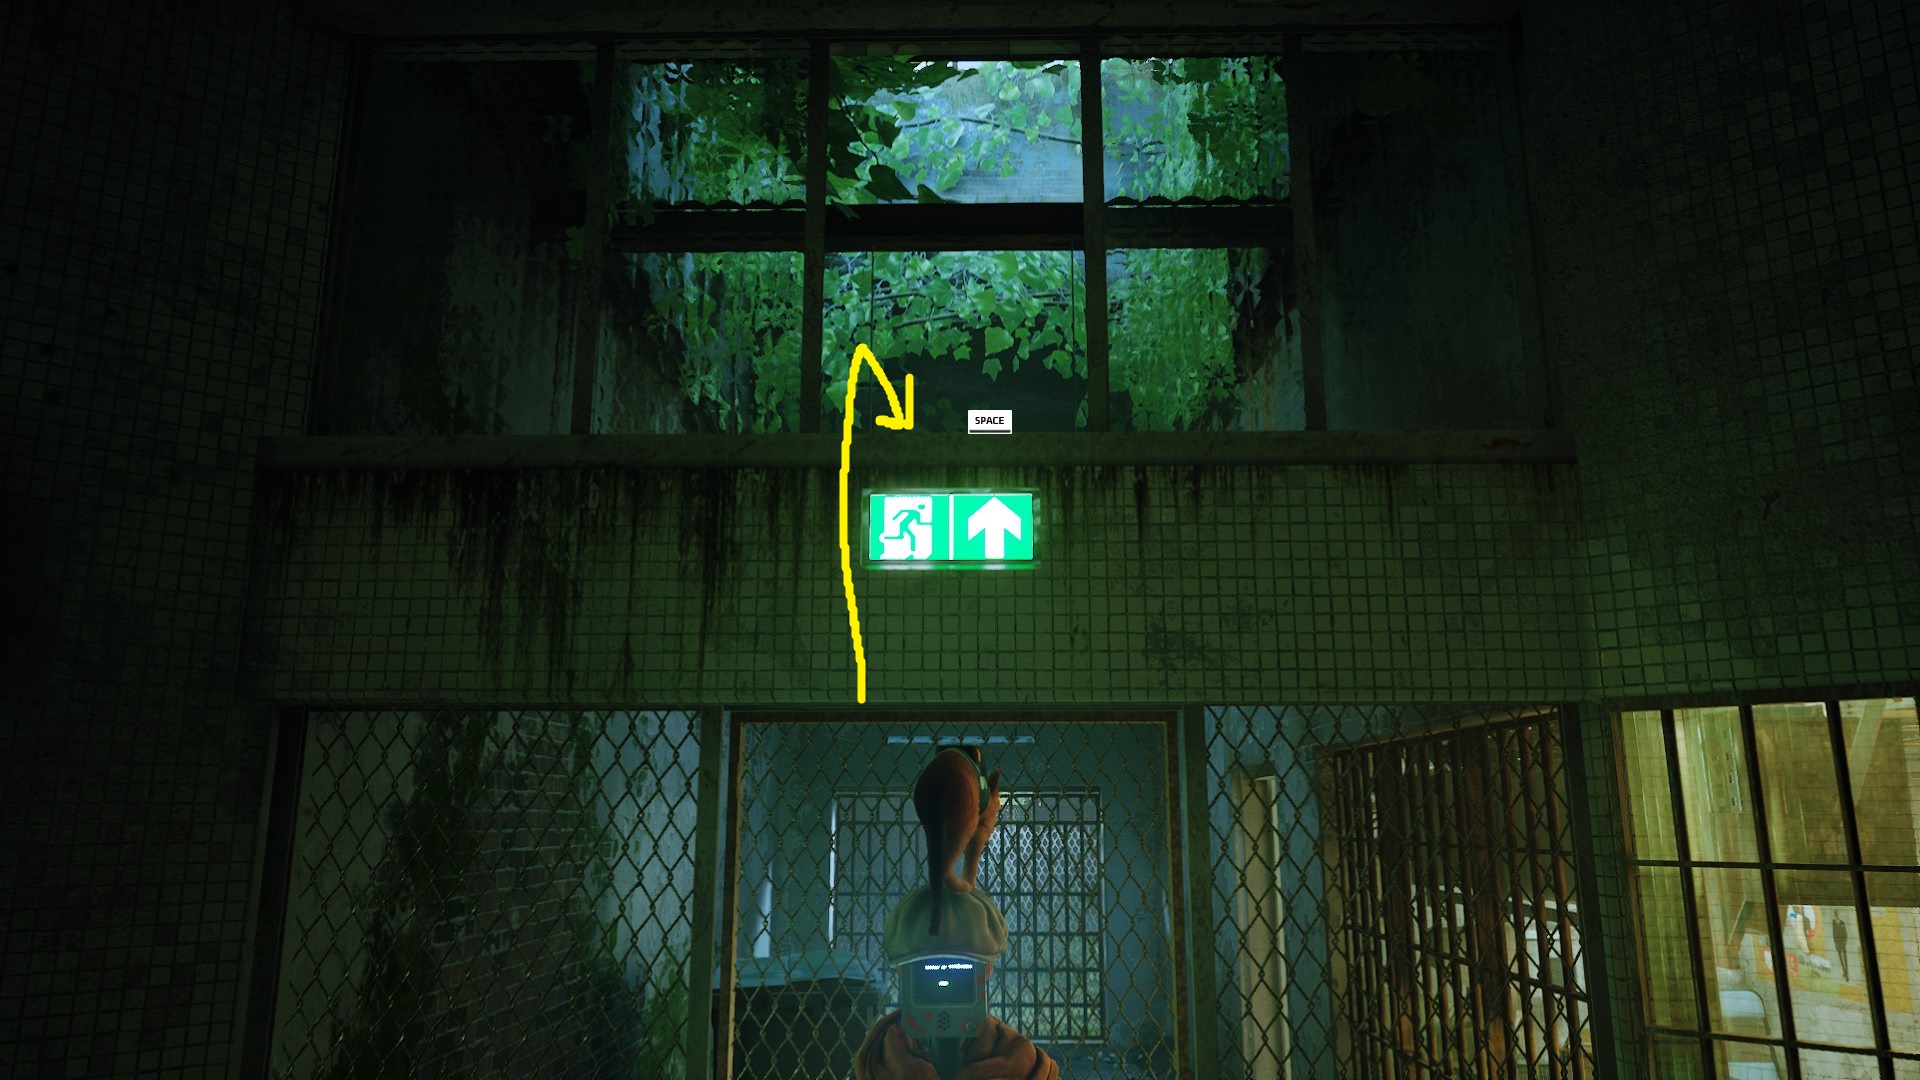
Momentum is the name of the game. Once out of the cage, look up for a path out.
Using the left and right movement inputs to swing the cage back and forth — hold left, then when the cage stops swinging left, hold right until the cage stops swinging right, then hold left again. Repeat this until the cage bangs against the pipe a couple of times — at this point, it will break open.
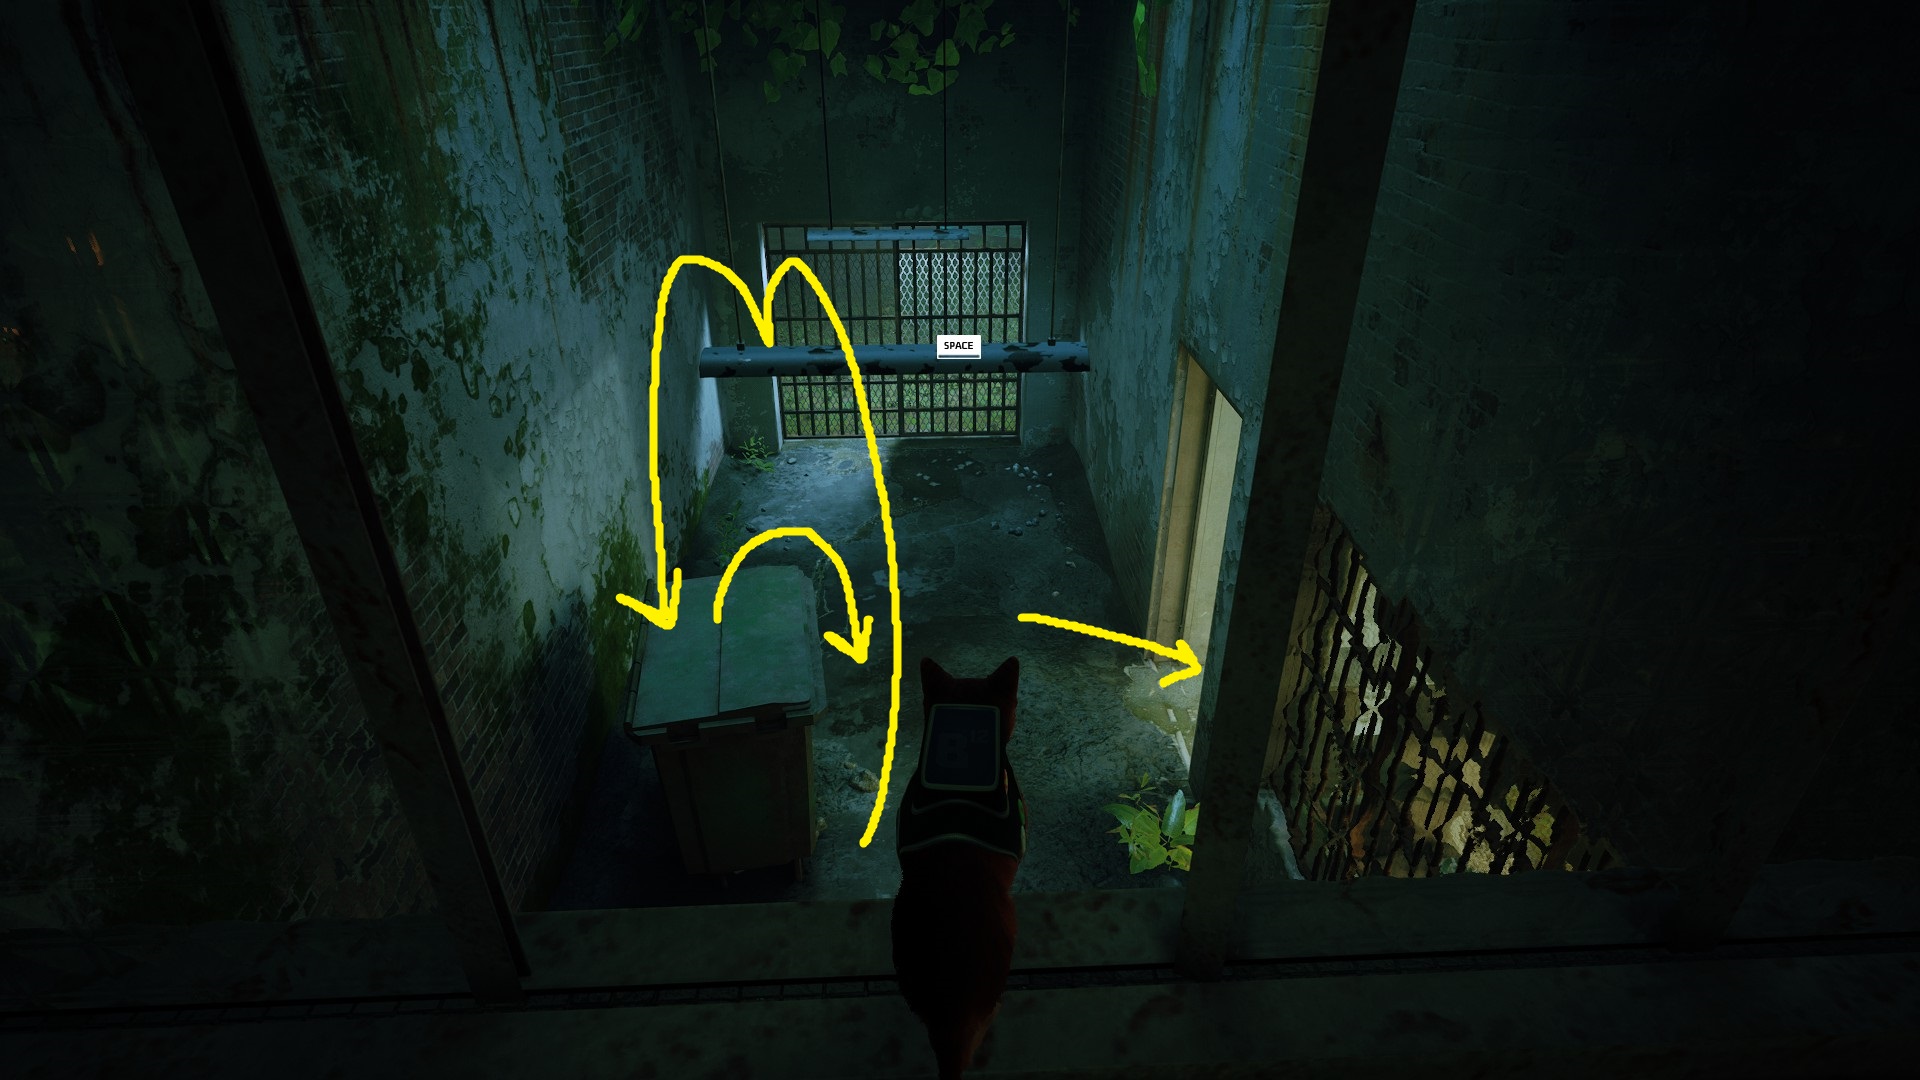
Once freed from the cage, hop up onto the nearby pipe, and then jump up to the ledge near the cell door. From there, jump to the iron railing, and then use the horizontal beams to reach the higher ledge. If you find you can’t jump from the first beam to the second, make sure you’re all the way at the end of the beam.
Once you’re on the higher ledge of your cell, you can head through the bars into the red-lit ventilation shaft, and continue forward through the next set of bars into the next room, where a physics puzzle awaits.
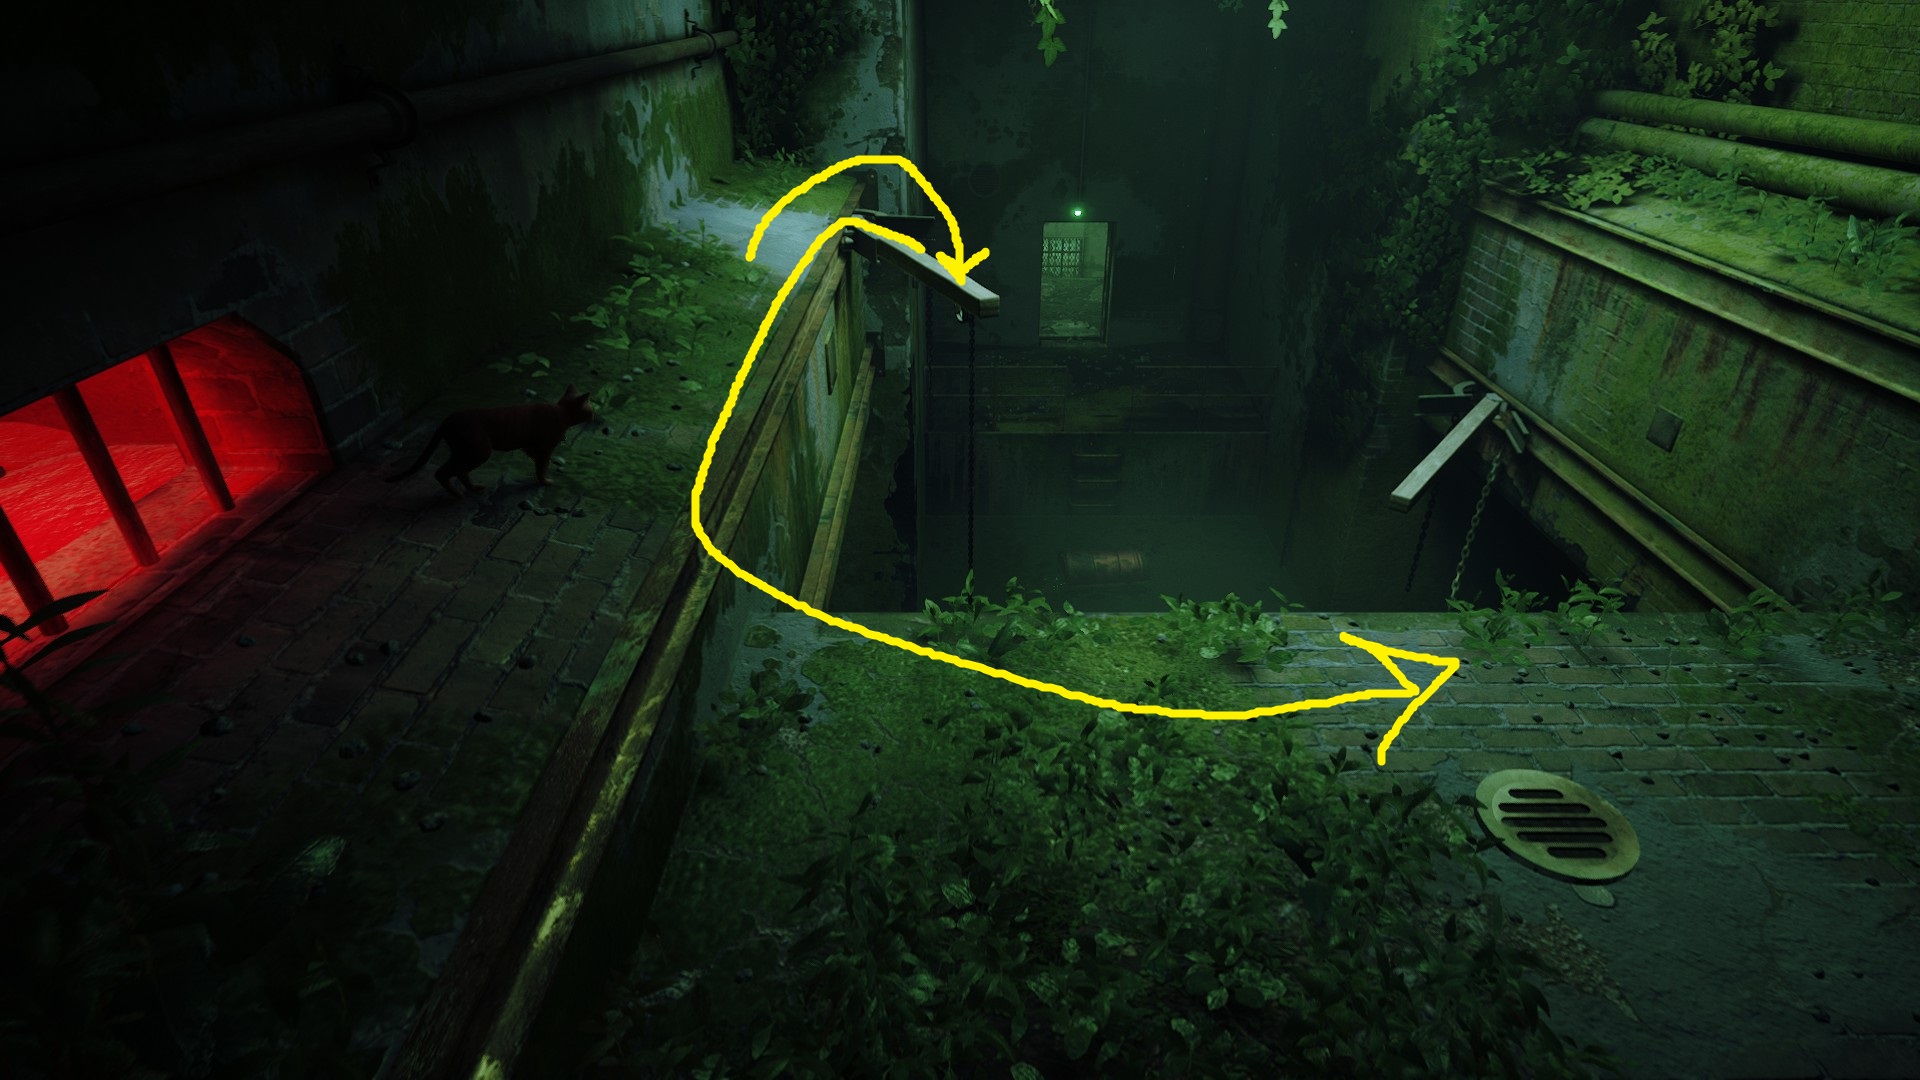
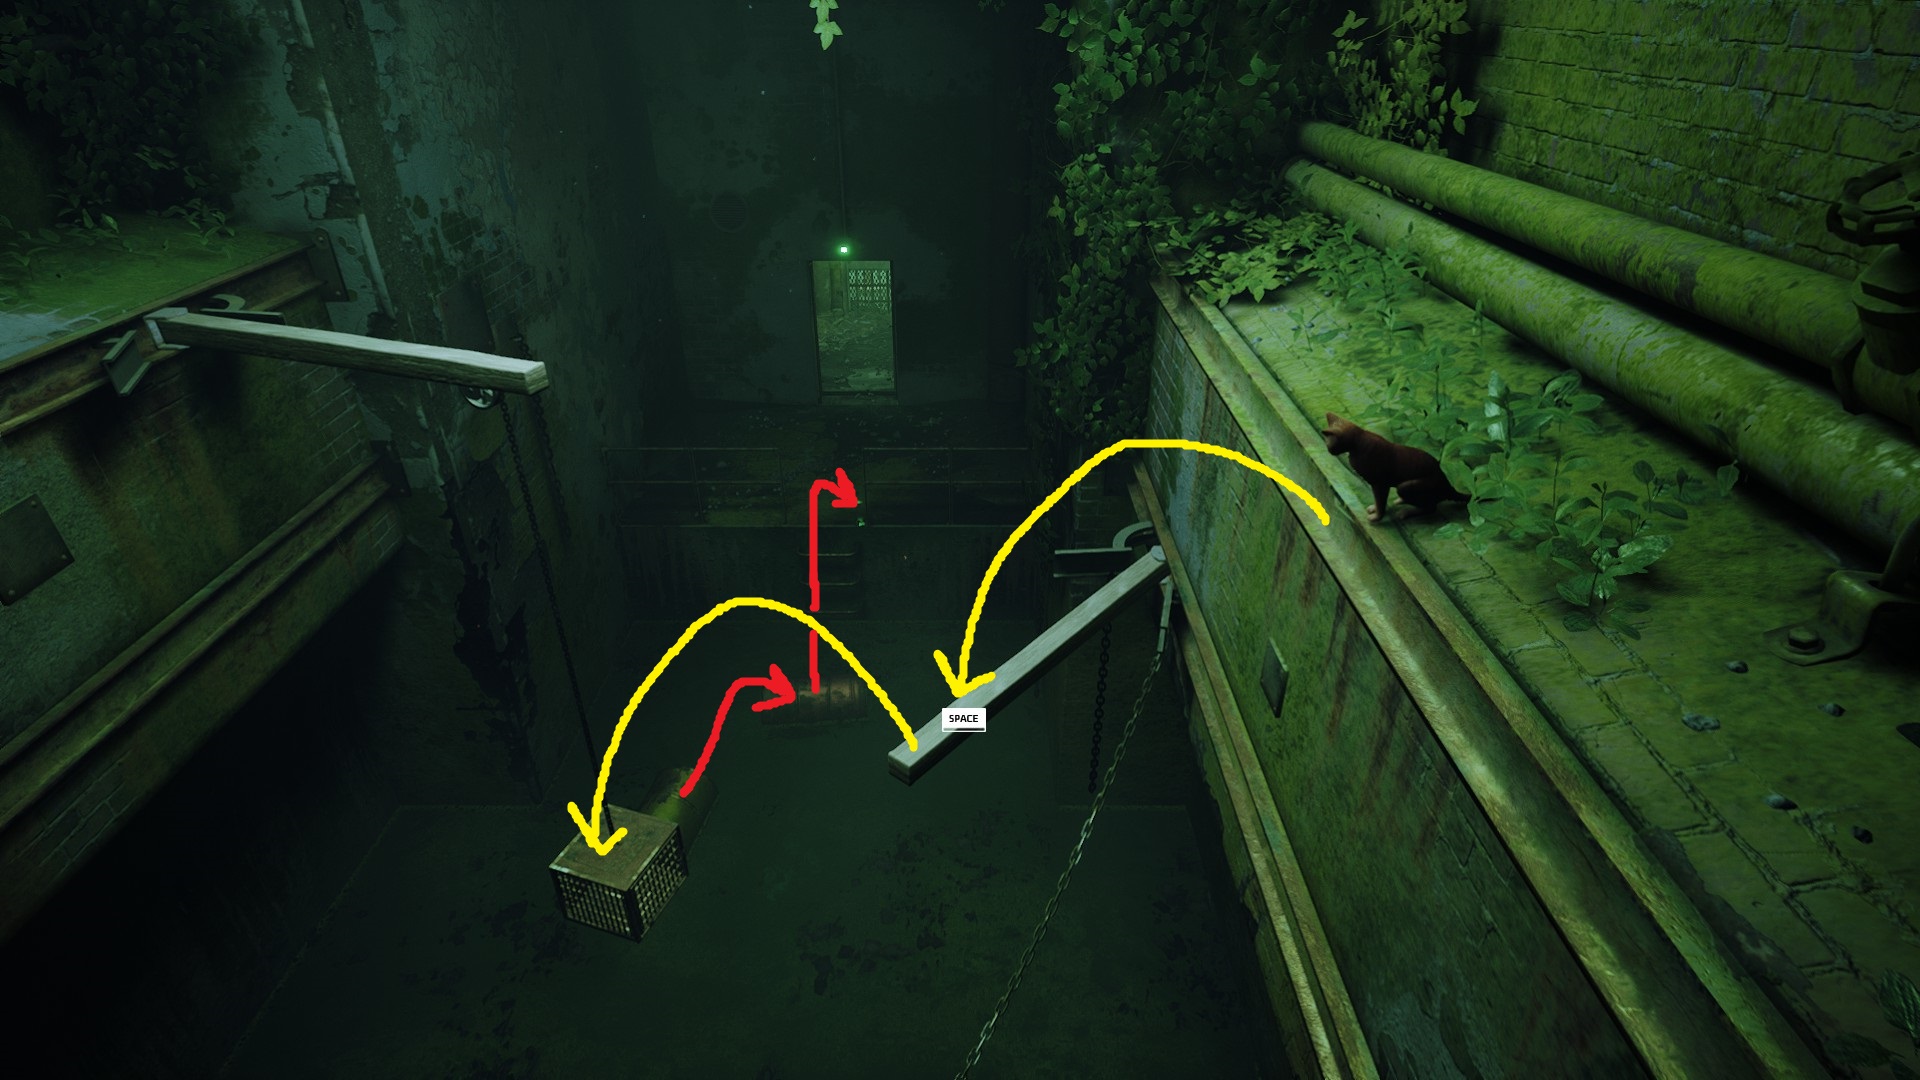
You need to move the cage in order to continue.
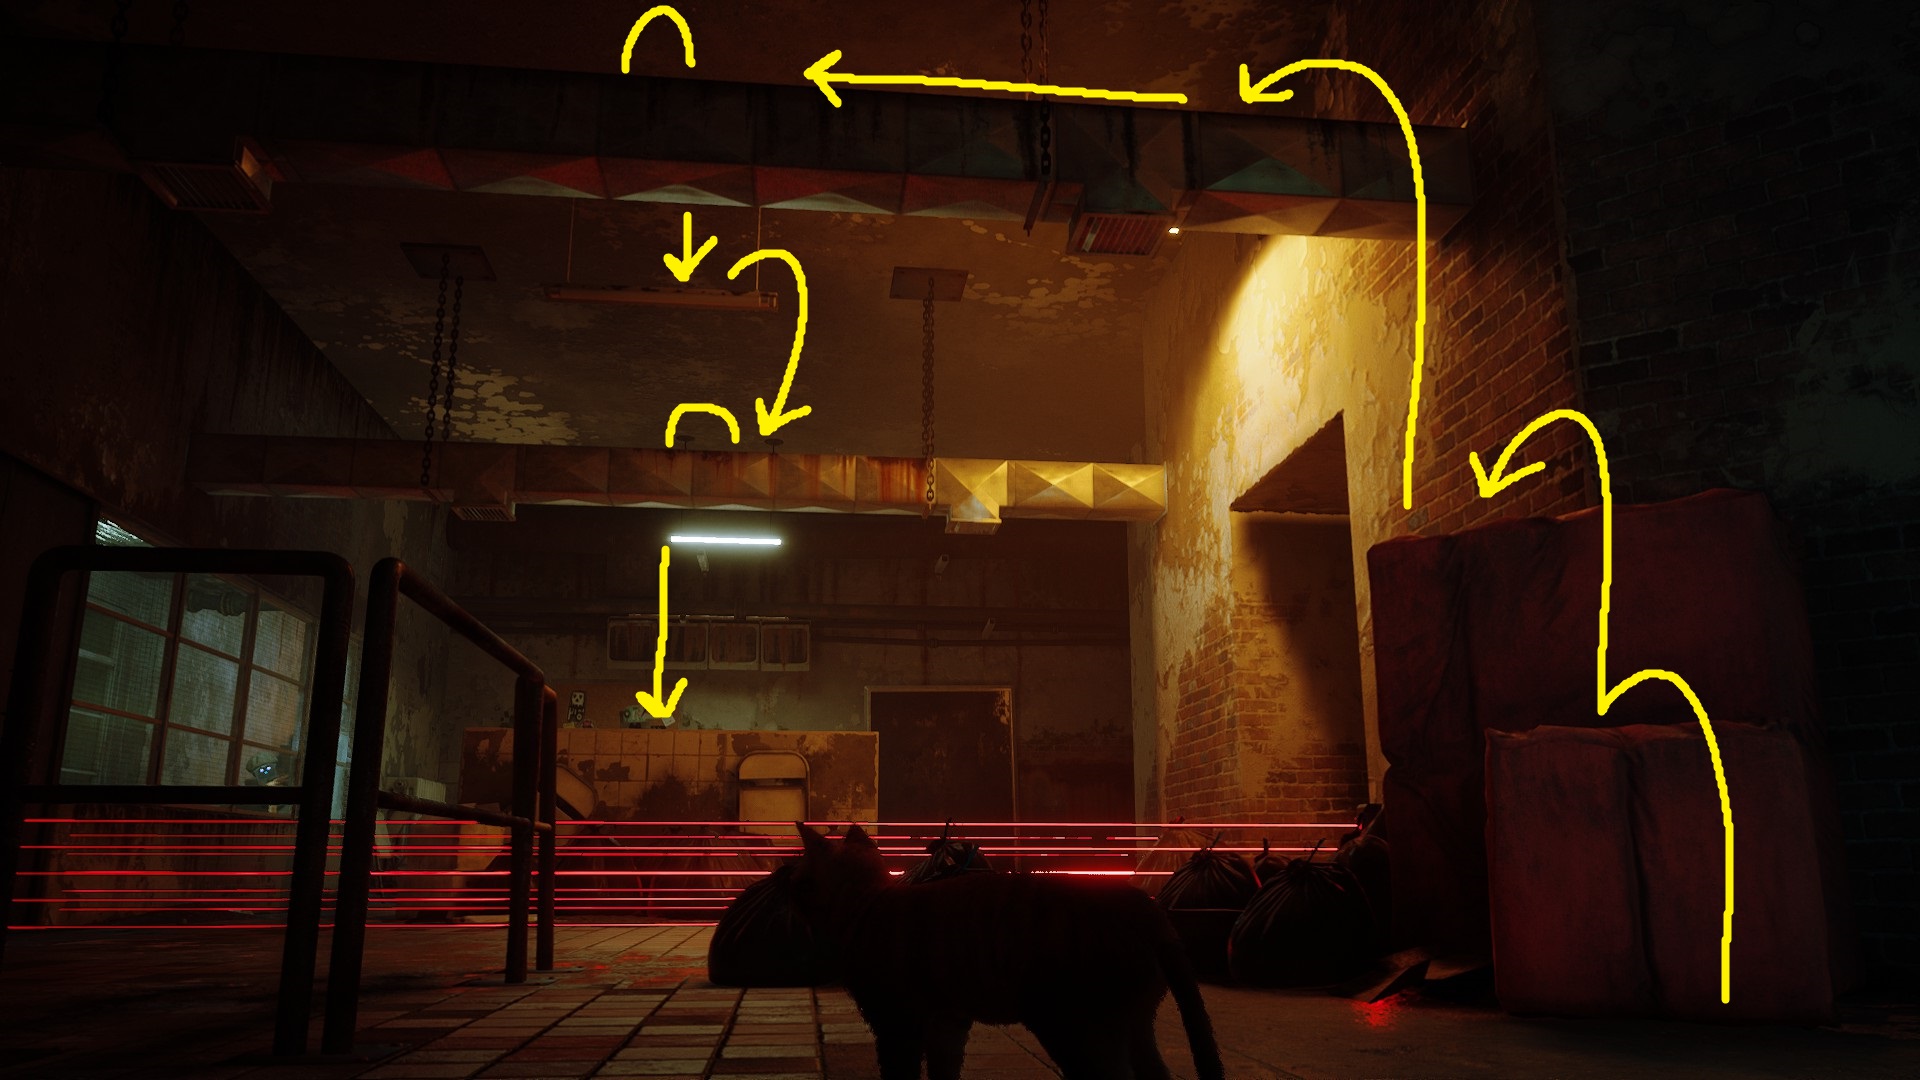
First, jump on the left-hand beam to swing the cage further towards the barrels. Then jump back to the ledge, and make your way around to the other beam. Jump to the right-hand beam, then from there to the cage. Then you can use the barrels to reach the ledge and exit the cell.
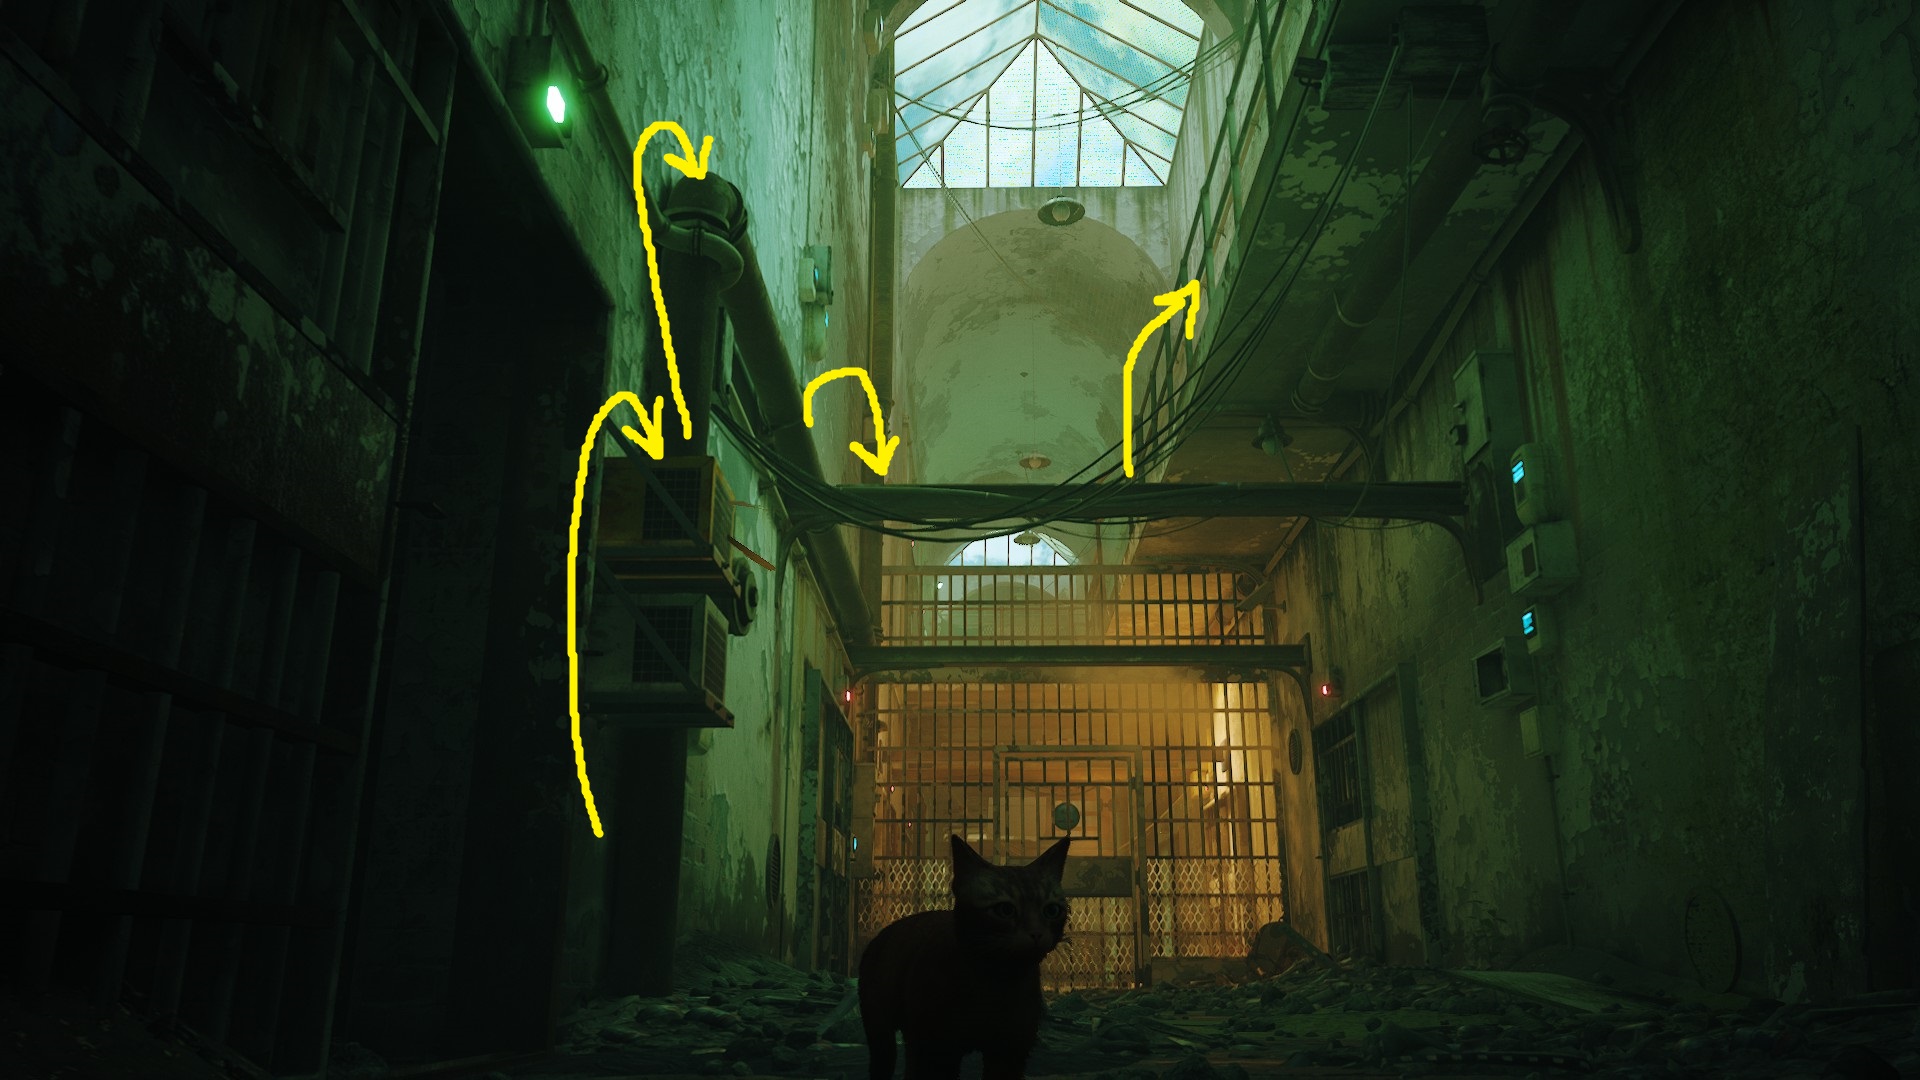
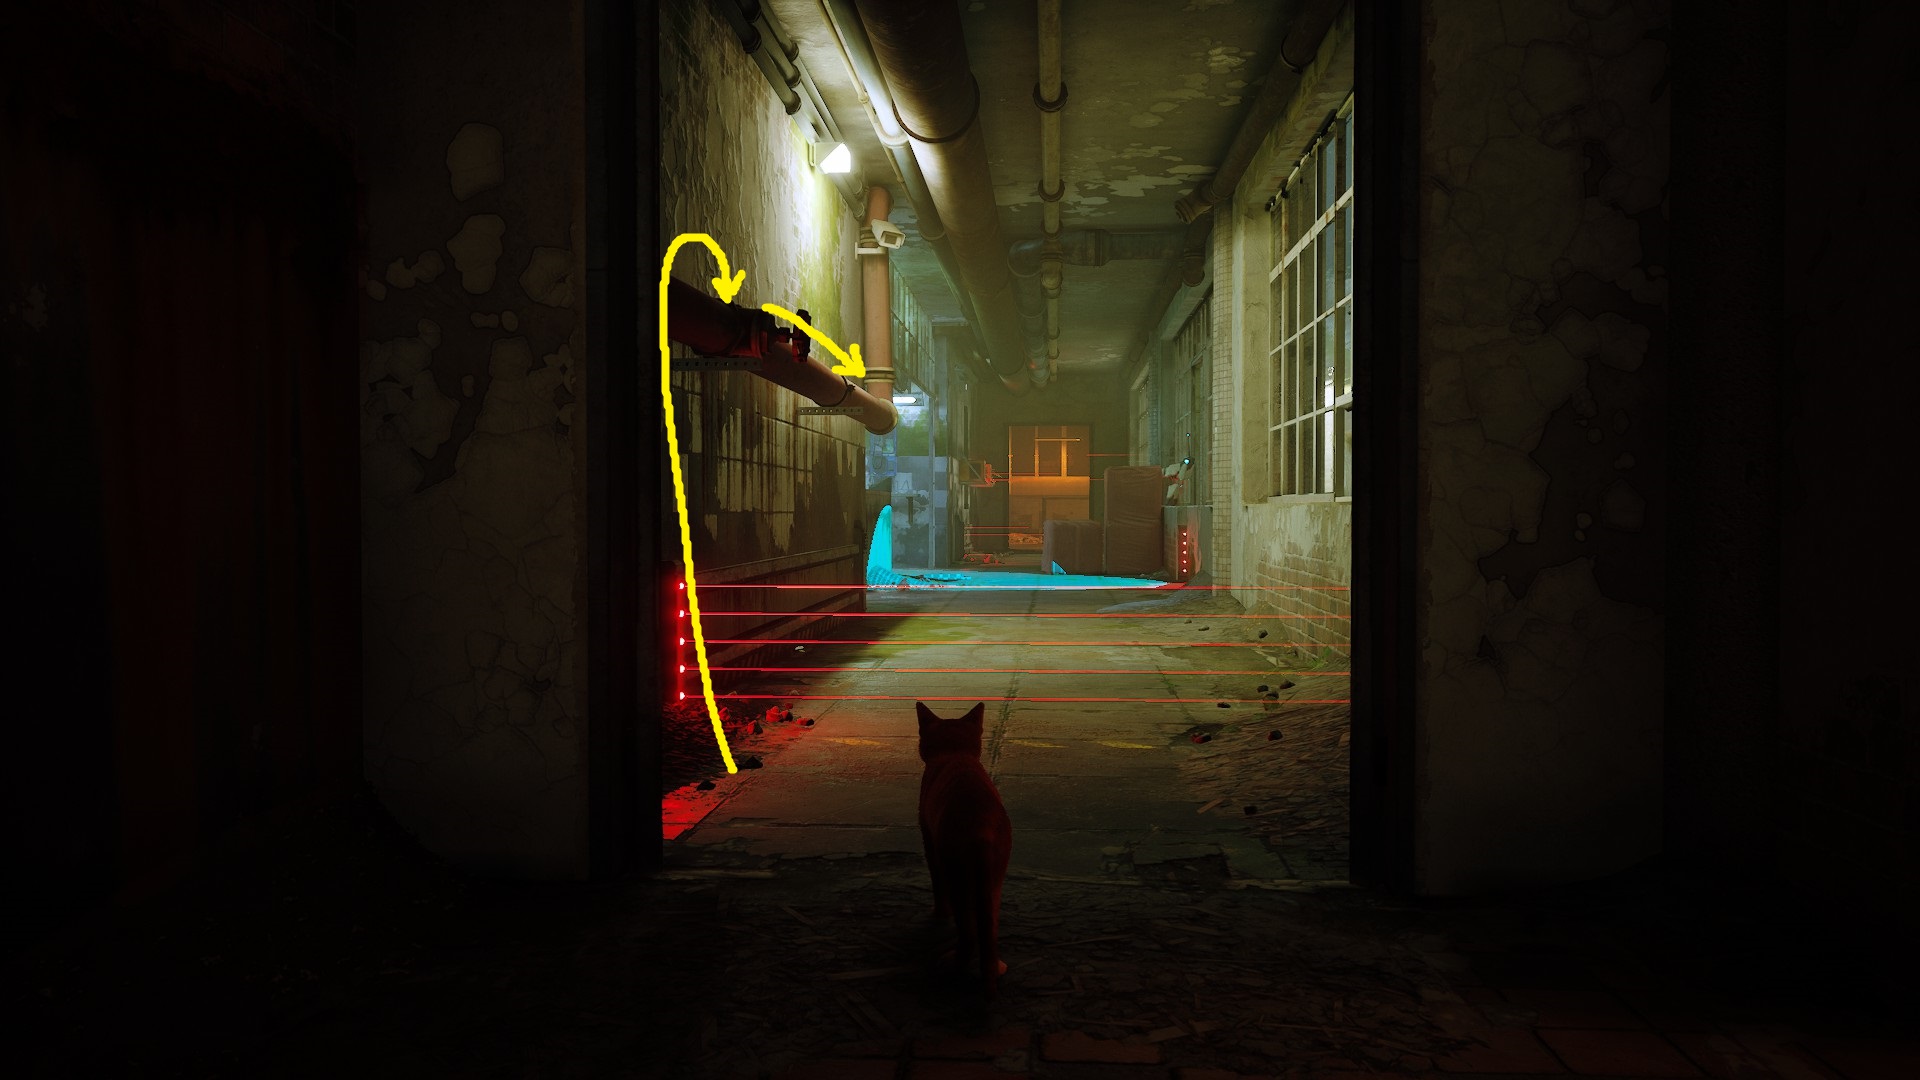
After leaving the cell, you’ll need to find a way past the drones that patrol the hallway.
Changing levels will help you find a path through the Sentinels.
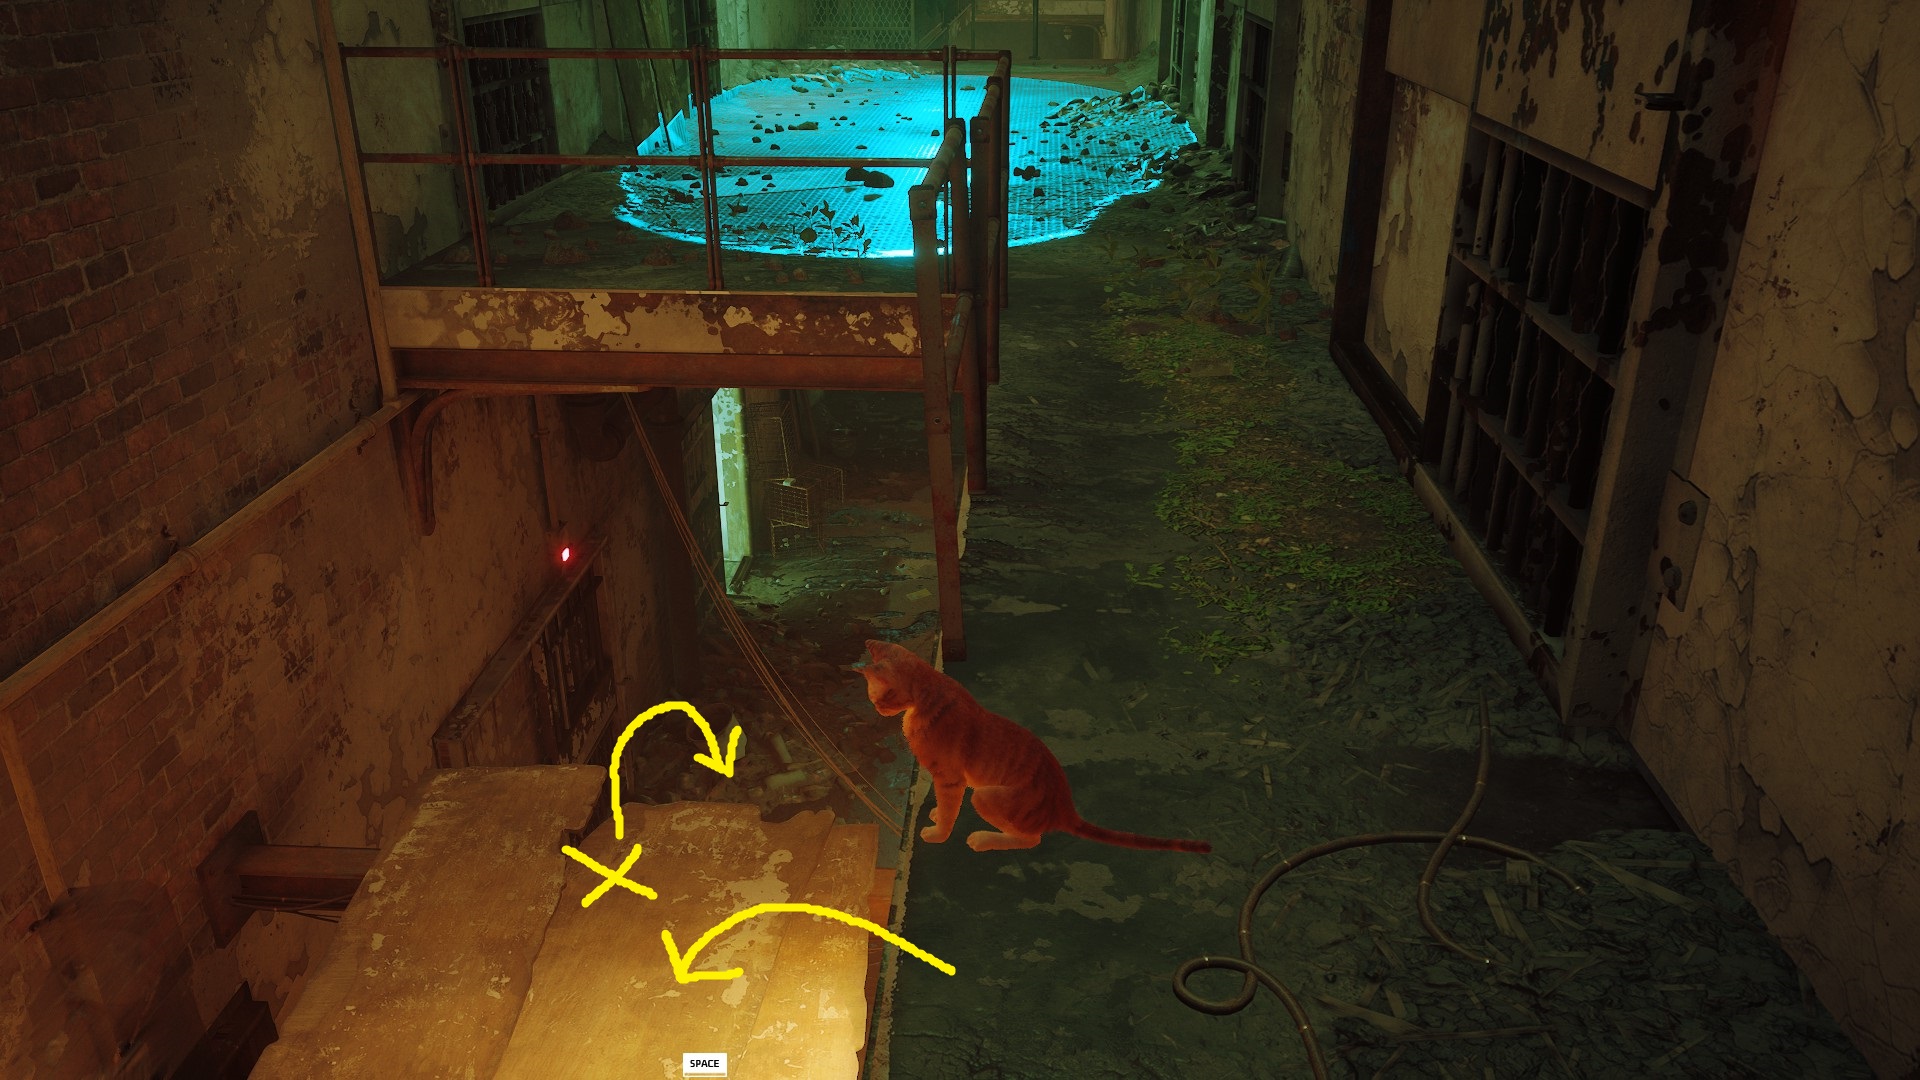
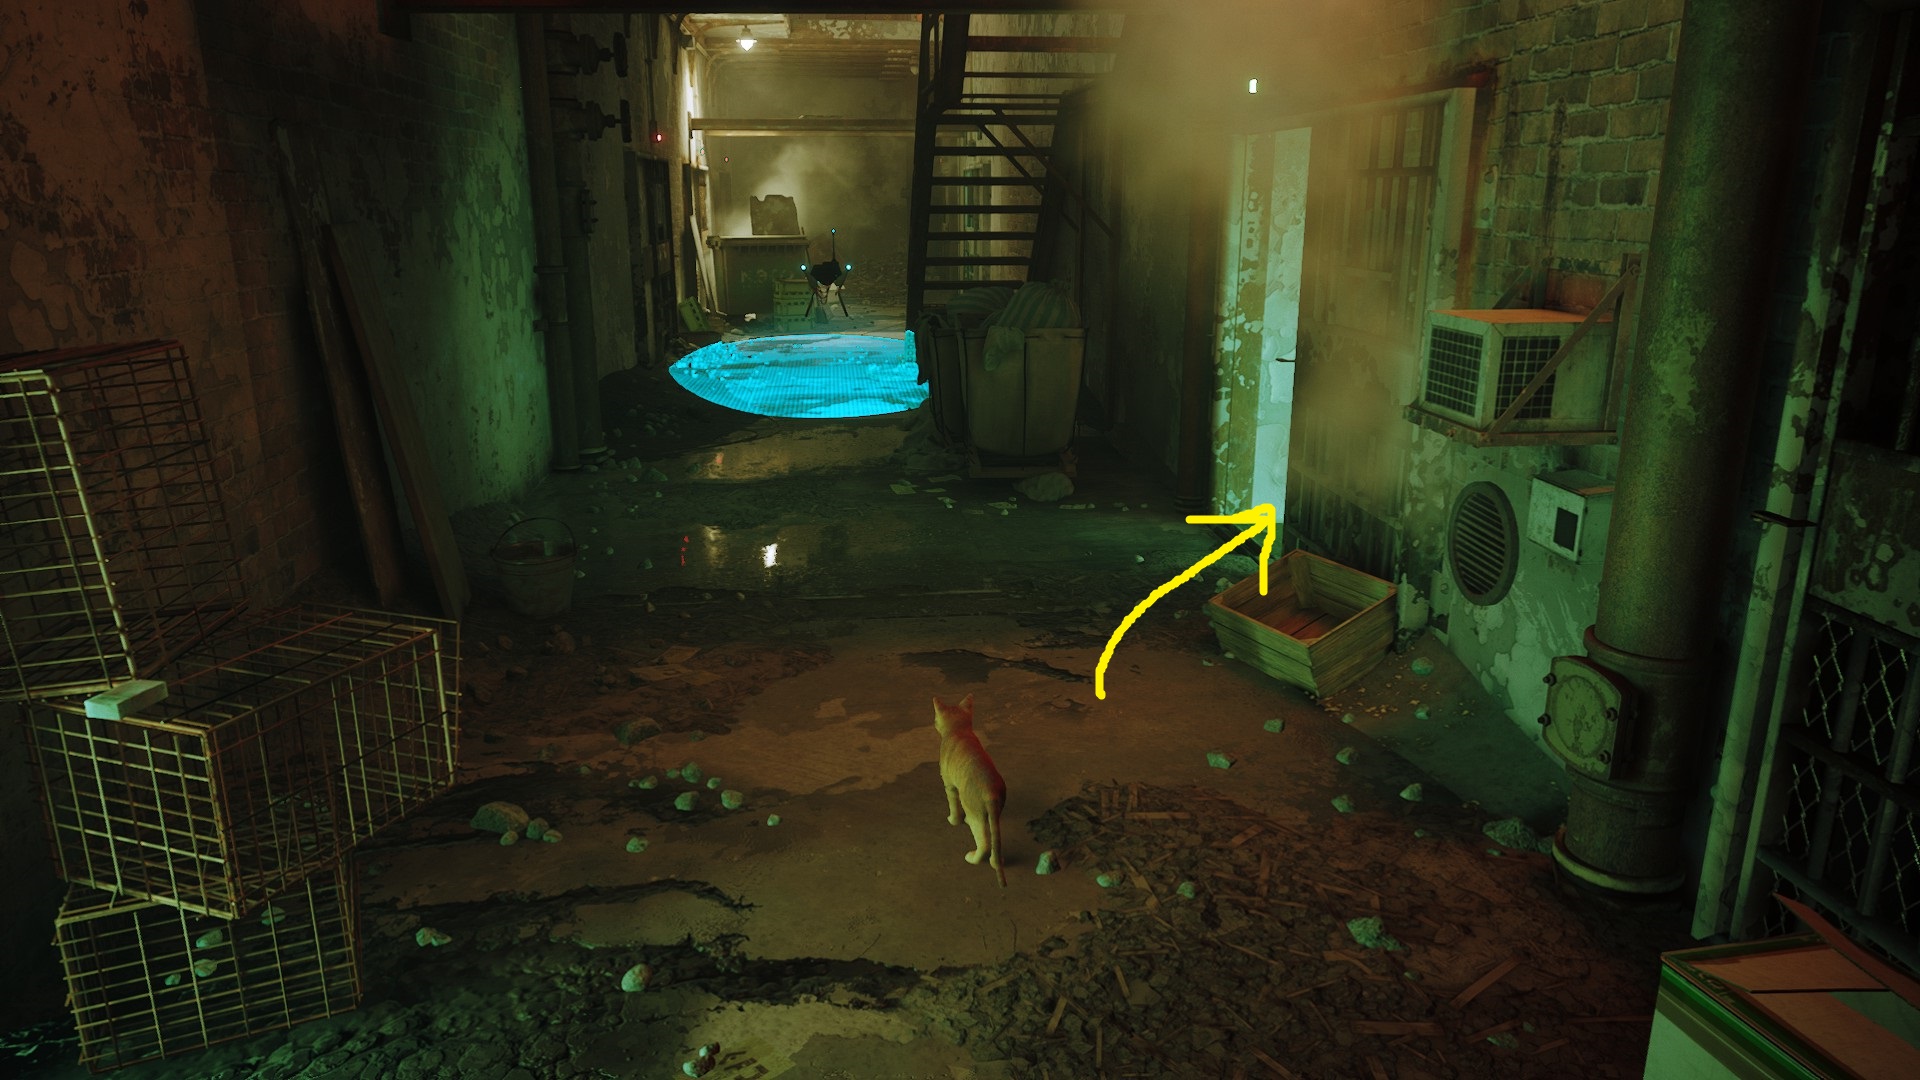
Right after you exit the cell, jump up on the AC unit to the left, and from there onto the pipe. Then you can use the beam to cross to the catwalk (1). Head forwards a bit and jump down onto the wooden boards, then wait where indicated (the X) until the drone is heading away from you (2). Then jump down and hide in the second cell on the right that’s open (3). Wait under the bed for the drone to pass heading in the direction you came from, and then exit the cell, turn right, and run towards the end of the hallway. Use the dumpster near the final cell to reach the plank above, and from there you can return to the catwalk (4).
1234
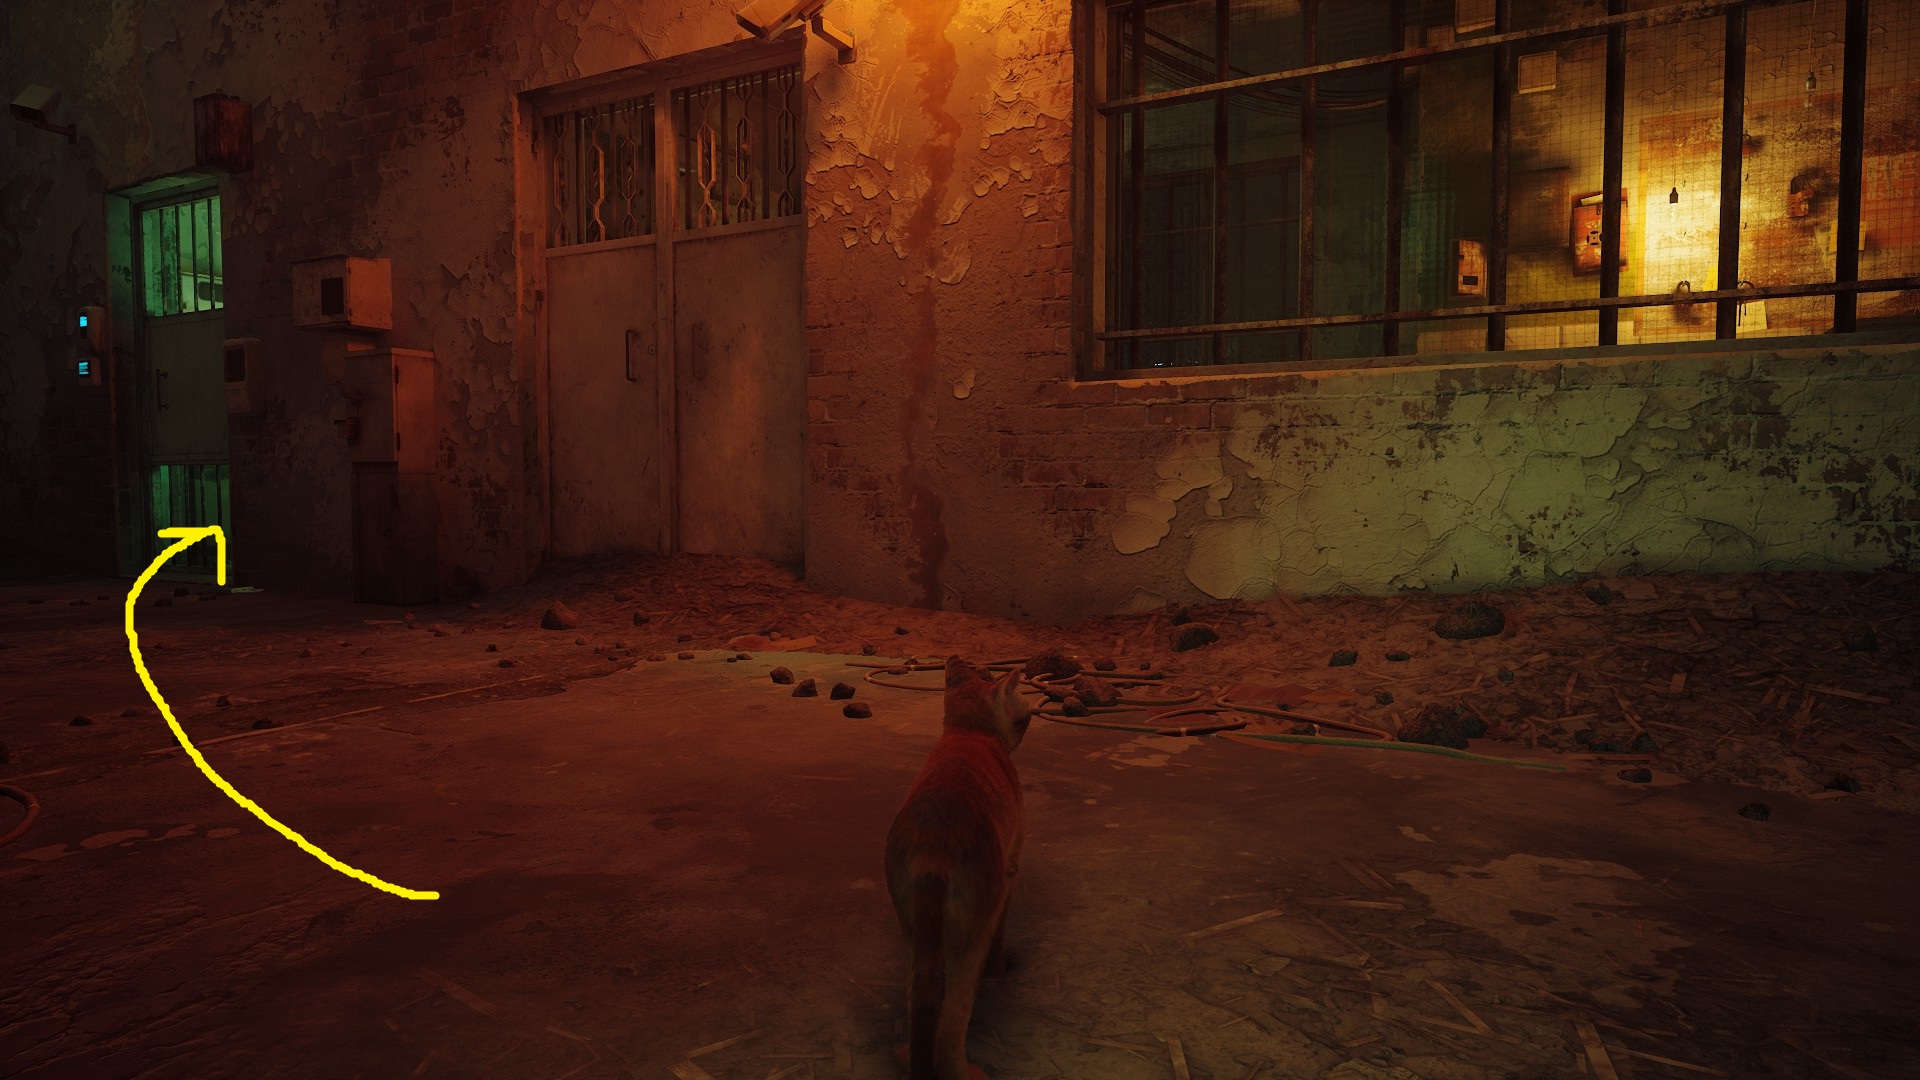
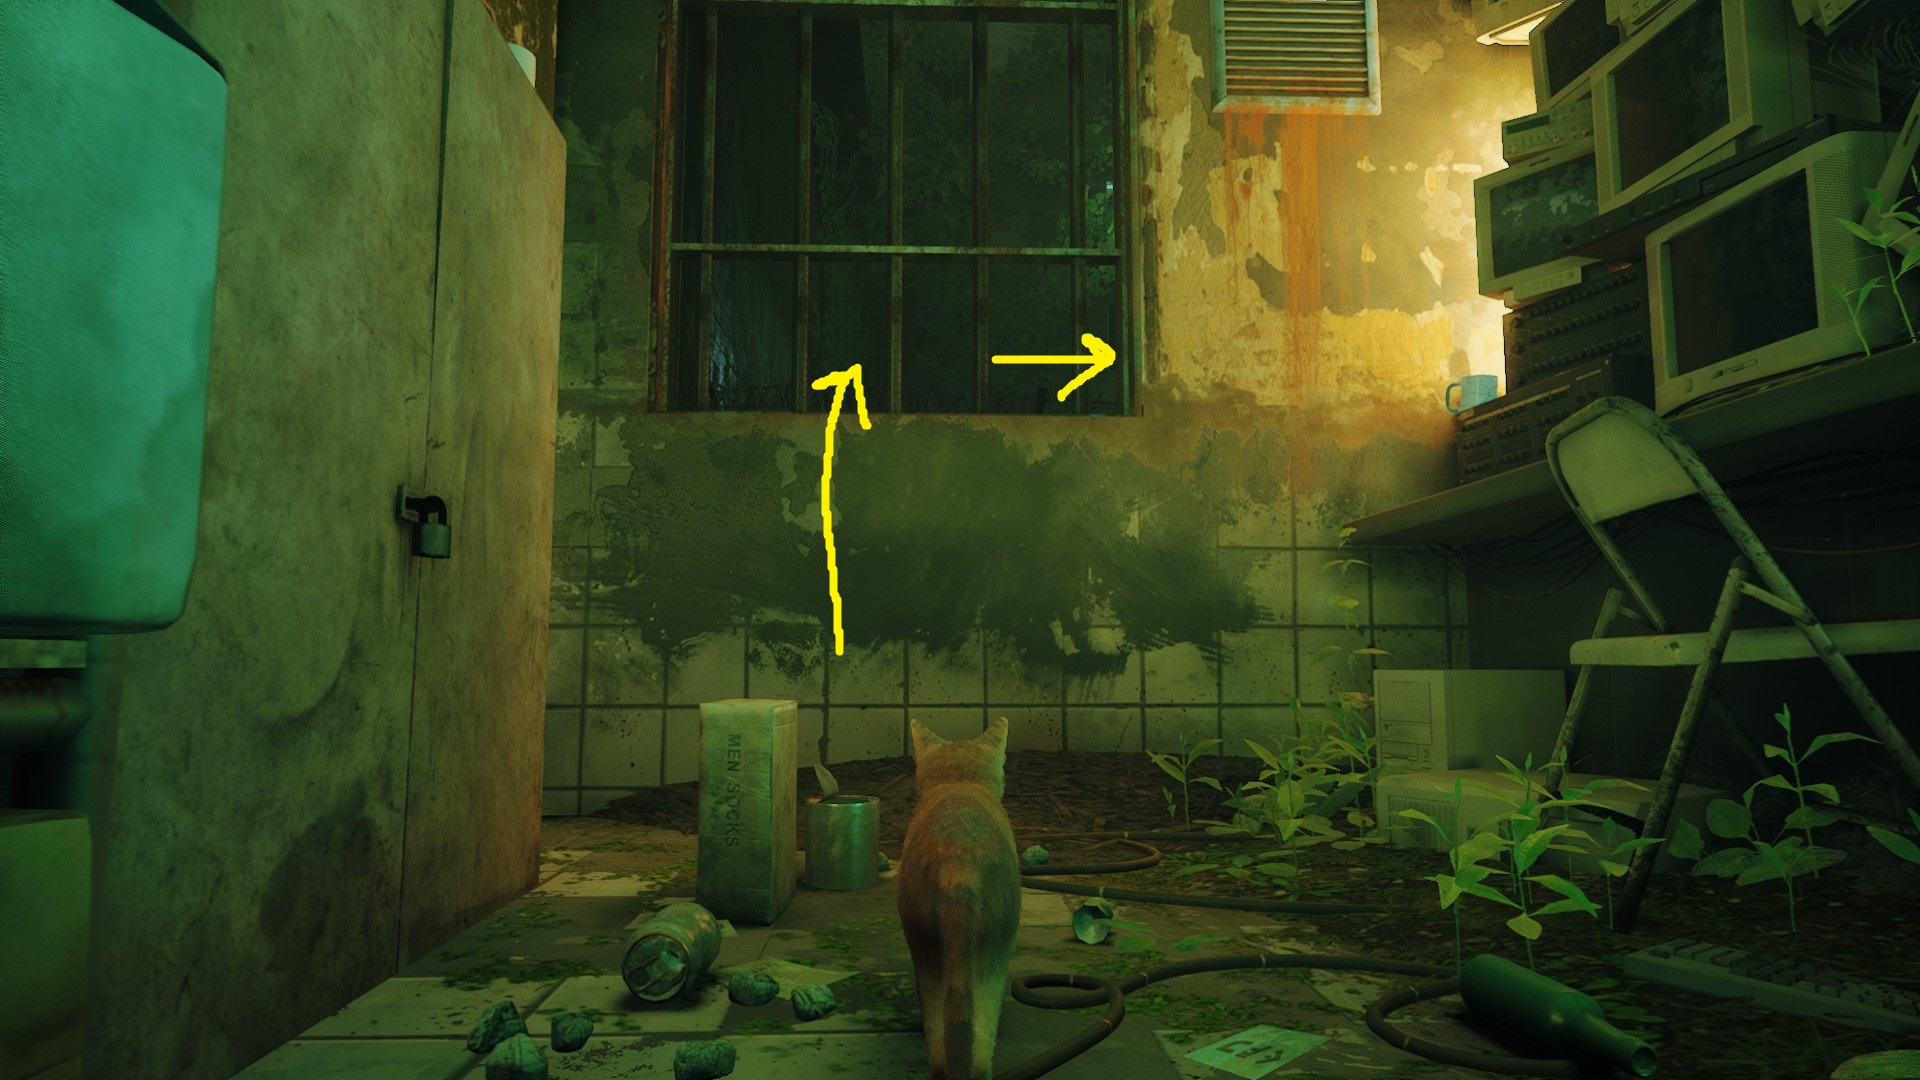
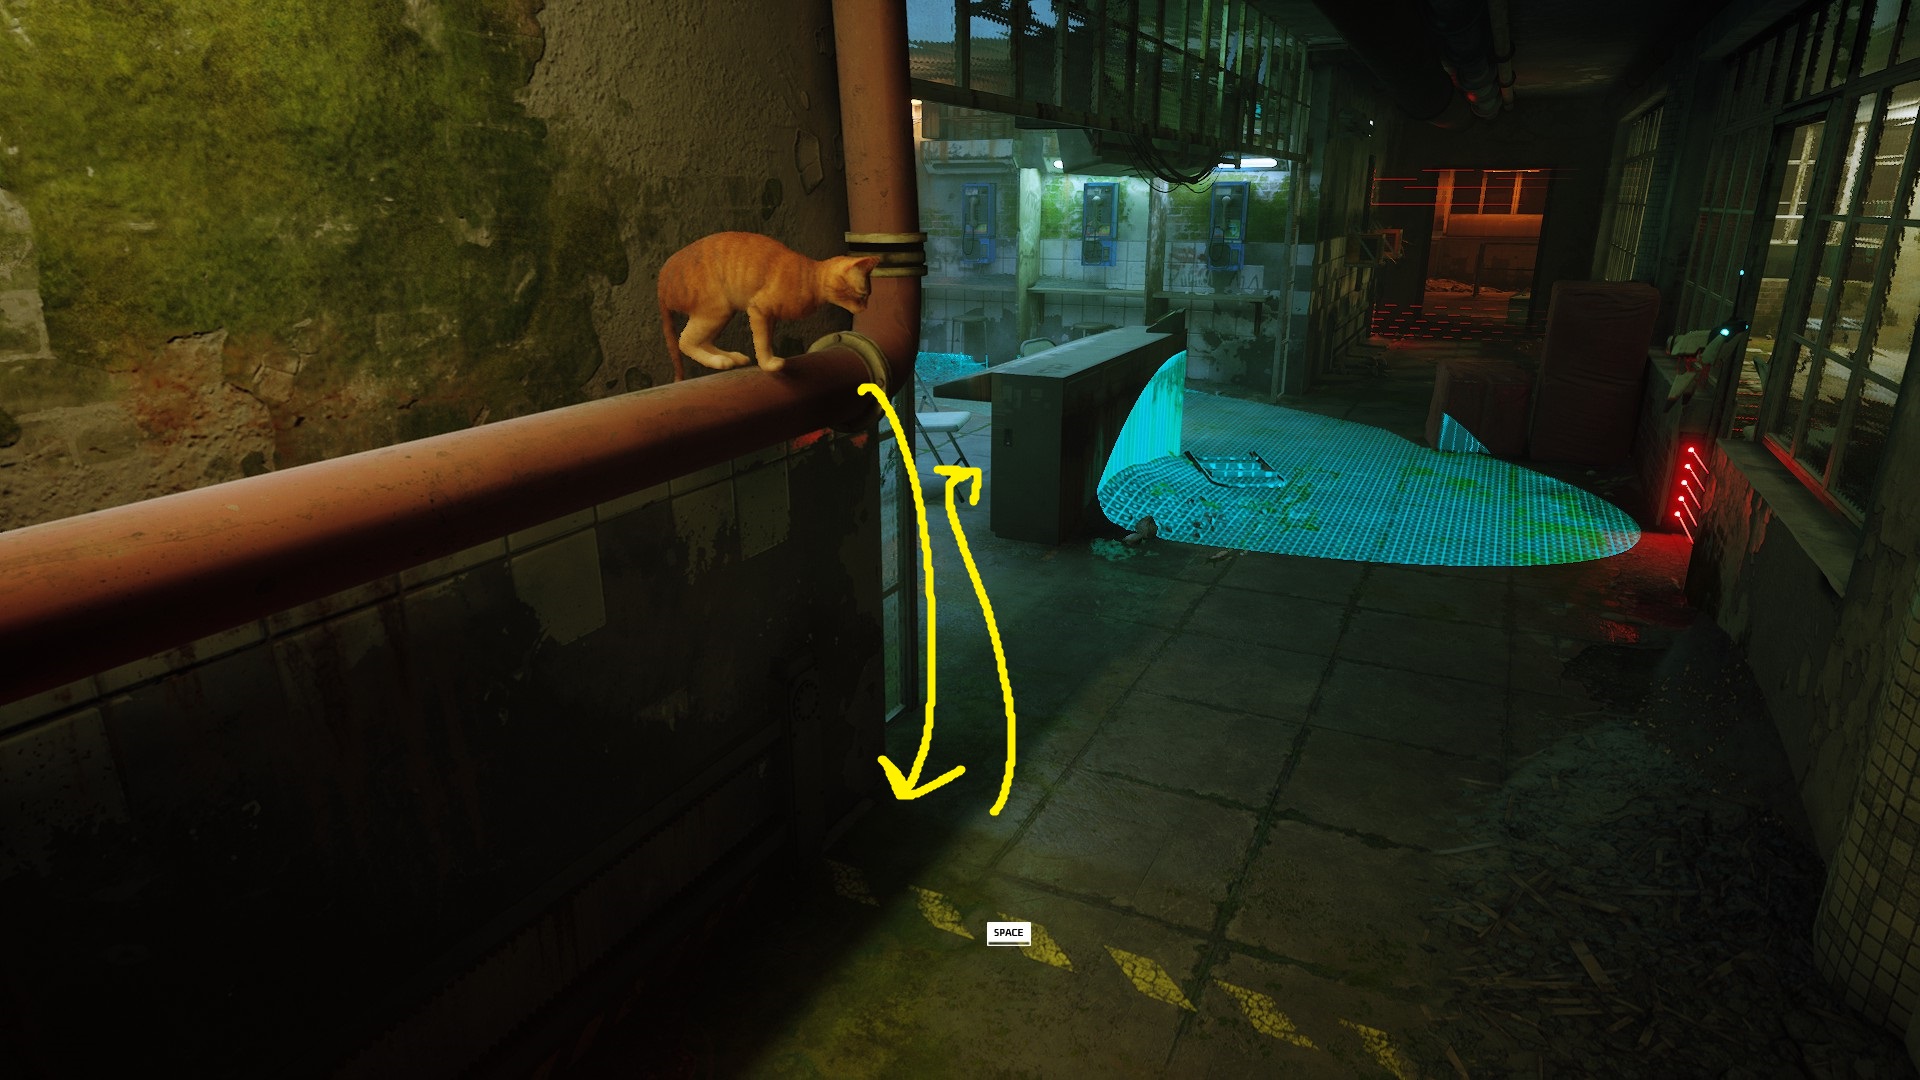
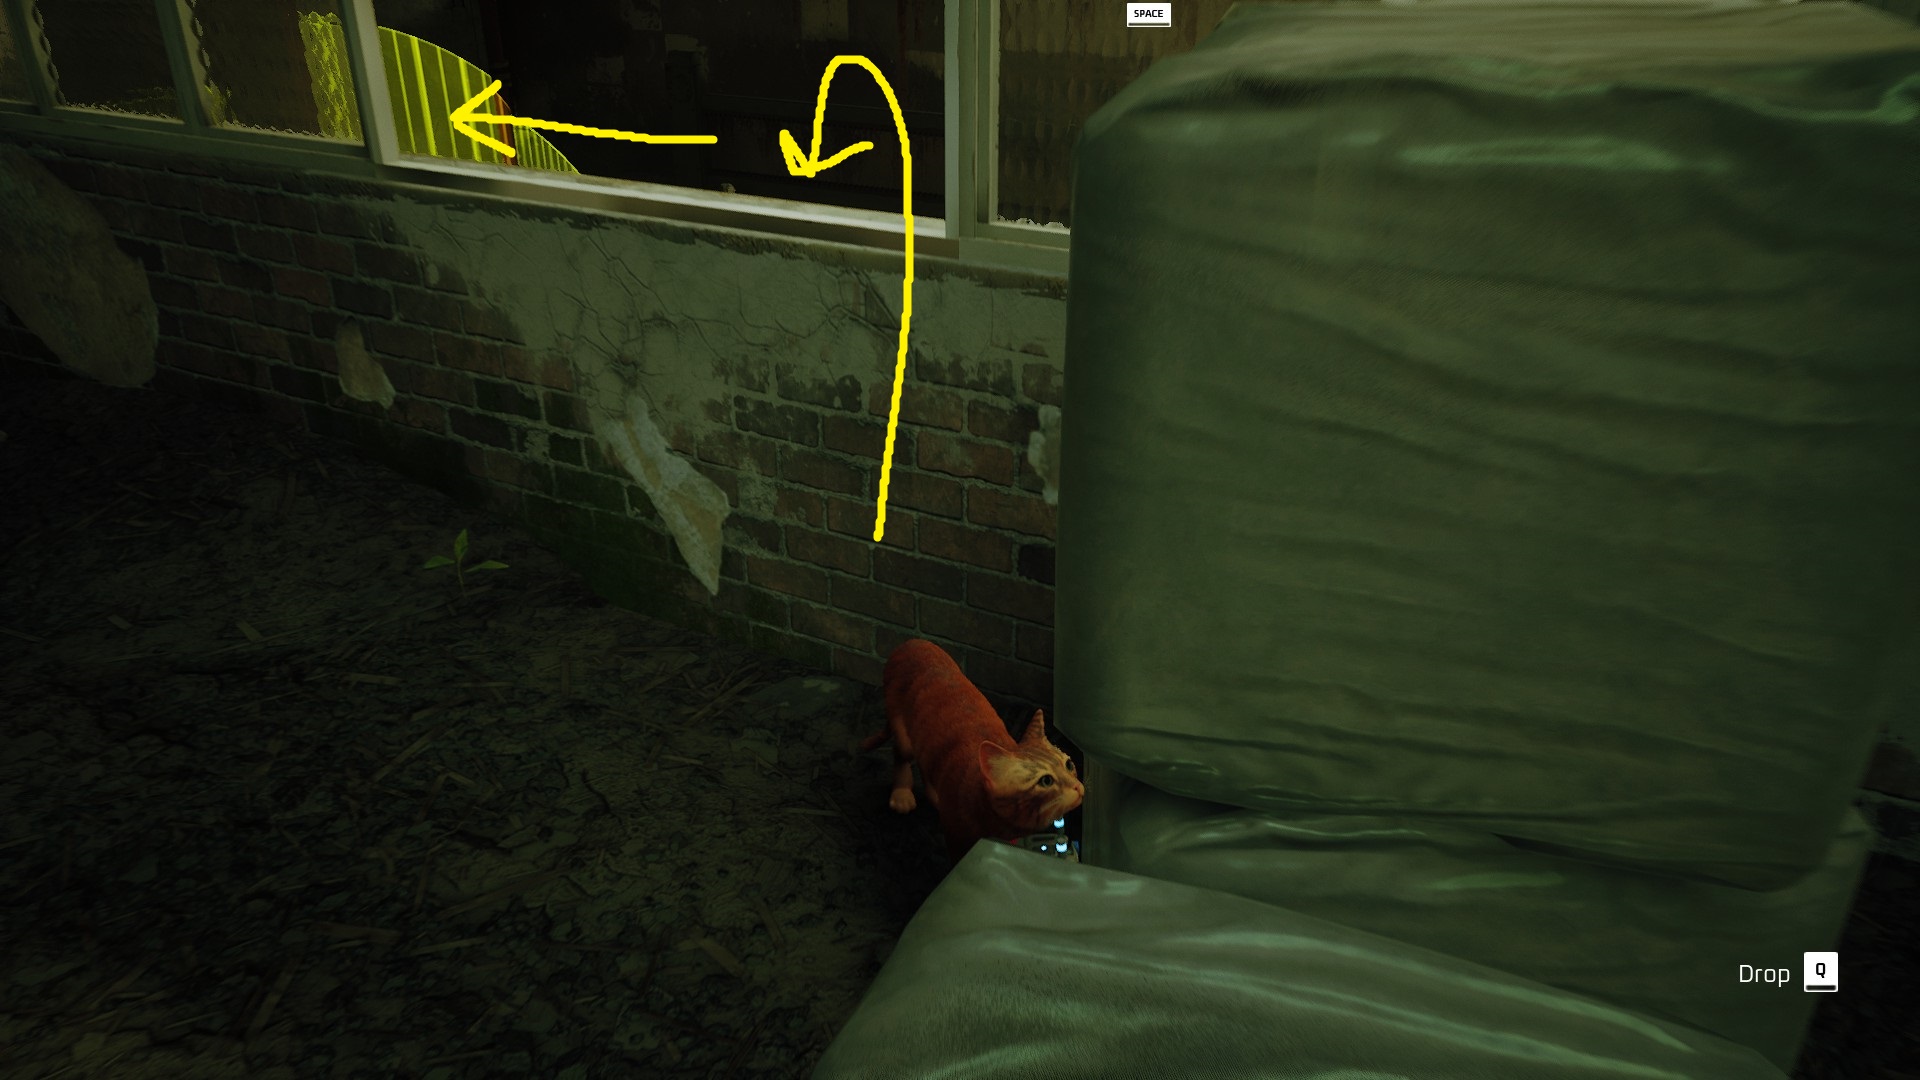
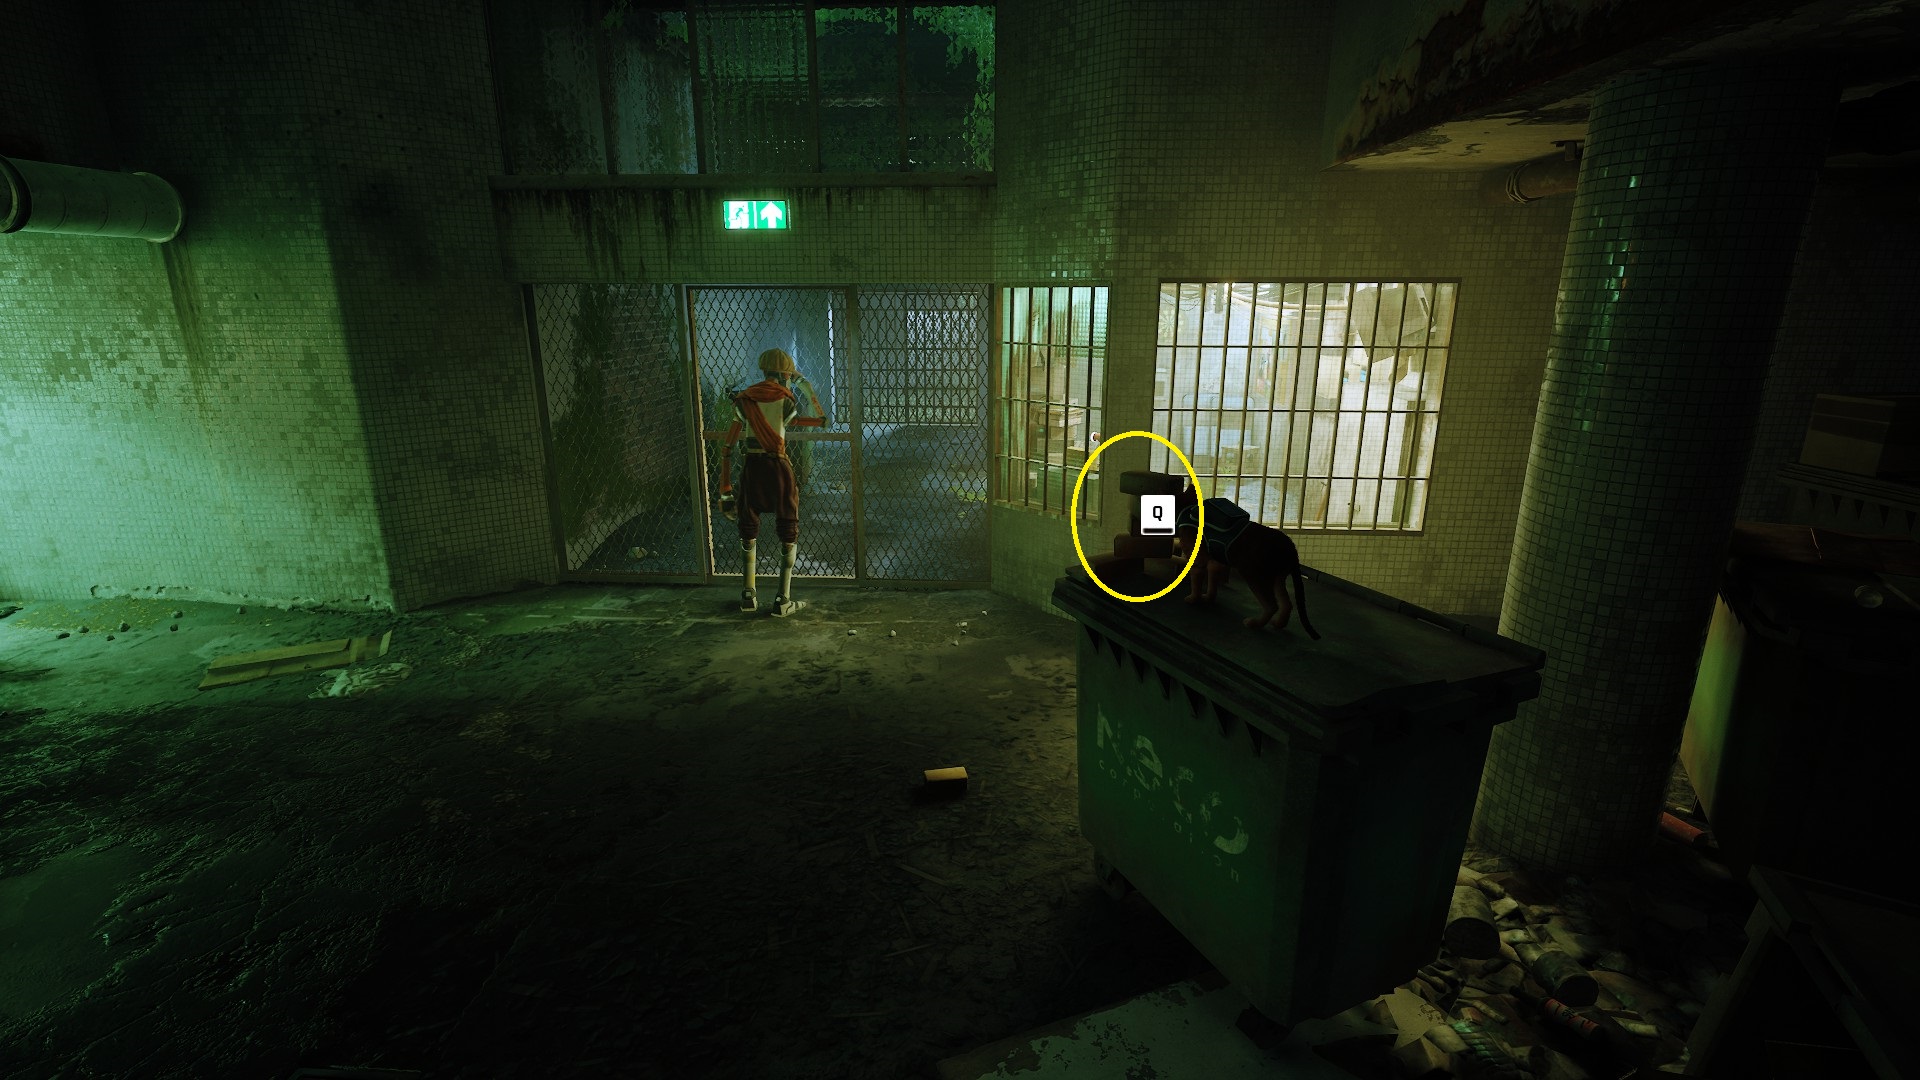
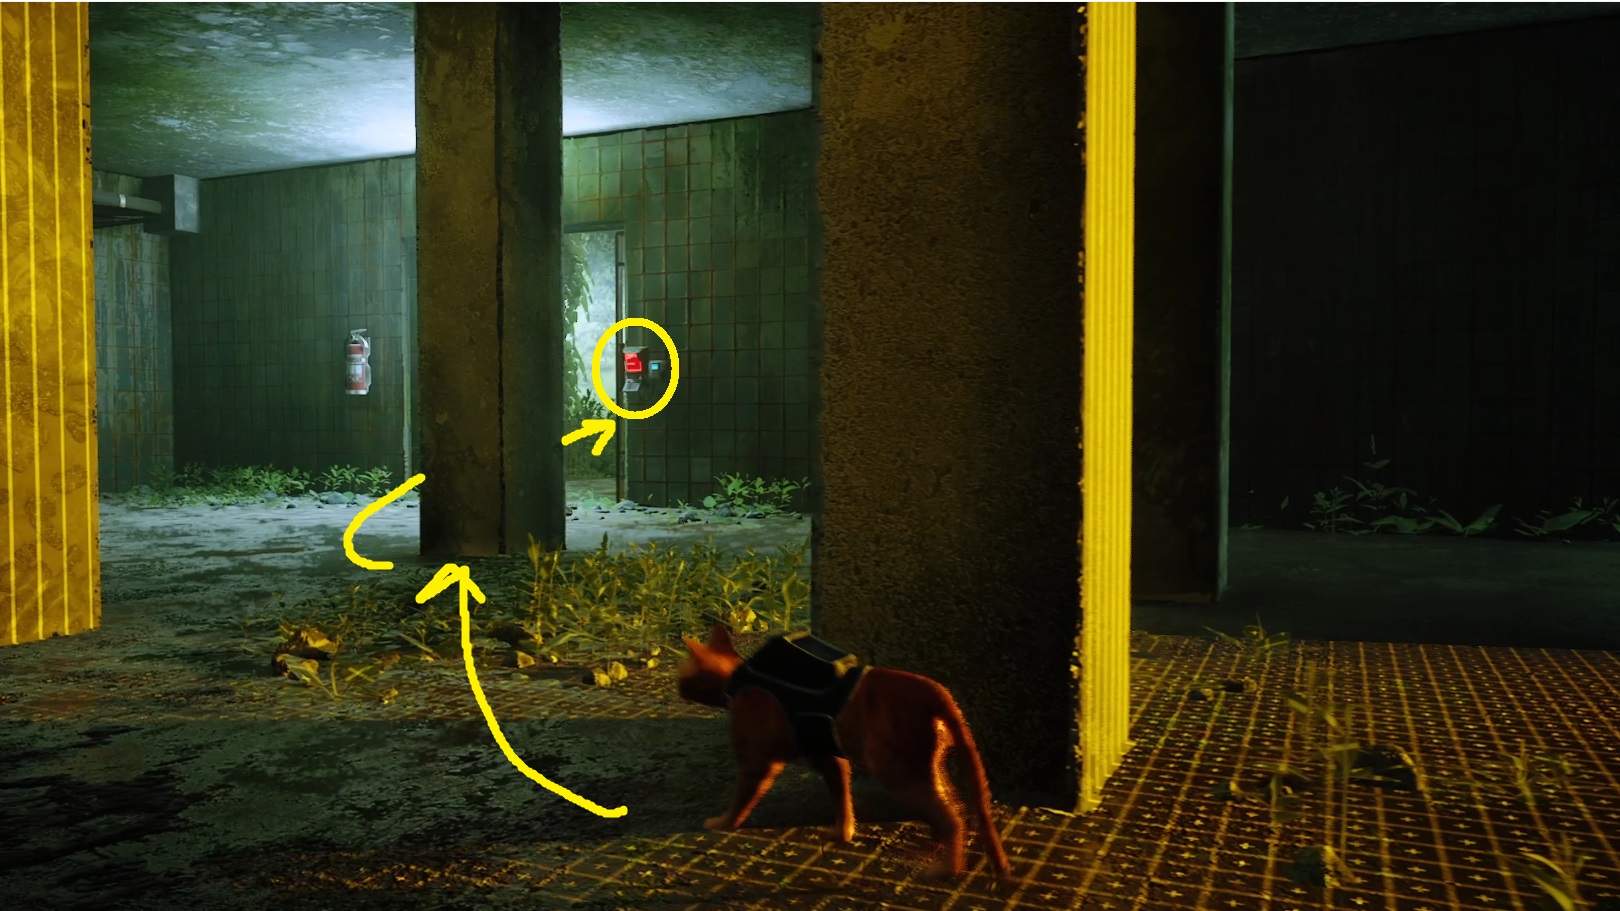
After making it past the drones, walk forward just a bit and you’ll find Clementine. A cutscene will play, and then you’ll need to get the keys to Clem’s cell. There’s no trick to it — just head through the bars at the bottom of the nearby door (1), then continue across the room and hop up through the barred window (2). Turn right, and then head through the next barred window on your right. On the desk in this room, grab the keys (3), then go back the way you came and drop the keys into Clementine’s hand.
123
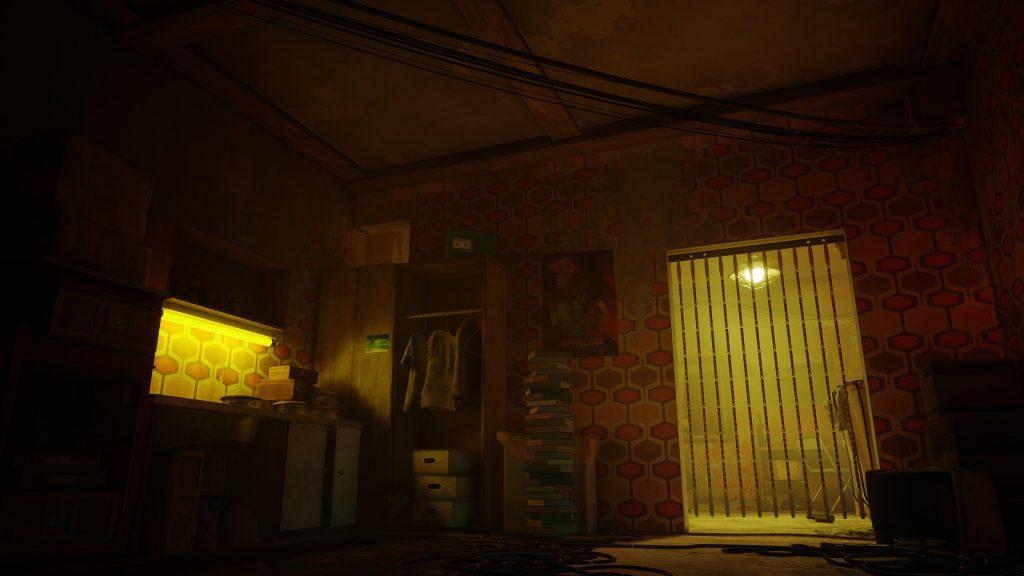
She’ll open the door to her cell, and then you can follow her to the end of the hall (if she doesn’t move, try getting out of her way). She’ll open this door as well, and you can both head forward into the next area. Clementine will walk to the door on the far side of the room, and once you get close enough, a cutscene will play. After it ends, Clementine will head to a different door and open it for you. Head through it and down the stairs to begin yet another cutscene.
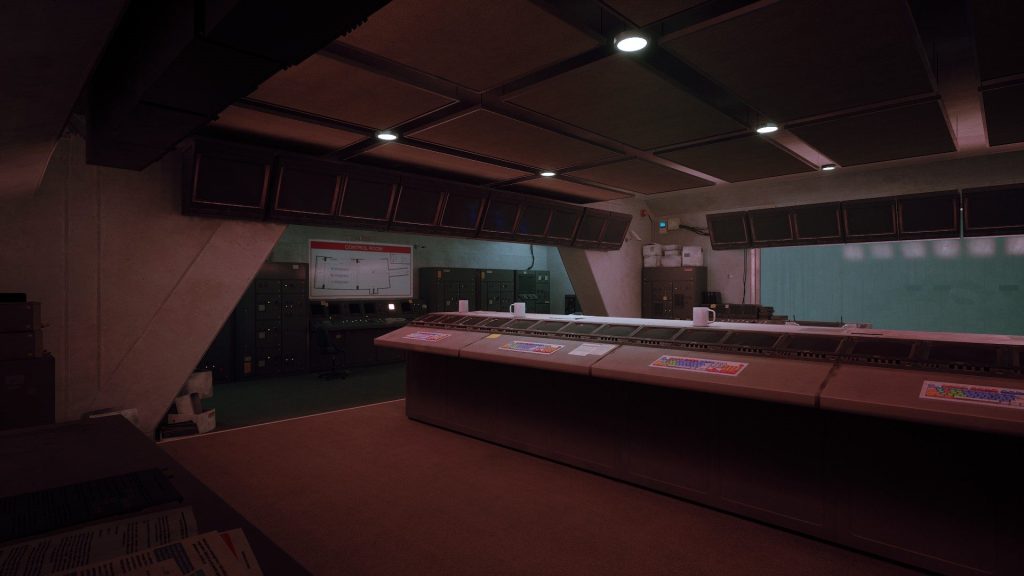
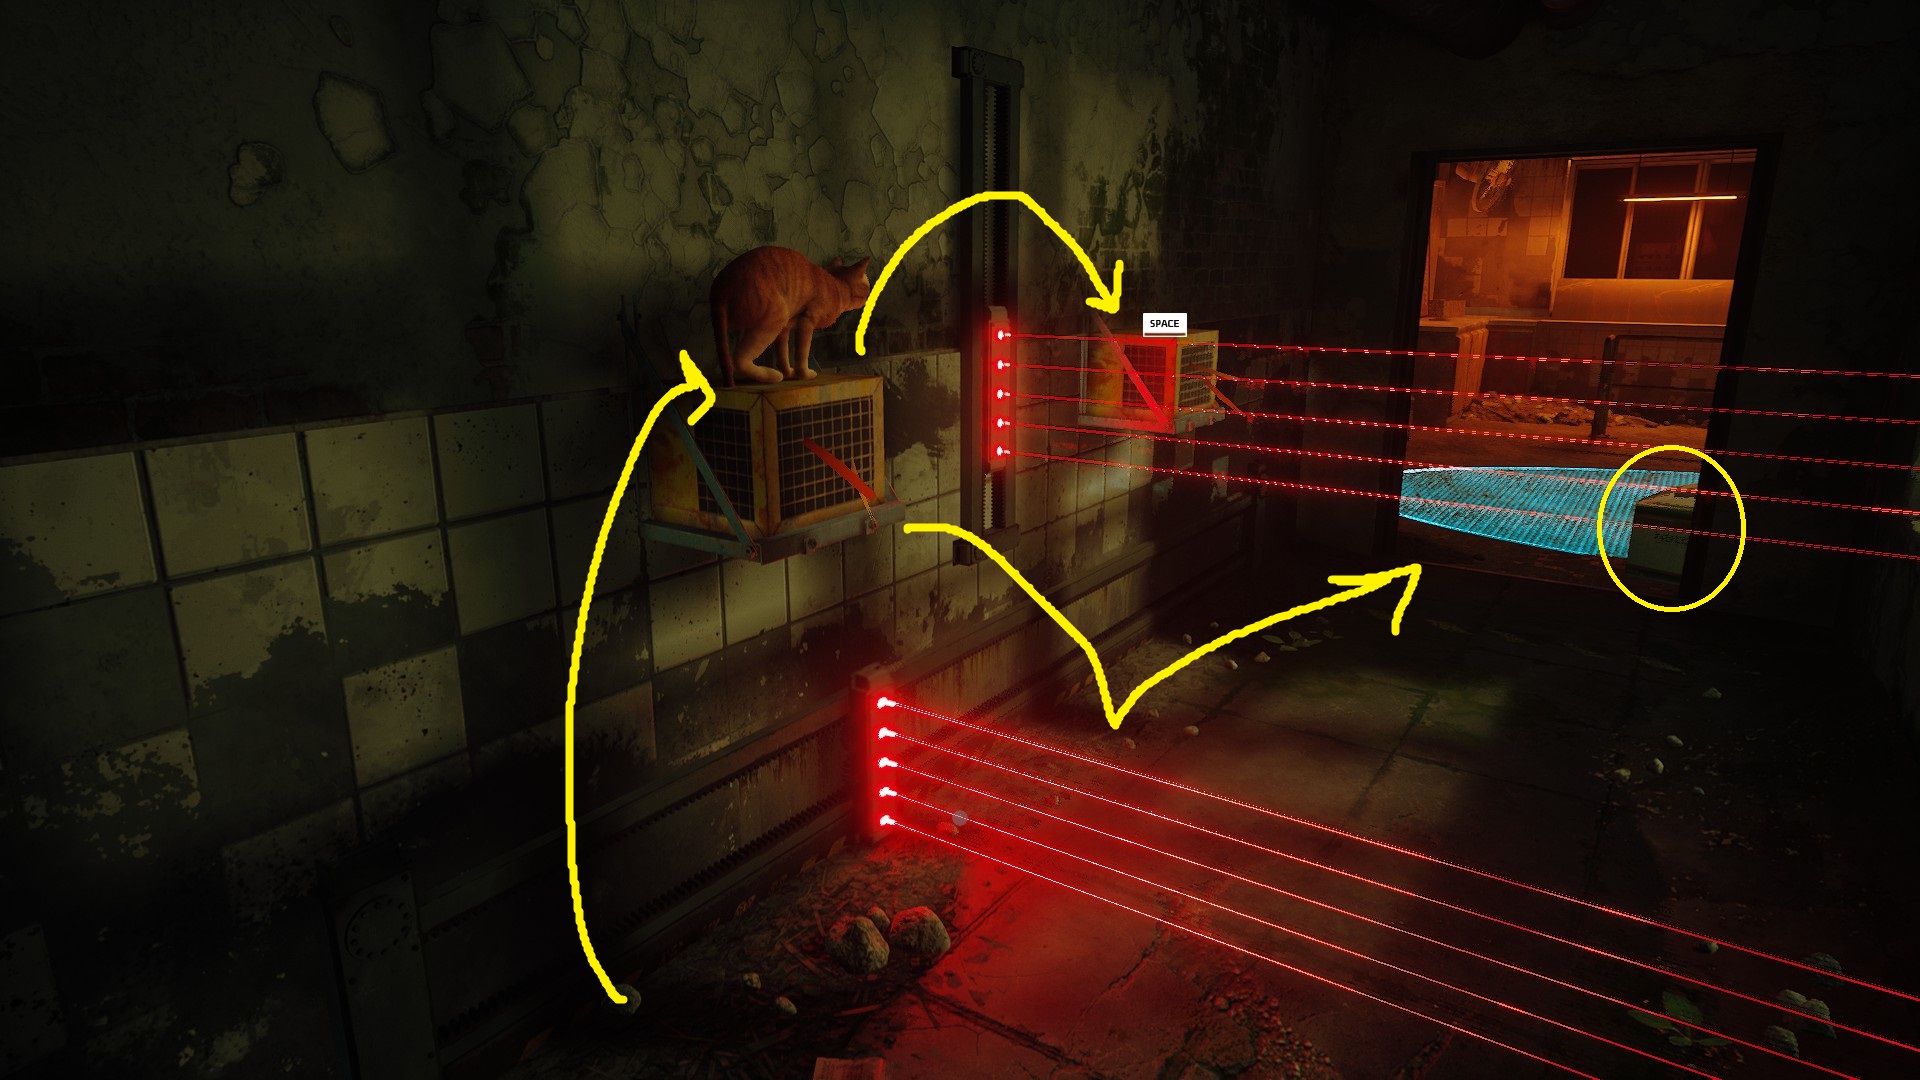
When you’re in control again, continue down the hall and jump through the little slot in the bars that protect the office. Cross the office, exit through the window, and you’ll find the way forward blocked by lasers. There are a series of laser “puzzles” coming up — while the path forward is generally clear, we’ll treat them like any other puzzle and hide the solution.
This one’s nice and easy – just hop on the boxes, use them to get to the air vents, and cross over the lasers by way of the light fixture.
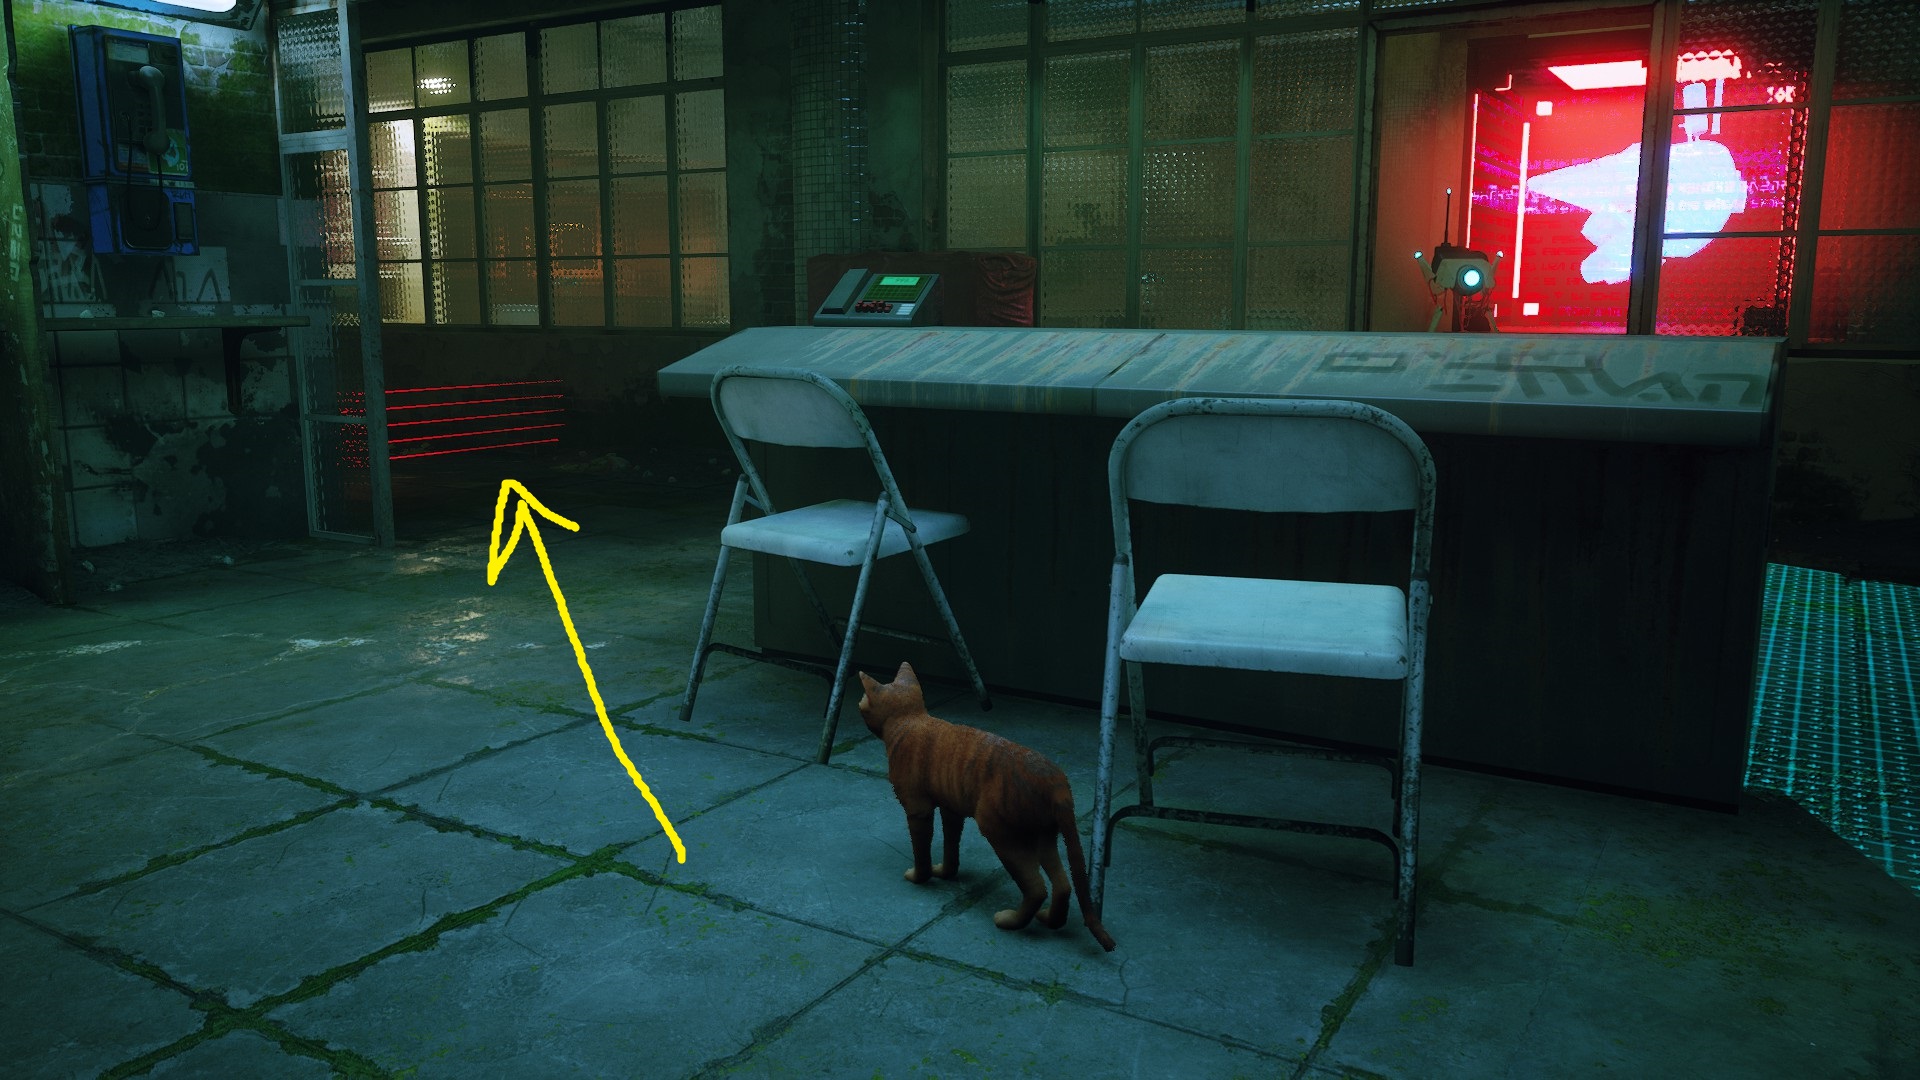
Once past the lasers, turn right to find a hallway with another series of lasers — this time, there’s a drone to avoid as well.
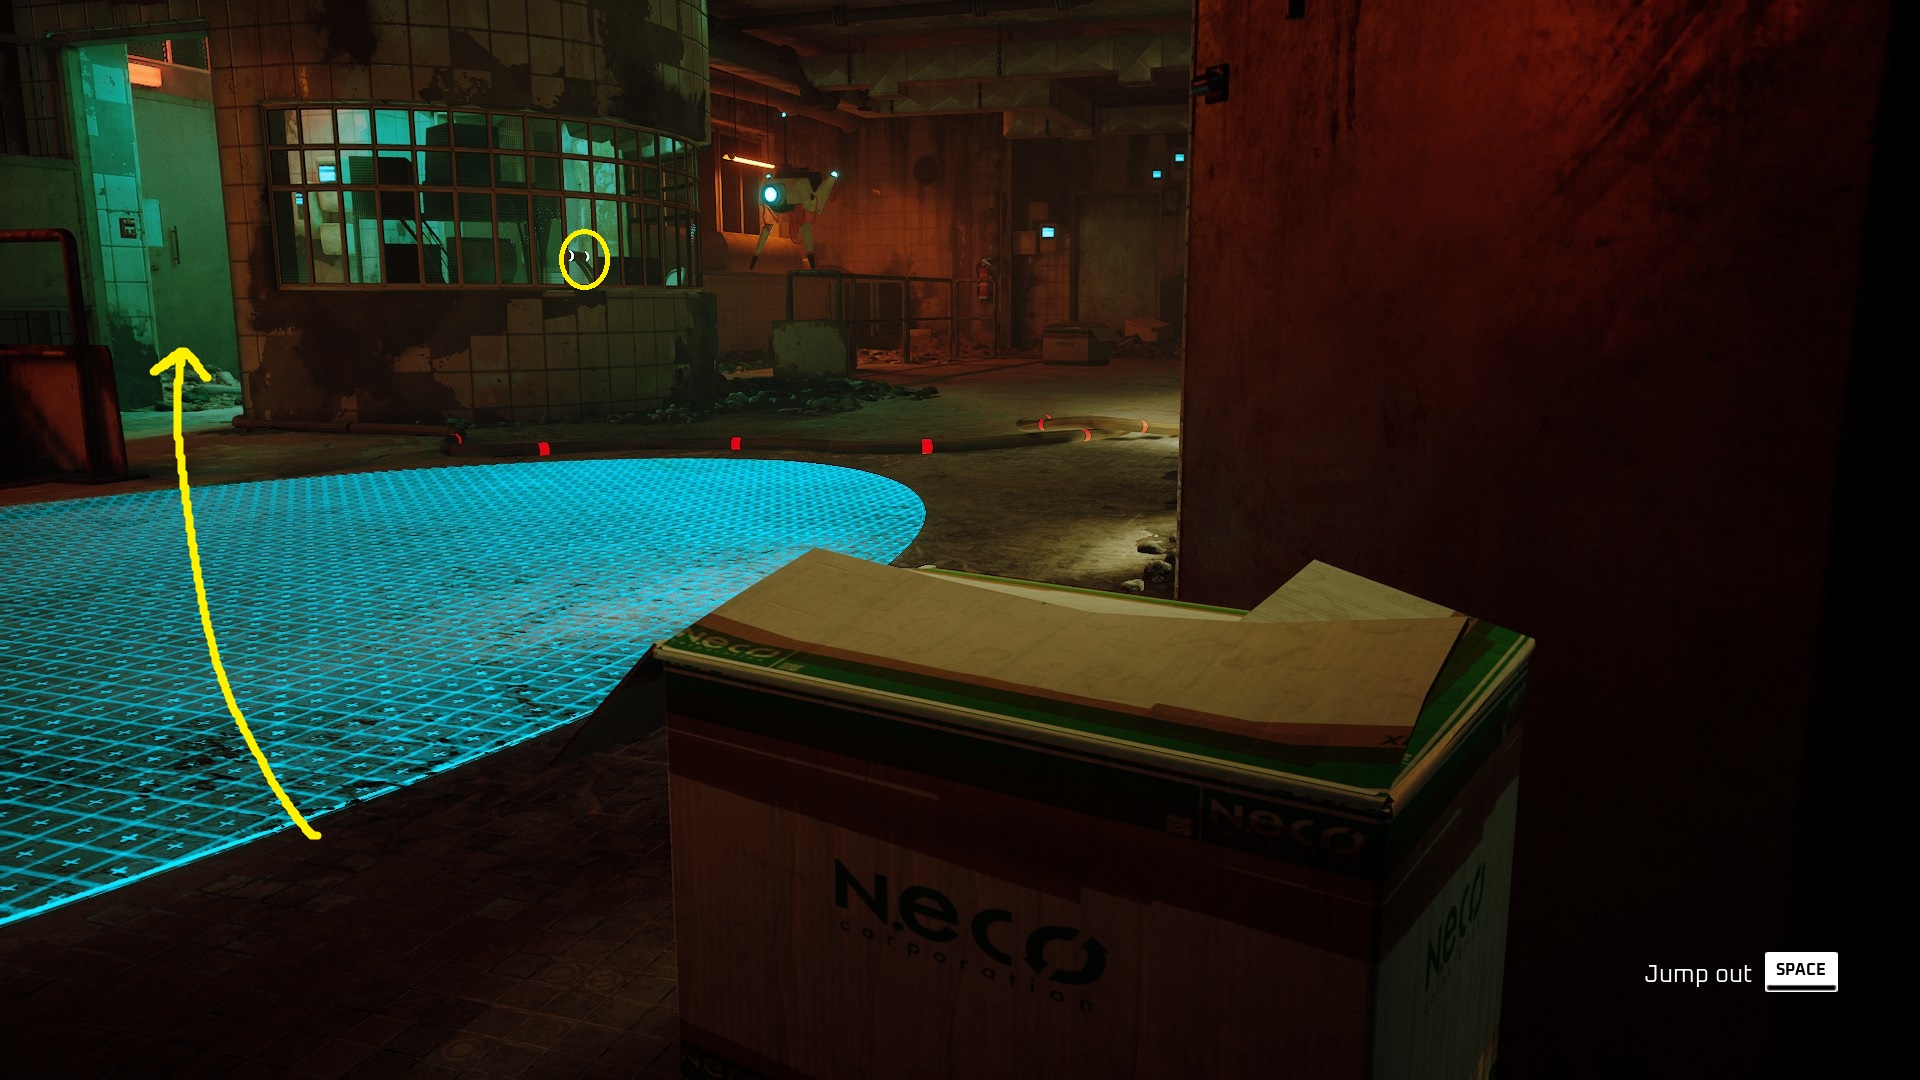
Hop up on the pipe that’s on the left side of the hall, and follow it as far as you can (1). Then, wait for the drone to look the other way, and run behind the counter (2) — if it sees you, just jump in the box that’s behind the counter. Again, wait for the drone to be looking the wrong way, and continue further down the hallway (3). When the laser is out of the way, jump up on the first AC unit — from here, you can jump over or sneak under the second laser (4). The drone in the next room might spot you, but there’s a conveniently placed box as you enter.
1234
In the next room, you can wait for the drone to patrol away from you, then head into the nearby control room and jump onto the lever.
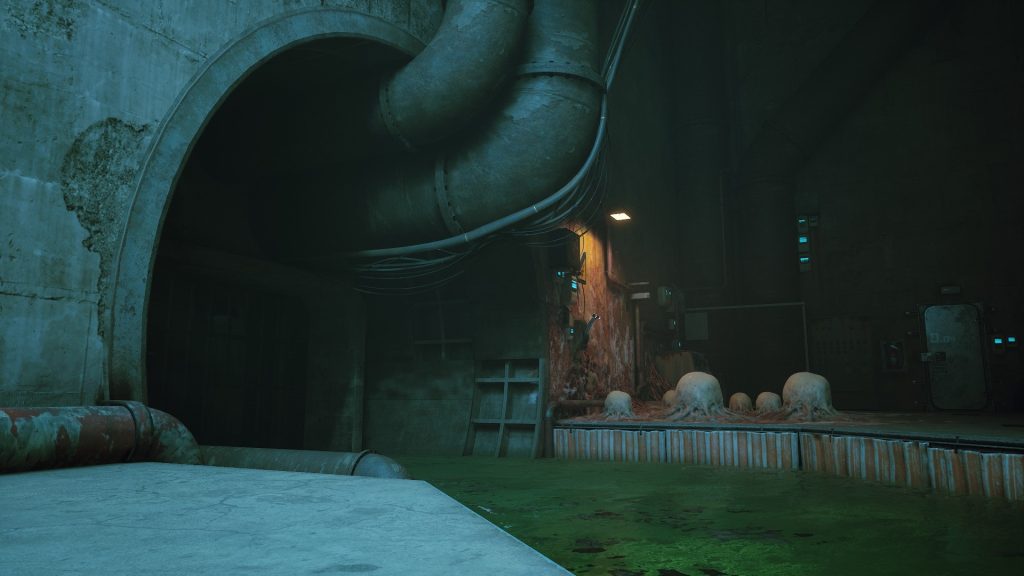
Now that B-12’s high-tech prison cell is open, you need to find a way to safely get to your friend, and then return with B-12 to Clementine.
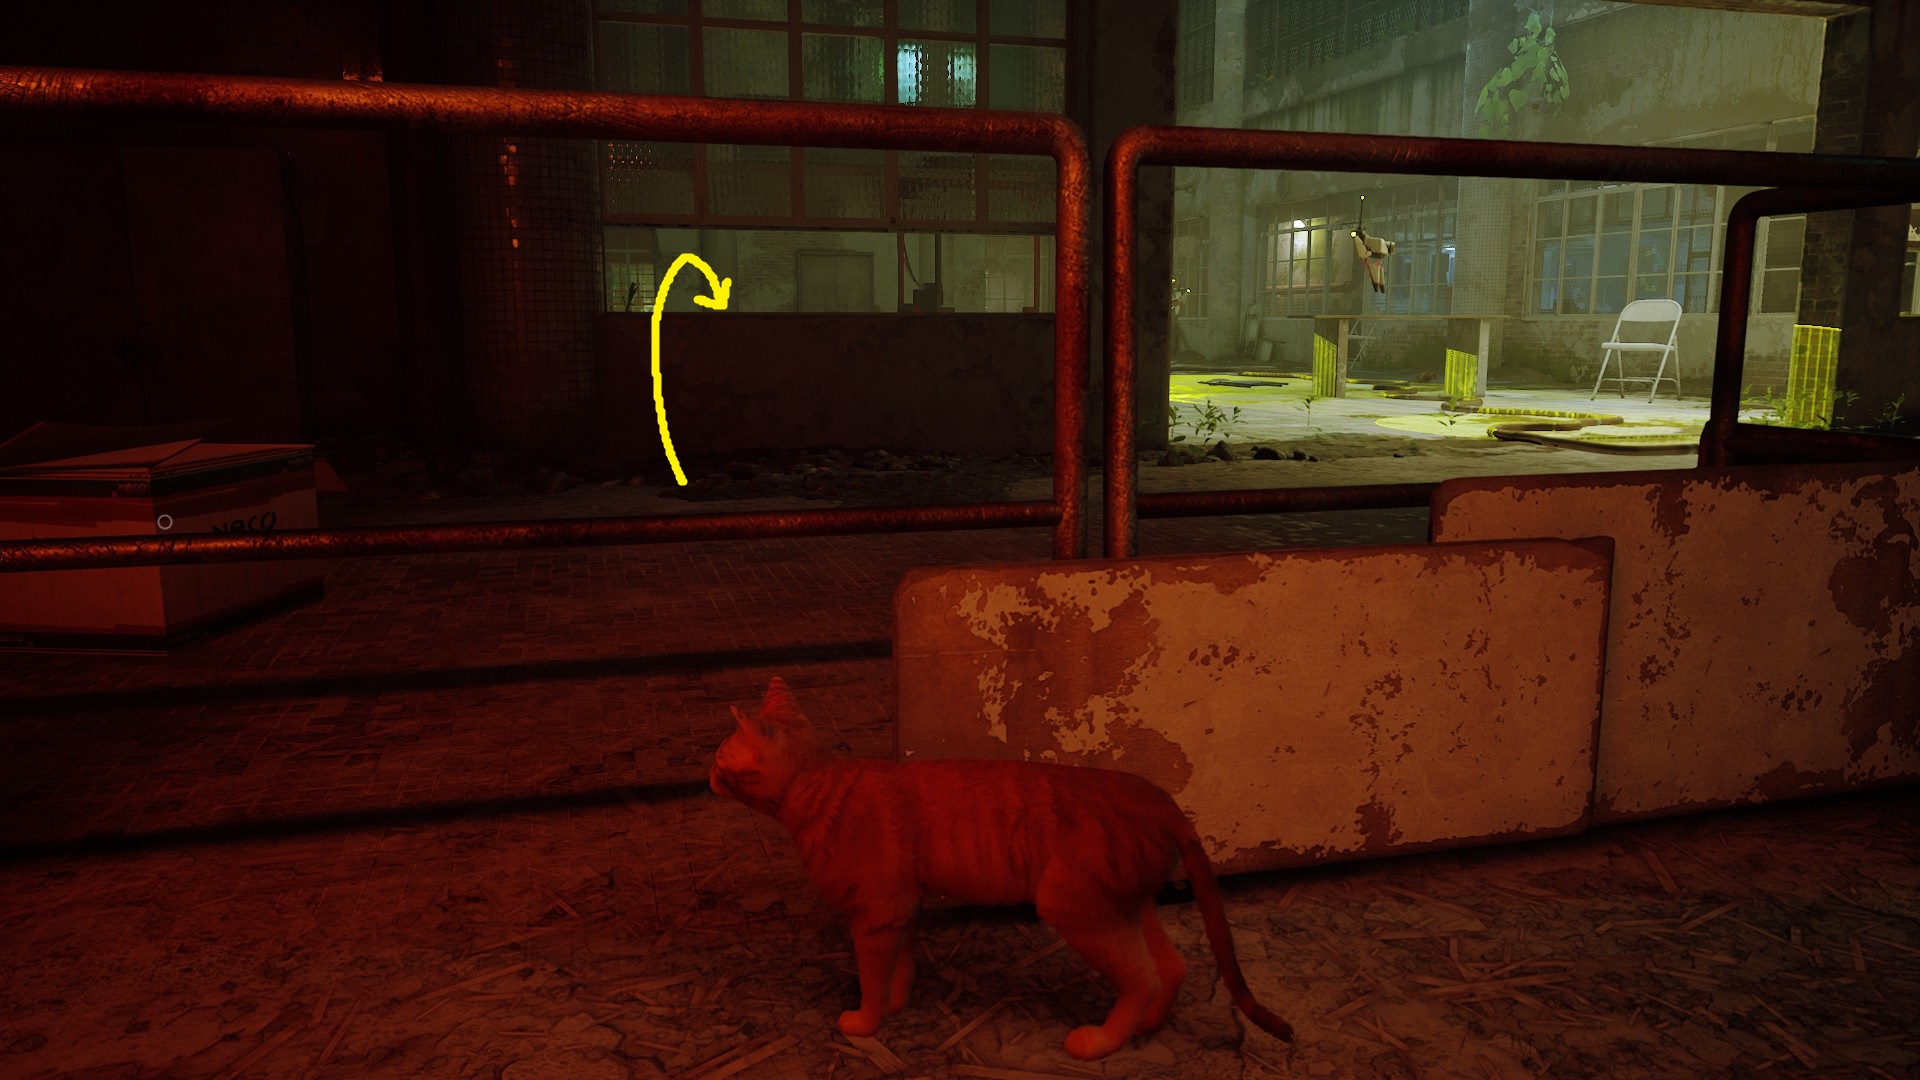
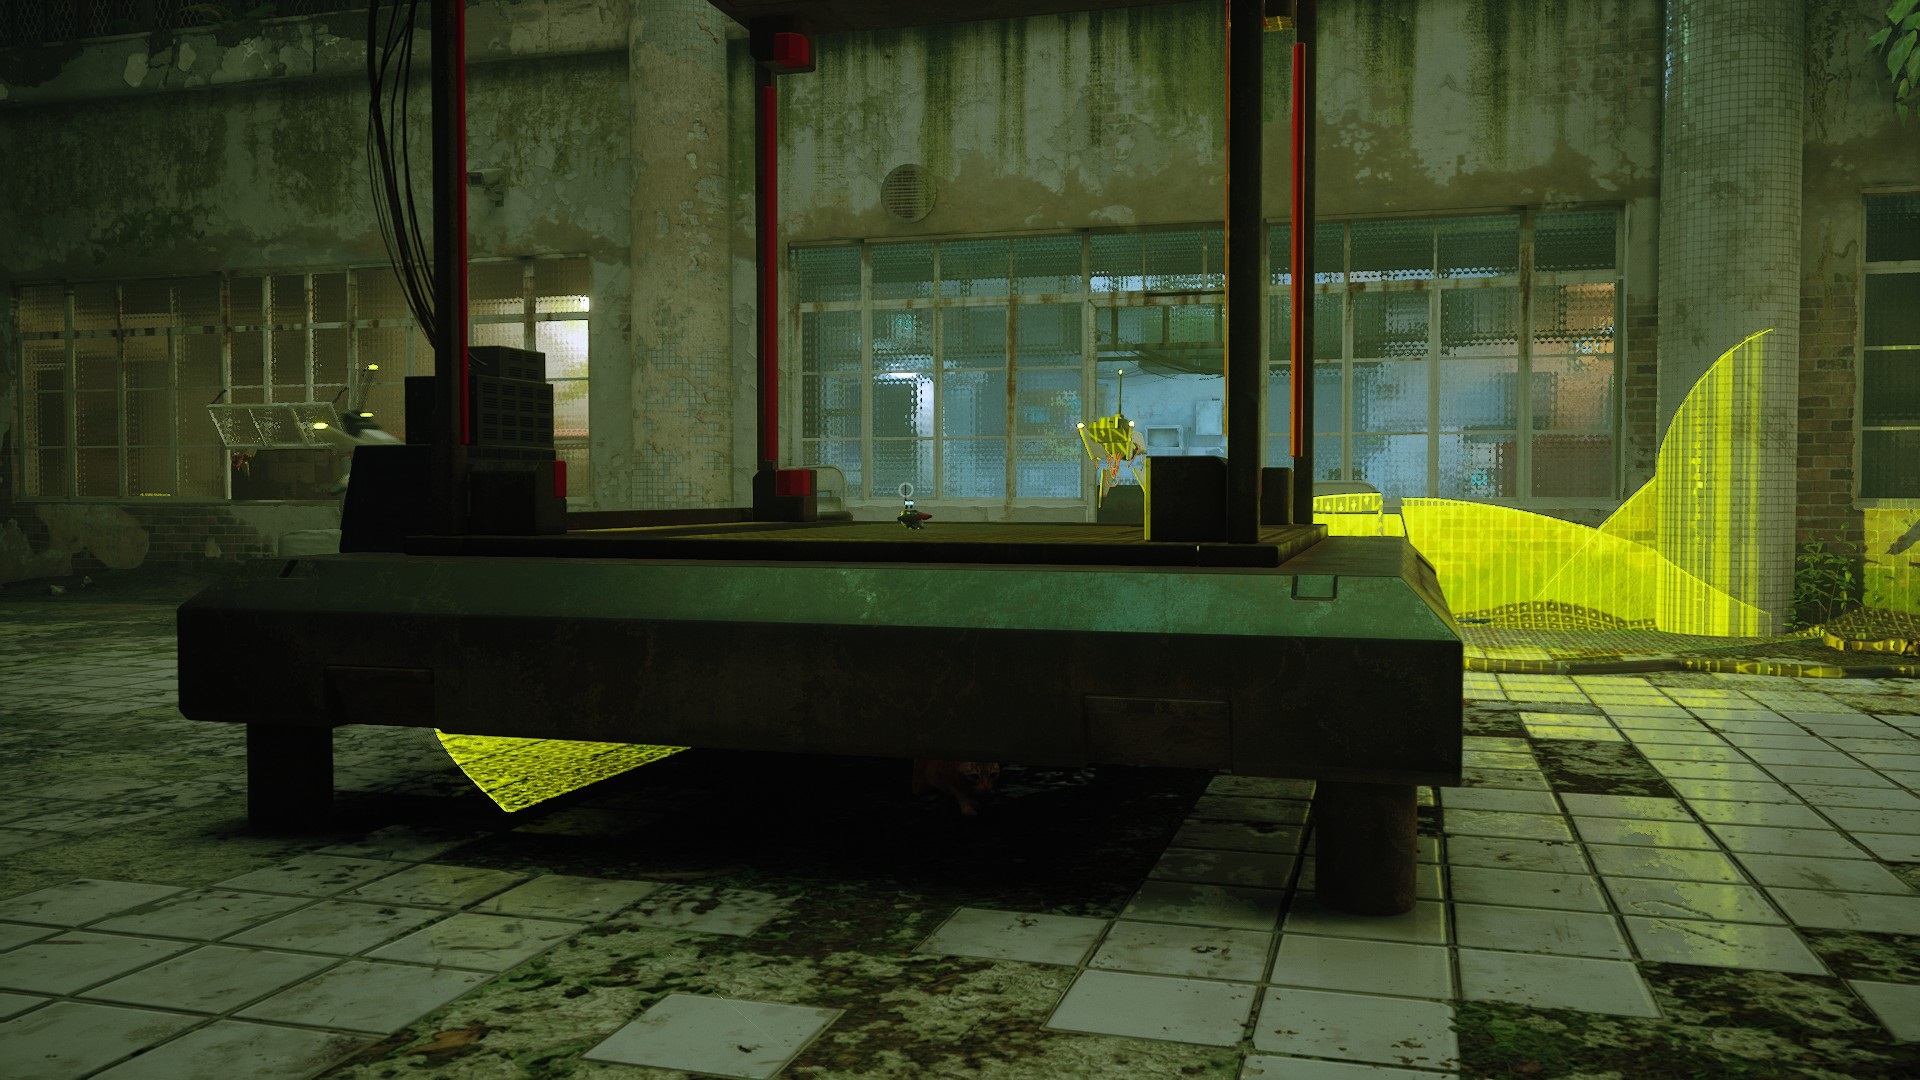
You can take a sneaky route to the left of the drone guarding the path forward (1), or you can just run straight towards the jail cell and hide underneath it (2). You don’t have to press anything, just run straight underneath the platform — the drones will forget you’re there after a little while. Really, a combination of both techniques is the safest choice. Wait for the drones to be looking away from B-12, then jump up on the platform he’s on and pick him up.
Once you’ve got him, head through the nearby window (1). If you get spotted, you can hide back under B-12’s cell, or in the box to the left of the window if it’s close. There’s a drone patrolling the hallway, so hide behind the white boxes and wait for it to pass by going right (2). Then jump through the window and head back the way you originally came, towards the first laser puzzle and the office. Go back through the office and return to Clementine.
12
Once you return to Clementine with B-12 in mouth, a brief cutscene will play, and then you and B-12 will be back in business! Open the door Clementine is facing, then head into the next room, where you’ll need to solve a puzzle to proceed.
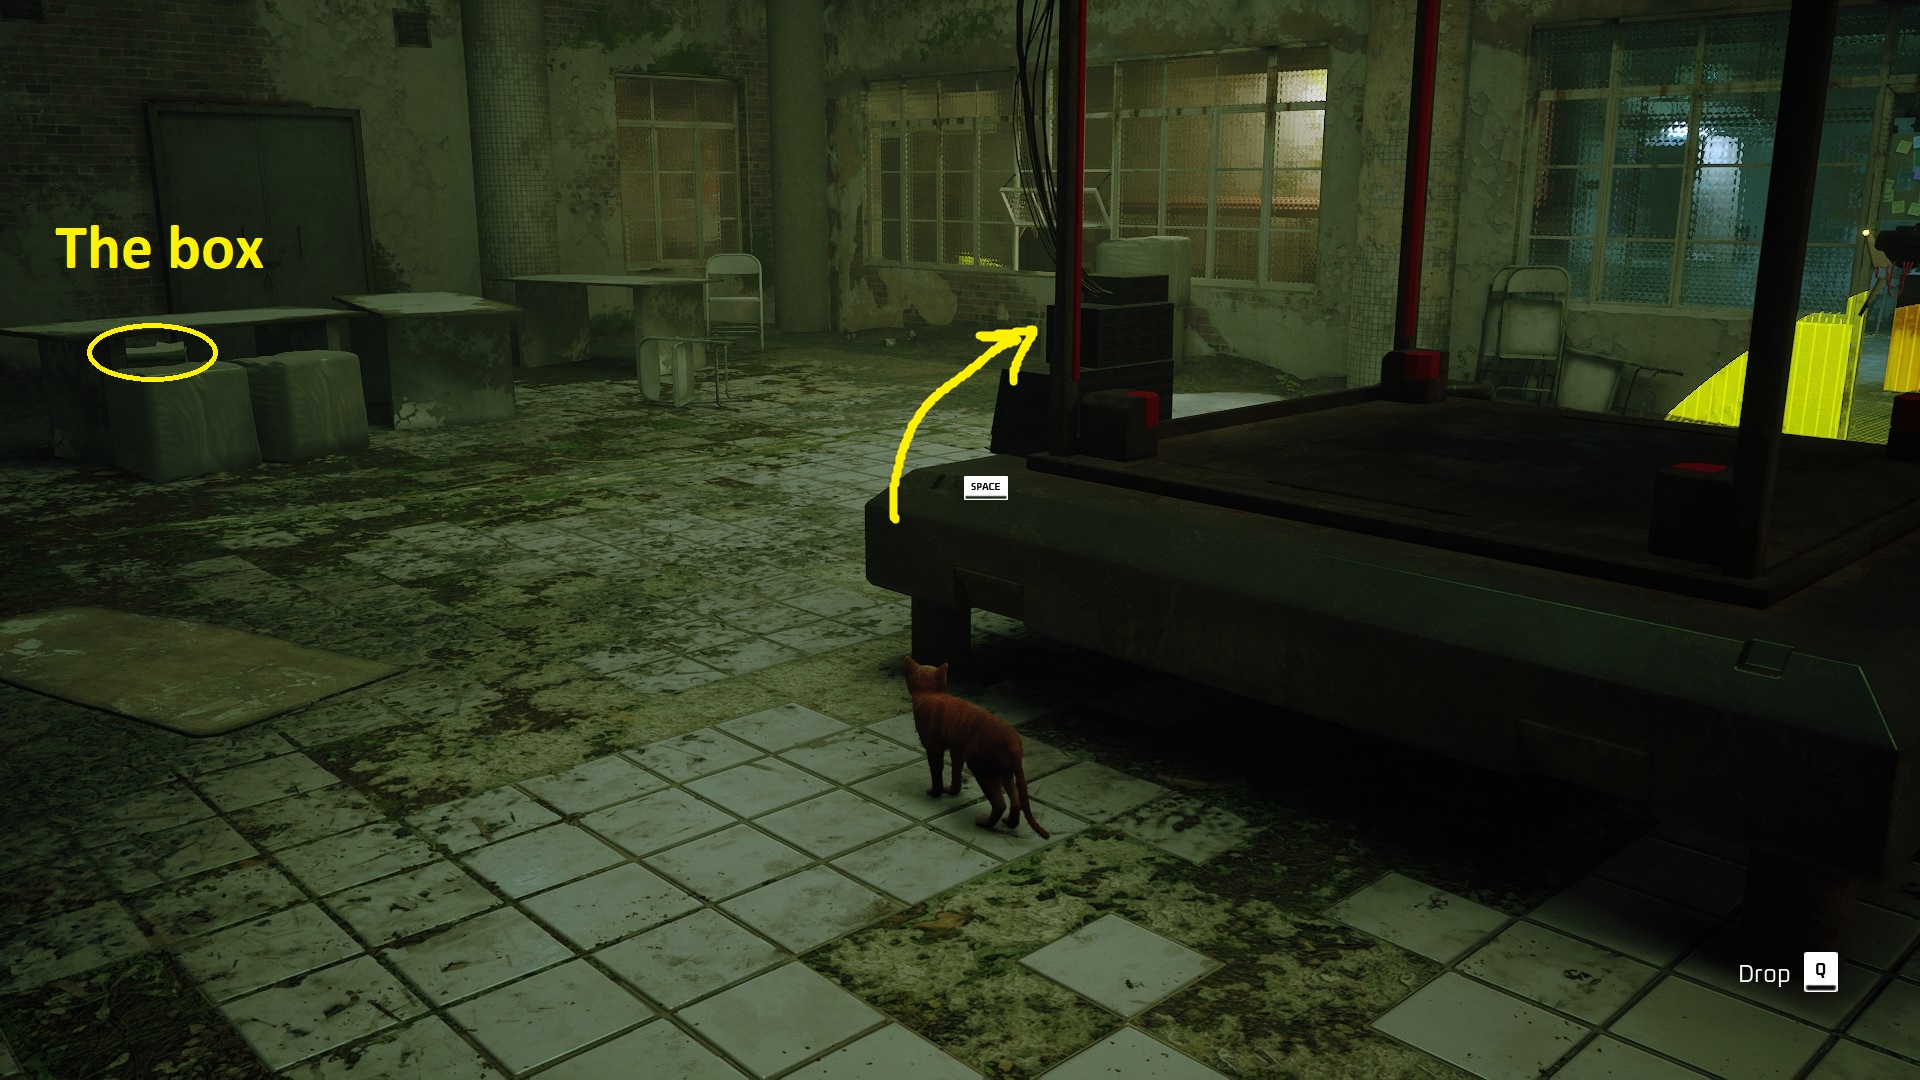
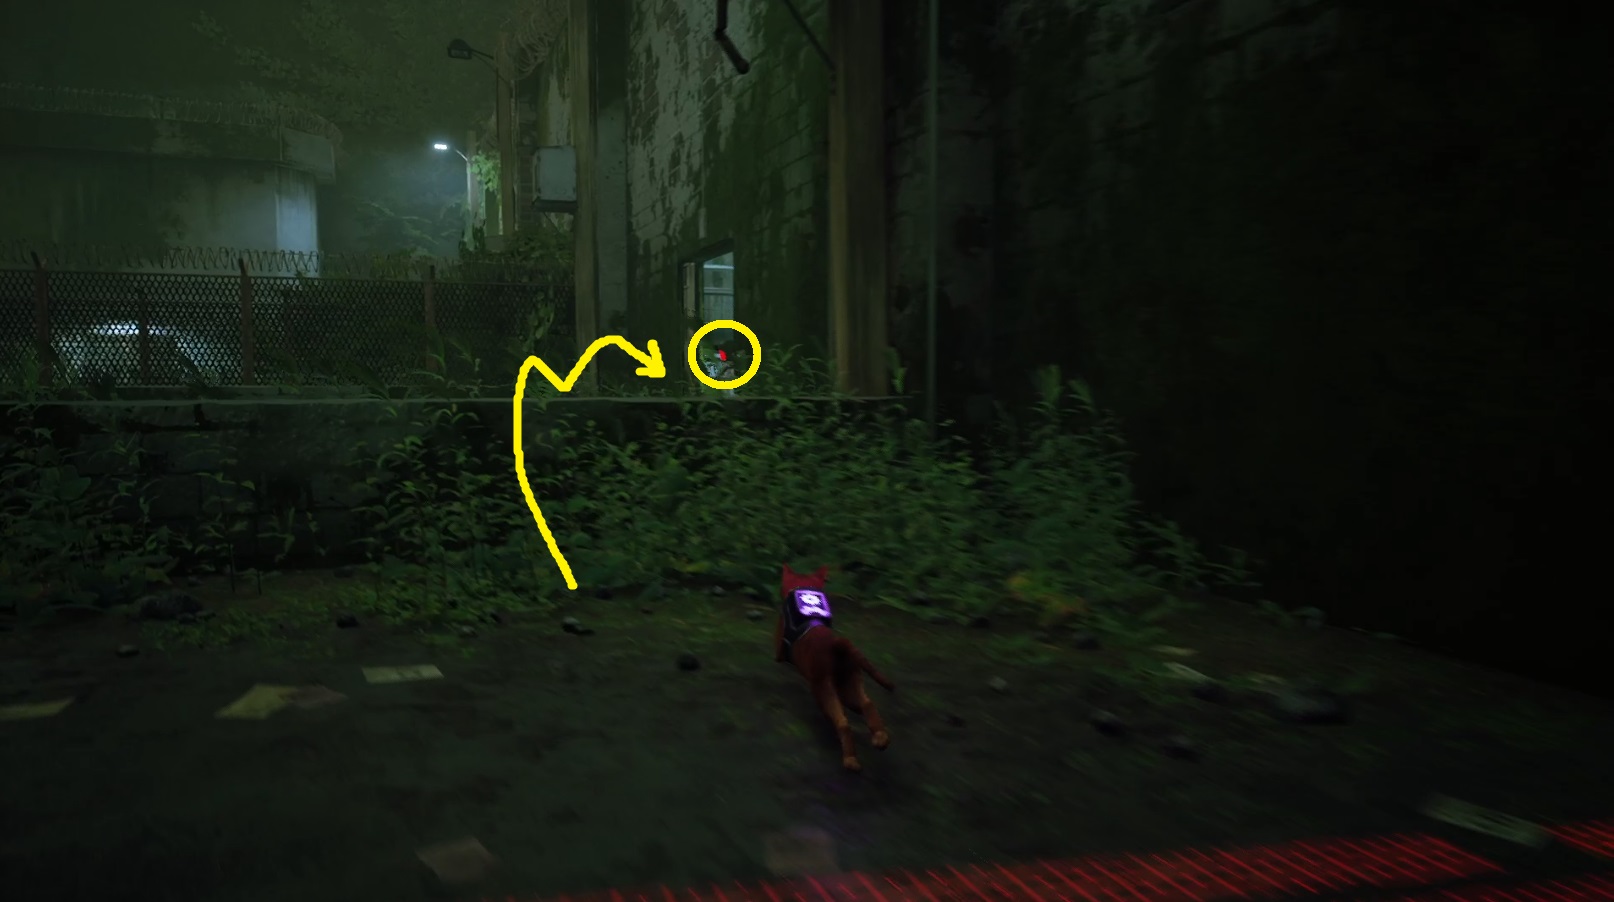
Jump up on the dumpster with the bricks, and knock the bricks to the ground (1). Clementine will throw one through the window and then, after a moment, bend down and gesture towards you. Jump onto her head and let her boost you to the newly-created hole in the window (2). Jump up and then make your way down into the hallway, and head into the control room to pull the lever and open the gate.
123
Clementine will saunter over to the next door and open it, and then B-12 will give you a hint about how to deal with the drones you’ll encounter in the outdoor area: trap them in the cells somehow.
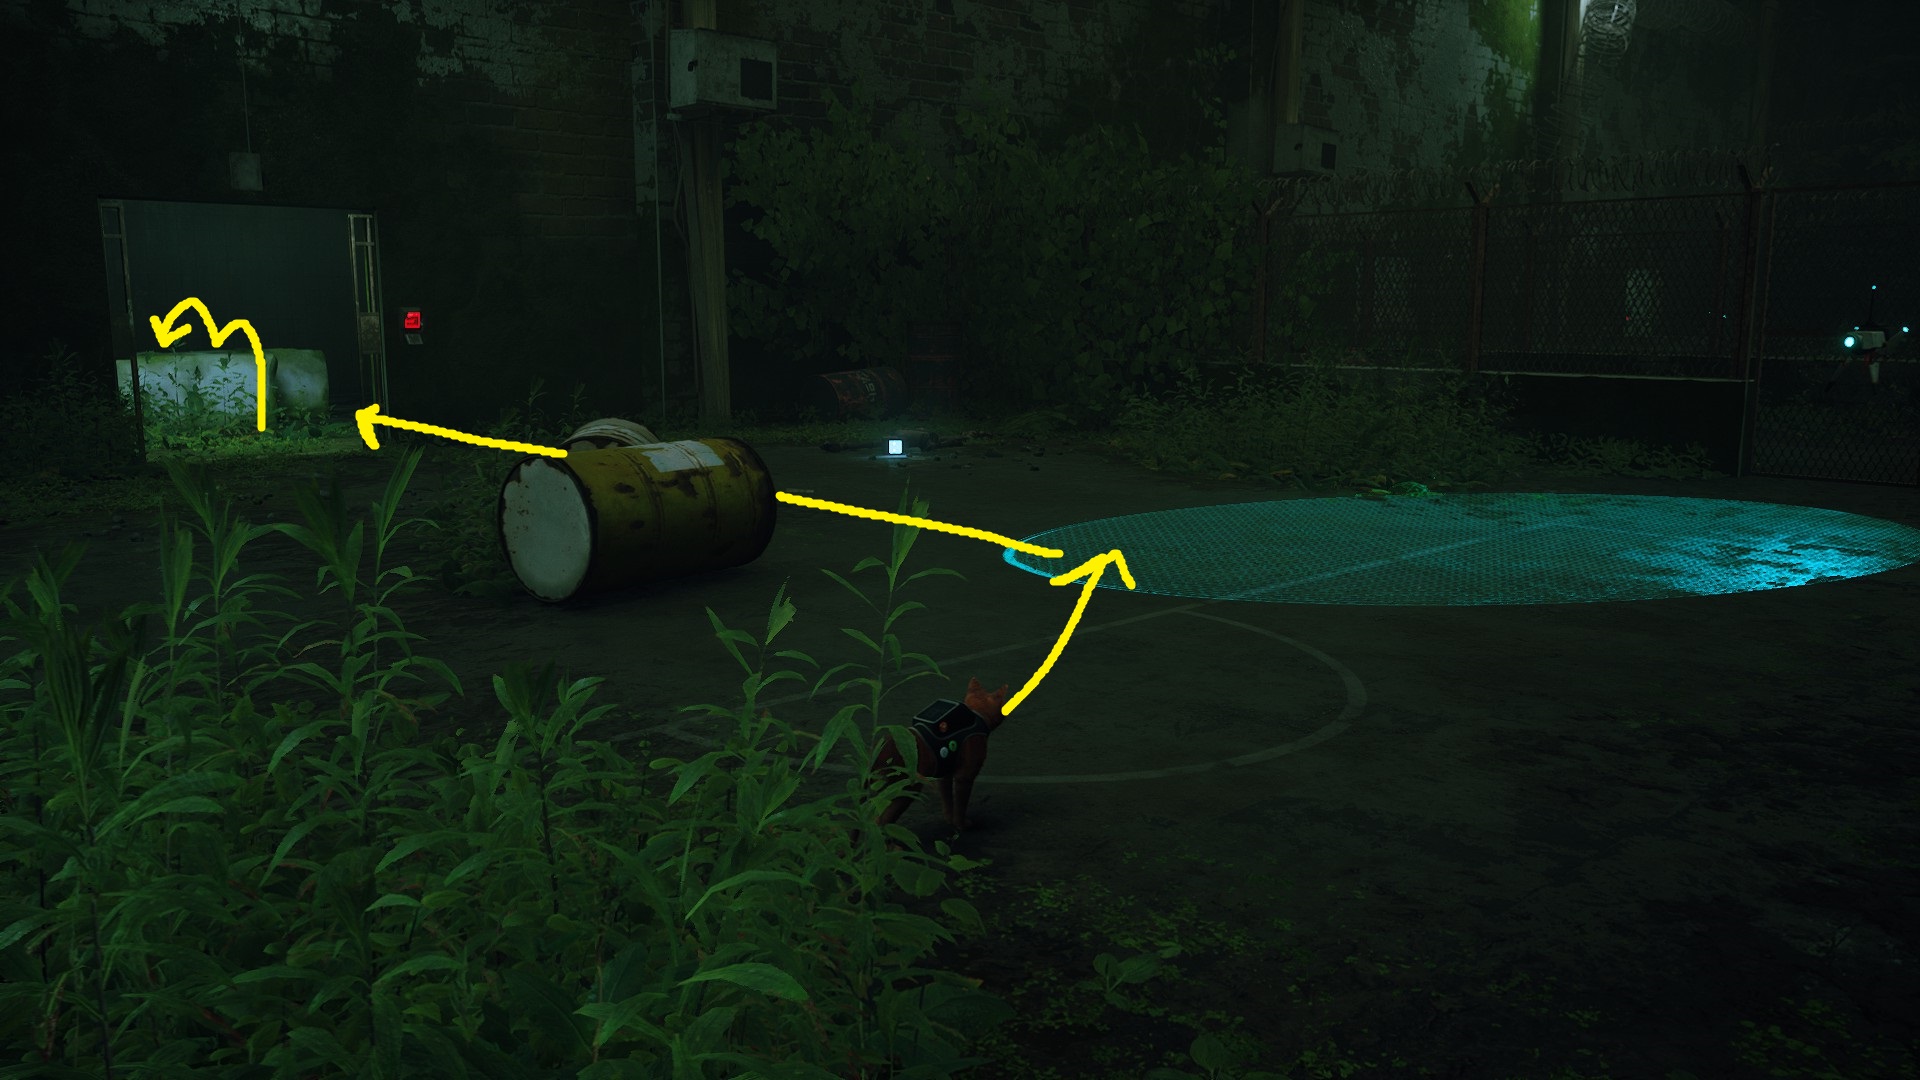
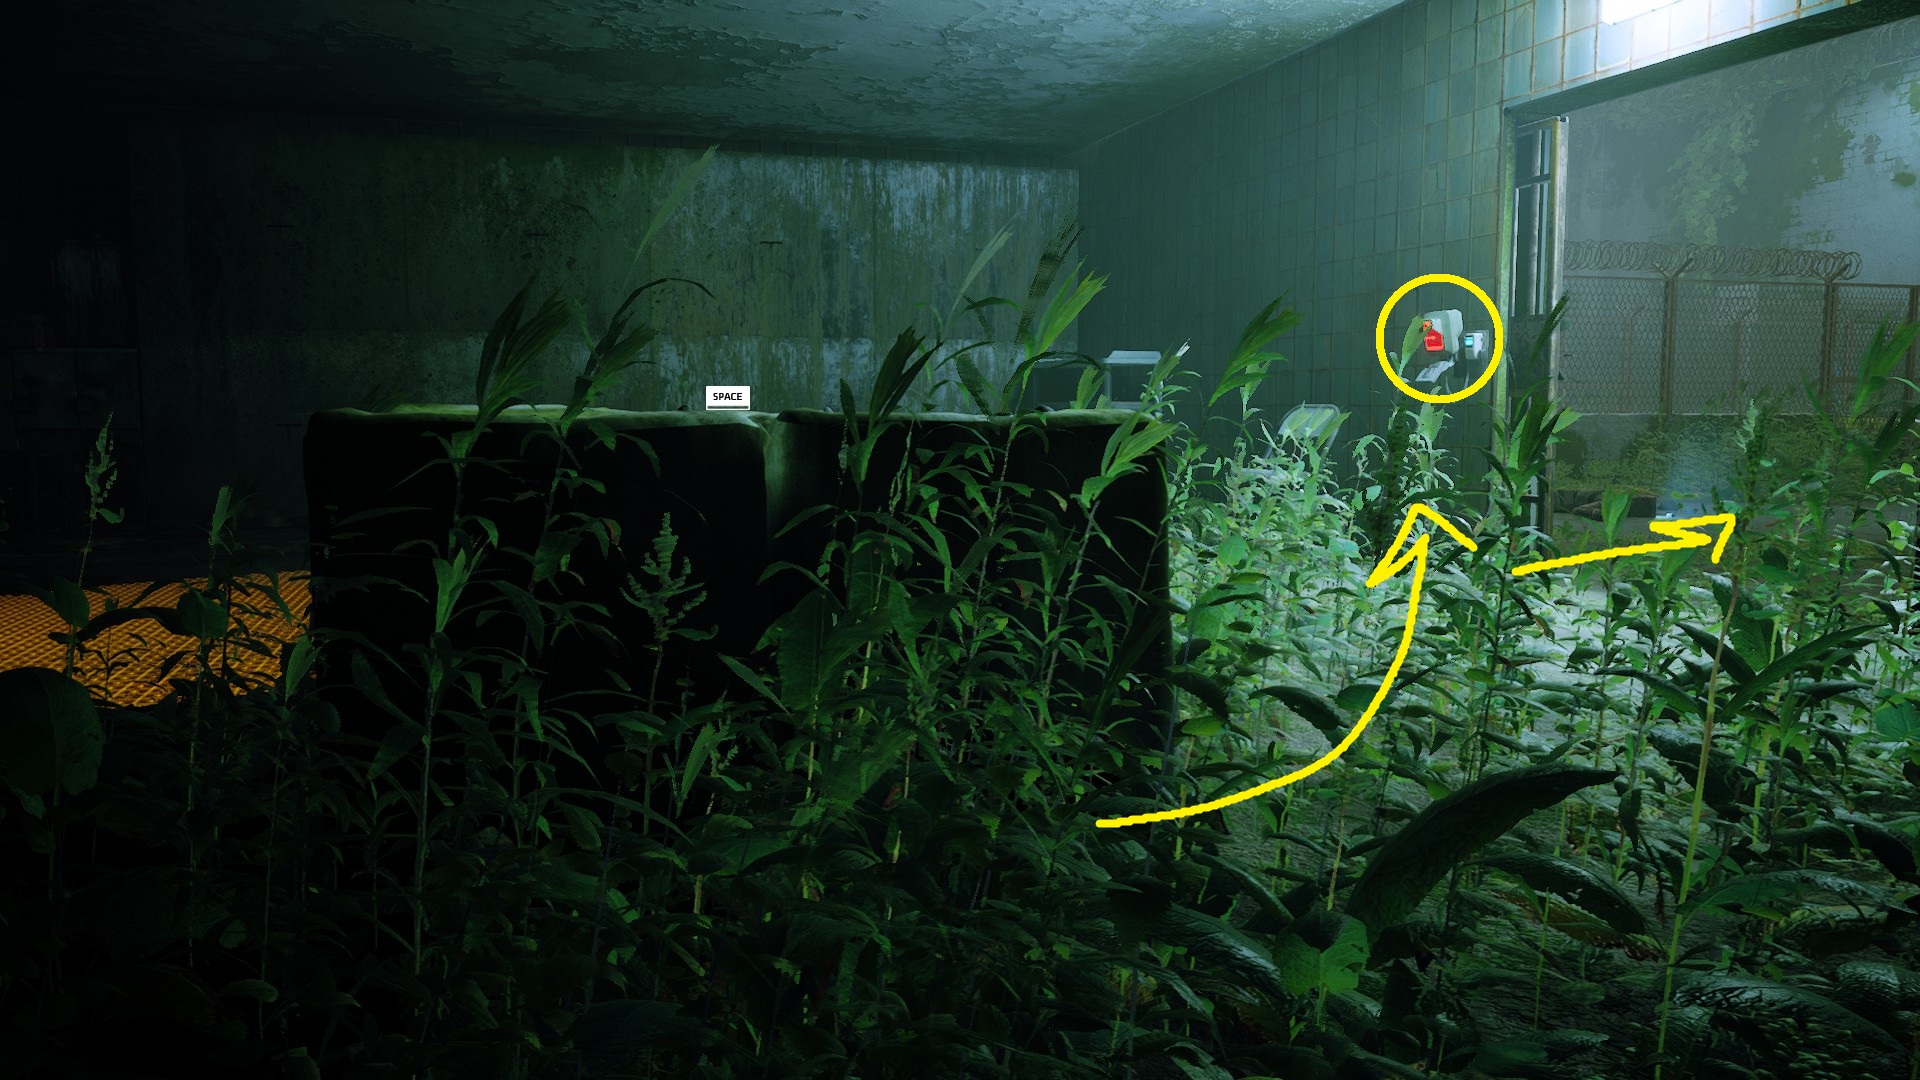
Wait near the drone for it to be looking towards the cell, then run into its field of view and continue running toward the cell — inside the cell, jump up and over the boxes and hide behind them (1). Wait for the drone to get most of the way inside the cell, then run around the boxes, activate the door panel, and run out (there’s a delay, so you can activate the inside or the outside panel).
12
Once you’ve locked up the drone here, Clementine will cross the courtyard and open up the next gate. (Before completing the next drone puzzle, make sure you grab the Memory from the dead robot to the right of Clementine.)
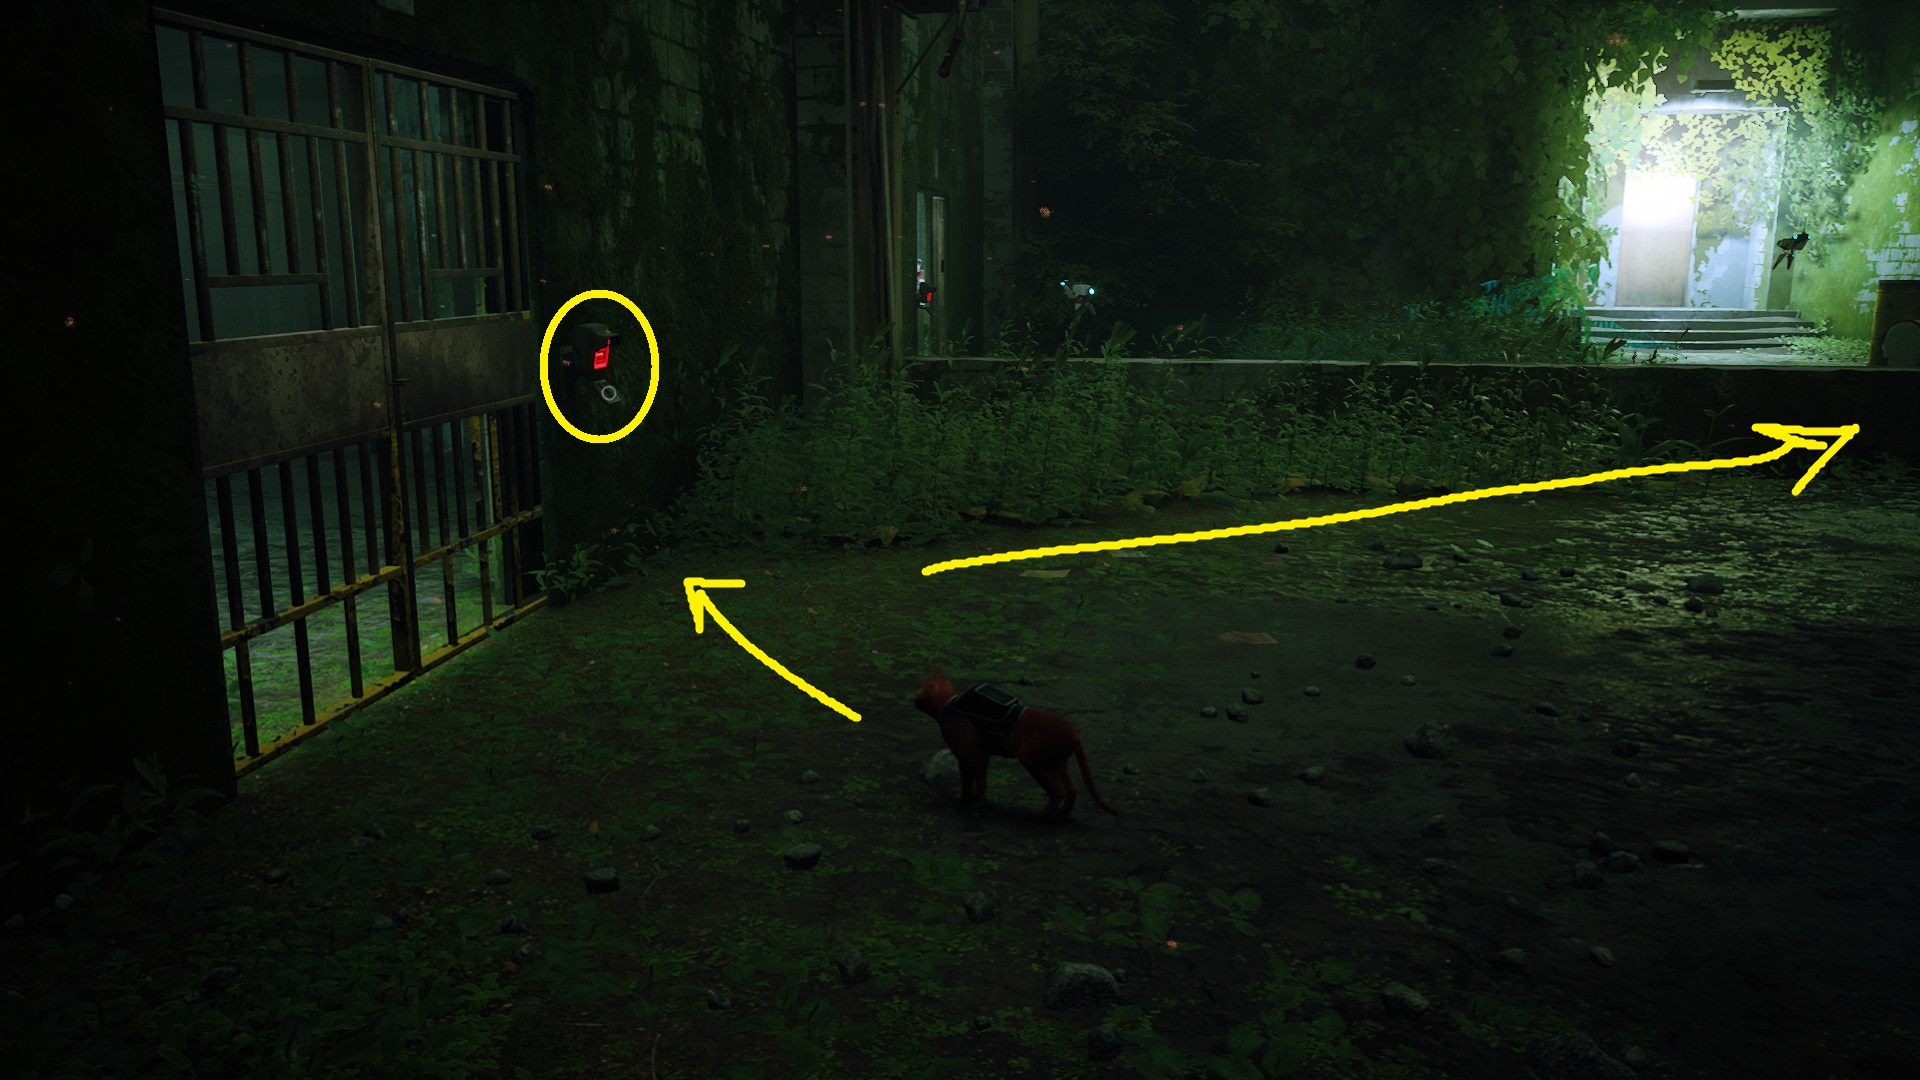
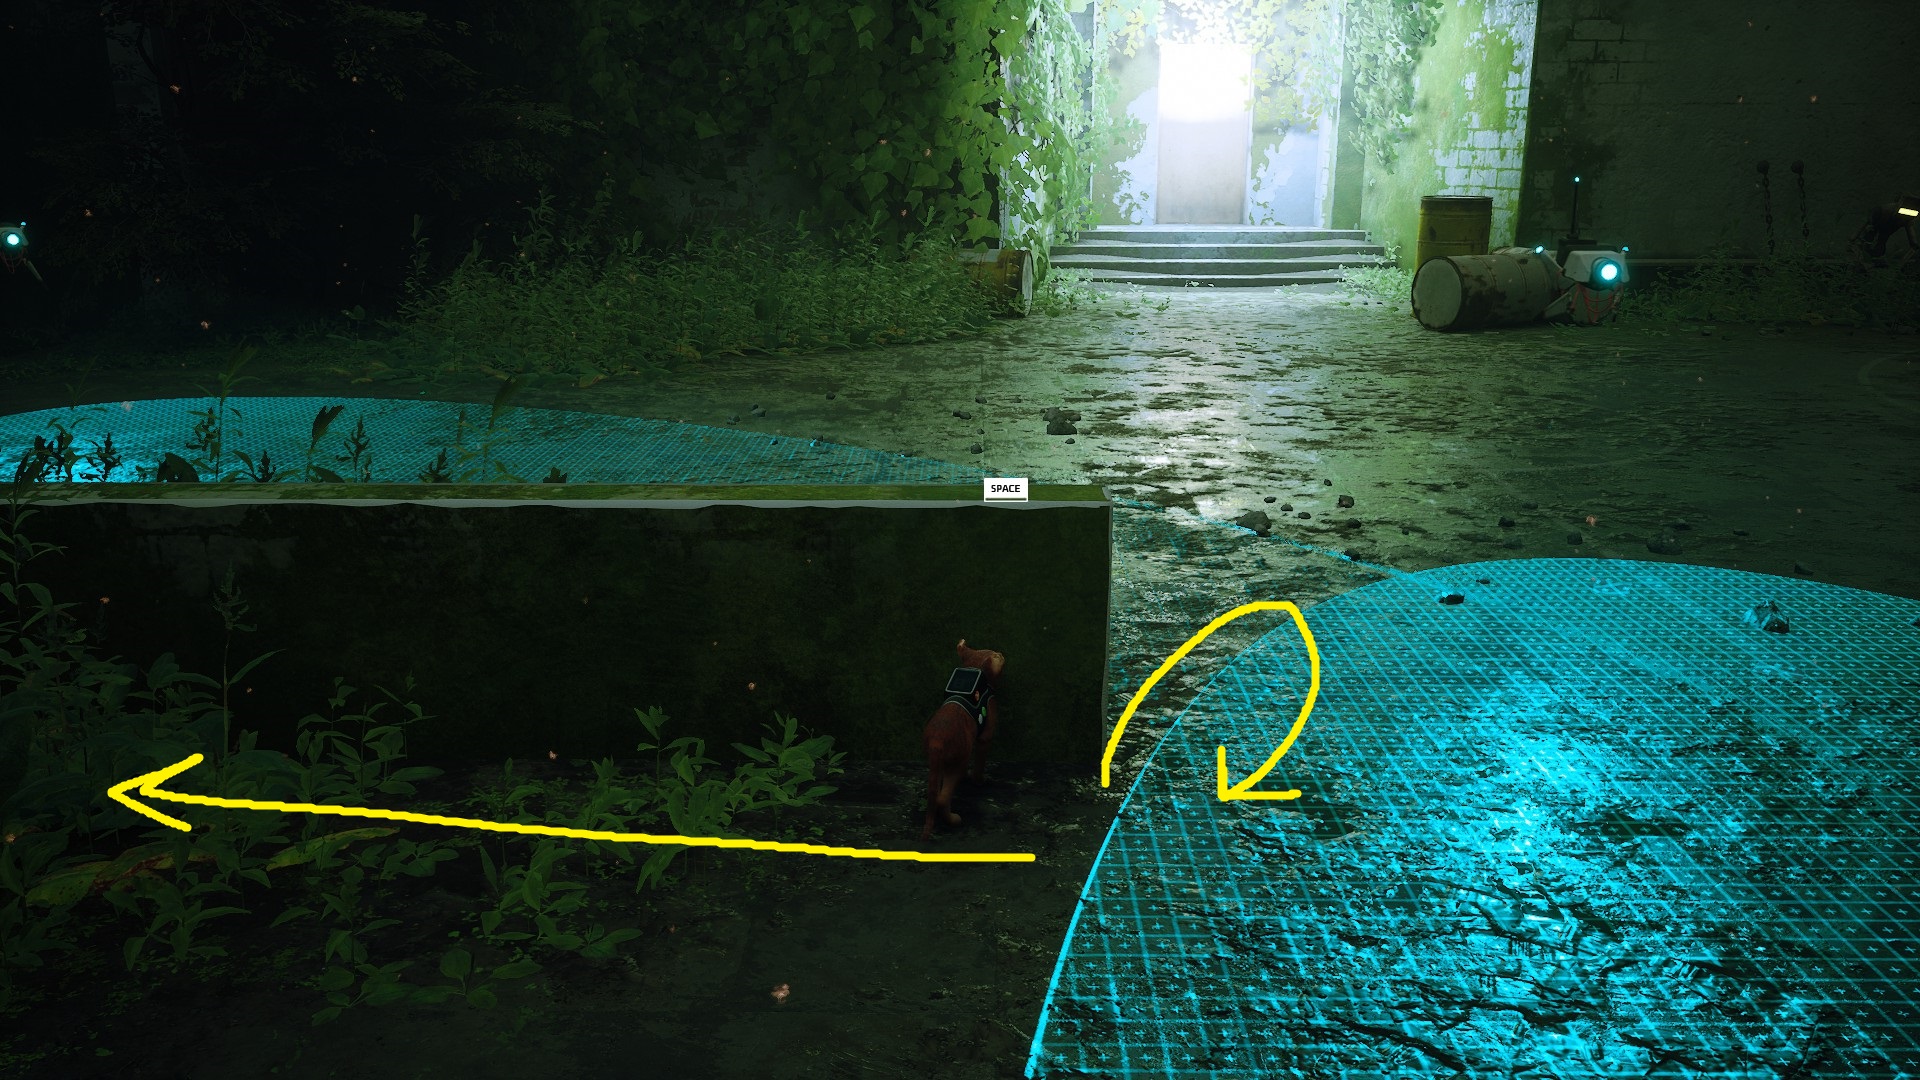
First, open the nearby cell door on your left. That done, go and stand near the edge of the low wall (1). Wait for both drones to be looking near the corner, then step out into view to get the attention of both drones (2). Use the wall for cover from their guns and run into the cell via the door you opened, and hide in the back of the cell behind the columns (3). Once both drones are inside, keep the columns between you and the drones as much as possible and run through the left-hand cell door — close it as you run past. Outside, turn right, jump over the low wall, and close the other cell door.
1234
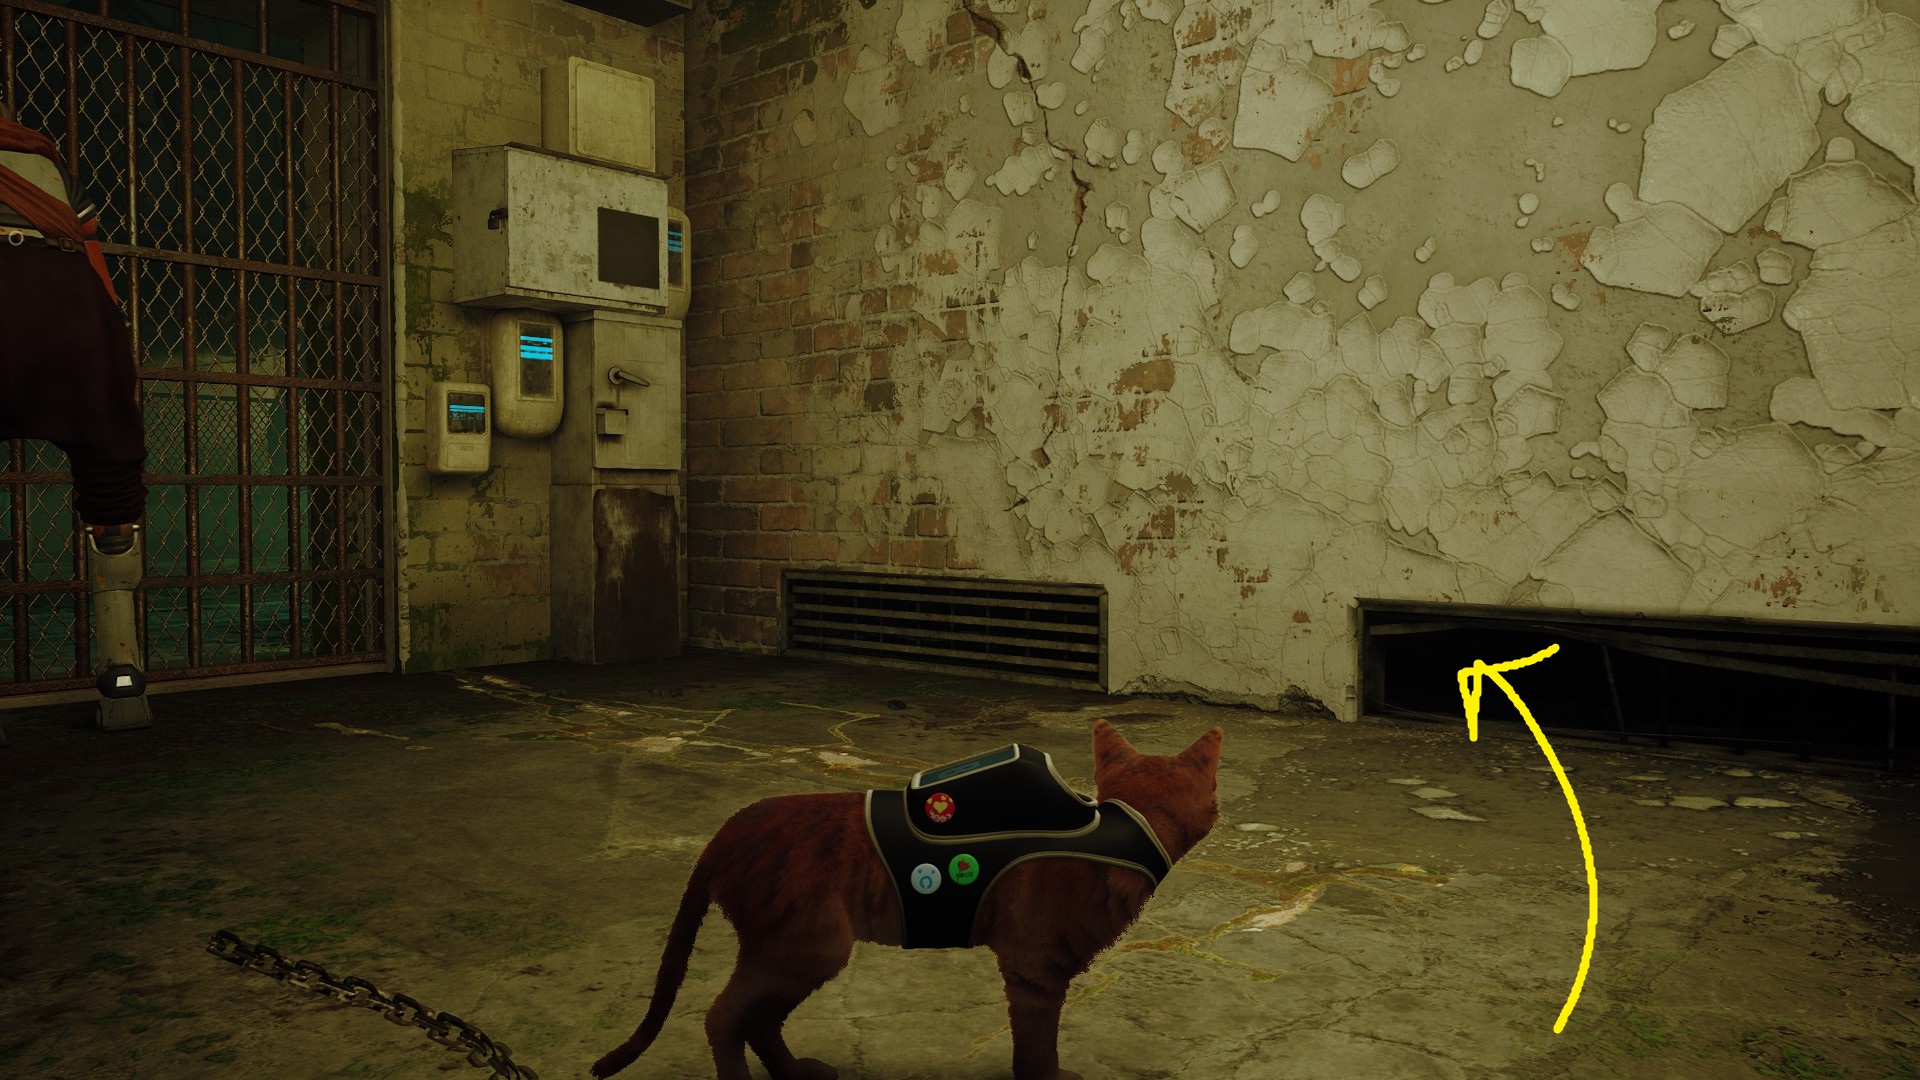
Once both drones are locked away in the cell, Clementine will cross the yard and open the door that leads into another cell block. Follow her in, and she’ll be unable to open the next door. Head through the broken vent on the right side of the room, then make your way through the vent and outside. You can then head to the gate and jump on the lever to let Clementine through.
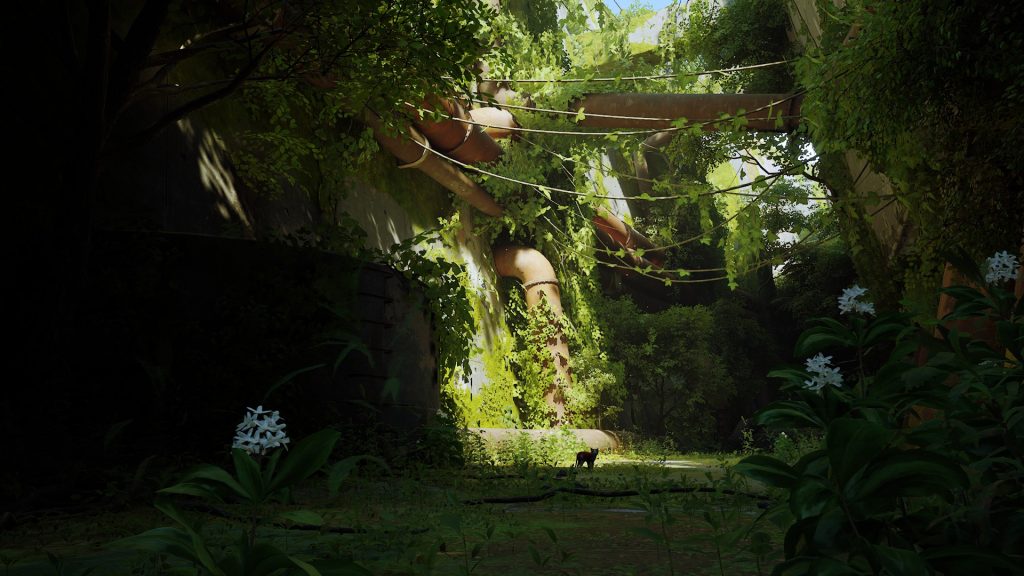
Now you’ve got to find a way into the control room in order to escape the Jail for good.
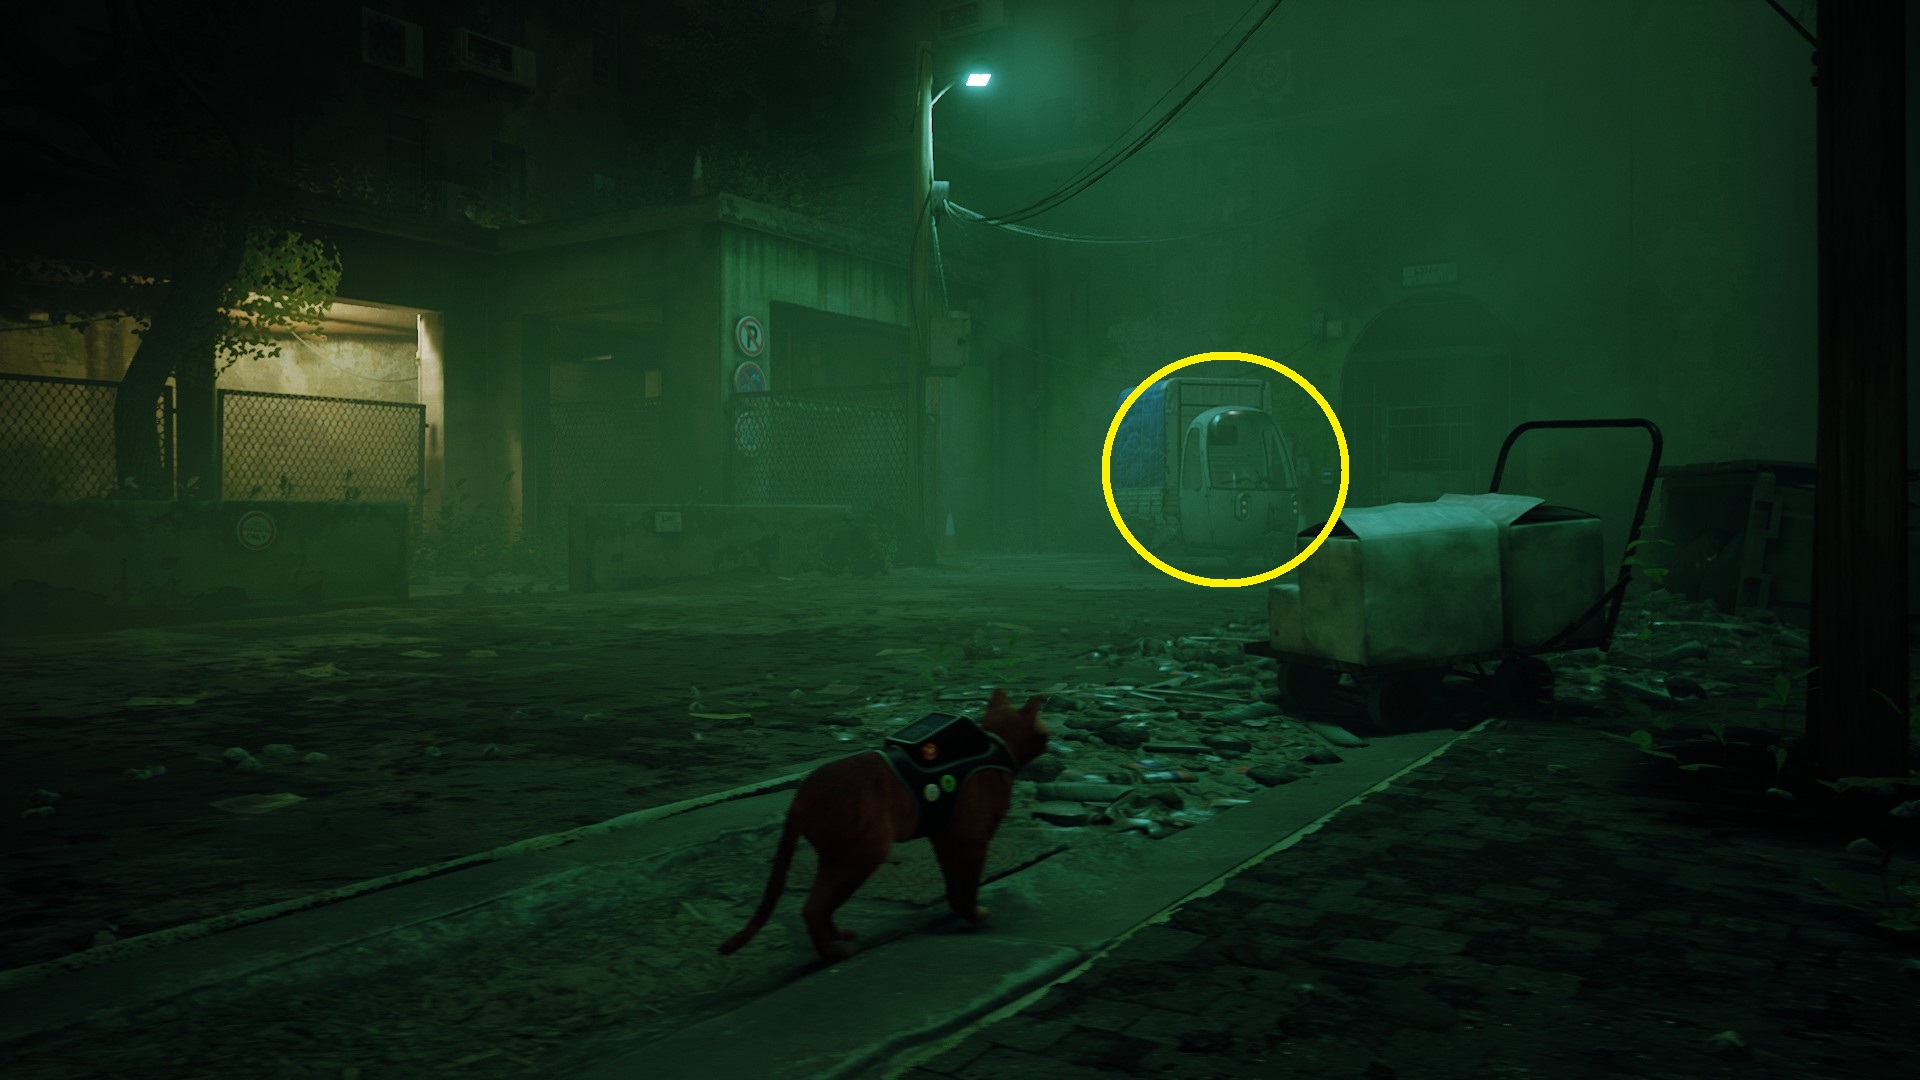
Is there anything in the courtyard that can be moved (by you or Clementine) in order to create a path to the control room?
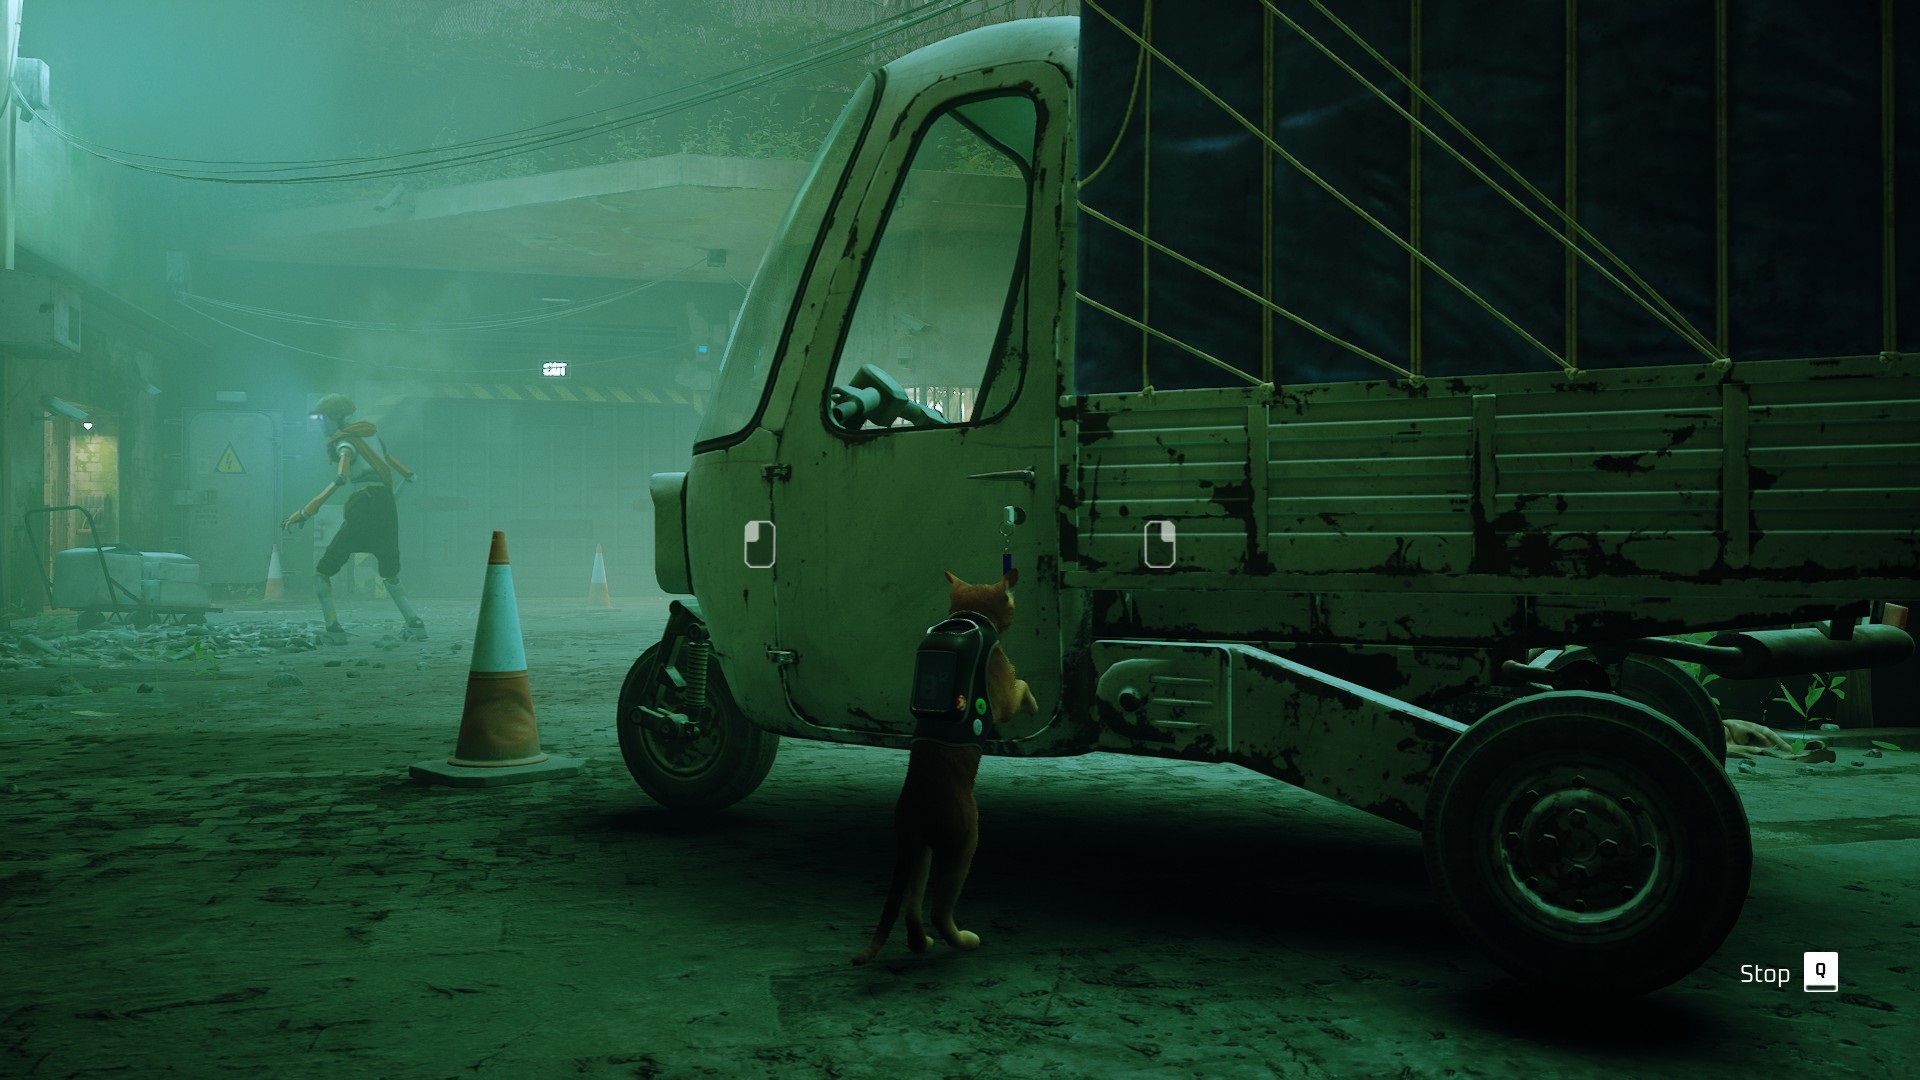
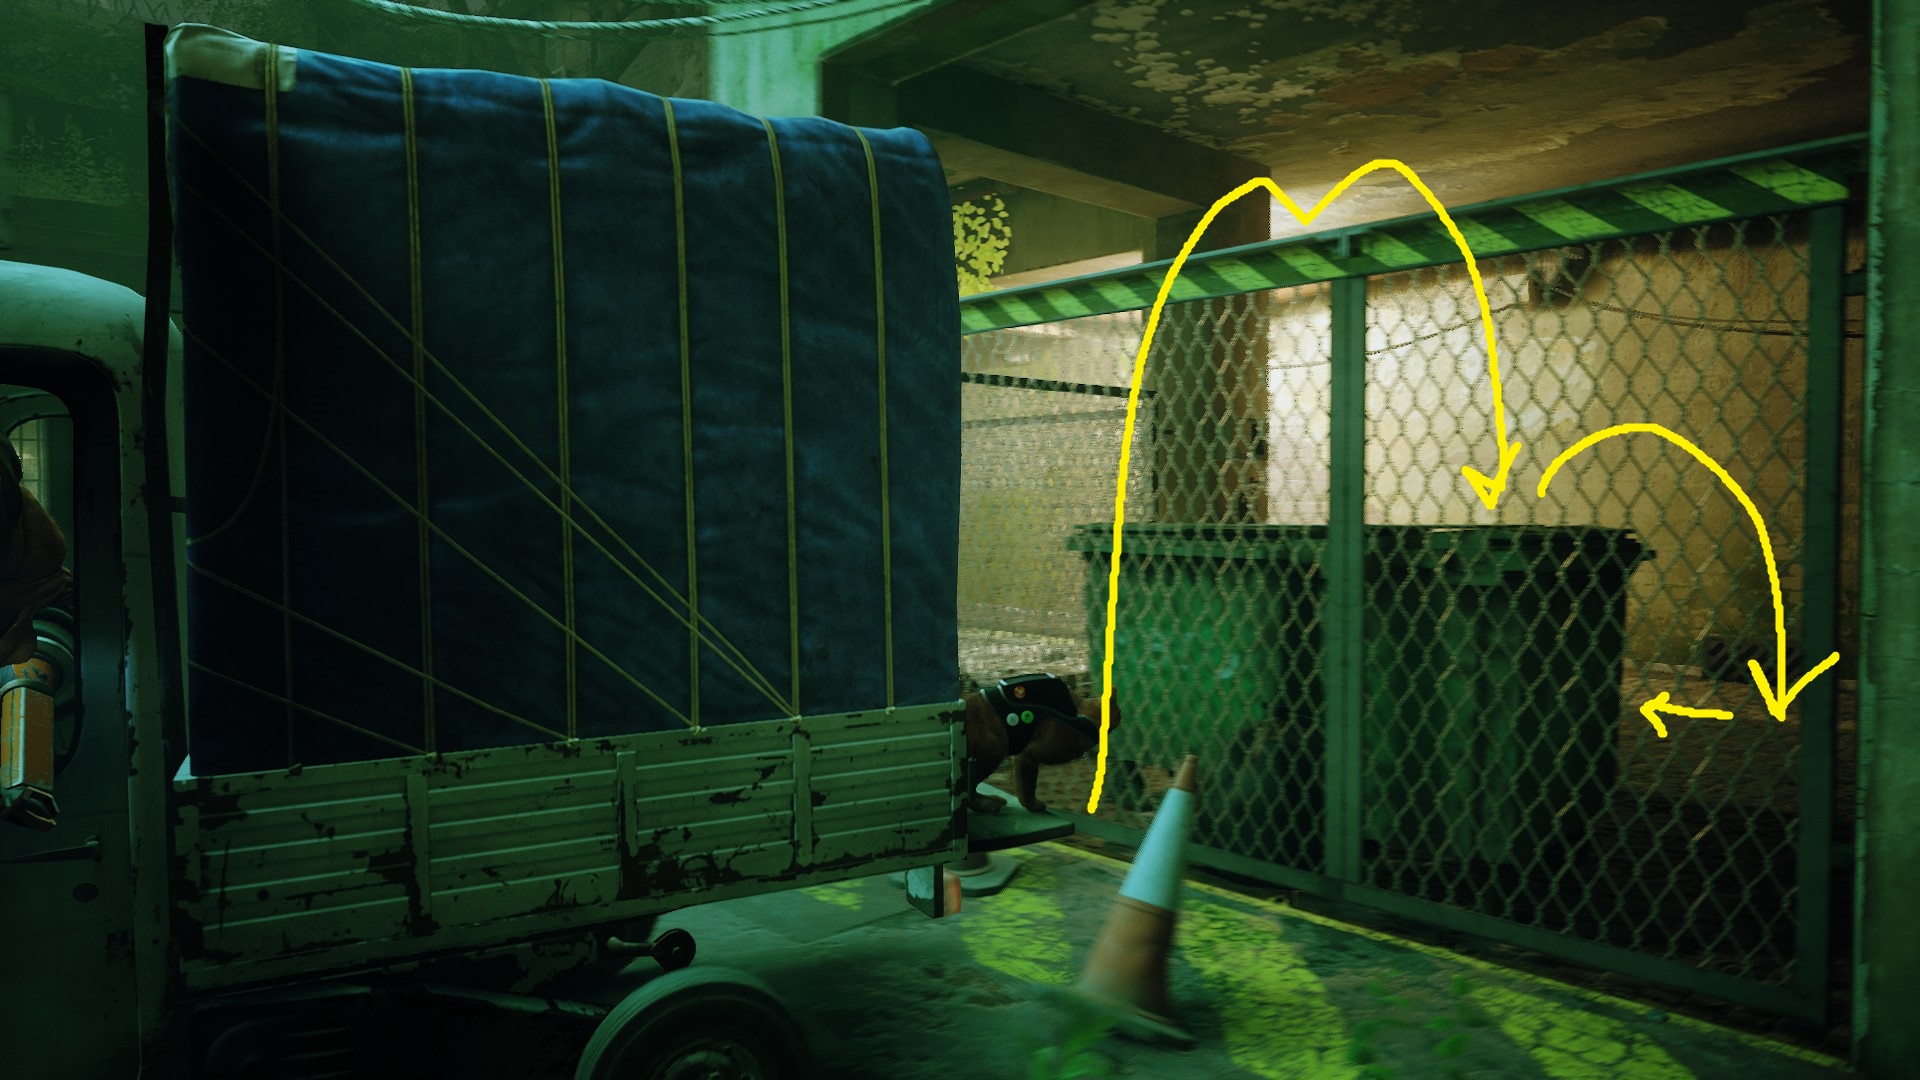
Head over to the truck and scratch at the driver’s side door until Clementine notices. She’ll back the truck up, and you can hop from the tailgate to the top of the fence.
Head into the control room and pull the lever, and then get ready to run — after the cutscene finishes, some drones will appear and try to blast you. There’s nowhere to hide from these drones, so just sprint back the way you came, and then start running after the truck. Run in a zig-zag pattern to avoid being shot, and spam the jump button once you’re close to the truck (so that you leap to it as soon as possible).
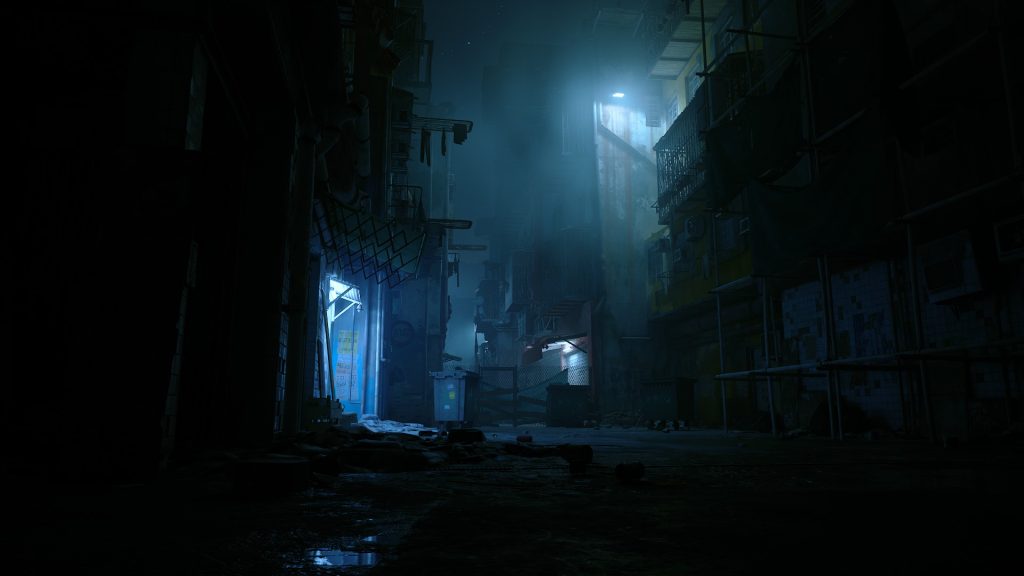
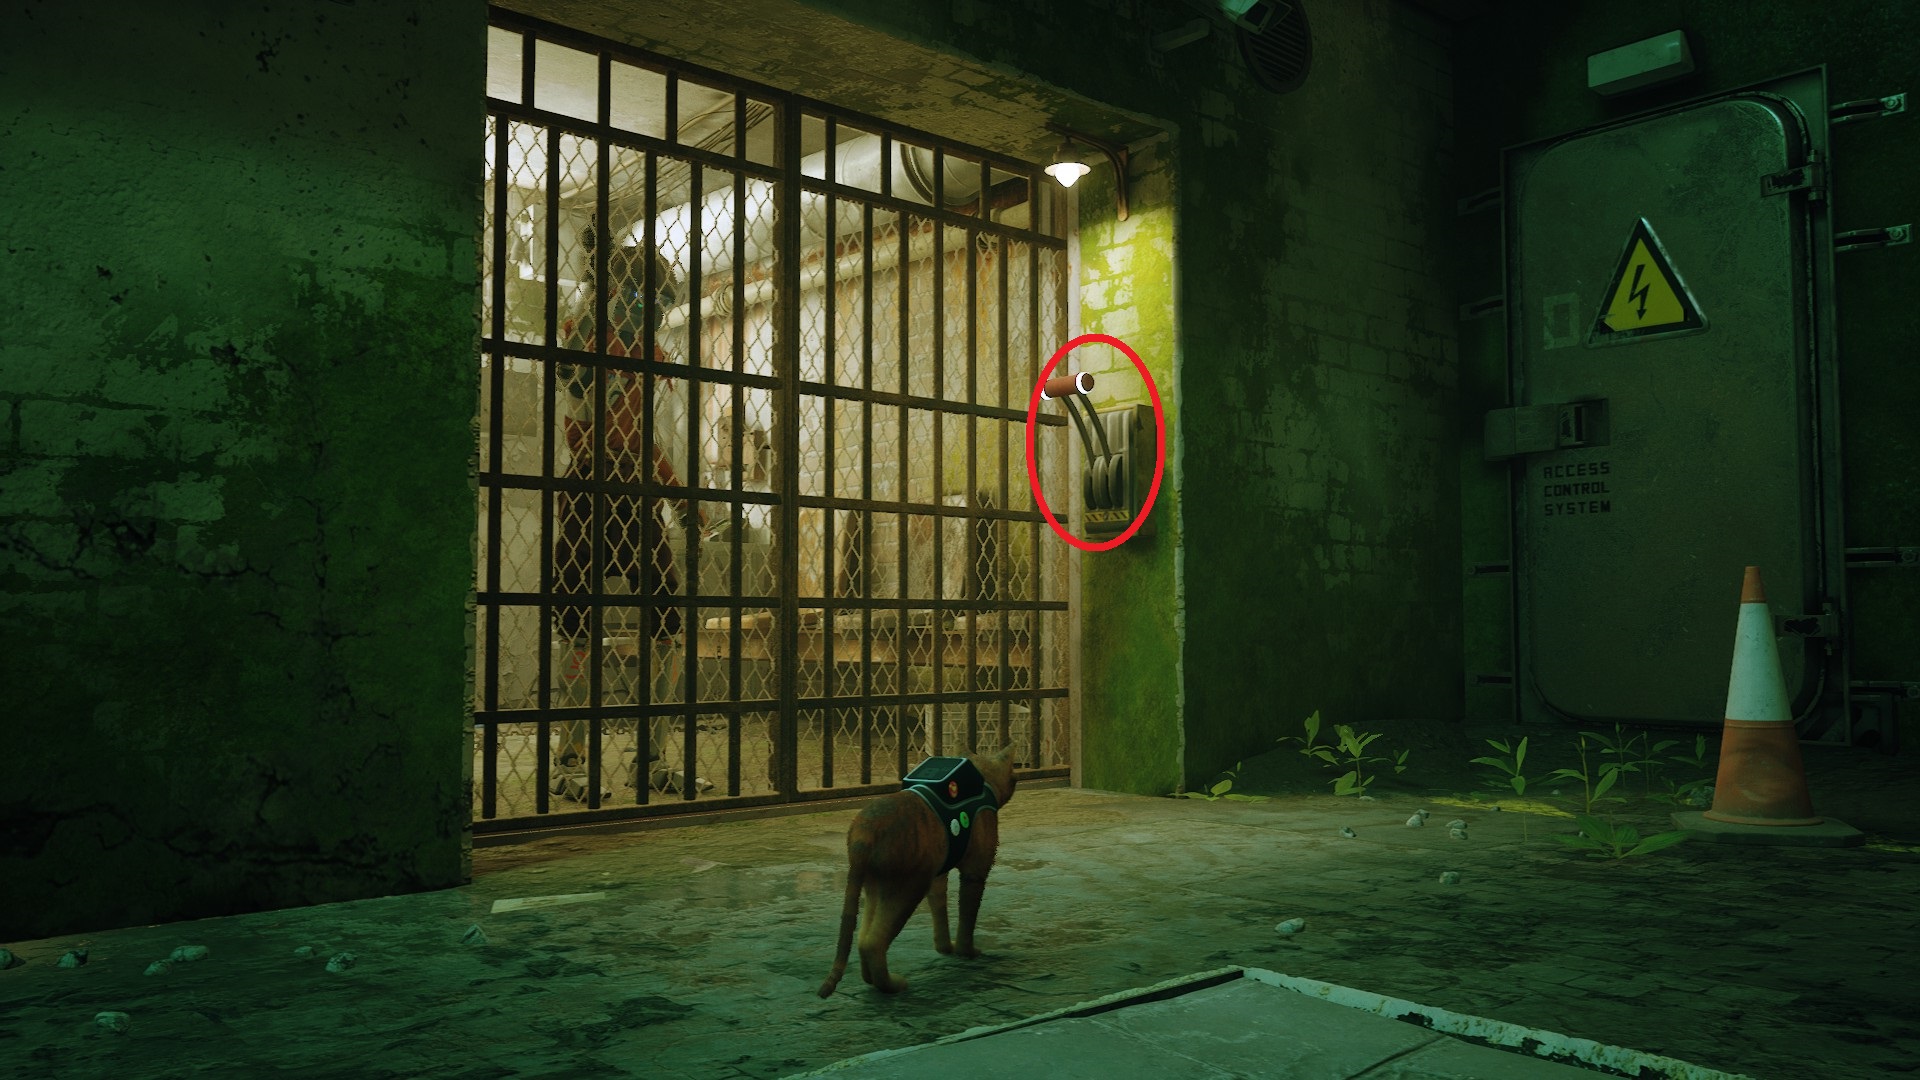
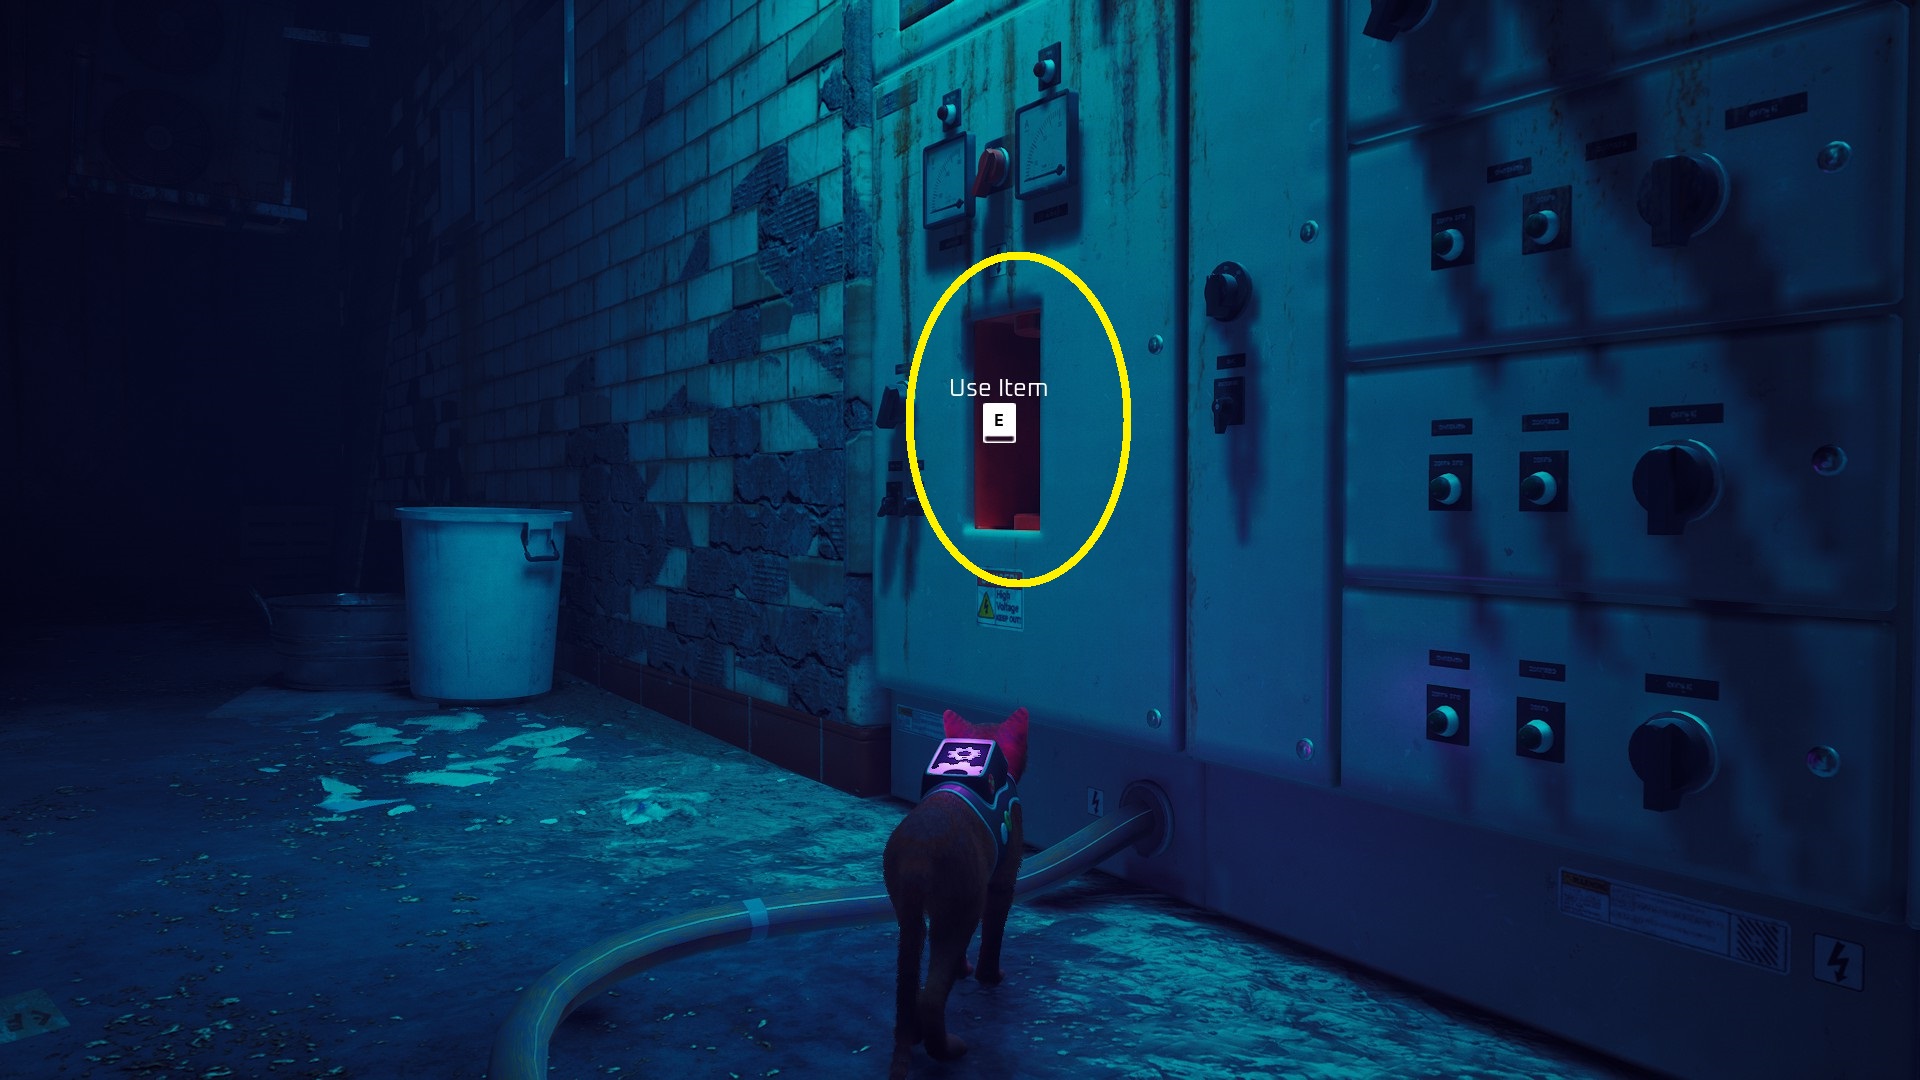
Once you manage to get onto the back of the truck, another cutscene will play in which Clementine gives you the Subway key. When it ends, you’ll be back in the subway. Go straight, through the hole in the corner of the fence and down the stairs. Head through the subway car to the other side of the tracks, and then turn right and follow the thick electric cable down the stairs. The cable ends at the generator, and you can use the Battery here to activate the subway (and trigger another cutscene).
Head back the way you came (easily done since you can follow the green lights on the cable) and go to the front of the subway car. Jump up into the driver’s seat and use the Subway key on the panel there — this will take you to the Control Room!
Unabashed FromSoftware fanboy still learning to take his time with games (and everything else, really). The time he doesn't spend on games is spent on music, books, or occasionally going outside.


this really helped me, even though i struggled to figure it out
Glad to hear the guide was helpful! That section with the two drones was definitely the hardest part of the game.