You are about to get into a battle where you will only be able to use Kimahri. This fight can be difficult if you haven’t been using Kimahri much throughout the game, so it’s recommended that you level him up a bit in the Calm Lands first, if you need to.
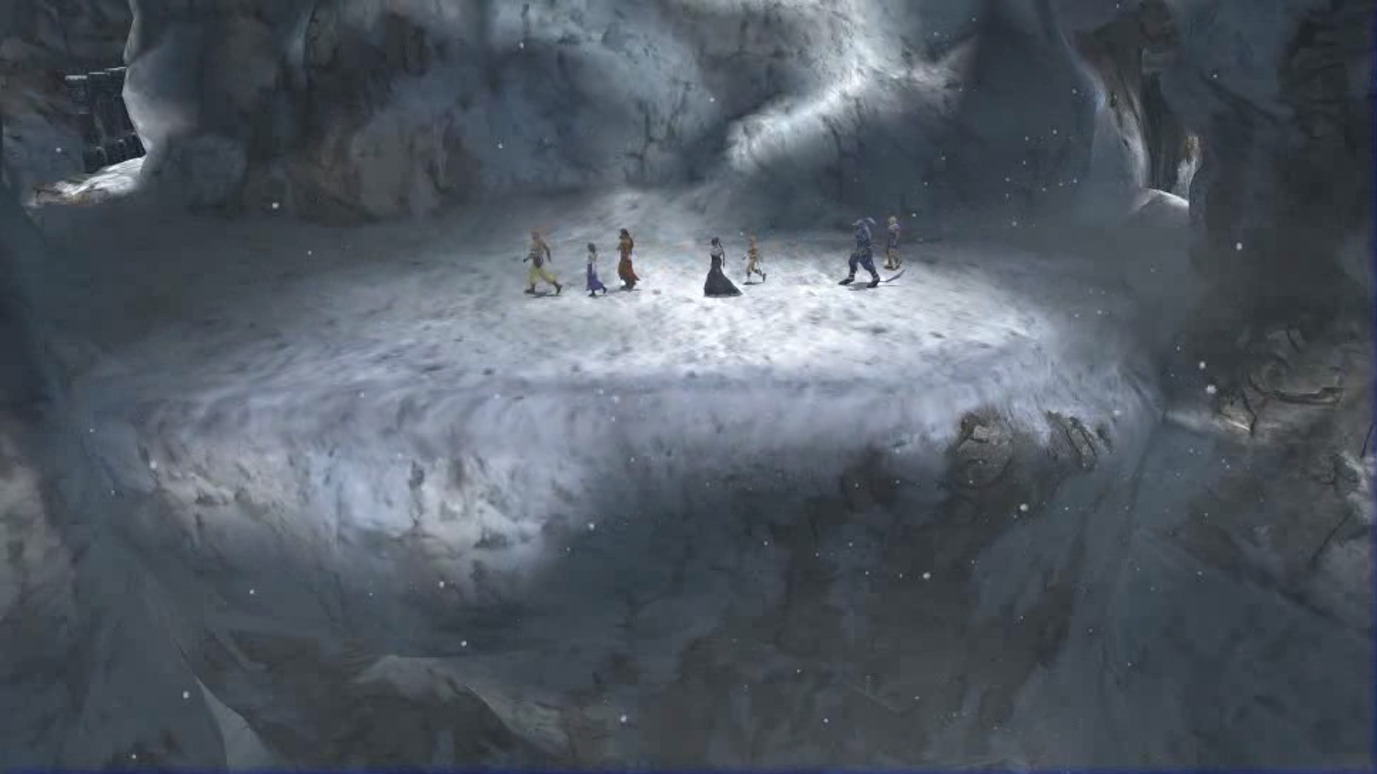
Go through the path until you get to the next area, and you will get put into a boss battle.
Biran and Yenke
For this battle, you will only be using Kimahri. There are a couple of useful opportunities you can take advantage of during this fight:
If you haven’t been learning Kimahri’s Ronso Rages during the game, you can learn most of them in this battle by continuously using Lancet on the two enemies.
From Biran, you can learn Self-Destruct, Thrust Kick, Doom and Mighty Guard (after he uses it).
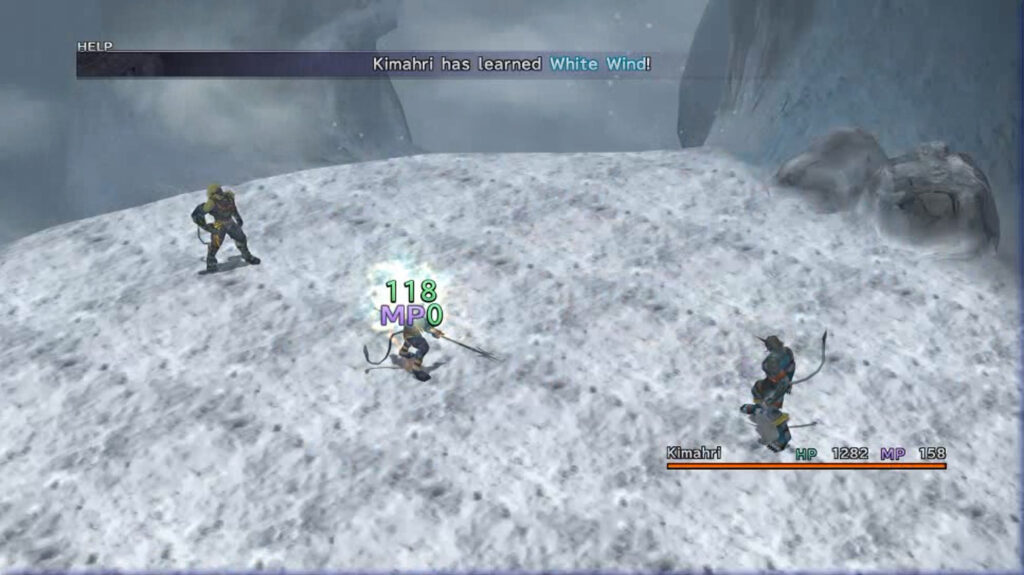
From Yenke, you can learn Fire Breath, Stone Breath, Aqua Breath and White Wind (after he uses it).
If you taught Kimahri Steal or Mug, you can steal Lv. 3 Key Spheres from both enemies, which are otherwise very hard to find.
While Biran and Yenke are standing next to each other, normal attack will be ineffective, because they will automatically guard each other and greatly reduce the damage. You can get around this by using Lancet or an Overdrive on them until one of them uses Bulldoze, which will place him behind Kimahri and separate the two (until the other uses Bulldoze and they are next to each other again).
On top of using Bulldoze, Biran will use Thunder and Blizzard, while Yenke will use Fire Breath and Aqua Breath. When they are taken down to 25% HP, they will use Mighty Guard and White Wind respectively (and this will be your chance to learn these as well).
It is recommended you take them down together, since when one of them is defeated, the other will buff himself (Biran will use Haste on himself, while Yenke will cast Berserk on himself). Keep in mind that once Yenke gives himself Berserk, you will no longer be able to learn any Ronso Rages from him. So, make sure you learn what you need from him before this happens.
Alternatively, you can cast Doom on one of them, which will give them a 20-turn countdown before they are automatically defeated, and focus on the other one meanwhile.
After the battle, head north to go to the next area.
Mountain Trail
Immediately on the right after you enter will be a chest containing 20,000 gil. Then, there will be another small path on the left with 2 Mega-Potions.
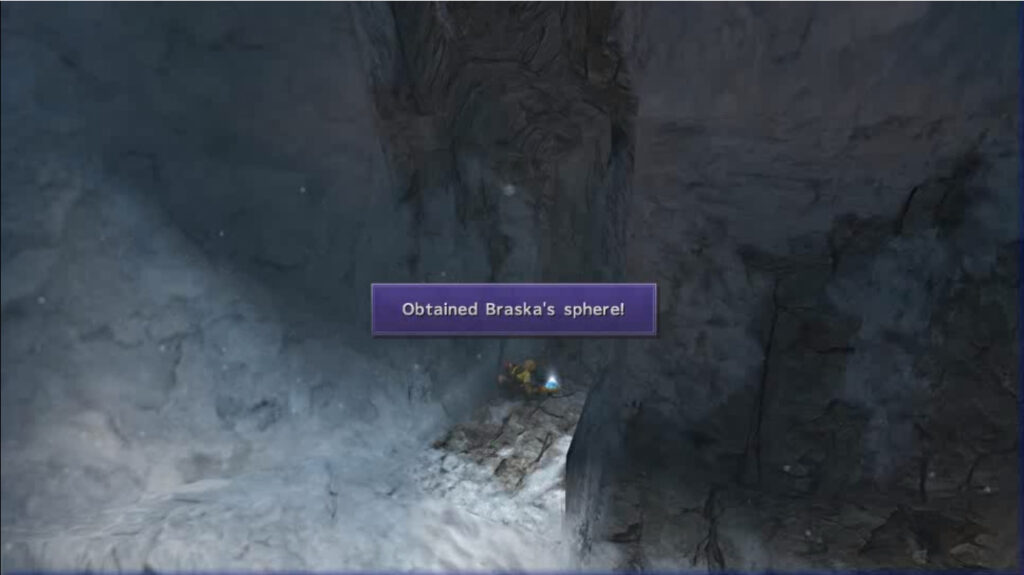
As you go down the path, you will find grave markings, which you can interact with to see extra cutscenes. A bit down the road you will see a small branch off north — go to the end of it to pick up Braska’s sphere (which serves as Jecht Sphere 10). Further down the path, go west on the next split that you see, and at the end of that path you will find a Defending Bracer for Auron.
Go back to the split and continue down the path, and you will find a man named Wantz. He will sell you items and weapons, but even if you don’t want to buy any, make sure you talk to him here.
This is because he will show up again in Macalania Woods later in the game, where he will sell armor that has four blank slots for customization, but only if you talk to him while you’re here.
Being able to buy this armor will be very helpful if you plan on fighting the superbosses.
Make sure you have a good amount of Holy Waters while you’re here, as they will be helpful for the next boss.
A little bit south of Wantz you will find another small path west. Take this path to find two chests containing a Lv. 4 Key Sphere and an HP Sphere. Take the southwest path on the last split of the previous path to continue on and move to the next area.
If you have or can make any armor with the ‘Zombie Ward’ passive, they will be helpful for the next part. When you reach the next area, just go forward a bit and you will trigger a cutscene and a boss fight.
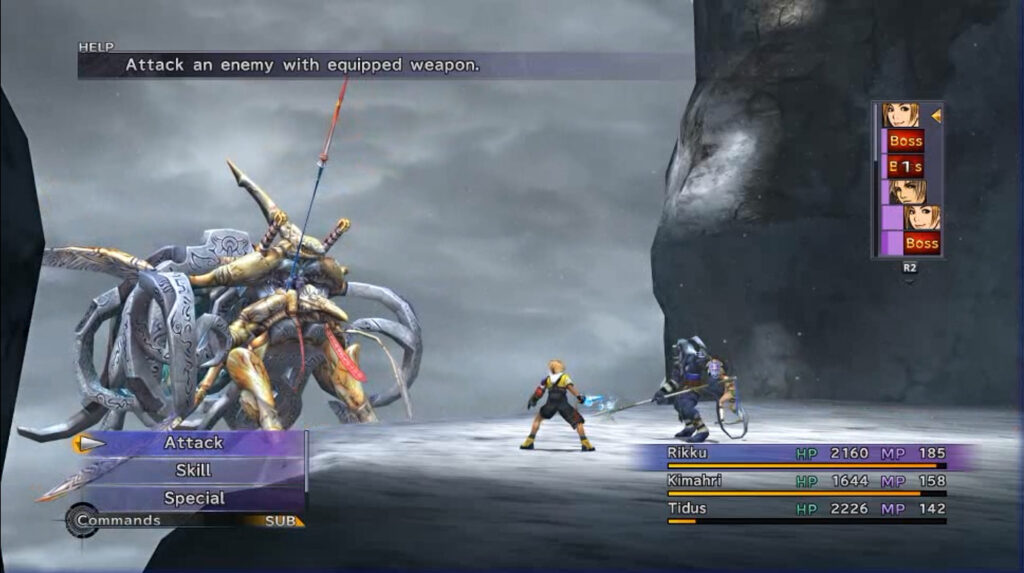
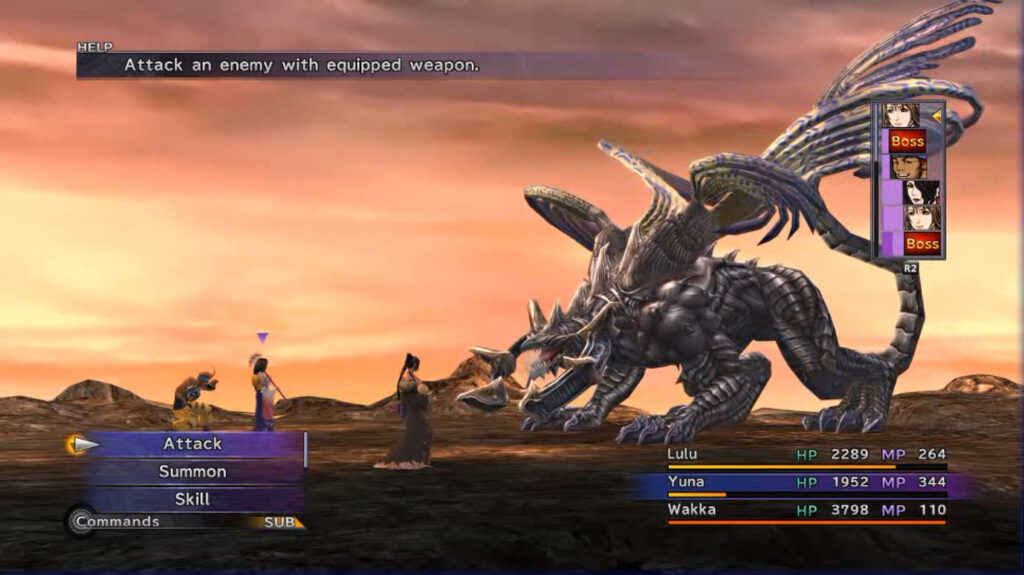
Seymour Flux
The fight will consist of Seymour himself and his Mortiorchis. Similar to the Mortibody in the last fight against Seymour, you cannot get rid of the Mortiorchis, since it will use Mortibsorption on Seymour when defeated. It will drain 4000 HP the first time — its HP and amount drained will gradually decrease until both are down to 1000 HP.
Another similarity to the last fight is what happens when you summon Aeons. Just like before, Seymour will use Banish on his next turn after an Aeon is out, so don’t bother summoning unless you can get one of their Overdrives triggered.
There are several dangerous things to watch out for during this fight. The most consistent of these is Seymour Flux and Mortiochis’s combo. Seymour will use Lance of Atrophy on someone, which will inflict them with Zombie, and Mortiochis will cast Full-Life on the target, killing them instantly. ‘Zombie Ward’ can help prevent this.
Another threatening attack in this fight is Cross Cleave. This is a powerful attack that can wipe your entire party if you are not at a high enough level. It can be survived if your party members have Protect, but Seymour will use Dispel on your party the turn before he uses it, meaning you won’t have much time to get your defenses up beforehand. If you find yourself dying to this move, you may want to level your characters up a little to get their HP higher.
Total Annihilation is another powerful attack that can wipe your party, but it has telltale signs. Mortiochis will take three moves to charge this attack: he will first go into auto-attack mode and then announce that it’s “ready to annihilate” the turn before. Have Shell on your party, and use Defend to help survive the attack.
Yuna and Kimahri will have a Trigger Command to talk to Seymour. Using it with Yuna will increase her Magic Defense for this fight, while Kimahri’s will increase his Strength. Have Lulu use Bio to get extra damage on Seymour, and maintain Haste on the party to keep your damage up (and for an easier time curing Zombie).
Dispel Seymour when he uses Reflect — he could end up hurting himself with Flare.
After the battle, continue down the path and you will see a row of pillars. Behind one of the pillars on the left you will find a chest containing the Saturn Crest (which will be used for Kimahri‘s Celestial Weapon later). Now, continue down the path until you reach the next area.
As soon as you enter, you will be taken into a dream sequence. Walk into the house in front of you to continue, and then follow the kid as needed in between cutscenes. Once you’re back at Mt. Gagazet, simply go down the path until you reach the next area.
Mountain Cave
In this area you can run into the Dark Flan enemy. Make sure you use Armor Break or Mental Break on it, otherwise you will do very little damage to it. If you didn’t learn it during the fight against Biran and Yenke, Kimahri can also learn the Healing Wind Ronso Rage from them with Lancet.
You can also learn the Mighty Guard Ronso Rage here if you missed it earlier from Behemoths (which you can run into).
When you get to the first split, take the left path to start swimming in the body of water (keep in mind that your party will be restricted to Tidus, Wakka, and Rikku until you go back). Then, swim to the next area. Continue through the path and go left on the split.
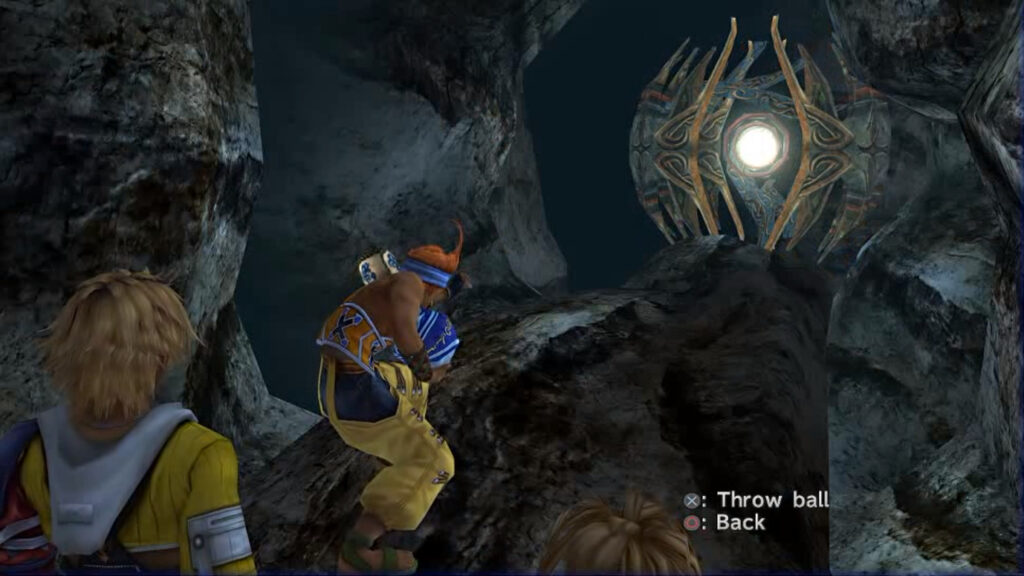
When you reach the end you will find the “First Trial of Gagazet.”
First Trial of Gagazet
Here Wakka will have to throw his blitzball to hit the orb in the center of rotating walls. The timing of this can be a little tricky, but throwing the ball while an outer wall is about half-way past the center can give you a good chance at hitting it.
Once you complete the trial, grab the chest that will appear to get a Lv. 1 Key Sphere, then go back to the first split in the cave and head north up the stairs. Take an immediate left, then take a right on the next split to reach another body of water.
Swim down the path until you get to the “Second Trial of Gagazet.”
Second Trial of Gagazet
Here you will need Tidus, Wakka and Rikku hit three buttons at the same time. You need them to pick the right switch to progress.
Have Rikku go to the green panel.
Have Tidus go to the blue panel.
Have Wakka go to the red panel.
Once the trial is complete, open the chest under the panels to get a Fortune Sphere.
Now, head back to the first body of water. This time around, as you are swimming through, go into the crevasse on the right to find a chest containing a Pep Talk for Wakka. Go back up the stairs past the Save Point and turn right, then go down the path to find two chests with a Return Sphere and a Recovery Ring for Yuna. Return to the split and go left again, then go left on the next split to continue on to the next area and trigger a boss fight.
If you have any armor with ‘Confuse Ward’ or ‘Confuseproof,’ they will be useful for the upcoming fight. Otherwise, any armor that has resistance to Sleep, Silence, and Darkness will help with the battle as well.
Sanctuary Keeper
The boss’s most dangerous attack is Photon Wings, which will inflict Curse on the party, in addition to having a chance of inflicting Darkness, Sleep, Silence, and Confusion. The Sanctuary Keeper can also use Mana Breath against a party member, a powerful magic attack. It can also counter attacks with Tail Sweep, which will Delay the party and remove Haste.
The Sanctuary Keeper is able to cast Protect, Curaga, and Regen on itself. It can also cast Esuna if inflicted with Poison or Darkness, and will cast Reflect on one of your party members if it is inflicted with Reflect. If you use Slow on it, it will counter with Haste.
An easy way to deal damage to the Sanctuary Keeper is to cast Bio on it, followed by Reflect, so it cannot cast Esuna or Curaga on itself. If it casts Reflect on your party members, Dispel it off of them so that it can’t bounce spells to heal itself. Keep Protect, Shell and Haste on your party, and have Auron use Armor Break and Mental Break to deal more damage to the boss.
When it uses Photon Wings, have Esuna and Remedies ready for most of the status effects that can be inflicted during this. Have Holy Waters available if you want to cure Curse, so that you can use your Overdrives. Keep everyone’s HP up to survive the boss’s attacks, and then the fight should go smoothly.
After the battle, continue down the path and eventually you you will see the opening cutscene again, now having been caught up on Tidus’s story. Afterwards, make your way to the next area.
Share this article:
KainHighwind27
I'm a huge gamer who especially loves the Final Fantasy series. I will play just about any game, especially if it has anything resembling a Dragoon.