Welcome to our fourth main mission walkthrough for Stranger of Paradise: Final Fantasy Origin! This time we are going to cover ‘Natural Distortion,’ which will take you through an area that should be familiar to fans of Final Fantasy XIII. Along the way, we will off some secrets and tips!
Let’s begin!
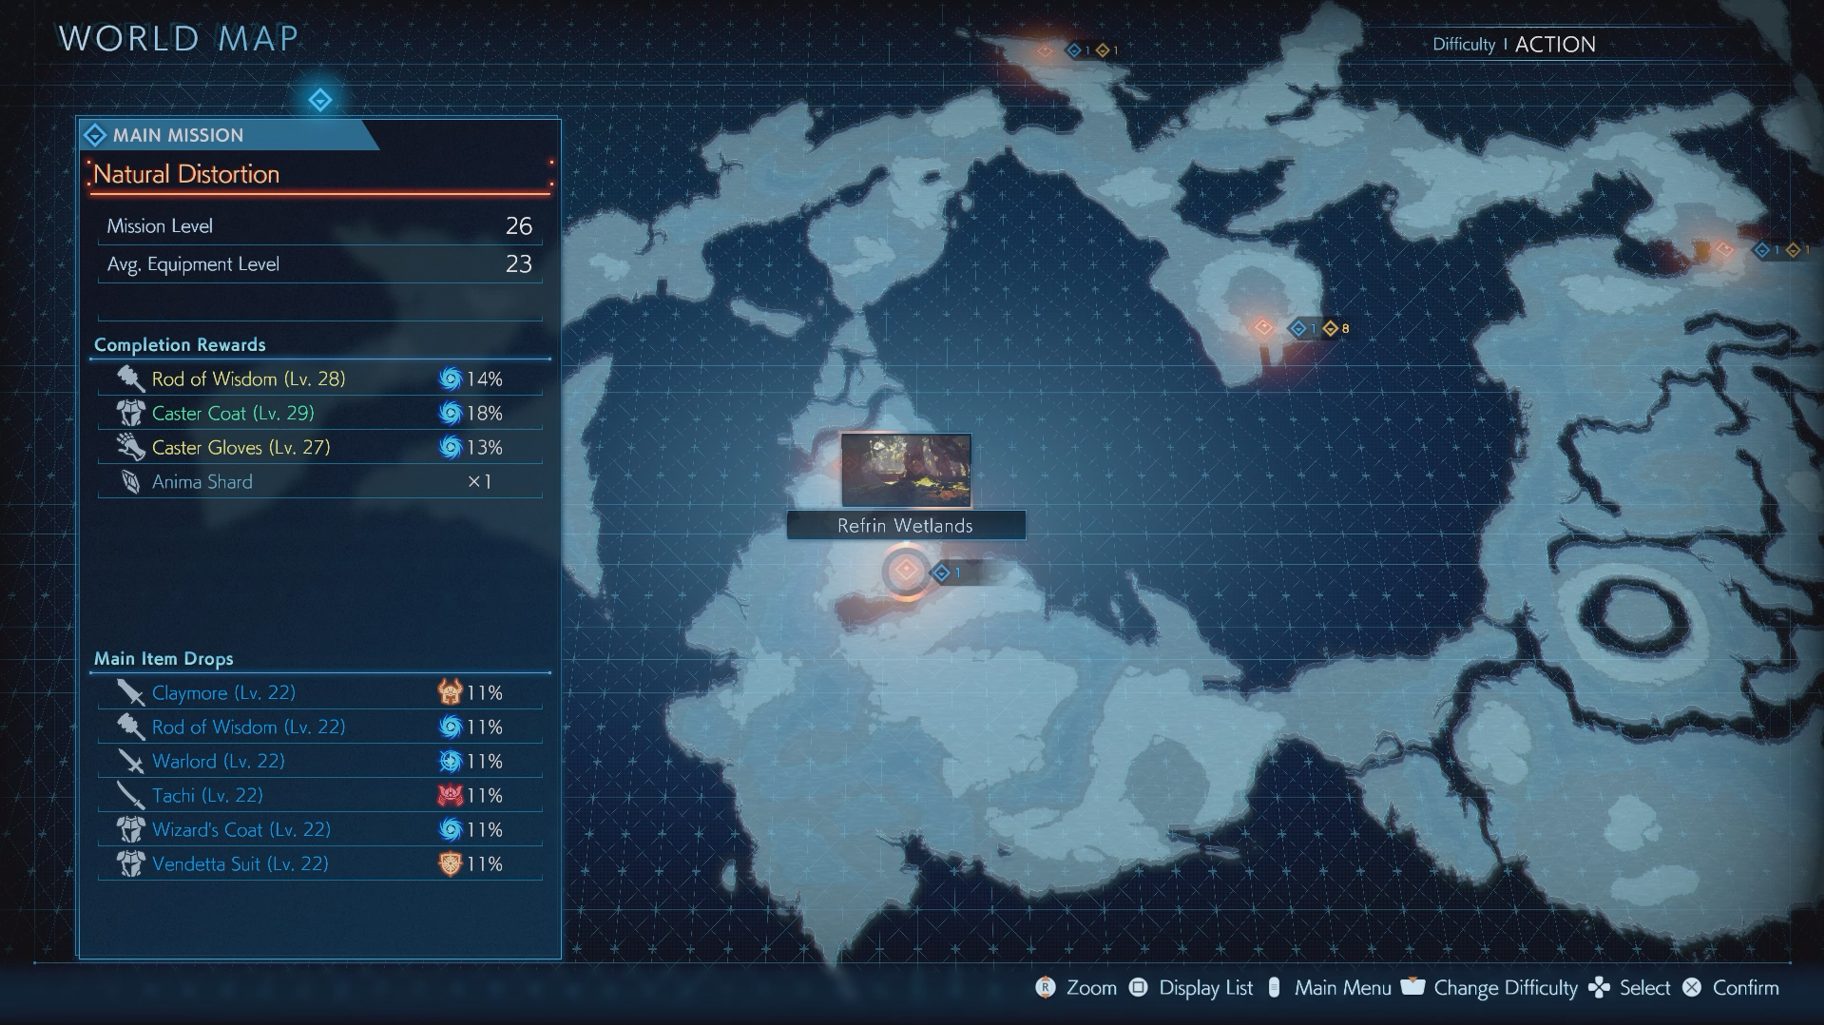
When you’re ready to begin, go to the Refrin Wetlands and begin ‘Natural Distortion.’
Primeval Forest Path of Rebels
On this level, you will frequently find pools of water in areas where you fight.
- If you use Lightning elemental Abilities in these pools of water, you will create an electrical field on the floor, doing consistent Lightning damage to anyone standing in it (yourself included).
- This can happen in any Mission that has water on the floor, but you are more likely to see it here, more than in any other Mission.
- First of all, this is due to the sheer amount of water is present on the level. But, secondly, this is also helped by you needing to fight Coeurls here, who can use Lightning attacks themselves to trigger the effect. Then, on top of all of this, there will be periodic lightning strikes happening during the level that can also trigger electrical fields.
- You will see a lot of Sahagins and Water Elementals on this level. Both of them are weak to Lightning, so take advantage of these fields when possible.
Go straight on the path until you see a blue orb. These are weather orbs, and you will frequently see them throughout this level. When you interact with one, it will change the weather of the entire level, opening new pathways while closing other ones. The color of the orb shifts between blue and orange depending on the weather.
Once you interact with the orb, you will see a small bridge form in front of you. Cross it, then turn right to find a chest. Then, turn around and continue forward. Once you jump down a ledge, go to the other side of this area and turn right to find a chest. Then, turn around and go straight forward to continue. Once you reach a split, turn left and you will be in another open area. Go up the ramp at the end of this area, then turn right, and you will find a chest and a shortcut to the Cube at the beginning. Turn around and continue forward until you run into another weather orb. Interact with it, and the waterfall in front of you will disappear, allowing you to move forward.
You will soon find a Dark Vent, which will spawn a Griffon Queen and some Crawlers. If you’re having trouble fighting the enemies, remember that you can go straight for the Dark Vent to kill all the enemies instantly. Once the Vent is destroyed, grab the chest in this area. Then, turn right from where the Dark Vent was to find a ledge. This will lead you into a cave. Once inside, you will find a purple orb and a chest around the center of this area, and at the end you will find a Tonberry guarding a special purple orb.
The orbs like this one are called Memory Mementos. When picked up, you will hear a line of dialogue from a former Stranger who has fallen, and you will also unlock a new Side Mission. The Mission unlocked for picking up this particular Memento will be ‘Bound by Crimson Memories’ at the Chaos Shrine. Once you’ve gotten everything, make your way back to where the Dark Vent was, and continue forward until you find a Cube.
Pass of the Branded
You will almost immediately find another weather orb here. Interact with it, then continue until you run into another Dark Vent — this one will spawn a Coeurl. Once it’s dealt with, head to the next area and grab the chest on the right side. Then, keep going forward until you reach a rope. Throw it down to create a shortcut, and go down the rope to interact with the weather orb again. Climb the rope back up, and you will now be able to jump down straight ahead.
When you reach a split, go left to open a chest. Then, turn around and continue forward until you reach the end of the cave — climb the rope up. Once you’re out, go left to find a chest, then turn around and continue on the path forward until you reach another Cube.
Valley of Distant Defiant Thunder
Touch the weather orb you encounter to create a path forward. Once you go up a small ramp, immediately turn right to find the Fool’s Missive X. Then, turn around and continue forward. Just before you go to the slope going down, go to the left and jump down the ledge first in order to grab a purple orb. At the bottom you will find another weather orb to interact with. Then, jump down the ledge just in front of you to continue forward.
Once you go up a slope, turn right to find a chest, then turn around and just continue forward until you can climb up a rope. Once you’ve reached the top, interact with the weather orb you see there and continue forward until you find a Cube.
Cradle of Radiant Reefs
Take the right path on the split (you will not be able to continue on the left path right now), and continue through the path until you see another weather orb. Just before you reach it, climb up the rope to the right to grab a chest, then go back and touch the weather orb. Climb down another rope, then continue forward until you can go down the newly revealed rope (feel free to use the Cube as you pass it).
Once you’re down, take the path to the right to grab a purple orb and jump down a ledge. Continue forward until you can see a Cube — just before the ramp up to it, take the branch-off to the left to grab a chest. Head to the Cube now and, when you’re ready, jump down the ledge to begin a boss fight.
Elemental Core
Phase 1 (Lahmu and Lahamu)
The fight will consist of three targets: The Elemental Core, Lahmu, and Lahamu. Initially, you will not be able to attack the Core directly, and it will not attack you itself. Instead, one of the two Elementals will come out of it, each of them periodically retreating back into the Core with the other Elemental coming out. We will discuss their attacks below.
In order to attack the Core directly, you will need to fully deplete the HP of either of the two Elementals. Then, the Core will briefly be vulnerable on the floor. You will be able to pull off 1-2 combos before the Core becomes untargetable again (and, if playing on Hard Mode, Lahmu will come out and spin around the Core partway through, giving you even less time to attack.)
It should be noted that attacking the Elementals will deal some damage, as well as Break damage to the Core itself. Once the Core becomes untargetable, the two Elementals will be fully healed.
Lahmu Attacks
Lahmu (the Fire Elemental) is an aggressive enemy that prefers fighting up close.
- He has a combo attack that will land a hit on you up to three times
- If you’re at a distance, he can charge at you and quickly close the gap
- Pyrotechnics is his Fire AoE attack, centered around him
- Scorching Flames has Lahmu shoot a line of flame pillars towards you (this can be stolen as an Instant Ability)
Lahamu Attacks
Lahamu (the Water Elemental), on the other hand, is more of a magic user.
- She can summon a Water pillar that will rise up directly under you, up to two times
- She can also shoot a quick-moving Water projectile towards you
- Bubble Nova is a slower but more powerful Water projectile (this can be stolen as an Instant Ability)
- Lahamu is able to use Bubbling Deluge, which will cause Water bubbles to project from her in all directions
- If in melee range, Lahamu can use Jeering Mire, which is an unblockable attack where she lunges at you to grab you
Occasionally, the Dance of Death Ability will be used. This causes both Elementals to briefly spin around the Elemental Core, shooting quick-moving projectiles in all directions.
Both Elementals are immune to their own element, but are weak to each other’s. An effective way to get some free damage is to steal the projectile from one of them, then shoot the Ability when the other one comes out.
Once you defeat one Elemental and attack the Core once, both Elementals will be able to come out at the same time. This can get overwhelming if both of them are attacking you, so take advantage of Resonance — have your allies take some pressure off of you. Remember that you only need to defeat one to make the Elemental Core vulnerable — just focus on the Elemental that you feel like you’ll have an easier time fighting, while making sure you don’t get ambushed by the other one.
Once you get the Core down to half its HP (or fully deplete the Break Gauge), Soul Burst it to destroy the outer core and cause the two Elementals to fuse together, beginning Phase 2.
Phase 2 (Fused Elemental)
This phase is a lot more straightfoward, as you will now only have one target to deal with. The Fused Elemental primarily attacks at melee range, while having access to a few AoE Abilities.
- It can swipe at you up to two times
- Eagle’s Talon is an unblockable attack, where it will spin towards you to grab you
- Splatter will cause the Fused Elemental to release several elemental puddles throughout the area. They will deal periodic Fire or Water damage when stepped on
- It will also periodically do a lesser version of this move that is nameless, releasing less puddles
- When it uses Conflict, it will jump up and slam onto the ground, causing all elemental puddles to explode
- Furious Tide will shoot a small tide in front of the Fused Elemental and release two Water puddles
- Roaring Conflagration creates an explosion in front of the Fused Elemental and releases two Fire puddles
- Crack will cause the Fused Elemental to leap towards you and slam on the ground, dealing both Fire and Water damage (you can steal this move as an Instant Ability). Any puddles caught in the AoE will explode as well
- Fuse is its only ranged attack, where it will shoot three Fire/Water projectiles at you
Jobs with ranged attacks (such as Black Mage and Lancer) will have an easy time getting free attacks off, as the Fused Elemental’s only real gap-closer is Crack — it will cover the distance of about half the area. On top of that, Fuse (the ranged attack) is a fairly easy move to Soul Shield, so you can easily keep your MP up while staying safe.
If that isn’t an option for your setup, watch out for the Fused Elemental’s Eagle’s Talon while in melee range, and be ready to dodge or block its AoE attacks.
Defeating the boss and completing the Mission will unlock the Side Mission ‘Indigo Memories: The Damned.’