Welcome back! It’s time to go through the third Main Mission in Stranger of Paradise: Audience with the Dark Elf — which takes place in a castle modeled after one that was raised by a certain villain in Final Fantasy II. Once again, we will gladly point out some secrets and offer some tips for you as we go along.
When you’re ready to begin the Mission, go to the Western Keep and begin ‘Audience with the Dark Elf.’
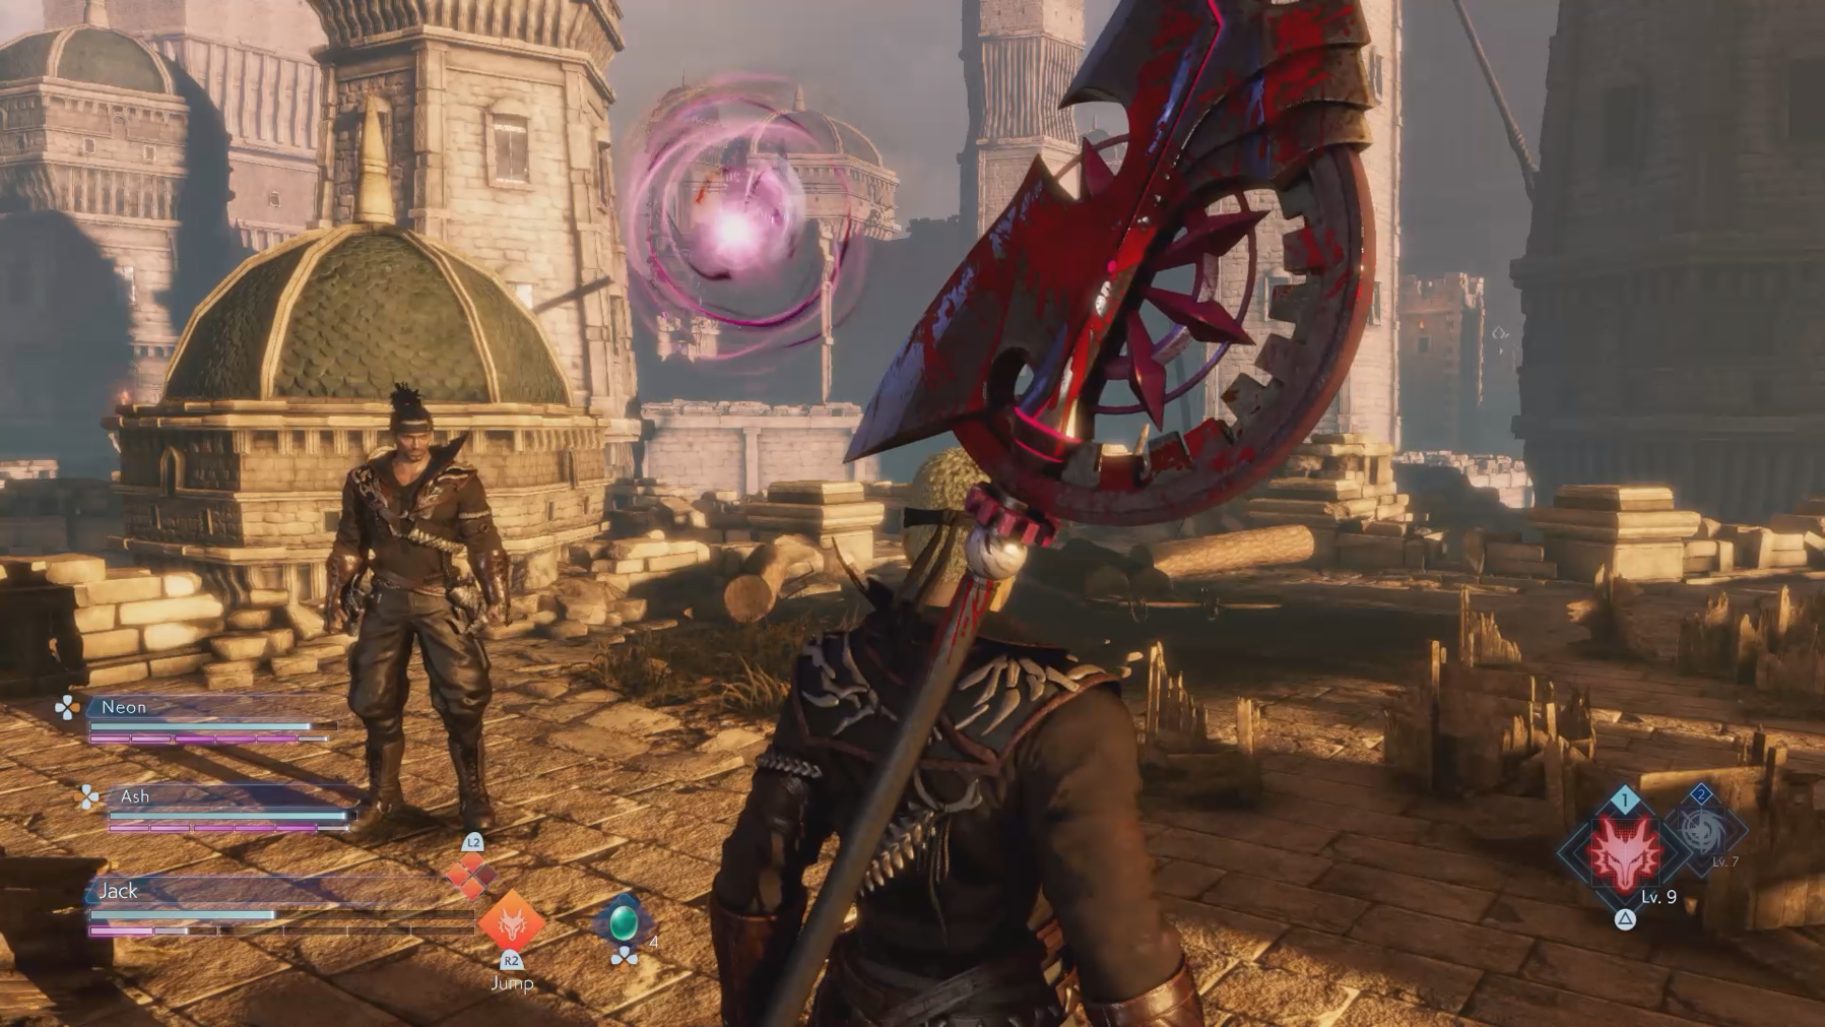
Betrayal’s Roost
When the Mission starts, go up the stairs. In the next room you will find a chest on the right side. Go back to the Cube, and this time go forward to stay on the first floor. Open the doors. In this room, you will find a chest containing the Key to Betrayal’s Roost. Continue forward, then head up the stairs, and open the door up ahead to continue (this will use the Key to Betrayal’s Roost).
At the three-way split, turn left to find a chest. Then, turn around, head back, and continue forward on the path until you reach another split. Go left to continue. Once you go up a set of stairs and find a room with a Coeurl, turn right from here to find a breakable wall hiding a chest. Then, keep going forward until you find a Cube.
Crimson Rampart
Once you’re outside, you will start getting periodically targeted by a large ballista, which will shoot large projectiles at you.
This will do a lot of damage to you and knock you down if you’re hit, so be careful as you navigate this area.
The shots from the ballista can be Guarded or even Soul Shielded if you time it correctly.
On the three-way split, turn left and climb the ladder to find a chest. Then, go back to the split and turn left again to find another one. Turn around, and turn left one more time to continue.
When you reach a more open area with a tower on both the left and right side, you will notice that the path to the right tower is blocked by a wooden wall. There will be a chest nearby as well. You can break the wall by having the ballista shoot at it — the impact will break it. Once you break it, climb up the tower to find a chest.
Be ready to block or dodge
Then, go back and climb up the other tower (that has a Harpy at the top). Once you’re at the top, look for a ledge to jump down to continue.
When you walk up a set of stairs, turn to the right path. Then, turn left when you are able to, to find a Cube and a locked door. Turn around, and turn left, and you will quickly find another set of stairs. To the right of the stairs you will find a chest, while at the top of them you will find a Tonberry, a Skeleton, and another chest.
Once you have everything, turn around and keep going straight to continue (feel free to use the Cube again as you pass it). When you cross a bridge, you will find a chest in this area (behind a wooden wall), and after the next bridge you will find two more chests. Then, climb down the ladder.
Cross the small bridge on top of the buildings to reach a purple orb. Then, jump down the other side of the roof and climb up the ladder, then up another ladder to find a Cube. Now is your chance to finally take care of that ballista. Walk up the stairs, and climb up the ladder immediately after, and you will see a Dark Vent (this one spawns no enemies). Destroy the Vent, and the ballista will be gone.
Go back to the Cube, and climb down the ladder next to it.
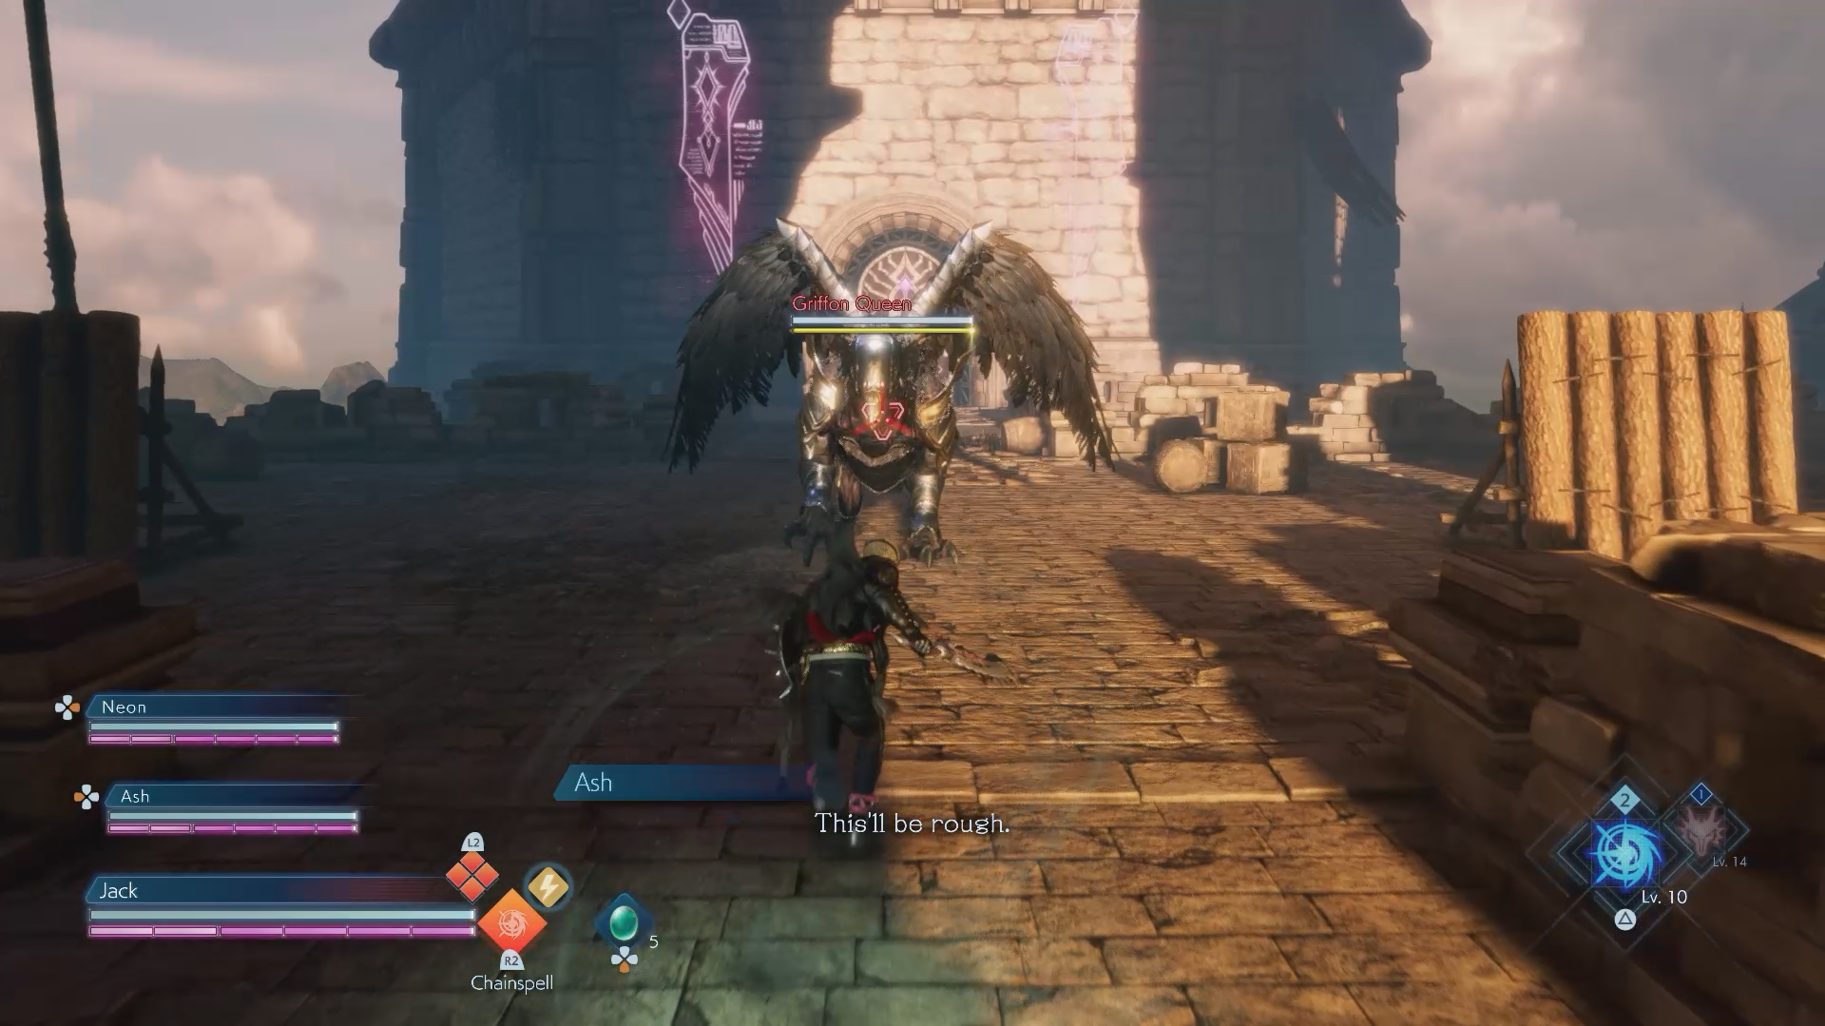
Here you will have to defeat a Griffon Queen.
Griffons are not easily staggered, so be ready to Guard or Evade when it gets ready to claw at you.
They are also able to use Sonic Blade as a fast-moving ranged attack, which will deal a large amount of Break Damage if it hits you (you are able to steal this move as an Instant Ability if you Soul Shield it).
If you deal enough Break Gauge damage, you will break the Griffon’s armor.
Without the armor, the Griffon Queen will gain the ability to fly, and will be more aggressive with its attacks, while also executing them faster.
While flying, it will frequently spin and charge at you. It will also periodically use Aerial Assault — an unblockable attack that will involve the Griffon Queen flying to you and attempting to grab you.
However, after its armor is gone, it will become weak to Pierce and Slash physical attacks. So, take advantage of this to deplete its Break Gauge quickly, allowing you to finish it off.
Once the Griffon Queen is defeated, it will drop the Key to the Treasury, which will open the door straight ahead. Go through it to find three chests and the Fool’s Missive VII. Then, go back to the Cube.
Climb up the stairs again, but this time go to another ladder that will take you down to continue. At the end of this path (and past the bridge you will see there), there is a ladder. Climb the ladder and jump down a ledge to find a chest, then jump down and make your way back to the bridge to cross it. Jump down a ledge there to find a chest, then jump down the next ledge and go through the doors.
Demonshold
Once you reach the hallway, you will find a chest containing the Tower Key just past the split to the right. Now go down this split, run past the elevator and towards the large doors, and open them with the Tower Key to create a shortcut to a previous Cube. Now turn around and go up the elevator. After defeating all of the enemies in this room, take the elevator on the other side of the room.
There will be a Cube in this room. When you’re ready, head through the doors to begin a boss fight.
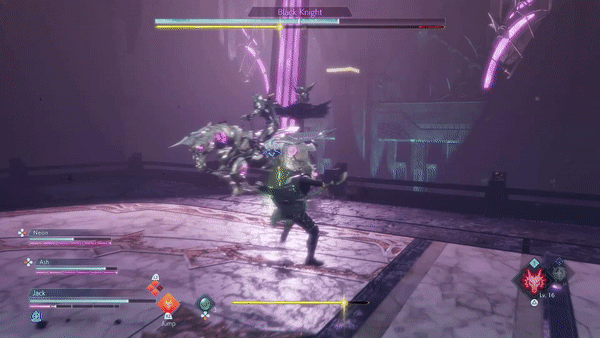
Black Knight
Phase 1
The Black Knight will begin the fight on a horse, allowing him to move around the field very quickly. The majority of the attacks in this phase will be unblockable, so you will have to use Evade more than blocking as you fight.
Rush will have the horse charge at the area in your direction, and it is able to use it multiple times in a row.
Squash will have the horse jump towards you, slamming the area around it upon landing.
If you try attacking from behind, it will like use Hind Leg Kick, which is also unblockable.
The only attack from the horse that you can block is Trample, which will attack in an area in front of it, dealing Earth damage (you can also steal this attack with Soul Shield).
The Black Knight himself will only use a couple of attacks during this phase, both of which are blockable.
Black Knight is able to leap towards you with his horse and do a slashing attack with his lance.
If you are in melee range on either side of him, he will swing at you with his lance, up to three times.
During this phase, the boss will be weak to Strike damage, so Jobs that use a Mace or an Axe will be able to do serious damage to his Break Gauge. Additionally, he is weak to Earth damage, making his horse’s own Trample attack very useful against him, as well as the Black Mage’s Quake attacks (if you have the Job unlocked).
Try to stay in melee range to make the Black Knight and his horse more likely to use their blockable attacks, and take advantage of his weaknesses to take him out quickly.
Once you get the Black Knight to half health (or deplete his Break Gauge), Soul Burst him to kill his horse and begin Phase 2.
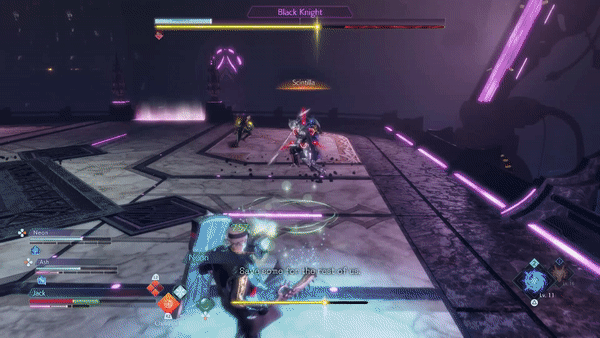
Phase 2
During the second phase, the Black Knight will no longer have unblockable attacks. However, he will have a wide variety of attacks, including long combos and ranged attacks. He will also lose his previous weaknesses from Phase 1.
He does a combo attack of up to five hits, but he can interrupt it at any point to do a large sweeping attack or use Aimed Thrust, which has him rush forward to stab you.
For ranged attacks, he can use Scintilla, which shoots three projectiles at you.
Another ranged attack will be Windstorm, which summons a tornado that causes Wind damage (you can steal this attack with a Soul Shield).
Finally, he will periodically use Summon Phantoms, which will summon four phantom copies of himself to help him in battle.
These have significantly less HP than the boss, however.
If left alive long enough, they will eventually use Phantom Assault, which is an unblockable attack where they briefly levitate, then crash down onto you. This move will remove them from the battle.
Be careful when Soul Shielding at close range during this fight. With the Black Knight’s combos being so long, it’s possible that you will get broken if you don’t have perfect timing for every hit. To help with this, you can swap Battle Sets after the fourth hit to have a fresh Break Gauge ready for the attack.
If you steal Windstorm, save it for when the boss uses Summon Phantoms. You can take out 2-3 of them quickly by using Windstorm, or by using your own AoE attacks, such as Aeroga or Jump.
Lightbringer will also be very helpful if the Phantoms start surrounding you. Remember that you can also use your allies’ Resonance to take some of the attention off of you. Alternatively, when they are summoned, you can keep your distance until they use Phantom Assault and remove themselves, as this move doesn’t have that much range.
Once you defeat the boss and finish the Mission, your allies will all gain a new Job: Ash will unlock Monk, Jed will unlock Thief, and Neon will unlock Red Mage. Even though they will have two Jobs now, they cannot swap freely between them like Jack does, so you will have to choose which Job you want them to be set with in the Battle Settings. You will also unlock the Side Mission ‘Azure Memories: The Overconfident’ in the Western Keep.
Share this article:
KainHighwind27
I'm a huge gamer who especially loves the Final Fantasy series. I will play just about any game, especially if it has anything resembling a Dragoon.