Like all Killers, the Knight has a laundry list of add-ons that can drastically increase his effectiveness in a Trial and can mean the difference between sacrificing all 4 Survivors and letting them all escape. The Knight’s add-ons, in particular, can be difficult to figure out due to his high degree of complexity and several guard powers. This guide exists to help you navigate that difficulty, in order to pick the best combination of add-ons to make the most of the Knight’s powers.
Best Add-Ons for Knight
Let’s get the most important part out of the way first! These are the best add-ons for Knight:
- Knight’s Contract
- Iridescent Company Banner
- Healing Poultice
- Flint and Steel
- Map of the Realm
- Broken Hilt
- Chain Mail Fragment
- Iron Worker’s Tongs
- Call to Arms
- Dried Horsemeat
- Tattered Tabbard
Broken Hilt and Chain Mail Fragment make this list, as they cause your power to be more devastating when your guards hit, inflicting brutal status effects on Survivors. These combine well, and each work well independently, in order to ensure that a Survivor that gets hit suffers for it.
By a similar token, the Knight’s Contract is also practical. While expensive, any effect that can allow you to down Survivors in a single hit as a Killer that otherwise wouldn’t is undeniably useful. Essentially, this is the best possible version of what Broken Hilt and Chain Mail Fragment do. Using it with any of the add-ons that let you summon a specific guard twice in a row guarantees that it will activate on the Jailer, too, making it easy to keep track of when it will activate to use it effectively.
Healing Poultice and Flint and Steel find their way on the list for the utility they add to the Assassin and Carnifex guards, respectively. The Healing Poultice is especially effective since it’s effect synergizes so well with the Assassin’s intended use for chases. However, Lightweight Greaves for the Jailer don’t make the list, since it is both less useful than the others, and used for the least practical Guard.
Call to Arms, Dried Horsemeat, and Tattered Tabbard all all modify your powers in order to increase their general efficiency. Call to Arms allows you to use the power faster, while Dried Horsemeat and Tattered Tabbard allow your Guards to more pressure by increasing the amount of time they will Hunt or Patrol, respectively.
Lastly, the Iron Worker’s Tongs are fantastic against skilled players who are likely to evade your Guards. While they might be able to avoid taking damage, this ensures that even a Survivor who escapes your power suffers an ill effect. Oblivious is not as devastating as some effects, but it helps apply pressure even against skilled Survivors who would otherwise escape your Guards scot-free.
All Knight Add-ons – Explanations & Strategies
 Knight’s Contract
Every 4th guard summoned inflicts Exposed on Survivors within 12 meters.
Strong choice. When it procs, this ensures that cornering Survivors will down them rather than injure them (so long as you get the hit and not your Guard). Keep in mind that using this add-on with any add-on that causes a member of the guard to come up twice in a row means that this will always activate on the Jailer.
Using this add-on: Keep track of when the effect will activate so that you can maximize it’s usefulness. On the 4th Guard summon, make sure you are close to a Survivor and quickly activate your power so that you can continue the chase, needing only a single hit to down.
 Iridescent Company Banner
Going through Windows while drawing a Patrol Path blocks them for 15 seconds, Exit Gates are blocked for Hunted Survivors, and Windows vaulted by Hunted Survivors are blocked for the remainder of the Hunt.
Strong choice. This perk can be very powerful during the endgame, and for countering Survivors who are very good at chases, though its obvious drawback is that it relies on you reaching the endgame.
Using this add-on: This is the most useful during the Endgame, when you can start a Hunt which will force Survivors waiting at the exit (or who are approaching it) to try to wait out the Guard, making it easy to down them. As well, you should be drawing Patrol Paths through windows whenever possible.
 Healing Poultice
After summoning the Assassin, all Survivors within 24 meters scream and reveal their location for 3 seconds.
Excellent Choice. While you let the Assassin loose on a Survivor, this can enable you to find others. Since this significantly improves the utility of the Assassin, this should be used with Treated Blade.
Using this add-on: Assassins are already the best Guard for chases, and this just helps you locate Survivors that you know to be nearby every time you summon an Assassin. Using this in combination with the Treated Blade means that half of your Guard summons will reveal Survivors near you.
 Flint and Steel
Whenever you summon the Carnifex, the Auras of Survivors within 24 meters of Unbroken Pallets are revealed for 5 seconds.
Strong choice. A surprisingly useful add-on for Killers with the restraint to leave pallets unbroken, this perk can surveil huge swaths of the map after a few chases. Since this significantly improves the utility of the Carnifex, this should be used with Battle Axe Head.
Using this add-on: Since this add-on provides you with map-wide surveillance (provided Survivors have dropped pallets), this makes it more and more useful as the game goes on and more pallets get dropped. Used with the Battle Axe Head, this can give you two surveillance reads back-to-back for each cycle of your power.
 Lightweight Greaves
After summoning the Jailer, the Knight’s movement speed increases by 10% for 6 seconds.
Poor Choice. This is nice to have if you are already using the Jailer heavily, but the movement speed buff doesn’t pair well with the Jailer’s more strategic purpose. Since this significantly improves the utility of the Jailer, this should be used with Cold Steel Manacles.
Using this add-on: You will want to use the Jailer more offensively than usual, summoning him during chases in order to give yourself the movement speed buff. This pairs decently with the Cold Steel Manacles,essentially letting you get two speed boosts in a row.
 Blacksmith’s Hammer
If a Survivor escapes a Hunt in any way other than grabbing the Standard, they suffer -3% Hindered and become Exhausted for 15 seconds.
Awful choice. The Hindered effect is so small and Exhausted does so little (for such a short amount of time) that this is a waste of a rare add-on. Neither effect will help very often.
Using this add-on: Using your guards to primarily Hunt means that this ability will activate often. Because it gives the Survivors exhausted, it is most useful against Survivors with perks that will be disabled by Exhaustion.
 Broken Hilt
Guards inflict Mangled when they hit a Survivor.
Strong choice. This straightforward add-on improves your Guards generally, and Mangled can drastically delay a Survivor from healing, especially if you don’t let up in hunting them. This works very well with the Knight perk Hex: Face the Darkness, because this slows down a Survivor’s healing.
Using this add-on: You don’t need to do anything special; this passive effect will simply make your power more effective whenever it works. This pairs well with the Chain Mail Fragment to make your Guard’s attacks truly devastating.
 Chain Mail Fragment
Guards inflict Haemorrhage when they hit a Survivor.
Strong choice. Clear and simple, this add-on makes your Guards a bit stronger as adversaries, and Haemorrhage can be a frustrating status effect. Pairs very well with the Knight perk Hex: Face the Darkness, since this can delay healing.
Using this add-on: You don’t need to do anything special; this passive effect will simply make your power more effective whenever it works. This pairs well with the Broken Hilt to make your Guard’s attacks truly devastating.
 Iron Worker’s Tongs
If a Guard fails to damage a Survivor during a Hunt, inflicts that Survivor with Oblivious for 20 seconds.
Strong choice. Because Guards are often inconsistent, and smart Survivors can evade them without too much trouble, this still gives purpose to unsuccessful guard summons. Oblivious is not as devastating as some effects, but it does ensure that even high-tier players are impacted by your Guards.
Using this add-on: This enables you to use your powers much more liberally for chases, since it means you’ll be getting some benefit whether or not your Guard manages to hit the Survivor.
 Town Watch’s Torch
After your Guards fail to damage Survivors after a Hunt 3 times, the Knight gains Undetectable for 25 seconds.
Poor choice. This add-on provides a very short buff that does little for the Knight, only after repeated failures. While you will probably manage to get it to activate once or twice in a given Trial, the benefit it grants is too small for it to matter.
Using this add-on: This works well as a come-back after a few failed Guard summons, and so it enables you to summon Guards for hunts more often. Once it procs, you can use Undetectable to try to ambush Survivors across the map.
 Grim Iron Mask
When a Guard detects a Survivor, the Survivor suffers from Blindness for 60 seconds.
Awful choice. The frequent activation and duration of the ability might let you forget that Blindness is barely an inconvenience for most Survivors.
Using this add-on: Since this is a passive effect that activates on detection, you don’t need to do anything special to use it. It adds a tiny benefit to your general play, and that is all.
 Call to Arms
Increases the maximum Patrol Path length by 10 meters, and increases the Knight’s movement speed will drawing it by 25%.
Excellent choice. This adds a lot of flexibility to the Knight’s power, both allowing you to effectively use your power faster (including in the middle of a chase), and allowing it to have the slightly greater utility of having an increased Path length. Generally useful, but rarely game-changing.
Using this add-on: This essentially lets you use your power faster, while giving you more utility. Because you can summon guards much faster, this broadly increases the utility of all playstyles. Whether you summon guards quickly to assist you with chases or need longer patrol routes to keep an area occupied, this will let you use your power more effectively.
 Dried Horsemeat
Increases the duration of Guard’s Hunt by 4 seconds.
OK choice. Increasing the Hunt duration is often the difference between injuring a Survivor and them getting away. Using this alongside the Treated Blade can be effective, since the Assassin is the strongest Hunt Guard.
Using this add-on: A fairly passive effect, this add-on will make guards on Hunt more effective, meaning it will be more useful for using Guards offensively to win chases.
 Battle Axe Head
The Carnifex is summoned twice in a row.
OK choice. This flatly improves builds based around the use of the Carnifex, incentivizing anti-Generator builds.
Using this add-on: Useful for builds that rely on generator regression.
 Cold Steel Manacles
The Jailer is summoned twice in a row.
Poor choice. This flatly improves builds based around the use of the Jailer, incentivizing strategic, trap-focused playstyles.
Using this add-on: Useful for builds that rely on area denial and ambushing.
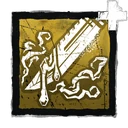 Treated Blade
The Assassin is summoned twice in a row.
Strong choice. This flatly improves builds based around the use of the Assassin, incentivizing aggressive, chase-focused playstyles.
Using this add-on: Useful for builds that rely on winning chases quickly.
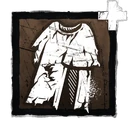 Tattered Tabbard
Increases the duration of Guards’ Patrol by 6 seconds.
Strong choice. Increasing the Patrol duration can let you leave behind guards to patrol somewhere you need to leave. This allows you to keep applying pressure somewhere for just that much longer, while being incredibly cheap.
Using this add-on: Use this to apply continuous pressure to generators or to set up ambushes further in advance. This add-on is best used defensively, and doesn’t help much if you use your powers primarily during chases.
 Gritty Lump
Increases Guards’ movement speed on Patrol by 9%.
Awful choice. Not only is the movement speed buff very minor, but it only applies to Guards before they activate their more critical Hunt.
Using this add-on: There is no reason to use this buff, and the increased Patrol speed adds next to no utility.
 Map of the Realm
Increases Guards’ Vision Range by 4 meters.
Strong choice. It’s no secret that the guards don’t always have the best perception, and this very cheap add-on fixes that, making them much more consistent when it comes to spotting survivors.
Using this add-on: This is a mostly passive boost that will occasionally increase the effectiveness of your guards during normal play, helping them notice Survivors much more often.
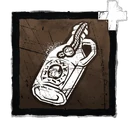 Pillage Mead
Reduces the duration of Guards’ Break or Damage Action by 25%.
Awful choice. A terrible add-on, this is only useful if you are focusing heavily on using the Carnifex to damage Generators, and even then, the amount of time it reduces the action on is negligible and unimportant.
Using this add-on: If you do use this add on, you should primarily focus on damaging generators and not letting Survivors finish them. Make sure to use your guards to damage the generators instead of doing it yourself, freeing yourself up to chase sooner.
Best Add-on Combinations
Deadly Chases Build
 +
+
Knights Contact + Dried Horsemeat
While these add-ons are expensive, the combination of Exposing survivors and increasing the amount of time your Guards will hunt Survivors can turn Survivors into mincemeat.
Cheap Patrol Build
 +
+
Map of the Realm + Tattered Tabbard
These add-ons might not be the best, but they are cheap, and pair well to set up more effective patrol routes for your guards.
Status Effect Build
 +
+
Chain Mail Fragment + Broken Hilt
These perks combine well to make your guards inflict frustrating Status Effects on Survivors, allowing you to pressure them further after your guards attack them.
Assassin Build
 +
+
Treated Blade + Healing Poultice
If you like the Assassin’s style of chase-focused gameplay, this is a great add-on combination. Probably the most effective of any of the three guard-specific combos.
Carnifex Build
 +
+
Battle Axe Head + Flint and Steel
The Carnifex’s build focuses on objects, making it tricky to use, but it can still be effective if you are running an anti-gen-rush build.
Jailer Build
 +
+
Cold Steel Manacles + Lightweight Greaves
The Jailer’s build can help you win a few more chases, and can combine well with the Knight’s Hubris perk. It is probably the weakest of the there guard-specific add-on combos, though.
Now that you know what add-ons you need to do your best against the Survivors, you should make sure you are brushed up on strategies for the Knight. Then, once you are ready, you will truly be a force to be reckoned with. Happy hunting, Killer!




 Knight’s Contract
 Healing Poultice
 Flint and Steel
 Lightweight Greaves
 Blacksmith’s Hammer
 Broken Hilt
 Chain Mail Fragment
 Iron Worker’s Tongs
 Town Watch’s Torch
 Grim Iron Mask
 Call to Arms
 Dried Horsemeat
 Battle Axe Head
 Cold Steel Manacles
 Treated Blade
 Tattered Tabbard
 Gritty Lump
 Map of the Realm
 Pillage Mead
Anybody reading this, I hope you know that this list is objectively wrong. Knight best add-ons are Call-To-Arms, Map of The Realm and Dried Horsemeat in that order. His greens aren’t very good, and the Iri Banner is better.
After giving it a few rounds (it was months ago when this article was written), we’ve decided to agree that Map of the Realms and the Iridescent Banner are more valuable than we originally wrote. Still not convinced on Dried Horsemeat, though.