Welcome to our Going Medieval Beginner’s Guide! This guide’s goal is to get you set up for success by helping you create a shelter, teaching you how to gather and grow your own food, and prepare you to survive your first fight with raiders. If you’re looking for help on a particular topic, use the Contents button to quickly find what you’re looking for.
Setting Up Your New Game
There’s a few important steps to get through before you even start playing Going Medieval, and while most of it is self-explanatory, there’s a few things worth noting. Once you hit New Game, you’ll have to choose between Standard, Peaceful, and Survival. If you’ve never If you’ve never played colony sim games like Rimworld or Prison Architect before, you may want to consider choosing the Peaceful scenario at the start. Otherwise, you’ll have to worry about enemy raids in addition to keeping your colonists fed, warm, and happy. Experienced RTS or sim players can probably choose Standard with no issues, and there’s also a drop-down difficulty menu to further tweak how challenging your game will be.
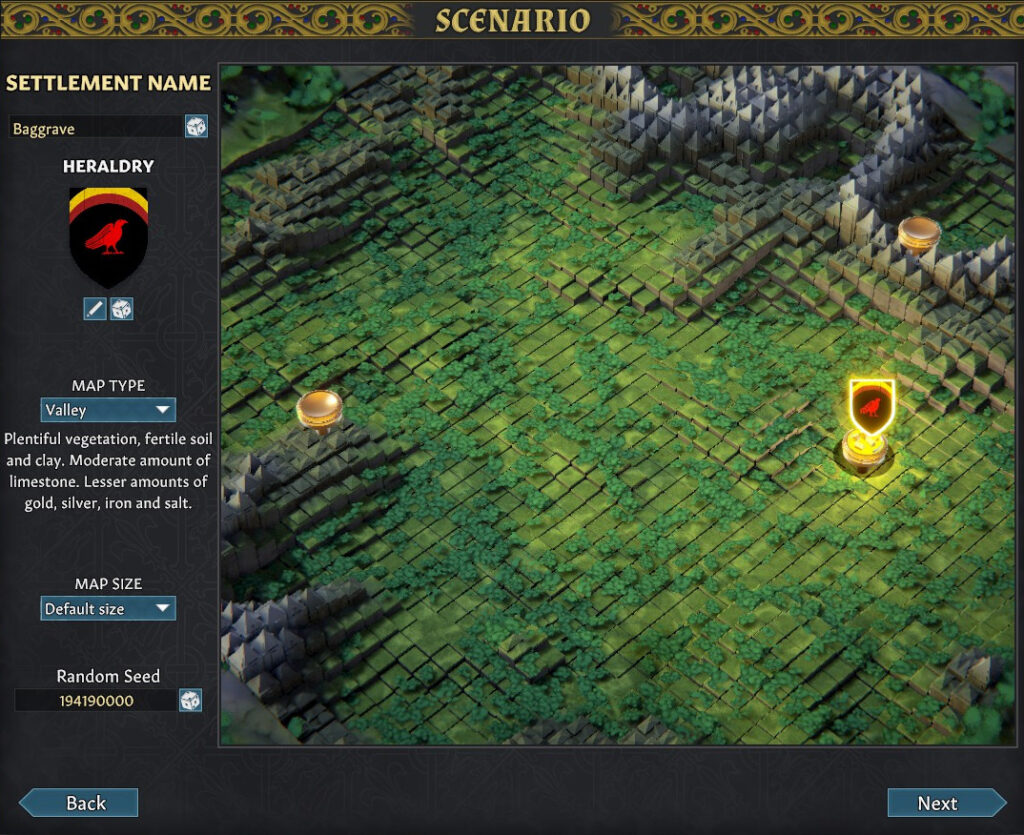
On the next screen, you’ll have the options A New Life, Lone Wolf, or Add new. Don’t worry about the last option for now, as it involves crafting specific starting conditions which won’t mean anything to you if you haven’t played yet. Lone Wolf is also designed with experienced players in mind, so we’ll cover that in a later guide. Select A New Life and move on. Then you’ll have to choose where on the area map to put your settlement. Hills and mountains are good for defense and mining, but since this is a standard difficulty scenario, settling in the valley is your best bet.
♪Ain’t no mountain high that we’re starting on♫
Lastly, you’ll have a chance to check out the randomly generated settlers, and roll new ones if you don’t like what you got. Then you’re ready to Embark!
The First Day
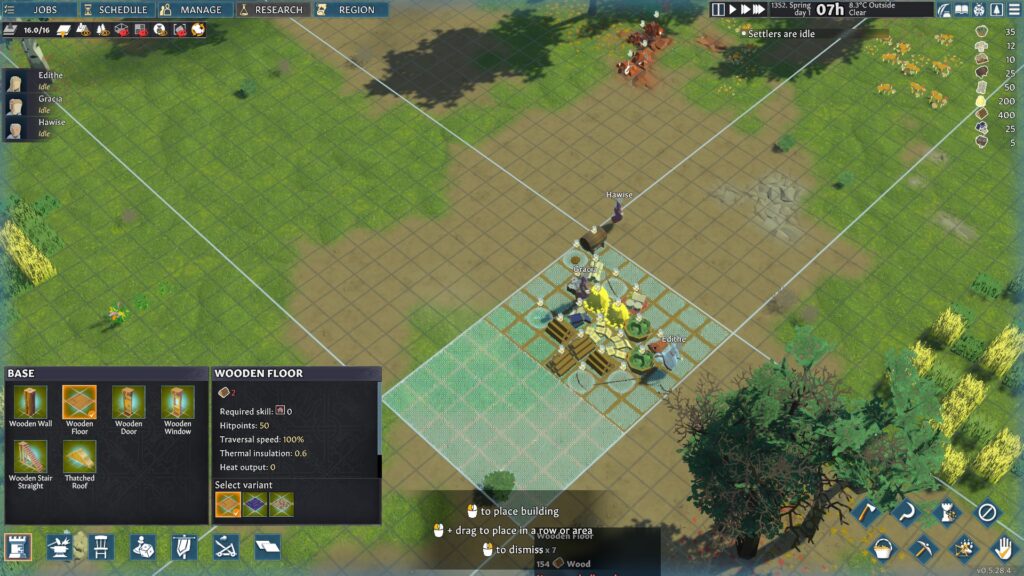
Once you begin the scenario, hit spacebar. This will pause the game, and give you time to figure out where you want to build your settlement. While you may be tempted to set up shop wherever you’re settlers and initial supplies are, a better bet is to choose a flat, open area near the middle of the map — if you’re lucky, that’s where you spawned!
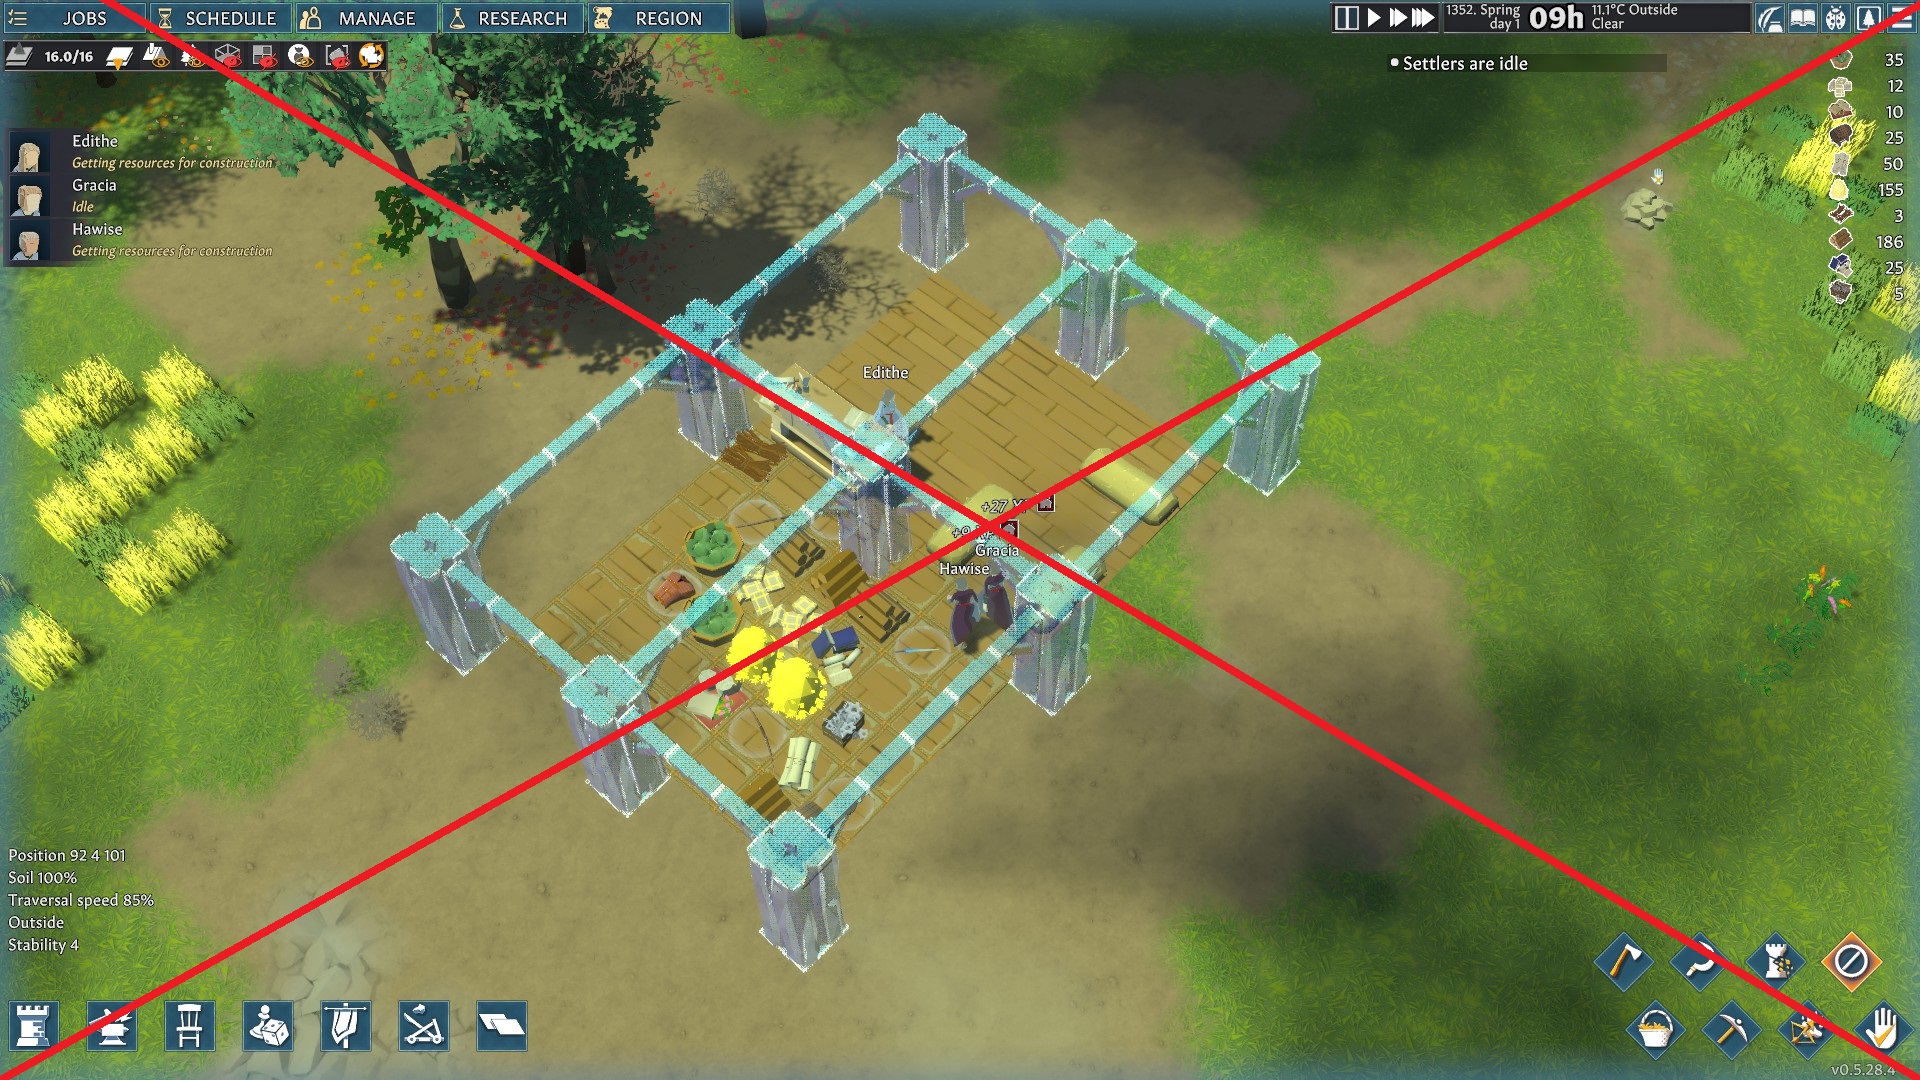
Once you’ve picked the right spot, open the Zone menu in the bottom left (or hit [F7]) and select the Default Stockpile zone. Then drag at least 6×6 square somewhere in the area you plan to create your settlement. Next, open the Base menu ([F1] by default) and create a Wooden Floor zone larger than your stockpile, with the stockpile in the corner of the floor. That way, your supplies won’t decay as quickly, since they won’t be sitting on the ground, and there will be room for your villagers to rest and stay dry.
Note: If you mess up while putting down zones or floors, you can use the Cancel button [L] and then left-click or drag-select to remove things you’ve zoned.
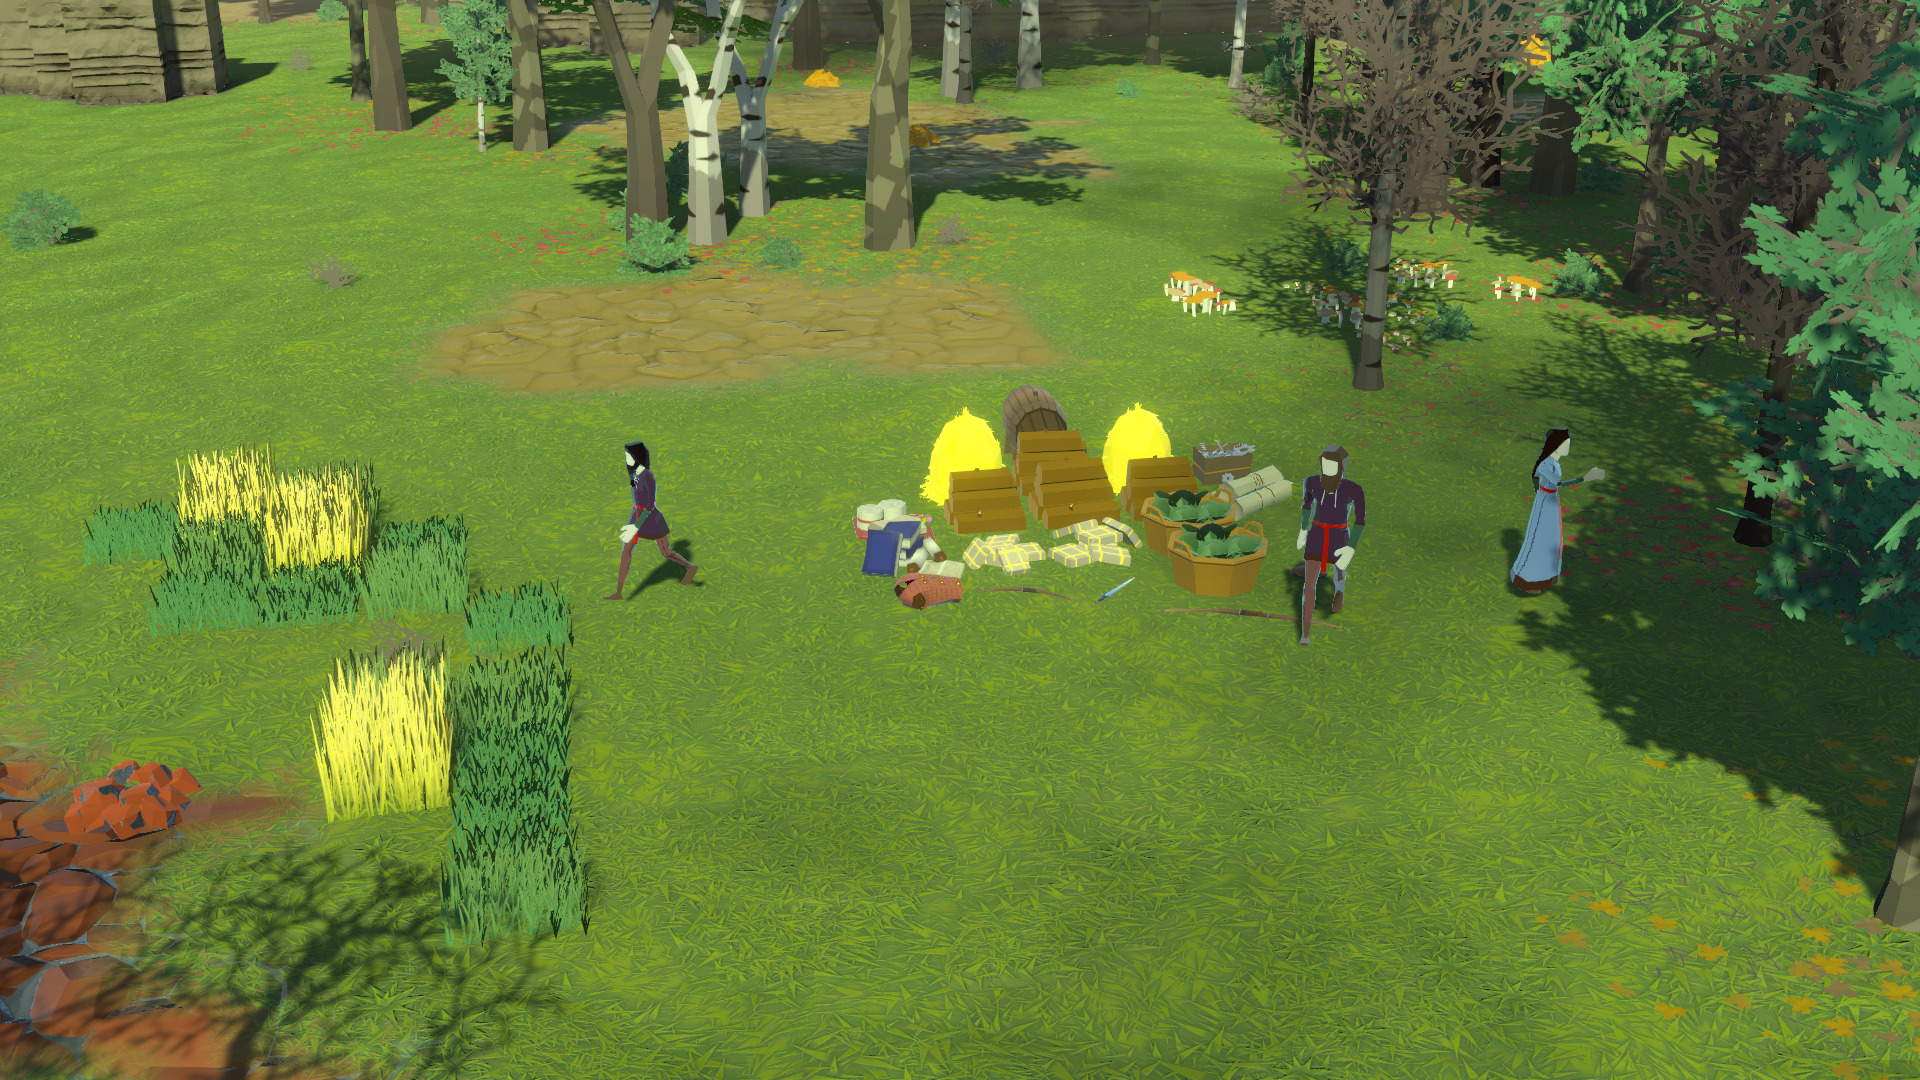
I got lucky here, and kept my starting supplies where they were by putting the stockpile and floor directly underneath them
You start with a decent amount of wood, but it’s marked “Forbidden” at the start, which means your settlers won’t use it — you can identify Forbidden items by the hand with the X on it. To quickly make all the items in your supplies available, left click each one and hit [Insert]. Note that you can double click a pile of something to select all of that type of resource, so you can quickly make the wood available for your settlers. You might have noticed that there’s quite a few Forbidden resources around the map; you can set them to “Allow” if you want them to be stored (and therefore not decay), but it will take time and space, so make sure you need them, and that they’re decaying soon, before you bother.
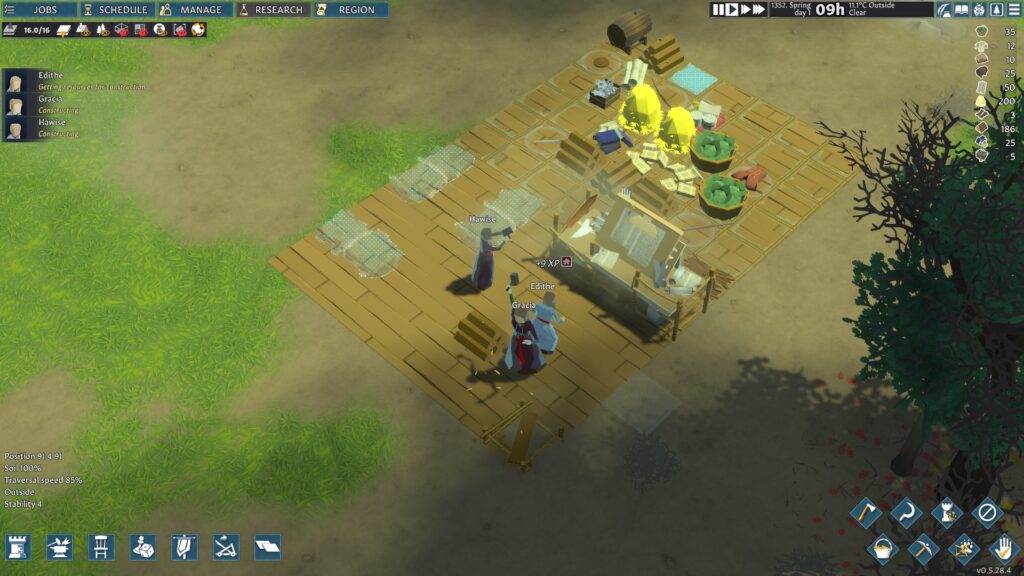
At this point, you can unpause the game with spacebar (or by using the speed buttons in the upper right) and let your settlers get to work moving your starting supplies. Meanwhile, open the Production menu and drop a Basic Research Table near your stockpile, making sure that it’s on the wooden floor. Feel free to speed up time with [2] or [3] while you wait for your villagers to create your new stockpile and the research table. You should also select one of your workers and right-click the research table outline, then select “Prioritize construction” to ensure it gets constructed ASAP.
I doubt many settlers really set up the writing table before the beds(or building a roof for that matter)
Night arrives sooner than you might think, so throw down a few Hay Sleeping Spots using the Furniture menu [F3] on the floor by your stockpile. Sleeping on the floor will negatively impact your settlers mood, and therefore their efficiency.
Your First Roof
Once the research table is finished, open the Research menu [O] and select Architecture, which will allow you to build the all-important Wooden Beam. Now you’ll be able to build a roof to make sure your people and their stuff stay dry. Many tasks also get bonus efficiency if done under a roof, so you’ll want to make sure your research table, cooking fires, and any other activity-related objects are covered if possible.
This will allow a roof
This will not
The game can be a bit particular about what beams will properly support a roof. Essentially, you need a beam or a wall for every 10 units a roof needs to span, and you need the roof to end on either a wall or beam.
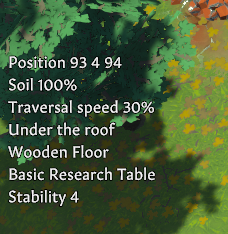
Use the Base menu [F1] and start by placing Wooden walls as support columns around your stockpile/sleeping area. Next, connect them with beams as shown above. Note that if you have a gap larger than 10 units, a beam wont span it, so you’ll need additional wall pieces. Once you’ve created the proper wall+beam combo, you can select the Thatched Roof from the Base menu and drag it over your supports. Once your roof is finished, you can use [C] to hide/show all your roofs, making it easy to either see inside, or marvel at the beautiful structure you’ve created. You can also quickly confirm whether or not something is protected by a roof by mousing over an object — in the bottom left of the screen, you can see lots of info about a hovered object, including whether it is outside or under a roof.
Hovering your mouse over anything in the game displays a bunch of useful info about it in the bottom left corner of your screen. This is particularly useful to check if something is exposed or under a roof, and how stable it is.
Harvesting, Gathering, and Hunting
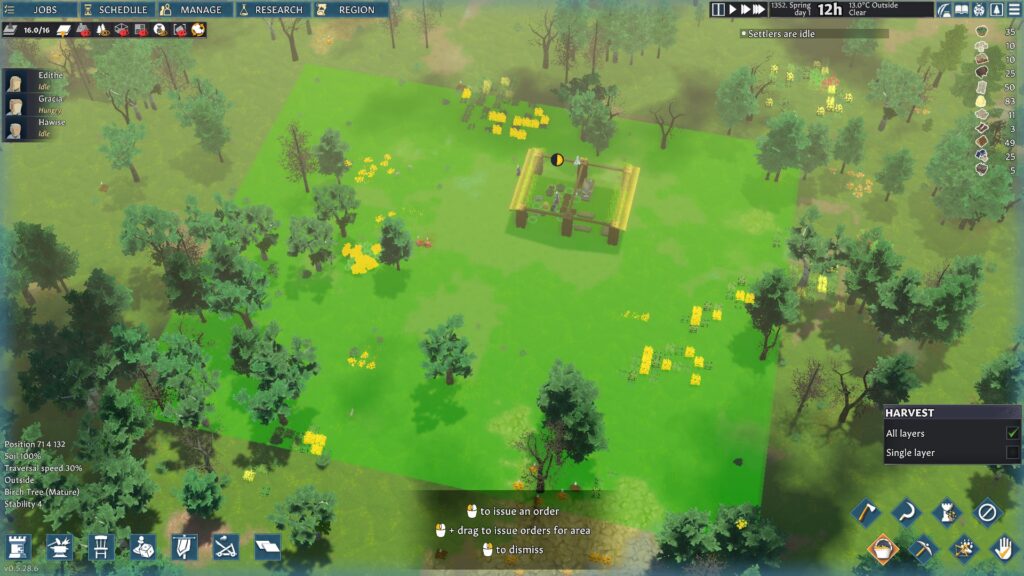
Your villagers should end up idle once they’ve finished the roof, so lets give them something to do. Use the Chop button [H] in the bottom right of the UI and then select some dead trees. Live trees will continue to grow — eventually, you’ll be able to plant trees, and then it won’t matter what you harvest, but for now, stick to the gross looking dead ones. You can check and see if a tree is Growing or Mature by clicking on it and checking the box in the bottom right; it’s best not to cut Growing trees down.
Now hit the Harvest button [B] and look for berry bushes or mushrooms, there should be plenty nearby. Just like with trees, you can left click or drag-select a target, and your settlers will automatically work to harvest the resource.
Items that will be harvested from your selection will be highlighted in yellow
Lastly, tag some animals for hunting using the Hunt [M] button and the same left-click or drag-select technique. There should be at least a handful of rabbits or deer around. If you start by left-clicking and holding in the upper left corner of the map, you can use the WASD camera controls to drag-select the entire map, tagging all the available animals for Hunting, which is a lot easier than searching for them manually.
Settler Skills, Jobs, and Equipment
Before you can send anyone out for that tasty meat, we need to take a look at how Skills work in Going Medieval, as well as learn about Jobs and Equipment.
Skills
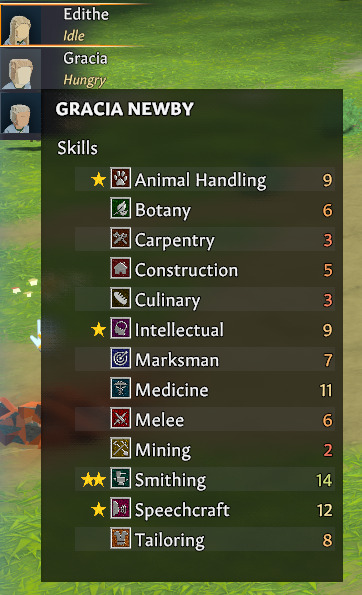
Pause the game if you haven’t already, then hover your mouse over one of your villagers portraits, and take a look at the dialog box that pops up. It’s fairly self-explanatory — the higher the number the better. The yellow star next to some skills indicate that the settler prefers that activity. If you allow settlers to do activities they prefer, they’ll be happier, which will in turn make them more productive (and also ensure they won’t abandon your settlement!).
You generally want to assign people who are skilled at something to that task, though if it isn’t something that needs to be done right away, you can also let settlers work on things they’re bad at, in order for them to improve their skills (they’ll level up a skill as they perform a task).
Jobs
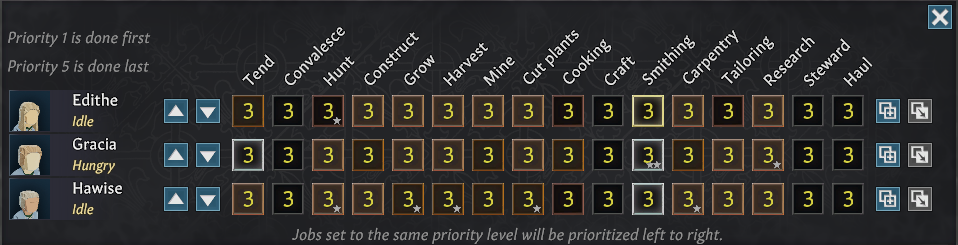
Now click the Jobs button [Y]. Here you can set job priorities, so that when settlers aren’t specifically assigned to a task, they will prioritize available tasks based on the settings on this menu. The borders around the numbers give an indication at how skilled a settler is at a given task: the brighter/lighter the border, the higher that settlers skill is in that category. Gold is the highest/best border indicator, while dark brown indicates a very low skill. Things like Convalesce, Haul, and Steward don’t depend on skills at all, which is why they have a grey border.
By left and right-clicking the numbered squares, you can ensure that certain jobs are done first, which can be quite valuable depending on what your settlers need most. For now, you can leave it all on 3 and just micro-manage settlers as needed, but later on you may decide you want your people to focus on specific tasks that suit their needs as well as their skills and preferences.
Equipment
Open the Manage menu [I]. Here, you can select what weapons and armor settlers will automatically equip if available, or you can choose specific items for them to equip. Find the settler you identified as the best possible hunter, and click their dropdown menu under Manage Weapon and select Ranged. Your settler should then go and grab one of the available bows once you unpause. Note that you can manage a lot of other stuff here, but for now all we really care about is the bow.
The Second Day and Beyond
Schedule
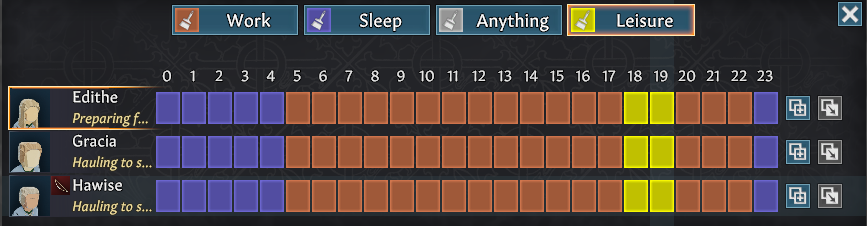
The day should be over now, and your settlers will automatically sleep. While they’re sleeping, let’s take a look at the Schedule [U]. Here, you can set when settlers do what activities. Sleep is set up by default to be only 6 hours — life was hard in the 14th century! Add a couple hours of leisure to each settlers schedule, and then paint the rest as work. If you find a settler’s mood is negative, you can always give them more leisure time, but for now we’ve got lots to do to prepare for the winter.
You know what they say about all work and no play…
Getting Warm and Fed
Cooking Meals
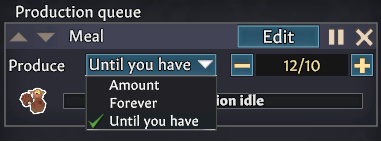
You’ll probably be low on wood at this point, so if you haven’t marked any nearby dead trees with Chop [H], do so now. Next, build a campfire from the Production menu [F2] somewhere under your roof. Once it’s finished, you’ll be able to queue up Meals to be made, which will make your villagers much happier than the raw cabbage they’ve been eating. It’s a good idea to use the dropdown to set Production to “Until you have” at least 10 meals or so. This technique is useful on any production facility, as it will take into account storage, ensuring you don’t accidentally make way more of something than you need.
Finish Your Shelter
If a settler isn’t already chopping wood, find one that prefers or is skilled at Cut plants, and set their priority for that Job to 2 or 1, or manually send them to a tree marked for lumber. Then use the Base menu [F1] to build walls around your shelter, and a door or two as well. This will come in handy when the winter cold or raiders want to get into your shelter. You’ll want to make sure your settlers all get their own rooms with beds in them — this will greatly increase their mood, which will in turn make them more productive.
Farming
This is another thing you’d think settlers would have figured out before they struck out on their own, but no. You’ll need to select your Research Table and produce more Chronicles. You’ll need at least 15 in order to be able to research Agriculture. Once you have the 15 Chronicles you need, open the Research menu [O] and unlock Agriculture.
This one sparks joy
This one does not
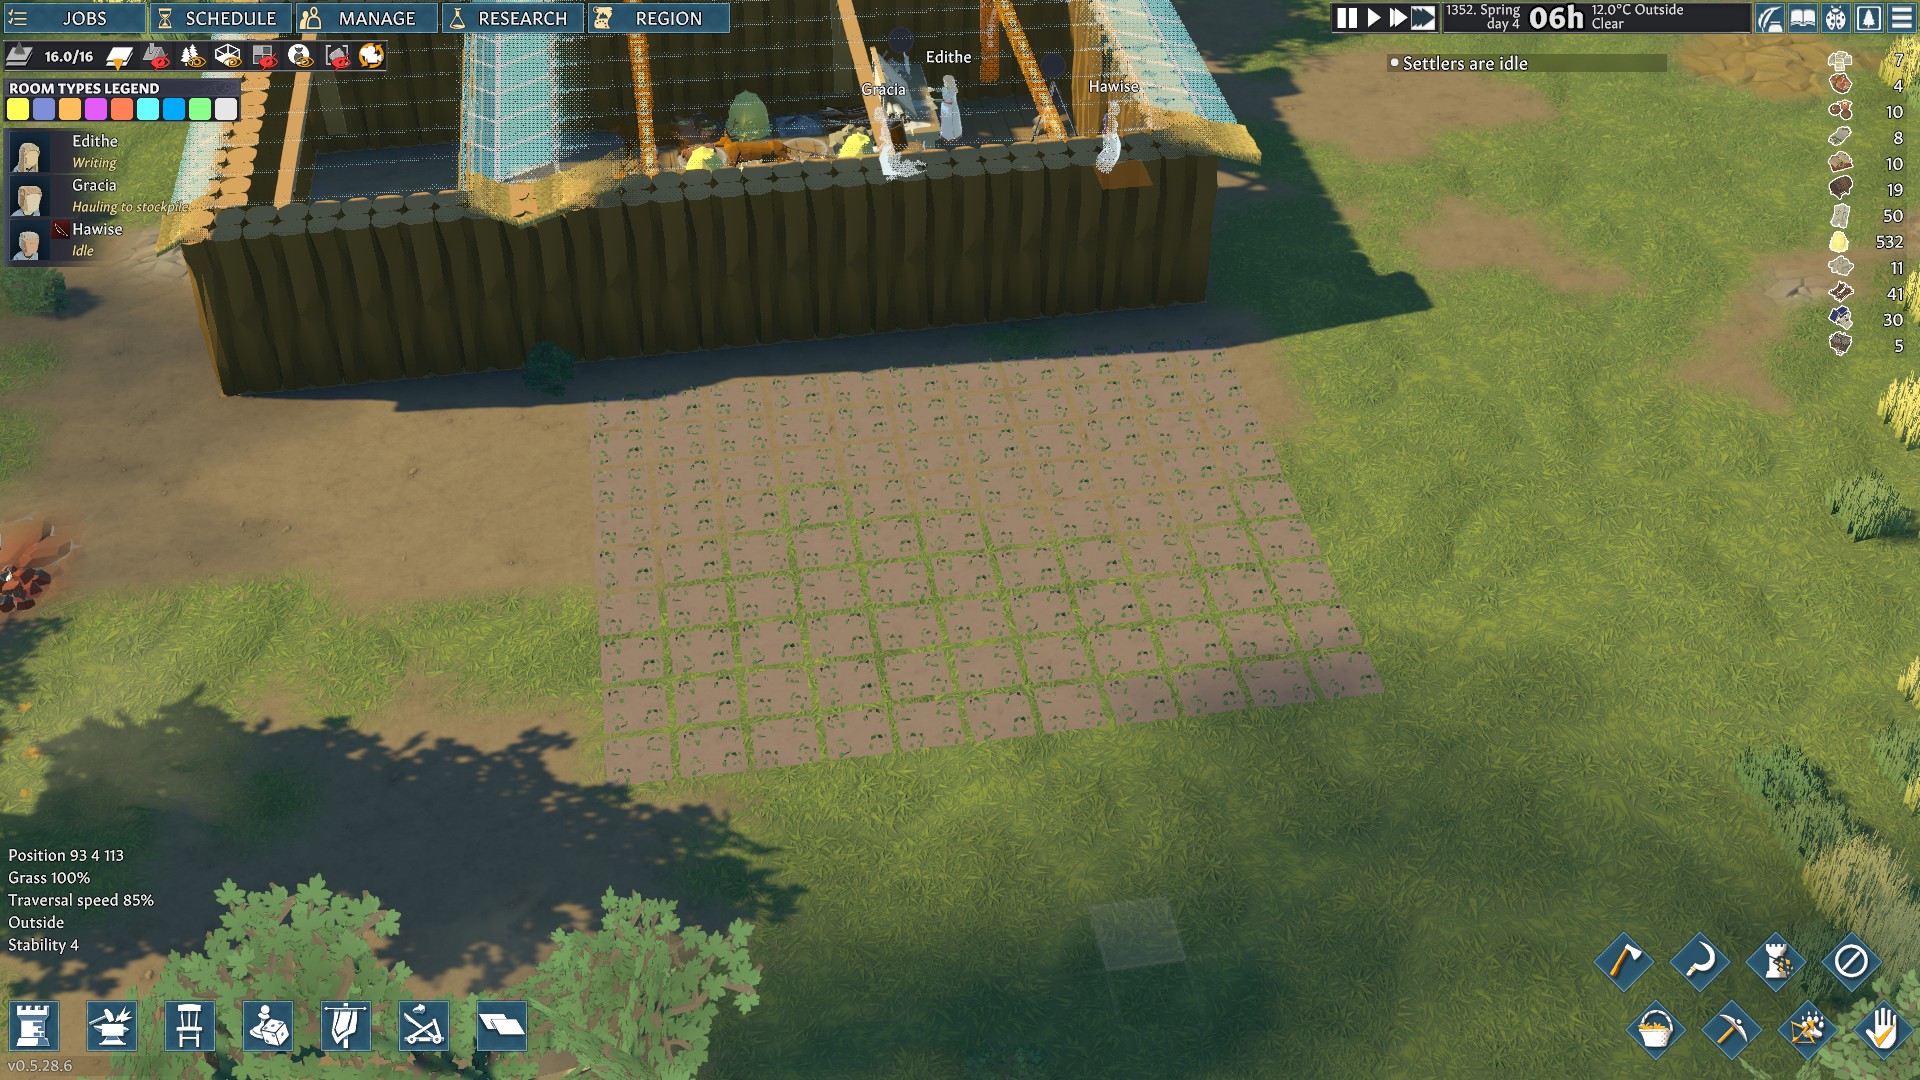
Now open the Zone menu [F7] and select the Cabbage Field. Drag a decently sized square plot somewhere near your shelter. If aesthetics are your thing, open up the Misc menu [F5] next and put some fencing around your soon-to-be cabbages.
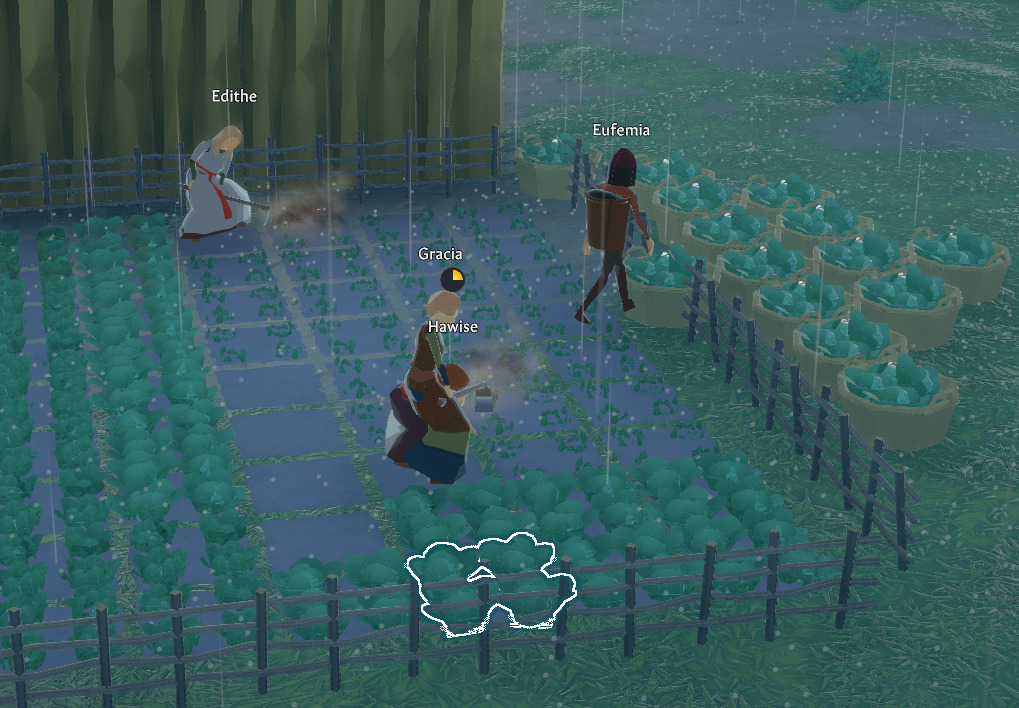
You can manually harvest crops the same way you harvest natural resources with the Cut Down Plants button [J], but your settlers will automatically harvest crops once they are at peak ripeness. It’s best to let them finish growing unless you’re desperate.
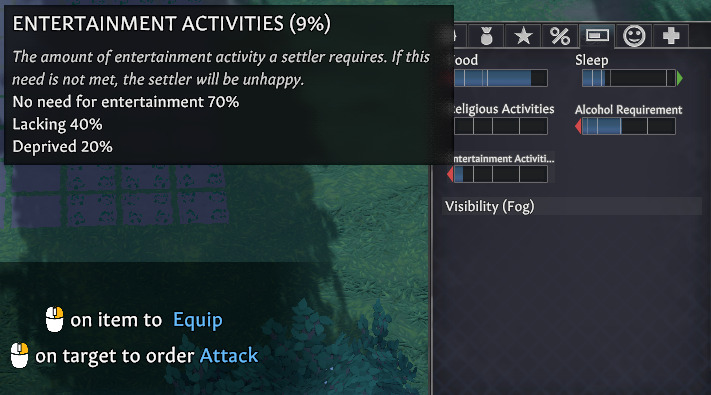
Managing Your Settlers Moods
Your settlers aren’t SCVs or Peons, unfortunately. They need rest and relaxation just like you do. By day 3, settler’s who haven’t had any fun will start to become unhappy. You can easily rectify this! Open the Leisure menu [F4] and drop a Backgammon Table somewhere in your shelter. It comes with chairs, and you can kind of stick it anywhere — settlers can walk over their beds or stored materials to get to it.
Keep a close eye on your settler’s needs
It’s also likely your settlers will want religious activities. First, check what religion your settlers follow, if any. To do this, select a settler and then click the Biography button in the dialog box that appears near the bottom right. Once you figured out what religion(s) your settlers follow, use the Leisure menu [F4] and construct the the shrine(s) you need to satisfy your settler’s needs for religious activities.
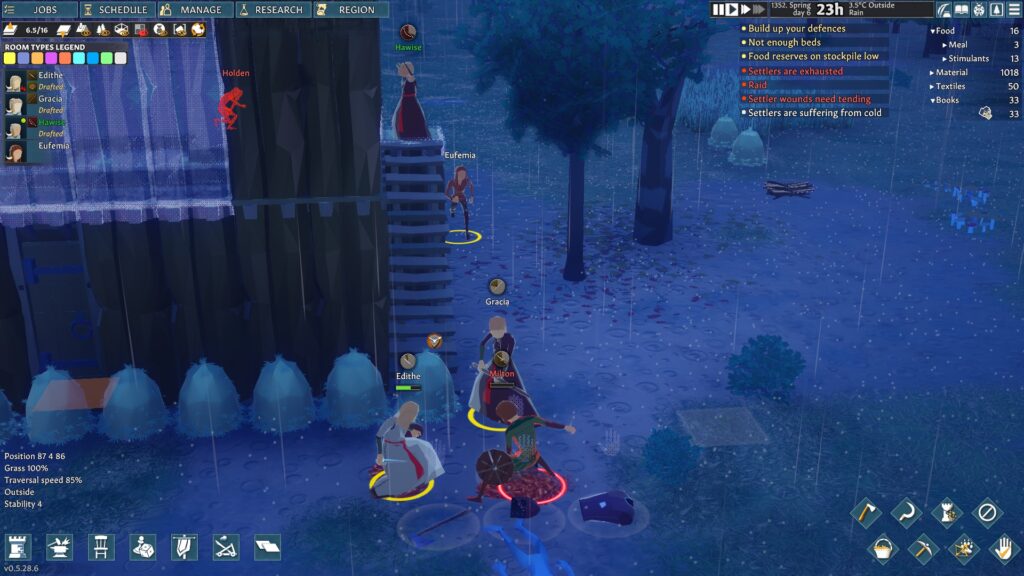
Prepare for Attack
By day 5 or so, you should get a tutorial message about “Build[ing] up your defenses”. Once you see this, you should add a 4th Hay Sleeping Spot somewhere in your shelter, and make sure you’ve assigned weapons to all of your settlers via the Manage menu. Soon, you’ll get a story pop-up about someone escaping from raiders. You can choose to not let the escapee into your settlement, but you’re much better off letting them in and preparing for the attack.
ez pz
If you have the time and the wood, you can build a second story, or create traps in entrances if you like, but it probably won’t be necessary (just remember to save your game before they come). As long as your settlers are grouped by a choke-point and equipped, you should win this fight easily. You’ll get a countdown timer once the raiders are near, so you won’t be surprised when they attack.
When the raiders do come, select all of your settlers (hold shift and left-click all of their portraits in the top left) and then click the Draft button [T]. They should now be standing still and directly controllable. Right click them into your defensive position, and then move your archer to have a clear line of sight. The enemies should attack in such a way that you can kill them one at a time. Don’t forget to select each settler and click [T] or the Draft button to undraft them, or they’ll just stand around waiting for something else to fight.
Next Steps
There’s a lot more to do to prepare for winter, but this guide’s pretty long already. You should now have the knowledge you need to keep your villagers fed and happy, at least for awhile. As a last piece of advice, prepare for the coming months by digging a cellar to store food, and try to research Preserving Food ASAP so you can store meat for the winter. Alcohol is another key resource that you’ll want to start producing quickly. Good luck, and let us know if you have any questions or suggestions in the comments below!
Share this article:
DanielD
Unabashed FromSoftware fanboy still learning to take his time with games (and everything else, really). The time he doesn't spend on games is spent on music, books, or occasionally going outside.
I press E and Q to rotate, has this changed since this was posted or something?
Lamar
1 year ago
Thanks man. It was great to read your informative post about the game. Can’t wait until they add multiplayer and those other cool stuff on their road maps.
I hope they add how to prioritize certain items when hauling though. My settlers always want to haul items from the edge of the map instead of things close by like wood that’s been cut or plants that’s been harvested.


i am finding nothing on how to turn furniture, like chairs and tables etc. but this is a great guide for all the other things i needed to know
Hi Margaret! To rotate furniture, press the [R] key while placing. Glad to hear the guide was otherwise helpful.
I press E and Q to rotate, has this changed since this was posted or something?
Thanks man. It was great to read your informative post about the game. Can’t wait until they add multiplayer and those other cool stuff on their road maps.
I hope they add how to prioritize certain items when hauling though. My settlers always want to haul items from the edge of the map instead of things close by like wood that’s been cut or plants that’s been harvested.