Thanks to her Magic Cocktail skill, Recluse can cast numerous unique spells. Trying to remember all 14 of them, and then executing the right one during a tense fight might do you more harm than good. Instead, you should remember some key Cocktails and use those as your go-to. This particular build will help you focus on the very powerful Magic/Fire/Holy Cocktail spell that will deal heavy damage to your enemies while restoring HP and FP for your allies.
Build Summary
Type: Ranged DPS/Healer
Uses Holy, Magic and Fire attacks, spells and incantations to charge powerful Magic Cocktails
Gains access to healing without sacrificing any damage output
When you play Recluse, you can’t help but notice how common Magic and Fire spells and incantations are, and how rarely you find any Holy or Lightning ones. But since Nightfarers can use weapons without any restrictions, nothing is stopping you from using a bow in one of your hands to deal Holy or Lightning damage. Having just one such bow will give you convenient access to three elemental affinities you can use to leverage Recluse’s main strength – her Magic Cocktail skill.
Having a bow like this will also essentially give you infinite FP. You’ll be able to shoot an arrow, collect the residue and restore your FP. Without a bow, if you mess up collecting residues, you can find yourself without any way to cast spells mid-fight. You can check out our How to Play Recluse guide for some general advice that will save you from that. Still, when you have an elemental bow, this will never be an issue. And if you visit the right locations during an expedition, you can find these bows pretty reliably.
Despite using a bow, due to the nature of the Magic/Fire/Holy Cocktail spell, you generally want to go for it against enemies that don’t spend most of the fight flying high up in the air.
Holy Fire Breath Recluse Best Relics
Best Effects:
Collecting affinity residue activates Terra Magica
Night of the Fathom
Intelligence +
Faith +
Other Options:
Flask Also Heals Allies
Increased Maximum HP
Max FP Up wth 3+ Staves Equipped
Mind +
Continuous HP Recovery
Since we’ll be doing some healing with our Magic/Fire/Holy Cocktail, we might as well lean into the healer role. As such, Relics with the Flask Also Heals Allies option are a good choice. When you defeat the Augur Nightlord (also known as Maris, Fathom of Night), you’ll get the Night of the Fathom Relic. Here’s what it gives you:
Increased Maximum HP
Flask Also Heals Allies
Items confer effect to all nearby allies
We don’t particularly care about the third bonus, but the first two are very good for this build, and it’s great to have them in one Relic.
The Collecting affinity residue activates Terra Magica bonus is exclusive to Recluse. You can reliably get it on the Vestige of Night Relic you earn by completing Recluse’s Remembrance missions. The other Relic choices are less impactful and more just nice to have for this build.
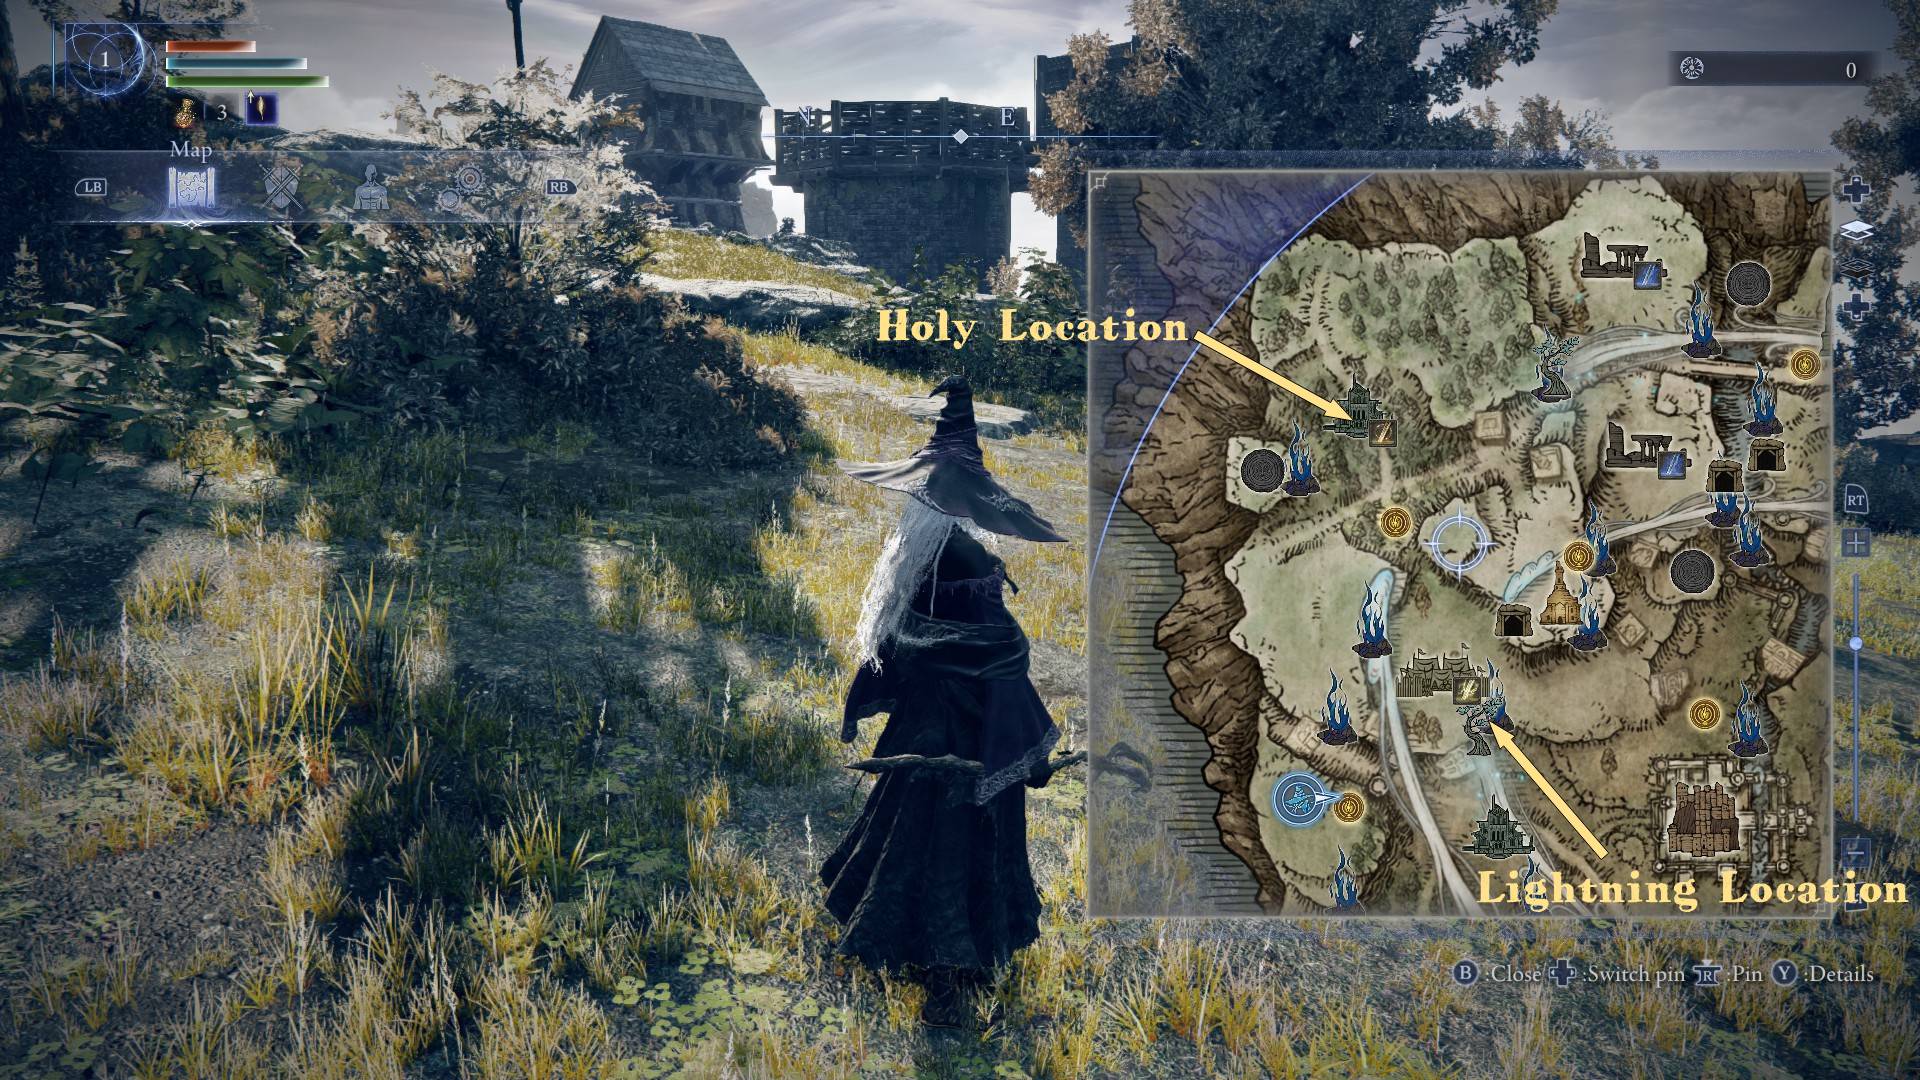
To enable this build, you’ll want to have a way to deal Holy, Magic, and Fire damage. The best way to deal Holy damage are Holy-enchanted bows. You can look for them during an expedition in locations marked by the Holy damage icon. If you absolutely can’t find a Holy bow, you can use a crossbow, a sacred seal with a Holy spell, or even a Holy melee weapon.
Holy Location here shows the Holy icon. Lightning Location shows a Main Encampment where you’re likely to get a good bow.
Here are your best weapon options for this build:
Rank
Icon
Name
Base Rarity
Base Affinity/Spells
Ideal Changes
S
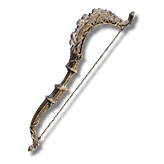
Erdtree Bow
Epic
Holy
None
S
Any Holy Bow
Any
Holy
Upgrade to Rare/Epic*
A
Godslayer’s Seal
Rare
Black Flame Catch Flame
Upgrade to Epic*
A
Albinauric Staff
Rare
Glintstone Pebble Glintstone Arc
Upgrade to Epic*
*Rare upgrade requires Smithing Stone [1], Epic needs Smithing Stone [2]
Best Equipment Spells
Glintstone Pebble
Black Flame
Since staffs and seals can have randomized spells, you’ll basically want to look for the best scaling and passives on them. And when it comes to spells, you’ll want to aim for Glintstone Pebble as your Magic spell and Black Flame as your Fire spell.
Glintstone Pebble has a surprisingly high DPS for such a basic spell, and you can easily spam it thanks to its great speed and range. This means you want a staff with high sorcery scaling that can cast it.
Black Flame has a nice range for a Fire spell, but more importantly it burns its targets for a percentage of their maximum health, making it a fantastic incantation.
Best Equipment Passives
Best:
Add Holy to Weapon – for your bow
Improved Sorceries
Improved Incantations
Improved Dodging
Less Likely to Be Targeted
Secondary Options:
Improved Charged Sorceries
Improved Charged Incantations
Damage Negation Up While Casting Spells
Improved Item Discovery
Improved Ranged Weapon Attacks
On top of Holy-enchanted bows, you can find some bows with the Add Holy to Weapon passive that does essentially the same thing. Other than that, you want passives that improve your spells and add some survivability to you. And if you can get Improved Item Discovery, that means you’ll have a better chance to find a good bow.
Holy Fire Breath Recluse Magic Cocktail Spells
With this build, you’ll have access to 7 Magic Cocktail spells. We’ll provide a quick overview below, but if you’d like to learn more about Magic Cocktail mechanics, feel free to check out our Recluse Magic Cocktail guide.
Icon
Name
Combination(s)
Effect
Pure Magic
Deals minor Magic damage several times and interrupts weaker foes
Pure Fire
Creates a Fire surface, burning enemies inside it
Pure Holy
A defensive buff that raises your poise and damage negation
Magic/Fire
A similar spell to Pure Magic but deals Fire damage instead
Magic/Holy
Creates an area where you and your allies can cast spells without consuming FP
Fire/Holy
Raise a torch to increase your allies’ maximum HP and lower the maximum HP of your enemies. It also reduces status ailment gauges for your allies
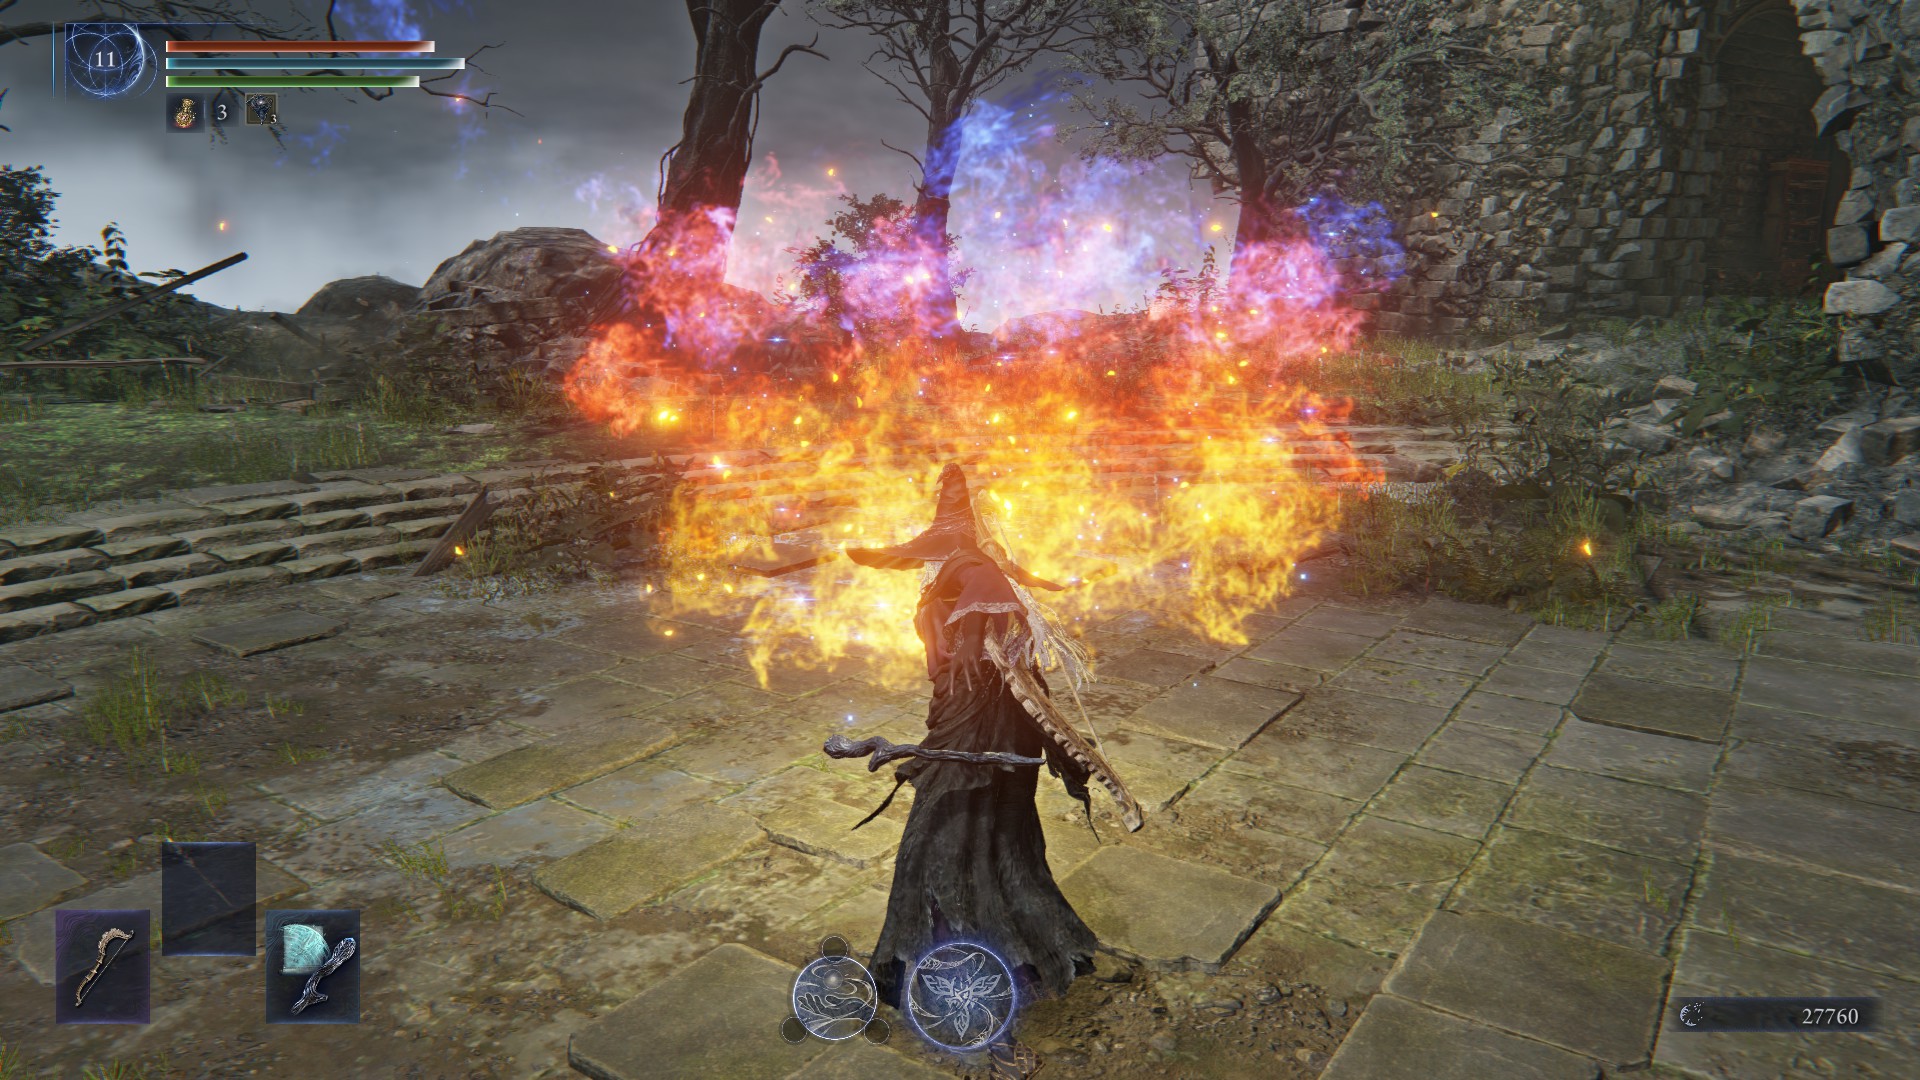
Magic/Fire/Holy
Your bread-and-butter spell for this build. Breathe a wide cone of holy fire that deals impressive damage to your enemies while healing your allies
Holy Fire Breath Recluse Best Consumables
Crimsonburst Crystal Tear – for extended period of regeneration
Starlight Shards – to get some FP should you ever run out
Holy Water Pot – extra source of Holy damage
Fire Pot – extra source of Fire damage
Warming Stone – minor heal for you and your allies
If you play Recluse right, you should never run out of FP. Still, everyone makes mistakes and you can find yourself completely tapped out at some point. For those situations you should carry some Starlight Shards.
Crimsonburst Crystal Tear is usually available at the Day 3 merchant, right before you begin your battle against the Nightlord. It lasts way longer than you would expect and provides a steady stream of healing that will let you save some of your precious flasks.
Holy Fire Breath Recluse Dormant Powers
Best Options:
Improved Dodging
Increased Maximum HP
Less Likely to Be Targeted
Wending Grace
Good Options:
Improved Stamina Recovery
Increased Rune Acquisition
Increased Maximum FP
Periodical Giant Glintblade
Recluse’s main issue is her low survivability. As such, Dormant Powers that increase it are your best bet. When it comes to Increased Rune Acquisition, only get it early, otherwise it may be a waste of Power.
Location Priorities
Best Location Options:
Main Encampment
Fort
Great Church
Church
Other Location Options:
Castle
Tunnel
Sorcerer’s Rise
Your biggest location priority should be Main Encampments with the Holy affinity. If you get one, you’re pretty much guaranteed a Holy bow because those locations usually have a bow rack with multiple bow options on top of their other rewards.
Forts and Great Churches supply you with good staff and seal options, respectively. And regular Churches are your main source of Flask improvements and should be visited on every run.
Aside from those, the Castle is always a good location to visit. There’s a lot of good stuff there, including a guaranteed Talisman chest. And if you need to upgrade a weapon from Rare to Epic, make sure to visit some Tunnels.
As a spellcaster, Sorcerer’s Rise is a fantastic location for you. But since most other Nightfarers don’t really need the magic-themed rewards usually found inside, you’re unlikely to end up there. It can also be tricky to spot the Crest you need to unlock the Rise (we have a guide that can help you find the Sorcerer’s Rise Crest). But if you do find yourself at a Rise, make sure to visit it.
Share this article:
Val Hull
Resident role-playing RPG game expert. Knows where trolls and paladins come from. You must fight for your right to gather your party before venturing forth.